DO9264C - Croque monsieur clip DOMO - Free user manual and instructions
Find the device manual for free DO9264C DOMO in PDF.

User questions about DO9264C DOMO
0 question about this device. Answer the ones you know or ask your own.
Ask a new question about this device
Download the instructions for your Croque monsieur clip in PDF format for free! Find your manual DO9264C - DOMO and take your electronic device back in hand. On this page are published all the documents necessary for the use of your device. DO9264C by DOMO.
USER MANUAL DO9264C DOMO
natural_image
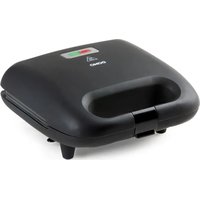
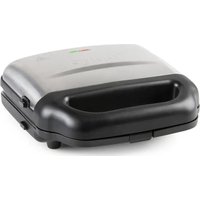
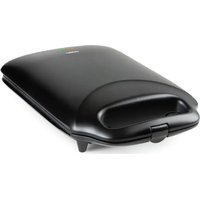
Exterior view of a modern stainless steel waffle grill with control panel and indicator lights (no text or symbols on main body)DO9264C
| Handleiding Snackmaker 3-in-1 | |
| Mode d'emploi Gril 3 en 1 | |
| Gebrauchsanleitung Sandwichtoaster 3-in-1 | |
| Instruction booklet Snack maker 3-in-1 | |

natural_image
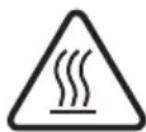
Two black-and-white icons: a triangular warning triangle with an exclamation mark and an open book with stacked books (no text or symbols)Read all instructions carefully - save this instruction manual for future reference.
| NL Nederlands 3 | |
| FR Français 11 | |
| DE Deutsch 19 | |
| EN English 27 |
GARANTIE
Geachte klant,
⚠PRODUCTSPECIFIEKE WAARSCHUWINGEN
natural_image
Open waffle grill with black tray and handle, labeled with number 6 (no text or symbols on the main subject)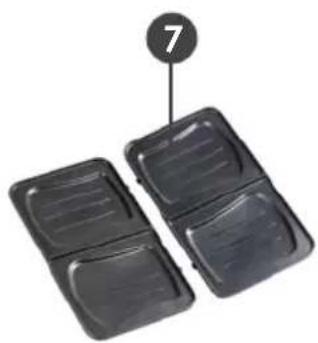
natural_image
Two black plastic containers with side compartments, one labeled with number 7 (no text or symbols on the containers themselves)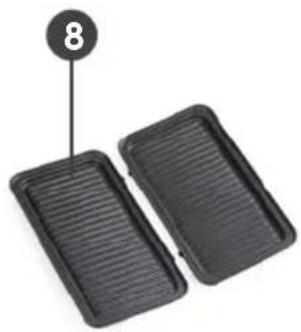
natural_image
Two black plastic grates with a numbered label '8' pointing to one (no text or symbols on the grates themselves)PROBLEEM EN OPLOSSING
text_image
Prohibition sign depicting a trash bin crossed with no signage, indicating no waste or discharge.natural_image
Recycling symbol icon (three chasing arrows) inside a rounded square frame, no text or labels present.⚠ AVERTISSEMENTS SPÉCIFIQUES AU PRODUIT
text_image
Labeled diagram of a portable electronic device with numbered parts for identification
natural_image
Open waffle grill with black tray and metal handle, labeled with number 6 (no text or symbols on the main subject)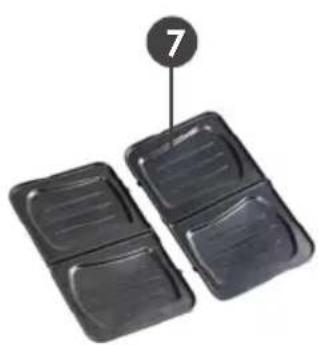
natural_image
Two black plastic containers with side compartments, one labeled with number 7 (no text or symbols on the containers themselves)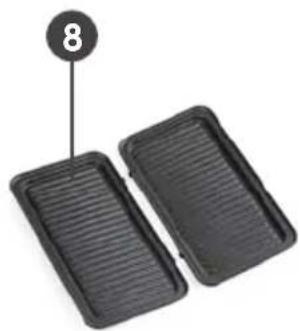
natural_image
Two black plastic grates with a numbered label '8' pointing to one (no text or symbols on the grates themselves)AVANT LA PREMIÈRE UTILISATION
text_image
Prohibition sign with a trash bin crossed out and a black rectangular base, indicating no waste or disposal.natural_image
Recycling symbol icon with three chasing arrows forming a triangle (no text or labels)text_image
Labeled diagram of a portable electronic device with numbered parts for identification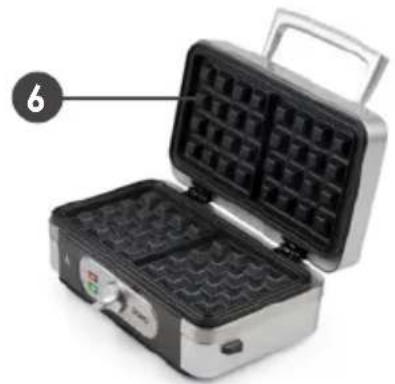
natural_image
Open waffle grill with black tray and metal handle, no visible text or symbols
natural_image
Two black plastic containers with side compartments, one labeled with number 7 (no text or symbols on the containers themselves)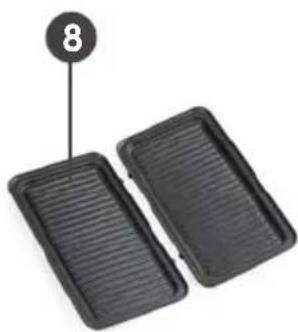
natural_image
Two black plastic grates with a numbered label '8' pointing to one (no text or symbols on the grates themselves)text_image
Prohibition sign with crossed-out trash bin and no text, indicating no waste or disposal restrictionnatural_image
Recycling symbol icon (three chasing arrows) inside a rounded square frame, no text or labels present.All of our products are always submitted to a strict quality control before they are sold to you.
Should you nevertheless experience problems with your device, we sincerely regret this.
In that case, we kindly request you to contact our customer service.
Our staff will gladly assist you.

+32 14 21 71 91

info@linea2000.be
Monday – Thursday: 8.30 – 12.00 and 13.00 – 17.00
Friday: 8.30 - 12.00 and 13.00 - 16.30
This appliance has a two year warranty period. During this period the manufacturer is responsible for any failures that are the direct result of construction failure. When these failures occur the appliance will be repaired or replaced if necessary. The warranty will not be valid when the damage to the appliance is caused by wrong use, not following the instructions or repairs executed by a third party. The guarantee is issued with the original till receipt. All parts, which are subject to wear, are excluded from the warranty. If your device breaks down within the 2-year warranty period, you can return the device together with your receipt to the shop where you purchased it.
The guarantee on accessories and components that are liable to wear-and-tear is only 6 months.
The guarantee and responsibility of the supplier and manufacturer lapse automatically in the following cases:
- If the instructions in this manual have not been followed.
· In case of incorrect connection, e.g. electrical voltage that is too high.
· In case of incorrect, rough or abnormal use.
· In case of insufficient or incorrect maintenance.
· In case of repairs or alterations to the device by the consumer or non-authorised third parties. - If the customer used parts or accessories that are not recommended or provided by the supplier / manufacturer.
SAFETY INSTRUCTIONS
When using electrical appliances, basic safety precautions should always be taken, including the following:
- Read all instructions carefully. Keep this manual for future reference.
- Make sure all packaging materials and promotional stickers have been removed before using the appliance for the first time. Make sure children cannot play with the packaging materials.
- This appliance is intended to be used in household and similar applications such as:
- staff kitchen areas in shops, offices and other working environments;
· farm houses; - by clients in hotels, motels and other residential type environments;
· bed and breakfast type environments.
- Children should be supervised to ensure that they do not play with the appliance.
- This appliance can be used by children aged from 16 years and above and persons with reduced physical, sensory or mental capabilities or lack of experience and knowledge if they have been given supervision or instruction concerning use of the appliance in a safe way and understand the hazards involved.
· Children shall not play with the appliance.
- Cleaning and user maintenance shall not be made by children unless they are older than 16 or supervised.
- Keep the appliance and its cord out of reach of children younger than 16 years.
- All repairs should be carried out by the manufacturer or its aftersales service.
- Any injury or damage caused by failure to comply with these rules are at your own risk. Neither the manufacturer, importer, or the supplier may be held liable.
▲ELECTRICAL WARNINGS
- In order to avoid a hazard this appliance must not be supplied through an external switching device, such as a timer or a separate remote control, or connected to a circuit that is regularly switched on and off by the utility.
- The appliance must be disconnected from its power source when not in use, during service and when replacing parts. Allow to cool before putting on or taking off parts, and before cleaning the appliance. To disconnect, turn controls to “OFF” or “o” position, then remove the plug from the wall. Never pull the cord or appliance to remove the plug from the socket.
- Before use, check carefully that the electric tension and frequency of the power net at your home match the indications on the rating label of the appliance.
- The appliance must be plugged into an appropriate outlet that is installed and grounded in accordance with local installation regulations.
- Do not let the power supply cord hang over the edge of a counter, or touch hot surfaces.
- Keep the power cord away from hot parts and don't cover the appliance.
- Unwrap the cord completely to prevent overheating of the cord. Do not allow the power cord supply to run underneath or around the unit.
- Do not operate this appliance with a damaged cord or plug or in the event the appliance malfunctions or has been damaged in any manner. Return the appliance to the DOMO Service Department or its service agent for examination, repair, or electrical or mechanical adjustment. Do not try to repair the appliance yourself.
⚠️INSTALLATION
· Do not place near flammable materials, gases or explosives.
· Do not use or store this appliance outdoors.
· Always use the appliance on a steady, dry and level surface.
- Never place this appliance near a gas stove or electrical stove or in a place where it may come into contact with a warm appliance.
⚠ USE
· Do not use this appliance for other than intended use.
- Only use the appliance for domestic use. The manufacturer cannot be held responsible for accidents that result from improper use of the appliance or not following the instructions described in this manual.
· Never leave the appliance unattended while it is functioning.
· Do not operate the appliance with wet hands.
- The use of accessories that are not recommended or sold by the manufacturer can cause fire, electrical shock or injuries.
Only use the utensils delivered with the appliance.
⚠ CLEANING AND MAINTENANCE
- To protect against electrical shock or burns, do not immerse unit, cord, or plug in water or other liquid.
- Failure to maintain this appliance in a clean condition could adversely affect the life of the appliance and possibly result in a hazardous situation.
⚠️PRODUCT-SPECIFIC WARNINGS
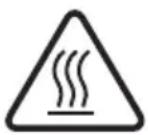
The appliance gets very hot during use and stays hot for some time after use. Keep the power cord away from hot parts and don't cover the appliance.
- Make sure that there is enough room around the appliance, so that the heat can escape and the air can circulate.
- Place the appliance on a stable and flat surface.
- Unplug the snack maker and wait until the appliance has cooled down completely before assembling or disassembling the baking plates.
- Do not let the baking plates come into contact with any metal cutlery or other metal objects to avoid damaging of the non-stick coating.
- Never use the appliance with only 1 baking plate. Always make sure that the 2 baking plates are assembled correctly.
SAVE THESE INSTRUCTIONS FOR FUTURE REFERENCE
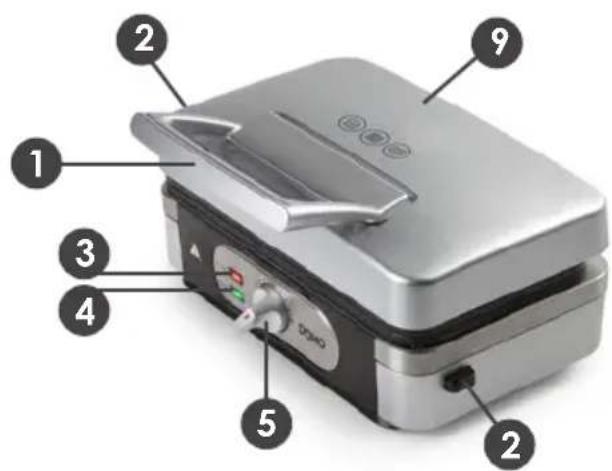
PARTS
- Handle
- Button to unlock the baking plate
- Red on/off light
- Green ready light
- Temperature knob
- Baking plates for waffles
- Baking plates for sandwiches
- Baking plates for grill
- Lid
text_image
Labeled diagram of a microwave oven with numbered parts for identification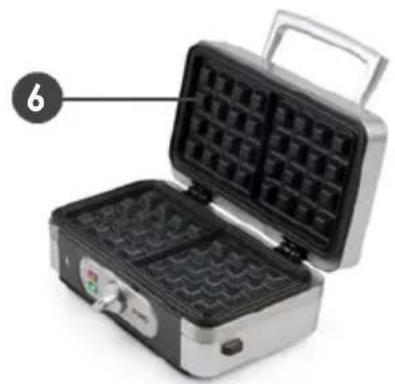
natural_image
Open waffle grill with black tray and metal handle, labeled with number 6 (no text or symbols on the main subject)
natural_image
Two black plastic car seats with a numbered label '7' pointing to one (no text or symbols on the car itself)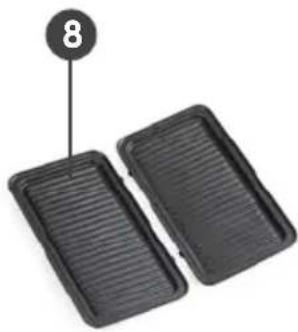
natural_image
Two black plastic grates with a numbered label '8' pointing to one (no text or symbols on the grates themselves)BEFORE THE FIRST USE
- Remove all packaging materials and any promotional stickers.
- Clean the non-stick baking plates using a soft sponge with warm water and a mild detergent. Then wipe with a cloth with clean warm water and dry well with a soft cloth.
· Wipe the outside of the appliance clean with a soft cloth.
· Make sure the baking plates and the appliance are completely dry before use.
When turning on the appliance for the first time, there may be some smoke development and a specific odour during a short period of time. This is normal.
ASSEMBLING AND DISASSEMBLING THE BAKING PLATES
- Before assembling or disassembling anything, unplug the snack maker and wait until the appliance has cooled down completely.
- Place the appliance on a flat and stable surface.
- Never use the appliance with only 1 baking plate. Always make sure that the 2 baking plates are assembled correctly.
- Do not let the baking plates come into contact with any metal cutlery or other metal objects to avoid damaging of the non-stick coating.
ASSEMBLY
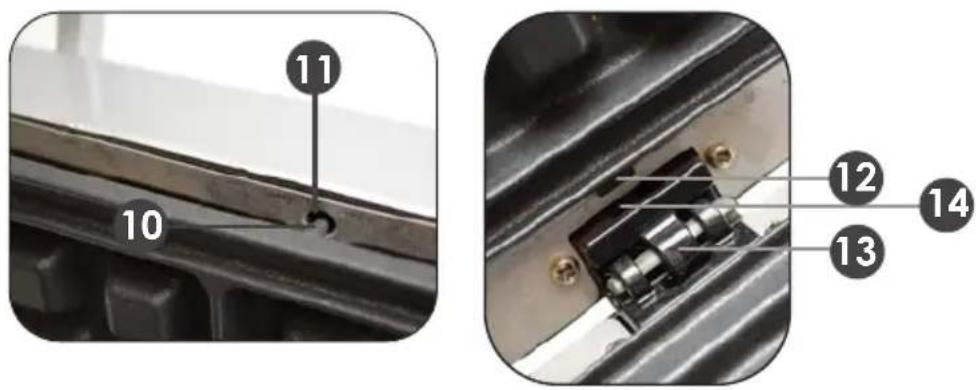
- Locking pin
- Hole
- Locking plate
- Hinge
- Slot
text_image
10 11 12 13 14- Place the 2 locking plates at the bottom of the top baking plate in the top slots of the hinges of the appliance. Make sure that the locking pin clicks into place in the hole at the top of the appliance. Push against the baking plate so that it locks into place.
- Place the 2 locking plates at the top of the bottom baking plate in the bottom slots of the hinges of the appliance. Make sure that the locking pin clicks into place in the hole at the front of the appliance. Push on the baking plate so that it locks into place.
DISASSEMBLY
- To remove the baking plates, press the buttons on the sides of the appliance. This will release the baking plates.
· To remove the top plate, press the left button.
· To remove the bottom plate, press the right button.
USE
-
This appliance is designed for making sandwiches, waffles and for grilling various foods such as paninis, meat and vegetables.
· The appliance is equipped with baking plates with a non-stick coating. -
Make sure that there is enough room around the appliance, so that the heat can escape and the air can circulate.
- Place the appliance on a stable and flat surface.
- Mount the desired baking trays (see also "Assembling and disassembling the baking plates").
- You can smear in the baking plates with a little vegetable oil to make sure that you will be able to easily remove any food remains after baking.
- Close the lid with the handle.
- Plug in the appliance. The red on/off light will light up.
- Switch on the snack maker by turning the temperature knob and set your desired baking temperature. You can choose between a low, medium or maximum temperature (or anything in between). The appliance will start heating.
- When the heating elements have reached the desired temperature, the green 'ready' light will light up. The appliance is now ready for use.
- Open the lid with the handle.
- Put the ingredients on the bottom baking plate.
- Close the lid with the handle.
-
When you are using the grill plates for panini sandwiches, make sure to use the handle to press down.
-
While the appliance is switched on, the green light will go on and off as the thermostat switches itself on and off to maintain the desired temperature.
- Bake the food until it is ready for consumption. The baking time depends on your personal taste. Experiment with the baking time to obtain the best results.
- Stay near the appliance and regularly check whether the food is done. Make sure not to burn the food.
- Lift the handle to open the lid when the food is done.
- Remove the food from the baking plate. Always use oven mitts to remove food from the snack maker.
- Close the lid to keep the heat for further use.
- To switch off the appliance, turn the temperature knob to the 'STOP' position and unplug the appliance. When the temperature knob is set to the 'STOP' position, the heating elements and the thermostat will not work. However, the red on/off light will stay lit up until the plug is removed from the socket.
- Let the appliance cool down completely.
CLEANING AND MAINTENANCE
CAUTION:
- Never immerse the appliance in a liquid.
· Before cleaning the snack maker, always unplug the appliance and let it cool down completely.
· Do not use any abrasive cleaners or scouring pads. They can damage the appliance.
CLEANING THE INSIDE
- Press the buttons on the sides of the appliance to release the baking plates from the snack maker.
- Clean the baking plates with absorbing paper towels or with a soft cloth.
- Although the baking plates are equipped with a non-stick coating, it could still be possible that there are remains on the plates that are hard to remove. To remove these residues, thoroughly smear in the baking plates with vegetable oil and let it rest for 5 to 10 minutes.
- Afterwards, clean the baking plates with absorbing paper towels.
- If this does not work, clean the plates with a damp cloth and a little mild detergent. Rinse the plates under running water. The baking plates are also dishwasher safe. Let the plates dry well afterwards.
CLEANING THE OUTSIDE
- Wipe the outside of the appliance clean with a soft, damp cloth.
- Thoroughly dry the outside of the appliance with a clean, dry cloth.
STORAGE
Store the appliance and its accessories in a dry and frost-free place, outside the reach of children.
PROBLEM AND SOLUTION
| PROBLEM SOLUTION | |
| The red indicator lamp does not turn on. Check that | the plug is in the socket and that a fuse in your fuse box has not been tripped. |
| The green indicator lamp does not turn on.The baking plates do not get hot. | Make sure the thermostat is not set to ‘STOP’ but the desired temperature is selected. |
| Food does not bake properly. The selected tempera | ture is not high enough for the food. Adjust the thermostat. |
| The food sticks and burns immediately. The selected | temperature is too high for the food.Adjust the thermostat. |
ENVIRONMENTAL GUIDELINES
text_image
Prohibition sign with crossed-out trash bin and no text, indicating no waste disposal or restrictionThis symbol on the product or on its packaging indicates that this product may not be treated as household waste. Instead it must be brought to the applicable collection point for recycling of electrical and electronic equipment. By ensuring this product is disposed of correctly, you will help prevent potential negative consequences for the environment and human health, which could otherwise be caused by inappropriate waste handling of this product. For more detailed information about recycling of this product, please contact your local city office, your household waste disposal service or the shop where you purchased the product.
natural_image
Recycling symbol icon with three chasing arrows forming a triangle (no text or labels)The packaging is recyclable. Please treat the packaging ecologically.
DOMO Webshop
BESTEL
de originele Domo-accessoires en -onderdelen online via:
COMMANDEZ
natural_image
Two cylindrical white objects on a plain background, no text or symbols visible