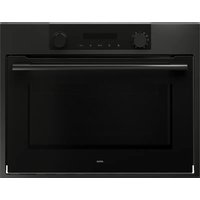
CX4595C - Oven Atag - Free user manual and instructions
Find the device manual for free CX4595C Atag in PDF.


User questions about CX4595C Atag
0 question about this device. Answer the ones you know or ask your own.
Ask a new question about this device
Download the instructions for your Oven in PDF format for free! Find your manual CX4595C - Atag and take your electronic device back in hand. On this page are published all the documents necessary for the use of your device. CX4595C by Atag.
USER MANUAL CX4595C Atag
Mid level is pre-selected. Sound levels can be set by rotate knob.
Instructions for use
Oven
ATAG
CX45xxC
EN Instructions for use EN 3-EN 29
Pictograms used

Important information

Tip
Your oven
Introduction 4
Description of the appliance 5
Guide rails/Telescopic guide rails 5
Accessories 6
Door 6
Cooling fan 6
Control panel 7
First use
Before using the appliance for the first time 8
Use
Switching on and settings 9
Choosing the cooking system 12
Description of the mains functions 12
Description of the sub functions 13
Choosing the settings 16
Selecting additional functions 18
Starting the cooking process 20
Switching off the oven 20
Operation
Microwaves 21
Guidelines for cookware 22
Using the appliance cooking functions 23
Maintenance
Cleaning the appliance 25
Cleaning function (Steam clean) 25
Removing and cleaning the guide rails 26
Replacing the oven lamp 26
Malfunctions
General 27
Environmental aspects
Disposal of the appliance and packaging 29
Introduction
Congratulations on choosing this oven. This product is designed with simple operation and optimum comfort in mind.
This manual shows how you can best use this oven. In addition to information about operating the appliance, you will also find background information that may be useful when using the appliance.

Please read the separate safety instructions carefully before using the appliance!
Read this manual before using the appliance and keep it in a safe place for future use.
The installation instructions are included separate.
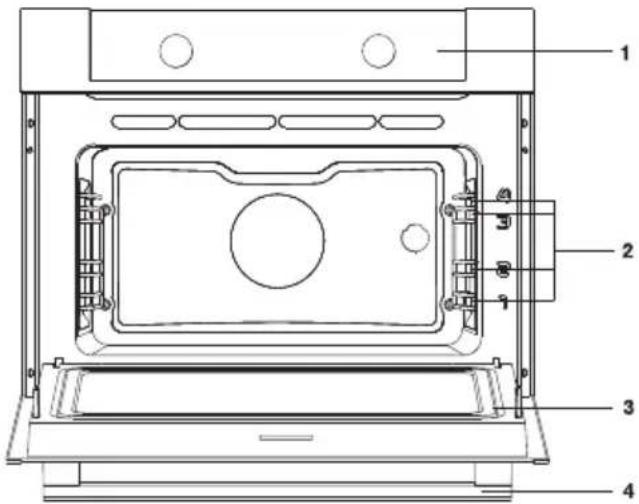
Description of the appliance
- Control panel
- Oven levels
- Oven door
- Door handle
Guide rails/Telescopic guide rails
-
The oven has four or five guide rails (Level 1 to 4/5), depending on the model. Level 1 is mainly used in combination with bottom heat. The two upper levels are mainly used for the grill function.
-
Place the oven rack, baking tray or steam dish in the gap between the guide rail sliders.
-
A number of shelf levels can have fully-retractable telescopic guide rails, depending on the model.
Pull the telescopic guide rails out of the oven cavity completely and place the oven rack / baking tray / steam dish on them. Then slide the oven rack / baking tray / steam dish on the telescopic guide rails, back into the oven cavity.
Only close the oven door when the telescopic guide rails have been returned completely back into the oven cavity.
Accessories
Your appliance is accompanied by a range of accessories, depending on the model. Only use original accessories; they are specially suited to your appliance. Be sure that all the accessories that are being used are able to withstand the temperature settings of the chosen oven function.
Note: not all accessories are suitable/available for every appliance (it may also differ by country). When purchasing, always provide the exact identification number of your appliance. Please see the sales brochures or check online for more details about optional accessories.
Note: never place an accessory on the bottom of the oven!
| Accessories that can be supplied with your appliance (depending on the model) | |
| Enamelled baking tray; to be used for pastries and cakes. ·Do not use the enamelled baking tray for microwave functions! ·Suitable for pyrolysis cleaning. | |
| Oven rack; mainly used for grilling. A steam dish or pan with food can also be placed on the oven rack. ·The oven rack is equipped with a safety peg. Lift the rack slightly at the front to slide it out of the oven. ·Do not use the oven rack for microwave functions! | |
| Deep enamelled baking tray; to be used for roasting meat and baking moist pastry. ·Do not place the deep baking tray on the lowest level during a cooking process, except when using it as a drip tray during grilling, roasting or roasting with a spit roast (when available). ·Do not use the deep enamelled baking tray for microwave functions! ·Suitable for pyrolysis cleaning. | |
| Glass baking tray; for microwave and oven use. ·NOT suitable for pyrolysis cleaning. | |
Door
- The door switches interrupt the operation of the oven when the door is opened during use. The oven continues operating when the door is closed.
Cooling fan
- The appliance is equipped with a cooling fan that cools the casing and control panel.
Control panel
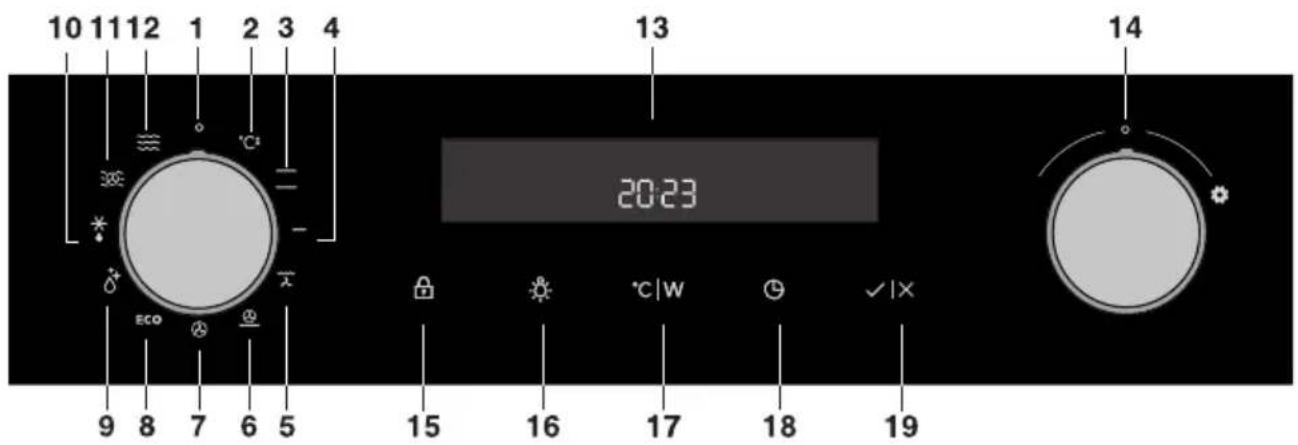
- Function knob (in 'Off' position)
- Fast preheat
- Upper and bottom heater
- Grill
- Grill with fan
- Hot air and bottom heater
- Hot air
- Eco cooking
- Cleaning
- Defrosting
- Combi microwave functions
- Microwave functions
- Cooking information and clock display
- Settings knob (- / + )
- Child lock key
- Oven lighting on/off key
- Temperature/power key
- Electronic program timer
19.Start/stop key

Symbols of cooking systems may be located on the knob or on the front panel (depending on the appliance model).
The keys will respond better if you touch them with a larger area of your fingertip. Each time you press a key, a short acoustic signal will be sounded.
Before using the appliance for the first time
- Upon receiving the appliance, remove all parts, including any transport equipment, from the oven. Clean all accessories and utensils with warm water and regular detergent. Do not use any abrasive cleaners.
- When the oven heats up for the first time, the characteristic smell of a new appliance will be emitted. Ventilate the room thoroughly during the first use.
Microwave function
Microwaves are used for cooking, roasting, and defrosting of food. They allow quick and efficient cooking without changing the colour or shape of the food.
Microwaves are a type of electromagnetic radiation. Such radiation is commonly found in our environment in the form of radio-electric waves, light or infrared rays. Their frequency is in the 2,450 MHz range.
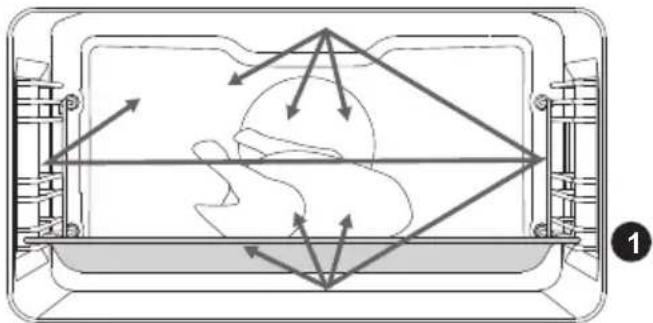
Their behaviour:
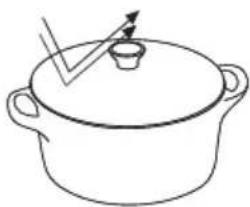
They are reflected by metals.
- They travel through all other materials.
- They are absorbed by water, fat and sugar molecules.
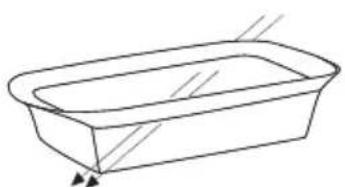
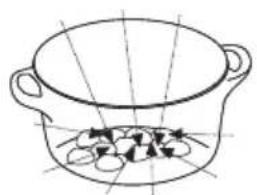
When food is exposed to microwaves, the molecules begin to move rapidly, thereby generating heat.
The microwaves penetrate approximately 2.5 centimeters deep into the food. If the food is thicker, the core of the food will be cooked by conduction, as in conventional cooking.

Never use or activate a microwave system if the oven is empty.
Switching on and settings
After connecting your appliance or after an extended power outage, 12:00 will flash on the display and the symbol will light up.
All the settings as follows:
SETTING THE CLOCK
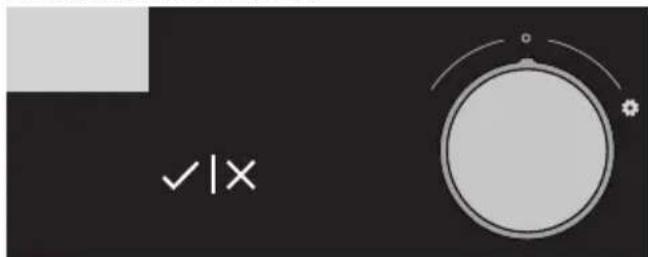
Rotate the SETTINGS KNOB (- + ) and first set the minutes; then, the cursor will switch to hours. After three seconds, the settings will be saved.

Turning the knob farther to the right or to the left will change the settings more quickly.
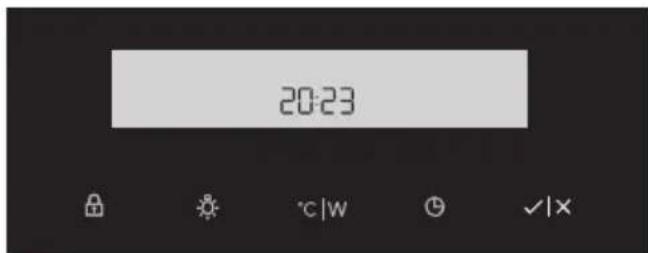
Confirm by pressing START/ STOP. If nothing is pressed within the next three seconds, the setting will be stored automatically.

The oven will also work if the clock is not set. However, timer functions are not available in this case (see chapter: SETTING THE TIMER FUNCTIONS).
After a few minutes of idling, the appliance will switch to standby mode.
CHANGING THE CLOCK SETTING
Clock settings may be changed when no timer function is activated.
Press the key to set the current time. Confirm by pressing START/ STOP.
SETTINGS
To change the settings, rotate the setting knob to the right and hold it for three seconds. Press the start/sop icon to scroll through respective settings or parameters. To change a parameter, rotate the setting knob to the right or to the left.
BRIGHTNESS LEVEL
Select between three different options of brightness levels. Mid level is pre-set. Levels can be set by rotate knob.
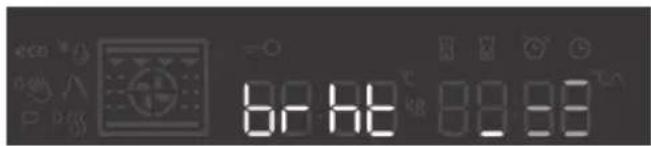
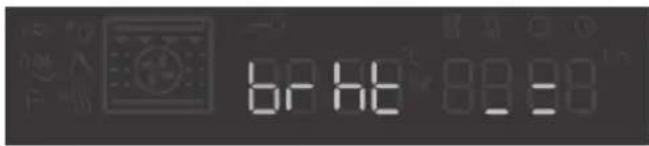
Brightness level low Brightness level mid

Brightness level max
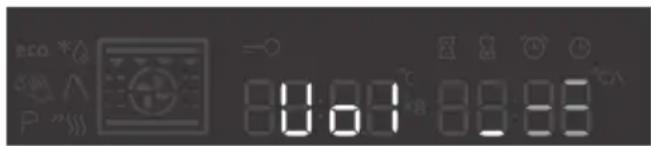
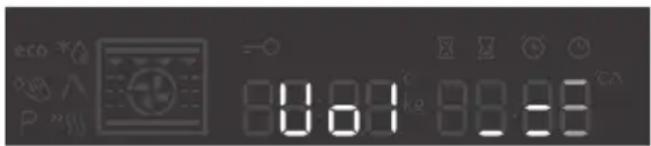
SOUND LEVEL
Mid level is pre-selected. Sound levels can be set by rotate knob.
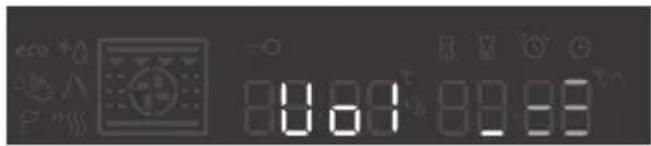
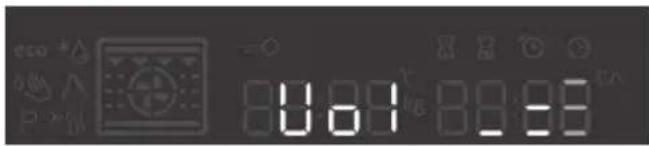
Volume level low Pre-set mid sound level
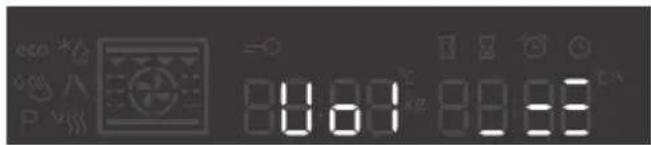
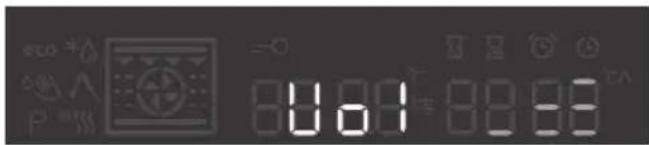
Volume level max Volume level off
END
By pressing the start/stop icon, user can go out of settings menu back to standby mode. You can go out of settings manu also if you hold selection knob on the left for 3 sec, or it you turn the system knob.
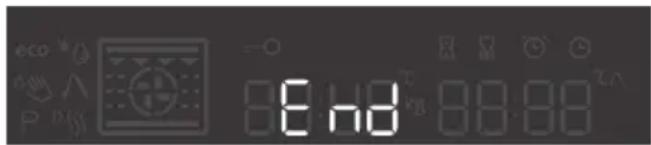
To change the settings, rotate the setting knob to the right and hold it for three seconds. Press the start/sop icon to scroll through respective settings or parameters. To change a parameter, rotate the setting knob to the right or to the left.

After a power outage or after the appliance is switched off, the additional function settings will remain stored for no more than a few minutes. Then, all settings, except for the acoustic signal and child lock will be reset to factory defaults.
USE
Choosing the cooking system
Rotate the knob (left and right) to select 0 COOKING SYSTEM (see program table).
The selected icon will appear on the display.
Settings can also be changed during operation.
Description of the mains functions
Consult the tables to select the preferred function. Also consult the instructions for preparation on the dish packaging. Some main functions have sub functions.
In 'Microwave function': do not use metal cookware or utensils and do not preheat the oven. Be sure that all the accessories that are being used are able to withstand the temperature settings of the chosen oven function.
Main functions (to select with the function knob)
Function Description
Fast preheat
- With this function, the oven space quickly reaches the desired temperature. Do not use this setting when you have a dish in the oven space.
Defrost
- This function uses microwaves. Dishes are defrosted quickly and efficiently.
Microwave
- Microwave energy is used to cook and defrost foods. It provides fast efficient cooking without changing the colour or form of food.
- Default settings can be changed in the settings menu.
- Place the glass dish on level 1.
- Suggested power: 750 W
| Funkcija Opis | ||
| Combi microwave ·Use one of the functions for (fast) cooking of meals. ·Sub functions are available (consult Combi microwave functions table). | ||
| Cleaning ·Grease and grime can easily be removed from the oven walls with a damp cloth. | ||
| Hot air ·Heating by means of hot air from the back of the oven. ·This mode provides uniform heating and is ideal for baking. ·Place the baking tray or oven rack in the middle of the oven. ·Suggested temperature: 180 °C ·Preheating is recommended. | ||
| Hot Air + Bottom heat ·Heating by means of hot air from the back of the oven and the bottom heating element. ·This mode can be used to bake pizza, moist pastry, fruitcakes, leavened dough and short crust. ·Place the baking tray or oven rack in the middle of the oven. ·Suggested temperature: 200 °C ·Preheating is recommended. | ||
| Top + Bottom heat ·Heating by means of the upper and lower heating elements. ·This mode can be used for traditional baking and roasting. ·Place the baking tray or oven rack in the middle of the oven. ·Suggested temperature: 200 °C ·Preheating is recommended. | ||
| Grill • Heating by means of the grill element. • This mode can be used for grilling a smaller amount of open sandwiches, beer sausages, and for toasting bread. • Place the oven rack in the upper part of the oven and the baking tray in the middle of the oven. • Monitor the cooking process at all times. The dish may burn quickly due to the high temperature. • Maximum allowed temperature: 240 °C | 1 2 | |
| Large grill + Fan • Heating by means of the top heating elements. The heat is distributed by the fan. • This mode can be used for grilling meat, fish and vegetables. • Place the oven rack in the upper part of the oven and the baking tray in the middle of the oven. • Suggested temperature: 170 °C • Monitor the cooking process at all times. The dish may burn quickly due to the high temperature. • Preheating is recommended. | 4 2 | |
| ECO | ECO Hot air • Heating by means of hot air. ECO hot air uses less energy but gives the same result as the hot air setting. Cooking takes a few minutes longer. • This mode can be used for roasting meat and baking pastry. Place the baking tray in the middle of the oven. • Suggested temperature: 180 °C • This setting makes use of the residual heat (heating is not on the whole time) to achieve low energy consumption (in accordance with energy class EN 60350-1). In this mode the actual temperature in the oven is not displayed. | 2 |
Combi microwave functions (to select with the selection knob)
| Function Description | |
| Hot air + MicrowaveThis system employs a combination of microwaves and hot air; therefore, the cooking time is shorter.Use this for all types of meat, stews, vegetables, pies, cakes, bread and dishes au gratin (i.e. food that require longer cooking time).Place the glass dish on level 1.Suggested temperature: 160 °C Suggested power: 600 W |
Choosing the settings
Each cooking system features basic or default settings which can be adjusted.
Adjust the settings by pressing the relevant key (before pressing the START/STOP key). Some settings are not available with some programs; an acoustic signal will remind you of such cases.
CHANGING THE COOKING TEMPERATURE AND MICROWAVE POWER
Only set the power (W) in combined systems and systems with microwaves.
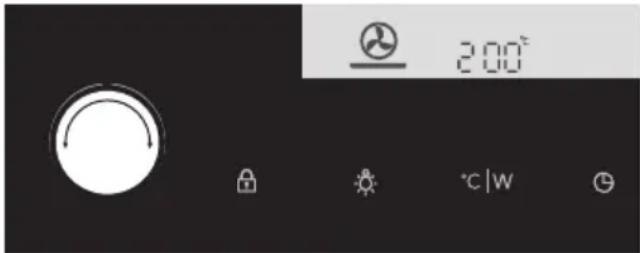
Select the COOKING SYSTEM. Selected icon will appear on the display and PRESET TEMPERATURE will flash.
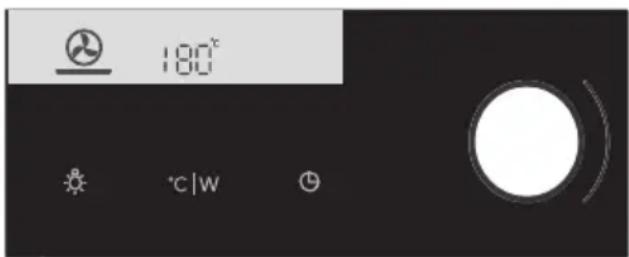
Select the COOKING SYSTEM. Selected icon will appear on the display and PRESET TEMPERATURE will flash.
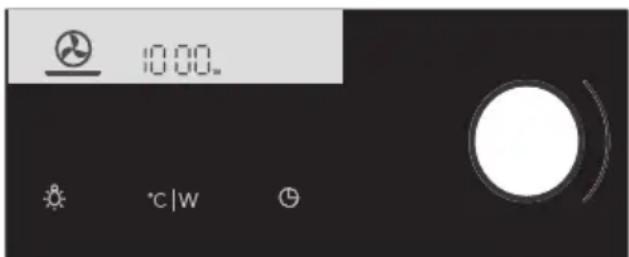
Touch the TEMPERATURE KEY twice to set the power. Power in watts (W) will appear on the display. Rotate the SETTINGS KNOB (÷ +) and set the power.

Maximum temperature or power is limited in some systems.
After switching on the appliance by pressing the START key, temperature and microwave power will alternate on the display (only with combined systems).
The symbol ^ C / W will flash on the display until the selected value is reached.
Microwave power setting
| Power Use | |
| 1000 W • | For quick heating of drinks, water and dishes containing a lot of moisture. • For cooking fresh or frozen vegetables. |
| 750 W • | For prepairing and heating of drinks and dishes. |
| 600 W • | For melting chocolate.For cooking fish and seafood. • For heating on two levels. • For cooking dried beans at low temperatures. • For heating or cooking delicate dishes with eggs. |
| 360 W • | For cooking dairy products or jam at low temperatures. |
| 180 W • | For fast defrosting of dishes. • For softening butter or ice cream. |
| 90 W • | For defrosting cakes containing cream. |
TIMER FUNCTIONS
First rotate the COOKING SYSTEM SELECTOR KNOB; then, set the temperature.
Touch the TIMER key several times to select the symbol.
The icon for the selected timer function will light up and the adjustable cooking start/end time will flash on the display. Other icons are dimly lit.
Press START to start the cooking process. ELAPSED COOKING TIME will be displayed.
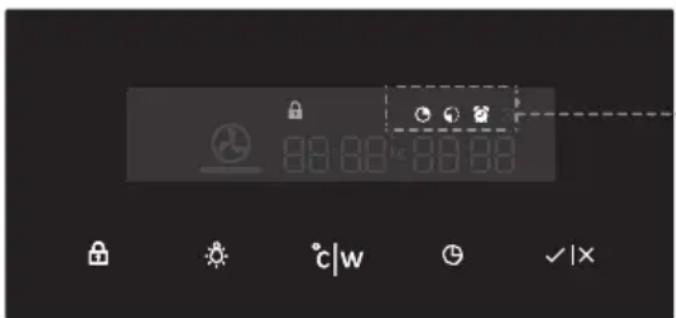
Timer function display

Setting the cooking time
In this mode, you can define the duration of oven operation (cooking time). Set the desired cooking time. First set the minutes, then the hours. Icon and cooking time are displayed on the display unit.
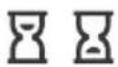
Setting the delayed start
In this mode, you may specify the duration of the cooking process (cooking time) and the time when you wish the cooking process to stop (end time). Make sure the clock is accurately set to current time.
Example:
Current time: noon
Cooking time: 2 hours
End of cooking: 6 pm
First set the OPERATION DURATION (2 hours). Touch the CLOCK button again and select END OF OPERATION. The display automatically shows a flashing sum of the time of day and duration of operation of the oven (14:00).
Set the time for the end of baking (18:00)
Press START to start the cooking process. The timer will wait for the time to start the cooking process and the symbol will be lit up. The oven automatically switches on (at 4 pm) and stops operating and the selected time (at 6 pm).

Setting the minute minder
The minute minder can be used independently of the oven operation. The longest possible setting is 24 hours.
During the last minute, the minute minder is displayed in seconds.

After the set time expires, the oven will automatically stop operating (end of cooking). An acoustic signal will be heard which you may turn off by touching any key. After one minute, the acoustic signal will be switched off automatically.
All timer functions can be cancelled by setting the time to 0
After a few minutes of idling, the appliance will switch to standby mode.
Selecting additional functions
Activate/deactivate the functions by pressing the desired key or a combination of keys.

Some functions are not available with some systems; an acoustic signal will indicate of such cases.

CHILD LOCK
Activate it by touching the CHILD LOCK key. The key icon will light up on the display. Touch the key again to deactivate the child lock. The icon on the display will disappear.
If the child lock is activated with no timer function engaged (only clock is displayed), then the oven will not operate.
If the child lock is activated after a timer function has been set, then the oven will operate normally; however, it will not be possible to change the settings.
When the child lock is activated, systems (cooking modes) or additional functions cannot be changed. The only possible change is to end the cooking process by rotating the selector knob to 0
Child lock will remain active after the oven is switched off. To select a new system, the child lock must first be deactivated.

Oven lighting
Oven lighting is switched on automatically when the door is opened or when the oven is switched on.
After the end of the cooking process, the light will remain on for another minute.
The light inside the oven can be switched on or off by pressing the LIGHT key.
5sek
C|W
Acoustic signal
Loudness of the acoustic signal can be set when no timer function is activated (only the time of day is displayed).
Press the TEMPERATURE/POWER key and hold it for 5 seconds. Two fully lit bars will appear on the display. Rotate the SETTINGS KNOB (- / +) to choose one of the three volume levels (one, two, or three bars). After three seconds, the setting will be automatically stored and the time of day will appear.
5sek

Decreasing the display contrast
The cooking system selector knob should be on the >0 position.
Press the LIGHT key and hold it for 5 seconds. Two fully lit bars will appear on the display. Rotate the SETTINGS KNOB (- / +) to adjust the display dimmer (one, two, or three bars). After three seconds, the setting will be automatically saved.
Standby
Display lighting can be automatically switched off after 10 minutes if it is not used.
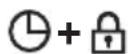
Press the KEY + TIMER keys to switch off the display. If a timer function has been activated, then OFF and the TIMER icon will appear on the display to indicate the activated function.

After a power outage or after the appliance is switched off, the additional function settings will remain stored for no more than a few minutes. Then, all settings, except for the acoustic signal and child lock will be reset to factory defaults.
Starting the cooking process
Start the cooking process by pressing the START/STOP key.

Switching off the oven
Turn the COOKING SYSTEM SELECTOR KNOB to position 0
After the end of the cooking process and after the oven has been switched off, declining temperature is displayed down to 50^ .
All timer settings are also paused and cancelled. Time of day (clock) will be displayed.
After one minute of idling, the appliance will switch to standby mode.
After the use of the oven, some water may be left in the condensate channel (underneath the door). Wipe the channel with a sponge or a cloth.
Microwaves
Microwaves are high-frequency electromagnetic waves. The energy makes it possible to cook or warm up a dish without affecting the form or colour.
Cooking principle
- The microwaves the microwave generates are spread evenly by a distribution system. This cooks the dish evenly.
- The food absorbs the microwaves to a depth of approximately 2.5cm . Cooking then continues, because the heat is spread in the dish.
- The cooking times vary and depend on the dish you use and the properties of the food:
Quantity and density
Moisture content
Starting temperature (whether or not it is chilled)

Please note!
The dish is cooked from the inside out by means of heat distribution. The cooking continues even when you take the dish from the oven. Standing times in recipes should therefore be adhered to, in order to ensure:
Even heating into the middle of the dish.
- Equal temperatures in all parts of the dish.
Guidelines for cookware
Cookware that you use for the microwave function should not block the microwaves. Metals such as stainless steel, aluminium and copper reflect microwaves. For that reason, do not use metal cookware. Cookware which is designated as microwave-safe can be used safely. For more information about suitable cookware, consult the following guidelines and always use the glass baking tray on level one if you use the microwave function.
| Cookware | Microwave safe | Remarks |
| Aluminium foil | ✓X | Can be used in small quantities to prevent certain parts of the dish from overcooking. Arcing can occur if the foil is too close to the oven wall or if too much foil is used. |
| Porcelain and earthenware | ✓ | Porcelain, earthenware, glazed earthenware and ivory porcelain are usually suitable, unless they have a metal edge. |
| Disposable crockery made from polyester or cardboard | ✓ | Frozen meals are sometimes packaged in disposable tableware. |
| Fast food packaging • Polystyrene cups • Paper bags or new-spaper • Recycled paper or metal edges | ✓X | Can be used to warm up dishes. Polystyrene can melt if it overheats. Can catch fire. Can cause arcing. |
| Glassware • Oven dishes • Fine glassware • Glass jars | ✓ | Can be used, unless it has a metal edge. Can be used to warm up dishes or liquids. Thin glass can break or shatter with sudden heating. The lid must be removed. Only suitable for warming. |
| Metal | X | Can cause arcing or fire. |
| Paper • Plates, cups, kitchen paper • Recycled paper | ✓X | For short cooking times and warming. For absorbing excess moisture. Can cause arcing. |
| Plastic | ✓ | Only use heat-resistant thermoplastic material. Other types of plastic can warp or discolour at high temperatures. Do not use melamine plastic. Only if boil-proof or ovenproof. Must not be airtight. If necessary, prick it with a fork. |
:Recommended
: Careful
X:Unsafe
Using the appliance cooking functions
Consult 'Control panel general use' to get information about the general operation of the appliance.
- Touch the 'On/off key to switch on the appliance.
- Turn the function knob to select a main function.
Consult 'Description of the functions' to select the appropriate (available) function.
- Turn the selection knob to select a sub function (when available) or to adjust a setting.
The first sub-function setting is active (when available).
- Start directly the selected function (with pre-set values) by touching the confirm key (this key is blinking if it is possible to start the program).
Available functions or settings to adjust:
- the function (sub oven function or combi microwave function);
the oven temperature; - the microwave power (when the (combi) microwave function is used);
the cooking time.
The next sub-function or setting becomes active (if available). Go back to an previous selection or setting by touching the left navigation key.

If preferred, select any additional setting (for example 'Fast preheat') using the plus menu. See 'Plus menu' for more information.
- Touch the confirm key to start preparing your meal with the chosen settings.
At the end of the cooking you can:
- Stop cooking
Touch the confirm key.
The finish display will be closed and the stand-by screen will be shown. If there is no action within 10 minutes, the display will switch to stand-by mode.
- Add extra time
Touch the right navigation key to select 'Add extra time'.
The time setting becomes active and can be changed directly by rotating the selection knob.
Touch the confirm key.
The previous process is activated again.
Changing settings during the progress
-
During progress, touching the navigation keys will show the active area. The selected setting can now be changed. After confirmation with the confirm key the progress screen will be shown with the changed settings.
-
After 5 seconds without actions the progress settings are cancelled and the display will return to the progress screen.
Cleaning the appliance
Clean the oven regularly to prevent fat and food particles from accumulating, especially on the surfaces of the interior and the exterior, the door and the seal.
- Activate the child lock (to prevent that the appliance is switched on accidentally).
- Clean the exterior surfaces with a soft cloth and warm soapy water.
- Next wipe with a clean, damp cloth and dry the surfaces.
- Remove splashes and stains on the interior surfaces with a cloth and soapy water.
- Next wipe with a clean, damp cloth and dry the surfaces.

Make sure that no water enters the vents. Never use abrasive cleaning materials or chemical solvents. Always make sure that the seal of the door is clean. This prevents accumulation of dirt and allows you to close the door properly.
Cleaning function (Steam clean)
With Steam clean and a damp cloth, you can easily remove grease and dirt from the oven walls.
Using Steam clean
- Only use Steam clean when the oven has cooled down fully. It is more difficult to remove dirt and grease if the oven is hot.
-
The program takes 30 minutes. Food remains on the enamel walls will be sufficiently soaked after 30 minutes so that they can be removed with a damp cloth.
-
Remove all accessories from the oven.
- Pour 0.15 litres of water into the bottom of the oven.
- Select 'Cleaning' with the function knob.
- Touch the confirm key to start Steam clean.

Do not open the door during the cleaning program.
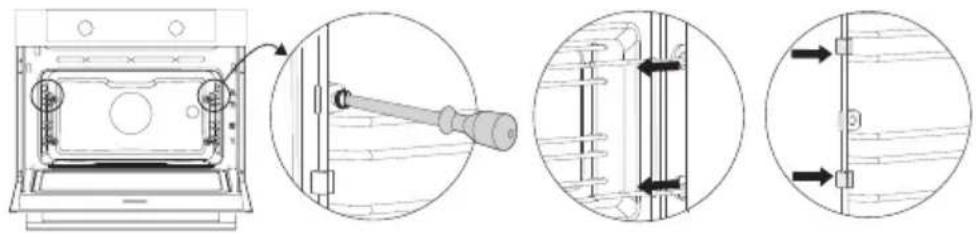
Removing and cleaning the guide rails
Use conventional cleaning products to clean the guide rails.
- Remove the screw using a screwdriver.
- Remove the guide rails from the holes in the back wall.

Save the guide rail spacers carefully. Return the spacers after cleaning. This prevents sparks being created during use.
Replacing the oven lamp

The lamp in this household appliance is only suitable for illumination of this appliance. The lamp is not suitable for household room illumination.
The oven is fitted with a halogen lamp.
This product contains a light source of energy efficiency class (G).

The lamp is a consumer item and therefore not covered by warranty. Replace the defective lamp with a lamp of the same type.

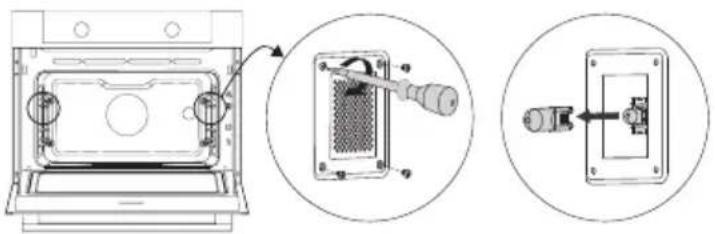
Disconnect the appliance from the power supply by removing the plug from the socket or by switching off the circuit breaker in the fuse box.
Please note: the light bulb can be very hot! To prevent burns, use protection to remove the light bulb.
- Remove the four screws from the cover panel. Remove the cover panel and glass.
- Remove the light bulb and install a new one.
- Do not remove the seal from the cover panel. The seal should not become lose from the cover panel. The seal must fit perfectly in the oven wall recess.
General
If you have problems with your oven, consult the error overview below. Should the problems persist, please contact the Customer Services Department.
The food stays raw
- Check whether the timer has been set and you have touched the confirm key.
Is the door closed properly? - Check whether a fuse has blown and whether a circuit breaker has been activated.
The food is overcooked or undercooked
- Check whether the correct cooking time has been set.
- Check whether the correct power has been set.
The keys do not respond; the display does not respond to the keys.
- Disconnect the appliance from the power supply for a few minutes (remove the mains plug from the socket or switch the circuit breaker to off); then reconnect the appliance and switch it on.
Sparking in the oven space.
- Ensure that all cover panels from the lamps are secure and that all spacers are placed on the guide rails.
Power failure can cause the display to reset.
- Remove the plug from the socket and put it back in again.
- Set the time again.
There is condensation in the oven.
- This is normal. Wipe the oven clean after use.
The fan keeps working after the oven is switched off.
- This is normal. The fan will keep working for a while after the oven is switched off.
Air flow can be felt at the door and the exterior of the appliance.
This is normal.
Light reflects on the door and the exterior of the appliance.
This is normal.
Steam escapes from the door or the vents.
This is normal.
Clicking sounds can be heard when the oven is working, particularly in the defrost setting.
This is normal.
The circuit breaker switches off regularly.
- Consult a service technician.
The display gives an error code, ERROR XX ...(XX indicates the number of the error).
- There is a fault in the electronic module. Disconnect the appliance from the power supply for a few minutes. Then reconnect it and set the current time.
- Consult a service technician if the error persists.
Storing and repairing the oven
- Repairs should only be performed by a qualified service technician.
If maintenance is required, take the plug from the socket and contact the ATAG customer service.
Have the following information to hand when you call:
- The model number and serial number (stated on the inside of the oven door)
Guarantee details
A clear description of the problem

Choose a clean, dry place if you have to store the oven temporarily, as dust and moisture can damage the appliance.
Disposal of the appliance and packaging
This product is made from sustainable materials. However, the appliance must be disposed of responsibly at the end of its useful life. The government can provide you with information about this.
The appliance packaging can be recycled. The following materials have been used:
cardboard;
polyethylene film (PE);
CFC-free polystyrene (hard PS foam).
Disposethestematerialsresponsiblyinaccordancewithlegalprovisions.
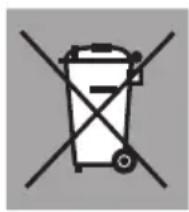
The product has a pictogram of a crossed-out waste container. This indicates that household appliances must be disposed of separately. This means that the appliance may not be processed via the regular waste flow at the end of its useful life. You should take it to a special municipal waste depot or a sales outlet that offers to do this for you.
Collecting household equipment separately prevents harm to the environment and public health. The materials used in manufacturing this appliance can be recycled, which provides considerable savings in energy and raw materials.
Declaration of Conformity We hereby declare that our products satisfy the applicable European Directives, Orders and Regulations, as well as the requirements stated in the referenced standards.

The appliance rating label is located on the inside of the appliance.
When contacting the service department, have the complete type number to hand.
You will find the addresses and phone numbers of the service organisation on the guarantee card.
