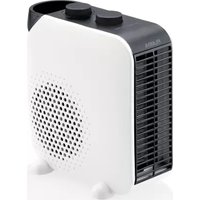
2300FL - Heating Flama - Free user manual and instructions
Find the device manual for free 2300FL Flama in PDF.


| Product type | Fan heater / Electric space heater |
| Brand | Flama |
| Model | 2300FL |
| Category | Heating |
| Rated heat output | 2000 W (2 kW) |
| Minimum heat output | 1000 W (1 kW) |
| Power supply | Electric via mains socket (230 V ~ 50 Hz) |
| Operating modes | Low temperature heating, high temperature heating, ventilation only |
| Type of control | Adjustable mechanical thermostat, power/mode button, thermostat knob |
| Recommended use | Well-insulated spaces or occasional use, domestic use |
| Installation | On a stable horizontal surface or in horizontal position (stand provided) |
| Safety | Overheat protection (automatic shut-off), do not cover, keep a safety distance of 1 m from flammable materials |
| Maintenance and cleaning | Grills can be cleaned with a vacuum cleaner (brush), outer surface with a damp cloth, do not immerse in water |
| Warranty | 36 months after purchase date |
| Certifications | Compliant with EMC and low voltage directives |
| Included accessories | Transport handle, stand for horizontal installation |
| Repairability | Do not disassemble yourself; entrust to an approved service center |
| Spare parts | Contact the manufacturer or an approved center |
Frequently Asked Questions - 2300FL Flama
User questions about 2300FL Flama
0 question about this device. Answer the ones you know or ask your own.
Ask a new question about this device
Download the instructions for your Heating in PDF format for free! Find your manual 2300FL - Flama and take your electronic device back in hand. On this page are published all the documents necessary for the use of your device. 2300FL by Flama.
USER MANUAL 2300FL Flama
natural_image
White and black electric heater with perforated grille and side-mounted buttons (no visible text or symbols)2300FL
PT TERMOVENTILADOR 1
ES CALEFACTOR 7
EN FAN HEATER 13
FR THERMOVENTILATEUR 19
This appliance is appropriate for use only in well-insulated spaces or for occasional use.
natural_image
Two electronic devices, one with a black arrow pointing to a building silhouette (no visible text or symbols)natural_image
Symbol of a trash bin with crossed lines indicating no waste or discharge (no text or labels)natural_image
Two black FLARA devices with a downward arrow overlay, placed on a cityscape background (no text or symbols visible)natural_image
Symbol of a trash bin with crossed lines and a horizontal bar below (no text or labels)Read all instructions carefully before using the device for the first time and keep this manual. Any use that does not comply with the instructions releases FLAMA from all responsibilities.
Before each use, make sure that the appliance, the socket and the cable are in good condition.
The device must be used under the normal conditions of use defined in this manual.

CAUTION: To avoid the risk of overheating, NEVER COVER the device.
Do not use this heater if it has been dropped;
Do not use the heater if there are visible signs of damage;
Use this heater on a horizontal, stable surface or hang it on the wall, as applicable.
It is advisable to keep the device out of the reach of children under 3 years of age, unless they are accompanied by an adult.
Do not place the device under a socket.
Do not use this appliance near baths, showers, washbasins or swimming pools.
WARNING: Do not use this heater in small rooms when they are occupied by persons unable to leave the room on their own initiative, except under constant supervision.
WARNING: To reduce the risk of fire, keep textiles, curtains or other flammable materials at least 1 m away from the air outlet.
Do not let water penetrate the device.
Do not touch the device with wet hands.
Do not insert any type of object inside the device (eg needles, etc.).
If the power cord is damaged in any way, it must be replaced by
the manufacturer, an authorized Technical Assistance Center or a qualified technician, in order to avoid any danger to the user. To learn more about maintenance and cleaning operations, see the user guide that comes with the appliance.
Children between 3 and 8 years of age must only be able to switch the appliance on or off if it has been placed or installed in the normal operating position and if children are accompanied or have been instructed on how to use the appliance safely and understand all potential hazards. Children between 3 and 8 years of age must not install, adjust or clean the appliance, or carry out maintenance at the expense of the user.
ATTENTION: Some components of the appliance can reach very high temperatures and cause burns. Particular attention should be paid to the presence of children and vulnerable people.
This appliance can be used by children over 8 years of age and by persons with reduced physical, sensory or mental capabilities, or without experience or knowledge, if these persons are properly supervised or if they have received instructions regarding the safe use of the appliance and if the possible risks have been assimilated. Children must not use the appliance as a toy. Cleaning and user maintenance must not be carried out by children without supervision.
This product complies with the Electromagnetic Compatibility and Low Voltage Directives.
This instruction manual is also available in PDF format at www.flama.pt.
RECOMMENDATIONS
The electrical installation of the part, the installation of the device and its use must comply with the regulations in force in your country.
Do not use the device near flammable objects and products, and, in general, respect the minimum distance of 50 cm between the device and other objects (walls, curtains, mists, etc.).
The appliance must be placed so that the electrical plug is accessible.
Do not pull on the power cord or the appliance, even when you want to disconnect the plug from the socket.
This product is intended for domestic use only. In the event of professional, inappropriate use or use that does not comply with the instructions, the manufacturer declines all responsibility and the guarantee will be void.
Fully unwind the cable before each use.
Do not use an extension cord not adapted to the power of the appliance.
Do not switch on the appliance in a dusty place or where there is a risk of fire.
DESCRIPTION
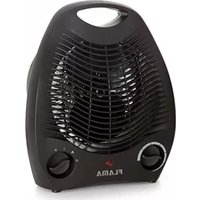
- Light indicator
- Power & Mode Button
- Thermostat regulator
- Carry handle
- Support for "horizontal position"
OPERATING INSTRUCTIONS
Caution: To avoid overheating, do not cover or conceal the appliance or the air inlets and outlets.
The fan heater can be operated by means of the manual controls located on the fan heater.
Remove the fan heater from the box and bag carefully.
Make sure that the Power & Mode button is in the off position (0) before plugging the appliance into the outlet.
The fan must be placed on a solid, flat surface.
Operation
Connect the power plug to an electrical outlet. Make sure the plug is securely attached to the outlet. If it is not well fitted, it may overheat and damage the outlet. The cable and plug assembly may become hot during use. This is a normal situation and it does not interfere with the proper functioning of the device.
Turn the thermostat regulator to the MAX (+) position.
Turn the Power & Mode button to the desired programmed temperature. The low temperature is represented by (*) and the high temperature by (*).
For fan operation only, without any heat production, turn the Power & Mode button to the fan setting ( ).
THERMOSTAT INSTRUCTIONS
Note - Make sure the thermostat regulator is in the MAX (+) position before turning on the appliance.
Once the compartment reaches the desired temperature, slowly turn the thermostat regulator counterclockwise until you hear a slight sound.
Then turn the thermostat regulator clockwise until you hear a slight sound again. The appliance/thermostat switches on and off to ensure the desired temperature.
To turn off the appliance, turn the Power & Mode button to the off position (0). Then remove the plug from the outlet.
To adjust the thermostat button, turn the thermostat regulator clockwise to increase the desired temperature. Turn counterclockwise to lower the temperature.
NOTE: It is normal for the appliance to turn on and off as it maintains a fixed temperature.
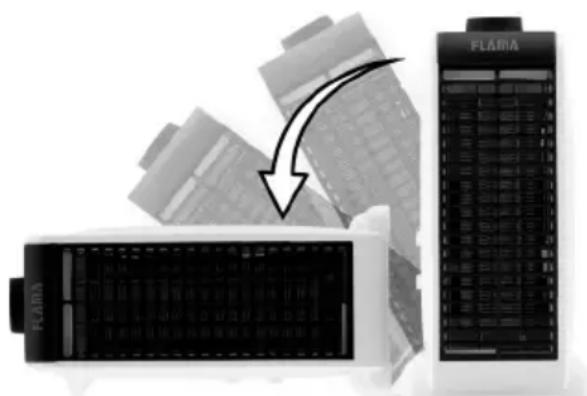
Horizontal operating position
natural_image
Two FLARA devices with a magnified inset showing their circuitry and components (no text or symbols visible)The fan can be used horizontally.
Place the fan heater on a solid, flat surface.
Lay the appliance to the side of the support for “horizontal position”.
Caution: To avoid overheating, do not cover or conceal the appliance or the air inlets and outlets.
SAFETY FEATURES
The fan is equipped with a thermal overload protection to prevent overheating. The fan heater switches off automatically when it reaches an excessive temperature. In this case:
Turn off the fan heater and wait 30 minutes until the appliance cools down.
After 30 minutes, turn the appliance back on and operate normally.
TROUBLESHOOTING TIPS
If your fan turns off unexpectedly or stops working, this may be due to the activation of one of the aforementioned safety features to prevent overheating.
Make sure the power plug is connected to a working electrical outlet.
Check the thermostat settings. The fan heater may be turned off because it has reached the desired fixed temperature.
CLEANING AND MAINTENANCE
Always disconnect the plug from the power outlet before carrying out any maintenance and cleaning operations.
Cleaning
IMPORTANT! DO NOT IMMERSE THE FAN IN WATER!
Clean the fan grilles with your vacuum cleaner brush attachment. This will remove lint and dirt from the inside of the heater.
DO NOT ATTEMPT TO DISASSEMBLE THE FAN.
Wipe the outer surface with a soft damp (non-wet) cloth and dry with a soft dry cloth.
DANGER: Do not use gasoline, benzene, thinner, abrasive cleaning liquids, etc. as these will damage the fan heater.
NEVER USE ALCOHOL OR SOLVENTS.
ANOMALIES AND REPAIR
In case of malfunction, please take the appliance to an authorized Technical Assistance Service. Do not attempt to disassemble or repair the appliance, as this may be dangerous.
PROTECTING THE ENVIRONMENT
natural_image
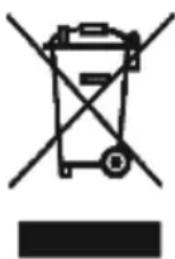
Symbol of a trash bin with crossed lines indicating no waste or discharge, and a solid black rectangle below (no text or labels)This symbol indicates the separate collection of electrical and electronic equipment.
The main objective of the separate collection of this waste is to reduce the quantity to be disposed of, promote re-
use, recycling and other forms of recovery in order to reduce its negative effects on the environment.
When it is no longer in use, this appliance must not be disposed of together with other unsorted municipal waste.
The user is responsible for delivering it free of charge to the selective collection facilities available for that purpose.
Pieces of equipment that are no longer in use can also be taken back at points of sale, by purchasing new pieces of equipment that are equivalent and have the same functions.
For more detailed information on collection points, please contact your City Council or a point of sale for this equipment.
INFORMATION REQUIREMENTS FOR ELECTRIC LOCAL SPACE HEATERS
| Contact Elements | Fábrica de Louças e Eletrodomésticos, S.A.Rua Alto de Mirões, no 249 | Industrial Zone | 3700-727 Cesar | PORTUGAL | |||||
| Model ID(s): 2300FL | ||||||
| Element Symbol Value Unit Item Unit | ||||||
| Heat power | Heat output type/room temperature control (select one) | |||||
| Nominal heat output Pnom 2,000 Kw | Single-stage heat output and no room temperature control | No | ||||
| Minimum heat output (indicative) | Pmin | 1,000 | Kw | Two or more manual stages, without room temperature control | No | |
| Maximum continuous heat output | Pmax, C | 2,000 | Kw | with mechanical thermostat room temperature control | Yes | |
| Power consumption | with electronic room temperature control | No | ||||
| In off mode | Po | 0.00 | W | Electronic room temperature control plus day timer | No | |
| In standby mode | Psm | N/A | W | Electronic room temperature control plus week timer | No | |
| In idle mode | Pidle | 0,00 | W | Other control options (multiple selections possible) | ||
| In network standby mode | Pnsm | N/A | W | Room temperature control, with presence detection | No | |
| Standby mode with display of information or status | No | room temperature control, with open window detection | No | |||
| Seasonal space heating energy efficiency in active mode | ηs,on | 85,0 | % | Distance control option | No | |
| Adaptive start control | No | |||||
| Working time limitation | No | |||||
| Black bulb sensor | No | |||||
| Self-learning functionality | No | |||||
| Control accuracy | No | |||||
THERMOVENTILATEUR
CONSIGNES DE SÉCURITÉ
INSTRUCTIONS DU THERMOSTAT
DYSFONCTIONNEMENTS ET RÉPARATIONS
natural_image
Symbol of a trash bin with crossed lines indicating no waste or discharge, and a solid black rectangle below (no text or labels)This page has been deliberately left blank
This page has been deliberately left blank
- Keep the proof of purchase (receipt) for this product carefully. When a repair is made under these conditions, the technician will require proof of purchase. This assistance can only be provided once you have proven, with the proof of purchase, that your appliance is within the warranty period.
- The warranty period for this appliance is defined by the respective EU Directive in force on the date of purchase/delivery.
- Within the guarantee period, we will repair or replace, free of charge, any parts which, during the normal use of the appliance, have deteriorated as a result of a proven material or manufacturing defect.
- This warranty does not cover consumable items, light bulbs, easily breakable parts made of glass or plastic, or any other defects that do not impair its proper functioning.
- We accept no liability for damage caused by incorrect or careless use of the appliance, by its connection to an electrical current other than that indicated on the appliance's rating plate, by faulty electrical installation, or by atmospheric, chemical or electrochemical causes. Other claims or demands for compensation relating to objects which are not an integral part of the appliance will be denied.
- The provision of assistance under warranty does not extend the warranty period. Only within this period will assistance be provided under warranty. The right to assistance is only granted to the first purchaser of the device and cannot be transferred to a third party.
- The warranty expires when unauthorized persons have attempted to repair, modify or replace parts of the appliance.
- All expenses and risks of transportation to our factory or vice versa will always be borne by the buyer.
WARRANTY CONDITIONS
To benefit from the Technical Assistance service during the 36-month warranty period after the date of purchase, you will need to:
Present the Invoice/Proof of Purchase, stating the model and the manufacturing number of the product (whenever possible).
Note: Failure to present the aforementioned documents will be grounds for not providing services under warranty.
CONDITIONS DE GARANTIE
CONDITIONS DE GARANTIE
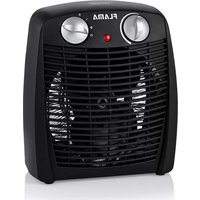
- 2300FL
- RECOMMENDATIONS
- DESCRIPTION
- OPERATING INSTRUCTIONS
- Operation
- THERMOSTAT INSTRUCTIONS
- Horizontal operating position
- SAFETY FEATURES
- TROUBLESHOOTING TIPS
- CLEANING AND MAINTENANCE
- Cleaning
- ANOMALIES AND REPAIR
- PROTECTING THE ENVIRONMENT
- THERMOVENTILATEUR
- CONSIGNES DE SÉCURITÉ
- INSTRUCTIONS DU THERMOSTAT
- DYSFONCTIONNEMENTS ET RÉPARATIONS
- WARRANTY CONDITIONS
- CONDITIONS DE GARANTIE
Brand : Flama
Model : 2300FL
Category : Heating