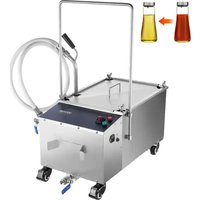
LYC-18L-EU - Electric fryer Vevor - Free user manual and instructions
Find the device manual for free LYC-18L-EU Vevor in PDF.

| Product Type | Electric fryer with oil filtration |
| Brand | Vevor |
| Model | LYC-18L-EU |
| Tank Capacity | 18 L |
| Power Supply | 220-240 V ~ 50 Hz |
| Power | 3000 W |
| Main Material | Stainless steel |
| Filtration System | Oil pump with filter paper and silicone seal |
| Drainage | Drain valve with extension |
| Safety | Resettable thermal overload switch |
| Usage | Professional restaurant use |
| Maintenance | Daily cleaning of the tray and replacement of filter paper |
| Included Accessories | Filter paper, silicone seal, sieve frame, hook, valves, fuse |
| Net Weight | 18 kg |
| Dimensions (L x W x H) | 500 x 400 x 400 mm |
| Compliance | CE, Directive 2012/19/EU (WEEE) |
Frequently Asked Questions - LYC-18L-EU Vevor
User questions about LYC-18L-EU Vevor
0 question about this device. Answer the ones you know or ask your own.
Ask a new question about this device
Download the instructions for your Electric fryer in PDF format for free! Find your manual LYC-18L-EU - Vevor and take your electronic device back in hand. On this page are published all the documents necessary for the use of your device. LYC-18L-EU by Vevor.
USER MANUAL LYC-18L-EU Vevor
Technical Support and E-Warranty Certificate www.vevor.com/support
OIL FRYER FILTER
MODEL: LYC-18L、LYC-18L-EU、LYC-38L LYC-38L-EU、LYC-55L、LYC-55L-EU
We continue to be committed to provide you tools with competitive price. "Save Half", "Half Price" or any other similar expressions used by us only represent of savings you might benefit from buying certain tools with us compared top brands and does not necessarily mean to cover all categories of tools offered are kindly reminded to verify carefully when you are placing an order with us actually saving half in comparison with the top major brands.
VEVOR®
TOUGH TOOLS, HALF PRICE
OIL FRYER FILTER
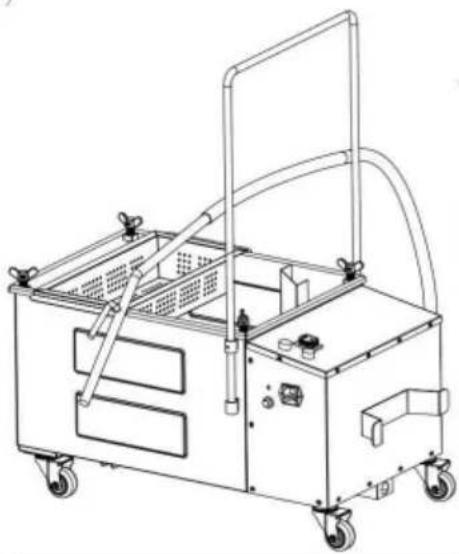
natural_image
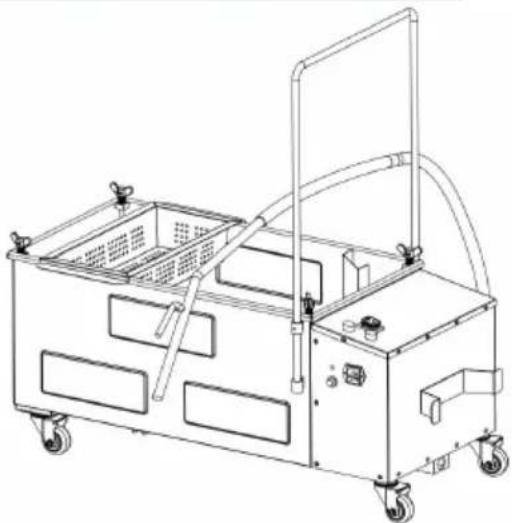
Line drawing of a mechanical device with wheels and tubing (no text or symbols)LYC-18L、LYC-18L-EU
natural_image
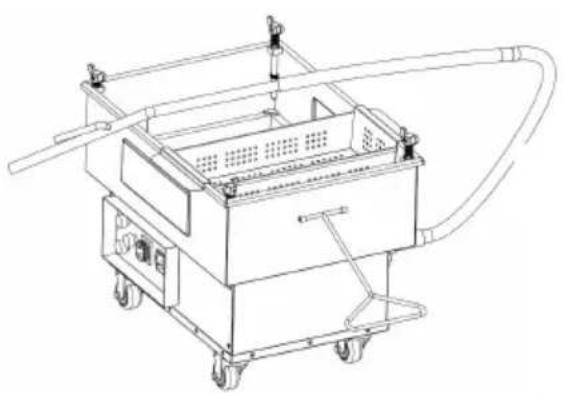
Line drawing of a mechanical device with wheels, handlebars, and control panel (no text or symbols)LYC-38L、LYC-38L-EU
natural_image
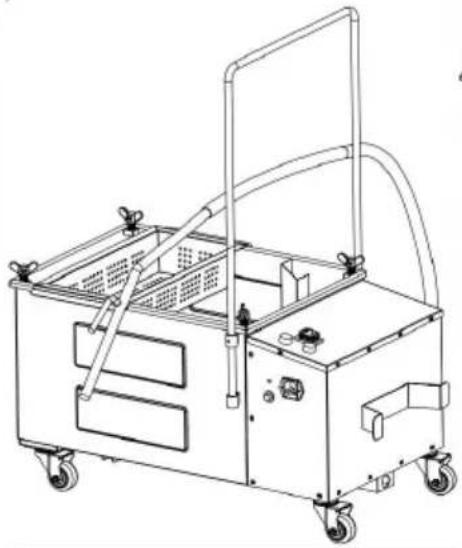
Line drawing of a mechanical device with wheels, compartments, and a handle (no text or symbols)LYC-55L、LYC-55L-EU
NEED HELP? CONTACT US!
Have product questions? Need technical support? Please feel from contact us:
Technical Support and E-Warranty Certificate www. vevor. com/support
This is the original instruction, please read all manual instruction carefully before operating. VEVOR reserves a clear interpretation user manual. The appearance of the product shall be subject to product you received. Please forgive us that we won't inform you if there are any technology or software updates on our product
 | Warning-To reduce the risk of injury, user must read instruct manual carefully. |
| Compliance is a EC security certification. | |
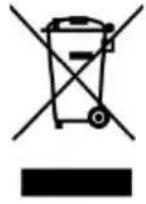 | CORRECT DISPOSALThis product is subject to the provision of European Directive 2012/19/EC. The symbol showing a wheelie bin crossed through indicates that the product requires separate refuse collection European Union. This applies to the product and all access marked with this symbol. Products marked as such may not discarded with normal domestic waste, but must be taken to collection point for recycling electrical and electronic devices |
IMPORTANT SAFEGUARDS
WARNING
CAN CAUSE SERIOUS INJURY OR DEATH.
DO NOT ATTEMPT TO SERVICE THIS EQUIPMENT UNLESS YOU ARE A LICENSED ELECTRICIAN OR TRAINED SERVICER.
- Because this equipment utilizes high voltage, it should only be installed and serviced by a licensed electrician or trained servicer. Attempting to install or service the equipment yourself could result in serious, potentially fatal injuries.
- If an electrical shock is felt when touching equipment, shut off power immediately (pull cord or turn off circuit breaker) and call a trained servicer repair. Failure to do so could result in serious, potentially fatal injuries.
• Always turn the power switch off whenever the equipment is not used. - If the supply cord is damaged, it must be replaced by a special cord or available from the manufacturer or its service agent.
WARNING
Improper installation, adjustment, alteration, service or maintenance can cause property damage, injury, or death. Read the installation, operating, and maintenance instructions thoroughly before installing or servicing this equipment.
CAUTION: This equipment is not intended for use by persons (including
children) with reduced physical, sensory, or mental capabilities, or lack of experience and knowledge, unless they have been given supervision or instruct concerning use of the equipment by a person responsible for their safety.
CAUTION: Children should be supervised to avoid playing with the equipment.
CAUTION: This equipment is intended to be used for commercial
applications, for example in kitchens of restaurants, canteens, hospitals in commercial enterprises such as bakeries, butcheries, etc., but not for continuous mass production of food.
CAUTION: These models are designed, built, and sold for
commercial use only. If these models are positioned so the general public can use the equipment, make sure that cautions, warnings, and operating instructions are clearly posted near each unit so that anyone using the equipment will use it correctly and not injure themselves or harm the equipment.
CAUTION: This appliance is intended for professional use only and should be
operated by fully trained and qualified personnel.
This appliance is intended for indoor use only.
WARNING
SERIOUS INJURY OR PROPERTY DAMAGE CAN OCCUR IF PROPER PRECAUTIONS ARE NOT FOLLOWED
- DO NOT USE if the filter pan is not completely dry and free of droplets.
• DO NOT overfill the filter pan. - DO NOT use water jets to clean this equipment. Doing so will damage the unit and void the warranty.
- DO NOT use the electrical cord as a leash to move the appliance
- DO NOT attempt to move this appliance or transfer hot liquids from one container to another when the unit is at operating temperature filled with hot liquids.
- DO NOT leave appliance unattended while draining or refilling with oil/ shortening.
VEVOR will not accept liability for product failures in event that:
- The instructions in this manual have not been followed correctly.
- Unqualified personnel have adjusted the Fryer Frame.
• Non-original spare parts are used.
SAVE THESE INSTRUCTIONS
PRODUCT PARAMETERS
| MODEL | Voltage | PLUG | Tank filling capacity (MAX.) |
| LYC-18L | AC120V 60Hz | US | 16L |
| LYC-18L-EU | AC220-240V 50Hz | EU | 16L |
| LYC-38L | AC120V 60Hz | US | 38L |
| LYC-38L-EU | AC220-240V 50Hz | EU | 38L |
| LYC-55L | AC120V 60Hz | US | 52L |
| LYC-55L-EU | AC220-240V 50Hz | EU | 52L |
Optional Equipment
A. LYC-18L LYC-18L-EU:
power cord*1, filter*1, pressure screen frame*1, oil transfer top*1, mesh hook*1, filter chamber reinforcement*4, silicone pad*1, filter paper*2, primary filter*1, faucet*1, water tape*2, power switch*1, red channel*1, green channel*1, protector*1, fuse*1
B. LYC-38L、LYC-38L-EU、LYC-55L、LYC-55L-EU:
power cord*1, filter*1, pressure screen frame*1, oil transfer top*1, mesh hook*1, filter chamber reinforcement*4, silicone pad*1, filter paper*2, primary filter*1, faucet*1, valve*1, water tape*2, power switch*1, red channel*1, green channel*1, protector*1, fuse*1
SETUP
Remove the Oil Filter from the packaging, ensuring that all prot packaging, plastic and residues are cleaned from its surfaces. La out all components of the Oil Filter on the floor to ready for a You will need an Allen key to assist in the assembly process.
For Model LYC-18L、LYC-18L-EU:
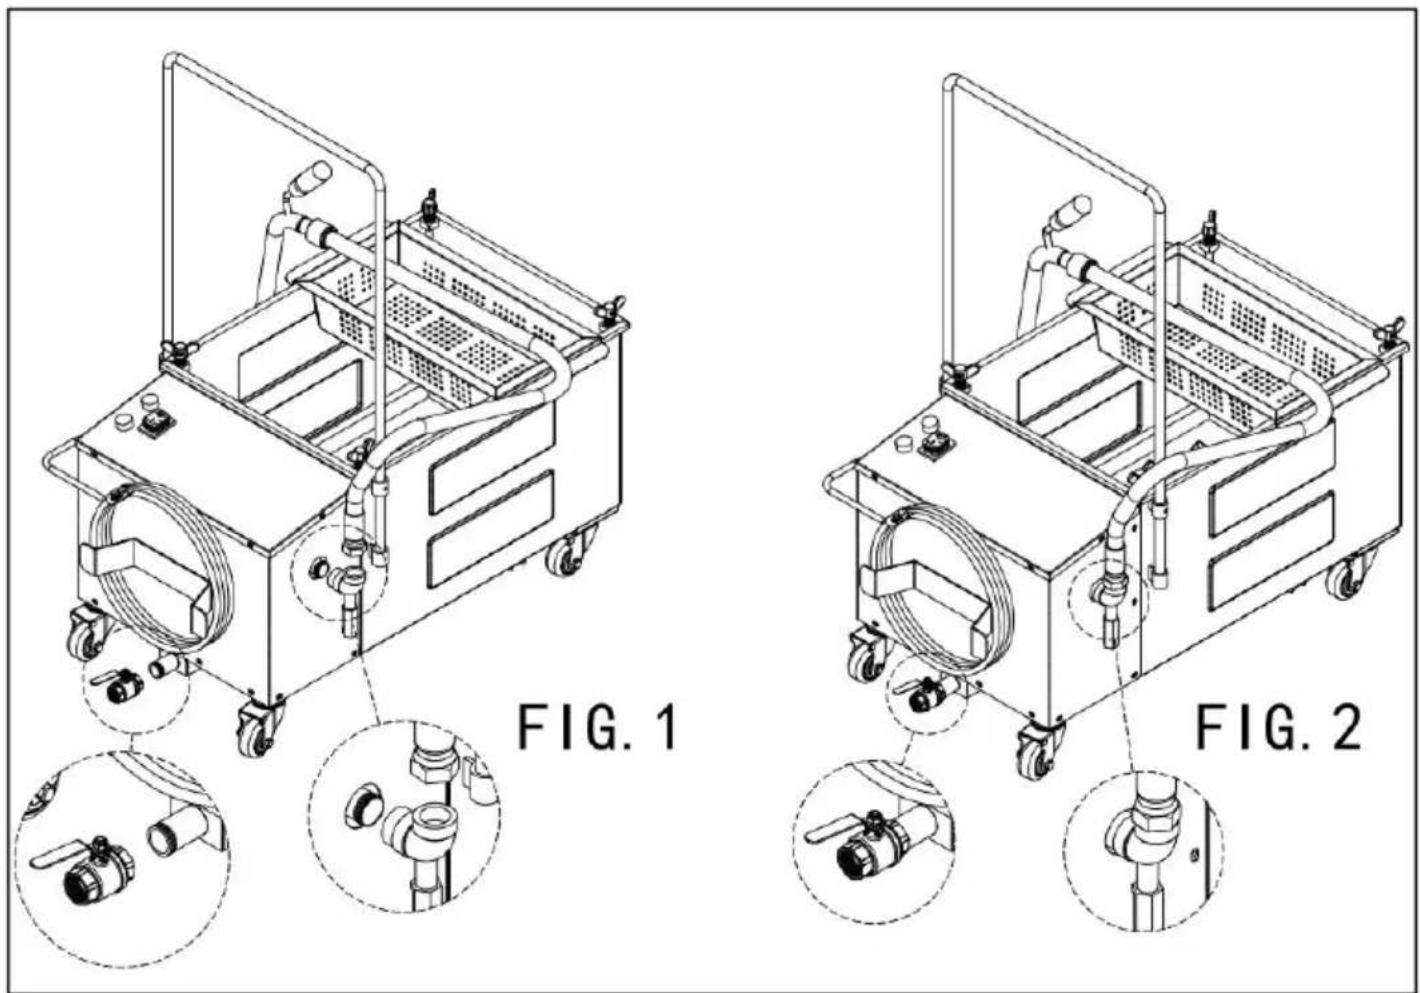
STEP 1: Assemble the oil gun to the main housing correctly as on the picture .

natural_image
Technical line drawings of two mechanical device components, labeled FIG. 1 and FIG. 2, showing internal components and assembly details (no text or symbols beyond labels)STEP 2: Put the filter paper, silicon seal ring into the pan, then the rectangular stainless steel frame to cover the silicone seal ring, then filter net and tighten the screws.
Caution: It must be installed in the order shown in the figure, and the paper(A-2) must be installed on top of the filter(A-1), otherwise the machine may not work and be empty.
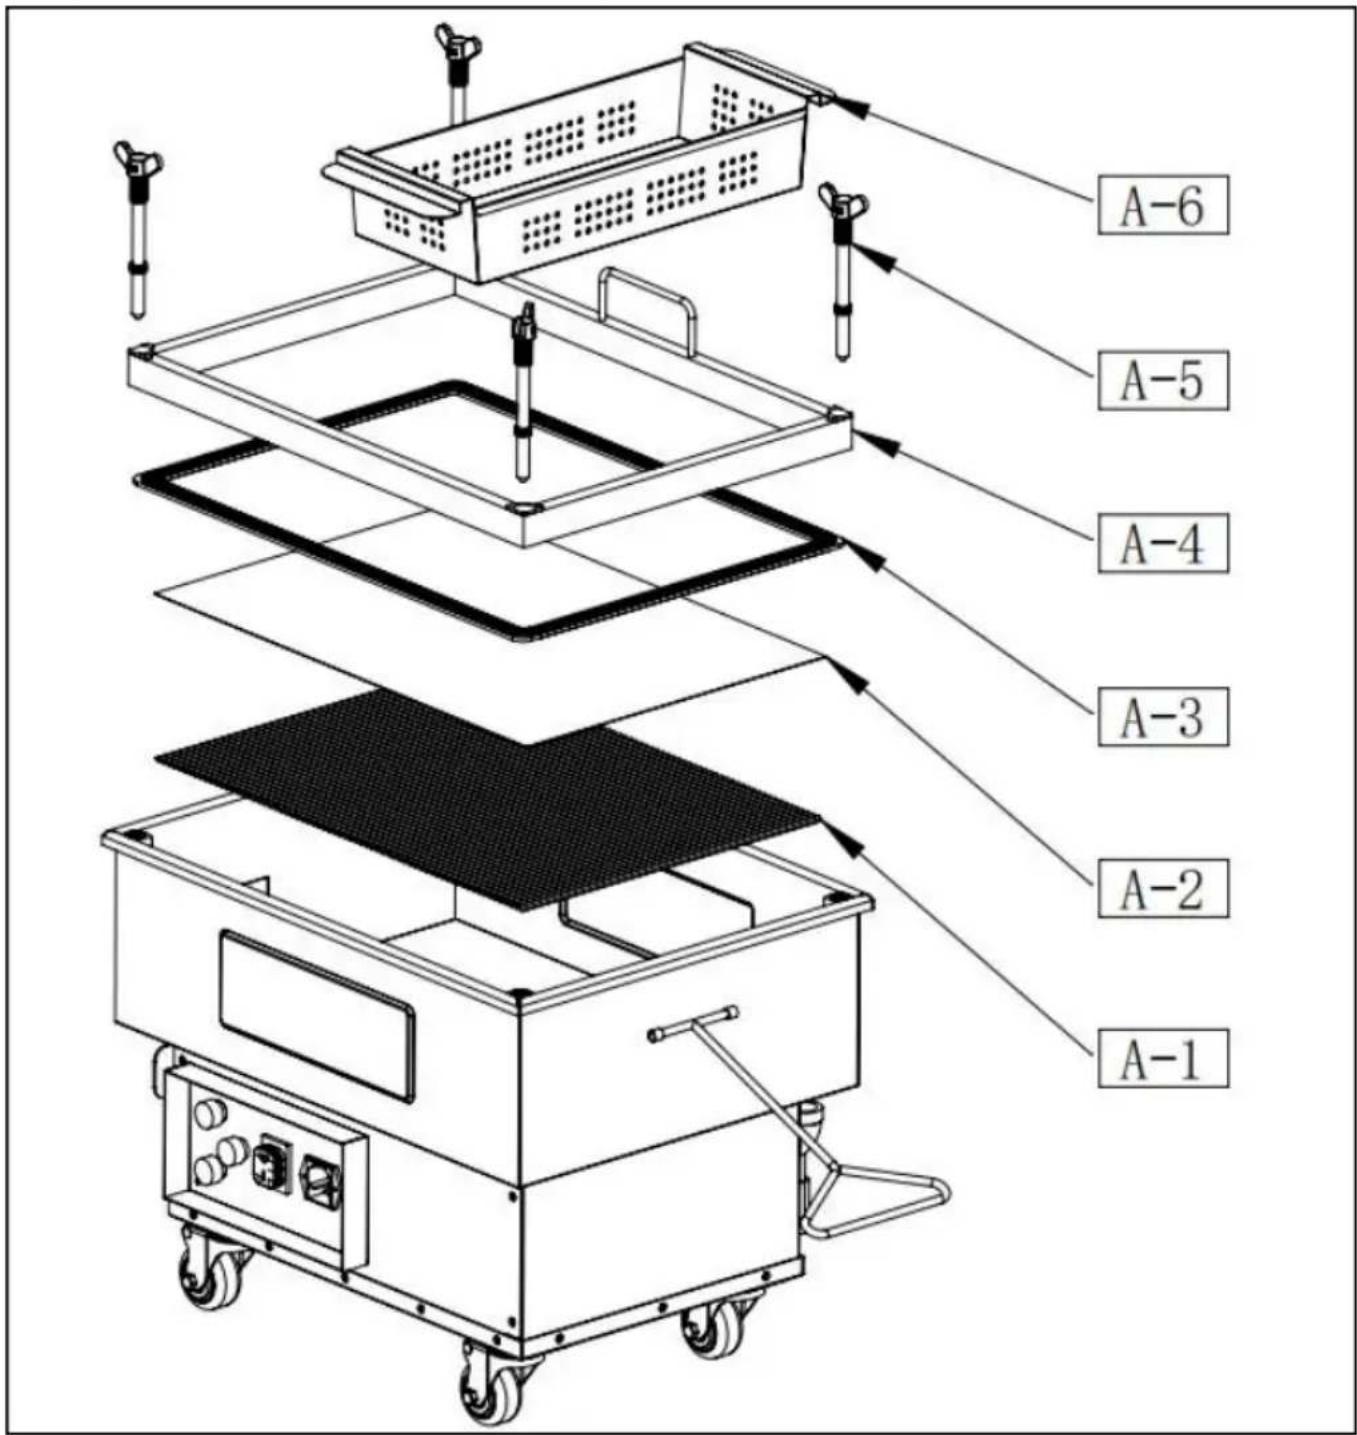
A-1:filter A-2:filter paper A-3:silicone pad A-4:pressure screen frame A-5:filter chamber reinforcement A-6:primary filter
For Model LYC-38L、LYC-38L-EU、LYC-55L、LYC-55L-EU:
STEP 1: Assemble the oil gun to the main housing correctly, as sh the picture above.
STEP 2: Put the filter paper, silicon seal ring into the pan, then the rectangular stainless steel frame to cover the silicone seal ring, then filter net and tighten the screws.
Caution: It must be installed in the order shown in the figure, and the paper(A-2) must be installed on top of the filter(A-1), otherwise the machine may not work and be empty.
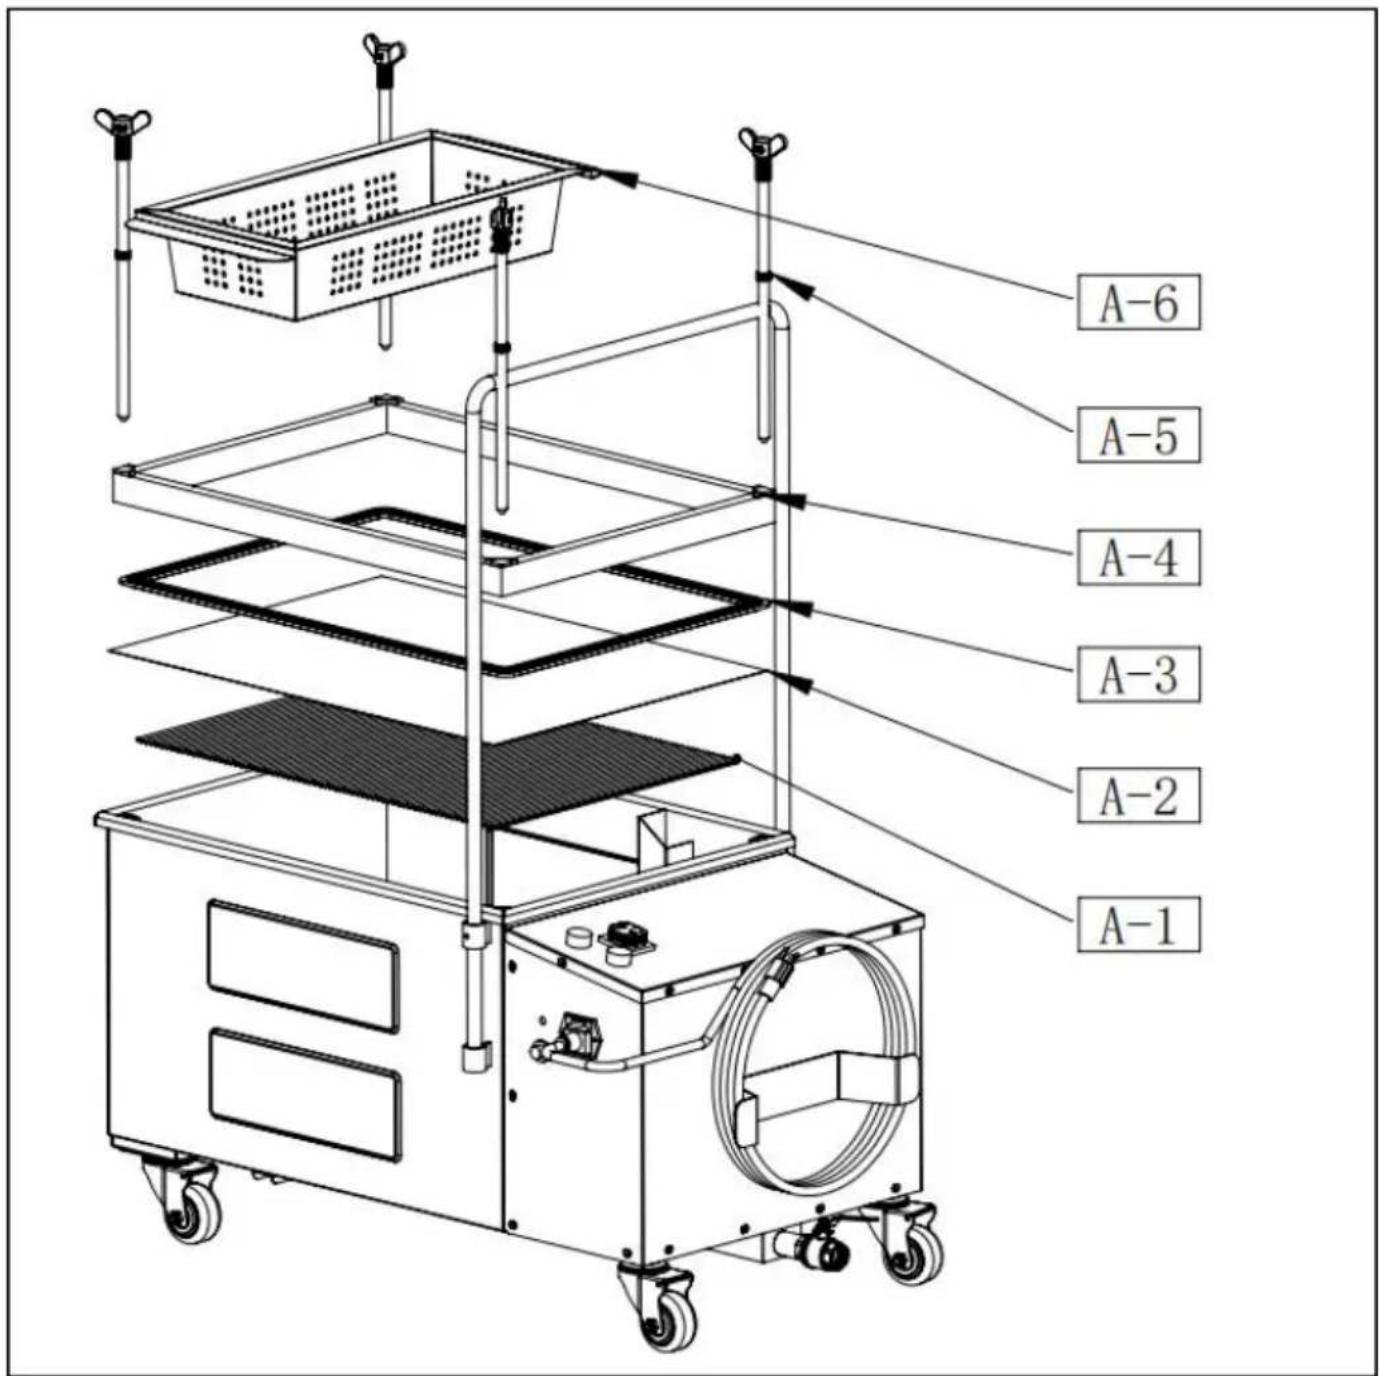
A-1:filter A-2:filter paper A-3:silicone pad A-4:pressure screen frame
A-5:filter chamber reinforcement A-6:primary filter
USE CAUTION:
- Ensure that the filter paper is fresh and in place properly. Refer to instru you need to replace or install the filter paper.
- Ensure that you have the filter machine plugged in and turned OFF, oil dral valve on the oil gun and main housing(Model LYC-38L
LYC-38L-EU、LYC-55L、LYC-55L-EU) is in "OFF" position. - Open your fryer and attach the drain valve extension.
- Position the front of the filter machine under the fryer drain valve extension
- Turn the fryer power switch OFF.
- Open the drain valve on the fryer and allow the frypot oil to drain into a machine.
- With the filter machine hose positioned in its holster on the machine, turn filter machine ON as the oil drains into the machine.
- Allow the machine to pump the oil through the paper and cycle it back in machine until the oil has been filtered.
- Once all of the oil has drained from the Fryer and has been filtered through machine, turn the machine OFF and close the drain valve on the fryer.
- Move the filter machine hose from the machine and into the frypot and machine back on.
- Return the oil to the fryer and allow the filter machine to run for 10-15 after no more oil comes through the hose.
- For added safety of the filter pipe, please lift the pipe to vertical position a open the draining valve on the bottom of the pipe to filter thoroughly the re oil, or it'll become solid and blocked the pipe.
WARNING:DO NOT OVER FILL THE Oil Fryer Filter.
CLEANING & MAINTENANCE
WARNING: SERIOUS INJURY OR PROPERTY DAMAGE CAN OCCUR IF
PROPER PRECAUTIONS ARE NOT FOLLOWED
- The power supply must be disconnected before servicing, maintaining, or cleaning this machine.
- DO NOT pump water through the filter pump system. The pump functions oil lubrication, and water will damage the pump.
- DO NOT attempt to lift filter machine off floor for cleaning. Bodily injury m occur.
- DO NOT attempt to circulate water through pump. Internal rusting in pump occur.
- DO NOT use the appliance as a step for cleaning or accessing the ventilation hood. Serious injury could result from slips, trips, or contact of hot liquids.
- If the supplied power cord or receptacle is damaged, it MUST be replaced an authorized service and parts company technician in order to avoid a haza
NOTE: Follow these cleaning instructions before using machine for the first tir NOTE: Shortening Filter must be cleaned DAILY. Failure to do so will void warranty.
NOTE: The contents of crumb catch and filter pan of any filter system must emptied into a fireproof container at the end of each day. Some food particles spontaneously combust if left soaking in certain types of oil or shortening.
NOTE: It is recommended that this appliance be inspected by a qualified ser technician for proper performance and operation on a yearly basis.
DAILY CLEANING
- Disconnect filter hose wand and drain.
- Disconnect filter tube and turn pump on for 3-5 seconds to force shorten pump. Failure to do this will cause pump or hose to clog with shortening.
- Unplug shortening filter.
-
Remove filter tube and clamp assembly.
-
Unscrew wing nuts on filter clamp assembly to remove filter paper from fi plate.
- Discard used paper; wash filter plate and thoroughly rinse with hot water; well.
- Remove and wash tank. Rinse and dry thoroughly.
- Replace tank onto filter.
- Wash clamp assembly, rinse with hot water, and dry well. For Model LYC-38L-EU, LYC-55L, LYC-55L-EU, there's a draining valve on the bottom of the main housing to release the residue. Close the drain valve while filtering and it after rinsing hot water.
- Replace filter paper on tube and clamp assembly and install in tank.
REPLACING FILTER PAPER
- Ensure that the machine is OFF and oil has been returned to the Fryer
- Unscrew the 4 clamps pressing the filter paper frame down.
- Remove the metal frame and, if necessary, the used filter paper.
- Place a new sheet of filter paper into the filter pan.
- Measure 8 ounces of filter powder and distribute evenly over the paper s
- Place the metal frame over the gasket and filter paper.
- Reinstall the 4 clamps and ensure the filter paper is securely in place.
ELECTRICAL DIAGRAM

flowchart
graph LR
    A["After Filter Oil"] --> B["MOTOR"]
    B --> C["Before Filter Oil"]
    C --> D["Switch"]
    D --> E["POWER"]
TROUBLESHOOTING
WARNING: SERIOUS INJURY OR PROPERTY DAMAGE CAN OCCUR IF
PROPER PRECAUTIONS ARE NOT FOLLOWED
- The power supply must be disconnected before servicing, maintaining, or cleaning this machine.
- If the supplied power cord or receptacle is damaged, it MUST be replaced authorized service and parts company technician in order to avoid a hazard.
| PROBLEM | CAUSE | REMEDY |
| Pump won't start | Insufficient power supplied | Check that main power supply is plugged in supplying required current |
| Power switch has not been turned on | Check that the unit is plugged in and turne | |
| Plug and/or lead and damaged | Call service agent or qualified technician to replace | |
| On/Off switch is faulty | Call service agent or qualified technician to replace | |
| Faulty internal wiring | Call service agent or qualified technician to replace | |
| Tripped thermal overload switch | Allow filter unit to cool for at least 45 minu then reset the thermal overload switch | |
| Pump stops during filtering process | Tripped thermal overload switch | Allow filter unit to cool for at least 45 minu then reset the thermal overload switch |
| Filter paper is dirty or incorrectly installed | Turn filter pump off. Allow oil to cool, then pan. Verify filter paper is clean and properly installed. Refill pan and restart process. | |
| Pump starts and abruptly stops | Tripped thermal overload switch | Allow filter unit to cool for at least 45 minu then reset the thermal overload switch |
| Pump is blocked or wiring is loose | Call service agent or qualified technician to replace | |
| Motor has failed | Call service agent or qualified technician to replace | |
| Pumping is erratic | Filter paper is incorrectly installed | Confirm whether the filter paper is installed correctly, in the order described in the draw |
| Filter hose connection is incorrectly installed | Verify that the filter hose connection is tight secure | |
| Oil is not being returned to fry pot | The filter hose is clogged with debris | Clear hose |
| Clogged filter paper | Scrape off excess sediment or replace filter | |
| Filter pan suction tube is blocked | Use a thin, flexible wire to unclog |
Address: Baoshanqu Shuangchenglu 803long 11hao 1602A-1609shi Shanghai
Imported to USA: Sanven Technology Ltd. Suite 250, 9166 Anaheim Place, Rancho Cucamonga, CA 91730
| UK | REP |
Pooledas Group Ltd
Unit 5 Albert Edward House, The Pavilion
Preston, United Kingdom
| EC | REP |
SHUNSHUN GmbH
Römeräcker 9 Z2021, 76351
Technical Support and E-Warranty Certificate www. vevor. com/support
VEVOR®
TOUGH TOOLS, HALF PRICE
natural_image
Line drawing of a mechanical device with wheels and tubing (no text or symbols)LYC-18L LYC-18L-EU

natural_image
Line drawing of a mechanical device with wheels, handlebars, and control panel (no text or symbols)LYC-38L LYC-38L-EU

natural_image
Line drawing of a mechanical device with wheels, compartments, and a handle (no text or symbols)LYC-55L LYC-55L-EU
BESOIN D'AIDE? CONTACTEZ-NOUS!
PARAMÈTRES DU PRODUIT
| MODÈLE | Tension | PRISE | Capacité de remplissage du réservoir (MAX.) |
| LYC-18L CA 120 V 60 Hz | NOUS | 16L | |
| LYC-18L-EU AC220-240V 50Hz | UE | 16L | |
| LYC-38L CA 120 V 60 Hz | NOUS | 38L | |
| LYC-38L-EU AC220-240V 50Hz | UE | 38L | |
| LYC-55L CA 120 V 60 Hz | NOUS | 52L | |
| LYC-55L-EU AC220-240V 50Hz | UE | 52L | |
natural_image
Technical line drawings of two mechanical devices labeled FIG. 1 and FIG. 2, showing internal components and assembly details (no text or symbols beyond labels)A-1 : filtre
A-2 : papier filtre
A-1 : filtre
A-2 : papier filtre
natural_image
Line drawing of a mechanical device with wheels and tubing (no text or symbols)LYC-18LÿLYC-18L-EU
natural_image
Line drawing of a mechanical device with wheels, handlebars, and control panel (no text or symbols)LYC-38LÿLYC-38L-EU

natural_image
Line drawing of a mechanical device with wheels, compartments, and a handle (no text or symbols)LYC-55LÿLYC-55L-EU
natural_image
Technical line drawings of two mechanical devices labeled FIG. 1 and FIG. 2, showing internal components and assembly details (no text or symbols beyond labels)A-1:Filter
A-2: Filterpapier
A-3: Silikonkissen A-4: Drucksiebrahmen
natural_image
Line drawing of a mechanical device with wheels and tubing (no text or symbols)LYC-18L, LYC-18L-EU

natural_image
Line drawing of a mechanical device with wheels, handlebars, and control panel (no text or symbols)LYC-38L, LYC-38L-EU

natural_image
Line drawing of a mechanical device with wheels, compartments, and a handle (no text or symbols)LYC-55L, LYC-55L-EU
natural_image
Technical line drawings of two mechanical devices labeled FIG. 1 and FIG. 2, showing internal components and assembly details (no text or symbols beyond labels)A-1:filtro
A-2: carta da filtro
A-3: tampone in silicone
A-1:filtro
A-2: carta da filtro
natural_image
Line drawing of a mechanical device with wheels and tubing (no text or symbols)LYC-18L LYC-18L-UE

natural_image
Line drawing of a mechanical device with wheels, handlebars, and control panel (no text or symbols)LYC-38L LYC-38L-UE

natural_image
Line drawing of a mechanical device with wheels, compartments, and a handle (no text or symbols)LYC-55L LYC-55L-UE
natural_image
Technical line drawings of two mechanical devices labeled FIG. 1 and FIG. 2, showing internal components and assembly (no text or symbols beyond labels)A-1:filtro
A-2: papel de filtro
A-1:filtro
A-2: papel de filtro
natural_image
Line drawing of a mechanical device with wheels and tubing (no text or symbols)LYC-18L, LYC-18L-EU

natural_image
Line drawing of a mechanical device with wheels, handlebars, and control panel (no text or symbols)LYC-38L, LYC-38L-EU

natural_image
Line drawing of a mechanical device with wheels, compartments, and a handle (no text or symbols)LYC-55L, LYC-55L-EU
POTRZEBUJESZ POMOCY? SKONTAKTUJ SIĘ Z NAMI!
natural_image
Technical line drawings of two mechanical devices labeled FIG. 1 and FIG. 2, showing internal components and assembly (no text or symbols beyond labels)A-1:filtr
A-1: filtr
natural_image
Line drawing of a mechanical device with wheels and tubing (no text or symbols)LYC-18L, LYC-18L-EU

natural_image
Line drawing of a mechanical device with wheels, handlebars, and control panel (no text or symbols)LYC-38LÿLYC-38L-EU

natural_image
Line drawing of a mechanical device with wheels, compartments, and a handle (no text or symbols)LYC-55LÿLYC-55L-EU
HULP NODIG? NEEM CONTACT MET ONS OP!
natural_image
Technical line drawings of two mechanical devices labeled FIG. 1 and FIG. 2, showing internal components and assembly details (no text or symbols beyond labels)A-1:filter
A-2:filterpapier
A-5:filterkamerversterking
A-3: siliconen pad A-4: drukschermframe
A-6:primair filter
A-1:filter
A-2:filterpapier
A-5:filterkamerversterking
A-3: siliconen pad A-4: drukschermframe
A-6:primair filter
WEES VOORZICHTIG:
Unit 5 Albert Edward House, De Paviljoens
natural_image
Line drawing of a mechanical device with wheels and tubing (no text or symbols)LYC-18LÿLYC-18L-EU

natural_image
Line drawing of a mechanical device with wheels, handlebars, and control panel (no text or symbols)LYC-38L, LYC-38L-EU

natural_image
Line drawing of a mechanical device with wheels, compartments, and a handle (no text or symbols)LYC-55L, LYC-55L-EU
BEHÖVER HJÄLP? KONTAKTA OSS!
natural_image
Technical line drawings of two mechanical devices labeled FIG. 1 and FIG. 2, showing internal components and assembly details (no text or symbols beyond labels)A-1:filter
A-2:filterpapper
A-1:filter
A-2:filterpapper
Enhet 5 Albert Edward House, The Pavilions