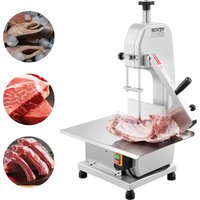
BS-130 - Saw Vevor - Free user manual and instructions
Find the device manual for free BS-130 Vevor in PDF.


| Product type | Electric bone saw |
| Brand | Vevor |
| Model | BS-130 |
| Power supply | Electric, mains plug (AC) |
| Main use | Cutting bones and frozen meat |
| Blade type | Steel band saw blade |
| Motor | Induction electric motor |
| Rotation speed | To be determined (high speed) |
| Cutting capacity | Suitable for bone size (adjustable) |
| Thickness adjustment | Thickness adjustment plate |
| Safety functions | Stop switch, grounding, blade guard |
| Cleaning | Clean after each use with a damp cloth; do not immerse |
| Maintenance | Blade inspection and replacement, cleaning residues |
| Spare parts | Replacement saw blades, guides, pulleys |
| Repairability | Repair by qualified professional; do not disassemble yourself |
| Weight | Approximately 15-25 kg (estimate) |
| Dimensions (L x W x H) | Approximately 50 x 40 x 80 cm (estimate) |
| Noise level | High, use hearing protection |
| Rated voltage | 220-240 V, 50 Hz (typical) |
| Warranty | Electronic warranty via www.vevor.com/support |
Frequently Asked Questions - BS-130 Vevor
User questions about BS-130 Vevor
0 question about this device. Answer the ones you know or ask your own.
Ask a new question about this device
Download the instructions for your Saw in PDF format for free! Find your manual BS-130 - Vevor and take your electronic device back in hand. On this page are published all the documents necessary for the use of your device. BS-130 by Vevor.
USER MANUAL BS-130 Vevor
Technical Support and E-Warranty Certificate www.vevor.com/support
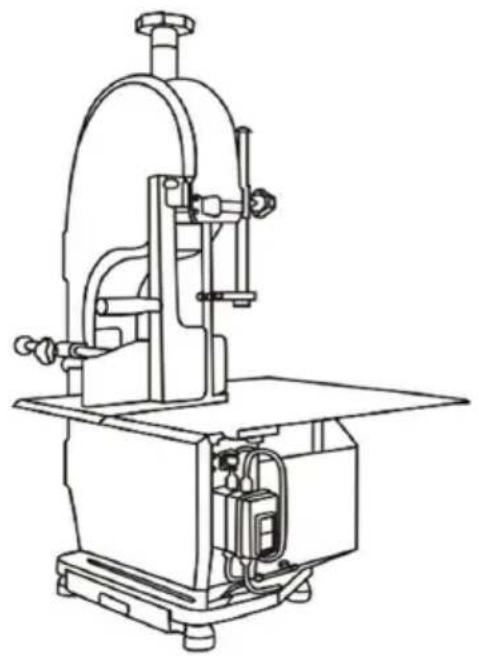
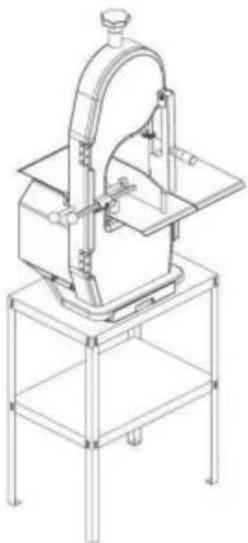
BONE SAW MACHINE
MODEL: 130/210/250/280
We continue to be committed to provide you tools with competitive price. "Save Half", "Half Price" or any other similar expressions used by us only represent of savings you might benefit from buying certain tools with us compared top brands and does not necessarily mean to cover all categories of tools offered are kindly reminded to verify carefully when you are placing an order with us actually saving half in comparison with the top major brands.
VEVOR®
BONE SAW MACHINI
MODEL:130/210/250/280
natural_image
Line drawing of a mechanical machine with no visible text or symbols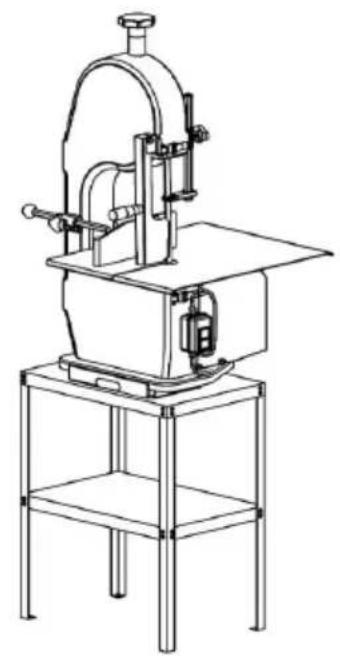
natural_image
Line drawing of a mechanical device with a stand and cylindrical base (no text or symbols)NEED HELP? CONTACT US!
Have product questions? Need technical support? Please feel from contact us:
Technical Support and E-Warranty Certificate www.vevor.com/support
This is the original instruction, please read all manual instruction carefully before operating. VEVOR reserves a clear interpretation user manual. The appearance of the product shall be subject to product you received. Please forgive us that we won't inform your product you received. Please forgive us that we won't inform your product you received.
 | Warning-To reduce the risk of injury, user must re instructions manual carefully. |
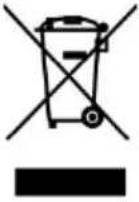 | CORRECT DISPOSALThis product is subject to the provision of European 2012/19/EC. The symbol showing a wheelie bin cros through indicates that the product requires separate re collection in the European Union. This applies to the and all accessories marked with this symbol. Produ marked as such may not be discarded with normal d waste, but must be taken to a collection point for r electrical and electronic devices |
IMPORTANT SAFEGUARDS
WARNING:
Read all safety warnings, instructions, illustrations and specifications provided with this electrical appliances. Failure to follow all instructions listed below may result in electric shock, fire and/or serious injury.
- There shouldn't be anything else on the counter.
- There is no abnormal phenomenon after the power is switched on
- It must be placed on the horizontal plane to avoid danger from s back and forth during use.
-
Because the chain saw rotates at high speed, it is also necessary to develop the habit of turning off the switch when the operation is suspended. Do not plug the power cord into the socket when not in Please unplug the power cord after use and before cleaning or maintenance.
-
If iron nails or other metal items are included in the cut items, it cause jagged cracks or damage. So, please pay attention to the cutti surface during operation to ensure workplace safety.
-
Please unplug the power of the machine before cleaning, assembling disassembling.
-
Do not place the product within reach of children. Children should supervised to ensure they do not play with the appliance.
- This appliance can be used by children aged from 8 years and a and persons with reduced physical, sensory or mental capabilities or I of experience and knowledge if they have been given supervision or instruction concerning use of the appliance in a safe way and unders the hazards involved. Children shall not play with the appliance. Clear and user maintenance shall not be made by children without supervisi
- Don't unplug the machine before it stops operation.
- If the supply cord is damaged, it must be replaced by the manu service agent, or similarly qualified persons to avoid a hazard.
- Electric Shock Danger! Non-professional personnel is forbidden to repair the products. Otherwise, it may result in electrical shock. When failures happen, they should be fixed by qualified maintenance personnel.
- WARNING! Putting the main body into the water to clean is strict prohibited. It only can be scrubbed with a wet towel. The machine m thoroughly cooled before cleaning.
- Please check that the specified supply voltage in the product is consistent with the supply voltage(AC only).
- Avoid power cord damage. Do not squeeze, bend, or friction; kee away from heat sources and open fires. The power cord does not to the blade.
- Power cord should be laid fiat. Do not pull the power cord and the product fall, which may cause damage.
- Do not use the product on wet ground. Do not touch the product power cord plug with wet hands.
- Do not disassemble the product at will. Also, do not let somethir or insert into the product, which may cause damage.
- Only accessories the seller or manufacturer provides can be used the product. We will not be responsible for any failure caused by using accessories from other manufacturers not covered by warranty.
-
Do not use the product on uneven, damp, not heat-resistant surfacto to avoid damage or failure.
-
Do not place the product directly on the fire or near the source fire. Otherwise, the product will be damaged or even result in danger.
- When the plug is plugged into the socket, it must be plugged in end. Otherwise, it will cause the components to overheat and burn due poor contact.
- Do not leave the product to work with no one watching. If the I is overheating, please stop working immediately and unplug the power.
- Once part of the product is on fire, do not directly use water to extinguish the fire. Use a wet cloth to cover the fire site.
- Please store the plastic bags and not allow children to play with to prevent a risk of suffocation.
- It is prohibited to put the main body of the machine and the point into any liquid.
- DO NOT open the case door; the hands are strictly forbidden from touching the saw blade while the machine operates.
SAVE THESE INSTRUCTIONS
Method of Application
- Move the guide block to the correct height according to the size, it.
- Adjust the thickness adjustment plate according to the required measure size.
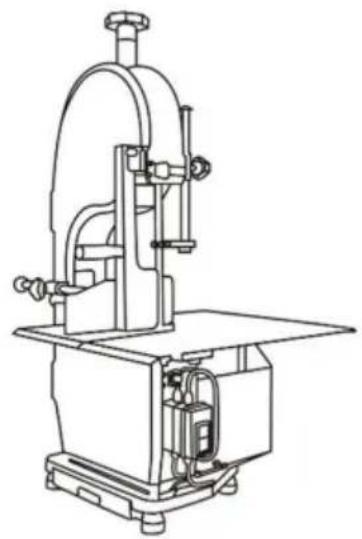
- Press the green button on the power switch. Do not push the sa item too much during the operation. This will cause the saw bar to or be damaged.
- The operator should stand before the machine and push the product horizontally and straight.
- The serrate should be exposed outside the wheel when replacing saw blade.
- The side of the saw blade presses the looseness of the saw blade, the force of rebound.
- Turn the upper wheel with your hand. Run the saw blade in and
the screw counterclockwise. Run the saw blade out and change the s clockwise.
Cleaning
The machine must be cleaned up after completion because the meat residue and foam attached to the body will not be hygienic for a long. The next time you use it, the noise increases, and the saw blade is damaged.
Diagnosis and repair of faults
1. Chainsaw often breaks
Reason: a. The band saw is of poor quality b. The band saw is too overpush or improper use, It is not direct push.
Repair: a. Use a good band saw. b. Adjust the band saw properly adjust the handle make sure the band saw is not too tight. This is the side of the saw blade presses the looseness of the saw blade force of rebound.
2. Departure with band saw
Reason: a. band saw is too loose. b something attached to the pull. Improper use Repair: a. Adjust the handle of the band saw properly it does not loosen too easily. b. Remove the thing attached to the p Use correctly.
3. Other malfunctions
Consult the agent, and please do not repair it by yourself. During the warranty period, the company is not responsible for the warranty of losses caused by improper operation, such as (water intake, lack of ph
Sawmill Series
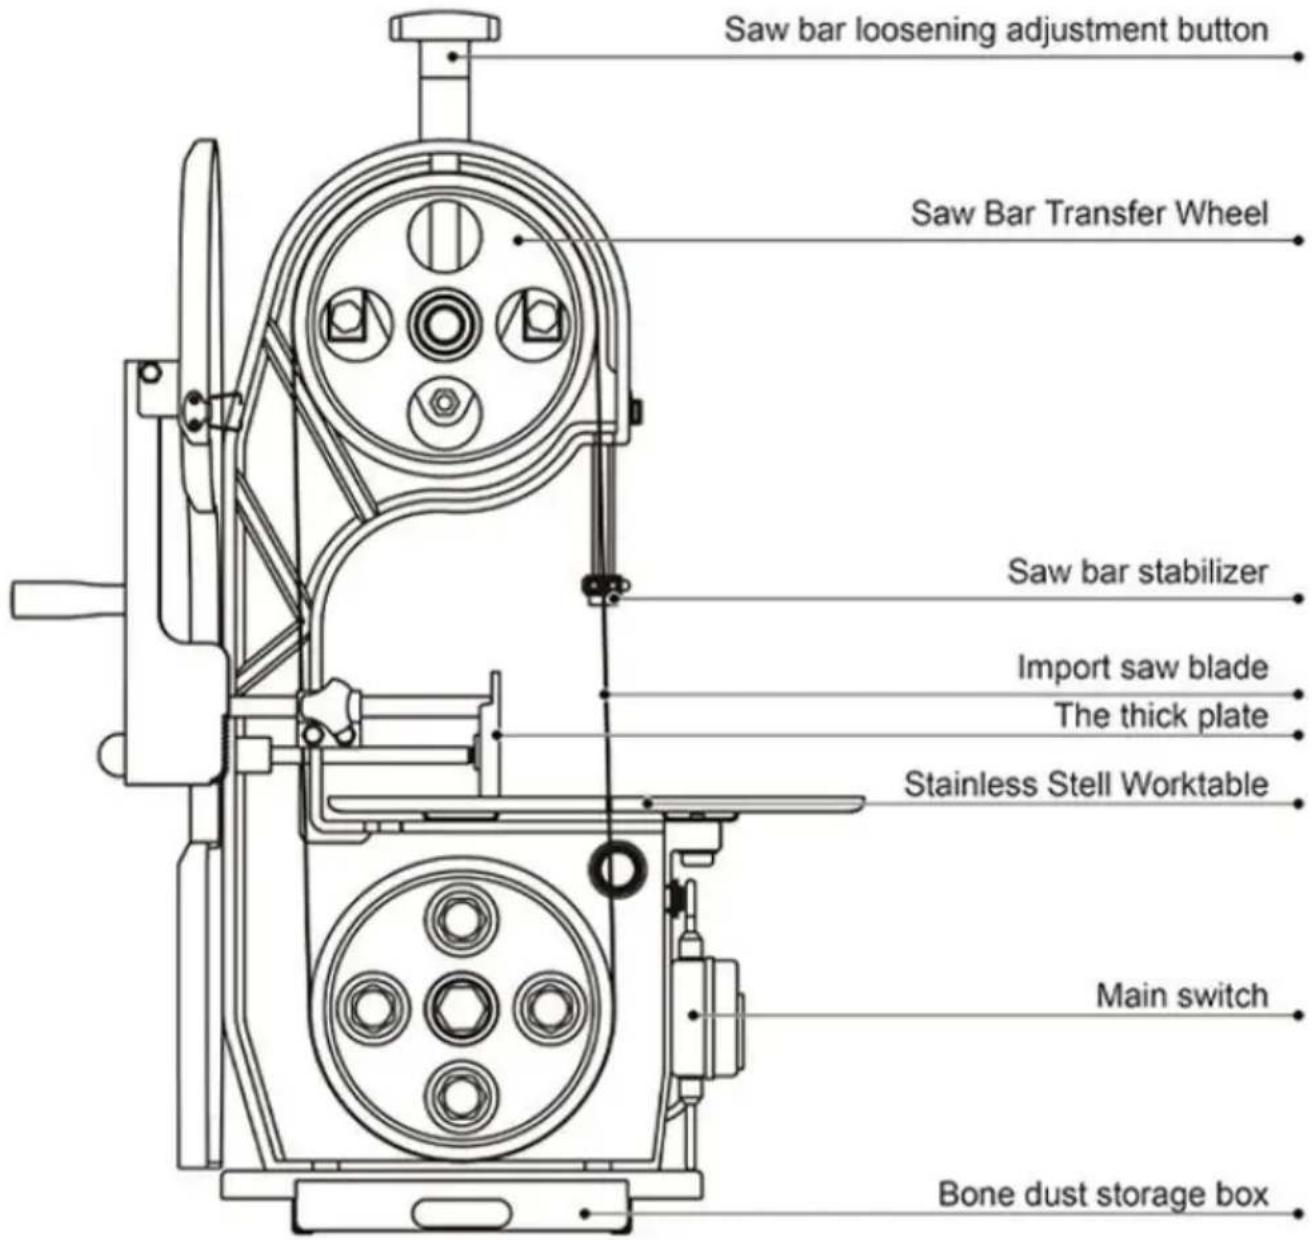
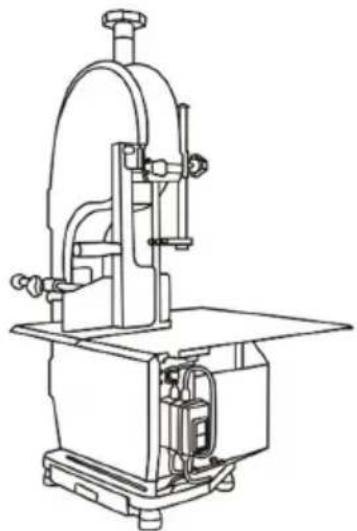
natural_image
Technical line drawing of a machine tool with no visible text or symbolsInstallation steps
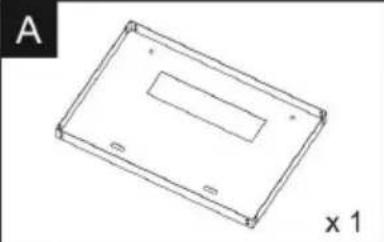
natural_image
Simple line drawing of a rectangular electronic device casing with mounting holes and a central slot (no text or symbols)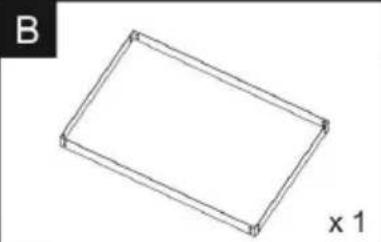
natural_image
Simple line drawing of a rectangular frame with no text or symbols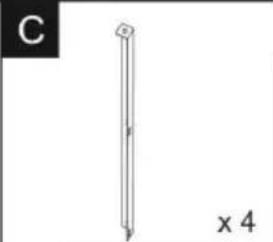
natural_image
Simple line drawing of a vertical rod with a pointed tip, labeled 'C' and 'x 4' (no text or symbols on the object itself)
natural_image
Technical line drawing of a mechanical device with no visible text or symbols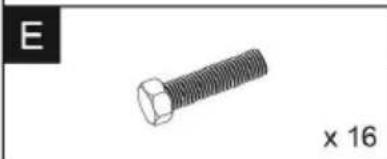
natural_image
Illustration of a hexagonal bolt with threaded shaft (no text or symbols)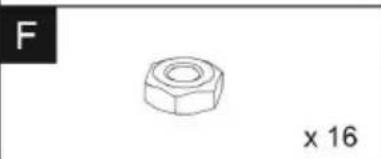
natural_image
Simple line drawing of a hexagonal nut with a flat body, labeled 'F' and 'x 16' (no text or symbols on the nut itself)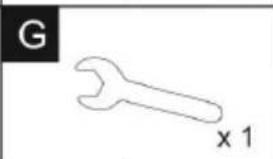
natural_image
Simple line drawing of a wrench with label 'G' and 'x 1' (no other text or symbols)
natural_image
Simple line drawing of a T-shaped tool or plunger with a base, labeled 'H' and 'x 1' (no text or symbols on the diagram itself)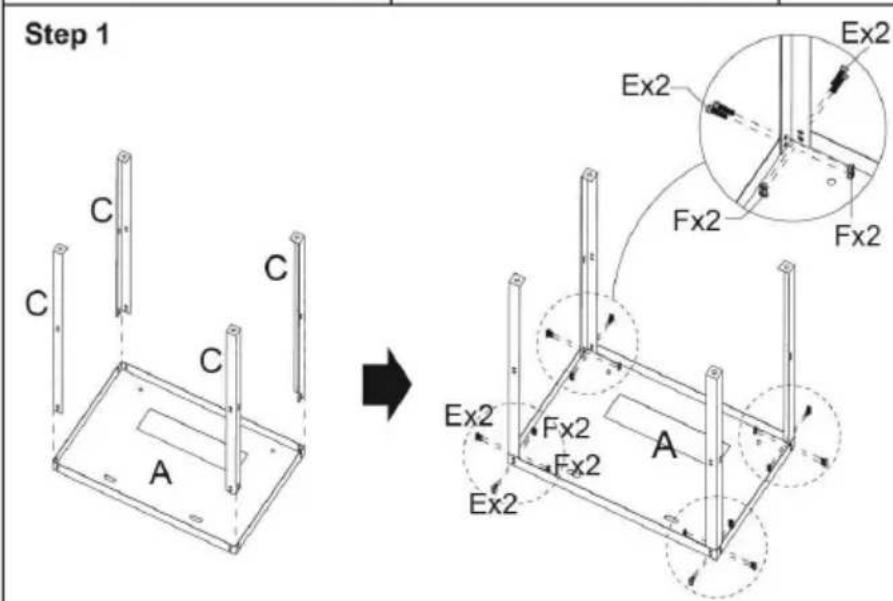
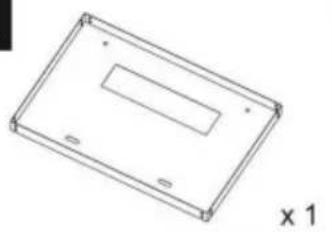
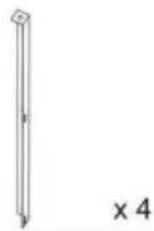
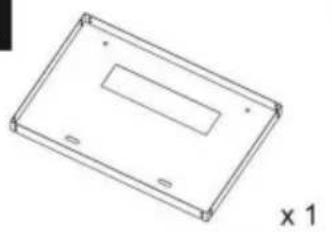
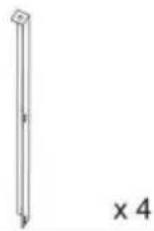
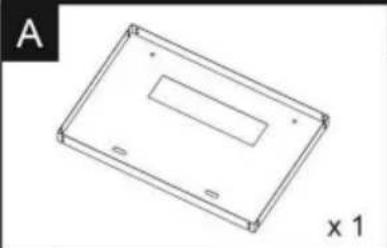
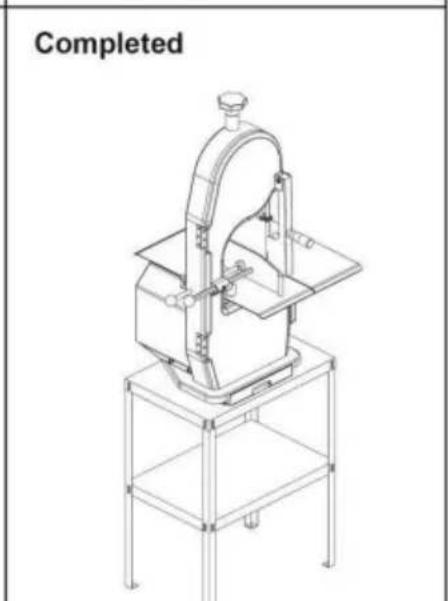
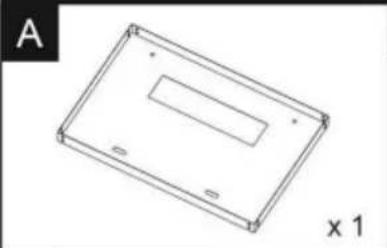
Fix A and 4 C with 8 screws and nuts (do not tighten too tightly).
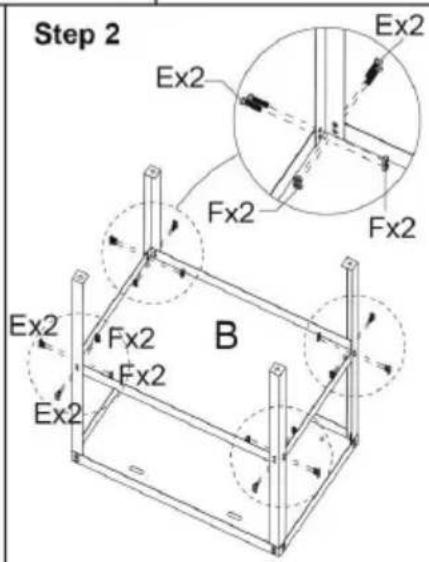
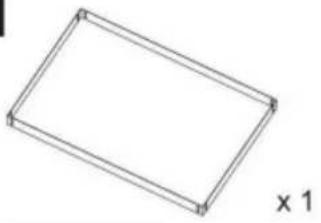
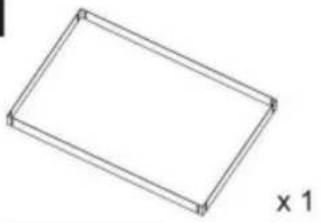
Fix B and 4 C with 8 screws and nuts (tighten all screws)
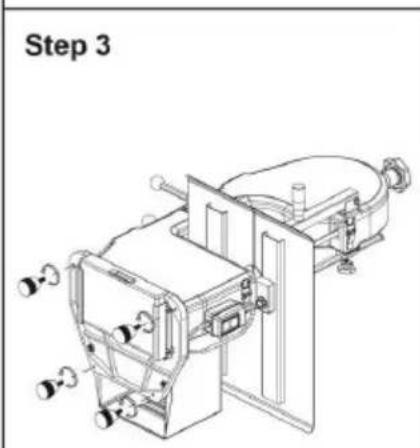
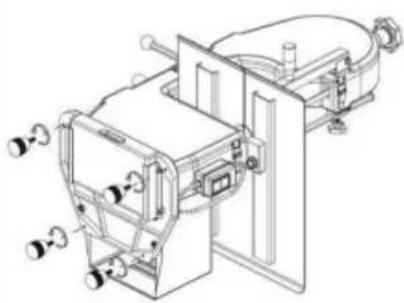
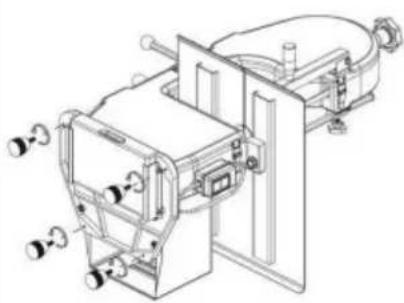
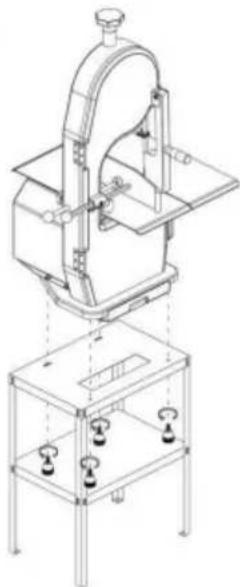
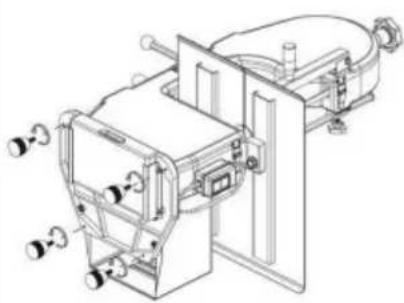
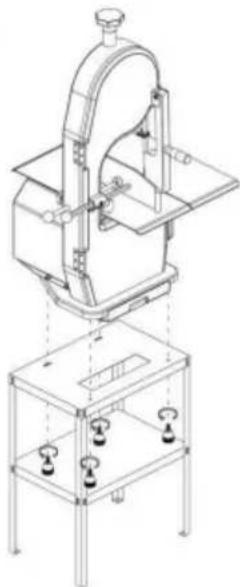
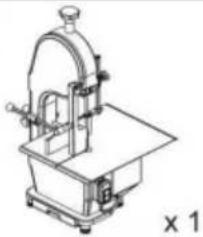
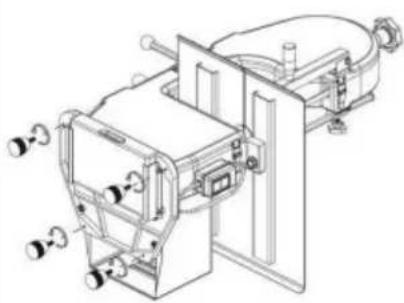
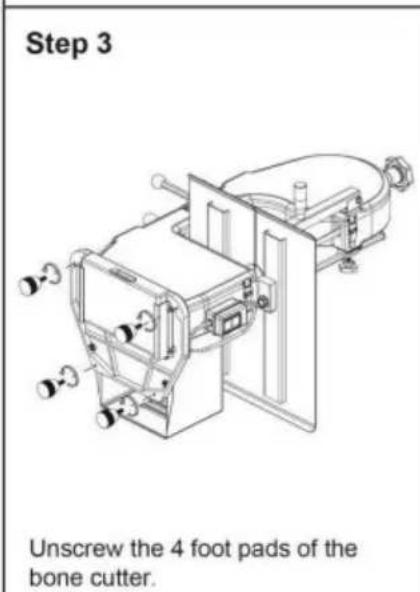
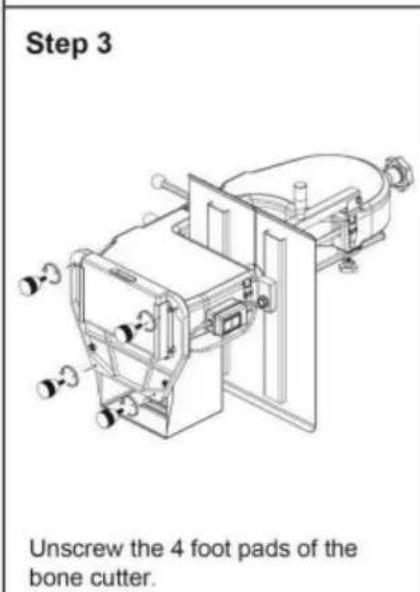
Unscrew the 4 foot pads of the bone cutter.
natural_image
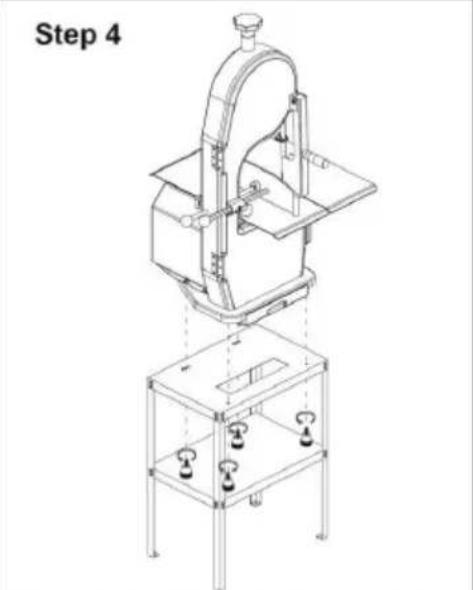
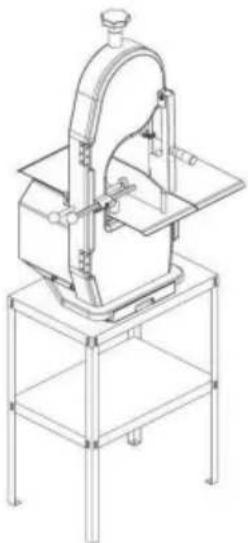
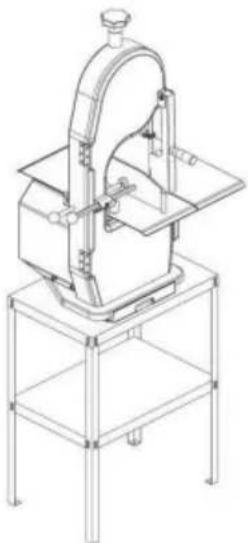
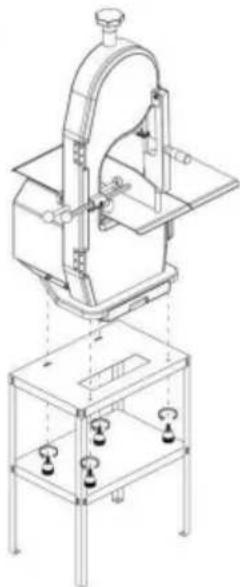
Technical line drawing of a mechanical device with a base platform and top component, labeled 'Step 4' (no text or symbols on the diagram itself)Fix and tighten the rack and bone cutter with foot pads.
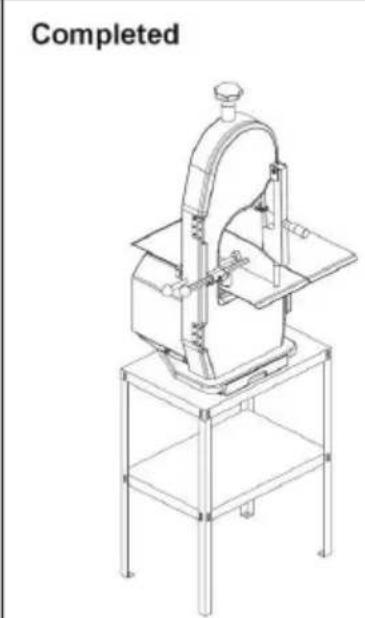
natural_image
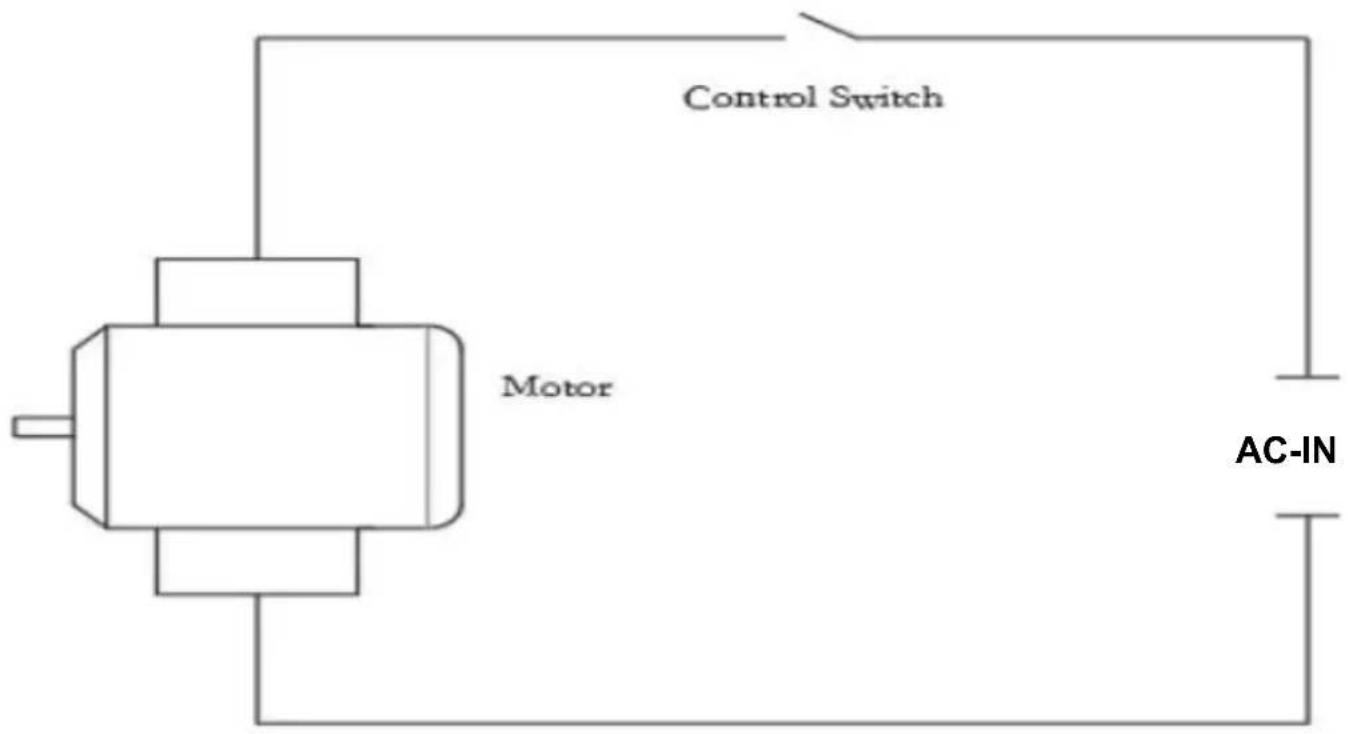
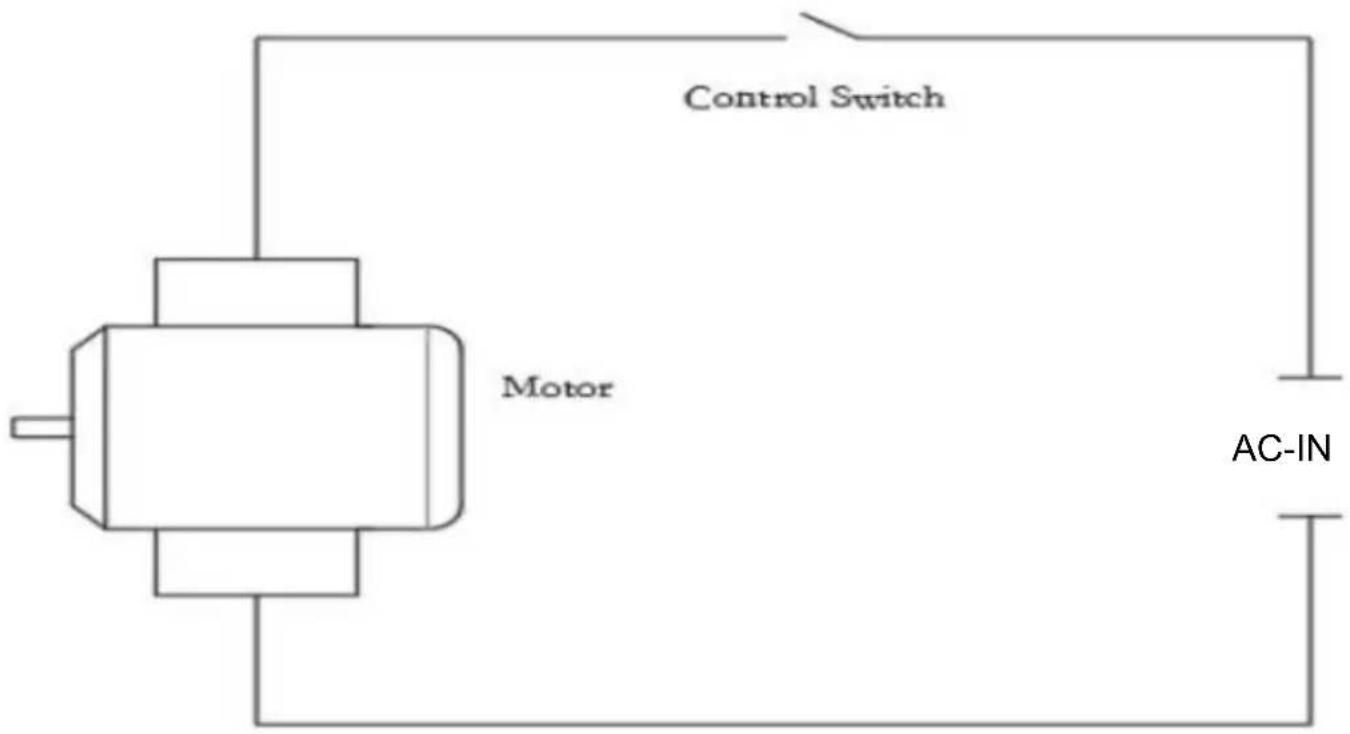
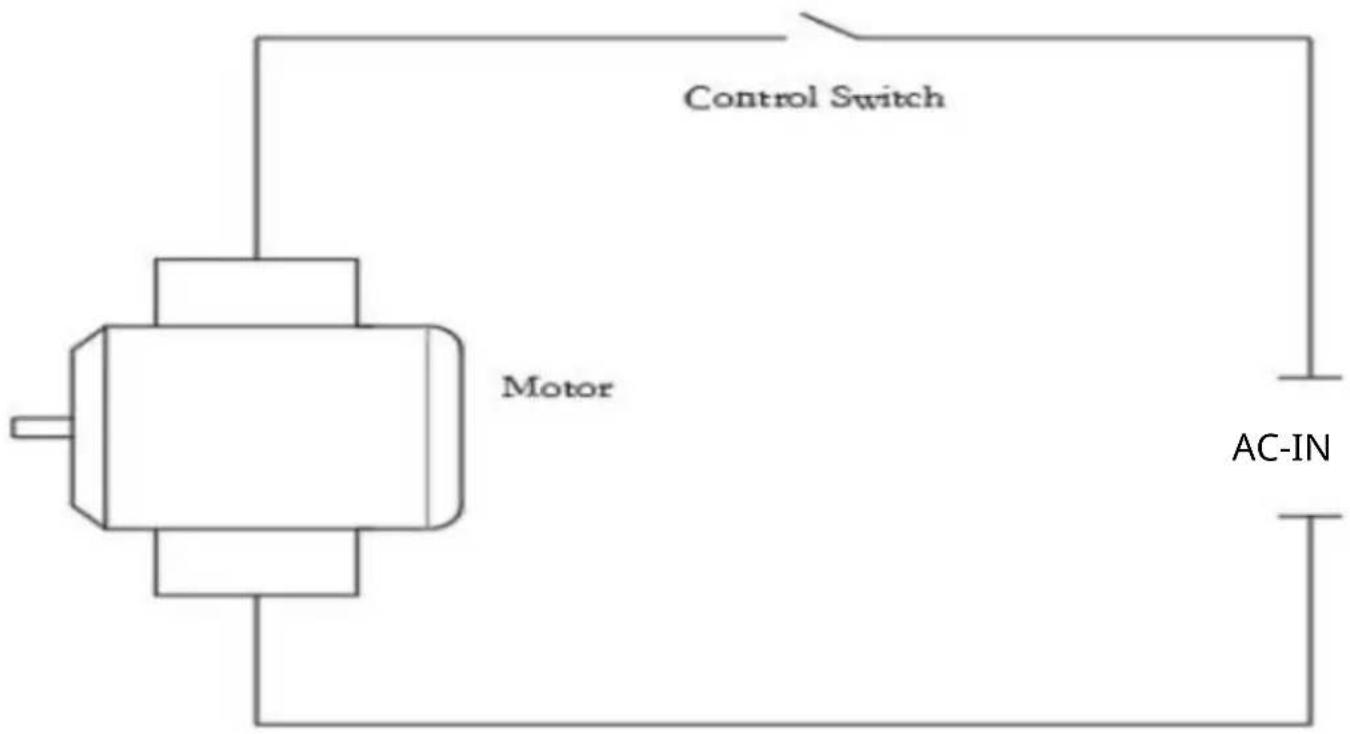
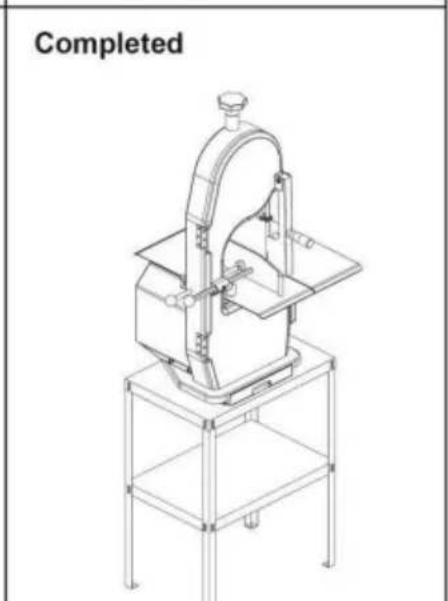
Line drawing of a mechanical device with a cylindrical top and base, labeled 'Completed' (no other text or symbols)Electrical schematic diagram
VEVOR®
TOUGH TOOLS, HALF PRICE
Technical Support and E-Warranty Certificate www.vevor.com/support
VEVOR®
TOUGH TOOLS, HALF PRICE
natural_image
Line drawing of a mechanical machine with no visible text or symbols
natural_image
Line drawing of a mechanical device with a curved arm and base platform (no text or symbols)BESOIN D'AIDE ? CONTACTEZ NOUS!
natural_image
Technical line drawing of a mechanical device with no visible text or symbolsInstallation steps
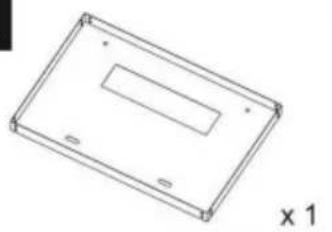
A
natural_image
Simple line drawing of a rectangular frame with a recessed slot and mounting holes, labeled 'x 1' (no text or symbols on the diagram itself)B

natural_image
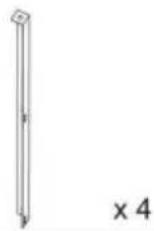
Simple 3D wireframe rectangle with no text or symbols, labeled 'x 1' on the right side (no other text or symbols)C
D
natural_image
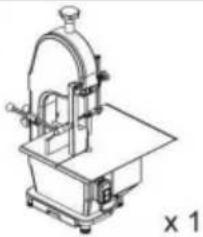
Technical line drawing of a mechanical device with no visible text or symbolsE
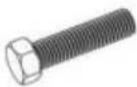
x 16
F

× 16
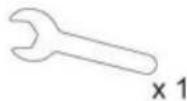
G
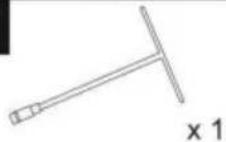
H
Step 1
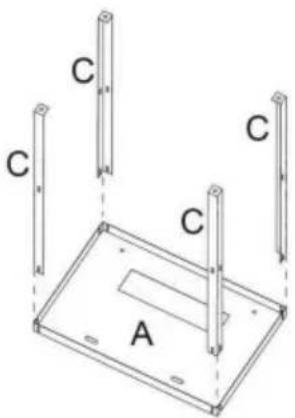

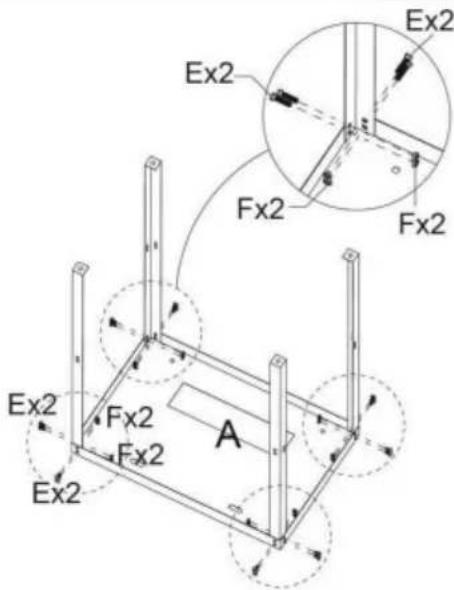
Fix A and 4 C with 8 screws and nuts (do not tighten too tightly).
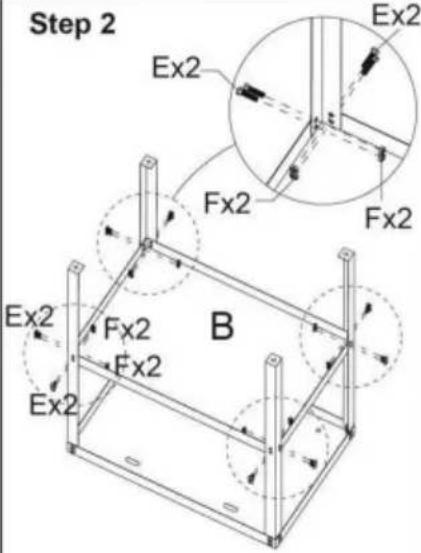
Fix B and 4 C with 8 screws and nuts (tighten all screws)
Step 3
natural_image
Technical line drawing of a mechanical device with no visible text or symbolsUnscrew the 4 foot pads of the bone cutter.
Step 4

natural_image
Technical line drawing of a mechanical device with mounting base and support frame (no text or symbols)Fix and tighten the rack and bone cutter with foot pads.
Completed
natural_image
Technical line drawing of a mechanical device with a curved arm and base platform (no text or symbols)Schéma électrique
VEVOR®
TOUGH TOOLS, HALF PRICE
natural_image
Line drawing of a mechanical machine with no visible text or symbols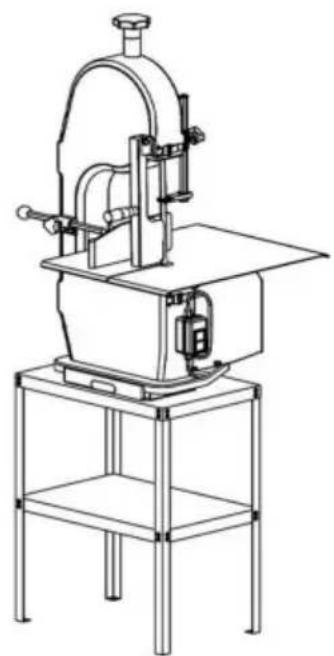
natural_image
Line drawing of a mechanical device with a curved top and base, mounted on a stand (no text or symbols)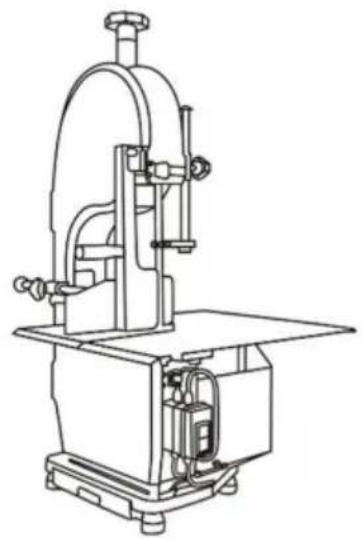
natural_image
Technical line drawing of a mechanical device with no visible text or symbolsInstallation steps
A
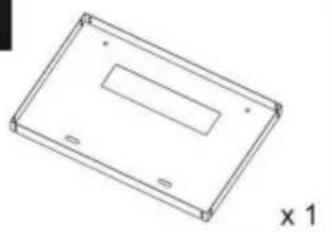
natural_image
Simple line drawing of a rectangular frame with a recessed slot and mounting holes, labeled 'x 1' (no text or symbols on the diagram itself)B
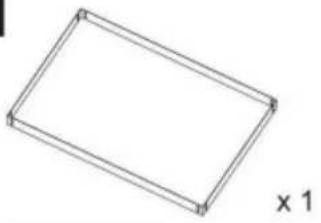
natural_image
Simple line drawing of a rectangular frame with no text or symbolsC
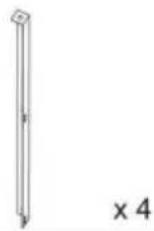
D
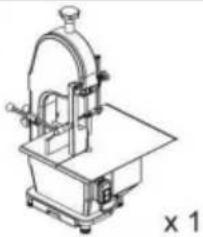
natural_image
Technical line drawing of a mechanical device with no visible text or symbolsE
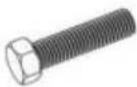
x 16
F

× 16
G
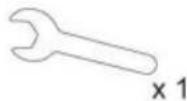
H
Step 1
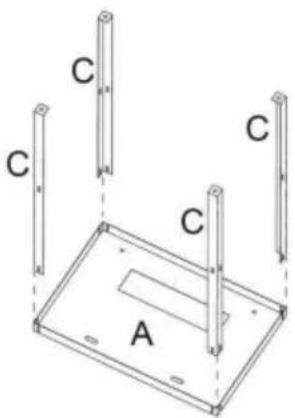

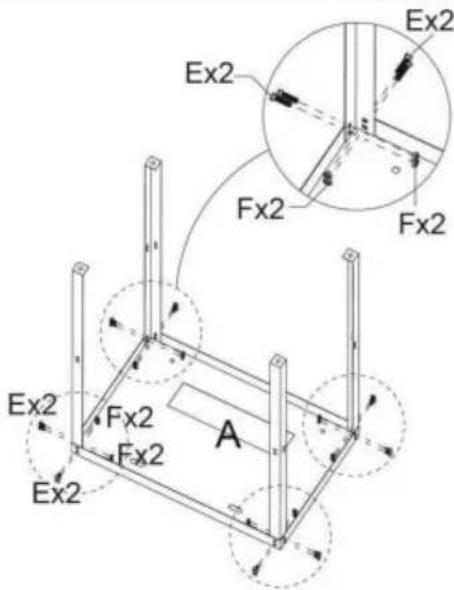
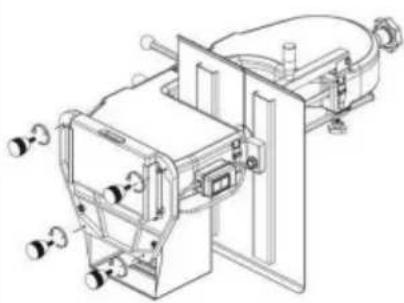
Fix A and 4 C with 8 screws and nuts (do not tighten too tightly).
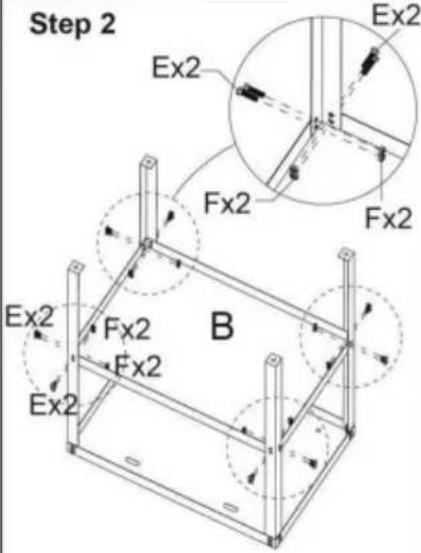
Fix B and 4 C with 8 screws and nuts (tighten all screws)
Step 3
natural_image
Technical line drawing of a mechanical device with no visible text or symbolsUnscrew the 4 foot pads of the bone cutter.
Step 4
natural_image
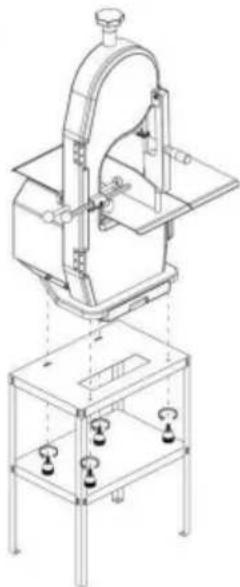
Technical line drawing of a mechanical device with mounting base and support frame (no text or symbols)Fix and tighten the rack and bone cutter with foot pads.
Completed
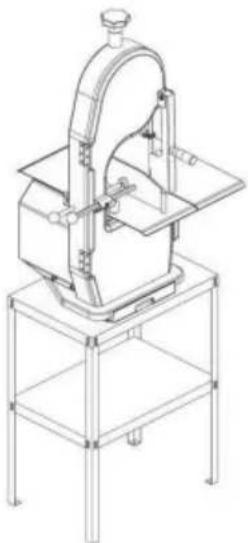
natural_image
Technical line drawing of a mechanical device with a curved arm and base platform (no text or symbols)www.vevor.com/support
VEVOR®
TOUGH TOOLS, HALF PRICE
natural_image
Line drawing of a mechanical machine with no visible text or symbols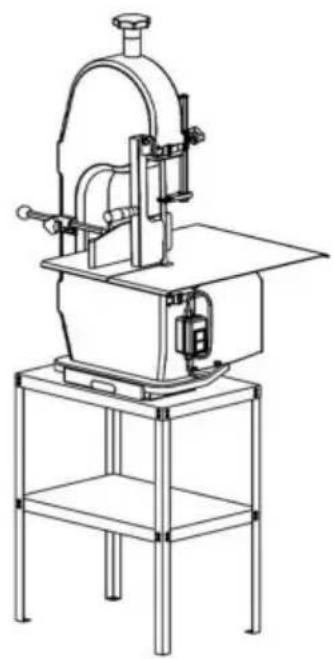
natural_image
Line drawing of a mechanical device with a curved arm and base platform (no text or symbols)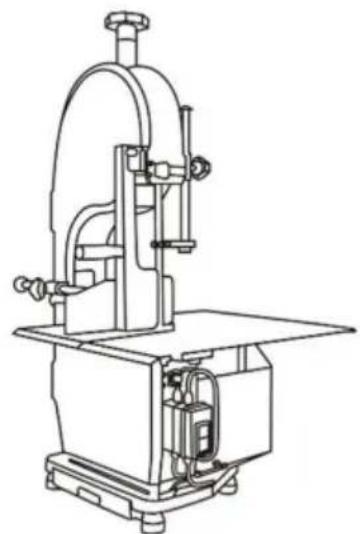
natural_image
Technical line drawing of a mechanical machine with no visible text or symbolsInstallation steps
A
natural_image
Simple line drawing of a rectangular frame with a recessed slot and mounting holes, labeled 'x 1' (no text or symbols on the diagram itself)B
natural_image
Simple 3D wireframe rectangle with no text or symbols, labeled 'x 1' on the right side (no other text or symbols)C
D
natural_image
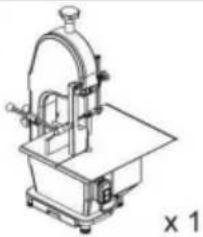
Technical line drawing of a mechanical device with no visible text or symbolsE
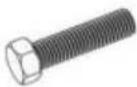
x 16
F

× 16
G
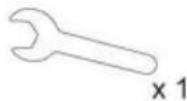
H
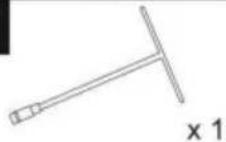
Step 1
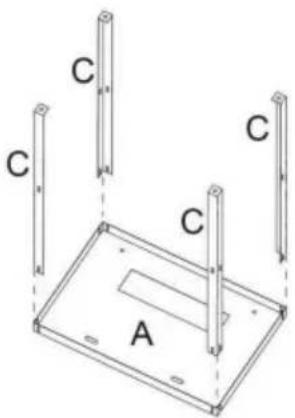

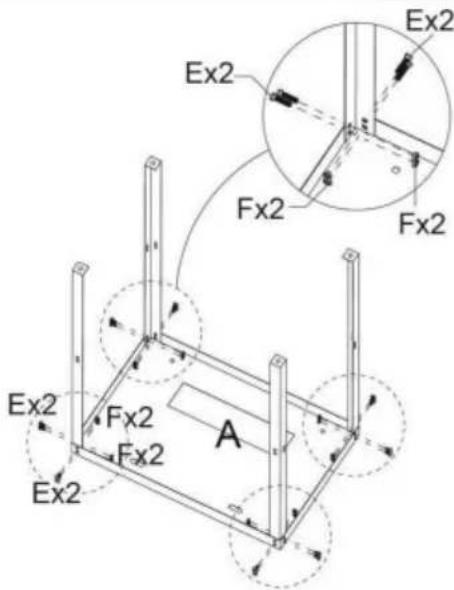
Fix A and 4 C with 8 screws and nuts (do not tighten too tightly).
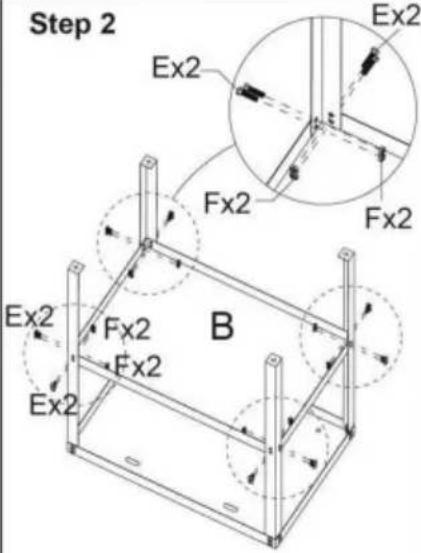
Fix B and 4 C with 8 screws and nuts (tighten all screws)
Step 3
natural_image
Technical line drawing of a mechanical device with no visible text or symbolsUnscrew the 4 foot pads of the bone cutter.
Step 4
natural_image
Technical line drawing of a mechanical device with mounting base and support frame (no text or symbols)Fix and tighten the rack and bone cutter with foot pads.
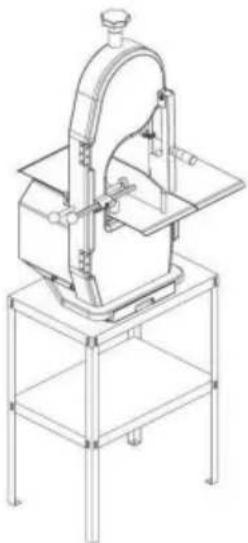
Completed
natural_image
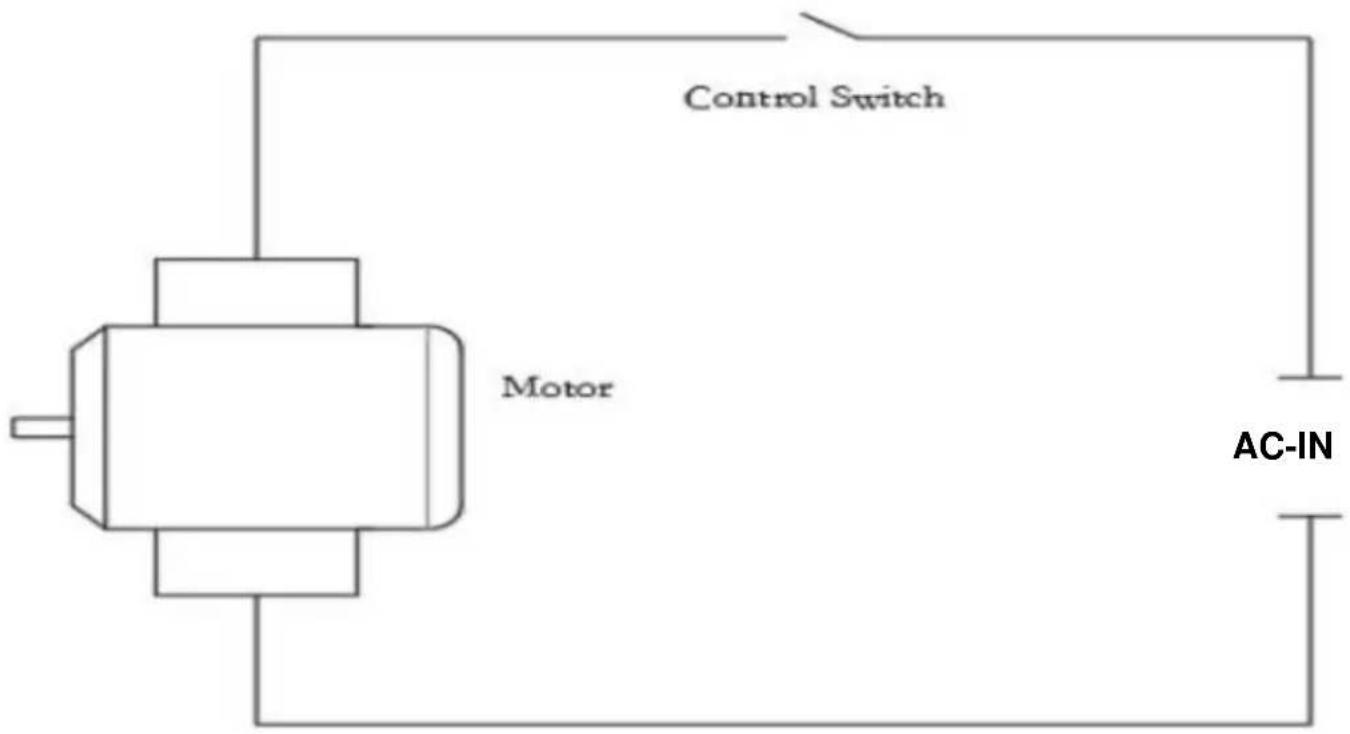
Technical line drawing of a mechanical device with a curved arm and base platform (no text or symbols)Schema elettrico
VEVOR®
TOUGH TOOLS, HALF PRICE
natural_image
Line drawing of a mechanical machine with no visible text or symbols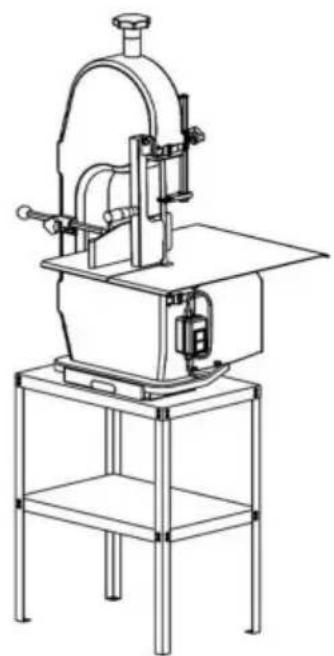
natural_image
Line drawing of a mechanical device with a curved top and base, mounted on a stand (no text or symbols)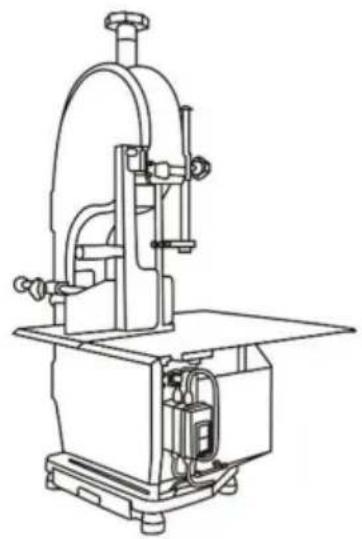
natural_image
Technical line drawing of a mechanical device with no visible text or symbolsInstallation steps
A
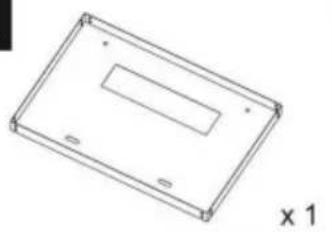
natural_image
Simple line drawing of a rectangular frame with a recessed slot and mounting holes, labeled 'x 1' (no text or symbols on the diagram itself)B
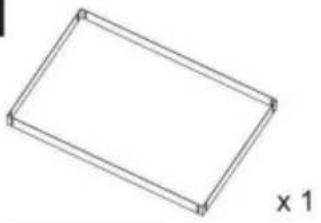
natural_image
Simple 3D wireframe rectangle with no text or symbols, labeled 'x 1' on the right side (no other text or symbols)C
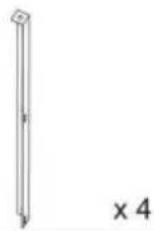
D
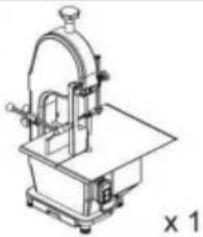
natural_image
Technical line drawing of a mechanical device with no visible text or symbolsE
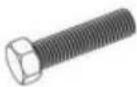
x 16
F

× 16
G
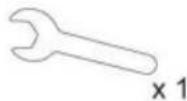
H
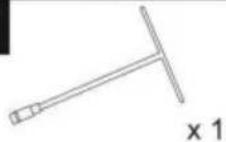
Step 1
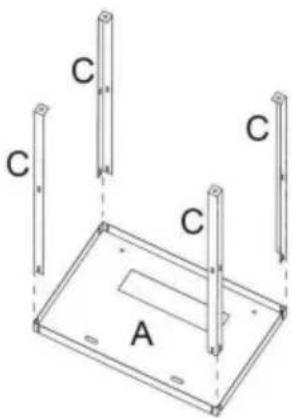

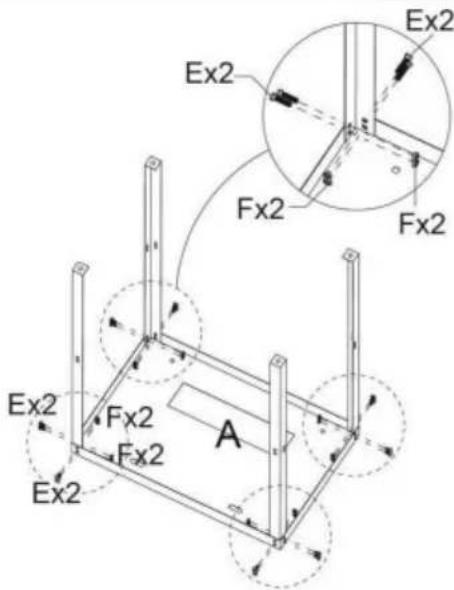
Fix A and 4 C with 8 screws and nuts (do not tighten too tightly).
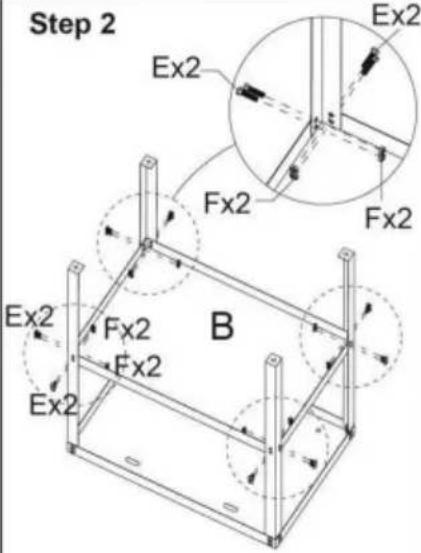
Fix B and 4 C with 8 screws and nuts (tighten all screws)
Step 3
natural_image
Technical line drawing of a mechanical device with no visible text or symbolsUnscrew the 4 foot pads of the bone cutter.
Step 4
natural_image
Technical line drawing of a mechanical device with mounting base and support frame (no text or symbols)Fix and tighten the rack and bone cutter with foot pads.
Completed
natural_image
Technical line drawing of a mechanical device with a curved top and base platform (no text or symbols)natural_image
Line drawing of a mechanical machine with no visible text or symbols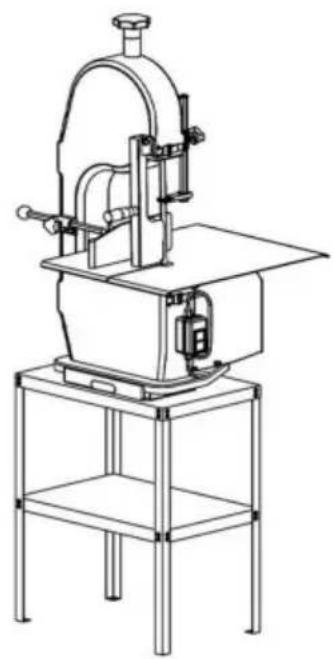
natural_image
Line drawing of a mechanical device with a curved arm and base platform (no text or symbols)POTRZEBUJESZ POMOCY? SKONTAKTUJ SIĘ Z NAMI!
natural_image
Technical line drawing of a mechanical device with no visible text or symbolsInstallation steps
A
natural_image
Simple line drawing of a rectangular frame with a recessed slot and mounting holes, labeled 'x 1' (no text or symbols on the diagram itself)B
natural_image
Simple 3D wireframe rectangle with no text or symbols, labeled 'x 1' on the right side (no other text or symbols)C
D
natural_image
Technical line drawing of a mechanical device with no visible text or symbolsE
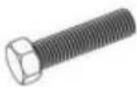
x 16
F

× 16
G
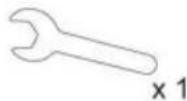
H
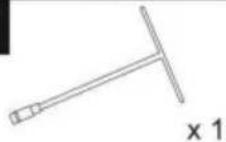
Step 1
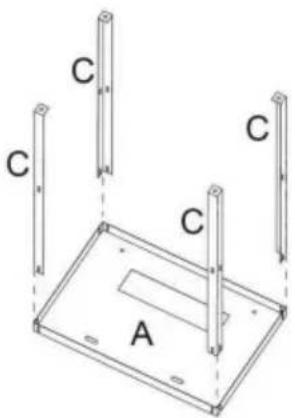

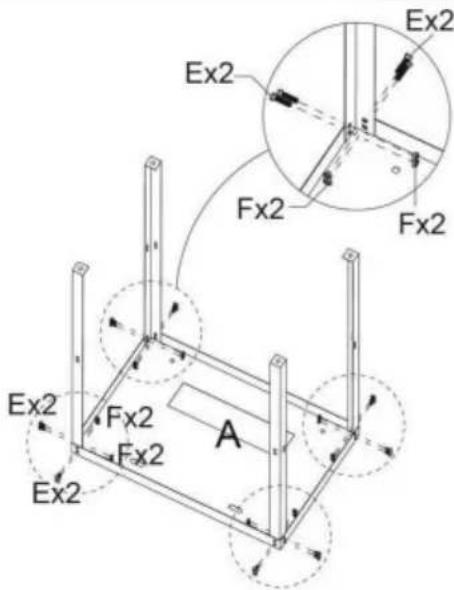
Fix A and 4 C with 8 screws and nuts (do not tighten too tightly).
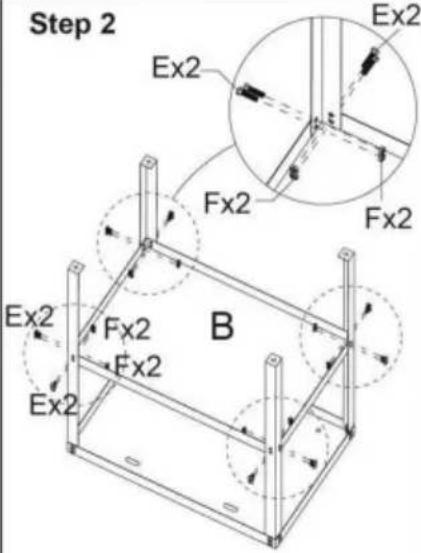
Fix B and 4 C with 8 screws and nuts (tighten all screws)
Step 3
natural_image
Technical line drawing of a mechanical device with no visible text or symbolsUnscrew the 4 foot pads of the bone cutter.
Step 4
natural_image
Technical line drawing of a mechanical device with mounting base and support frame (no text or symbols)Fix and tighten the rack and bone cutter with foot pads.
Completed
natural_image
Technical line drawing of a mechanical device with a curved top and base platform (no text or symbols)Schemat elektryczny
VEVOR®
TOUGH TOOLS, HALF PRICE
www.vevor.com/support
VEVOR®
TOUGH TOOLS, HALF PRICE
Technische ondersteuning en e-garantiecertificaat www.vevor.com/support
BEENZAAGMACHINE
MODEL: 130/210/250/280
natural_image
Line drawing of a mechanical machine with no visible text or symbols
natural_image
Line drawing of a mechanical device with a curved top and base, mounted on a stand (no text or symbols)HULP NODIG? NEEM CONTACT MET ONS OP!
natural_image
Technical line drawing of a mechanical machine with no visible text or symbolsInstallation steps
natural_image
Technical line drawing of a rectangular electronic device with mounting holes and a central slot (no text or symbols)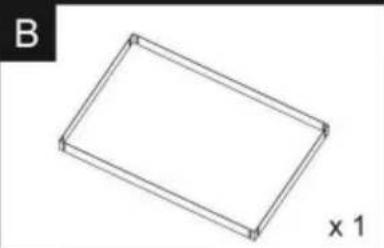
natural_image
Simple line drawing of a rectangular frame with no text or symbols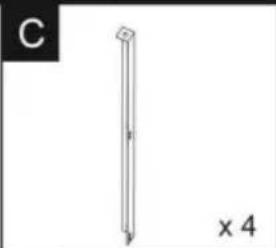
natural_image
Simple line drawing of a vertical rod with a pointed tip, labeled 'C' and 'x 4' (no text or symbols on the object itself)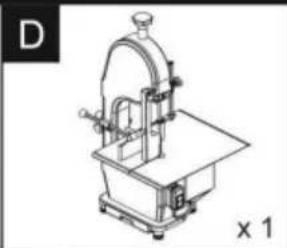
natural_image
Technical line drawing of a mechanical device with no visible text or symbols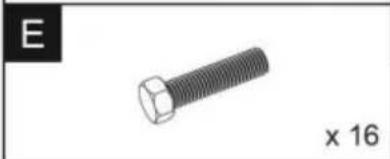
natural_image
Close-up of a hexagonal bolt with threaded shaft, labeled 'E' and 'x 16' (no other text or symbols)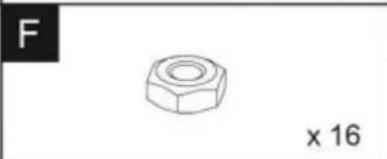
natural_image
Simple line drawing of a hexagonal nut with a flat body, labeled 'F' and 'x 16' (no text or symbols on the nut itself)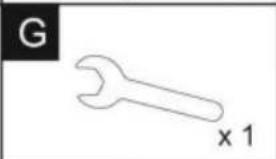
natural_image
Simple line drawing of a wrench with label 'G' and 'x 1' (no other text or symbols)
natural_image
Simple line drawing of a tool with a handle and base, labeled 'H' and 'x 1' (no text or symbols on the object itself)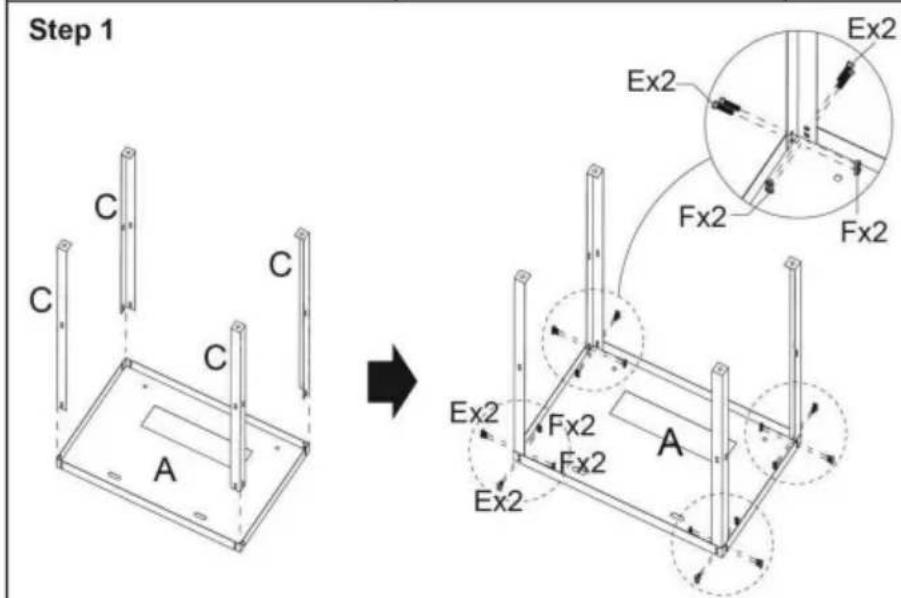
Fix A and 4 C with 8 screws and nuts (do not tighten too tightly).
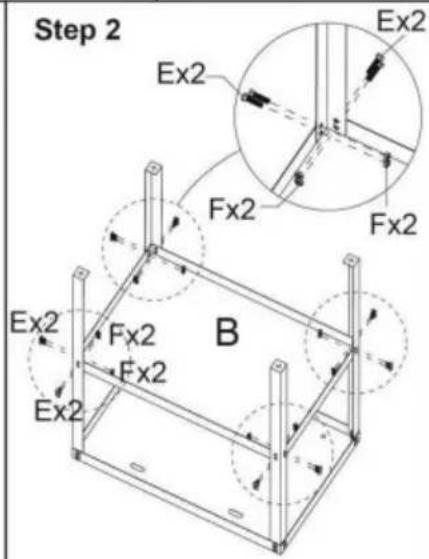
Fix B and 4 C with 8 screws and nuts (tighten all screws)
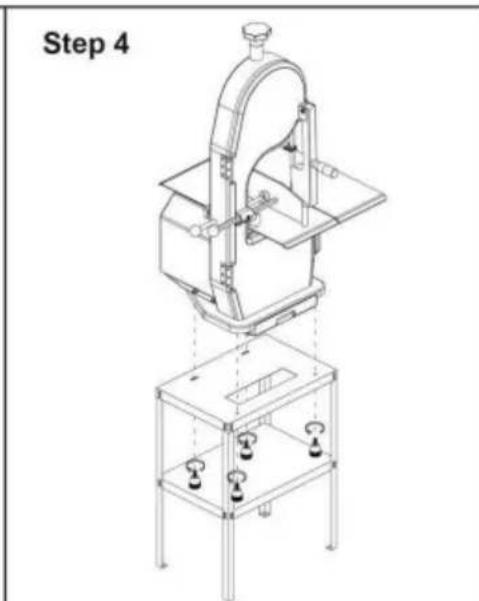
Fix and tighten the rack and bone cutter with foot pads.
natural_image
Line drawing of a mechanical device on a stand, labeled 'Completed' (no other text or symbols)natural_image
Line drawing of a mechanical machine with no visible text or symbols
natural_image
Line drawing of a mechanical device with a curved top and base, mounted on a stand (no text or symbols)BEHÖVER HJÄLP? KONTAKTA OSS!
natural_image
Technical line drawing of a mechanical device with no visible text or symbolsInstallation steps
natural_image
Technical line drawing of a rectangular electronic device with mounting holes and a central slot (no text or symbols)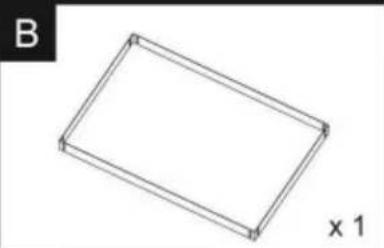
natural_image
Simple line drawing of a rectangular frame with no text or symbols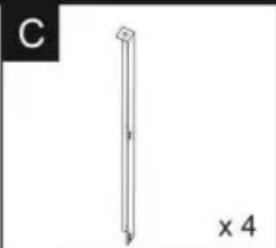
natural_image
Simple line drawing of a vertical rod with a pointed tip, labeled 'C' and 'x 4' (no text or symbols on the object itself)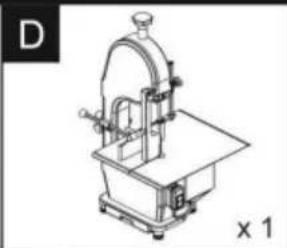
natural_image
Technical line drawing of a mechanical device with no visible text or symbols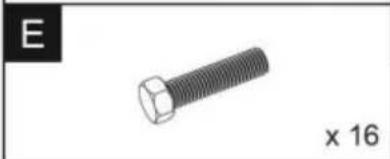
natural_image
Close-up of a hexagonal bolt with threaded shaft, labeled 'E' and 'x 16' (no other text or symbols)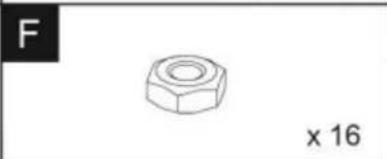
natural_image
Simple line drawing of a hexagonal nut with a flat body, labeled 'F' and 'x 16' (no text or symbols on the nut itself)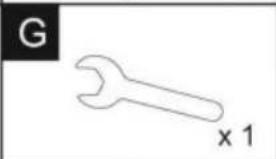
natural_image
Simple line drawing of a wrench with label 'G' and 'x 1' (no other text or symbols)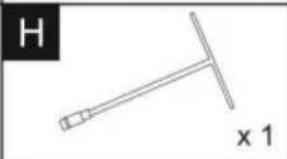
natural_image
Simple line drawing of a tool with a handle and base, labeled 'H' and 'x 1' (no text or symbols on the object itself)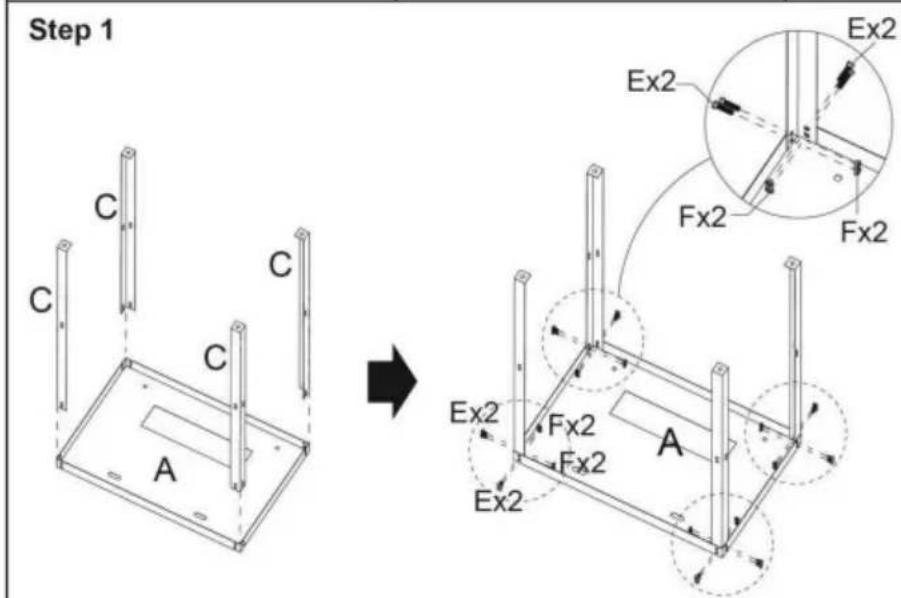
Fix A and 4 C with 8 screws and nuts (do not tighten too tightly).
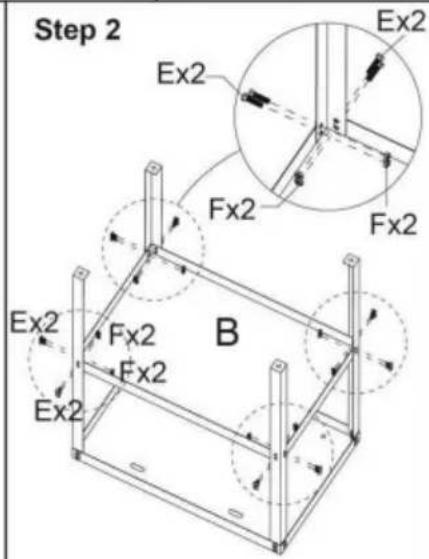
Fix B and 4 C with 8 screws and nuts (tighten all screws)
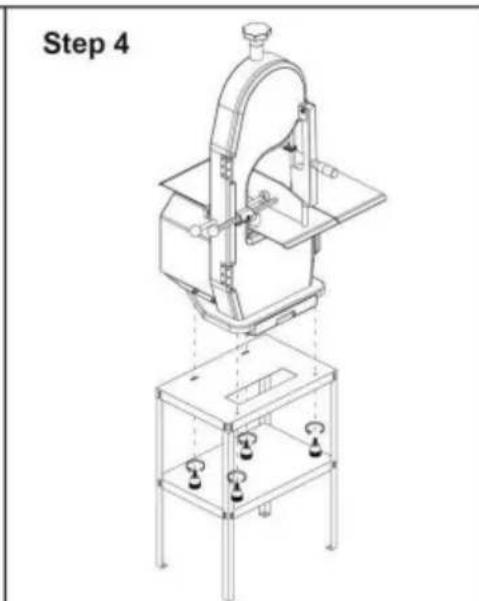
Fix and tighten the rack and bone cutter with foot pads.
natural_image
Line drawing of a mechanical device on a stand, labeled 'Completed' (no other text or symbols)www.vevor.com/support
- BONE SAW MACHINE
- VEVOR®
- NEED HELP? CONTACT US!
- IMPORTANT SAFEGUARDS
- WARNING:
- SAVE THESE INSTRUCTIONS
- Method of Application
- Cleaning
- Diagnosis and repair of faults
- Chainsaw often breaks
- Departure with band saw
- Other malfunctions
- Installation steps
- TOUGH TOOLS, HALF PRICE
- BESOIN D'AIDE ? CONTACTEZ NOUS!
- BEENZAAGMACHINE
- HULP NODIG? NEEM CONTACT MET ONS OP!
- BEHÖVER HJÄLP? KONTAKTA OSS!
Brand : Vevor
Model : BS-130
Category : Saw