
XDB-436B1 - Composter Vevor - Free user manual and instructions
Find the device manual for free XDB-436B1 Vevor in PDF.

| Brand | Vevor |
| Model | XDB-436B1 |
| Product Type | Tumbling Composter |
| Capacity | 70 L |
| Dimensions (L x W x H) | 605 x 510 x 730 mm |
| Net Weight | 5.15 kg |
| Main Material | Resistant Plastic (PP/PE) |
| Composting System | Tumbler with internal mixing bars |
| Estimated Composting Time | 4 to 6 weeks |
| Aeration Mechanism | Integrated ventilation openings |
| Locking | Side locking latch |
| Recommended Use | Outdoor (garden) |
| Assembly | Requires assembly, tools: screwdriver |
| Number of Parts | 11 components (A to K) |
| Warranty | Electronic certificate available at vevor.com/support |
| Maintenance | Clean with a damp cloth, avoid abrasive products |
| Safety | Do not use near flame, keep out of reach of children |
| Manufacturer | Made in China |
| Importer (EU) | SHUNSHUN GmbH, Germany |
| Importer (UK) | Pooledas Group Ltd, United Kingdom |
Frequently Asked Questions - XDB-436B1 Vevor
User questions about XDB-436B1 Vevor
0 question about this device. Answer the ones you know or ask your own.
Ask a new question about this device
Download the instructions for your Composter in PDF format for free! Find your manual XDB-436B1 - Vevor and take your electronic device back in hand. On this page are published all the documents necessary for the use of your device. XDB-436B1 by Vevor.
USER MANUAL XDB-436B1 Vevor
Technical Support and E-Warranty Certificate www.vevor.com/support
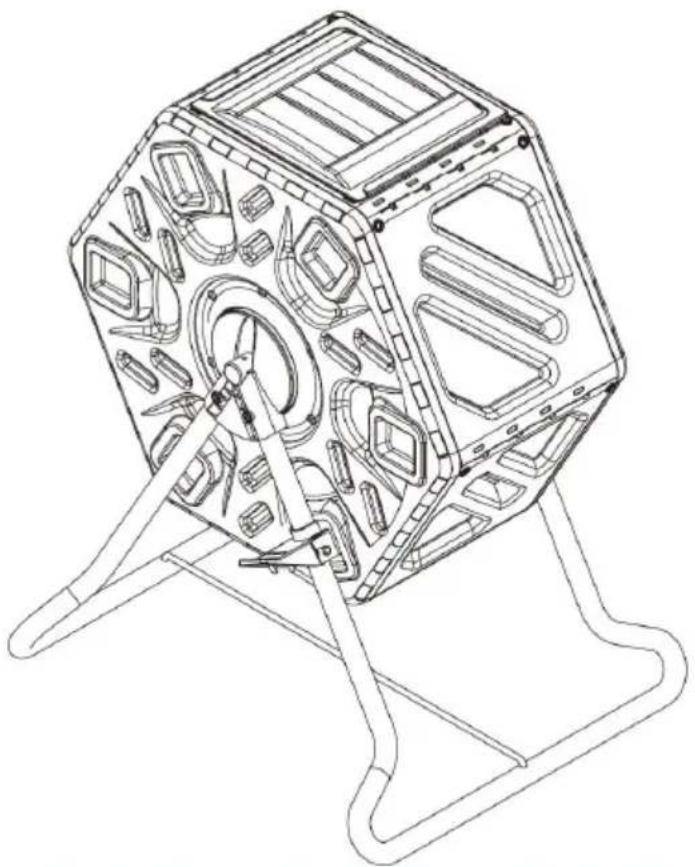
TUMBLING COMPOSTER
MODEL:XDB-436B1
We continue to be committed to provide you tools with competitive price. "Save Half", "Half Price" or any other similar expressions used by us only represent estimate of savings you might benefit from buying certain tools with us compared top brands and does not necessarily mean to cover all categories of tools offered are kindly reminded to verify carefully when you are placing an order with us actually saving half in comparison with the top major brands.
MODEL:XDB-436B1
natural_image
Technical line drawing of a mechanical device with internal components and mounting base (no text or symbols)NEED HELP? CONTACT US!
Have product questions? Need technical support? Please feel fr contact us:
Technical Support and E-Warranty Certificate www.vevor.com/support
This is the original instruction, please read all manual instruction carefully before operating. VEVOR reserves a clear interpretation user manual. The appearance of the product shall be subject to product you received. Please forgive us that we won't inform you there are any technology or software updates on our product.
IMPORTANT SAFEGUARDS

WARNING: Read and understand this entire manual before operating or servicing this product. Failure to follow these warnings and instructions can cause personal injury or damage to valuable property.
- It is best to complete the process of assembling it with an assista
● Installation and disassembly by two people is safer and easier. Please consult your Tumbling Composter owners manual. - Avoid children using the Tumbling Composter, and this product is r toy, do not allow children to play with.
- Keep away from sharp points, blades and other items.
- Keep away from open flame. This product will ignite and burn if brought into contact with an open flame.
Installation precautions
- Installation only according to these instructions. Improper installation can create hazards.
- Keep the installation area clean and well-lit.
- Keep bystanders out of the area during assembly.
- Do not install when tired or when under the influence of alcohol, or medication.
- Product capabilities apply to properly and completely installed produce only.
- For additional information regarding the parts listed in the following pages, please refer to the accessories package of this manual. Unwraz and separate all parts in a clean work area. Please keep small spans out of children's reach.
- Do not use it near the fire. Use it after it is fully assembled.
- Do not use excessive force when assembling or storing the product
- This product MUST be installed/serviced by a qualified service technician.
SAVE THESE INSTRUCTIONS
Thank you very much for choosing our product. Please read all the instructions before using it. The information will help you achieve the possible results.
INTRODUCTION
- This product is used to turn your food waste into garden gold. It transforms kitchen and garden waste into rich, fertile compost. Ready-to-use compost will be yours in just 4-6 weeks; it's unique aeration system. Internal mixing bars speed up decomposition to n growing a happy garden easier than ever!
- Reduce your carbon footprint – Studies show that approximately one-third of the world's food supply goes to waste. But with VEV rolling compost box, you can do your part to change that. Help the environment, and cook up some compost that your plants will love
- Year-round, hassle-free – Why should composting be a seasonal activity? VEVOR's heavy-duty design lets you keep your compost going all year round! The sturdy side-locking mechanism ensures loading and unloading, while the durable construction maintains a seal.
●
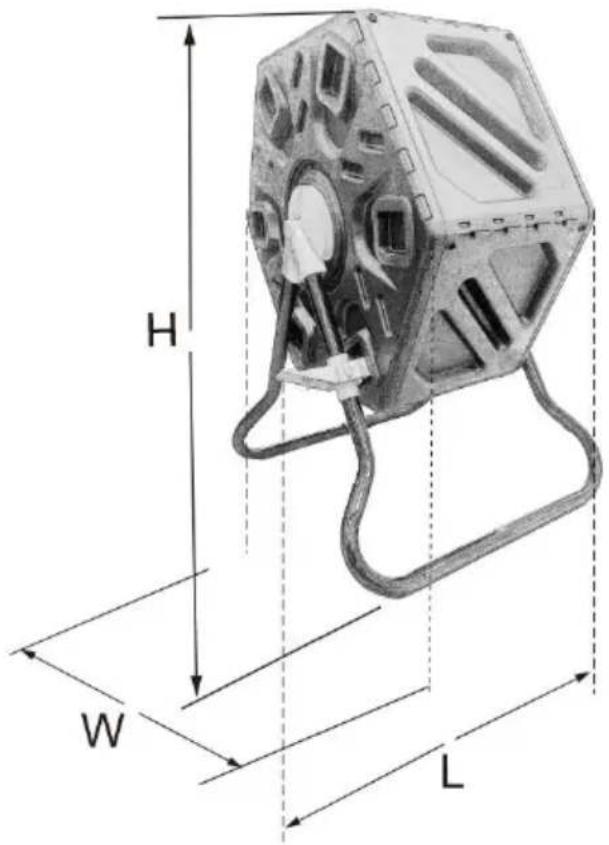
SPECIFICATIONS
| Model | XDB-436B1 |
| Capacity(L) | 70 |
| L | 605 |
| W | 510 |
| H | 730 |
| Net Weight (kg) | 5.15kg |
Accessories package
| No | Components | Picture | Q'ty |
| 1 | A |  | 5 |
| 2 | B&C |  Part B&C come pre-installe Part B&C come pre-installe | 1 |
| 3 | D | 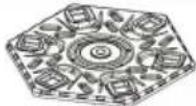 | 2 |
| 4 | E |  | 2 |
| 5 | F |  | 1 |
| 6 | G |  | 1 |
| 7 | H |  | 8 |
| 8 | I |  | 1 |
| 9 | J | 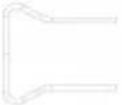 | 2 |
| 10 | K |  | 1 |
Installation
One person may install it with brief help from additional personnel. U these instructions to ensure the correct installation function. And opera of product VEVOR Corporation reserves the right to modify appearance and specifications without notice.
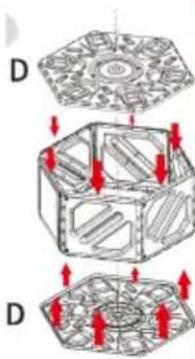
| Step 1: Match A and B and slide into position.Note that the male and female clasp the edge of the A&B should be align before sliding up and down so that t can be fastened properly. | 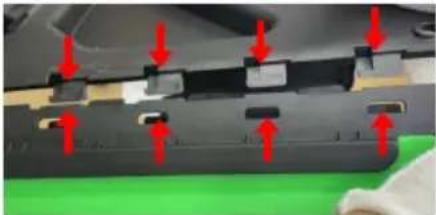 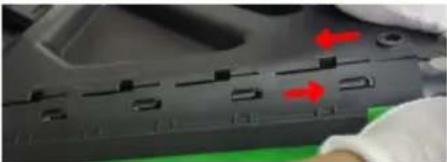 |
| Step 2: The same operation method is to combine the remaining 4 pieces of A turn, and the last piece of A and B are connected to form a closed loop.Also, note that the male and female on the edge of the A&B should be a before sliding up and down so that t can be fastened properly. | 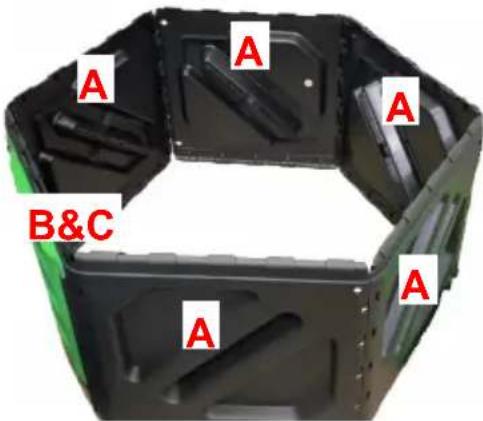 |
Step 3: Install both sides of the panels to a chamber.
Caution:
-
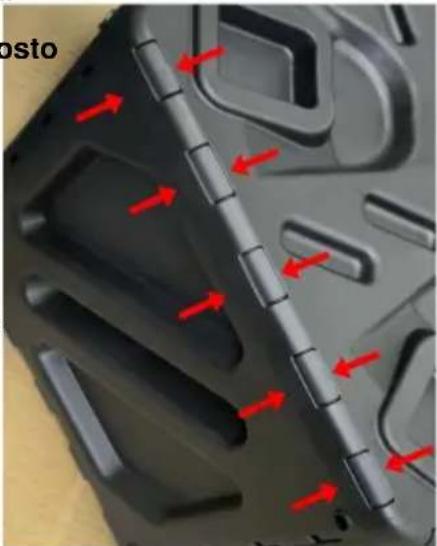
When installing, pay attention to the alignment of the buckle and the slot. can tap the buckle with your fist or hammer to tighten the buckle. A "click sound is usually heard, indicating that buckle is installed in place. If there is obvious gap between panel D and side panel A or B on the side, the buckle installed in place.
-
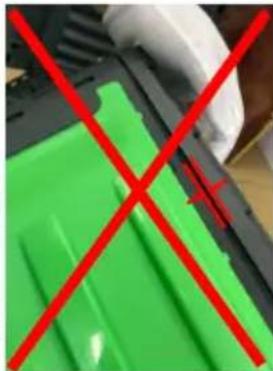
When the buckle is not installed in place, press panel D about 40mm from edge with your thumb so that panel dented and deformed. At this time, you can hear a "click" sound, indicating the buckle is installed in place.
-
Check whether there is a significant gap or warped edge between D and 1 and ensure that the panel is installed place. Install the other panel D in the way. So, we've completed the assemble the cavity.
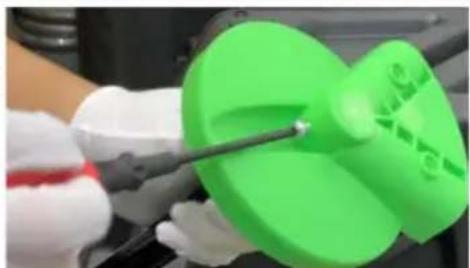
Step 4: Install the side support end cov and support rod I, and tighten screw H screwdriver.
natural_image
Green plastic tray with red X mark, no visible text or symbols
natural_image
Close-up of gloved hands holding a black mechanical component with a red arrow pointing to a small feature (no visible text or symbols)
natural_image
Close-up of gloved hands holding a small object with a red arrow pointing to a dark surface (no visible text or symbols)
natural_image
Close-up of a black plastic component with red arrows pointing to internal features (no text or symbols visible)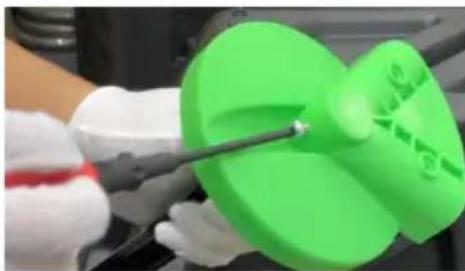
natural_image
Close-up of gloved hands holding a green 3D-printed object with a tool, no visible text or symbols| Step 5: The installed side support end cover E and support rod I pass through t center of the cavity. | 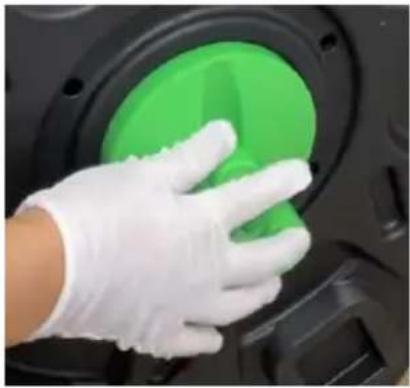 | |
| Step 6: Install support end o E on the other side and tigh screw H using a screwdriver. | 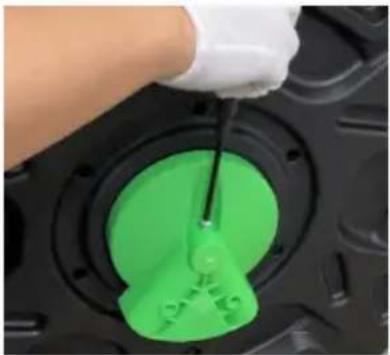 | |
| Step 7: Insert the support ba support J into the hole on t side support E, and tighten t screw H. | 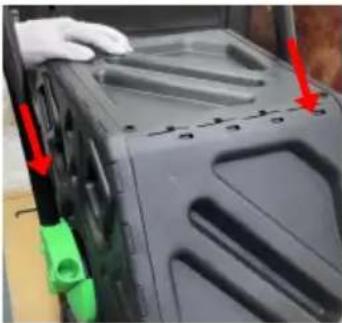 | 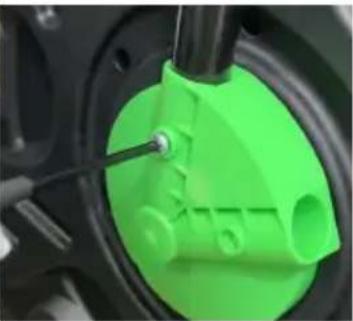 |
| Step 8: Fasten mounting support F into support J of support base. Align the arrow pointing down on support F the screw hole, and install a tighten screw H. |  | |
| Step 9: Install the lock G on t support F, noting that G will be slightly deformed before it can b stuck into the shaft pin of F, b there is no need to worry; this normal. | 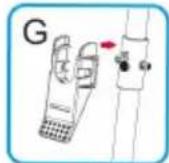 ↓ ↓ | |
| Step 10: Insert the support base support J into the hole on the support E, and tighten the screv |  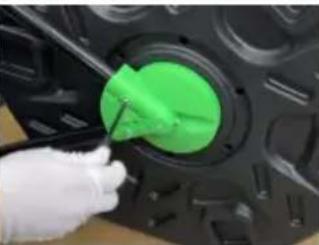 | |
| Step 11: Install reinforcing rod h the bottom of support frame J. | 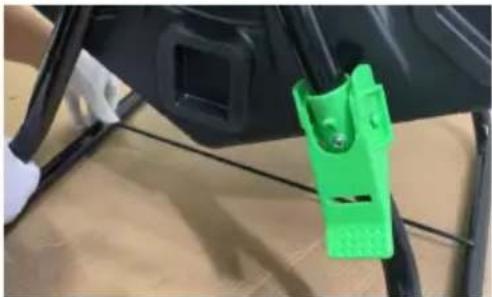 | |
| Step 12: Test whether the composter chamber can rotate smoothly.Test whether the compo chamber can rotate smoothly, ar whether the lock G can clamp buckle hole of the side panel D the chamber to fix the chamberCaution: If the latch G is in th locking position, the cavity canne be forced to rotate at this time, which will cause the buckle G deformed and damaged.At this point, we have complete the installation of the composter. |  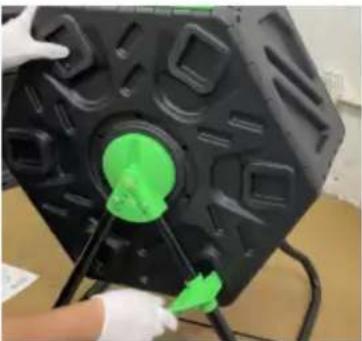 | |
How to compost
Here, we recommend you how to compost.
| 1. Collect some of the waste generated in your daily life, su as apple peel, banana peel, vegetable leaves, egg shells, e Pour them into the composter. |  |
| 2. Add dead garden leaves, e scraps of paper; you don't nee care about the proportion of g organic matter, but the best ef is (25-30) 1. You can also ad some bran, which is more effective for fermentation of the compost. |  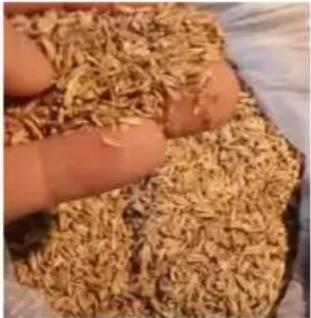 |
| 3. Add some clean water to t mixture to make it easier to ferment when they becomes moist, and rotate the composte make them mix. Internal mixing bars aerate material while turni to help accelerate decompositio When composting, place a bas under the compost machine to receive the liquid from the composter, which can be used water the trees and flowers in your garden. |  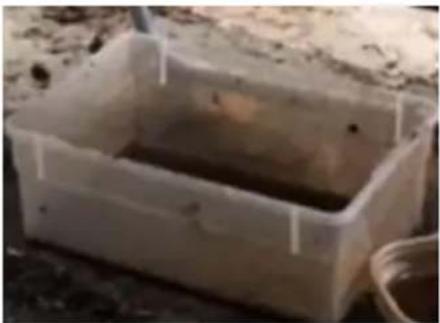 |
- Ready-to-use compost will by yours in just 4-6 weeks. The compost is done when it's dar and crumbly with an earthy sn

natural_image
Close-up of a textured brown soil or gravel surface with scattered dark particles and fragments (no text or symbols visible)Caution:
- Check that the compost is slightly damp, and add water when nee
● Turn the compost 5-10 rotations at least 2-3 times a week. - Aerating vents help promote fast composting with air flow as needed.
● Empty the compost into a bucket, wheelbarrow, or tarp. - Use the compost in your garden.
- Do not compost with grass and leaves that have been sprayed with insecticide.
Address: Baoshanqu Shuangchenglu 803long 11hao 1602A-1609shi Shanghai
Imported to AUS: SIHAO PTY LTD. 1 ROKEVA STREETEASTWOOD NSW 2122 Australia
Imported to USA: Sanven Technology Ltd. Suite 250, 9166 Anaheim Place, Rancho Cucamonga, CA 91730
| UK | REP |
Pooledas Group Ltd
Unit 5 Albert Edward House, The Pavilion
Preston, United Kingdom
| EC | REP |
SHUNSHUN GmbH
Römeräcker 9 Z2021, 76351
Technical Support and E-Warranty Certificate
www.vevor.com/support
VEVOR®
TOUGH TOOLS, HALF PRICE
natural_image
Technical line drawing of a mechanical device with internal components and mounting base (no text or symbols)BESOIN D'AIDE? CONTACTEZ-NOUS!
natural_image
Technical diagram showing 3D mechanical components with red arrows indicating movement, alongside a green plastic sheet with red X marks (no text or symbols)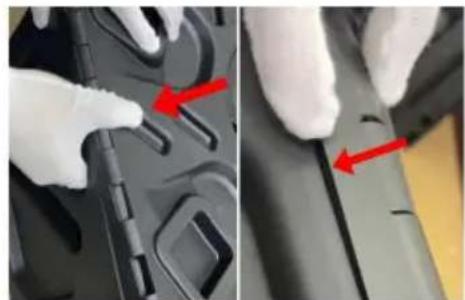
natural_image
Close-up of gloved hands adjusting a mechanical component with red arrows pointing to features (no visible text or symbols)
natural_image
Close-up of a black plastic component with red arrows pointing to internal channels (no text or symbols visible)
natural_image
Close-up of a gloved hand holding a green 3D-printed object with a tool, no visible text or symbolsnatural_image
Close-up of a textured, granular surface with dark patches and small fragments (no visible text or symbols)Prudence:
natural_image
Technical line drawing of a modular device with internal compartments and mounting base (no text or symbols)BRAUCHEN SIE HILFE? KONTAKTIERE UNS!
natural_image
Three-step diagram of a mechanical or architectural component with red arrows indicating direction, no text or symbols present.
natural_image
Green plastic container being crossed out by a red X (no text or symbols visible)
natural_image
Close-up of gloved hands holding a black mechanical component with a red arrow pointing to a small component (no visible text or symbols)
natural_image
Close-up of gloved hands holding a dark object with a red arrow pointing to a small white object (no visible text or symbols)
natural_image
Close-up of a black plastic component with red arrows pointing to internal channels (no text or symbols visible)
natural_image
Close-up of a gloved hand holding a green 3D-printed object with a tool, no visible text or symbolsnatural_image
Close-up of soil with visible aggregate and minor fragments (no text or symbols)Vorsicht:
www.vevor.com/support
VEVOR®
TOUGH TOOLS, HALF PRICE
natural_image
Technical line drawing of a mechanical device with internal components and mounting base (no text or symbols)HO BISOGNO DI AIUTO? CONTATTACI!
natural_image
Close-up of gloved hands holding a black mechanical component with a red arrow pointing to a small component (no visible text or symbols)
natural_image
Close-up of gloved hands holding a dark object with a red arrow pointing to a small circular feature (no text or symbols visible)dal
posto
natural_image
Close-up of a black plastic component with red arrows pointing to internal channels (no text or symbols visible)
natural_image
Close-up of a gloved hand holding a green 3D-printed object with a tool, no visible text or symbolsnatural_image
Close-up of a textured, granular surface with dark patches and small fragments (no visible text or symbols)Attenzione:
Importato in AUS: SIHAO PTY LTD. 1 ROKEVA STREETEASTWOOD NSW 2122Australia
natural_image
Technical line drawing of a mechanical device with internal components and mounting base (no text or symbols)natural_image
Close-up of gloved hands holding a black mechanical component with a red arrow pointing to a small component (no visible text or symbols)
natural_image
Close-up of gloved hands holding a dark object with a red arrow pointing to a small circular feature (no text or symbols visible)
natural_image
Close-up of a black plastic component with red arrows pointing to internal channels (no text or symbols visible)E
natural_image
Close-up of a gloved hand holding a green 3D-printed object with a tool, no visible text or symbolsnatural_image
Close-up of a textured, granular surface with dark patches and small fragments (no visible text or symbols)Precaución:
natural_image
Technical line drawing of a mechanical device with internal components and mounting base (no text or symbols)POTRZEBUJE POMOCY? SKONTAKTUJ SIĘ Z NAMI!
natural_image
Diagram of three stages of a mechanical or structural assembly with red arrows indicating direction, no text or symbols present.
natural_image
Green plastic container with red X mark, no visible text or symbols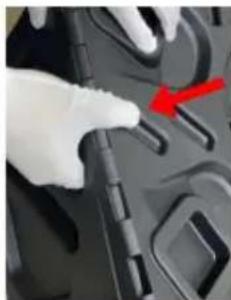
natural_image
Close-up of gloved hands holding a black mechanical component with a red arrow pointing to a small component (no visible text or symbols)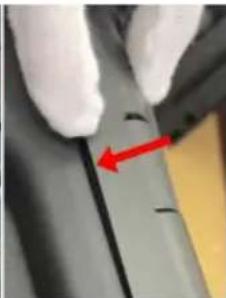
natural_image
Close-up of gloved hands holding a dark object with a red arrow pointing to a small feature (no visible text or symbols)
natural_image
Close-up of a black plastic component with red arrows pointing to internal channels (no text or symbols visible)
natural_image
Close-up of a gloved hand holding a green 3D-printed object with a tool, no visible text or symbolsnatural_image
Close-up of soil with visible aggregate and minor fragments (no text or symbols)Ostrożność:
www.vevor.com/support
VEVOR®
TOUGH TOOLS, HALF PRICE
Technische ondersteuning en e-garantiecertificaat www.vevor.com/support
natural_image
Technical line drawing of a modular device with internal compartments and mounting base (no text or symbols)HULP NODIG? NEEM CONTACT MET ONS OP!
natural_image
Technical illustration showing three 3D mechanical components with red arrows indicating motion, alongside a green plastic sheet with red X marks (no text or symbols)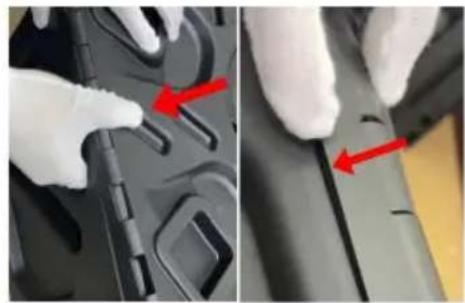
natural_image
Close-up of gloved hands adjusting a black plastic component with red arrows pointing to features (no text or symbols visible)
natural_image
Close-up of a black plastic component with red directional arrows indicating flow or movement (no text or symbols)
natural_image
Close-up of a gloved hand holding a green 3D-printed plastic object with a tool, no visible text or symbolsnatural_image
Close-up of a textured, granular surface with dark patches and small fragments (no visible text or symbols)Voorzichtigheid:
natural_image
Technical line drawing of a mechanical device with internal components and mounting base (no text or symbols)BEHÖVS HJÄLP? KONTAKTA OSS!
natural_image
Close-up of gloved hands holding a black mechanical component with a red arrow pointing to a small component (no visible text or symbols)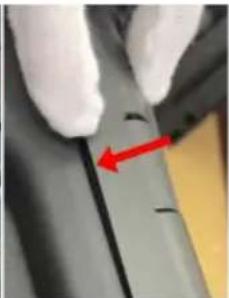
natural_image
Close-up of gloved hands holding a dark object with a red arrow pointing to a small feature (no text or symbols visible)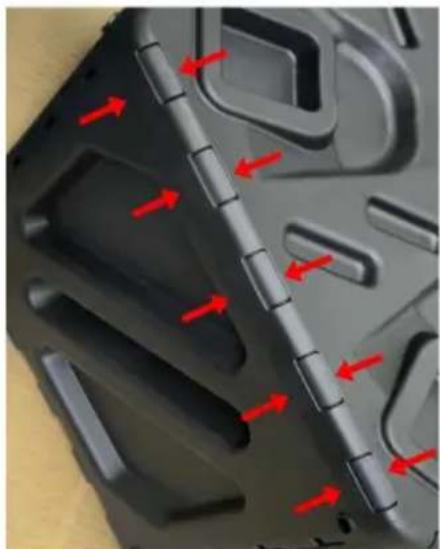
natural_image
Close-up of a black plastic component with red directional arrows indicating movement or force (no text or symbols)
natural_image
Close-up of a gloved hand holding a green 3D-printed object with a tool, no visible text or symbolsnatural_image
Close-up of a textured, granular surface with dark patches and small fragments (no visible text or symbols)Varning:
www.vevor.com/support


