
PR-010-50 - Power tool Vevor - Free user manual and instructions
Find the device manual for free PR-010-50 Vevor in PDF.
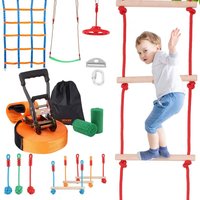


| Brand | Vevor |
| Model | PR-010-50 |
| Product type | Ninja Obstacle Course and Slackline Kit |
| Strap length | 50 feet (15.24 m) |
| Strap material | High-strength polyester |
| Maximum weight capacity | 150 kg (estimated) |
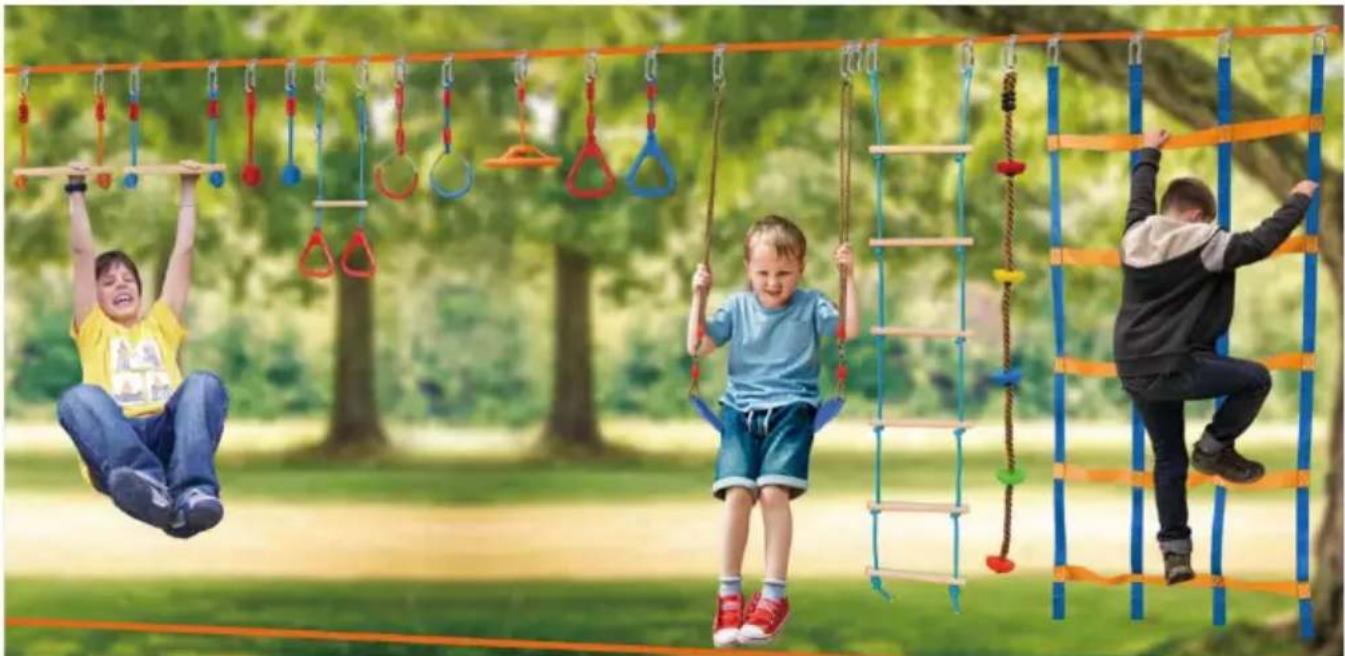
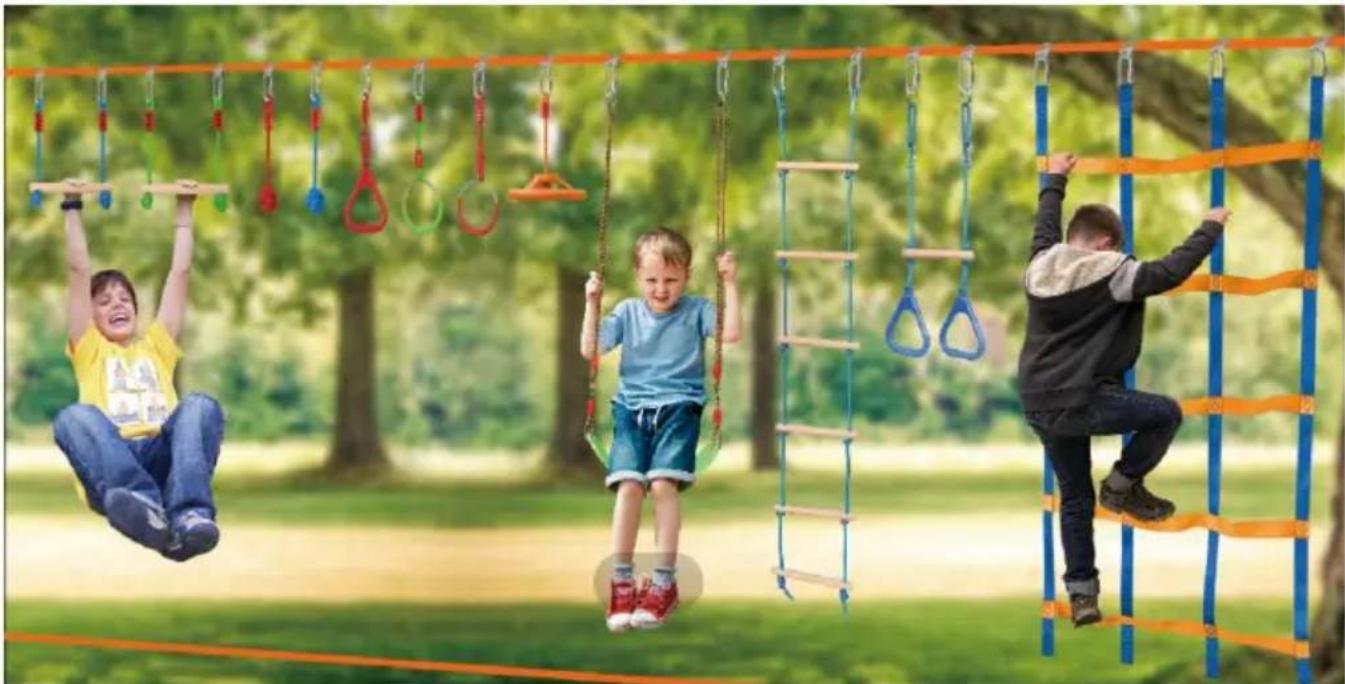
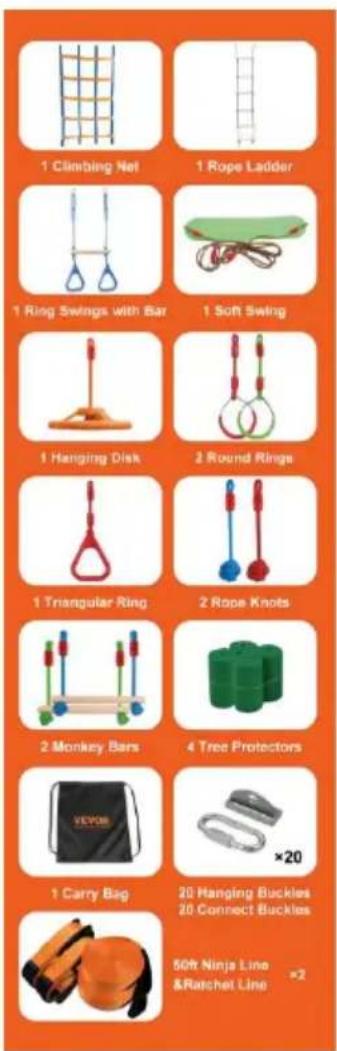
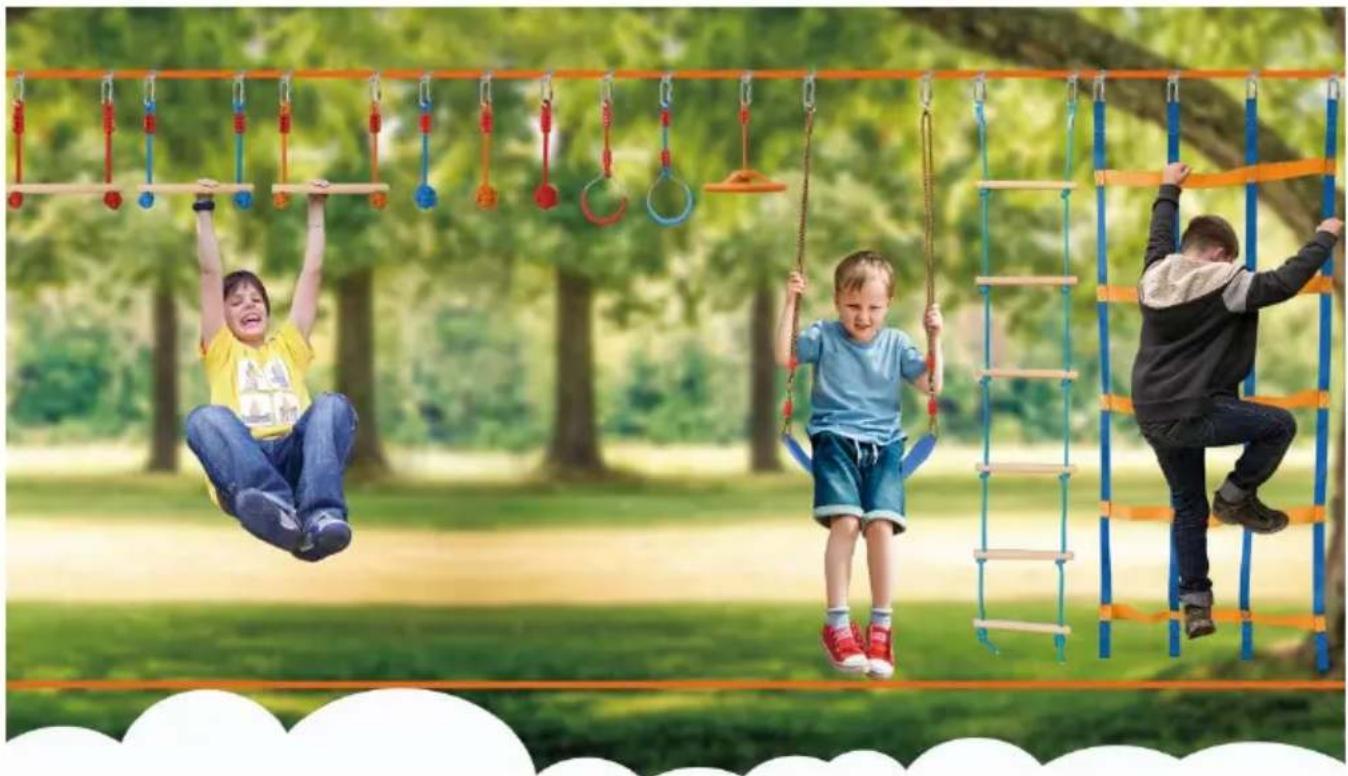
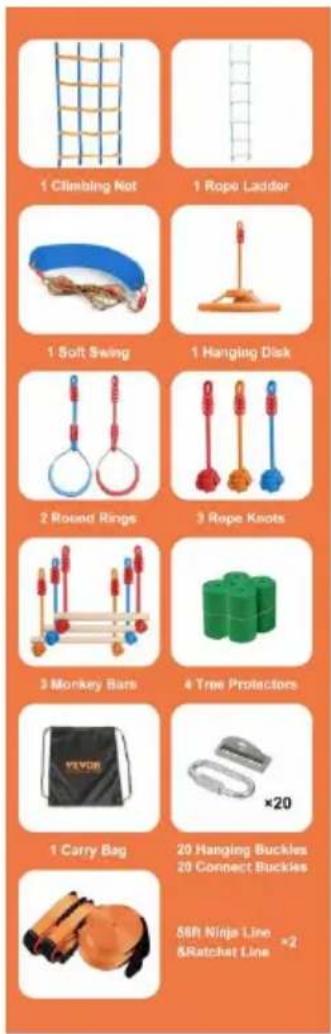
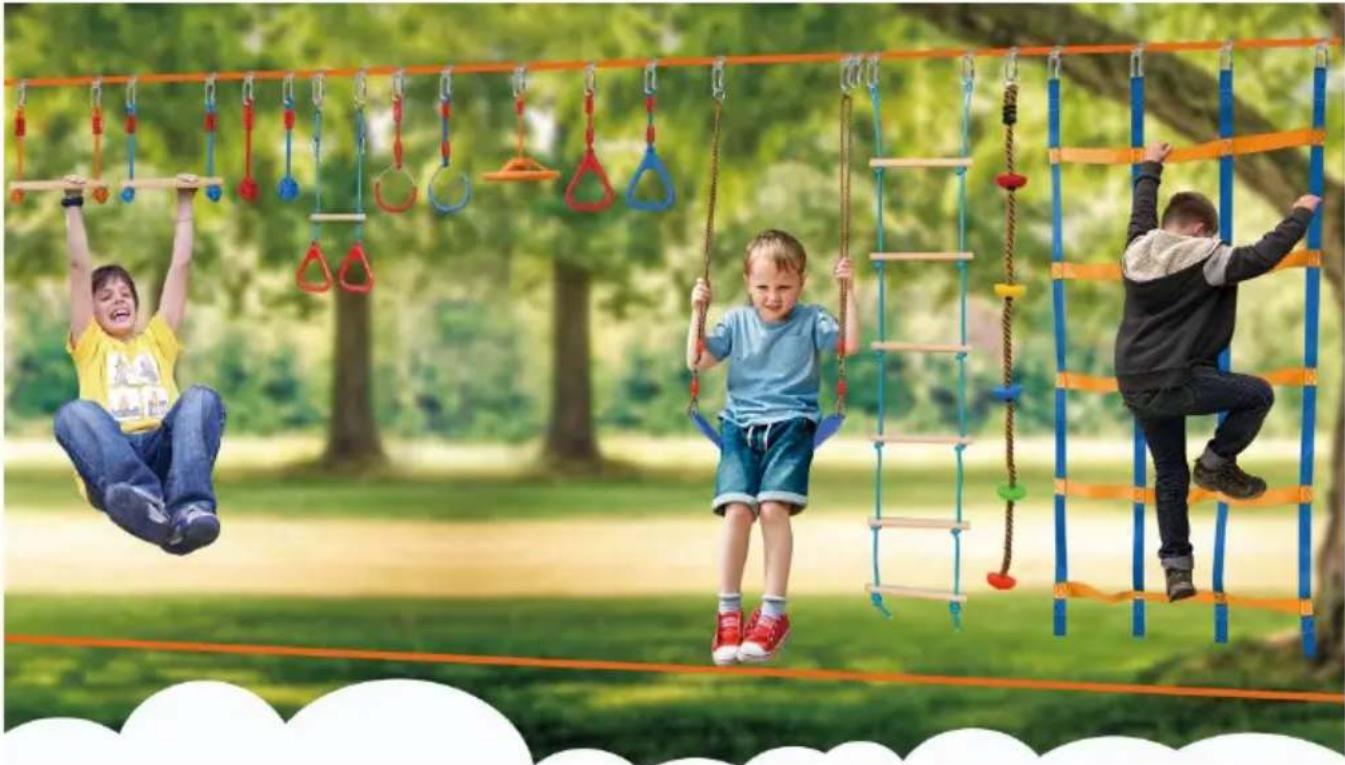
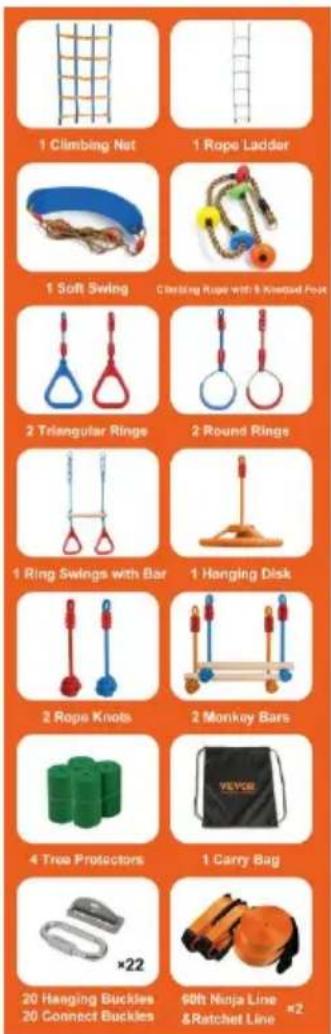
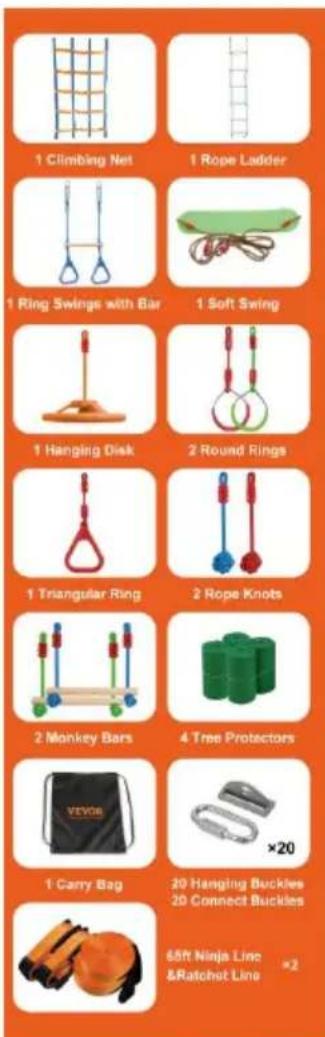
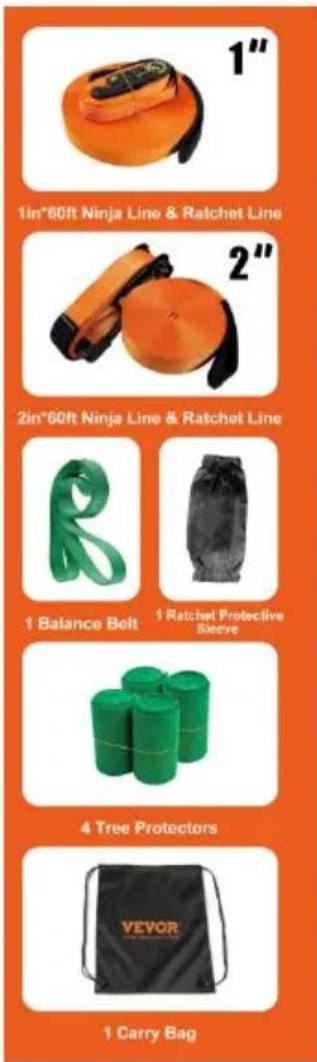
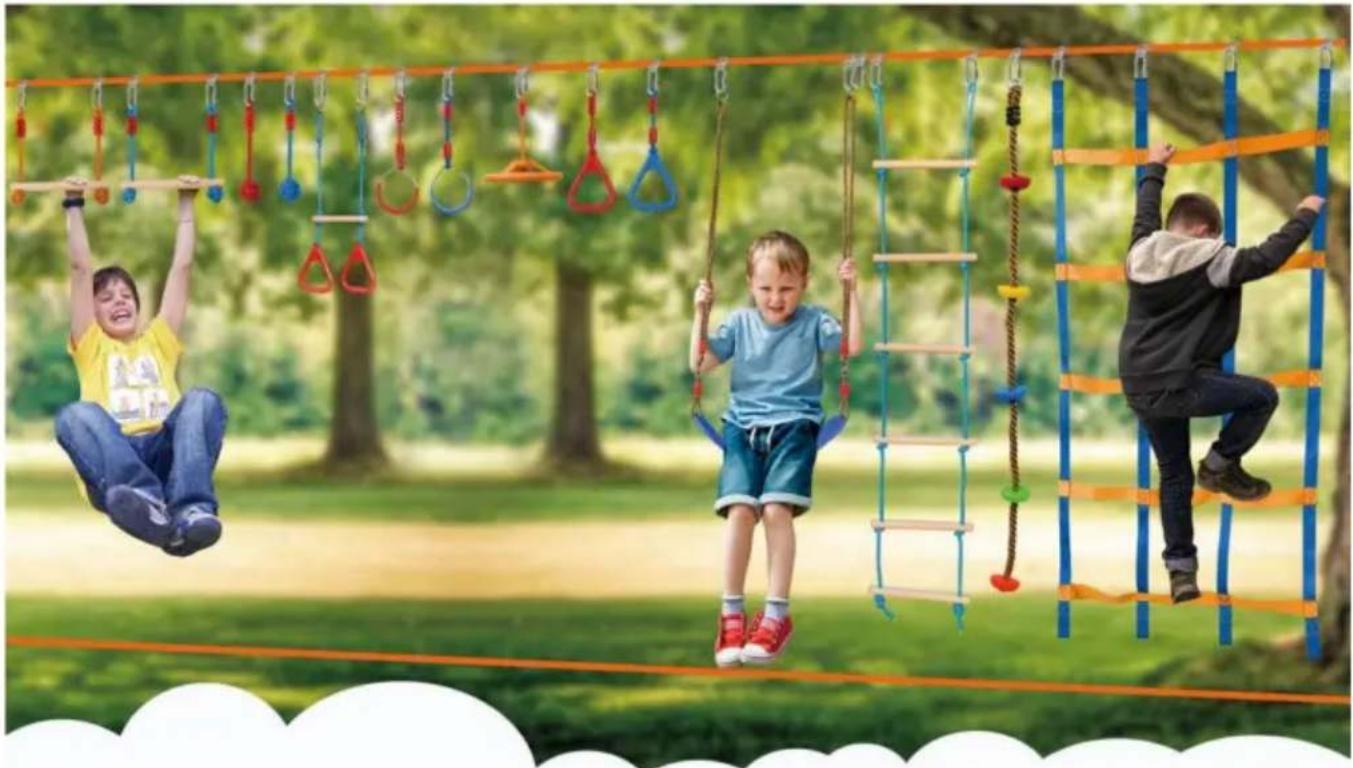
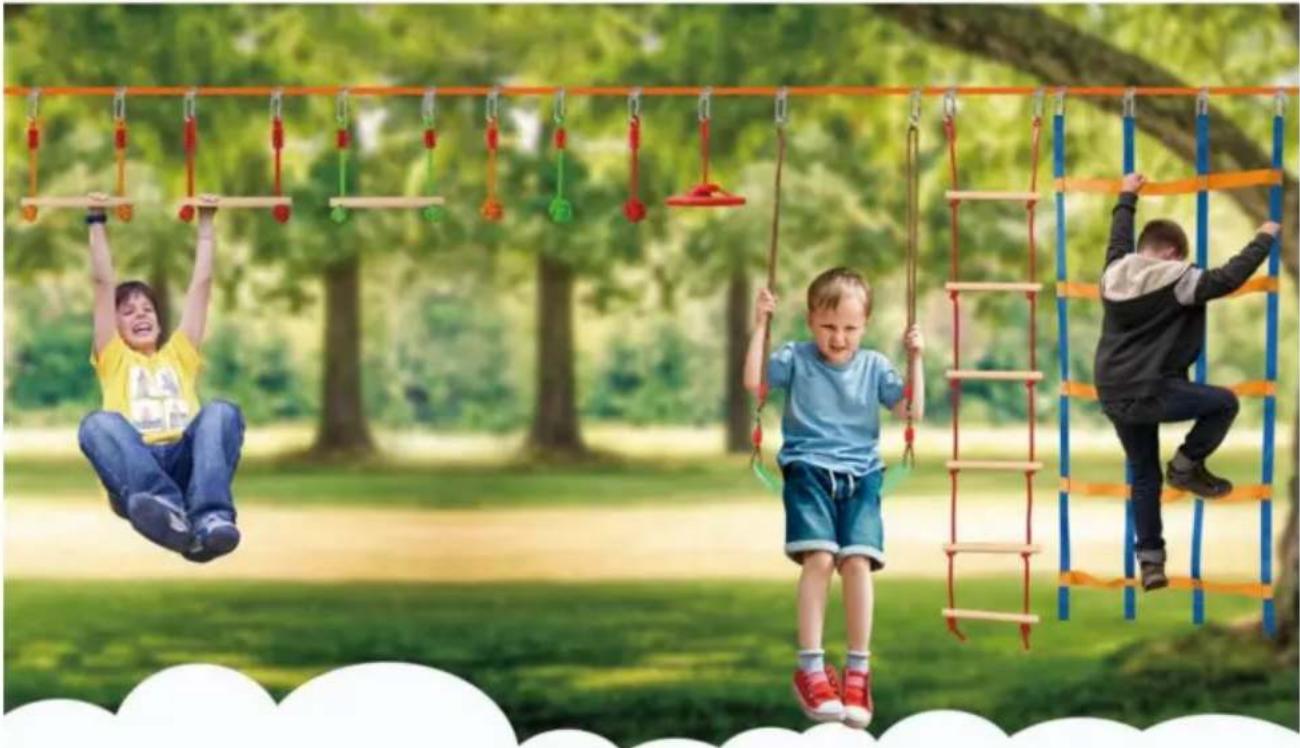
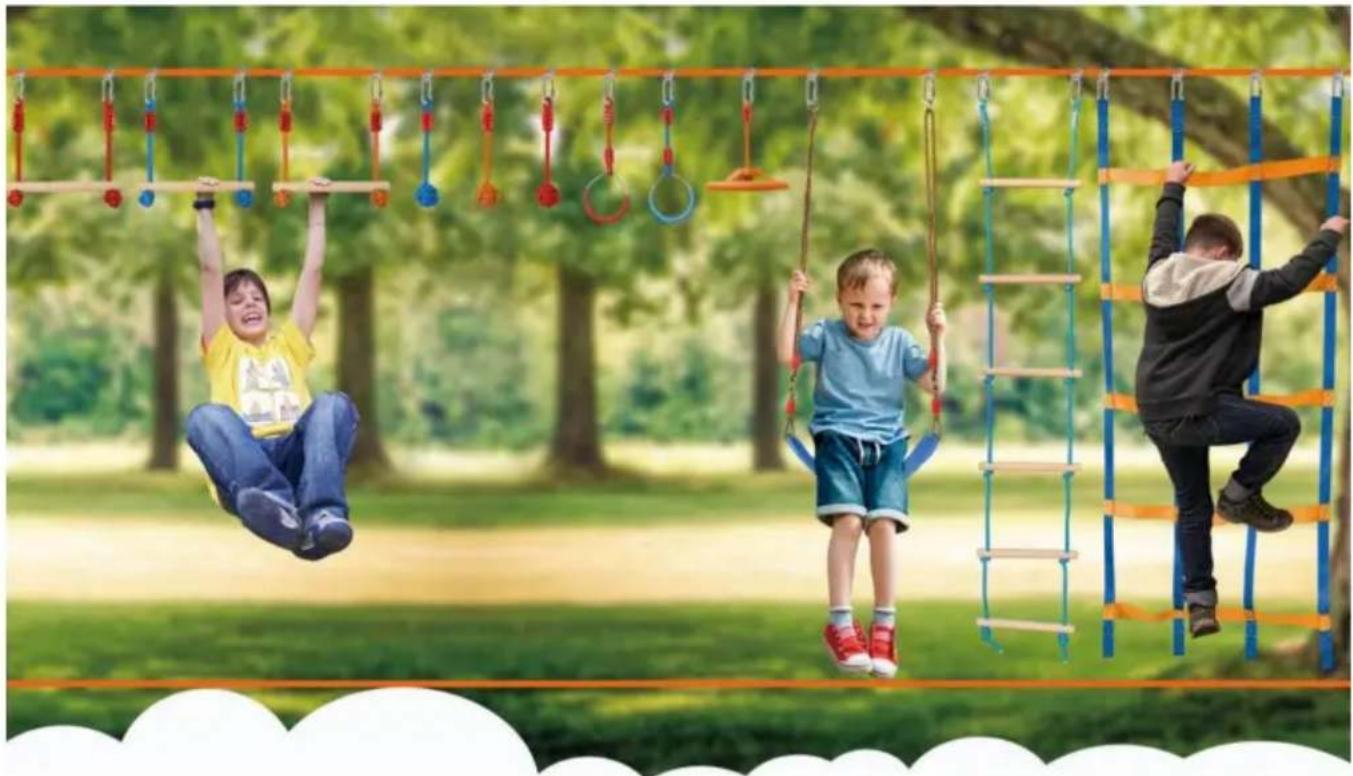
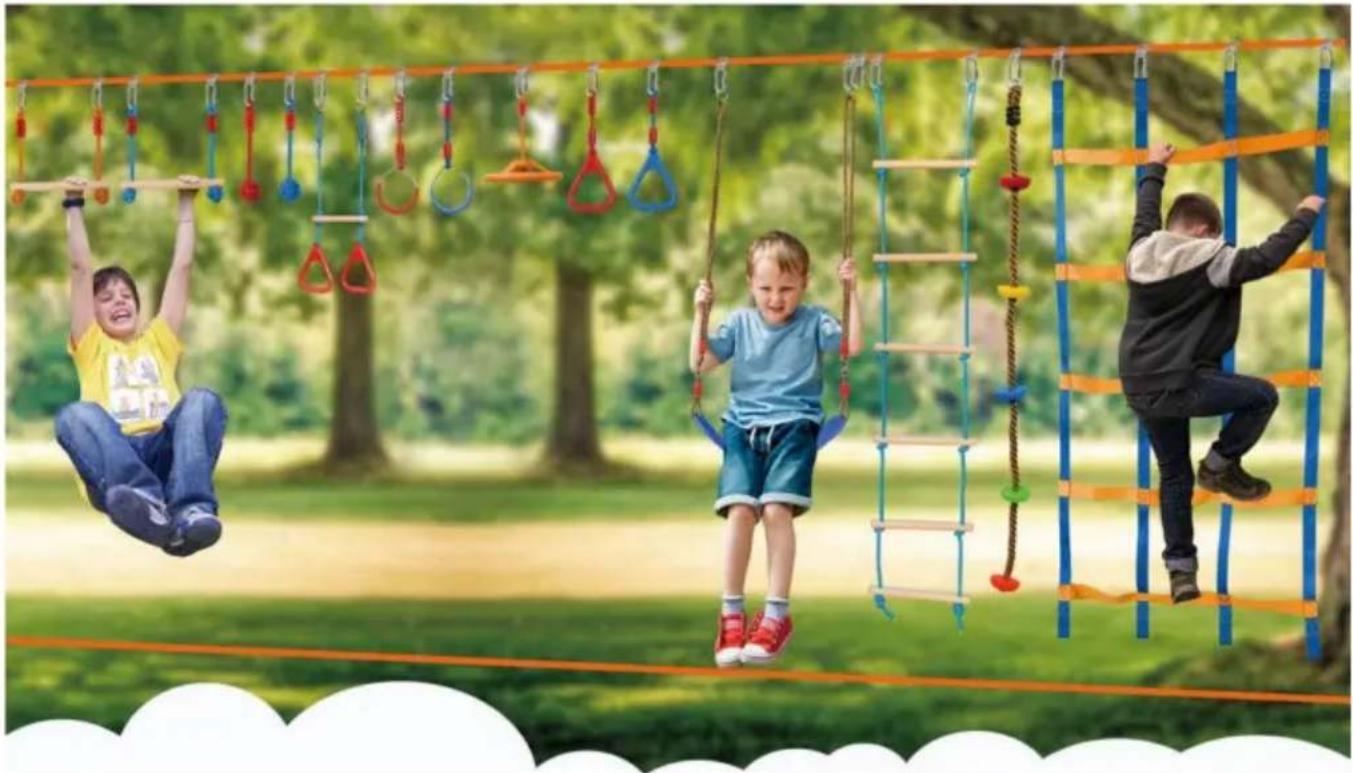
| Included accessories | 1 rope ladder, 1 soft panel swing, 1 climbing net, 3 monkey bars, 3 monkey knots, 1 spinning wheel, 4 tree protectors, 1 ratchet protection sleeve, 1 carrying bag |
| Usage | Indoor or outdoor (between two trees or poles) |
| Recommended age | From 6 years (with adult supervision) |
| Maintenance and cleaning | Wipe with a soft dry cloth. Do not use any abrasive cleaners. Keep dry after cleaning. Rinse with clean water if necessary. |
| Safety instructions | Read the manual before use. Inspect before each use. Do not use if fatigued or under influence. Keep small parts out of reach of children during assembly. |
| Spare parts and repairability | Parts available via Vevor technical support (www.vevor.com/support). The product is not designed to be repaired by the user. |
| General information | Made in China. Imported by Vevor. Electronic warranty available on the website. |
| Package dimensions | Approximately 60 x 40 x 30 cm (estimated) |
| Package weight | Approximately 10 kg (estimated) |
Frequently Asked Questions - PR-010-50 Vevor
User questions about PR-010-50 Vevor
0 question about this device. Answer the ones you know or ask your own.
Ask a new question about this device
Download the instructions for your Power tool in PDF format for free! Find your manual PR-010-50 - Vevor and take your electronic device back in hand. On this page are published all the documents necessary for the use of your device. PR-010-50 by Vevor.
USER MANUAL PR-010-50 Vevor
Technical Support and E-Warranty Certificate www.vevor.com/support
NINJA LINE/SLACK LINE KIT
MODEL: PR-012-50/PR-010-50/PR-012-56/PR-014-60/PR-012-65/PR-03-60
We continue to be committed to providing you with tools at competitive prices. "Save Half", "Half Price", or any other similar expressions used by us only represent savings you might benefit from buying certain tools with us compared to top brands, and does not necessarily mean to cover all categories of tools offered. We kindly remind you to verify carefully when placing an order with us that you are actually saving half in comparison with the top major brands.
MODEL: PR-012-50/PR-010-50/PR-012-56/
PR-014-60/PR-012-65/PR-03-60
NEED HELP? CONTACT US!
Have product questions? Need technical support? Please feel free to contact us:
Technical Support and E-Warranty Certificate www.vevor.com/support
This is the original instruction. Please read all manual instructions carefully before operating. VEVOR reserves the right to interpret the user manual. The appearance of the product shall be subject to the product you received. Please forgive us that we won't inform you of any technology or software updates on our product.
 | Warning-To reduce the risk of injury, user must read instructions manual carefully. |
 | Be careful to pinch your hands. |
SAFETY WARNINGS AND PRECAUTIONS
Thank you for using this product. In order to ensure that you can operate the machine correctly, read this instruction carefully before operation and keep it properly for future reference. Please be sure to follow the precautions and safety rules on this page to ensure your safe use. The manual will outline safety warnings and precautions, operating, maintenance, and cleaning. The warnings and instructions reviewed in the manual cannot cover all possible conditions and situations that may occur. Caution and common sense are not built into this product, since we expect that the users will comply with these codes.
Please read ALL the instructions before using your machine.
- Assembly needs to follow these instructions. Incorrect assembly can create a hazard. Wear heavy-duty work gloves during assembly.
- Do not assemble when tired or when under the influence of alcohol, drugs, or medication.
- Keep the assembly area clean and well-lit.
- Inspect before every use. Do not use it if parts are loose or damaged.
WARNING:
- This product contains small parts. If swallowed, it will pose a choking hazard. Keep these small parts away from children when assembling!
TIPS: Before installation, the packaging can be laid flat on the ground, and the product placed on the packaging for assembly to protect the process. About this item.
Product related parameters
| Model | PR-012-50 | PR-010-50 | PR-012-56 | PR-014-60 | PR-012-65 | PR-03-60 |
| Ribbon specifications | 50FT | 50FT | 56FT | 60FT | 65FT | 60FT |
| Six layer rope ladder | 1 | 1 | 1 | 1 | 1 | |
| Soft board swing | 1 | 1 | 1 | 1 | 1 | |
| Climbing the web | 1 | 1 | 1 | 1 | 1 | |
| Climbing rope | / | / | / | 1 | / | |
| Kuchu buranko | 1 | / | / | 1 | 1 | |
| Gymnastic Triangle Ring | 1 | / | / | 2 | 1 | |
| Monkey pole | 2 | 3 | 3 | 2 | 2 | |
| Monkey fist | 2 | 3 | 3 | 2 | 2 | |
| Gymnastic Circle | 2 | / | 2 | 2 | 2 | |
| Rotating wheel | 1 | 1 | 1 | 1 | 1 | |
| Total quantity | 12 | 10 | 12 | 14 | 12 | / |
PR-012-50
Installation instructions
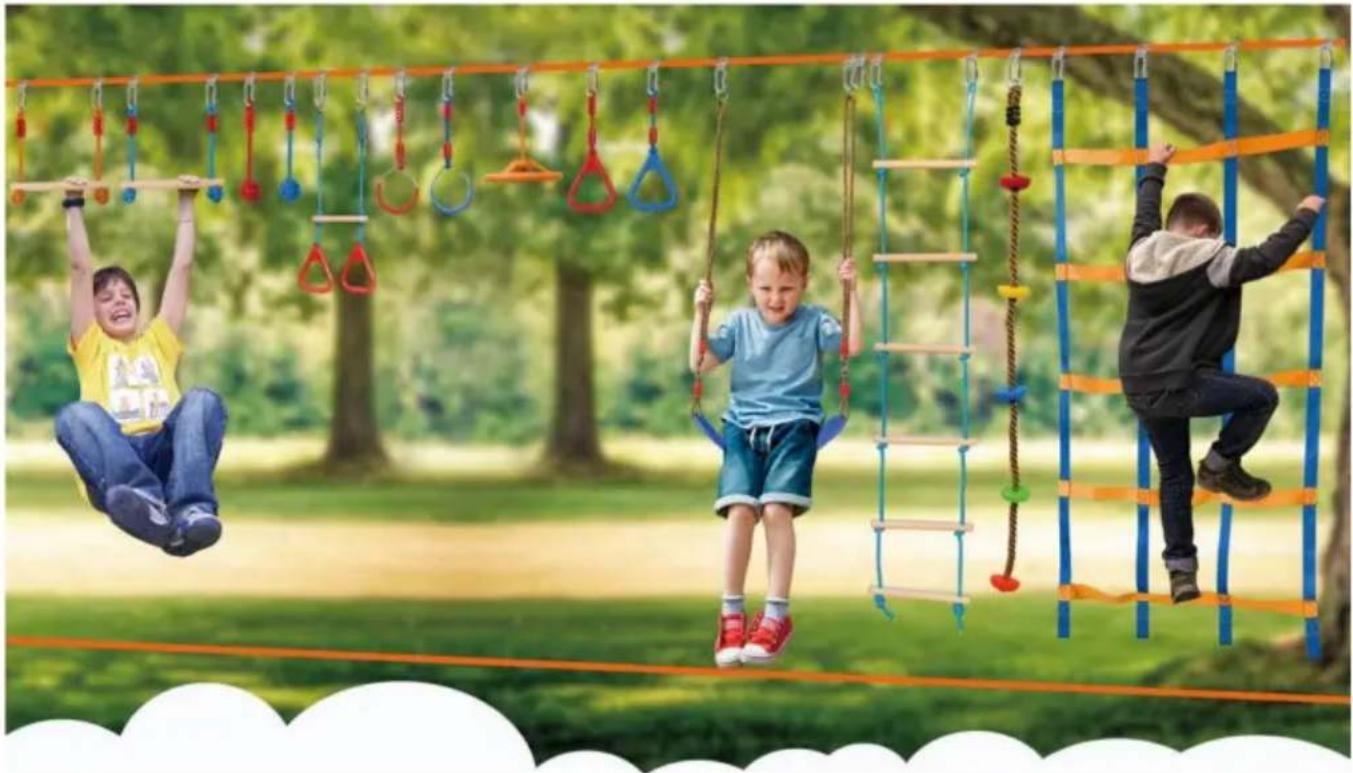
• HOW TO SET UP A NINJA OBSTACLE COURSE?
Step 1: Where to Slackline?
Picking a place to slackline is mostly based on personal preference. To set up the ninja line, two objects will be needed to tie it into place (typically trees).
MATTERS NEEDING ATTENTION:
Do not use buildings or playground structures (unless specifically built for slackline), live power/telephone poles, dead trees or stumps, trees with rot, disease, structural cracks, excessive lean, exposed roots, or trees in boggy, wet, sandy, loose soil. This is only a partial list. You must use your good judgment in determining what is not an appropriate anchor point. If in doubt, please contact us.
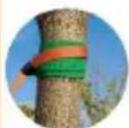
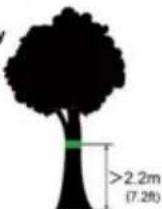
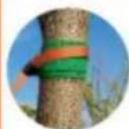
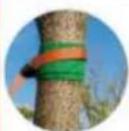
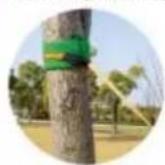
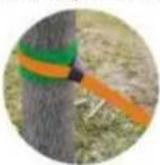
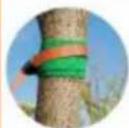
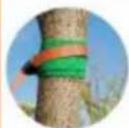
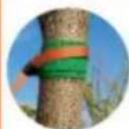
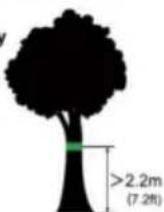
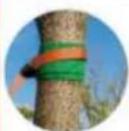
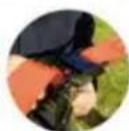
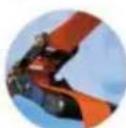
Step 2: install tree protectors. They can not only protect trees, but also reduce the wear of the slackline.
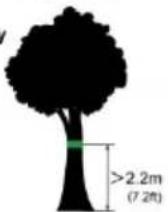
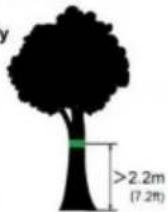
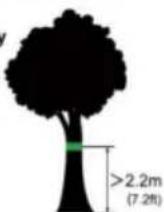
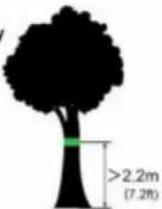
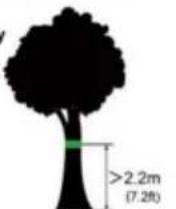
Installation height: more than 2.2m (7.2ft) is recommended
Of course, this value is not absolute. You can appropriately adjust the installation height of the slackline according to your child's height.
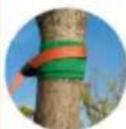

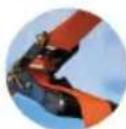
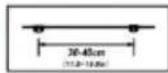
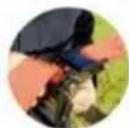
Step 3: Install the main line and ratchet line on the installed tree protectors.
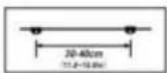
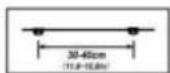
Step 4: Install the hanging buckles to the main line.
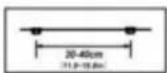
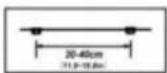
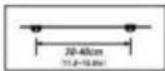
It is recommended to install a hanging buckle every 11.8-15.8in.
![graph LR A["Device with lid"] --> B["Internal Combustion"] B --> C["Backfilling"]](/content/2026/04/736592/images/6b57f498730c0e2df125d6e5296fce674fc1895ec7e1363cf8d7d4cc1e99d5ea.jpg)
If you are unable to determine the exact location during installation, you can straighten the main line and put it on the ground. Then measure with a tape measure and mark on the main line with a marker pen.
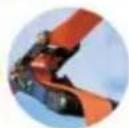
Step 5: Use the ratchet to tighten the main line of the slackline.
Tip: if you need to adjust the position of your hanging buckles, you must loosen the ratchet line before adjustment. Because the friction between the buckles and the main line is very large when the main line is tightened, you can't adjust the position of the hanging buckles.
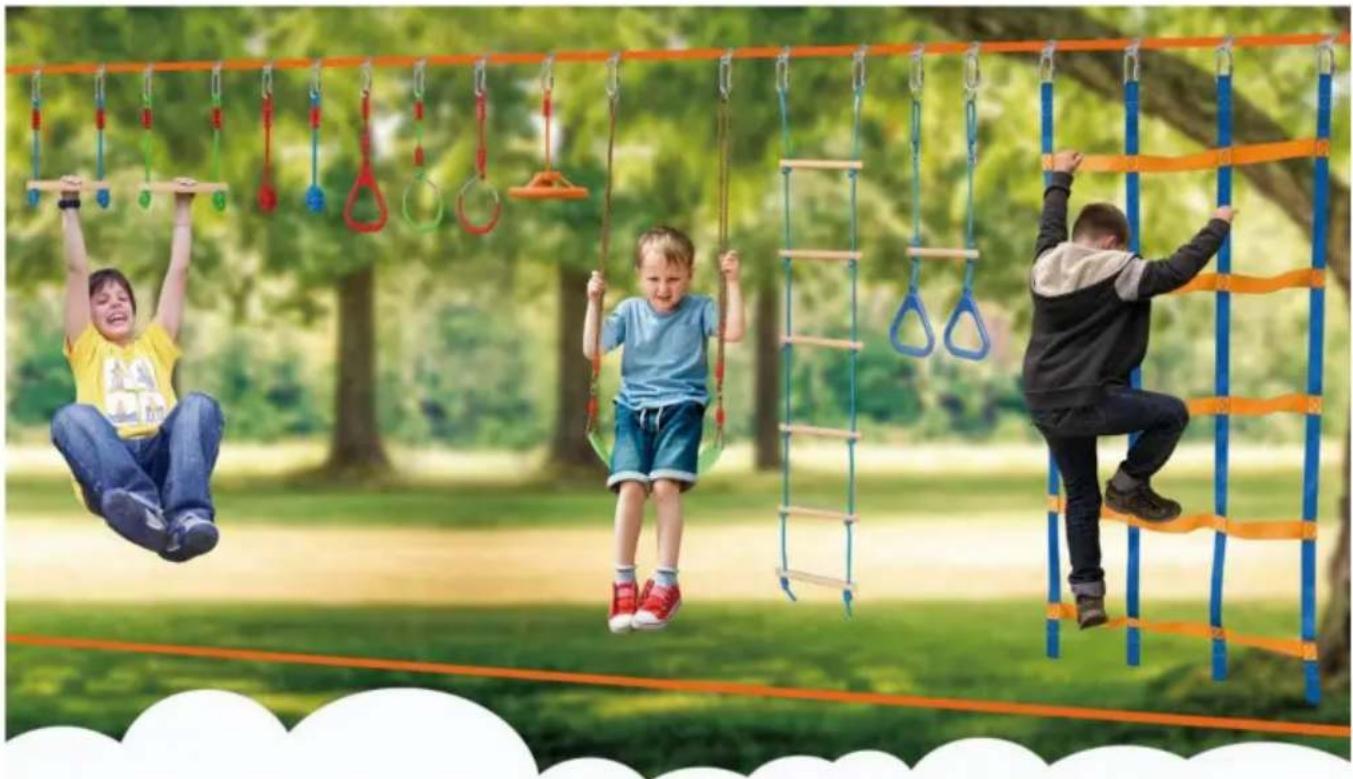
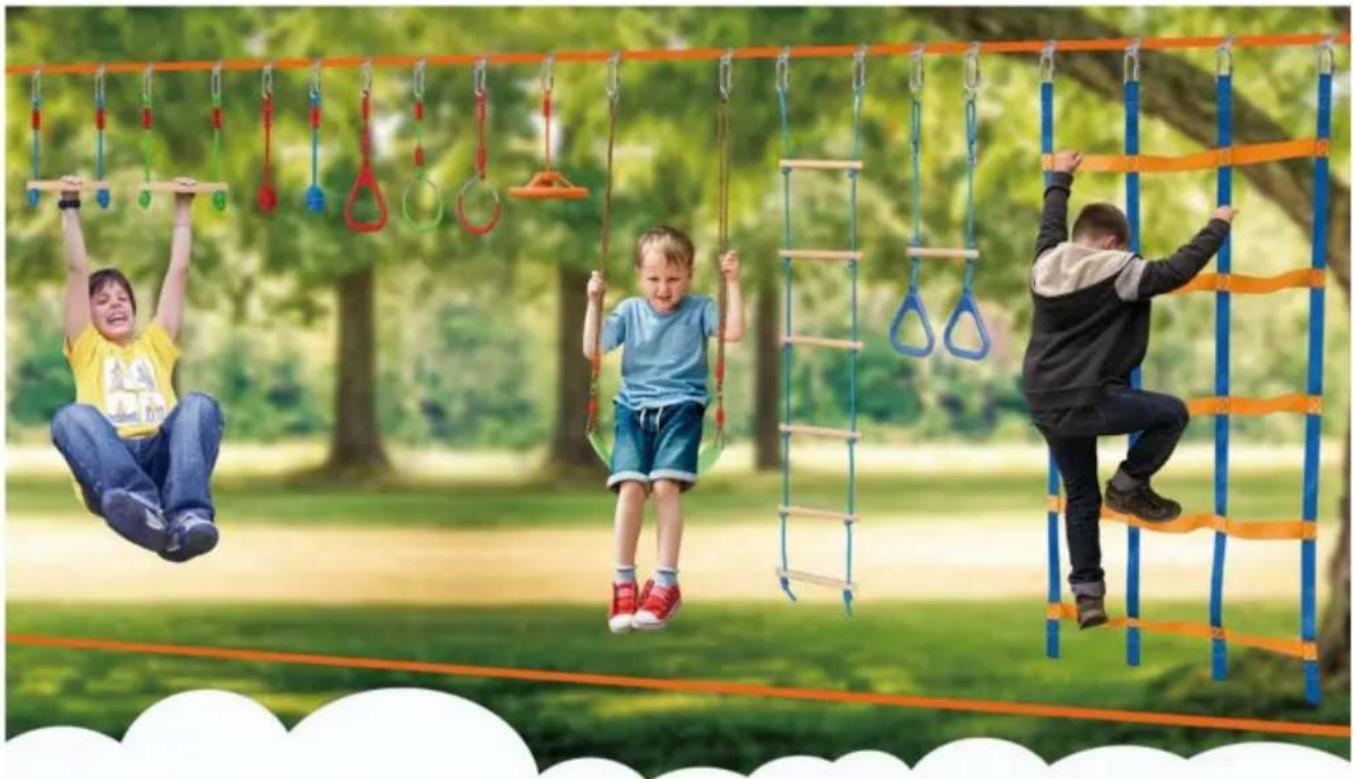
Step 6: Use contact buckles to hang all accessories on the hanging buckle and tighten it.
Please note that after installing the accessories, you need to test their reliability. We sincerely hope you enjoy your ninja slackline kit as much as possible. Have fun!
• HOW TO USE THE RATCHET LINE
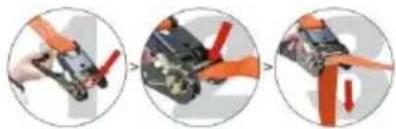
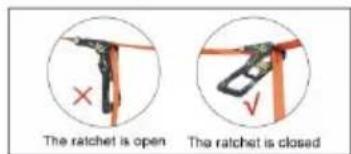
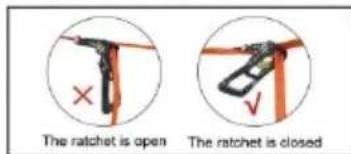
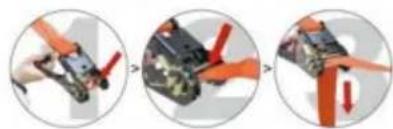
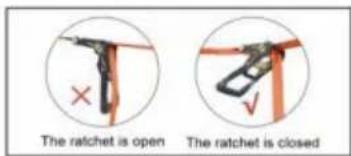
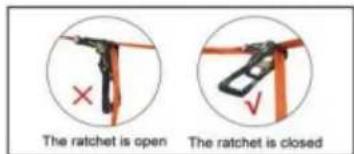
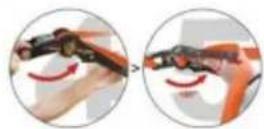
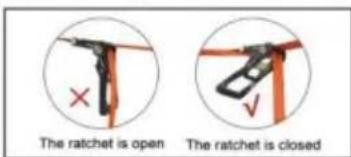
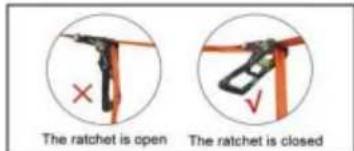
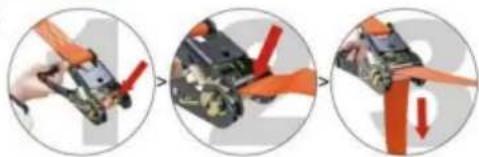
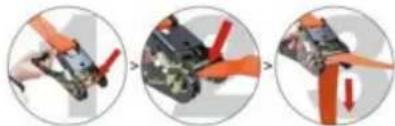
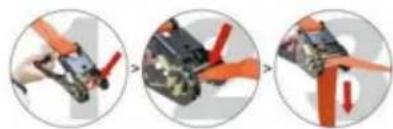
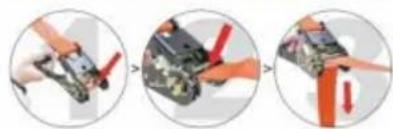
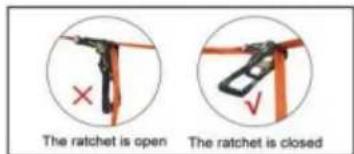
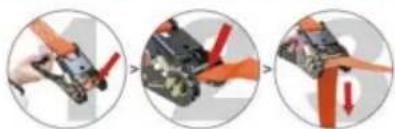
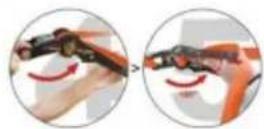
- First, close the ratchet and thread the webbing through the upper hole in the middle of the ratchet. If the position of the hole is not above, it can be adjusted to the top by opening and closing the ratchet.
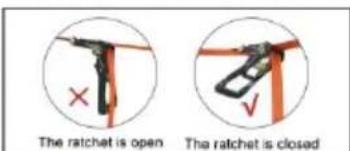
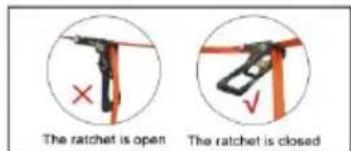
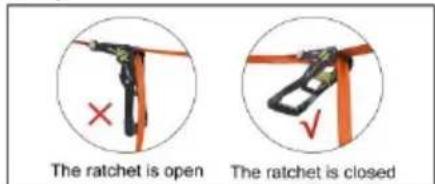
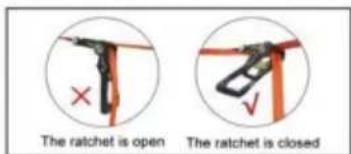
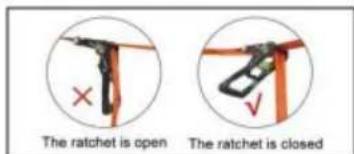
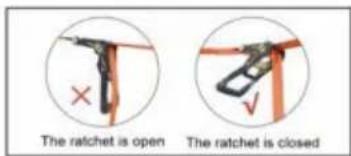
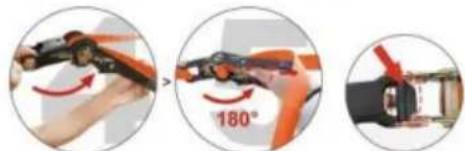
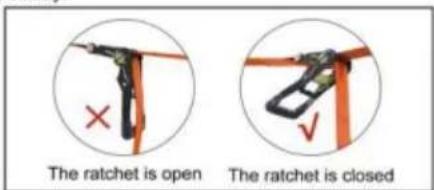
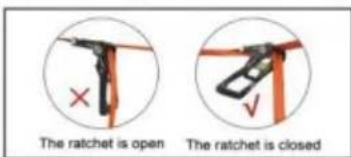
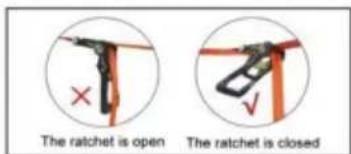
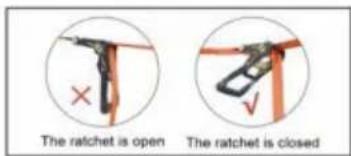
- Pull the webbing down until it is as tight as possible. Then tighten the webbing with one hand and hold the handle of the ratchet with the other hand. Tighten the webbing by continuously opening and closing the ratchet until you can't pull the handle of the ratchet. Note: please make sure your ratchet is closed when it is finally tightened.
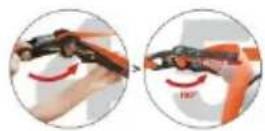
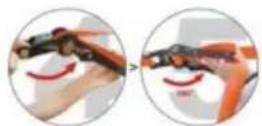
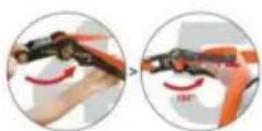
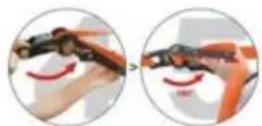
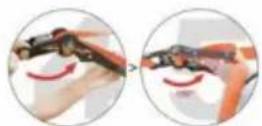
- When you are ready to stow the slackline kit, you can pull the switch marked in the figure outward and open the handle of the ratchet to about 180° at the same time. After hearing the "bang", you can pull the webbing out of the ratchet and put it away.
Technical Support and E-Warranty Certificate www.vevor.com/support
PR-010-50
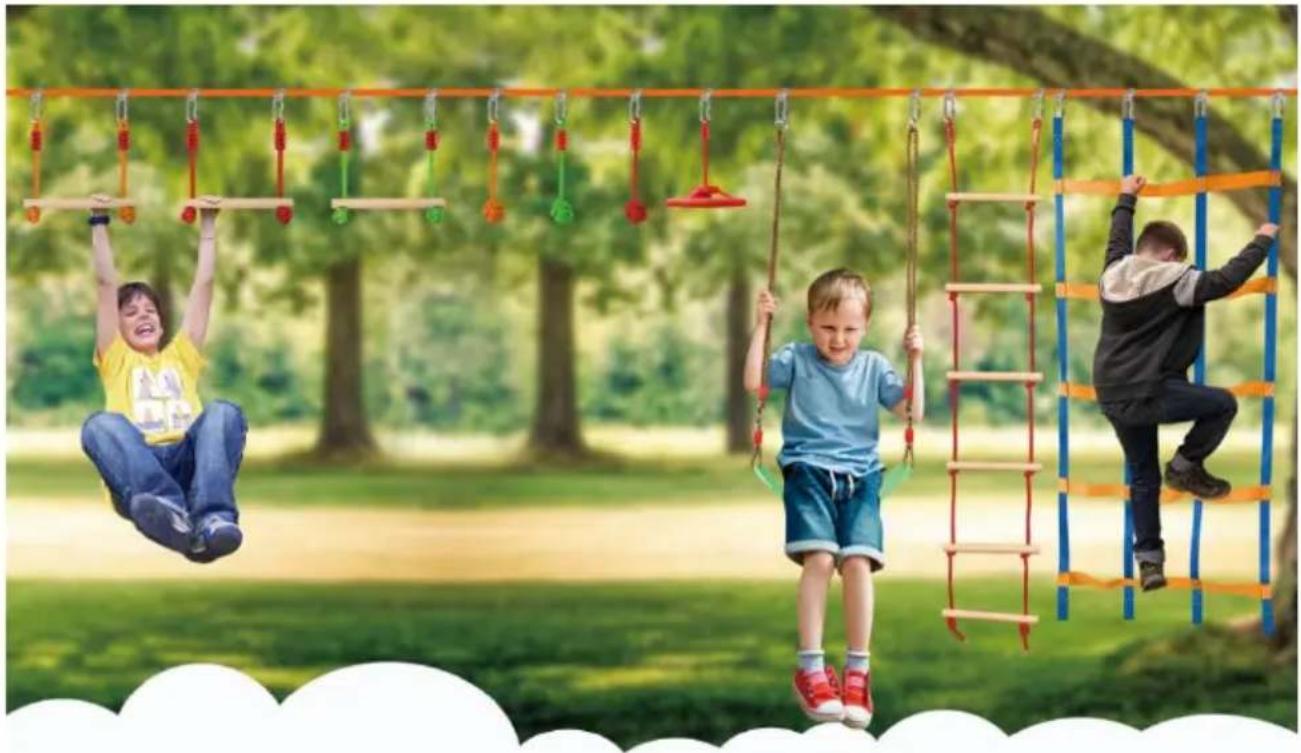
Installation instructions
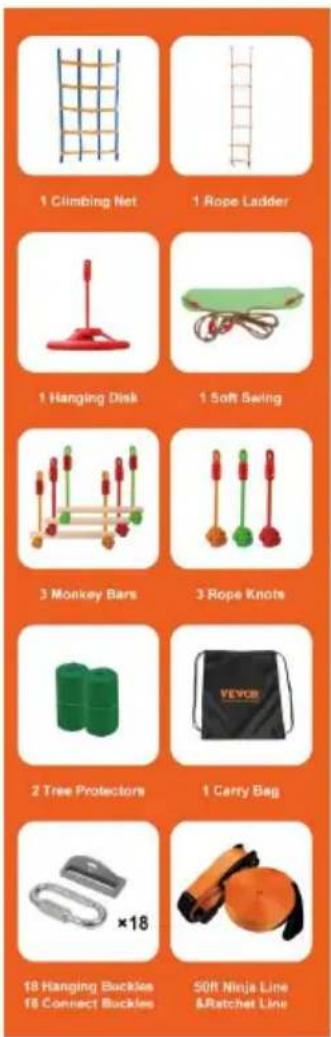
• HOW TO SET UP A NINJA OBSTACLE COURSE?
Step 1: Where to Slackline?
Picking a place to slackline is mostly based on personal preference. To set up the ninja line, two objects will be needed to tie it into place (typically trees).
MATTERS NEEDING ATTENTION:
Do not use buildings or playground structures (unless specifically built for slackline), live power/telephone poles, dead trees or stumps, trees with rot, disease, structural cracks, excessive lean, exposed roots, or trees in boggy, wet, sandy, loose soil. This is only a partial list. You must use your good judgment in determining what is not an appropriate anchor point. If in doubt, please contact us.
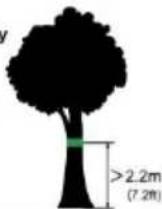
Step 2: Install tree protectors. They not only protect trees, but also reduce the wear of the slackline.
Installation height: more than 2.2m (7.2ft) is recommended.
Of course, this value is not absolute. You can appropriately adjust the installation height of the slackline according to your child's height.
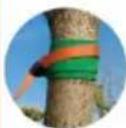
Step 3: Install the main line and ratchet line on the installed tree protectors.
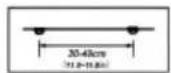
Step 4: Install the hanging buckles to the main line.
It is recommended to install a hanging buckle every 11.8-15.8in.
![graph LR A["Device with sensor"] --> B["Valve with red arrows"] B --> C["Belt drive mechanism"]](/content/2026/04/736592/images/6fd7e88b7d23146a009df07204abff5984efcc857686aa1e715180bcb2364bf9.jpg)
If you are unable to determine the exact location during installation, you can straighten the main line and put it on the ground. Then measure with a tape measure and mark on the main line with a marker pen.
Step 5: Use the ratchet to tighten the main line of the slackline.
Tip: If you need to adjust the position of your hanging buckles, you must loosen the ratchet line before adjustment. Because the friction between the buckles and the main line is very large when the main line is tightened, you can't adjust the position of the hanging buckles.
Step 6: Use contact buckles to hang all accessories on the hanging buckle and tighten it.
Please note that after installing the accessories, you need to test their reliability. We sincerely hope you enjoy your ninja slackline kit as much as possible. Have fun!
• HOW TO USE THE RATCHET LINE
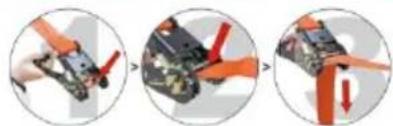
- First, close the ratchet and thread the webbing through the upper hole in the middle of the ratchet. If the position of the hole is not above, it can be adjusted to the top by opening and closing the ratchet.
- Pull the webbing down until it is as tight as possible. Then tighten the webbing with one hand and hold the handle of the ratchet with the other hand. Tighten the webbing by continuously opening and closing the ratchet until you can't pull the handle of the ratchet. Note: please make sure your ratchet is closed when it is finally tightened.
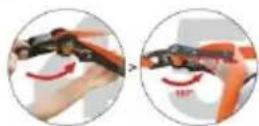
- When you are ready to slow the slackline kit, you can pull the switch marked in the figure outward and open the handle of the ratchet to about 180° at the same time. After hearing the "bang", you can pull the webbing out of the ratchet and put it away.
Technical Support and E-Warranty
Certificate www.vevor.com/support
PR-012-56
Installation instructions
• HOW TO SET UP A NINJA OBSTACLE COURSE?
Step 1: Where to Slackline?
Picking a place to slackline is mostly based on personal preference. To set up the ninja line, two objects will be needed to tie it into place (typically trees).
MATTERS NEEDING ATTENTION:
Do not use buildings or playground structures (unless specifically built for slackline), live power/telephone poles, dead trees or stumps, trees with rot, disease, structural cracks, excessive lean, exposed roots, or trees in boggy, wet, sandy, loose soil. This is only a partial list. You must use your good judgment in determining what is not an appropriate anchor point. If in doubt, please contact us.
Step 2: Install tree protectors. They not only protect the trees but also reduce wear on the slackline.
Installation height: more than 2.2m (7.2ft) is recommended.
Of course, this value is not absolute. You can adjust the installation height of the slackline appropriately according to your child's height.

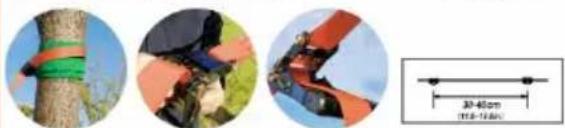
Step 3: Install the main line and ratchet line on the installed tree protectors.
Step 4: Install the hanging buckles onto the main line.
It is recommended to install a hanging buckle every 11.8-15.8 inches.
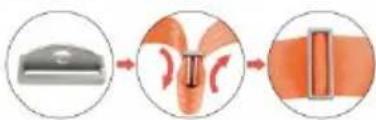
If you are unable to determine the exact location during installation, you can straighten the main line and place it on the ground. Then measure with a tape measure and mark the main line with a marker pen.
Step 5: Use the ratchet to tighten the main line of the slackline.
Tip: If you need to adjust the position of your hanging buckles, you must loosen the ratchet line before adjustment. Because the friction between the buckles and the main line is very large when the main line is tightened, you cannot adjust the position of the hanging buckles.
Step 6: Use contact buckles to hang all accessories on the hanging buckle and tighten them.
Please note that after installing the accessories, you need to test their reliability. We sincerely hope you enjoy your ninja slackline kit as much as possible. Have fun!
• HOW TO USE THE RATCHET LINE
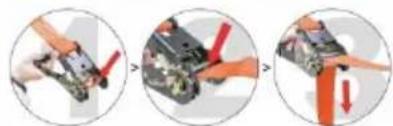
- First, close the ratchet, and thread the webbing through the upper hole in the middle of the ratchet. If the position of the hole is not above, it can be adjusted to the top by opening and closing the ratchet.
- Pull the webbing down until it is as tight as possible. Then tighten the webbing with one hand and hold the handle of the ratchet with the other hand. Tighten the webbing by continuously opening and closing the ratchet until you can't pull the handle of the ratchet. Note: please make sure your ratchet is closed when it is finally tightened.
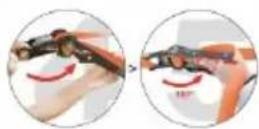
- When you are ready to stow the slackline kit, you can pull the switch marked in the figure outward and open the handle of the ratchet to about 180° at the same time. After hearing the "bang", you can pull the webbing out of the ratchet and put it away.
Technical Support and E-Warranty Certificate www.vevor.com/support
PR-014-60
Installation instructions
• HOW TO SET UP A NINJA OBSTACLE COURSE?
Step 1: Where to Slackline?
Picking a place to slackline is mostly based on personal preference. To set up the ninja line, two objects will be needed to tie it into place (typically trees).
MATTERS NEEDING ATTENTION:
Do not use buildings or playground structures (unless specifically built for slackline), live power/telephone poles, dead trees or stumps, trees with rot, disease, structural cracks, excessive lean, exposed roots, or trees in boggy, wet, sandy, loose soil. This is only a partial list. You must use your good judgment in determining what is not an appropriate anchor point. If in doubt, please contact us.
Step 2: Install tree protectors. It can not only protect trees, but also reduce the wear of slackline.
Installation height: more than 2.2m (7.2ft) is recommended.
Of course, this value is not absolute. You can appropriately adjust the installation height of the slackline according to your child's height.

Step 3: Install the main line and ratchet line on the installed tree protectors.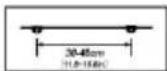
Step 4: Install the hanging buckles to the main line.
It is recommended to install a hanging buckle every 11.8-15.8in.
![graph LR A["Device with lid"] --> B["Internal Combustion"] B --> C["Final Assembly with Red Arrow"]](/content/2026/04/736592/images/8f9b0fc2ef4e6de6c30910a645cfcc1d393a4a235a6f82cbbb9c03b17604b823.jpg)
If you are unable to determine the exact location during installation, you can straighten the main line and put it on the ground. Then measure with a tape measure and mark on the main line with a marker pen.
Step 5: Use the ratchet to tighten the main line of the slackline.
Tip: if you need to adjust the position of your hanging buckles, you must loosen the ratchet line before adjustment. Because the friction between the buckles and the main line is very large when the main line is tightened, you can't adjust the position of the hanging buckles.
Step 6: Use contact buckles to hang all accessories on the hanging buckle and tighten it.
Please note that after installing the accessories, you need to test their reliability. We sincerely hope you enjoy your ninja slackline kit as much as possible. Have fun!
• HOW TO USE THE RATCHET LINE
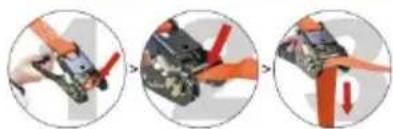
- First, close the ratchet, and thread the webbing through the upper hole in the middle of the ratchet. If the position of the hole is not above, it can be adjusted to the top by opening and closing the ratchet.
- Pull the webbing down until it is as tight as possible. Then tighten the webbing with one hand and hold the handle of the ratchet with the other hand. Tighten the webbing by continuously opening and closing the ratchet until you can't pull the handle of the ratchet. Note: please make sure your ratchet is closed when it is finally tightened.
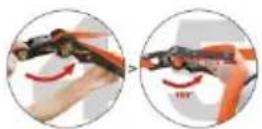
- When you are ready to stow the slackline kit, you can pull the switch marked in the figure outward and open the handle of the ratchet to about 180° at the same time. After hearing the "bang", you can pull the webbing out of the ratchet and put it away.
Installation instructions
• HOW TO SET UP A NINJA OBSTACLE COURSE?
Step 1: Where to Slackline?
Picking a place to slackline is mostly based on personal preference. To set up the ninja line, two objects will be needed to tie it into place (typically trees).
MATTERS NEEDING ATTENTION:
Do not use buildings or playground structures (unless specifically built for slackline), live power/telephone poles, dead trees or stumps, trees with rot, disease, structural cracks, excessive lean, exposed roots, or trees in boggy, wet, sandy, loose soil. This is only a partial list. You must use your good judgment in determining what is not an appropriate anchor point. If in doubt, please contact us.
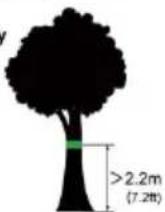
Step 2: Install tree protectors. It can not only protect trees, but also reduce the wear of slackline.
Installation height: more than 2.2m(7.2ft) is recommended
Of course, this value is not absolute. You can appropriately adjust the installation height of the slackline according to your child's height.
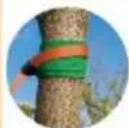
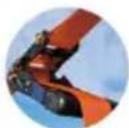
Step 3: Install the main line and ratchet line on the installed tree protectors.
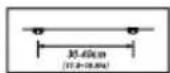
Step 4: Install the hanging buckles to the main line.
It is recommended to install a hanging buckle every 11.8-15.8in.
![graph LR A["Device"] --> B["Valve Mechanism"] B --> C["Belt Drive"]](/content/2026/04/736592/images/f8fabe08fed4c8dc271a6d795e4e93913af56fd2abba9ecf305e092751d44482.jpg)
If you are unable to determine the exact location during installation, you can straighten the main line and place it on the ground. Then measure with a tape measure and mark the main line with a marker pen.
Step 5: Use the ratchet to tighten the main line of the slackline.
Tip: If you need to adjust the position of your hanging buckles, you must loosen the ratchet line before adjustment. Because the friction between the buckles and the main line is very large when the main line is tightened, you cannot adjust the position of the hanging buckles.
Step 6: Use contact buckles to hang all accessories on the hanging buckle and tighten it.
Please note that after installing the accessories, you need to test their reliability. We sincerely hope you enjoy your ninja slackline kit as much as possible. Have fun!
• HOW TO USE THE RATCHET LINE
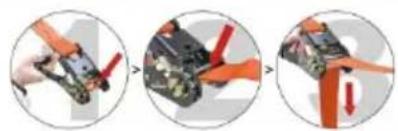
- First, close the ratchet, and thread the webbing through the upper hole in the middle of the ratchet. If the position of the hole is not above, it can be adjusted to the top by opening and closing the ratchet.
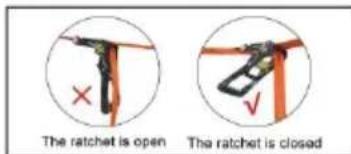
- Pull the webbing down until it is as tight as possible. Then tighten the webbing with one hand and hold the handle of the ratchet with the other hand. Tighten the webbing by continuously opening and closing the ratchet until you cannot pull the handle of the ratchet. Note: Please make sure your ratchet is closed when it is finally tightened.
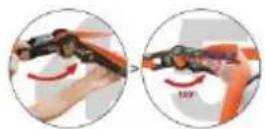
- When you are ready to slow the slackline kit, you can pull the switch marked in the figure outward and open the handle of the ratchet to about 180° at the same time. After hearing the "bang", you can pull the webbing out of the ratchet and put it away.
Technical Support and E-Warranty Certificate www.vevor.com/support
PR-03-60

Installation instructions
• HOW TO SET UP A SLACKLINE?
Step 1: Where to Slackline?
Picking a place to slackline is mostly based on personal preference. To set up the ninjaline, two objects will be needed to tie it into place (typically trees).
MATTERS NEEDING ATTENTION:
Do not use buildings or playground structures (unless specifically built for slackline), live power/telephone poles, dead trees or stumps, trees with rot, disease, structural cracks, excessive lean, exposed roots, or trees in boggy, wet, sandy, loose soil. This is only a partial list. You must use your good judgment in determining what is not an appropriate anchor point. If in doubt, contact us.
Step 2: Install tree protectors. They not only protect trees but also reduce the wear of the slackline.
Step 3: Attach the main line to a tree or solid post.
Installation height: Generally, we recommend that the installation height difference of two slacklines be slightly less than: your child's height + half of the length of the balance belt, and the slackline at the bottom is about 23.6in from the ground. Of course, you can adjust the height according to your actual situation.
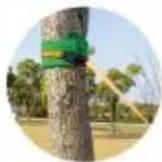
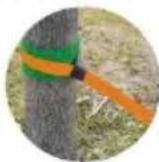
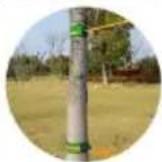
Step 4: Attach the ratchet line to another tree or solid post. Put the ratchet protector on first. Then use the ratchet to tighten the main line of the slackline. Cover the protective sleeve onto the ratchet again. (The protective sleeve is used for 2-inch slackline.)
Step 5: How to use the slackline ratchet?
We introduced the use of the ratchet on the right.
Please note that after installing the accessories, you need to test their reliability. We sincerely hope you enjoy your slackline kit as much as possible. Have fun!
• HOW TO USE THE RATCHET LINE?
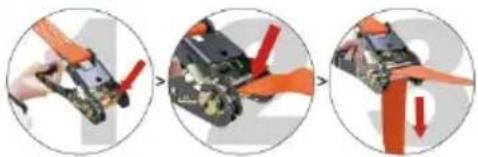
- First, close the ratchet, and thread the webbing through the upper hole in the middle of the ratchet. If the position of the hole is not above, it can be adjusted to the top by opening and closing the ratchet.
- Pull the webbing down until it is as tight as possible. Then tighten the webbing with one hand and hold the handle of the ratchet with the other hand. Tighten the webbing by continuously opening and closing the ratchet until you can't pull the handle of the ratchet. Note: please make sure your ratchet is closed when it is finally tightened.
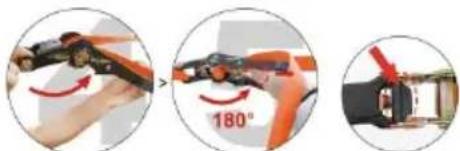
- When you are ready to stow the slackline kit, you can pull the switch marked in the figure outward and open the handle of the ratchet to about 180 degrees at the same time. After hearing the "bang", you can pull the webbing out of the ratchet and put it away.
Technical Support and E-Warranty
Certificate www.vevor.com/support
CLEANING AND STORAGE
- Wipe with a soft, dry cloth. Never use an abrasive cleanser or heat. Wipe with clean water. Keep product dry after cleaning.
- Children are not allowed to wipe the product to avoid tipping and injuries.
- After the product is disassembled, please put the parts and accessories together.
Manufacturer: Shanghaimuxinmuyeyouxiangongsi
Address: Shuangchenglu 803nong11hao1602A-1609shi, baoshanqu, shanghai 200000 CN.
Imported to AUS: SIHAO PTY LTD. 1 ROKEVA STREETEASTWOOD NSW 2122 Australia
Imported to USA: Sanven Technology Ltd. Suite 250, 9166 Anaheim Place, Rancho Cucamonga, CA 91730
| UK | REP |
YH CONSULTING LIMITED.
C/O YH Consulting Limited Office 147, Cent House, London Road, Staines-upon-Thames, Surrey, TW18 4AX
| EC | REP |
E-CrossStu GmbH
Mainzer Landstr. 69, 60329 Frankfurt am Main
Made In China
VEVOR®
TOUGH TOOLS, HALF PRICE
Technical Support and E-Warranty Certificate
www.vevor.com/support
VEVOR®
TOUGH TOOLS, HALF PRICE
NEED HELP? CONTACT US!
• HOW TO SET UP A NINJA OBSTACLE COURSE?
Step 1: Where to Slackline?
Picking a place to slackline is mostly based on personal preference. To set up the ninja line, two objects will be needed to tie it into place (typically trees).
MATTERS NEEDING ATTENTION:
Do not use buildings or playground structures (unless specifically built for slackline), live power/telephone poles, dead trees or stumps, trees with rot, disease, structural cracks, excessive lean, exposed roots, or trees in boggy, wet, sandy, loose soil. This is only a partial list. You must use your good judgment in determining what is not an appropriate anchor point. If in doubt, please contact us.
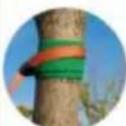
Step 2: Install tree protectors. It can not only protect trees, but also reduce the wear of slackline.
Installation height: more than 2.2m (7.2ft) is recommended.
Of course, this value is not absolute. You can adjust the installation height of the slackline appropriately according to your child's height.
Step 3: Install the main line and ratchet line on the installed tree protectors.
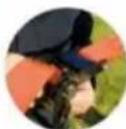
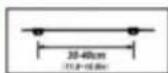
Step 4: Install the hanging buckles to the main line.
It is recommended to install a hanging buckle every 11.8-15.8in.
![graph LR A["Device Icon"] --> B["Close-up of Belt Buck"] B --> C["Close-up of Belt Buck"]](/content/2026/04/736592/images/39aaee4f9a056a0f87d1662aa98df0eeb83a9e787d1a08a7d2a631d3b096a444.jpg)
If you are unable to determine the exact location during installation, you can straighten the main line and put it on the ground. Then measure with a tape measure and mark on the main line with a marker pen.
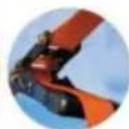
Step 5: Use the ratchet to tighten the main line of the slackline.
Tip: if you need to adjust the position of your hanging buckles, you must loosen the ratchet line before adjustment. Because the friction between the buckles and the main line is very large when the main line is tightened, you can't adjust the position of the hanging buckles.
Step 6: Use contact buckles to hang all accessories on the hanging buckle and tighten it.
Please note that after installing the accessories, you need to test their reliability. We sincerely hope you enjoy your ninja slackline kit as much as possible. Have fun!
• HOW TO USE THE RATCHET LINE
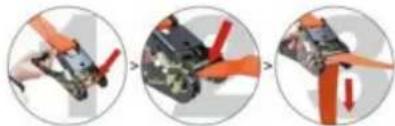
- First, close the ratchet and thread the webbing through the upper hole in the middle of the ratchet. If the position of the hole is not above, it can be adjusted to the top by opening and closing the ratchet.
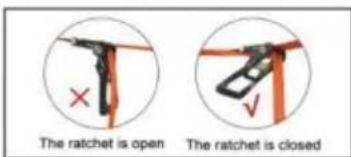
- Pull the webbing down until it is as tight as possible. Then tighten the webbing with one hand and hold the handle of the ratchet with the other hand. Tighten the webbing by continuously opening and closing the ratchet until you can't pull the handle of the ratchet. Note: please make sure your ratchet is closed when it is finally tightened.
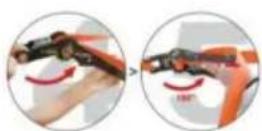
3 When you are ready to stow the slackline kit, you can pull the switch marked in the figure outward and open the handle of the ratchet to about 180° at the same time. After hearing the "bang", you can pull the webbing out of the ratchet and put it away.
Technical Support and E-Warranty Certificate www.vevor.com/support
PR-010-50
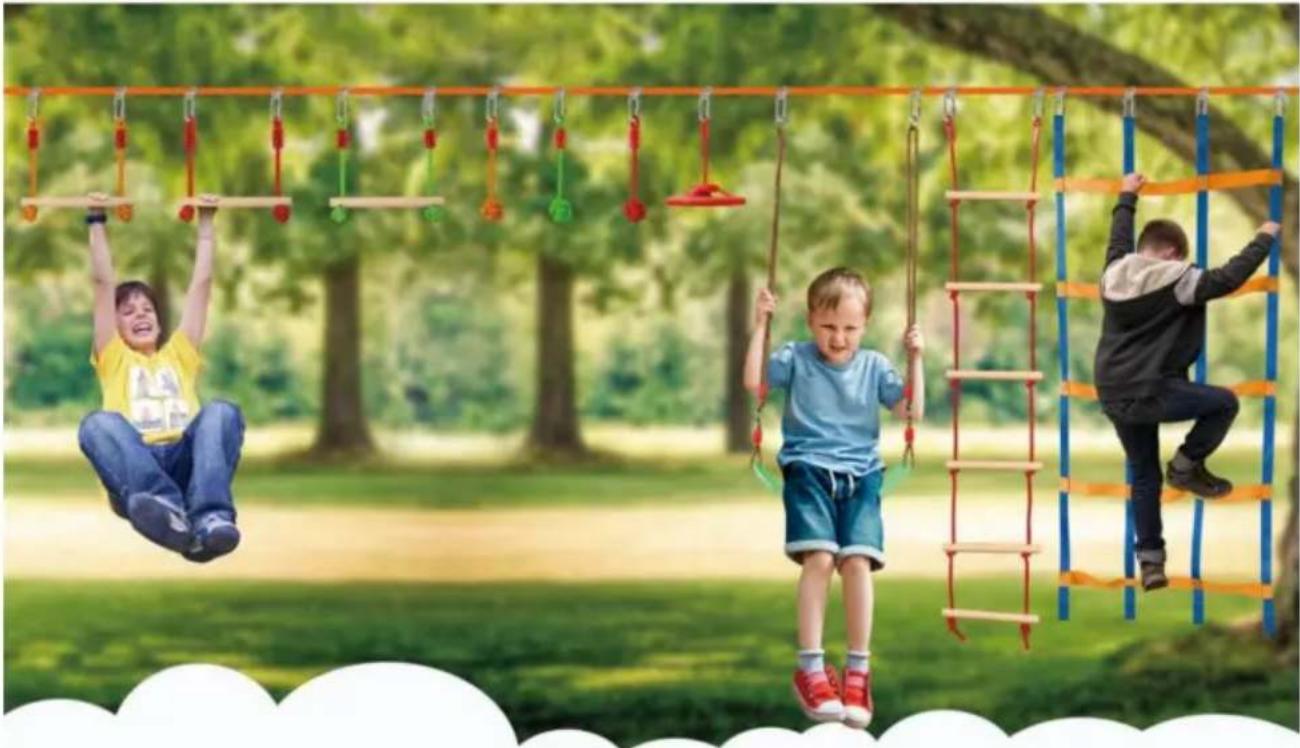
• HOW TO SET UP A NINJA OBSTACLE COURSE?
Step 1: Where to Slackline?
Picking a place to slackline is mostly based on personal preference. To set up the ninja line, two objects will be needed to tie it into place (typically trees).
MATTERS NEEDING ATTENTION:
Do not use buildings or playground structures (unless specifically built for slackline), live power/telephone poles, dead trees or stumps, trees with rot, disease, structural cracks, excessive lean, exposed roots, or trees in boggy, wet, sandy, loose soil. This is only a partial list. You must use your good judgment in determining what is not an appropriate anchor point. If in doubt, please contact us.
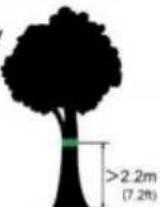
Step 2: Install tree protectors. It can not only protect trees, but also reduce the wear of slackline.
Installation height: more than 2.2m (7.2ft) is recommended
Of course, this value is not absolute. You can appropriately adjust the installation height of the slackline according to your child's height.
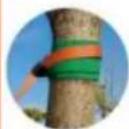
Step 3: Install the main line and ratchet line on the installed tree protectors.
Step 4: Install the hanging buckles to the main line.
It is recommended to install a hanging buckle every 11.8-15.8in.
![graph LR A["Device with sensor"] --> B["Drive with red motion arrows"] B --> C["Drive with orange belt drive"]](/content/2026/04/736592/images/12438c33522bf1f27efac9b3facd5f74ecc1bf1d99f11a12b8f3d09301e350e0.jpg)
If you are unable to determine the exact location during installation. You can straighten the main line and put it on the ground. Then measure with a tape measure and mark on the main line with a marker pen.
Step 5: Use the ratchet to tighten the main line of the slackline.
Tip: If you need to adjust the position of your hanging buckles, you must loosen the ratchet line before adjustment. Because the friction between the buckles and the main line is very large when the main line is tightened, you can't adjust the position of the hanging buckles.
Step 6: Use contact buckles to hang all accessories on the hanging buckle and tighten it.
Please note that after installing the accessories, you need to test their reliability. We sincerely hope you enjoy your ninja slackline kit as much as possible. Have fun!
• HOW TO USE THE RATCHET LINE
- First, close the ratchet and thread the webbing through the upper hole in the middle of the ratchet. If the position of the hole is not above, it can be adjusted to the top by opening and closing the ratchet.
- Pull the webbing down until it is as tight as possible. Then tighten the webbing with one hand and hold the handle of the ratchet with the other hand. Tighten the webbing by continuously opening and closing the ratchet until you can't pull the handle of the ratchet. Note: please make sure your ratchet is closed when it is finally tightened.
- When you are ready to stow the slackline kit, you can pull the switch marked in the figure outward and open the handle of the ratchet to about 180° at the same time. After hearing the "bang", you can pull the webbing out of the ratchet and put it away.
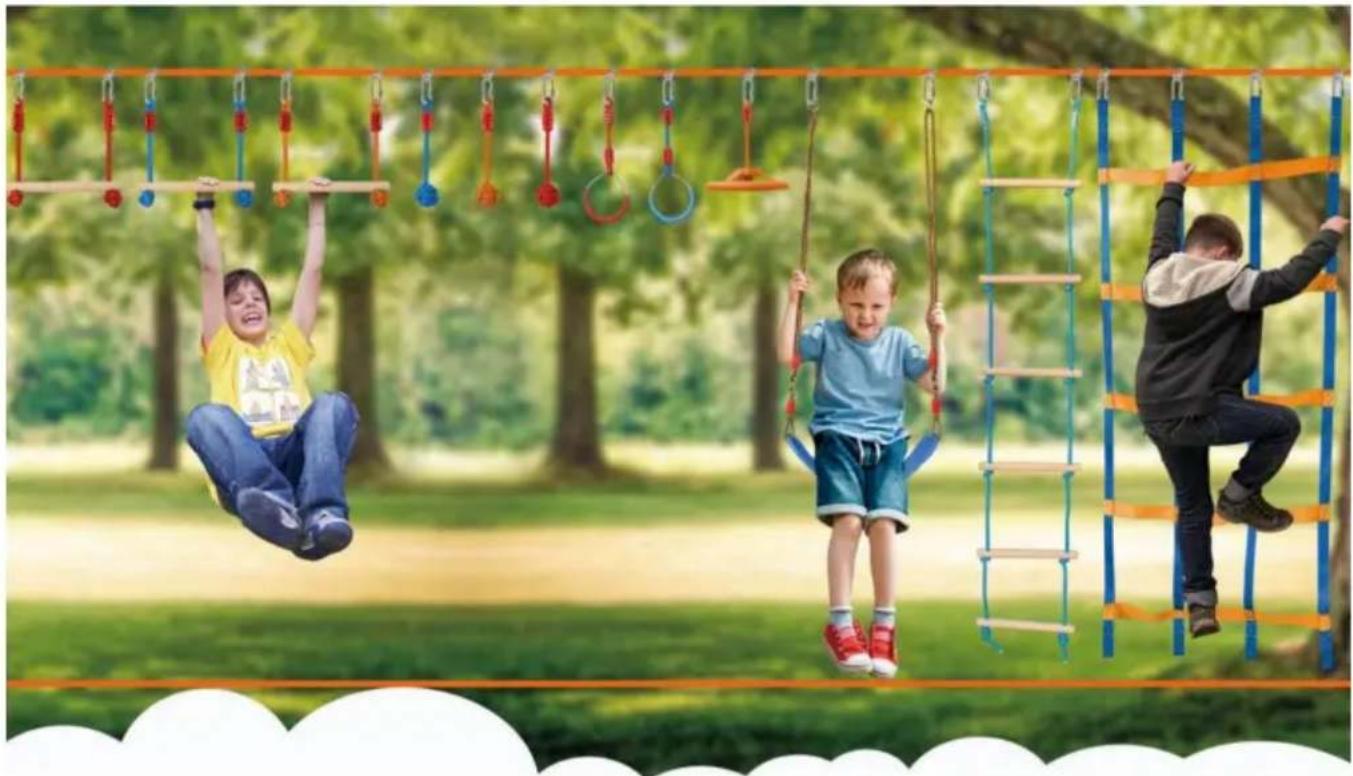
• HOW TO SET UP A NINJA OBSTACLE COURSE?
Step 1: Where to Slackline?
Picking a place to slackline is mostly based on personal preference. To set up the ninja line, two objects will be needed to tie it into place (typically trees).
MATTERS NEEDING ATTENTION:
Do not use buildings or playground structures (unless specifically built for slackline), live power/telephone poles, dead trees or stumps, trees with rot, disease, structural cracks, excessive lean, exposed roots, or trees in boggy, wet, sandy, loose soil. This is only a partial list. You must use your good judgment in determining what is not an appropriate anchor point. If in doubt, please contact us.
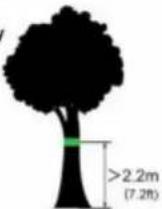
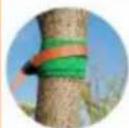
Step 2: Install tree protectors. They not only protect trees, but also reduce wear on the slackline.
Installation height: more than 2.2m (7.2ft) is recommended.
Of course, this value is not absolute. You can adjust the installation height of the slackline appropriately according to your child's height.
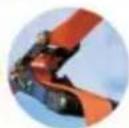
Step 3: Install the main line and ratchet line on the installed tree protectors.
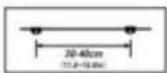
Step 4: Install the hanging buckles onto the main line.
It is recommended to install a hanging buckle every 11.8-15.8 inches.
![graph LR A["Device with sensor"] --> B["Valve with valves"] B --> C["Belt drive mechanism"]](/content/2026/04/736592/images/c241022d8adeb6e9cc3d405a3450a9983bfafeda1ff3ec511b00519cb46c6869.jpg)
If you are unable to determine the exact location during installation, you can straighten the main line and place it on the ground. Then measure with a tape measure and mark the main line with a marker pen.
Step 5: Use the ratchet to tighten the main line of the slackline.
Tip: If you need to adjust the position of your hanging buckles, you must loosen the ratchet line before adjustment. Because the friction between the buckles and the main line is very large when the main line is tightened, you cannot adjust the position of the hanging buckles.
Step 6: Use contact buckles to hang all accessories on the hanging buckle and tighten it.
Please note that after installing the accessories, you need to test their reliability. We sincerely hope you enjoy your ninja slackline kit as much as possible. Have fun!
• HOW TO USE THE RATCHET LINE
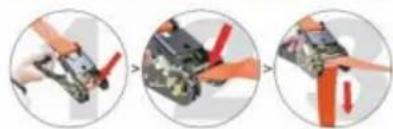
- First, close the ratchet, and thread the webbing through the upper hole in the middle of the ratchet. If the position of the hole is not above, it can be adjusted to the top by opening and closing the ratchet.
- Pull the webbing down until it is as tight as possible. Then, with one hand, tighten the webbing, and with the other hand, hold the handle of the ratchet. Tighten the webbing by continuously opening and closing the ratchet until you can no longer pull the handle. Note: make sure the ratchet is closed when it is finally tightened.
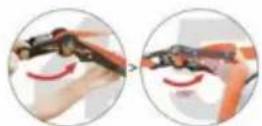
- When you are ready to stow the slackline kit, pull the switch marked in the figure outward and simultaneously open the handle of the ratchet to about 180°. After hearing a "bang", you can pull the webbing out of the ratchet and put it away.
Technical Support and E-Warranty Certificate www.vevor.com/support
PR-014-60
Step 1: Where to Slackline?
Choosing a place to slackline is mostly based on personal preference. To set up the ninja line, you will need two objects to tie it to (typically trees).
▲ MATTERS NEEDING ATTENTION:
Do not use buildings or playground structures (unless specifically built for slackline), live power/telephone poles, dead trees or stumps, trees with rot, disease, structural cracks, excessive lean, exposed roots, or trees in boggy, wet, sandy, or loose soil. This is only a partial list. You must use your good judgment in determining what is not an appropriate anchor point. If in doubt, please contact us.
Step 2: Install tree protectors. They not only protect the trees but also reduce wear on the slackline.
Installation height: more than 2.2m (7.2ft) is recommended.
Of course, this value is not absolute. You can adjust the installation height of the slackline appropriately according to your child's height.
Step 3: Install the main line and ratchet line on the installed tree protectors.
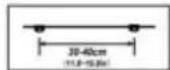
Step 4: Install the hanging buckles to the main line.
It is recommended to install a hanging buckle every 11.8-15.8in.
![graph LR A["Device with sensor"] --> B["Valve with red valves"] B --> C["Belt with orange belt drive"]](/content/2026/04/736592/images/ab37cefea25f69a6cbc303672295db68aace58456c81018193e1a8df7b2f62ab.jpg)
If you are unable to determine the exact location during installation, you can straighten the main line and put it on the ground. Then measure with a tape measure and mark on the main line with a marker pen.
Step 5: Use the ratchet to tighten the main line of the slackline.
Tip: if you need to adjust the position of your hanging buckles, you must loosen the ratchet line before adjustment. Because the friction between the buckles and the main line is very large when the main line is tightened, you can't adjust the position of the hanging buckles.
Step 6: Use contact buckles to hang all accessories on the hanging buckle and tighten it.
Please note that after installing the accessories, you need to test their reliability. We sincerely hope you enjoy your ninja slackline kit as much as possible. Have fun!
• HOW TO USE THE RATCHET LINE
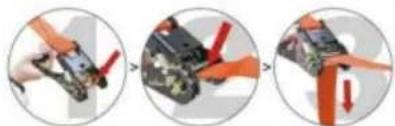
- First, close the ratchet, and thread the webbing through the upper hole in the middle of the ratchet. If the position of the hole is not above, it can be adjusted to the top by opening and closing the ratchet.
- Pull the webbing down until it is as tight as possible. Then tighten the webbing with one hand and hold the handle of the ratchet with the other hand. Tighten the webbing by continuously opening and closing the ratchet until you can't pull the handle of the ratchet. Note: please make sure your ratchet is closed when it is finally tightened.

- When you are ready to stow the slackline kit, you can pull the switch marked in the figure outward and open the handle of the ratchet to about 180° at the same time. After hearing the "bang", you can pull the webbing out of the ratchet and put it away.
Technical Support and E-Warranty Certificate www.vevor.com/support
PR-012-65
Step 1: Where to Slackline?
Picking a place to slackline is mostly based on personal preference. To set up the ninja line, two objects will be needed to tie it into place (typically trees).
MATTERS NEEDING ATTENTION:
Do not use buildings or playground structures (unless specifically built for slackline), live power/telephone poles, dead trees or stumps, trees with rot, disease, structural cracks, excessive lean, exposed roots, or trees in boggy, wet, sandy, loose soil. This is only a partial list. You must use your good judgment in determining what is not an appropriate anchor point. If in doubt, please contact us.
Step 2: Install tree protectors. They not only protect the trees but also reduce wear on the slackline.
Installation height: more than 2.2m (7.2ft) is recommended.
Of course, this value is not absolute. You can adjust the installation height of the slackline appropriately according to your child's height.
Step 3: Install the main line and ratchet line on the installed tree protectors.
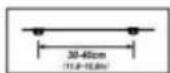
Step 4: Install the hanging buckles onto the main line.
It is recommended to install a hanging buckle every 11.8-15.8in.
![graph LR A["Device with sensor"] --> B["Valve with red curved arrows"] B --> C["Belt drive mechanism"]](/content/2026/04/736592/images/659eae34da370a09c929487be1888b1bae80222c8be3645ec70c900bb9efac2d.jpg)
If you are unable to determine the exact location during installation, you can straighten the main line and place it on the ground. Then measure with a tape measure and mark the main line with a marker pen.
Step 5: Use the ratchet to tighten the main line of the slackline.
Tip: If you need to adjust the position of your hanging buckles, you must loosen the ratchet line before adjustment. Because the friction between the buckles and the main line is very large when the main line is tightened, you cannot adjust the position of the hanging buckles.
Step 6: Use contact buckles to hang all accessories on the hanging buckle and tighten it.
Please note that after installing the accessories, you need to test their reliability. We sincerely hope you enjoy your ninja slackline kit as much as possible. Have fun!
• HOW TO USE THE RATCHET LINE
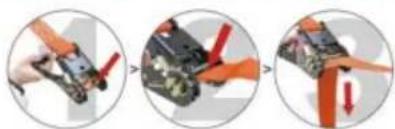
- First, close the ratchet and thread the webbing through the upper hole in the middle of the ratchet. If the hole is not positioned at the top, you can adjust it by opening and closing the ratchet.
- Pull the webbing down until it is as tight as possible. Then, tighten the webbing with one hand while holding the ratchet handle with the other. Tighten the webbing by continuously opening and closing the ratchet until you can no longer pull the handle. Note: Make sure the ratchet is closed when it is finally tightened.
- When you are ready to stow the slackline kit, pull the switch marked in the figure outward and open the ratchet handle to about 180° at the same time. After hearing a "bang", you can pull the webbing out of the ratchet and put it away.
Step 1: Where to Slackline?
Choosing a place to slackline is mostly based on personal preference. To set up the ninja line, you will need two objects to tie it to (typically trees).
MATTERS NEEDING ATTENTION:
Do not use buildings or playground structures (unless specifically built for slackline), live power/telephone poles, dead trees or stumps, trees with rot, disease, structural cracks, excessive lean, exposed roots, or trees in boggy, wet, sandy, or loose soil. This is only a partial list. You must use your good judgment in determining what is not an appropriate anchor point. If in doubt, contact us.
Step 2: Install tree protectors. They not only protect the trees but also reduce wear on the slackline.
Step 3: Attach the main line to a tree or solid post.
Installation height: Generally, we recommend that the height difference between the two slacklines be slightly less than: your child's height + half the length of the balance belt, and the bottom slackline should be about 23.6 inches from the ground. Of course, you can adjust the height according to your actual situation.
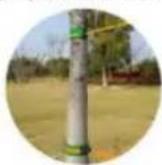
Step 4: Attach the ratchet line to another tree or solid post. Put the ratchet protector on first. Then use the ratchet to tighten the main line of the slackline. Cover the protective sleeve onto the ratchet again. (The protective sleeve is used for 2-inch slackline.)
Step 5: How to use the slackline ratchet?
We introduced the use of ratchet on the right.
Please note that after installing the accessories, you need to test their reliability. We sincerely hope you enjoy your slackline kit as much as possible. Have fun!
• HOW TO USE THE RATCHET LINE?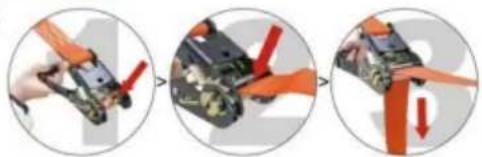
- First, close the ratchet, and thread the webbing through the upper hole in the middle of the ratchet. If the position of the hole is not above, it can be adjusted to the top by opening and closing the ratchet.
- Pull the webbing down until it is as tight as possible. Then tighten the webbing with one hand and hold the handle of the ratchet with the other hand. Tighten the webbing by continuously opening and closing the ratchet until you can't pull the handle of the ratchet. Note: please make sure your ratchet is closed when it is finally tightened.
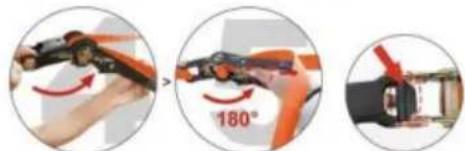
- When you are ready to stow the slackline kit, you can pull the switch marked in the figure outward and open the handle of the ratchet to about 180° at the same time. After hearing the "bang", you can pull the webbing out of the ratchet and put it away.
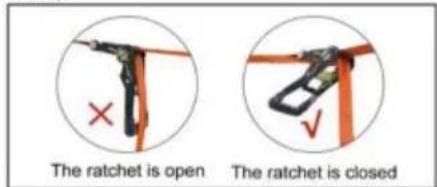
Technical Support and E-Warranty
Certificate www.vevor.com/support
A/S YH Consulting Limited Bureau 147, Centurion Maison, London Road, Staines-upon-Thames, Surrey, TW18 4AX
E-CrossStu GmbH
Step 1: Where to Slackline?
Picking a place to slackline is mostly based on personal preference. To set up the ninja line, two objects will be needed to tie it into place (typically trees).
MATTERS NEEDING ATTENTION:
Do not use buildings or playground structures (unless specifically built for slackline), live power/telephone poles, dead trees or stumps, trees with rot, disease, structural cracks, excessive lean, exposed roots, or trees in boggy, wet, sandy, loose soil. This is only a partial list. You must use your good judgment in determining what is not an appropriate anchor point. If in doubt, please contact us.
Step 2: Install tree protectors. They not only protect trees, but also reduce wear on the slackline.
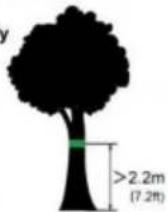
Installation height: more than 2.2m (7.2ft) is recommended.
Of course, this value is not absolute. You can adjust the installation height of the slackline appropriately according to your child's height.
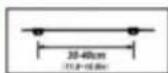
Step 3: Install the main line and ratchet line on the installed tree protectors.
Step 4: Install the hanging buckles onto the main line.
It is recommended to install a hanging buckle every 11.8-15.8in.
![graph LR A["Device Icon"] --> B["Close-up of Belt Buck"] B --> C["Close-up of Belt Buck"]](/content/2026/04/736592/images/967212aaa6a39101580463fdd2908ccbee55491cd41057eef055a564203c0282.jpg)
If you are unable to determine the exact location during installation, you can straighten the main line and place it on the ground. Then measure with a tape measure and mark the main line with a marker pen.
Step 5: Use the ratchet to tighten the main line of the slackline.
Tip: If you need to adjust the position of your hanging buckles, you must loosen the ratchet line before adjustment. Because the friction between the buckles and the main line is very large when the main line is tightened, you cannot adjust the position of the hanging buckles.
Step 6: Use contact buckles to hang all accessories on the hanging buckle and tighten it.
Please note that after installing the accessories, you need to test their reliability. We sincerely hope you enjoy your ninja slackline kit as much as possible. Have fun!
• HOW TO USE THE RATCHET LINE
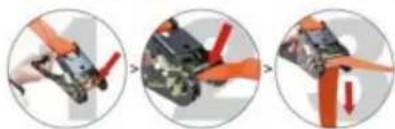
- First, close the ratchet and thread the webbing through the upper hole in the middle of the ratchet. If the position of the hole is not above, it can be adjusted to the top by opening and closing the ratchet.
- Pull the webbing down until it is as tight as possible. Then tighten the webbing with one hand and hold the handle of the ratchet with the other hand. Tighten the webbing by continuously opening and closing the ratchet until you can't pull the handle of the ratchet. Note: please make sure your ratchet is closed when it is finally tightened.
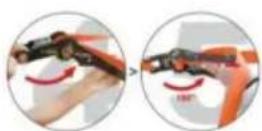
3 When you are ready to stow the slackline kit, you can pull the switch marked in the figure outward and open the handle of the ratchet to about 180° at the same time. After hearing the "bang", you can pull the webbing out of the ratchet and put it away.
Technical Support and E-Warranty Certificate www.vevor.com/support
PR-010-50
Step 1: Where to Slackline?
Picking a place to slackline is mostly based on personal preference. To set up the ninja line, two objects will be needed to tie it into place (typically trees).
MATTERS NEEDING ATTENTION:
Do not use buildings or playground structures (unless specifically built for slackline); live power/telephone poles, dead trees or stumps, trees with rot, disease, structural cracks, excessive lean, exposed roots, or trees in boggy, wet, sandy, loose soil. This is only a partial list. You must use your good judgment in determining what is not an appropriate anchor point. If in doubt, please contact us.
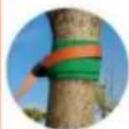
Step 2: Install tree protectors. It can not only protect trees, but also reduce the wear of slackline.
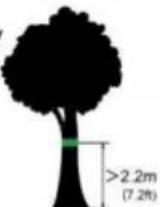
Installation height: more than 2.2m (7.2ft) is recommended
Of course, this value is not absolute. You can appropriately adjust the installation height of the slackline according to your child's height.
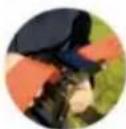
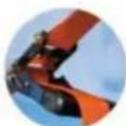
Step 3: Install the main line and ratchet line on the installed tree protectors.
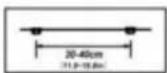
Step 4: Install the hanging buckles to the main line.
It is recommended to install a hanging buckle every 11.8-15.8in.
![graph LR A["Device Icon"] --> B["Arrow to Red Motion"] B --> C["Arrow to Orange Belt"]](/content/2026/04/736592/images/3d2ab15e7e613bc6601149093b42208b744ddd60c60f5667cbd36492d0b4ecdf.jpg)
If you are unable to determine the exact location during installation. You can straighten the main line and put it on the ground. Then measure with a tape measure and mark on the main line with a marker pen.
Step 5: Use the ratchet to tighten the main line of the slackline.
Tip: If you need to adjust the position of your hanging buckles, you must loosen the ratchet line before adjustment. Because the friction between the buckles and the main line is very large when the main line is tightened, you can't adjust the position of the hanging buckles.
Step 6: Use contact buckles to hang all accessories on the hanging buckle and tighten it.
Please note that after installing the accessories, you need to test their reliability. We sincerely hope you enjoy your ninja slackline kit as much as possible. Have fun!
• HOW TO USE THE RATCHET LINE
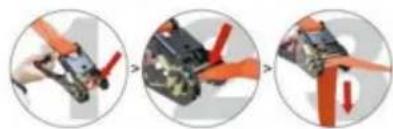
- First, close the ratchet and thread the webbing through the upper hole in the middle of the ratchet. If the position of the hole is not above, it can be adjusted to the top by opening and closing the ratchet.
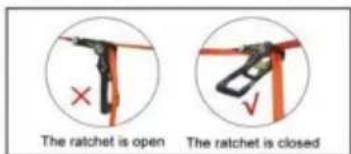
- Pull the webbing down until it is as tight as possible. Then tighten the webbing with one hand and hold the handle of the ratchet with the other hand. Tighten the webbing by continuously opening and closing the ratchet until you can't pull the handle of the ratchet. Note: please make sure your ratchet is closed when it is finally tightened.
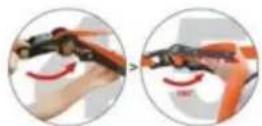
- When you are ready to stow the slackline kit, you can pull the switch marked in the figure outward and open the handle of the ratchet to about 180° at the same time. After hearing the "bang", you can pull the webbing out of the ratchet and put it away.
Technical Support and E-Warranty Certificate www.vevor.com/support
PR-012-56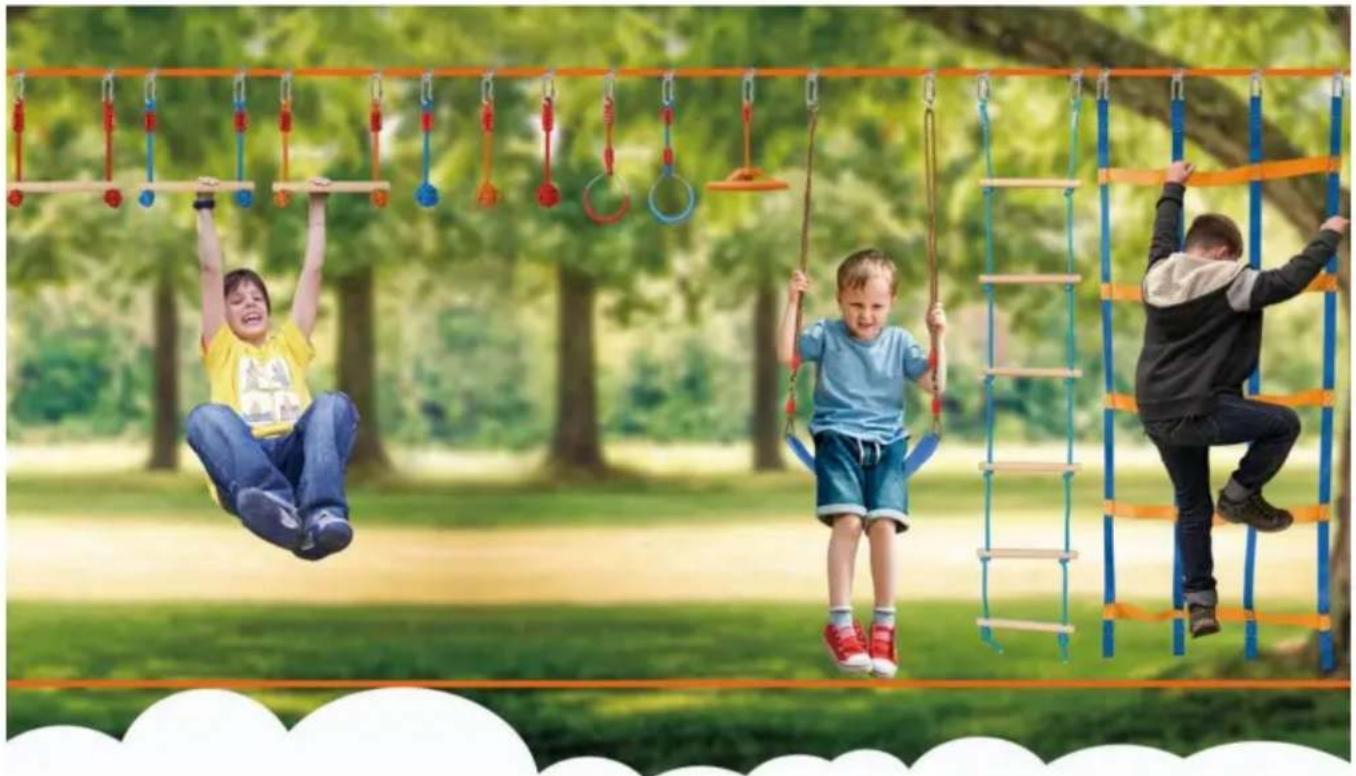
• HOW TO SET UP A NINJA OBSTACLE COURSE?
Step 1: Where to Slackline?
Picking a place to slackline is mostly based on personal preference. To set up the ninja line, two objects will be needed to tie it into place (typically trees).
MATTERS NEEDING ATTENTION:
Do not use buildings or playground structures (unless specifically built for slackline), live power/telephone poles, dead trees or stumps, trees with rot, disease, structural cracks, excessive lean, exposed roots, or trees in boggy, wet, sandy, loose soil. This is only a partial list. You must use your good judgment in determining what is not an appropriate anchor point. If in doubt, please contact us.
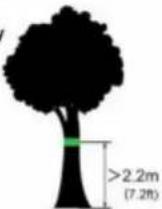
Step 2: Install tree protectors. They not only protect trees but also reduce wear on the slackline.
Installation height: more than 2.2m (7.2ft) is recommended.
Of course, this value is not absolute. You can adjust the installation height of the slackline appropriately according to your child's height.
Step 3: Install the main line and ratchet line on the installed tree protectors.
Step 4: Install the hanging buckles onto the main line.
It is recommended to install a hanging buckle every 11.8-15.8 inches.
![graph LR A["Device with sensor"] --> B["Valve with valves"] B --> C["Belt drive mechanism"]](/content/2026/04/736592/images/d757bb45d023de5b16ac7d72fd2f8bf5d239ff7b5f66687537dda2909181f227.jpg)
If you are unable to determine the exact location during installation, you can straighten the main line and place it on the ground. Then measure with a tape measure and mark the main line with a marker pen.
Step 5: Use the ratchet to tighten the main line of the slackline.
Tip: If you need to adjust the position of your hanging buckles, you must loosen the ratchet line before adjustment. Because the friction between the buckles and the main line is very large when the main line is tightened, you cannot adjust the position of the hanging buckles.
Step 6: Use contact buckles to hang all accessories on the hanging buckle and tighten it.
Please note that after installing the accessories, you need to test their reliability. We sincerely hope you enjoy your ninja slackline kit as much as possible. Have fun!
• HOW TO USE THE RATCHET LINE
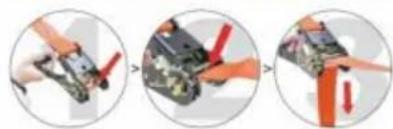
- First, close the ratchet, and thread the webbing through the upper hole in the middle of the ratchet. If the position of the hole is not on top, it can be adjusted to the top by opening and closing the ratchet.
- Pull the webbing down until it is as tight as possible. Then, with one hand, tighten the webbing, and with the other hand, hold the handle of the ratchet. Tighten the webbing by continuously opening and closing the ratchet until you can no longer pull the handle. Note: make sure the ratchet is closed when it is finally tightened.
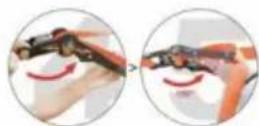
- When you are ready to stow the slackline kit, pull the switch marked in the figure outward and simultaneously open the handle of the ratchet to about 180°. After hearing a "bang", you can pull the webbing out of the ratchet and put it away.
Technical Support and E-Warranty Certificate www.vevor.com/support
PR-014-60
Step 1: Where to Slackline?
Choosing a place to slackline is mostly based on personal preference. To set up the ninja line, you will need two objects to tie it to (typically trees).
▲ MATTERS NEEDING ATTENTION:
Do not use buildings or playground structures (unless specifically built for slackline), live power/telephone poles, dead trees or stumps, trees with rot, disease, structural cracks, excessive lean, exposed roots, or trees in boggy, wet, sandy, or loose soil. This is only a partial list. You must use your good judgment in determining what is not an appropriate anchor point. If in doubt, please contact us.
Step 2: Install tree protectors. They not only protect the trees but also reduce wear on the slackline.
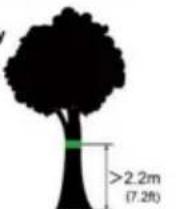
Installation height: more than 2.2m (7.2ft) is recommended.
Of course, this value is not absolute. You can adjust the installation height of the slackline appropriately according to your child's height.
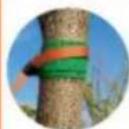
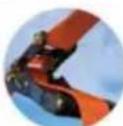
Step 3: Install the main line and ratchet line on the installed tree protectors.
Step 4: Install the hanging buckles to the main line.
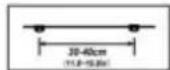
It is recommended to install a hanging buckle every 11.8-15.8in.
![graph LR A["Device with sensor"] --> B["Valve with red valves"] B --> C["Belt with orange belt drive"]](/content/2026/04/736592/images/8e436ca2b60a6c9da484895c03aae771cfc6d4a5d9d5c40efcdd79c34f5bb73e.jpg)
If you are unable to determine the exact location during installation, you can straighten the main line and put it on the ground. Then measure with a tape measure and mark on the main line with a marker pen.
Step 5: Use the ratchet to tighten the main line of the slackline.
Tip: if you need to adjust the position of your hanging buckles, you must loosen the ratchet line before adjustment. Because the friction between the buckles and the main line is very large when the main line is tightened, you can't adjust the position of the hanging buckles.
Step 6: Use contact buckles to hang all accessories on the hanging buckle and tighten it.
Please note that after installing the accessories, you need to test their reliability. We sincerely hope you enjoy your ninja slackline kit as much as possible. Have fun!
• HOW TO USE THE RATCHET LINE
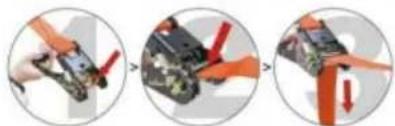
- First, close the ratchet and thread the webbing through the upper hole in the middle of the ratchet. If the position of the hole is not above, it can be adjusted to the top by opening and closing the ratchet.
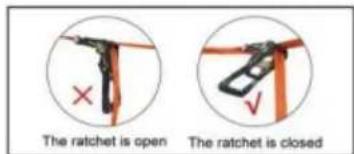
- Pull the webbing down until it is as tight as possible. Then tighten the webbing with one hand and hold the handle of the ratchet with the other hand. Tighten the webbing by continuously opening and closing the ratchet until you can't pull the handle of the ratchet. Note: please make sure your ratchet is closed when it is finally tightened.
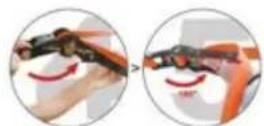
- When you are ready to stow the slackline kit, you can pull the switch marked in the figure outward and open the handle of the ratchet to about 180° at the same time. After hearing the "bang", you can pull the webbing out of the ratchet and put it away.
Technical Support and E-Warranty Certificate www.vevor.com/support
PR-012-65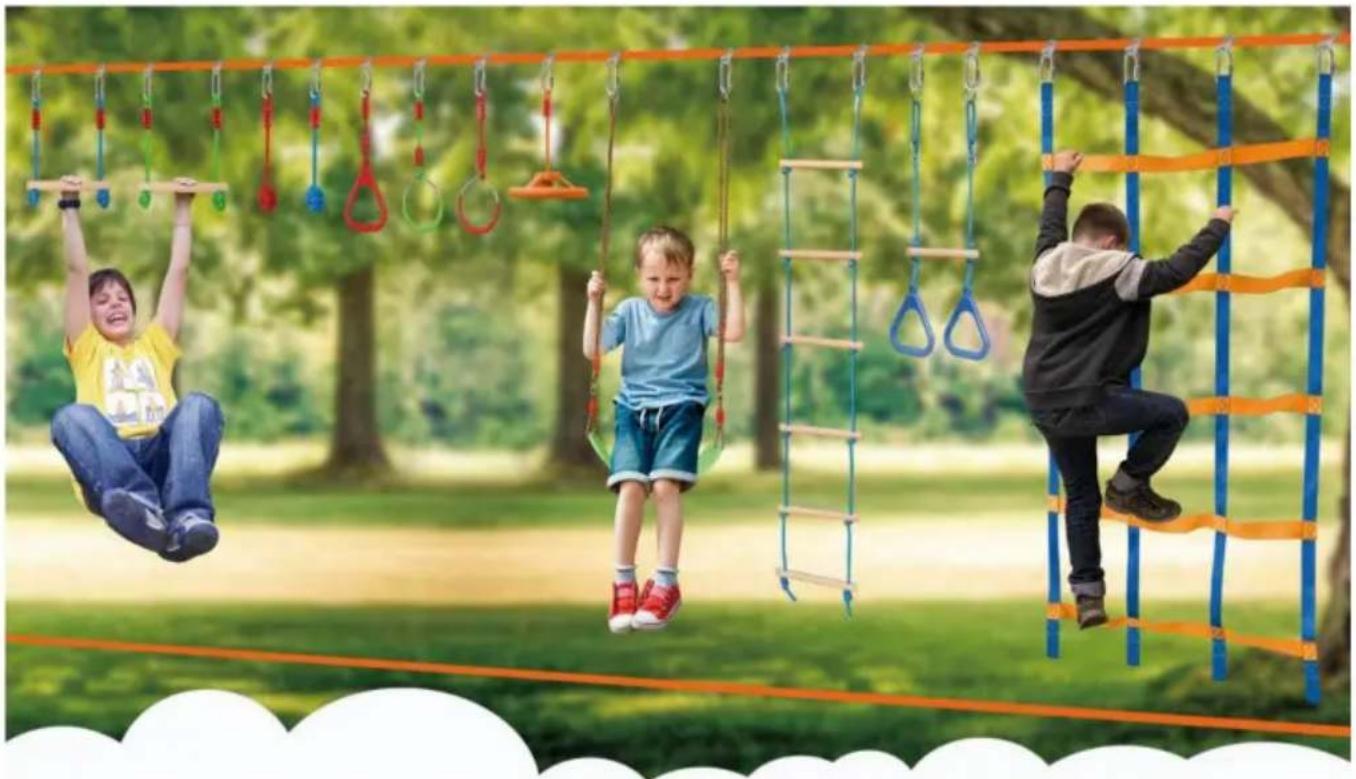
Step 1: Where to Slackline?
Picking a place to slackline is mostly based on personal preference. To set up the ninja line, two objects will be needed to tie it into place (typically trees).
MATTERS NEEDING ATTENTION:
Do not use buildings or playground structures (unless specifically built for slackline), live power/telephone poles, dead trees or stumps, trees with rot, disease, structural cracks, excessive lean, exposed roots, or trees in boggy, wet, sandy, loose soil. This is only a partial list. You must use your good judgment in determining what is not an appropriate anchor point. If in doubt, please contact us.
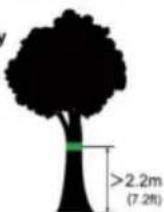
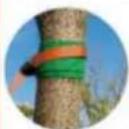
Step 2: Install tree protectors. They not only protect trees but also reduce the wear of the slackline.
Installation height: more than 2.2m (7.2ft) is recommended.
Of course, this value is not absolute. You can appropriately adjust the installation height of the slackline according to your child's height.
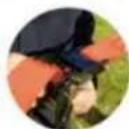
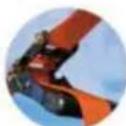
Step 3: Install the main line and ratchet line on the installed tree protectors.
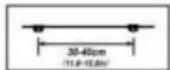
Step 4: Install the hanging buckles to the main line.
It is recommended to install a hanging buckle every 11.8-15.8in.
![graph LR A["Device with sensor"] --> B["Valve with red curved arrows"] B --> C["Belt drive mechanism"]](/content/2026/04/736592/images/56603003e6959988077de55b738dce78f04523a34811f3d8d4efa959b947160e.jpg)
If you are unable to determine the exact location during installation, you can straighten the main line and put it on the ground. Then measure with a tape measure and mark on the main line with a marker pen.
Step 5: Use the ratchet to tighten the main line of the slackline.
Tip: if you need to adjust the position of your hanging buckles, you must loosen the ratchet line before adjustment. Because the friction between the buckles and the main line is very large when the main line is tightened, you can't adjust the position of the hanging buckles.
Step 6: Use contact buckles to hang all accessories on the hanging buckle and tighten it.
Please note that after installing the accessories, you need to test their reliability. We sincerely hope you enjoy your ninja slackline kit as much as possible. Have fun!
• HOW TO USE THE RATCHET LINE
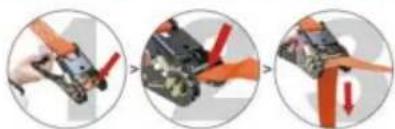
- First, close the ratchet and thread the webbing through the upper hole in the middle of the ratchet. If the hole is not positioned at the top, you can adjust it by opening and closing the ratchet.
- Pull the webbing down until it is as tight as possible. Then, tighten the webbing with one hand while holding the ratchet handle with the other. Tighten the webbing by continuously opening and closing the ratchet until you can no longer pull the handle. Note: Make sure the ratchet is closed when it is finally tightened.
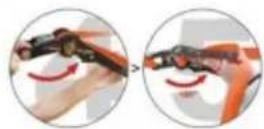
- When you are ready to stow the slackline kit, pull the switch marked in the figure outward and open the ratchet handle to about 180° at the same time. After hearing a "bang", you can pull the webbing out of the ratchet and put it away.
Technical Support and E-Warranty Certificate www.vevor.com/support
PR-03-60
Step 1: Where to Slackline?
Picking a place to slackline is mostly based on personal preference. To set up the ninja line, you will need two objects to tie it into place (typically trees).
MATTERS NEEDING ATTENTION:
Do not use buildings or playground structures (unless specifically built for slackline), live power/telephone poles, dead trees or stumps, trees with rot, disease, structural cracks, excessive lean, exposed roots, or trees in boggy, wet, sandy, or loose soil. This is only a partial list. You must use your good judgment in determining what is not an appropriate anchor point. If in doubt, contact us.
Step 2: Install tree protectors. They not only protect trees but also reduce wear on the slackline.
Step 3: Attach the main line to a tree or solid post.
Installation height: Generally, we recommend that the installation height difference between the two slacklines be slightly less than: your child's height + half the length of the balance belt, and the slackline at the bottom is about 23.6 inches from the ground. Of course, you can adjust the height according to your actual situation.
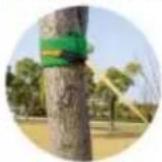
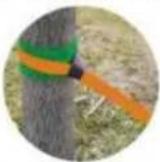
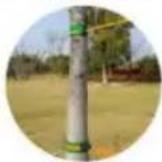
Step 4: Attach the ratchet line to another tree or solid post. Put the ratchet protector on first. Then use the ratchet to tighten the main line of the slackline. Cover the protective sleeve onto the ratchet again. (The protective sleeve is used for 2-inch slackline.)
Step 5: How to use the slackline ratchet?
We introduced the use of ratchet on the right.
Please note that after installing the accessories, you need to test their reliability. We sincerely hope you enjoy your slackline kit as much as possible. Have fun!
• HOW TO USE THE RATCHET LINE?
- First, close the ratchet, and thread the webbing through the upper hole in the middle of the ratchet. If the position of the hole is not above, it can be adjusted to the top by opening and closing the ratchet.
- Pull the webbing down until it is as tight as possible. Then tighten the webbing with one hand and hold the handle of the ratchet with the other hand. Tighten the webbing by continuously opening and closing the ratchet until you can't pull the handle of the ratchet. Note: please make sure your ratchet is closed when it is finally tightened.
- When you are ready to stow the slackline kit, you can pull the switch marked in the figure outward and open the handle of the ratchet to about 180° at the same time. After hearing the "bang", you can pull the webbing out of the ratchet and put it away.
Technical Support and E-Warranty
Certificate www.vevor.com/support
C/O YH Consulting Limited Office 147, Centurion Haus, London Road, Staines-upon-Thames, Surrey, TW18 4AX
www.vevor.com/support
VEVOR®
TOUGH TOOLS, HALF PRICE
HOW TO SET UP A NINJA OBSTACLE COURSE?
Step 1: Where to Slackline?
Picking a place to slackline is mostly based on personal preference. To set up the ninja line, two objects will be needed to tie it into place (typically trees).
MATTERS NEEDING ATTENTION:
Do not use buildings or playground structures (unless specifically built for slackline), live power/telephone poles, dead trees or stumps, trees with rot, disease, structural cracks, excessive lean, exposed roots, or trees in boggy, wet, sandy, loose soil. This is only a partial list. You must use your good judgment in determining what is not an appropriate anchor point. If in doubt, please contact us.
Step 2: Install tree protectors. They not only protect trees, but also reduce the wear of the slackline.
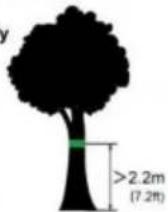
Installation height: more than 2.2m (7.2ft) is recommended.
Of course, this value is not absolute. You can appropriately adjust the installation height of the slackline according to your child's height.

Step 3: Install the main line and ratchet line on the installed tree protectors.
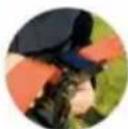
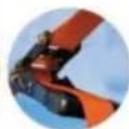
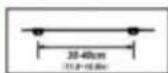
Step 4: Install the hanging buckles to the main line.
It is recommended to install a hanging buckle every 11.8-15.8in.
![graph LR A["Device Icon"] --> B["Close-up of Belt Buck"] B --> C["Close-up of Belt Buck"]](/content/2026/04/736592/images/5829d060268627cd15e572c795b61eb6370537788062523cb2507f30246f23d7.jpg)
If you are unable to determine the exact location during installation, you can straighten the main line and put it on the ground. Then measure with a tape measure and mark on the main line with a marker pen.
Step 5: Use the ratchet to tighten the main line of the slackline.
Tip: if you need to adjust the position of your hanging buckles, you must loosen the ratchet line before adjustment. Because the friction between the buckles and the main line is very large when the main line is tightened, you can't adjust the position of the hanging buckles.
Step 6: Use contact buckles to hang all accessories on the hanging buckle and tighten it.
Please note that after installing the accessories, you need to test their reliability. We sincerely hope you enjoy your ninja slackline kit as much as possible. Have fun!
• HOW TO USE THE RATCHET LINE
- First, close the ratchet and thread the webbing through the upper hole in the middle of the ratchet. If the position of the hole is not above, it can be adjusted to the top by opening and closing the ratchet.
- Pull the webbing down until it is as tight as possible. Then tighten the webbing with one hand and hold the handle of the ratchet with the other hand. Tighten the webbing by continuously opening and closing the ratchet until you can't pull the handle of the ratchet. Note: please make sure your ratchet is closed when it is finally tightened.
3 When you are ready to stow the slackline kit, you can pull the switch marked in the figure outward and open the handle of the ratchet to about 180° at the same time. After hearing the "bang", you can pull the webbing out of the ratchet and put it away.
Technical Support and E-Warranty Certificate www.vevor.com/support
PR-010-50
• HOW TO SET UP A NINJA OBSTACLE COURSE?
Step 1: Where to Slackline?
Picking a place to slackline is mostly based on personal preference. To set up the ninja line, two objects will be needed to tie it into place (typically trees).
MATTERS NEEDING ATTENTION:
Do not use buildings or playground structures (unless specifically built for slackline), live power/telephone poles, dead trees or stumps, trees with rot, disease, structural cracks, excessive lean, exposed roots, or trees in boggy, wet, sandy, loose soil. This is only a partial list. You must use your good judgment in determining what is not an appropriate anchor point. If in doubt, please contact us.
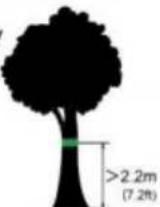
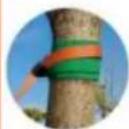
Step 2: Install tree protectors. It can not only protect trees, but also reduce the wear of slackline.
Installation height: more than 2.2m (7.2ft) is recommended.
Of course, this value is not absolute. You can adjust the installation height of the slackline appropriately according to your child's height.
Step 3: Install the main line and ratchet line on the installed tree protectors.
Step 4: Install the hanging buckles to the main line.
It is recommended to install a hanging buckle every 11.8-15.8in.
![graph LR A["Device with sensor"] --> B["Drive with red motion arrows"] B --> C["Drive with orange belt drive"]](/content/2026/04/736592/images/63c00dc0c1b50f0cafb6f929dfaa696de2988c2bc221d869aa5f0e0f4b5ca2df.jpg)
If you are unable to determine the exact location during installation, you can straighten the main line and put it on the ground. Then measure with a tape measure and mark on the main line with a marker pen.
Step 5: Use the ratchet to tighten the main line of the slackline.
Tip: if you need to adjust the position of your hanging buckles, you must loosen the ratchet line before adjustment. Because the friction between the buckles and the main line is very large when the main line is tightened, you can't adjust the position of the hanging buckles.
Step 6: Use contact buckles to hang all accessories on the hanging buckle and tighten it.
Please note that after installing the accessories, you need to test their reliability. We sincerely hope you enjoy your ninja slackline kit as much as possible. Have fun!
• HOW TO USE THE RATCHET LINE
- First, close the ratchet and thread the webbing through the upper hole in the middle of the ratchet. If the position of the hole is not above, it can be adjusted to the top by opening and closing the ratchet.
- Pull the webbing down until it is as tight as possible. Then tighten the webbing with one hand and hold the handle of the ratchet with the other hand. Tighten the webbing by continuously opening and closing the ratchet until you can't pull the handle of the ratchet. Note: please make sure your ratchet is closed when it is finally tightened.
- When you are ready to stow the slackline kit, you can pull the switch marked in the figure outward and open the handle of the ratchet to about 180° at the same time. After hearing the "bang", you can pull the webbing out of the ratchet and put it away.
Technical Support and E-Warranty Certificate www.vevor.com/support
PR-012-56
Step 1: Where to Slackline?
Picking a place to slackline is mostly based on personal preference. To set up the ninja line, two objects will be needed to tie it into place (typically trees).
MATTERS NEEDING ATTENTION:
Do not use buildings or playground structures (unless specifically built for slackline), live power/telephone poles, dead trees or stumps, trees with rot, disease, structural cracks, excessive lean, exposed roots, or trees in boggy, wet, sandy, loose soil. This is only a partial list. You must use your good judgment in determining what is not an appropriate anchor point. If in doubt, please contact us.
Step 2: Install tree protectors. It can not only protect trees, but also reduce the wear of slackline.
Installation height: more than 2.2m (7.2ft) is recommended
Of course, this value is not absolute. You can appropriately adjust the installation height of the slackline according to your child's height.

Step 3: Install the main line and ratchet line on the installed tree protectors.
Step 4: Install the hanging buckles to the main line.
It is recommended to install a hanging buckle every 11.8-15.8in.
![graph LR A["Device"] --> B["Transformation"] B --> C["Assembly"]](/content/2026/04/736592/images/987ce44eb58ef256d5dcdfaba95c23a72390a7195079e2da7c9c9d6fddbff38f.jpg)
If you are unable to determine the exact location during installation. You can straighten the main line and put it on the ground. Then measure with a tape measure and mark on the main line with a marker pen.
Step 5: Use the ratchet to tighten the main line of the slackline.
Tip: if you need to adjust the position of your hanging buckles, you must loosen the ratchet line before adjustment. Because the friction between the buckles and the main line is very large when the main line is tightened, you can't adjust the position of the hanging buckles.
Step 6: Use contact buckles to hang all accessories on the hanging buckle and tighten it.
Please note that after installing the accessories, you need to test their reliability. We sincerely hope you enjoy your ninja slackline kit as much as possible. Have fun!
• HOW TO USE THE RATCHET LINE
- First, close the ratchet, and thread the webbing through the upper hole in the middle of the ratchet. If the position of the hole is not above, it can be adjusted to the top by opening and closing the ratchet.
- Pull the webbing down until it is as tight as possible. Then tighten the webbing with one hand and hold the handle of the ratchet with the other hand. Tighten the webbing by continuously opening and closing the ratchet until you can't pull the handle of the ratchet. Note: please make sure your ratchet is closed when it is finally tightened.
- When you are ready to stow the slackline kit, you can pull the switch marked in the figure outward and open the handle of the ratchet to about 180° at the same time. After hearing the "bang", you can pull the webbing out of the ratchet and put it away.
Technical Support and E-Warranty Certificate www.vevor.com/support
PR-014-60
Step 1: Where to Slackline?
Picking a place to slackline is mostly based on personal preference. To set up the ninja line, two objects will be needed to tie it into place (typically trees).
▲ MATTERS NEEDING ATTENTION:
Do not use buildings or playground structures (unless specifically built for slackline), live power/telephone poles, dead trees or stumps, trees with rot, disease, structural cracks, excessive lean, exposed roots, or trees in boggy wet, sandy, loose soil. This is only a partial list. You must use your good judgment in determining what is not an appropriate anchor point. If in doubt, please contact us.
Step 2: Install tree protectors. They not only protect the trees but also reduce wear on the slackline.
Recommended installation height: more than 2.2 m (7.2 ft).
Of course, this value is not absolute. You can adjust the installation height of the slackline according to your child's height.
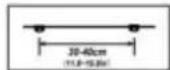
Step 3: Install the main line and ratchet line on the installed tree protectors.
Step 4: Install the hanging buckles onto the main line.
It is recommended to install a hanging buckle every 11.8–15.8 in.
![graph LR A["Device with sensor"] --> B["Valve with red valves"] B --> C["Belt with orange belt drive"]](/content/2026/04/736592/images/2b9bb01d2e25fe23eaee4b497d8c2d8daa91d37c7e33f837fe3723b704860f78.jpg)
If you cannot determine the exact location during installation, you can straighten the main line and place it on the ground. Then measure with a tape measure and mark the main line with a marker pen.
Step 5: Use the ratchet to tighten the main line of the slackline.
Tip: If you need to adjust the position of your hanging buckles, you must loosen the ratchet line before adjustment. Because the friction between the buckles and the main line is very large when the main line is tightened, you cannot adjust the position of the hanging buckles.
Step 6: Use contact buckles to hang all accessories on the hanging buckle and tighten it.
Please note that after installing the accessories, you need to test their reliability. We sincerely hope you enjoy your ninja slackline kit as much as possible. Have fun!
• HOW TO USE THE RATCHET LINE
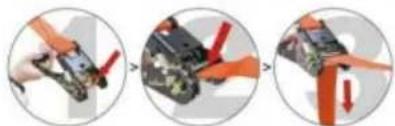
- First, close the ratchet and thread the webbing through the upper hole in the middle of the ratchet. If the position of the hole is not above, it can be adjusted to the top by opening and closing the ratchet.
- Pull the webbing down until it is as tight as possible. Then tighten the webbing with one hand and hold the handle of the ratchet with the other hand. Tighten the webbing by continuously opening and closing the ratchet until you cannot pull the handle of the ratchet. Note: Please make sure your ratchet is closed when it is finally tightened.
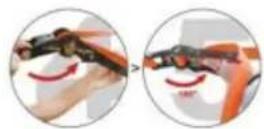
- When you are ready to stow the slackline kit, you can pull the switch marked in the figure outward and open the handle of the ratchet to about 180° at the same time. After hearing the "bang", you can pull the webbing out of the ratchet and put it away.
Technical Support and E-Warranty Certificate www.vevor.com/support
PR-012-65
Step 1: Where to Slackline?
Picking a place to slackline is mostly based on personal preference. To set up the ninja line, two objects will be needed to tie it into place (typically trees).
MATTERS NEEDING ATTENTION:
Do not use buildings or playground structures (unless specifically built for slackline), live power/telephone poles, dead trees or stumps, trees with rot, disease, structural cracks, excessive lean, exposed roots, or trees in boggy, wet, sandy, loose soil. This is only a partial list. You must use your good judgment in determining what is not an appropriate anchor point. If in doubt, please contact us.
Step 2: Install tree protectors. It can not only protect trees, but also reduce the wear of slackline.
Installation height: more than 2.2m (7.2ft) is recommended
Of course, this value is not absolute. You can appropriately adjust the installation height of the slackline according to your child's height.
Step 3: Install the main line and ratchet line on the installed tree protectors.
Step 4: Install the hanging buckles to the main line.
It is recommended to install a hanging buckle every 11.8-15.8in.
![graph LR A["Device with sensor"] --> B["Valve with red curved arrows"] B --> C["Belt with orange bands"]](/content/2026/04/736592/images/892e626af419caabf7b3159dd7dd5c42cd8d0545f0155020d2236518c353e64a.jpg)
If you are unable to determine the exact location during installation, you can straighten the main line and put it on the ground. Then measure with a tape measure and mark on the main line with a marker pen.
Step 5: Use the ratchet to tighten the main line of the slackline.
Tip: If you need to adjust the position of your hanging buckles, you must loosen the ratchet line before adjustment. Because the friction between the buckles and the main line is very large when the main line is tightened, you can't adjust the position of the hanging buckles.
Step 6: Use contact buckles to hang all accessories on the hanging buckle and tighten it.
Please note that after installing the accessories, you need to test their reliability. We sincerely hope you enjoy your ninja slackline kit as much as possible. Have fun!
• HOW TO USE THE RATCHET LINE
- First, close the ratchet and thread the webbing through the upper hole in the middle of the ratchet. If the position of the hole is not above, it can be adjusted to the top by opening and closing the ratchet.
- Pull the webbing down until it is as tight as possible. Then tighten the webbing with one hand and hold the handle of the ratchet with the other hand. Tighten the webbing by continuously opening and closing the ratchet until you can't pull the handle of the ratchet. Note: please make sure your ratchet is closed when it is finally tightened.
- When you are ready to stow the slackline kit, you can pull the switch marked in the figure outward and open the handle of the ratchet to about 180° at the same time. After hearing the "bang", you can pull the webbing out of the ratchet and put it away.

Step 1: Where to Slackline?
Picking a place to slackline is mostly based on personal preference. To set up the ninjaline, two objects will be needed to tie it into place (typically trees).
MATTERS NEEDING ATTENTION:
Do not use buildings or playground structures (unless specifically built for slackline), live power/telephone poles, dead trees or stumps, trees with rot, disease, structural cracks, excessive lean, exposed roots, or trees in boggy, wet, sandy, loose soil. This is only a partial list. You must use your good judgment in determining what is not an appropriate anchor point. If in doubt, contact us.
Step 2: Install tree protectors. They not only protect trees but also reduce wear on the slackline.
Step 3: Attach the main line to a tree or solid post.
Installation height: Generally, we recommend that the installation height difference between the two slacklines be slightly less than your child's height plus half the length of the balance belt, and the slackline at the bottom is about 23.6 inches from the ground. Of course, you can adjust the height according to your actual situation.
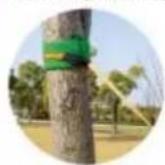
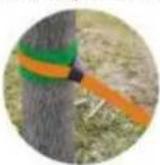
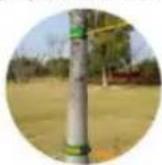
Step 4: Attach the ratchet line to another tree or solid post. Put the ratchet protector on first. Then use the ratchet to tighten the main line of the slackline. Cover the protective sleeve onto the ratchet again. (The protective sleeve is used for 2-inch slackline.)
Step 5: How to use the slackline ratchet?
We introduced the use of the ratchet on the right.
Please note that after installing the accessories, you need to test their reliability. We sincerely hope you enjoy your slackline kit as much as possible. Have fun!
• HOW TO USE THE RATCHET LINE?
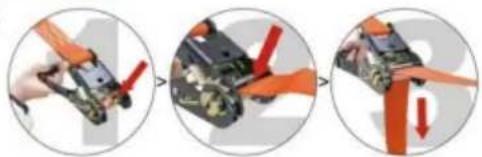
- First, close the ratchet, and thread the webbing through the upper hole in the middle of the ratchet. If the position of the hole is not above, it can be adjusted to the top by opening and closing the ratchet.
- Pull the webbing down until it is as tight as possible. Then tighten the webbing with one hand and hold the handle of the ratchet with the other hand. Tighten the webbing by continuously opening and closing the ratchet until you can't pull the handle of the ratchet. Note: please make sure your ratchet is closed when it is finally tightened.
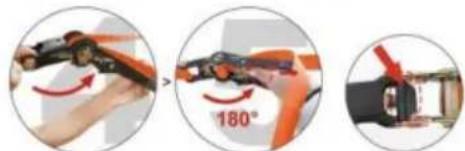
- When you are ready to stow the slackline kit, you can pull the switch marked in the figure outward and open the handle of the ratchet to about 180° at the same time. After hearing the "bang", you can pull the webbing out of the ratchet and put it away.
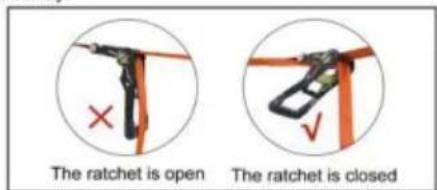
Technical Support and E-Warranty
Certificate www.vevor.com/support
Imported in AUS: SIHAO PTY LTD. 1 ROKEVA STREETEASTWOOD
New South Wales 2122 Australia
C/O YH Consulting Limited Office 147, Centurion
House, London Road, Staines-upon-Thames,
electronics www.vevor.com/support
VEVOR®
TOUGH TOOLS, HALF PRICE
www.vevor.com/support
• HOW TO SET UP A NINJA OBSTACLE COURSE?
Step 1: Where to Slackline?
Picking a place to slackline is mostly based on personal preference. To set up the ninja line, two objects will be needed to tie it into place (typically trees).
MATTERS NEEDING ATTENTION:
Do not use buildings or playground structures (unless specifically built for slackline), live power/telephone poles, dead trees or stumps, trees with rot, disease, structural cracks, excessive lean, exposed roots, or trees in boggy, wet, sandy, loose soil. This is only a partial list. You must use your good judgment in determining what is not an appropriate anchor point. If in doubt, please contact us.
Step 2: Install tree protectors. It can not only protect trees, but also reduce the wear of slackline.
Installation height: more than 2.2m (7.2ft) is recommended.
Of course, this value is not absolute. You can appropriately adjust the installation height of the slackline according to your child's height.
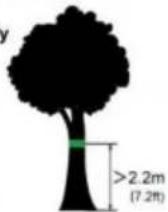
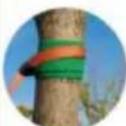
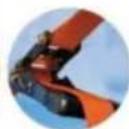
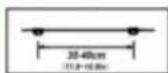
Step 3: Install the main line and ratchet line on the installed tree protectors.
Step 4: Install the hanging buckles to the main line.
It is recommended to install a hanging buckle every 11.8-15.8in.
![graph LR A["Device Icon"] --> B["Close-up of Belt Buck"] B --> C["Close-up of Belt Buck"]](/content/2026/04/736592/images/d9c5ba92f76a46d0c18699b17f28e3c8842214ee4264d951af4d5b05907a87ad.jpg)
If you are unable to determine the exact location during installation, you can straighten the main line and put it on the ground. Then measure with a tape measure and mark on the main line with a marker pen.
Step 5: Use the ratchet to tighten the main line of the slackline.
Tip: if you need to adjust the position of your hanging buckles, you must loosen the ratchet line before adjustment. Because the friction between the buckles and the main line is very large when the main line is tightened, you can't adjust the position of the hanging buckles.
Step 6: Use contact buckles to hang all accessories on the hanging buckle and tighten it.
Please note that after installing the accessories, you need to test their reliability. We sincerely hope you enjoy your ninja slackline kit as much as possible. Have fun!
• HOW TO USE THE RATCHET LINE
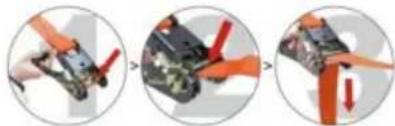
- First, close the ratchet and thread the webbing through the upper hole in the middle of the ratchet. If the position of the hole is not above, it can be adjusted to the top by opening and closing the ratchet.
- Pull the webbing down until it is as tight as possible. Then tighten the webbing with one hand and hold the handle of the ratchet with the other hand. Tighten the webbing by continuously opening and closing the ratchet until you can't pull the handle of the ratchet. Note: please make sure your ratchet is closed when it is finally tightened.
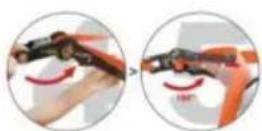
3 When you are ready to stow the slackline kit, you can pull the switch marked in the figure outward and open the handle of the ratchet to about 180 ° at the same time. After hearing the "bang", you can pull the webbing out of the ratchet and put it away.
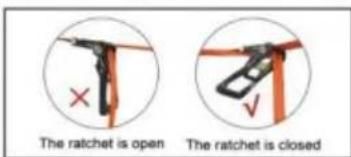
PR-010-50
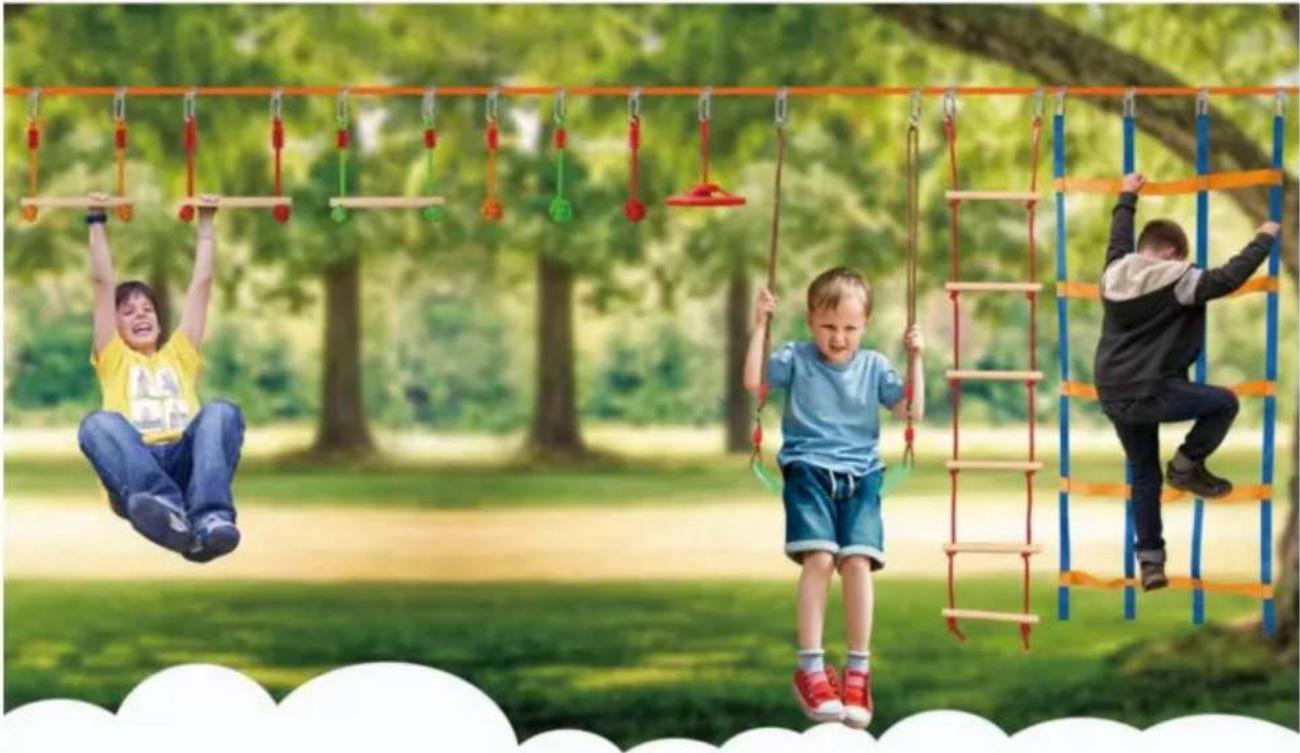
Step 1: Where to Slackline?
Picking a place to slackline is mostly based on personal preference. To set up the ninja line, two objects will be needed to tie it into place (typically trees).
MATTERS NEEDING ATTENTION:
Do not use buildings or playground structures (unless specifically built for slackline), live power/telephone poles, dead trees or stumps, trees with rot, disease, structural cracks, excessive lean, exposed roots, or trees in boggy, wet, sandy, loose soil. This is only a partial list. You must use your good judgment in determining what is not an appropriate anchor point. If in doubt, please contact us.
Step 2: Install tree protectors. It can not only protect trees, but also reduce the wear of slackline.
Installation height: more than 2.2m (7.2ft) is recommended
Of course, this value is not absolute. You can appropriately adjust the installation height of the slackline according to your child's height.
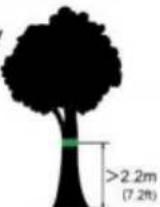
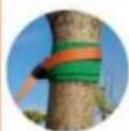
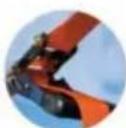
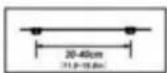
Step 3: Install the main line and ratchet line on the installed tree protectors.
Step 4: Install the hanging buckles to the main line.
It is recommended to install a hanging buckle every 11.8-15.8in.
![graph LR A["Device with sensor"] --> B["Drive with red motion arrows"] B --> C["Drive with orange belt drive"]](/content/2026/04/736592/images/3512d5d5d252d5bb26b653f1ae924b955bb145492085880e1e81d5e03a7accd1.jpg)
If you are unable to determine the exact location during installation. You can straighten the main line and put it on the ground. Then measure with a tape measure and mark on the main line with a marker pen.
Step 5: Use the ratchet to tighten the main line of the slackline.
Tip: if you need to adjust the position of your hanging buckles, you must loosen the ratchet line before adjustment. Because the friction between the buckles and the main line is very large when the main line is tightened, you can't adjust the position of the hanging buckles.
Step 6: Use contact buckles to hang all accessories on the hanging buckle and tighten it.
Please note that after installing the accessories, you need to test their reliability. We sincerely hope you enjoy your ninja slackline kit as much as possible. Have fun!
• HOW TO USE THE RATCHET LINE
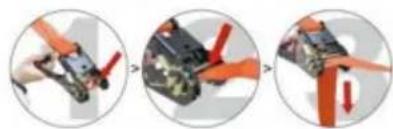
- First, close the ratchet and thread the webbing through the upper hole in the middle of the ratchet. If the position of the hole is not above, it can be adjusted to the top by opening and closing the ratchet.
- Pull the webbing down until it is as tight as possible. Then tighten the webbing with one hand and hold the handle of the ratchet with the other hand. Tighten the webbing by continuously opening and closing the ratchet until you can't pull the handle of the ratchet. Note: please make sure your ratchet is closed when it is finally tightened.
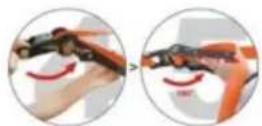
- When you are ready to stow the slackline kit, you can pull the switch marked in the figure outward and open the handle of the ratchet to about 180° at the same time. After hearing the "bang", you can pull the webbing out of the ratchet and put it away.
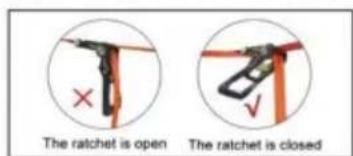
Technical Support and E-Warranty Certificate www.vevor.com/support
PR-012-56
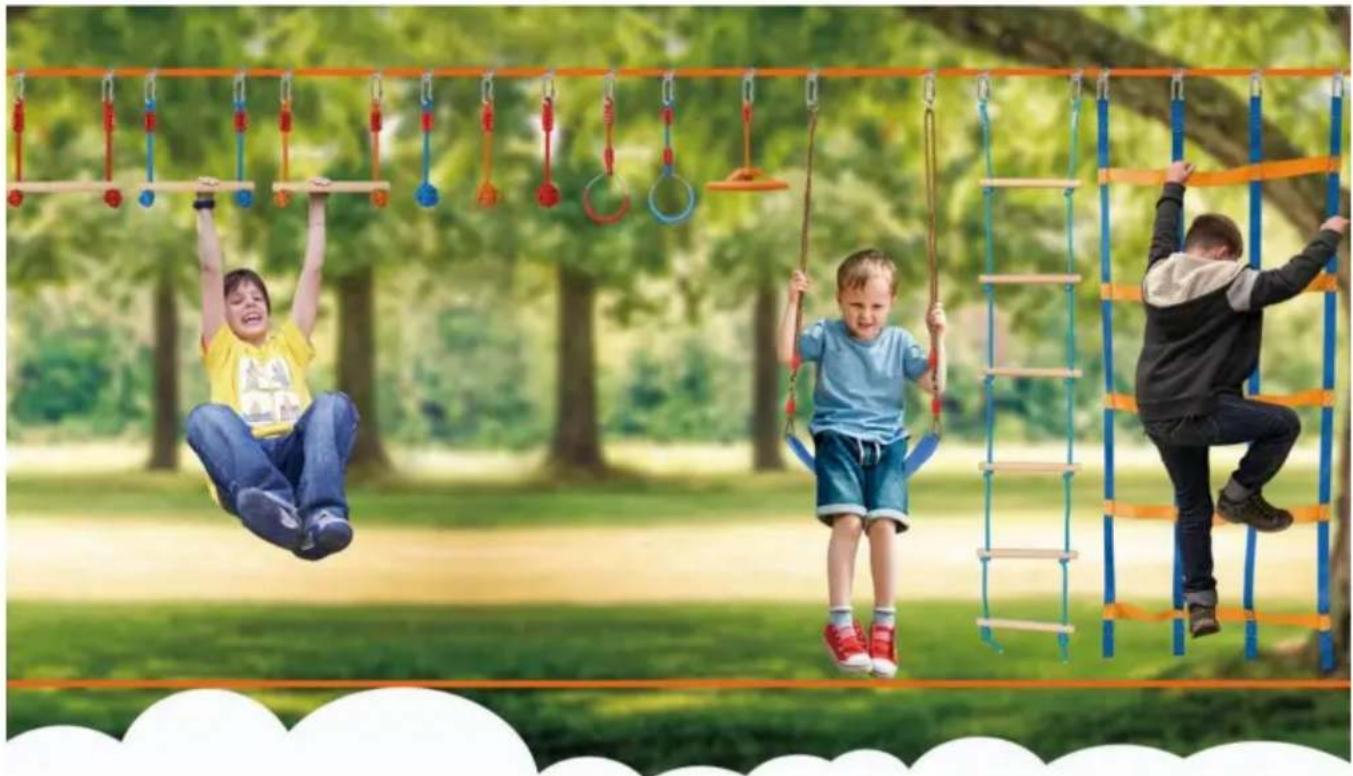
• HOW TO SET UP A NINJA OBSTACLE COURSE?
Step 1: Where to Slackline?
Picking a place to slackline is mostly based on personal preference. To set up the ninja line, two objects will be needed to tie it into place (typically trees).
MATTERS NEEDING ATTENTION:
Do not use buildings or playground structures (unless specifically built for slackline), live power/telephone poles, dead trees or stumps, trees with rot, disease, structural cracks, excessive lean, exposed roots, or trees in boggy, wet, sandy, loose soil. This is only a partial list. You must use your good judgment in determining what is not an appropriate anchor point. If in doubt, please contact us.
Step 2: Install tree protectors. They not only protect trees but also reduce wear on the slackline.
Installation height: more than 2.2m (7.2ft) is recommended.
Of course, this value is not absolute. You can adjust the installation height of the slackline according to your child's height.
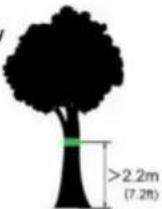
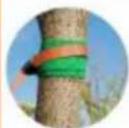
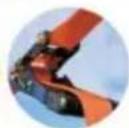
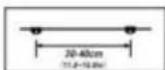
Step 3: Install the main line and ratchet line on the installed tree protectors.
Step 4: Install the hanging buckles onto the main line.
It is recommended to install a hanging buckle every 11.8-15.8 inches.
![graph LR A["Device"] --> B["Transformation"] B --> C["Assembly"]](/content/2026/04/736592/images/af6fe26b0e7bda942e7f0aaa51cc31c7d09a8c09fcc4d31ecae93d0dc5d0f068.jpg)
If you are unable to determine the exact location during installation, you can straighten the main line and place it on the ground. Then measure with a tape measure and mark the main line with a marker pen.
Step 5: Use the ratchet to tighten the main line of the slackline.
Tip: If you need to adjust the position of your hanging buckles, you must loosen the ratchet line before adjustment. Because the friction between the buckles and the main line is very large when the main line is tightened, you cannot adjust the position of the hanging buckles.
Step 6: Use contact buckles to hang all accessories on the hanging buckle and tighten it.
Please note that after installing the accessories, you need to test their reliability. We sincerely hope you enjoy your ninja slackline kit as much as possible. Have fun!
• HOW TO USE THE RATCHET LINE
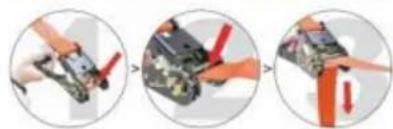
- First, close the ratchet, and thread the webbing through the upper hole in the middle of the ratchet. If the position of the hole is not above, it can be adjusted to the top by opening and closing the ratchet.
- Pull the webbing down until it is as tight as possible. Then tighten the webbing with one hand and hold the handle of the ratchet with the other hand. Tighten the webbing by continuously opening and closing the ratchet until you can't pull the handle of the ratchet. Note: please make sure your ratchet is closed when it is finally tightened.

- When you are ready to stow the slackline kit, you can pull the switch marked in the figure outward and open the handle of the ratchet to about 180° at the same time. After hearing the "bang", you can pull the webbing out of the ratchet and put it away.
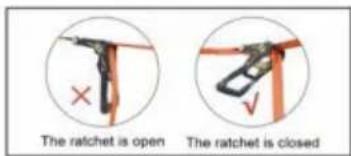
Technical Support and E-Warranty Certificate www.vevor.com/support
PR-014-60
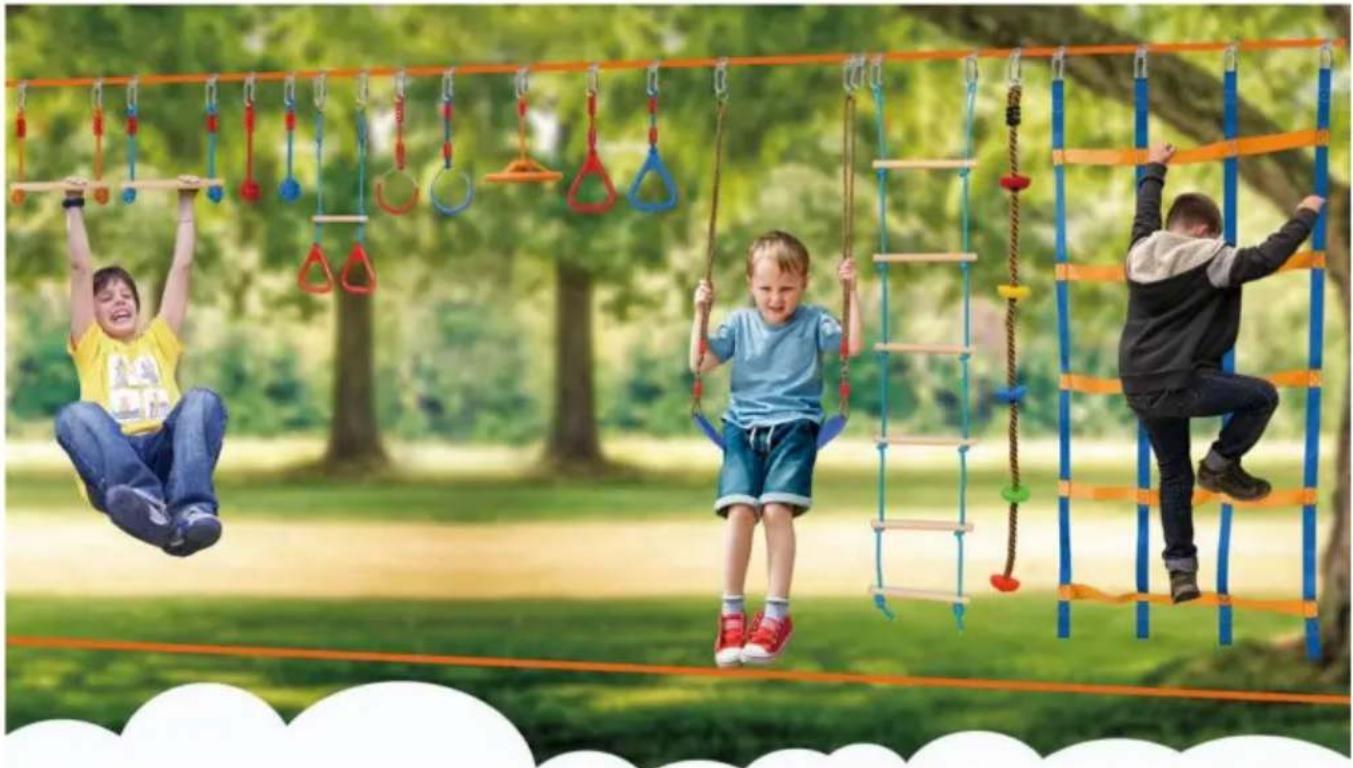
Step 1: Where to Slackline?
Picking a place to slackline is mostly based on personal preference. To set up the ninja line, two objects will be needed to tie it into place (typically trees).
▲ MATTERS NEEDING ATTENTION:
Do not use buildings or playground structures (unless specifically built for slackline), live power/telephone poles, dead trees or stumps, trees with rot, disease, structural cracks, excessive lean, exposed roots, or trees in boggy wet, sandy, loose soil. This is only a partial list. You must use your good judgment in determining what is not an appropriate anchor point. If in doubt, please contact us.
Step 2: Install tree protectors. It can not only protect trees, but also reduce the wear of slackline.
Installation height: more than 2.2m (7.2ft) is recommended.
Of course, this value is not absolute. You can appropriately adjust the installation height of the slackline according to your child's height.
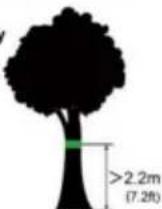
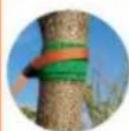
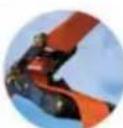
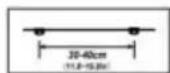
Step 3: Install the main line and ratchet line on the installed tree protectors.
Step 4: Install the hanging buckles to the main line.
It is recommended to install a hanging buckle every 11.8-15.8in.
![graph LR A["Device with sensor"] --> B["Valve with red valves"] B --> C["Belt with orange belt drive"]](/content/2026/04/736592/images/40b566f7d942735f42d1736f141f8ae668d4801e5977c0eb7140c416d518784d.jpg)
If you are unable to determine the exact location during installation, you can straighten the main line and place it on the ground. Then measure with a tape measure and mark the main line with a marker pen.
Step 5: Use the ratchet to tighten the main line of the slackline.
Tip: If you need to adjust the position of your hanging buckles, you must loosen the ratchet line before adjustment. Because the friction between the buckles and the main line is very large when the main line is tightened, you cannot adjust the position of the hanging buckles.
Step 6: Use contact buckles to hang all accessories on the hanging buckle and tighten it.
Please note that after installing the accessories, you need to test their reliability. We sincerely hope you enjoy your ninja slackline kit as much as possible. Have fun!
• HOW TO USE THE RATCHET LINE
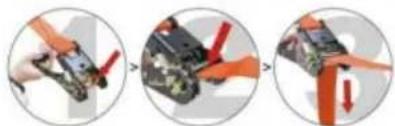
- First, close the ratchet and thread the webbing through the upper hole in the middle of the ratchet. If the position of the hole is not above, it can be adjusted to the top by opening and closing the ratchet.
- Pull the webbing down until it is as tight as possible. Then tighten the webbing with one hand and hold the handle of the ratchet with the other hand. Tighten the webbing by continuously opening and closing the ratchet until you cannot pull the handle of the ratchet. Note: Please make sure your ratchet is closed when it is finally tightened.
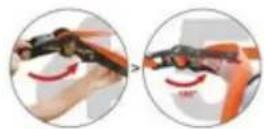
- When you are ready to stow the slackline kit, you can pull the switch marked in the figure outward and open the handle of the ratchet to about 180° at the same time. After hearing the "bang", you can pull the webbing out of the ratchet and put it away.
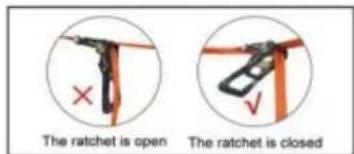
Technical Support and E-Warranty Certificate www.vevor.com/support
PR-012-65
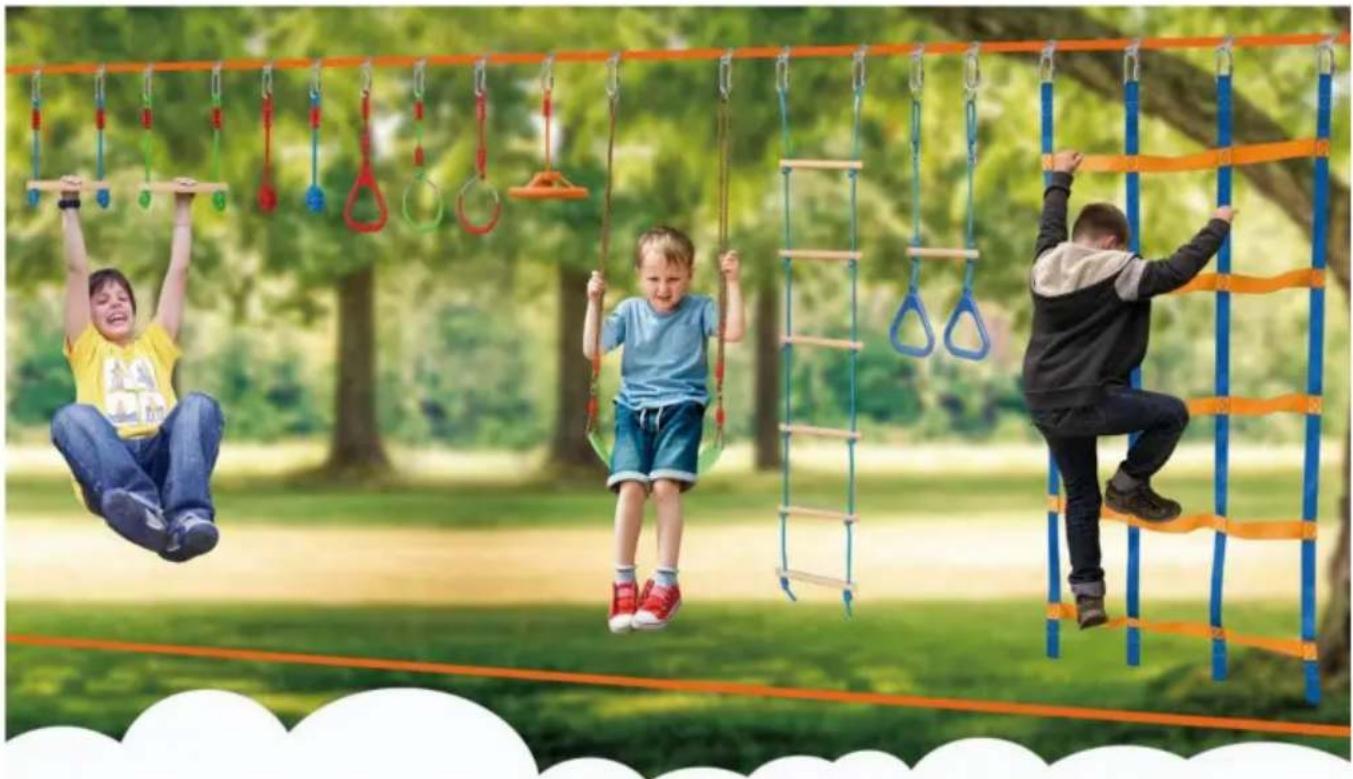
Step 1: Where to Slackline?
Picking a place to slackline is mostly based on personal preference. To set up the ninja line, two objects will be needed to tie it into place (typically trees).
MATTERS NEEDING ATTENTION:
Do not use buildings or playground structures (unless specifically built for slackline), live power/telephone poles, dead trees or stumps, trees with rot, disease, structural cracks, excessive lean, exposed roots, or trees in boggy, wet, sandy, loose soil. This is only a partial list. You must use your good judgment in determining what is not an appropriate anchor point. If in doubt, please contact us.
Step 2: Install tree protectors. They not only protect trees, but also reduce wear on the slackline.
Installation height: more than 2.2m (7.2ft) is recommended.
Of course, this value is not absolute. You can adjust the installation height of the slackline appropriately according to your child's height.
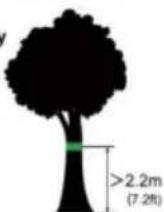
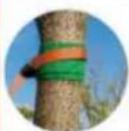
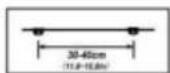
Step 3: Install the main line and ratchet line on the installed tree protectors.
Step 4: Install the hanging buckles onto the main line.
It is recommended to install a hanging buckle every 11.8-15.8in.
![graph LR A["Device with sensor"] --> B["Valve with red curved arrows"] B --> C["Belt drive mechanism"]](/content/2026/04/736592/images/7167ad6bd798c120537d6703152853009086eea8a2c9f8135b94d53eb50f1063.jpg)
If you are unable to determine the exact location during installation, you can straighten the main line and place it on the ground. Then measure with a tape measure and mark the main line with a marker pen.
Step 5: Use the ratchet to tighten the main line of the slackline.
Tip: If you need to adjust the position of your hanging buckles, you must loosen the ratchet line before adjustment. Because the friction between the buckles and the main line is very large when the main line is tightened, you cannot adjust the position of the hanging buckles.
Step 6: Use contact buckles to hang all accessories on the hanging buckle and tighten it.
Please note that after installing the accessories, you need to test their reliability. We sincerely hope you enjoy your ninja slackline kit as much as possible. Have fun!
• HOW TO USE THE RATCHET LINE
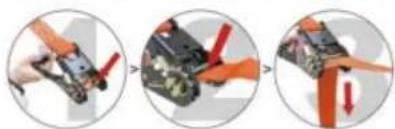
- First, close the ratchet and thread the webbing through the upper hole in the middle of the ratchet. If the position of the hole is not above, it can be adjusted to the top by opening and closing the ratchet.
- Pull the webbing down until it is as tight as possible. Then tighten the webbing with one hand and hold the handle of the ratchet with the other hand. Tighten the webbing by continuously opening and closing the ratchet until you can't pull the handle of the ratchet. Note: please make sure your ratchet is closed when it is finally tightened.
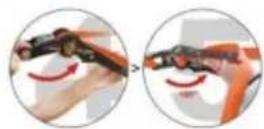
- When you are ready to stow the slackline kit, you can pull the switch marked in the figure outward and open the handle of the ratchet to about 180° at the same time. After hearing the "bang", you can pull the webbing out of the ratchet and put it away.
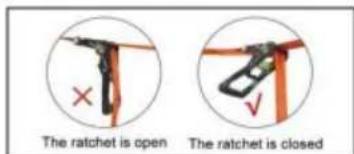
Technical Support and E-Warranty Certificate www.vevor.com/support
PR-03-60
Step 1: Where to Slackline?
Picking a place to slackline is mostly based on personal preference. To set up the ninjaline, two objects will be needed to tie it into place (typically trees).
MATTERS NEEDING ATTENTION:
Do not use buildings or playground structures (unless specifically built for slackline), live power/telephone poles, dead trees or stumps, trees with rot, disease, structural cracks, excessive lean, exposed roots, or trees in boggy, wet, sandy, loose soil. This is only a partial list. You must use your good judgment in determining what is not an appropriate anchor point. If in doubt, contact us.
Step 2: Install tree protectors. They not only protect trees but also reduce the wear of the slackline.
Step 3: Attach the main line to a tree or solid post.
Installation height: Generally, we recommend that the installation height difference of two slacklines be slightly less than: your child's height + half of the length of the balance belt, and the slackline at the bottom is about 23.6in from the ground. Of course, you can adjust the height according to your actual situation.
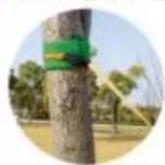
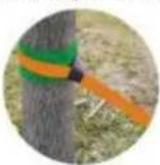
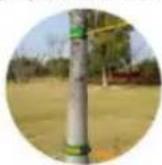
Step 4: Attach the ratchet line to another tree or solid post. Put the ratchet protector on first. Then use the ratchet to tighten the main line of the slackline. Cover the protective sleeve onto the ratchet again. (The protective sleeve is used for 2-inch slackline.)
Step 5: How to use the slackline ratchet?
We introduced the use of ratchet on the right.
Please note that after installing the accessories, you need to test their reliability. We sincerely hope you enjoy your slackline kit as much as possible. Have fun!
• HOW TO USE THE RATCHET LINE?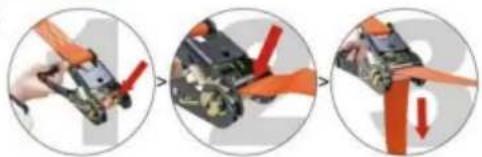
- First, close the ratchet, and thread the webbing through the upper hole in the middle of the ratchet. If the position of the hole is not above, it can be adjusted to the top by opening and closing the ratchet.
- Pull the webbing down until it is as tight as possible. Then tighten the webbing with one hand and hold the handle of the ratchet with the other hand. Tighten the webbing by continuously opening and closing the ratchet until you can't pull the handle of the ratchet. Note: please make sure your ratchet is closed when it is finally tightened.
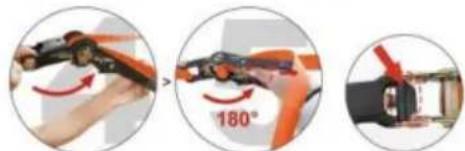
- When you are ready to stow the slackline kit, you can pull the switch marked in the figure outward and open the handle of the ratchet to about 180° at the same time. After hearing the "bang", you can pull the webbing out of the ratchet and put it away.
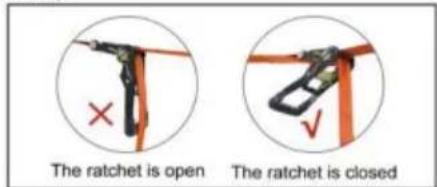
Technical Support and E-Warranty
Certificate www.vevor.com/support
CLEANING AND STORAGE
C/O YH Consulting Limited Office 147, Centurion House, London Road, Staines-upon-Thames, Surrey, TW18 4AX
E-CrossStu GmbH
NEED HELP? CONTACT US!
• HOW TO SET UP A NINJA OBSTACLE COURSE?
Step 1: Where to Slackline?
Picking a place to slackline is mostly based on personal preference. To set up the ninja line, two objects will be needed to tie it into place (typically trees).
MATTERS NEEDING ATTENTION:
Do not use buildings or playground structures (unless specifically built for slackline), live power/telephone poles, dead trees or stumps, trees with rot, disease, structural cracks, excessive lean, exposed roots, or trees in boggy, wet, sandy, loose soil. This is only a partial list. You must use your good judgment in determining what is not an appropriate anchor point. If in doubt, please contact us.
Step 2: Install tree protectors. They not only protect the trees but also reduce wear on the slackline.
Installation height: more than 2.2m (7.2ft) is recommended.
Of course, this value is not absolute. You can adjust the installation height of the slackline appropriately according to your child's height.
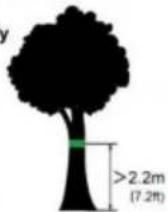
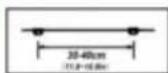
Step 3: Install the main line and ratchet line on the installed tree protectors.
Step 4: Install the hanging buckles onto the main line.
It is recommended to install a hanging buckle every 11.8-15.8 inches.
![graph LR A["Device Icon"] --> B["Close-up of Belt Buck"] B --> C["Close-up of Belt Buck"]](/content/2026/04/736592/images/8a4494aa05606ef9ddc82ec78e6da48149c5ad8c6e9c6a41529123aa74e7c6c5.jpg)
If you are unable to determine the exact location during installation, you can straighten the main line and place it on the ground. Then measure with a tape measure and mark the main line with a marker pen.
Step 5: Use the ratchet to tighten the main line of the slackline.
Tip: If you need to adjust the position of your hanging buckles, you must loosen the ratchet line before adjustment. Because the friction between the buckles and the main line is very large when the main line is tightened, you cannot adjust the position of the hanging buckles.
Step 6: Use contact buckles to hang all accessories on the hanging buckle and tighten them.
Please note that after installing the accessories, you need to test their reliability. We sincerely hope you enjoy your ninja slackline kit as much as possible. Have fun!
• HOW TO USE THE RATCHET LINE
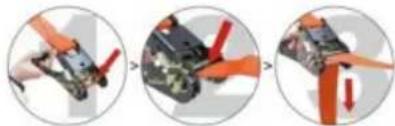
- First, close the ratchet and thread the webbing through the upper hole in the middle of the ratchet. If the hole is not positioned at the top, you can adjust it by opening and closing the ratchet.
- Pull the webbing down until it is as tight as possible. Then tighten the webbing with one hand while holding the ratchet handle with the other. Tighten the webbing by continuously opening and closing the ratchet until you can no longer pull the handle. Note: Make sure the ratchet is closed when it is finally tightened.
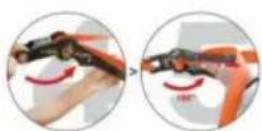
3. When you are ready to stow the slackline kit, pull the switch marked in the figure outward and open the ratchet handle to about 180° at the same time. After hearing a "bang", you can pull the webbing out of the ratchet and put it away.
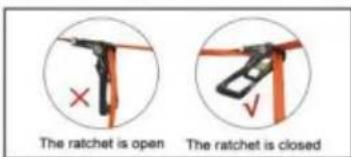
Technical Support and E-Warranty Certificate www.vevor.com/support
PR-010-50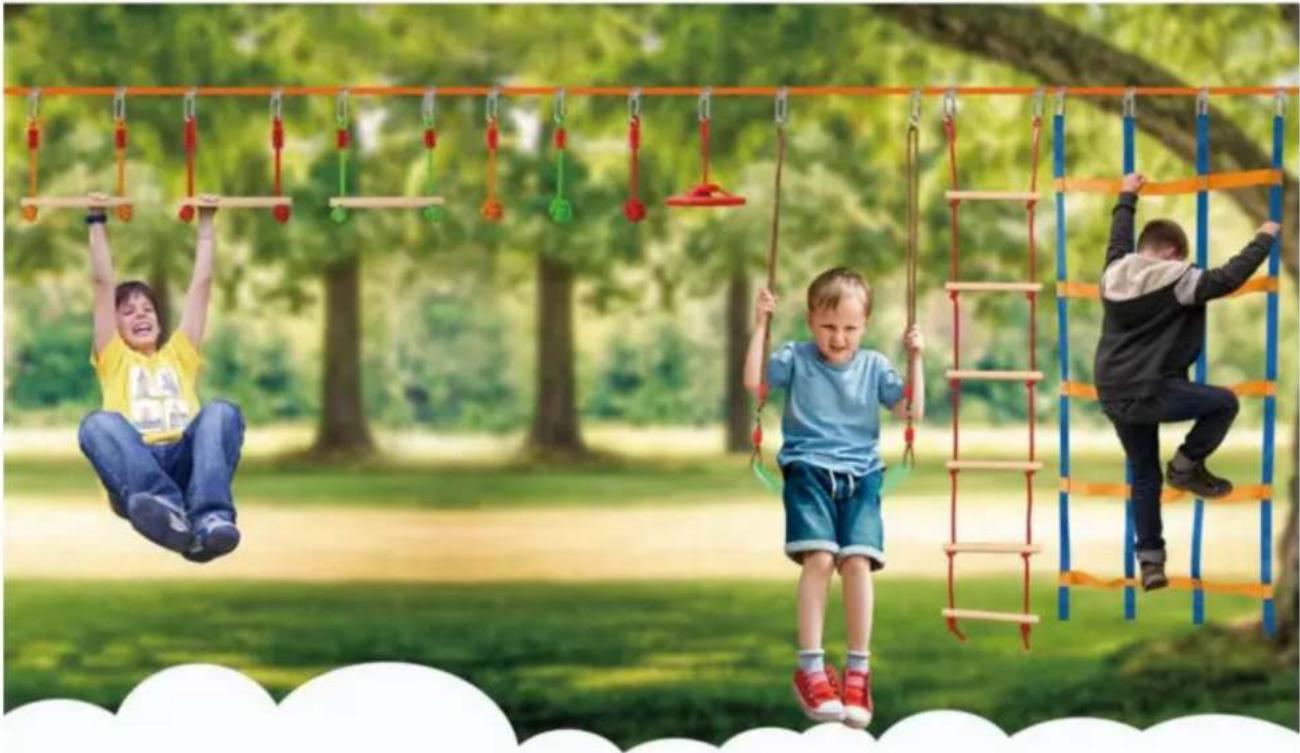
Step 1: Where to Slackline?
Choosing a place to slackline is mostly based on personal preference. To set up the ninja line, you will need two objects to tie it to (typically trees).
MATTERS NEEDING ATTENTION:
Do not use buildings or playground structures (unless specifically built for slackline), live power/telephone poles, dead trees or stumps, trees with rot, disease, structural cracks, excessive lean, exposed roots, or trees in boggy, wet, sandy, or loose soil. This is only a partial list. You must use your good judgment in determining what is not an appropriate anchor point. If in doubt, please contact us.
Step 2: Install tree protectors. They not only protect the trees but also reduce wear on the slackline.
Installation height: more than 2.2m (7.2ft) is recommended.
Of course, this value is not absolute. You can adjust the installation height of the slackline appropriately according to your child's height.
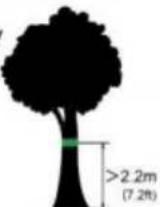
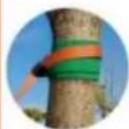
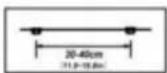
Step 3: Install the main line and ratchet line on the installed tree protectors.
Step 4: Install the hanging buckles to the main line.
It is recommended to install a hanging buckle every 11.8-15.8in.
![graph LR A["Device Icon"] --> B["Arrow to Red Motion"] B --> C["Arrow to Orange Belt"]](/content/2026/04/736592/images/16da3bcaa92f5fee8e23843b774ad5b4b091778baef35d9667780d269e64344d.jpg)
If you are unable to determine the exact location during installation, you can straighten the main line and put it on the ground. Then measure with a tape measure and mark on the main line with a marker pen.
Step 5: Use the ratchet to tighten the main line of the slackline.
Tip: if you need to adjust the position of your hanging buckles, you must loosen the ratchet line before adjustment. Because the friction between the buckles and the main line is very large when the main line is tightened, you can't adjust the position of the hanging buckles.
Step 6: Use contact buckles to hang all accessories on the hanging buckle and tighten it.
Please note that after installing the accessories, you need to test their reliability. We sincerely hope you enjoy your ninja slackline kit as much as possible. Have fun!
• HOW TO USE THE RATCHET LINE
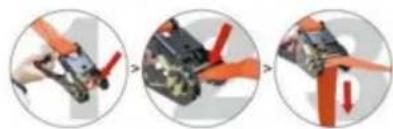
- First, close the ratchet and thread the webbing through the upper hole in the middle of the ratchet. If the position of the hole is not above, it can be adjusted to the top by opening and closing the ratchet.
- Pull the webbing down until it is as tight as possible. Then tighten the webbing with one hand and hold the handle of the ratchet with the other hand. Tighten the webbing by continuously opening and closing the ratchet until you can't pull the handle of the ratchet. Note: please make sure your ratchet is closed when it is finally tightened.
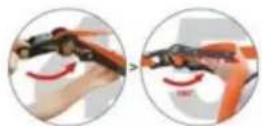
- When you are ready to stow the slackline kit, you can pull the switch marked in the figure outward and open the handle of the ratchet to about 180° at the same time. After hearing the "bang", you can pull the webbing out of the ratchet and put it away.
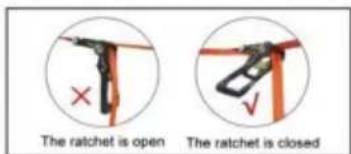
Technical Support and E-Warranty Certificate www.vevor.com/support
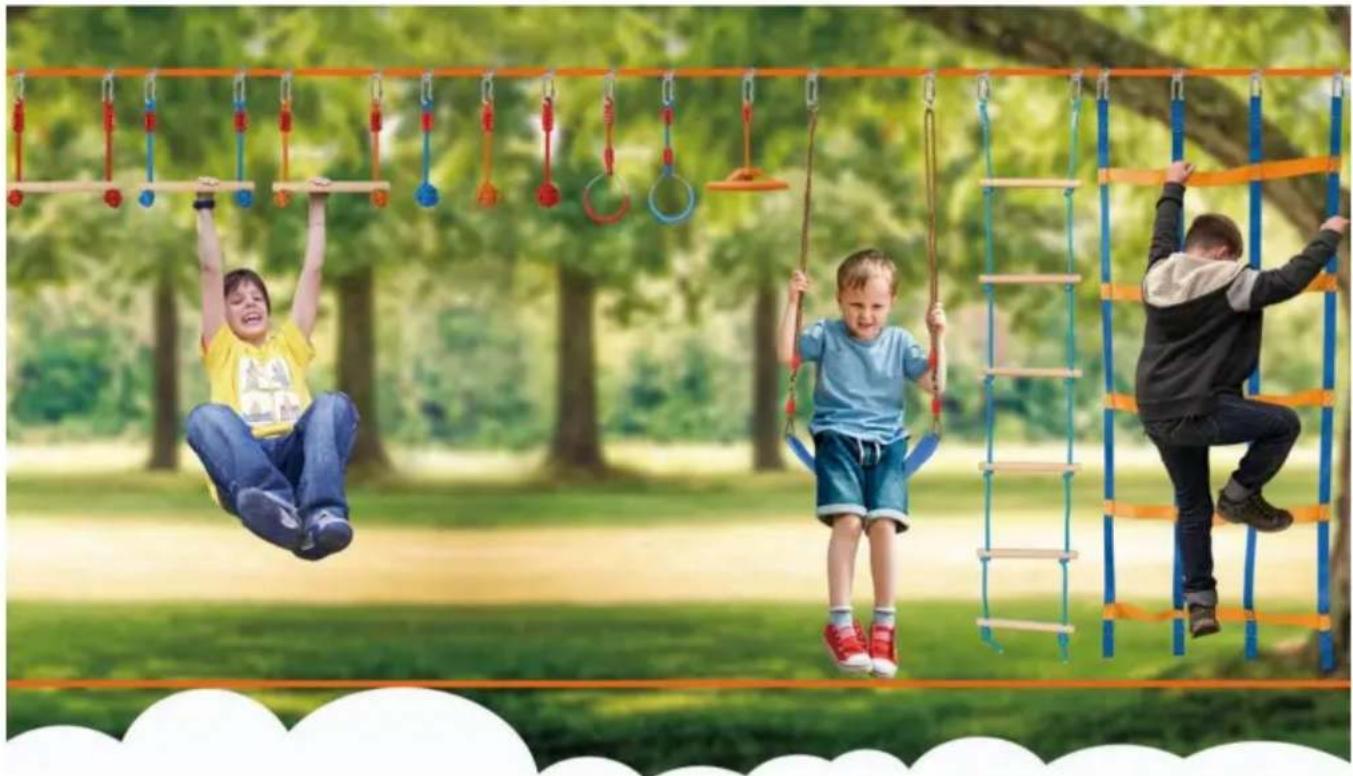
• HOW TO SET UP A NINJA OBSTACLE COURSE?
Step 1: Where to Slackline?
Picking a place to slackline is mostly based on personal preference. To set up the ninja line, two objects will be needed to tie it into place (typically trees).
▲ MATTERS NEEDING ATTENTION:
Do not use buildings or playground structures (unless specifically built for slackline), live power/telephone poles, dead trees or stumps, trees with rot, disease, structural cracks, excessive lean, exposed roots, or trees in boggy, wet, sandy, loose soil. This is only a partial list. You must use your good judgment in determining what is not an appropriate anchor point. If in doubt, please contact us.
Step 2: Install tree protectors. They not only protect trees, but also reduce the wear of the slackline.
Installation height: more than 2.2m (7.2ft) is recommended.
Of course, this value is not absolute. You can appropriately adjust the installation height of the slackline according to your child's height.
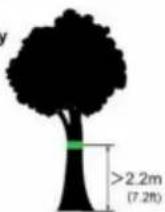
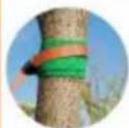
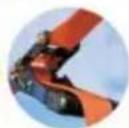
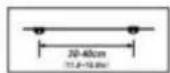
Step 3: Install the main line and ratchet line on the installed tree protectors.
Step 4: Install the hanging buckles to the main line.
It is recommended to install a hanging buckle every 11.8-15.8in.
![graph LR A["Device"] --> B["Transformation"] B --> C["Assembly"]](/content/2026/04/736592/images/4c29cc36fd6399df32cd9a00cff061ac0d8e9d1cc9dd258874c2e7b5535f37b2.jpg)
If you are unable to determine the exact location during installation, you can straighten the main line and put it on the ground. Then measure with a tape measure and mark on the main line with a marker pen.
Step 5: Use the ratchet to tighten the main line of the slackline.
Tip: if you need to adjust the position of your hanging buckles, you must loosen the ratchet line before adjustment. Because the friction between the buckles and the main line is very large when the main line is tightened, you can't adjust the position of the hanging buckles.
Step 6: Use contact buckles to hang all accessories on the hanging buckle and tighten it.
Please note that after installing the accessories, you need to test their reliability. We sincerely hope you enjoy your ninja slackline kit as much as possible. Have fun!
• HOW TO USE THE RATCHET LINE
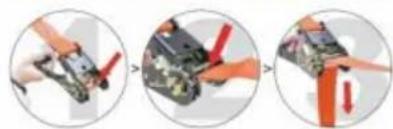
- First, close the ratchet, and thread the webbing through the upper hole in the middle of the ratchet. If the position of the hole is not above, it can be adjusted to the top by opening and closing the ratchet.
- Pull the webbing down until it is as tight as possible. Then tighten the webbing with one hand and hold the handle of the ratchet with the other hand. Tighten the webbing by continuously opening and closing the ratchet until you can't pull the handle of the ratchet. Note: please make sure your ratchet is closed when it is finally tightened.
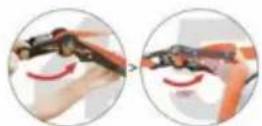
- When you are ready to stow the slackline kit, you can pull the switch marked in the figure outward and open the handle of the ratchet to about 180° at the same time. After hearing the "bang", you can pull the webbing out of the ratchet and put it away.
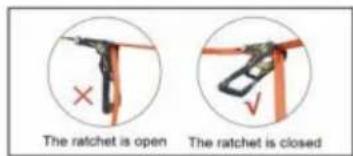
Technical Support and E-Warranty Certificate www.vevor.com/support
PR-014-60
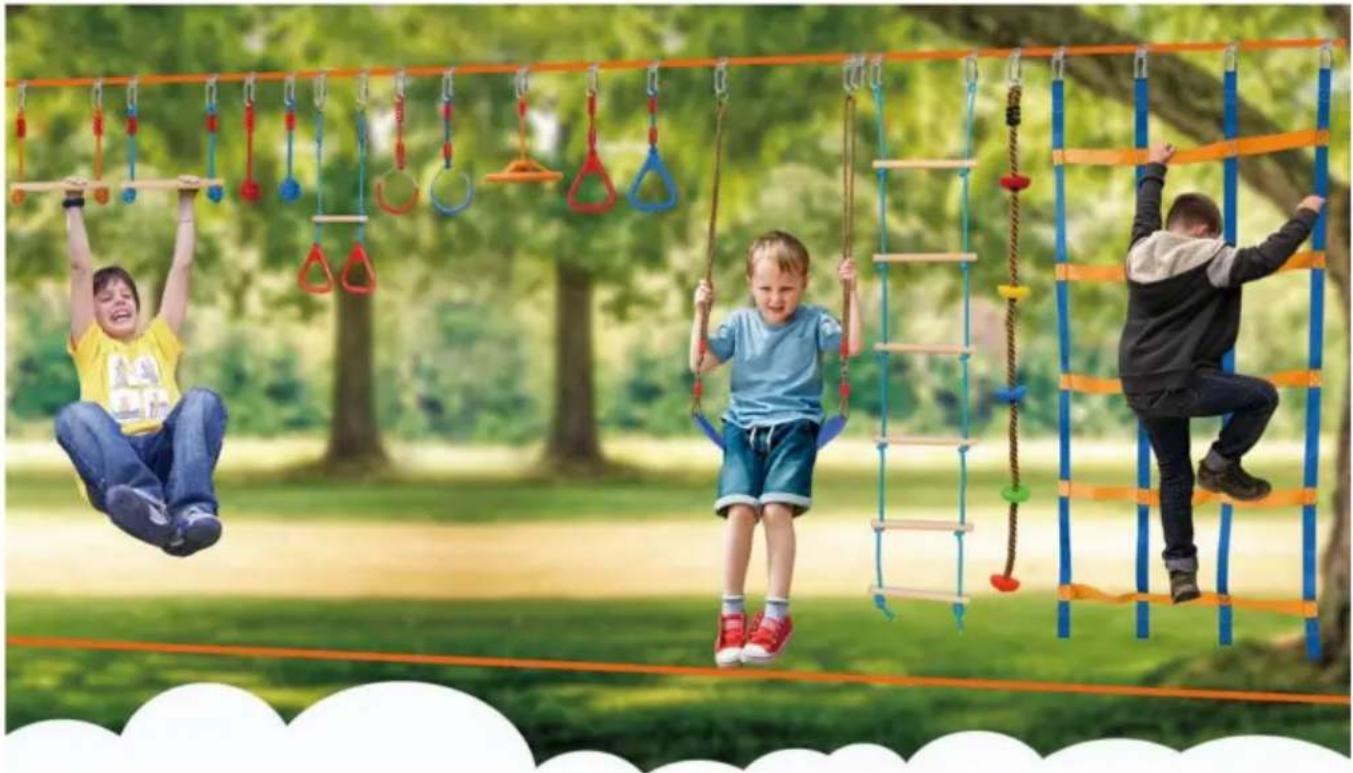
Step 1: Where to Slackline?
Picking a place to slackline is mostly based on personal preference. To set up the ninja line, two objects will be needed to tie it into place (typically trees).
▲ MATTERS NEEDING ATTENTION:
Do not use buildings or playground structures (unless specifically built for slackline), live power/telephone poles, dead trees or stumps, trees with rot, disease, structural cracks, excessive lean, exposed roots, or trees in boggy wet, sandy, loose soil. This is only a partial list. You must use your good judgment in determining what is not an appropriate anchor point. If in doubt, please contact us.
Step 2: Install tree protectors. It can not only protect trees, but also reduce the wear of slackline.
Installation height: more than 2.2m (7.2ft) is recommended.
Of course, this value is not absolute. You can adjust the installation height of the slackline appropriately according to your child's height.
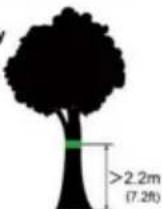
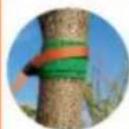
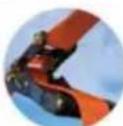
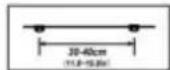
Step 3: Install the main line and ratchet line on the installed tree protectors.
Step 4: Install the hanging buckles to the main line.
It is recommended to install a hanging buckle every 11.8-15.8in.
![graph LR A["Device with sensor"] --> B["Valve with red valves"] B --> C["Belt with orange belt drive"]](/content/2026/04/736592/images/731fa00d68463bdf70b4557a4dc826f972c1ec2576f2f9d45374d8e41d1c6411.jpg)
If you are unable to determine the exact location during installation, you can straighten the main line and put it on the ground. Then measure with a tape measure and mark on the main line with a marker pen.
Step 5: Use the ratchet to tighten the main line of the slackline.
Tip: if you need to adjust the position of your hanging buckles, you must loosen the ratchet line before adjustment. Because the friction between the buckles and the main line is very large when the main line is tightened, you can't adjust the position of the hanging buckles.
Step 6: Use contact buckles to hang all accessories on the hanging buckle and tighten it.
Please note that after installing the accessories, you need to test their reliability. We sincerely hope you enjoy your ninja slackline kit as much as possible. Have fun!
• HOW TO USE THE RATCHET LINE
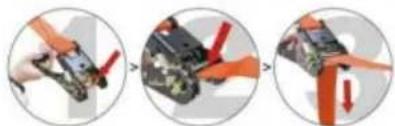
- First, close the ratchet and thread the webbing through the upper hole in the middle of the ratchet. If the position of the hole is not above, it can be adjusted to the top by opening and closing the ratchet.
- Pull the webbing down until it is as tight as possible. Then tighten the webbing with one hand and hold the handle of the ratchet with the other hand. Tighten the webbing by continuously opening and closing the ratchet until you can't pull the handle of the ratchet. Note: please make sure your ratchet is closed when it is finally tightened.
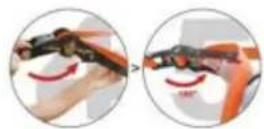
- When you are ready to stow the slackline kit, you can pull the switch marked in the figure outward and open the handle of the ratchet to about 180° at the same time. After hearing the "bang", you can pull the webbing out of the ratchet and put it away.
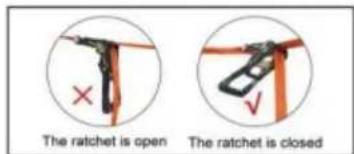
Step 1: Where to Slackline?
Picking a place to slackline is mostly based on personal preference. To set up the ninja line, two objects will be needed to tie it into place (typically trees).
MATTERS NEEDING ATTENTION:
Do not use buildings or playground structures (unless specifically built for slackline), live power/telephone poles, dead trees or stumps, trees with rot, disease, structural cracks, excessive lean, exposed roots, or trees in boggy, wet, sandy, loose soil. This is only a partial list. You must use your good judgment in determining what is not an appropriate anchor point. If in doubt, please contact us.
Step 2: Install tree protectors. It can not only protect trees, but also reduce the wear of slackline.
Installation height: more than 2.2m (7.2ft) is recommended.
Of course, this value is not absolute. You can appropriately adjust the installation height of the slackline according to your child's height.
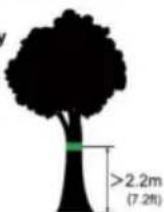
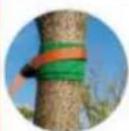

Step 3: Install the main line and ratchet line on the installed tree protectors.
Step 4: Install the hanging buckles to the main line.
It is recommended to install a hanging buckle every 11.8-15.8in.
![graph LR A["Device with sensor"] --> B["Valve with red curved arrows"] B --> C["Belt drive mechanism"]](/content/2026/04/736592/images/621fa4a0f106e046fb32d50b1b3dae17259216c9aad594a194f6e364bb94acfa.jpg)
If you are unable to determine the exact location during installation, you can straighten the main line and put it on the ground. Then measure with a tape measure and mark on the main line with a marker pen.
Step 5: Use the ratchet to tighten the main line of the slackline.
Tip: if you need to adjust the position of your hanging buckles, you must loosen the ratchet line before adjustment. Because the friction between the buckles and the main line is very large when the main line is tightened, you can't adjust the position of the hanging buckles.
Step 6: Use contact buckles to hang all accessories on the hanging buckle and tighten it.
Please note that after installing the accessories, you need to test their reliability. We sincerely hope you enjoy your ninja slackline kit as much as possible. Have fun!
• HOW TO USE THE RATCHET LINE
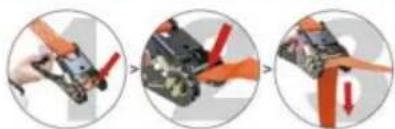
- First, close the ratchet and thread the webbing through the upper hole in the middle of the ratchet. If the position of the hole is not above, it can be adjusted to the top by opening and closing the ratchet.
- Pull the webbing down until it is as tight as possible. Then tighten the webbing with one hand and hold the handle of the ratchet with the other hand. Tighten the webbing by continuously opening and closing the ratchet. Until you can't pull the handle of the ratchet. Note: please make sure your ratchet is closed when it is finally tightened.
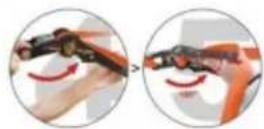
- When you are ready to stow the slackline kit, you can pull the switch marked in the figure outward and open the handle of the ratchet to about 180 ° at the same time. After hearing the "bang", you can pull the webbing out of the ratchet and put it away.
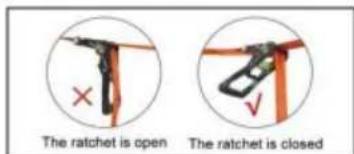
Technical Support and E-Warranty Certificate www.vevor.com/support
PR-03-60
Step 1: Where to Slackline?
Picking a place to slackline is mostly based on personal preference. To set up the ninjaline, two objects will be needed to tie it into place (typically trees).
MATTERS NEEDING ATTENTION:
Do not use buildings or playground structures (unless specifically built for slackline), live power/telephone poles, dead trees or stumps, trees with rot, disease, structural cracks, excessive lean, exposed roots, or trees in boggy, wet, sandy, loose soil. This is only a partial list. You must use your good judgment in determining what is not an appropriate anchor point. If in doubt, contact us.
Step 2: Install tree protectors. They not only protect the trees but also reduce wear on the slackline.
Step 3: Attach the main line to a tree or solid post.
Installation height: Generally, we recommend that the height difference between the two slacklines be slightly less than your child's height plus half the length of the balance belt, and the slackline at the bottom should be about 23.6 inches from the ground. Of course, you can adjust the height according to your actual situation.
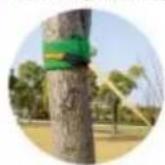
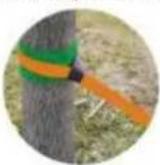
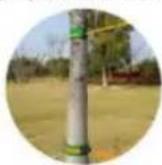
Step 4: Attach the ratchet line to another tree or solid post. Put the ratchet protector on first. Then use the ratchet to tighten the main line of the slackline. Cover the protective sleeve onto the ratchet again. (The protective sleeve is used for 2-inch slacklines.)
Step 5: How to use the slackline ratchet?
We introduced the use of the ratchet on the right.
Please note that after installing the accessories, you need to test their reliability. We sincerely hope you enjoy your slackline kit as much as possible. Have fun!
• HOW TO USE THE RATCHET LINE?
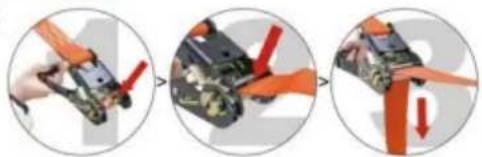
- First, close the ratchet, and thread the webbing through the upper hole in the middle of the ratchet. If the position of the hole is not above, it can be adjusted to the top by opening and closing the ratchet.
- Pull the webbing down until it is as tight as possible. Then tighten the webbing with one hand and hold the handle of the ratchet with the other hand. Tighten the webbing by continuously opening and closing the ratchet until you can't pull the handle of the ratchet. Note: please make sure your ratchet is closed when it is finally tightened.
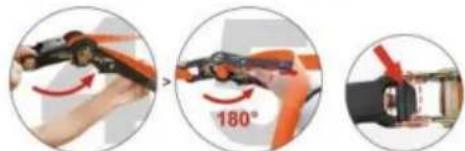
- When you are ready to stow the slackline kit, you can pull the switch marked in the figure outward and open the handle of the ratchet to about 180° at the same time. After hearing the "bang", you can pull the webbing out of the ratchet and put it away.
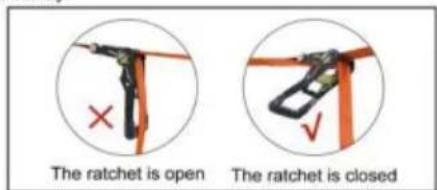
Technical Support and E-Warranty
Certificate www.vevor.com/support
CLEANING AND STORAGE
| Przedstawiciel UE |
E-CrossStu GmbH
Mainzer Landstr.69, 60329 Frankfurt am Main.
NEED HELP? CONTACT US!
www.vevor.com/support
• HOW TO SET UP A NINJA OBSTACLE COURSE?
Step 1: Where to Slackline?
Picking a place to slackline is mostly based on personal preference. To set up the ninja line, two objects will be needed to tie it into place (typically trees).
MATTERS NEEDING ATTENTION:
Do not use buildings or playground structures (unless specifically built for slackline), live power/telephone poles, dead trees or stumps, trees with rot, disease, structural cracks, excessive lean, exposed roots, or trees in boggy, wet, sandy, loose soil. This is only a partial list. You must use your good judgment in determining what is not an appropriate anchor point. If in doubt, please contact us.
Step 2: Install tree protectors. It can not only protect trees, but also reduce the wear of slackline.
Installation height: more than 2.2m (7.2ft) is recommended
Of course, this value is not absolute. You can appropriately adjust the installation height of the slackline according to your child's height.

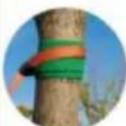
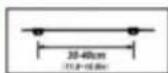
Step 3: Install the main line and ratchet line on the installed tree protectors.
Step 4: Install the hanging buckles to the main line.
It is recommended to install a hanging buckle every 11.8-15.8in.
![graph LR A["Device Icon"] --> B["Close-up of Belt Buck"] B --> C["Close-up of Belt Buck"]](/content/2026/04/736592/images/3951a9a639efd82b8fb03bf78a4544ff1e83a67d2ce470c5eeea85dc4667a524.jpg)
If you are unable to determine the exact location during installation. You can straighten the main line and put it on the ground. Then measure with a tape measure and mark on the main line with a marker pen.
Step 5: Use the ratchet to tighten the main line of the slackline.
Tip: if you need to adjust the position of your hanging buckles, you must loosen the ratchet line before adjustment. Because the friction between the buckles and the main line is very large when the main line is tightened, you can't adjust the position of the hanging buckles.
Step 6: Use contact buckles to hang all accessories on the hanging buckle and tighten it.
Please note that after installing the accessories, you need to test their reliability. We sincerely hope you enjoy your ninja slacklinel kit as much as possible. Have fun!
• HOW TO USE THE RATCHET LINE
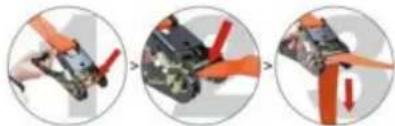
- First, close the ratchet and thread the webbing go through the upper hole in the middle of the ratchet. If the position of the hole is not above, it can be adjusted to the top by opening and closing the ratchet.
- Pull the webbing down until it is as tight as possible. Then tighten the webbing with one hand and hold the handle of the ratchet with the other hand. Tighten the webbing by continuously opening and closing the ratchet. Until you can't pull the handle of the ratchet. Note: please make sure your ratchet is closed when it is finally tightened.
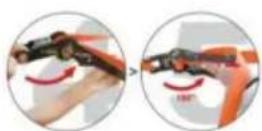
3 When you are ready to stow the slackline kit, you can pull the switch marked in the figure outward and open the handle of the ratchet to about 180 ° at the same time. After hearing the "bang", you can pull the webbing out of the ratchet and put it away.
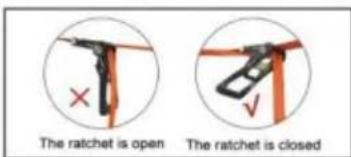
Technical Support and E-Warranty Certificate www.vevor.com/support
PR-010-50
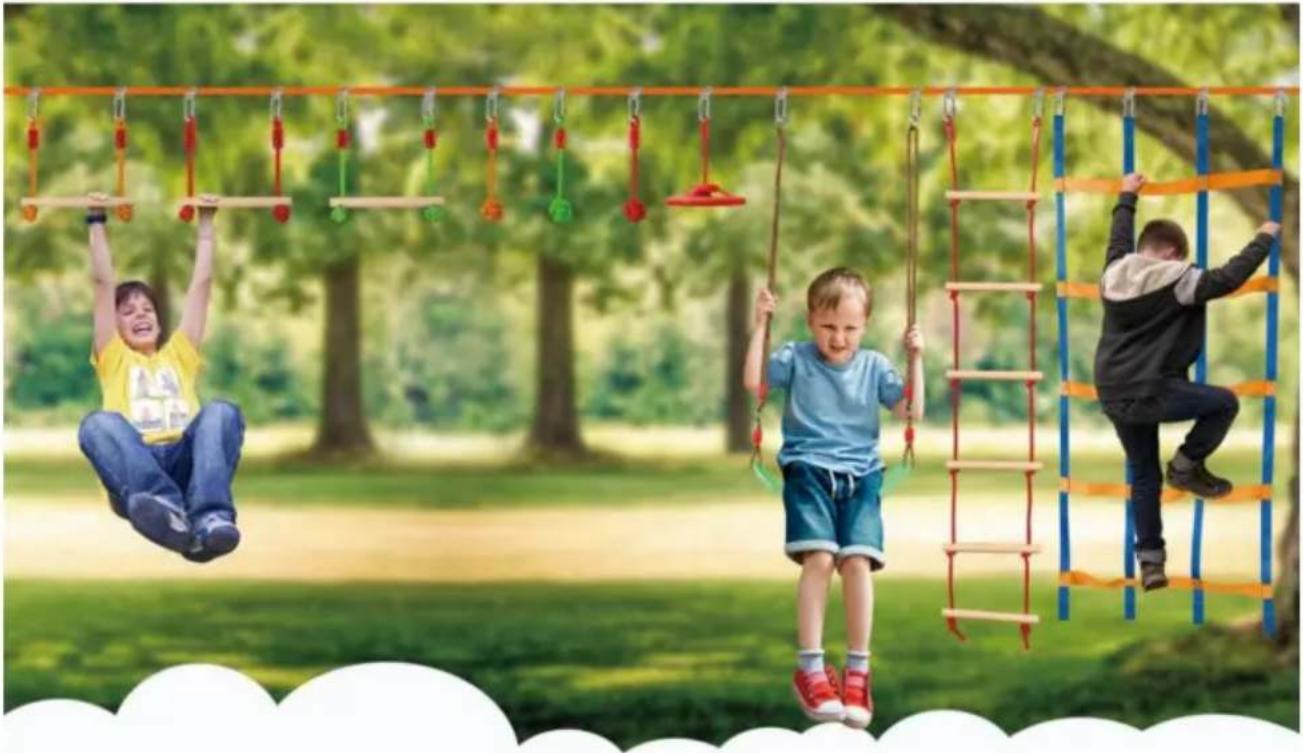
Step 1: Where to Slackline?
Picking a place to slackline is mostly based on personal preference. To set up the ninja line, two objects will be needed to tie it into place (typically trees).
MATTERS NEEDING ATTENTION:
Do not use buildings or playground structures (unless specifically built for slackline), live power/telephone poles, dead trees or stumps, trees with rot, disease, structural cracks, excessive lean, exposed roots, or trees in boggy, wet, sandy, loose soil. This is only a partial list. You must use your good judgment in determining what is not an appropriate anchor point. If in doubt, please contact us.
Step 2: Install tree protectors. They not only protect the trees but also reduce wear on the slackline.
Installation height: more than 2.2m (7.2ft) is recommended.
Of course, this value is not absolute. You can adjust the installation height of the slackline appropriately according to your child's height.
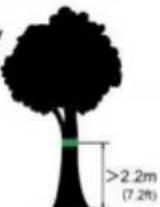
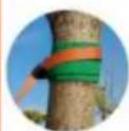
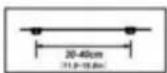
Step 3: Install the main line and ratchet line on the installed tree protectors.
Step 4: Install the hanging buckles onto the main line.
It is recommended to install a hanging buckle every 11.8-15.8in.
![graph LR A["Device with sensor"] --> B["Drive with red motion arrows"] B --> C["Drive with orange belt drive"]](/content/2026/04/736592/images/3f71f4df38494e32bef0a3b4bb9a871ad632a4b7b4f257c510b571ada6a62af5.jpg)
If you are unable to determine the exact location during installation, you can straighten the main line and place it on the ground. Then measure with a tape measure and mark the main line with a marker pen.
Step 5: Use the ratchet to tighten the main line of the slackline.
Tip: If you need to adjust the position of your hanging buckles, you must loosen the ratchet line before adjustment. Because the friction between the buckles and the main line is very large when the main line is tightened, you cannot adjust the position of the hanging buckles.
Step 6: Use contact buckles to hang all accessories on the hanging buckle and tighten it.
Please note that after installing the accessories, you need to test their reliability. We sincerely hope you enjoy your ninja slackline kit as much as possible. Have fun!
• HOW TO USE THE RATCHET LINE
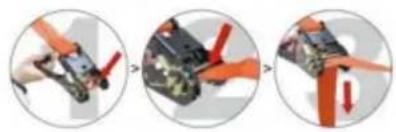
- First, close the ratchet and thread the webbing through the upper hole in the middle of the ratchet. If the position of the hole is not above, it can be adjusted to the top by opening and closing the ratchet.
- Pull the webbing down until it is as tight as possible. Then tighten the webbing with one hand and hold the handle of the ratchet with the other hand. Tighten the webbing by continuously opening and closing the ratchet until you can't pull the handle of the ratchet. Note: please make sure your ratchet is closed when it is finally tightened.
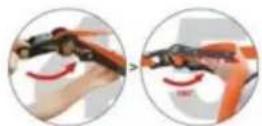
- When you are ready to stow the slackline kit, you can pull the switch marked in the figure outward and open the handle of the ratchet to about 180° at the same time. After hearing the "bang", you can pull the webbing out of the ratchet and put it away.
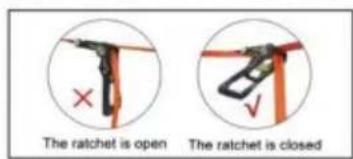
Technical Support and E-Warranty Certificate www.vevor.com/support
PR-012-56
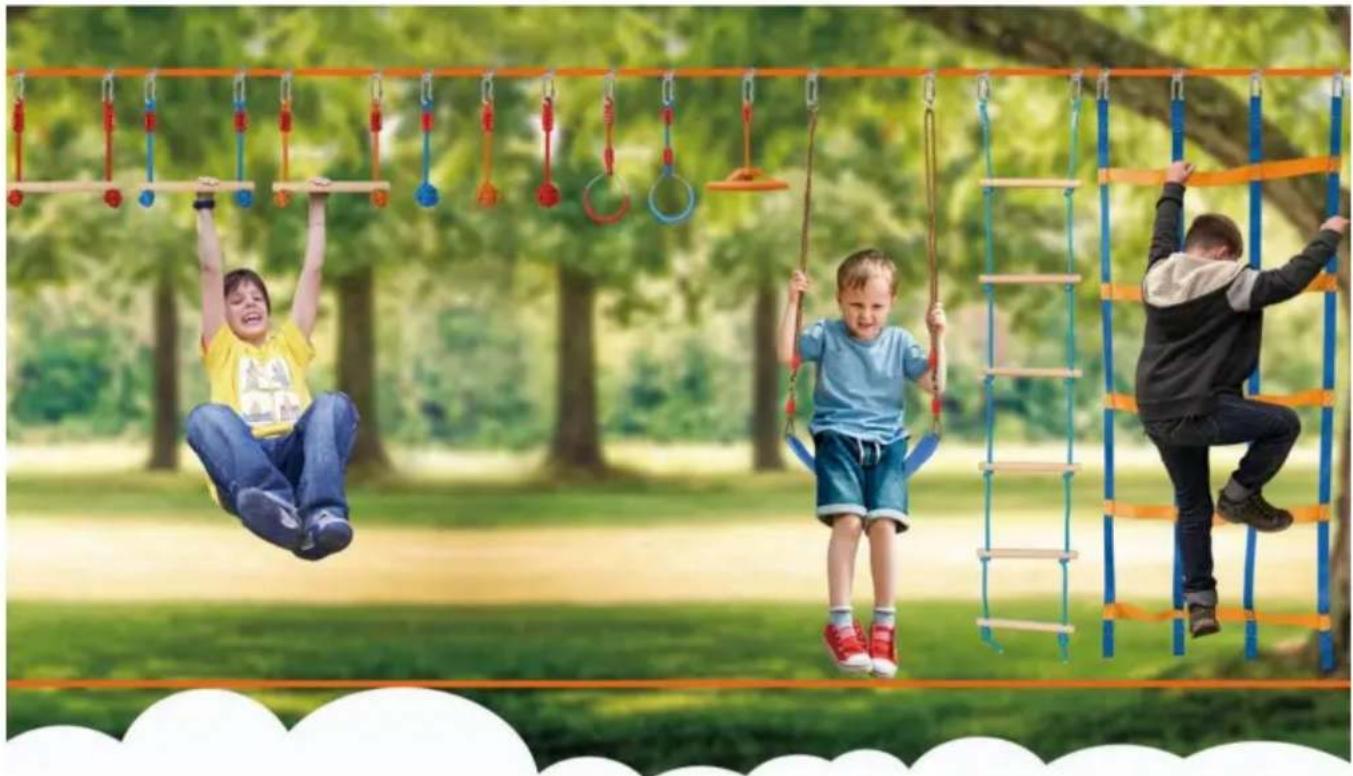
• HOW TO SET UP A NINJA OBSTACLE COURSE?
Step 1: Where to Slackline?
Picking a place to slackline is mostly based on personal preference. To set up the ninja line, two objects will be needed to tie it into place (typically trees).
MATTERS NEEDING ATTENTION:
Do not use buildings or playground structures (unless specifically built for slackline), live power/telephone poles, dead trees or stumps, trees with rot, disease, structural cracks, excessive lean, exposed roots, or trees in boggy, wet, sandy, loose soil. This is only a partial list. You must use your good judgment in determining what is not an appropriate anchor point. If in doubt, please contact us.
Step 2: Install tree protectors. It can not only protect trees, but also reduce the wear of slackline.
Installation height: more than 2.2m (7.2ft) is recommended
Of course, this value is not absolute. You can appropriately adjust the installation height of the slackline according to your child's height.
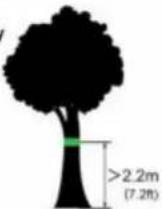
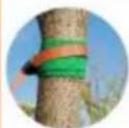
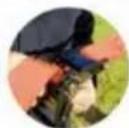
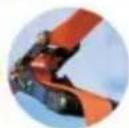
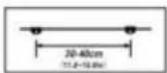
Step 3: Install the main line and ratchet line on the installed tree protectors.
Step 4: Install the hanging buckles to the main line.
It is recommended to install a hanging buckle every 11.8-15.8in.
![graph LR A["Device with sensor"] --> B["Valve with valves"] B --> C["Belt drive mechanism"]](/content/2026/04/736592/images/55a55f71500fd274dd8905e9b5b2af1ff2a70cc6728b2f41d03e33b3ed9e6abc.jpg)
If you are unable to determine the exact location during installation. You can straighten the main line and put it on the ground. Then measure with a tape measure and mark on the main line with a marker pen.
Step 5: Use the ratchet to tighten the main line of the slackline.
Tip: if you need to adjust the position of your hanging buckles, you must loosen the ratchet line before adjustment. Because the friction between the buckles and the main line is very large when the main line is tightened, you can't adjust the position of the hanging buckles.
Step 6: Use contact buckles to hang all accessories on the hanging buckle and tighten it.
Please note that after installing the accessories, you need to test their reliability. We sincerely hope you enjoy your ninja slackline kit as much as possible. Have fun!
• HOW TO USE THE RATCHET LINE
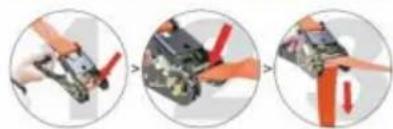
- First, close the ratchet, and thread the webbing through the upper hole in the middle of the ratchet. If the position of the hole is not above, it can be adjusted to the top by opening and closing the ratchet.
- Pull the webbing down until it is as tight as possible. Then tighten the webbing with one hand and hold the handle of the ratchet with the other hand. Tighten the webbing by continuously opening and closing the ratchet. Until you can't pull the handle of the ratchet. Note: please make sure your ratchet is closed when it is finally tightened.
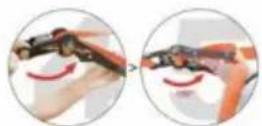
- When you are ready to stow the slackline kit, you can pull the switch marked in the figure outward and open the handle of the ratchet to about 180 ° at the same time. After hearing the "bang", you can pull the webbing out of the ratchet and put it away.
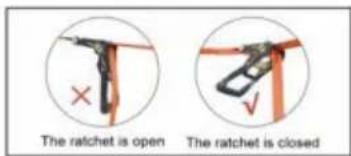
Technical Support and E-Warranty Certificate www.vevor.com/support
PR-014-60
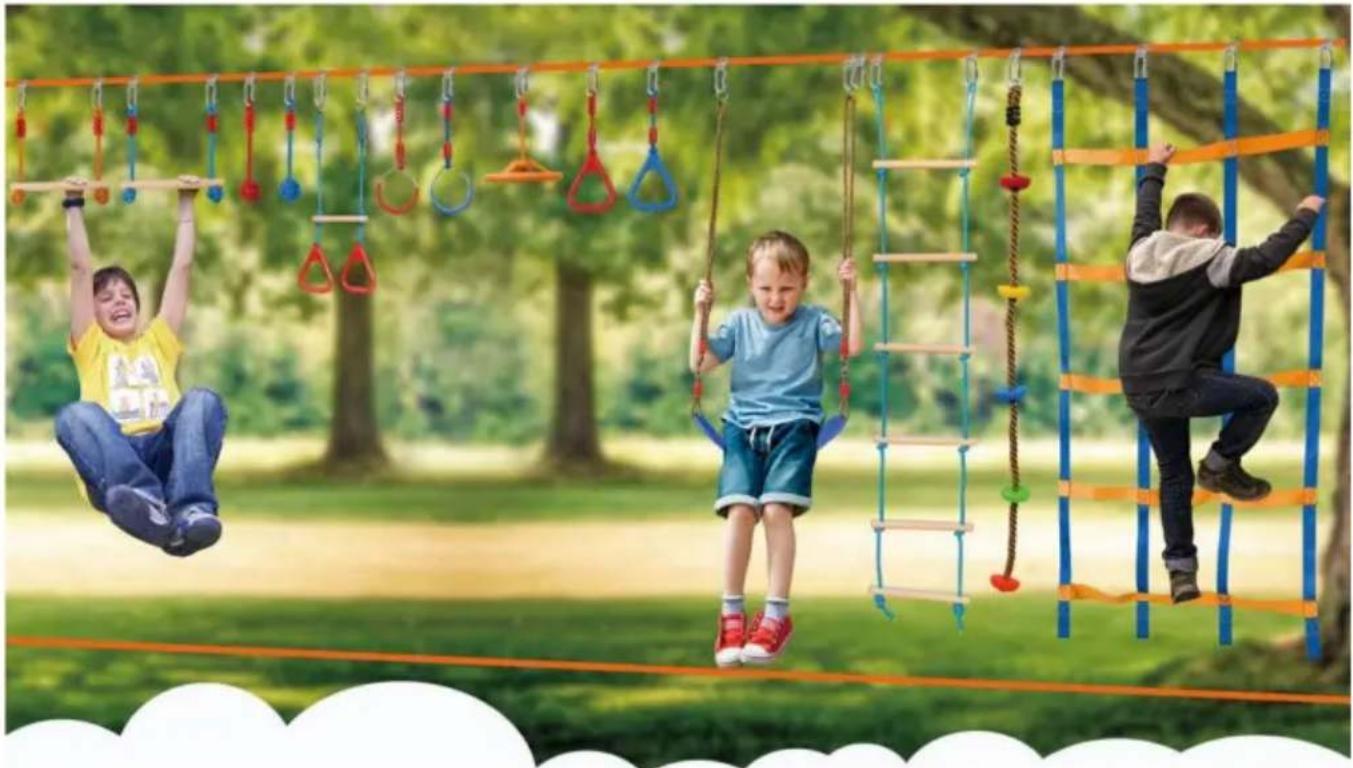
Step 1: Where to Slackline?
Picking a place to slackline is mostly based on personal preference. To set up the ninja line, two objects will be needed to tie it into place (typically trees).
▲ MATTERS NEEDING ATTENTION:
Do not use buildings or playground structures (unless specifically built for slackline), live power/telephone poles, dead trees or stumps, trees with rot, disease, structural cracks, excessive lean, exposed roots, or trees in boggy wet, sandy, loose soil. This is only a partial list. You must use your good judgment in determining what is not an appropriate anchor point. If in doubt, please contact us.
Step 2: Install tree protectors. They not only protect trees, but also reduce wear on the slackline.
Installation height: more than 2.2m (7.2ft) is recommended.
Of course, this value is not absolute. You can adjust the installation height of the slackline appropriately according to your child's height.
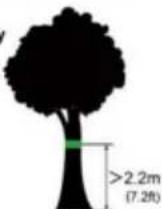
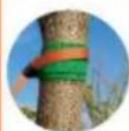
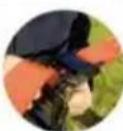
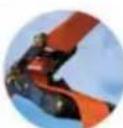
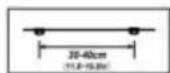
Step 3: Install the main line and ratchet line on the installed tree protectors.
Step 4: Install the hanging buckles onto the main line.
It is recommended to install a hanging buckle every 11.8-15.8in.
![graph LR A["Device with lid"] --> B["Internal component with red curved arrows"] B --> C["Carriage with orange belt"]](/content/2026/04/736592/images/24758f938d82629a5bb9e4e28efae7e427749a85f230b3ad8b4e6fb03b031efb.jpg)
If you are unable to determine the exact location during installation, you can straighten the main line and place it on the ground. Then measure with a tape measure and mark the main line with a marker pen.
Step 5: Use the ratchet to tighten the main line of the slackline.
Tip: If you need to adjust the position of your hanging buckles, you must loosen the ratchet line before adjustment. Because the friction between the buckles and the main line is very large when the main line is tightened, you cannot adjust the position of the hanging buckles.
Step 6: Use the carabiners to hang all accessories on the hanging buckle and tighten it.
Please note that after installing the accessories, you need to test their reliability. We sincerely hope you enjoy your ninja slackline kit as much as possible. Have fun!
• HOW TO USE THE RATCHET LINE
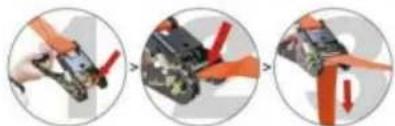
- First, close the ratchet and thread the webbing through the upper hole in the middle of the ratchet. If the position of the hole is not above, it can be adjusted to the top by opening and closing the ratchet.
- Pull the webbing down until it is as tight as possible. Then tighten the webbing with one hand and hold the handle of the ratchet with the other hand. Tighten the webbing by continuously opening and closing the ratchet until you can't pull the handle of the ratchet. Note: please make sure your ratchet is closed when it is finally tightened.
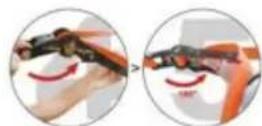
- When you are ready to stow the slackline kit, you can pull the switch marked in the figure outward and open the handle of the ratchet to about 180° at the same time. After hearing the "bang", you can pull the webbing out of the ratchet and put it away.
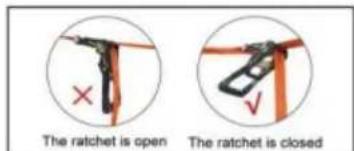
Technical Support and E-Warranty Certificate www.vevor.com/support
PR-012-65
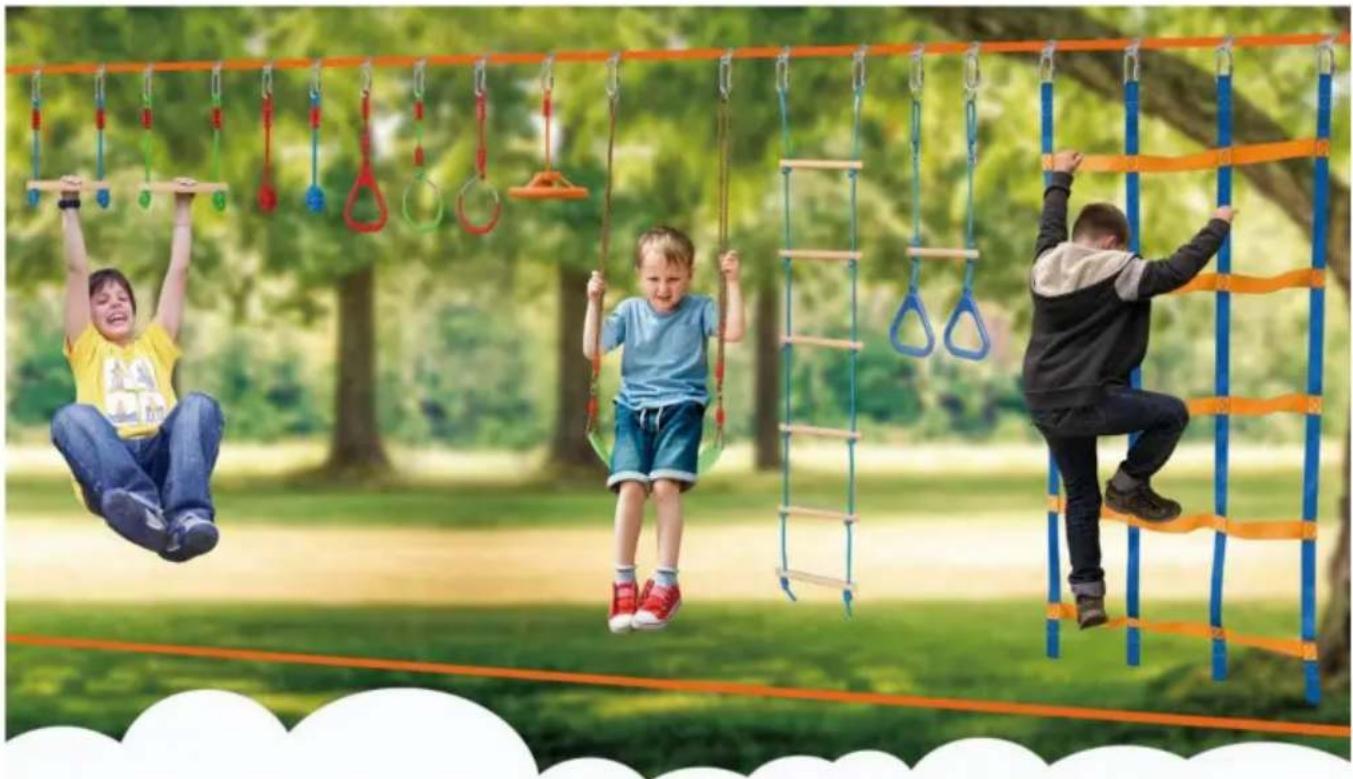
• HOW TO SET UP A NINJA OBSTACLE COURSE?
Step 1: Where to Slackline?
Picking a place to slackline is mostly based on personal preference. To set up the ninja line, two objects will be needed to tie it into place (typically trees).
MATTERS NEEDING ATTENTION:
Do not use buildings or playground structures (unless specifically built for slackline), live power/telephone poles, dead trees or stumps, trees with rot, disease, structural cracks, excessive lean, exposed roots, or trees in boggy, wet, sandy, loose soil. This is only a partial list. You must use your good judgment in determining what is not an appropriate anchor point. If in doubt, please contact us.
Step 2: Install tree protectors. They not only protect the trees but also reduce wear on the slackline.
Recommended installation height: more than 2.2 m (7.2 ft).
Of course, this value is not absolute. You can adjust the installation height of the slackline according to your child's height.
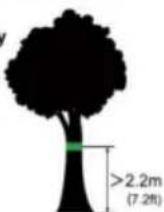
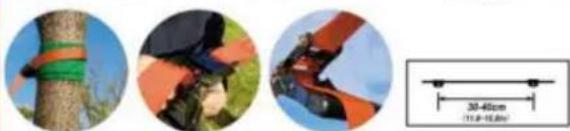
Step 3: Install the main line and ratchet line on the installed tree protectors.
Step 4: Install the hanging buckles onto the main line.
It is recommended to install a hanging buckle every 11.8–15.8 in.
![graph LR A["Device with sensor"] --> B["Valve with red curved arrows"] B --> C["Belt drive mechanism"]](/content/2026/04/736592/images/2a93edd3d11576db0e274d89f03d06da4c7d38238578f079d37718ff53a4b5ed.jpg)
If you cannot determine the exact location during installation, you can straighten the main line and place it on the ground. Then measure with a tape measure and mark the main line with a marker pen.
Step 5: Use the ratchet to tighten the main line of the slackline.
Tip: If you need to adjust the position of your hanging buckles, you must loosen the ratchet line before adjustment. Because the friction between the buckles and the main line is very large when the main line is tightened, you cannot adjust the position of the hanging buckles.
Step 6: Use contact buckles to hang all accessories on the hanging buckle and tighten it.
Please note that after installing the accessories, you need to test their reliability. We sincerely hope you enjoy your ninja slackline kit as much as possible. Have fun!
• HOW TO USE THE RATCHET LINE
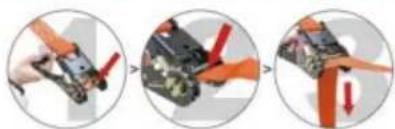
- First, close the ratchet and thread the webbing through the upper hole in the middle of the ratchet. If the position of the hole is not above, it can be adjusted to the top by opening and closing the ratchet.
- Pull the webbing down until it is as tight as possible. Then tighten the webbing with one hand and hold the handle of the ratchet with the other hand. Tighten the webbing by continuously opening and closing the ratchet until you cannot pull the handle of the ratchet. Note: Please make sure your ratchet is closed when it is finally tightened.
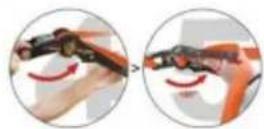
- When you are ready to stow the slackline kit, you can pull the switch marked in the figure outward and open the handle of the ratchet to about 180° at the same time. After hearing the "bang", you can pull the webbing out of the ratchet and put it away.
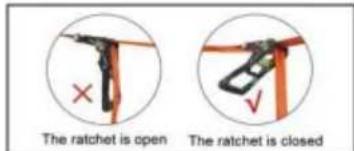
Technical Support and E-Warranty Certificate www.vevor.com/support
PR-03-60

Step 1: Where to Slackline?
Picking a place to slackline is mostly based on personal preference. To set up the ninjaline, two objects will be needed to tie it into place (typically trees).
MATTERS NEEDING ATTENTION:
Do not use buildings or playground structures (unless specifically built for slackline), live power/telephone poles, dead trees or stumps, trees with rot, disease, structural cracks, excessive lean, exposed roots, or trees in boggy, wet, sandy, loose soil. This is only a partial list. You must use your good judgment in determining what is not an appropriate anchor point. If in doubt, contact us.
Step 2: Install tree protectors. It can not only protect trees, but also reduce the wear of slackline.
Step 3: Attach the main line to a tree or solid post.
Installation height: Generally, we recommend that the installation height difference of two slackline be slightly less than: your child's height + half of the length of the balance belt, and the slackline at the bottom is about 23.6in from the ground. Of course, you can adjust the height according to your actual situation.
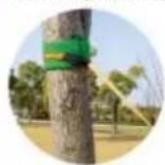
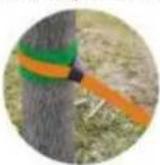
Step 4: Attach the ratchet line to another tree or solid post. Put the ratchet protector on first. Then use the ratchet to tighten the main line of the slackline. Cover the protective sleeve onto the ratchet again. (The protective sleeve is used for 2-inch slackline.)
Step 5: How to use the slackline ratchet?
We introduced the use of ratchet on the right.
Please note that after installing the accessories, you need to test their reliability. We sincerely hope you enjoy your slackline kit as much as possible. Have fun!
• HOW TO USE THE RATCHET LINE?
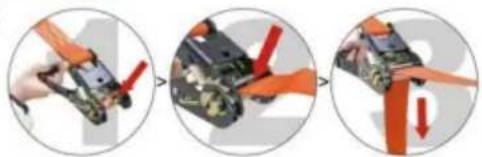
- First, close the ratchet, and thread the webbing through the upper hole in the middle of the ratchet. If the position of the hole is not above, it can be adjusted to the top by opening and closing the ratchet.
- Pull the webbing down until it is as tight as possible. Then tighten the webbing with one hand and hold the handle of the ratchet with the other hand. Tighten the webbing by continuously opening and closing the ratchet until you can't pull the handle of the ratchet. Note: please make sure your ratchet is closed when it is finally tightened.
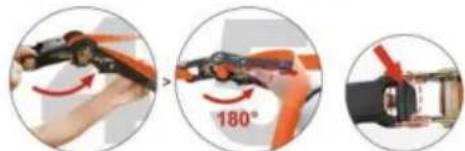
- When you are ready to stow the slackline kit, you can pull the switch marked in the figure outward and open the handle of the ratchet to about 180° at the same time. After hearing the "bang", you can pull the webbing out of the ratchet and put it away.
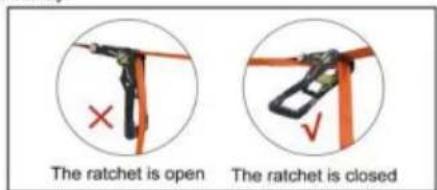
Technical Support and E-Warranty
Certificate www.vevor.com/support
Cleaning and Storage
C/O YH Consulting Limited Office 147, Centurion
House, London Road, Staines-upon-Thames,
Surrey, TW18 4AX
E-CrossStu GmbH
Mainzer Landstr.69, 60329 Frankfurt am Main.
Made in China
VEVOR®
TOUGH TOOLS, HALF PRICE
warranty certificate www.vevor.com/support
VEVOR®
TOUGH TOOLS, HALF PRICE
NEED HELP? CONTACT US!
Step 1: Where to Slackline?
Picking a place to slackline is mostly based on personal preference. To set up the ninja line, two objects will be needed to tie it into place (typically trees).
MATTERS NEEDING ATTENTION:
Do not use buildings or playground structures (unless specifically built for slackline), live power/telephone poles, dead trees or stumps, trees with rot, disease, structural cracks, excessive lean, exposed roots, or trees in boggy, wet, sandy, loose soil. This is only a partial list. You must use your good judgment in determining what is not an appropriate anchor point. If in doubt, please contact us.
Step 2: Install tree protectors. It can not only protect trees, but also reduce the wear of slackline.
Installation height: more than 2.2m(7.2ft) is recommended
Of course, this value is not absolute. You can appropriately adjust the installation height of the slackline according to your child's height.
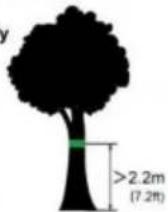
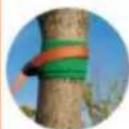
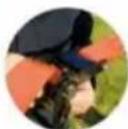
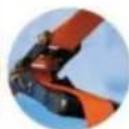
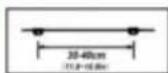
Step 3: Install the main line and ratchet line on the installed tree protectors.
Step 4: Install the hanging buckles to the main line.
It is recommended to install a hanging buckle every 11.8-15.8in.
![graph LR A["Device with sensor"] --> B["Valve with red arrows"] B --> C["Belt drive mechanism"]](/content/2026/04/736592/images/bc5f16a6ff89f469b60921105fc87bc4c951fb3ac6fc7ec075b06af77811f88b.jpg)
If you are unable to determine the exact location during installation, you can straighten the main line and put it on the ground. Then measure with a tape measure and mark on the main line with a marker pen.
Step 5: Use the ratchet to tighten the main line of the slackline.
Tip: if you need to adjust the position of your hanging buckles, you must loosen the ratchet line before adjustment. Because the friction between the buckles and the main line is very large when the main line is tightened, you can't adjust the position of the hanging buckles.
Step 6: Use contact buckles to hang all accessories on the hanging buckle and tighten it.
Please note that after installing the accessories, you need to test their reliability. We sincerely hope you enjoy your ninja slackline kit as much as possible. Have fun!
• HOW TO USE THE RATCHET LINE
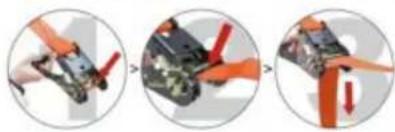
- First, close the ratchet and thread the webbing through the upper hole in the middle of the ratchet. If the position of the hole is not above, it can be adjusted to the top by opening and closing the ratchet.
- Pull the webbing down until it is as tight as possible. Then tighten the webbing with one hand and hold the handle of the ratchet with the other hand. Tighten the webbing by continuously opening and closing the ratchet until you can't pull the handle of the ratchet. Note: please make sure your ratchet is closed when it is finally tightened.
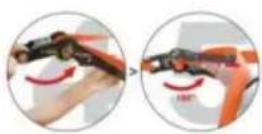
When you are ready to stow the slackline kit, you can pull the switch marked in the figure outward and open the handle of the ratchet to about 180° at the same time. After hearing the "bang", you can pull the webbing out of the ratchet and put it away.
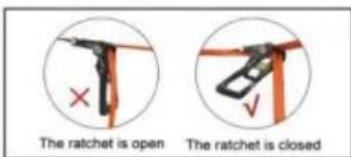
Technical Support and E-Warranty Certificate www.vevor.com/support
PR-010-50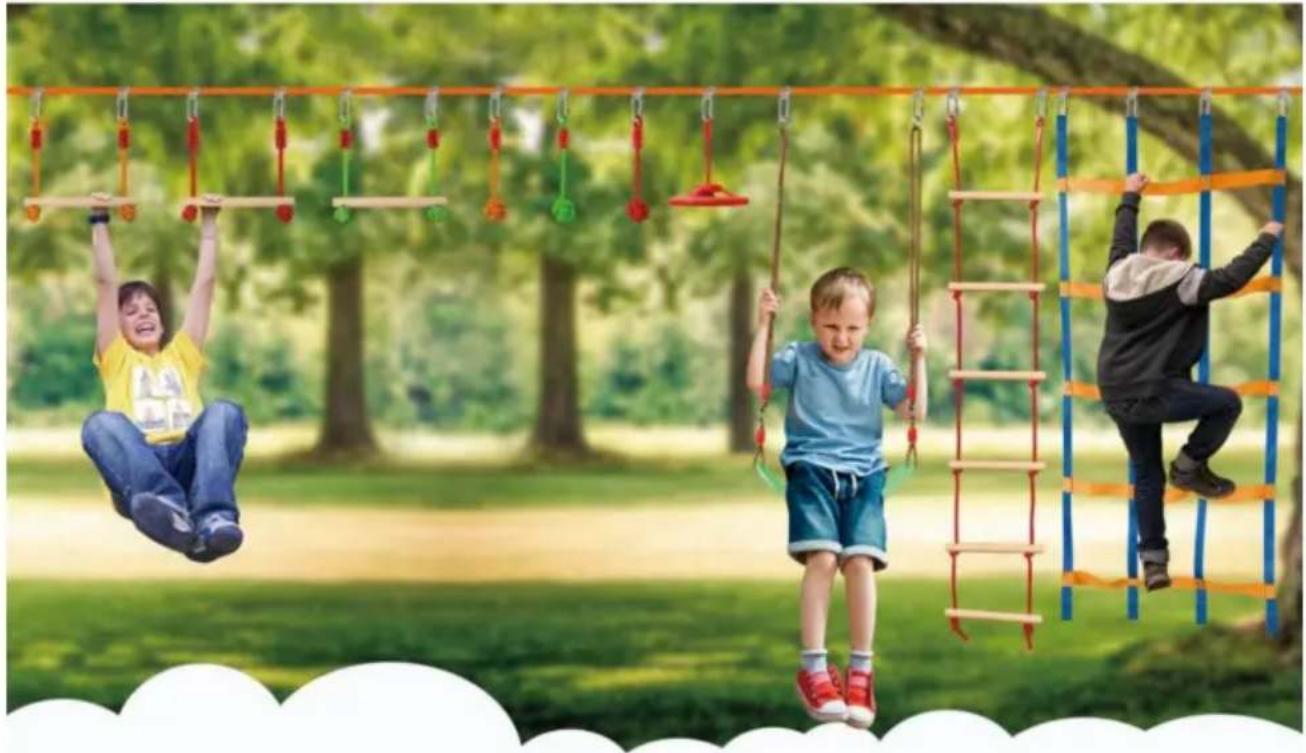
Step 1: Where to Slackline?
Picking a place to slackline is mostly based on personal preference. To set up the ninja line, two objects will be needed to tie it into place (typically trees).
MATTERS NEEDING ATTENTION:
Do not use buildings or playground structures (unless specifically built for slackline), live power/telephone poles, dead trees or stumps, trees with rot, disease, structural cracks, excessive lean, exposed roots, or trees in boggy, wet, sandy, loose soil. This is only a partial list. You must use your good judgment in determining what is not an appropriate anchor point. If in doubt, please contact us.
Step 2: Install tree protectors. They not only protect trees but also reduce wear on the slackline.
Installation height: more than 2.2m (7.2ft) is recommended.
Of course, this value is not absolute. You can adjust the installation height of the slackline appropriately according to your child's height.
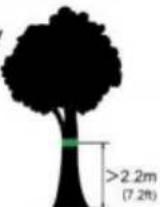
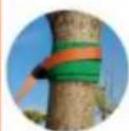
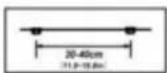
Step 3: Install the main line and ratchet line on the installed tree protectors.
Step 4: Install the hanging buckles onto the main line.
It is recommended to install a hanging buckle every 11.8-15.8in.
![graph LR A["Device with sensor"] --> B["Drive with red motion arrows"] B --> C["Drive with orange belt drive"]](/content/2026/04/736592/images/4ea2be1e37c705d457afb8e16afbf21c78fdec7f81499c76aadfe86187799088.jpg)
If you are unable to determine the exact location during installation, you can straighten the main line and place it on the ground. Then measure with a tape measure and mark the main line with a marker pen.
Step 5: Use the ratchet to tighten the main line of the slackline.
Tip: If you need to adjust the position of your hanging buckles, you must loosen the ratchet line before adjustment. Because the friction between the buckles and the main line is very large when the main line is tightened, you cannot adjust the position of the hanging buckles.
Step 6: Use contact buckles to hang all accessories on the hanging buckle and tighten it.
Please note that after installing the accessories, you need to test their reliability. We sincerely hope you enjoy your ninja slackline kit as much as possible. Have fun!
• HOW TO USE THE RATCHET LINE
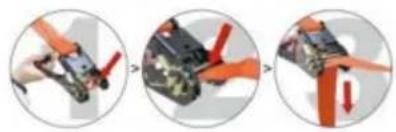
- First, close the ratchet and thread the webbing through the upper hole in the middle of the ratchet. If the position of the hole is not above, it can be adjusted to the top by opening and closing the ratchet.
- Pull the webbing down until it is as tight as possible. Then tighten the webbing with one hand and hold the handle of the ratchet with the other hand. Tighten the webbing by continuously opening and closing the ratchet until you can't pull the handle of the ratchet. Note: please make sure your ratchet is closed when it is finally tightened.
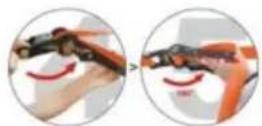
- When you are ready to stow the slackline kit, you can pull the switch marked in the figure outward and open the handle of the ratchet to about 180° at the same time. After hearing the "bang", you can pull the webbing out of the ratchet and put it away.
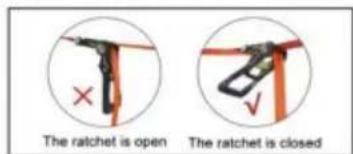
Technical Support and E-Warranty Certificate www.vevor.com/support
PR-012-56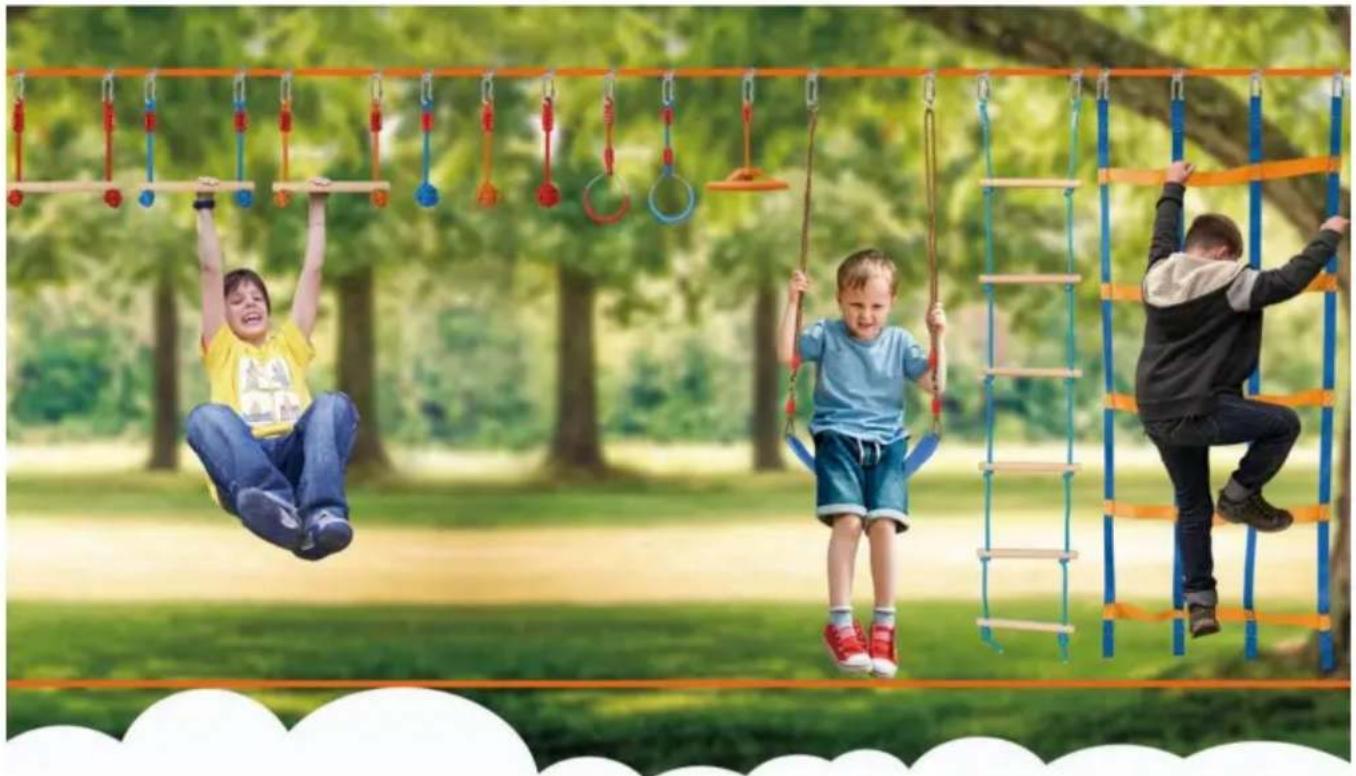
• HOW TO SET UP A NINJA OBSTACLE COURSE?
Step 1: Where to Slackline?
Picking a place to slackline is mostly based on personal preference. To set up the ninja line, two objects will be needed to tie it into place (typically trees).
MATTERS NEEDING ATTENTION:
Do not use buildings or playground structures (unless specifically built for slackline), live power/telephone poles, dead trees or stumps, trees with rot, disease, structural cracks, excessive lean, exposed roots, or trees in boggy, wet, sandy, loose soil. This is only a partial list. You must use your good judgment in determining what is not an appropriate anchor point. If in doubt, please contact us.
Step 2: Install tree protectors. It can not only protect trees, but also reduce the wear of slackline.
Installation height: more than 2.2m (7.2ft) is recommended
Of course, this value is not absolute. You can appropriately adjust the installation height of the slackline according to your child's height.
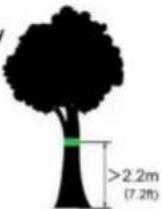
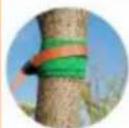
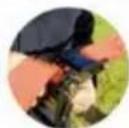
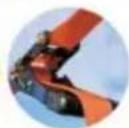
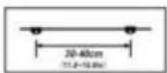
Step 3: Install the main line and ratchet line on the installed tree protectors.
Step 4: Install the hanging buckles to the main line.
It is recommended to install a hanging buckle every 11.8-15.8in.
![graph LR A["Device with sensor"] --> B["Valve with valves"] B --> C["Belt drive mechanism"]](/content/2026/04/736592/images/b413f99fc25467ab1edd8956a2f072bb24a5b296d326de222eaa3125395ac4a5.jpg)
If you are unable to determine the exact location during installation, you can straighten the main line and put it on the ground. Then measure with a tape measure and mark on the main line with a marker pen.
Step 5: Use the ratchet to tighten the main line of the slackline.
Tip: if you need to adjust the position of your hanging buckles, you must loosen the ratchet line before adjustment. Because the friction between the buckles and the main line is very large when the main line is tightened, you can't adjust the position of the hanging buckles.
Step 6: Use contact buckles to hang all accessories on the hanging buckle and tighten it.
Please note that after installing the accessories, you need to test their reliability. We sincerely hope you enjoy your ninja slackline kit as much as possible. Have fun!
• HOW TO USE THE RATCHET LINE
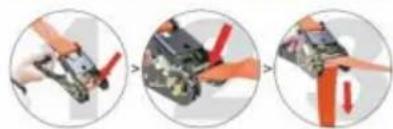
- First, close the ratchet, and thread the webbing through the upper hole in the middle of the ratchet. If the position of the hole is not above, it can be adjusted to the top by opening and closing the ratchet.
- Pull the webbing down until it is as tight as possible. Then tighten the webbing with one hand and hold the handle of the ratchet with the other hand. Tighten the webbing by continuously opening and closing the ratchet until you can't pull the handle of the ratchet. Note: please make sure your ratchet is closed when it is finally tightened.
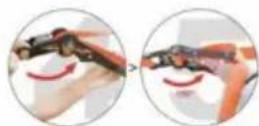
- When you are ready to stow the slackline kit, you can pull the switch marked in the figure outward and open the handle of the ratchet to about 180° at the same time. After hearing the "bang", you can pull the webbing out of the ratchet and put it away.
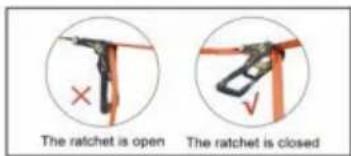
Technical Support and E-Warranty Certificate www.vevor.com/support
PR-014-60
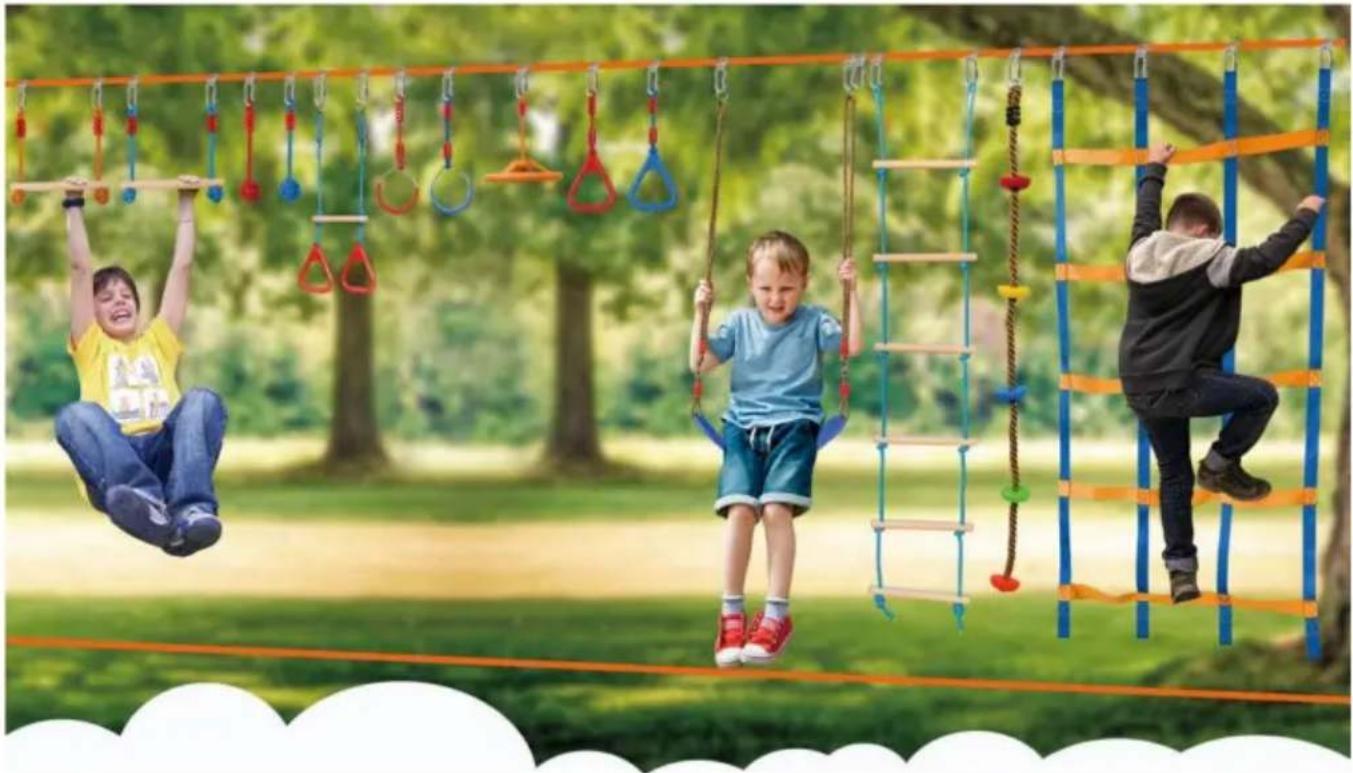
Step 1: Where to Slackline?
Picking a place to slackline is mostly based on personal preference. To set up the ninja line, two objects will be needed to tie it into place (typically trees).
▲ MATTERS NEEDING ATTENTION:
Do not use buildings or playground structures (unless specifically built for slackline), live power/telephone poles, dead trees or stumps, trees with rot, disease, structural cracks, excessive lean, exposed roots, or trees in boggy wet, sandy, loose soil. This is only a partial list. You must use your good judgment in determining what is not an appropriate anchor point. If in doubt, please contact us.
Step 2: Install tree protectors. They not only protect trees but also reduce the wear of the slackline.
Installation height: more than 2.2m (7.2ft) is recommended.
Of course, this value is not absolute. You can appropriately adjust the installation height of the slackline according to your child's height.
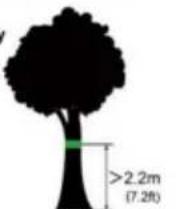
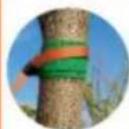
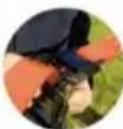
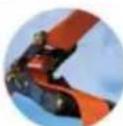
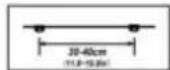
Step 3: Install the main line and ratchet line on the installed tree protectors.
Step 4: Install the hanging buckles to the main line.
It is recommended to install a hanging buckle every 11.8-15.8in.
![graph LR A["Device with sensor"] --> B["Valve with red valves"] B --> C["Belt with orange belt drive"]](/content/2026/04/736592/images/070f1ecdb519a472b1c36a527304b13a9d1b72f2cbc2b777663a9054a72507d0.jpg)
If you are unable to determine the exact location during installation, you can straighten the main line and put it on the ground. Then measure with a tape measure and mark on the main line with a marker pen.
Step 5: Use the ratchet to tighten the main line of the slackline.
Tip: if you need to adjust the position of your hanging buckles, you must loosen the ratchet line before adjustment. Because the friction between the buckles and the main line is very large when the main line is tightened, you can't adjust the position of the hanging buckles.
Step 6: Use contact buckles to hang all accessories on the hanging buckle and tighten it.
Please note that after installing the accessories, you need to test their reliability. We sincerely hope you enjoy your ninja slackline kit as much as possible. Have fun!
• HOW TO USE THE RATCHET LINE
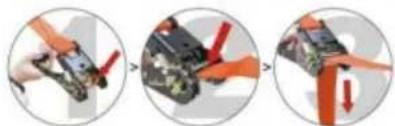
- First, close the ratchet and thread the webbing through the upper hole in the middle of the ratchet. If the hole is not positioned at the top, you can adjust it by opening and closing the ratchet.
- Pull the webbing down until it is as tight as possible. Then tighten the webbing with one hand while holding the ratchet handle with the other. Tighten the webbing by continuously opening and closing the ratchet until you can no longer pull the handle. Note: Make sure the ratchet is closed when it is finally tightened.
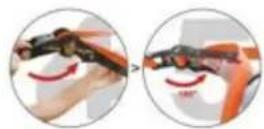
- When you are ready to stow the slackline kit, pull the switch marked in the figure outward and simultaneously open the ratchet handle to about 180°. After hearing a "bang", you can pull the webbing out of the ratchet and put it away.
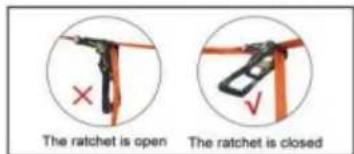
Technical Support and E-Warranty Certificate www.vevor.com/support
PR-012-65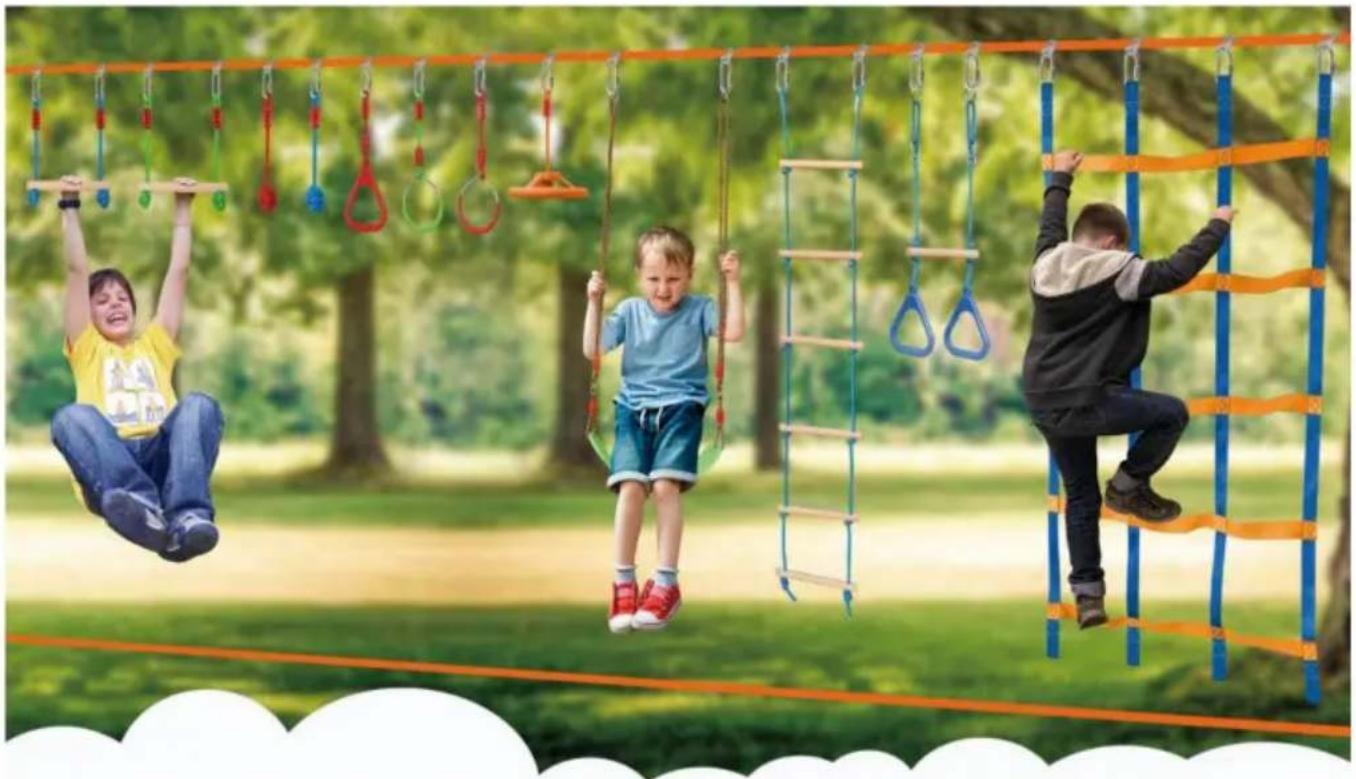
Step 1: Where to Slackline?
Picking a place to slackline is mostly based on personal preference. To set up the ninja line, two objects will be needed to tie it into place (typically trees).
MATTERS NEEDING ATTENTION:
Do not use buildings or playground structures (unless specifically built for slackline), live power/telephone poles, dead trees or stumps, trees with rot, disease, structural cracks, excessive lean, exposed roots, or trees in boggy, wet, sandy, loose soil. This is only a partial list. You must use your good judgment in determining what is not an appropriate anchor point. If in doubt, please contact us.
Step 2: Install tree protectors. They not only protect trees but also reduce wear on the slackline.
Installation height: more than 2.2m (7.2ft) is recommended.
Of course, this value is not absolute. You can appropriately adjust the installation height of the slackline according to your child's height.
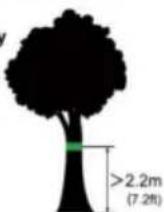
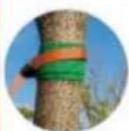
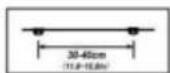
Step 3: Install the main line and ratchet line on the installed tree protectors.
Step 4: Install the hanging buckles to the main line.
It is recommended to install a hanging buckle every 11.8-15.8in.
![graph LR A["Device with sensor"] --> B["Valve with red curved arrows"] B --> C["Belt drive mechanism"]](/content/2026/04/736592/images/0cbe5773e6e748fcd50dd72b22c39f9d50bcafc2687b64e5c0411ebd38732b6d.jpg)
If you are unable to determine the exact location during installation, you can straighten the main line and put it on the ground. Then measure with a tape measure and mark on the main line with a marker pen.
Step 5: Use the ratchet to tighten the main line of the slackline.
Tip: if you need to adjust the position of your hanging buckles, you must loosen the ratchet line before adjustment. Because the friction between the buckles and the main line is very large when the main line is tightened, you can't adjust the position of the hanging buckles.
Step 6: Use contact buckles to hang all accessories on the hanging buckle and tighten it.
Please note that after installing the accessories, you need to test their reliability. We sincerely hope you enjoy your ninja slackline kit as much as possible. Have fun!
• HOW TO USE THE RATCHET LINE

- First, close the ratchet and thread the webbing through the upper hole in the middle of the ratchet. If the position of the hole is not above, it can be adjusted to the top by opening and closing the ratchet.
- Pull the webbing down until it is as tight as possible. Then tighten the webbing with one hand and hold the handle of the ratchet with the other hand. Tighten the webbing by continuously opening and closing the ratchet until you can't pull the handle of the ratchet. Note: please make sure your ratchet is closed when it is finally tightened.
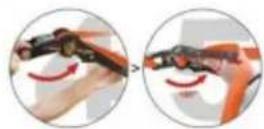
- When you are ready to stow the slackline kit, you can pull the switch marked in the figure outward and open the handle of the ratchet to about 180° at the same time. After hearing the "bang", you can pull the webbing out of the ratchet and put it away.
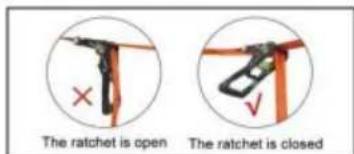
Technical Support and E-Warranty
Certificate www.vevor.com/support
PR-03-60
Step 1: Where to Slackline?
Picking a place to slackline is mostly based on personal preference. To set up the ninjaline, two objects will be needed to tie it into place (typically trees).
MATTERS NEEDING ATTENTION:
Do not use buildings or playground structures (unless specifically built for slackline), live power/telephone poles, dead trees or stumps, trees with rot, disease, structural cracks, excessive lean, exposed roots, or trees in boggy, wet, sandy, loose soil. This is only a partial list. You must use your good judgment in determining what is not an appropriate anchor point. If in doubt, contact us.
Step 2: Install tree protectors. They not only protect trees but also reduce the wear of the slackline.
Step 3: Attach the main line to a tree or solid post.
Installation height: Generally, we recommend that the installation height difference of two slacklines be slightly less than: your child's height + half of the length of the balance belt, and the slackline at the bottom is about 23.6in from the ground. Of course, you can adjust the height according to your actual situation.
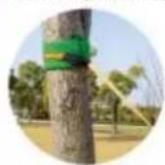
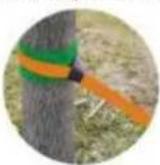
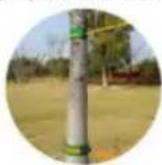
Step 4: Attach the ratchet line to another tree or solid post. Put the ratchet protector on first. Then use the ratchet to tighten the main line of the slackline. Cover the protective sleeve onto the ratchet again. (The protective sleeve is used for 2-inch slackline.)
Step 5: How to use the slackline ratchet?
We introduced the use of the ratchet on the right.
Please note that after installing the accessories, you need to test their reliability. We sincerely hope you enjoy your slackline kit as much as possible. Have fun!
• HOW TO USE THE RATCHET LINE?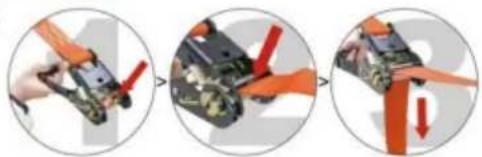
- First, close the ratchet, and thread the webbing through the upper hole in the middle of the ratchet. If the position of the hole is not above, it can be adjusted to the top by opening and closing the ratchet.
- Pull the webbing down until it is as tight as possible. Then tighten the webbing with one hand and hold the handle of the ratchet with the other hand. Tighten the webbing by continuously opening and closing the ratchet until you can't pull the handle of the ratchet. Note: please make sure your ratchet is closed when it is finally tightened.
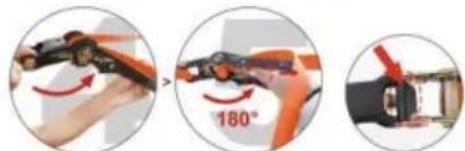
- When you are ready to stow the slackline kit, you can pull the switch marked in the figure outward and open the handle of the ratchet to about 180° at the same time. After hearing the "bang", you can pull the webbing out of the ratchet and put it away.
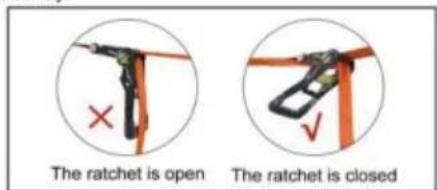
Technical Support and E-Warranty
Certificate www.vevor.com/support
C/O YH Consulting Limited Office 147, Centurion House, London Road, Staines-upon-Thames, Surrey, TW18 4AX
| EC | REP |
E-CrossStu GmbH
Mainzer Landstr.69, 60329 Frankfurt am Main.
Made in China
VEVOR®
TOUGH TOOLS, HALF PRICE
www.vevor.com/support

- NINJA LINE/SLACK LINE KIT
- NEED HELP? CONTACT US
- SAFETY WARNINGS AND PRECAUTIONS
- PLEASE READ ALL THE INSTRUCTIONS BEFORE USING YOUR MACHINE
- WARNING
- PR
- INSTALLATION INSTRUCTIONS
- HOW TO SET UP A NINJA OBSTACLE COURSE
- STEP 1: WHERE TO SLACKLINE
- MATTERS NEEDING ATTENTION
- STEP 2: INSTALL TREE PROTECTORS. THEY CAN NOT ONLY PROTECT TREES, BUT ALSO REDUCE THE WEAR OF THE SLACKLINE
- INSTALLATION HEIGHT: MORE THAN 2.2M (7.2FT) IS RECOMMENDED
- STEP 3: INSTALL THE MAIN LINE AND RATCHET LINE ON THE INSTALLED TREE PROTECTORS
- STEP 4: INSTALL THE HANGING BUCKLES TO THE MAIN LINE
- IT IS RECOMMENDED TO INSTALL A HANGING BUCKLE EVERY 11.8-15.8IN
- STEP 5: USE THE RATCHET TO TIGHTEN THE MAIN LINE OF THE SLACKLINE
- STEP 6: USE CONTACT BUCKLES TO HANG ALL ACCESSORIES ON THE HANGING BUCKLE AND TIGHTEN IT
- HOW TO USE THE RATCHET LINE
- HOW TO SET UP A SLACKLINE
- CLEANING AND STORAGE
- VEVOR®
- TOUGH TOOLS, HALF PRICE
- STEP 2: INSTALL TREE PROTECTORS. IT CAN NOT ONLY PROTECT TREES, BUT ALSO REDUCE THE WEAR OF SLACKLINE
- STEP 2: INSTALL TREE PROTECTORS. THEY NOT ONLY PROTECT TREES, BUT ALSO REDUCE WEAR ON THE SLACKLINE
- STEP 4: INSTALL THE HANGING BUCKLES ONTO THE MAIN LINE
- STEP 2: INSTALL TREE PROTECTORS. THEY NOT ONLY PROTECT TREES, BUT ALSO REDUCE THE WEAR OF THE SLACKLINE
- STEP 2: INSTALL TREE PROTECTORS. THEY NOT ONLY PROTECT THE TREES BUT ALSO REDUCE WEAR ON THE SLACKLINE
- IT IS RECOMMENDED TO INSTALL A HANGING BUCKLE EVERY 11.8-15.8 INCHES
- STEP 6: USE CONTACT BUCKLES TO HANG ALL ACCESSORIES ON THE HANGING BUCKLE AND TIGHTEN THEM
- STEP 3: ATTACH THE MAIN LINE TO A TREE OR SOLID POST
- STEP 5: HOW TO USE THE SLACKLINE RATCHET
- INSTALLATION HEIGHT: MORE THAN 2.2M(7.2FT) IS RECOMMENDED
- PLEASE NOTE THAT AFTER INSTALLING THE ACCESSORIES, YOU NEED TO TEST THEIR RELIABILITY. WE SINCERELY HOPE YOU ENJOY YOUR NINJA SLACKLINE KIT AS MUCH AS POSSIBLE. HAVE FUN
Brand : Vevor
Model : PR-010-50
Category : Power tool