SS-602 - Office Vevor - Free user manual and instructions

Find the device manual for free SS-602 Vevor in PDF.

Vevor SS-602 - Office
📄 224 pages English EN Download 💬 AI Question 10 questions ⚙️ Specs
Notice Vevor SS-602 - page 33
Pick your language and provide your email: we'll send you a specifically translated version.
Brand Vevor
Model SS-602
Product Type Reception Desk
Dimensions (L x D x H) 1600 x 600 x 1110 mm
Maximum Load Capacity 50 kg
Color Black and Brown
Main Material Particleboard
Assembly System Cam Lock
Integrated Lighting LED Light Strip (optional)
Main Functions Reception desk with integrated lighting
Assembly Required Yes, self-assembly
Necessary Tools Safety goggles and gloves (not included)
Safety Precautions Do not sit or stand on the desk; use on a flat, hard floor
Maintenance Clean with a soft, dry cloth
Customer Service www.vevor.com/support
Manufacturer Shanghaimuxinmuyeyouxiangongsi

Frequently Asked Questions - SS-602 Vevor

How to assemble the Vevor SS-602 desk?
Follow the instructions in the provided manual. Use the Cam Lock system to secure the panels. Assemble on a flat, hard surface. Wear safety goggles and gloves during assembly.
What are the dimensions of the desk?
The dimensions are 1600 x 600 x 1110 mm (length x depth x height).
What is the maximum load capacity?
The maximum load capacity is 50 kg. Never exceed this limit.
Can I sit on the desk?
No, it is strictly forbidden to sit or step on the desk. This could cause injury or damage the item.
How to install the light strip?
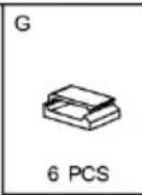
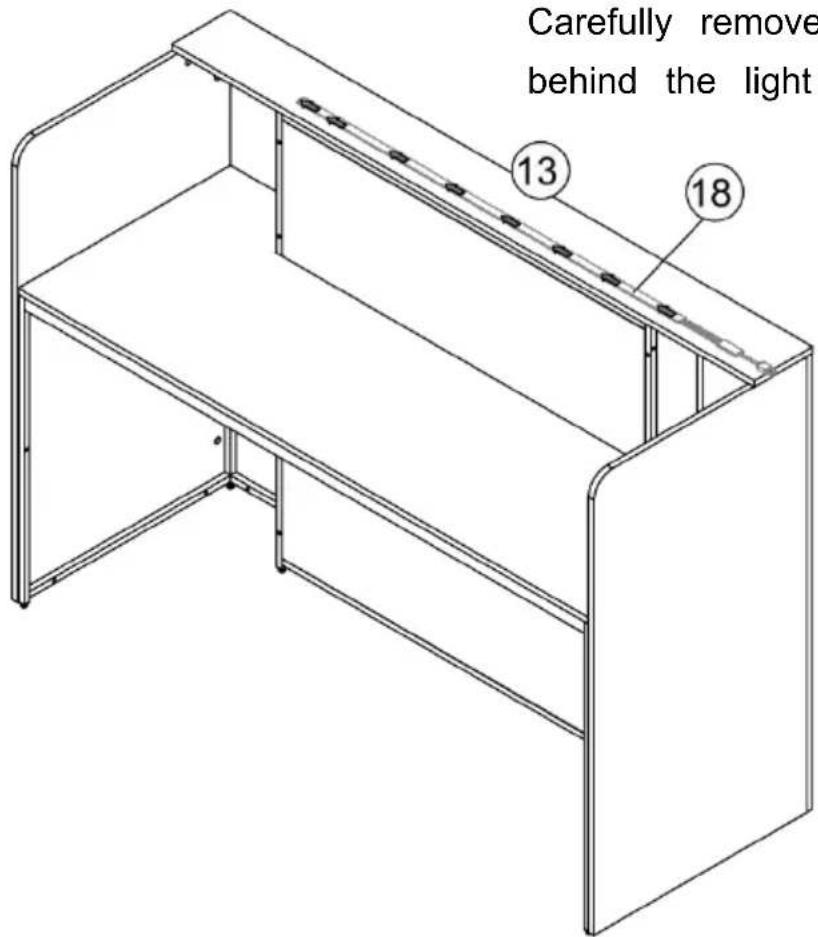
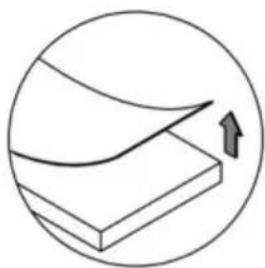
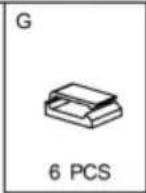
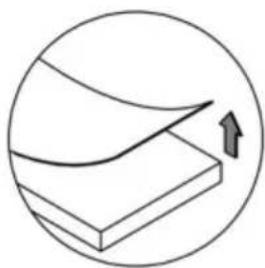
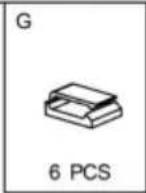
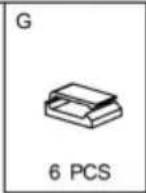
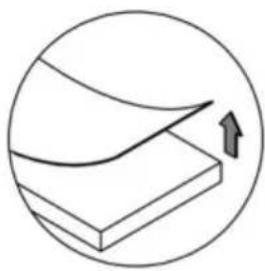
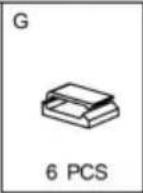
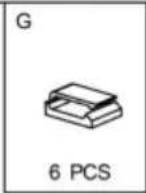
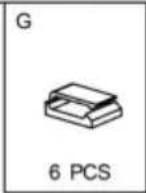
Carefully remove the plastic film behind the light strip. Attach the strip using component G if necessary. Installation is optional according to your needs.
How to clean the desk?
Use a soft, dry cloth to dust. Avoid abrasive chemicals that may damage the surface.
What to do if a part is missing or damaged?
Contact Vevor customer service at www.vevor.com/support to get a replacement part. Provide your order number and the model SS-602.
Is the desk delivered assembled?
No, the desk is delivered as a kit and requires full assembly. Follow the steps in the manual.
Where to find replacement parts?
Replacement parts are available from Vevor customer service. Check the manual for the parts list and contact support via the website.
How to contact Vevor customer service?
You can reach customer service via the website www.vevor.com/support for any technical questions or parts orders.

User questions about SS-602 Vevor

0 question about this device. Answer the ones you know or ask your own.

Ask a new question about this device

Your email remains private: it is only used to notify you if someone answers your question.

No questions yet. Be the first to ask one.

Download the instructions for your Office in PDF format for free! Find your manual SS-602 - Vevor and take your electronic device back in hand. On this page are published all the documents necessary for the use of your device. SS-602 by Vevor.

USER MANUAL SS-602 Vevor

Technical Support and E-Warranty Certificate www.vevor.com/support

RECEPTION DESK

USER MANUAL

MODEL: SS-602

We continue to be committed to provide you tools with competitive price. "Save Half", "Half Price" or any other similar expressions used by us only represents an estimate of savings you might benefit from buying certain tools with us compared to the major top brands and does not necessarily mean to cover all categories of tools offered by us. You are kindly reminded to verify carefully when you are placing an order with us if you are actually saving half in comparison with the top major brands.

VEVOR®

TOUGH TOOLS, HALF PRICE

RECEPTION DESK

MODEL: SS-602
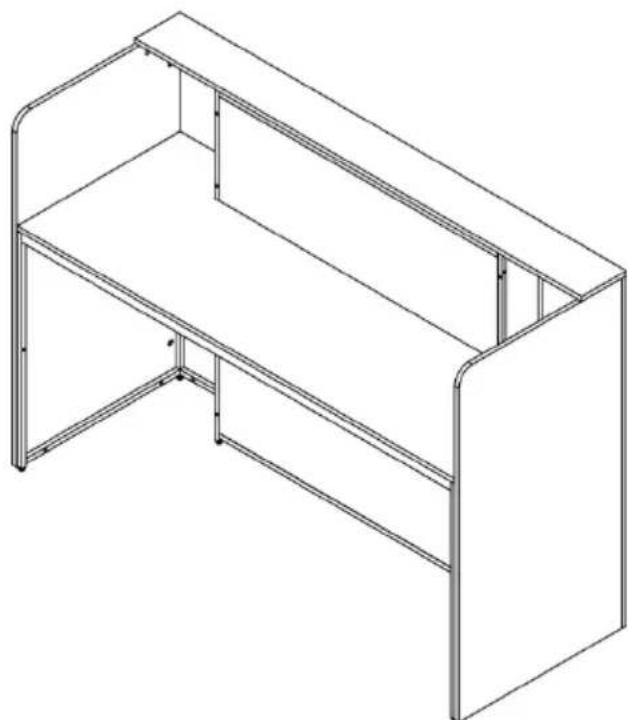
Isometric line drawing of a two-story office cabinet or enclosure with metal framing (no text or symbols).

NEED HELP? CONTACT US!

Have product questions? Need technical support? Please feel free to contact us:

Technical Support and E-Warranty Certificate www.vevor.com/support

This is the original instruction. Please read all manual instructions carefully before operating. VEVOR reserves a clear interpretation of the user manual. The appearance of the product shall be subject to the product you received. Please forgive us that we won't inform you again if there are any technology or software updates on our product.

WARNING:

Read this material before using this product. Failure to do so can result in serious injury.

Assembly precautions

  1. Assemble only according to these instructions. Improper assembly can create hazards.
  2. Wear ANSI-approved safety goggles and heavy-duty work gloves during assembly.
  3. Keep the assembly area clean and well-lit.
  4. Keep bystanders out of the area during assembly.
  5. Do not assemble if tired or when under the influence of alcohol or medication.
  6. The product capabilities apply to properly and completely assembled products only.
  7. Assemble on a flat, level, hard, and smooth surface capable of safely supporting the Reception Desk.
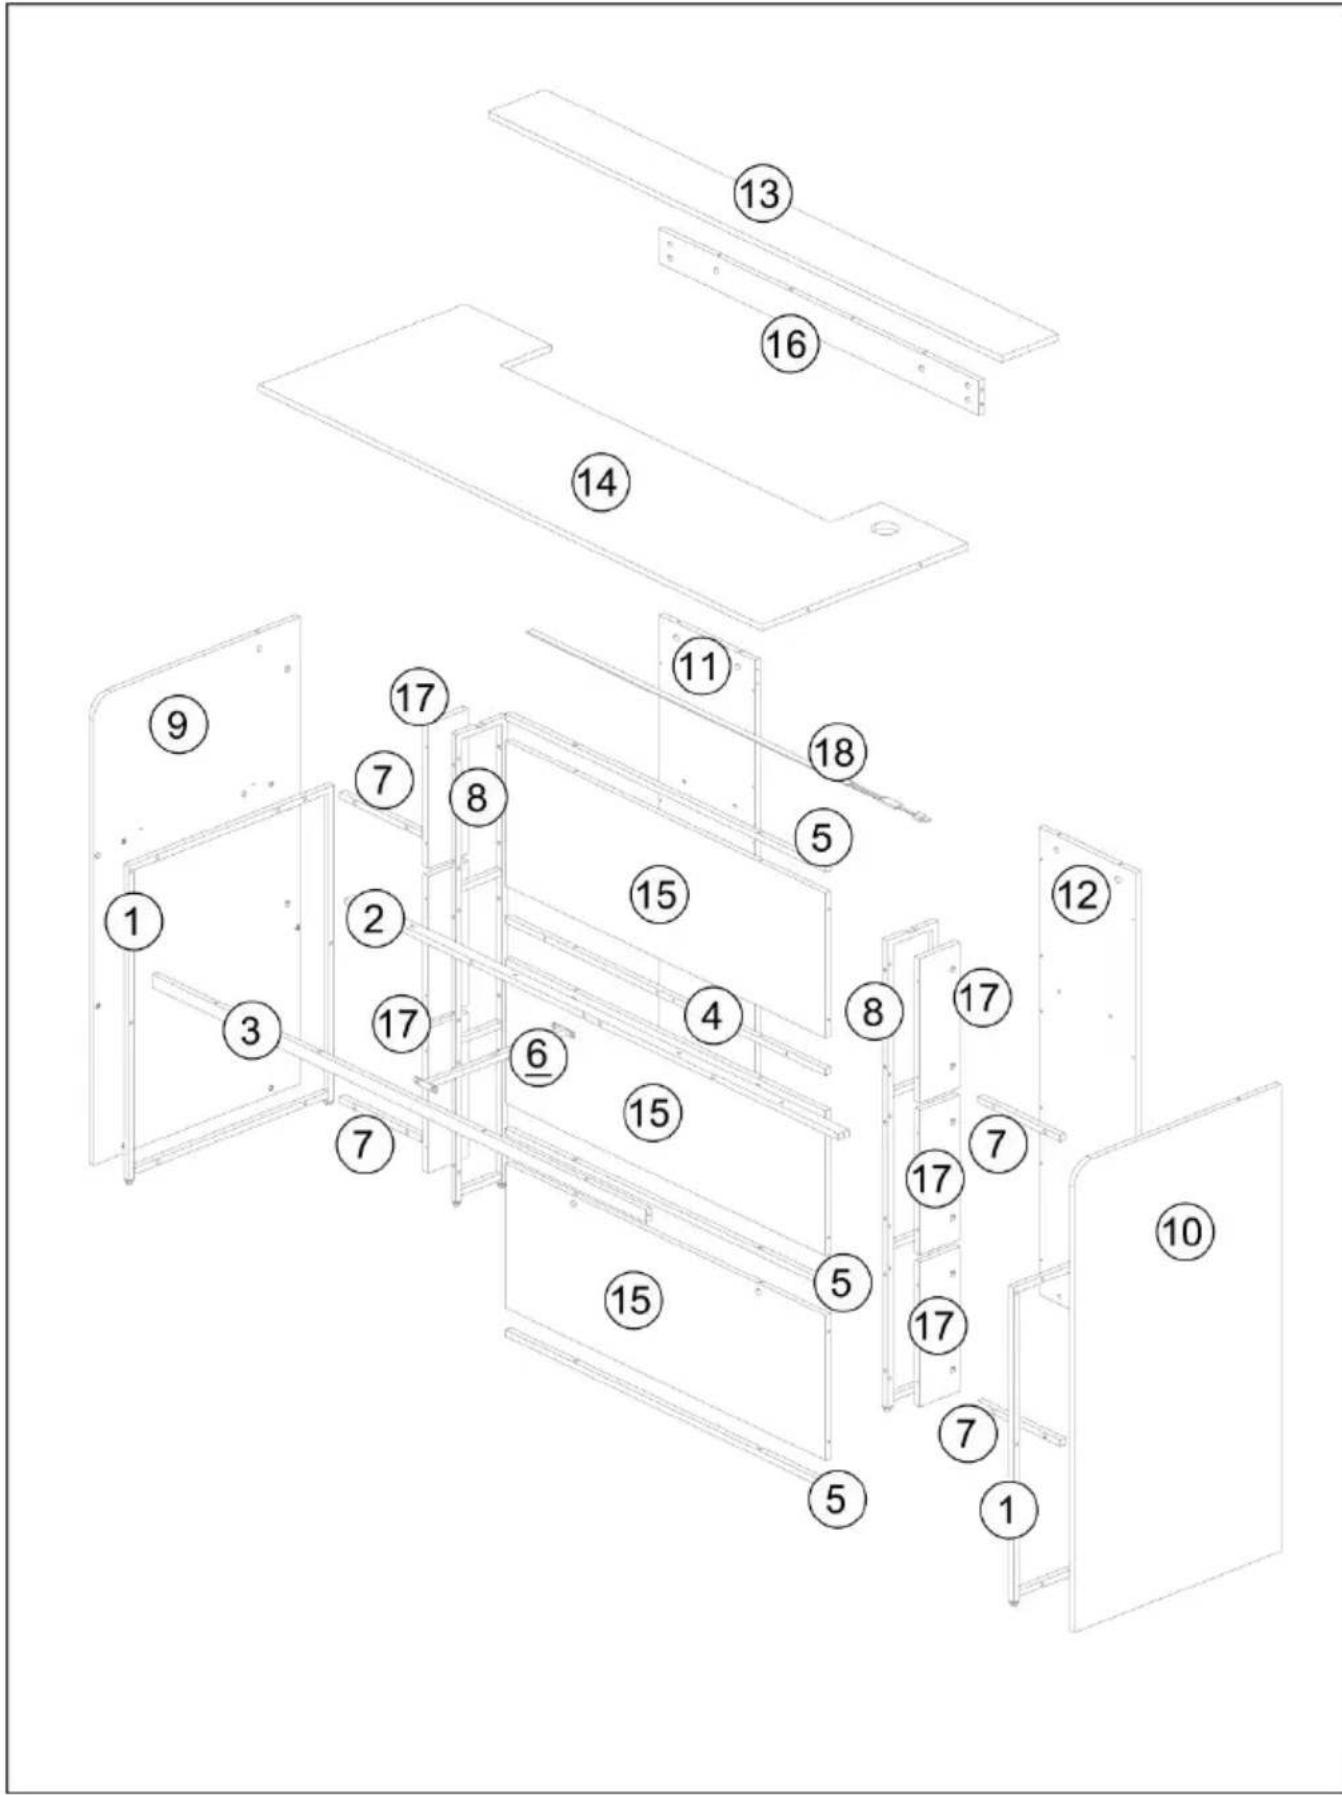
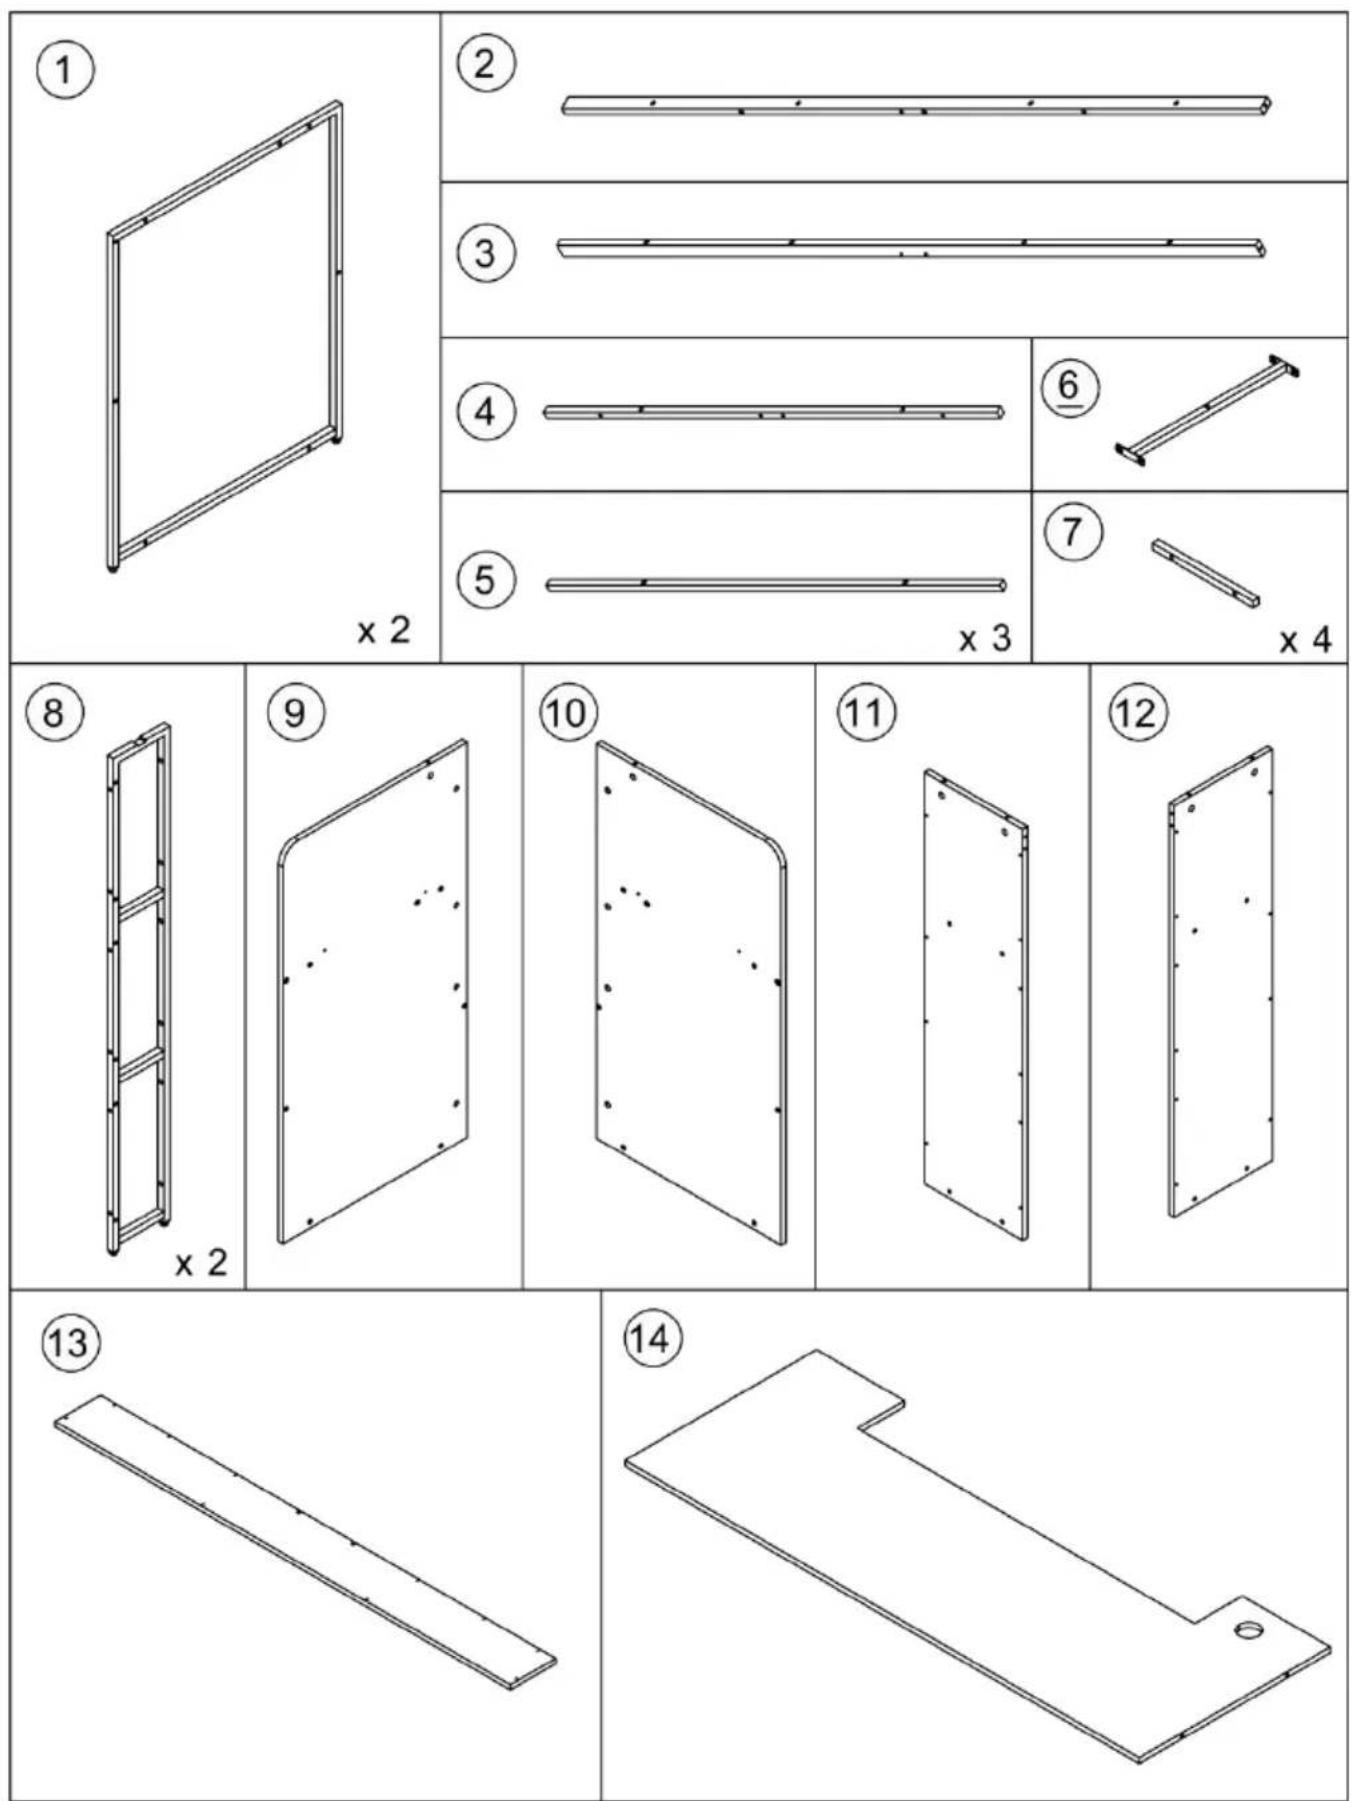
  8. For additional information regarding the parts listed in the following pages, please refer to the Assembly Diagram of this manual. Unwrap and separate all parts in a clean work area.

Use precautions

  1. DO NOT SIT OR STAND ON THIS ITEM.
  2. This product is not a toy. Do not allow children to play with or near this item.
  3. Do not exceed specified weight capacities.
  4. Use only on a flat, level, hard, and smooth surface that can safely support a fully loaded Reception Desk.
  5. Use as intended only.
  6. Inspect before every use; do not use if parts are loose or damaged.

SAVE THIS MANUAL
Simple line drawing of a confused person with a question mark above their head, standing on a desk (no text or symbols).

IMPORTANT INFORMATION!

Please read the entire manual before starting to assemble and/or using this product. Follow the manual thoroughly and keep it for further reference.
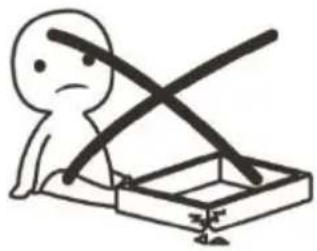
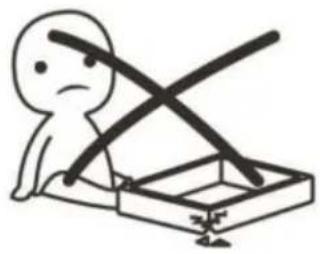
Simple line drawing of a person sitting on a bench with a cross symbol, no text or labels present.

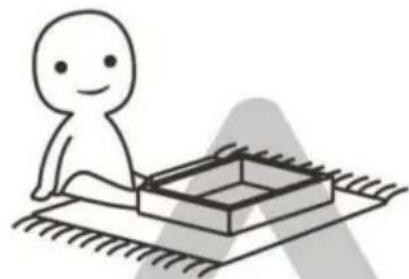
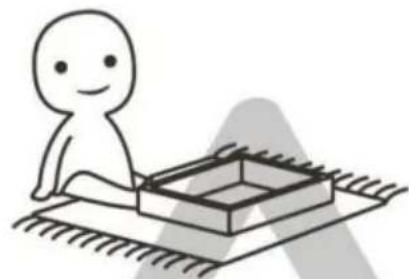
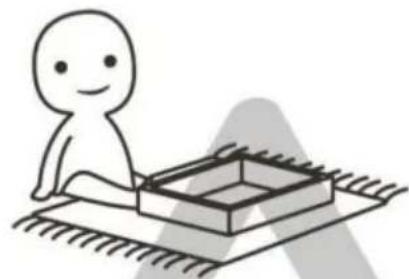
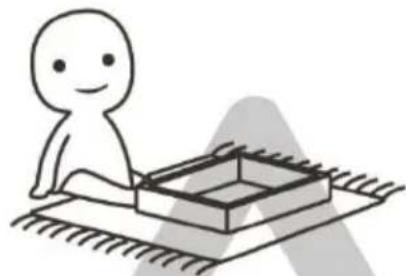
Simple line drawing of a person sitting on a mat next to a rectangular object (no text or symbols).

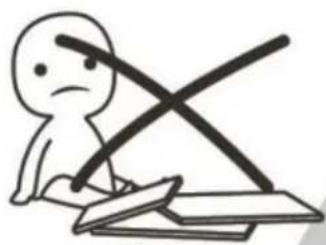
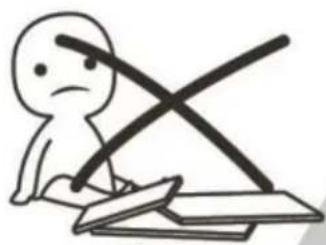
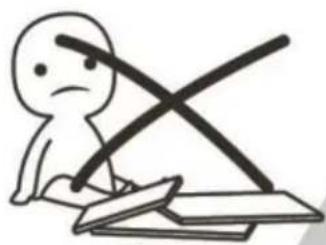
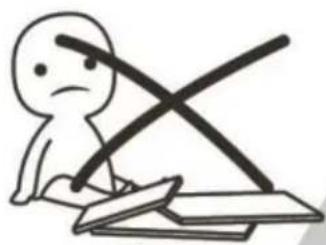
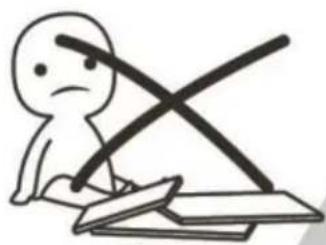
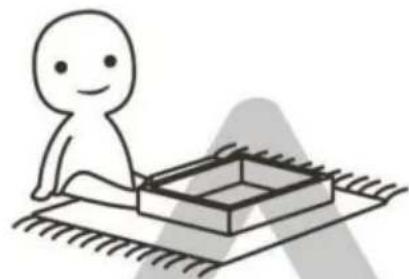
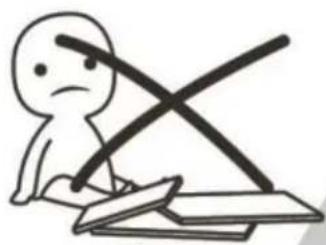
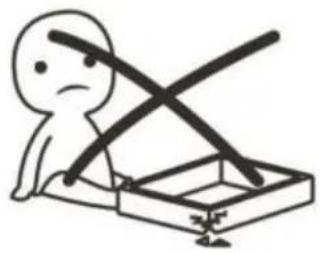
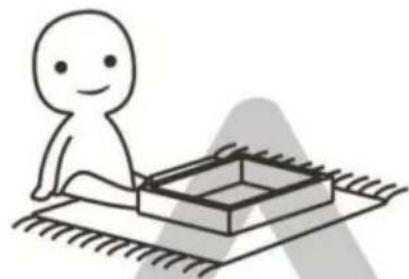
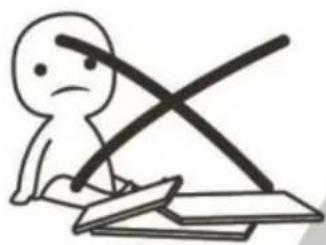
AVOID SCRATCHES!

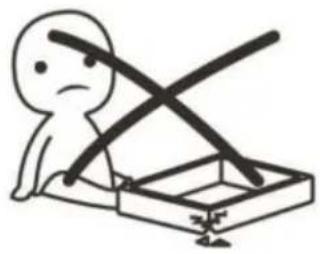
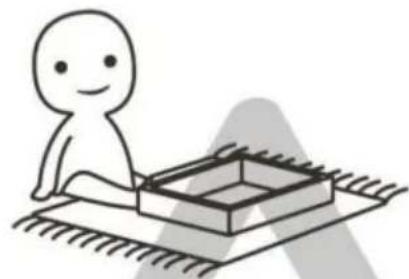
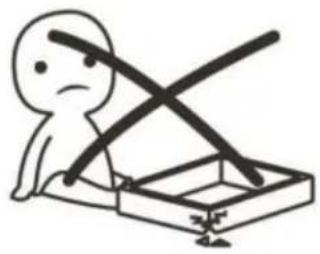
In order to avoid scratching, this furniture should be assembled on a soft layer—could be a rug.
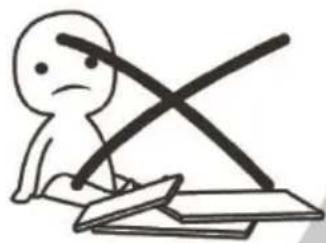
Simple line drawing of a sad figure sitting on a table with a crossed X-line, no text or symbols present.

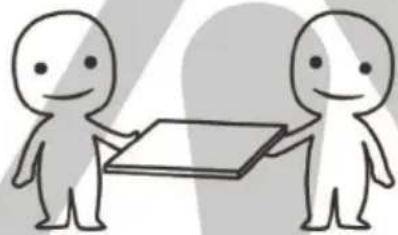
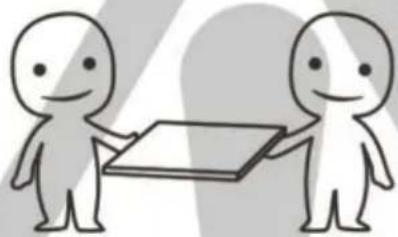
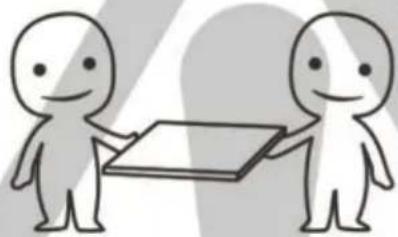
Two stick figures standing beside a blank document or board (no text or symbols visible).

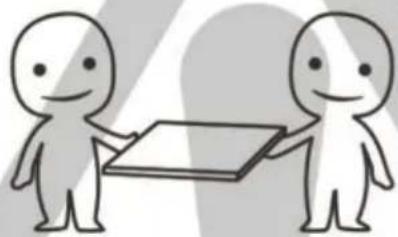
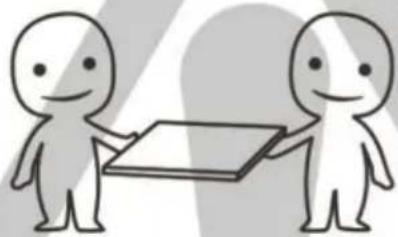
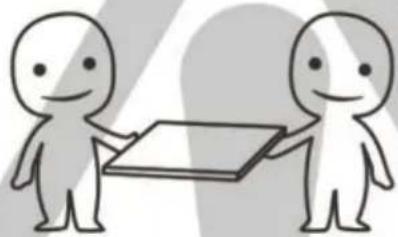
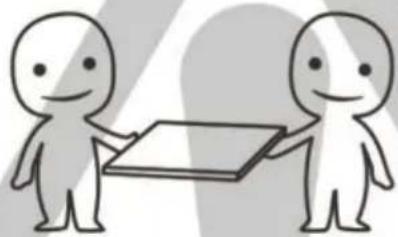
IMPROVE EFFICIENCY!

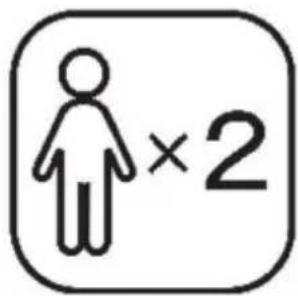
Try to find a partner to install with you, which can speed up the installation efficiency and shorten the time.
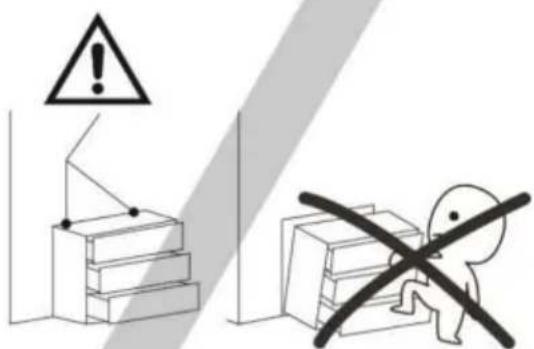
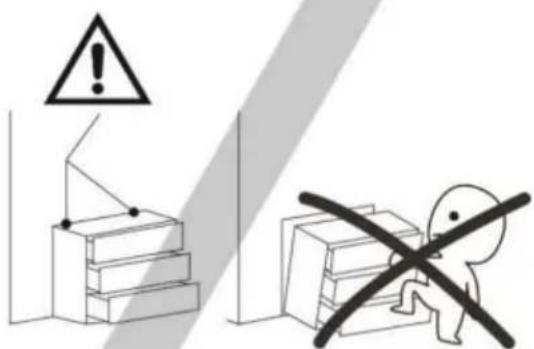
Warning sign and pictogram showing a warning triangle with warning symbol and a person crossed out with a cross symbol.

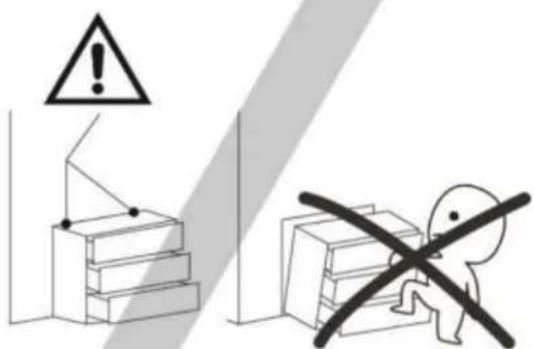
Warning symbol with exclamation mark and building diagram, indicating hazard or caution.

Simple line drawing of a person standing next to stacked boxes with a cross symbol (no text or labels).

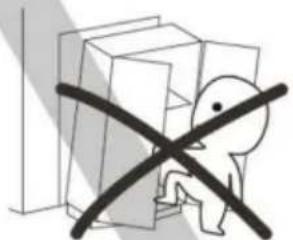
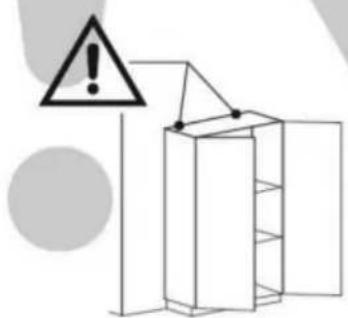
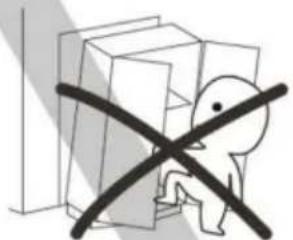
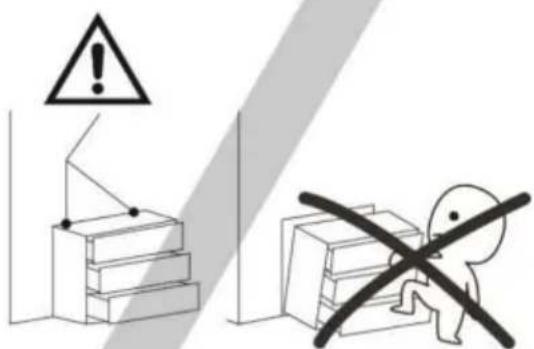
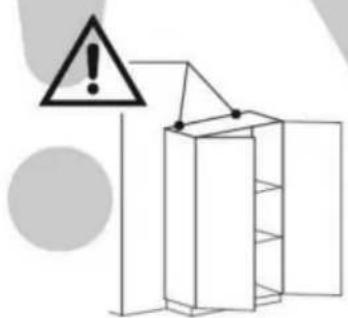
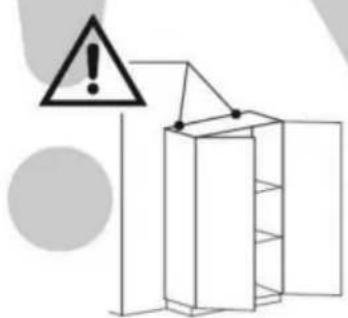
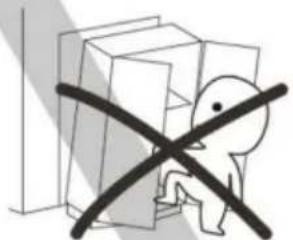
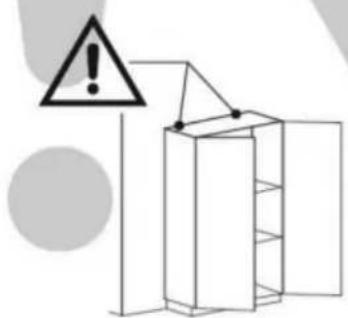
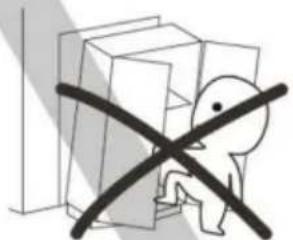
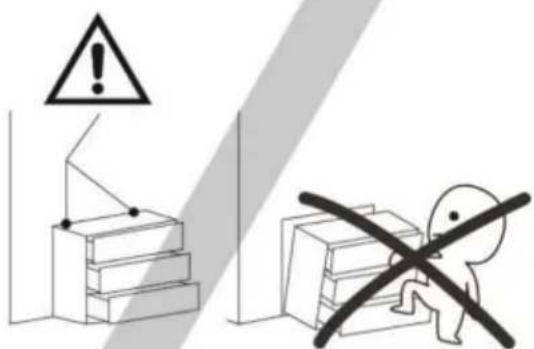
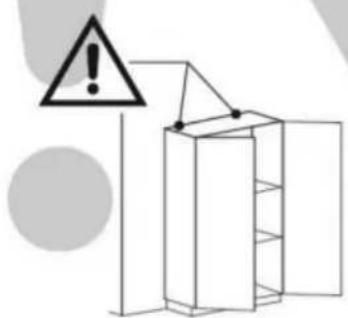
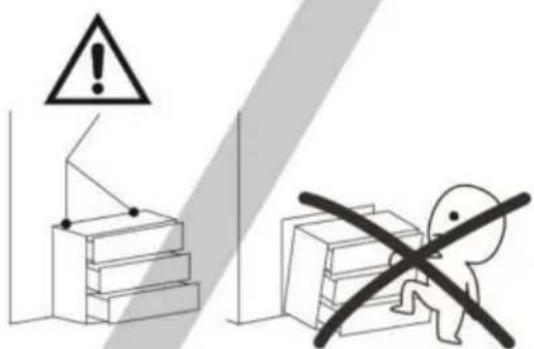
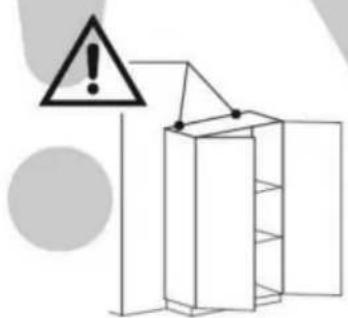
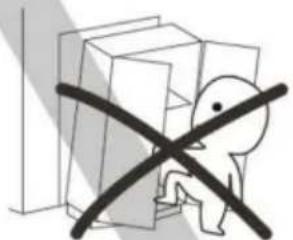
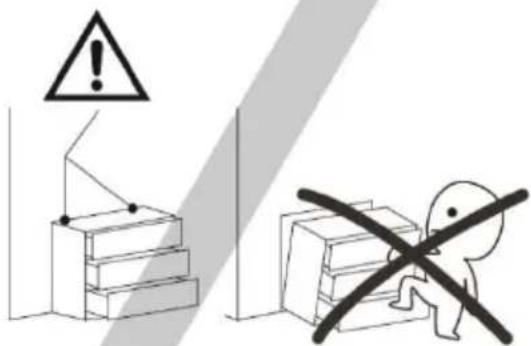
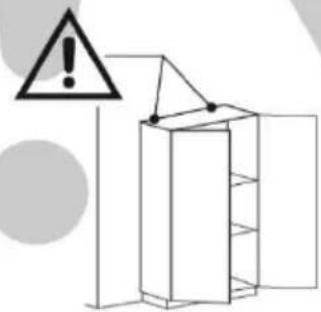
ANTI-TOPPLE WARNING!

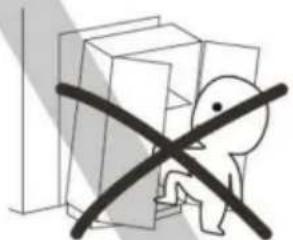
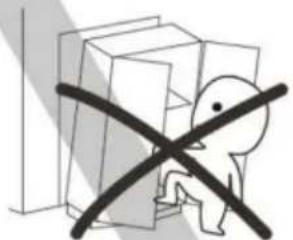
Overturned furniture can cause serious or fatal crush injuries. To prevent tipping over, be sure to use the wall attachment. If it is not included with this product, please purchase the wall attachment that fits your wall. If unsure, seek professional advice. Please read and follow each step of the instructions carefully.

IMPORTANT!

It is important that any product which is assembled using any kind of screw is re-tightened 2 weeks after assembly, and once every 3 months—in order to assure stability throughout the lifespan of the product.

For regular maintenance and cleaning of the product, for the frame, please use a rag dipped in neutral detergent to fully wipe it, and then dry it with a clean rag. For glass materials, wipe with a rag dampened with water glass cleaner, and then dry with a dry rag.

Do not use an electric screwdriver, and do not use too much force when installing, because the board is easy to break.

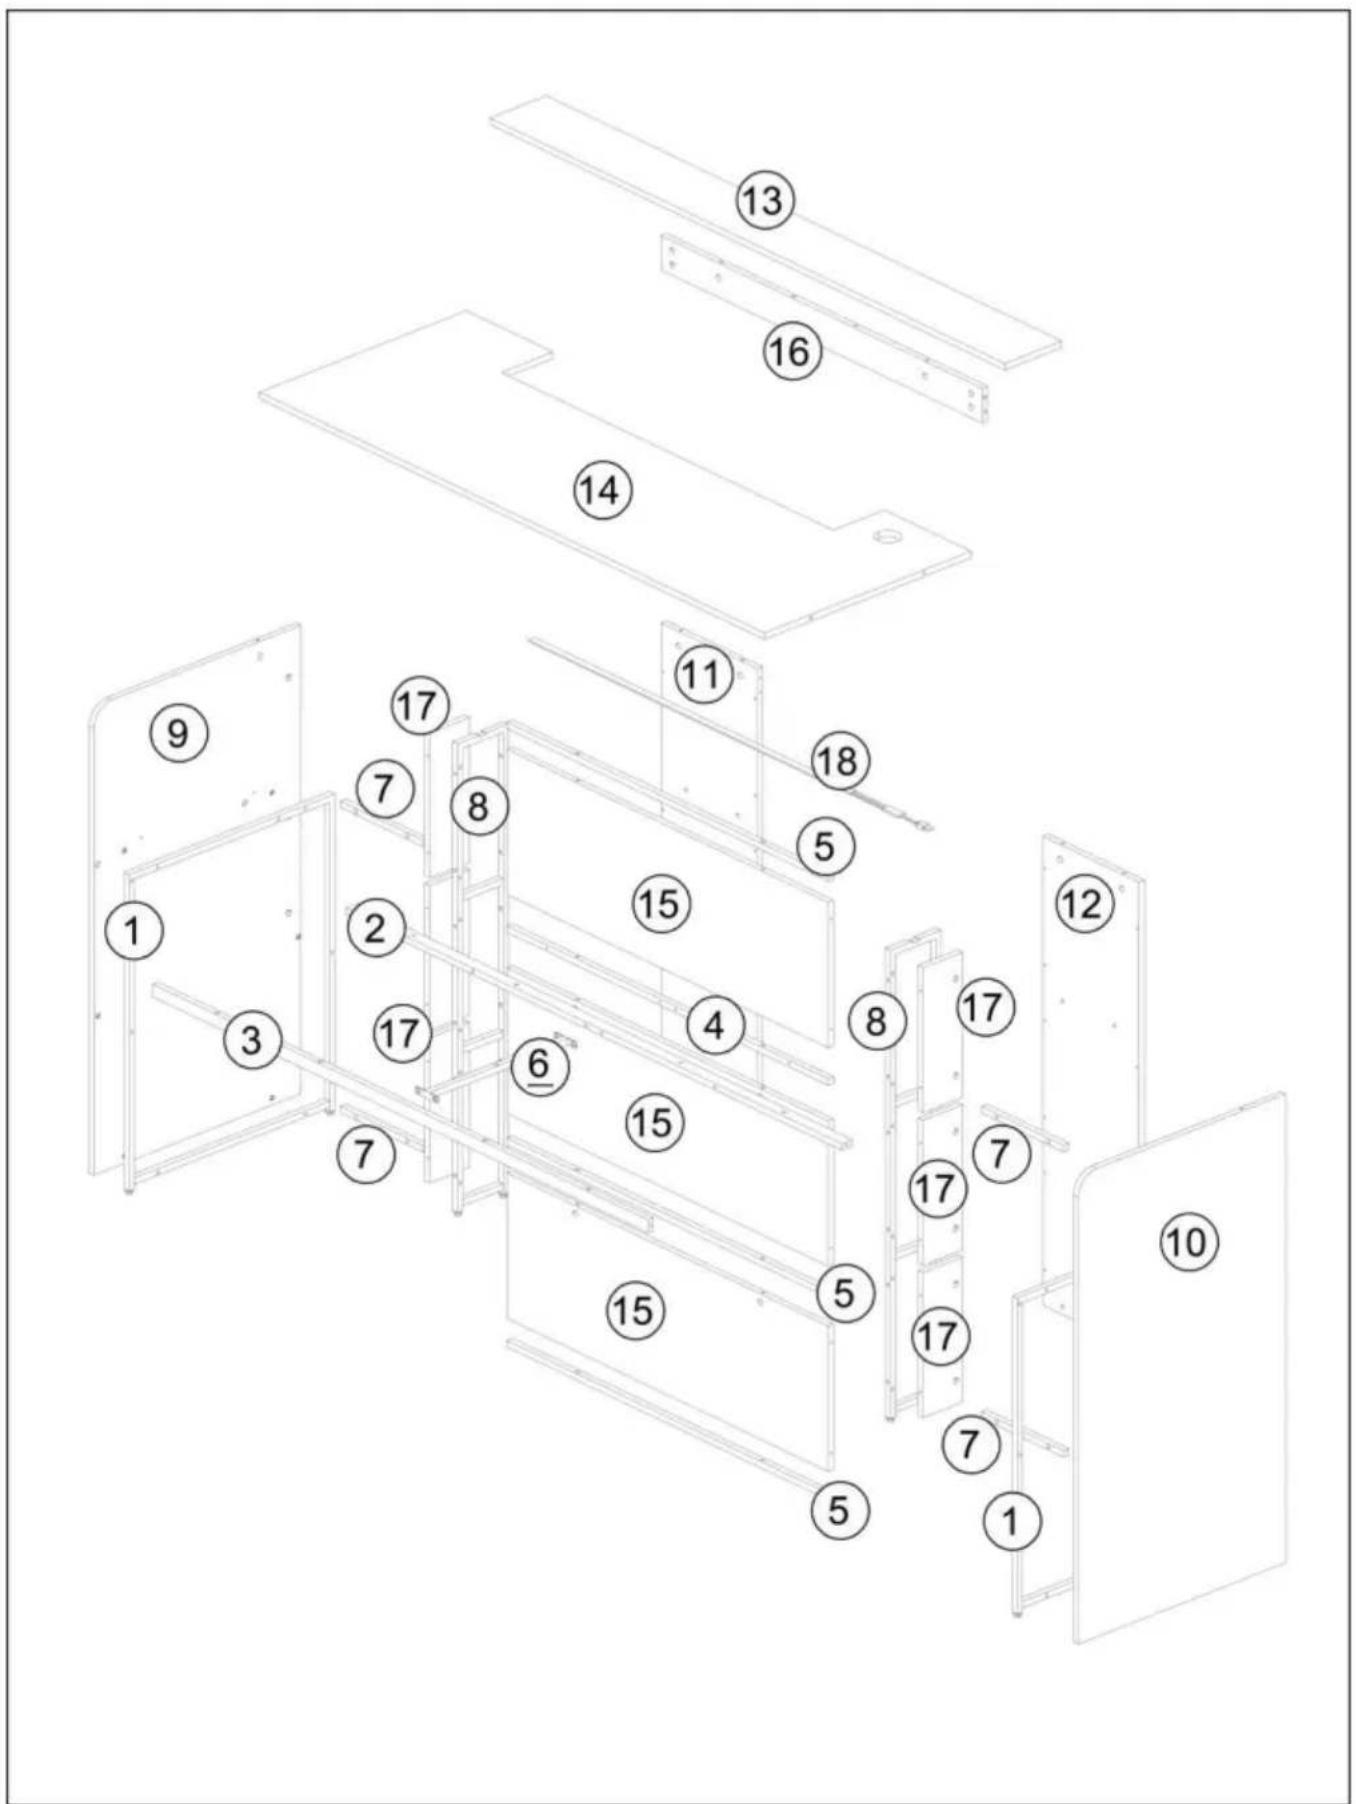
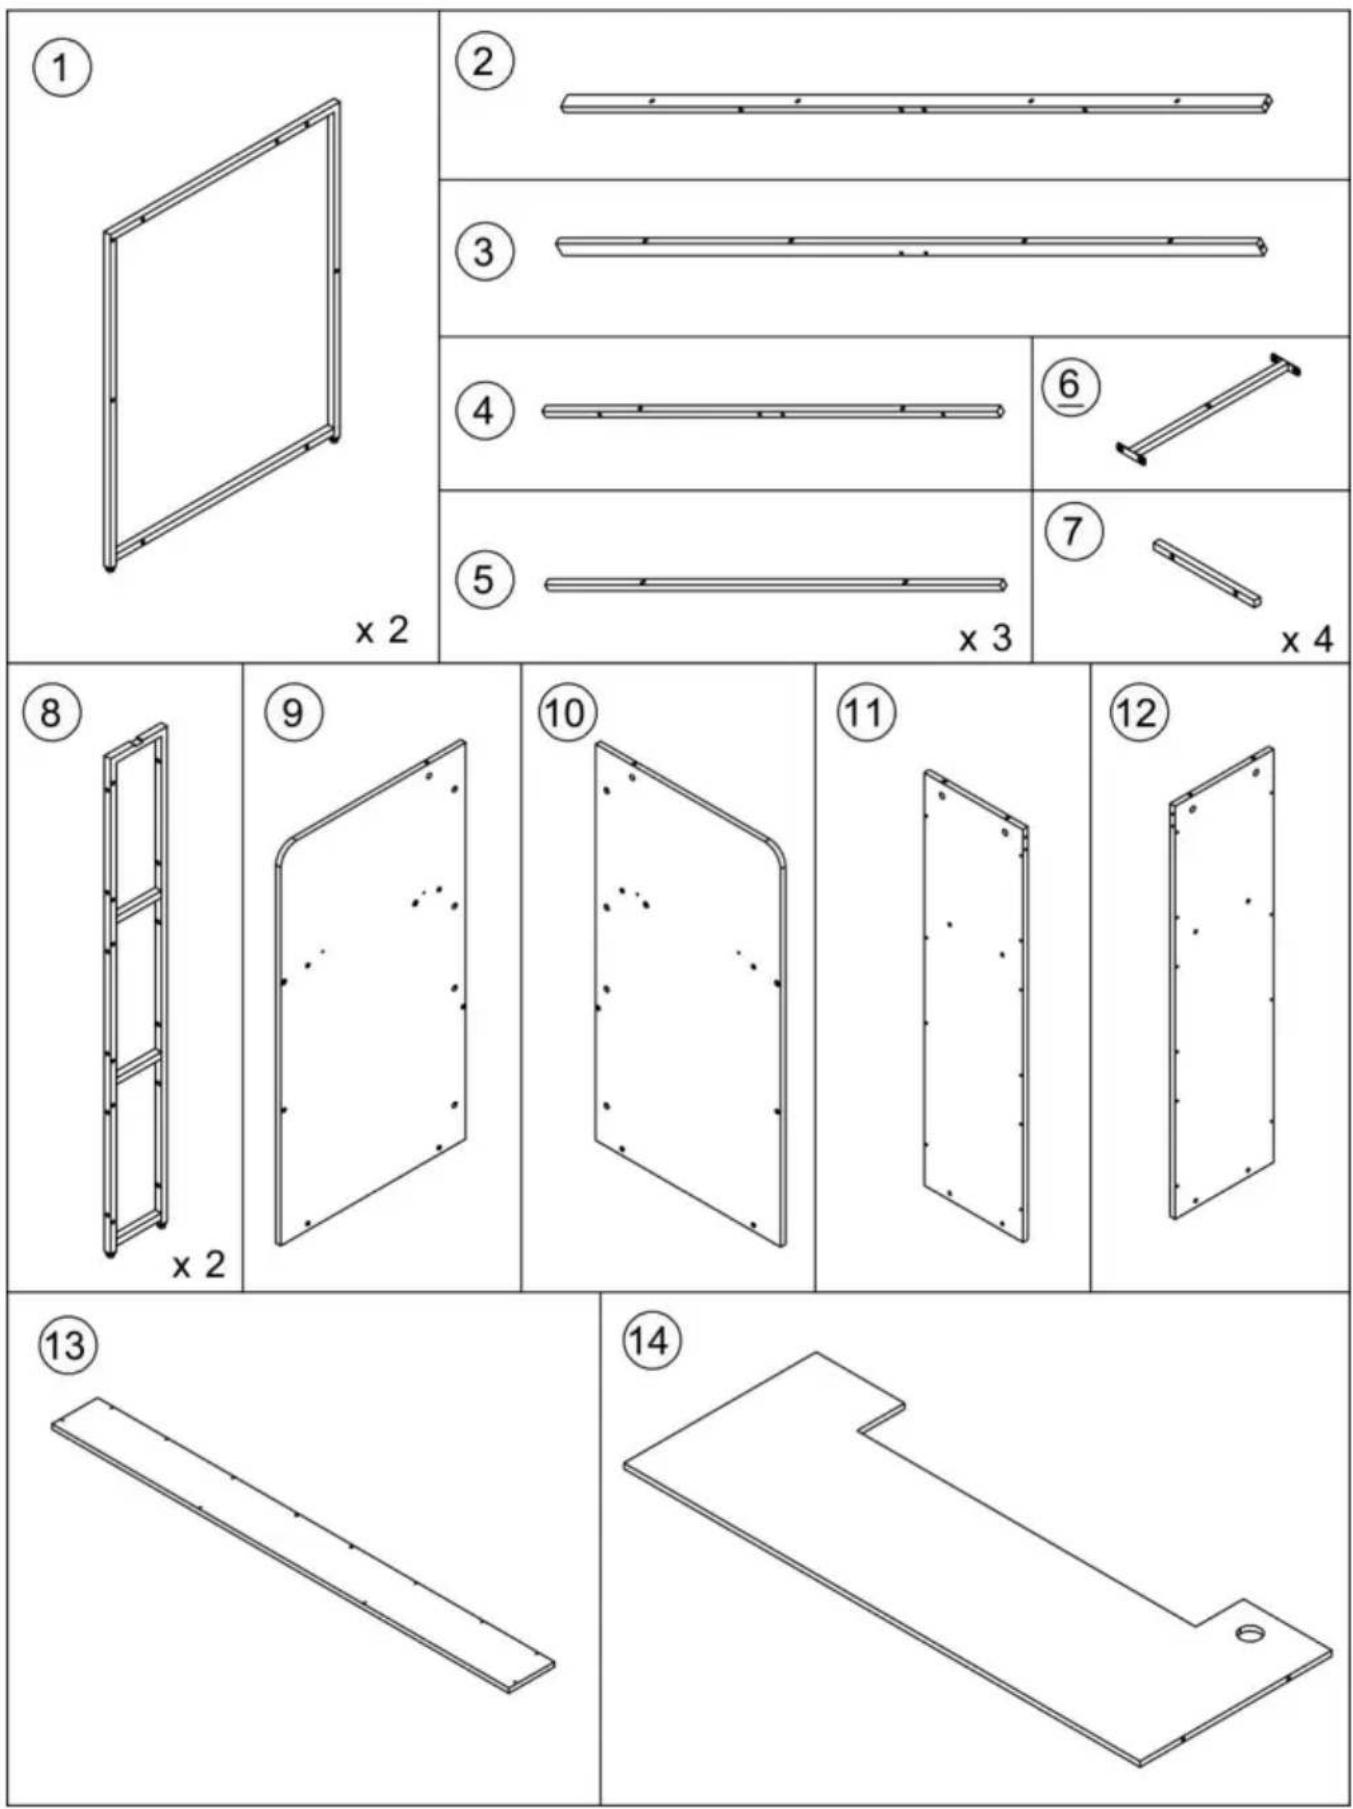
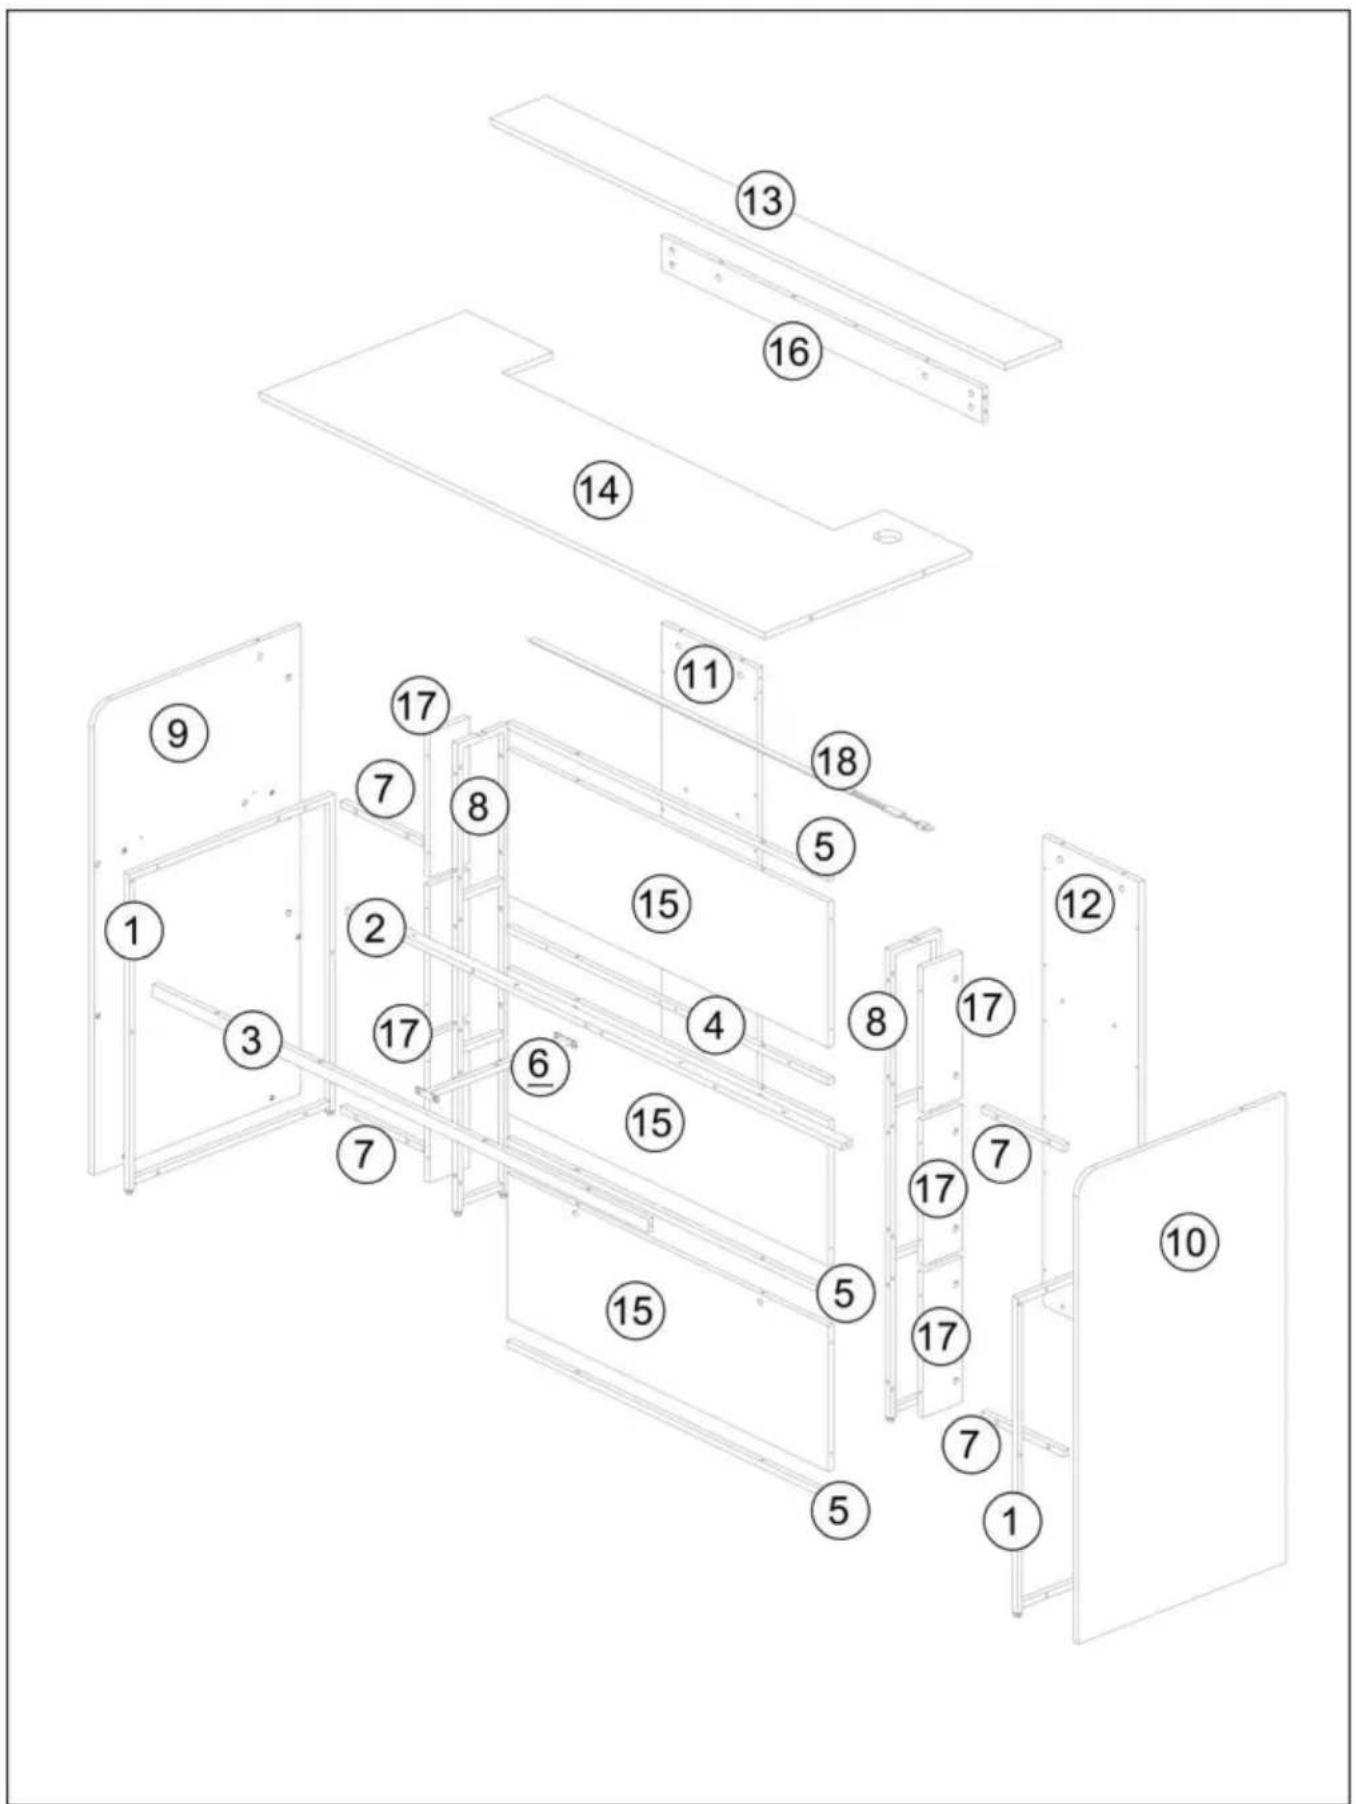
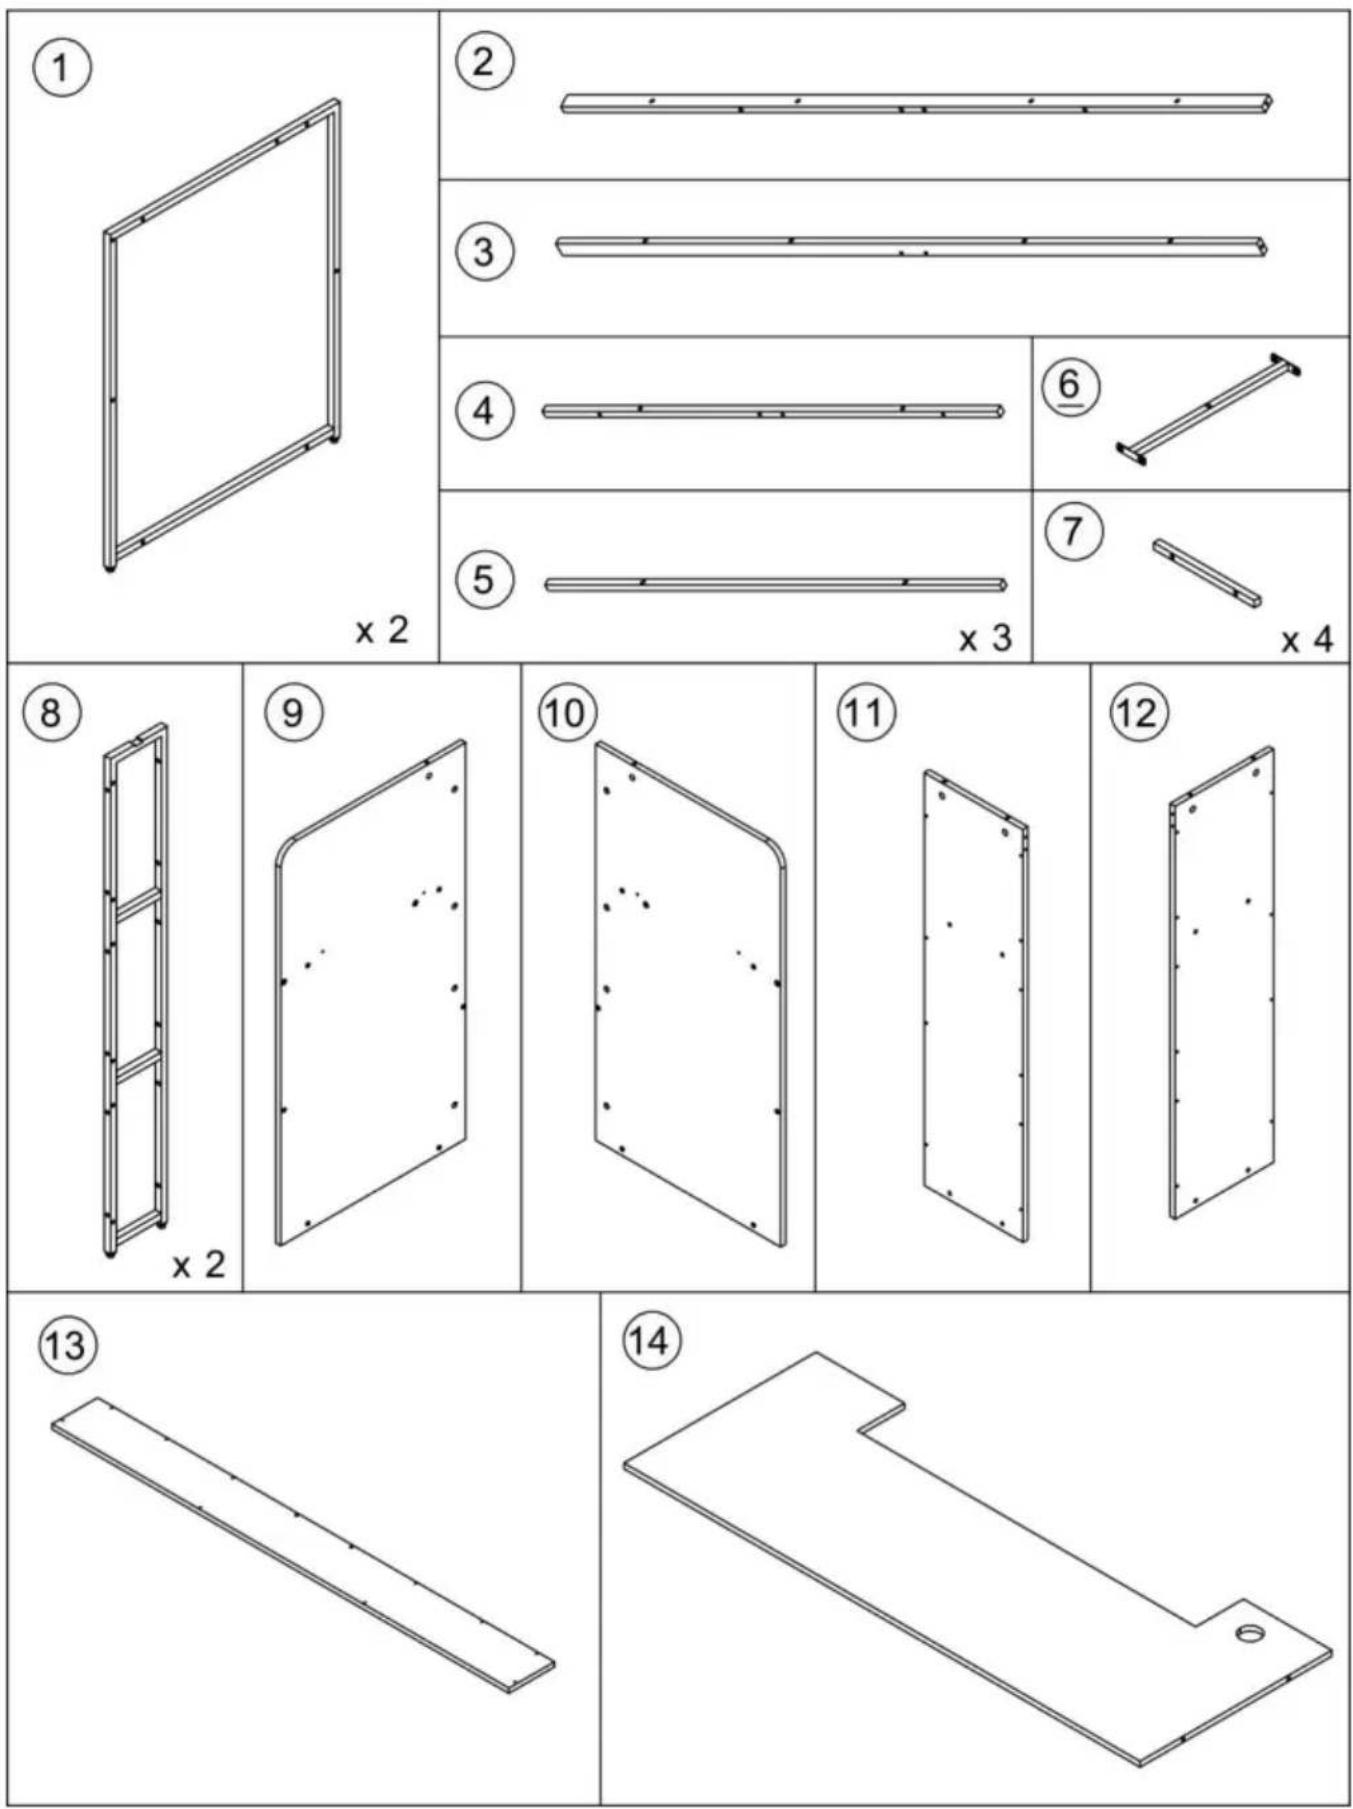
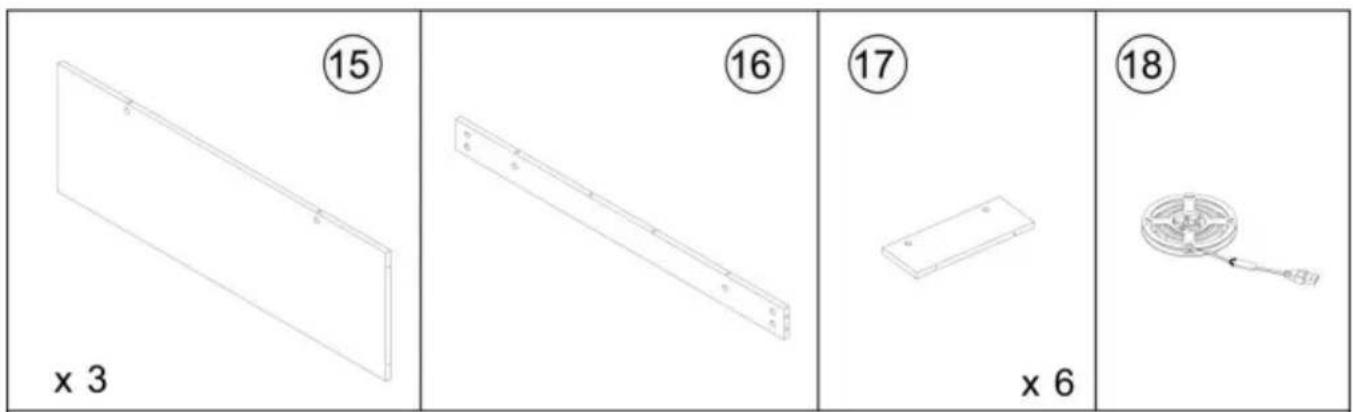
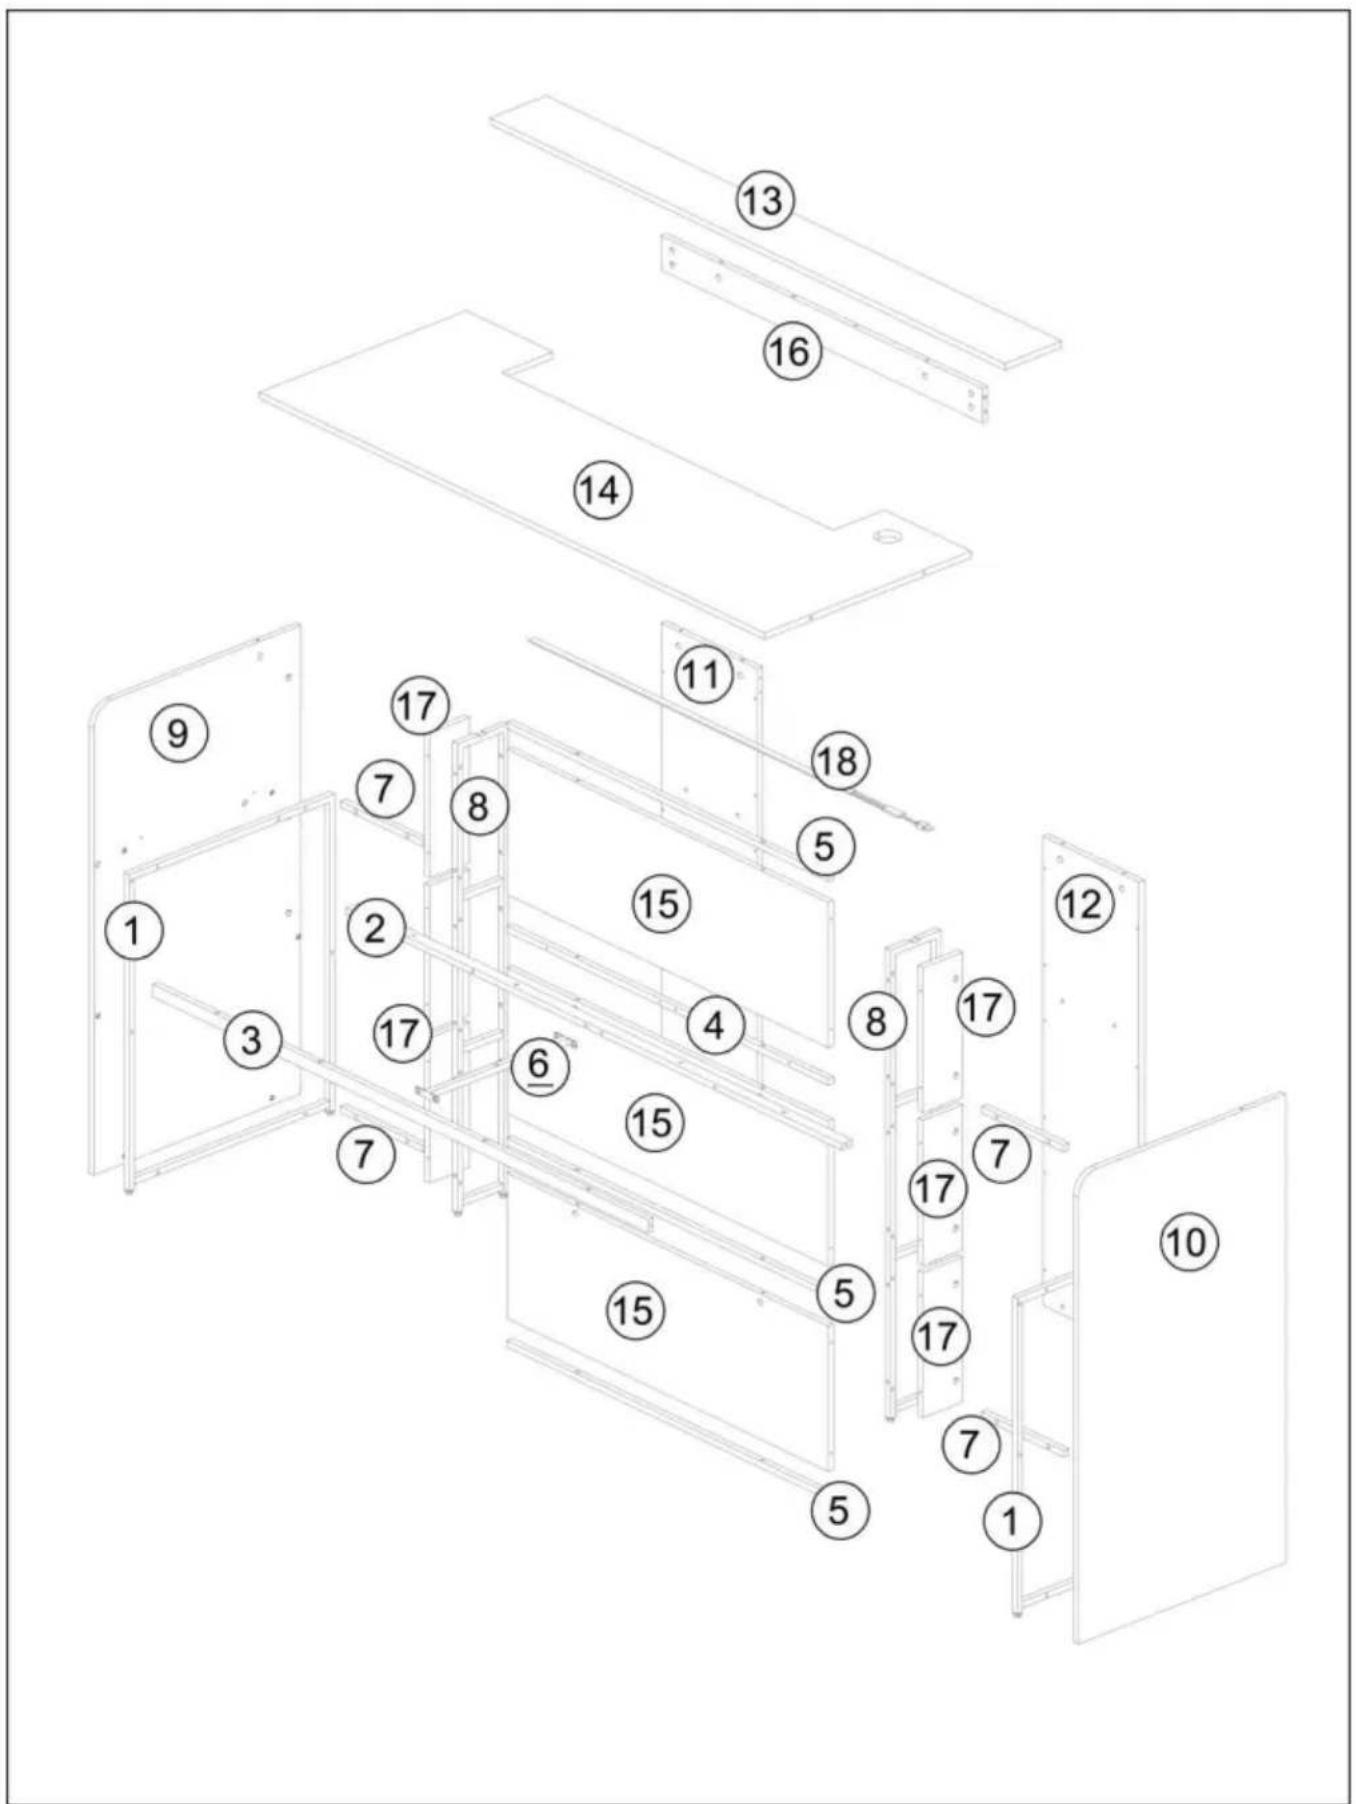
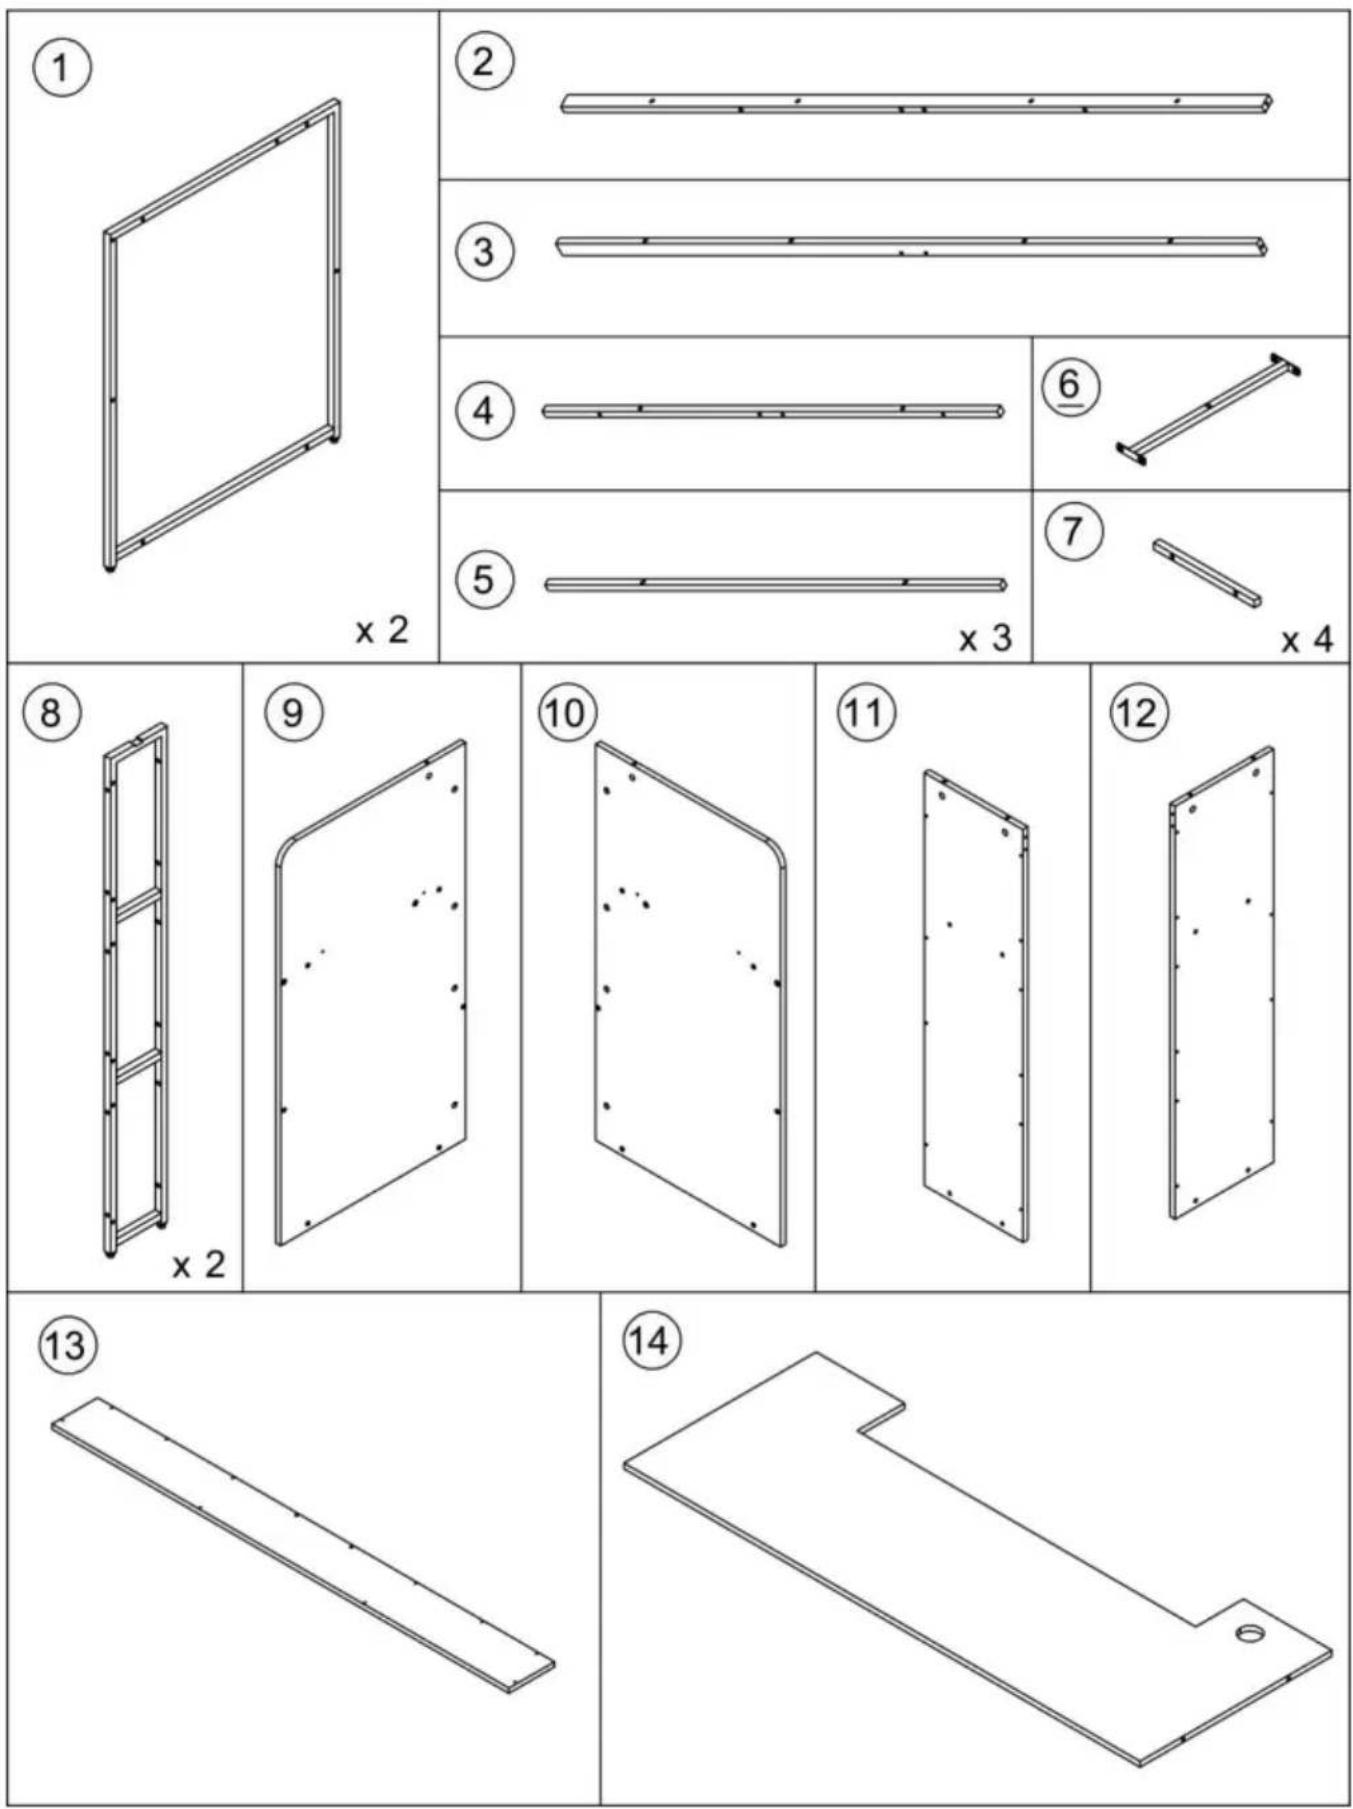
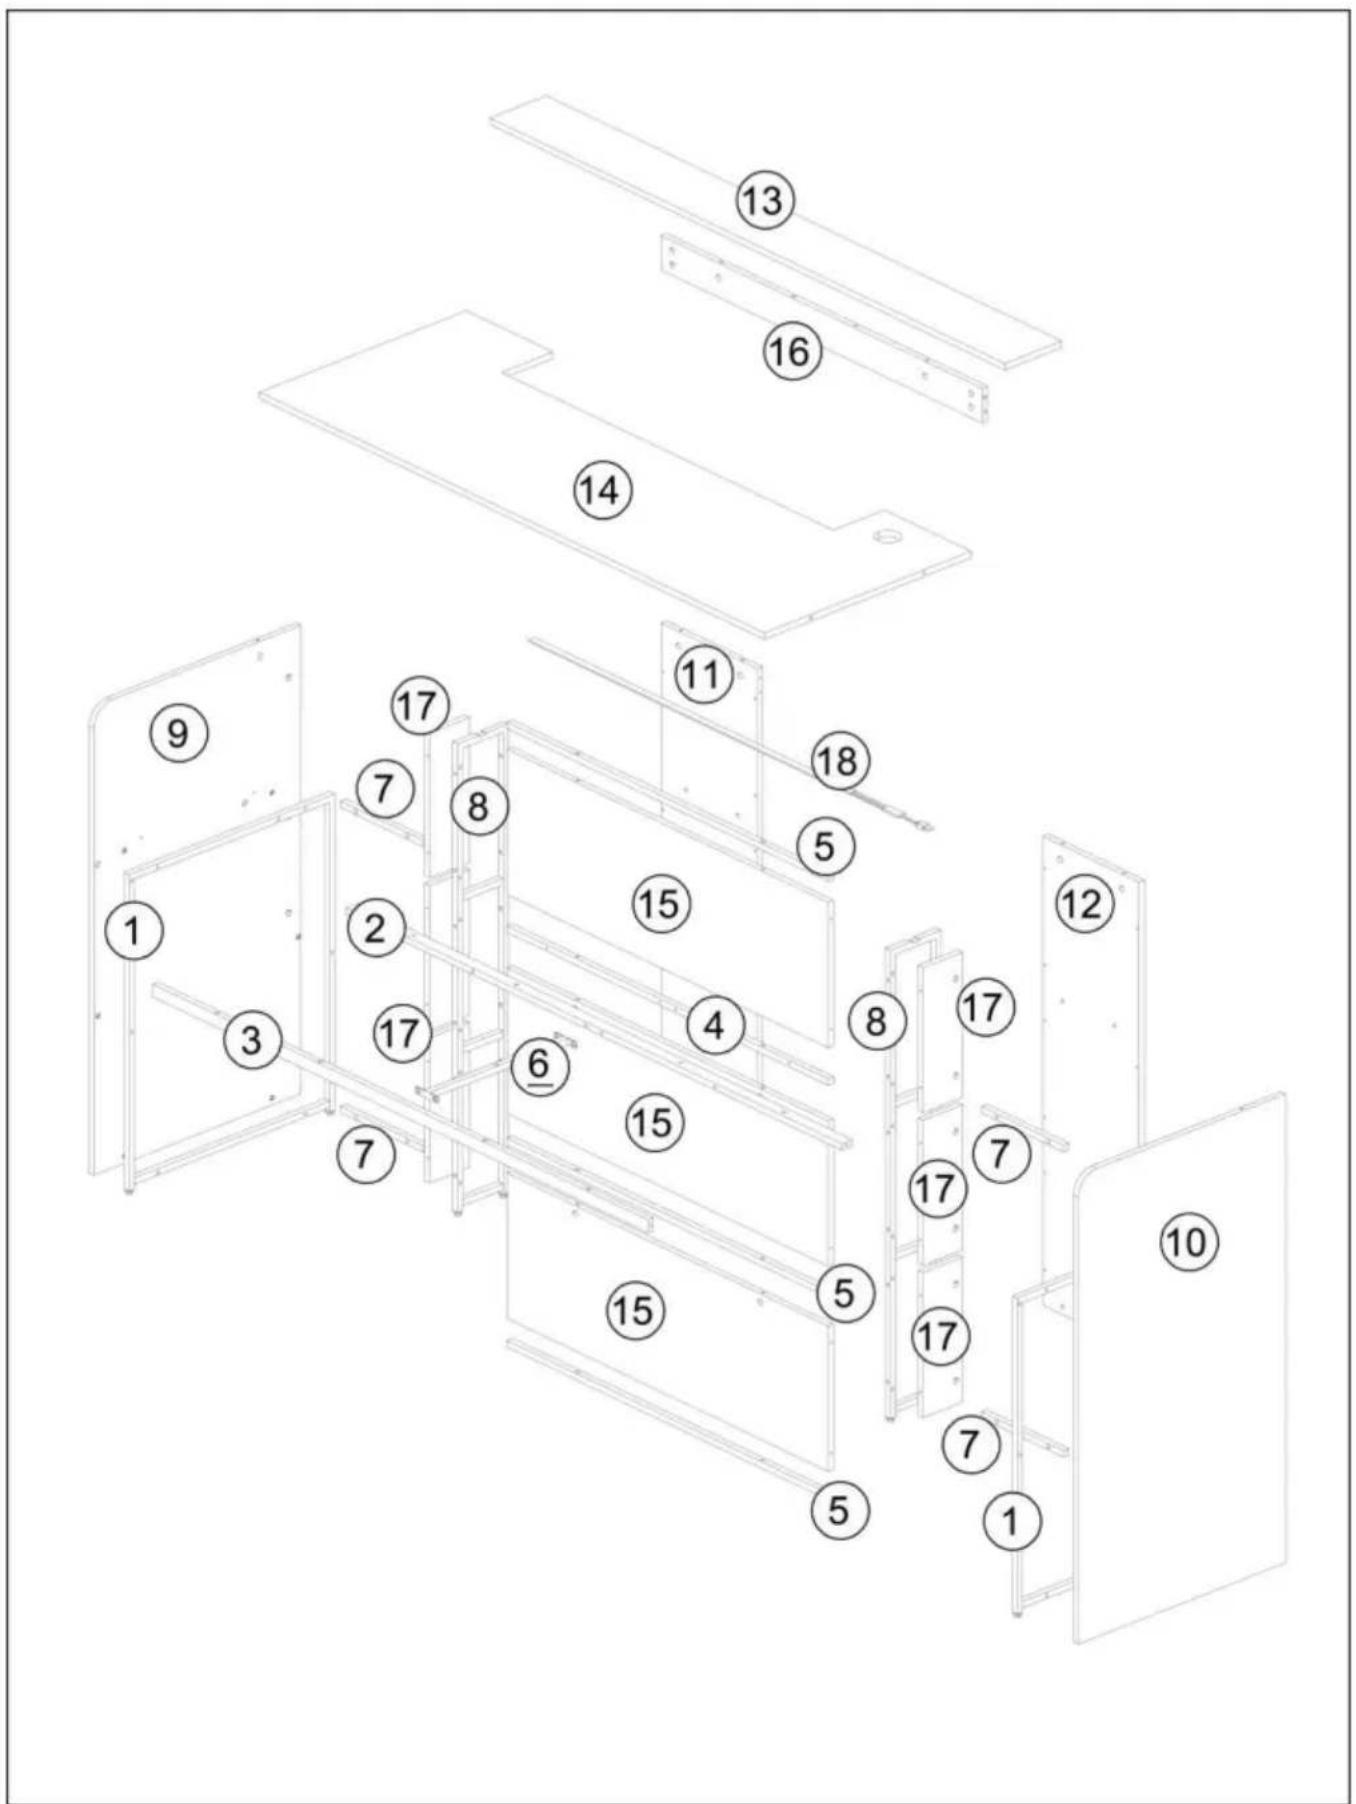
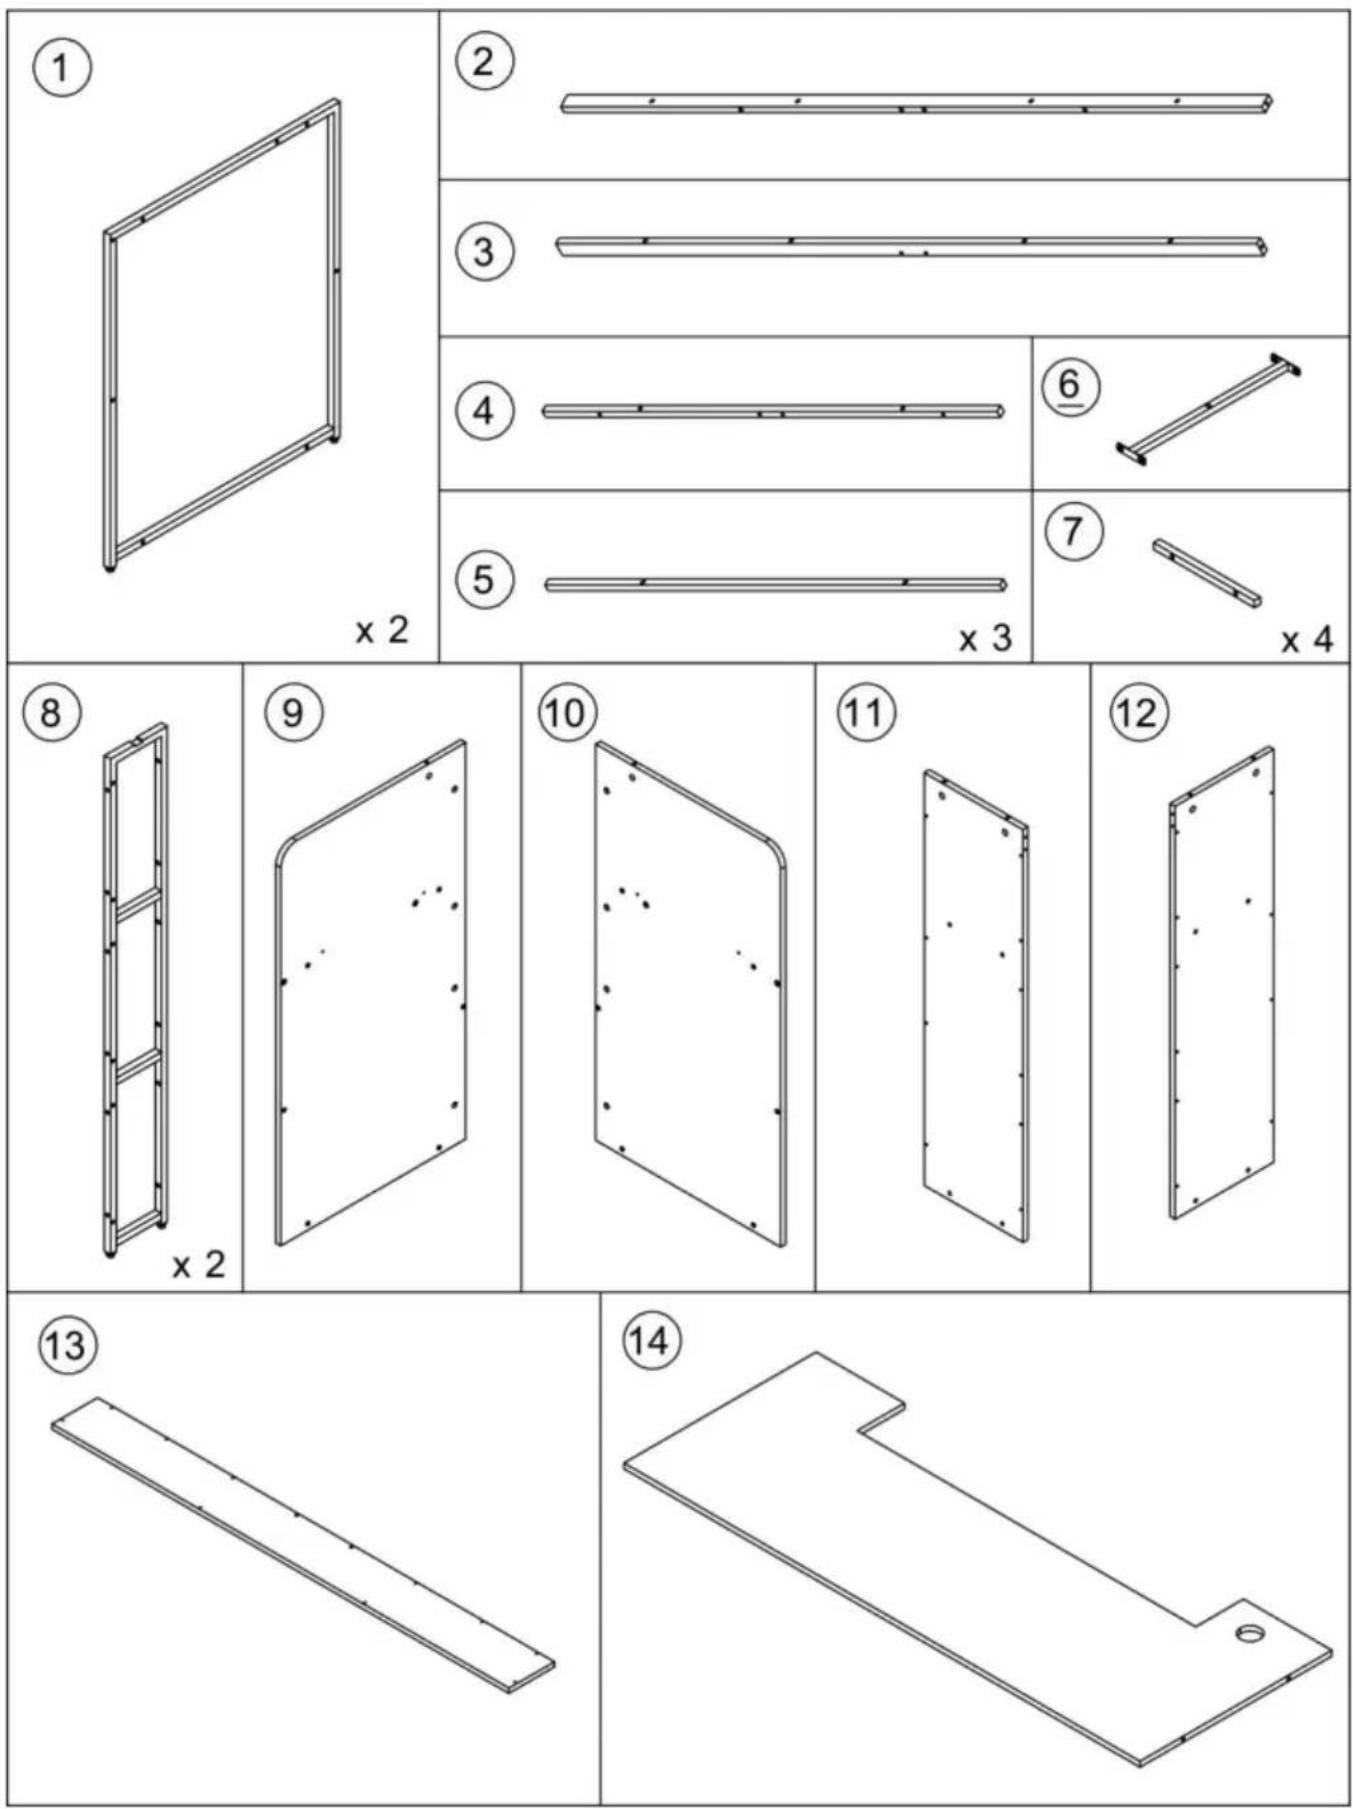
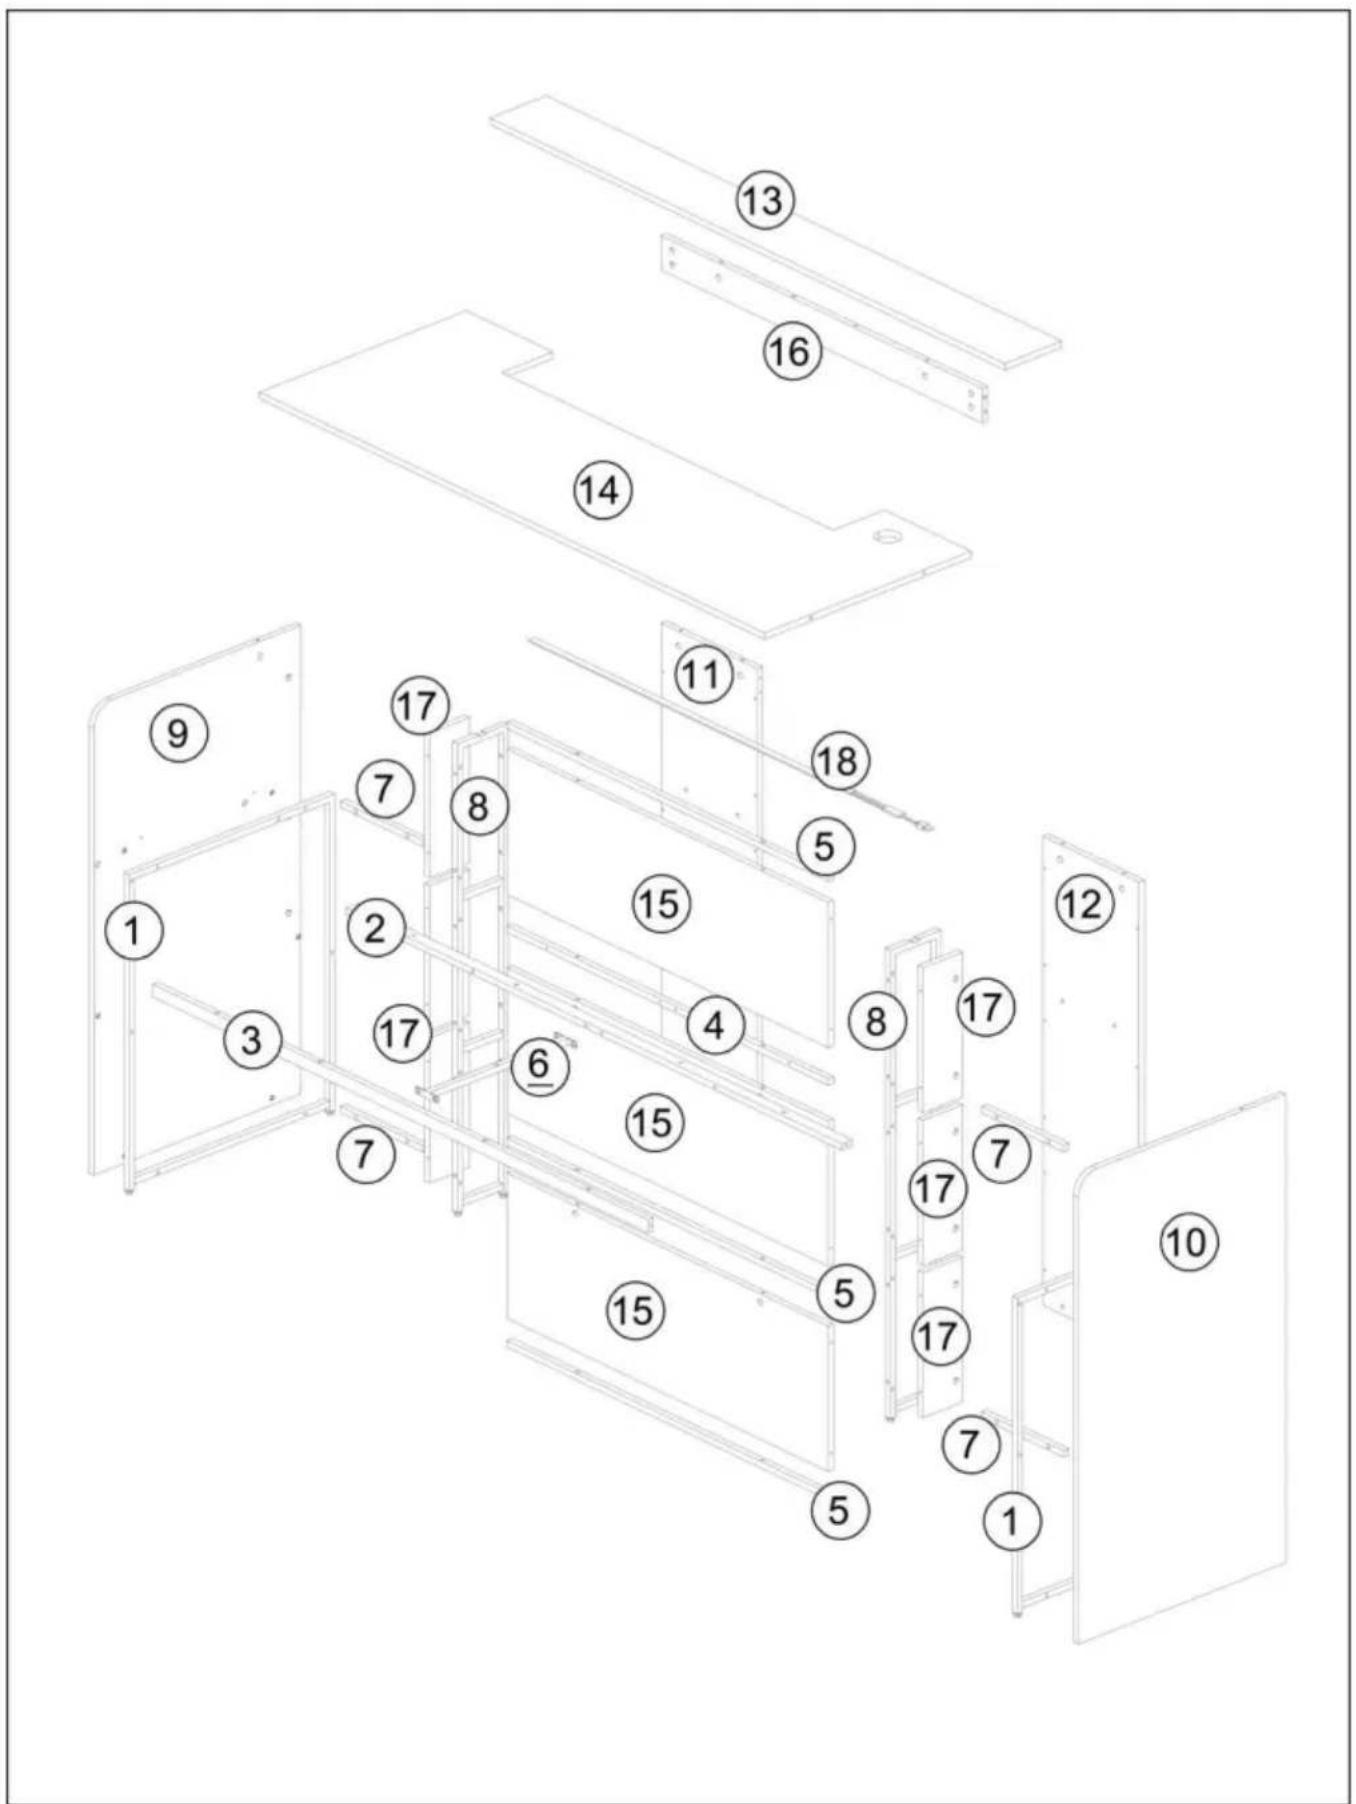
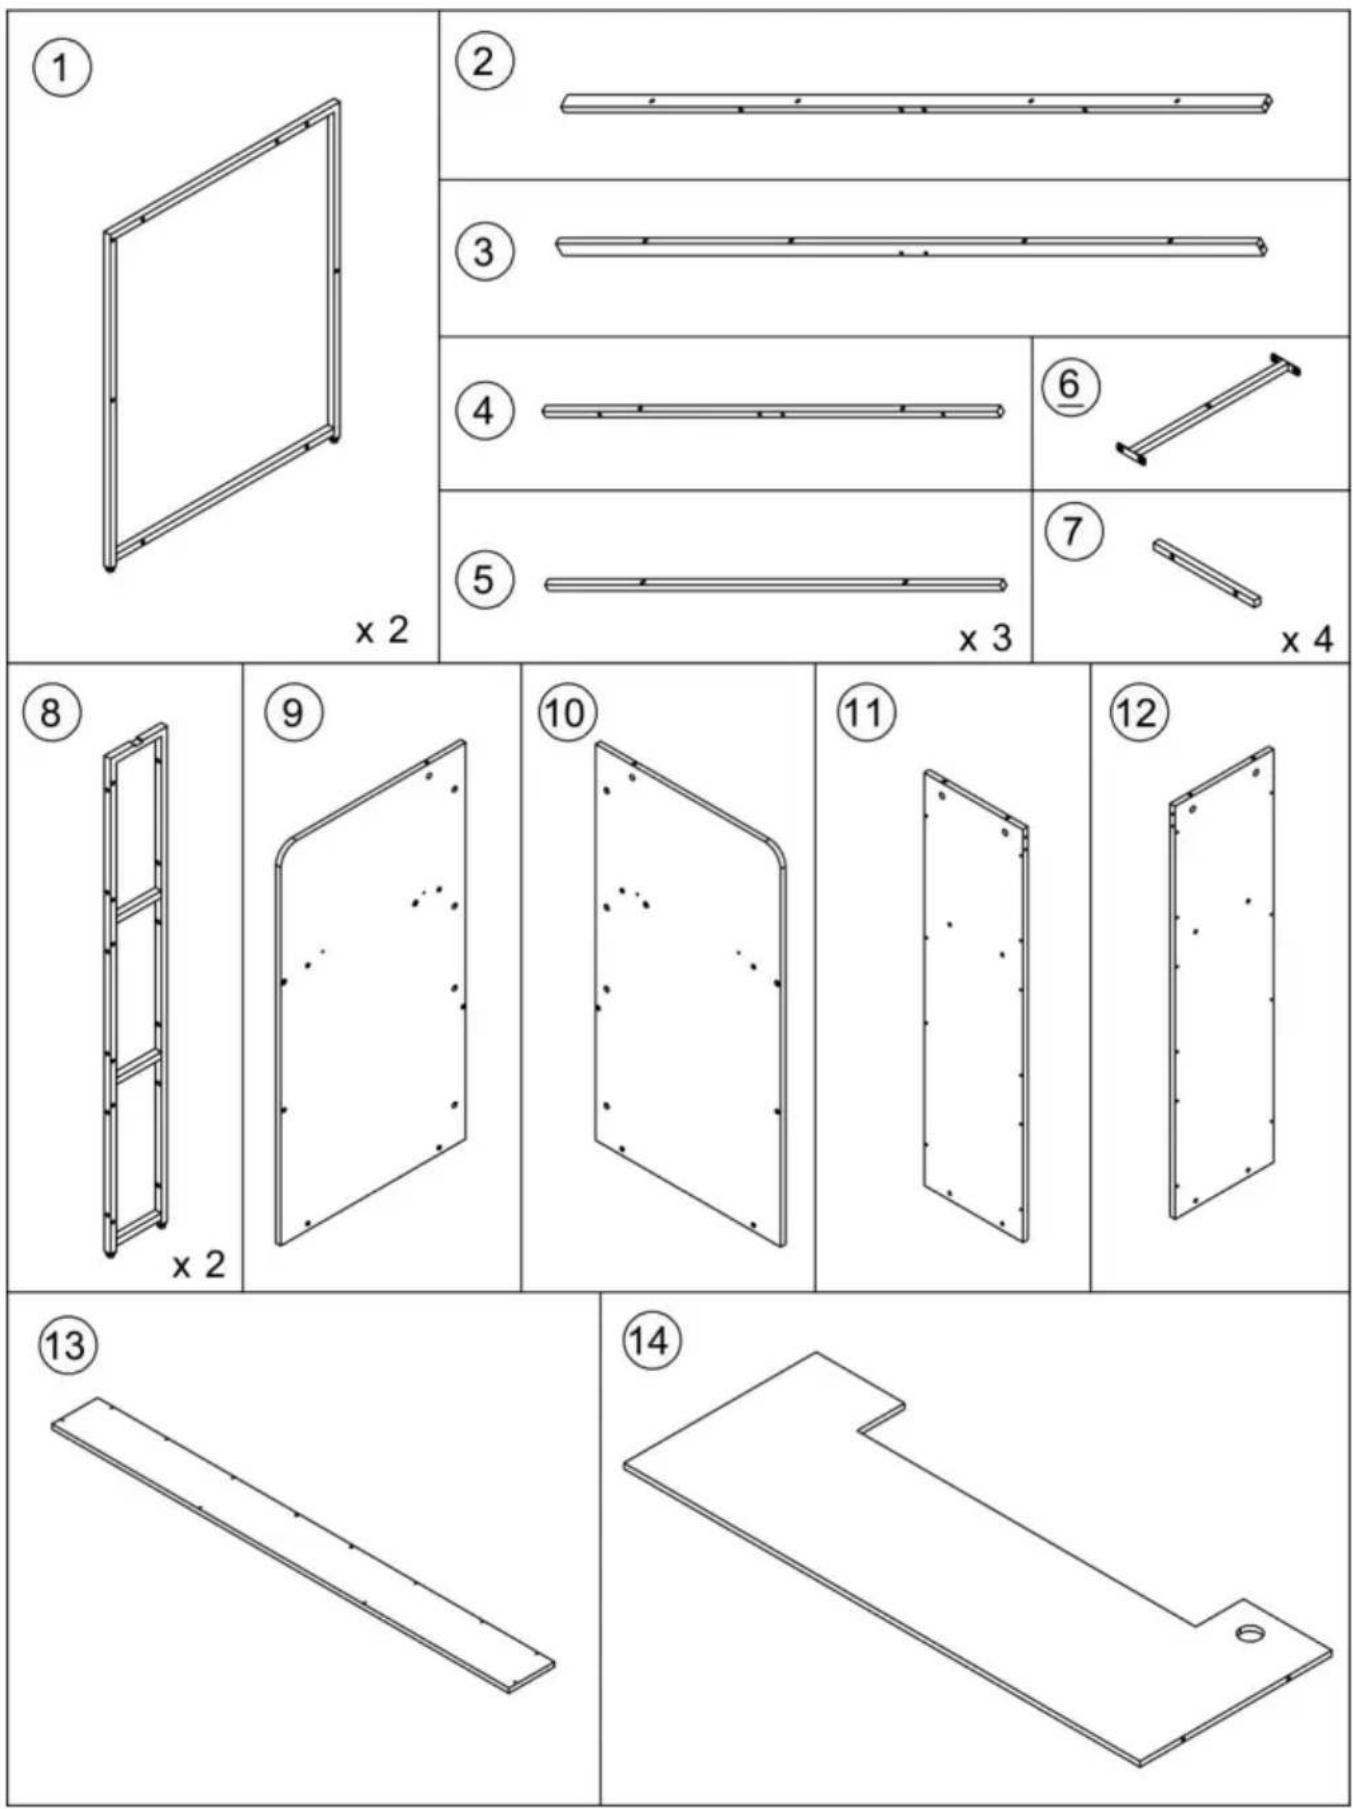
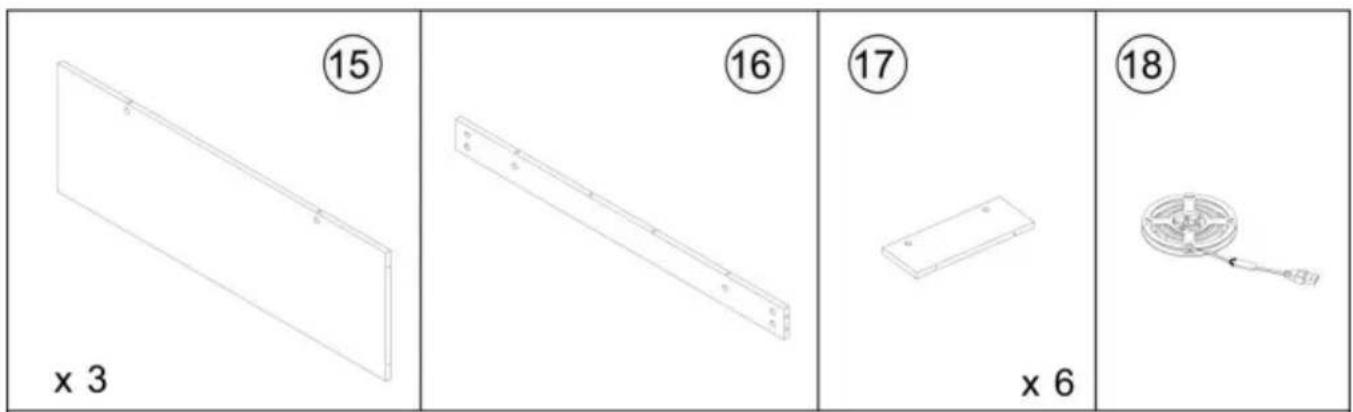
PARTS LIST

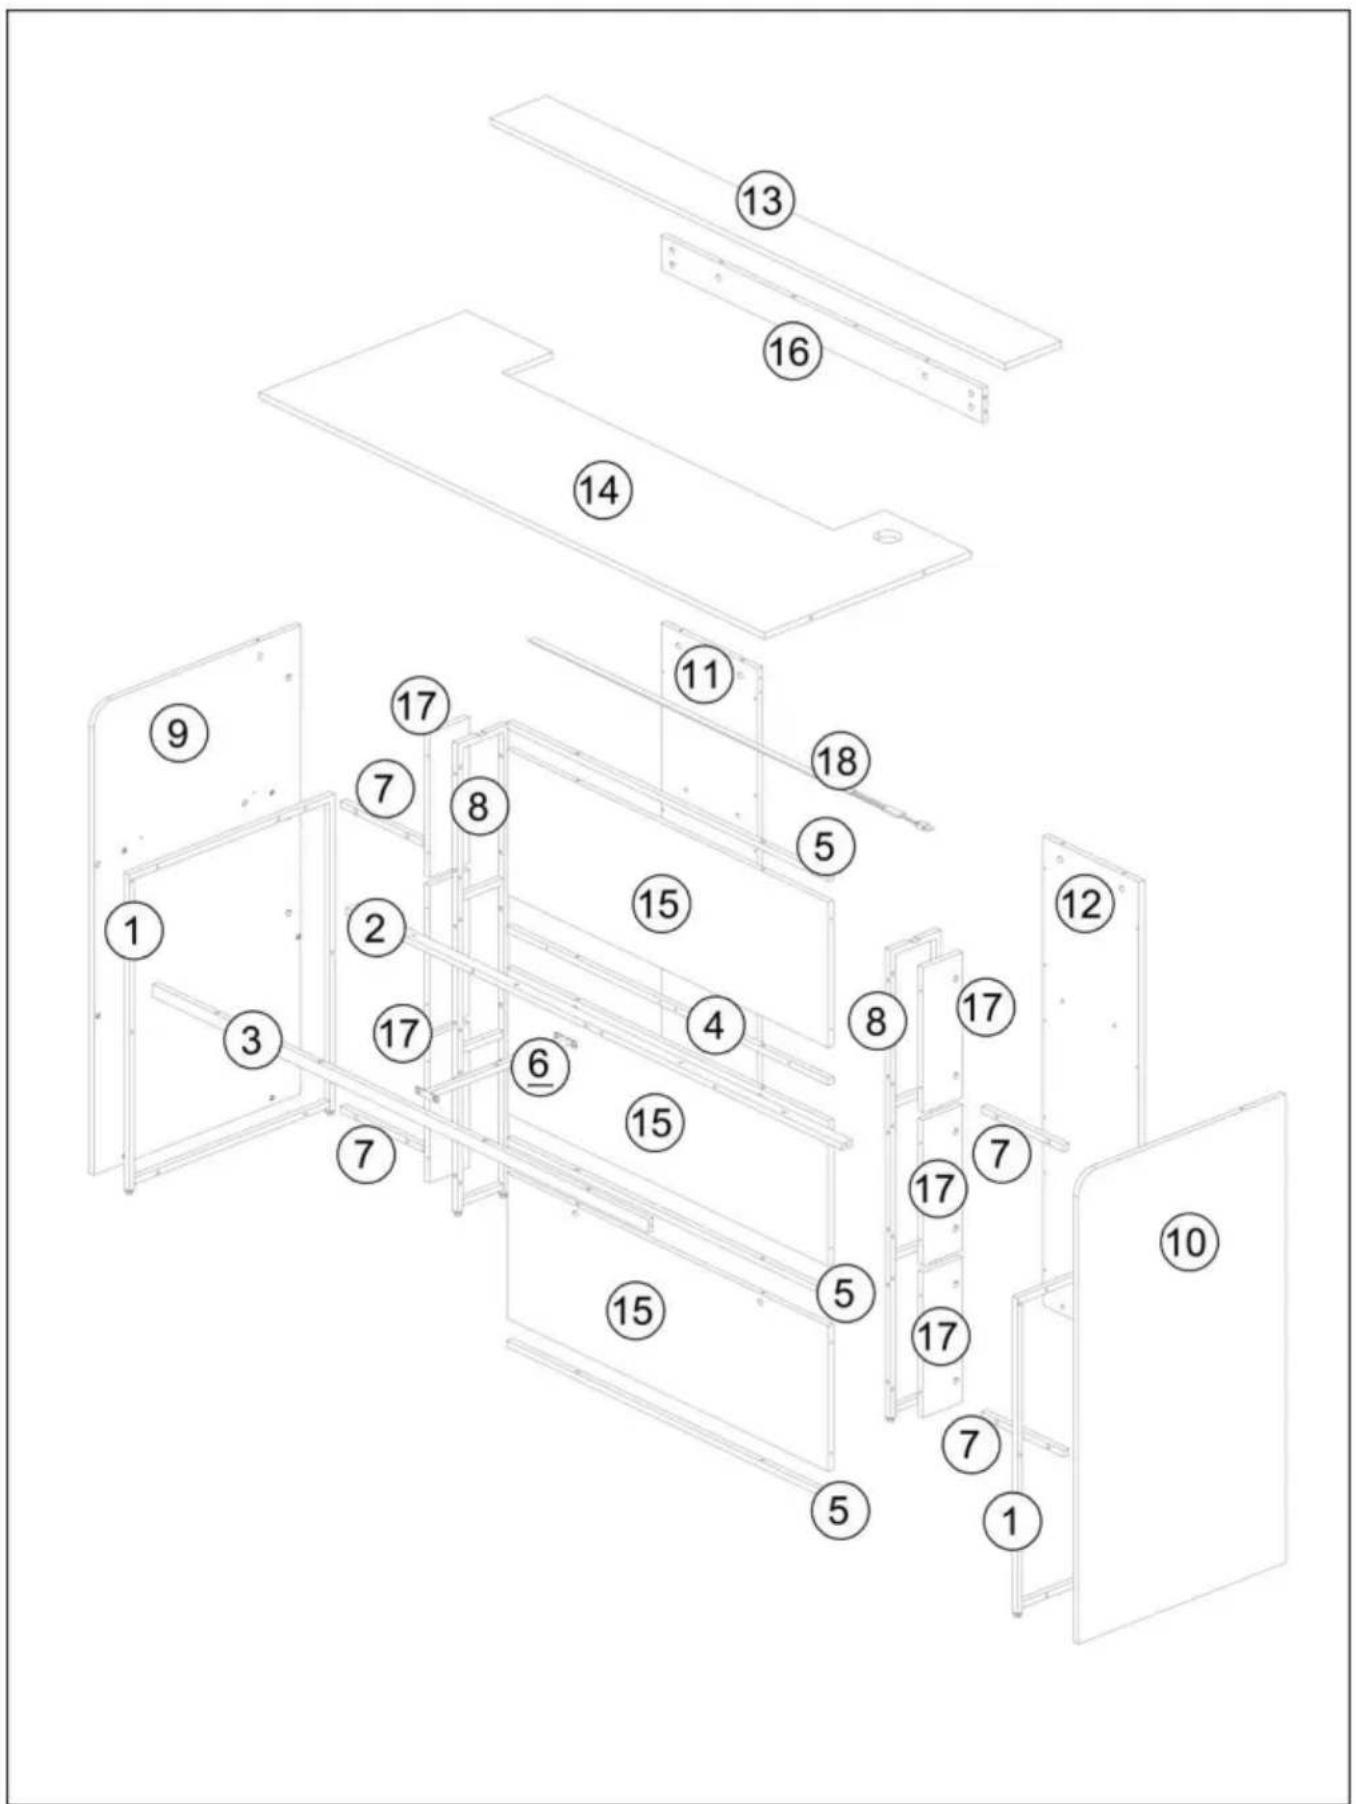
Technical diagram of a multi-level assembly with numbered components for identification.

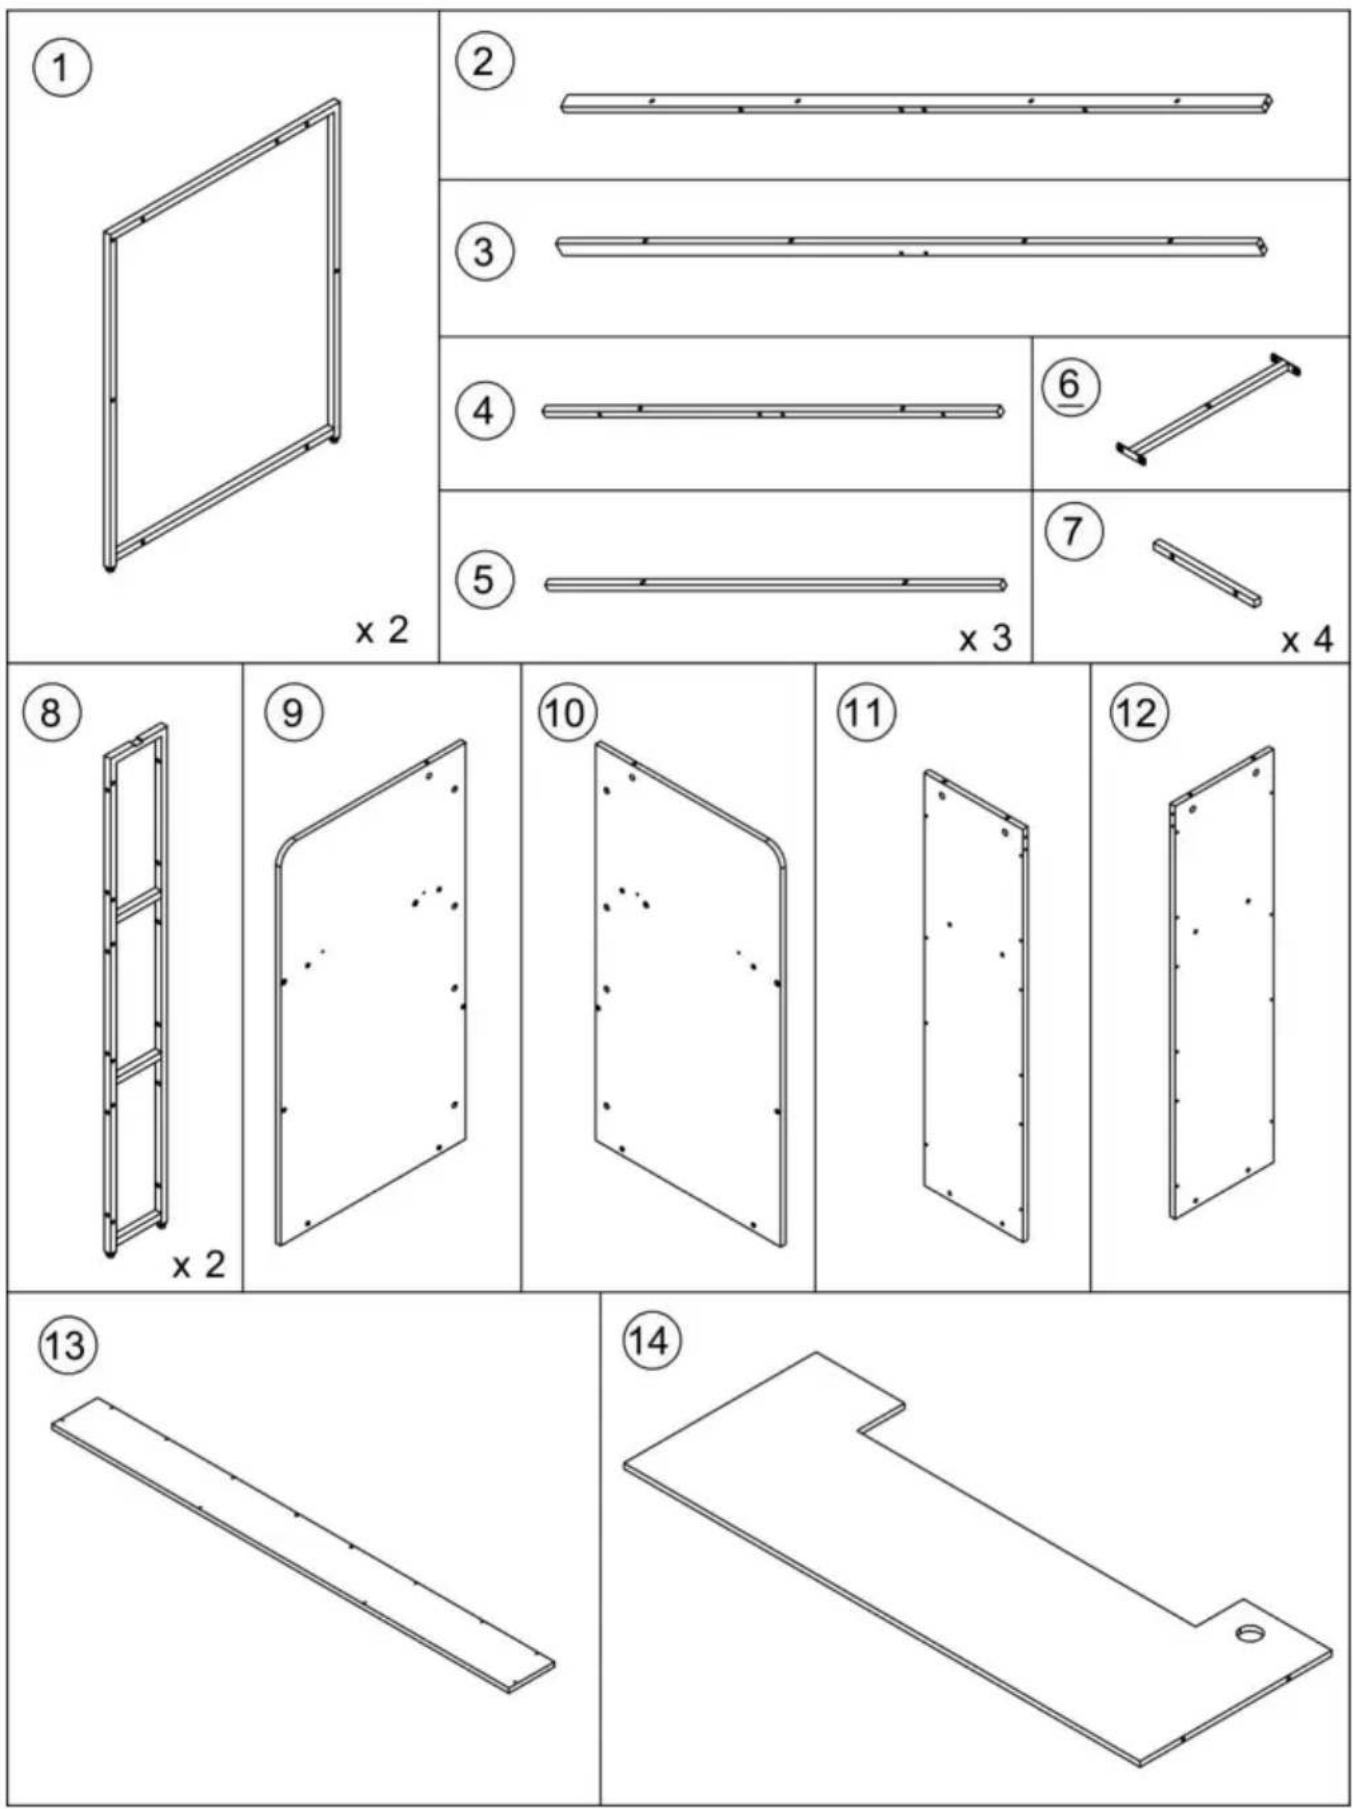
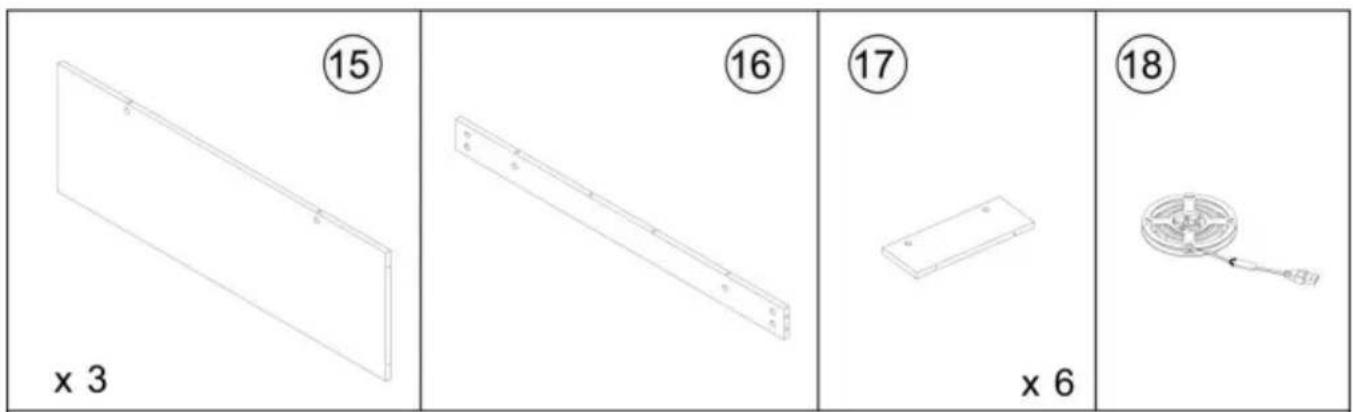
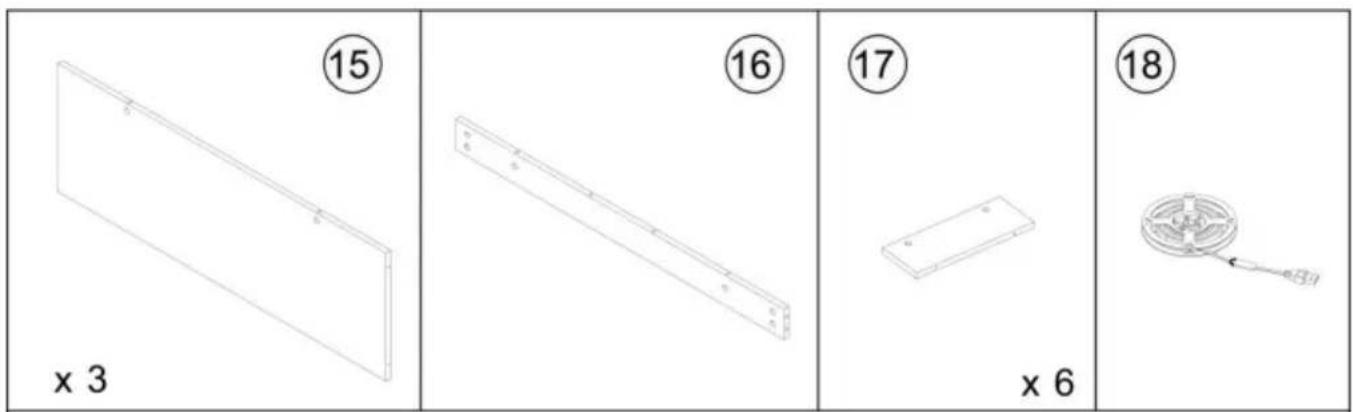
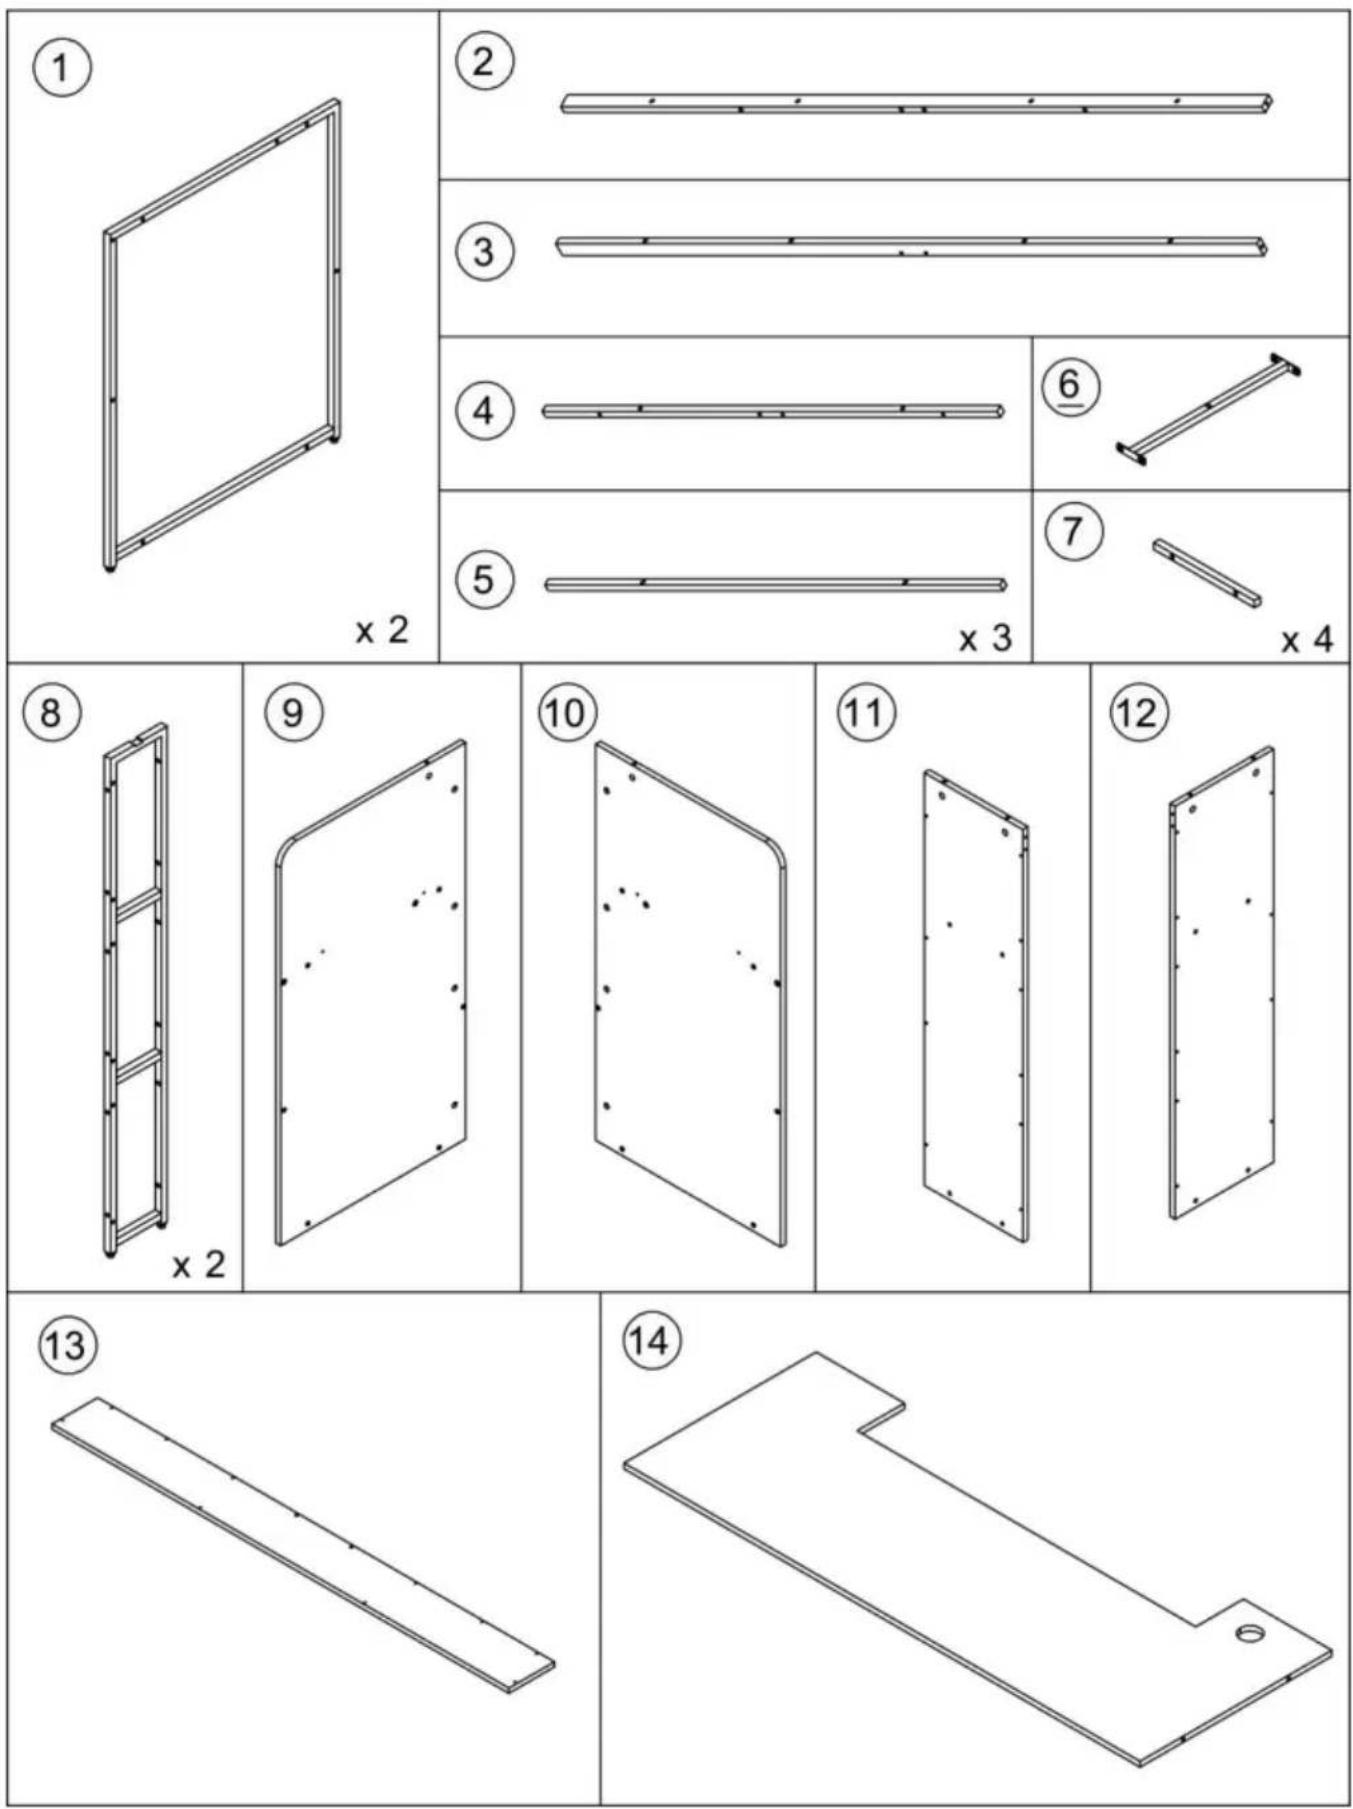
① x 2 ② ③ ④ ⑤ ⑥ x 3 ⑦ x 4 ⑧ x 2 ⑨ ⑩ ⑪ ⑫ ⑬ ⑭ ⑮ ⑯ ⑰ ⑱ ⑲ ⑳ ㉑ ㉒ ㉓ ㉔ ㉕ ㉖ ㉗ ㉘ ㉙ ㉚ ㉛ ㉜ ㉝ ㉞ ㉟ ㉳ ㉟ ㉟ ㉟ ㉟ ㉟ ㉟ ㉟ ㉟ ㉟ ㉟ ㉟ ㉟ ㉟ ㉟ ㉟ ㉟ ㉟ ㉟ ㉟ ㉟ ㉟ ㉟ ㉟ ㉟ ㉟ ㉟ ㉟ ㉟ ㉟ ㉟ ㉟ ㉟ ㉟ ㉟

Simple 3D rectangular block diagram with dimension labels and page number 15 (no text or symbols on the object itself).

Simple line drawing of a rectangular ruler with measurement markings (no text or numbers visible).

Simple line drawing of a rectangular object with a circled number 17 above it (no text or symbols on the object itself).

Simple line drawing of a round object with a handle and central cross (no text or symbols).

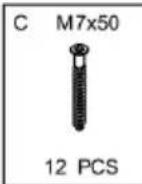
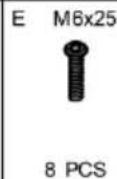
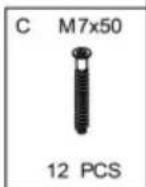
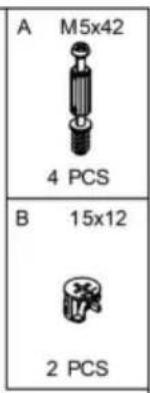
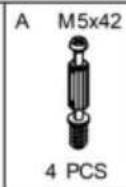
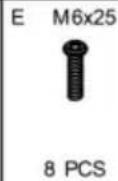
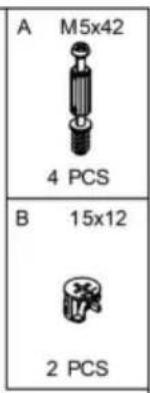
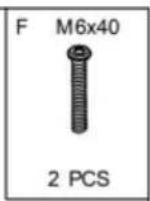
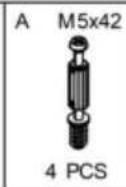
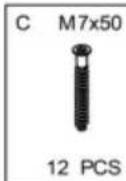
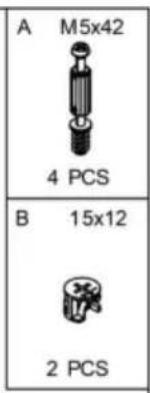
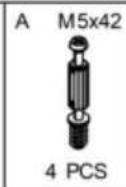
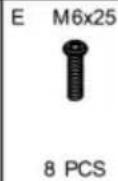
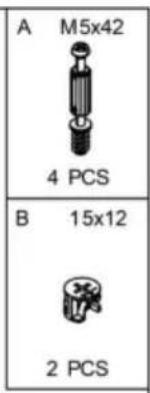
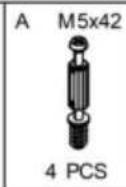
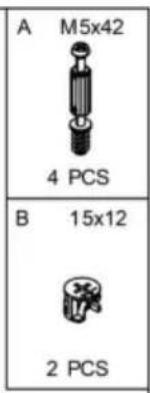
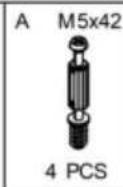
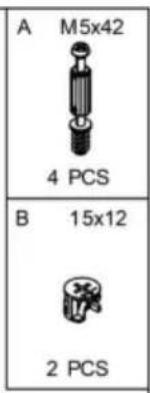
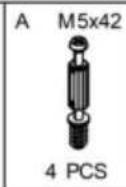
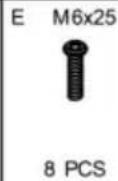
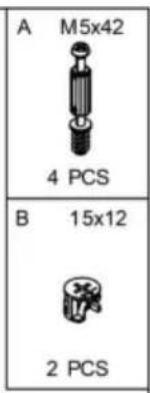
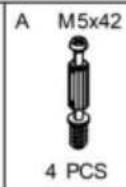
A M5x42Vevor SS-602 - PARTS LIST - 742 PCSB 15x12Vevor SS-602 - PARTS LIST - 842 PCSC M7x50Vevor SS-602 - PARTS LIST - 926 PCSD M6x12[47W]2 PCSE M6x25[22CC]25 PCSF M6x40[2T66]12 PCS
GVevor SS-602 - PARTS LIST - 106 PCSH 8x40[2A4D]2 PCSVevor SS-602 - PARTS LIST - 111 PCS4#Vevor SS-602 - PARTS LIST - 121 PCS

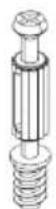
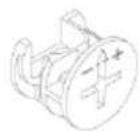
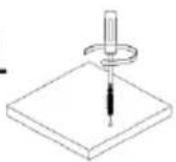
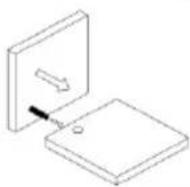
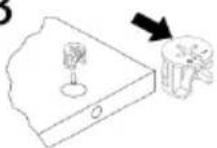
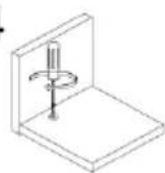
Cam Lock Fastening System

This Cam Lock Fastening

System will be used

Throughout the assembly process

Vevor SS-602 - Cam Lock Fastening System - 1

Vevor SS-602 - Cam Lock Fastening System - 2

1Vevor SS-602 - Cam Lock Fastening System - 3

2Vevor SS-602 - Cam Lock Fastening System - 4

3Vevor SS-602 - Cam Lock Fastening System - 5

4Vevor SS-602 - Cam Lock Fastening System - 6

ASSEMBLY STEP

1Vevor SS-602 - ASSEMBLY STEP - 1

Vevor SS-602 - ASSEMBLY STEP - 2

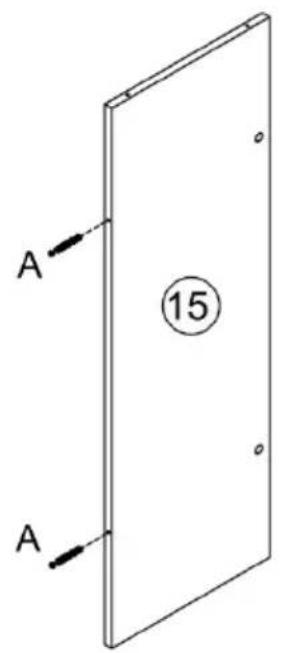
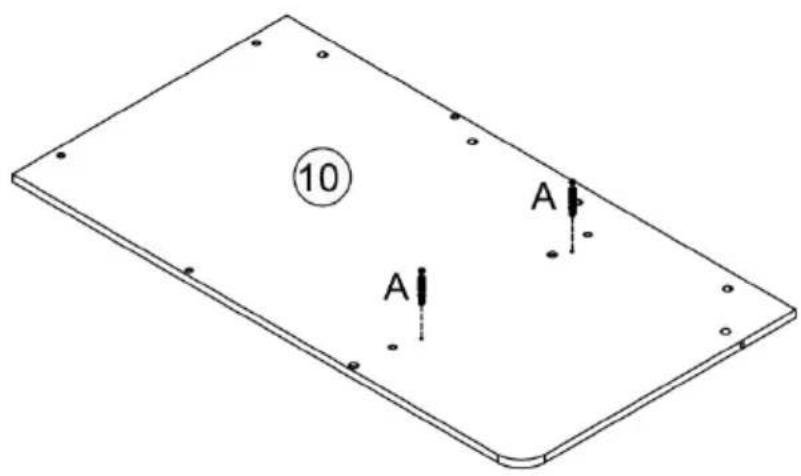
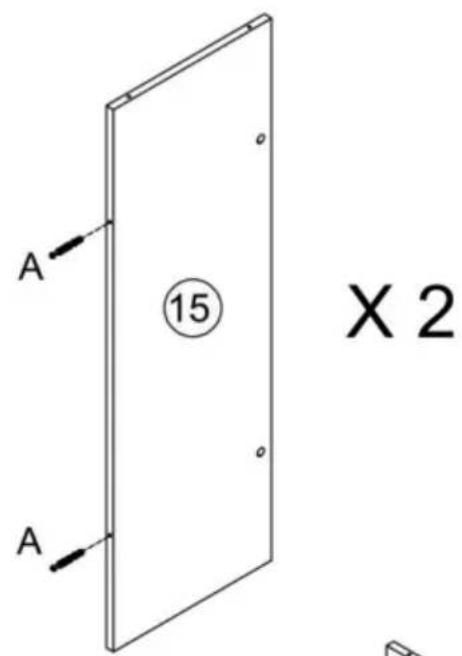
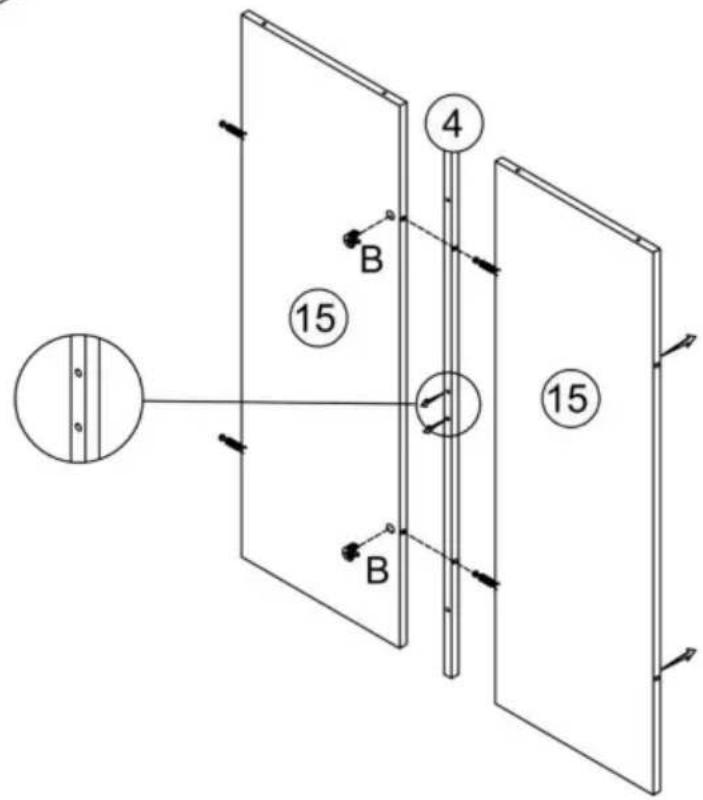
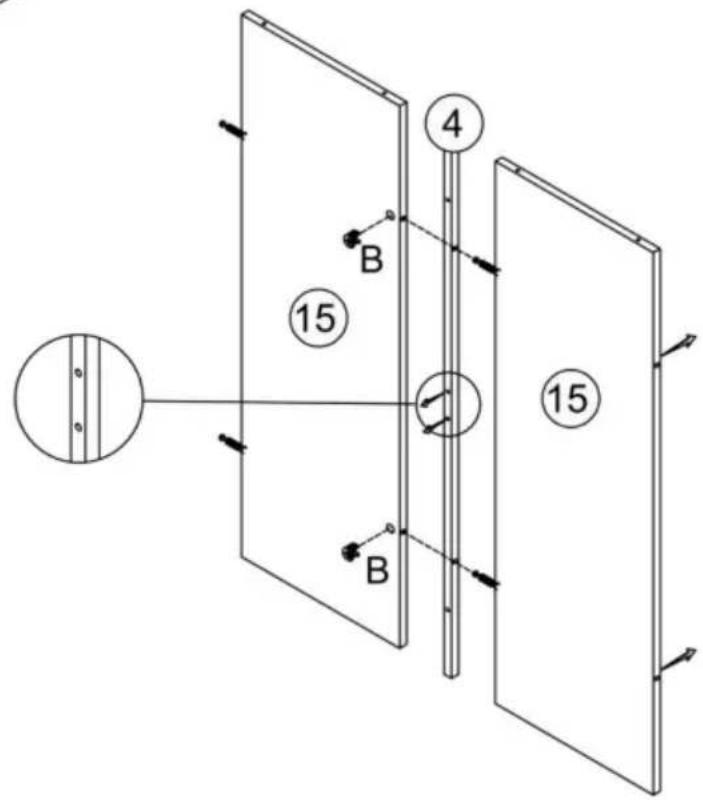
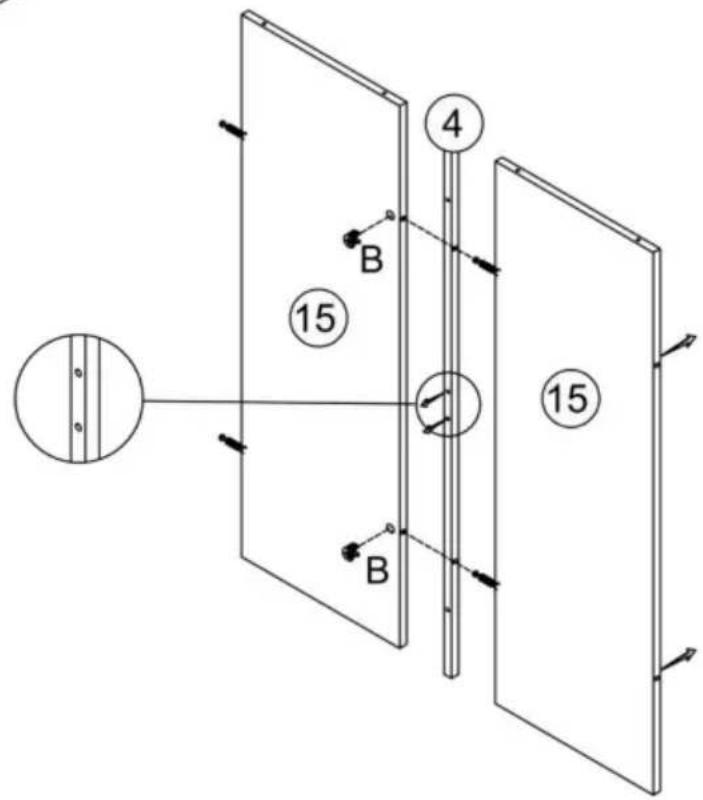
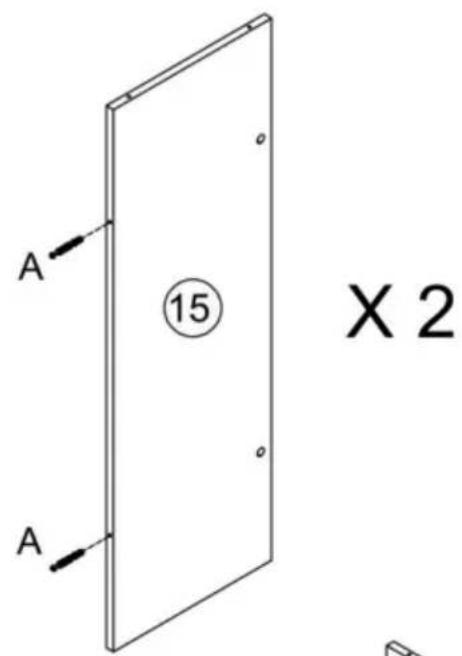
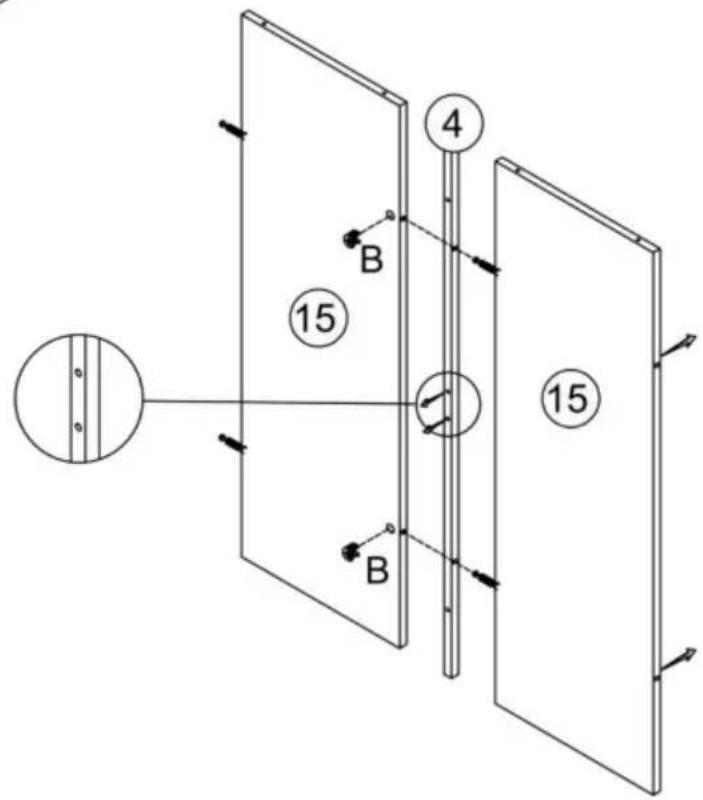
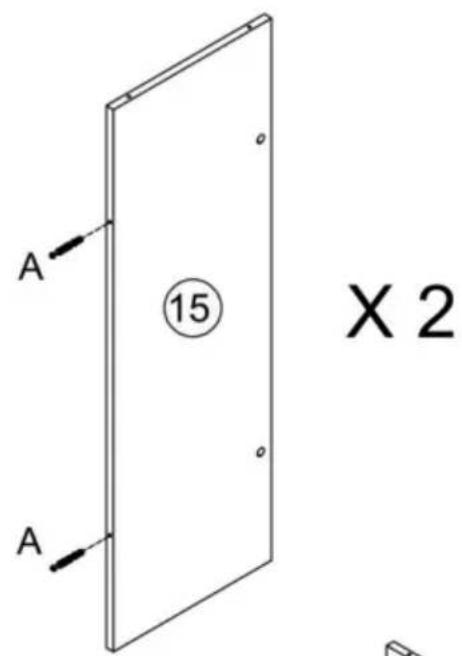
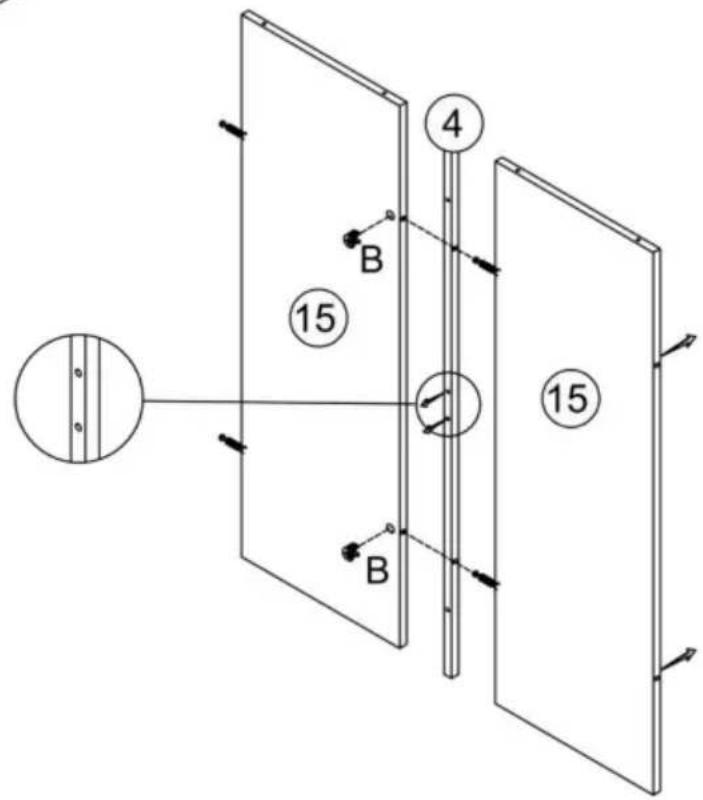
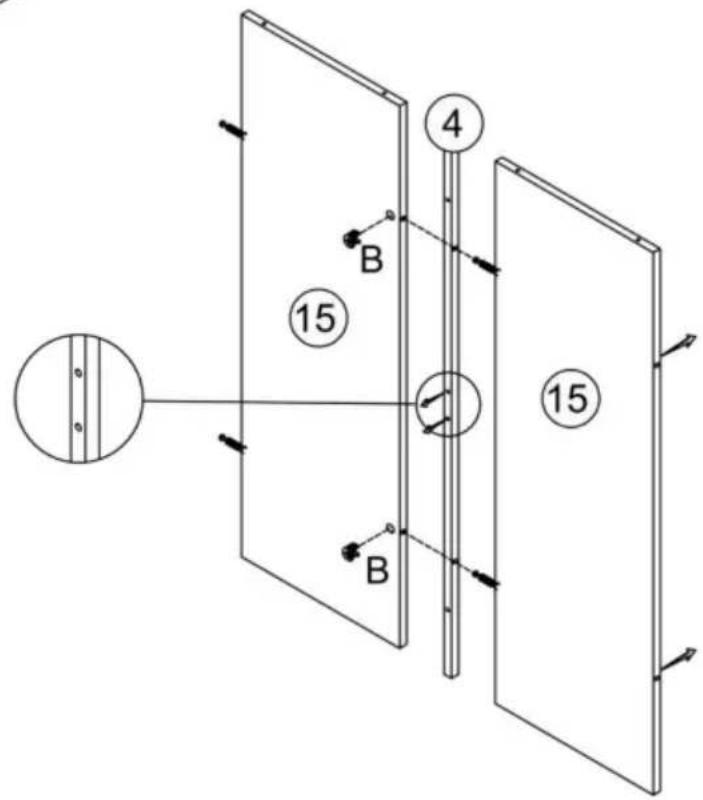
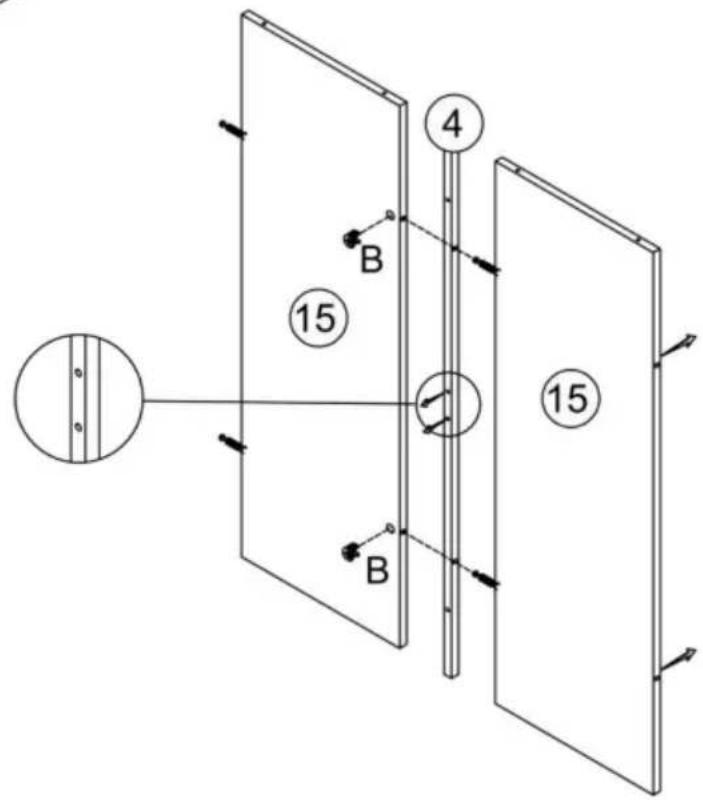
2A 15 A

X 2

Technical diagram of a structural frame with labeled components and directional arrows, including numbered parts and a circular inset showing internal components.

6Vevor SS-602 - ASSEMBLY STEP - 5

Technical diagram of a mechanical linkage system with force vectors and labeled components.

7Vevor SS-602 - ASSEMBLY STEP - 7

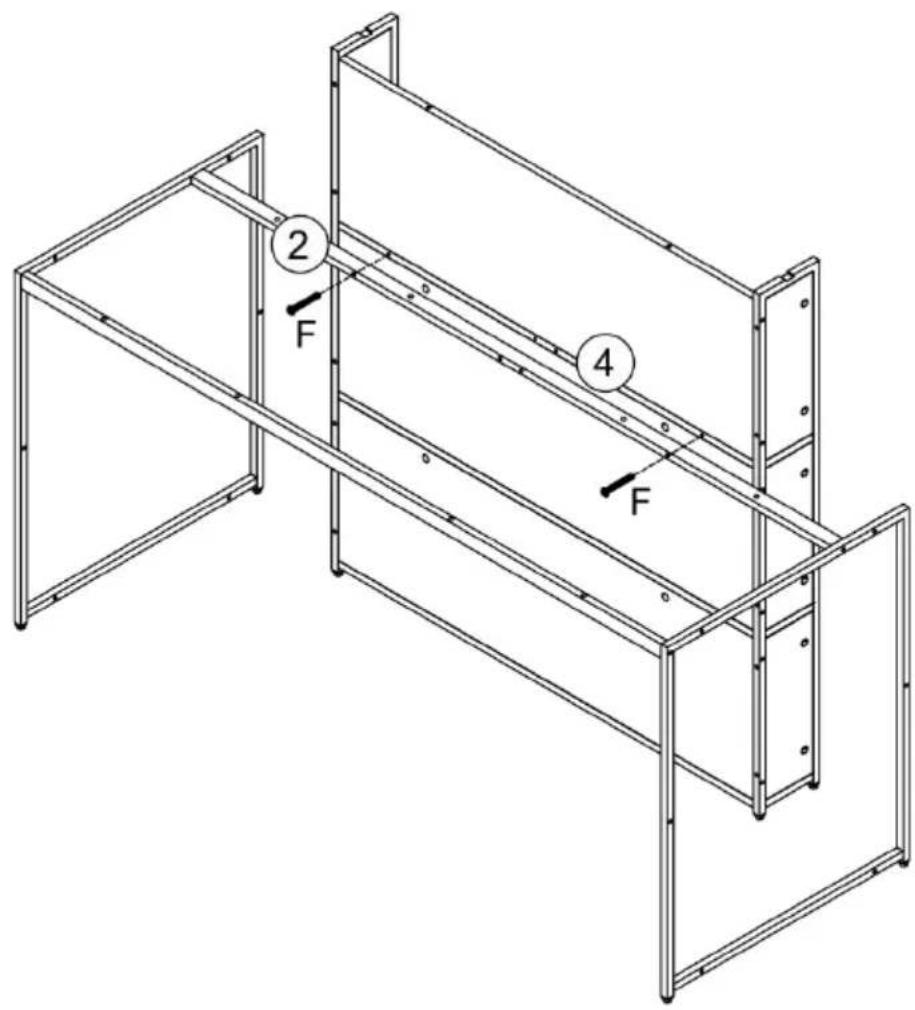
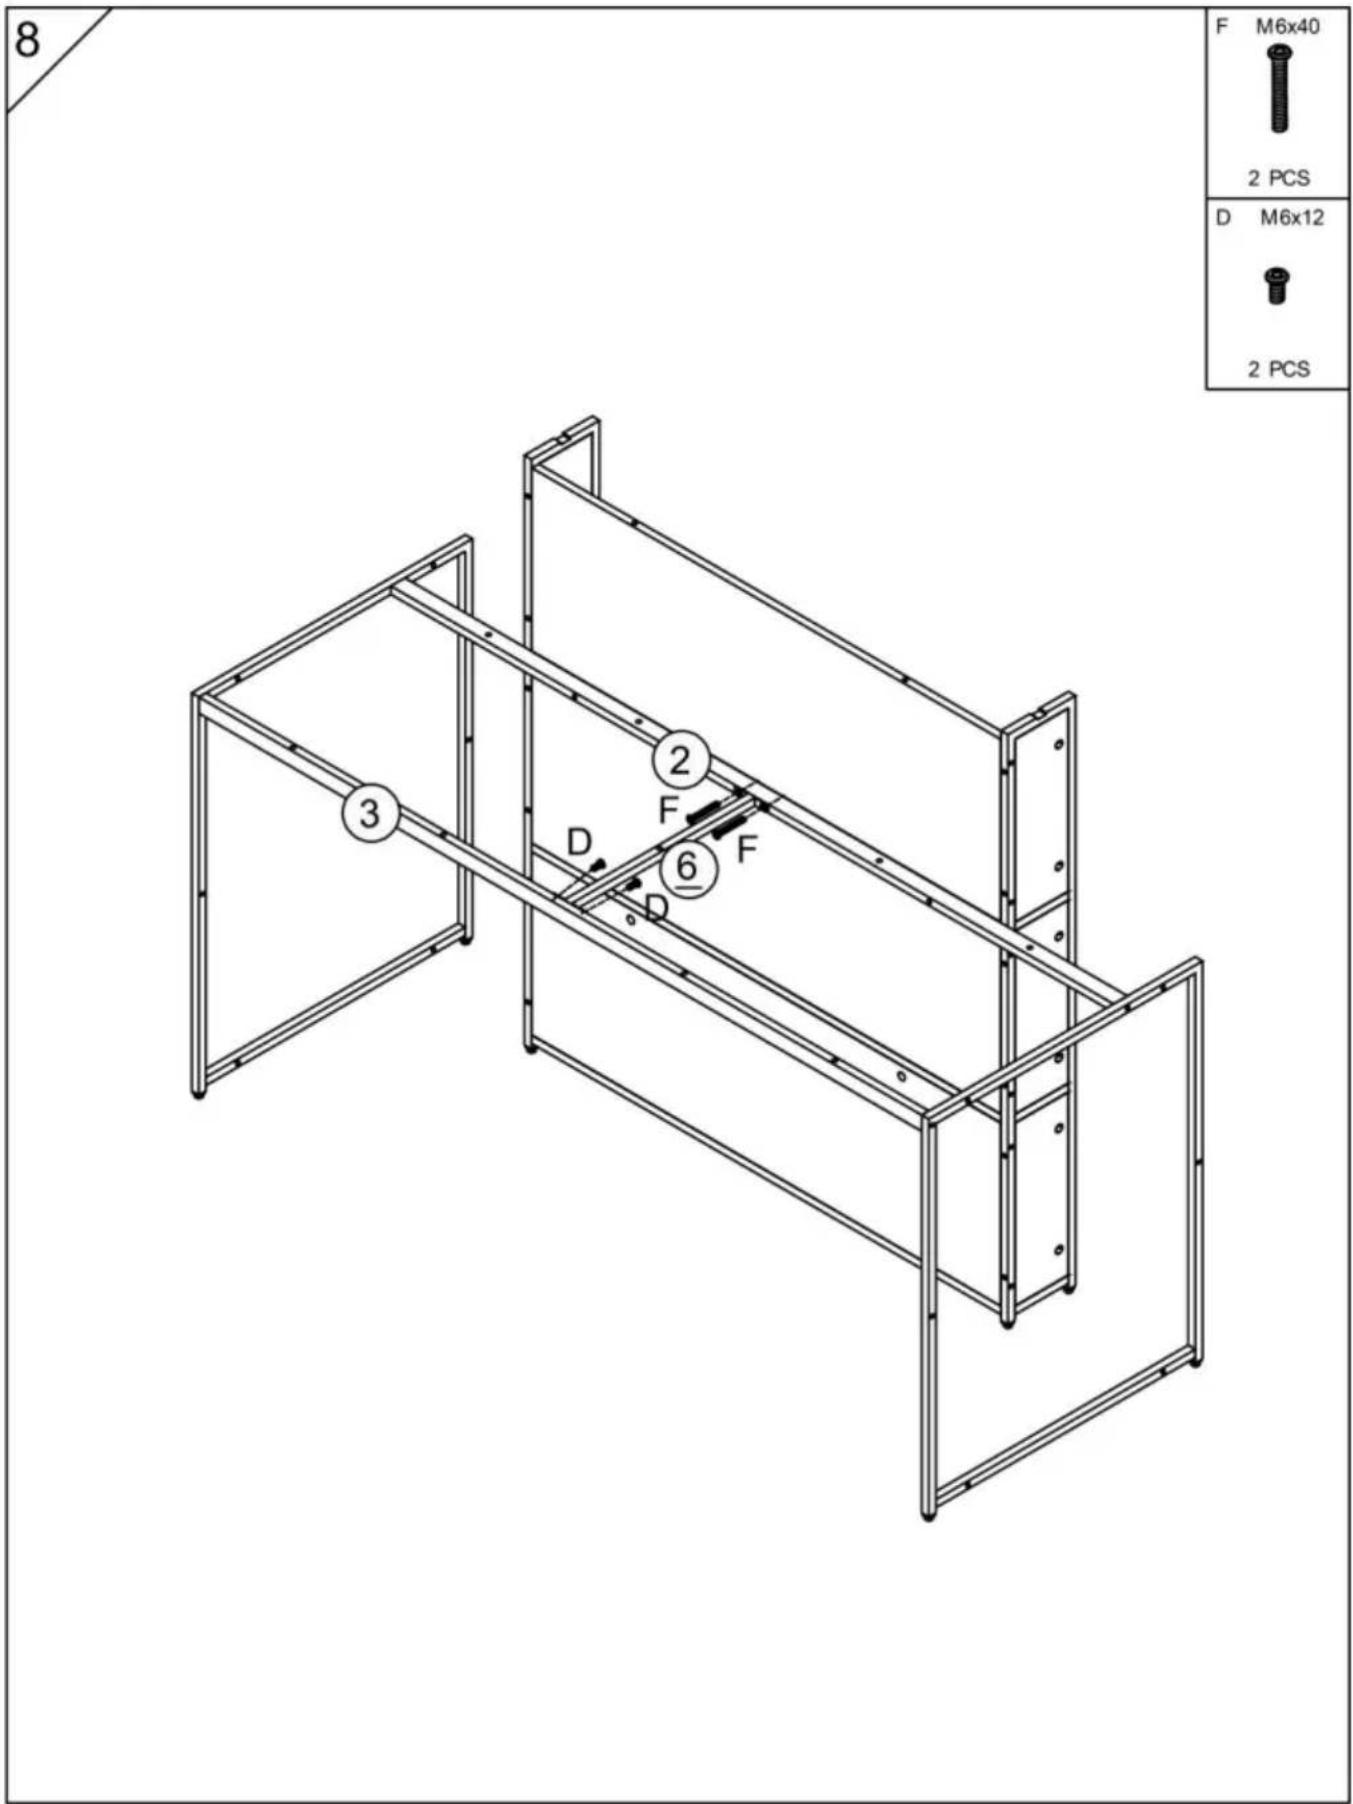
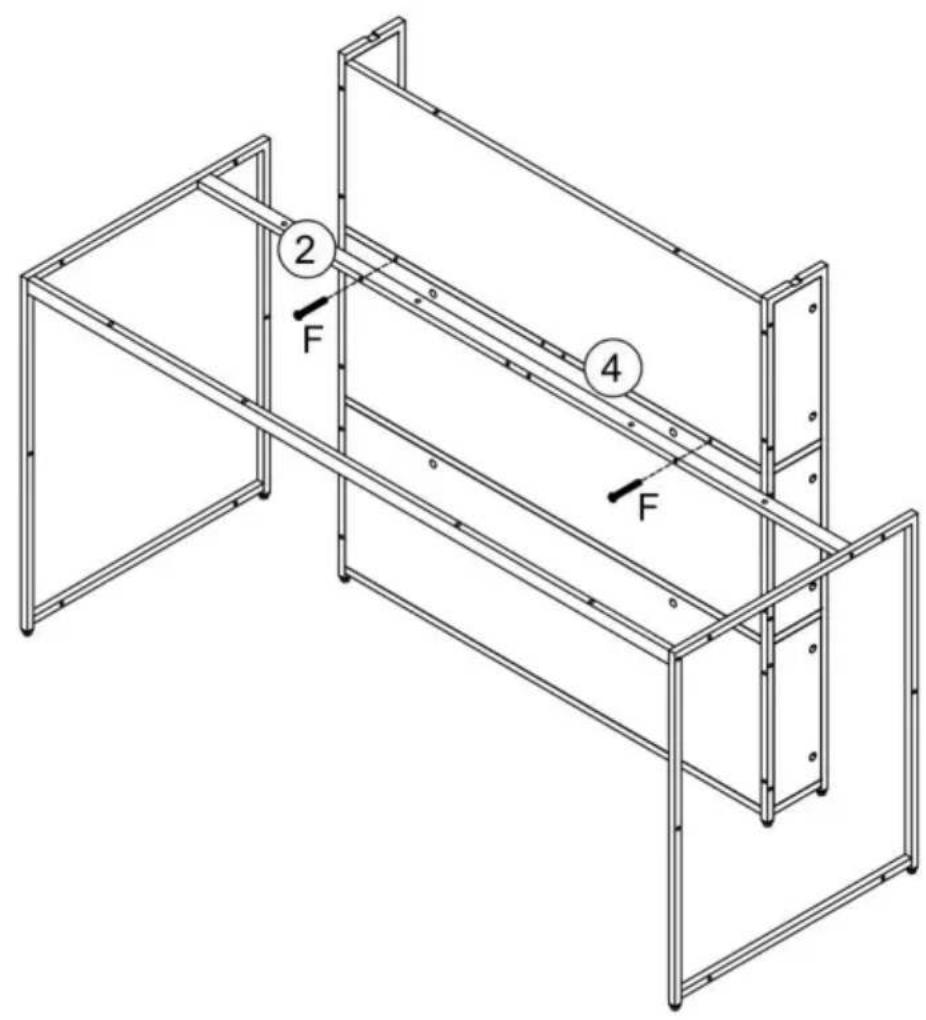
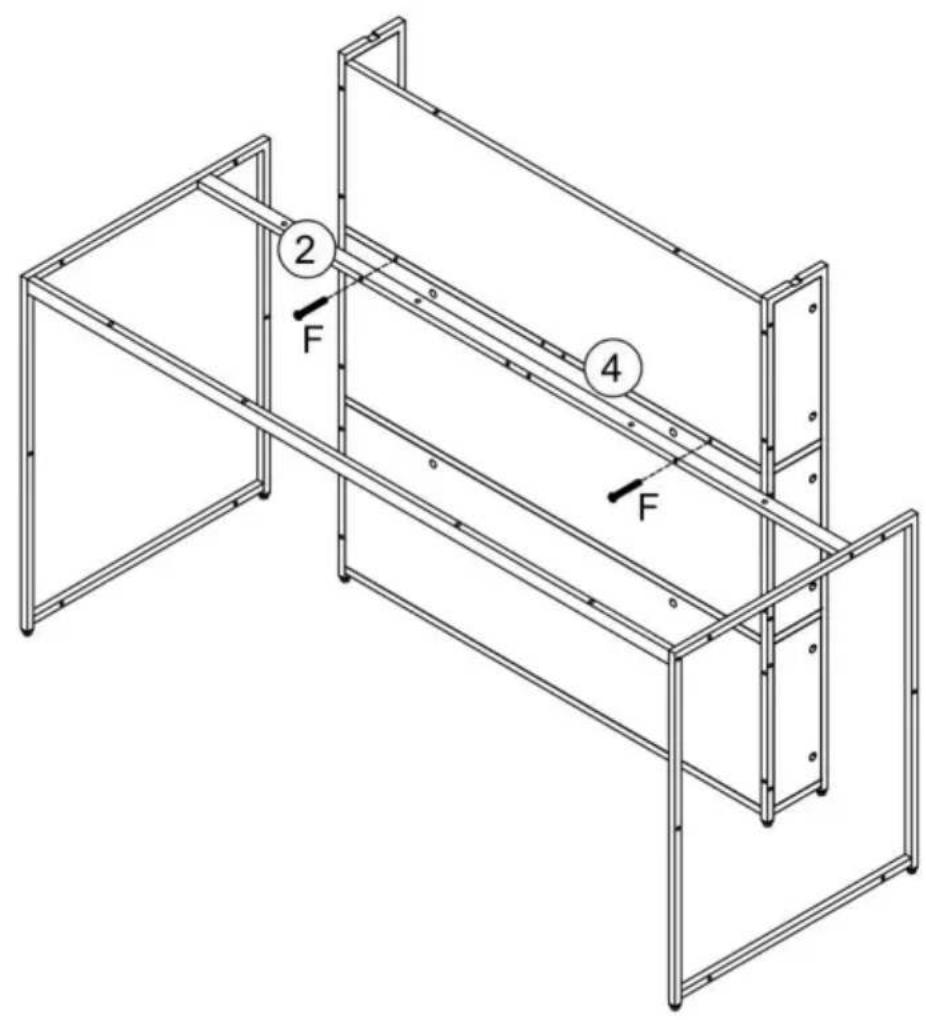
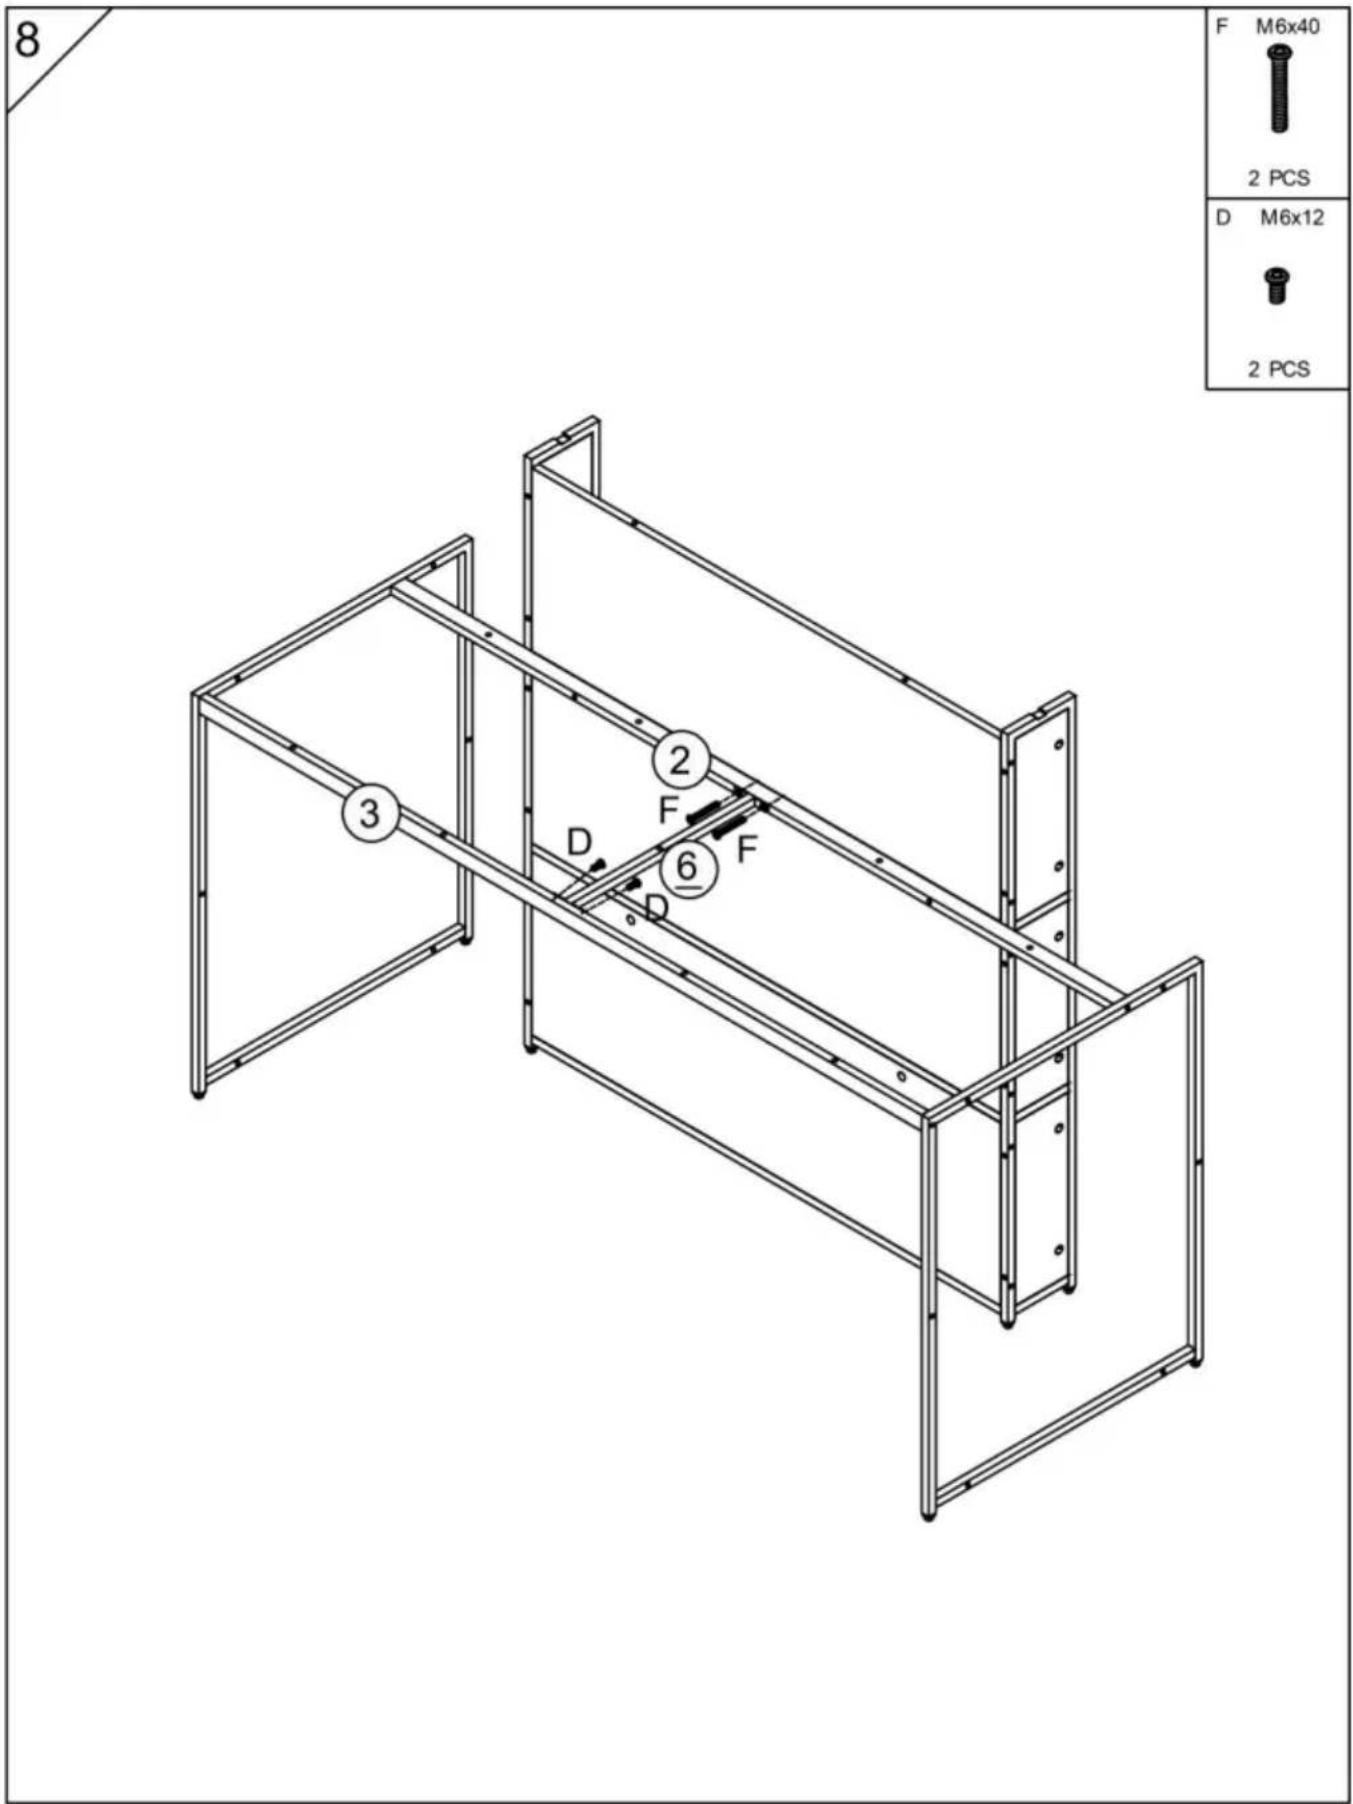
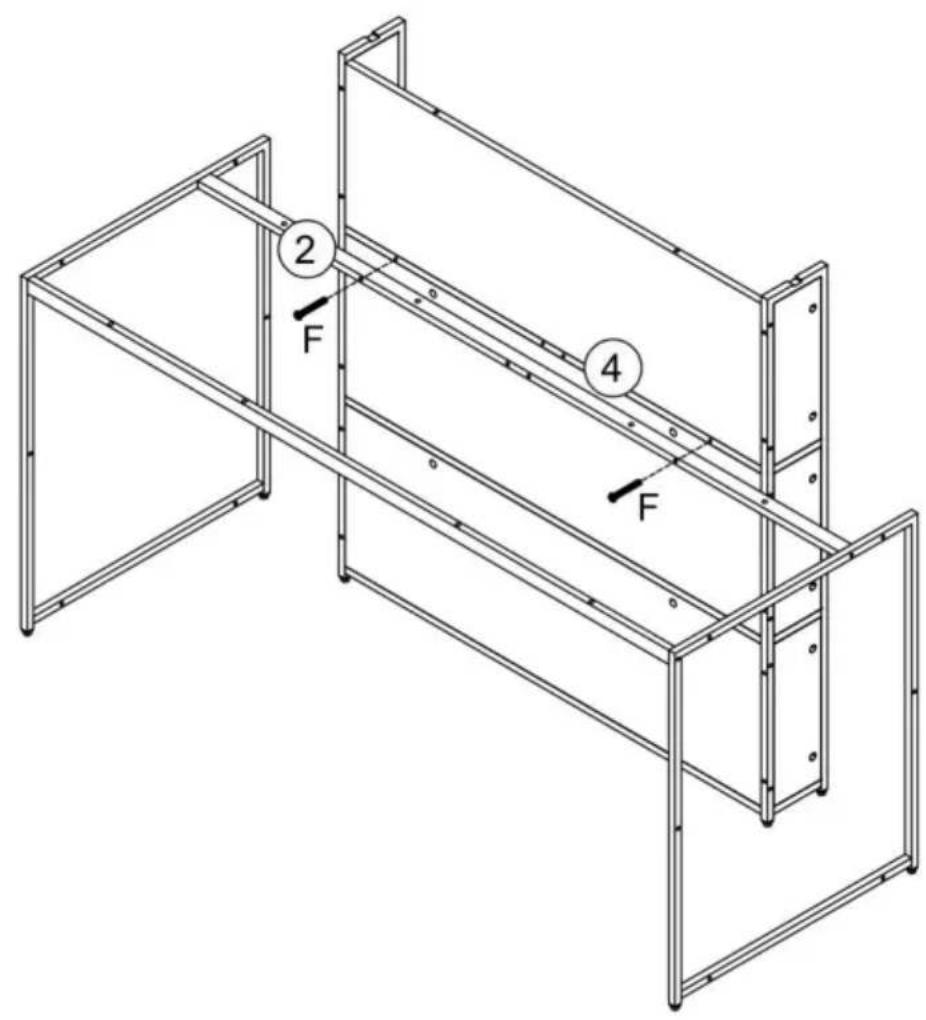
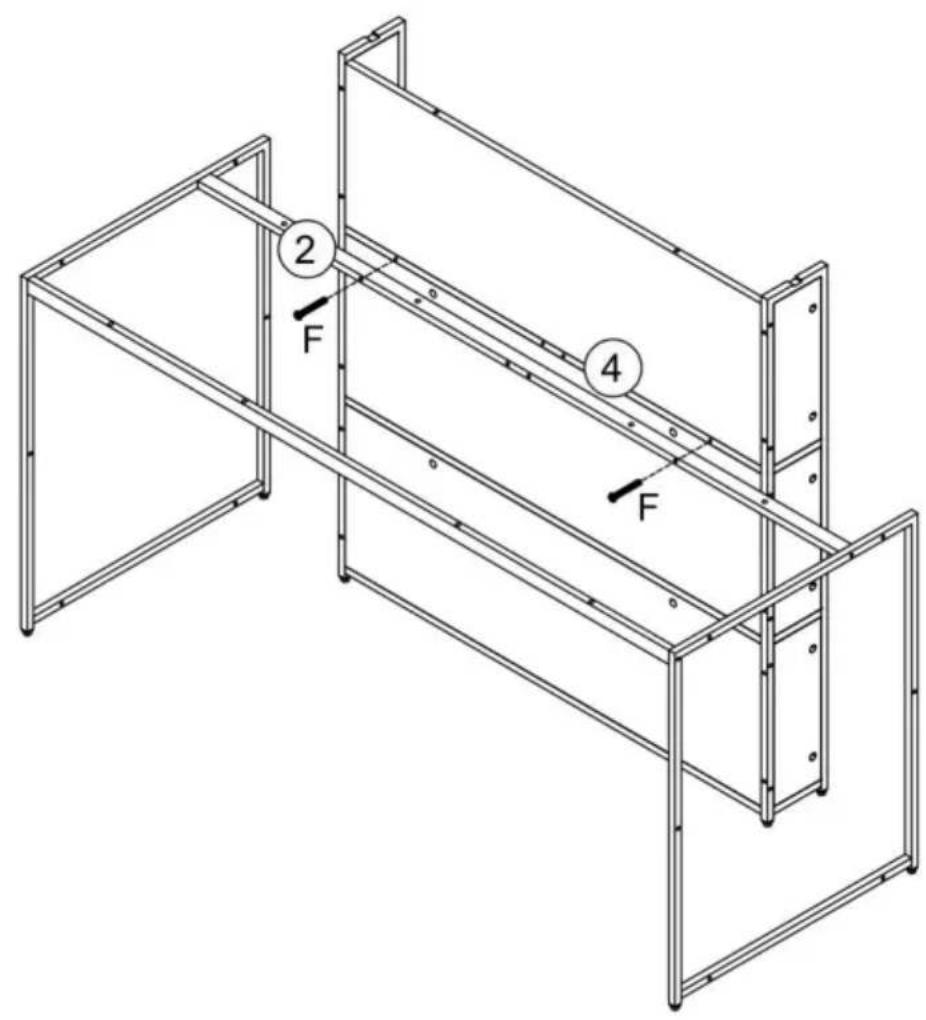
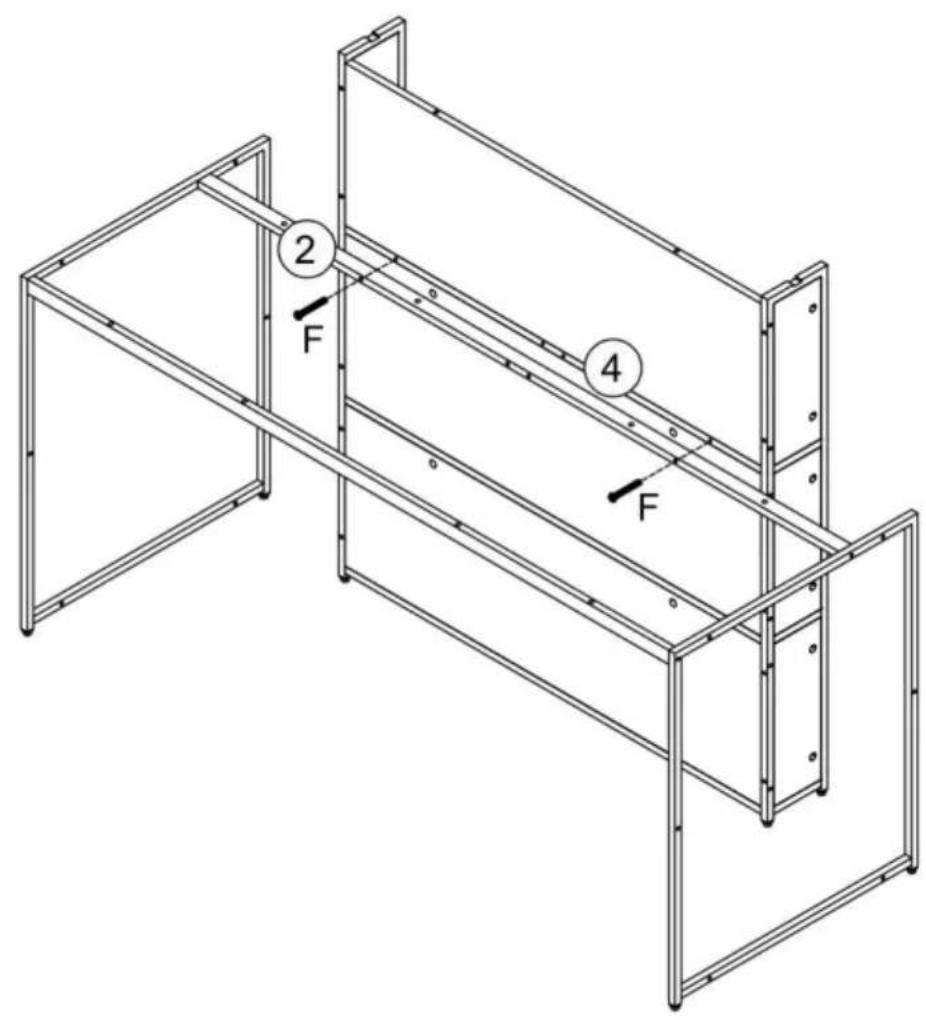
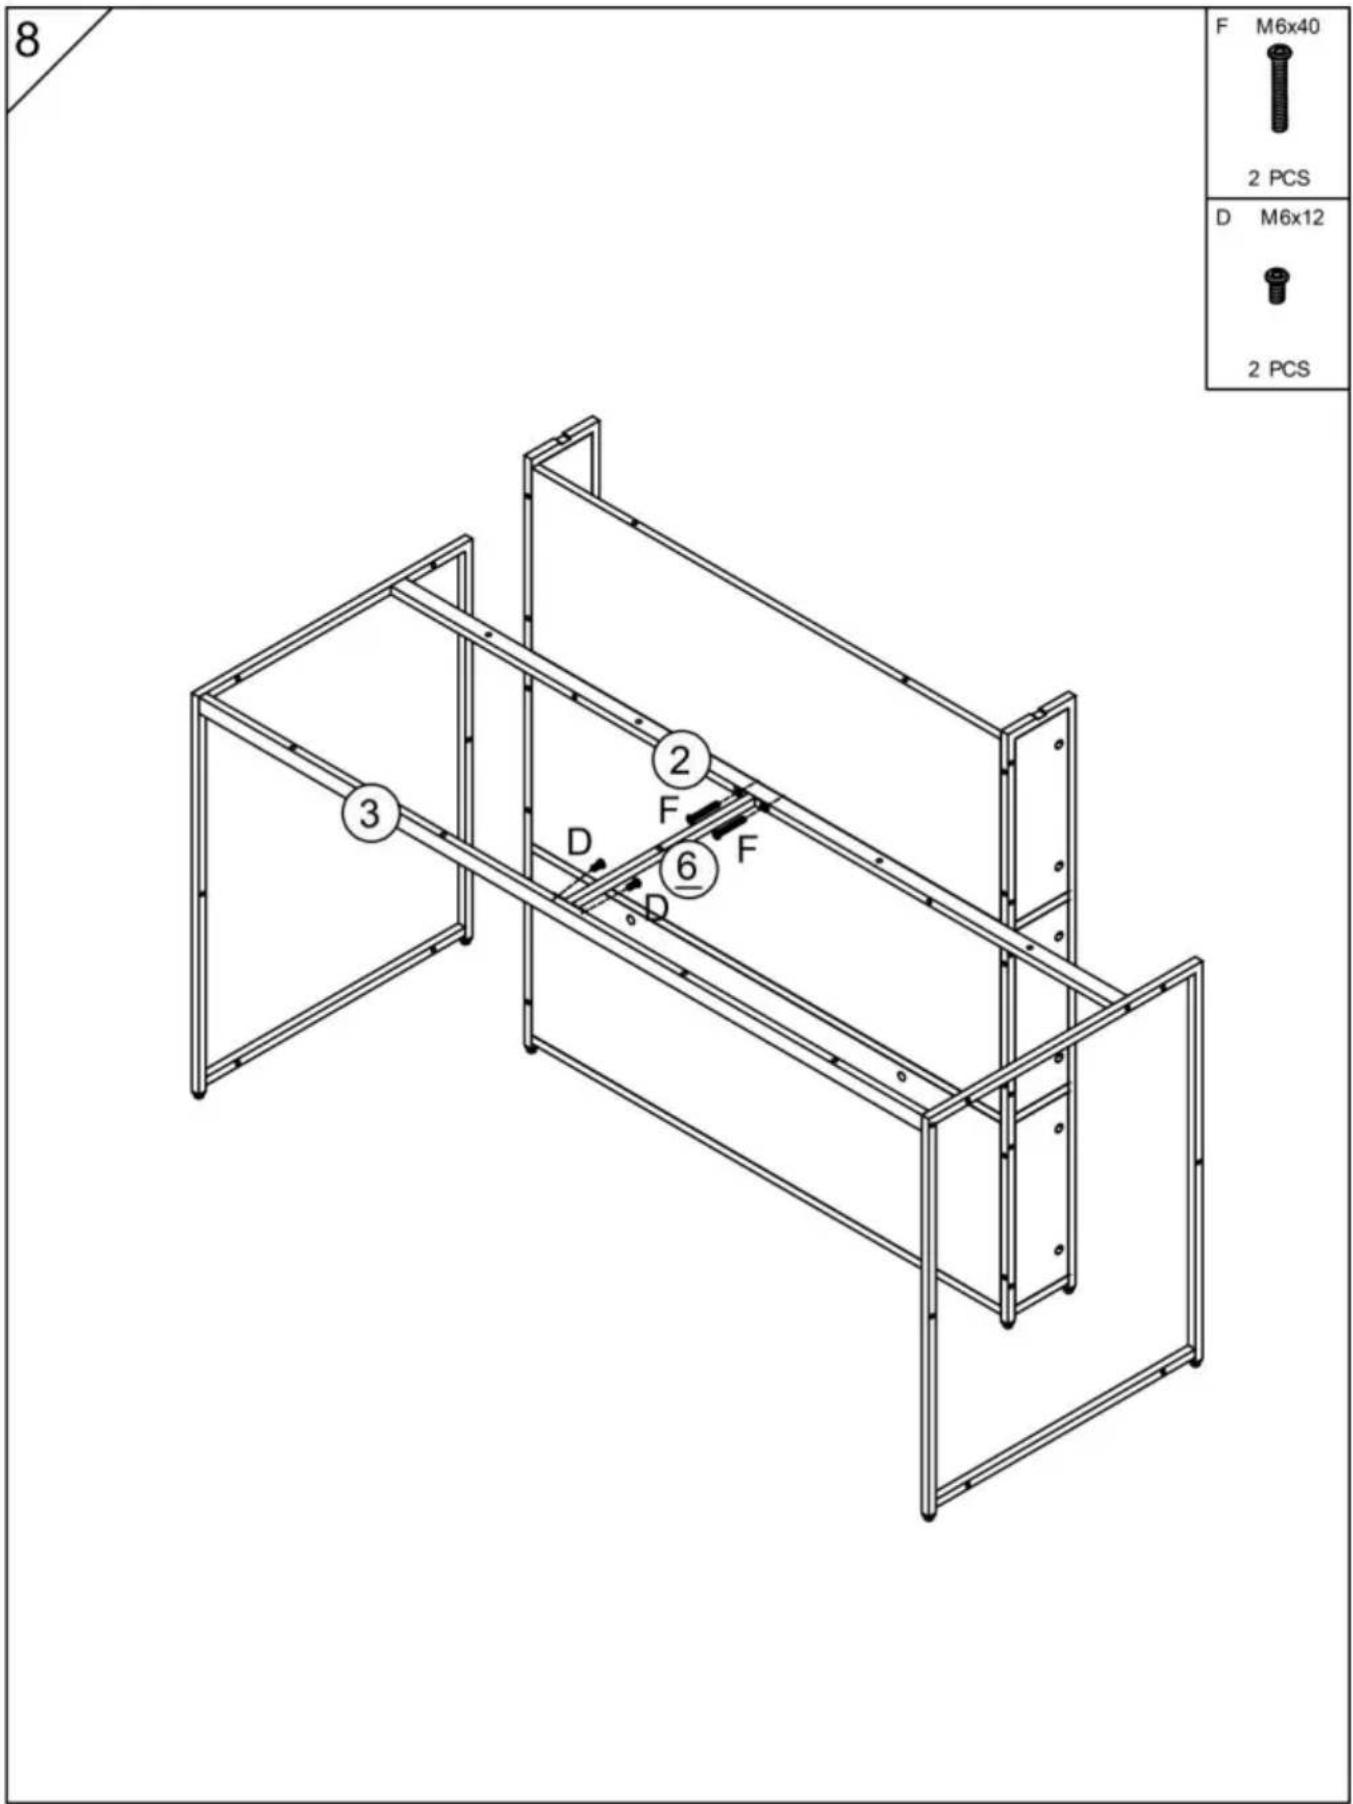
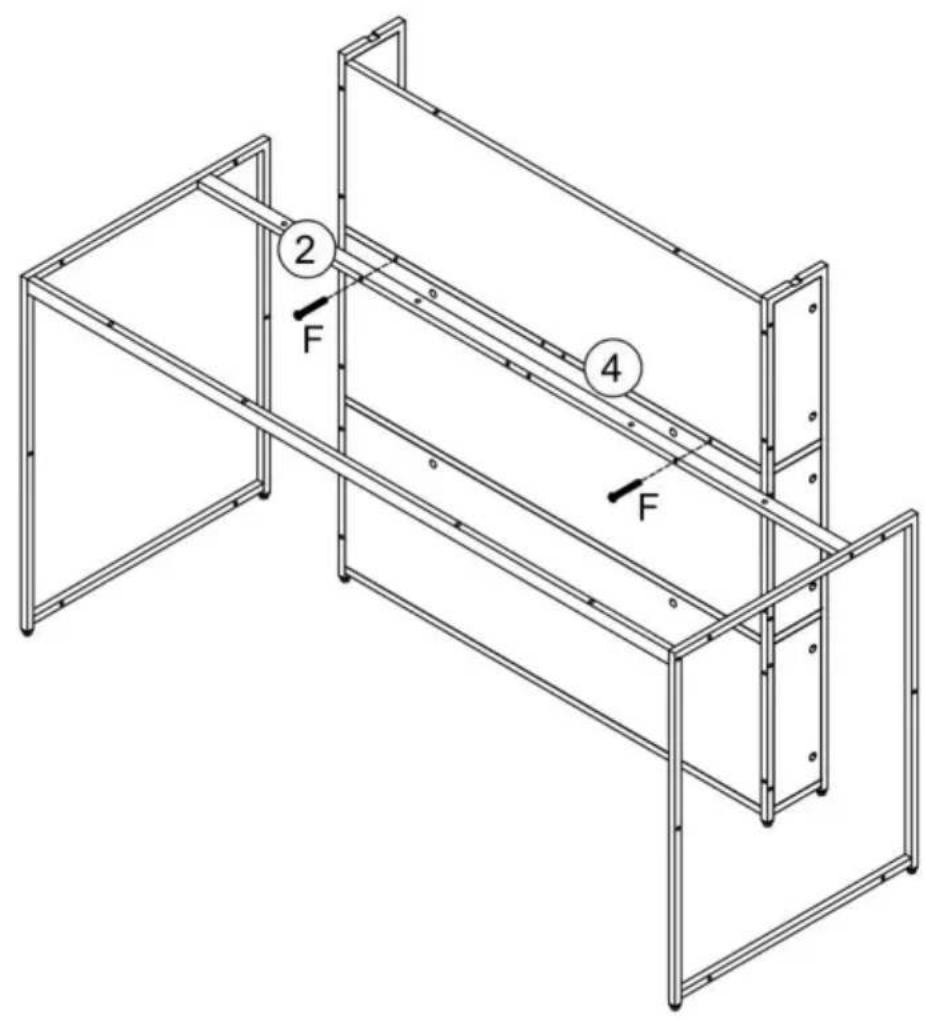
② F ④ F

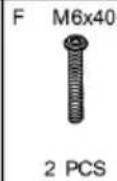
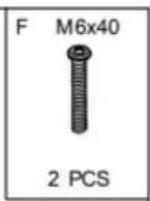
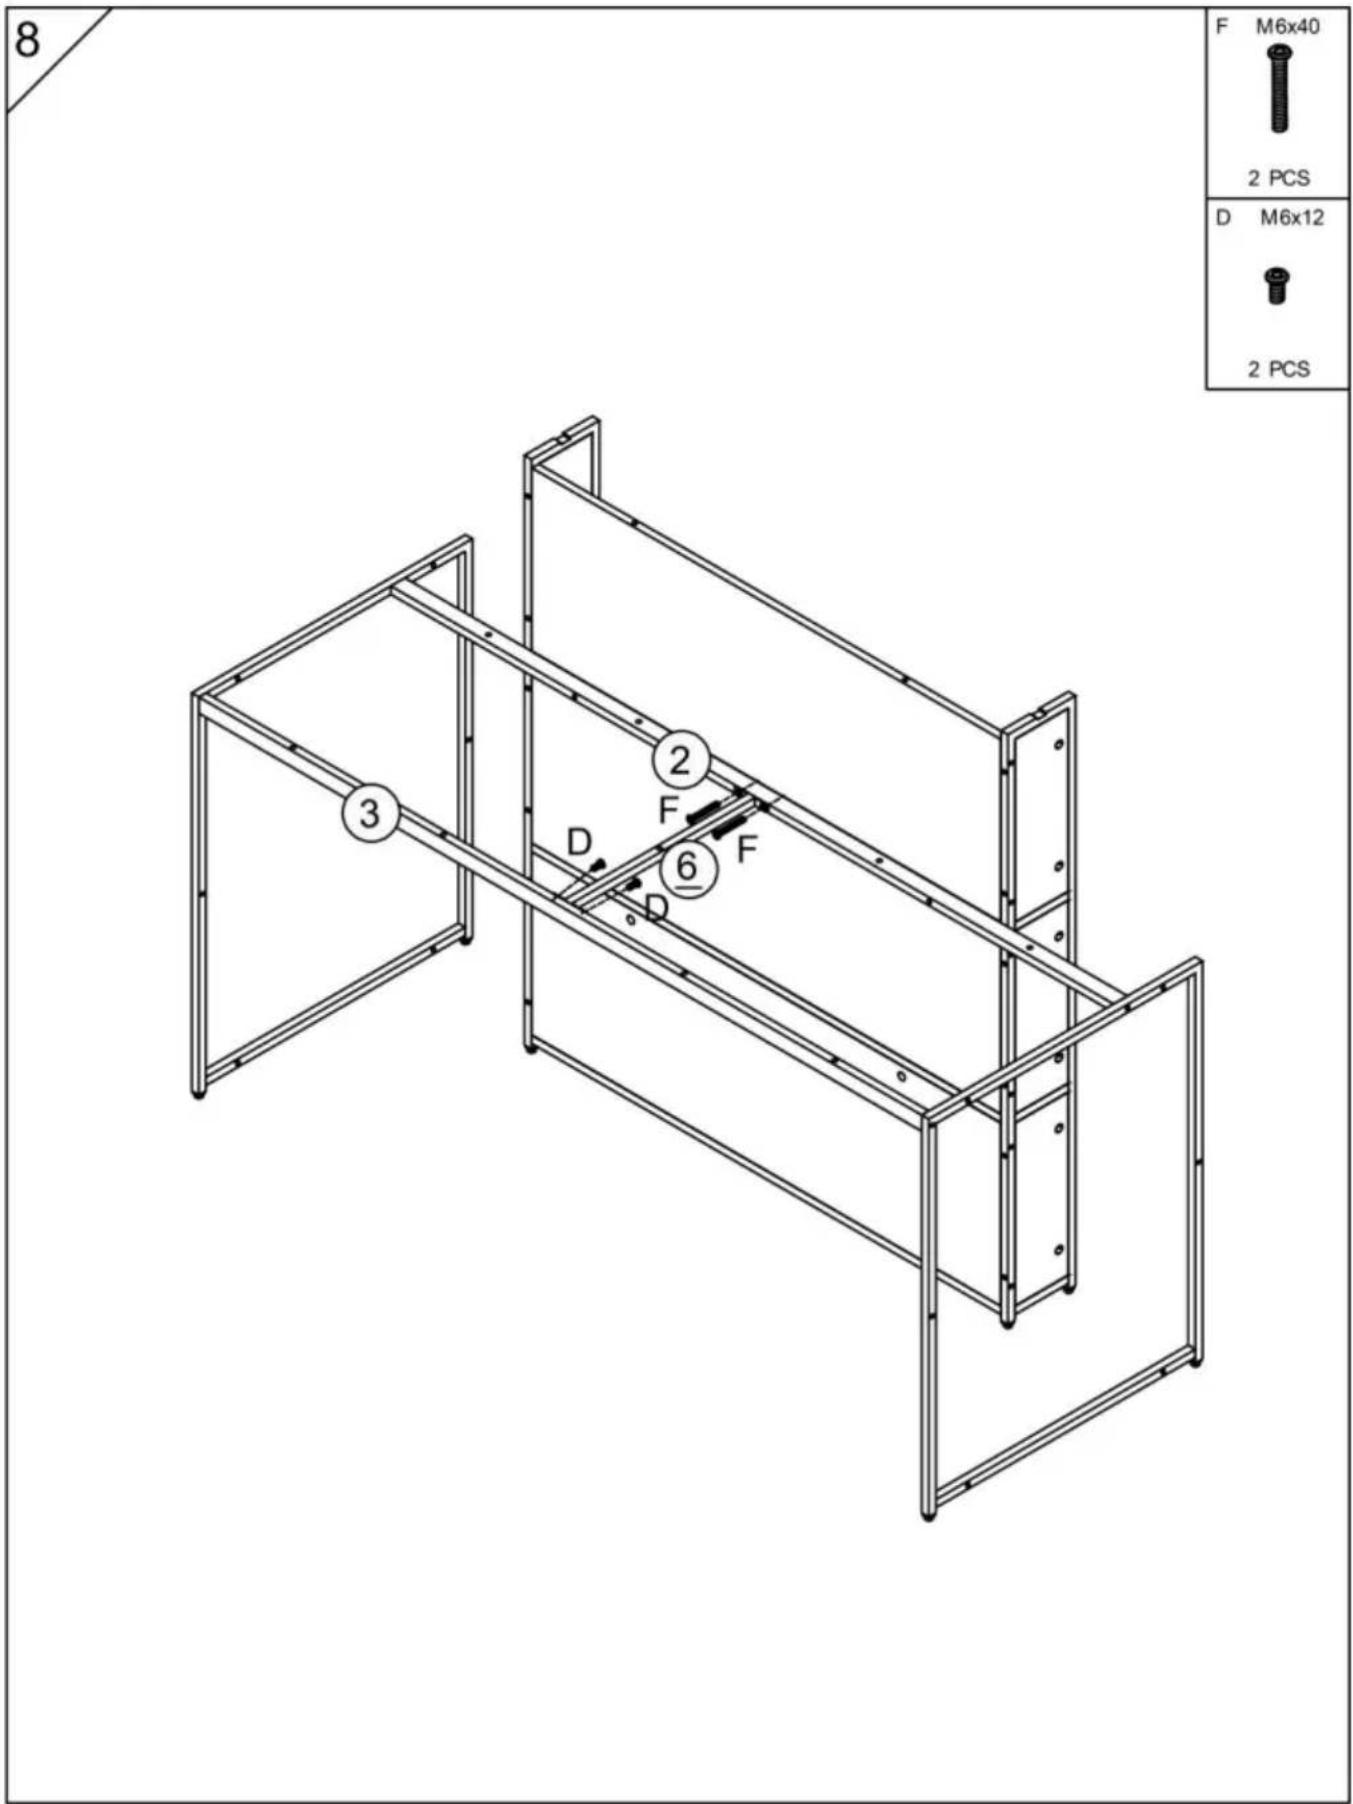
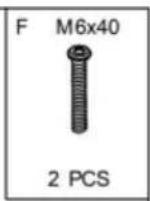
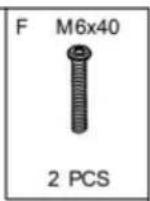
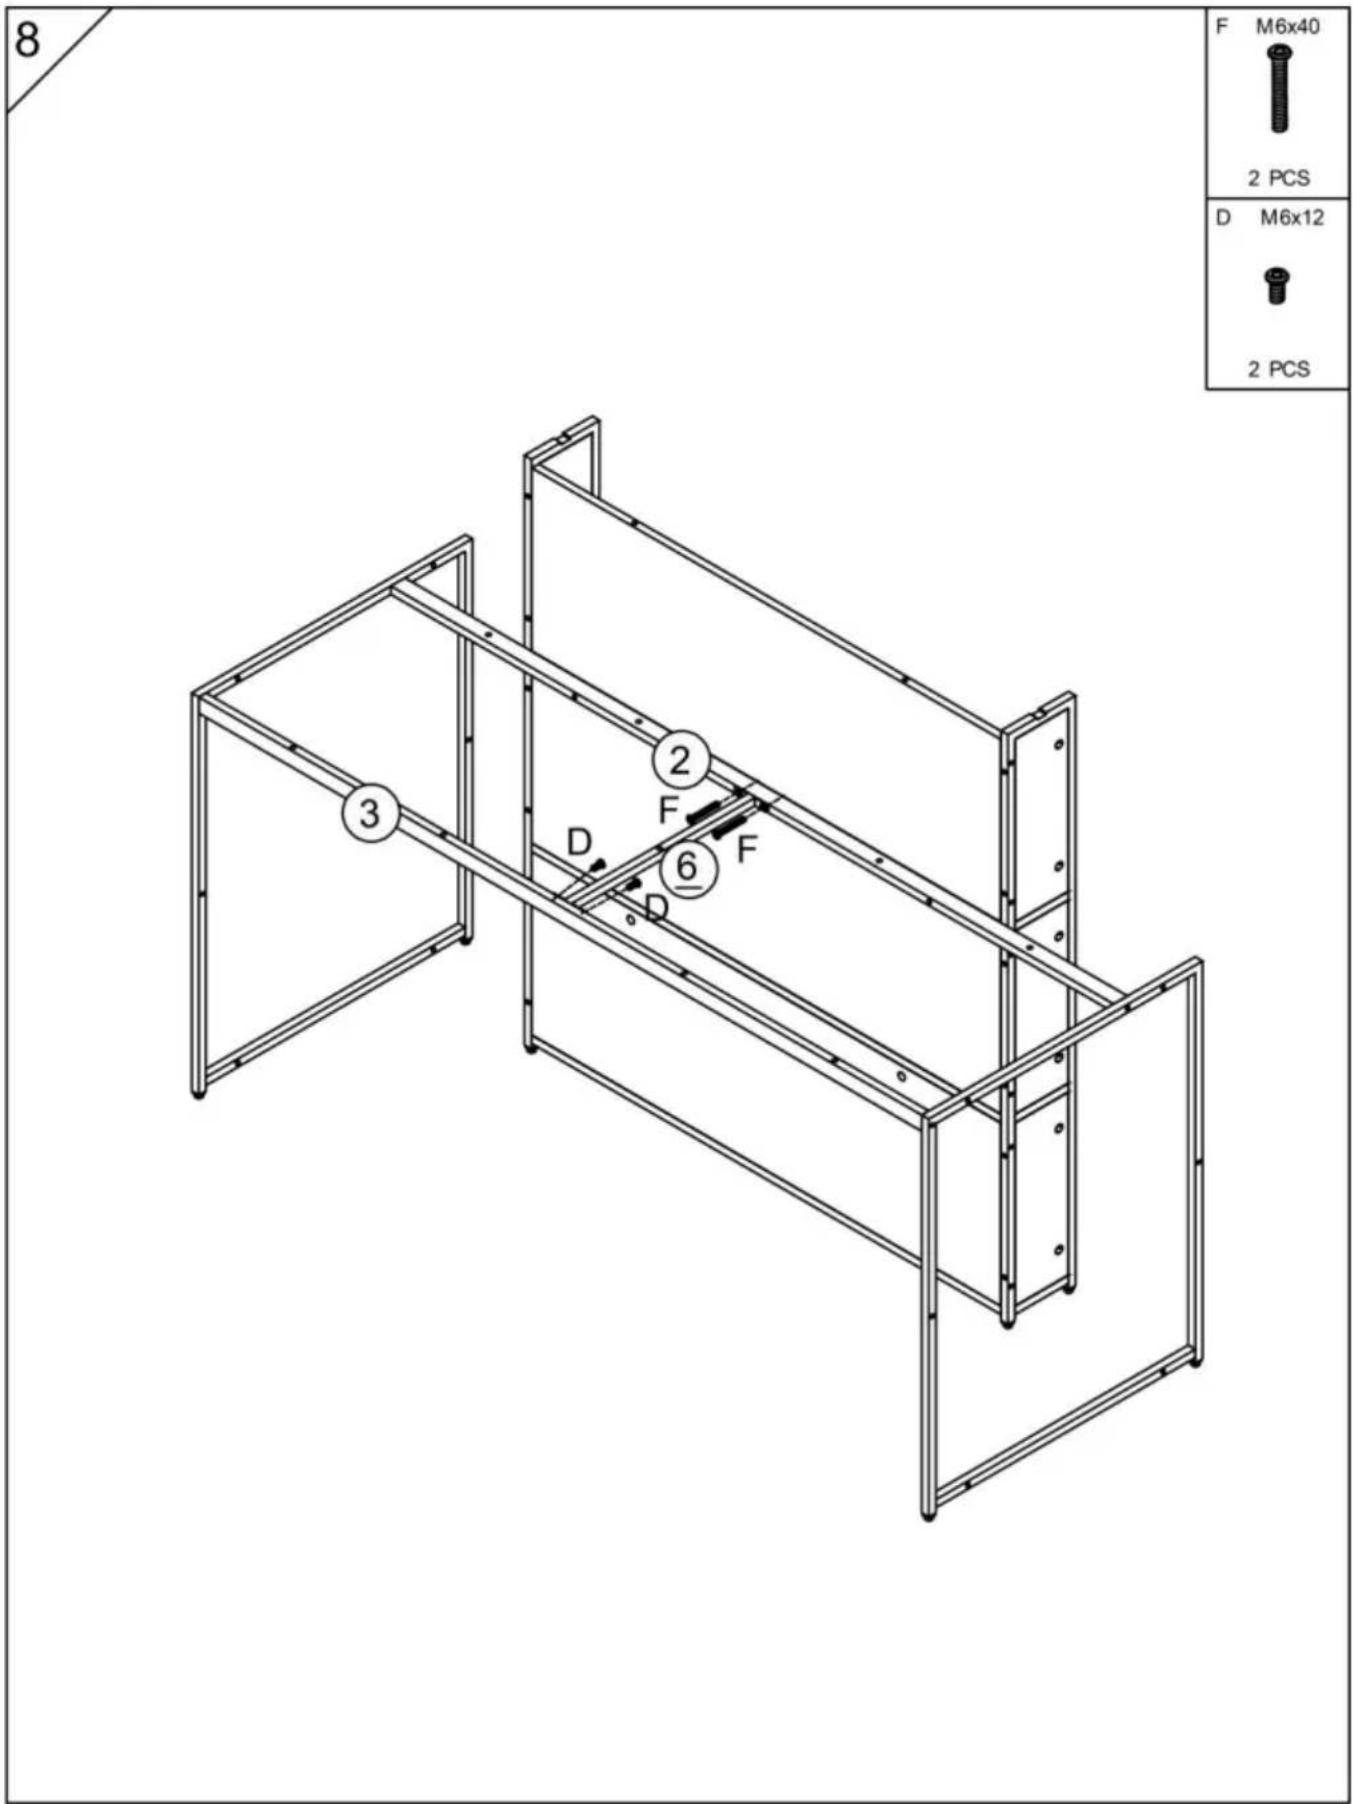
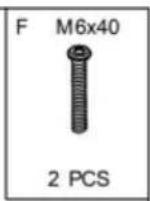
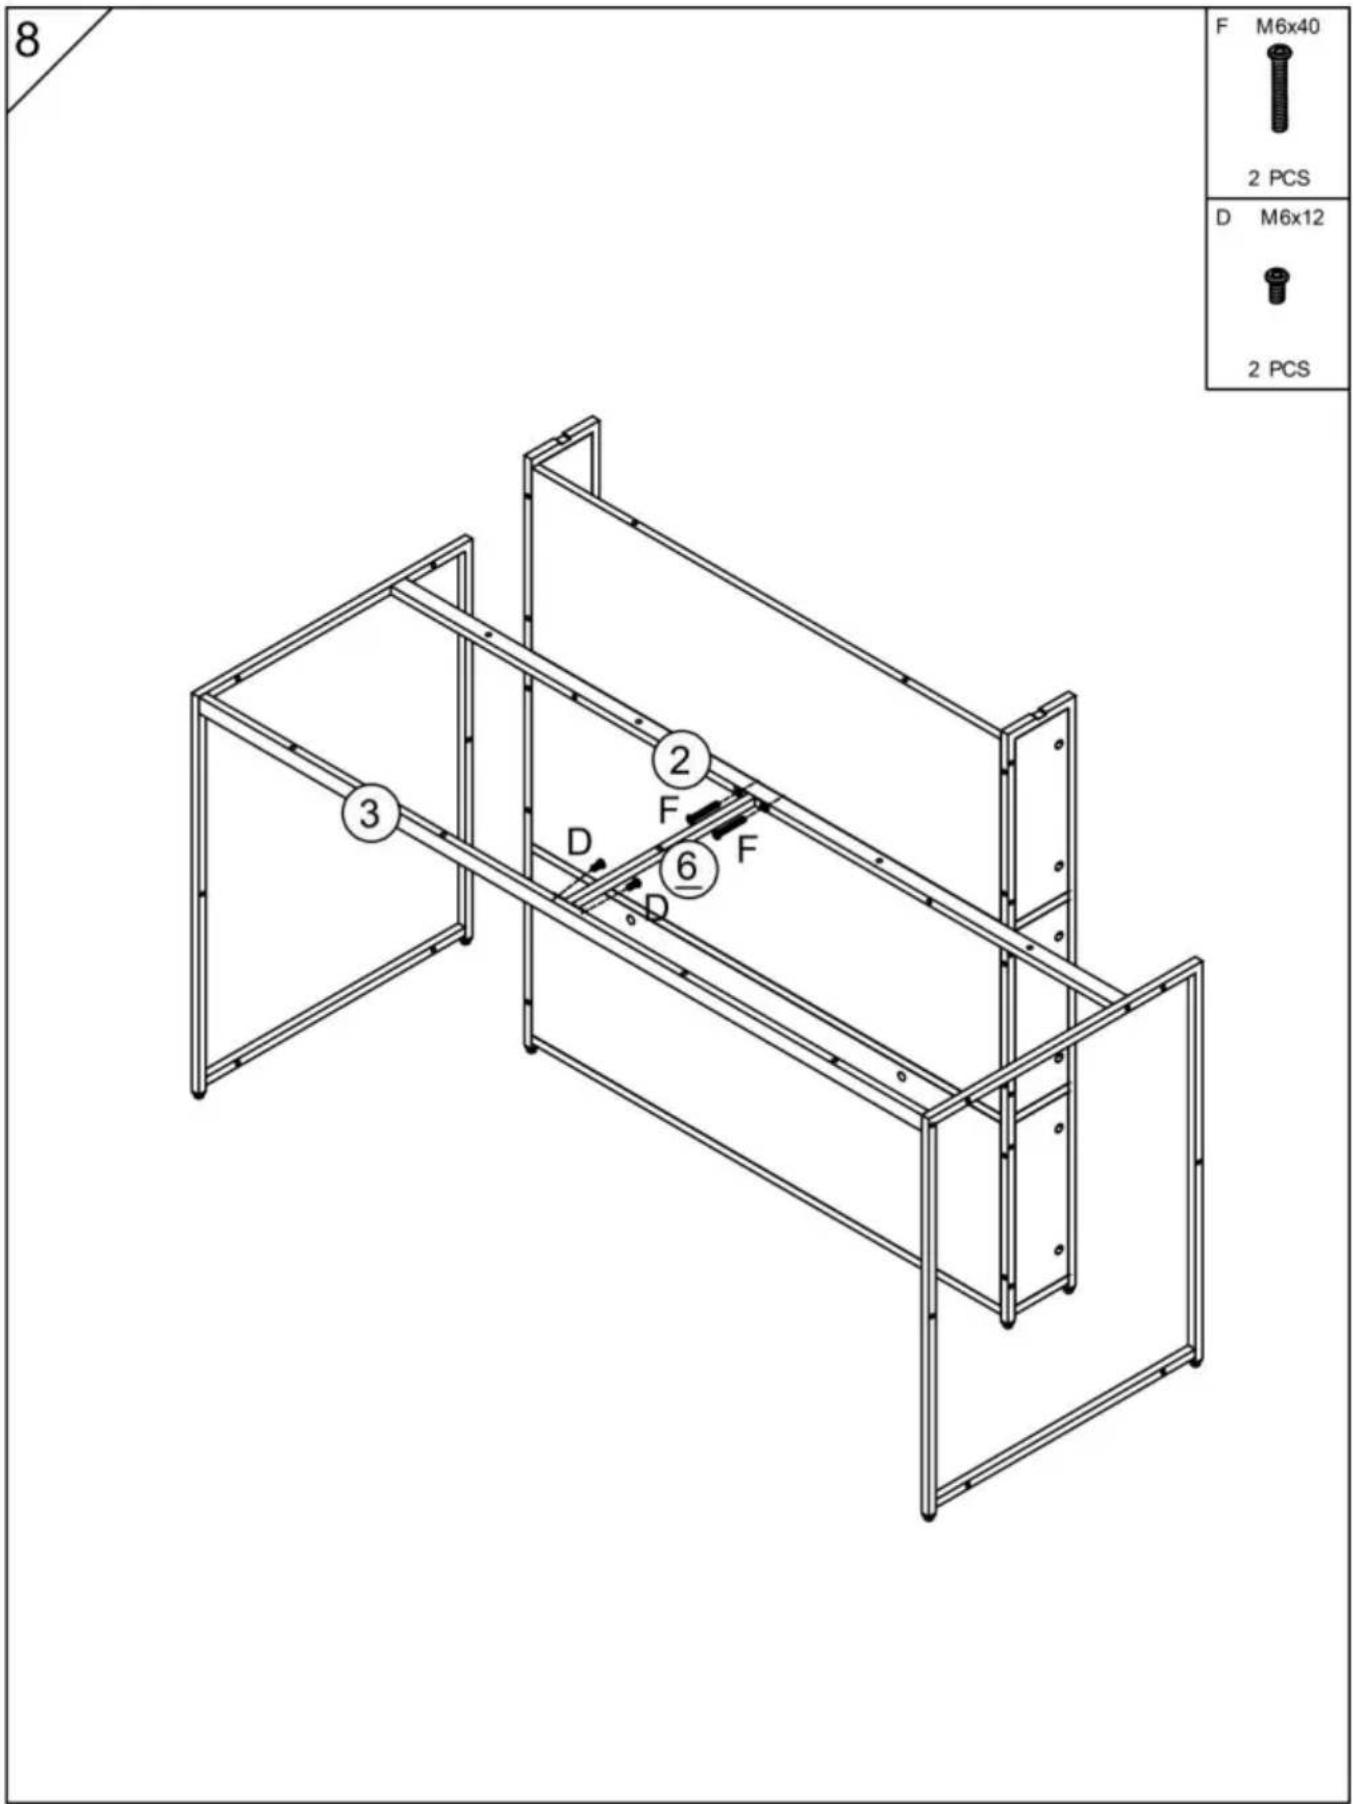
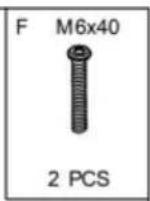
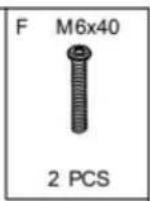
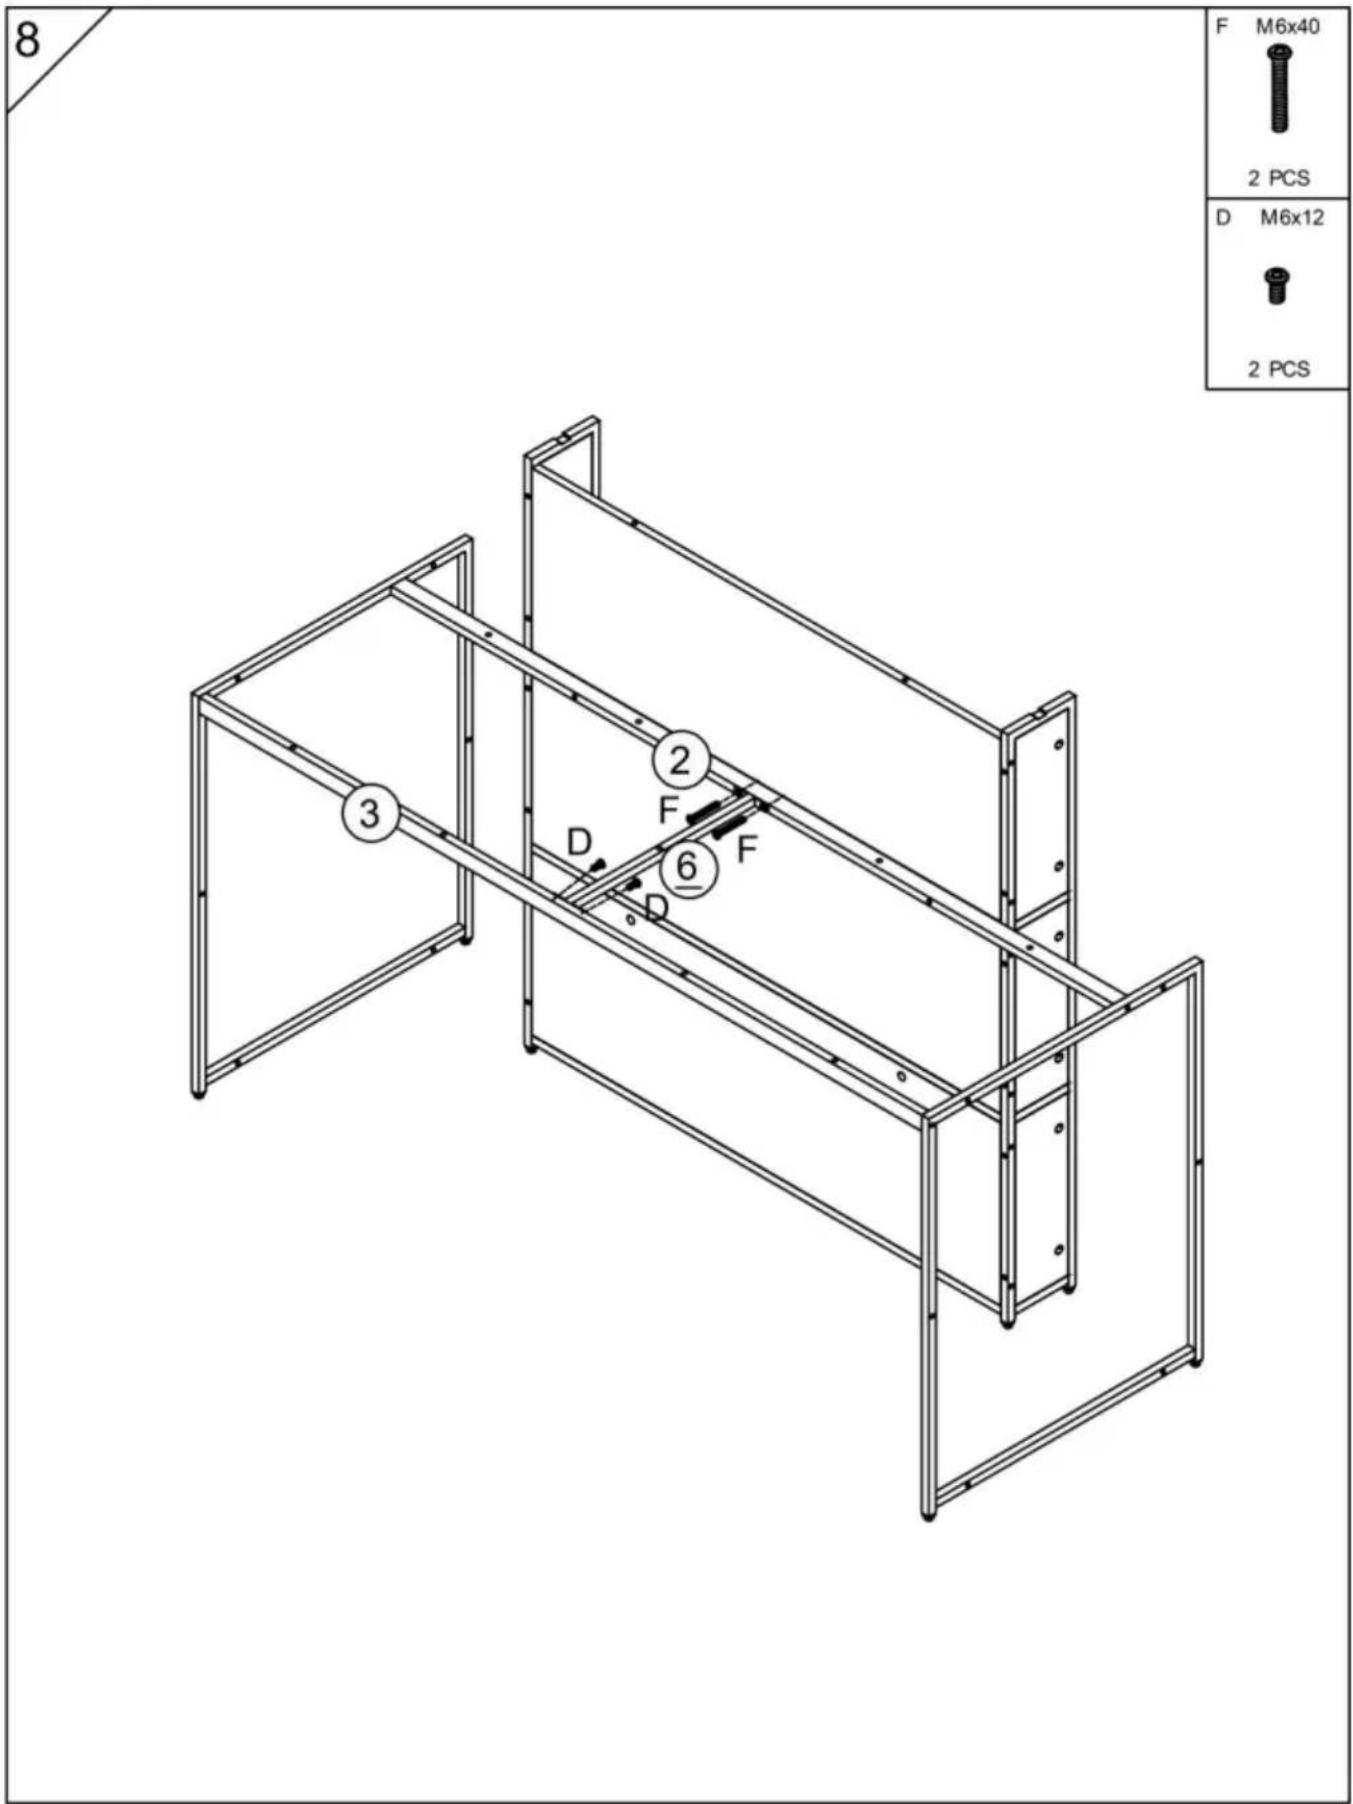
8 F M6x40 2 PCSVevor SS-602 - ASSEMBLY STEP - 9

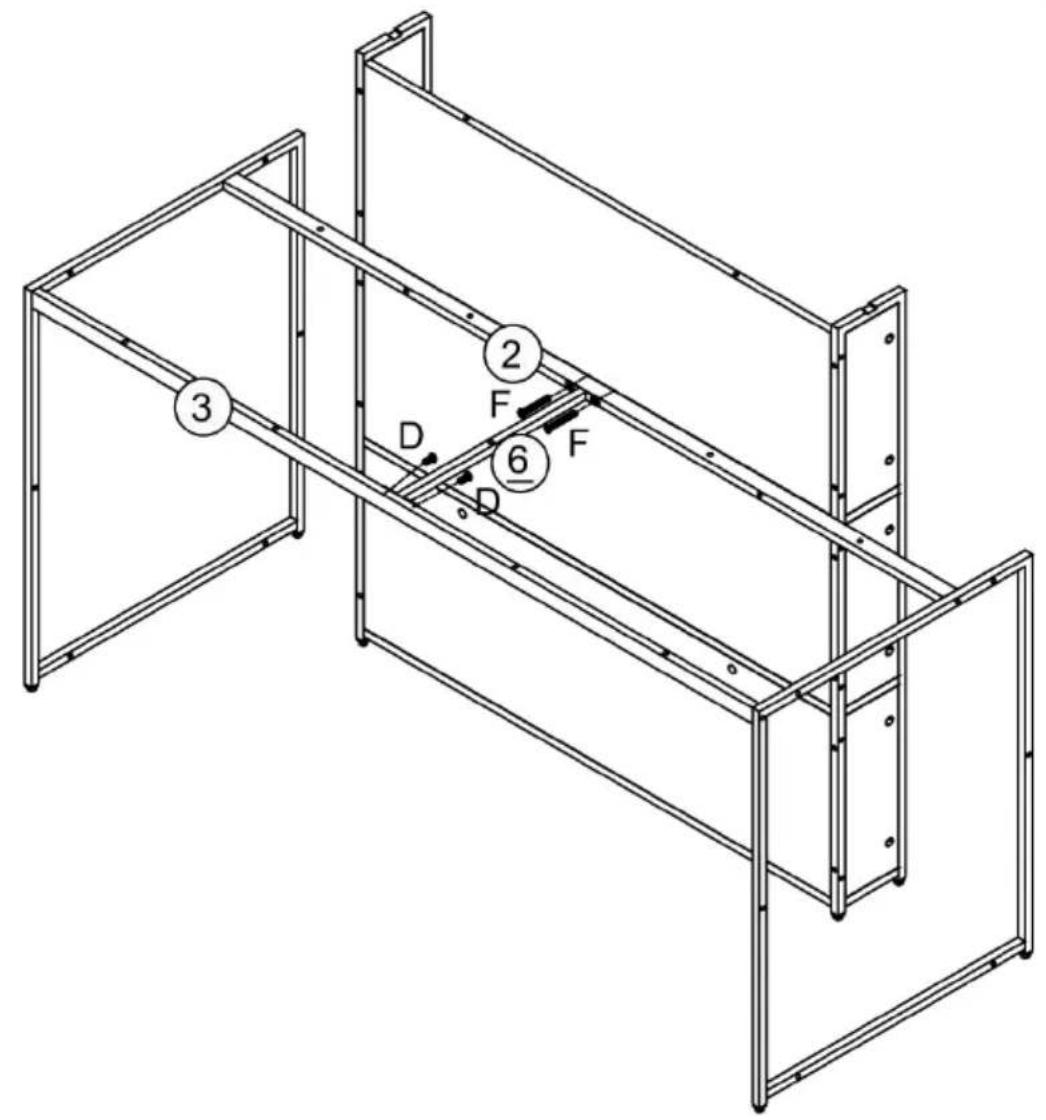
D M6x12Vevor SS-602 - ASSEMBLY STEP - 10

2 PCS2 F D 6 D 3 F

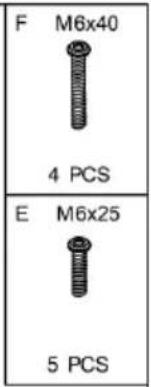
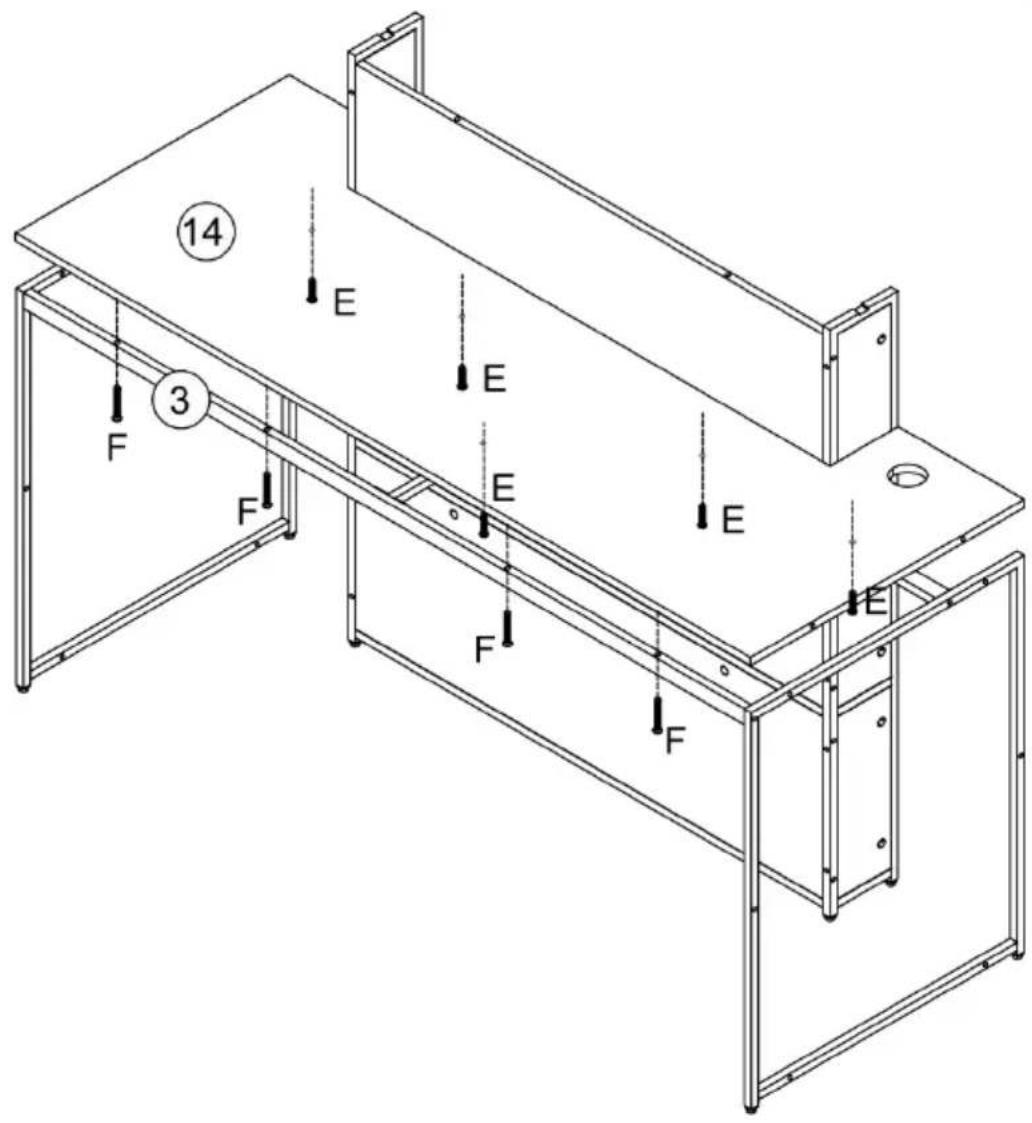
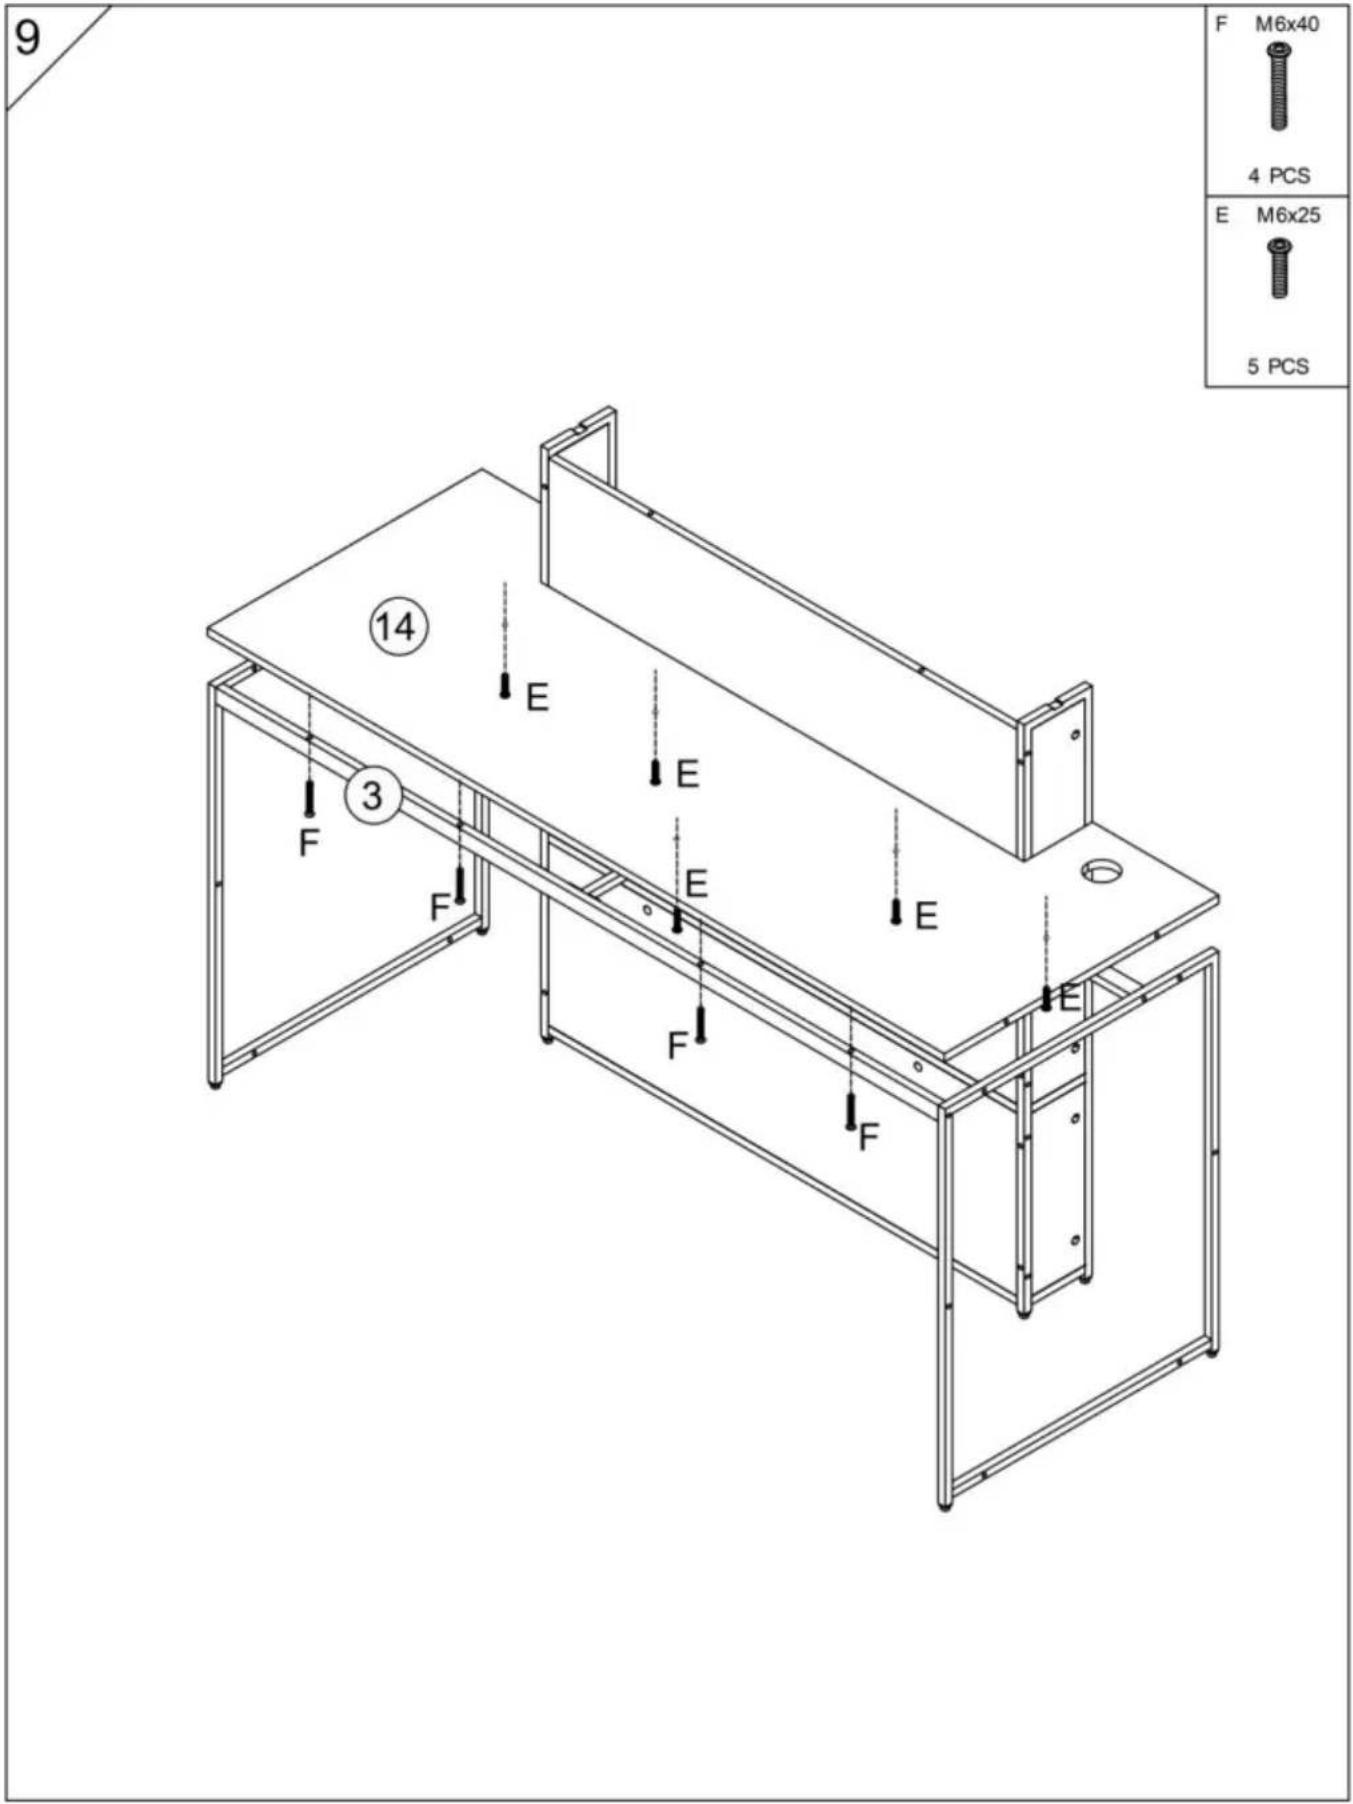
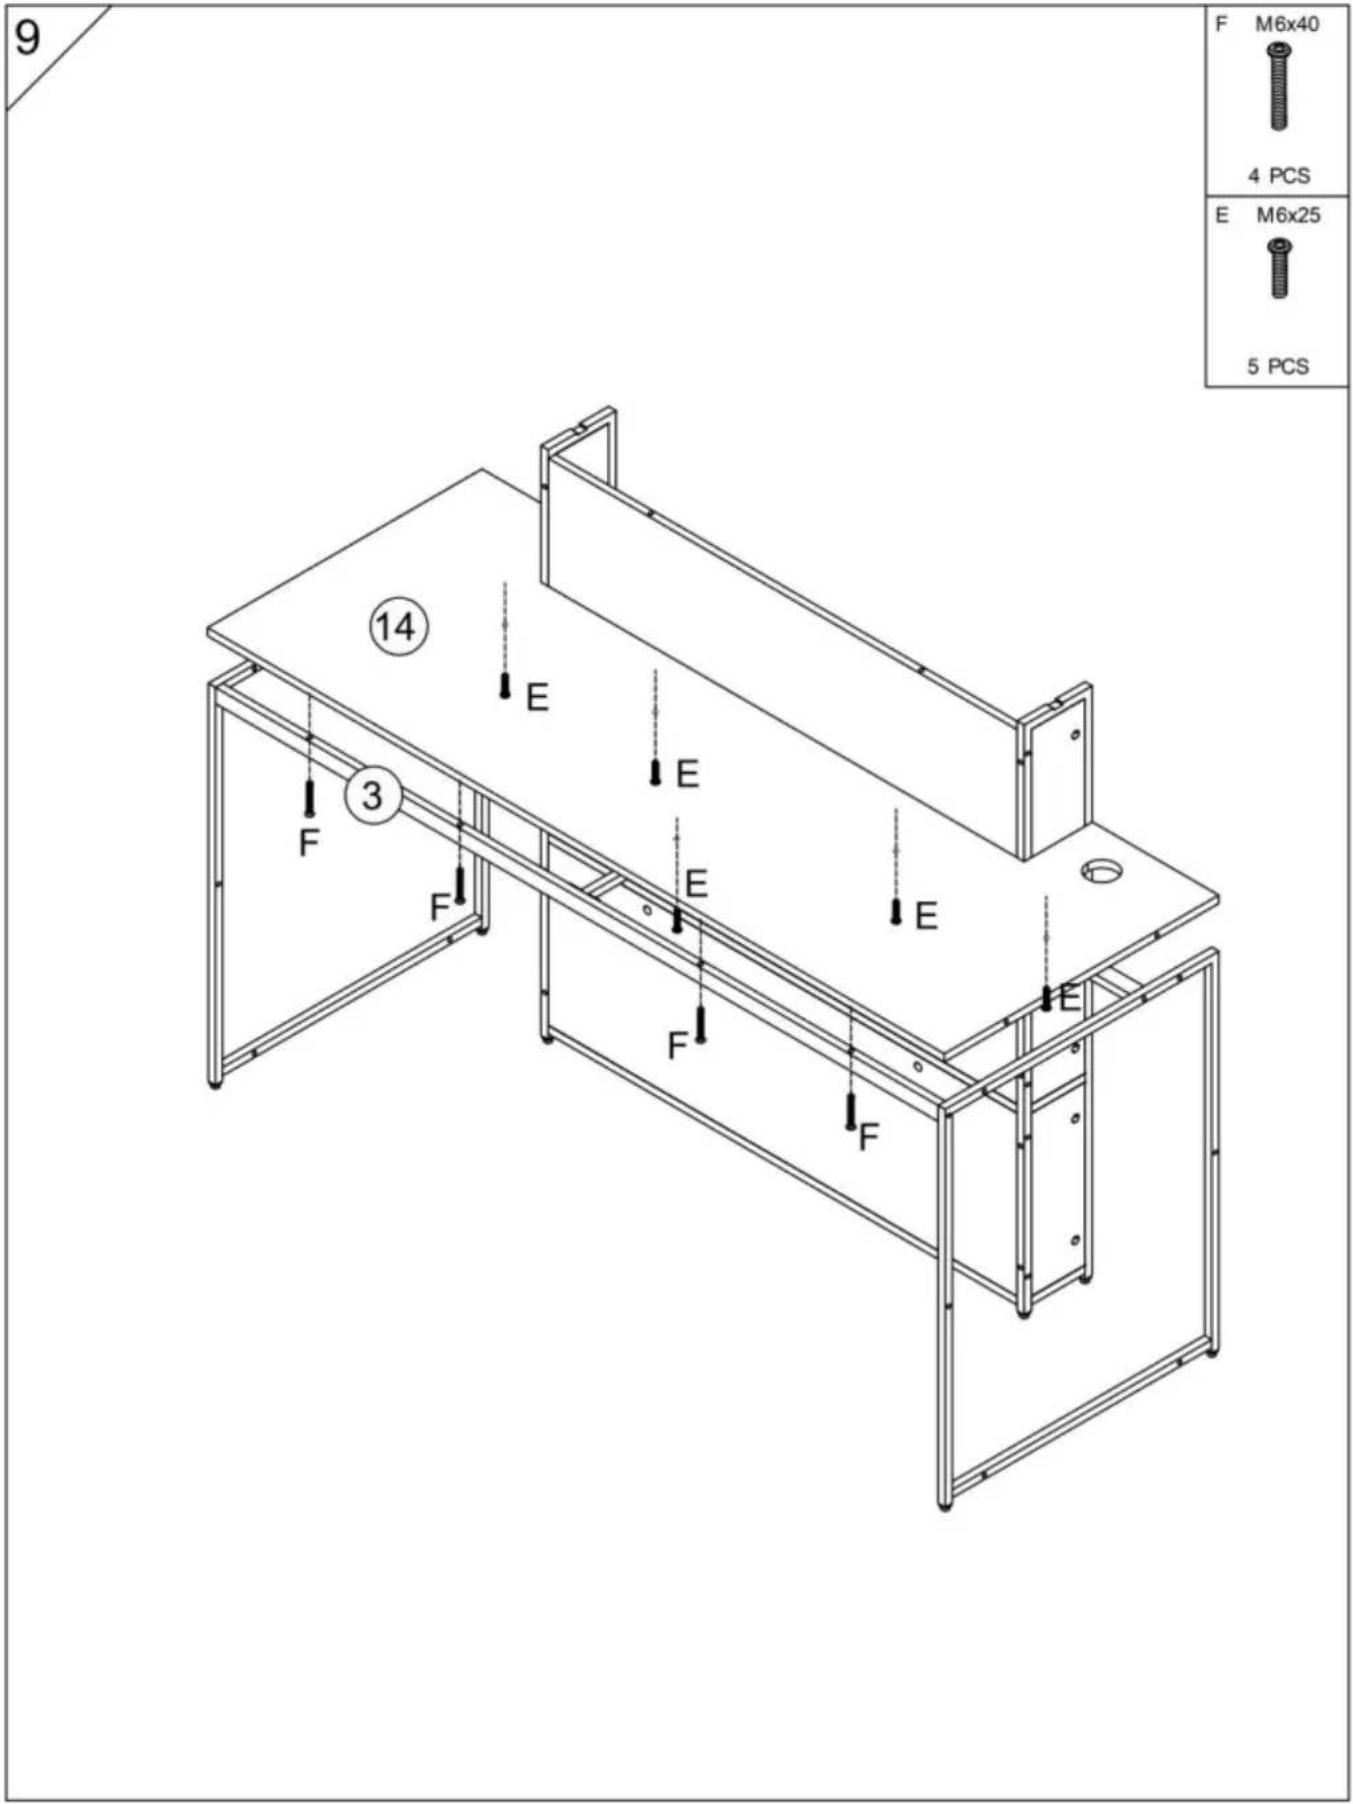
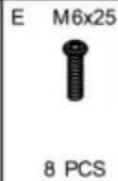
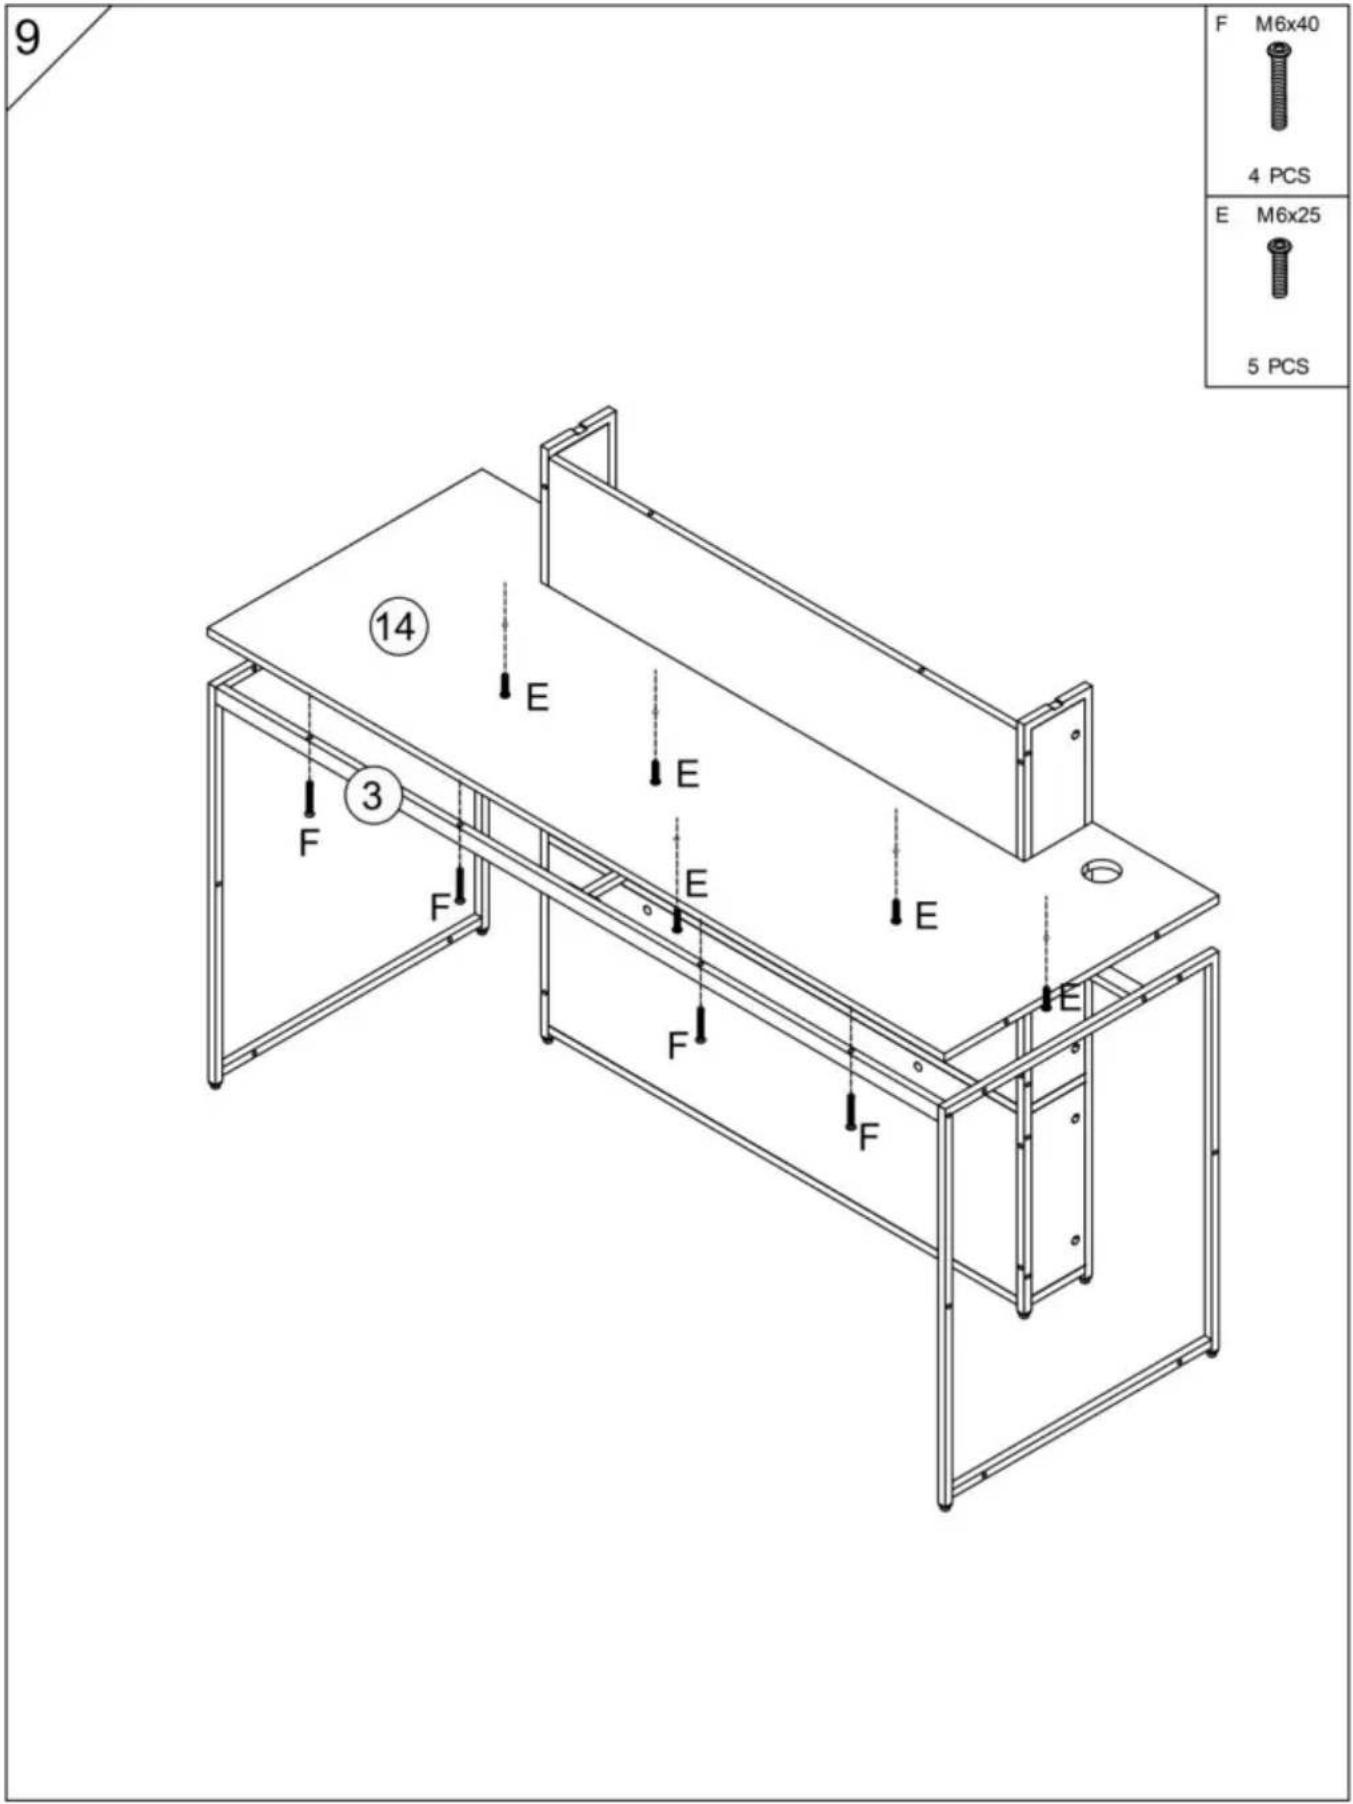
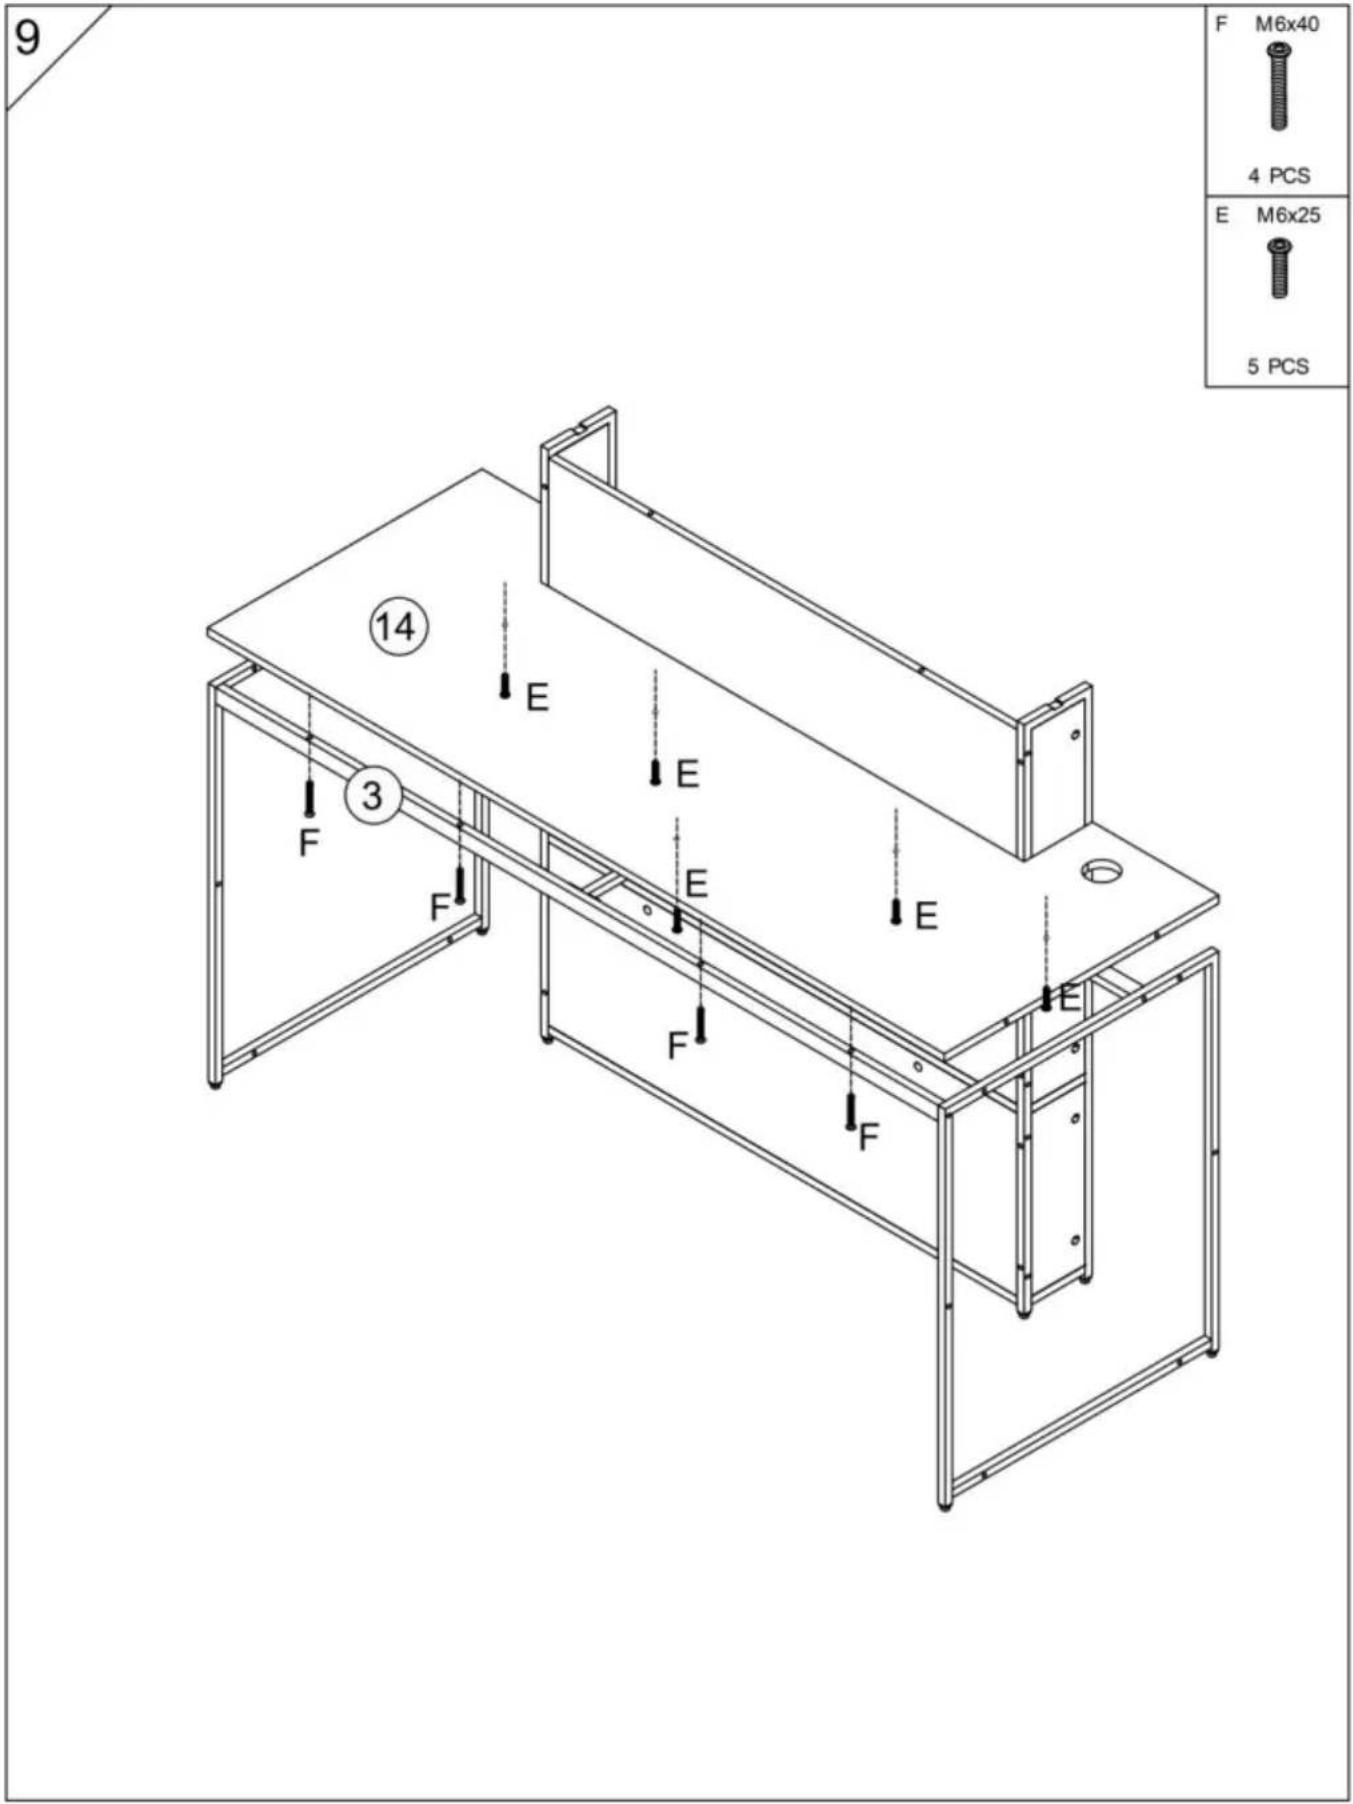
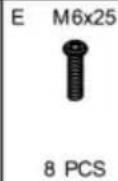
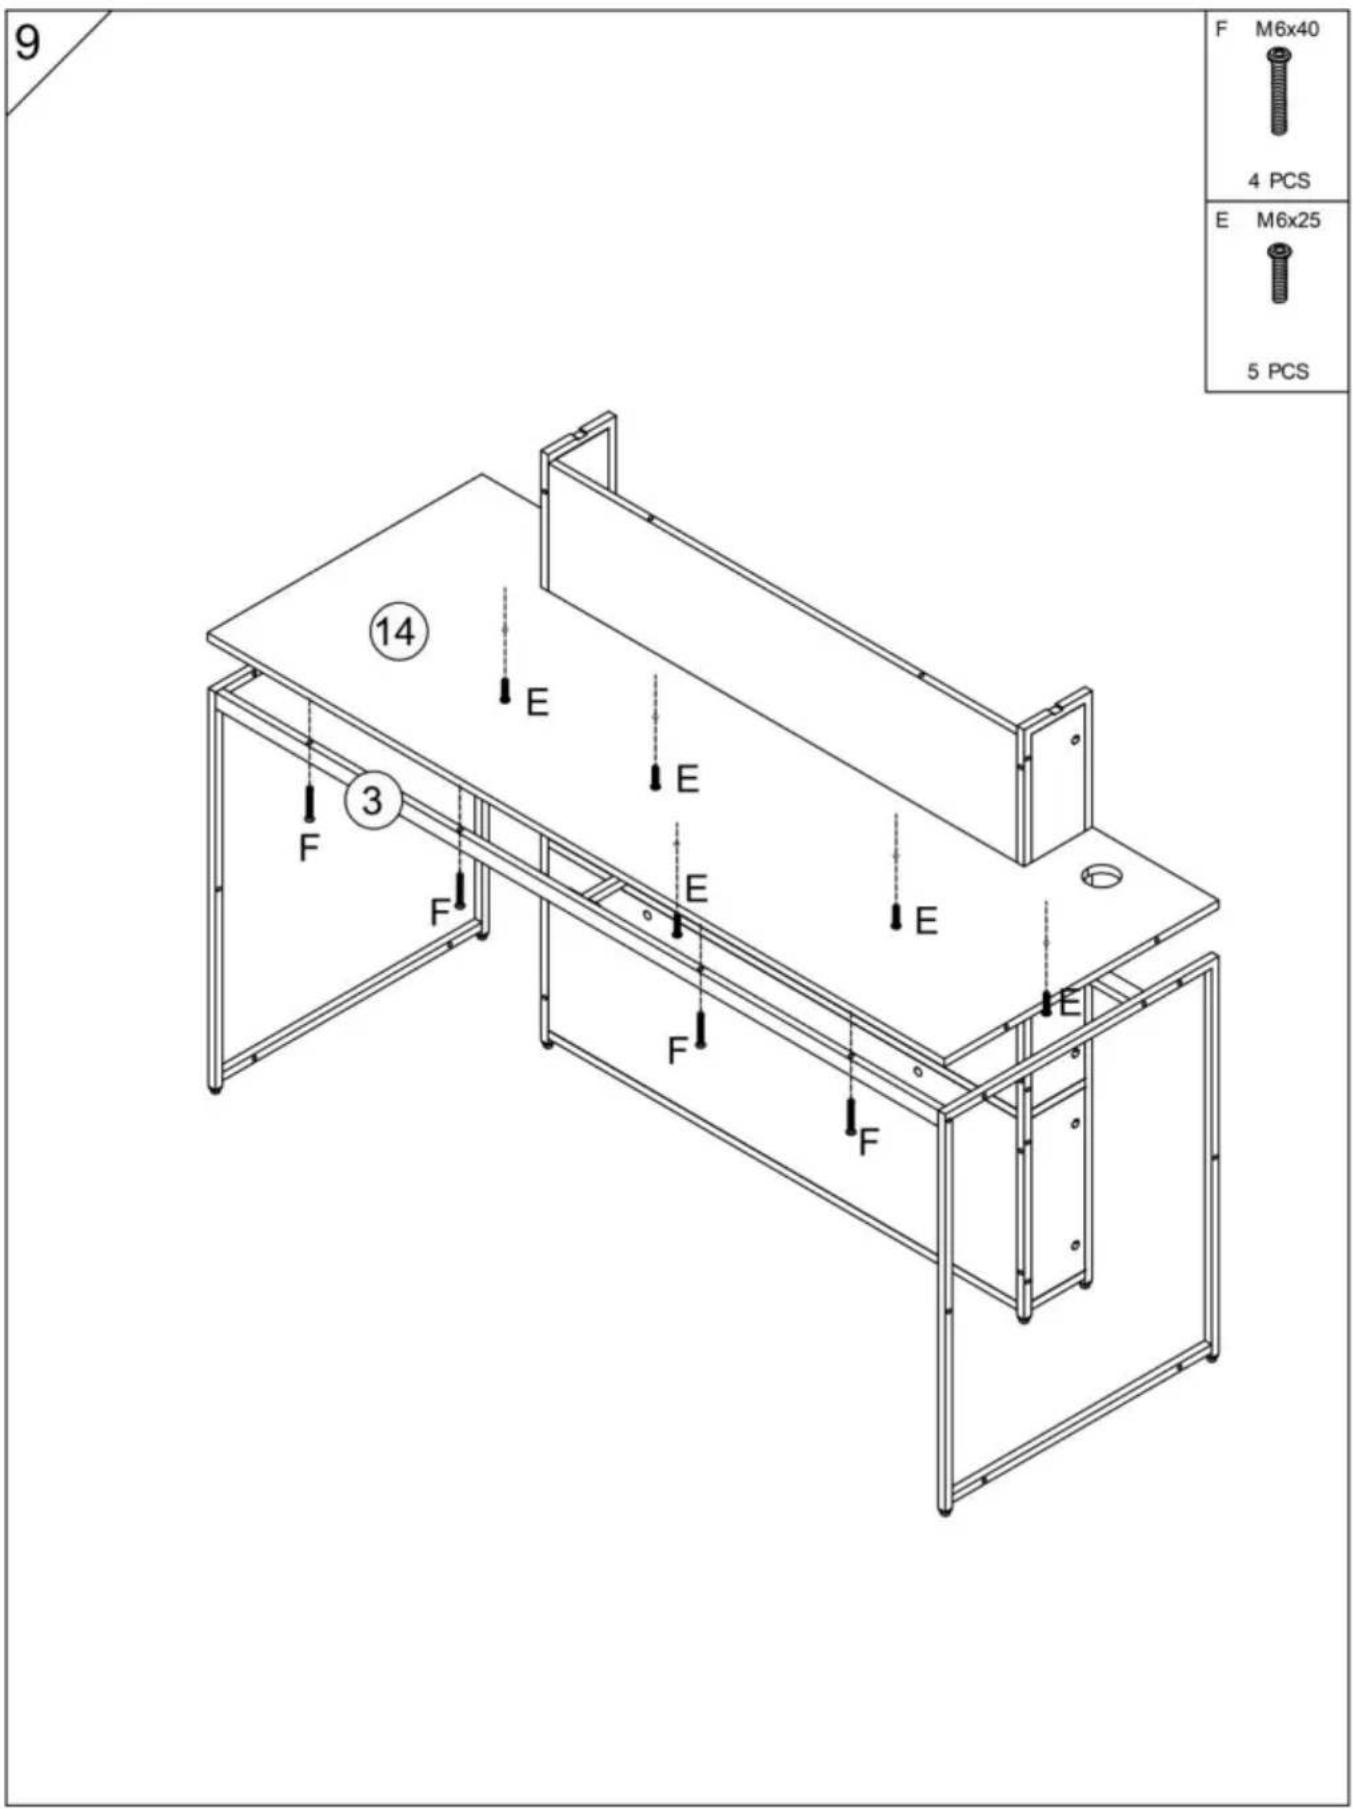
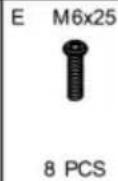
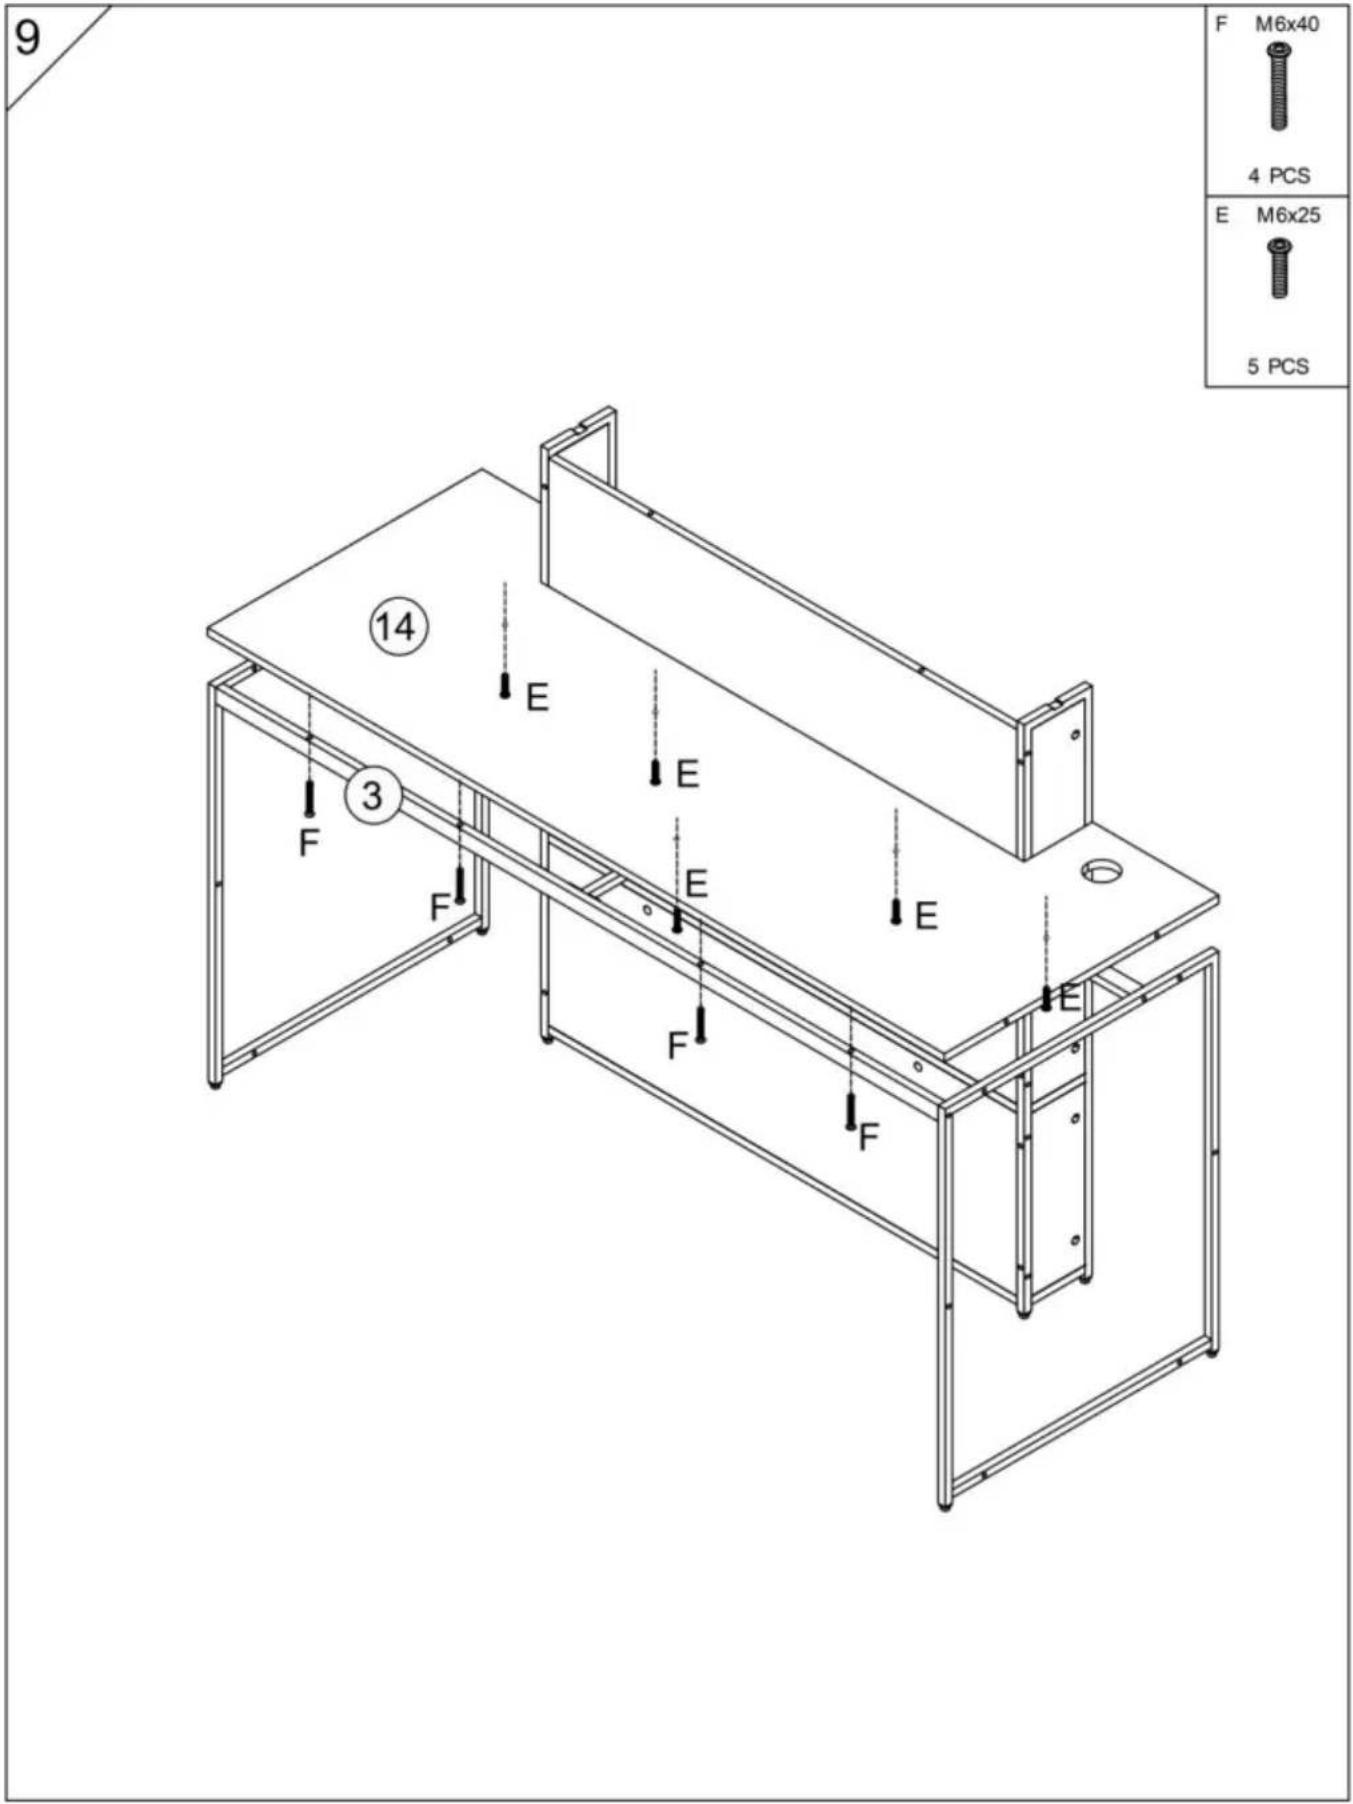
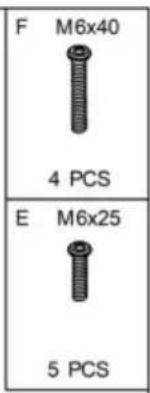
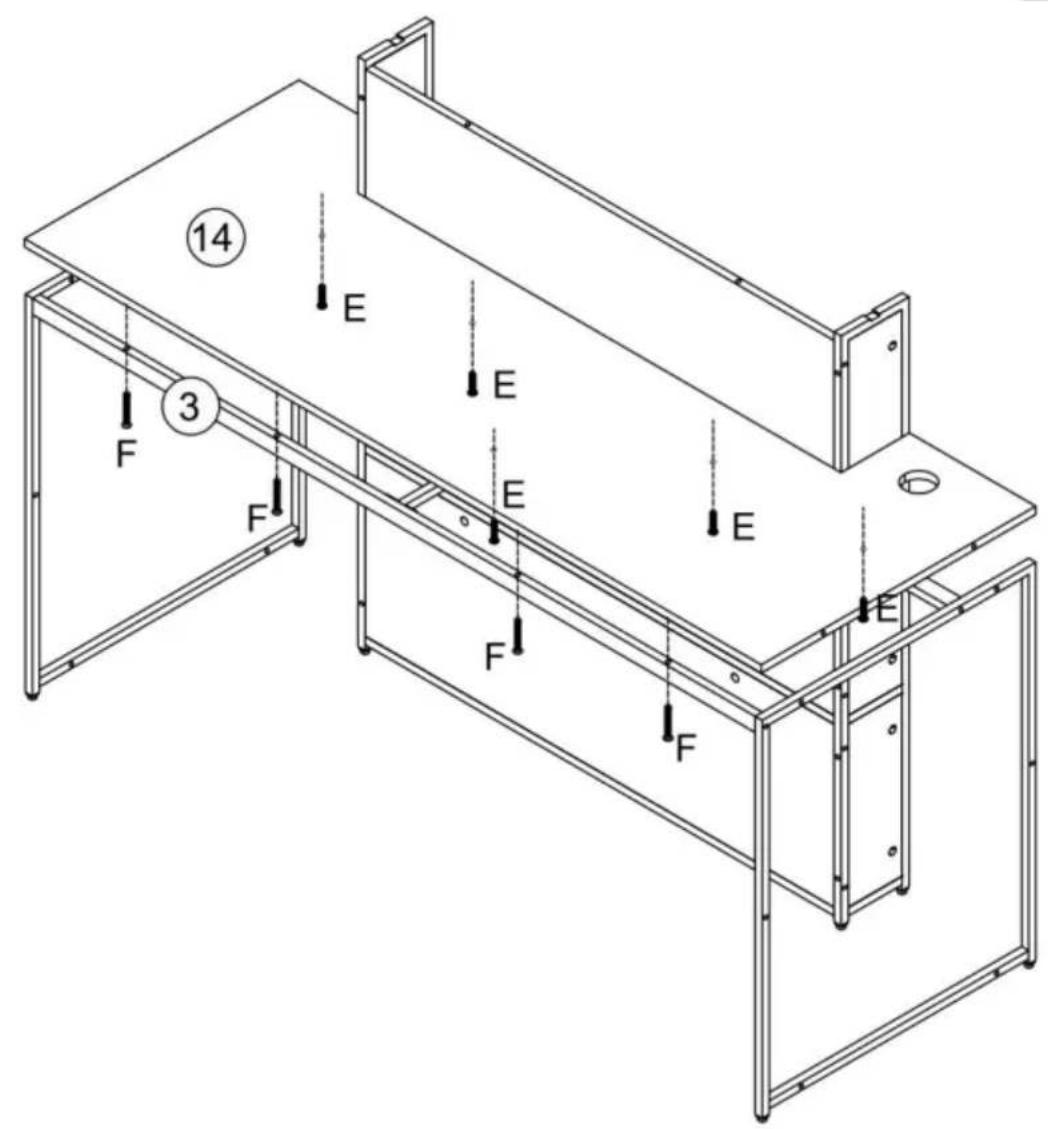
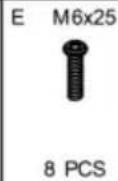
9F M6x40 4 PCS E M6x25 5 PCS

14 E 3 F F E E E F F E

10

Vevor SS-602 - ASSEMBLY STEP - 14

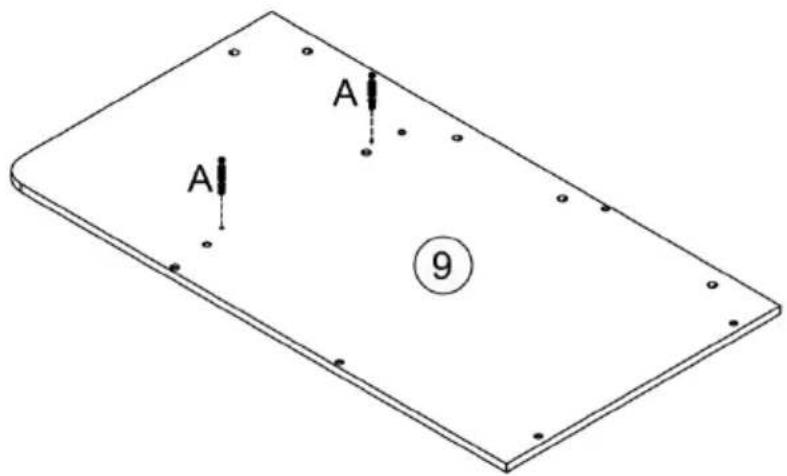
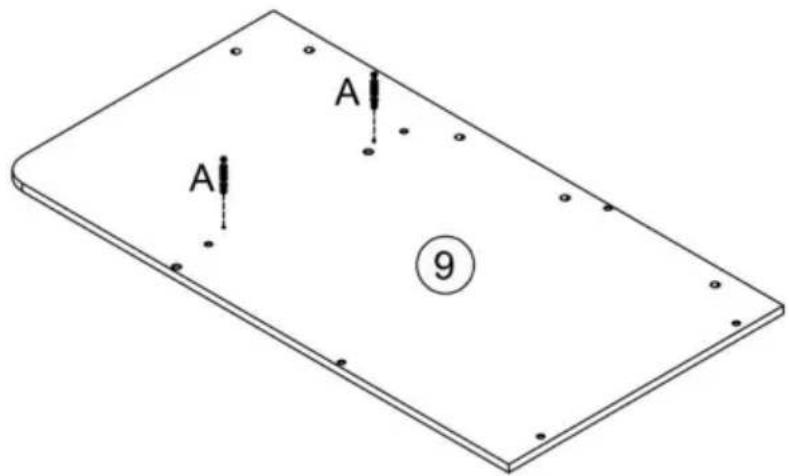
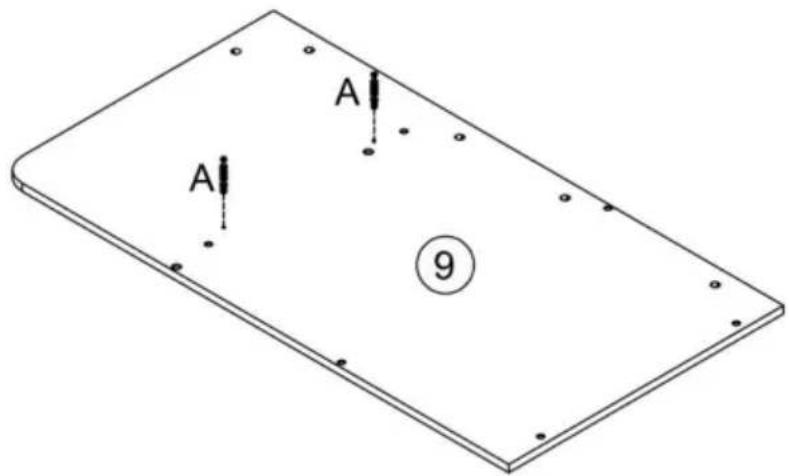
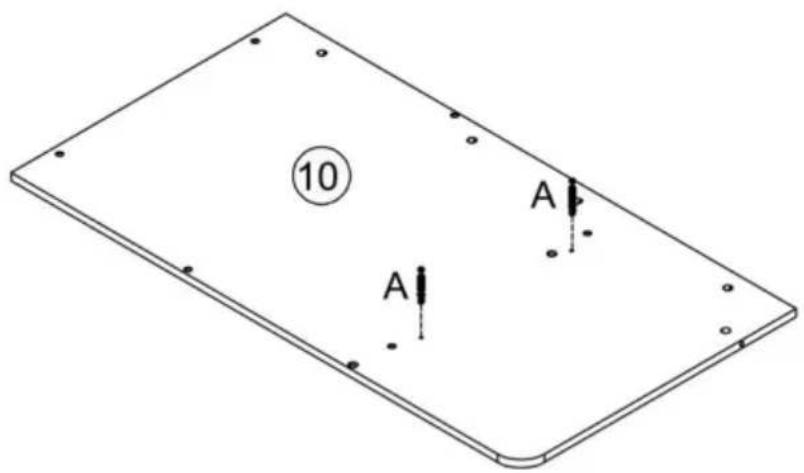
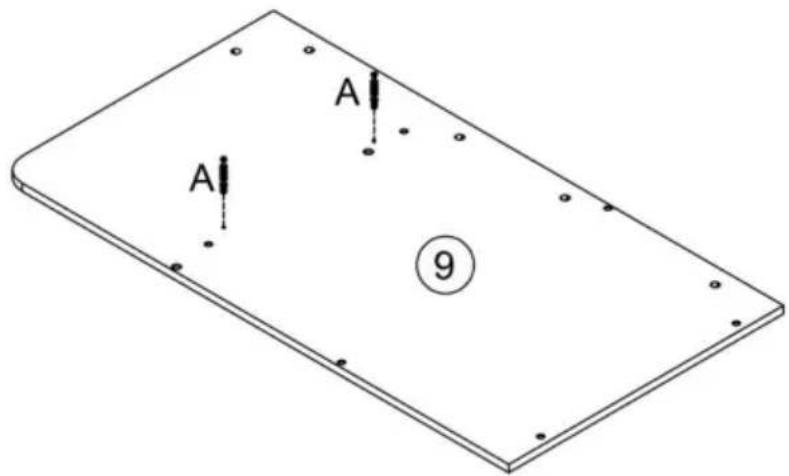
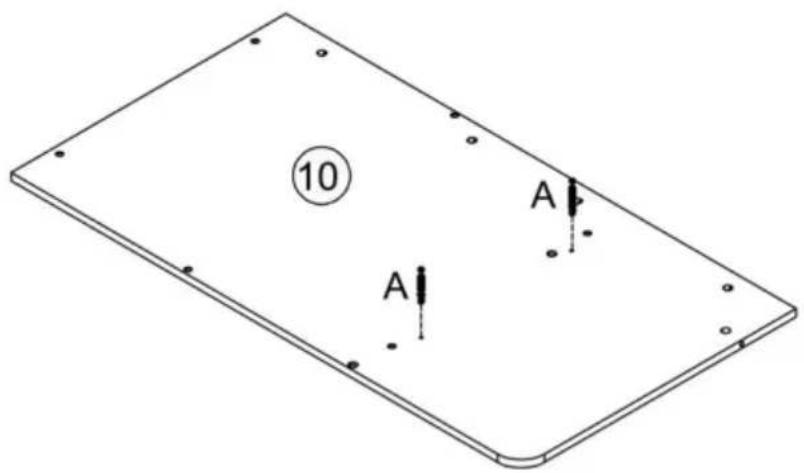
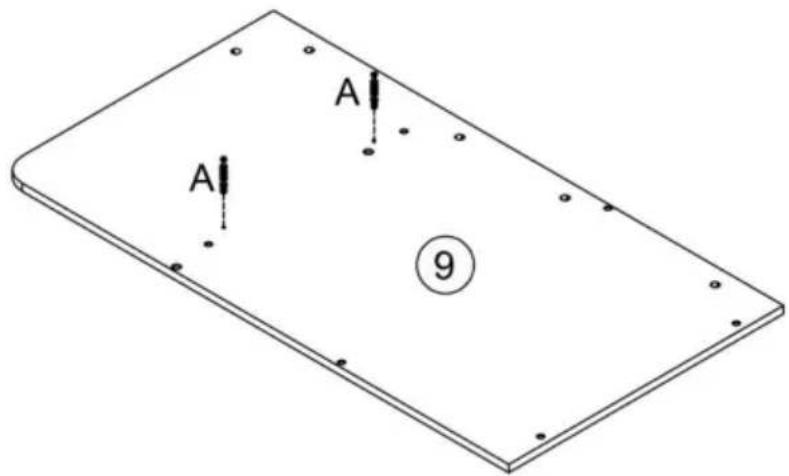
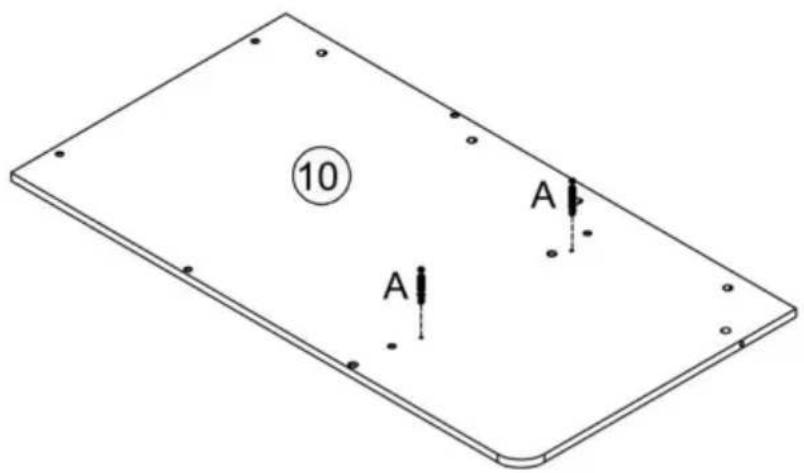
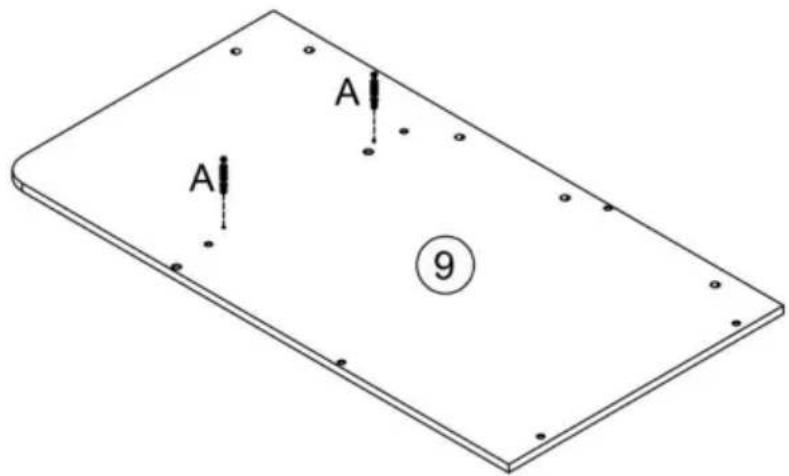
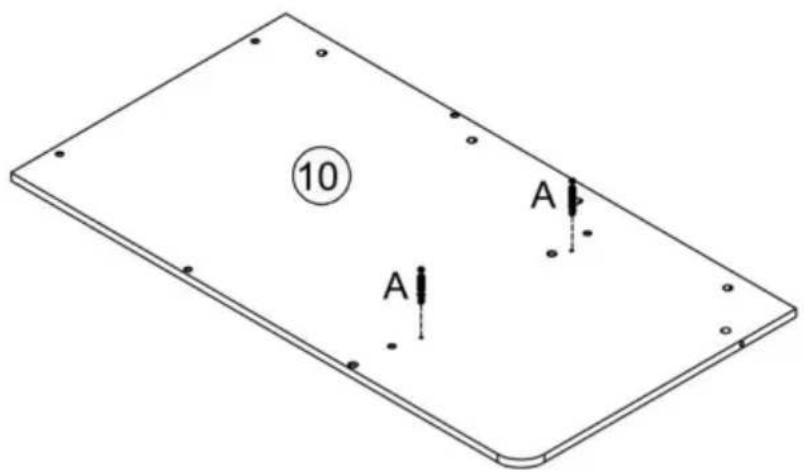
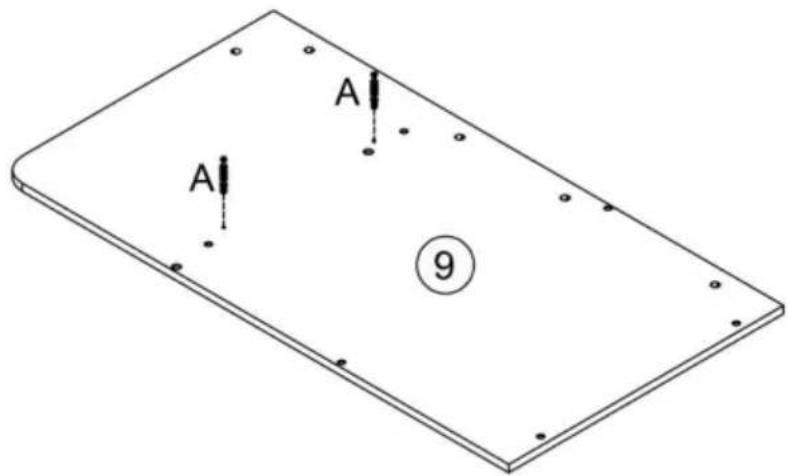
A A ⑨

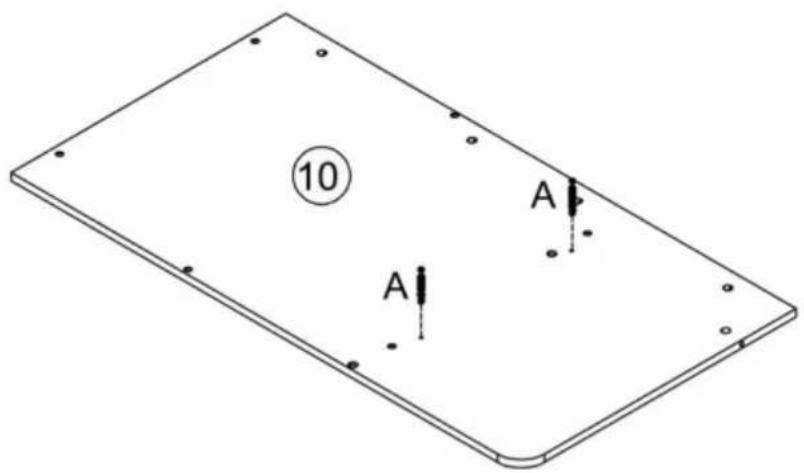
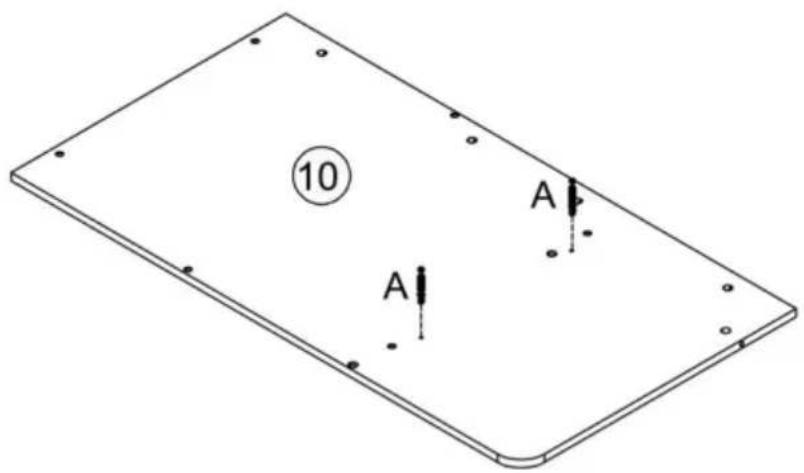
10 A A

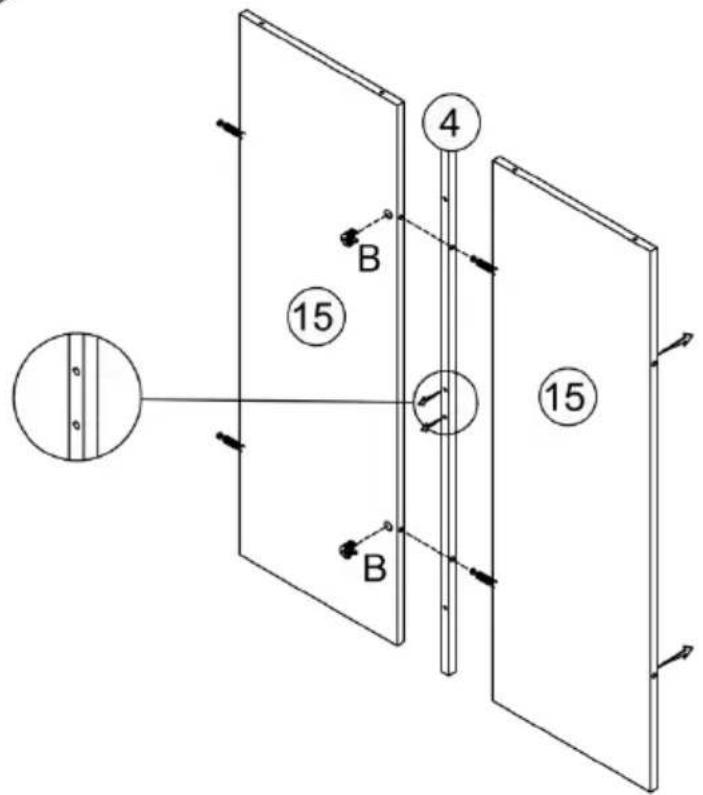
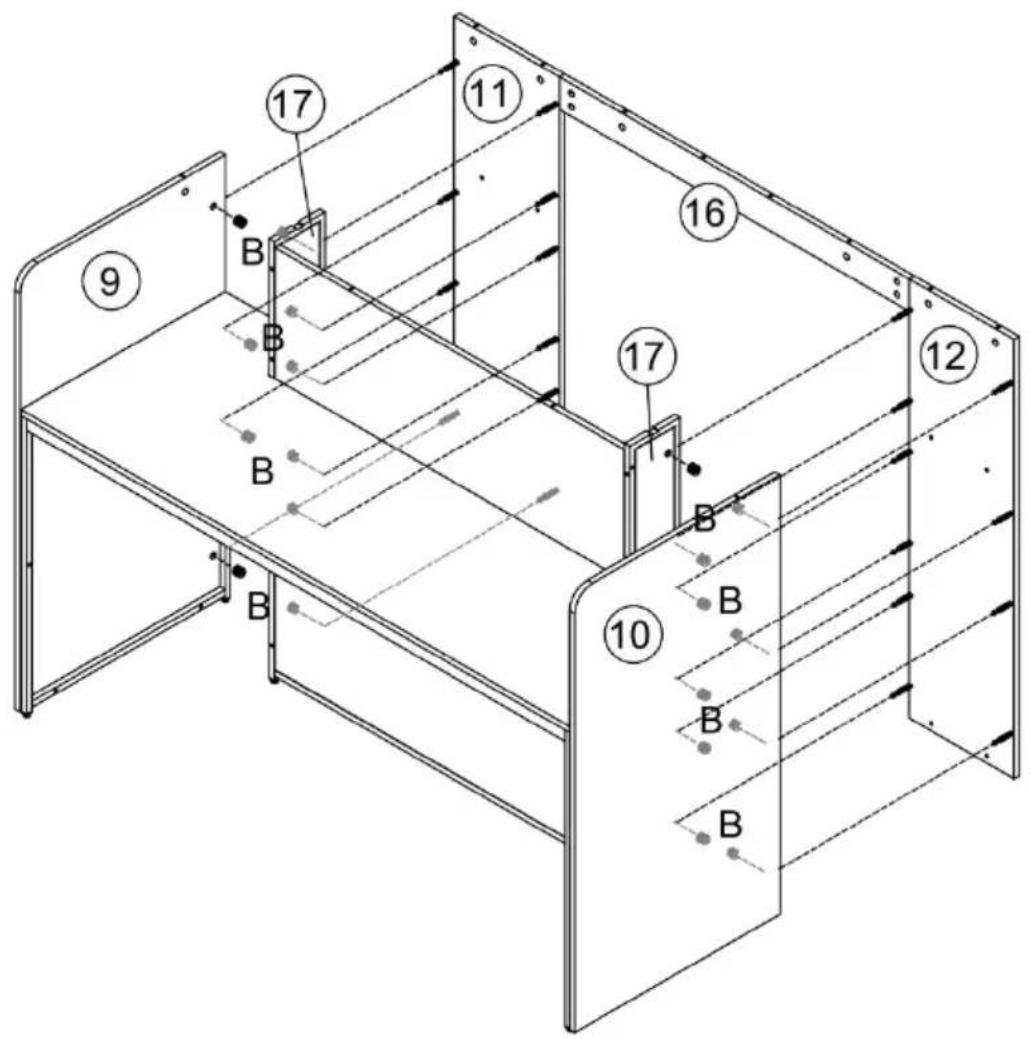
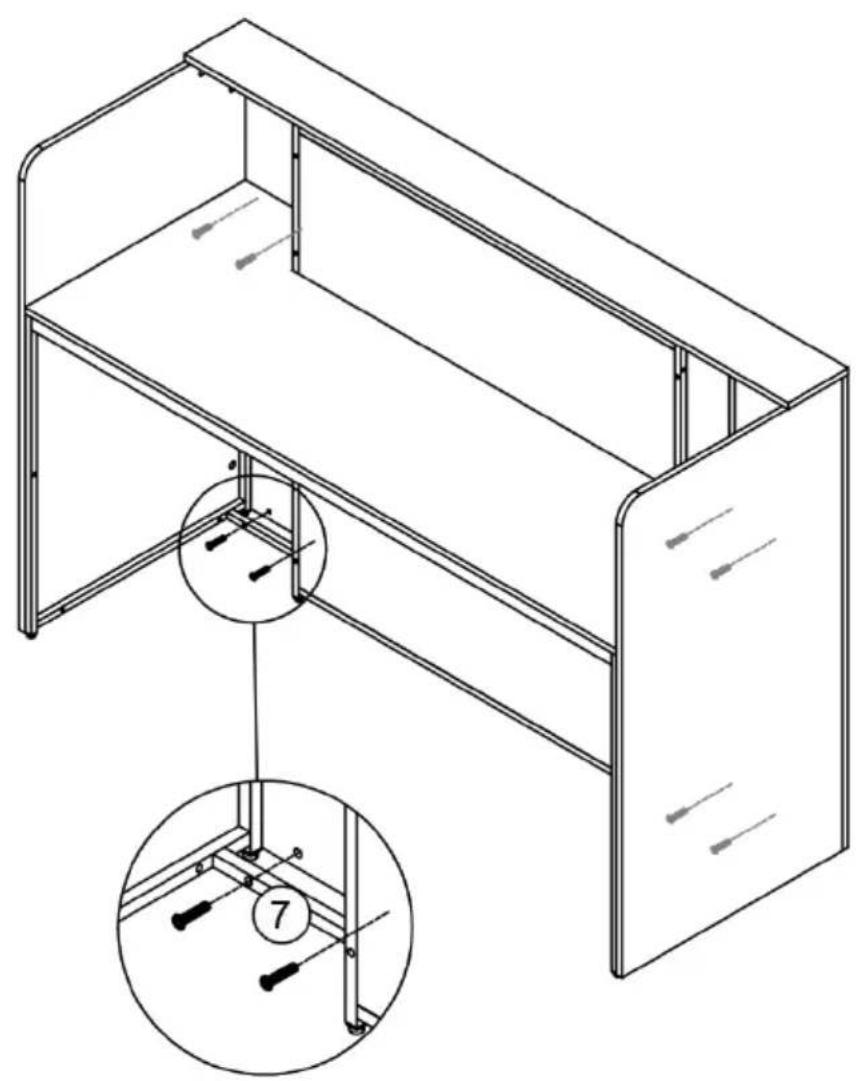
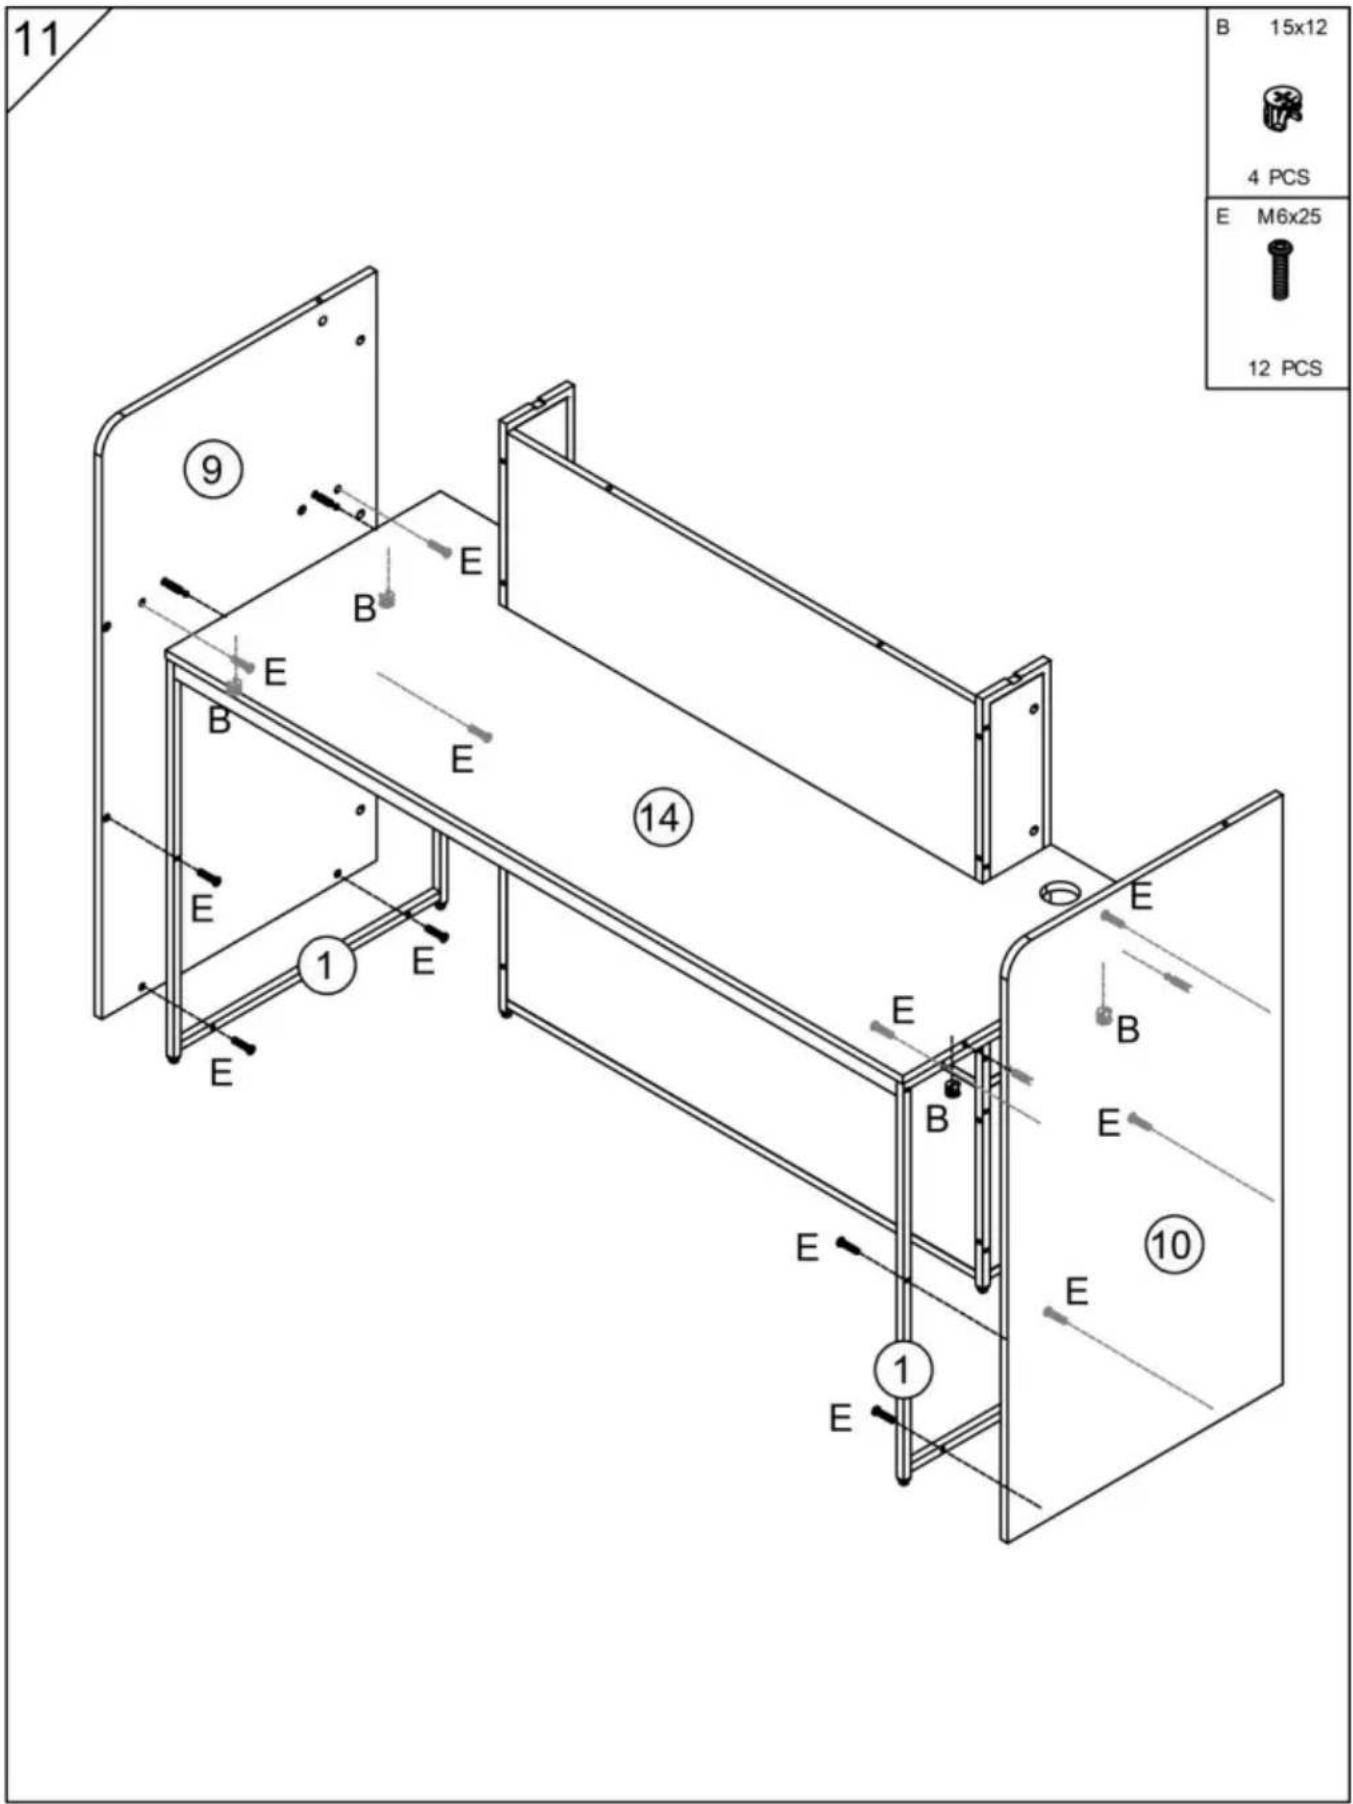
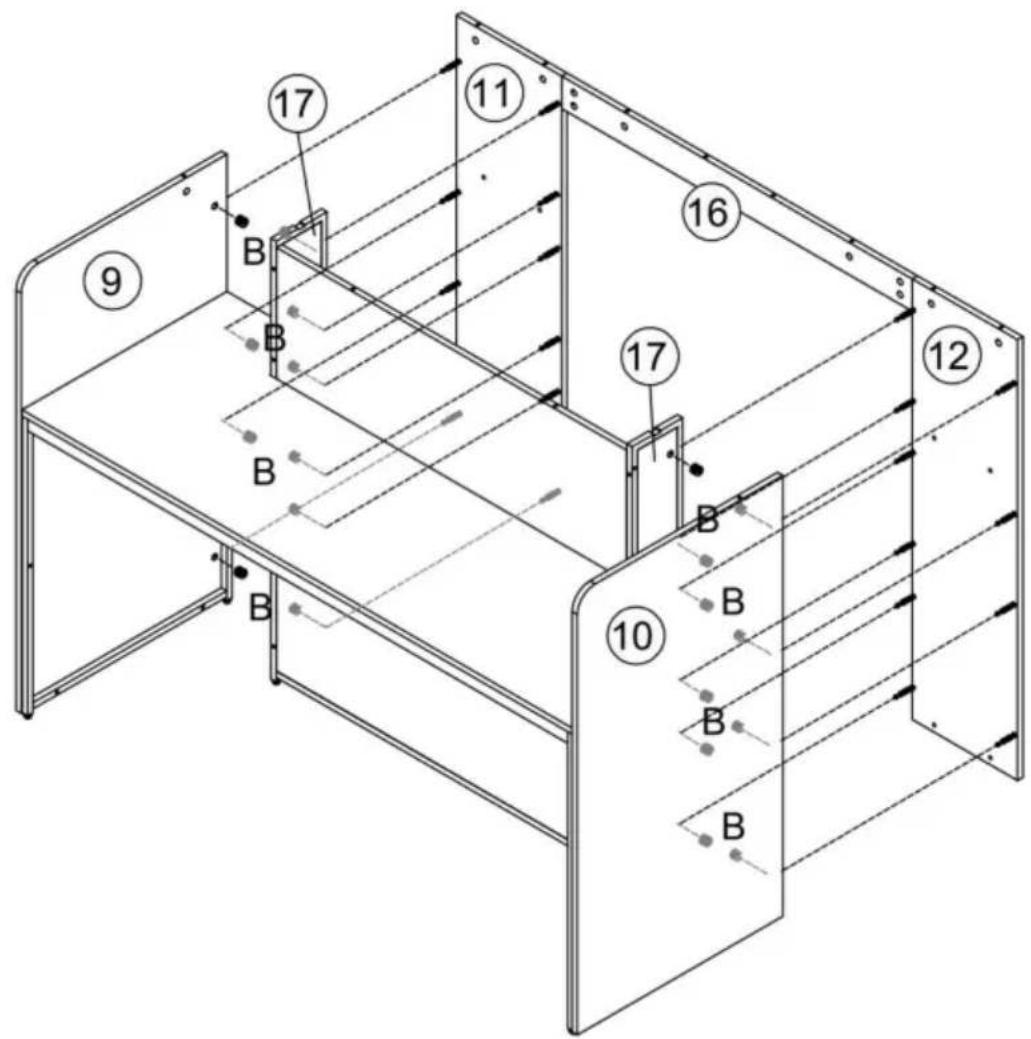
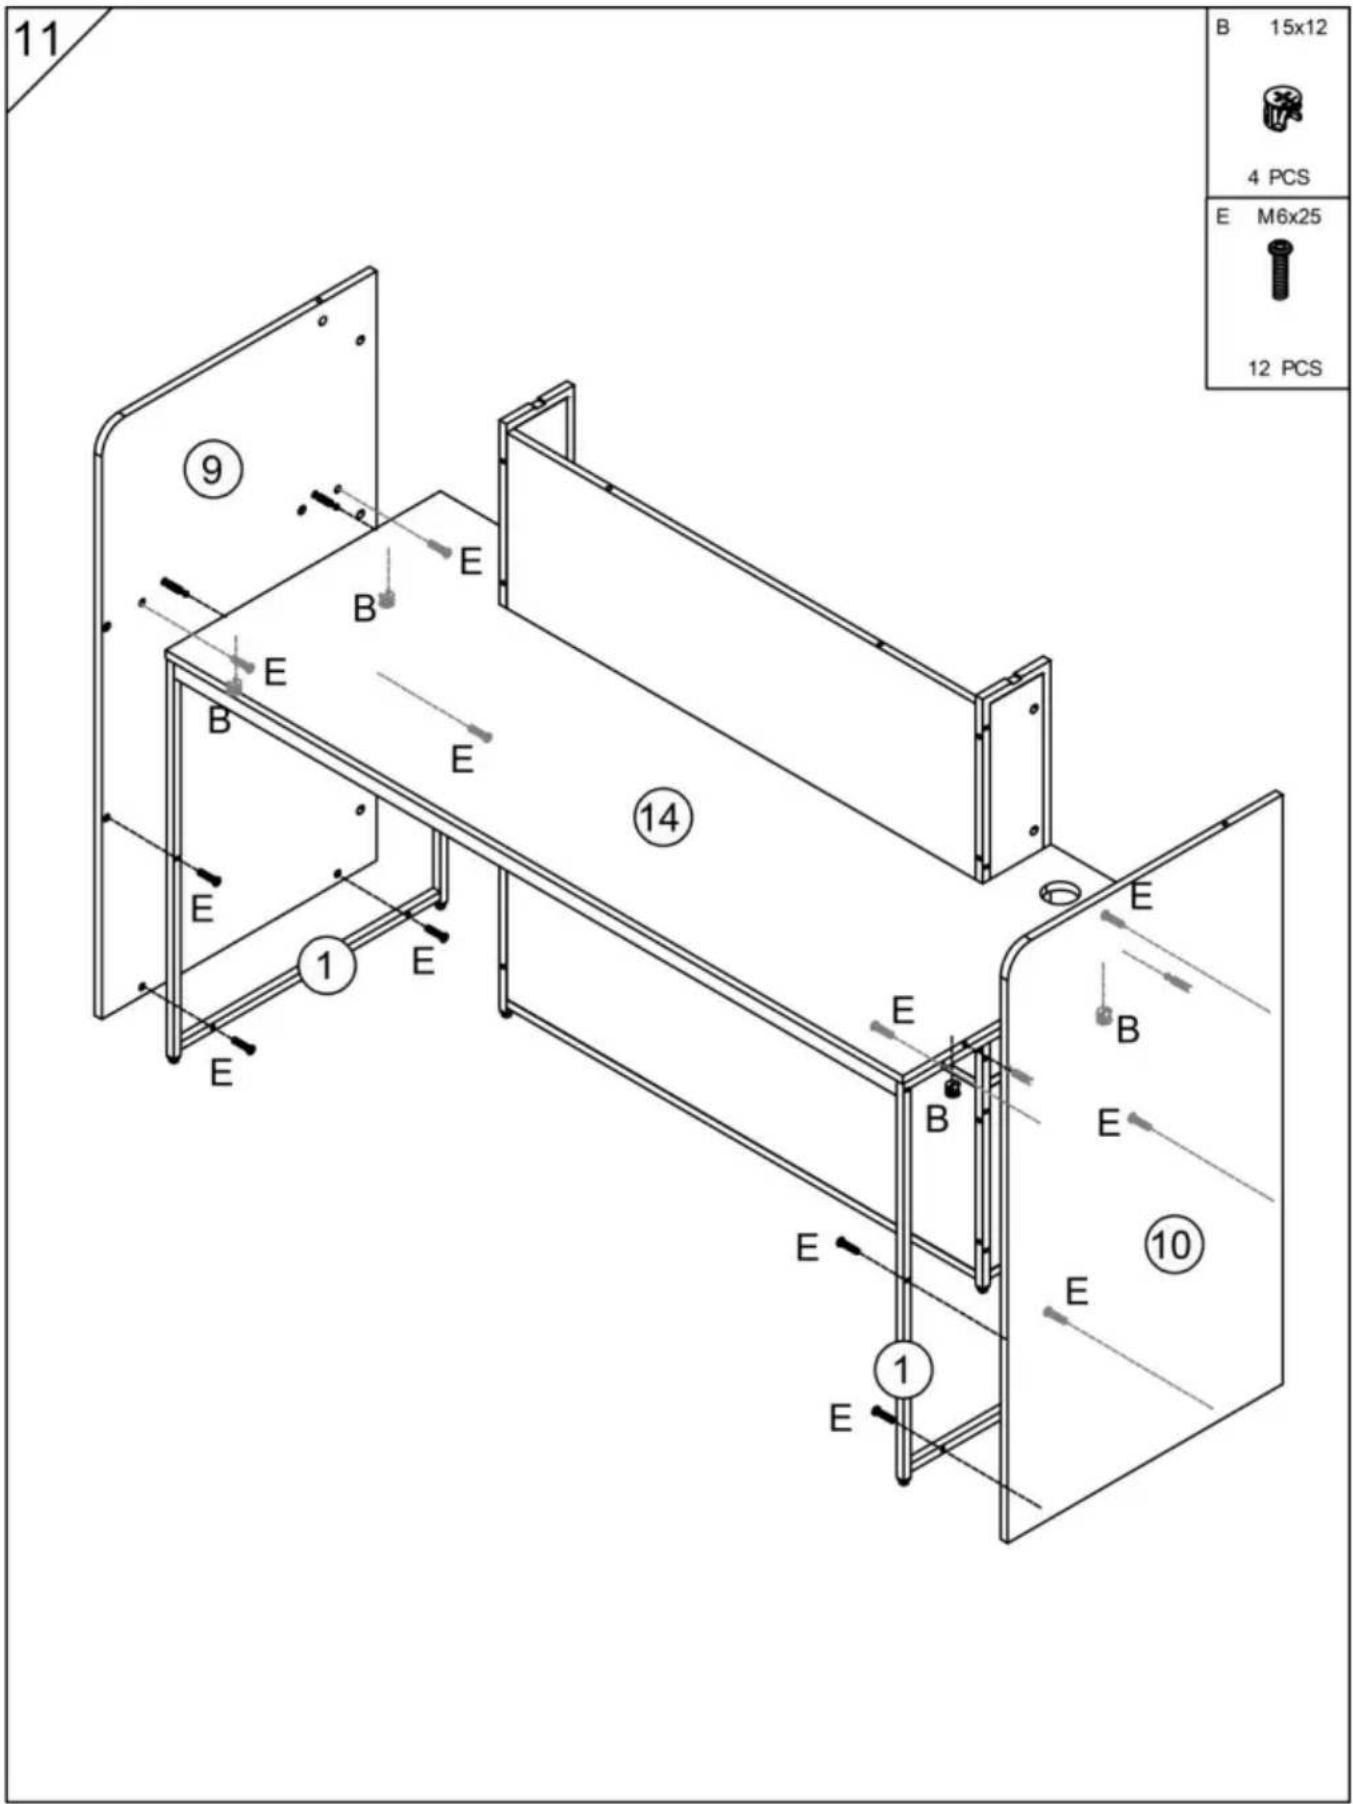
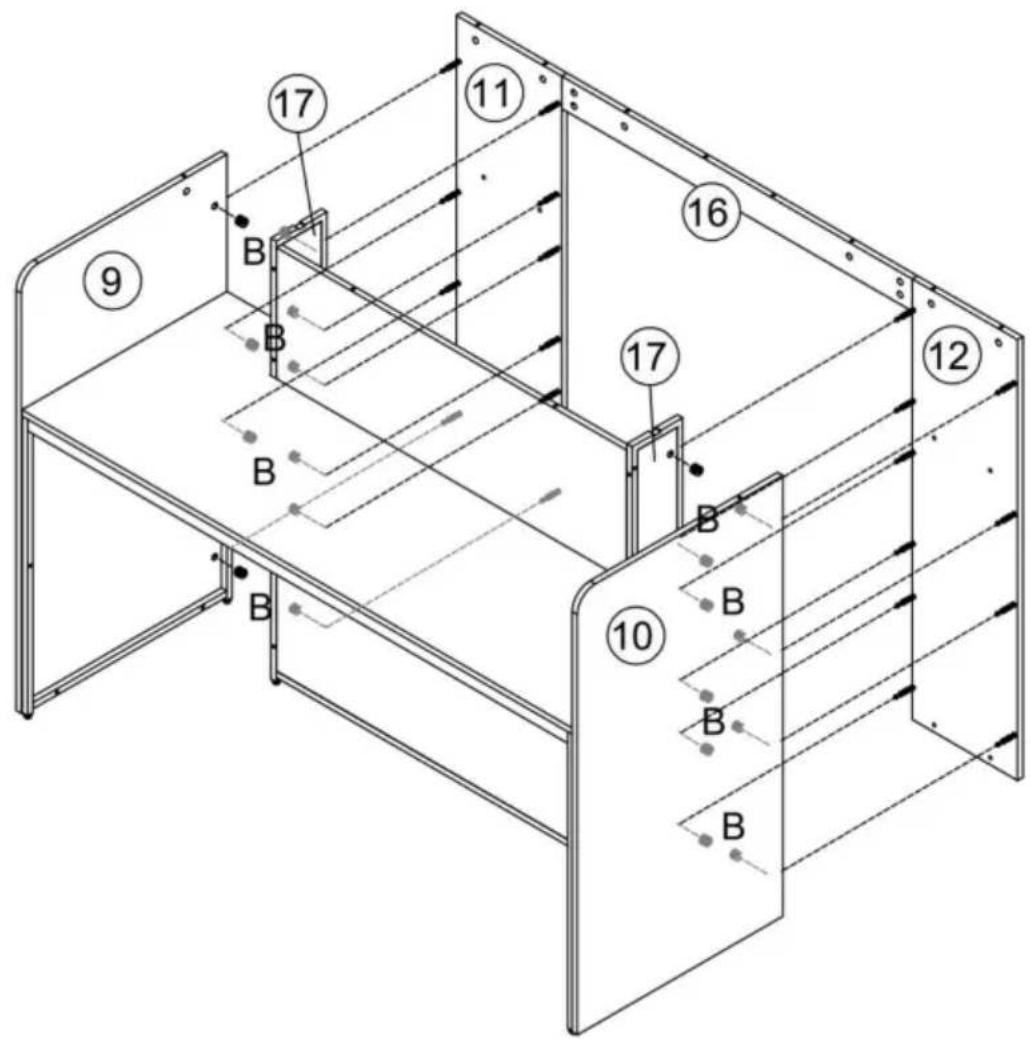
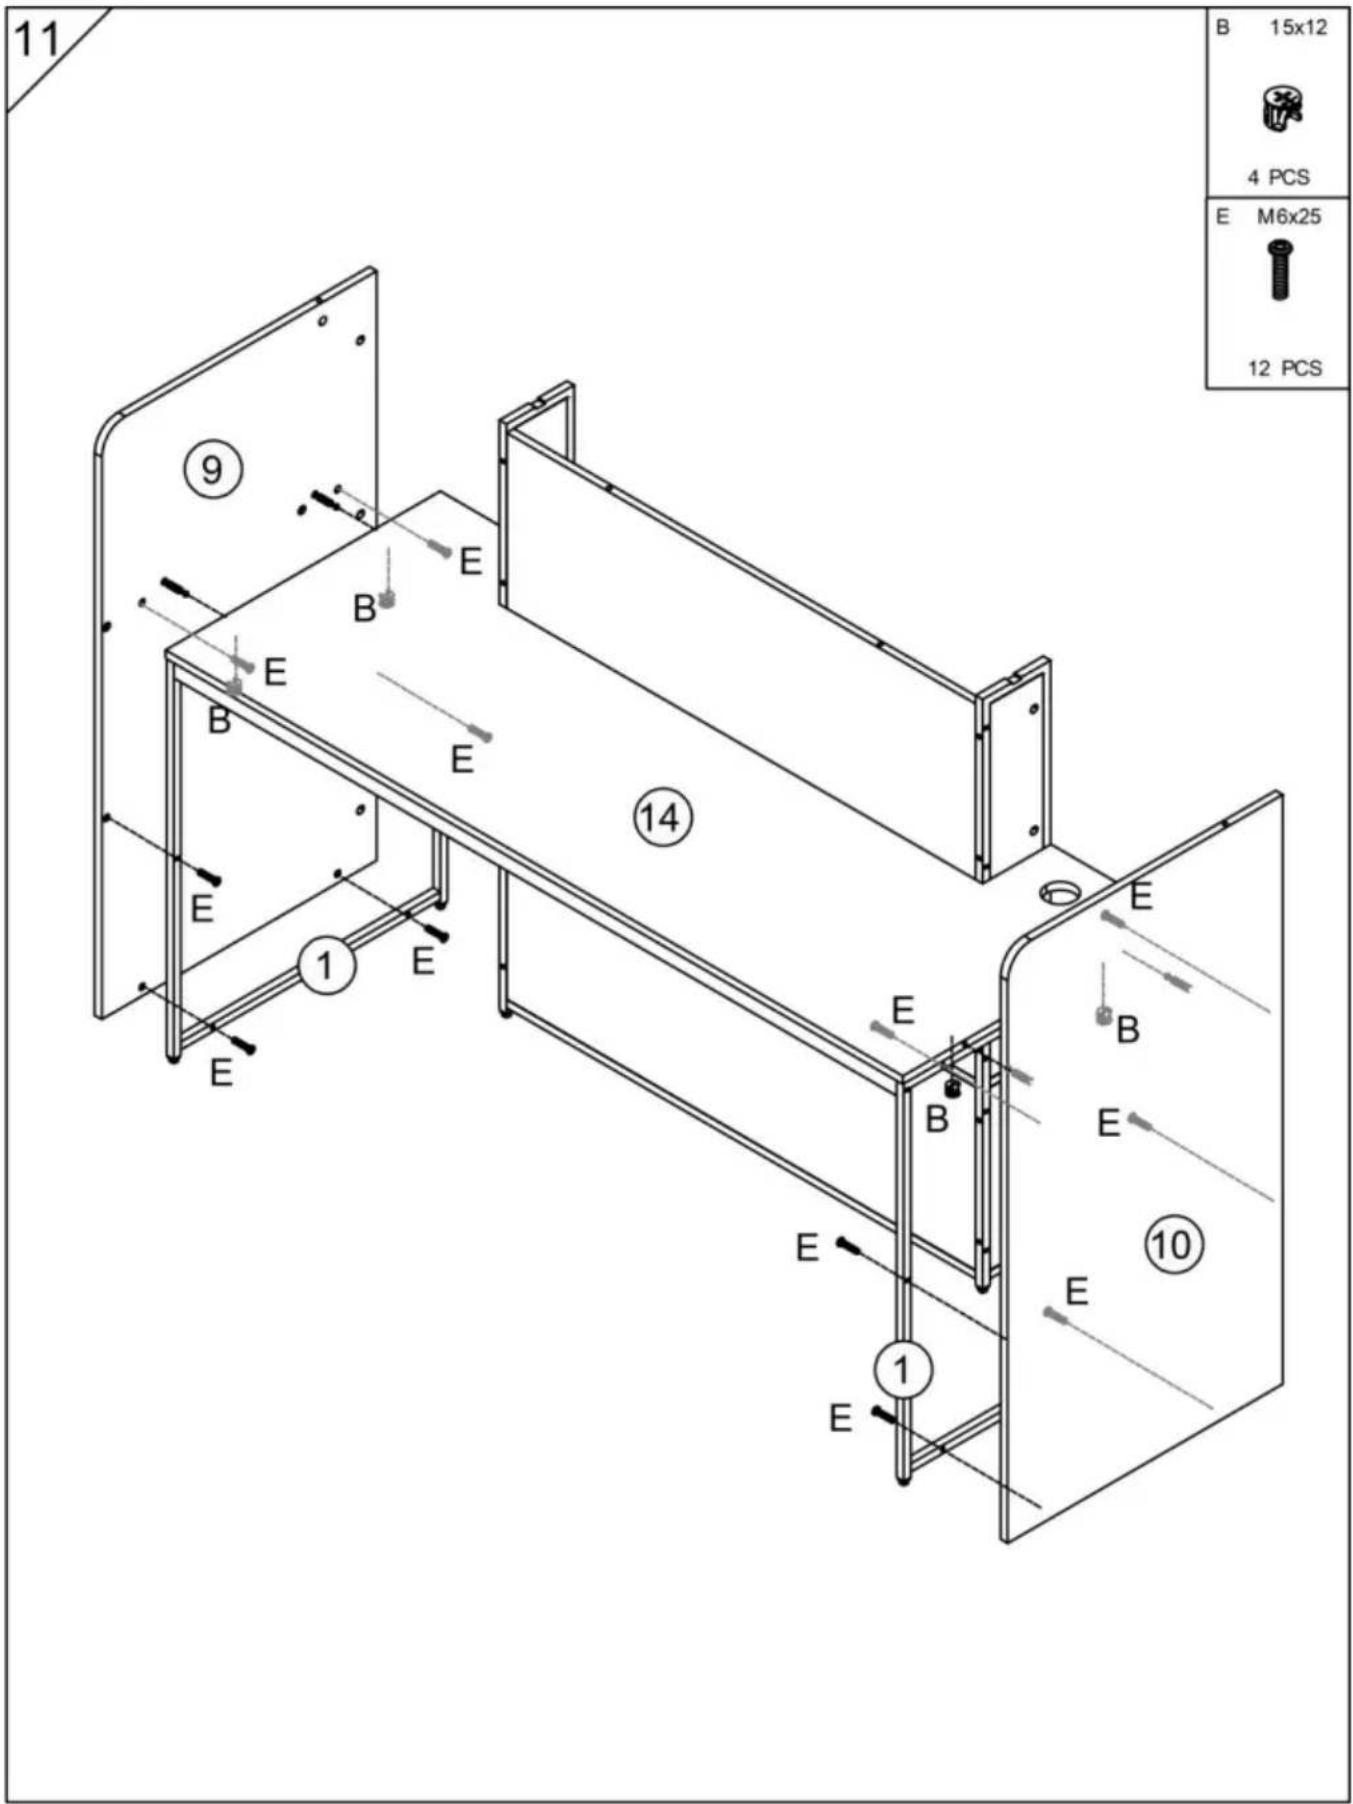
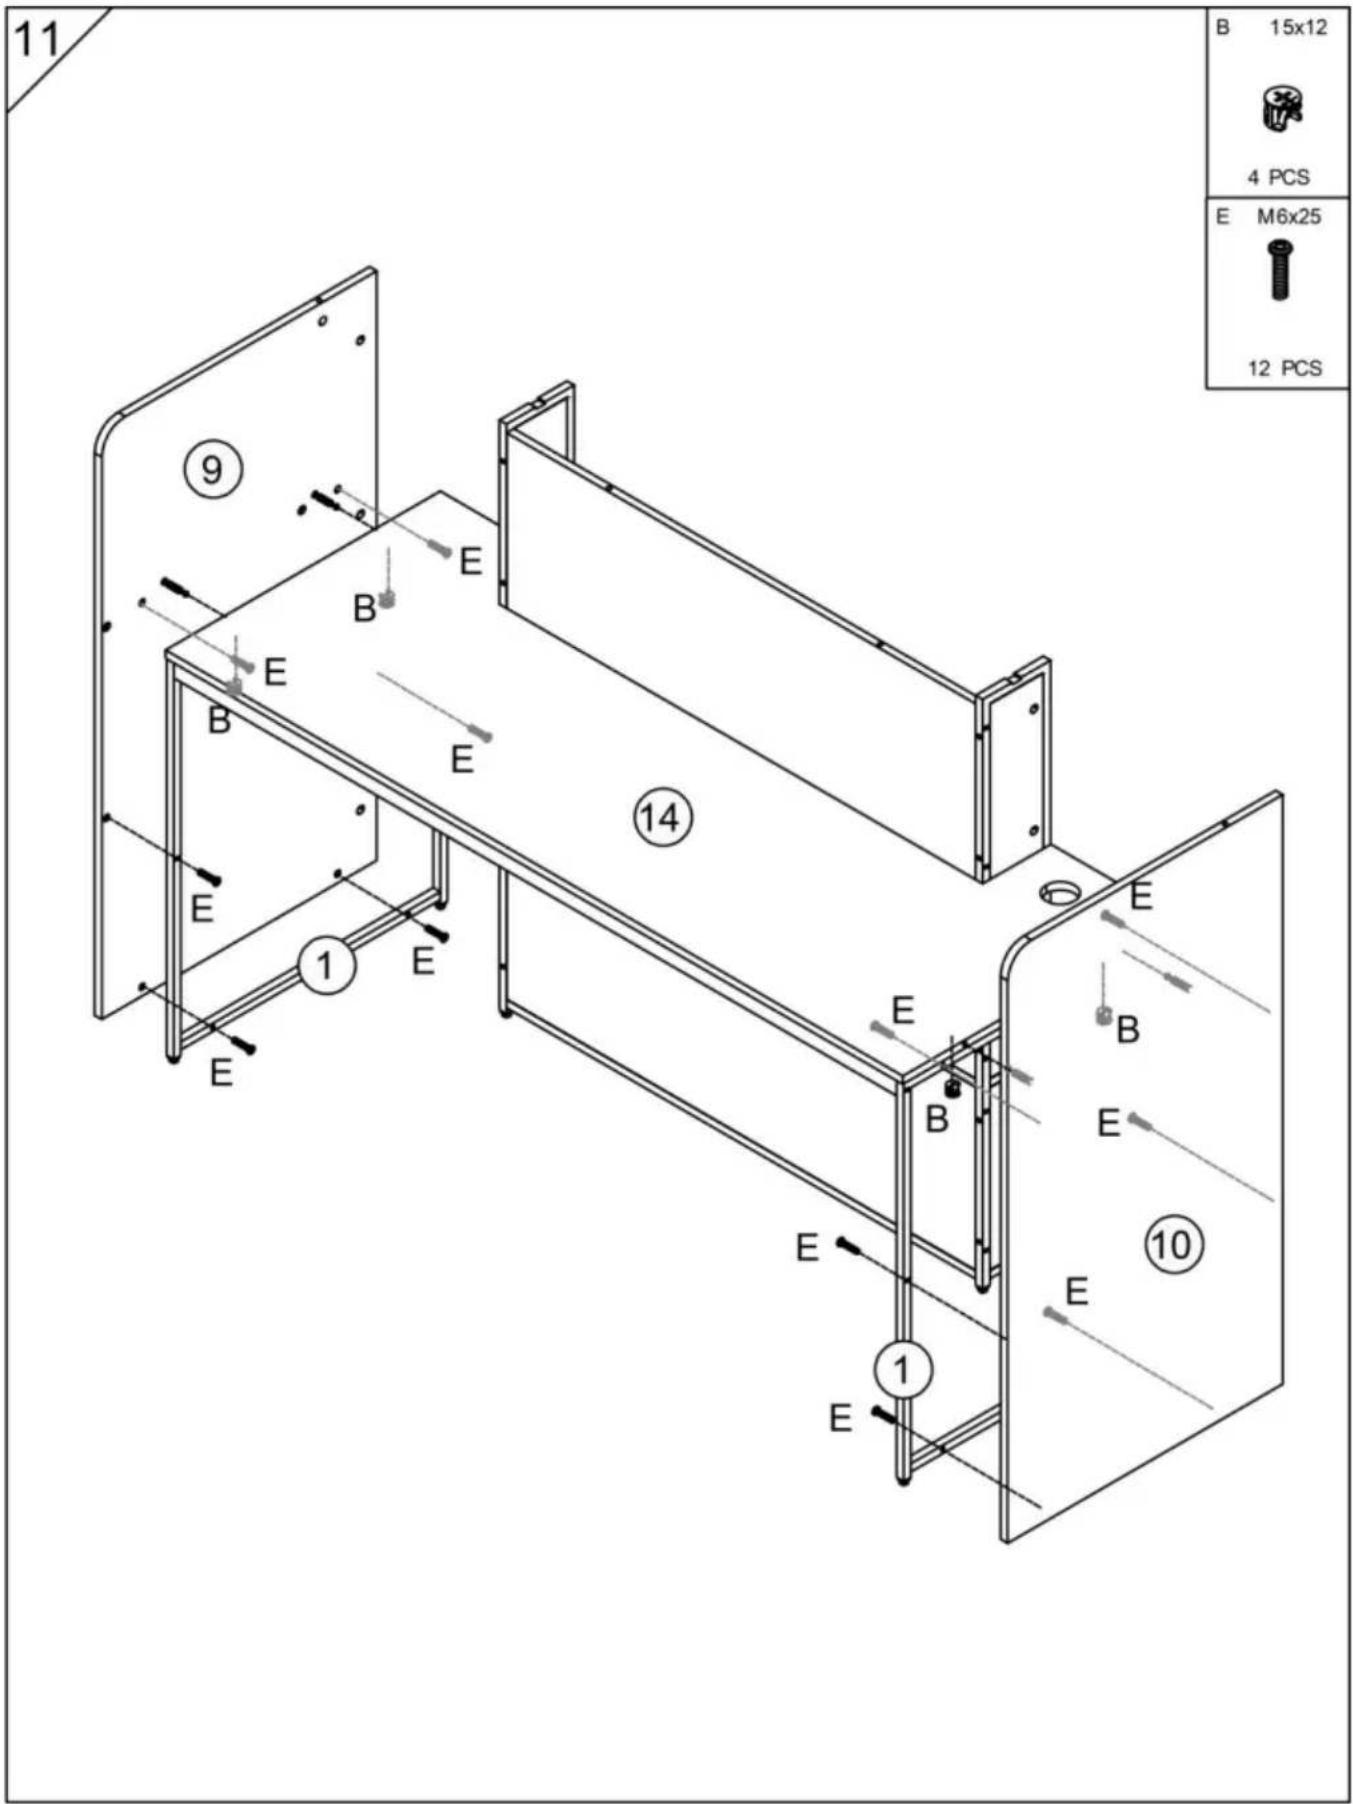
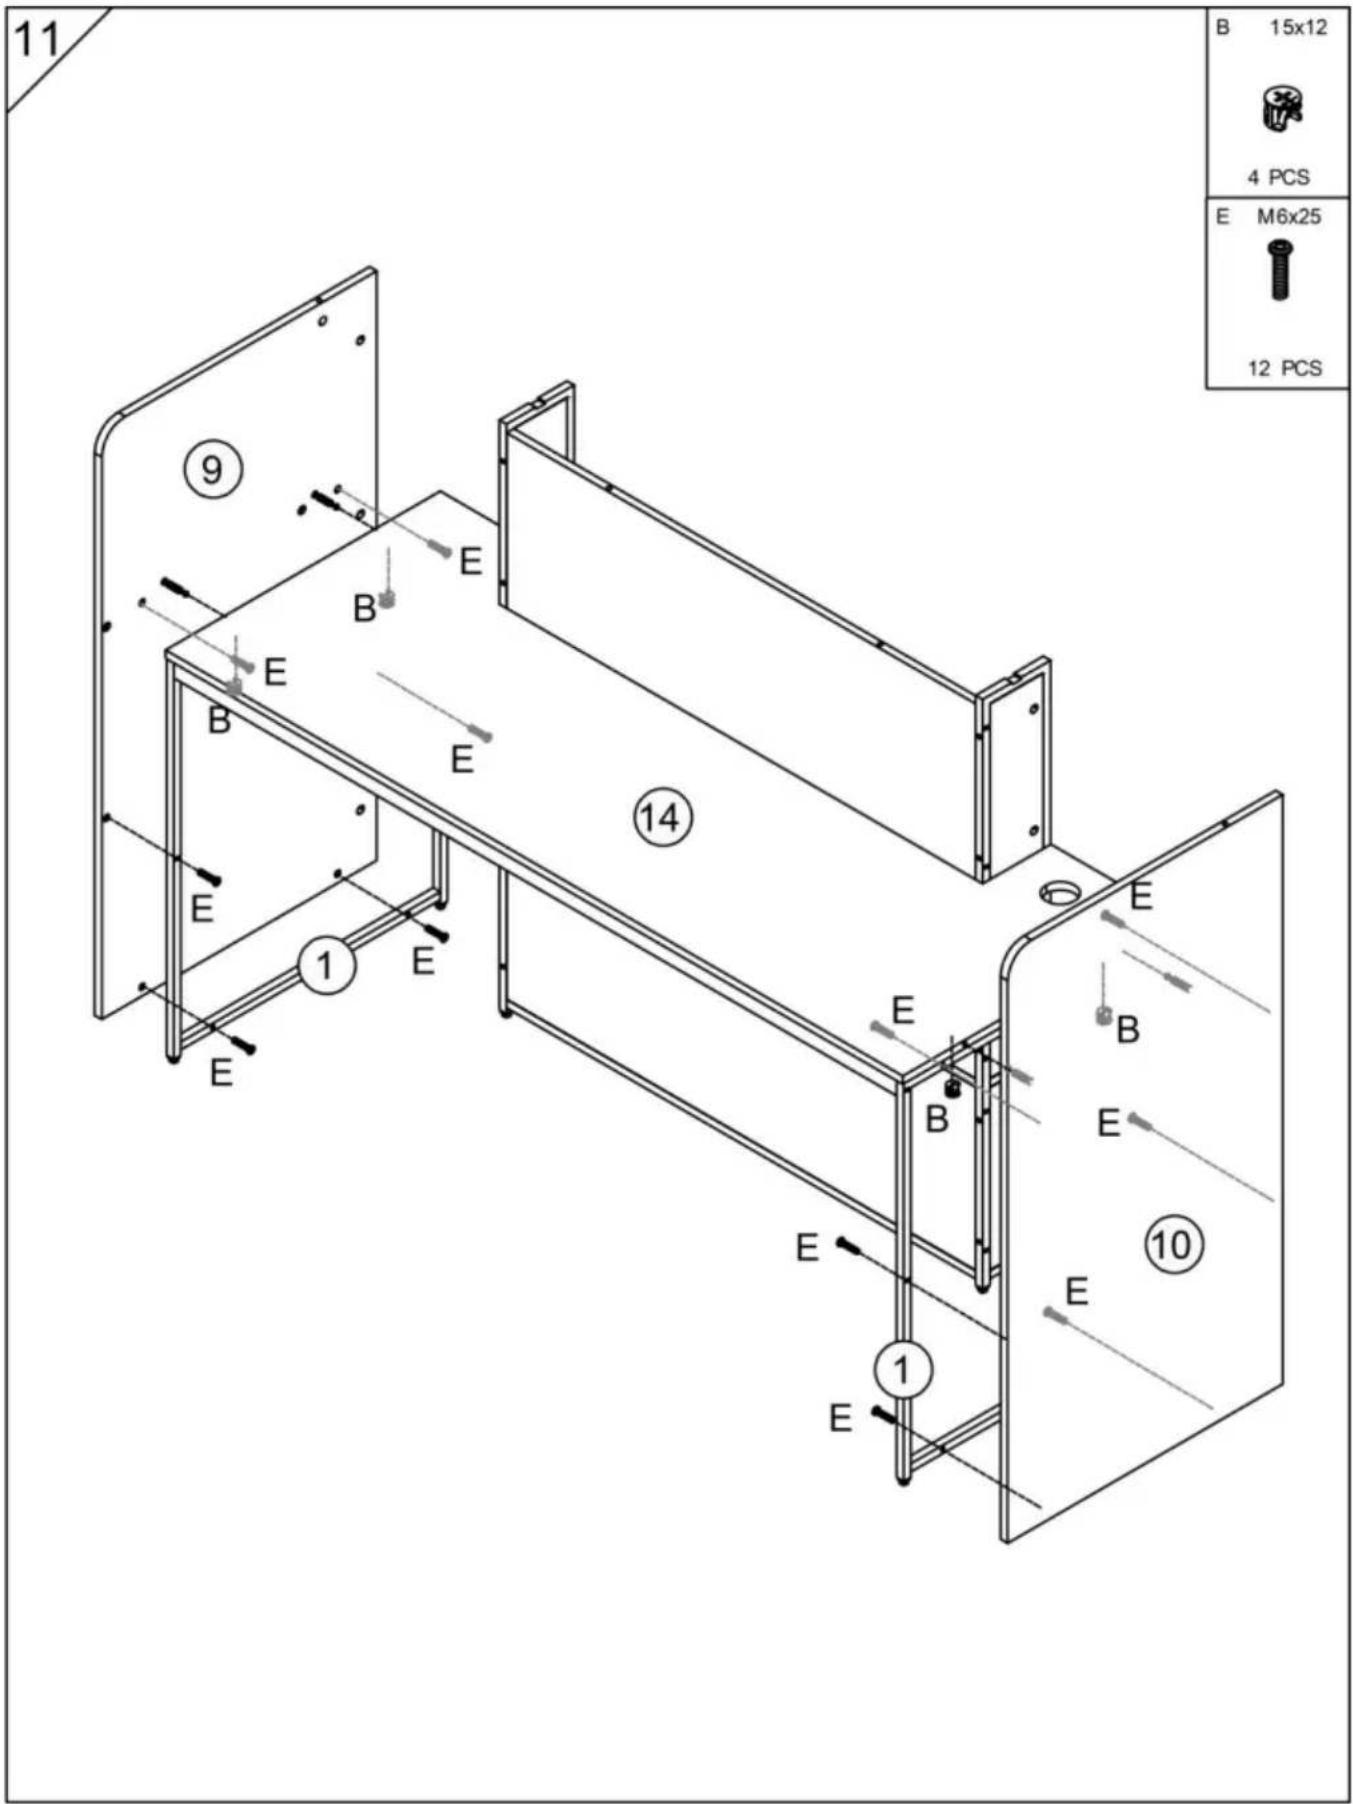
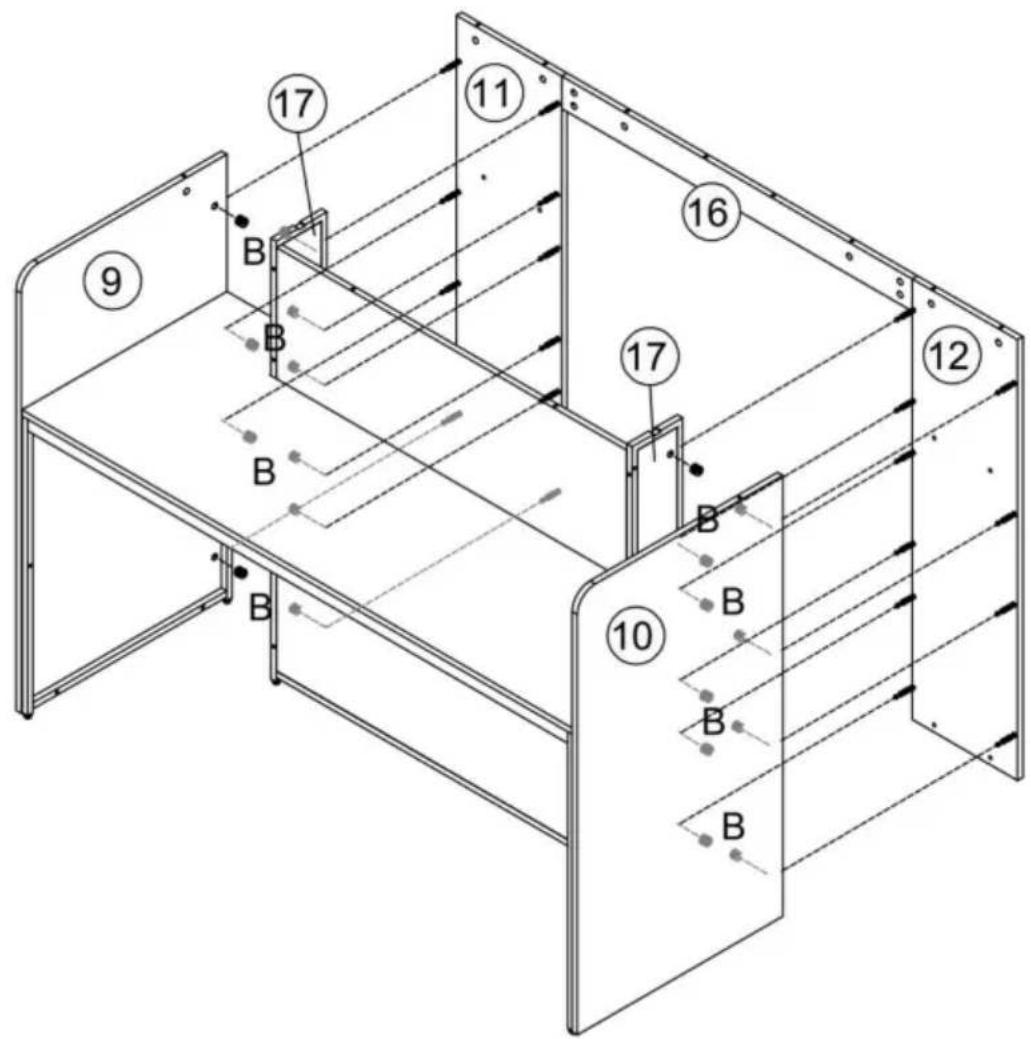
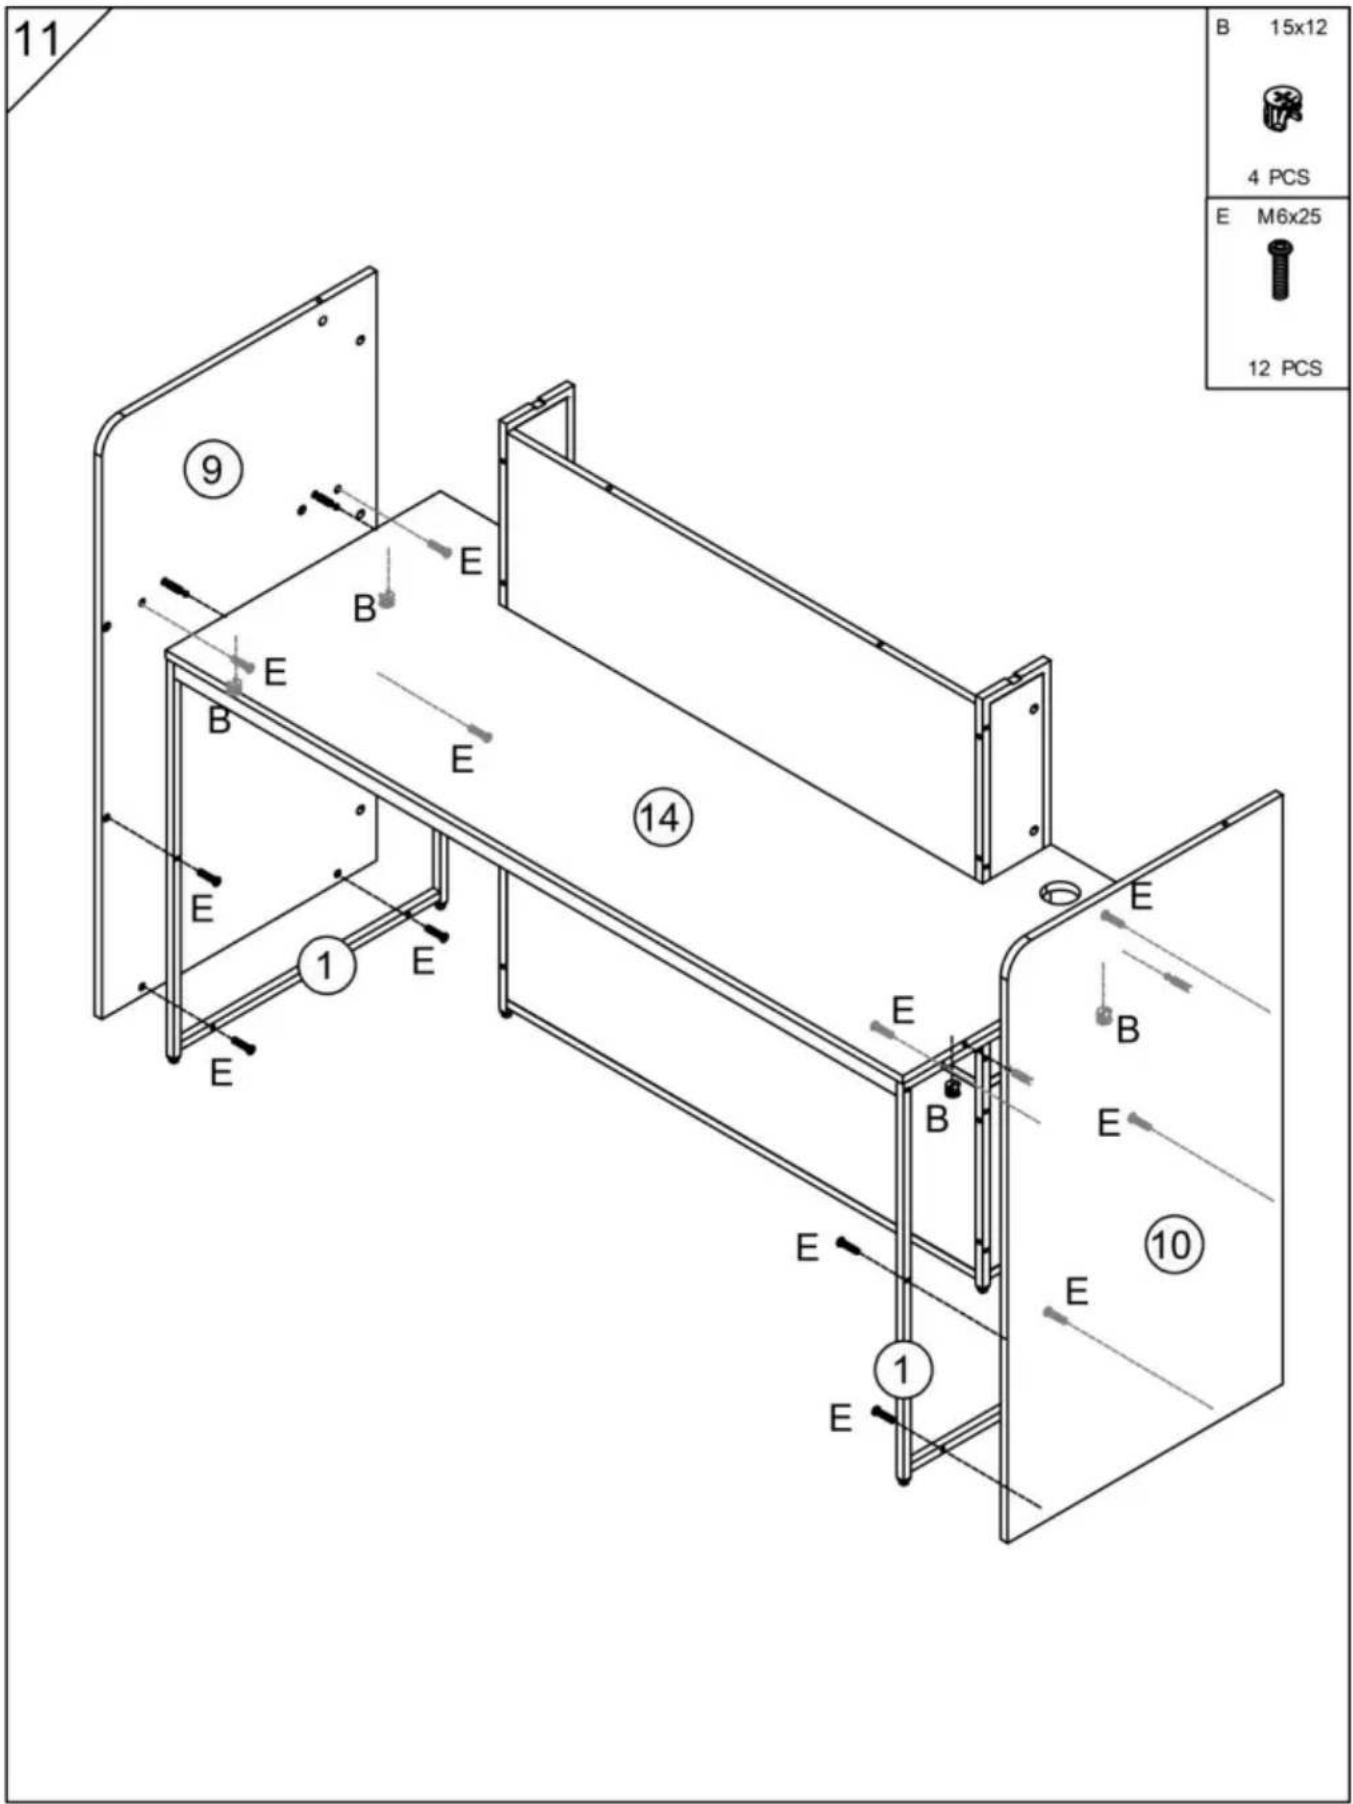
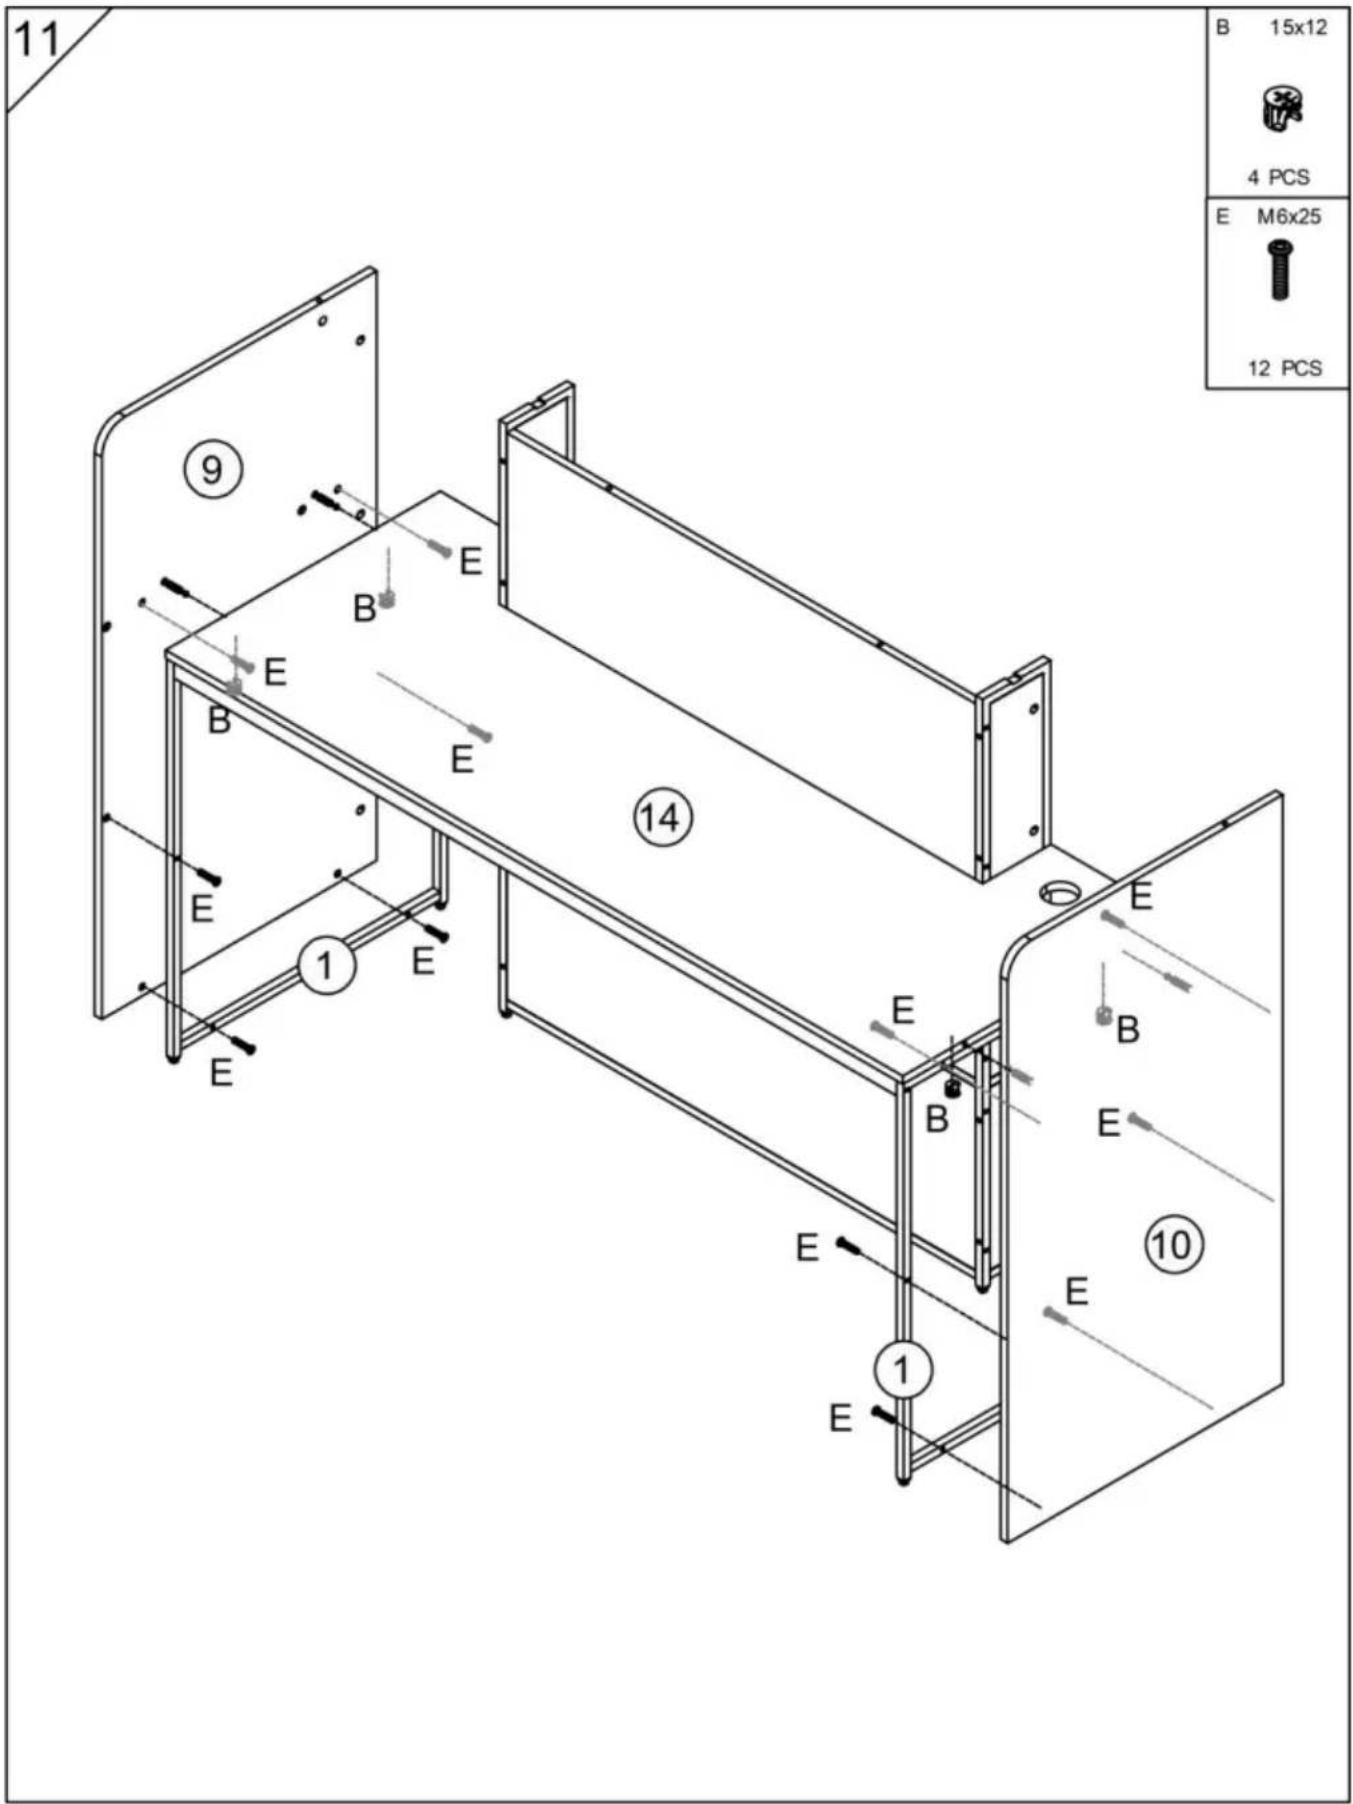
11 B 15x12 4 PCS E M6x25 12 PCS ⑨ B E E B E E ⑪ E 1 E E E B E B E E ⑩ 1 E E

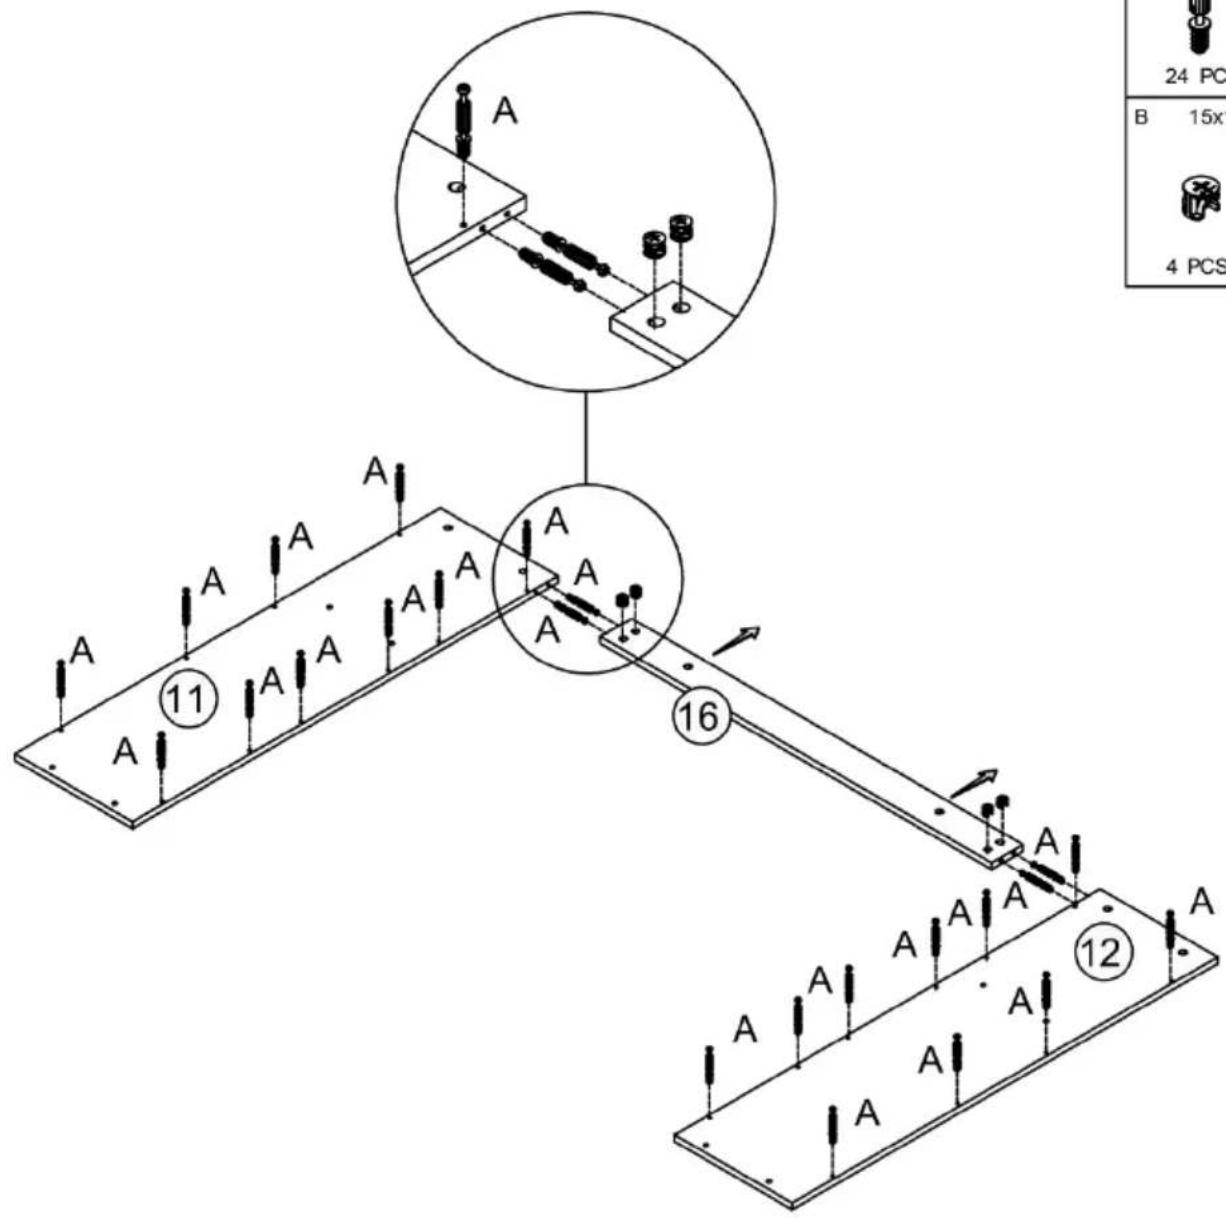
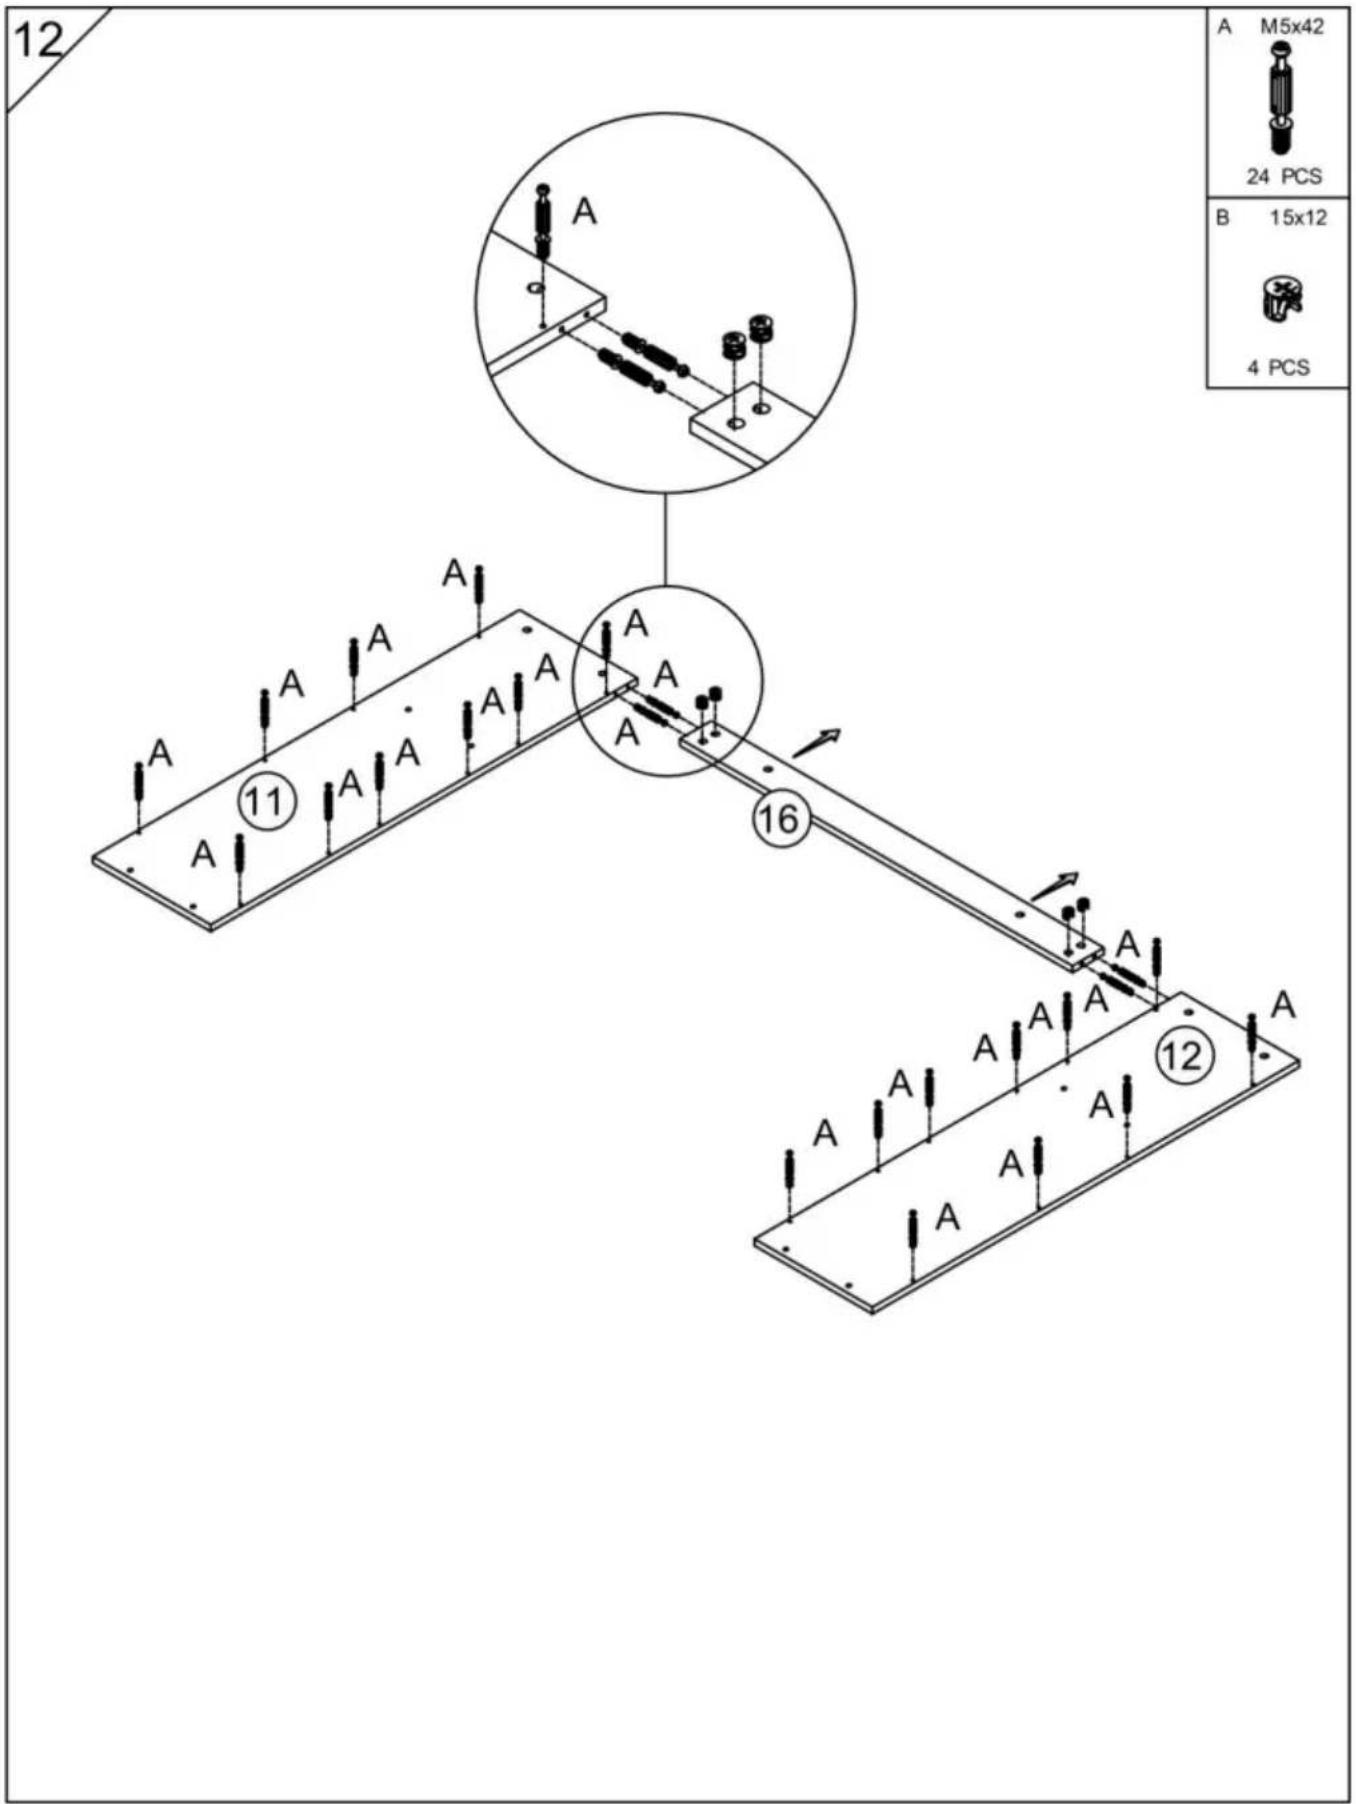
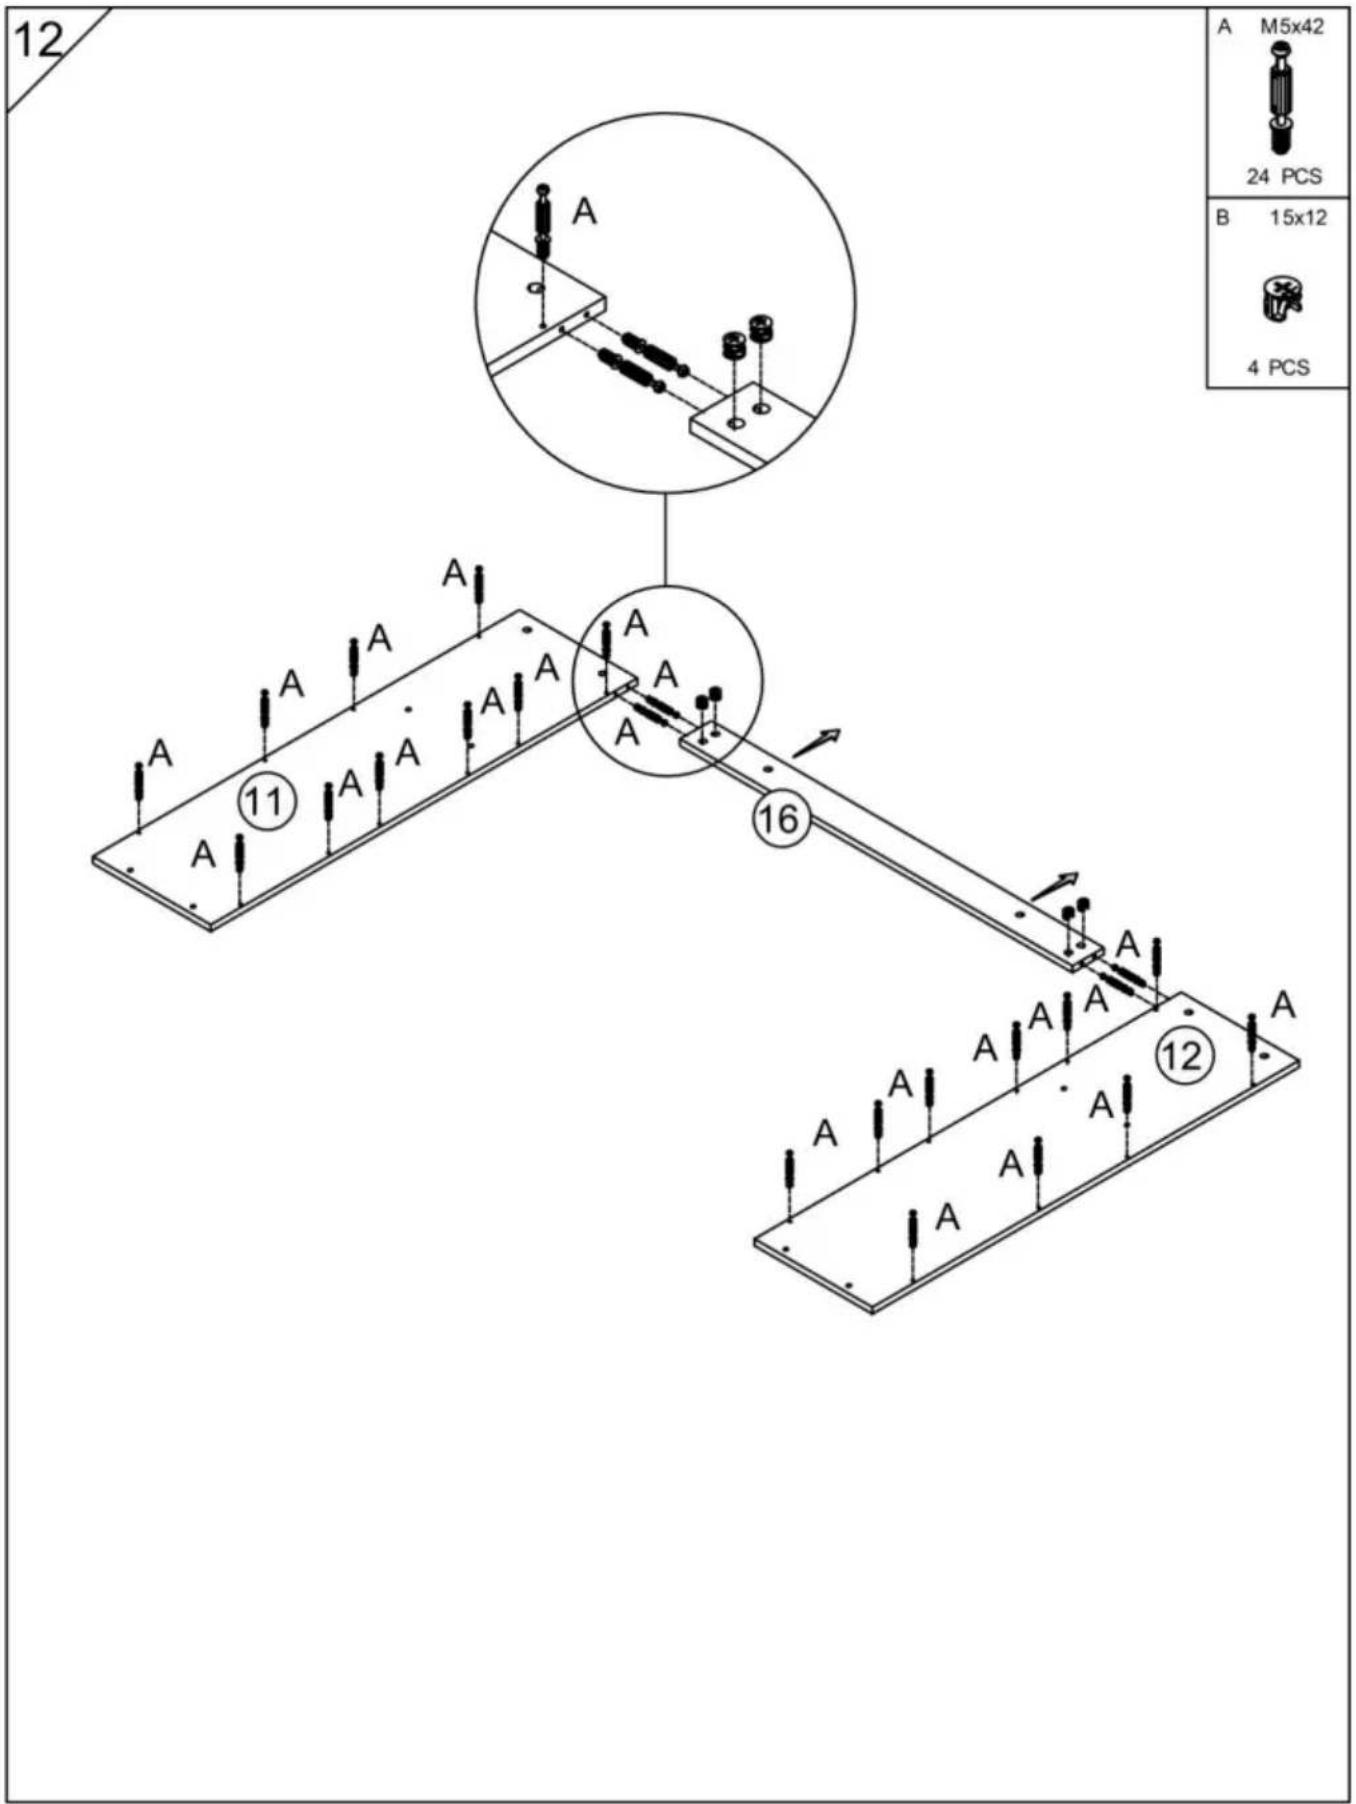
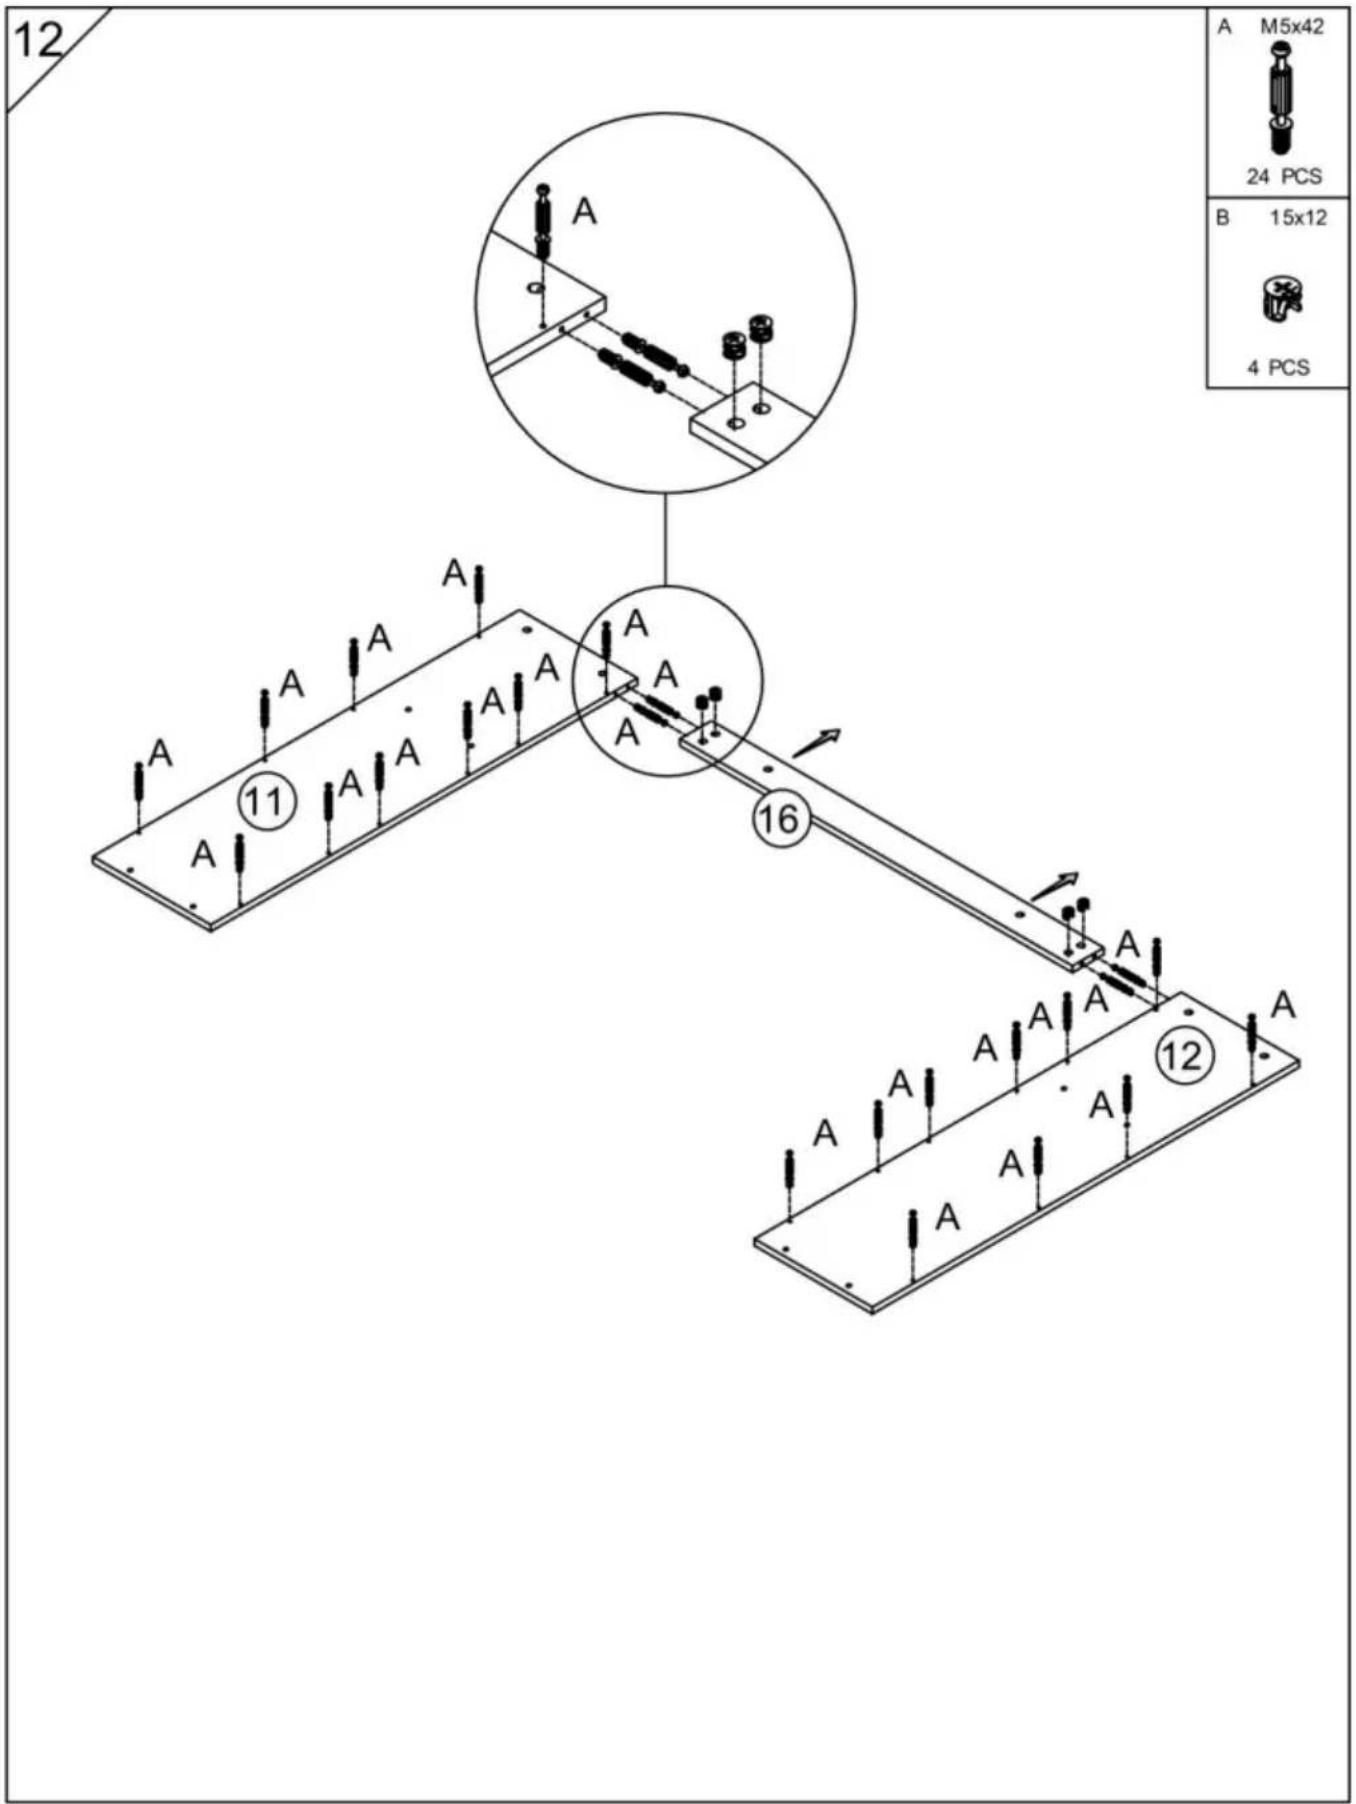
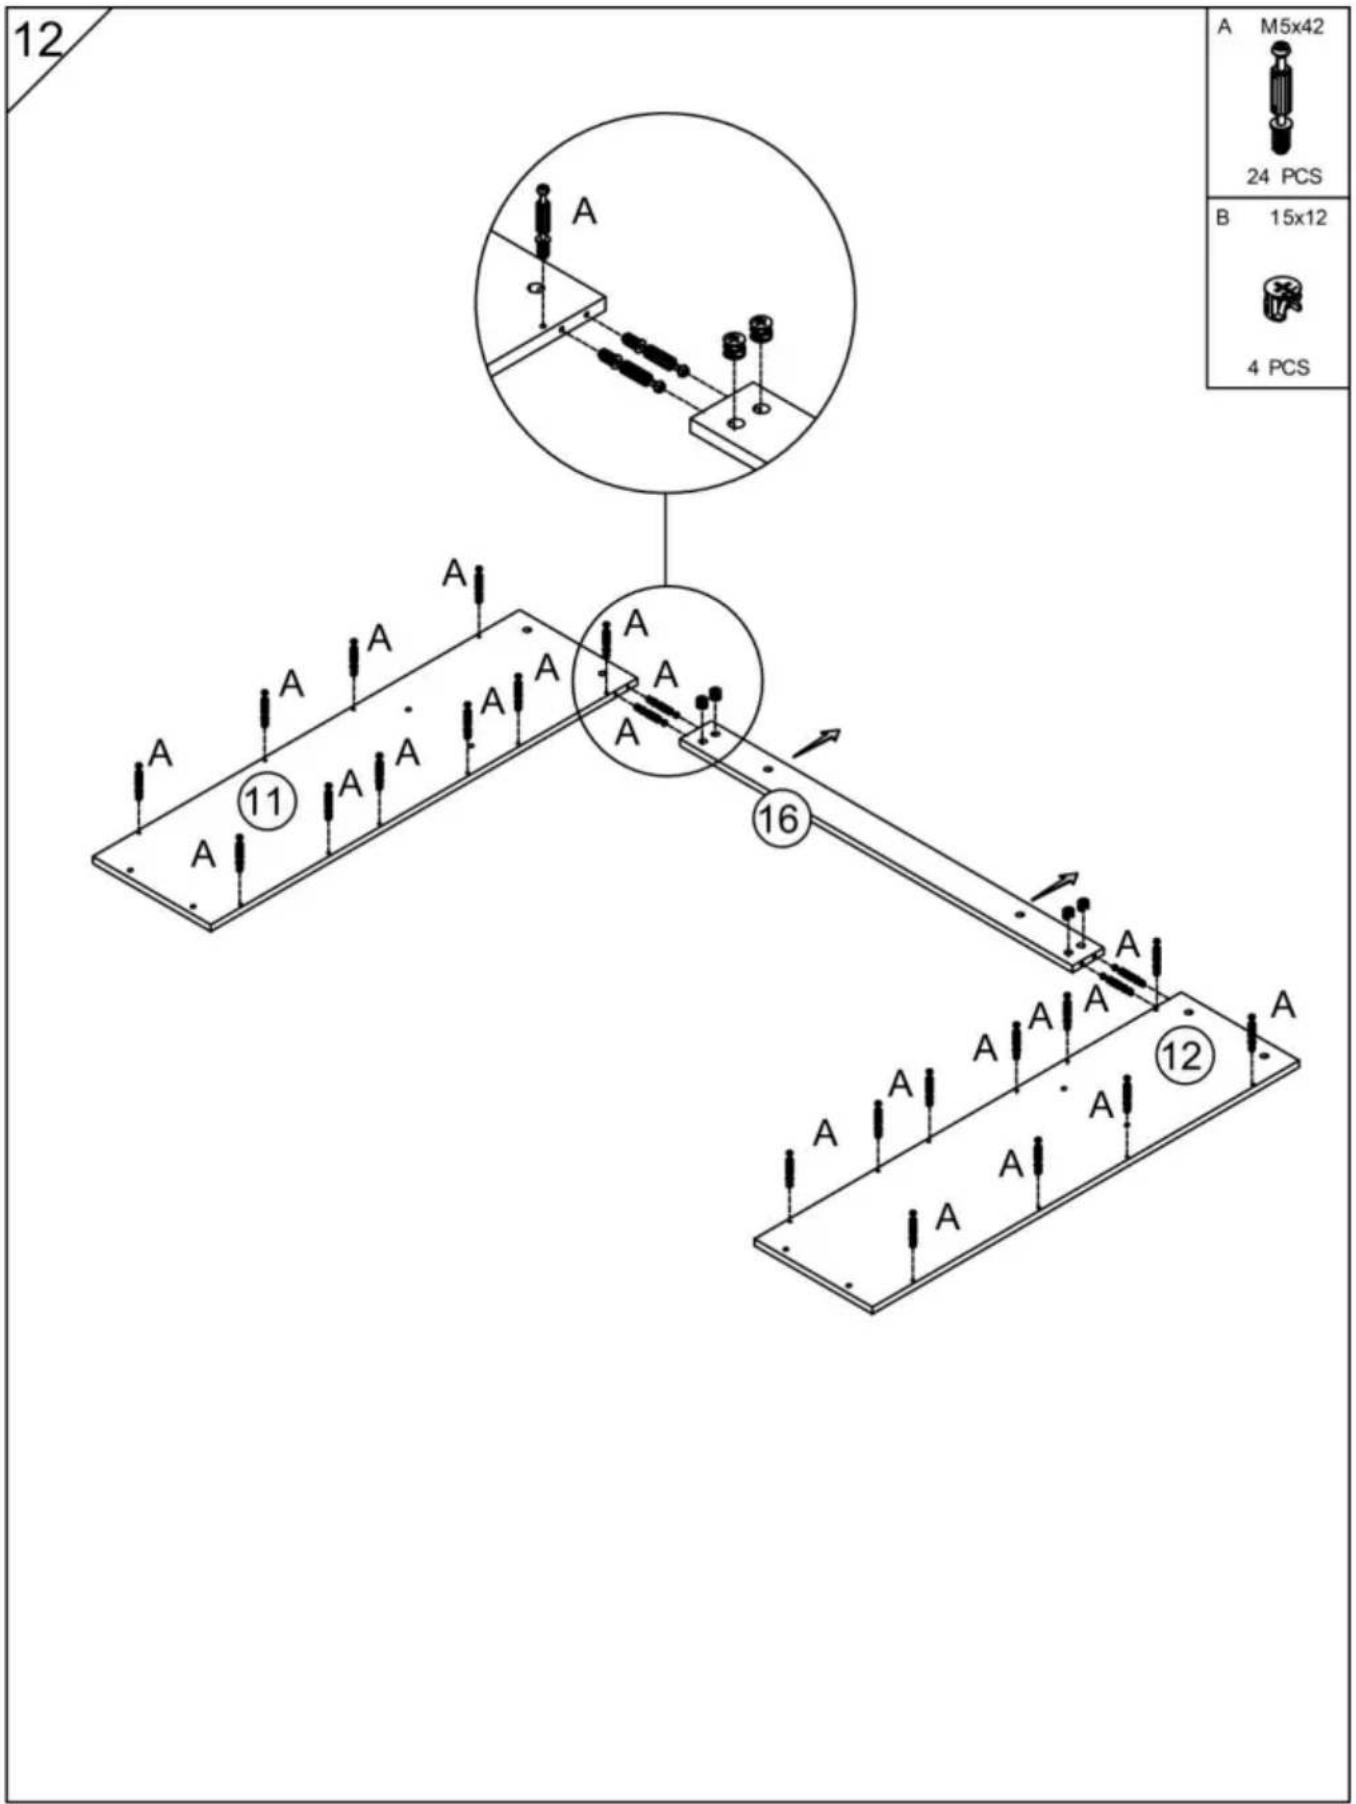
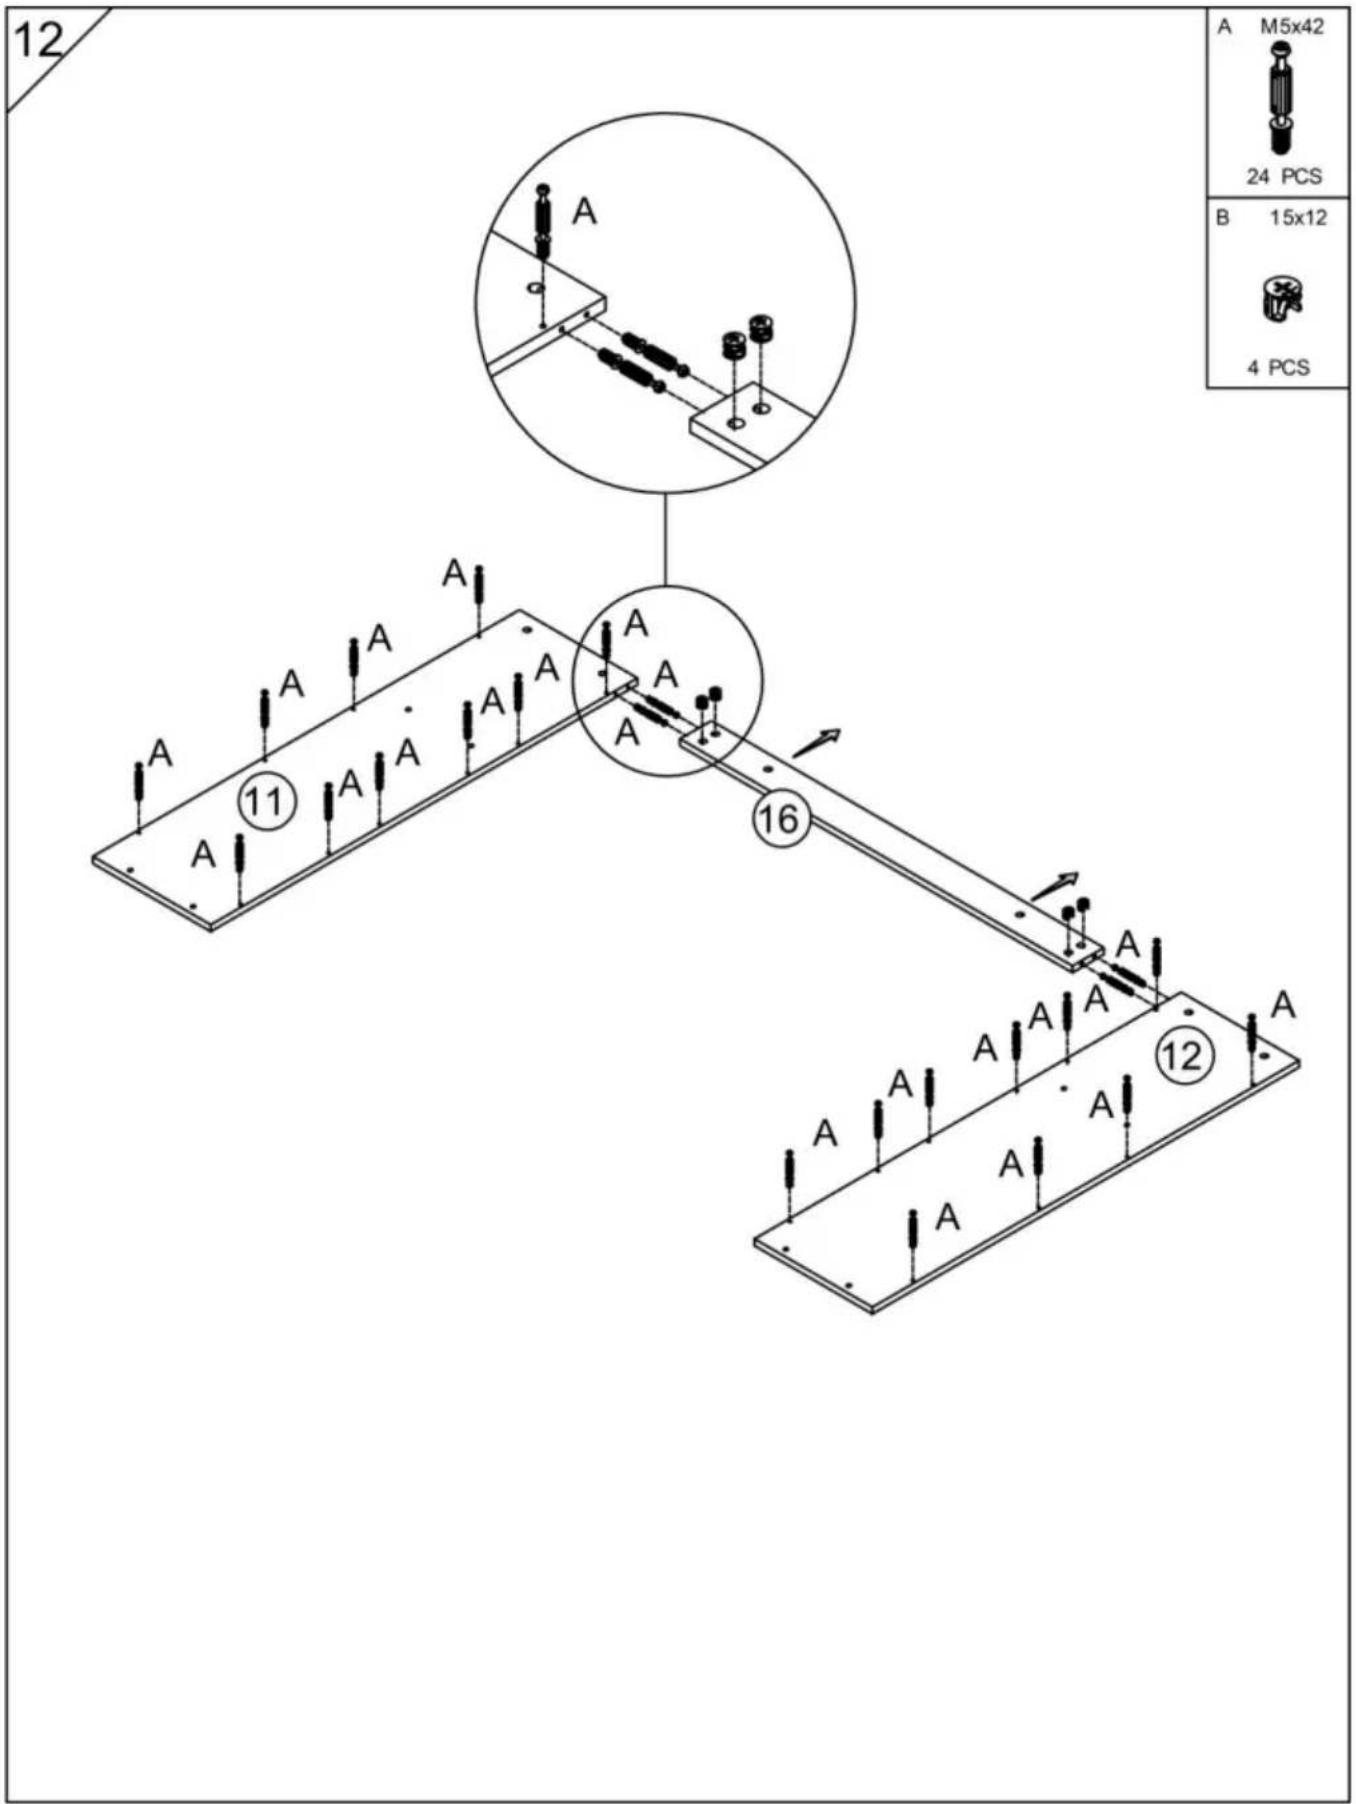
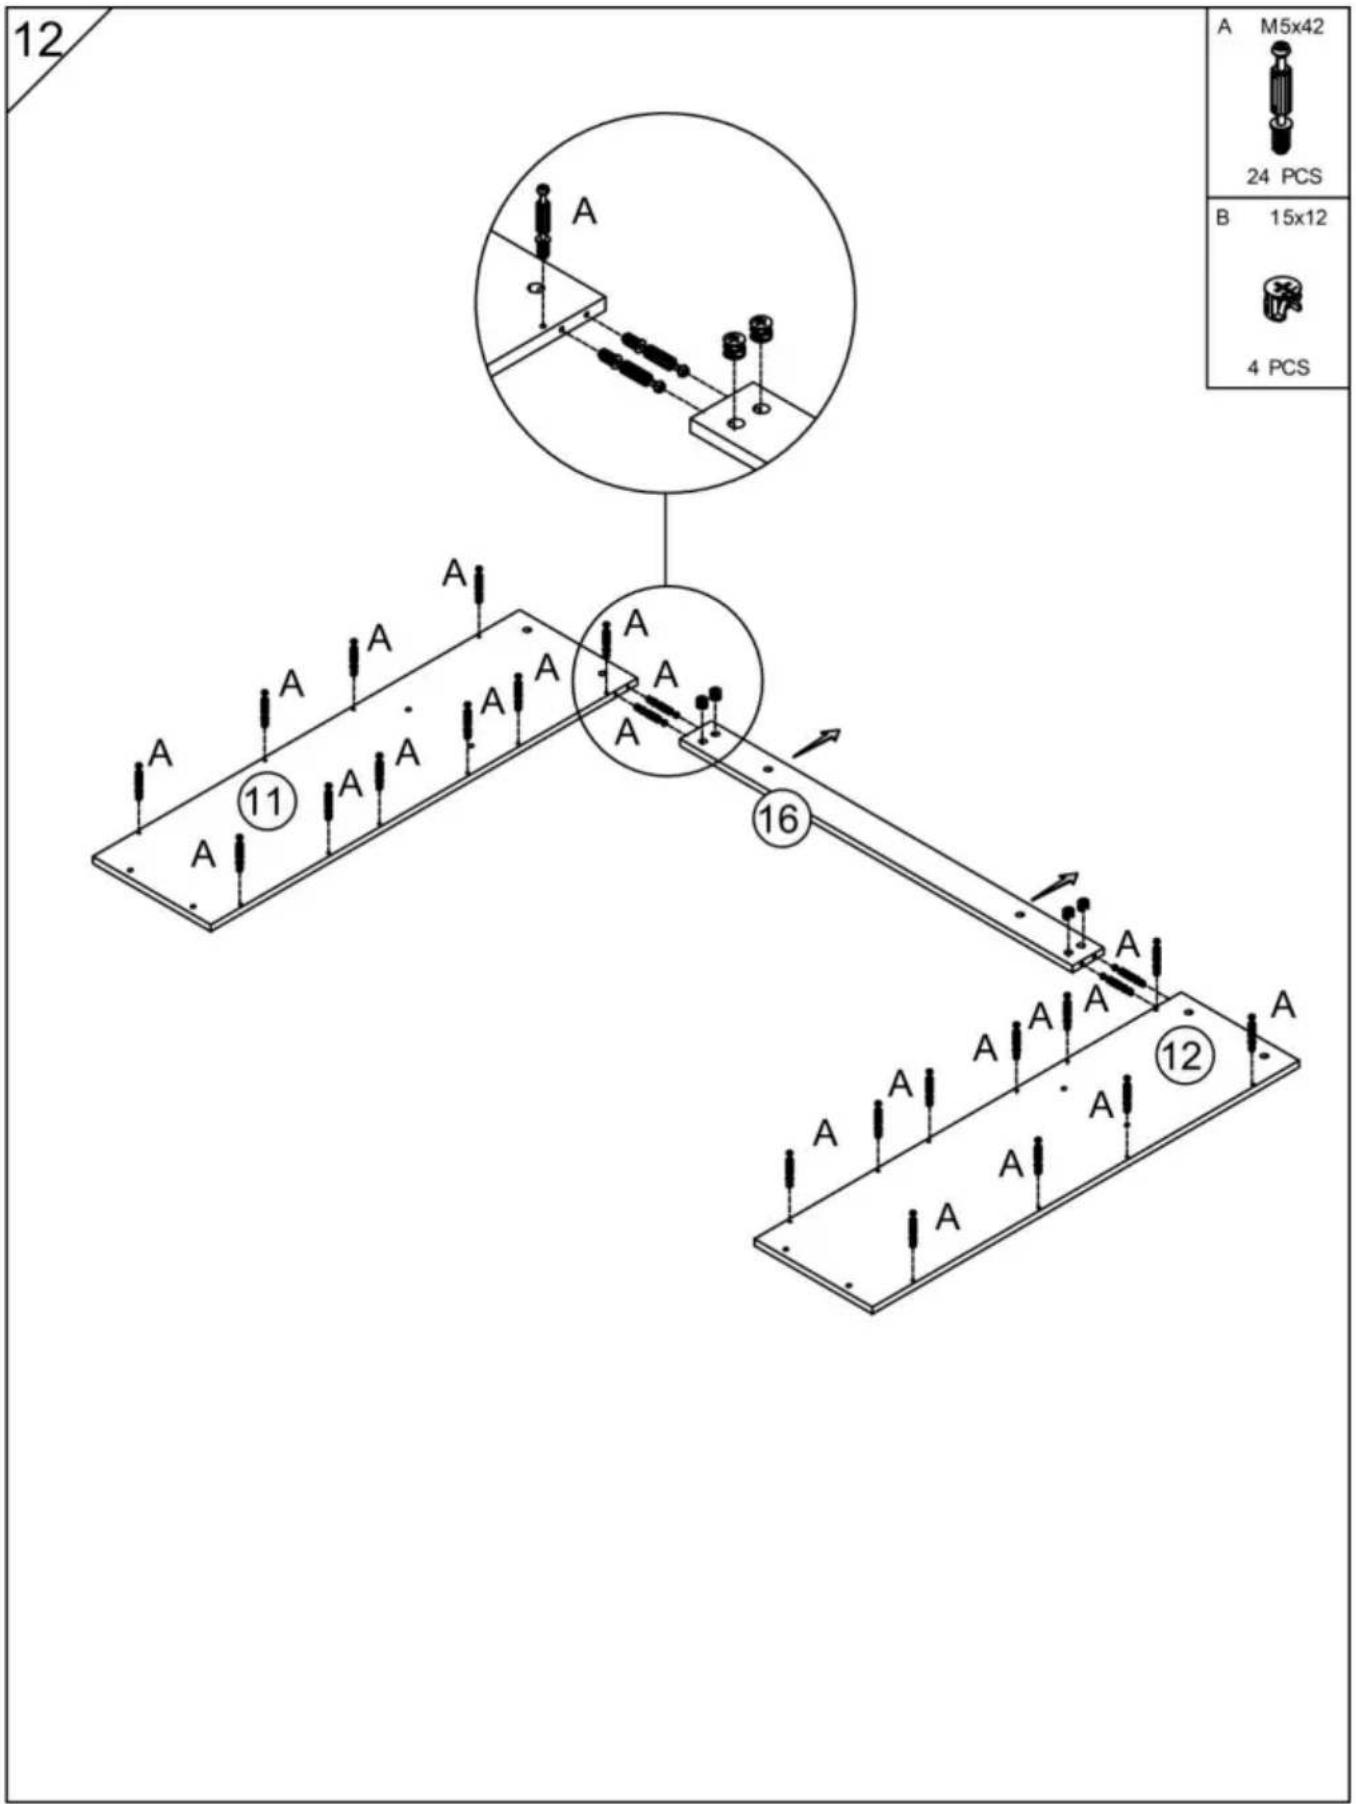
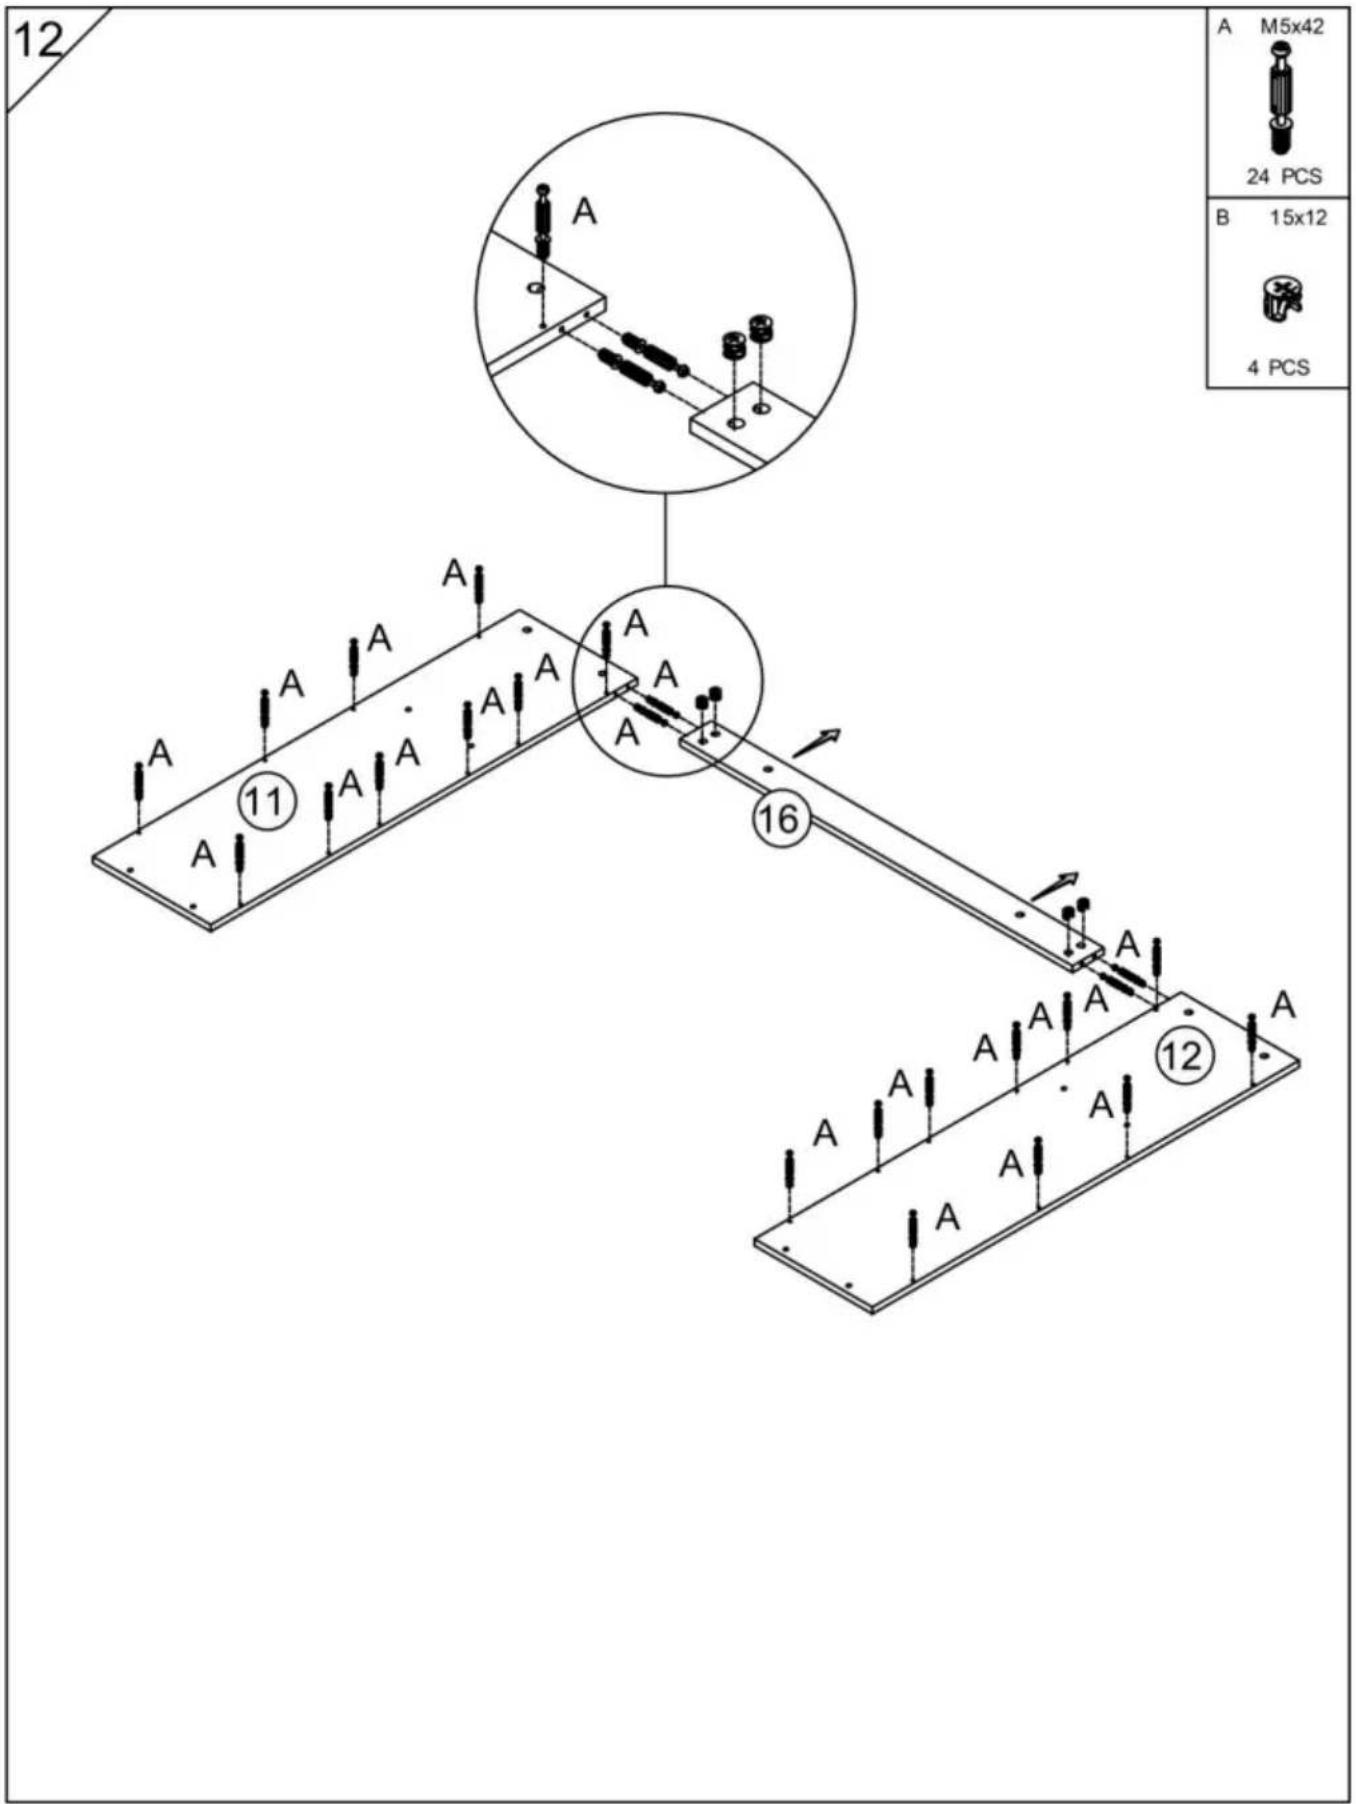
12A 24 PC B 15x1 4 PCS A A A A A A A 16 12 A A A A A A A

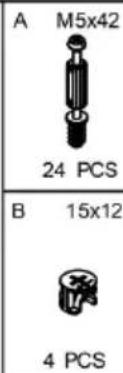
A M5x42 24 PCS B 15x12 4 PCS

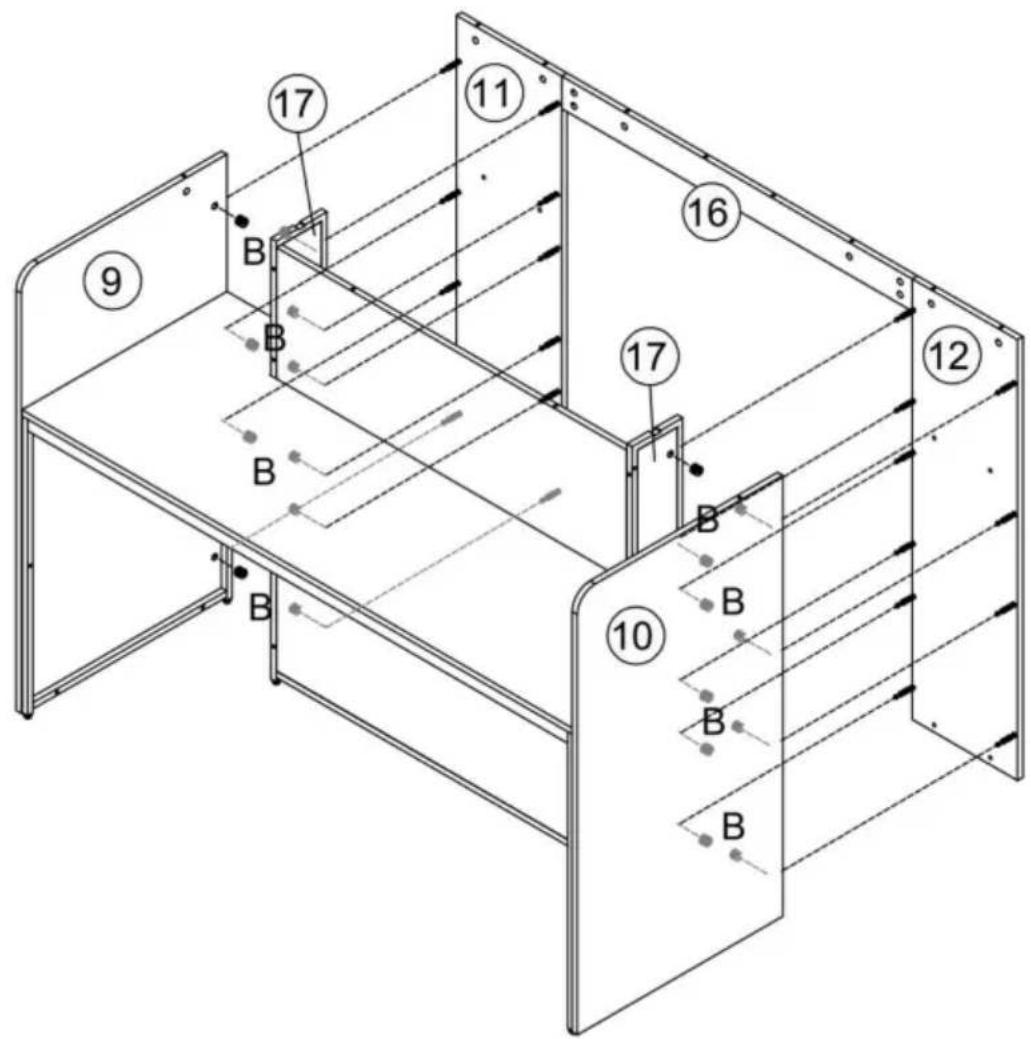
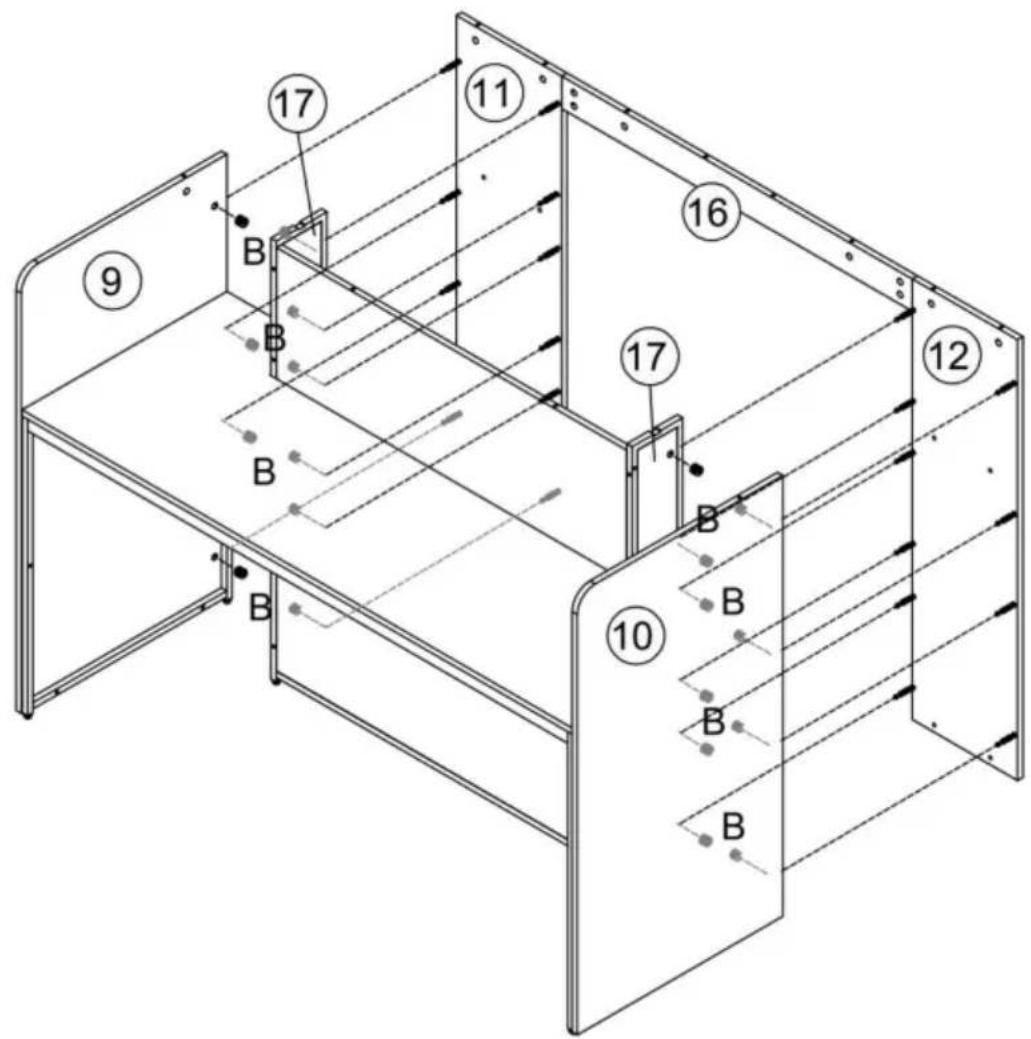
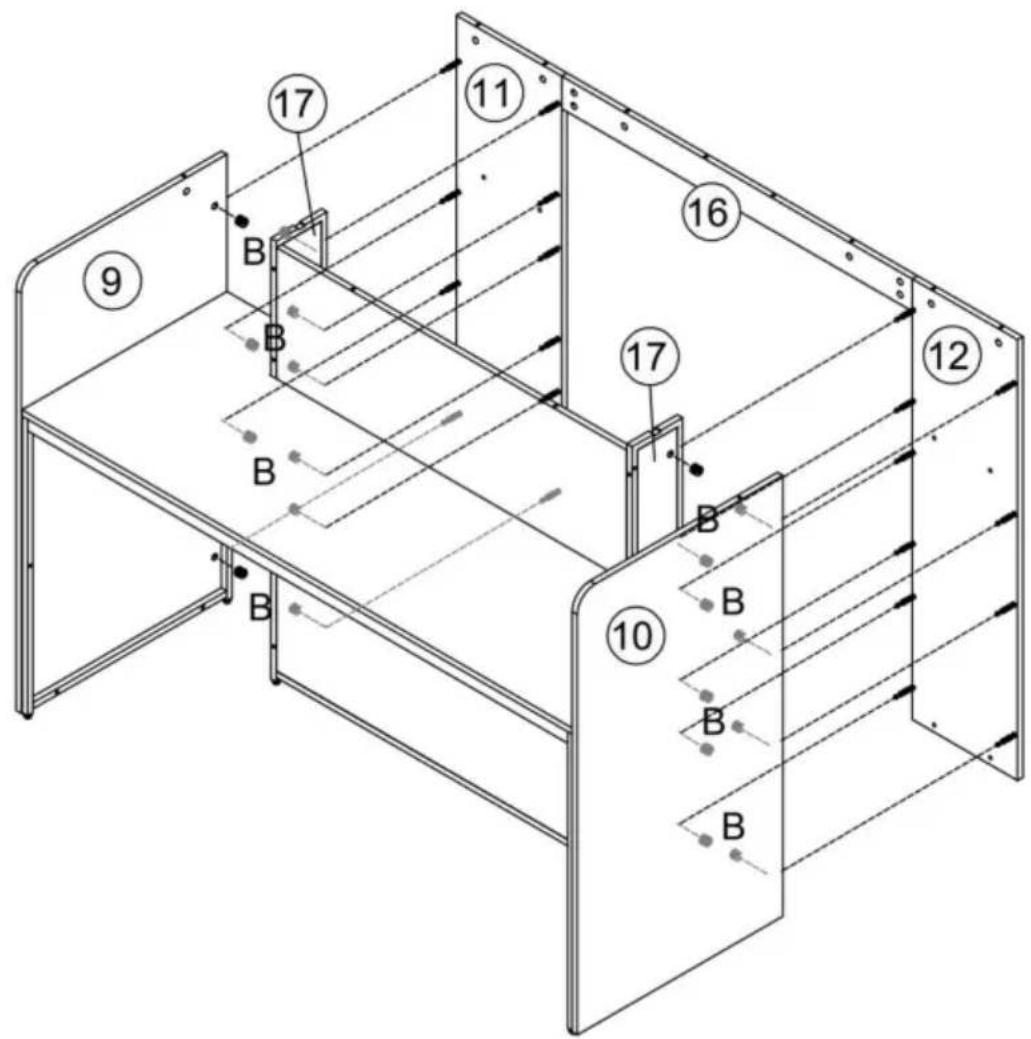
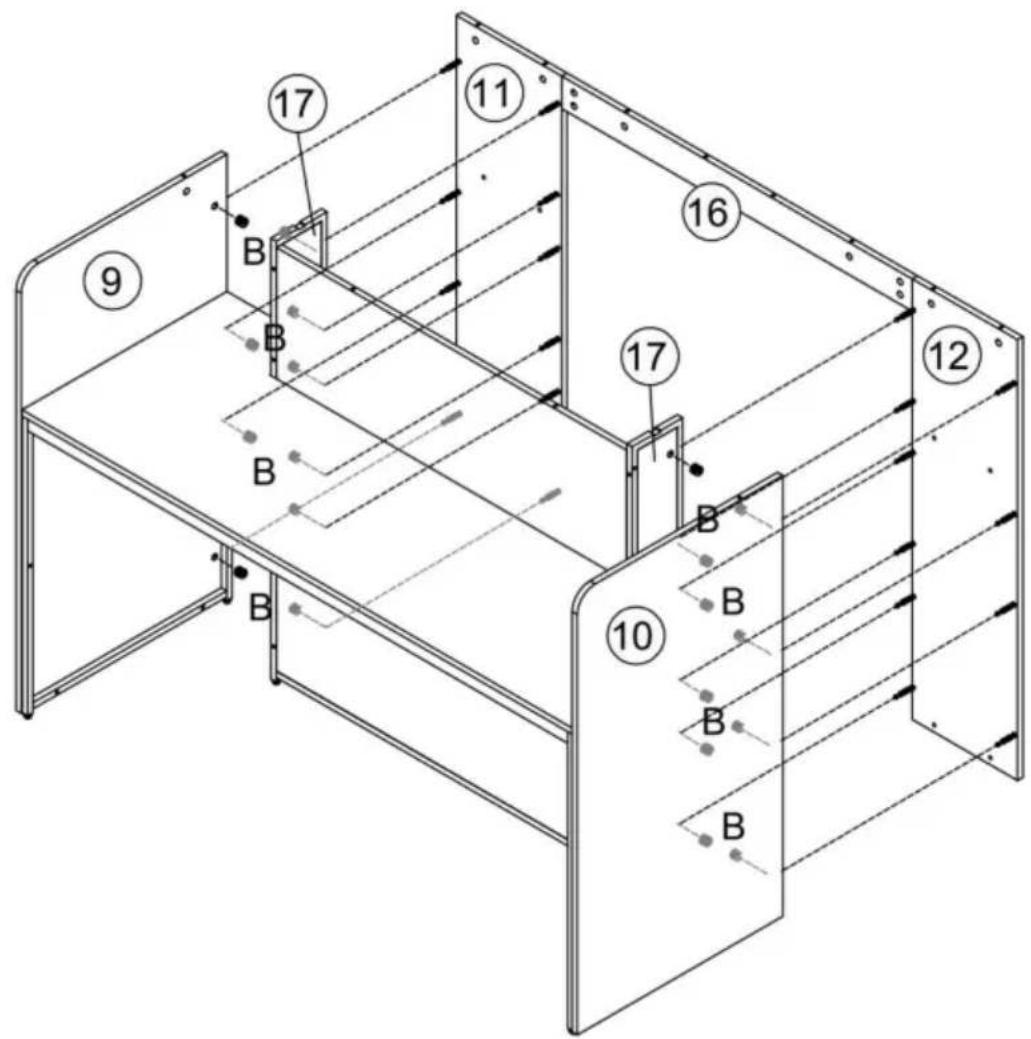
13

B 15x12

Vevor SS-602 - ASSEMBLY STEP - 20

20 PCS

Technical diagram of a 3D architectural structure with numbered components, likely for architectural or engineering purposes.

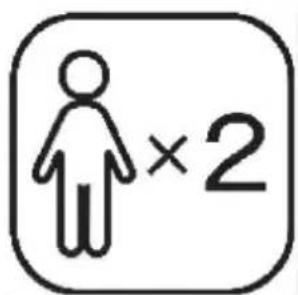
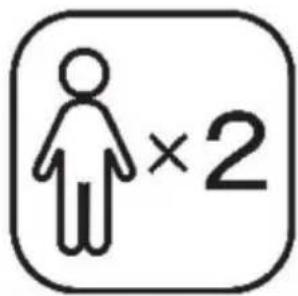
Symbol image showing a human figure with an '×2' label inside a rounded square, likely indicating a multiplication or comparison.

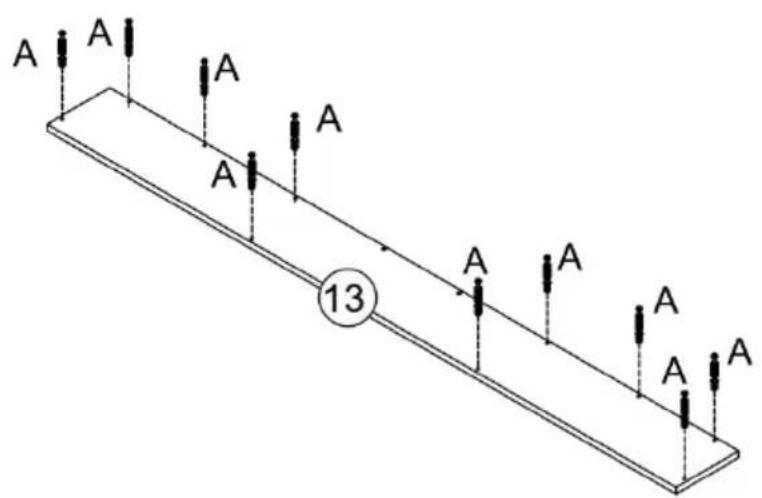
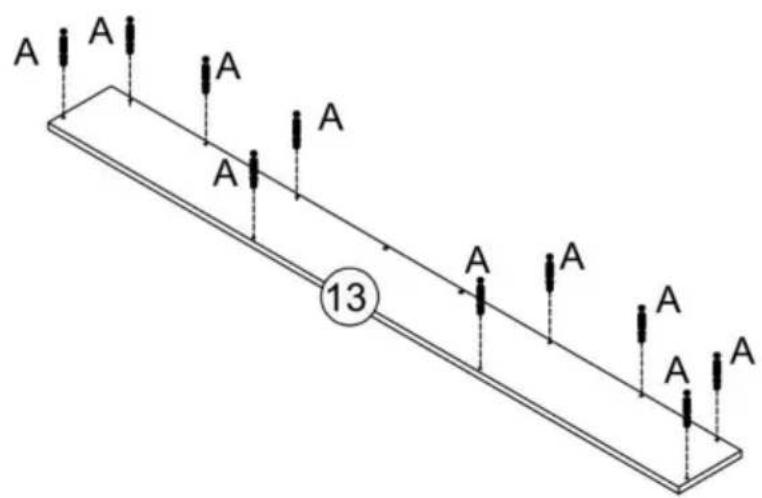
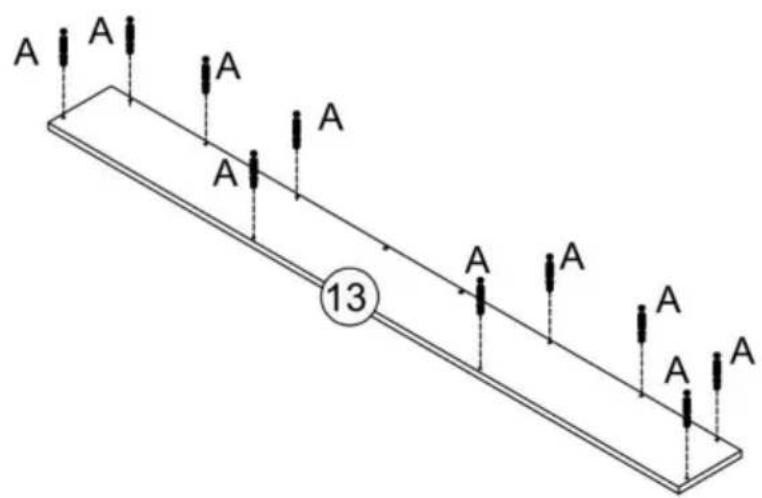
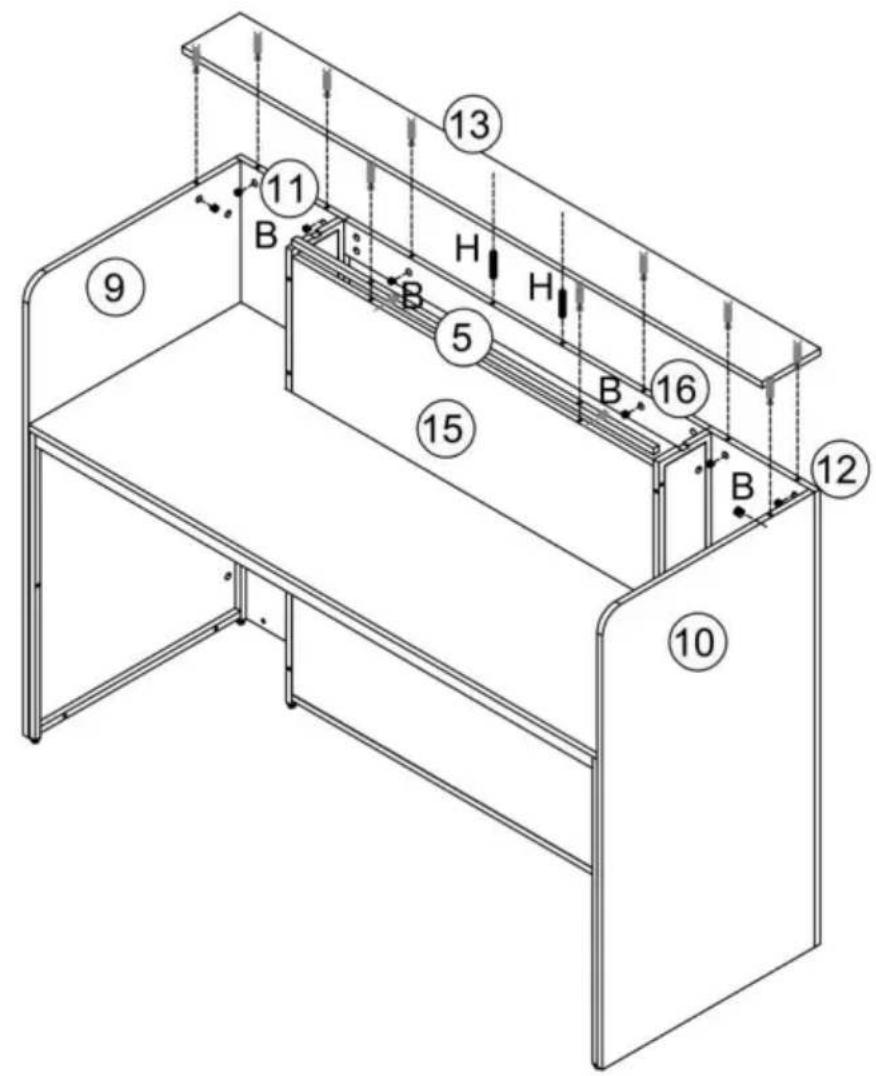
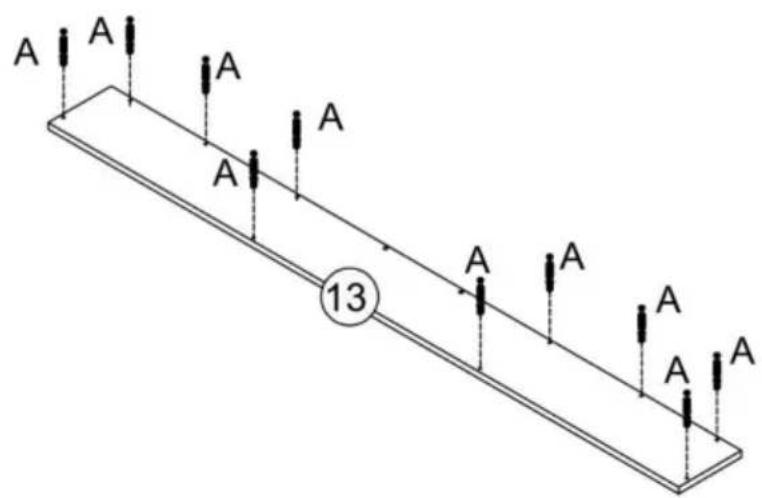
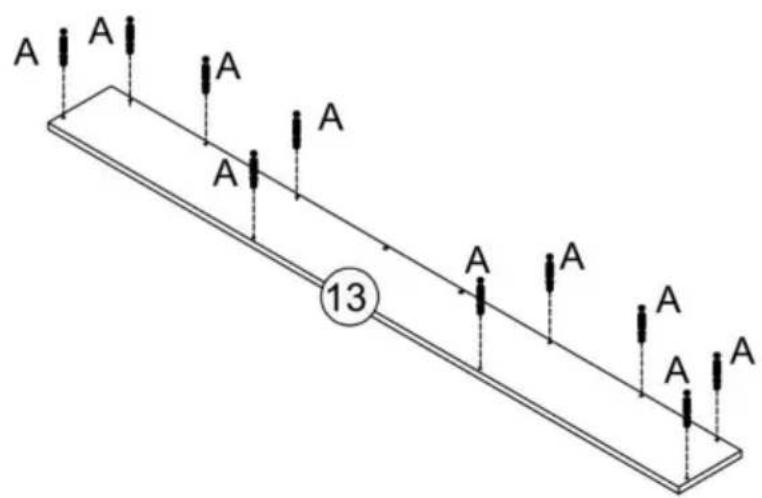
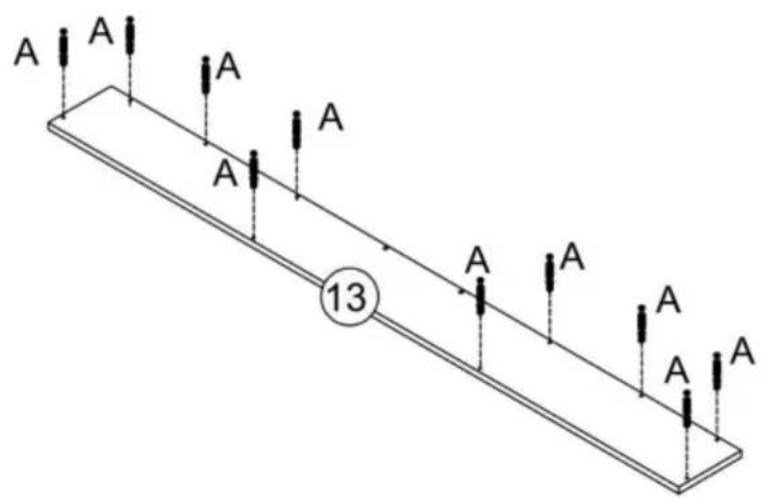
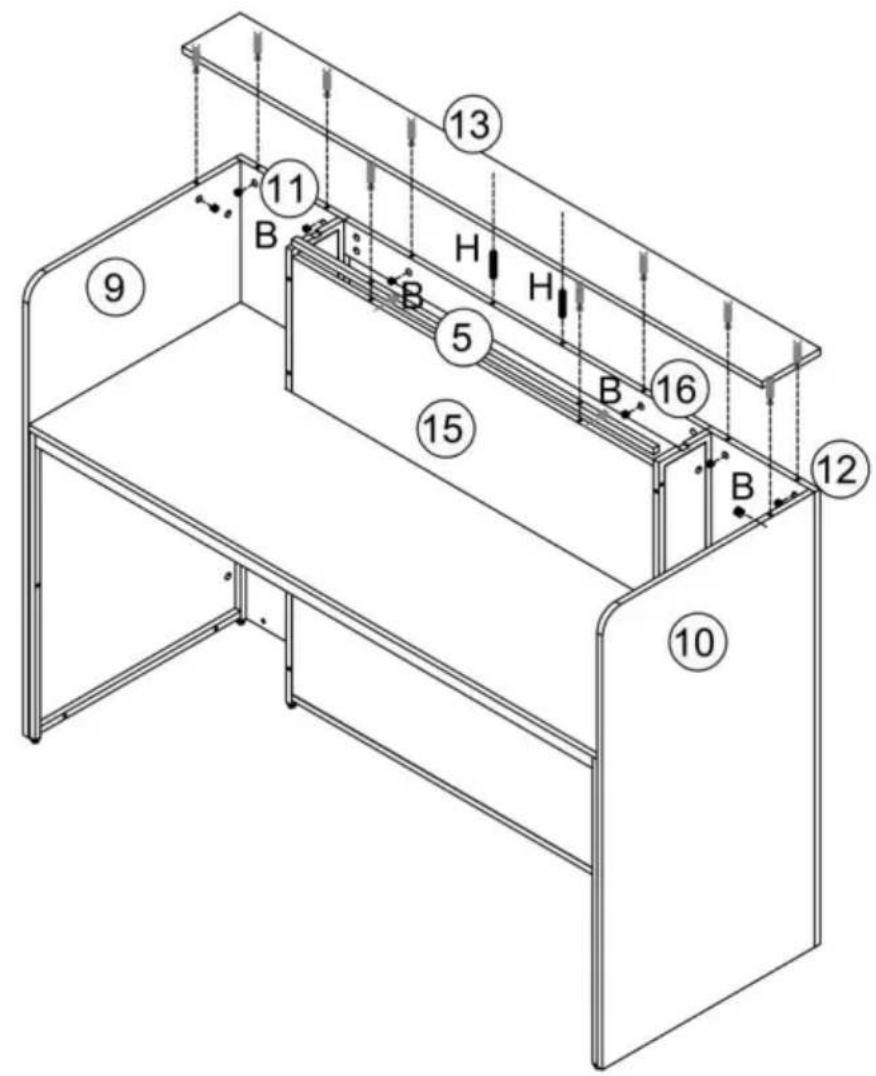
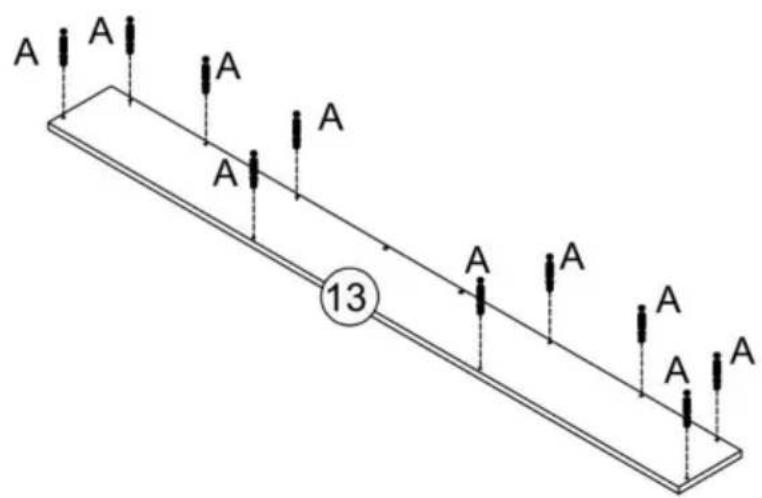
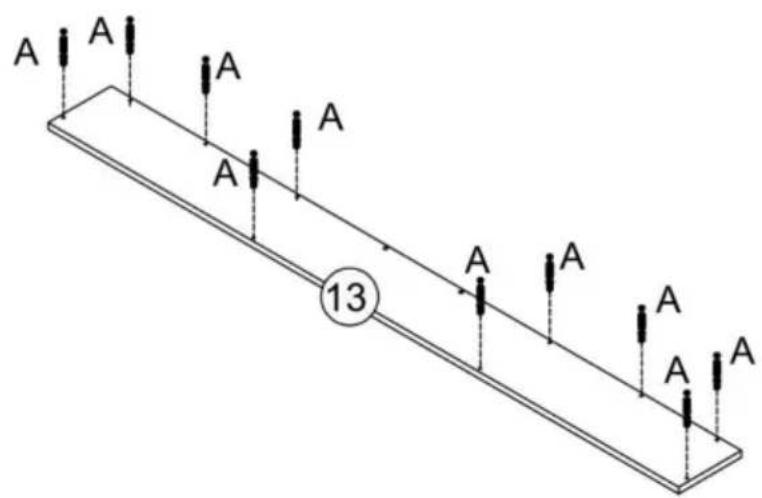
14A A A A A A 13 A A A A A

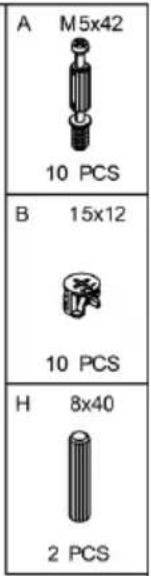
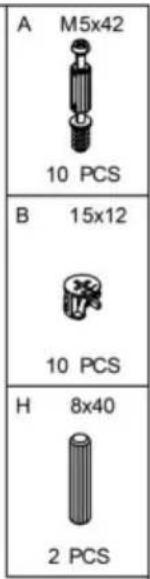
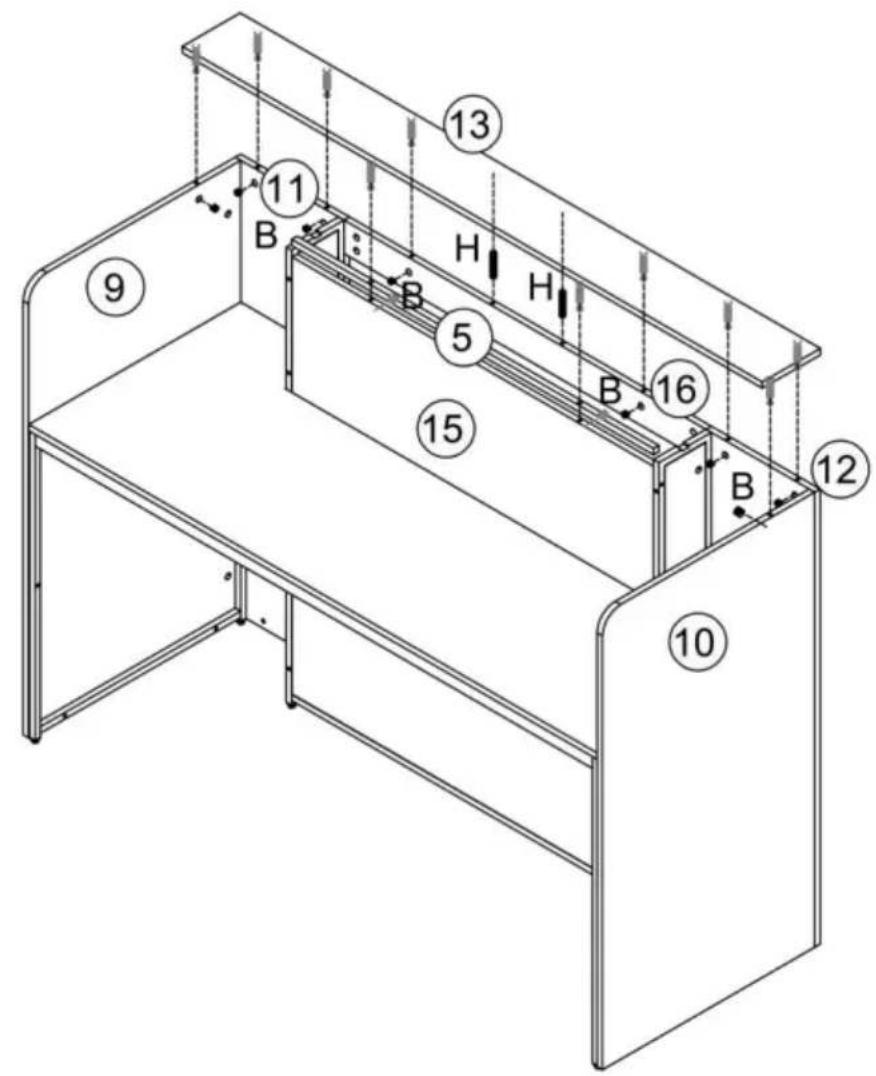
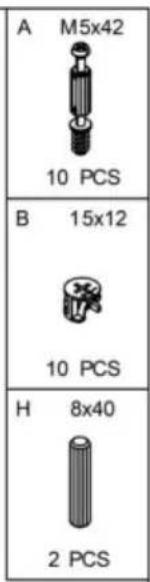
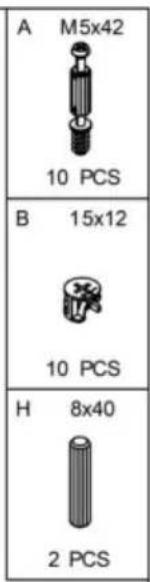
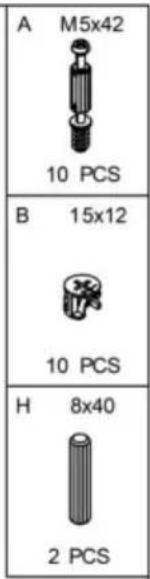
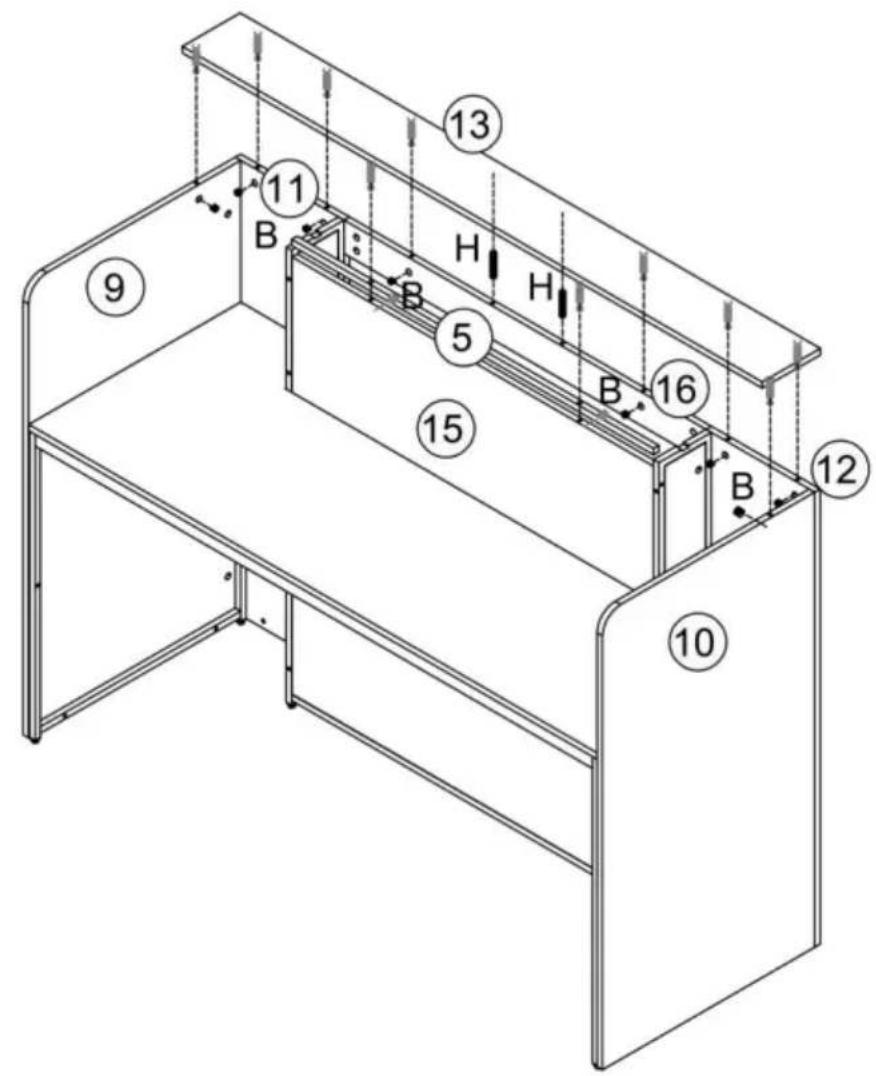
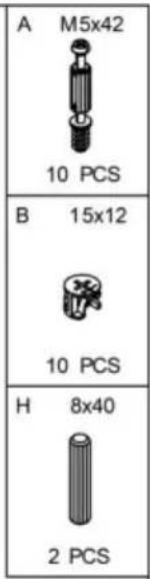
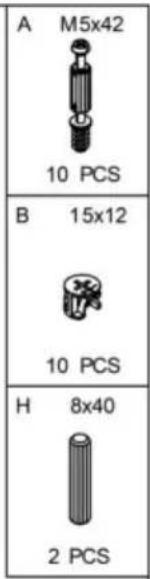
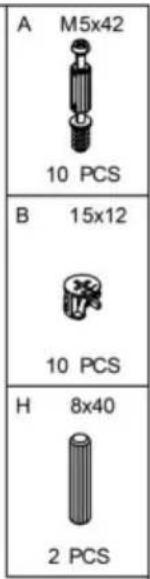
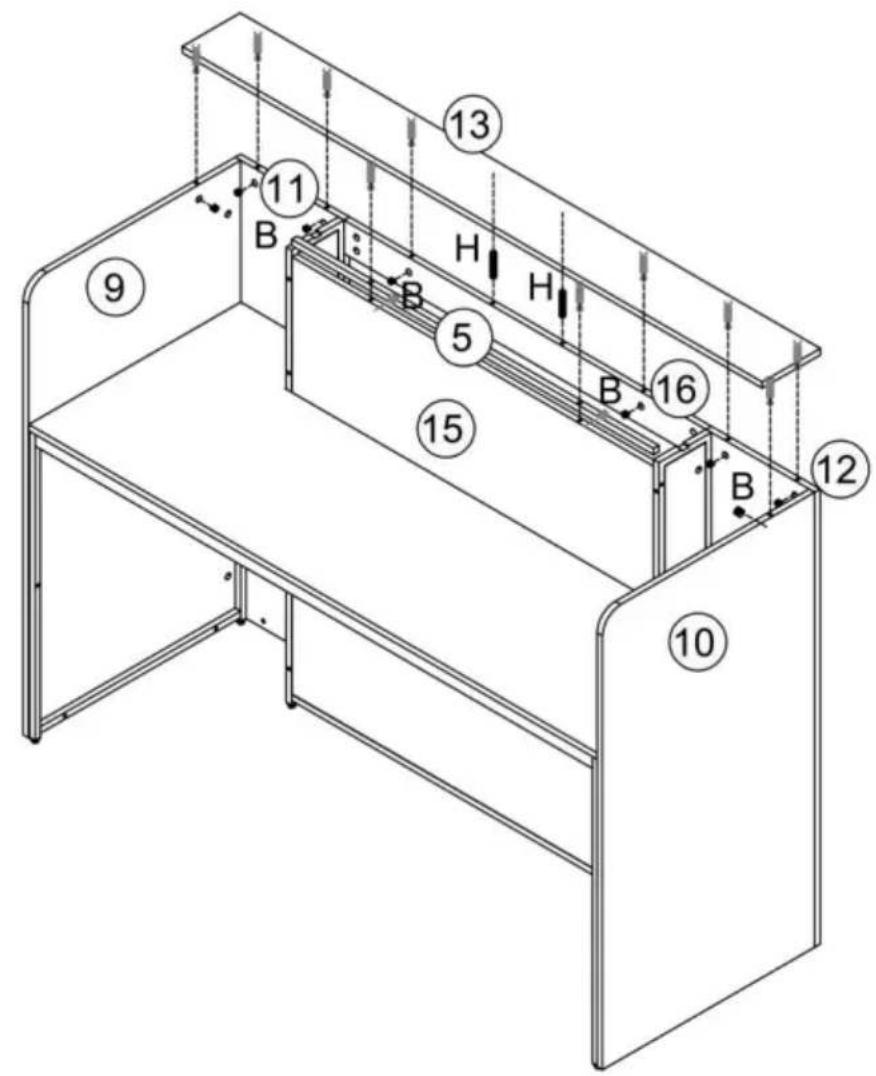
A M5x42, 10 PCS; B 15x12, 10 PCS; H 8x40, 2 PCS

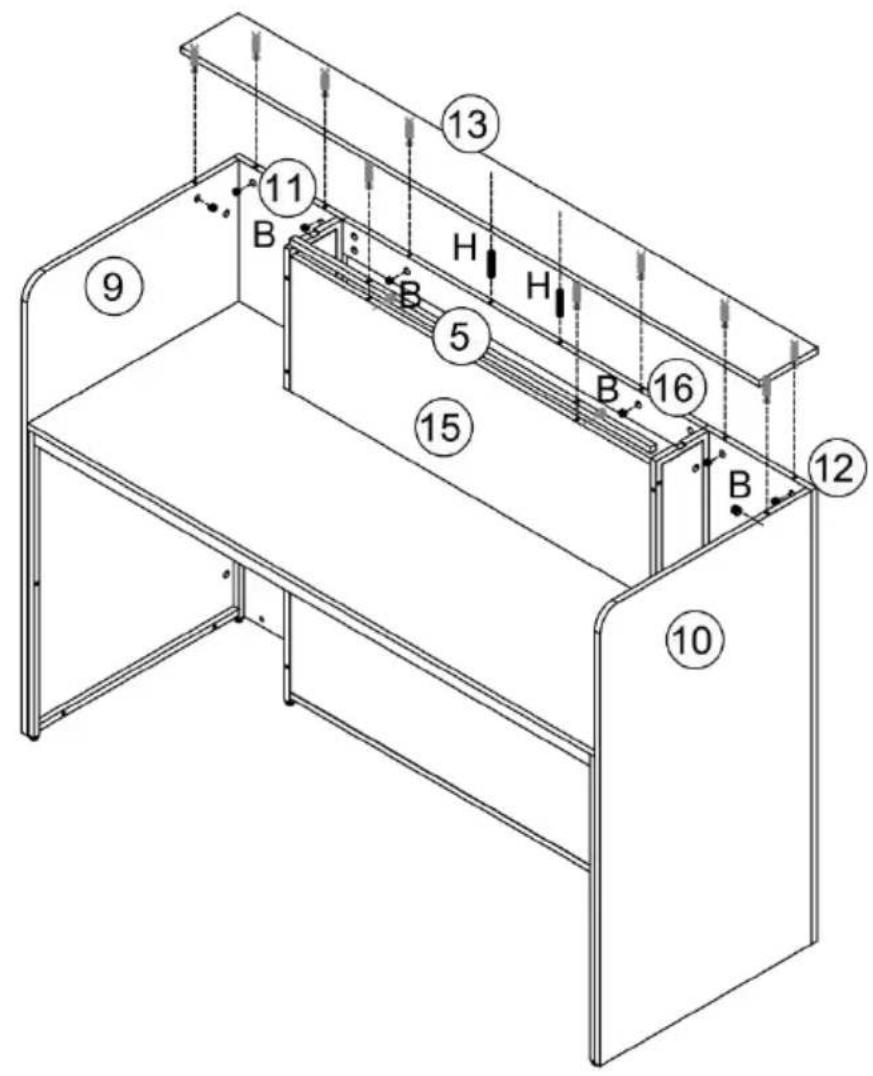
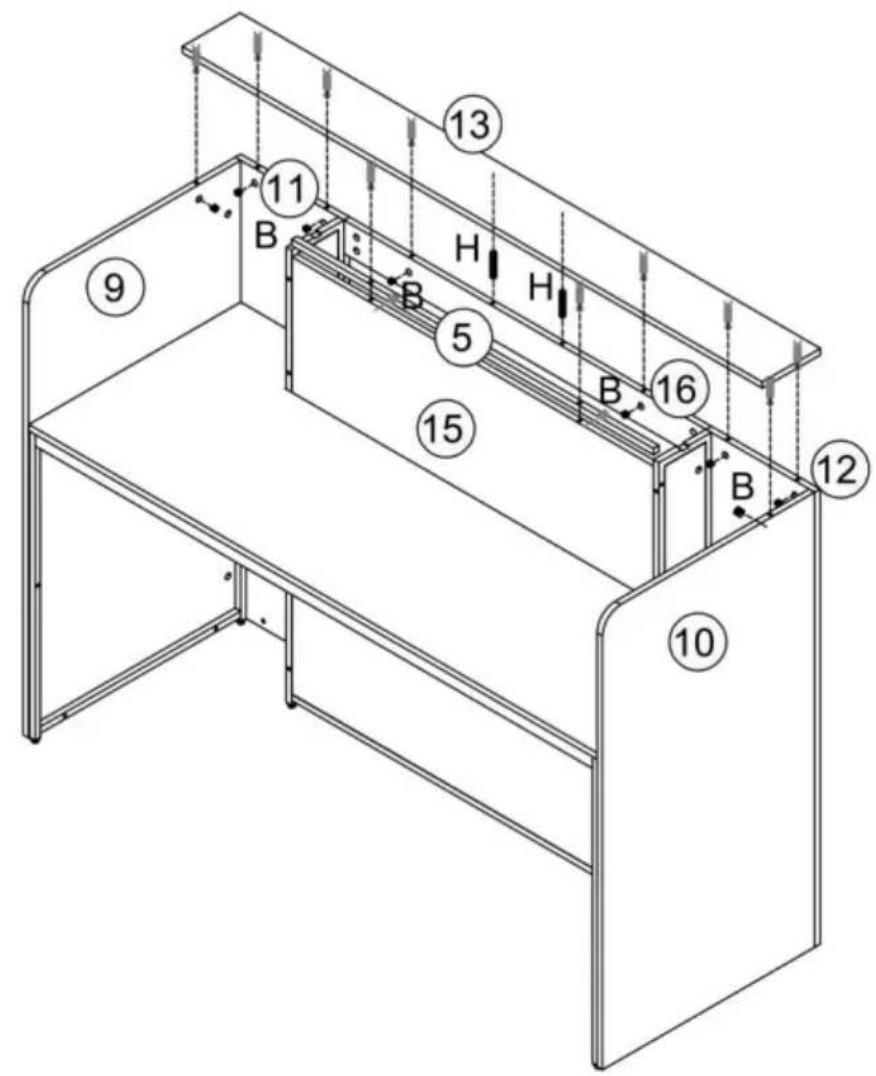
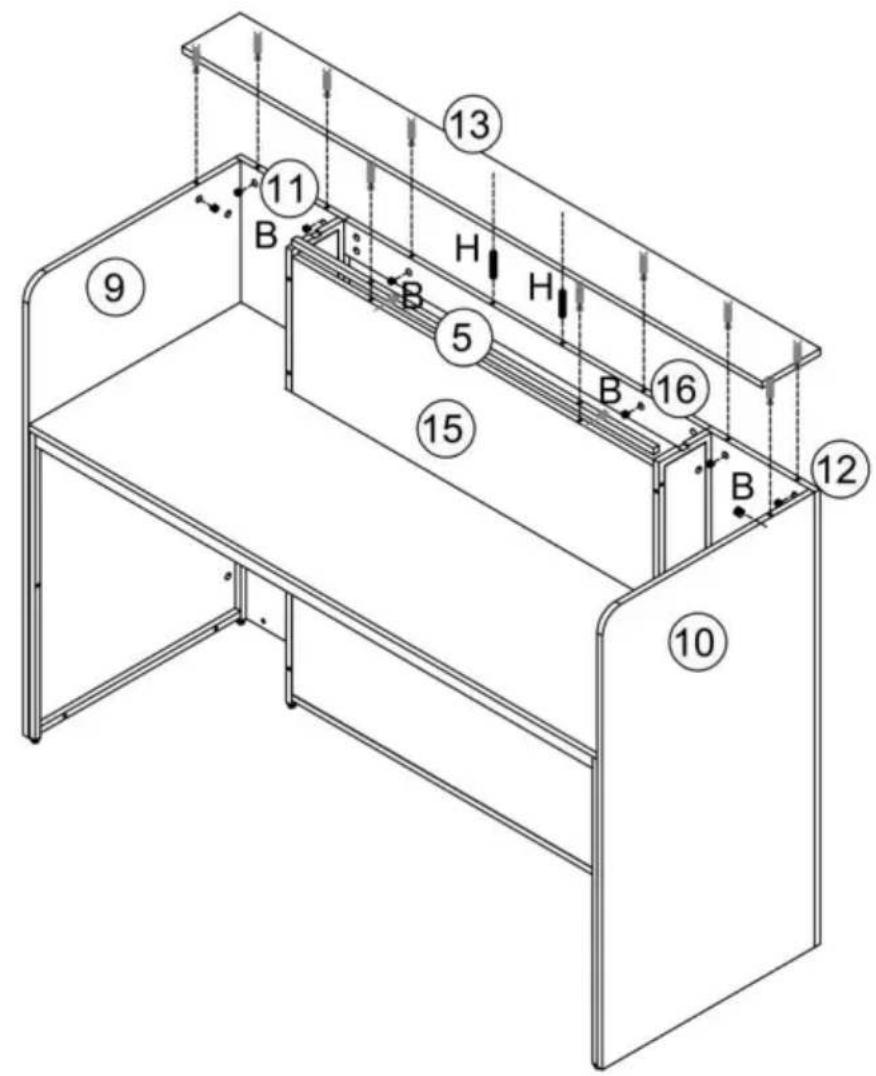
13, 11, B, H, H, 5, B, 16, 9, 15, B, 12, 10

15

Vevor SS-602 - ASSEMBLY STEP - 26

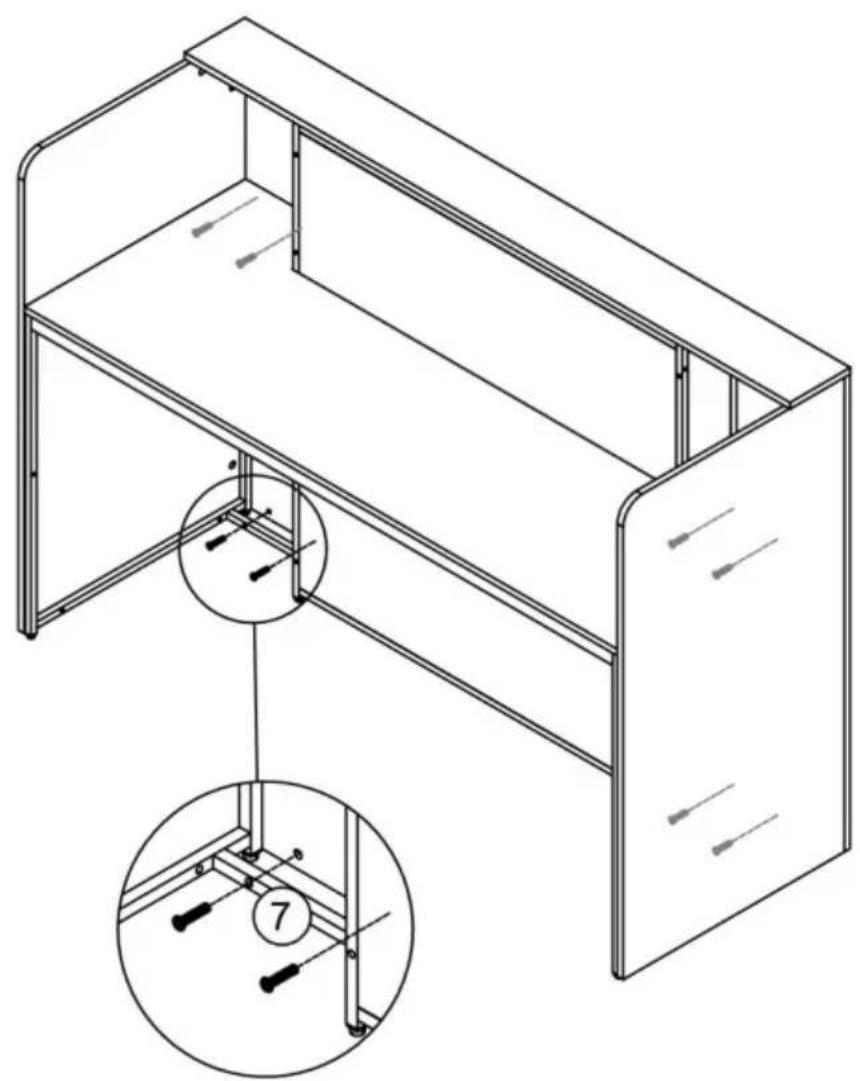
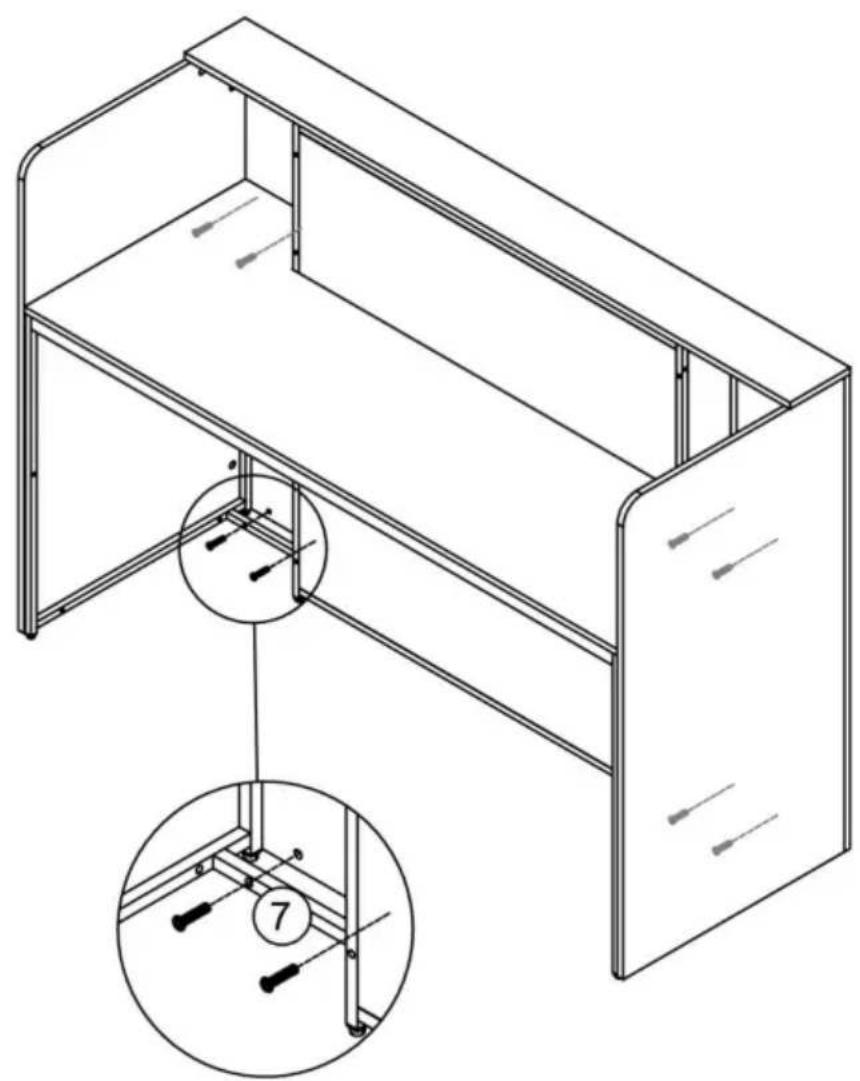
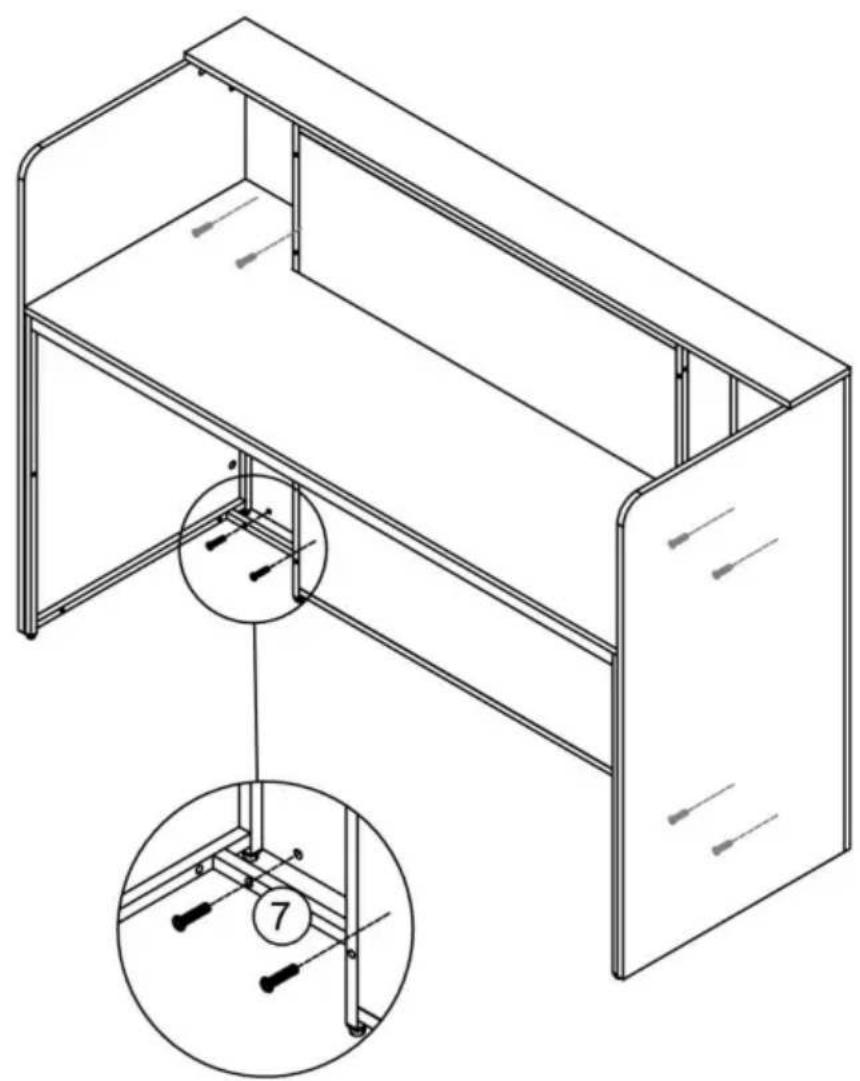
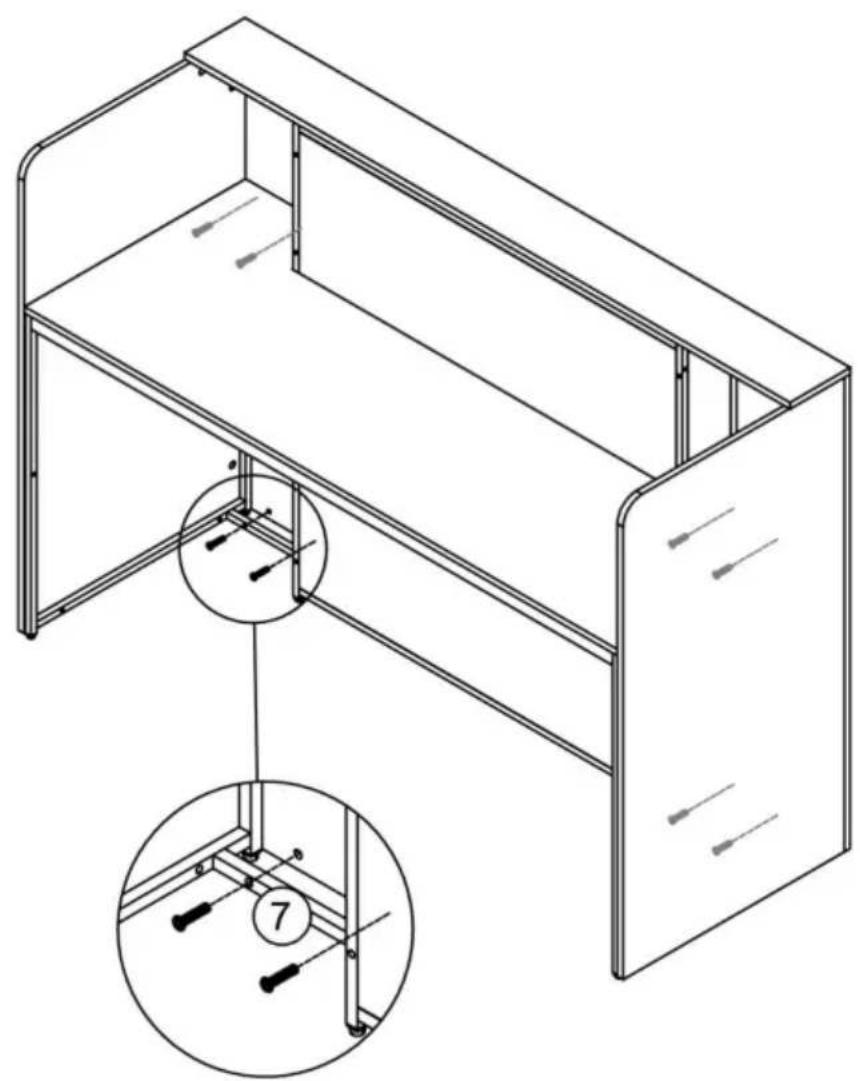
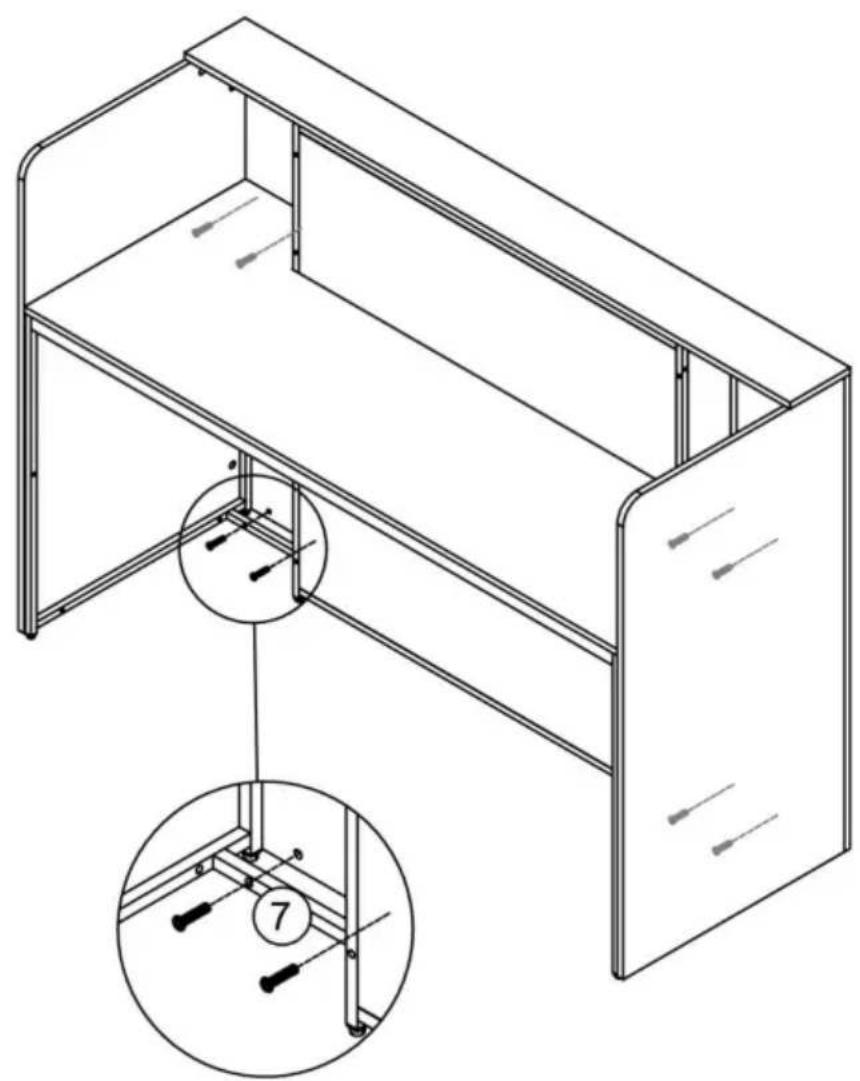
Technical line drawing of a cabinet or enclosure with internal components and a magnified inset showing internal parts (no text or symbols)

16

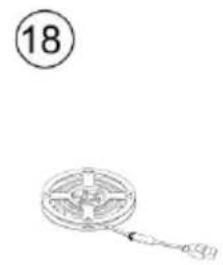
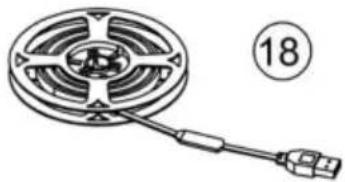
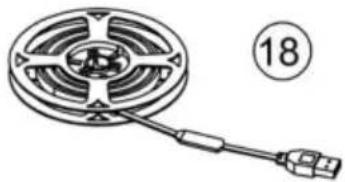
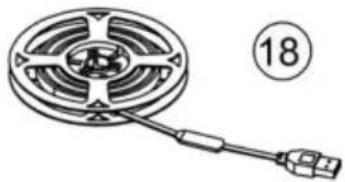
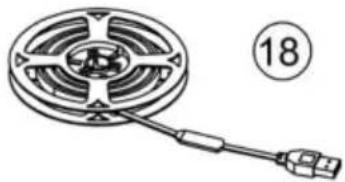
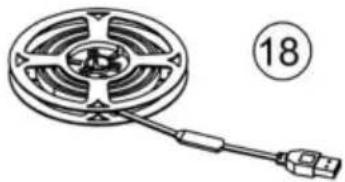
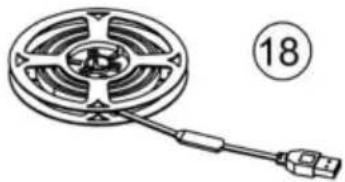
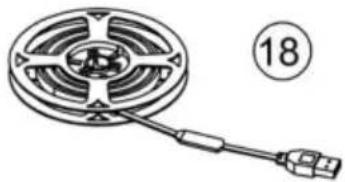
Diagram of a circular mechanical component with a cable and connector, labeled with number 18 (no text or symbols on the diagram itself)

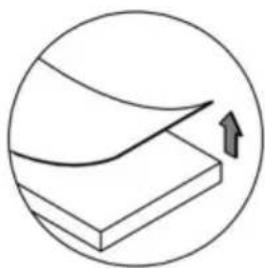
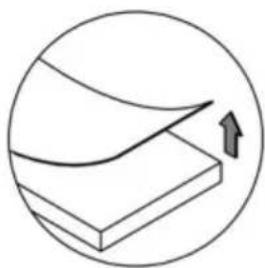
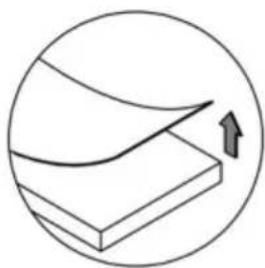
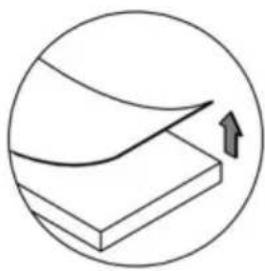
Simple line drawing of a 3D block with an arrow indicating upward motion (no text or symbols)

Vevor SS-602 - ASSEMBLY STEP - 30

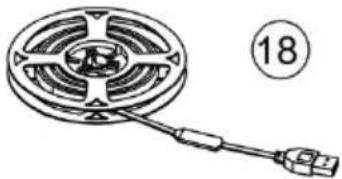
Carefully remove the plastic film behind the light strip.

Carefully remove behind the light 13 18

graph LR A["Light strip"] --> B["Arrow to G"] B --> C["Arrow to right"] C --> D["Arrow to right"] D --> E["Arrow to right"]

Note that G can be installed or not according to person: G is used for the stick-off configuration of the light strip.

PRODUCT PARAMETER

ModelSS-602
Safe Loading Weight50kg
ColourBlack + Brown
Product Size1600*600*1110mm

Manufacturer: Shanghaimuxinmuyeyouxiangongsi

Address: Shuangchenglu 803nong11hao1602A-1609shi, Baoshan District, Shanghai 200000 CN.

Imported to AUS: SIHAO PTY LTD. 1 ROKEVA STREET, EASTWOOD NSW 2122 Australia

Imported to USA: Sanven Technology Ltd. Suite 250, 9166 Anaheim Place, Rancho Cucamonga, CA 91730

ECREP

E-CrossStu GmbH

Mainzer Landstr. 69, 60329 Frankfurt am Main

UKREP

YH CONSULTING LIMITED.

C/O YH Consulting Limited Office 147, Centurion House, London Road, Staines-upon-Thames, Surrey TW18 4AX

VEVOR®

TOUGH TOOLS, HALF PRICE

Technical Support and E-Warranty Certificate

www.vevor.com/support

VEVOR®

TOUGH TOOLS, HALF PRICE

NEED HELP? CONTACT US!

IMPORTANT INFORMATION!

Please read the entire manual before starting to assemble and/or using this product. Follow the manual thoroughly and keep it for further reference.

Simple line drawing of a person standing on a platform with crossed lines indicating resistance (no text or symbols)

Simple line drawing of a smiling stick figure sitting on a mat with a rectangular object placed on it (no text or symbols)

AVOID SCRATCHES!

In order to avoid scratching, this furniture should be assembled on a soft layer-could be a rug.

Simple line drawing of a sad face sitting on a table with a crossed X-axis (no text or symbols)

Two stylized human figures holding a rectangular object, no text or symbols present

IMPROVE EFFICIENCY!

Try to find a partner to install with you, which can speed up the installation efficiency and shorten the time.
Safety warning illustration showing a hazard symbol above stairs and a person crossed out with a cross symbol below, implying blocked or invalid conditions.

Warning symbol with exclamation mark and building diagram, likely indicating an alert or hazard in a safety or emergency context.

Simple line drawing of a person standing next to stacked boxes with a cross symbol (no text or labels)

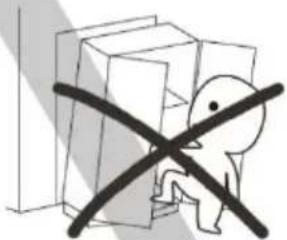
ANTI-TOPPLE WARNING!

Overturned furniture can cause serious or fatal crush injuries. To prevent tipping over, be sure to use the wall attachment. If it is not included with this product, Please purchase the wall attachment that fit your wall. If unsure, seek professional advice. Please read and follow each step of the instructions carefully.

IMPORTANT!

It is important that any product which is assembled using any kind of screw is re-tightened 2 weeks after assembly, and once every 3 months - in order to assure stability through-out the lifespan of the product.

For regular maintenance and cleaning of the product, for the frame, please use a rag dipped in neutral detergent to fully wipe it, and then dry it with a clean rag. For glass materials, wipe with a rag dampened with water glass cleaner, and then dry with a dry rag.

Do not use an electric screwdriver, and do not use too much force when installing, because the board is easy to break.

LIST OF PARTS

Technical diagram of a multi-level assembly with numbered components, likely for architectural or mechanical design reference.

① x2, ②, ③, ④, ⑤, ⑥ x3, ⑦ x4, ⑧ x2, ⑨, ⑩, ⑪, ⑫, ⑬, ⑭, ⑮, ⑯, ⑰, ⑱, ⑲, ⑳, ㉑, ㉒, ㉓, ㉔, ㉕, ㉖, ㉗, ㉘, ㉙, ㉚, ㉛, ㉜, ㉝, ㉞, ㉟, ㉳, ㉟, ㉟, ㉟, ㉟, ㉟, ㉟, ㉟, ㉟, ㉟, ㉟, ㉟, ㉟, ㉟, ㉟, ㉟, ㉟, ㉟, ㉟, ㉟, ㉟, ㉟, ㉟, ㉟, ㉟, ㉟, ㉟, ㉟, ㉟, ㉟, ㉟, ㉟, ㉟

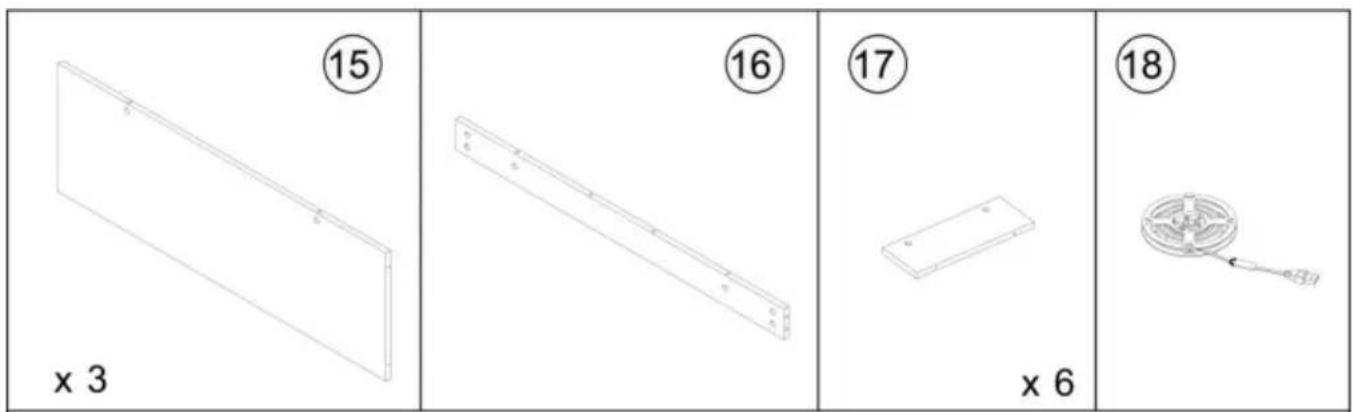
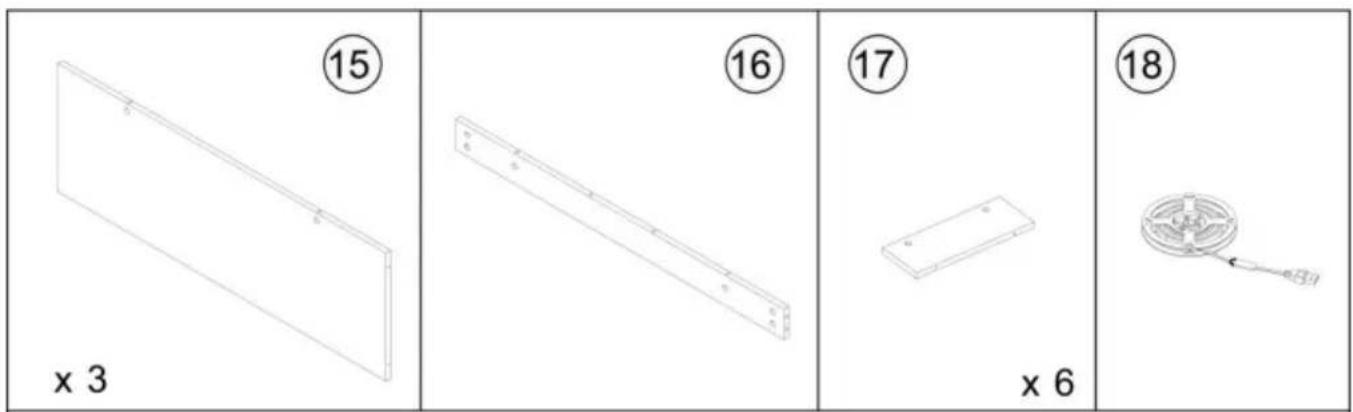
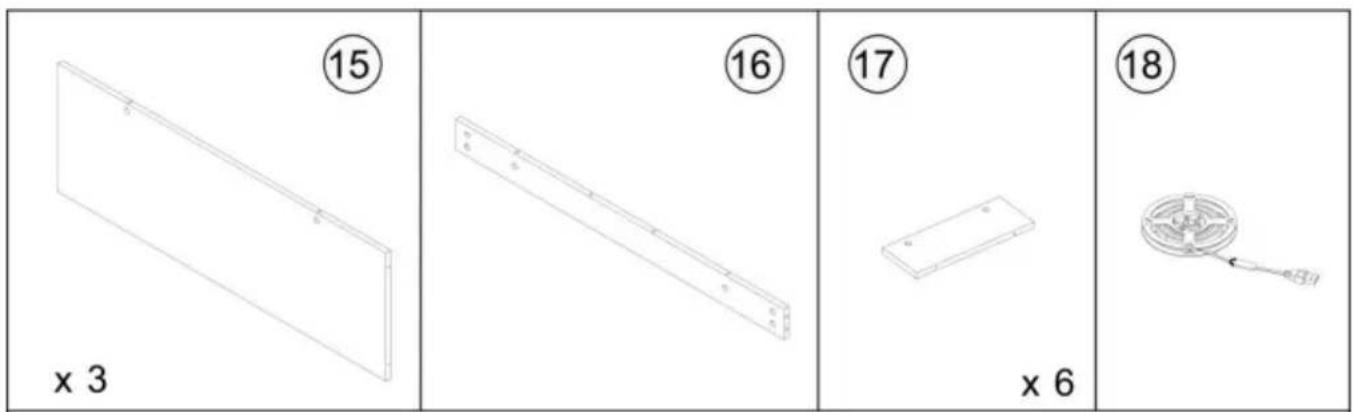
⑮ x3, ⑯, ⑰ x6, ⑱

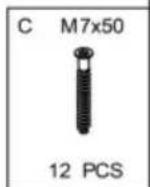
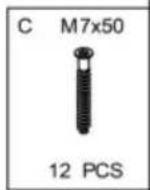
A M5x42 42 PCSB 15x12 42 PCSC M7x50 26 PCSD M6x12 2 PCSE M6x25 25 PCSF M6x40 12 PCS
G 6 PCSH 8x40 2 PCS1 PCS4# 1 PCS

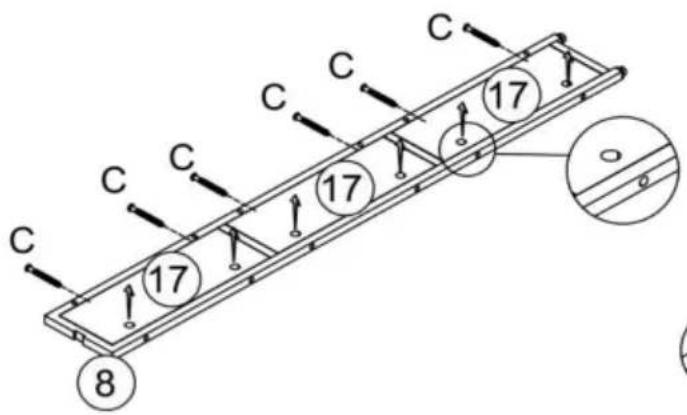
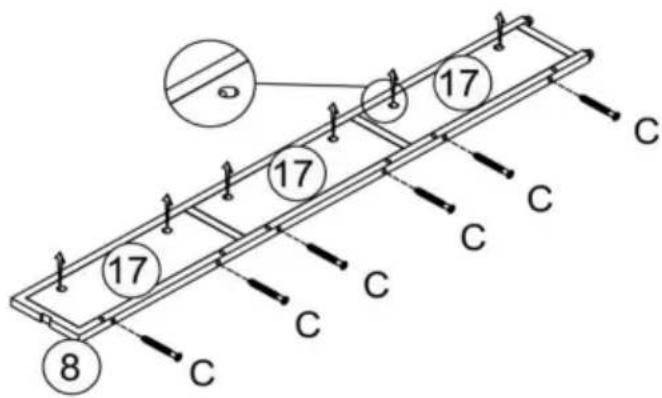
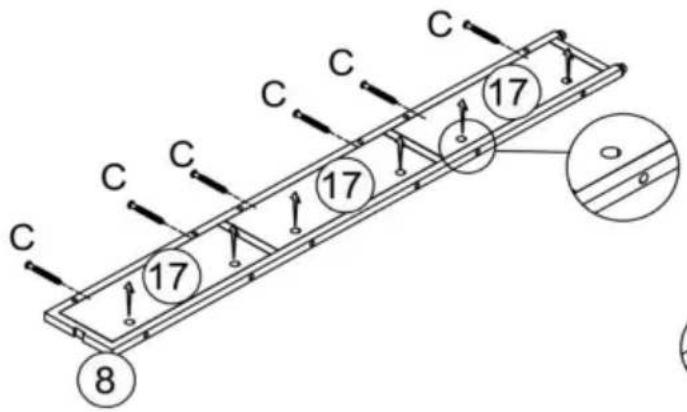
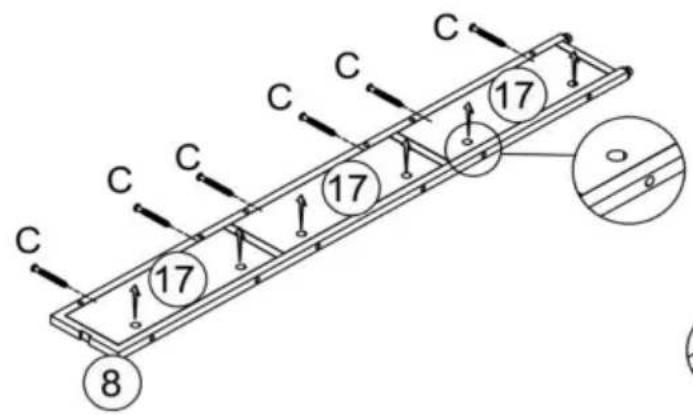
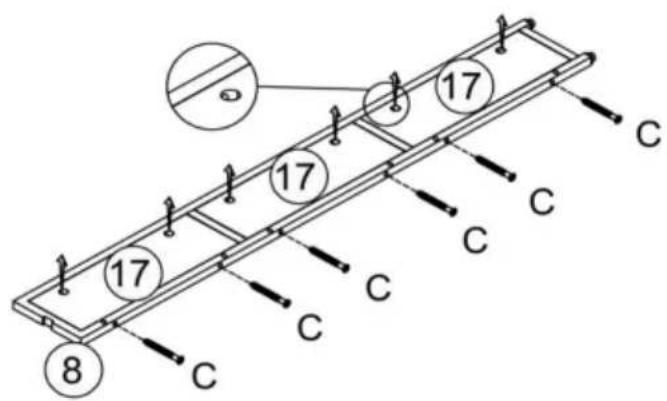
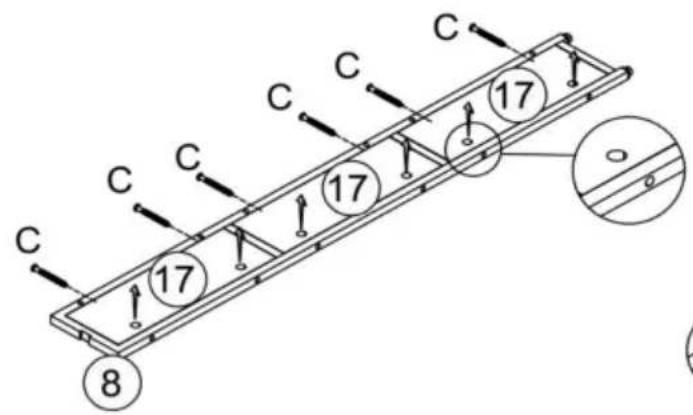
C C C C 17 17 17 8

Vevor SS-602 - IMPORTANT! - 5

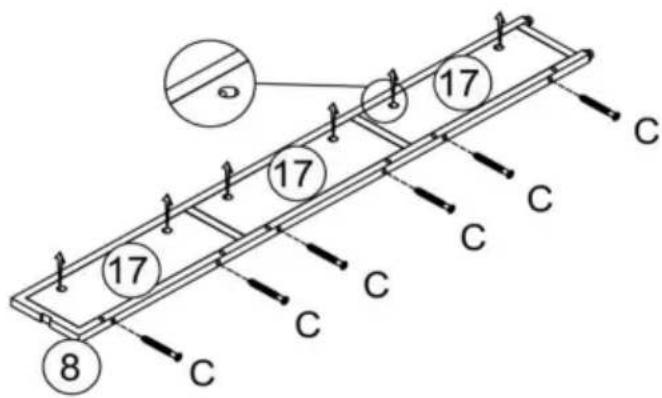
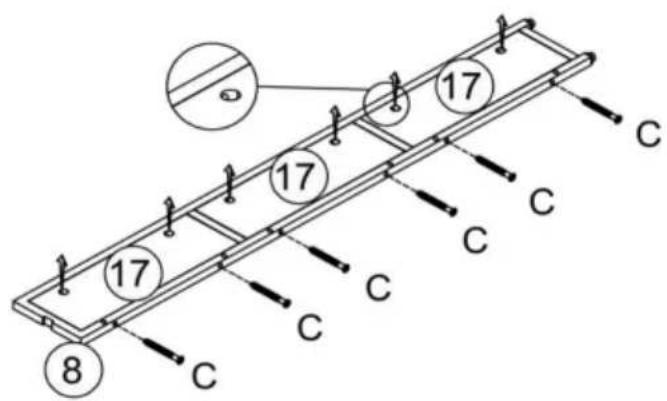
17 17 17 C C C C C 8 C

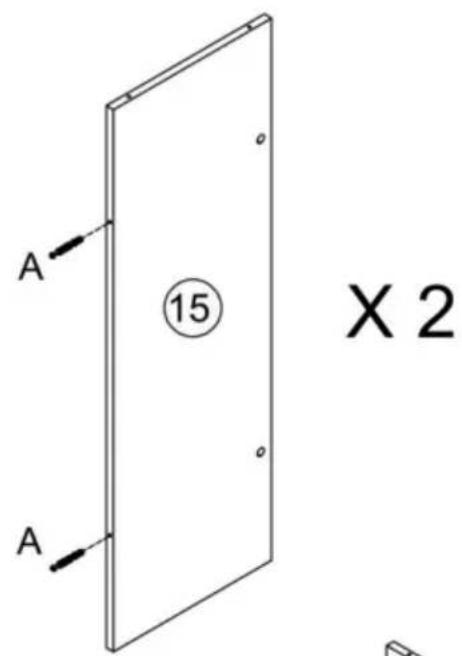
2A ⑮ X 2 A

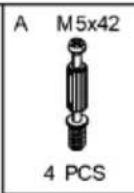
A M5x42, 4 PCS; B 15x12, 2 PCS

Technical diagram of a mechanical system with force vectors and labeled components, including zoomed-in views and numbered parts.

7Vevor SS-602 - IMPORTANT! - 10

Technical diagram of a structural frame with labeled components and force indicators.

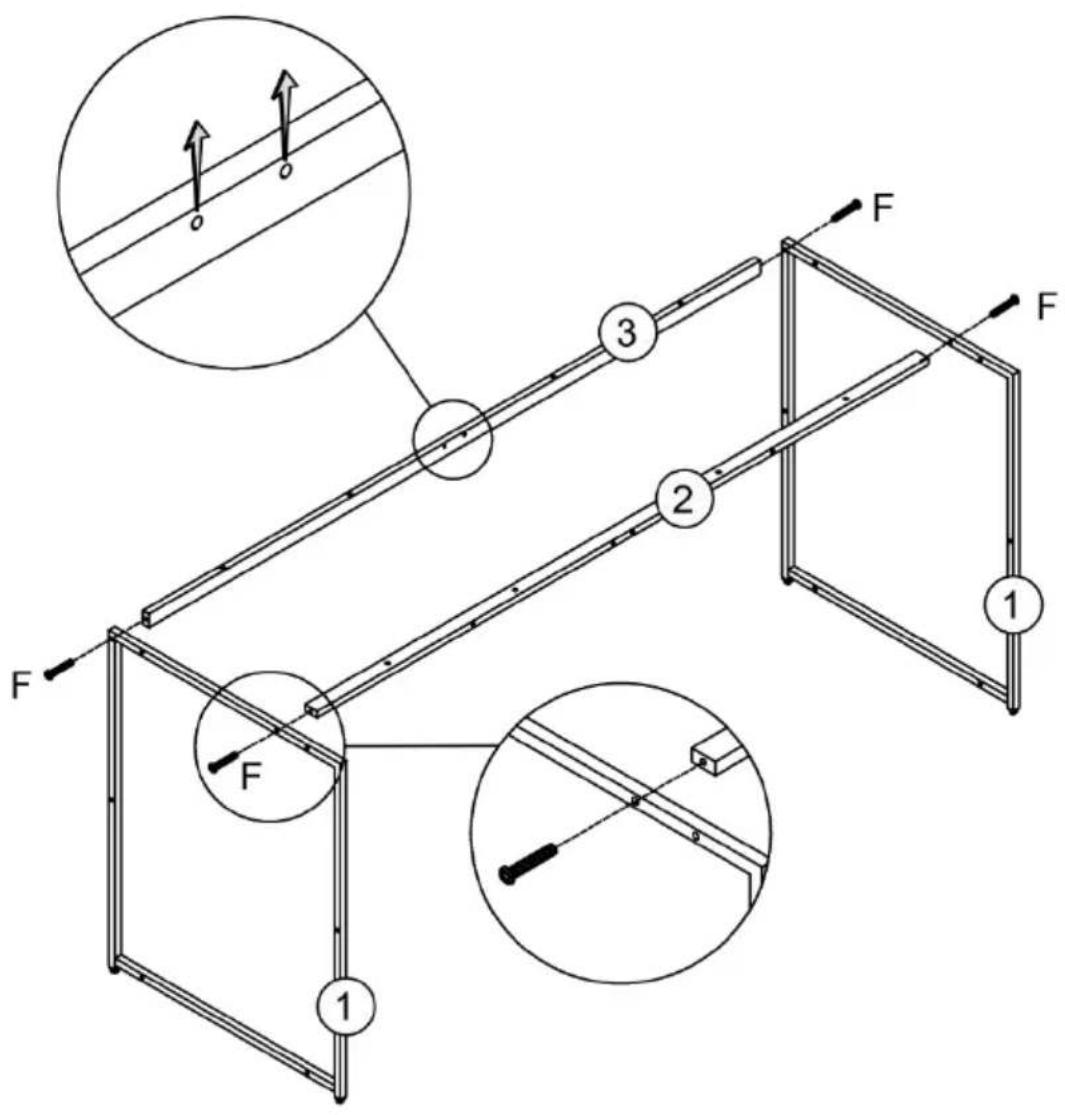
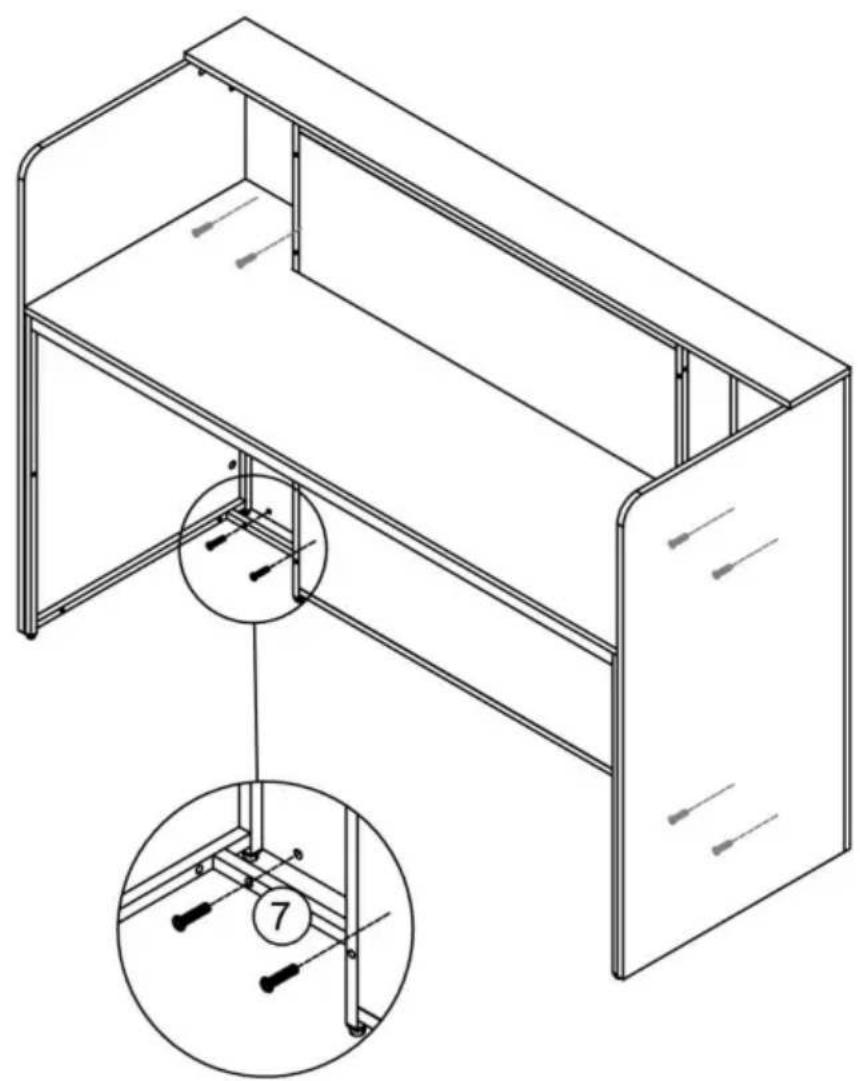
8; F M6x40, 2 PCS; D M6x12, 2 PCS; 3; 2; F; D; 6; F

9; F M6x40, 4 PCS; E M6x25, 5 PCS; 14; E; E; E; 3; F; F; E; F; F; E

10

Vevor SS-602 - IMPORTANT! - 14

A; A; ⑨

10; A; A

11; B 15x12, 4 PCS; E M6x25, 12 PCS; ⑨; B; E; E; B; E; ⑭; E; 1; E; E; E; B; E; E; E; ⑩; 1; E

12 A M5x42 24 PCS B 15x12 4 PCS A A A A A A A A A A A A A A A A A A A A A A A A A A A A A A A A A A A A A A A A A A A A A A A A A A A A A A A A A A A A A A A A A A A A A A A A A A A A A A A A A A A A A A A A A 16 11 12

13

B 15×12

Vevor SS-602 - IMPORTANT! - 19

20 PCS

Technical diagram of a 3D architectural structure with numbered components, likely for architectural or engineering purposes.

×2

14A A A A A 13 A A A A A

A M5x42 10 PCS B 15x12 10 PCS H 8x40 2 PCS

Technical diagram of a cabinet or enclosure with numbered components and labeled parts (B, H)

15

Vevor SS-602 - IMPORTANT! - 25

Technical line drawing of a cabinet or enclosure with internal components and a magnified inset showing internal parts (no text or symbols)

16

Diagram of a circular mechanical component with a cable and connector, labeled with number 18 (no text or symbols on the diagram itself)

Simple line drawing of a 3D block with an arrow indicating direction (no text or symbols)

Vevor SS-602 - IMPORTANT! - 29

A/S YH Consulting Limited Bureau 147, Centurion

Maison, London Road, Staines-upon-Thames, Surrey, TW18 4AX

VEVOR®

TOUGH TOOLS, HALF PRICE

IMPORTANT INFORMATION!

Please read the entire manual before starting to assemble and/or using this product. Follow the manual thoroughly and keep it for further reference.

Simple line drawing of a person standing at a table with crossed lines, no text or symbols present

Simple line drawing of a smiling stick figure sitting on a mat with a rectangular object placed on it (no text or symbols)

AVOID SCRATCHES!

In order to avoid scratching, this furniture should be assembled on a soft layer-could be a rug.

Simple line drawing of a sad face sitting on a table with a crossed X-axis (no text or symbols)

Two stylized human figures holding a rectangular object, no text or symbols present

IMPROVE EFFICIENCY!

Try to find a partner to install with you, which can speed up the installation efficiency and shorten the time.

Safety warning illustration showing a hazard symbol above stairs and a person crossed out with a cross symbol below, implying blocked or invalid conditions.

Warning symbol with exclamation mark and building diagram, likely indicating an alert or hazard in a safety or emergency context.

Simple line drawing of a person standing next to stacked boxes with a cross symbol (no text or labels).

ANTI-TOPPLE WARNING!

Overturned furniture can cause serious or fatal crush injuries. To prevent tipping over, be sure to use the wall attachment. If it is not included with this product, Please purchase the wall attachment that fit your wall. If unsure, seek professional advice. Please read and follow each step of the instructions carefully.

IMPORTANT!

It is important that any product which is assembled using any kind of screw is re-tightened 2 weeks after assembly, and once every 3 months - in order to assure stability through-out the lifespan of the product.

For regular maintenance and cleaning of the product, for the frame, please use a rag dipped in neutral detergent to fully wipe it, and then dry it with a clean rag. For glass materials, wipe with a rag dampened with water glass cleaner, and then dry with a dry rag.

Do not use an electric screwdriver, and do not use too much force when installing, because the board is easy to break.

PARTS LIST
Technical diagram of a multi-level assembly with numbered components, likely for architectural or mechanical design reference.

① x2 ② ③ ④ ⑤ ⑥ x3 ⑦ x4 ⑧ x2 ⑨ ⑩ ⑪ ⑫ ⑬ ⑭ ⑮ ⑯ ⑰ ⑱ ⑲ ⑳ ㉑ ㉒ ㉓ ㉔ ㉕ ㉖ ㉗ ㉘ ㉙ ㉚ ㉛ ㉜ ㉝ ㉞ ㉟ ㉳ ㉟ ㉟ ㉟ ㉟ ㉟ ㉟ ㉟ ㉟ ㉟ ㉟ ㉟ ㉟ ㉟ ㉟ ㉟ ㉟ ㉟ ㉟ ㉟ ㉟ ㉟ ㉟ ㉟ ㉟ ㉟ ㉟ ㉟ ㉟ ㉟ ㉟ ㉟ ㉟ ㉟

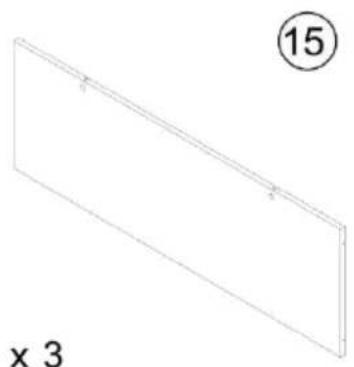
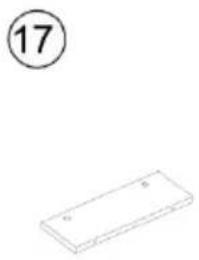
⑮ x 3, ⑯, ⑰ x 6, ⑱

A M5x42 42 PCSB 15x12 42 PCSC M7x50 26 PCSD M6x12 2 PCSE M6x25 25 PCSF M6x40 12 PCS
G 6 PCSH 8x40 2 PCS1 PCS4# 1 PCS

A M5x42, 4 PCS; B 15x12, 2 PCS

Technical diagram of a mechanical system with force vectors and labeled components, including force application and assembly details.

7Vevor SS-602 - PARTS LIST - 6

Technical diagram of a structural frame with labeled components and force indicators.

8; F M6x40, 2 PCS; D M6x12, 2 PCS; 3; 2; F; D; 6; F

9; F M6x40, 4 PCS; E M6x25, 5 PCS; 14; E; E; E; 3; F; F; E; F; F; E

10

Vevor SS-602 - PARTS LIST - 10

A; A; ⑨

10; A; A

11; B 15x12, 4 PCS; E M6x25, 12 PCS; ⑨; B; E; E; B; E; ⑭; 14; E; E; E; B; E; E; E; ⑩; 1; E; E; E; 1

12 A M5x42 24 PCS B 15x12 4 PCS A A A A A A A A A A A A A A A A A A A A A A A A A A A A A A A A A A A A A A A A A A A A A A A A A A A A A A A A A A A A A A A A A A A A A A A A A A A A A A A A A A A A A A 16 11 12

13

B 15×12

Vevor SS-602 - PARTS LIST - 15

20 PCS

Technical diagram of a 3D architectural structure with numbered components, likely for architectural or engineering purposes.

×2

14A A A A A 13 A A A A A

A M5x42 10 PCS B 15x12 10 PCS H 8x40 2 PCS

Technical diagram of a cabinet or enclosure with numbered components and labeled parts (B, H)

15

Vevor SS-602 - PARTS LIST - 21

Isometric line drawing of a two-level cabinet or enclosure with internal components and a magnified inset showing internal wiring (no text or symbols)

16

Diagram of a circular mechanical component with a cable and connector, labeled with number 18 (no text or symbols on the diagram itself)

Simple line drawing of a 3D block with an arrow indicating direction (no text or symbols)

Vevor SS-602 - PARTS LIST - 25

C/O YH Consulting Limited Office 147, Centurion

Haus, London Road, Staines-upon-Thames, Surrey,

TW18 4AX

VEVOR®

TOUGH TOOLS, HALF PRICE

www.vevor.com/support

VEVOR®

TOUGH TOOLS, HALF PRICE

IMPORTANT INFORMATION!

Please read the entire manual before starting to assemble and/or using this product. Follow the manual thoroughly and keep it for further reference.

Simple line drawing of a person standing on a platform with crossed lines indicating resistance or resistance (no text or symbols)

Simple line drawing of a smiling stick figure sitting on a mat with a rectangular object placed on it (no text or symbols)

AVOID SCRATCHES!

In order to avoid scratching, this furniture should be assembled on a soft layer-could be a rug.

Simple line drawing of a sad face sitting on a table with a crossed X-axis (no text or symbols)

Two stylized human figures holding a rectangular object, no text or symbols present

IMPROVE EFFICIENCY!

Try to find a partner to install with you, which can speed up the installation efficiency and shorten the time.

Safety warning illustration showing a hazard symbol above stairs and a person crossed out with a cross symbol below, implying blocked or invalid conditions.

Warning symbol with exclamation mark and building diagram, likely indicating an alert or hazard in a safety or emergency context.

Simple line drawing of a person standing next to stacked boxes with a cross symbol (no text or labels).

ANTI-TOPPLE WARNING!

Overturned furniture can cause serious or fatal crush injuries. To prevent tipping over, be sure to use the wall attachment. If it is not included with this product, please purchase the wall attachment that fits your wall. If unsure, seek professional advice. Please read and follow each step of the instructions carefully.

IMPORTANT!

It is important that any product which is assembled using any kind of screw is re-tightened 2 weeks after assembly, and once every 3 months - in order to assure stability throughout the lifespan of the product.

For regular maintenance and cleaning of the product, for the frame, please use a rag dipped in neutral detergent to fully wipe it, and then dry it with a clean rag. For glass materials, wipe with a rag dampened with water glass cleaner, and then dry with a dry rag.

Do not use an electric screwdriver, and do not use too much force when installing, because the board is easy to break.

PARTS LIST
Exploded view diagram of a modular building layout with numbered components for identification.

① x2, ②, ③, ④, ⑤, ⑥ x3, ⑦ x4, ⑧ x2, ⑨, ⑩, ⑪, ⑫, ⑬, ⑭, ⑮, ⑯, ⑰, ⑱, ⑲, ⑳, ㉑, ㉒, ㉓, ㉔, ㉕, ㉖, ㉗, ㉘, ㉙, ㉚, ㉛, ㉜, ㉝, ㉞, ㉟, ㉳, ㉟ (repeated many times)

⑮ x3, ⑯, ⑰ x6, ⑱

A M5x42 42 PCSB 15x12 42 PCSC M7x50 26 PCSD M6x12 2 PCSE M6x25 25 PCSF M6x40 12 PCS
G 6 PCSH 8x40 2 PCS1 PCS4# 1 PCS

C C C C 17 17 17 8

Vevor SS-602 - PARTS LIST - 5

17 17 17 C C C C C C 8

2A ⑮ X 2 A

A M5x42 4 PCS B 15x12 2 PCS

Technical diagram of a mechanical system with force vectors and labeled components, including zoomed-in views and numbered parts.

7Vevor SS-602 - PARTS LIST - 10

Technical diagram of a structural frame with labeled components and force indicators

8 F M6x40 2 PCS D M6x12 2 PCS 3 2 F D 6 F

9 F M6x40 4 PCS E M6x25 5 PCS 14 E E E 3 F F E F F E

10

Vevor SS-602 - PARTS LIST - 14

A A ⑨

10 A A

11 B 15x12 4 PCS E M6x25 12 PCS ⑨ B E E B E ⑭ 14 E E E B E E E ⑩ 1 E E E 1

12 A M5x42 24 PCS B 15x12 4 PCS A A A A A A A A A A A A A A A A A A A A A A A A A A A A A A A A A A A A A A A A A A A A A A A A A A A A A A A A A A A A A A A A A A A A A A A A A A A A A A A A A A A A A A A A A 16 11 12

13

B 15x12

Vevor SS-602 - PARTS LIST - 19

20 PCS

Technical diagram of a 3D architectural structure with numbered components, likely for architectural or engineering purposes.

×2

14A A A A A A 13 A A A A A

A M5x42 10 PCS B 15x12 10 PCS H 8x40 2 PCS

Technical diagram of a cabinet or enclosure with numbered components and labeled parts (B, H)

15

Vevor SS-602 - PARTS LIST - 25

Technical line drawing of a two-level cabinet or enclosure with internal components and a magnified inset showing internal parts (no text or symbols)

16

Diagram of a circular mechanical component with a cable and connector, labeled with number 18 (no text or symbols on the diagram itself)

Simple line drawing of a 3D block with an arrow indicating direction (no text or symbols)

graph LR A["Component G"] --> B["Light strip"] B --> C["Final step with red arrow"]

Imported into AUS: SIHAO PTY LTD. 1 ROKEVA STREET EASTWOOD

New South Wales 2122 Australia

C/O YH Consulting Limited Office 147, Centurion

House, London Road, Staines-upon-Thames, Surrey,

Model TW18 4AX

VEVOR®

TOUGH TOOLS, HALF PRICE

electronics www.vevor.com/support

VEVOR®

TOUGH TOOLS, HALF PRICE

IMPORTANT INFORMATION!

Please read the entire manual before starting to assemble and/or using this product. Follow the manual thoroughly and keep it for further reference.

Simple line drawing of a person standing on a platform with crossed lines indicating resistance or resistance (no text or symbols)

Simple line drawing of a smiling stick figure sitting on a mat with a rectangular object placed on it (no text or symbols).

AVOID SCRATCHES!

In order to avoid scratching, this furniture should be assembled on a soft layer - could be a rug.

Simple line drawing of a sad face sitting on a table with a crossed X-axis (no text or symbols).

Two stylized human figures holding a rectangular object, no text or symbols present.

IMPROVE EFFICIENCY!

Try to find a partner to install with you, which can speed up the installation efficiency and shorten the time.

Safety warning illustration showing a hazard symbol above stairs and a person crossed out with a cross symbol below, implying blocked or invalid conditions.

Warning symbol with exclamation mark and building diagram, likely indicating an alert or hazard in a safety or emergency context.

Simple line drawing of a person standing next to stacked boxes with a cross symbol (no text or labels).

ANTI-TOPPLE WARNING!

Overturned furniture can cause serious or fatal crush injuries. To prevent tipping over, be sure to use the wall attachment. If it is not included with this product, please purchase the wall attachment that fits your wall. If unsure, seek professional advice. Please read and follow each step of the instructions carefully.

IMPORTANT!

It is important that any product which is assembled using any kind of screw is re-tightened 2 weeks after assembly, and once every 3 months - in order to assure stability throughout the lifespan of the product.

For regular maintenance and cleaning of the product, for the frame, please use a rag dipped in neutral detergent to fully wipe it, and then dry it with a clean rag. For glass materials, wipe with a rag dampened with water glass cleaner, and then dry with a dry rag.

Do not use an electric screwdriver, and do not use too much force when installing, because the board is easy to break.

PARTS LIST
Technical diagram of a multi-level assembly with numbered components, likely for architectural or mechanical design reference.

① x2, ②, ③, ④, ⑤, ⑥, x3, ⑦, x4, ⑧, x2, ⑨, ⑩, ⑪, ⑫, ⑬, ⑭, ⑮, ⑯, ⑰, ⑱, ⑲, ⑳, ㉑, ㉒, ㉓, ㉔, ㉕, ㉖, ㉗, ㉘, ㉙, ㉚, ㉛, ㉜, ㉝, ㉞, ㉟, ㉳, ㉟ (repeated many times).

⑮ x3, ⑯, ⑰, x6, ⑱.

A M5x42 42 PCSB 15x12 42 PCSC M7x50 26 PCSD M6x12 2 PCSE M6x25 25 PCSF M6x40 12 PCS
G 6 PCSH 8x40 2 PCS1 PCS4# 1 PCS

C, C, C, C, C, 17, 17, 17, ⑧.

Vevor SS-602 - PARTS LIST - 5

17, 17, C, C, C, C, C, 8, C.

2A, ⑮ X2, A.

A M5x42, 4 PCS; B 15x12, 2 PCS.

Technical diagram of a mechanical system with force vectors and labeled components, including zoomed-in views and numbered parts.

7Vevor SS-602 - PARTS LIST - 10

Technical diagram of a structural frame with labeled components and force indicators.

8 F M6x40 2 PCS D M6x12 2 PCS 3 2 F D 6 F

9 F M6x40 4 PCS E M6x25 5 PCS 14 E E E 3 F F E F F E

10

Vevor SS-602 - PARTS LIST - 14

A A ⑨

10 A A

11 B 15x12 4 PCS E M6x25 12 PCS ⑨ B E E B E ⑭ E 1 E E E B E E E ⑩ 1 E

12 A M5x42 24 PCS B 15x12 4 PCS A A A A A A A A A A A A A A A A A A A A A A A A A A A A A A A A A A A A A A A A A A A A A A A A A A A A A A A A A A A A A A A A A A A A A A A A A A A A A A A A A A A A A A A A A 16 11 12

13

B 15×12

Vevor SS-602 - PARTS LIST - 19

20 PCS

Technical diagram of a 3D architectural structure with numbered components, likely for architectural or engineering purposes.

×2

14A A A A A 13 A A A A A

A M5x42 10 PCS B 15x12 10 PCS H 8x40 2 PCS

Technical diagram of a cabinet or enclosure with numbered components and labeled parts (B, H).

15

Vevor SS-602 - PARTS LIST - 25

Technical line drawing of a two-level cabinet or enclosure with internal components and a magnified inset showing internal parts (no text or symbols).

16

Diagram of a circular mechanical component with a cable and connector, labeled with number 18 (no text or symbols on the diagram itself).

Simple line drawing of a 3D block with an arrow indicating direction (no text or symbols).

Vevor SS-602 - PARTS LIST - 29

Casa, London Road, Staines-upon-Thames, Surrey, TW18 4AX

VEVOR®

TOUGH TOOLS, HALF PRICE

NEED HELP? CONTACT US!

IMPORTANT INFORMATION!

Please read the entire manual before starting to assemble and/or using this product. Follow the manual thoroughly and keep it for further reference.

Simple line drawing of a person standing on a platform with crossed lines indicating resistance or obstruction (no text or symbols).

Simple line drawing of a smiling stick figure sitting on a mat with a rectangular object placed on it (no text or symbols).

AVOID SCRATCHES!

In order to avoid scratching, this furniture should be assembled on a soft layer, such as a rug.

Simple line drawing of a sad face sitting on a table with a crossed X-axis (no text or symbols).

Two stylized human figures holding a rectangular object, no text or symbols present.

IMPROVE EFFICIENCY!

Try to find a partner to install with you, which can speed up the installation efficiency and shorten the time.

Safety warning illustration showing a hazard symbol above stairs and a person crossed out with a cross symbol below, implying blocked or invalid conditions.

Warning symbol with exclamation mark and building diagram, likely indicating an alert or hazard in a safety or emergency context.

Simple line drawing of a person standing next to stacked boxes with a cross symbol (no text or labels).

ANTI-TOPPLE WARNING!

Overturned furniture can cause serious or fatal crush injuries. To prevent tipping over, be sure to use the wall attachment. If it is not included with this product, please purchase the wall attachment that fits your wall. If unsure, seek professional advice. Please read and follow each step of the instructions carefully.

IMPORTANT!

It is important that any product which is assembled using any kind of screw is re-tightened 2 weeks after assembly, and once every 3 months - in order to assure stability through-out the lifespan of the product.

For regular maintenance and cleaning of the product, for the frame, please use a rag dipped in neutral detergent to fully wipe it, and then dry it with a clean rag. For glass materials, wipe with a rag dampened with water glass cleaner, and then dry with a dry rag.

Do not use an electric screwdriver, and do not use too much force when installing, because the board is easy to break.

PARTS LIST

Exploded view diagram of a modular building layout with numbered components for identification.

① x 2 ② ③ ④ ⑤ ⑥ x 3 ⑦ x 4 ⑧ x 2 ⑨ ⑩ ⑪ ⑫ ⑬ ⑭ ⑮ ⑯ ⑰ ⑱ ⑲ ⑳ ㉑ ㉒ ㉓ ㉔ ㉕ ㉖ ㉗ ㉘ ㉙ ㉚ ㉛ ㉜ ㉝ ㉞ ㉟ ㉳ ㉴ ㉵ ㉶ ㉇ ㉈ ㉒ ㉓ ㉔ ㉕ ㉖ ㉗ ㉘ ㉙ ㉚ ㉛ ㉜ ㉝ ㉞ ㉟ ㉟ ㉟ ㉟ ㉟ ㉟ ㉟ ㉟

⑮ x 3 ⑯ ⑰ x 6 ⑱

A M5x42 42 PCSB 15x12 42 PCSC M7x50 26 PCSD M6x12 2 PCSE M6x25 25 PCSF M6x40 12 PCS
G 6 PCSH 8x40 2 PCS1 PCS4# 1 PCS

C C C C C 17 17 17 ⑧

Vevor SS-602 - IMPORTANT! - 5

17 17 C C C C C 8 C

2A ⑮ X 2 A

A M5x42, 4 PCS; B 15x12, 2 PCS

Technical diagram of a mechanical system with force vectors and labeled components, including zoomed-in views and numbered parts.

7Vevor SS-602 - IMPORTANT! - 10

Technical diagram of a structural frame with labeled components and force indicators.

8: F M6x40, 2 PCS; D M6x12, 2 PCS; 3, 2, F, D, 6, F

9: F M6x40, 4 PCS; E M6x25, 5 PCS; 14, E, E, E, 3, F, F, F, F, E

10

Vevor SS-602 - IMPORTANT! - 14

A, A, ⑨

10: A, A

11: B 15x12, 4 PCS; E M6x25, 12 PCS; ⑨, B, E, E, B, E, ⑭, 14, E, E, E, B, E, E, E, ⑩, 1, E, E, E, 1

12: A M5x42, 24 PCS; B 15x12, 4 PCS; A repeated many times; 16, 11, 12

13

B 15×12

Vevor SS-602 - IMPORTANT! - 19

20 PCS

Technical diagram of a 3D architectural structure with numbered components, likely for architectural or engineering purposes.

×2

14A, A, A, A, A, 13, A, A, A, A, A

A M5x42, 10 PCS; B 15x12, 10 PCS; H 8x40, 2 PCS

Technical diagram of a cabinet or enclosure with numbered components and labeled parts (B, H).

15

Vevor SS-602 - IMPORTANT! - 25

Technical line drawing of a two-level cabinet or enclosure with internal components and a magnified inset showing internal parts (no text or symbols)

16

Diagram of a circular mechanical component with a cable and connector, labeled with number 18 (no text or symbols on the diagram itself)

Simple line drawing of a 3D block with an arrow indicating upward motion (no text or symbols)

Vevor SS-602 - IMPORTANT! - 29

C/O YH Consulting Limited Office 147, Centurion

Dom, London Road, Staines-upon-Thames, Surrey, TW18 4AX

VEVOR®

TOUGH TOOLS, HALF PRICE

NEED HELP? CONTACT US!

IMPORTANT INFORMATION!

Please read the entire manual before starting to assemble and/or using this product. Follow the manual thoroughly and keep it for further reference.

Simple line drawing of a person standing on a platform with crossed lines indicating resistance (no text or symbols)

Simple line drawing of a smiling stick figure sitting on a mat with a rectangular object placed on it (no text or symbols)

AVOID SCRATCHES!

In order to avoid scratching, this furniture should be assembled on a soft layer, such as a rug.

Simple line drawing of a sad face sitting on a table with a crossed X-axis (no text or symbols)

Two stylized human figures holding a rectangular object, no text or symbols present

IMPROVE EFFICIENCY!

Try to find a partner to install with you, which can speed up the installation efficiency and shorten the time.

Safety warning illustration showing a hazard symbol above stairs and a person crossed out with a cross symbol below, implying blocked or invalid conditions.

Warning symbol with exclamation mark and building diagram, likely indicating an alert or hazard in a safety or emergency context.

Simple line drawing of a person standing next to stacked boxes with a cross symbol (no text or labels)

ANTI-TIPPING WARNING!

Overturned furniture can cause serious or fatal crush injuries. To prevent tipping over, be sure to use the wall attachment. If it is not included with this product, please purchase the wall attachment that fits your wall. If unsure, seek professional advice. Please read and follow each step of the instructions carefully.

IMPORTANT!

It is important that any product which is assembled using any kind of screw is re-tightened 2 weeks after assembly, and once every 3 months, in order to assure stability throughout the lifespan of the product.

For regular maintenance and cleaning of the product, for the frame, please use a rag dipped in neutral detergent to fully wipe it, and then dry it with a clean rag. For glass materials, wipe with a rag dampened with water glass cleaner, and then dry with a dry rag.

Do not use an electric screwdriver, and do not use too much force when installing, because the board is easy to break.

PARTS LIST
Technical diagram of a multi-level assembly with numbered components, likely for architectural or mechanical design reference.

① x2, ②, ③, ④, ⑤, ⑥ x3, ⑦ x4, ⑧ x2, ⑨, ⑩, ⑪, ⑫, ⑬, ⑭, ⑮, ⑯, ⑰, ⑱, ⑲, ⑳, ㉑, ㉒, ㉓, ㉔, ㉕, ㉖, ㉗, ㉘, ㉙, ㉚, ㉛, ㉜, ㉝, ㉞, ㉟, ㉳, ㉟, ㉟, ㉟, ㉟, ㉟, ㉟, ㉟, ㉟, ㉟, ㉟, ㉟, ㉟, ㉟, ㉟, ㉟, ㉟, ㉟, ㉟, ㉟, ㉟, ㉟, ㉟, ㉟, ㉟, ㉟, ㉟, ㉟, ㉟, ㉟, ㉟, ㉟, ㉟, ㉟

⑮ x3, ⑯, ⑰ x6, ⑱

A M5x42 42 PCSB 15x12 42 PCSC M7x50 26 PCSD M6x12 2 PCSE M6x25 25 PCSF M6x40 12 PCS
G 6 PCSH 8x40 2 PCS1 PCS4# 1 PCS

Cam Lock fastening system

A M5x42, 4 PCS; B 15x12, 2 PCS

Technical diagram of a mechanical system with force vectors and labeled components, including zoomed-in views and numbered parts.

7Vevor SS-602 - Cam Lock fastening system - 3

Technical diagram of a structural frame with labeled components and force indicators.

8: F M6x40, 2 PCS; D M6x12, 2 PCS; 3, 2, F, D, 6, F

9: F M6x40, 4 PCS; E M6x25, 5 PCS; 14, E, E, E, 3, F, F, E, F, F, E

10

Vevor SS-602 - Cam Lock fastening system - 7

A A ⑨

10: A A

11: B 15x12, 4 PCS; E M6x25, 12 PCS; ⑨, B, E, E, B, E, ⑭, 14, E, E, E, B, E, E, E, ⑩, 1, E, E, E, 1

12: A M5x42, 24 PCS; B 15x12, 4 PCS; A repeated many times; 16, 11, 12

13

B 15×12

Vevor SS-602 - Cam Lock fastening system - 12

20 PCS

Technical diagram of a 3D architectural structure with numbered components, likely for architectural or engineering purposes.

×2

14A A A A A 13 A A A A A

A M5x42, 10 PCS; B 15x12, 10 PCS; H 8x40, 2 PCS

13: 11, B, H, H, 5, B, 16, 9, 15, B, 12, 10

15

Vevor SS-602 - Cam Lock fastening system - 18

Technical line drawing of a two-level cabinet or enclosure with internal components and a magnified inset showing internal wiring (no text or symbols)

16

Diagram of a circular mechanical component with a cable and connector, labeled with number 18 (no text or symbols on the diagram itself)

Simple line drawing of a 3D block with an arrow indicating direction (no text or symbols)

Vevor SS-602 - Cam Lock fastening system - 22

C/O YH Consulting Limited Office 147, Centurion House, London Road, Staines-upon-Thames, Surrey, TW18 4AX

VEVOR®

TOUGH TOOLS, HALF PRICE

warranty certificate www.vevor.com/support

VEVOR®

TOUGH TOOLS, HALF PRICE

NEED HELP? CONTACT US!

IMPORTANT INFORMATION!

Please read the entire manual before starting to assemble and/or using this product. Follow the manual thoroughly and keep it for further reference.
Simple line drawing of a person standing in a boat with crossed lines indicating crossing (no text or symbols)

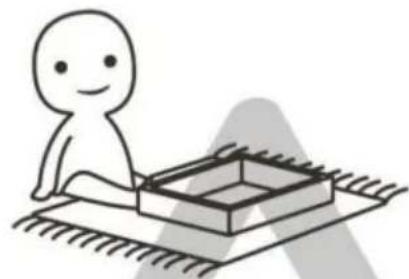
Simple line drawing of a smiling stick figure sitting on a mat with a rectangular object placed on it (no text or symbols)

AVOID SCRATCHES!

In order to avoid scratching, this furniture should be assembled on a soft layer, such as a rug.

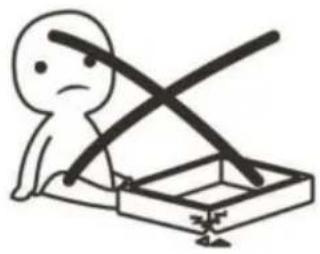
Simple line drawing of a sad face sitting on a table with a crossed X-axis (no text or symbols)

Two stylized human figures holding a rectangular object, no text or symbols present

IMPROVE EFFICIENCY!

Try to find a partner to install with you, which can speed up the installation efficiency and shorten the time.
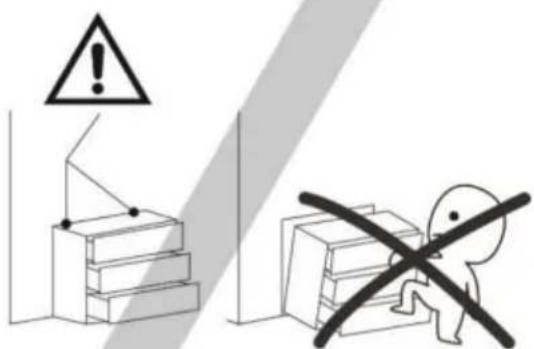
Safety warning illustration showing a hazard symbol above stairs and a person crossed out with a cross symbol below, implying blocked or invalid conditions.

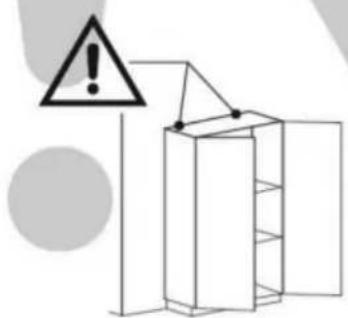
Warning symbol with exclamation mark and building diagram, likely indicating an alert or hazard in a safety or emergency context.

Simple line drawing of a person standing next to stacked boxes with a cross symbol (no text or labels)

ANTI-TIPPING WARNING!

Overturned furniture can cause serious or fatal crush injuries. To prevent tipping over, be sure to use the wall attachment. If it is not included with this product, please purchase the wall attachment that fits your wall. If unsure, seek professional advice. Please read and follow each step of the instructions carefully.

IMPORTANT!

It is important that any product which is assembled using any kind of screw is re-tightened 2 weeks after assembly, and once every 3 months, in order to assure stability throughout the lifespan of the product.

For regular maintenance and cleaning of the product, for the frame, please use a rag dipped in neutral detergent to fully wipe it, and then dry it with a clean rag. For glass materials, wipe with a rag dampened with water glass cleaner, and then dry with a dry rag.

Do not use an electric screwdriver, and do not use too much force when installing, because the board is easy to break.

DELLISTA
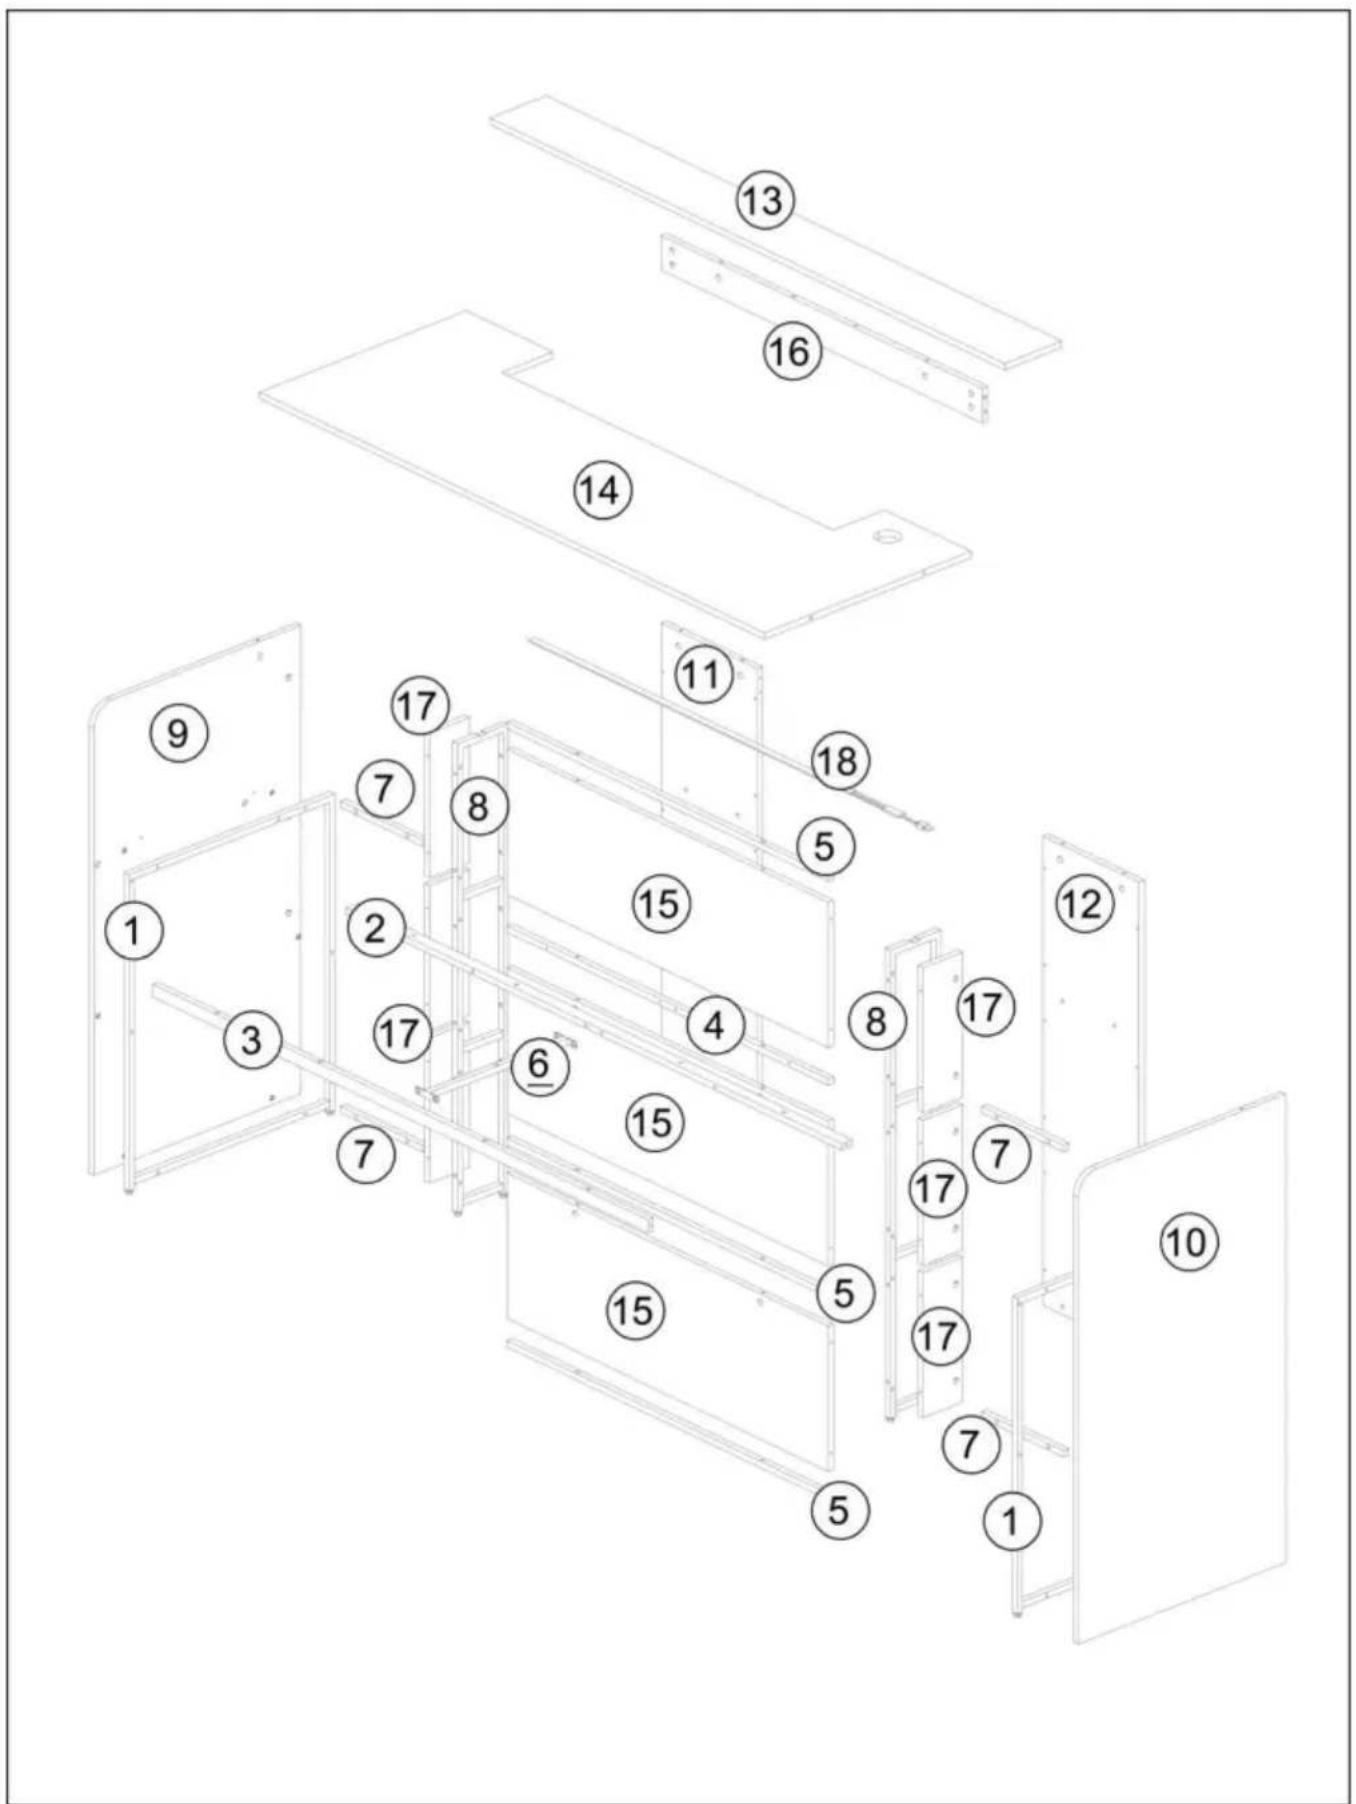
Technical diagram of a multi-level assembly with numbered components, likely for architectural or mechanical design reference.

① x 2 ② ③ ④ ⑤ ⑥ x 3 ⑦ x 4 ⑧ x 2 ⑨ ⑩ ⑪ ⑫ ⑬ ⑭ ⑮ ⑯ ⑰ ⑱ ⑲ ⑳ ㉑ ㉒ ㉓ ㉔ ㉕ ㉖ ㉗ ㉘ ㉙ ㉚ ㉛ ㉜ ㉝ ㉞ ㉟ ㉳ ㉟ ㉟ ㉟ ㉟ ㉟ ㉟ ㉟ ㉟ ㉟ ㉟ ㉟ ㉟ ㉟ ㉟ ㉟ ㉟ ㉟ ㉟ ㉟ ㉟ ㉟ ㉟ ㉟ ㉟ ㉟ ㉟ ㉟ ㉟ ㉟ ㉟ ㉟ ㉟ ㉟ ㉟

⑮ x 3 ⑯ ⑰ x 6 ⑱

A M5x42 42 PCSB 15x12 42 PCSC M7x50 26 PCSD M6x12 2 PCSE M6x25 25 PCSF M6x40 12 PCS
G 6 PCSH 8x40 2 PCS1 PCS4# 1 PCS

Cam Lock Fastening System

A M5x42, 4 PCS; B 15x12, 2 PCS

Technical diagram of a mechanical system with force vectors and labeled components, including zoomed-in views and numbered parts.

7Vevor SS-602 - Cam Lock Fastening System - 3

Technical diagram of a structural frame with labeled components and force indicators.

8; F M6x40, 2 PCS; D M6x12, 2 PCS; 3; 2; F; D; 6; F

9F M6x40, 4 PCS; E M6x25, 5 PCS

14; E; 3; F; F; E; E; E; F; F; E

10

Vevor SS-602 - Cam Lock Fastening System - 8

A; A; ⑨

10; A; A

11; B 15x12, 4 PCS; E M6x25, 12 PCS; ⑨; B; E; E; B; E; ⑭; E; 1; E; E; E; B; E; E; E; ⑩; 1; E

12; A M5x42, 24 PCS; B 15x12, 4 PCS; A A A A A A A A A A A A A A A A A A A A A A A A A A A A A A A A A A A A A A A A A A A A A A A A A A A A A A A A A A A A A A A A A A A A A A A A A A A A A A A A A A A A A A A A A; 16; 11; 12

13

B 15×12

Vevor SS-602 - Cam Lock Fastening System - 13

20 PCS

Technical diagram of a 3D architectural structure with numbered components, likely for architectural or engineering purposes.

×2

14A A; A A; A A; 13; A A A A A

A M5x42, 10 PCS; B 15x12, 10 PCS; H 8x40, 2 PCS

Technical diagram of a cabinet or enclosure with numbered components and labeled parts (B, H).

15

Vevor SS-602 - Cam Lock Fastening System - 19

Technical line drawing of a two-level cabinet or enclosure with internal components and a magnified inset showing internal parts (no text or symbols).

16

Diagram of a circular mechanical component with a cable and connector, labeled with number 18 (no text or symbols on the diagram itself).

Simple line drawing of a 3D block with an arrow indicating upward motion (no text or symbols).

Vevor SS-602 - Cam Lock Fastening System - 23

C/O YH Consulting Limited Office 147, Centurion

House, London Road, Staines-upon-Thames, Surrey, TW18 4AX

VEVOR®

TOUGH TOOLS, HALF PRICE

www.vevor.com/support

Manual assistant
Powered by Anthropic
Waiting for your message
Product information

Brand : Vevor

Model : SS-602

Category : Office