
PBS-2 - Office Vevor - Free user manual and instructions
Find the device manual for free PBS-2 Vevor in PDF.



| Product type | Sit-stand desk with adjustable height |
| Brand | Vevor |
| Model | PBS-2 |
| Category | Desk |
| Tabletop material | MDF board / wood |
| Frame material | Steel |
| Tabletop dimensions | 120 x 60 cm (W x D) |
| Height range | 72 to 120 cm |
| Net weight of desk | 26 kg |
| Load capacity | 80 kg |
| Power supply | Power cable 220-240 V |
| Adjustment type | Motorized with remote control |
| Memory functions | 3 memory positions |
| Noise level | < 50 dB |
| Safety | Obstacle detection |
| Feet | Adjustable floor levelers |
| Mounting | Removable steel underframe |
| Package contents | 1 tabletop, 1 underframe, screws, instructions |
| Maintenance | Soft slightly damp cloth |
| Assembly | Assembly required (2 people recommended) |
Frequently Asked Questions - PBS-2 Vevor
User questions about PBS-2 Vevor
0 question about this device. Answer the ones you know or ask your own.
Ask a new question about this device
Download the instructions for your Office in PDF format for free! Find your manual PBS-2 - Vevor and take your electronic device back in hand. On this page are published all the documents necessary for the use of your device. PBS-2 by Vevor.
USER MANUAL PBS-2 Vevor
Technical Support and E-Warranty Certificate
www.vevor.com/support
WALL MOUNTED WORKTABLE USER MANUAL
MODEL: PBS-2
We continue to be committed to provide you tools with competitive price. "Save Half", "Half Price" or any other similar expressions used by us only represent of savings you might benefit from buying certain tools with us compared top brands and does not necessarily mean to cover all categories of tools offered are kindly reminded to verify carefully when you are placing an order with us actually saving half in comparison with the top major brands.
VEVOR®
TOUGH TOOLS, HALF PRICE
WALL MOUNTED WORKTABLE
MODEL: PBS-2

(The picture is for reference only, please refer to the actual object)
NEED HELP? CONTACT US!
Have product questions? Need technical support? Please feel fr contact us:
Technical Support and E-Warranty Certificate www.vevor.com/support
This is the original instruction, please read all manual instruction carefully before operating. VEVOR reserves a clear interpretation user manual. The appearance of the product shall be subject to product you received. Please forgive us that we won't inform you there are any technology or software updates on our product.
SAFETY INSTRUCTION AND PRECAUTIONS
WARNING:
Read this material before using this product. Failure to do so can re serious injury.
- This product is not a toy. Do not allow children to play with this
- Use as intended only.
- It is recommended to check whether the support of the worktable loose when using.
- Do not exceed the listed weight capacity.
PART LIST


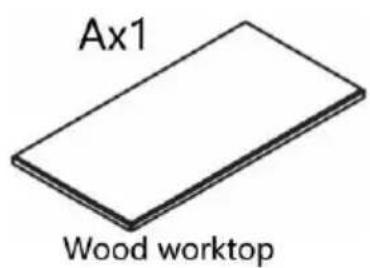
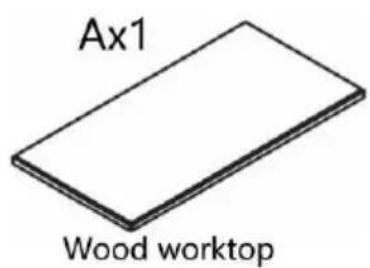
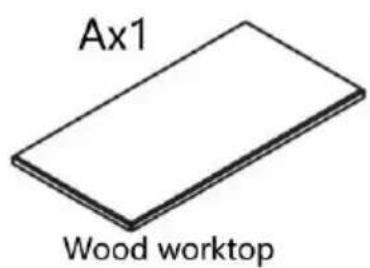
Wood worktop

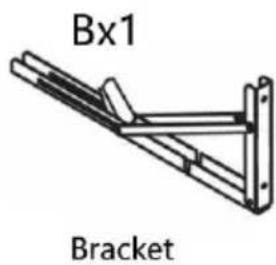
Bracket
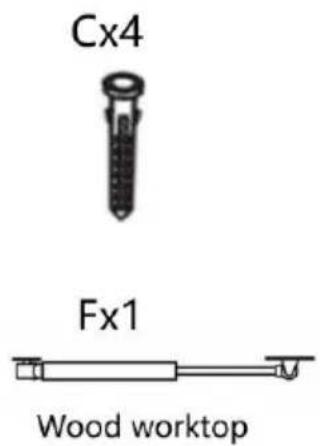
Cx4

Dx4

Ex6

Fx1

Wood worktop
Gx1

Positioning cardboard
INSTALLATION INSTRUCTION
Q: How to solve the hole misalignment?
A: Please do not tighten all the screws until aligning all the holes.
STEP1
Note:
Positioning cardboard
against the wall
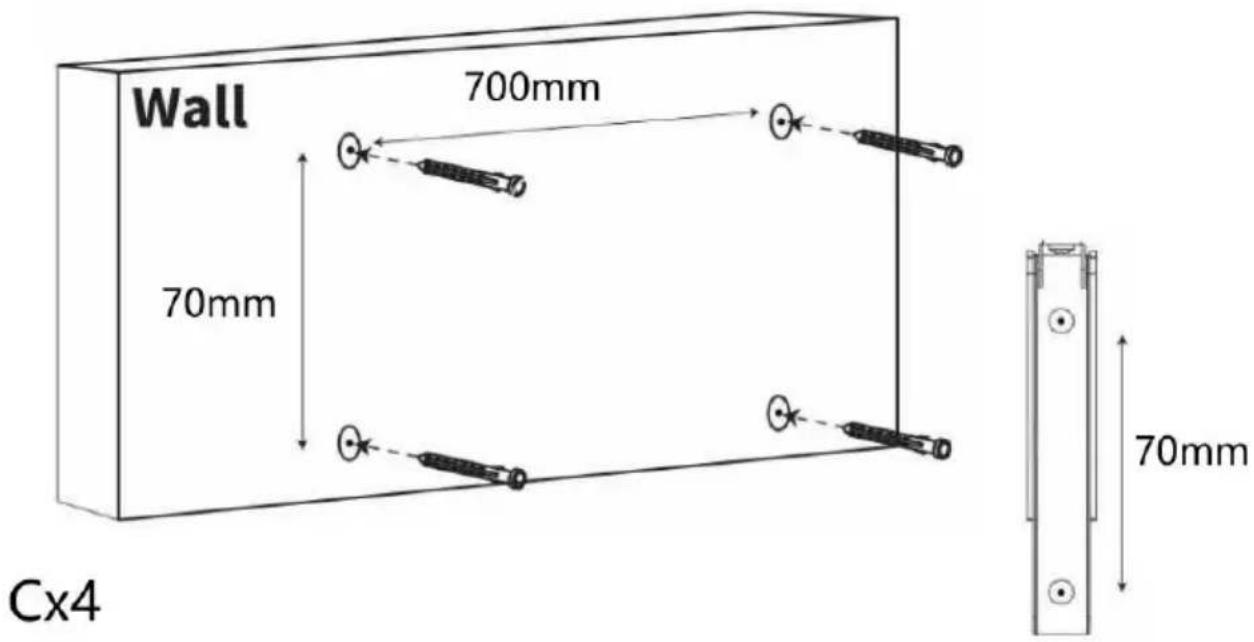
Make a mark on the wall as below.

700mm
(Distance from the center of the holes)
STEP2
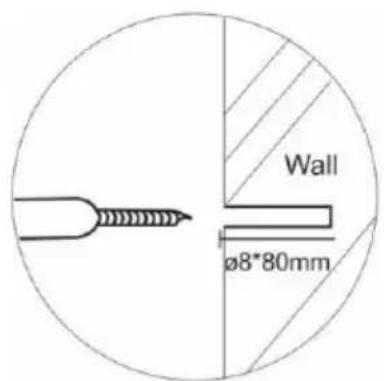
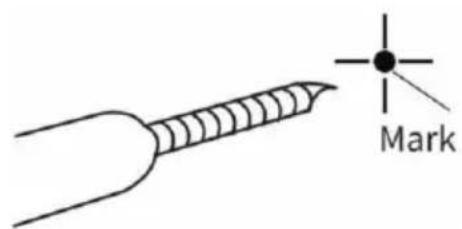
Note: Drill into the wall.


STEP3
Note: Pay attention to the distance of the holes
STEP4

Bx2
Dx4
STEP5
Note: The mounting holes of the bracket and the mountingholes of the wood board should be on the same line.

Use Instruction


| Items | Description | |
| 1 | Name | Wall Mounted Worktable |
| 2 | Model | PBS-2 |
| 3 | Parameter | Texture: shaving boardSize:31.5x15.7inchload-bearing: 110lbs |
VEVOR®
TOUGH TOOLS, HALF PRICE
Technical Support and E-Warranty Certificate www.vevor.com/support
VEVOR®
TOUGH TOOLS, HALF PRICE
www.vevor.com/support
TABLE DE TRAVAIL MURALE MANUEL DE L'UTILISATEUR
MODÈLE : PBS-2
We continue to be committed to provide you tools with competitive price. "Save Half", "Half Price" or any other similar expressions used by us only represent of savings you might benefit from buying certain tools with us compared top brands and does not necessarily mean to cover all categories of tools offered are kindly reminded to verify carefully when you are placing an order with us actually saving half in comparison with the top major brands.
VEVOR®
TOUGH TOOLS, HALF PRICE
WALL MOUNTED WORKTABLE
MODÈLE: PBS-2

NEED HELP? CONTACT US!
Have product questions? Need technical support? Please feel fr contact us:
Technical Support and E-Warranty Certificate www.vevor.com/support
This is the original instruction, please read all manual instruction carefully before operating. VEVOR reserves a clear interpretation user manual. The appearance of the product shall be subject to product you received. Please forgive us that we won't inform you there are any technology or software updates on our product.
SAFETY INSTRUCTION AND PRECAUTIONS
⚠ AVERTISSEMENT:


Gx1

Positioning cardboard
INSTALLATION INSTRUCTION
| STEP1 Note: Positioning cardboard against the wall | Make a mark on the wall as below. Wall 700mm (Distance from the center of the holes) |
STEP2
Note: Drill into the wall.


STEP3
Note: Pay attention to the distance of the holes

STEP4

Bx2
Dx4
STEP5
Note: The mounting holes of the bracket and the mountingholes of the wood board should be on the same line.


www.vevor.com/support
WANDMONTIERTER ARBEITSTISCH BENUTZERHANDBUCH
MODELL: PBS-2
We continue to be committed to provide you tools with competitive price. "Save Half", "Half Price" or any other similar expressions used by us only represent of savings you might benefit from buying certain tools with us compared top brands and does not necessarily mean to cover all categories of tools offered are kindly reminded to verify carefully when you are placing an order with us actually saving half in comparison with the top major brands.
VEVOR®
TOUGH TOOLS, HALF PRICE
WALL MOUNTED WORKTABLE
MODELL: PBS-2

NEED HELP? CONTACT US!
Have product questions? Need technical support? Please feel fr contact us:
Technical Support and E-Warranty Certificate www.vevor.com/support
This is the original instruction, please read all manual instruction carefully before operating. VEVOR reserves a clear interpretation user manual. The appearance of the product shall be subject to product you received. Please forgive us that we won't inform you there are any technology or software updates on our product.
SAFETY INSTRUCTION AND PRECAUTIONS
⚠️WARNUNG:




Gx1

Positioning cardboard
INSTALLATION INSTRUCTION
| STEP1 Note: Positioning cardboard against the wall | Make a mark on the wall as below. Wall 700mm (Distance from the center of the holes) |
STEP2
Note: Drill into the wall.


STEP3
Note: Pay attention to the distance of the holes

STEP4

Bx2
Dx4
STEP5
Note: The mounting holes of the bracket and the mountingholes of the wood board should be on the same line.


www.vevor.com/support
TAVOLO DA LAVORO A PARETE MANUALE D'USO
MODELLO: PBS-2
We continue to be committed to provide you tools with competitive price. "Save Half", "Half Price" or any other similar expressions used by us only represent of savings you might benefit from buying certain tools with us compared top brands and does not necessarily mean to cover all categories of tools offered are kindly reminded to verify carefully when you are placing an order with us actually saving half in comparison with the top major brands.
VEVOR®
TOUGH TOOLS, HALF PRICE
WALL MOUNTED WORKTABLE
MODELLO: PBS-2

NEED HELP? CONTACT US!
Have product questions? Need technical support? Please feel fr contact us:
Technical Support and E-Warranty Certificate www.vevor.com/support
This is the original instruction, please read all manual instruction carefully before operating. VEVOR reserves a clear interpretation user manual. The appearance of the product shall be subject to product you received. Please forgive us that we won't inform you there are any technology or software updates on our product.
SAFETY INSTRUCTION AND PRECAUTIONS
⚠AVVERTIMENTO:


Gx1

Positioning cardboard
INSTALLATION INSTRUCTION
STEP2
Note: Drill into the wall.


STEP3
Note: Pay attention to the distance of the holes

STEP4

Bx2
Dx4
STEP5
Note: The mounting holes of the bracket and the mountingholes of the wood board should be on the same line.


www.vevor.com/support
MESA DE TRABAJO MONTADA EN LA PARE MANUAL DE USUARIO
MODELO: PBS-2
We continue to be committed to provide you tools with competitive price. "Save Half", "Half Price" or any other similar expressions used by us only represent estimate of savings you might benefit from buying certain tools with us compared top brands and does not necessarily mean to cover all categories of tools offered are kindly reminded to verify carefully when you are placing an order with us actually saving half in comparison with the top major brands.
VEVOR®
TOUGH TOOLS, HALF PRICE
WALL MOUNTED WORKTABLE
MODELO: PBS-2

NEED HELP? CONTACT US!
Have product questions? Need technical support? Please feel fr contact us:
Technical Support and E-Warranty Certificate www.vevor.com/support
This is the original instruction, please read all manual instruction carefully before operating. VEVOR reserves a clear interpretation user manual. The appearance of the product shall be subject to product you received. Please forgive us that we won't inform you there are any technology or software updates on our product.
SAFETY INSTRUCTION AND PRECAUTIONS
ADVERTENCIA:


Gx1

Positioning cardboard
INSTALLATION INSTRUCTION
STEP2
Note: Drill into the wall.


STEP3
Note: Pay attention to the distance of the holes

STEP4

Bx2
Dx4
STEP5
Note: The mounting holes of the bracket and the mountingholes of the wood board should be on the same line.


www.vevor.com/support
STÓŁ ROBOCZY MONTOWANY NA ŚCIANIE INSTRUKCJA OBSŁUGI
MODEL: PBS-2
We continue to be committed to provide you tools with competitive price. "Save Half", "Half Price" or any other similar expressions used by us only represent of savings you might benefit from buying certain tools with us compared top brands and does not necessarily mean to cover all categories of tools offered are kindly reminded to verify carefully when you are placing an order with us actually saving half in comparison with the top major brands.
VEVOR®
TOUGH TOOLS, HALF PRICE
WALL MOUNTED WORKTABLE
MODEL: PBS-2

NEED HELP? CONTACT US!
Have product questions? Need technical support? Please feel fr contact us:
Technical Support and E-Warranty Certificate www.vevor.com/support
This is the original instruction, please read all manual instruction carefully before operating. VEVOR reserves a clear interpretation user manual. The appearance of the product shall be subject to product you received. Please forgive us that we won't inform you there are any technology or software updates on our product.
SAFETY INSTRUCTION AND PRECAUTIONS
⚠OSTRZEŻENIE:
Cx4

Dx4

Ex6


Gx1

Positioning cardboard
INSTALLATION INSTRUCTION
Positioning cardboard
Make a mark on the wall as below.

700mm
(Distance from the center of the holes)
STEP2
Note: Drill into the wall.


STEP3
Note: Pay attention to the distance of the holes

STEP4

Bx2
Dx4
STEP5
Note: The mounting holes of the bracket and the mountingholes of the wood board should be on the same line.

Use Instruction


www.vevor.com/support
WANDGEMONTEERDE WERKTAFEL HANDLEIDING
MODEL: PBS-2
We continue to be committed to provide you tools with competitive price. "Save Half", "Half Price" or any other similar expressions used by us only represent of savings you might benefit from buying certain tools with us compared top brands and does not necessarily mean to cover all categories of tools offered are kindly reminded to verify carefully when you are placing an order with us actually saving half in comparison with the top major brands.
VEVOR®
TOUGH TOOLS, HALF PRICE
WALL MOUNTED WORKTABLE
MODEL: PBS-2

NEED HELP? CONTACT US!
Have product questions? Need technical support? Please feel fr contact us:
Technical Support and E-Warranty Certificate www.vevor.com/support
This is the original instruction, please read all manual instruction carefully before operating. VEVOR reserves a clear interpretation user manual. The appearance of the product shall be subject to product you received. Please forgive us that we won't inform you there are any technology or software updates on our product.
SAFETY INSTRUCTION AND PRECAUTIONS
⚠ WAARSCHUWING:

Wood worktop

Bracket
Cx4

Dx4
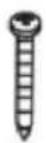
Ex6

Fx1

Wood worktop
Gx1

Positioning cardboard
INSTALLATION INSTRUCTION
Positioning cardboard
against the wall
Make a mark on the wall as below.

700mm
(Distance from the center of the holes)
STEP2
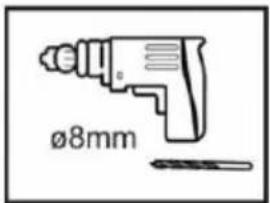
Note: Drill into the wall.


STEP3
Note: Pay attention to the distance of the holes

STEP4

Bx2
Dx4
STEP5
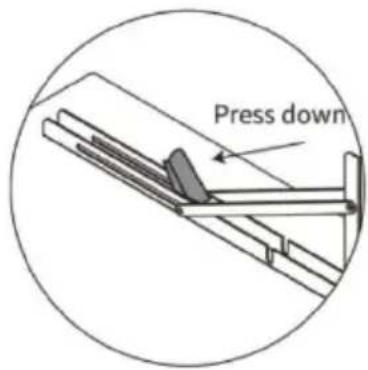
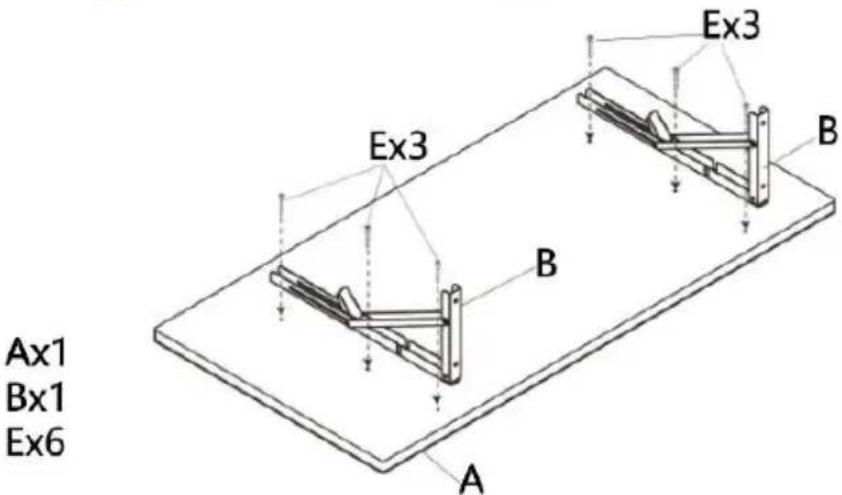
Note: The mounting holes of the bracket and the mountingholes of the wood board should be on the same line.

Use Instruction

www.vevor.com/support
VÄGGMONTERAT ARBETSBORD ANVÄNDARMANUAL
MODELL: PBS-2
We continue to be committed to provide you tools with competitive price. "Save Half", "Half Price" or any other similar expressions used by us only represent of savings you might benefit from buying certain tools with us compared top brands and does not necessarily mean to cover all categories of tools offered are kindly reminded to verify carefully when you are placing an order with us actually saving half in comparison with the top major brands.
VEVOR®
TOUGH TOOLS, HALF PRICE
WALL MOUNTED WORKTABLE
MODELL: PBS-2

NEED HELP? CONTACT US!
Have product questions? Need technical support? Please feel fr contact us:
Technical Support and E-Warranty Certificate www.vevor.com/support
This is the original instruction, please read all manual instruction carefully before operating. VEVOR reserves a clear interpretation user manual. The appearance of the product shall be subject to product you received. Please forgive us that we won't inform you there are any technology or software updates on our product.
SAFETY INSTRUCTION AND PRECAUTIONS
⚠️VARNING:


Gx1

Positioning cardboard
INSTALLATION INSTRUCTION
| STEP1 Note: Positioning cardboard against the wall | Make a mark on the wall as below. Wall 700mm (Distance from the center of the holes) |
STEP2
Note: Drill into the wall.


STEP3
Note: Pay attention to the distance of the holes

STEP4

Bx2
Dx4
STEP5
Note: The mounting holes of the bracket and the mountingholes of the wood board should be on the same line.






- WALL MOUNTED WORKTABLE USER MANUAL
- VEVOR®
- WALL MOUNTED WORKTABLE
- NEED HELP? CONTACT US
- SAFETY INSTRUCTION AND PRECAUTIONS
- WARNING
- INSTALLATION INSTRUCTION
- STEP
- NOTE
- TABLE DE TRAVAIL MURALE MANUEL DE L'UTILISATEUR
- ⚠ AVERTISSEMENT
- WANDMONTIERTER ARBEITSTISCH BENUTZERHANDBUCH
- ⚠️WARNUNG
- TAVOLO DA LAVORO A PARETE MANUALE D'USO
- ⚠AVVERTIMENTO
- MESA DE TRABAJO MONTADA EN LA PARE MANUAL DE USUARIO
- ADVERTENCIA
- STÓŁ ROBOCZY MONTOWANY NA ŚCIANIE INSTRUKCJA OBSŁUGI
- ⚠OSTRZEŻENIE
- WANDGEMONTEERDE WERKTAFEL HANDLEIDING
- ⚠ WAARSCHUWING
- VÄGGMONTERAT ARBETSBORD ANVÄNDARMANUAL
- ⚠️VARNING
Brand : Vevor
Model : PBS-2
Category : Office