
SSX120 - Ice machine Vevor - Free user manual and instructions
Find the device manual for free SSX120 Vevor in PDF.
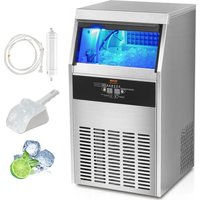


| Brand | Vevor |
| Model | SSX120 |
| Product type | Automatic ice maker |
| Use | Professional and commercial (restaurants, hotels) |
| Approximate dimensions (L x W x H) | 500 x 400 x 700 mm |
| Approximate weight | 35 kg |
| Power supply | 220-240 V, 50 Hz, single phase |
| Power | Approximately 1,000 W |
| Ice production | Up to 120 kg per 24 hours |
| Ice type | Cube-shaped ice cubes |
| Storage bin capacity | Approximately 20 kg |
| Refrigerant | R290 (flammable) or similar |
| Display | Digital display with 4 buttons |
| Main functions | Automatic ice production, automatic stop when bin is full, timer, ice cube thickness adjustment, self-diagnosis (codes E1, E2) |
| Water connection | Drinking water supply (pressure 0.13-0.55 MPa), gravity or pump drainage |
| Maintenance and cleaning | Regular cleaning of condenser (every 3 months), water pump (every month), ice grids (every 2 months), and water circuit (every 7-15 days with citric acid) |
| Safety | Mandatory grounding, leak protection, automatic stop when bin is full, 3 min restart delay, compressor rest time of 24 h before first use |
| Spare parts and repairability | Available parts: water pump, solenoid valve, sensors, motherboard, condenser, fan, etc. Maintenance by qualified personnel recommended |
| Installation conditions | Indoors, flat floor, sheltered from sun and heat, ambient temperature 10-32 °C, max altitude 2000 m |
Frequently Asked Questions - SSX120 Vevor
User questions about SSX120 Vevor
0 question about this device. Answer the ones you know or ask your own.
Ask a new question about this device
Download the instructions for your Ice machine in PDF format for free! Find your manual SSX120 - Vevor and take your electronic device back in hand. On this page are published all the documents necessary for the use of your device. SSX120 by Vevor.
USER MANUAL SSX120 Vevor
ICE MACHINE
MODEL: SSX65C, SSX160V, SSX200V
SSX265V, SSX360V, SSX440V
SSX80, SSX90, SSX100
SSX110, SSX120, SSX130
SSX140, SSX300, SSX440
VEVOR
ICE MACHINE
MODEL: SSX65C, SSX160V, SSX200V, SSX265V, SSX360V, SSX440V, SSX80, SSX90, SSX100, SSX110, SSX120, SSX130, SSX140, SSX300, SSX440
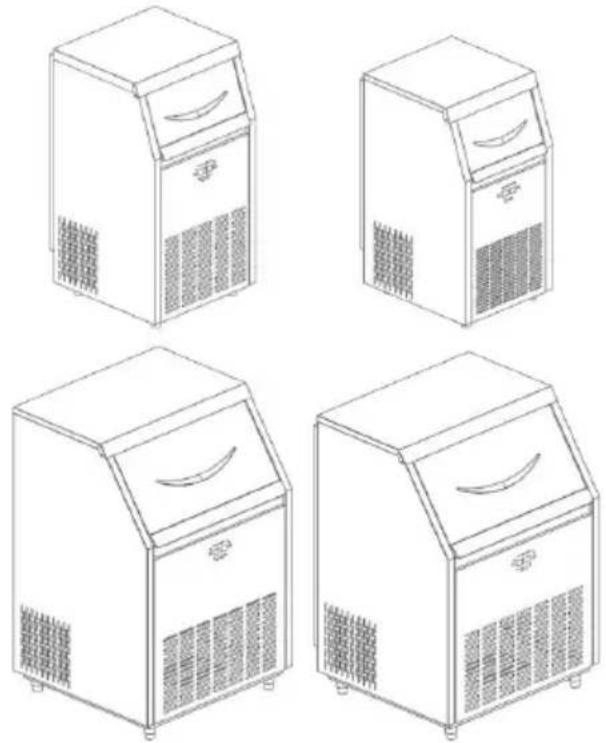
This is the original instruction. Please read all manual instructions carefully before operating. VEVOR reserves a clear interpretation of our user manual. The appearance of the product shall be subject to the product received. Please forgive us that we won't inform you again if there are technology or software updates on our product.
The warning diagram and operation safety instruction
 Prohibition mark Prohibition mark |  Warning mark Warning mark | 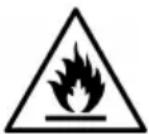 Beware of fire Beware of fire | 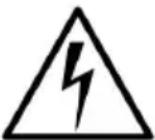 Dangerous voltage Dangerous voltage |
| Indicates a prohibited act that could caus fatal injury or serious injury | Indicates matters that may cause personal injury or damage to items | Indicates that the material used is a combustible material, beware of fire | Indicates a high-voltage electric danger zone, beware of high-voltage electricity |

Note: Be sure to keep this manual in a location that users can access at any time.
Safe operation precautions.
 Caution Caution | After receiving the goods, you have to let the com lubricating oil settle for 24 hours to start the use, it will easily damage the compressor. |
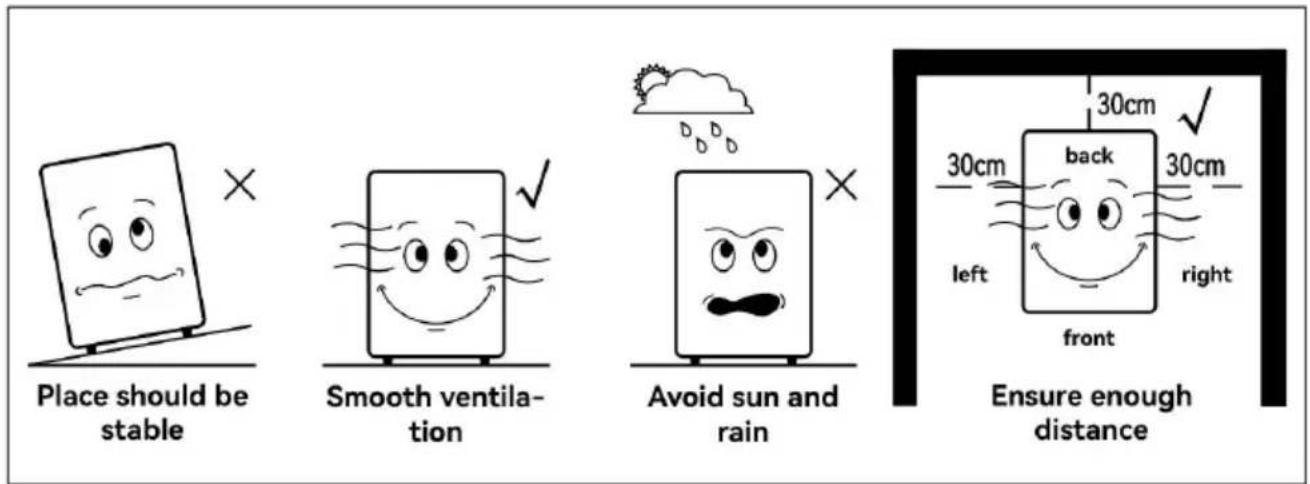
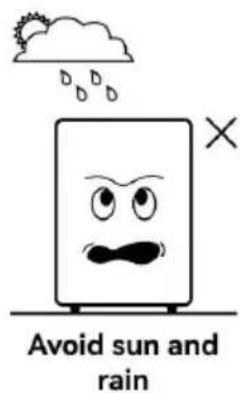
 | Do not use the ice machine in the open air. Whe machine is wet by rain, it may cause electric leaf electric shock. |
 | Never place this ice machine in a wet location or subject to splashing water. Damage to the insulation ice machine may cause electric leakage or electric |
 | Never spray water directly onto the ice machine. A machine may cause electric shock or short circu |
 | Be sure not to put volatile or flammable substance the ice machine. Storage of such materials may ca explosion or fire. |
 | The ice machine should only be installed by qua engineers or maintenance personnel. Installing the machine by yourself may cause gas or liquid leaf electric shock or fire. |
 | Never disassemble, repair, or modify the ice mach such work is performed by unqualified personnel, i cause fire or personal injury due to work failur |
 | Never ground the ice machine through a gas pipe mains, telephone line or lightning rod. This is cons unsafe to ground. |
 | Never insert metal materials such as iron pins or v the vents, passage holes or exhaust ports for air c in the tank. This may result in electric shock or injury due to accidental operation of moving par |
 | Be sure to place the ice machine firmly on a soli the floor is not strong enough or not placed prope cause damage due to the ice machine being turned down or overturned. |
 | Be sure to use the dedicated power supply specif the nameplate of this ice machine. Using a branch may cause a fire. |
  | Be sure to insert the power plug firmly into the o removing the dust.A dusty socket or improperly inserted may causeUse a grounded outlet to prevent electric shock. unlikely event that there is no grounded outlet, grounding device must be assembled by a qualif engineering technician. The socket should be in an accessible position after installation. |
 | If there is any abnormal temperature or alarm in the any reason, you must immediately transfer the cont the box to a safe place to avoid your loss. |
 | This appliance contains flammable materials and mu disposed of and recycled by qualified personnel a agencies. |
 | Do not use mechanical equipment or other mean speed up the defrosting process except as recommended by the manufactu |
 | Do not damage the refrigeration circuit. |
 | Except for the type recommended by the manufactu appliance must not be used in the food storage ro appliance. |
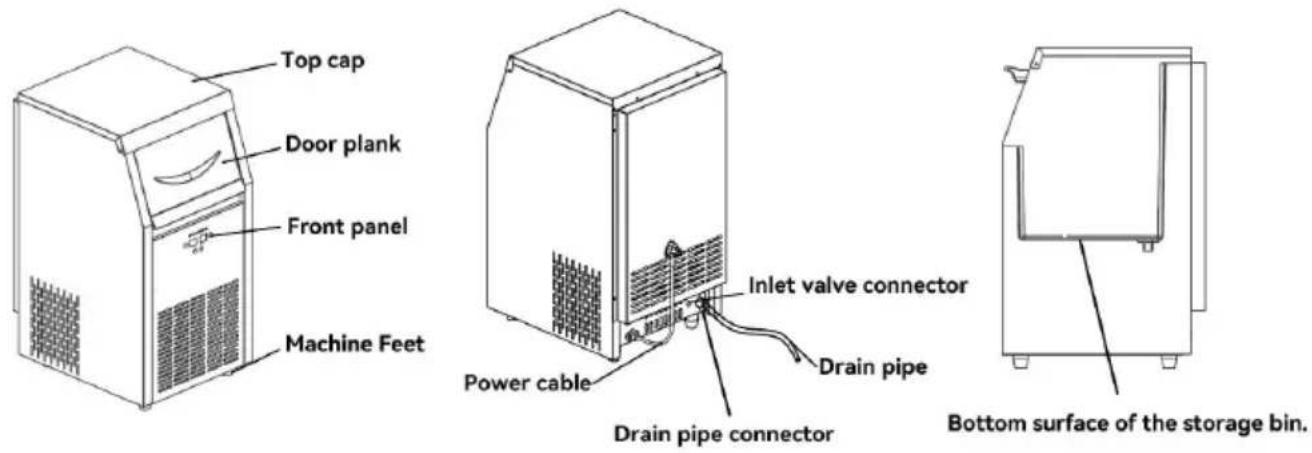
 | Use the new hose assembly that comes with the a and the old hose assembly cannot be reused. |
  | When handling toxic, hazardous or radioactive mate use this ice machine in a safe place. Improper u adversely affect your health and the environmenThe disposal of the ice machine should be done special person. Never throw the ice machine away it be natural. This may cause the child to be shut the ice machine. |
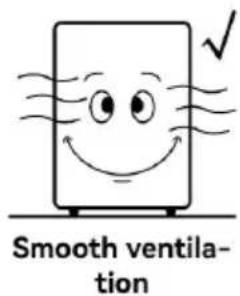
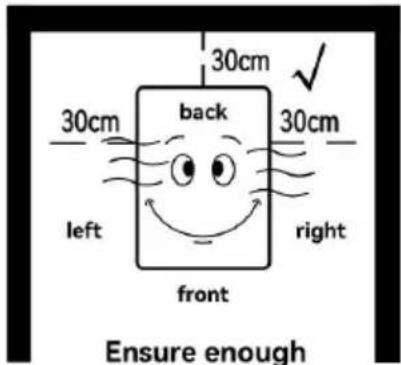
 | There are no obstructions around the appliance or embedded structure, keeping the ventilation open. |
 | Unplug the power cord before cleaning, maintaining inspecting the ice machine to prevent electric shock personal injury. |
 | Some models use flammable refrigerants and flamm foaming agents, beware of fire, (the product has a of fire mark). When an abnormality occurs in the product, it must be repaired by qualified personnel institutions. |
 | This appliance contains a flammable blowing agercyclopentane, which must be disposed of and recyqualified personnel and institutions. |
 | Children should be supervised to ensure that children not play with the machine. |
 | When the ice machine malfunctions, unplug the po cord. Continued abnormal operation may result in e shock or fire. |
Electrical safety matters
- The working voltage of the ice maker should be consistent with the rated voltage. If the voltage is not in this range, please purchase a regulator above 1000W.
- Be sure to connect the ground wire and ground it safely. The ground should not be connected to the water pipe or gas pipe.
- In order to protect the compressor, do not start the ice machine again within 10 minutes after power off or shutdown.
- Please do not connect other electrical appliances to the same socket.
- If the power cord is damaged, in order to avoid danger, it must be replaced by a person arranged by the manufacturer or a qualified professional.
- The electrical control system has a voltage of more than 36V, do not open and touch when used. If you need to repair, please contact the manufacturer or have relevant qualified technical personnel to deal with it.
WARNING: Do not operate the ice machine when a gas leak occurs in the environment in which the ice machine is located. Because the spark caused by the opening and closing of the plug or the temperature could cause a fire, the air source should be cut off and the window opened to allow air to circulate.
Installation Precautions
Requirements for handling and moving conditions:
When transporting, the cabinet should be kept as straight as possible, the inclination should not exceed 45 degrees at most. Do not invert and lie horizontally.
To operate the ice machine properly and get the best performance, place the ice machine in the following conditions:
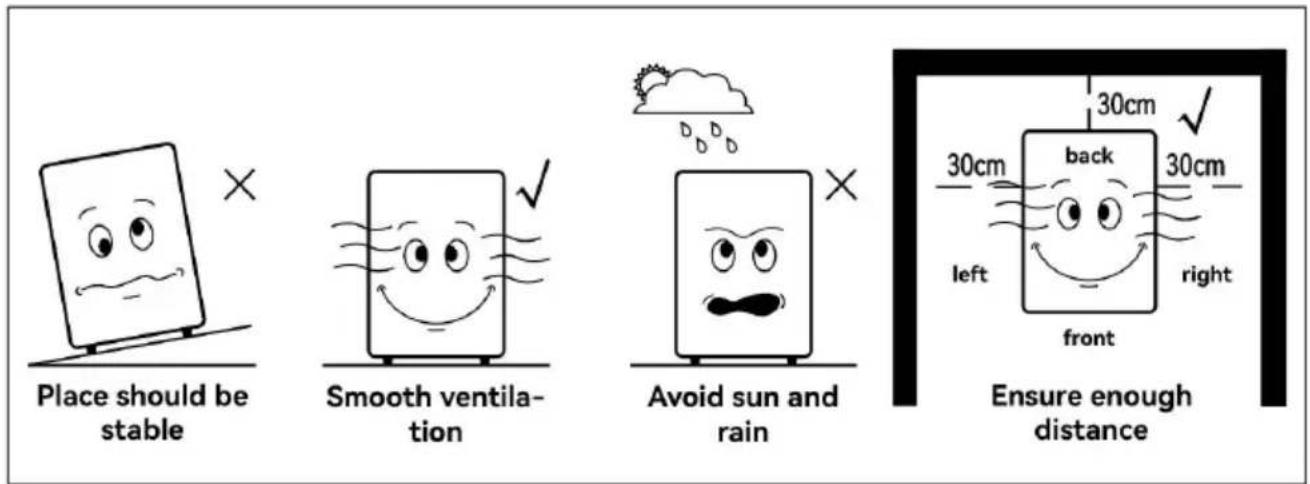
1. Solid and flat ground
Place the ice machine on a solid, level surface to avoid excessive vibration and noise.
2. Keep away from the heat source
Avoid placing the ice machine near hot equipment such as gas stoves. Heating the ice machine can cause a decrease in cooling efficiency.
3. Avoid direct sunlight
If the ice machine is installed in direct sunlight, it may cause abnormal operation and may shorten the working life of the ice machine.
4. Dry area
Avoid placing the ice machine in a wet area, for example, near a sink.

Be careful

After receiving the goods, you have to let the compressor's lubricating oil settle for 24 hours before use, otherwise it will easily damage the compressor.
If the ice machine is placed in a wet area, a switch must be installed and the ice machine must be grounded. Install the disconnect switch on the power supply. For further information, consult the ice machine retailer or an electrical technician.

Caution



Always use a plug with a grounding structure and the ice machine to prevent electric shock during operation.
Replacing a grounding terminal with a water pipe may not provide proper grounding protection in many situations, as plastic pipes are often used in plumbing.
Never ground the ice machine through a gas pipe; this is very dangerous.

Never ground the ice machine by telephone line or lightning protection, because if lightning strikes, a large current will be generated, which makes grounding very dangerous.
- Nothing will fall on the ice machine.
- Installation and operating instructions shall be provided with cautionary statements concerning the handling, moving, and use of the ice maker to avoid either damaging the refrigerant tubing or increasing the risk of a leak.
- The installation and operating instructions shall indicate that component parts shall be replaced with like components and that servicing shall be done by factory authorized service personnel, so as to minimize the risk of possible ignition due to incorrect parts or improper service.
- The installation instructions shall indicate the ice maker is to be installed in accordance with the safety standard for Refrigeration systems, ASHRAE 15. In addition, the instructions shall indicate that the ice maker shall not be installed in corridors or hallways of public buildings.
Environmental conditions:
This equipment is designed in accordance with the following conditions:
- Indoor use.
- The altitude is not higher than 2000 meters.
- The ambient temperature is in the range of 10°C to 32°C.
- When the temperature is not higher than 31°C, the maximum relative humidity is 80%, and the maximum relative humidity decreases linearly with increasing temperature.
- The main power supply voltage fluctuation does not exceed ±10% of rated voltage.
- In accordance with the equipment installation level (overvoltage level) transient overvoltage.
This appliance is used for similar purposes such as:
-- a kitchen area in a store, office or other workplace;
-- Farmers as well as hotels, motels and residential environments; Fam -- hotel environment;
Catering industry and similar non-retail applications. This appliance is intended for general household use.
Correct operation
When using for the first time and continuous operation, please follow rules below.
- Connect the ice maker to a special socket (the power supply is co with the famous brand).
- The ice machine needs to run for a long time to stabilize the temp in the ice storage room, and minimize the number of door opening of this period.
- The ice machine is surrounded by a cooling system for cooling the system. It is forbidden to block the items.
- After completing the inspection of the operation of the ice machine, on the power of the ice machine and let the machine start making i
- Use an independent water source for the ice machine and check it regularly to prevent low water pressure, fluctuations, or filter clogging.
- Do not store any debris in the ice storage room, or freeze or free food in the ice storage room, and keep the ice shovel clean.
- When the ice storage bucket is plasticized, it should be lightly opened and closed. Do not drop the door. After the ice is finished, please close the sliding door of the ice storage bin.
- The ice machine should be kept away from heat sources. It is strictly
forbidden to use in high temperature or low temperature environments, and to avoid direct sunlight, so as not to affect the heat dissipation of the machine.
- Do not directly wash the surface of the ice machine by splashing. Otherwise, it may cause short circuit or electric leakage. After using the ice machine for a period of time, if it is left unused, it should be energized every 4 months for 4 to 6 hours.
Installation instructions
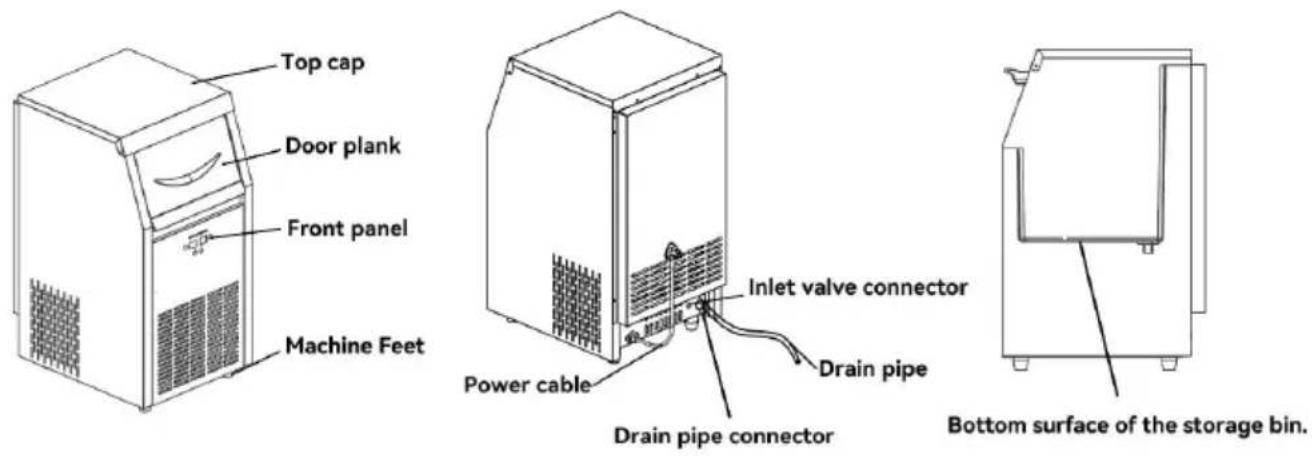
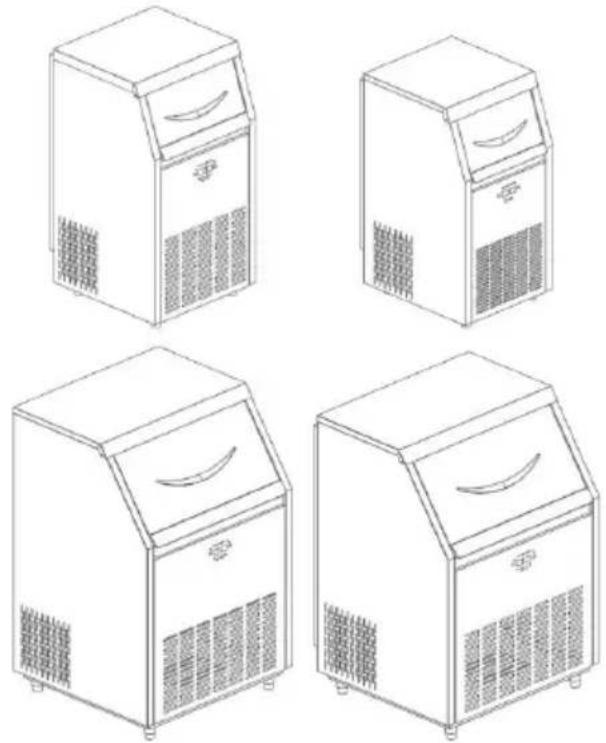
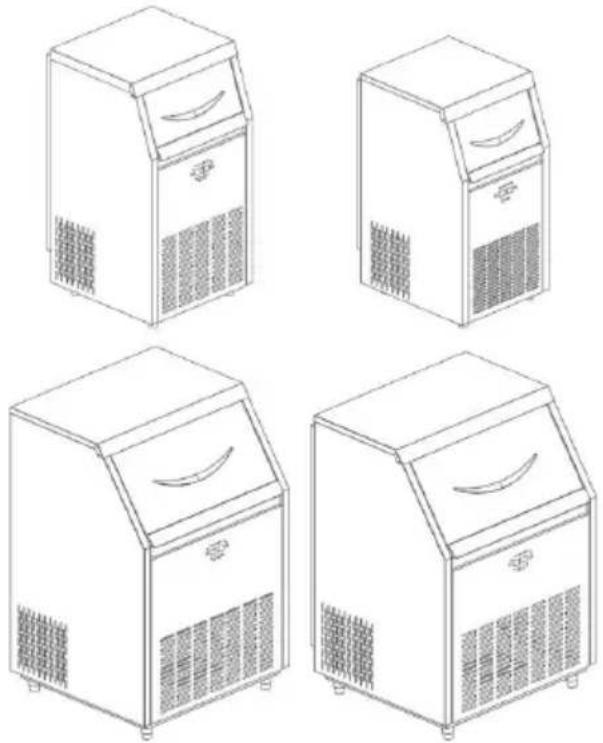
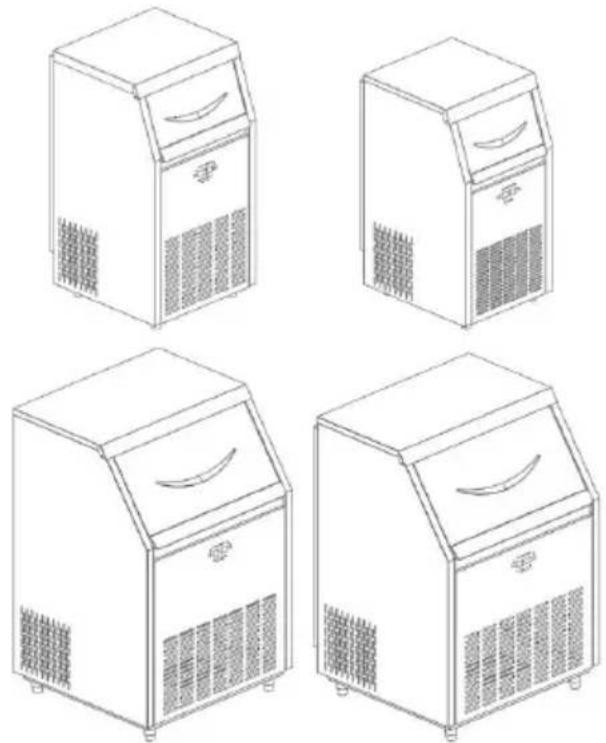
Due to the product being updated and classified continuously, the machine you get may not be the same as the picture in the manual. Please give your understanding. We will improve it continuously.
- It should use filtered drinking water at normal temperature to make ice.
- The pressure of water supply should be controlled between 130-55 Pa. If the water pressure is over high, please install a relief valve. Do not let the hose be under high pressure.
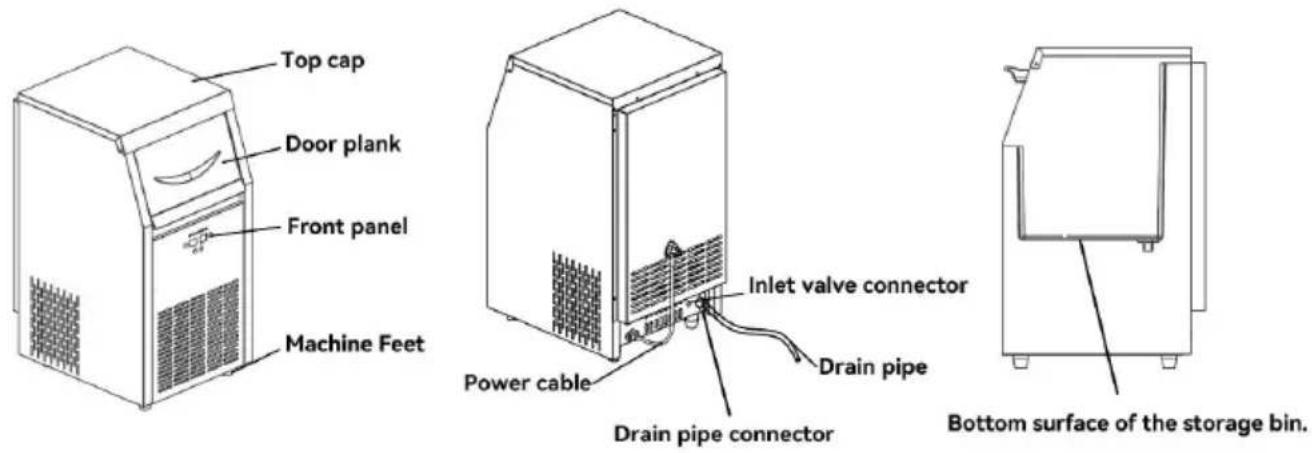
- Please connect the outside branch hose of the machine to the tap drinking water filter. The filter has a sign to show the outlet and inlet.
- Connect the inlet of the filter to the tap of the drinking water.
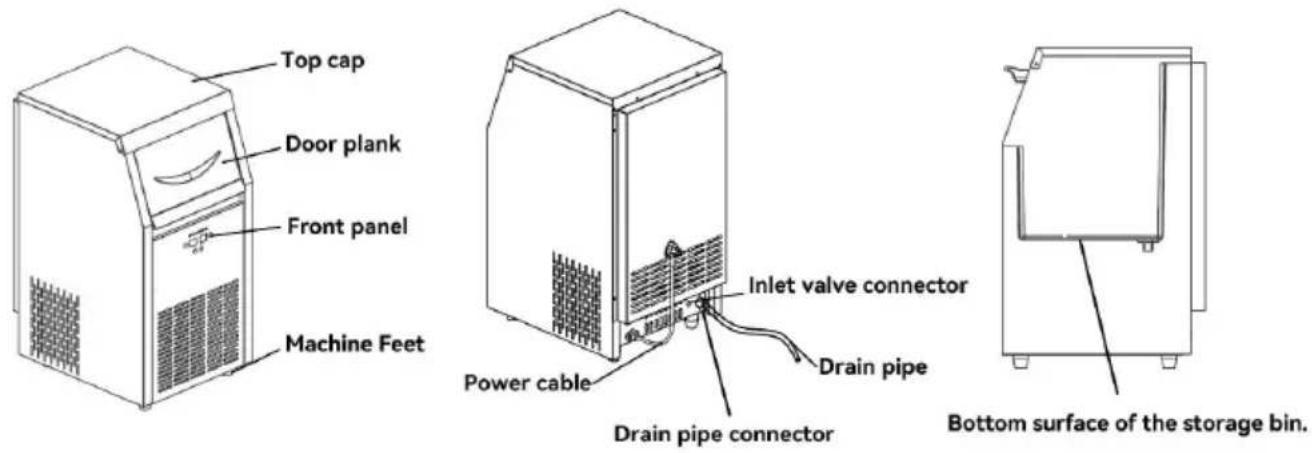
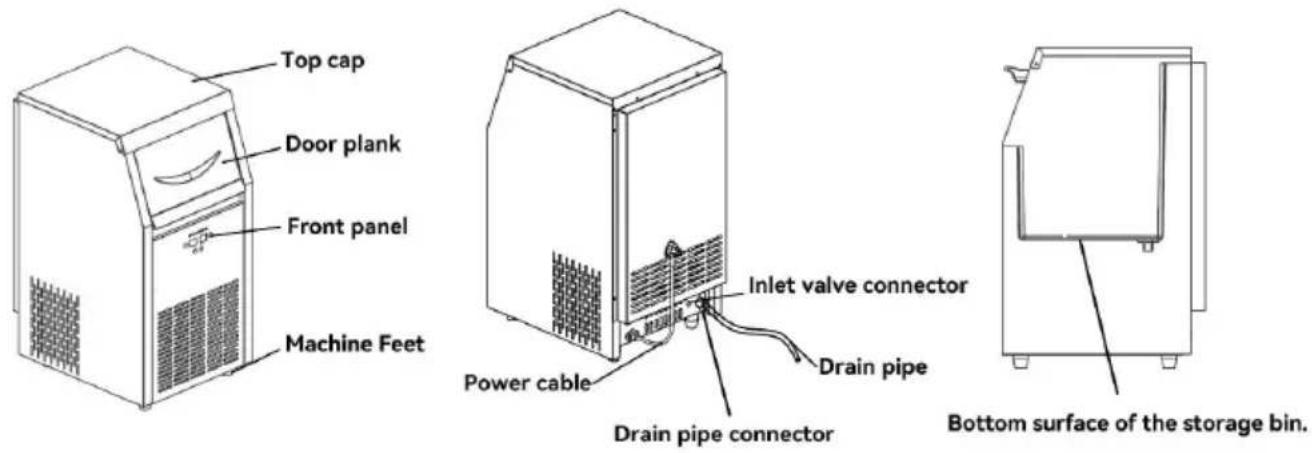
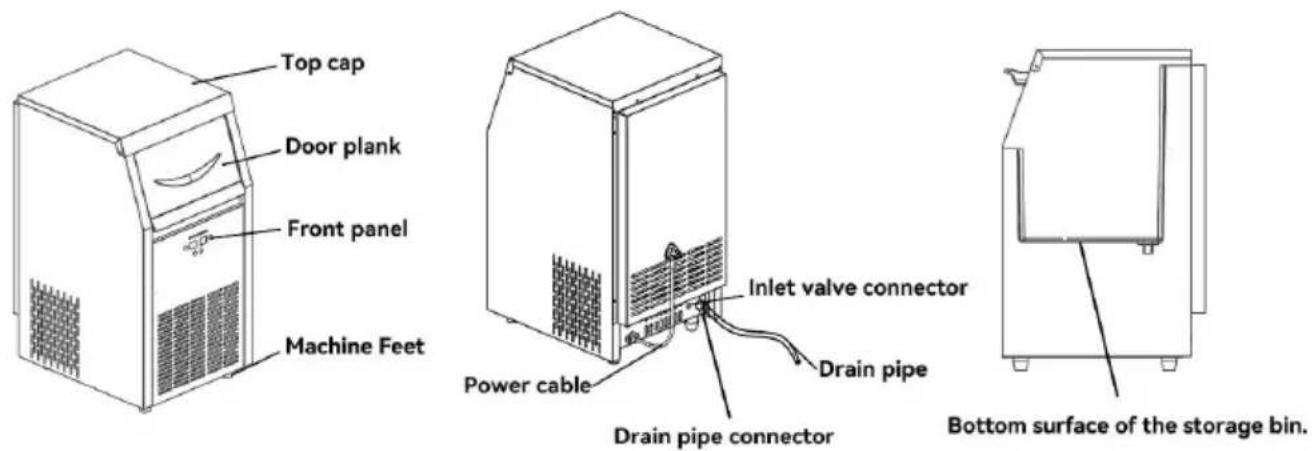
- To ensure the smooth drainage of the machine, it is important that the drainage pipeline is below the bottom surface of the machine. The drainage pipe of the machine with a drainage pump has to be lower than the bottom surface of the storage bin.
Warning
It is merely permitted to connect to the drinking water
All-in-one installation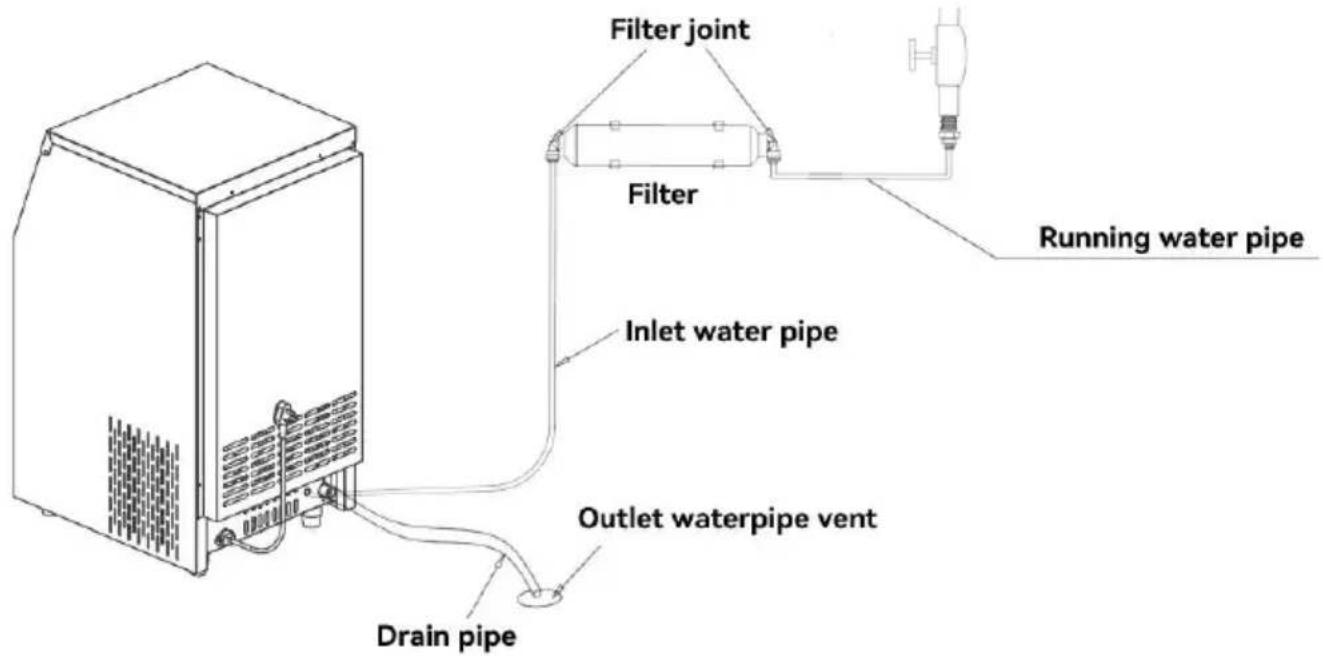
※ If the ice machine does not come with a filter, customers need to purchase it themselves.
The instructions for the filter installation.
The instructions for the filter installation.
The instructions for the filter installation.
![graph LR A["The tap of drinking water"] --> B["Filter"] B --> C["The joint of filtered water"]](/content/2026/04/736375/images/8121eb706e377796b91df7350e2bd5f6db75a0042c0960bc698e511a6d060fb4.jpg)
The instructions for quick installation of the filter.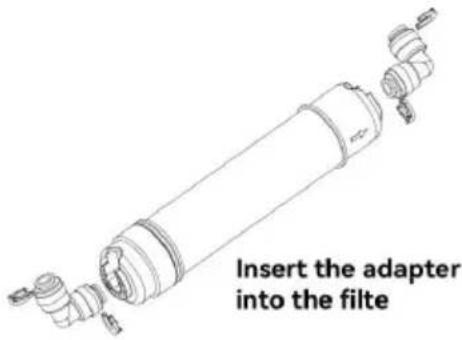
The installation for the pipeline and joint.
① 1. Take off the blue clip.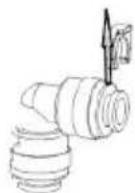
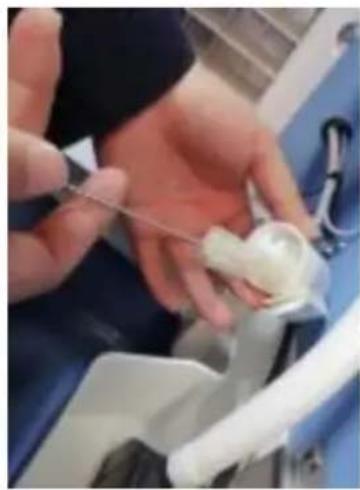
② 2. Make the orifice flat, insert the pipe stopper firmly, and make sure the orifice connects to the inside seal firmly.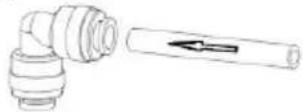
③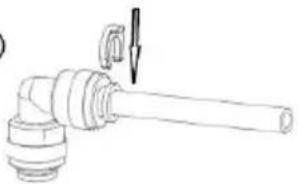
- Fix the blue clip on.
④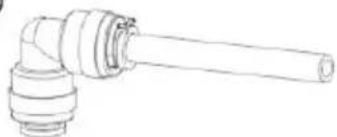
- Finished installation.
Operating Instructions
Function description of the four-button digital tube operation panel.
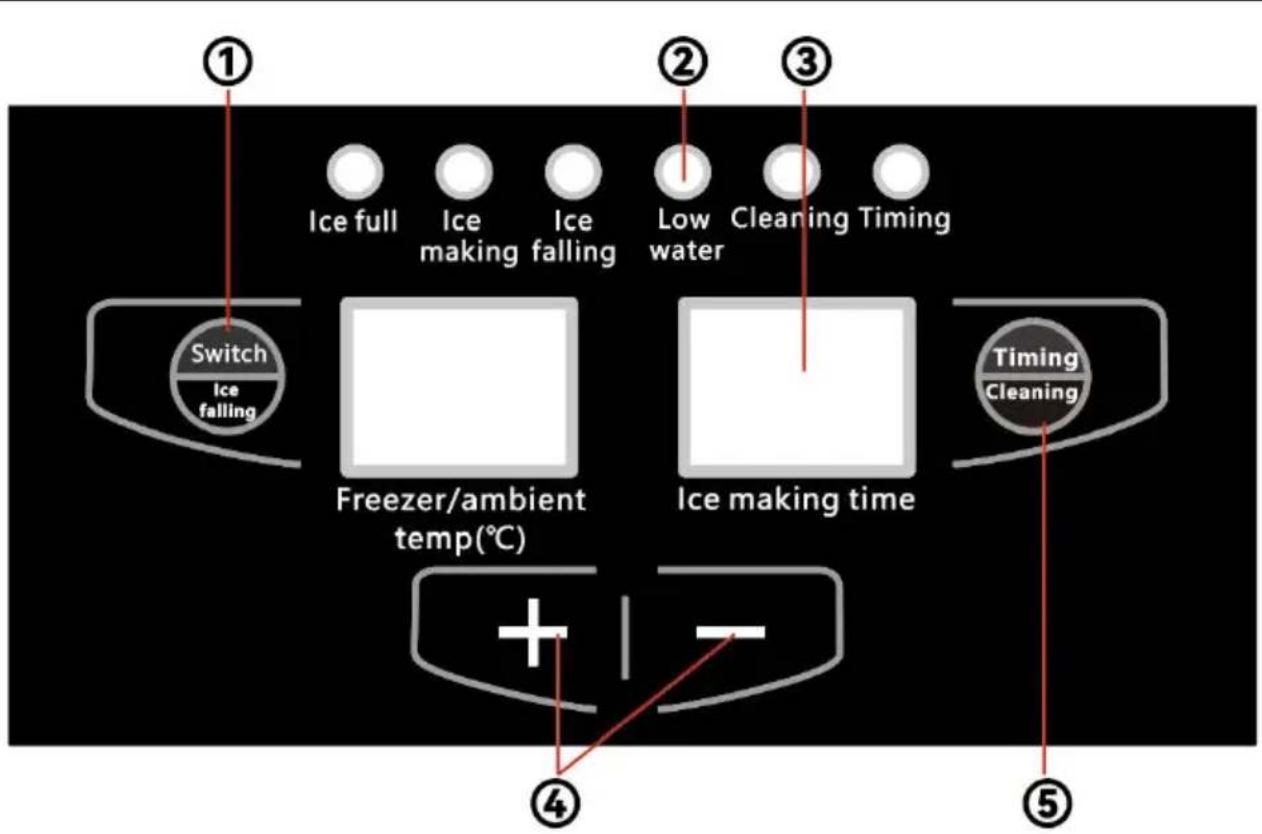
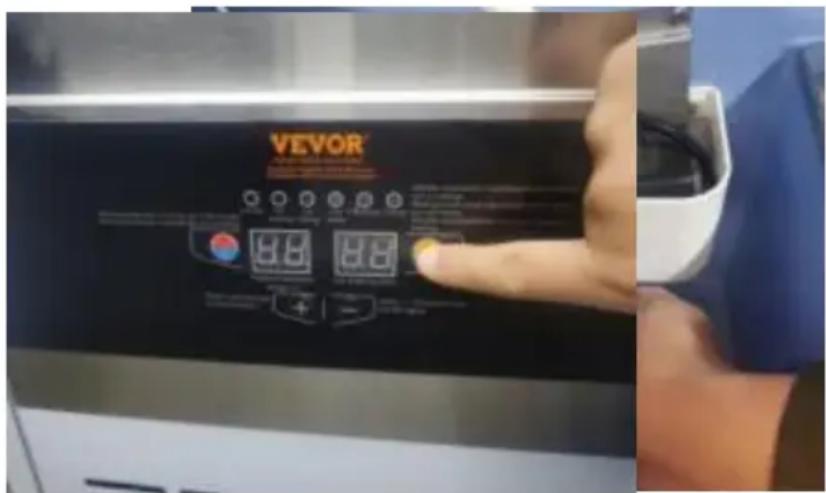
① Power switch and deicing key: after power on, click to enter the ice-making state; click to enter the deicing state during the ice-making process; in the ice-making and de-icing state, press and hold for seconds to enter the shutdown state. ② LED light: indicates the state of the machine. ③ Digital display tube
The left digital tube displays the ambient temperature and return temperature; the right digital tube shows the timing swing and ice-making time.
④ +- button:
Adjust the thickness of the ice cube in the working mode; in timing off or timing on and off, adjust the timing switch time; press and hold the "-" button for 3 seconds to turn on or off the light.
⑤ Cleaning and timing button
In standby mode, press the key continuously for 3 seconds to enter the cleaning mode; press this button when starting up the countdown of the scheduled shutdown, and then click to cancel the scheduled shutdown; press this button in the standby state to start the countdown of the scheduled power-on, and then click to cancel the scheduled power-on; the displayed time unit is hour.
Button Operation Instructions
• Operation process
- Plug in the power, click the ice machine switch button, and the ice machine starts to run.
- Open the water inlet solenoid valve to enter the water. After the level rises, the floating ball floats up. When the water level reaches the requirement, the water inlet valve is closed, and the cleaning program runs. After the cleaning is completed, it will automatically enter the ice-making cycle.
- When the thickness of the ice cube reaches the set thickness, the deicing program starts, the solenoid valve starts to work, the water pump stops working, the heat enters the evaporator, and the ice cube falls in about 1.5 minutes. When the ice cube falls, the ice-falling baffle flips open the reed switch; when the reed switch closes again, the machine goes back into the ice-making process.
- The compressor does not stop during the entire ice-making and deicing process.
- When the ice bucket is full of ice and the magnetic reed switch is closed automatically, the machine will automatically stop working. When
enough ice cubes are removed and the magnetic reed switch is closed again, the machine will start up with a delay of 3 minutes and re-enter the ice-making process.
Ice Cube Thickness Adjustment
- Press and hold the “+” button for 3 seconds until the displayed temperature starts flashing. Then, press the “+” or “-” button to adjust the thickness of the ice cubes. Pressing the “+” button will display the number of minutes, with each increment of 1 minute adding to the current ice-making time, up to a maximum of 15 minutes. Each decrement of 1 minute reduces the ice-making time, with a minimum reduction of -7 minutes. Increasing the ice-making time will result in thicker ice cubes, while decreasing it will make the cubes thinner.
- Once the ice-making time has been adjusted, the new ice-making time will apply to the next batch of ice after the current batch has finished.
Click the blue light switch to turn it on, otherwise turn it off. •Scheduled power-on function
- In the standby state, press the preset timing key to execute the power-on function. The timing LED light is on, and the displayed number is the remaining power-on time, and the unit is hour.
- In the timing power-on state, click + or - to adjust the remaining power-on time.
- After executing the scheduled power-on, click the scheduled reserve button to cancel the scheduled power-on.
- Ice full function
- When the ice bucket is full of ice and the ice baffle cannot be cleared automatically, the machine will stop working automatically.
- When the ice cubes are used up, the ice baffle will reset, and the machine will automatically start up after a delay of 3 minutes. If the maker stops due to fluctuations in voltage and water pressure, and does not make ice or de-ice, please first unplug the power for 5
minutes, then turn on the power to test the machine. Due to changes in temperature and ambient temperature, ice may sometimes appear in the sink. If the ice is severe, please unplug the power for 10 minutes and turn on the power again.
- When not in any setting interface, force the drainage pump to work for seconds and then end (including standby and startup) by continuously pressing the "-" button twice (effective within 2 seconds).
- When the machine is powered on, the drainage pump automatically starts for 20 seconds every 15 minutes and then turns off. Note: The machine which is in full ice, ice making, deicing, adding water, lacking water, and short-term cleaning all belong to the startup mode.
Precautions
Please follow the requirements of this manual to maintain your machine in order to increase the reliability and longevity of this ice machine. Also, maintenance can avoid excessive energy consumption.
- Clean the environment around the ice machine frequently to keep it clean, and do not block the louvers used for ventilation of the ice machine.
- The shell can be cleaned with a neutral detergent, and then wiped with a soft cloth. If necessary, commercial stainless steel cleaners and polishes can be used.
- Filters should be checked regularly and replaced with new filters immediately if damaged.
- The water tank of the ice machine and the interior of the ice storage room can be washed directly with water pipes. Do not use too much pressure, and do not directly flush the water pump and the part above the ice tray to prevent the circuit from being soaked.
- Maintenance of air-cooled ice machine condenser: Clean the air-cooled condenser once every three months. Use a soft brush or a vacuum with a brush to brush the condenser fins up and down along the direction of the fins to avoid damaging the fins and affecting the cooling effect.
 | Any kinds of maintenance are not including to warranty. |
 | The filter elements should be changed regularly |
 | Please cut off the waterhead and electricity before clean or check the the machine. |
 | If there is much dirt and scale in the machine,or of pipes are blocked,please dial the telephone of a service. But, it will cost fees for the door to-door |
 | The air-cooled condenser warping blade is very sharpen.Be careful of getting hurt when you clear |
Routine maintenance and inspection is especially important if the ice is to be used as edible ice.
If the ice machine has been used for a long time, the ice produced may become entrapped with scale, mold, or rust due to temperature, water quality, or aging. Therefore, it is important to keep the inside of the refrigerator clean through routine maintenance. If you find foreign matter at the bottom of the refrigerator or in the ice during operation or maintenance, please stop using the ice maker and contact the seller immediately.
- Ice Scoop (clean once a day)
Soak the ice scoop in warm water (30~40°C) containing a disinfectant solution for more than 3 minutes, then rinse with tap water and wipe dry.
- Refrigerator door (clean once a day)
Since the door of the refrigerator is susceptible to bacterial contamination, make sure to keep it clean by wiping it with a soft cloth with warm water. Refrigerator, ice scoop holder, and case (clean weekly).
Important information
- To prevent deformation or cracking of plastic parts, avoid contact with pesticides or other oily substances.
- Thoroughly remove the dirt or dust on the ice scooper fixing frame.
Cleaning of the major components.
1. Top cover disassembly.
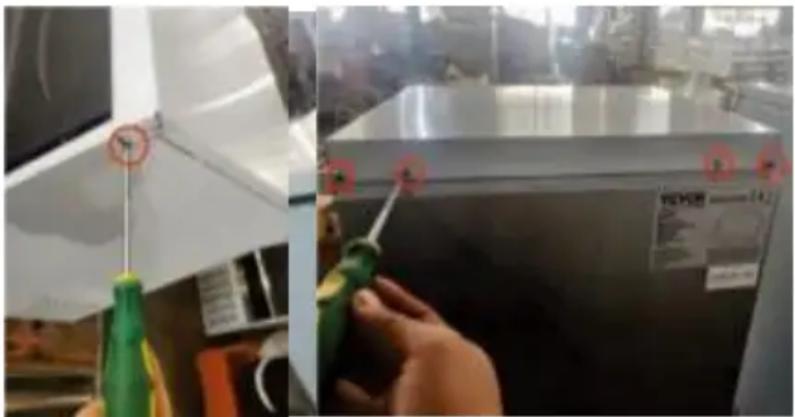
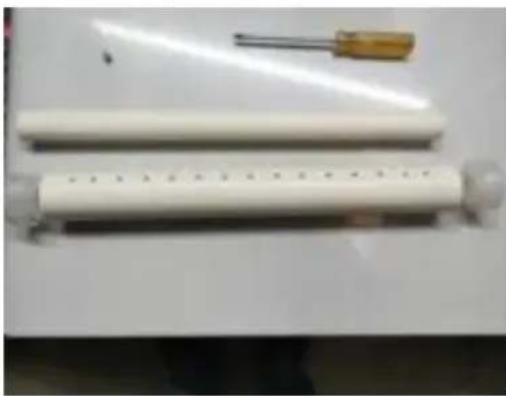
There are six screws in front of the top cover of the machine on the right sides and the back. Use a cross screwdriver to remove these screws counterclockwise, and then gently lift the top cover plate and place it in a suitable position.
2. Removal and cleaning of water pump (clean every 2 months).
2.1 Remove the two screws above the pump support bracket with a screwdriver, then pull out the pump pipe joint from the pump outlet nozzle, and remove the two screws at the bottom of the pump support with a cross screwdriver.
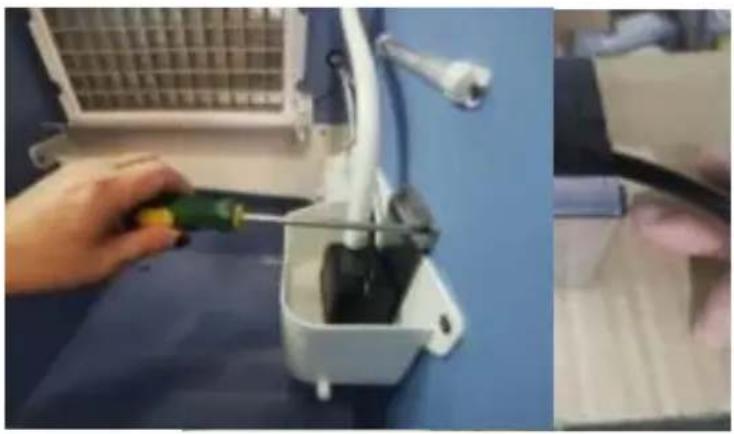
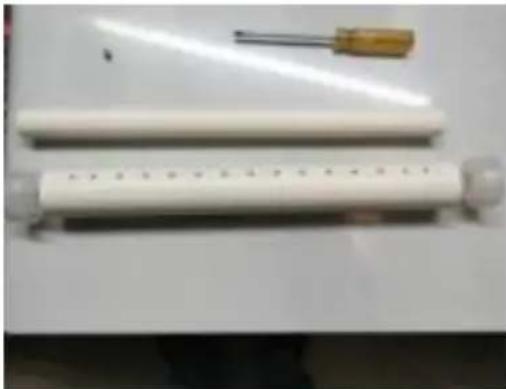
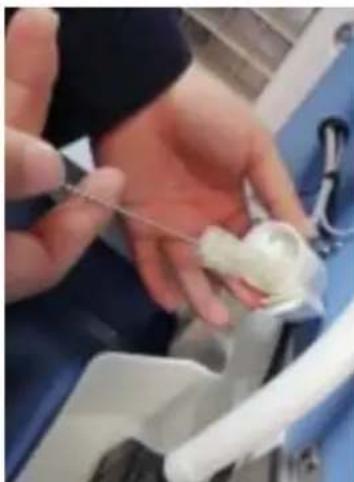
Figure 1 Figure 2
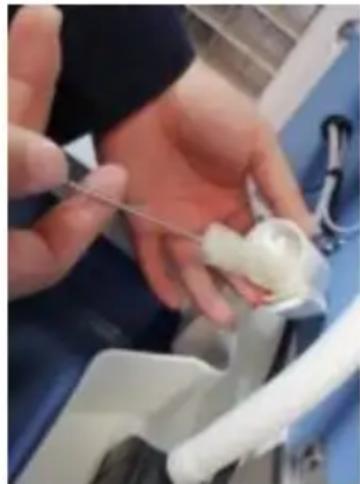
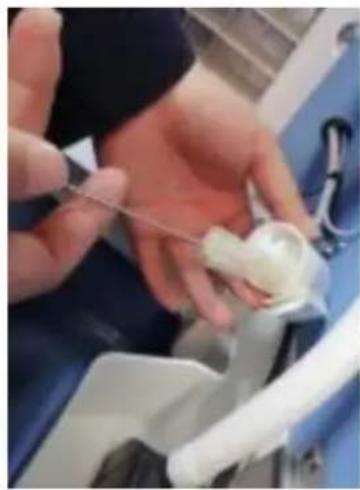
2.2 Remove the front cover filter (Figure 1), and the filter can be removed directly. 2.3 Rotate the cap counterclockwise and remove the cap (Figure 2). 2.4 After removing the sealing lid, remove the rotor. The rotor is fixed in the proper position by a magnet, and can be removed only by holding the water leaf with a clip or fingernail (Figure 3). 2.5 Clean it up and put the water pump back in again.
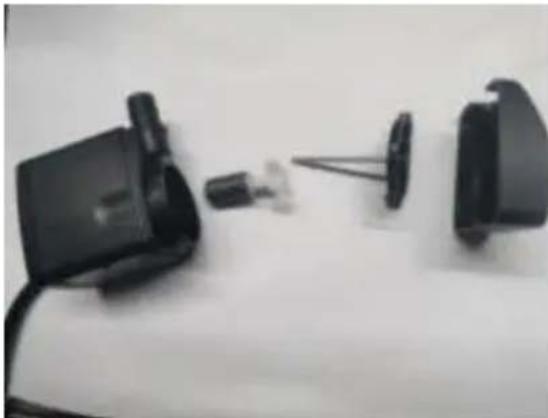
Figure 3
3. Cleaning of ice grids (clean every 2 months).
3.1 Hold the clamp on the water pipe, and then pull off the pump.
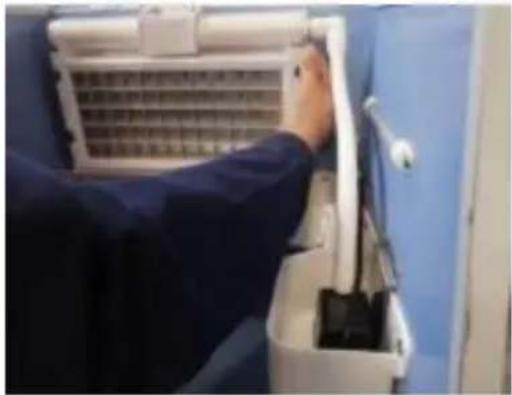
3.2 Remove the two screws on the holder of the pipe with a cross screwdriver, then remove the holder and the pipe.
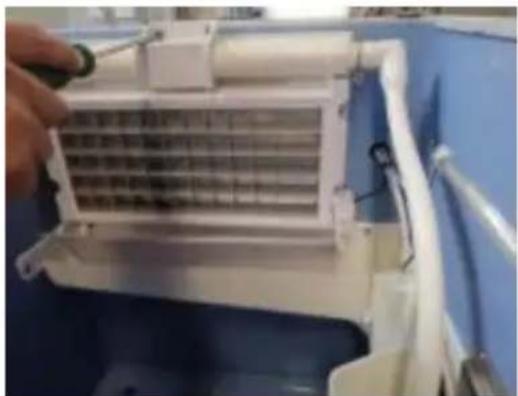
3.3 Wash the ice lattice surface with a soft brush or sponge dipped in vinegar or scale remover to clean up the scale.
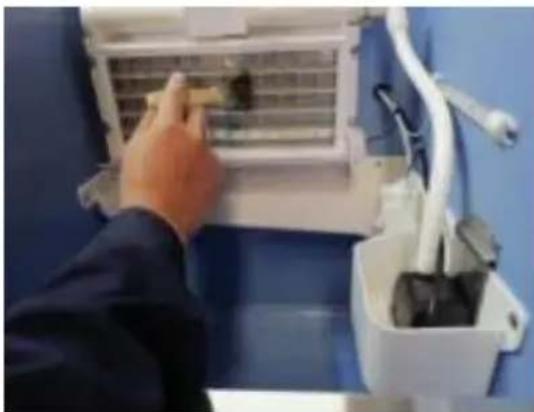
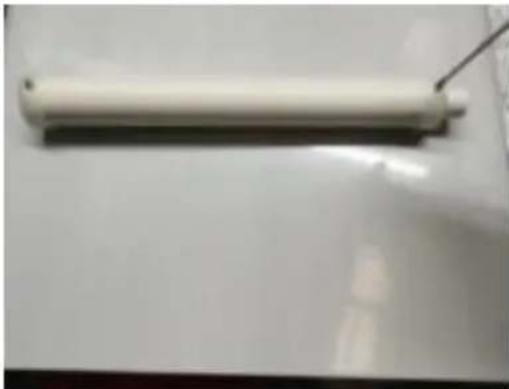
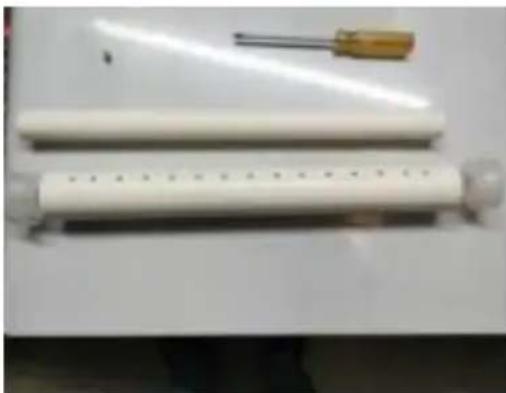
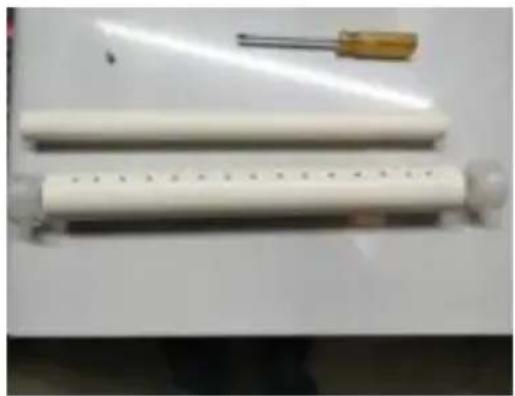
3.4 Use a cross screwdriver to remove the fixing screw on the ice pipe, and then remove the left and right plug and the shower pipe at the same time. Then clean the inside and outside of the shower pipe with a brush.
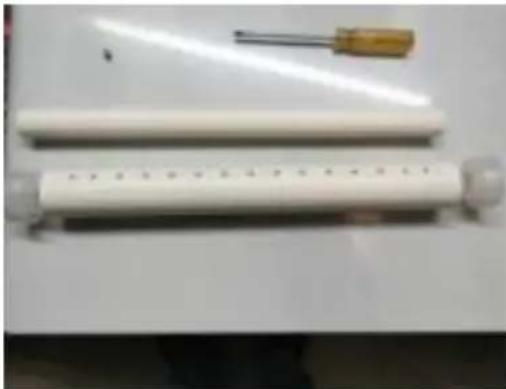
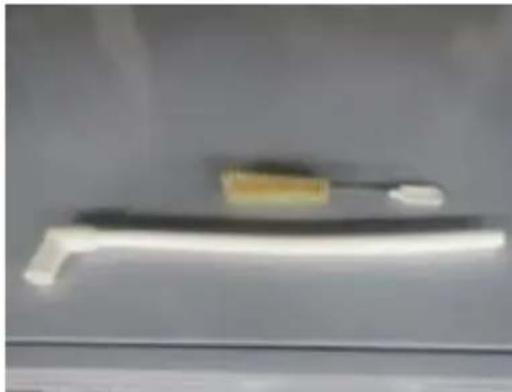
3.5 Clean the pump head hose with a brush.
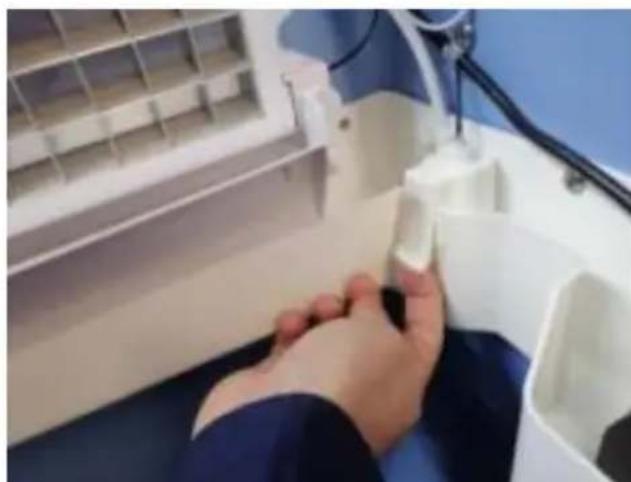
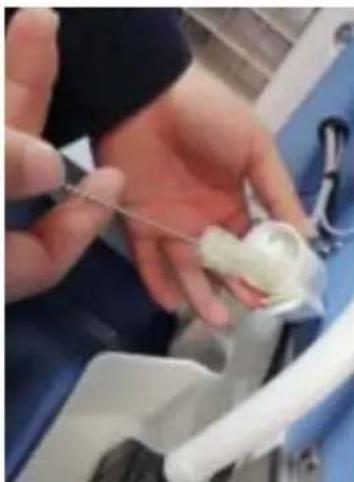
- Wash the float ball (wash once every 2 months)
Remove the float ball assembly from the sink slot and wash the float assembly with a brush.
5. Cleaning of the sink and the storage refrigerator
5.1 Dip a soft cloth in vinegar or scale remover, wipe the surface of the sink and refrigerator, and clean the surface.
5.2 The sink is cleaned every 2 months, and the refrigerator is cleaned
once a week.
6. Daily cleaning of the waterways
6.1 Mix the right amount of citric acid solution with a clean bucket. Pour the solution into the sink, click the display screen to clear. After cleaning, pull the tank drain plug, and then drain the citric acid solution in the tank.
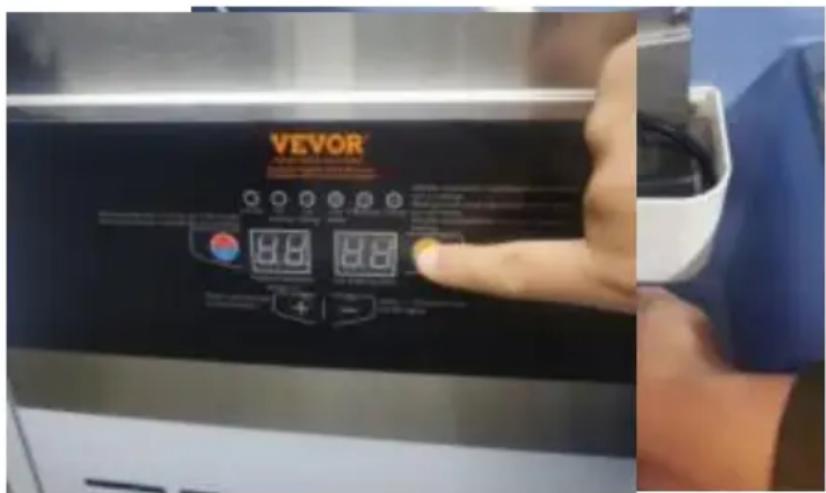
6.2 Pour an appropriate amount of water into the sink, then press the key, wash for 3-5 minutes, drain the water in the tank, repeat 4-6 times. 6.3 Ensure that the waterway is cleaned every 7-15 days.
Before consulting with after-sales customer service
If the ice maker is operating abnormally, please contact after-sales customer service. However, you need to confirm the following situation:
- If the water head is normal or not.
The correct way to check it is to loosen the inlet joint (6 branch con) behind the machine. If it leaks normally when you loosen the joint to the required value, it means normal. Otherwise, there is no water.
- Confirm if the machine is electrified or not.
Our ice machines are all fully automatic. So, some models don't have an electric switch. You can ask an electric technician to help you check. Mainly, you should pay attention to the socket.
- The model number and serial number.
There is a nameplate on the front board, and there are model numbers
serial number on the side board.
 | It will cost fees for the door to door service if caused by the users(for example,no water,no electricity,environment, etc) |
 | To prevent from high-pressure water spraying ,do loosen the joint of the inlet completely when you o waterhead. |
 | Plastic parts are not in including to the warran |
| Warranty |
| 1. Our company agrees the warranty of the product within 1 labor cost and the replacement of components are free within warranty. |
| 2. All the plastic parts are not including to the warranty. |
| 3. Our warranty is limited liability.Except the machine itself,any joint liability is not in the warranty. |
| 4. The routine maintenance ,cleaning,and all the hitches from the incorrect operation are not in the warranty. |
| 5.All the warranty services should be finished by the machine or related institutes. |
Troubleshooting of this series of machines
| Fault | Possible cause | Solution |
| Ice machine does not work | Not connected to the power supply or water supply. | 1. Fuses 2. Power switch Cable 4. Water switch 5 Power plug 6. Sockets |
| Ice tray baffle remain open | If the ice tray baffle could open and close automatica | |
| The machine stops 3 minutes after it's turned on | High Voltage Protection | 1. High temperature environment2. Dirty condenser filter3. Damaged fan motor |
| The machine car only make one tray of ice every time it is turned on | Ice full or ice tray remains open | 1. If the ice tray baffle can open and close automatica2. The ice full switch whe be falls |
| Ice could not fa off the ice tray | Dirty Ice Tray | Cleaning and disinfection needs to be done |
| Machine not placed a level ground | Adjust the machine to a leg ground | |
| Environment temperature is too low | Environment temperature should be higher 5 °C | |
| The ice is too thick | Adjust tee ice thickness parameter to below 0 | |
| Faulty Solenoid valve | Replace the solenoid valve | |
| Ice too thin or complete | Tank water level is low | Check the water level che if there is any leakage |
| Inlet valve does not work | Check the inlet valve | |
| Not enough water pressure | Water pressure must be 0.13 - 0.55Mpa | |
| Water pipes are blocked | Check the pipes and join for dirt | |
| Ice making is slow | Condenser is dirty | Clean the condenser |
| Temperature too high or the ventilation is t | Ambient temperature should not exceed 40 °C, and ensure ventilation | |
| The float ball in tank too high or there is leakage | Adjust the float ball or replace the water tank | |
| Water tank leakage | Replace water tank | |
| Inlet valve could not closed tightly or leakage | Clean or replace the inlet valve | |
| Not enough space around the machine | Provide adequate space | |
| Ice full indicator light is lit up b there is no ice | Faulty ice tray baffle | Check if the ice tray baffle stuck |
| E1 Alarm | Ambient temperature sensor get broken | Replace ambient temperature sensor |
| E2 Alarm | Return air temperature sensor get broken | Replace return air temperatuer sensor |
| E1,E2 Alarm | Ambient temperature sensor and return air temperature sensor both get broken | 1.replace ambient temperature sensor and return air temperature sensor2.provide enough space |
Circuit diagram
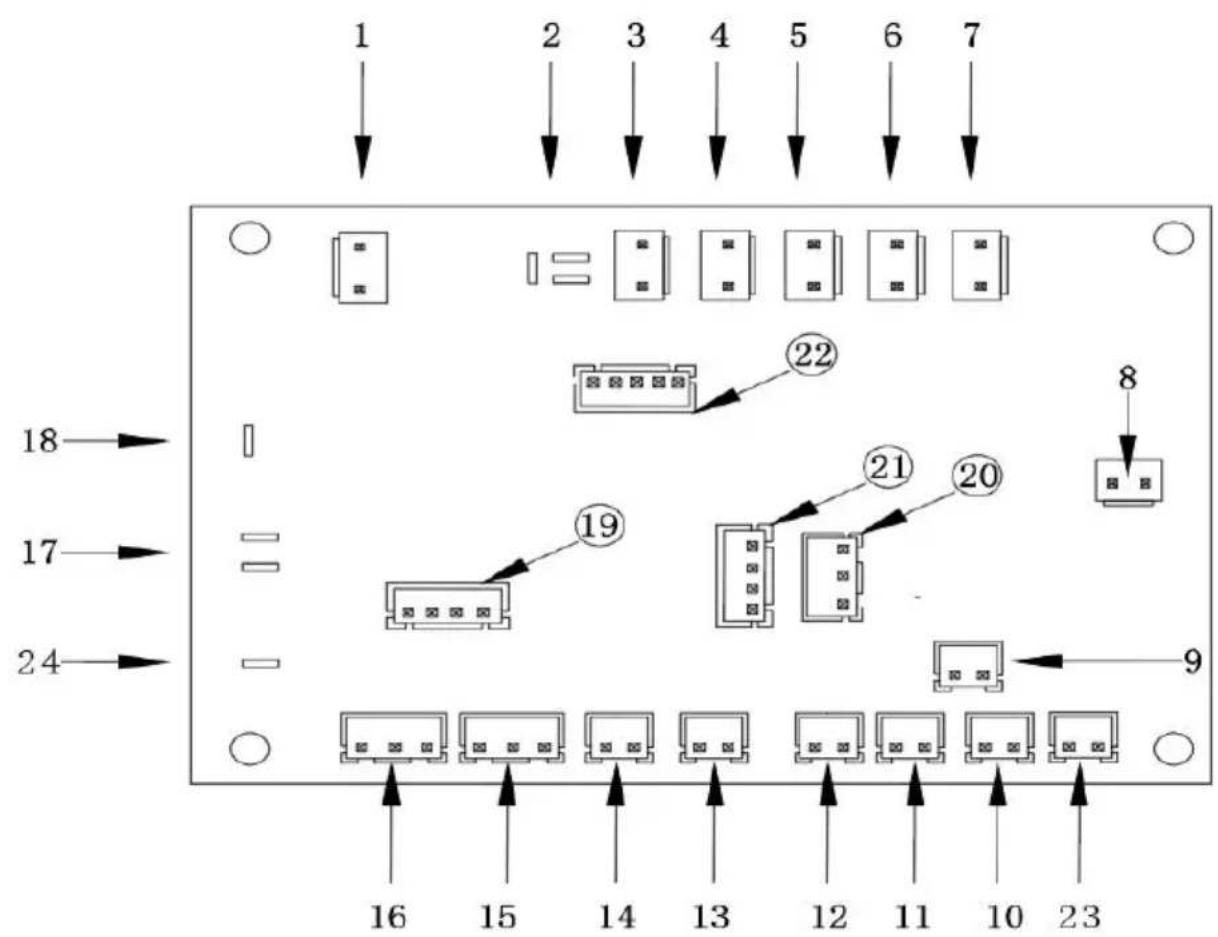
Small ice maker mother board wiring diagram.
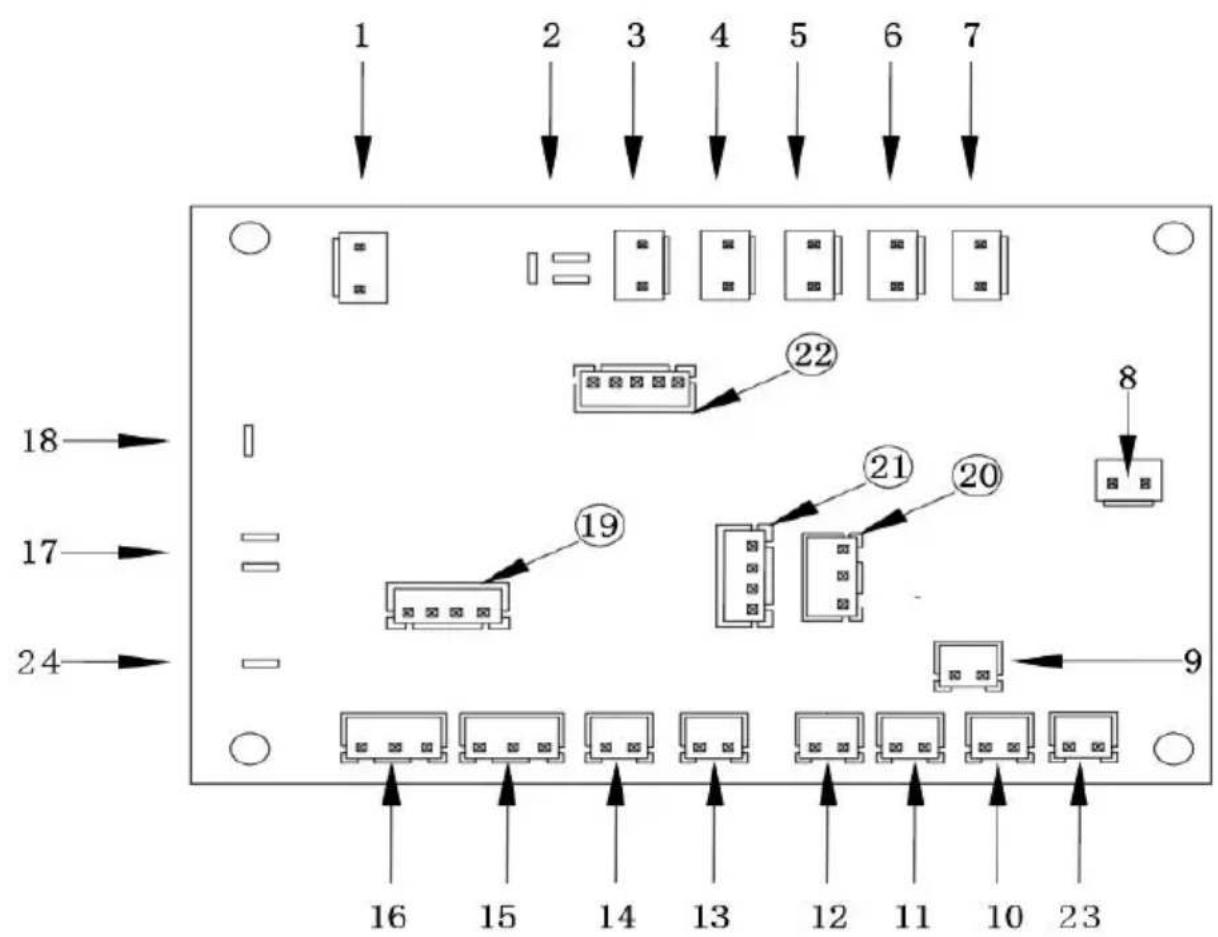
- Elementary Transformer Pavilion
- Zero line
- De-icing valve
- Water pump
- Fan
- Inlet valve
- Drain valve
- Transformer Secondary
- Ambient Light
- blue light
- Float
- Evaporation probe
- Condensation probe
- Drainage options
- Blue light control
- De-icing detection
- Connect live wire
- Compressor live wire
- Connect to Swift serial port
- Ice full probe
- Download port
- Display screen
- Direct current fan
- Connect machine
PRODUCT EXPLOSION DIAGRAM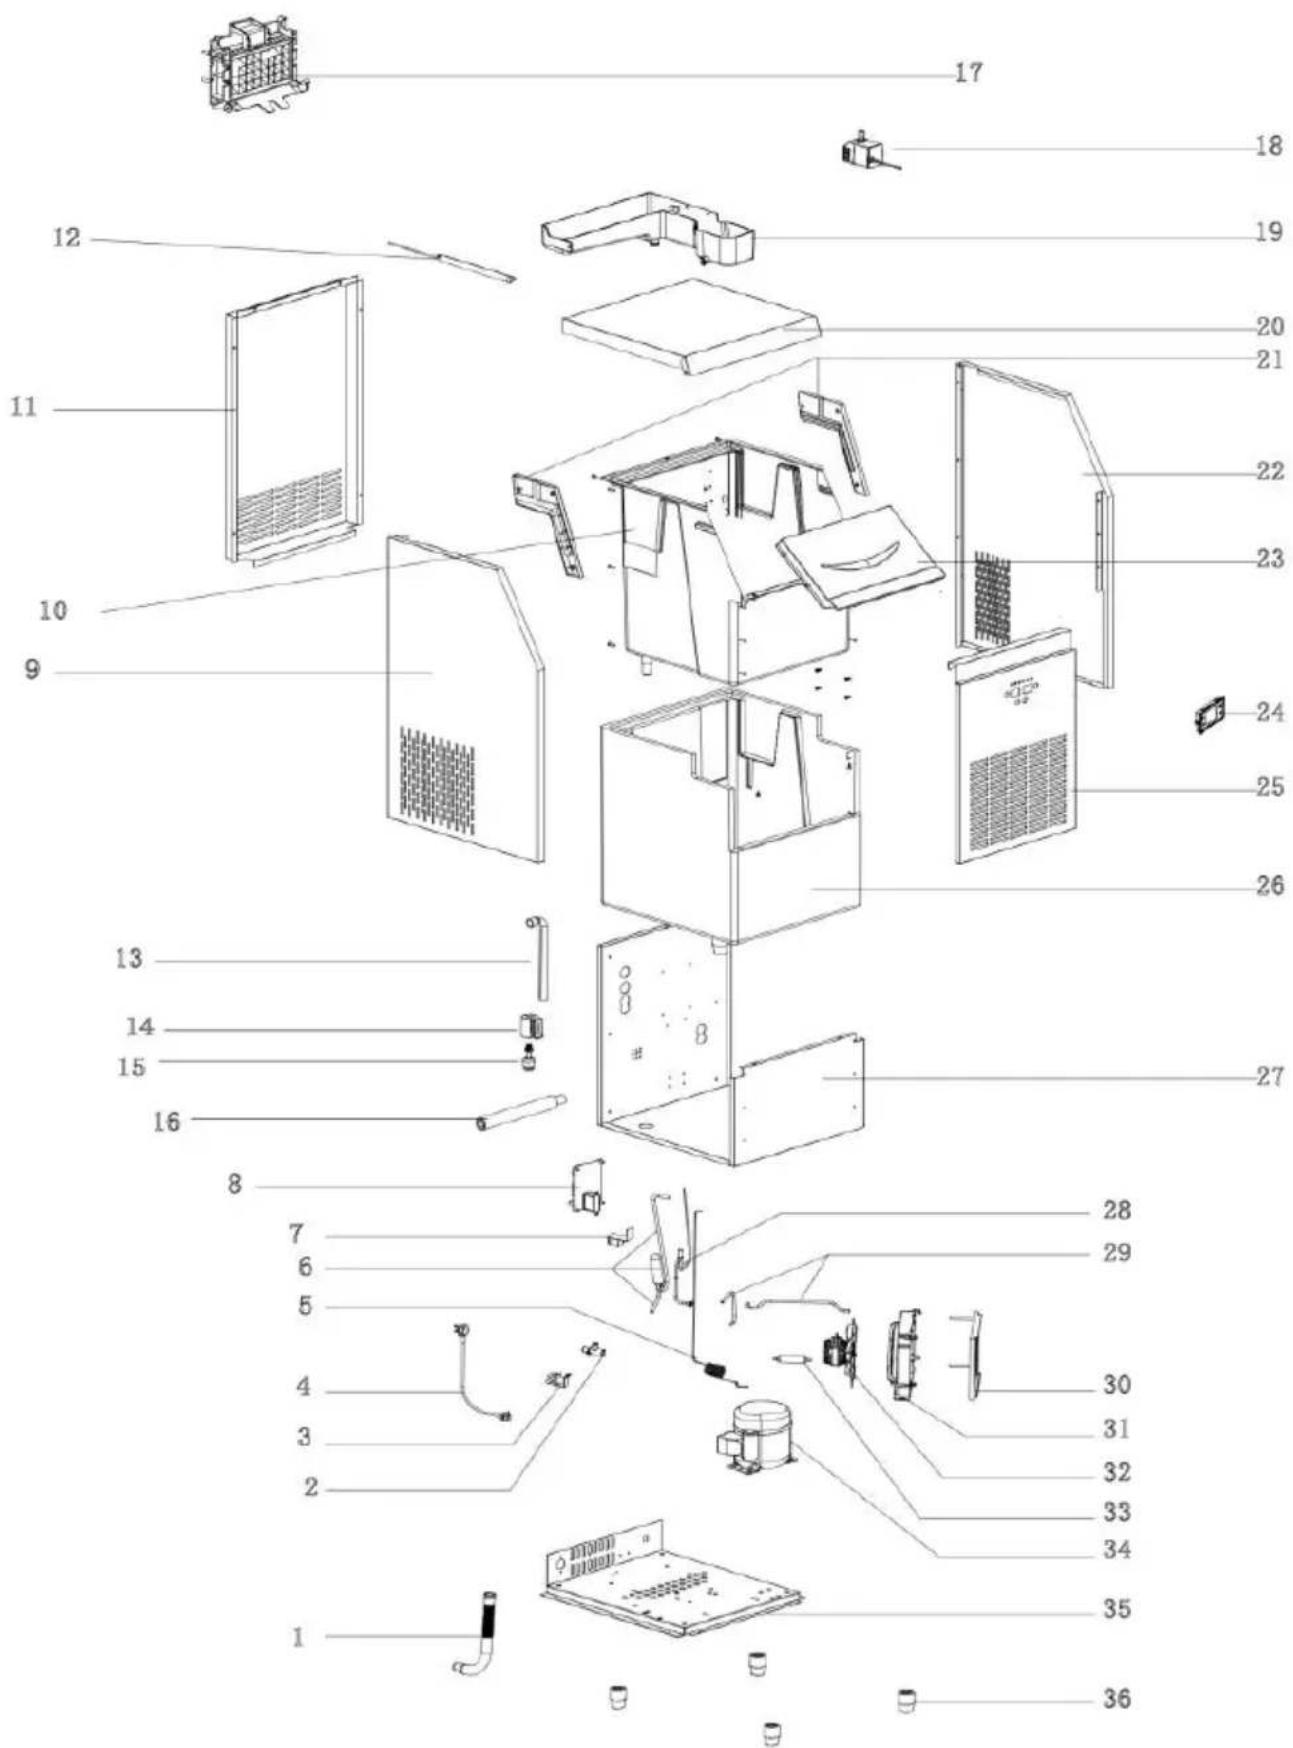
| Reference number | Part name | Reference number | Part name |
| 1 | Inner tank drain pipe | 19 | Water tank / Water trough |
| 2 | Drain outlet | 20 | Top cover panel |
| 3 | Water inlet valve | 21 | Left and right slide r |
| 4 | Power cord | 22 | Right side panel |
| 5 | Capillary tube | 23 | Door panel |
| 6 | Liquid reservoir | 24 | Display screen |
| 7 | Solenoid valve coil | 25 | Front panel |
| 8 | Control board | 26 | Inner tank foam insulation |
| 9 | Left side panel | 27 | Rear panel |
| 10 | Inner tank | 28 | Solenoid valve |
| 11 | Rear air vent cover | 29 | High-pressure tube |
| 12 | Blue light LED | 30 | Condenser |
| 13 | Water pump discharge pipe | 31 | Fan cover |
| 14 | Float cove | 32 | Fan |
| 15 | Float ball | 33 | Filter |
| 16 | Ice tray water supply p | 34 | Compressor |
| 17 | Ice tray | 35 | Base plate |
| 18 | Water pump | 36 | Machine feet |

VEVOR
Affordable. Reliable. Home Improvement.
ICE MACHINE
MODEL: SSX65C SSX160V SSX200V
SSX265V SSX360V SSX440V
SSX80 SSX90 SSX100
SSX110 SSX120 SSX130
SSX140 SSX300 SSX440
VEVOR
Affordable. Reliable. Home Improvement.
ICE MACHINE
MODEL: SSX65C | SSX160V | SSX200V | SSX265V | SSX360V | SSX440V | SSX80 | SSX90 | SSX100 | SSX110 | SSX120 | SSX130 | SSX140 | SSX300 | SSX440
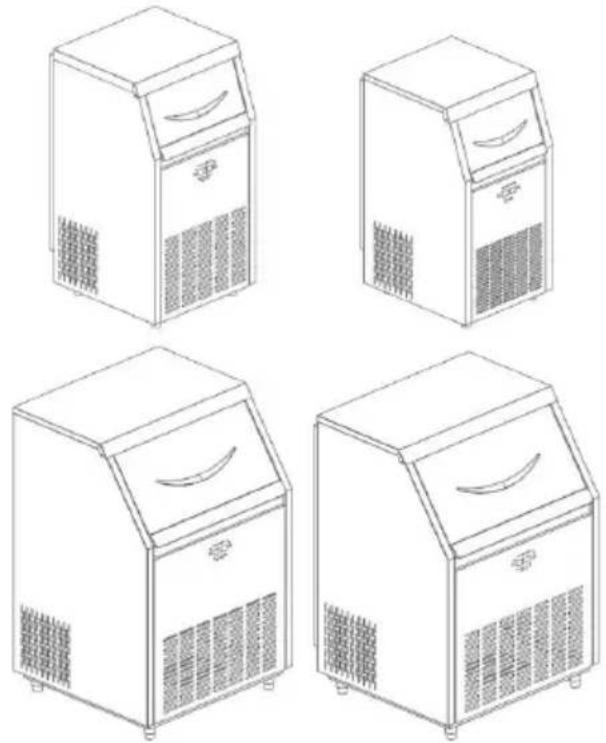
Warning diagram and operation safety instructions
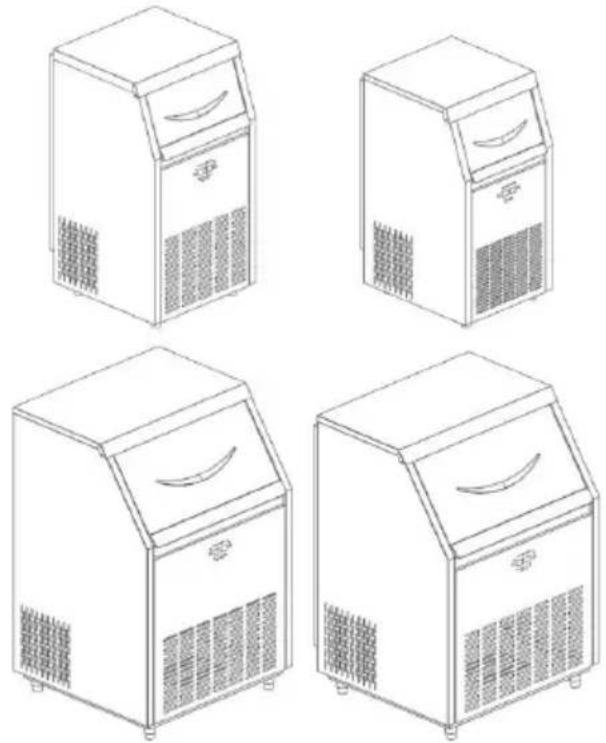
Place should be stable
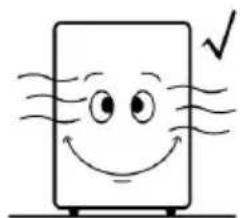
Smooth ventilation
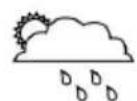
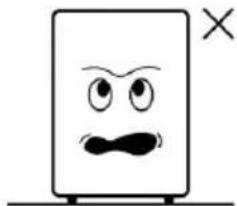
Avoid sun and rain
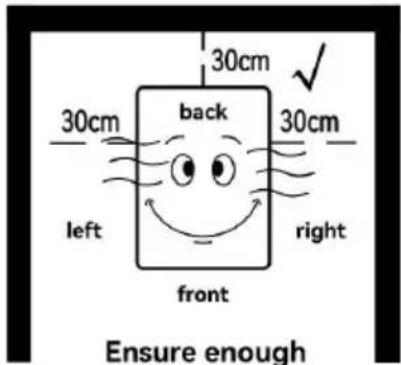
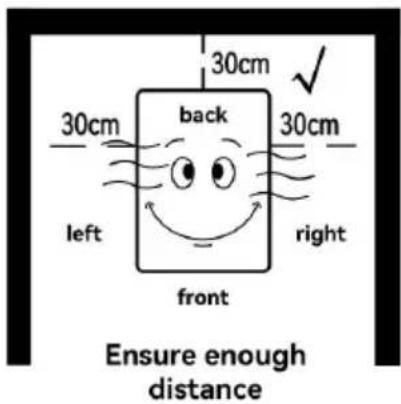
Ensure enough distance
Installation instructions
Quick installation instructions for the filter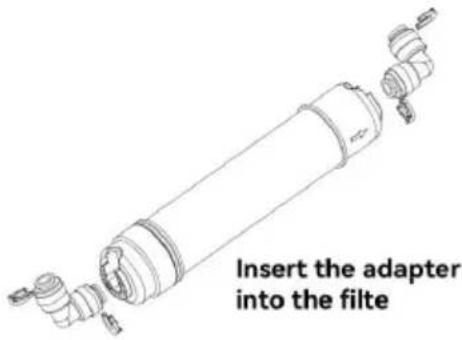
Installation of pipeline and joint
1. Remove the blue clip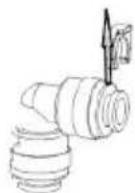
2. Make the orifice flat, insert the pipe stopper firmly, and ensure the orifice connects to the inside seal firmly.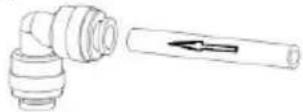
3.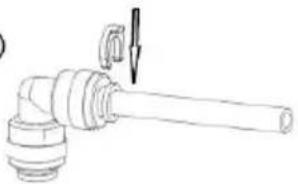
- Fix the blue clip on
4.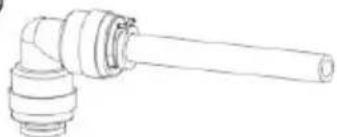
- Installation complete
Operating instructions
Cleaning of the major components
Figure 1 Figure 2
Figure 3
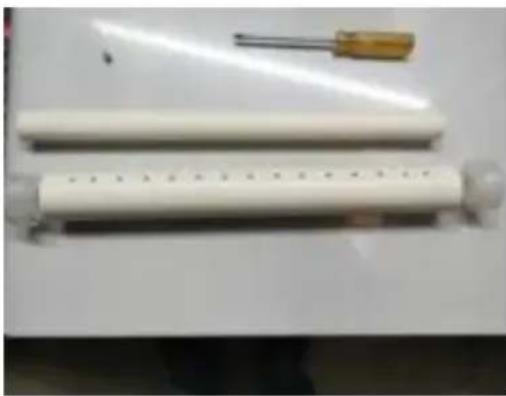
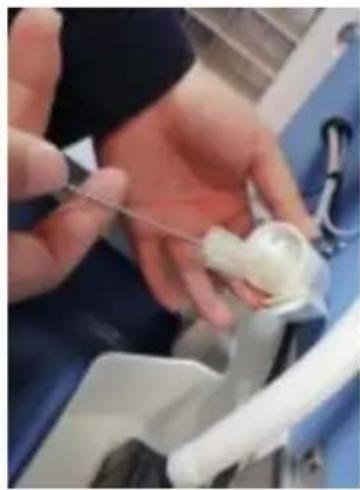
Troubleshooting of this series of machines
Exploded view of the product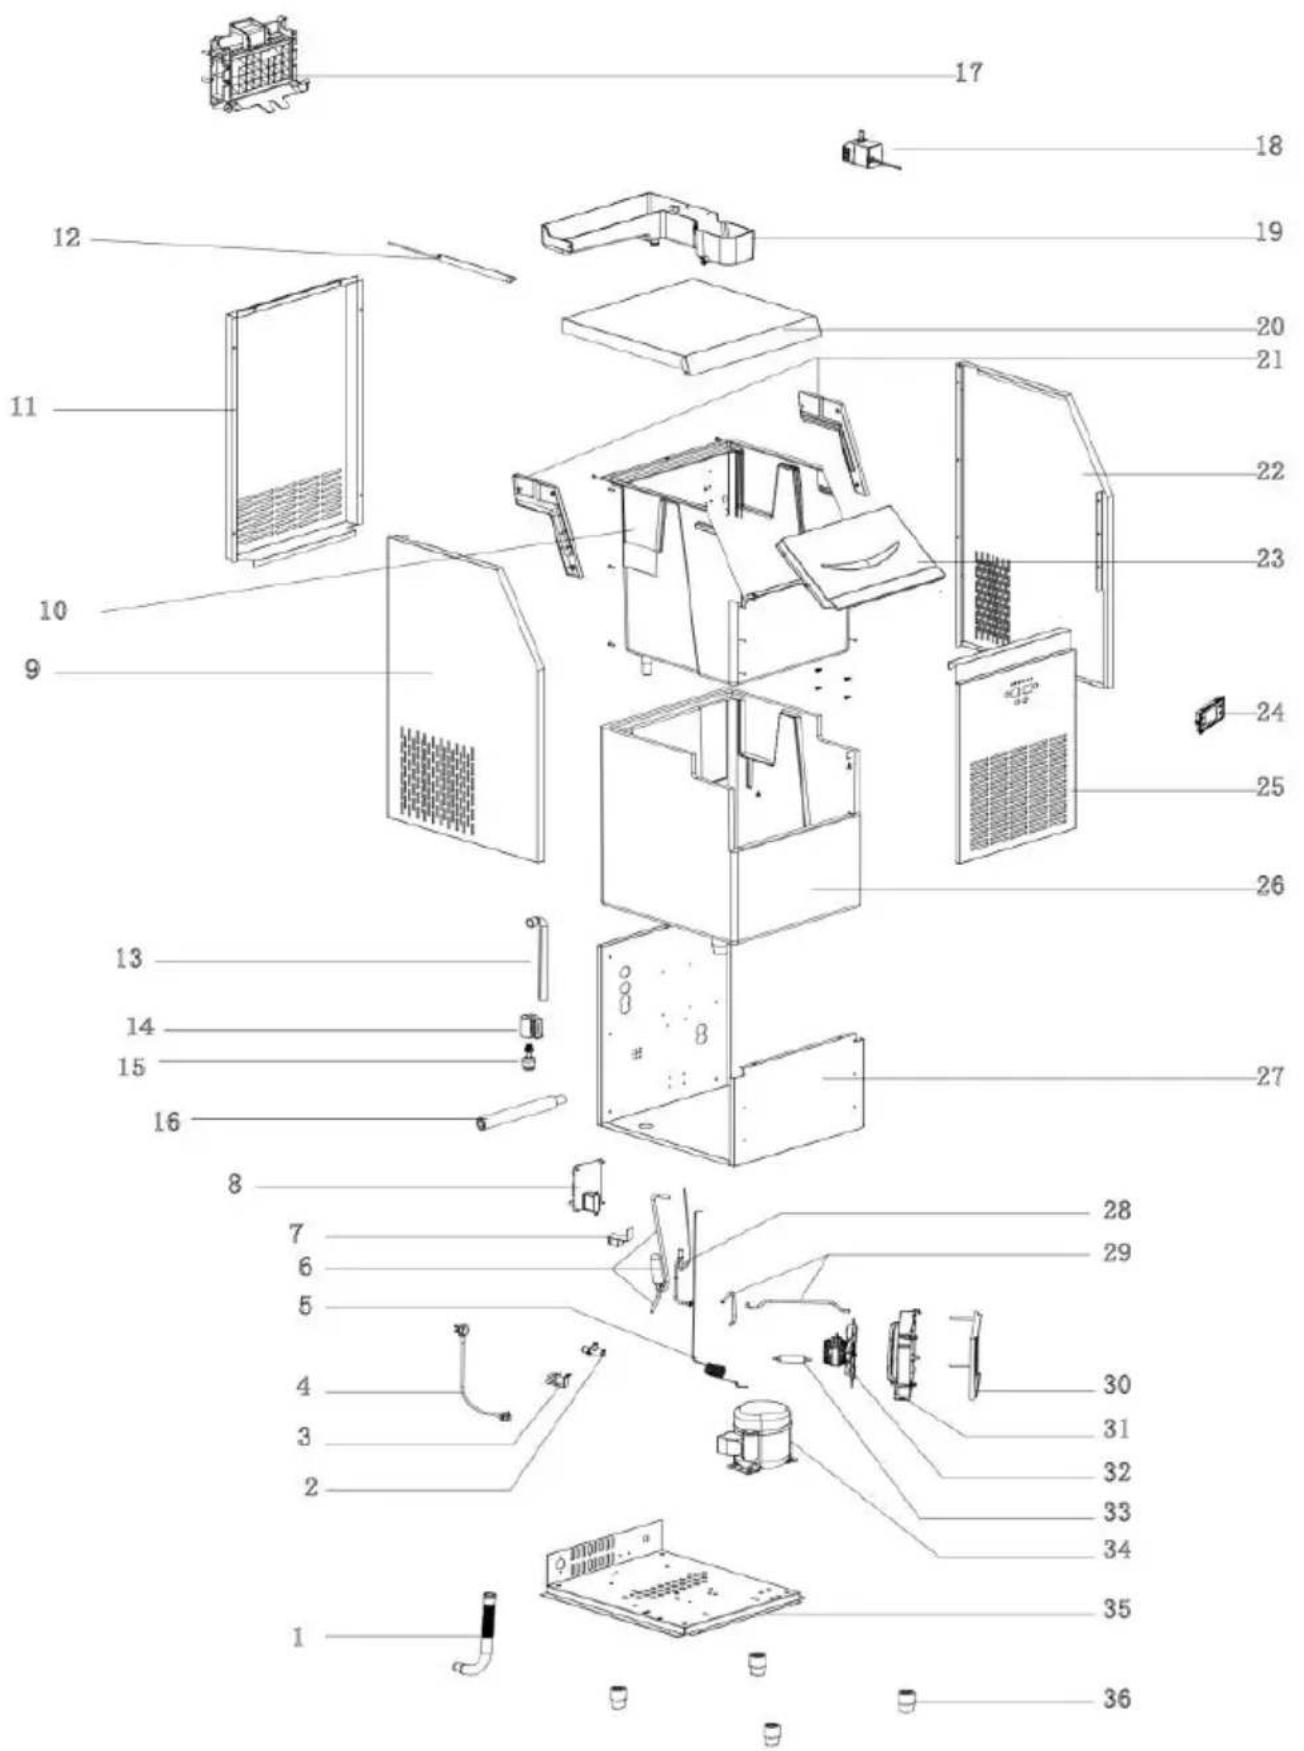
Affordable. Reliable. Home Improvement.
Ice machine
Model: SSX65C SSX160V SSX200V
SSX265V SSX360V SSX440V
SSX80 SSX90 SSX100
SSX110 SSX120 SSX130
SSX140 SSX300 SSX440
VEVOR
Affordable. Reliable. Home Improvement.
Ice machine
MODEL: SSX65C \ SSX160V \ SSX200V \ SSX265V \ SSX360V \ SSX440V \ SSX80 \ SSX90 \ SSX100 \ SSX110 \ SSX120 \ SSX130 SSX140 \ SSX300 \ SSX440
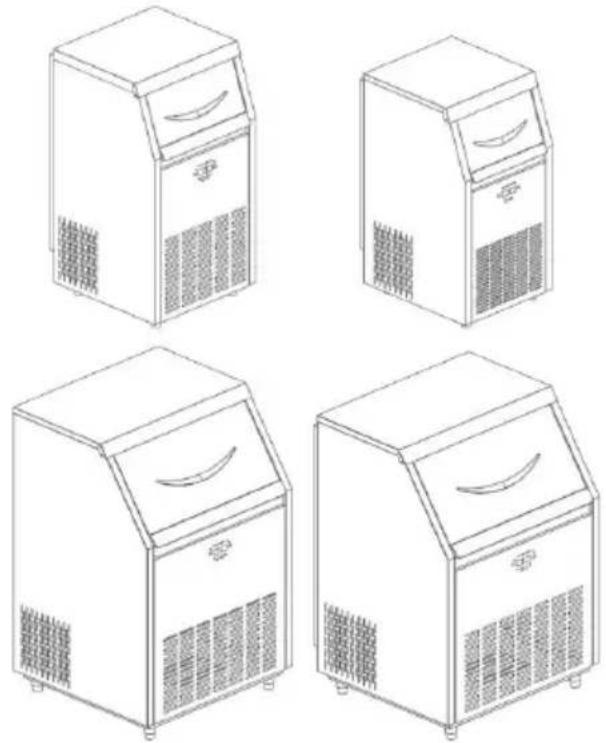
The warning diagram and operation safety instructions
Installation instructions
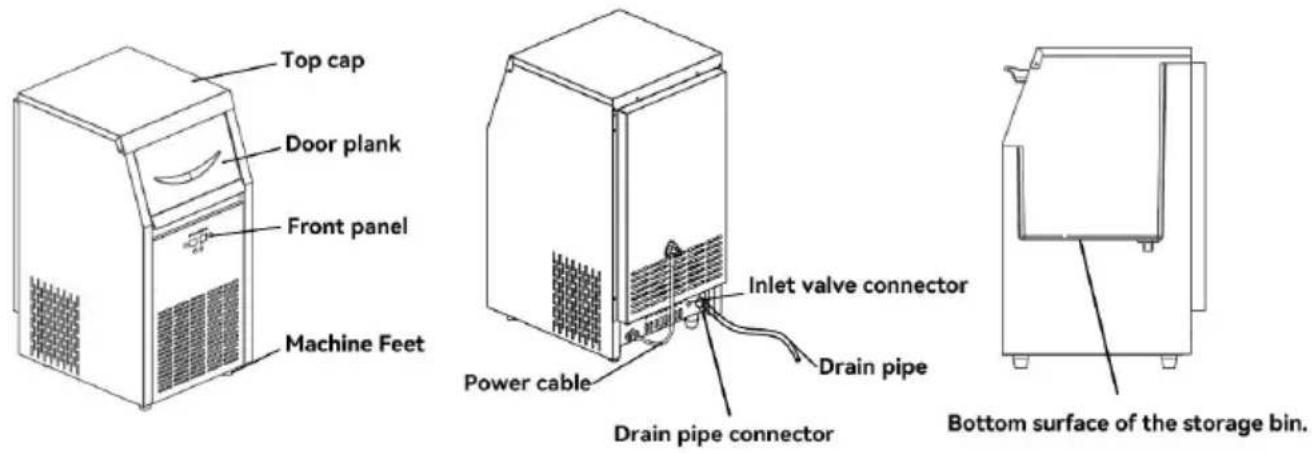
All-in-One Installation
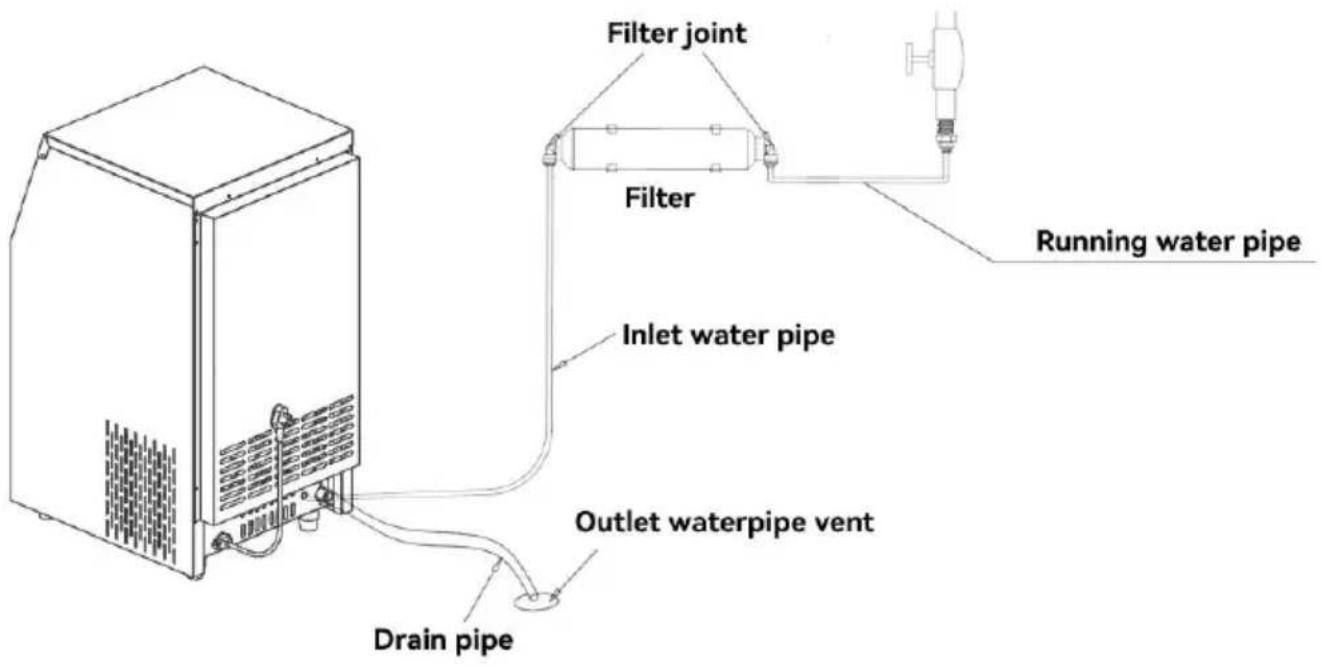
The instruction for quick installation of the filter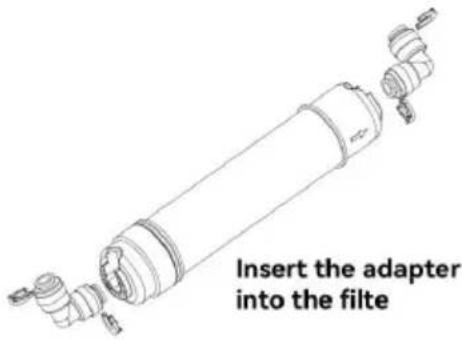
The installation for the pipeline and joint
① 1. Take off the blue clip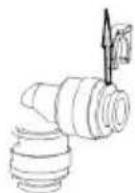
② 2. Make the orifice flat, insert the pipe stopper firmly, make sure the orifice connects to the inside seal firmly.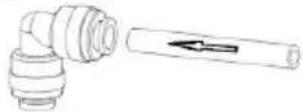
③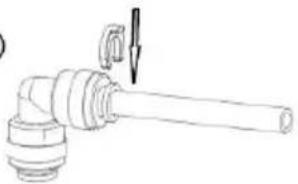
- Fix the blue clip on
④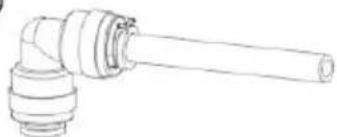
- Finished installation
Operating Instructions
Cleaning of the major components
Troubleshooting of this series of machines
ICE MACHINE
MODEL: SSX65C, SSX160V, SSX200V
SSX265V, SSX360V, SSX440V
SSX80, SSX90, SSX100
SSX110, SSX120, SSX130
SSX140, SSX300, SSX440
VEVOR
ICE MACHINE
MODEL: SSX65C, SSX160V, SSX200V, SSX265V, SSX360V, SSX440V, SSX80, SSX90, SSX100, SSX110, SSX120, SSX130, SSX140, SSX300, SSX440
This is the original instruction. Please read all manual instructions carefully before operating. VEVOR reserves a clear interpretation of our user manual. The appearance of the product shall be subject to the product received. Please forgive us that we won't inform you again if there are technology or software updates on our product.
The warning diagram and operation safety instruction
| Prohibition mark | Warning mark | Beware of fire | Dangerous voltage |
| Indicates a prohibited act that could caus fatal injury or serious injury | Indicates matters that may cause personal injury or damage to items | Indicates that the material used is a combustible material, beware of fire | Indicates a high-voltage electric danger zone, beware of high-voltage electricity |

Note: Be sure to keep this manual in a location that users can access at any time.
Safe operation precautions.
| Caution | After receiving the goods, you have to let the com lubricating oil settle for 24 hours to start the use, it will easily damage the compressor. |
| Do not use the ice machine in the open air. Whe machine is wet by rain, it may cause electric leaf electric shock. |
| Never place this ice machine in a wet location or subject to splashing water. Damage to the insulation ice machine may cause electric leakage or electric |
| Never spray water directly onto the ice machine. A machine may cause electric shock or short circu |
| Be sure not to put volatile or flammable substance the ice machine. Storage of such materials may ca explosion or fire. |
| The ice machine should only be installed by qua engineers or maintenance personnel. Installing the machine by yourself may cause gas or liquid leaf electric shock or fire. |
| Never disassemble, repair, or modify the ice mach such work is performed by unqualified personnel, i cause fire or personal injury due to work failure |
| Never ground the ice machine through a gas pipe mains, telephone line or lightning rod. This is cons unsafe to ground. |
| Never insert metal materials such as iron pins or v the vents, passage holes or exhaust ports for air c in the tank. This may result in electric shock or injury due to accidental operation of moving par |
| Be sure to place the ice machine firmly on a soli the floor is not strong enough or not placed prope cause damage due to the ice machine being turned down or overturned. |
| Be sure to use the dedicated power supply specif the nameplate of this ice machine. Using a branch may cause a fire. |
| Be sure to insert the power plug firmly into the o removing the dust.A dusty socket or improperly inserted may causeUse a grounded outlet to prevent electric shock. unlikely event that there is no grounded outlet, grounding device must be assembled by a qualif engineering technician. The socket should be in an accessible position after installation. |
| If there is any abnormal temperature or alarm in the any reason, you must immediately transfer the cont the box to a safe place to avoid your loss. |
| This appliance contains flammable materials and mu disposed of and recycled by qualified personnel a agencies. |
| Do not use mechanical equipment or other mean speed up the defrosting process except as recommended by the manufactu |
| Do not damage the refrigeration circuit. |
| Except for the type recommended by the manufactu appliance must not be used in the food storage ro appliance. |
| Use the new hose assembly that comes with the a and the old hose assembly cannot be reused. |
| When handling toxic, hazardous or radioactive mate use this ice machine in a safe place. Improper u adversely affect your health and the environmenThe disposal of the ice machine should be done special person. Never throw the ice machine away it be natural. This may cause the child to be shut the ice machine. |
| There are no obstructions around the appliance or embedded structure, keeping the ventilation open. |
| Unplug the power cord before cleaning, maintaining inspecting the ice machine to prevent electric shock personal injury. |
| Some models use flammable refrigerants and flamm foaming agents, beware of fire, (the product has a of fire mark). When an abnormality occurs in the product, it must be repaired by qualified personnel institutions. |
| This appliance contains a flammable blowing agercyclopentane, which must be disposed of and recyqualified personnel and institutions. |
| Children should be supervised to ensure that children not play with the machine. |
| When the ice machine malfunctions, unplug the po cord. Continued abnormal operation may result in e shock or fire. |
Electrical safety matters
- The working voltage of the ice maker should be consistent with the rated voltage. If the voltage is not in this range, please purchase a regulator above 1000W.
- Be sure to connect the ground wire and ground it safely. The ground should not be connected to the water pipe or gas pipe.
- In order to protect the compressor, do not start the ice machine again within 10 minutes after power off or shutdown.
- Please do not connect other electrical appliances to the same socket.
- If the power cord is damaged, in order to avoid danger, it must be replaced by a person arranged by the manufacturer or a qualified professional.
- The electrical control system has a voltage of more than 36V, do not open and touch when used. If you need to repair, please contact the manufacturer or have relevant qualified technical personnel to deal with it.
WARNING: Do not operate the ice machine when a gas leak occurs in the environment in which the ice machine is located. Because the spark caused by the opening and closing of the plug or the temperature could cause a fire, the air source should be cut off and the window opened to allow air to circulate.
Installation Precautions
Requirements for handling and moving conditions:
When transporting, the cabinet should be kept as straight as possible, the inclination should not exceed 45 degrees at most. Do not invert and lie horizontally.
To operate the ice machine properly and get the best performance, place the ice machine in the following conditions:
1. Solid and flat ground
Place the ice machine on a solid, level surface to avoid excessive vibration and noise.
2. Keep away from heat sources
Avoid placing the ice machine near hot equipment such as gas stoves. Heating the ice machine can cause a decrease in cooling efficiency.
3. Avoid direct sunlight
If the ice machine is installed in direct sunlight, it may cause abnormal operation and may shorten the working life of the ice machine.
4. Dry area
Avoid placing the ice machine in a wet area, for example, near a sink.

Be careful

After receiving the goods, you have to let the compressor's lubricating oil settle for 24 hours before use, otherwise it will easily damage the compressor.
If the ice machine is placed in a wet area, a switch must be installed and the ice machine must be grounded. Install the disconnect switch on the power supply. For further information, consult the ice machine retailer or an electrical technician.

Caution



Always use a plug with a grounding structure and ground the ice machine to prevent electric shock during use.
Replacing a grounding terminal with a water pipe does not provide proper grounding protection in many situations, as plastic pipes are often used in plumbing.
Never ground the ice machine through a gas pipe; it is very dangerous.

Never ground the ice machine by telephone line or lightning protection, because if lightning strikes, a large current will be generated, which makes grounding very dangerous.
- Nothing should fall on the ice machine.
- Installation and operating instructions shall be provided with cautionary statements concerning the handling, moving, and use of the ice maker to avoid either damaging the refrigerant tubing or increasing the risk of a leak.
- The installation and operating instructions shall indicate that component parts shall be replaced with like components and that servicing shall be done by factory authorized service personnel, so as to minimize the risk of possible ignition due to incorrect parts or improper service.
- The installation instructions shall indicate the ice maker is to be installed in accordance with the safety standard for Refrigeration systems, ASHRAE 15. In addition, the instructions shall indicate that the ice maker shall not be installed in corridors or hallways of public buildings.
Environmental conditions:
This equipment is designed in accordance with the following conditions:
- Indoor use.
- The altitude is not higher than 2000 meters.
- The ambient temperature is in the range of 10°C to 32°C.
- When the temperature is not higher than 31°C, the maximum relative humidity is 80%, and the maximum relative humidity decreases linearly with increasing temperature.
- The main power supply voltage fluctuation does not exceed ±10% of rated voltage.
- In accordance with the equipment installation level (overvoltage category) transient overvoltage.
This appliance is used for similar purposes such as:
– in a kitchen area in a store, office, or other workplace;
– on farms, as well as in hotels, motels, and residential environments; – in bed and breakfast environments;
– in catering and similar non-retail applications. This appliance is intended for general household use.
Correct operation
When using for the first time and during continuous operation, please follow the rules below.
- Connect the ice maker to a dedicated socket (the power supply is compatible with well-known brands).
- The ice machine needs to run for a long time to stabilize the temperature in the ice storage room, and minimize the number of door openings during this period.
- The ice machine is surrounded by a cooling system for cooling. It is forbidden to block the items.
- After completing the inspection of the operation of the ice machine, turn on the power of the ice machine and let the machine start making ice.
- Use an independent water source for the ice machine and check it regularly to prevent low water pressure, fluctuations, or filter clogging.
- Do not store any debris in the ice storage room, or freeze or store food in the ice storage room, and keep the ice shovel clean.
- When the ice storage bucket is plasticized, it should be opened and closed gently. Do not drop the door. After the ice is finished, please close the sliding door of the ice storage bin.
- The ice machine should be kept away from heat sources. It is strictly
forbidden to use in high temperature or low temperature environments. Avoid direct sunlight, so as not to affect the heat dissipation of the machine.
- Do not directly wash the surface of the ice machine by splashing water. Otherwise, it may cause short circuit or electric leakage. After using the ice machine for a period of time, if it is left unused, it should be energized every 4 months for 4 to 6 hours.
Installation instructions
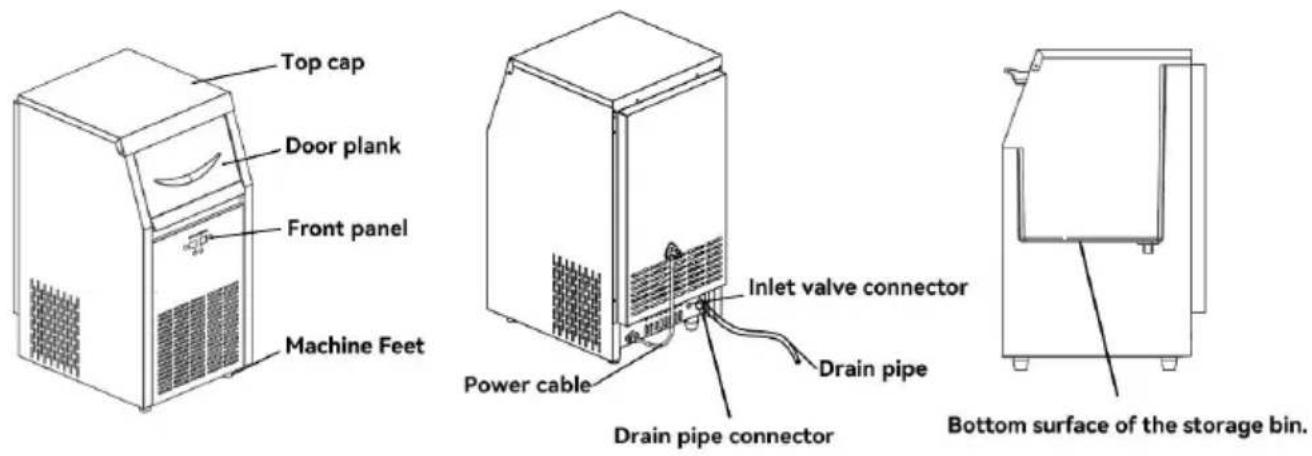
Due to the product being updated and classified continuously, the machine you get may not be the same as the picture in the manual. Please understand. We will improve it continuously.
- It should use filtered drinking water at normal temperature to make ice.
- The pressure of water supply should be controlled between 130-55 Pa. If the water pressure is too high, please install a relief valve. Do not let the hose be under high pressure.
- Please connect the outside branch hose of the machine to the tap drinking water filter. The filter has a sign to show the outlet and inlet.
- Connect the inlet of the filter to the tap of the drinking water.
- To ensure the smooth drainage of the machine, it is important that the drainage pipeline is below the bottom surface of the machine. The drainage pipe of the machine with a drainage pump has to be lower than the bottom surface of the storage bin.
Warning
It's merely permitted to connect to the drinking water
All-in-one installation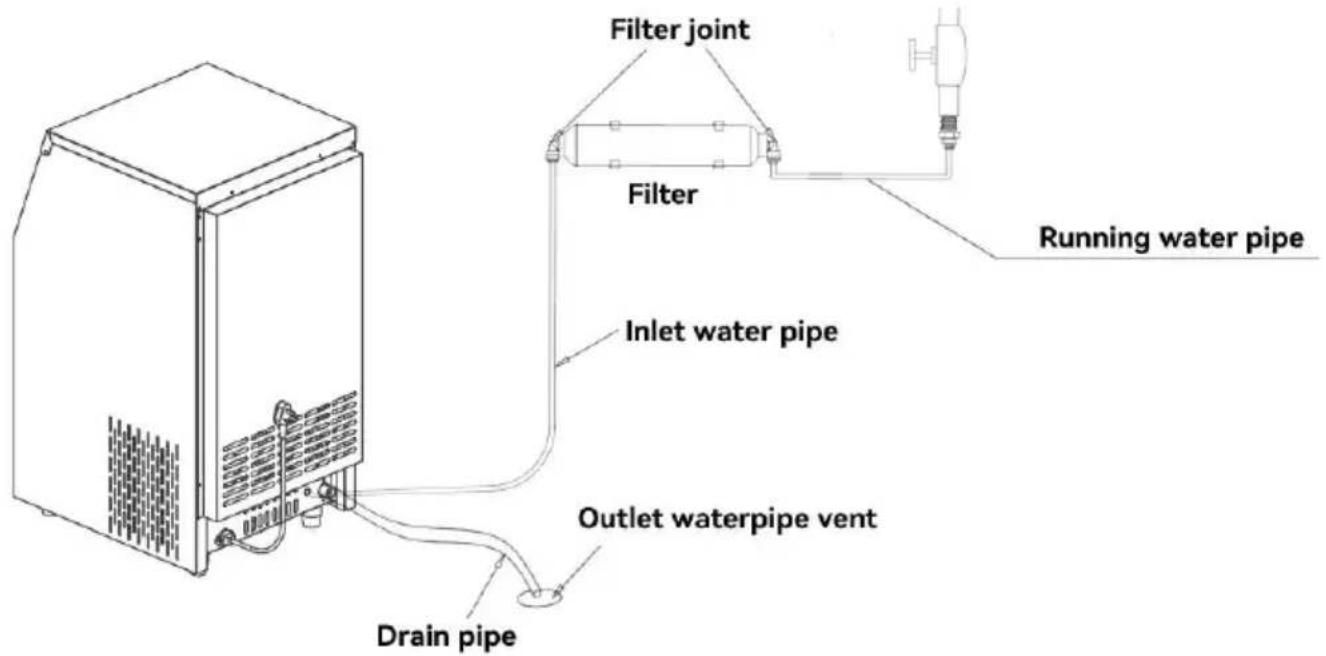
※ If the ice machine does not come with a filter, customers need to purchase it themselves
The instructions of the filter installation.
The instructions of the filter installation
The instruction of the filter installation
![graph LR A["The tap of drinking water"] --> B["Filter"] B --> C["The joint of filtered water"]](/content/2026/04/736375/images/2d5e026f9cb4e4cee483432663e25399eeea1e066682ea94aaa239ee329c0908.jpg)
The instruction of quick installation for the filter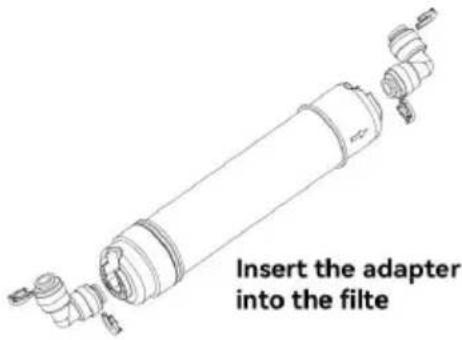
The installation for the pipeline and joint
① 1. Take off the blue clip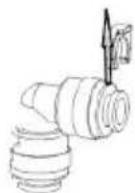
② 2. Make the orifice flat, insert the pipe stopper firmly, make sure the orifice to connect the inside seal firmly.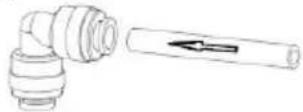
③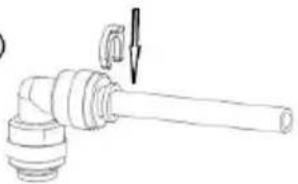
- Fix the blue clip on
④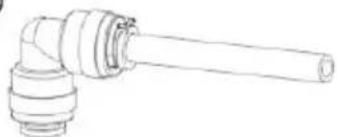
- Finished installation
Operating Instructions
Function description of the four-button digital tube operation panel.
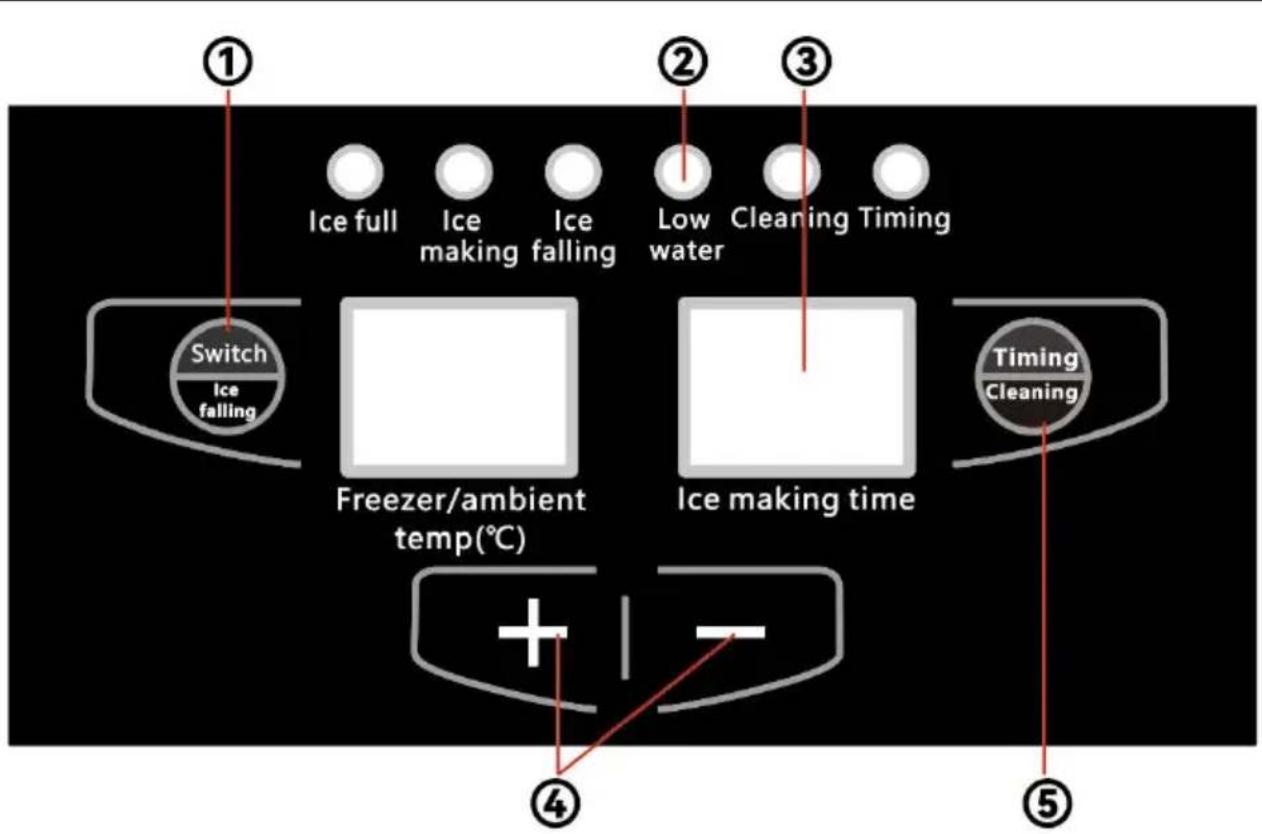
① Power switch and deicing key: After power on, click to enter the ice-making state; click to enter the deicing state during the ice-making process; in the ice-making and de-icing state, press and hold for seconds to enter the shutdown state. ② LED light: Represents the state of the machine. ③ Digital display tube
The left digital tube displays the ambient temperature and return temperature; the digital tube on the right shows the timing swing and ice-making time.
④ +- button;
Adjust the thickness of the ice cube in the working mode; in timing off or timing on and off, adjust the timing switch time; hold the "-" button for 3 seconds to turn on or off the light.
⑤ Cleaning and timing button
In standby mode, press the key continuously for 3 seconds, then it enters the cleaning mode; press this button when starting up the countdown of the scheduled shutdown, and then click to cancel scheduled shutdown; press this button in the standby state to start the countdown of the scheduled power-on, and then click to cancel scheduled power-on; the displayed time unit is hour.
Button Operation Instructions
- Operation process
- Plug in the power, click the ice machine switch button, the ice machine starts to run.
- Open the water inlet solenoid valve to enter the water. After the level rises, the floating ball floats up. When the water level reaches the requirement, the water inlet valve is closed, and the cleaning program runs. After the cleaning is completed, it will automatically enter the ice-making cycle.
- When the thickness of the ice cube reaches the set thickness, the deicing program starts, the solenoid valve starts to work, the water pump stops working, the heat enters the evaporator, and the ice cube falls after about 1.5 minutes. When the ice cube falls, the ice-falling baffle flips open the reed switch; when the reed switch closes again, the machine goes back into the ice-making process.
- The compressor does not stop during the entire ice-making and deicing process.
- When the ice bucket is full of ice and the magnetic reed switch closes automatically, the machine will automatically stop working. When
enough ice cubes are removed and the magnetic reed switch closes again, the machine will start up with a delay of 3 minutes and re-enter the ice-making process.
Ice Cube Thickness Adjustment
- Press and hold the “+” button for 3 seconds until the displayed temperature starts flashing. Then, press the “+” or “-” button to adjust the thickness of the ice cubes. Pressing the “+” button will display the number of minutes, with each increment of 1 minute adding to the current ice-making time, up to a maximum of 15 minutes. Each decrement of 1 minute reduces the ice-making time, with a minimum reduction of -7 minutes. Increasing the ice-making time will result in thicker ice cubes, while decreasing it makes the cubes thinner.
- Once the ice-making time has been adjusted, the new ice-making time will apply to the next batch of ice after the current batch has finished.
Click the blue light switch to turn it on, otherwise turn it off. •Scheduled power-on function
- In the standby state, press the preset timing key to execute the power-on function. The timing LED light is on, and the displayed number is the remaining power-on time, in hours.
- In the timing power-on state, click + or - to adjust the remaining power-on time.
- After executing the scheduled power-on, click the scheduled reserve button to cancel the scheduled power-on.
- Ice full function
- When the ice bucket is full of ice and the ice baffle cannot be cleared automatically, the machine will stop working automatically.
- When the ice cubes are used up, the ice baffle will reset, and the machine will automatically start up after a delay of 3 minutes. If the maker stops due to fluctuations in voltage and water pressure, and does not make ice or de-ice, please first unplug the power for 5
minutes, then turn on the power to test the machine. Due to changes in temperature and ambient temperature, ice may sometimes appear in the sink. If the ice is severe, please unplug the power for 10 minutes and turn on the power again.
- When not in any setting interface, force the drainage pump to work for seconds and then end (including standby and startup) by continuously pressing the "-" button twice (effective within 2 seconds).
- When the machine is powered on, the drainage pump automatically starts for 20 seconds every 15 minutes and then turns off. Note: The machine which is in full ice, ice making, deicing, adding water, lacking water, and short-term cleaning all belong to the startup mode.
Precautions
Please follow the requirements of this manual to maintain your machine in order to increase the reliability and longevity of this ice machine. Also, maintenance can avoid excessive energy consumption.
- Clean the environment around the ice machine frequently to keep it clean, and do not block the louvers used for ventilation of the ice machine.
- The shell can be cleaned with a neutral detergent, and then wiped with a soft cloth. If necessary, commercial stainless steel cleaners and polishes can be used.
- Filters should be checked regularly and replaced with new filters immediately if damaged.
- The water tank of the ice machine and the interior of the ice storage room can be washed directly with water pipes. Do not use too much pressure, and do not directly flush the water pump and the part above the ice tray to prevent the circuit from being soaked.
- Maintenance of air-cooled ice machine condenser: Clean the air-cooled condenser once every three months. Use a soft brush or a vacuum with a brush to brush the condenser fins up and down along the fins to avoid damaging the fins and affecting the cooling effect.
 | Any kinds of maintenance are not including to warranty. |
 | The filter elements should be changed regularly |
 | Please cut off the waterhead and electricity before clean or check the the machine. |
 | If there is much dirt and scale in the machine,or of pipes are blocked,please dial the telephone of a service. But, it will cost fees for the door to-door |
 | The air-cooled condenser warping blade is very sharpen.Be careful of getting hurt when you clear |
Safety use guide for ice
Routine maintenance and inspection is especially important if the ice is to be used as edible ice.
If the ice machine has been used for a long time, the ice produced may become entrapped with scale, mold, or rust due to temperature, water quality, or aging. Therefore, it is important to keep the inside of the refrigerator clean through routine maintenance. If you find foreign matter at the bottom of the refrigerator or in the ice during operation or maintenance, please stop using the ice maker and contact the seller immediately.
- Ice Scoop (clean once a day)
Soak the ice scoop in warm water (30~40°C) containing a disinfectant solution for more than 3 minutes, then rinse with tap water and wipe.
- Refrigerator door (clean once a day)
Since the door of the refrigerator is susceptible to bacterial contamination, make sure to keep it clean by wiping it with a soft cloth with warm water. Refrigerator, ice scoop holder, and case (clean weekly).
Important information
- To prevent deformation or cracking of plastic parts, avoid contact with pesticides or other oily substances.
- Thoroughly remove the dirt or dust on the ice scooper fixing frame.
Cleaning of the major components.
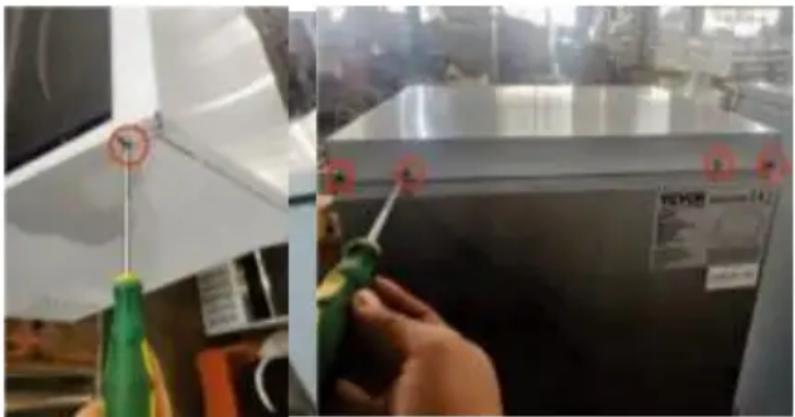
1. Top cover disassembly.
There are six screws in front of the top cover of the machine on the right sides and the back. Use a cross screwdriver to remove these screws counterclockwise, and then gently lift the top cover plate and place it in a suitable position.
2. Removal and cleaning of water pump (clean every 2 months).
2.1 Remove the two screws above the pump support bracket with a screwdriver, then pull out the pump pipe joint from the pump outlet nozzle, and remove the two screws at the bottom of the pump support with a cross screwdriver.
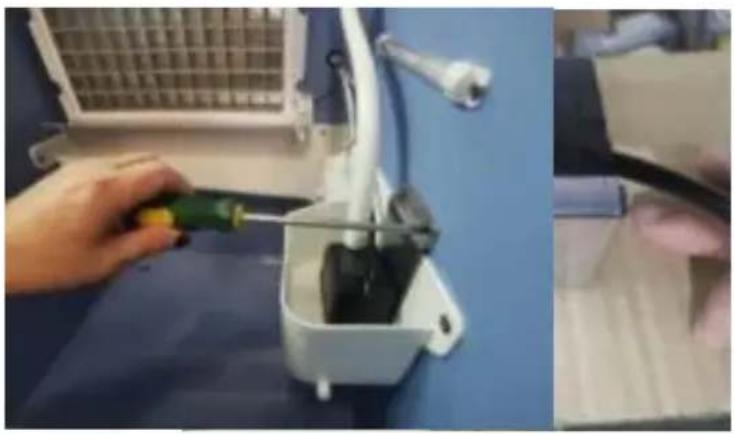
Figure 1 Figure 2
2.2 Remove the front cover filter (Figure 1), and the filter can be removed directly.
2.3 Rotate the cap counterclockwise and remove the cap (Figure 2).
2.4 After removing the sealing lid, remove the rotor. The rotor is fixed in the proper position by a magnet, and can be removed only by holding the water leaf with a clip or fingernail (Figure 3).
2.5 Clean it up and put the water pump back in again.
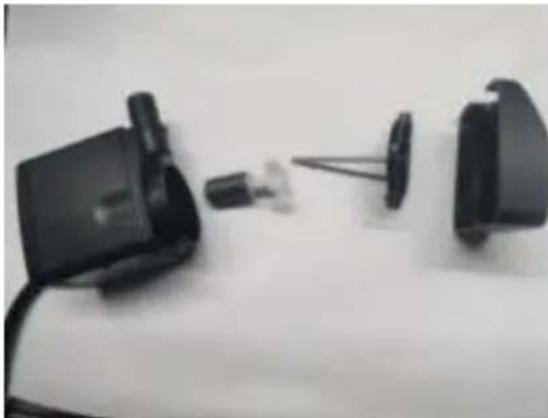
Figure 3
- Cleaning of ice grids (clean every 2 months).
3.1 Hold the clamp on the water pipe, and then pull off the pump.
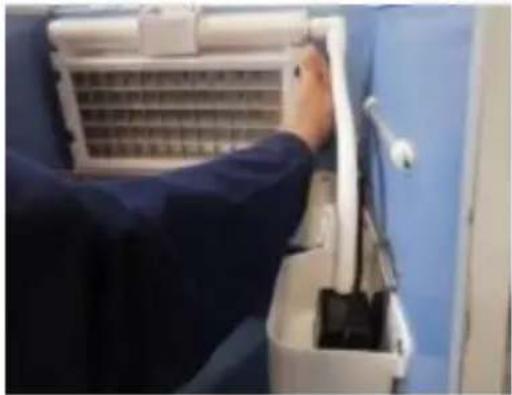
3.2 Remove the two screws on the holder of the pipe with a cross screwdriver, then remove the holder and the pipe.
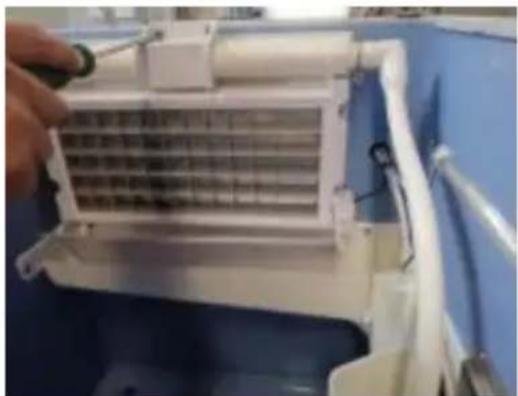
3.3 Wash the ice lattice surface with a soft brush or sponge dipped in vinegar or scale remover to clean up the scale.
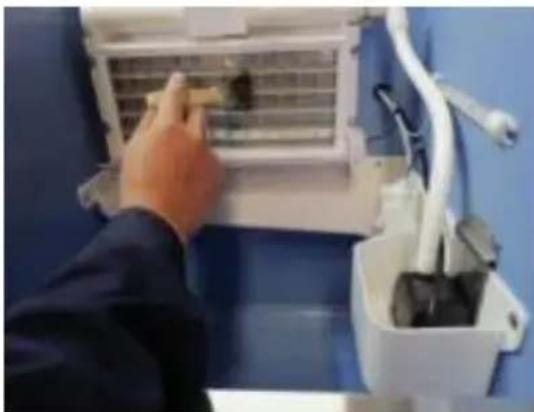
3.4 Use a cross screwdriver to remove the fixing screw on the ice pipe, and then remove the left and right plug and the shower pipe at the same time. Then clean the inside and outside of the shower pipe with a brush.
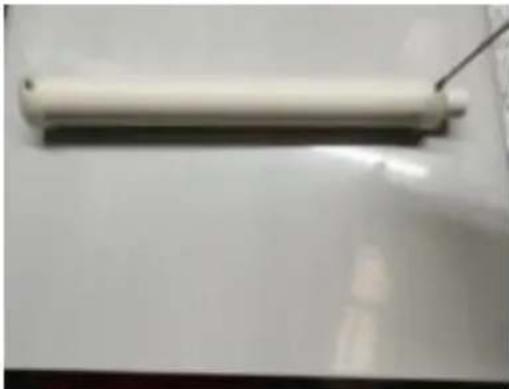
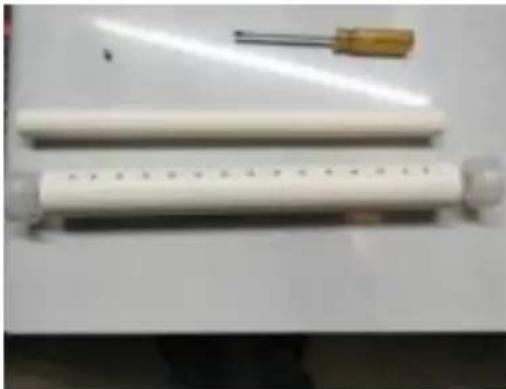
3.5 Clean the pump head hose with a brush.
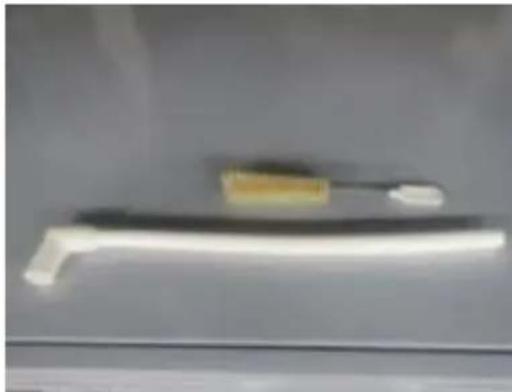
- Wash of the float ball (wash once every 2 months)
Remove the float ball assembly from the sink slot and wash the float assembly with a brush.
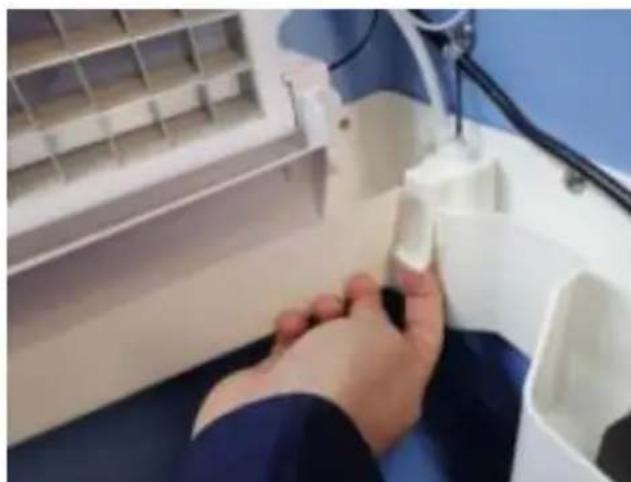
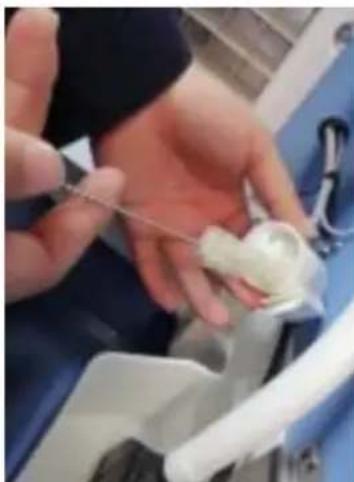
5. Cleaning of the sink and the storage refrigerator
5.1 Dip a soft cloth in vinegar or scale agent, wipe the surface of the sink and refrigerator, and clean the surface.
5.2 The sink is cleaned every 2 months, and the refrigerator is cleaned
once a week.
6. Daily cleaning of the waterways
6.1 Mix the right amount of citric acid solution with a clean bucket. Pour the solution into the sink, click the display screen to clear the scale. After cleaning, pull the tank drain plug, and then drain the citric acid solution in the tank.
6.2 Pour an appropriate amount of water into the sink, then press the key, wash for 3-5 minutes, drain the water in the tank, repeat 4-6 times. 6.3 Ensure that the waterway is cleaned every 7-15 days.
Before consulting with after-sales customer service
If the ice maker is operating abnormally, please contact after-sales customer service. However, you need to confirm the following situation
- If the water head is normal or not.
The correct way to check it is to loosen the inlet joint (6 branch con) behind the machine. If it leaks normally when you loosen the joint to the required value, it means normal. Otherwise, there is no water.
- Confirm whether the machine is electrified or not.
Our ice machines are all fully automatic. So, some models don't have an electric switch. You can ask an electric technician to help you check. Mainly, you should pay attention to the socket.
- The model number and serial number.
There is a nameplate on the front board, and there are model numbers
and serial numbers on the side board.
| It will cost fees for the door to door service if caused by the users(for example,no water,no electricity,environment, etc) |
| To prevent from high-pressure water spraying ,do loosen the joint of the inlet completely when you o waterhead. |
| Plastic parts are not in including to the warran |
| Warranty |
| 1. Our company agrees the warranty of the product within 1 labor cost and the replacement of components are free within warranty. |
| 2. All the plastic parts are not including to the warranty. |
| 3. Our warranty is limited liability.Except the machine itself,any joint liability is not in the warranty. |
| 4. The routine maintenance ,cleaning,and all the hitches from the incorrect operation are not in the warranty. |
| 5.All the warranty services should be finished by the machine or related institutes. |
Troubleshooting of this series of machines
| Fault | Possible cause | Solution |
| Ice machine does not work | Not connected to the power supply or water supply. | 1. Fuses 2. Power switch Cable 4. Water switch 5 Power plug 6. Sockets |
| Ice tray baffle remain open | If the ice tray baffle could open and close automatica | |
| The machine stops 3 minutes after it's turned on | High Voltage Protection | 1. High temperature environment2. Dirty condenser filter3. Damaged fan motor |
| The machine car only make one tray of ice every time it is turned on | Ice full or ice tray remains open | 1. If the ice tray baffle can open and close automatica2. The ice full switch whe be falls |
| Ice could not fa off the ice tray | Dirty Ice Tray | Cleaning and disinfection needs to be done |
| Machine not placed a level ground | Adjust the machine to a leg ground | |
| Environment temperature is too low | Environment temperature should be higher 5 °C | |
| The ice is too thick | Adjust tee ice thickness parameter to below 0 | |
| Faulty Solenoid valve | Replace the solenoid valve | |
| Ice too thin or complete | Tank water level is low | Check the water level che if there is any leakage |
| Inlet valve does not work | Check the inlet valve | |
| Not enough water pressure | Water pressure must be 0.13 - 0.55Mpa | |
| Water pipes are blocked | Check the pipes and join for dirt | |
| Ice making is slow | Condenser is dirty | Clean the condenser |
| Temperature too high or the ventilation is t | Ambient temperature should not exceed 40 °C, and ensure ventilation | |
| The float ball in tank too high or there is leakage | Adjust the float ball or replace the water tank | |
| Water tank leakage | Replace water tank | |
| Inlet valve could not closed tightly or leakage | Clean or replace the inlet valve | |
| Not enough space around the machine | Provide adequate space | |
| Ice full indicator light is lit up b there is no ice | Faulty ice tray baffle | Check if the ice tray baffle stuck |
| E1 Alarm | Ambient temperature sensor get broken | Replace ambient temperature sensor |
| E2 Alarm | Return air temperature sensor get broken | Replace return air temperatuer sensor |
| E1,E2 Alarm | Ambient temperature sensor and return air temperature sensor both get broken | 1.replace ambient temperature sensor and return air temperature sensor2.provide enough space |
Circuit diagram
Small ice maker mother board wiring diagram.
- Elementary Transformer Pavilion
- Zero line
- De-icing valve
- Water pump
- Fan
- Inlet valve
- Drain valve
- Transformer Secondary
- Ambient Light
- Blue light
- Float
- Evaporation probe
- Condensation probe
- Drainage options
- Blue light control
- De-icing detection
- Connect live wire
- Compressor live wire
- Connect to Swift serial port
- Ice full probe
- Download port
- Display screen
- Direct current fan
- Connect machine
PRODUCT EXPLOSION DIAGRAM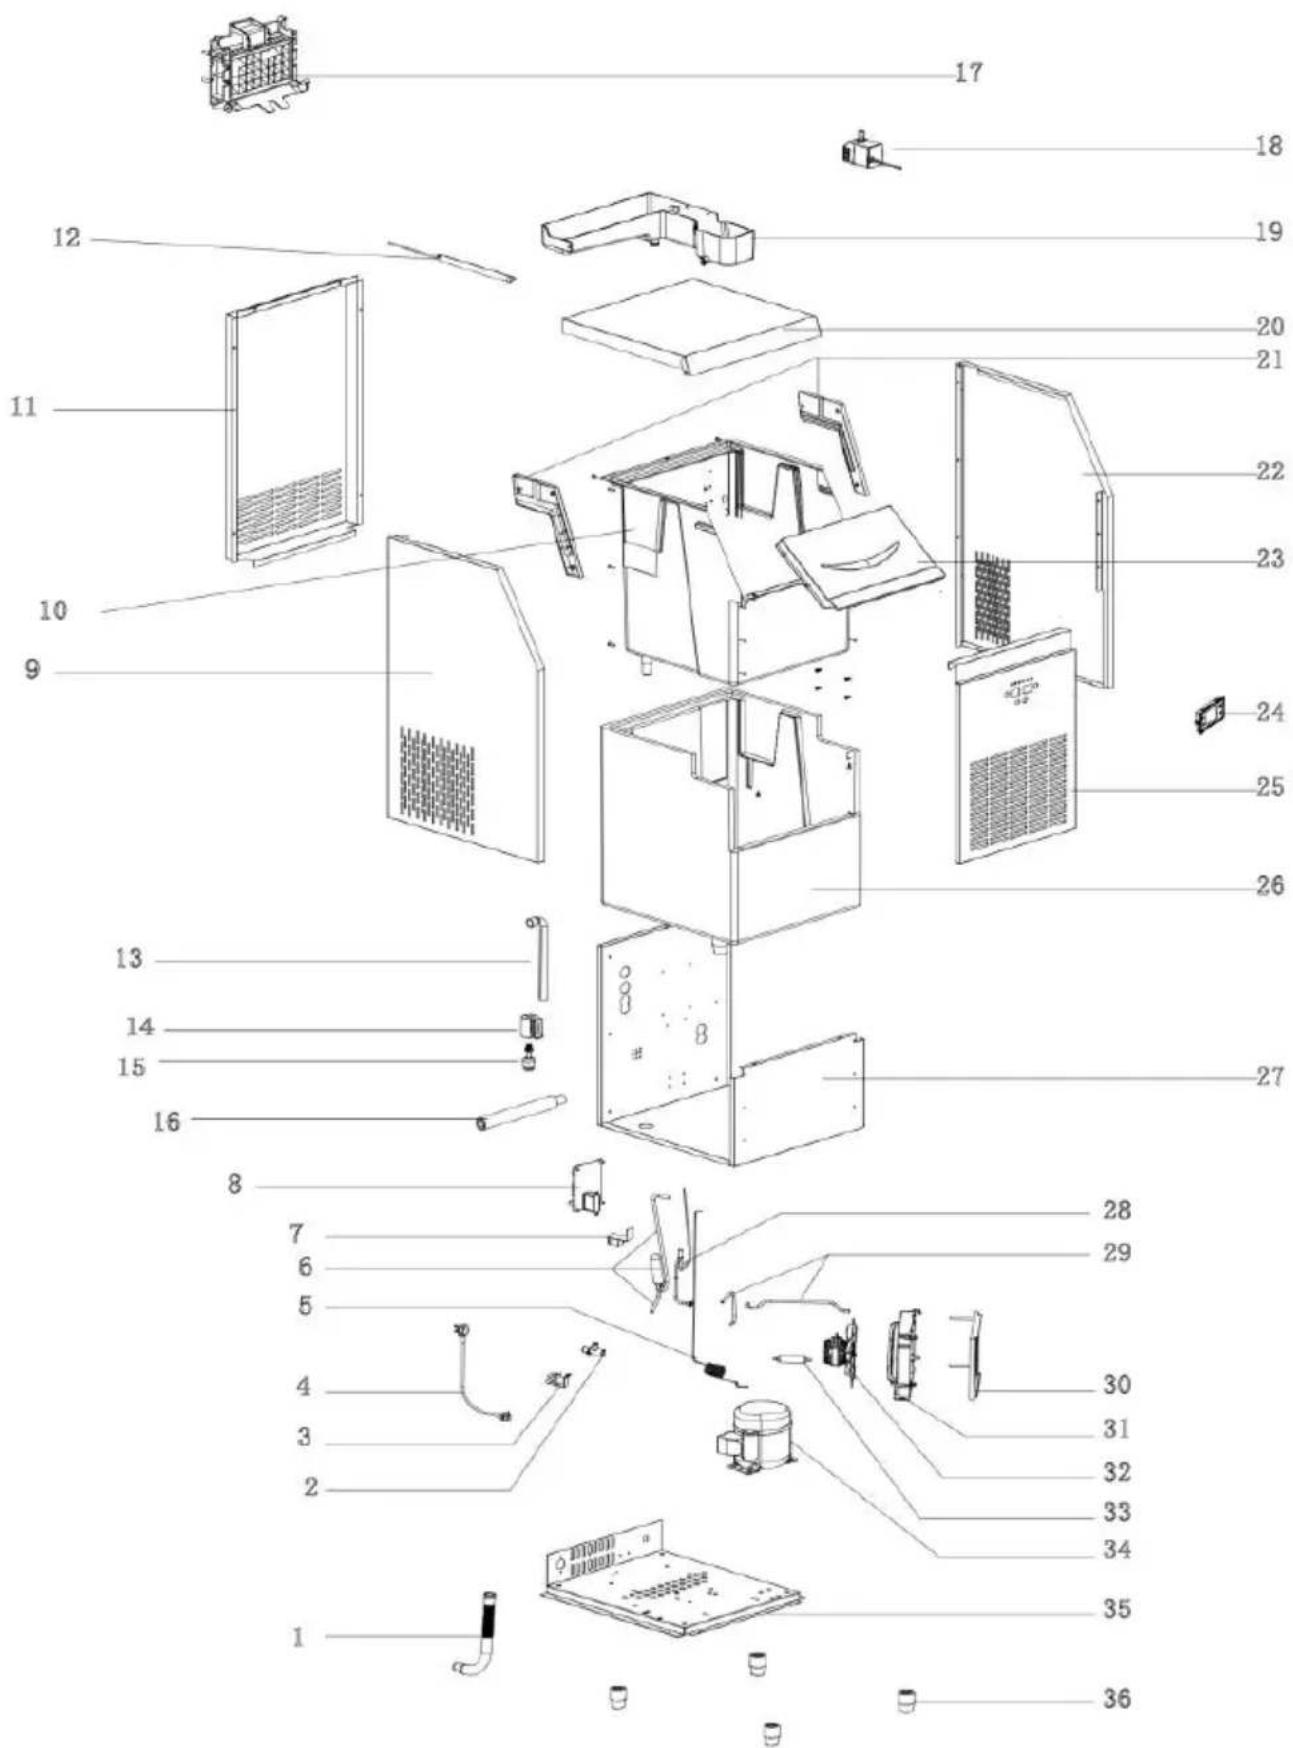
| Reference number | Part name | Reference number | Part name |
| 1 | Inner tank drain pipe | 19 | Water tank / Water trough |
| 2 | Drain outlet | 20 | Top cover panel |
| 3 | Water inlet valve | 21 | Left and right slide r |
| 4 | Power cord | 22 | Right side panel |
| 5 | Capillary tube | 23 | Door panel |
| 6 | Liquid reservoir | 24 | Display screen |
| 7 | Solenoid valve coil | 25 | Front panel |
| 8 | Control board | 26 | Inner tank foam insulation |
| 9 | Left side panel | 27 | Rear panel |
| 10 | Inner tank | 28 | Solenoid valve |
| 11 | Rear air vent cover | 29 | High-pressure tube |
| 12 | Blue light LED | 30 | Condenser |
| 13 | Water pump discharge pipe | 31 | Fan cover |
| 14 | Float cove | 32 | Fan |
| 15 | Float ball | 33 | Filter |
| 16 | Ice tray water supply p | 34 | Compressor |
| 17 | Ice tray | 35 | Base plate |
| 18 | Water pump | 36 | Machine feet |

VEVOR
Affordable. Reliable. Home Improvement.
ICE MACHINE
MODEL: SSX65C SSX160V SSX200V
SSX265V SSX360V SSX440V
SSX80 SSX90 SSX100
SSX110 SSX120 SSX130
SSX140 SSX300 SSX440
VEVOR
Affordable. Reliable. Home Improvement.
ICE MACHINE
MODEL: SSX65C | SSX160V | SSX200V | SSX265V | SSX360V | SSX440V | SSX80 | SSX90 | SSX100 | SSX110 | SSX120 | SSX130 SSX140 | SSX300 | SSX440
The warning diagram and operation safety instruction
Place should be stable
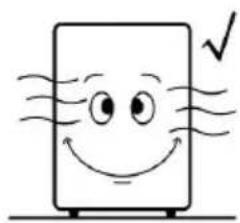
Smooth ventilation
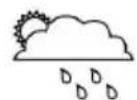
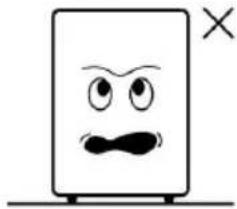
Avoid sun and rain
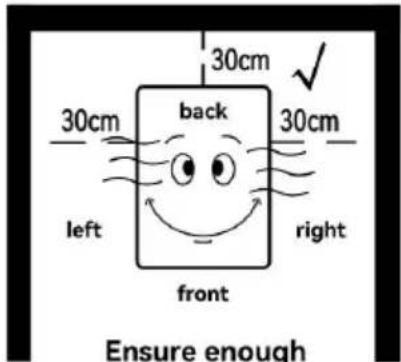
Ensure enough distance
Installation instructions
The instruction of quick installation for the filter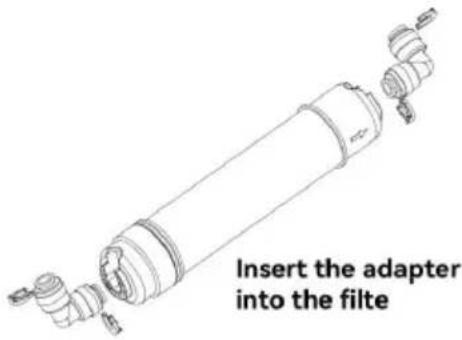
The installation for the pipeline and joint
① 1. Take off the blue clip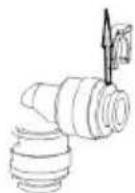
② 2. Make the orifice flat, insert the pipe stopper firmly, make sure the orifice to connect the inside seal firmly.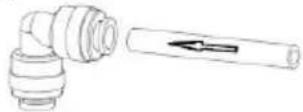
③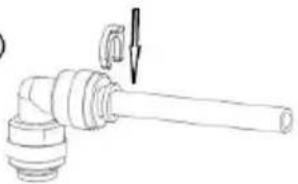
- Fix the blue clip on
④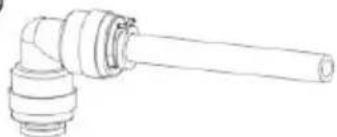
- Finished installation
Operating Instructions
Cleaning of the major components
1. Remove the top cover
Figure 1 Figure 2
Figure 3
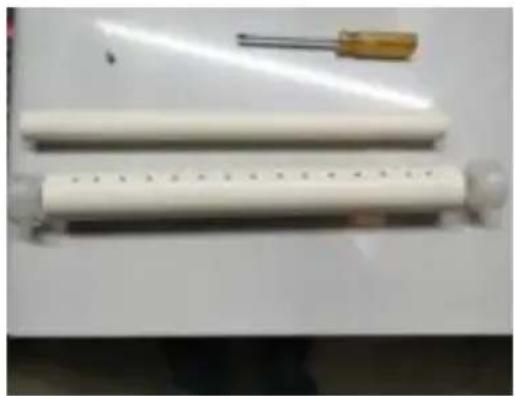
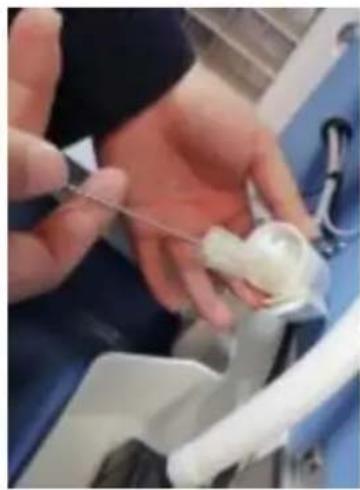
Troubleshooting of this series of machines
PRODUCT EXPLODED DIAGRAM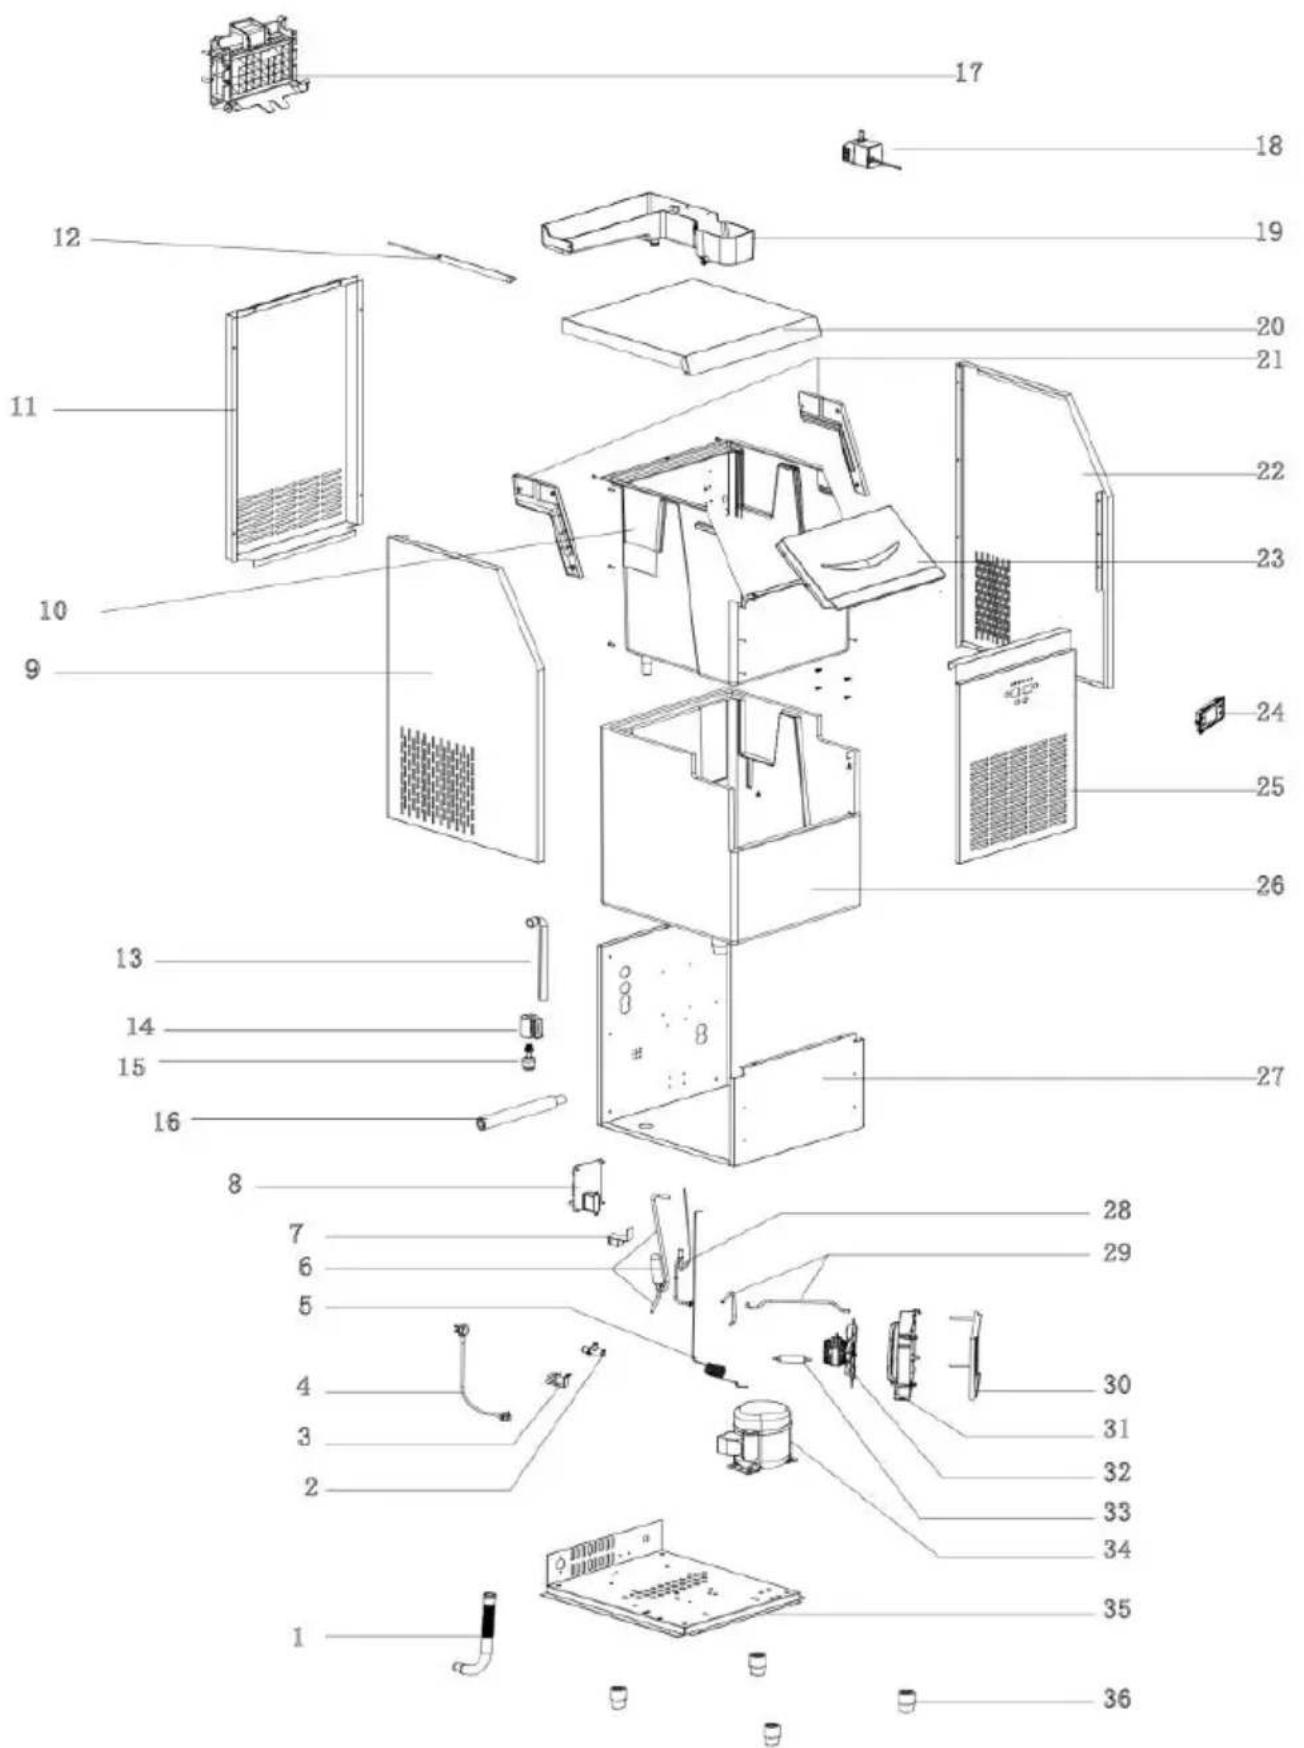
Affordable. Reliable. Home Improvement.
ICE MACHINE
MODEL: SSX65C SSX160V SSX200V
SSX265V SSX360V SSX440V
SSX80 SSX90 SSX100
SSX110 SSX120 SSX130
SSX140 SSX300 SSX440
VEVOR
Affordable. Reliable. Home Improvement.
ICE MACHINE
MODEL: SSX65C | SSX160V | SSX200V | SSX265V | SSX360V | SSX440V | SSX80 | SSX90 | SSX100 | SSX110 | SSX120 | SSX130 | SSX140 | SSX300 | SSX440
Warning diagram and operation safety instructions
Installation instructions
Instructions for quick installation of the filter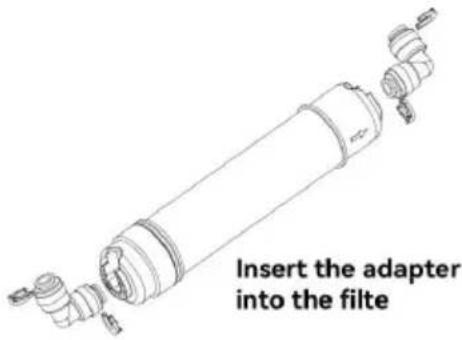
Installation of the pipeline and joint
① 1. Remove the blue clip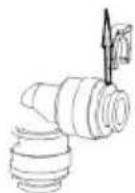
② 2. Flatten the orifice, insert the pipe stopper firmly, and ensure the orifice connects securely to the inner seal.
③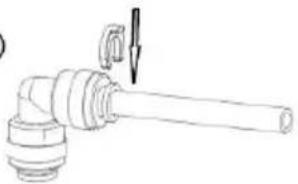
- Attach the blue clip
④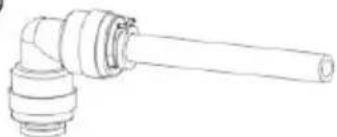
- Finished installation
Operating Instructions
Cleaning of the major components
Troubleshooting of this series of machines
Affordable. Reliable. Home Improvement.
ICE MACHINE
MODEL: SSX65C SSX160V SSX200V
SSX265V SSX360V SSX440V
SSX80 SSX90 SSX100
SSX110 SSX120 SSX130
SSX140 SSX300 SSX440
VEVOR
Affordable. Reliable. Home Improvement.
ICE MACHINE
MODEL: SSX65C \ SSX160V \ SSX200V \ SSX265V \ SSX360V \ SSX440V \ SSX80 \ SSX90 \ SSX100 \ SSX110 \ SSX120 \ SSX130 \ SSX140 \ SSX300 \ SSX440
Warning diagram and operation safety instructions
Place should be stable
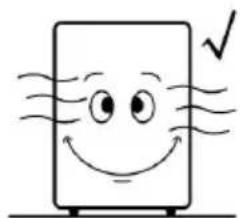
Smooth ventilation
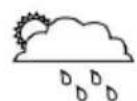
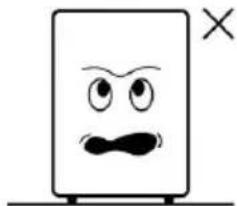
Avoid sun and rain
Ensure enough distance
Installation instructions
Quick installation instructions for the filter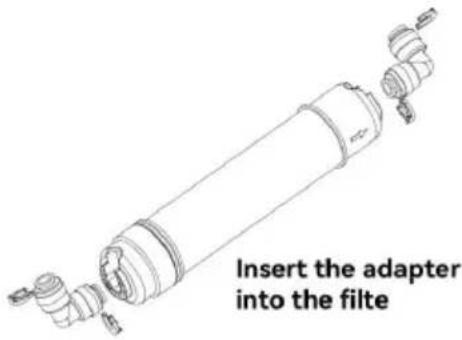
Installation of the pipeline and joint
1. Take off the blue clip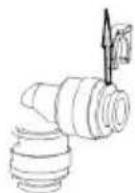
2. Make the orifice flat, insert the pipe stopper firmly, and make sure the orifice connects to the inside seal firmly.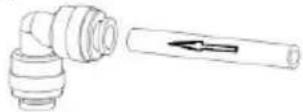
3.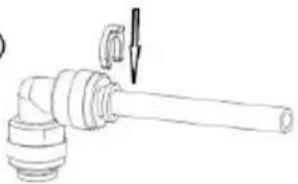
- Fix the blue clip on
4.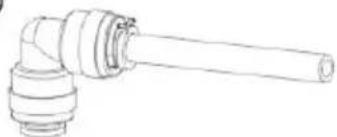
- Finished installation
Operating Instructions
Cleaning of the major components
Figure 1 Figure 2
Figure 3
Troubleshooting of this series of machines
Affordable. Reliable. Home Improvement.
ICE MACHINE
MODEL: SSX65C SSX160V SSX200V
SSX265V SSX360V SSX440V
SSX80 SSX90 SSX100
SSX110 SSX120 SSX130
SSX140 SSX300 SSX440
VEVOR
Affordable. Reliable. Home Improvement.
ICE MACHINE
MODEL: SSX65C \ SSX160V \ SSX200V \ SSX265V \ SSX360V \ SSX440V \ SSX80 \ SSX90 \ SSX100 \ SSX110 \ SSX120 \ SSX130 \ SSX140 \ SSX300 \ SSX440
The warning diagram and operation safety instruction
Installation instructions
The instruction of quick installation for the filter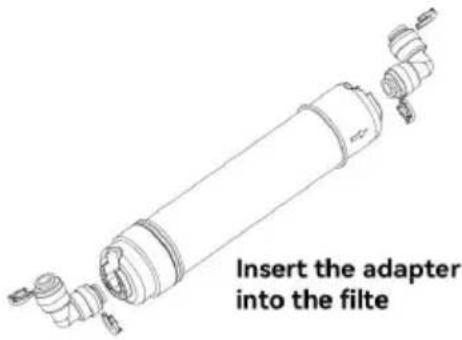
The installation for the pipeline and joint
① 1. Take off the blue clip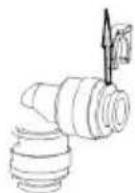
② 2. Make the orifice flat, insert the pipe stopper firmly, make sure the orifice to connect the inside seal firmly.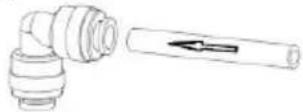
③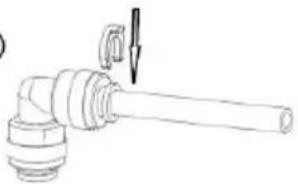
- Fix the blue clip on
④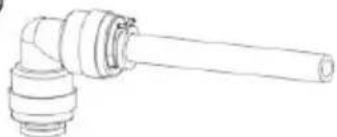
- Finished installation
Operating Instructions
cleaning of the major components
Figure 1 Figure 2
Figure 3
Troubleshooting of this series of machines
PRODUCT EXPLOSION DIAGRAM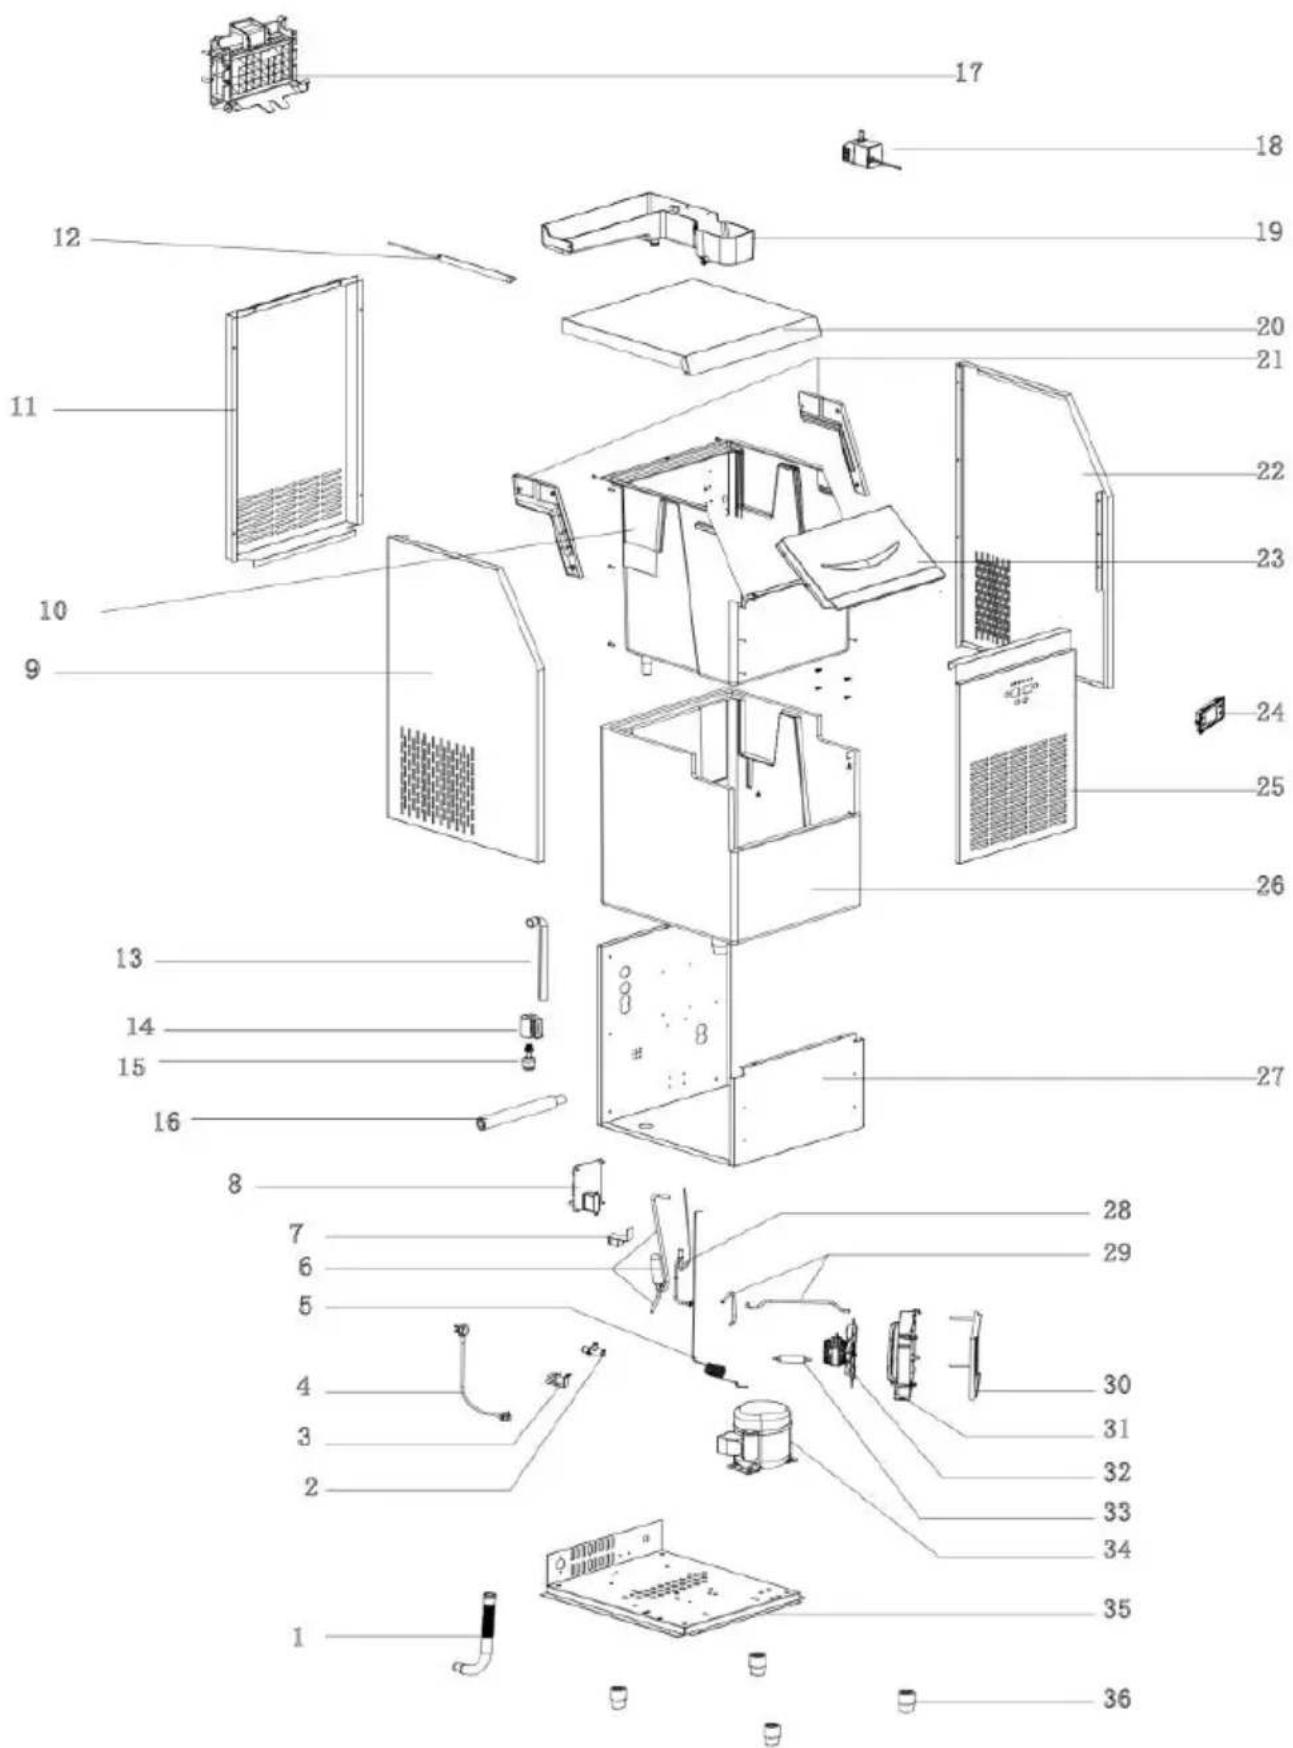



- ICE MACHINE
- VEVOR
- THE WARNING DIAGRAM AND OPERATION SAFETY INSTRUCTION
- SAFE OPERATION PRECAUTIONS
- ELECTRICAL SAFETY MATTERS
- INSTALLATION PRECAUTIONS
- SOLID AND FLAT GROUND
- AVOID DIRECT SUNLIGHT
- DRY AREA
- ENVIRONMENTAL CONDITIONS
- THIS APPLIANCE IS USED FOR SIMILAR PURPOSES SUCH AS
- CORRECT OPERATION
- INSTALLATION INSTRUCTIONS
- WARNING
- THE INSTALLATION FOR THE PIPELINE AND JOINT
- OPERATING INSTRUCTIONS
- BUTTON OPERATION INSTRUCTIONS
- OPERATION PROCESS
- ICE CUBE THICKNESS ADJUSTMENT
- CLICK THE BLUE LIGHT SWITCH TO TURN IT ON, OTHERWISE TURN IT OFF. •SCHEDULED POWER-ON FUNCTION
- ICE FULL FUNCTION
- PRECAUTIONS
- IMPORTANT INFORMATION
- CLEANING OF THE MAJOR COMPONENTS
- TOP COVER DISASSEMBLY
- REMOVAL AND CLEANING OF WATER PUMP (CLEAN EVERY 2 MONTHS)
- CLEANING OF ICE GRIDS (CLEAN EVERY 2 MONTHS)
- DAILY CLEANING OF THE WATERWAYS
- BEFORE CONSULTING WITH AFTER-SALES CUSTOMER SERVICE
- CIRCUIT DIAGRAM
- AFFORDABLE. RELIABLE. HOME IMPROVEMENT
- WARNING DIAGRAM AND OPERATION SAFETY INSTRUCTIONS
- INSTALLATION OF PIPELINE AND JOINT
- THE WARNING DIAGRAM AND OPERATION SAFETY INSTRUCTIONS
- THIS EQUIPMENT IS DESIGNED IN ACCORDANCE WITH THE FOLLOWING CONDITIONS
- SAFETY USE GUIDE FOR ICE
- REMOVE THE TOP COVER
- INSTALLATION OF THE PIPELINE AND JOINT
Brand : Vevor
Model : SSX120
Category : Ice machine