
JD-C-2-2 - Car floor mats Vevor - Free user manual and instructions
Find the device manual for free JD-C-2-2 Vevor in PDF.
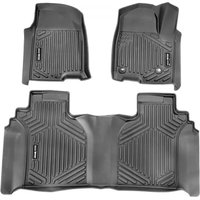


| Product Type | Automotive Floor Mat |
| Brand | Vevor |
| Model | JD-C-2-2 |
| Net Weight | 6.8 kg |
| Main Material | TPE (Thermoplastic Elastomer) |
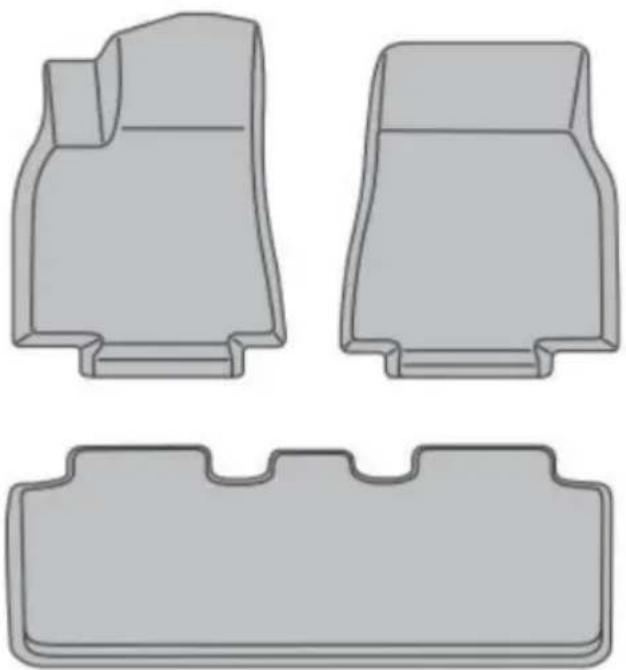
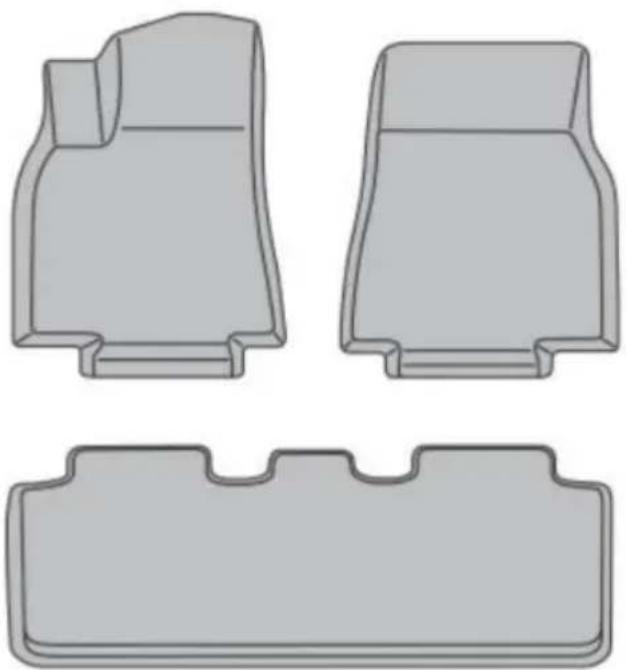
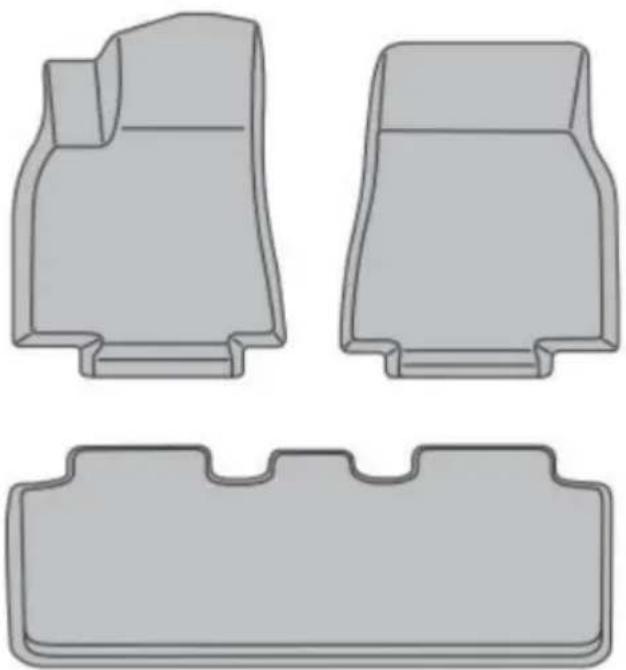
| Package Contents | 2 Front Mats, 1 Rear Mat |
| Vehicle Compatibility | Specific Vehicles - Check Model, Year, Trim, Floor Type |
| Fixation | Retention Hooks (if vehicle equipped) |
| Maintenance | Clean with mild cleaner and cloth; dry flat |
| Safety | Avoid any interference with pedals; always secure properly |
| Deformation Recovery | Sun exposure, gentle heat, or compression by heavy object |
| Manufacturer | Shanghaimuxinmuyeyouxiangongsi, Shanghai, China |
| Technical Support | www.vevor.com/support |
| Warranty | Electronic Warranty Certificate available online |
Frequently Asked Questions - JD-C-2-2 Vevor
User questions about JD-C-2-2 Vevor
0 question about this device. Answer the ones you know or ask your own.
Ask a new question about this device
Download the instructions for your Car floor mats in PDF format for free! Find your manual JD-C-2-2 - Vevor and take your electronic device back in hand. On this page are published all the documents necessary for the use of your device. JD-C-2-2 by Vevor.
USER MANUAL JD-C-2-2 Vevor
Technical Support and E-Warranty Certificate www.vevor.com/support
AUTOMOTIVE FLOOR MATS
MODEL: JD-D-10-2 / JD-C-3-3 / JD-D-12-1 /
JD-A-30-2 / JD-C-2-2 / JD-C-2-2 / JD-C-12-1
/ JD-C-4-4 / JD-C-5-1 / JD-A-27-1
We continue to be committed to provide you with tools at competitive prices. "Save Half", "Half Price", or any other similar expressions used by us only represent an estimate of savings you might benefit from buying certain tools with us compared to top brands, and does not necessarily mean to cover all categories of tools. We kindly remind you to verify carefully when placing an order with us that you are actually saving half in comparison with the top major brands.
VEVOR®
TOUGH TOOLS, HALF PRICE
Automotive Floor Mats
MODEL: JD-D-10-2 / JD-C-3-3 / JD-D-12-1 / JD-A-30-2 / JD-C-2-2 / JD-C-2-2 / JD-C-12-1 / JD-C-4-4 / JD-C-5-1 / JD-A-27-1
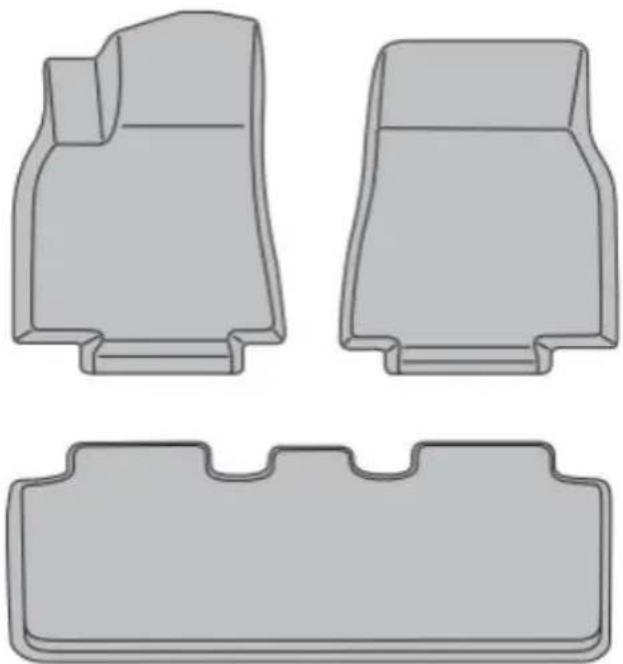
The picture is for reference only, all subject to the actual product.
NEED HELP? CONTACT US!
Have product questions? Need technical support? Please feel free to contact us:
Technical Support and E-Warranty Certificate www.vevor.com/support
This is the original instruction. Please read all manual instructions carefully before operating. VEVOR reserves the right to interpret the user manual. The appearance of the product shall be subject to the product you received. Please forgive us that we won't inform you if there are any technology or software updates on our product.
PARAMETER LIST
| Model | JD-D | -10-2 | JD-C | -3-3 | JD-D | -12-1 | JD-A-30 | -2 | JD-C-2 | -2 |
| Net Weight (Kg) | 6.55 | 5.1 | 7.2 | 5.55 | 6.8 | |||||
| Model JD-C | -17-1 | JD-C | -12-1 | JD-C | -4-4 | JD-C-5 | -1 | JD-A-27 | -1 |
| Net Weight (Kg) | 4.7 | 4.2 | 4.85 | 4.95 | 4.5 |
PART LIST
| Model Front | Ground Mat | Rear | Ground Mat |
| JD-D-10-2 | 2 | 1 | |
| JD-C-3-3 | 2 | 1 | |
| JD-D-12-1 | 2 | 1 | |
| JD-A-30-2 | 2 | 1 | |
| JD-C-2-2 | 2 | 1 | |
| JD-C-17-1 | 2 | 1 | |
| JD-C-12-1 | 2 | 1 | |
| JD-C-4-4 | 2 | 1 | |
| JD-C-5-1 | 2 | 1 | |
| JD-A-27-1 | 2 | 1 |
SECURITY & WARNINGS
WARNING:
- Always use floor mats that are designed to fit your vehicle.
- Pedal interference can cause loss of vehicle control and increase the risk of serious injury.
- Always make sure that the floor mats are properly secured to the retaining hooks in the carpet, if your vehicle is equipped with retaining hooks.
- Do not use two or more floor mats on top of each other.
- Always properly reinstall and secure floor mats that have been removed for cleaning or replacement.
- Failure to properly follow floor mat installation or attachment instructions can potentially cause interference with pedal operation causing a loss of vehicle control.
- Keep your foot dry. Do not drive barefoot.
- Do not leave loose objects in or near the driver side foot well.
- Always use the floor mat with the correct side up. Do not turn it over.
OPERATION
Before Installation:
- After taking the floor mats out of the package, place them on a flat surface to restore their resilience.
If necessary, fold the floor mats in the opposite direction to restore resilience.
- Recheck fitment details before installation, including but not limited to: Model/Model Trim Level/Cab Style/Seat Type/Transmission Type/Floor Type.
- Verify the directions of each floor mat refer to the correct positions.
- Remove factory or other floor mats.
- Clean the carpet from dust and debris.
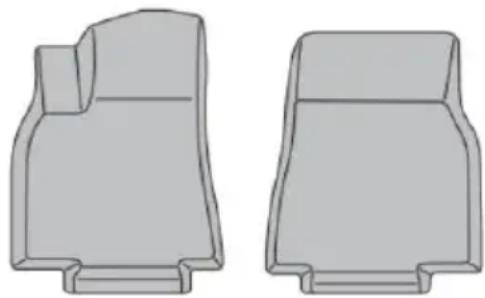

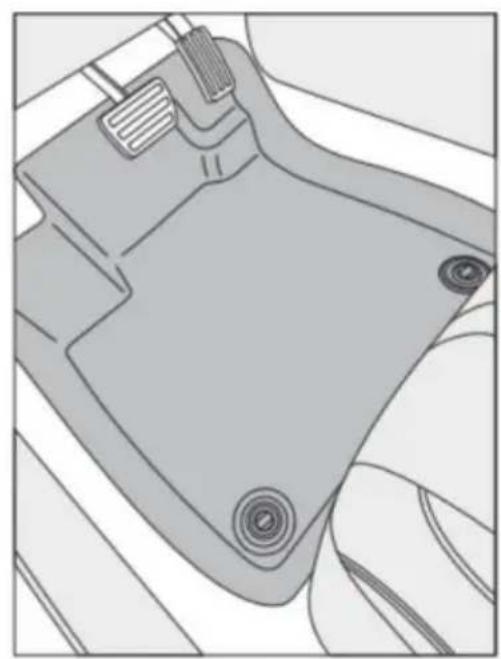
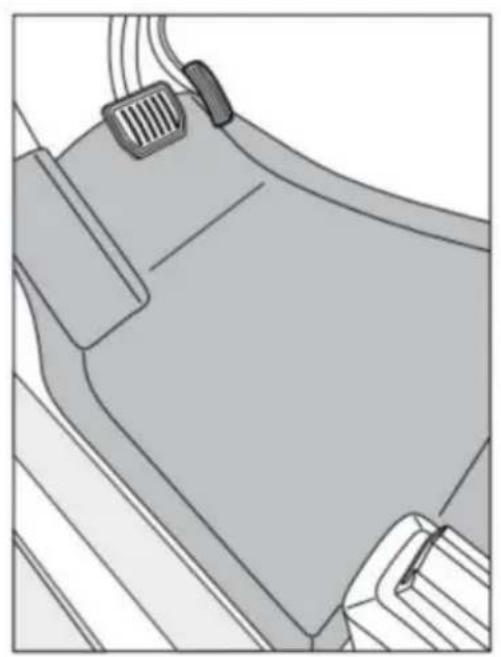
Reference Image
Installation
- Adjust front seats to the rear end when installing the first row floor mats.
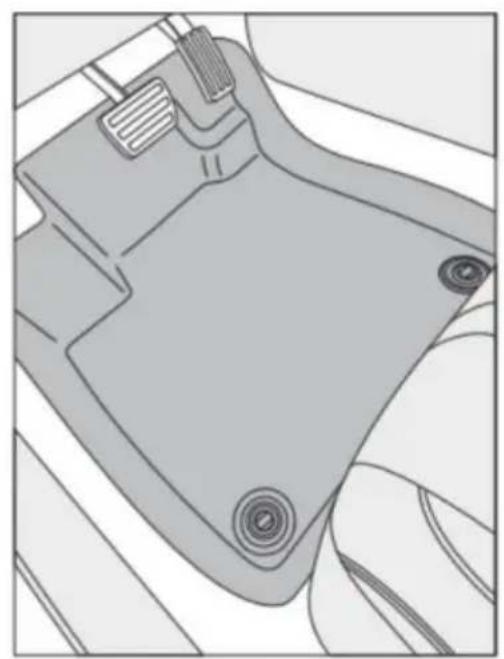
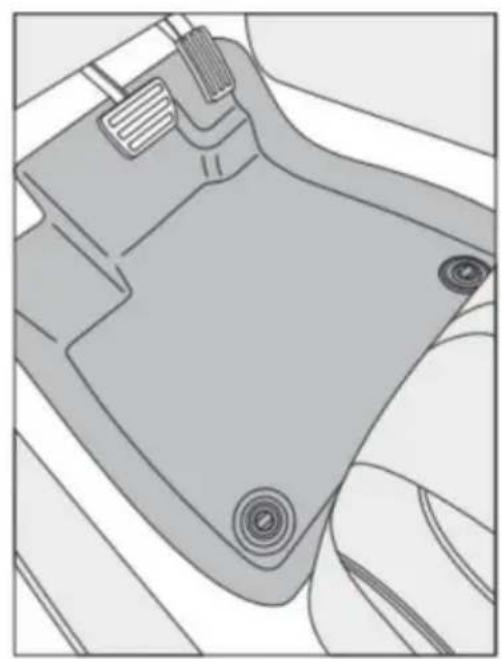
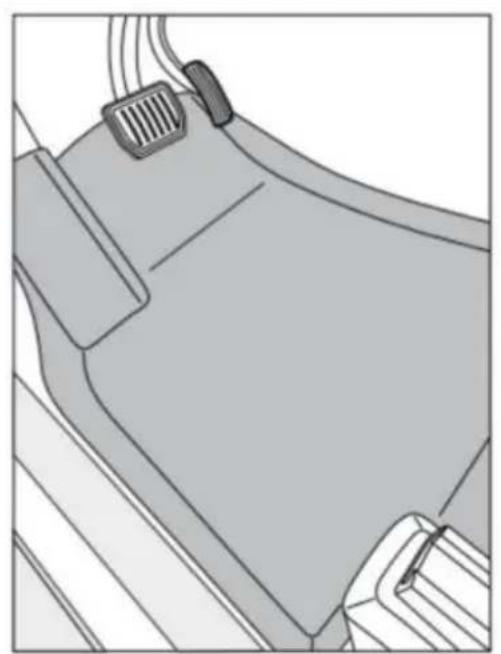
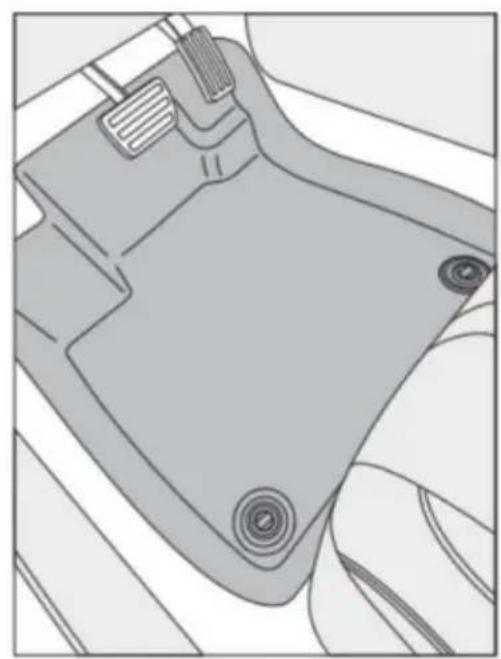
- Take the driver side floor mat, carefully install it to the driver side floor and around the accelerator and brake pedals.
- Engage the retaining hooks if equipped.
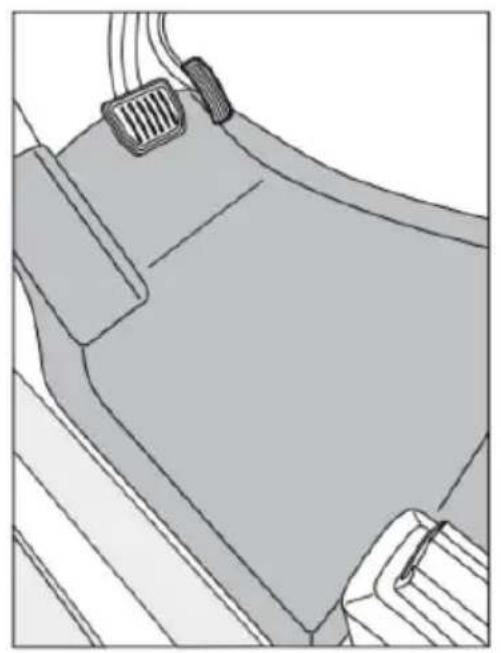
Without the Retaining Hook
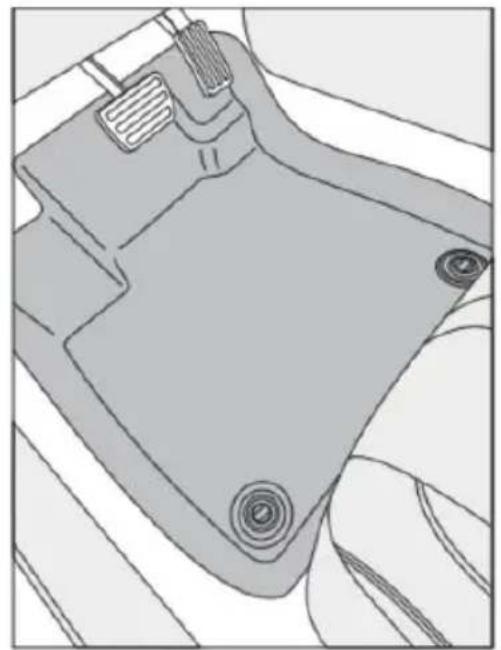
With the Retaining Hook
- With the engine stopped and the parking brake set, fully depress the pedal and make sure there is no interference with the floor mat.
If the pedals have interference with the floor mat, please remove the floor mat and contact us.
- Repeat steps 2 through 3 to install the front passenger side floor mat.
- Adjust front seats to the front end when installing the second row floor mat.
- For pickup trucks, fold up the second seats. For SUVs and MPVs, adjust the second row seats to the rear end.
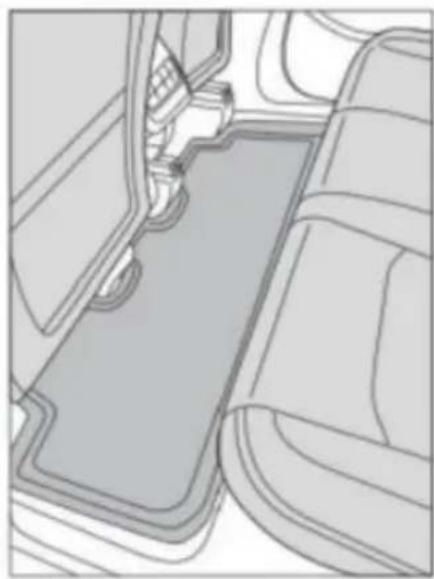
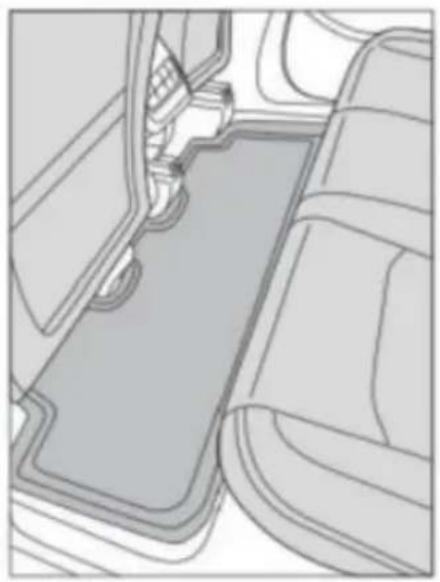
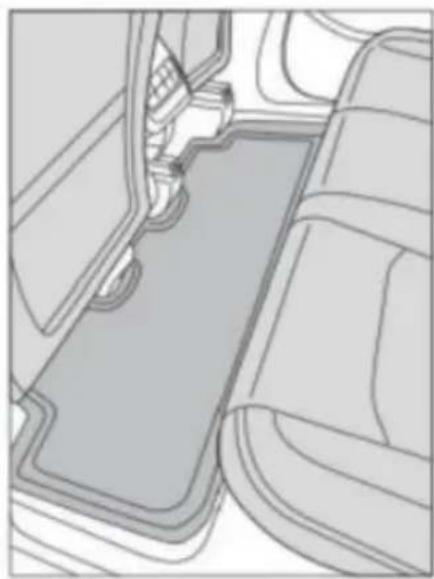
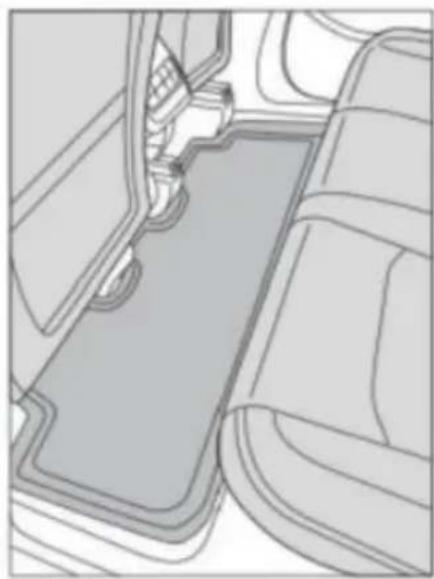
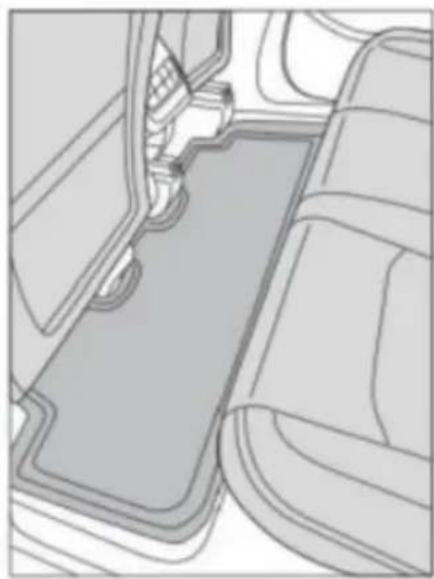
- Take the second row floor mat(s) and fully install to the second row floor.
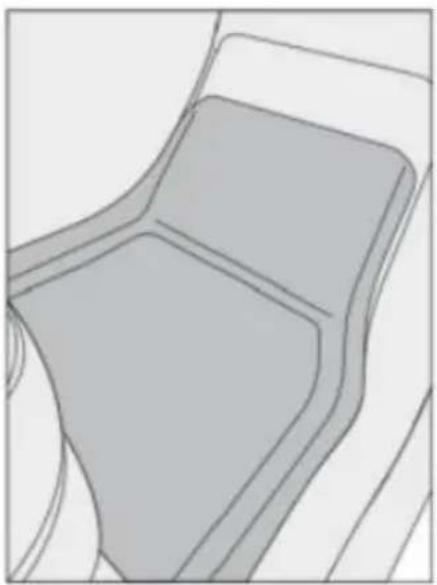
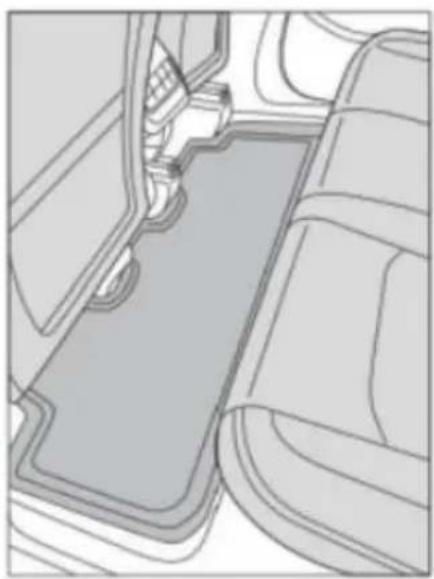
Please refer to our
listing images to verify the upside and the downside.
- Repeat steps 6 through 8 to install the third row floor mat(s) if equipped.
- Adjust all the seats back to their original positions.
Cleaning:
- Periodic cleaning extends the service life of your floor mats.
- Remove the floor mats from the vehicle and shake off loose debris and dust.
- Clean the floor mats using a neutral cleaner and a soft cloth.
- Lay the floor mats flat to dry.
- Reinstall the floor mats.
NOTICE:
- Keep this instruction with the vehicle's owner's manual.
- Please inform the following safety information to all drivers of this vehicle.
- When selling the vehicle with floor mats, please inform the next owner.
OPEN-BOX:
- Lay the floor mats on a flat surface to restore resilience.
- If necessary, fold the second row floor mat in the opposite direction to restore its resilience.
RECHECK FITMENT DETAILS:
- The AUTOSAVER88 floor mats are designed to fit specific vehicles.
Fitment details include but are not limited to: Make/Model/Year/Trim/Cab Style/Seat Type/Transmission Type/Floor Type/Country of Origin.
- Unfitted floor mats on the driver side may cause danger when driving.
- Do not try to modify the unfitted floor mats; please contact us.
RETAINING HOOK:
- If the retaining hooks are loosened, please contact your dealer to reinstall them.
- Periodically check to make sure the retaining hook is secure and tight.
- Some vehicles may not be equipped with a retaining hook.
CLEANING:
- Do not use a scrubbing brush to clean the floor mats.
- Reinstall the floor mats after they have dried.
Deformation recovery:
- Light method: Take out the foot pad and dry it in a place with sufficient sunlight, such as in the sun. TPE material has the characteristics of thermal expansion and contraction, and the heat of the sun helps it gradually return to its original shape.
- Heating method: Use a heat gun or hair dryer to carefully heat the deformed area. Pay attention to control the temperature to avoid excessive heat damaging the material. While heating, gently press the deformed part to help it return to its original shape. This method is suitable for slight deformation.
- Heavy weight compression method: For some slight deformation, you can lay the foot pad flat and press the deformed part with a heavy object (such as a book), so that it can recover its shape naturally within a period of time.
Manufacturer: Shanghai Muxin Muye Youxiangongsi
Address: Shuangchenglu 803nong11hao1602A-1609shi, Baoshanqu, Shanghai 200000 CN.
Imported to AUS: SIHAO PTY LTD. 1 ROKEVA STREET EASTWOOD NSW 2 Australia
Imported to USA: Sanven Technology Ltd. Suite 250, 9166 Anaheim Place, Rancho Cucamonga, CA 91730
| EC | REP |
E-CrossStu GmbH
Mainzer Landstr.69, 60329
Frankfurt am Main.
| UK | REP |
YH CONSULTING LIMITED.
C/O YH Consulting Limited Office 147,
Centurion House, London Road,
Staines-upon-Thames, Surrey, TW18 4AX
VEVOR®
TOUGH TOOLS, HALF PRICE
Technical Support and E-Warranty Certificate
www.vevor.com/support
VEVOR®
TOUGH TOOLS, HALF PRICE
JD-A-30-2/JD-C-2-2/JD-C-2-2/JD-C-12-1
/JD-C-4-4/JD-C-5-1/JD-A-27-1
MODEL: JD-D-10-2/JD-C-3-3/JD-D-12-1/JD-A-30-2/JD-C-2-2/JD-C-2-2/J
DC-12-1/JD-C-4-4/JD-C-5-1/JD-A-27-1
Reference Image
Installation
Without the Retaining Hook
With the Retaining Hook
C/O YH Consulting Limited Bureau 147,
Staines-upon-Thames, Surrey, TW18 4AX
VEVOR®
TOUGH TOOLS, HALF PRICE
JD-A-30-2/JD-C-2-2/JD-C-2-2/JD-C-12-1
/JD-C-4-4/JD-C-5-1/JD-A-27-1
MODELL: JD-D-10-2/JD-C-3-3/JD-D-12-1/JD-A-30-2/JD-C-2-2/JD-C-2-2/J
DC-12-1/JD-C-4-4/JD-C-5-1/JD-A-27-1
Reference Image
Without the Retaining Hook
With the Retaining Hook
C/O YH Consulting Limited Office 147,
Centurion House, London Road,
Staines-upon-Thames, Surrey, TW18 4AX
VEVOR®
TOUGH TOOLS, HALF PRICE
www.vevor.com/support
VEVOR®
TOUGH TOOLS, HALF PRICE
Reference Image
Installation
Without the Retaining Hook
With the Retaining Hook
Imported in AUS: SIHAO PTY LTD. 1 ROKEVA STREETEASTWOOD NSW 2122 Australia
Imported in the USA: Sanven Technology Ltd. Suite 250, 9166 Anaheim Place, Rancho Cucamonga, CA 91730
C/O YH Consulting Limited Office 147,
Centurion House, London Road,
Staines-upon-Thames, Surrey, TW18 4AX
VEVOR®
TOUGH TOOLS, HALF PRICE
electronics www.vevor.com/support
VEVOR®
TOUGH TOOLS, HALF PRICE
JD-A-30-2/JD-C-2-2/JD-C-2-2/JD-C-12-1
/JD-C-4-4/JD-C-5-1/JD-A-27-1
MODELO: JD-D-10-2/JD-C-3-3/JD-D-12-1/JD-A-30-2/JD-C-2-2/JD-C-2-2/J
DC-12-1/JD-C-4-4/JD-C-5-1/JD-A-27-1
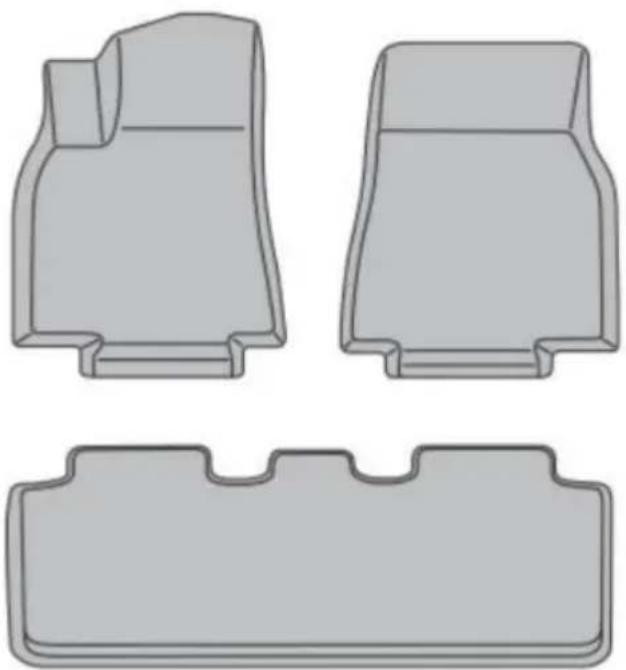

Reference Image
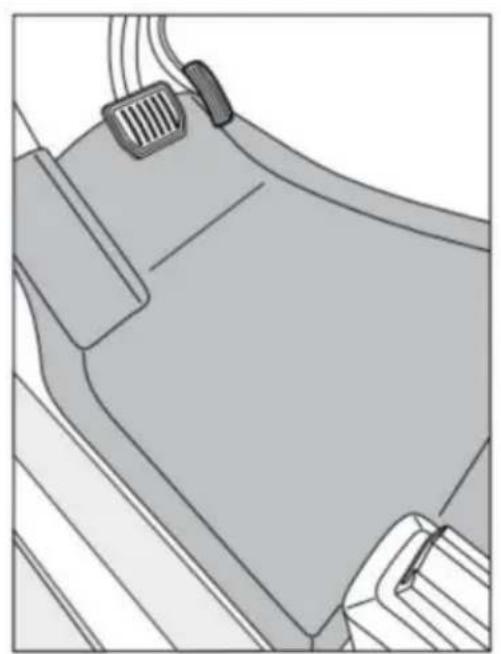
Without the Retaining Hook
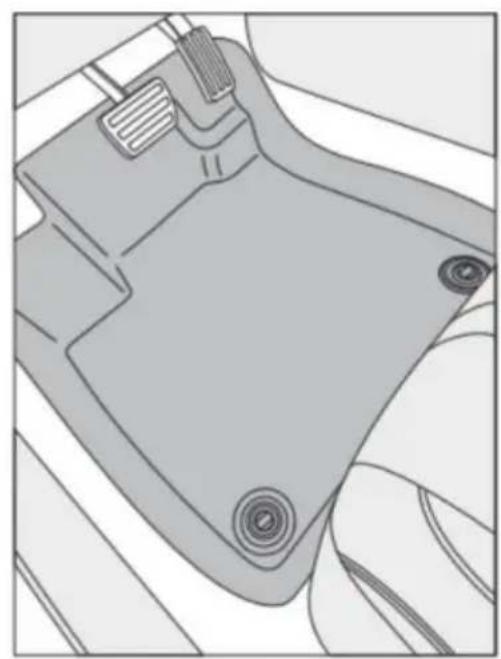
With the Retaining Hook
Casa Centurión, London Road,
Staines-upon-Thames, Surrey, TW18 4AX
VEVOR®
TOUGH TOOLS, HALF PRICE
JD-A-30-2/JD-C-2-2/JD-C-2-2/JD-C-12-1
/JD-C-4-4/JD-C-5-1/JD-A-27-1
MODEL: JD-D-10-2/JD-C-3-3/JD-D-12-1/JD-A-30-2/JD-C-2-2/JD-C-2-2/J
DC-12-1/JD-C-4-4/JD-C-5-1/JD-A-27-1
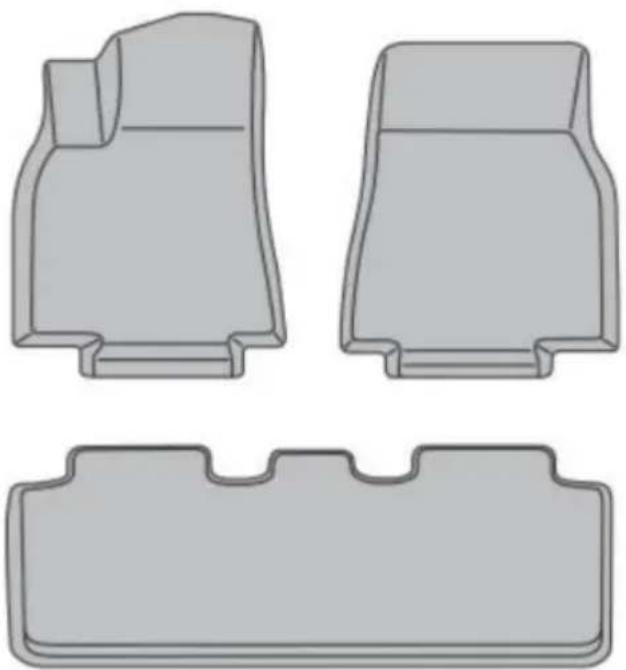
Reference Image
Installation
Without the Retaining Hook
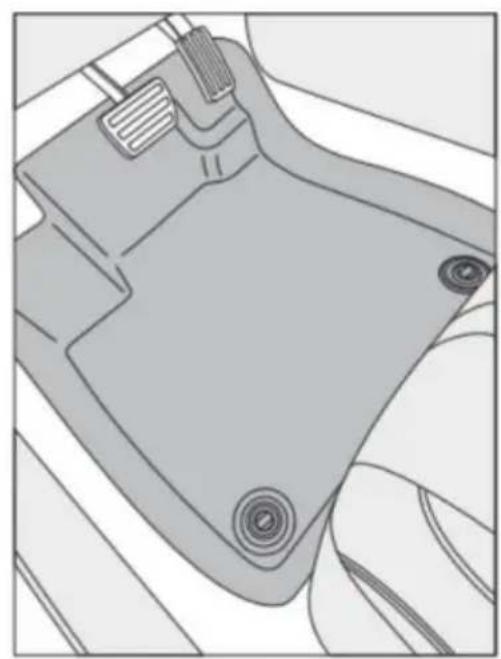
With the Retaining Hook
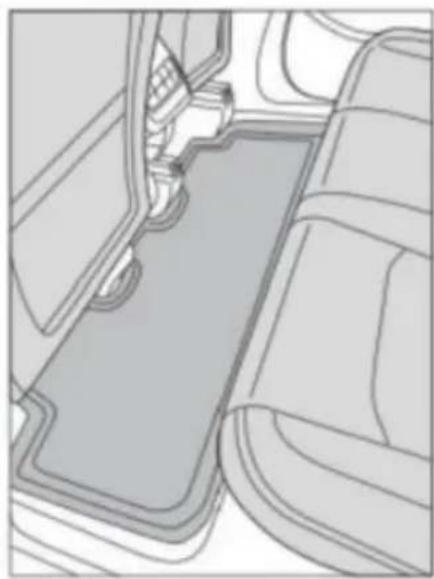
C/O YH Consulting Limited Biuro 147,
Dom Centuriona, London Road,
Staines-upon-Thames, Surrey, TW18 4AX
VEVOR®
TOUGH TOOLS, HALF PRICE
JD-A-30-2/JD-C-2-2/JD-C-2-2/JD-C-12-1
/JD-C-4-4/JD-C-5-1/JD-A-27-1
MODEL: JD-D-10-2/JD-C-3-3/JD-D-12-1/JD-A-30-2/JD-C-2-2/JD-C-2-2/J
DC-12-1/JD-C-4-4/JD-C-5-1/JD-A-27-1
NEED HELP? CONTACT US!
Reference Image
Without the Retaining Hook
With the Retaining Hook
C/O YH Consulting Limited Office 147,
Centurion House, London Road,
Staines-upon-Thames, Surrey, TW18 4AX
VEVOR®
TOUGH TOOLS, HALF PRICE
warranty certificate www.vevor.com/support
VEVOR®
TOUGH TOOLS, HALF PRICE
JD-A-30-2/JD-C-2-2/JD-C-2-2/JD-C-12-1
/JD-C-4-4/JD-C-5-1/JD-A-27-1
MODEL: JD-D-10-2/JD-C-3-3/JD-D-12-1/JD-A-30-2/JD-C-2-2/JD-C-2-2/J
DC-12-1/JD-C-4-4/JD-C-5-1/JD-A-27-1
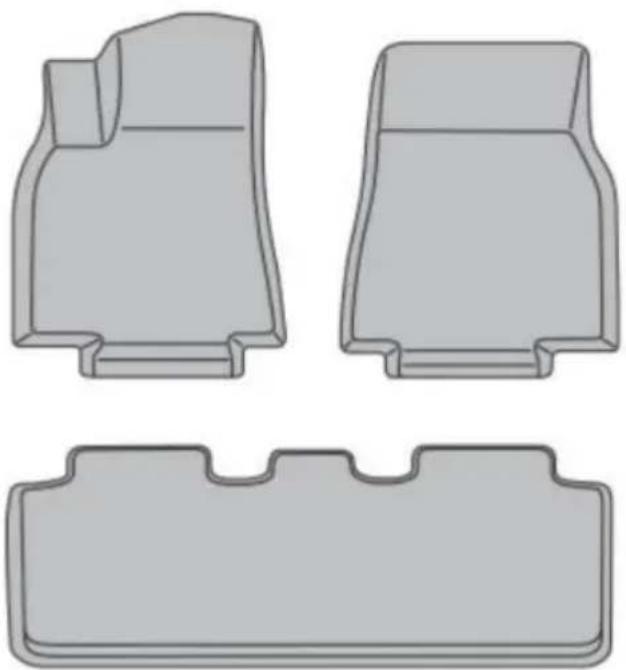

Reference Image
Installation
Without the Retaining Hook
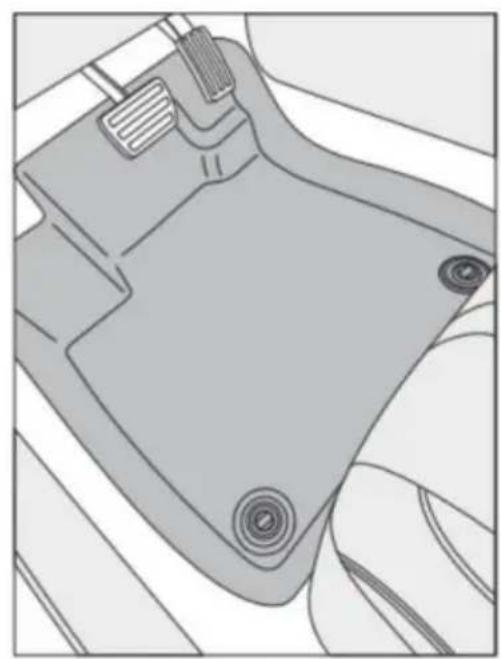
With the Retaining Hook
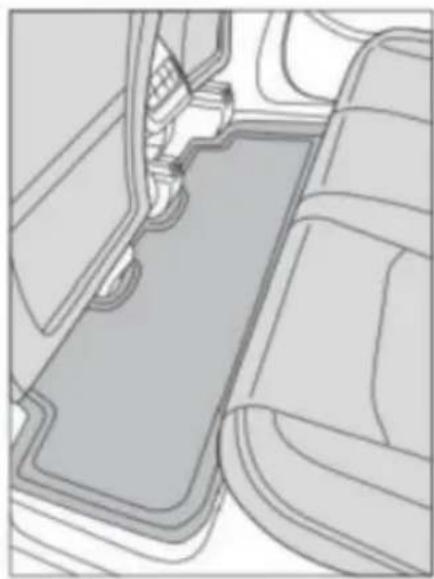
See our
C/O YH Consulting Limited Office 147,
Centurion House, London Road,
Staines-upon-Thames, Surrey, TW18 4AX
VEVOR®
TOUGH TOOLS, HALF PRICE
www.vevor.com/support
Brand : Vevor
Model : JD-C-2-2
Category : Car floor mats