SS-SQH01 - Safe Vevor - Free user manual and instructions
Find the device manual for free SS-SQH01 Vevor in PDF.

| Product Type | Handgun Safe |
| Brand | Vevor |
| Model | SS-SQH01 |
| Dimensions (L x W x H) | 320 x 260 x 82 mm |
| Net Weight | 4.65 kg |
| Power Supply | DC 6V (4 AA 1.5V batteries) |
| Capacity | 2 Handguns |
| Opening Modes | Numeric Code (4-6 digits) and Fingerprint |
| Emergency Key | 2 emergency keys included |
| Auto-Lock | After 5 incorrect code or fingerprint attempts, locks for 5 minutes |
| Low Battery Alarm | Yellow light and 6 beeps when voltage is below 4.8V |
| Interior Light | LED light inside |
| Silent Function | Disables beeps by pressing the I key for 3 seconds |
| Factory Reset | Press the reset button for 3-5 seconds to clear fingerprints and reset password to 1234 |
| Color | Black |
| Material | Steel (reasonable estimate) |
| Wall Mounting | Can be mounted with provided screws (2 security screws) |
| Included Accessories | 1 security cable, 2 emergency keys, 4 screws, 2 security screws, 4 AA batteries |
| Maintenance | Clean with a soft dry cloth, avoid solvents |
| Standards | Compliant with FCC (Part 15) and European Directive 2012/19/EC |
Frequently Asked Questions - SS-SQH01 Vevor
User questions about SS-SQH01 Vevor
0 question about this device. Answer the ones you know or ask your own.
Ask a new question about this device
Download the instructions for your Safe in PDF format for free! Find your manual SS-SQH01 - Vevor and take your electronic device back in hand. On this page are published all the documents necessary for the use of your device. SS-SQH01 by Vevor.
USER MANUAL SS-SQH01 Vevor
Technical Support and E-Warranty Certificate www.vevor.com/support
HAND GUN SAFE
USER MANUAL
MODEL:SS-SQH01
We continue to be committed to provide you tools with competitive price.
"Save Half, "Half Price" or any other similar expressions used by us only represents an estimate of savings you might benefit from buying certain tools with us compared to the major top brands and doses not necessarily mean to cover all categories of tools offered by us. You are kindly reminded to verify carefully when you are placing an order with us if you are actually saving half in comparison with the top major brands.
VEVOR®
TOUGH TOOLS, HALF PRICE
HAND GUN SAFE
MODEL:SS-SQH01
natural_image
Line drawing of a rectangular electronic device casing with mounting brackets and internal slots (no text or symbols)NEED HELP? CONTACT US!
Have product questions? Need technical support? Please feel free to contact us: Technical Support and E-Warranty Certificate www.vevor.com/support
This is the original instruction, please read all manual instructions carefully before operating. VEVOR reserves a clear interpretation of our user manual. The appearance of the product shall be subject to the product you received. Please forgive us that we won't inform you again if there are any technology or software updates on our product.
IMPORTANT SAFEGUARDS
☐3 Waming-To reduce the risk of injury, user must read instructions manual carefully. Failure to do so can result in serious injury.
- DO NOT SIT, STAND OR CLIMB ON THIS ITEM.
- This product is not a toy. Do not allow children to play with or near this item.
- Use as intended only. Keep away from sharp points, blades and other items, so as not to scratch the product.
- Flammable: Keep away from open flame. This product will ignite and burn if brought into contact with an open flame.
- Battery Replacement: When the batteries are not high enough and must be replaced immediately. To replace the batteries, turn off the hand gun safe first. Replace the old batteries with new ones of the same type, make sure that the polarity connections are correct (see the polarity indications at the bottom of the battery compartment). Reinstall the battery cover.
SAVE THESE INSTRUCTIONS
INSTRUCTIONS
| Model SS-SQH01 | |
| Product Size | 320*260*82 mm |
| Net Weight 4.65 kg | |
| Working Power | DC 6V (4x AA batteries needed) 2.4-3.0A |
| Gun Capacity | 2 piece |
| FCC STATEMENT: This device complies with Part 15 of the FCC Rules.Operation is subject to the following two conditions:(1)This device may not cause harmful interference, and (2)this device must accept any | |
interference received, including interference that may cause undesired operation
PARTS LIST
| Emergency key*2 Safety rope ^+ |  | 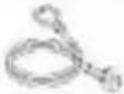 | |
| Install the screw*4 |  | Safety line screw*2 |  |
| AA(1.5V) Batteries*4 |  |
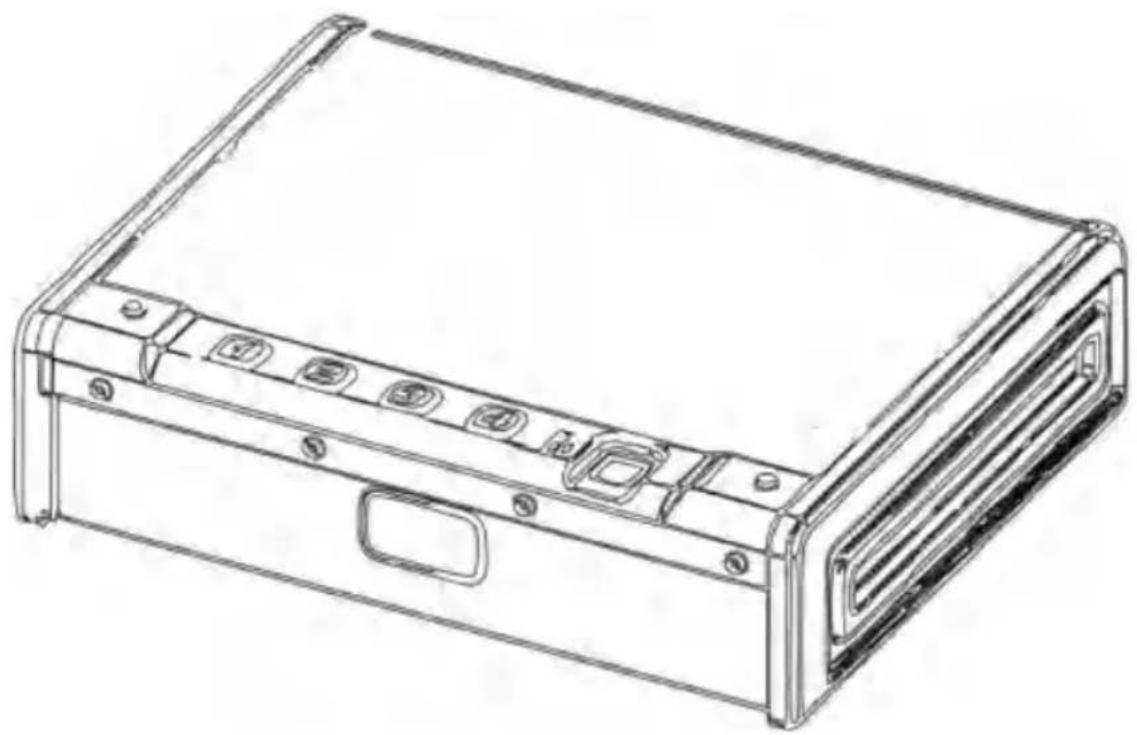
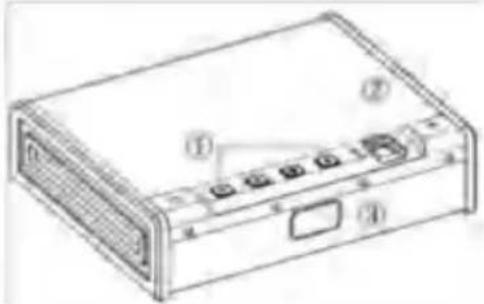
SCHEMATIC DIAGRAM
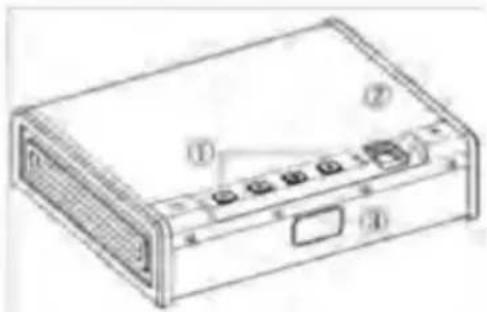
① Digital keys
② Fingerprint collector
(3) Hide emergency keyholes
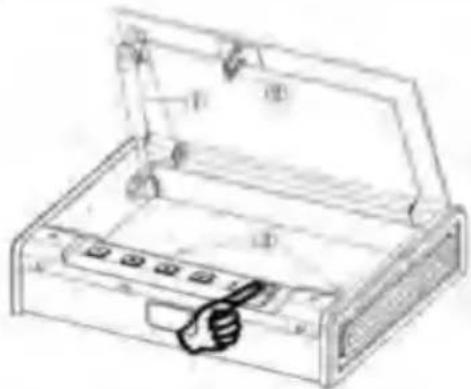
① Hydraulic rod
② Latches Hook
(3) Reserved mounting hole
natural_image
Line drawing of a mechanical device with open lid and internal compartments (no text or symbols)① Battery case cover
② Install the battery box
③ Interior LED Light
④ Set the keys

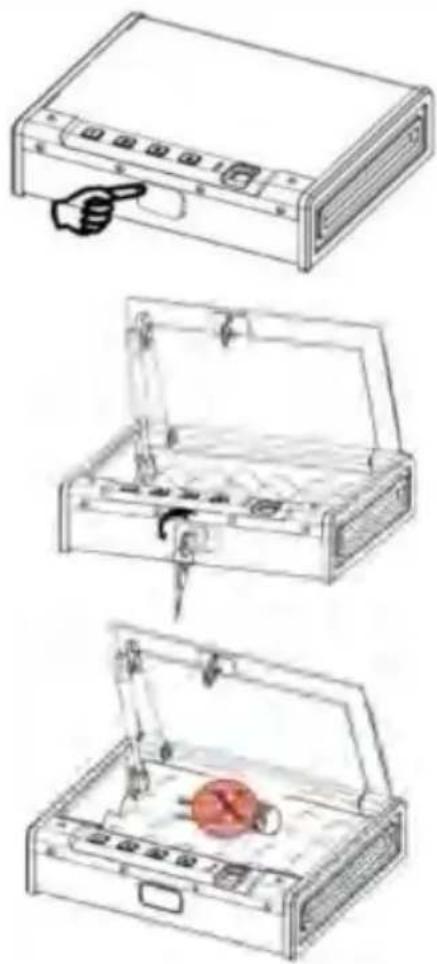
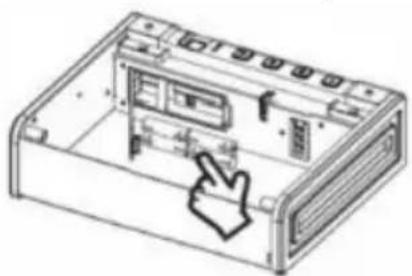
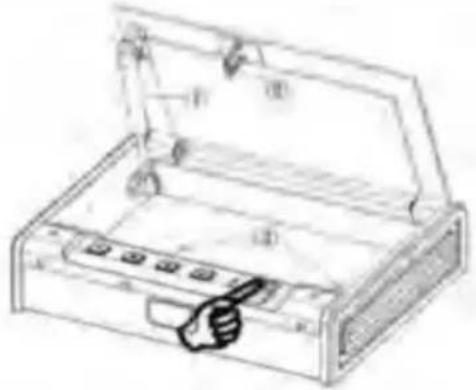
① Find the location of the mark, and press the upper left or right corner of the mark to open the emergency cover.
② Expose the emergency key channel, insert it, and turn it counterclockwise 40^ , then the door will open.
惠 Note: After finishing the operation, take out the emergency key and keep it properly. Don't put the key in the safe.
natural_image
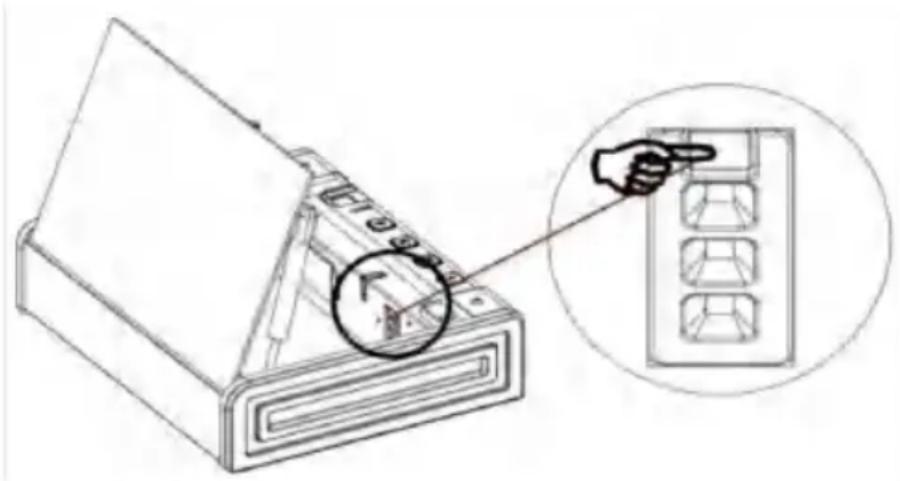
Illustration of a portable electronic device with three open cases showing internal components and a red circular object inside (no text or symbols)INSTALL THE BATTERY
Open the cover plate of the internal battery box and install four AA alkaline batteries in the positive and negative directions. When the buzzer "beep" sounds, it means that the power has been connected and the operation can continue normally.
natural_image
Line drawing of an internal device casing with a cursor pointing to a component (no text or symbols)
natural_image
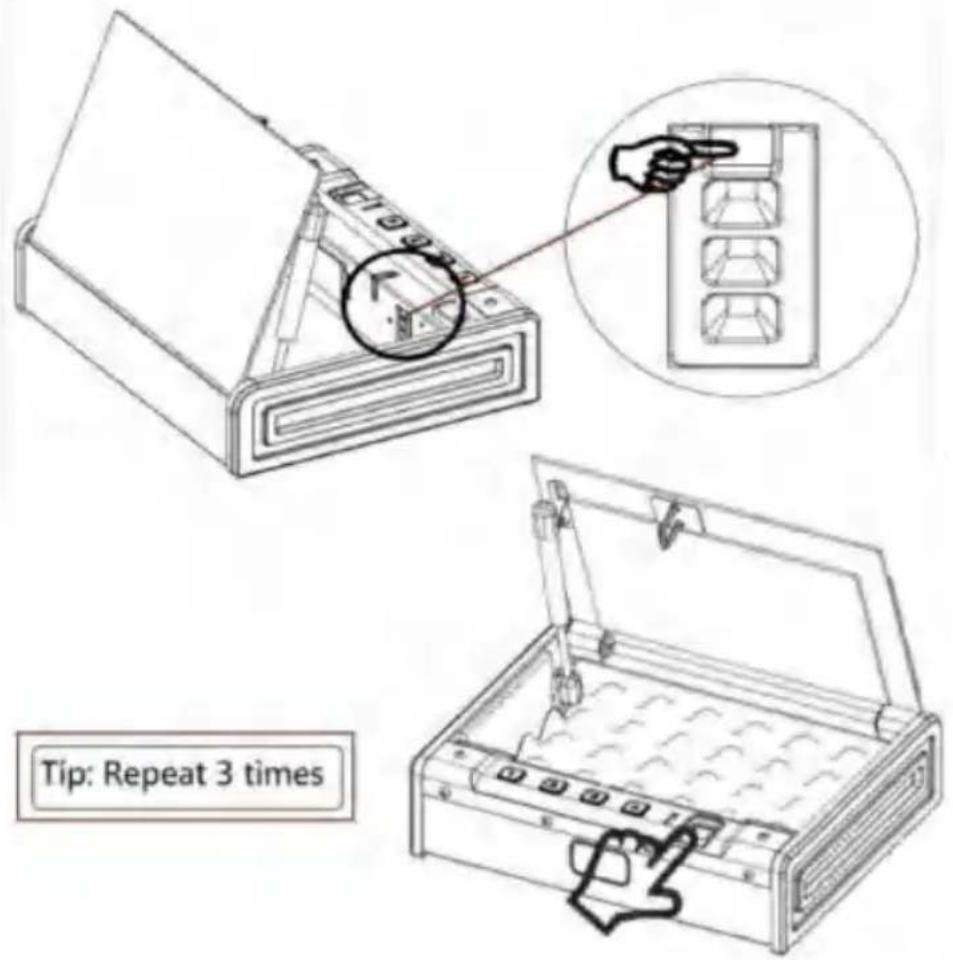
Line drawing of an open computer case with a hand pointing to the internal panel (no text or symbols)Note: Install 4 new batteries of the same brand, avoid using lithium batteries.
©After the battery is installed in the internal battery box, the buzzer beeps once, indicating that the power has been connected and the operation can continue normally.
②The blue light in the indicator area indicates the setting and door opening states, the red light indicates the error code alarm state and the yellow light indicates the battery undervoltage state. (The factory original password is 1234, the password can be set to 4-6 digits, and the door cannot be opened with a blank fingerprint.)
(3) This product has two modes of opening the door with a digital password and fingerprint opening. The door can be opened by entering any correct password or correct fingerprint. After the door is opened, the blue light flashes once, and the buzzer beeps for a long time and the lock opens. The lighting inside the box lights up.
SET PASSWORD
In the standby state, press the setting button once, the blue light will shine, and the buzzer "beep" will sound twice. Enter a new password, press the setting button again, the blue light will light up, and the buzzer "beep" will sound for a long time, indicating that the password has been set successfully.
(20 FINGERPRINTS CAN BE REGISTERED)
① In the standby state, press the setting button once, the blue light will light up and the buzzer will "beep" twice.
② At this point, put your finger on the fingerprint collector, raise your finger when you hear the "beep" sound, and then put the same finger back on the fingerprint collector, and press it repeatedly 3 times.
(3) At this time, the buzzer "beep", indicating that the fingerprint is set successfully.
④ If the red light is on, the buzzer "beep" twice, indicating that the fingerprint setting was unsuccessful.
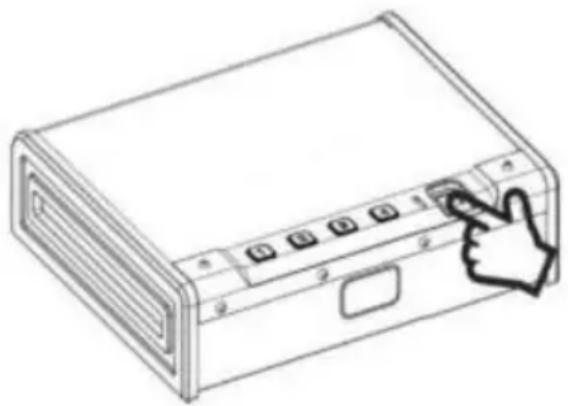
MUFFLER FUNCTION
1, Long press the number "I" key (about 3 seconds), the blue light will shine and the sound will be silenced successfully.
2. Long press the "I" button again (about 3 seconds). The blue light will shine and the sound will turn on
A>(Note: "I" is the muffler button, and it will return to normal without electricity).
natural_image
Line drawing of a computer monitor with control buttons and a hand cursor pointing to the button (no text or symbols)[Press for 3 seconds to lift the finger
ERROR ALARM FUNCTION
When the wrong password or wrong fingerprint is entered, the red light flashes five times, and the buzzer "beep" five times to alarm. After 5 consecutive times of wrong code or wrong fingerprint, the button and fingerprint will self-lock for 5 minutes. (Both the digital keys and fingerprints are invalid when the alarm is wrong, and they will be returned to normal use after the alarm is over).
RESTORE FACTORY SETTINGS
Press the setting button for 3-5 seconds, and the blue light will shine, and the buzzer "beep" will ring, indicating that the fingerprint has been removed successfully. The numeric password is reset to the original password 1234. (At this point, any fingerprint cannot be verified.) Reset the fingerprint.
When the voltage is around 4.8V, the yellow light will shine 6 times after opening the door, and the buzzer "beep" will ring 6 times to alarm, reminding the low power to replace the new battery, so as not to affect the normal opening of the door next time.
垂Tip: Do not use lithium batteries, different brands of batteries.
INSTALLATION AND FIXATION DIAGRAM
① Secure the safe in a place that cannot be moved easily.
② Clamp the screws in the correct position, secure the box body to the board, make sure the installation is in place, then tighten all screws.
(3) Note: Use clamping screws when, wooden wall surfaces are available.
Each product comes with 2 screws.

natural_image
Line drawing of a mechanical device with a lid and base, showing internal components and mounting points (no text or symbols)CORRECT DISPOSAL:
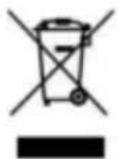
This product is subject to the provision of European Directive 2012/19/EC. The symbol showing a wheelie bin crossed through indicates that the product requires separate refuse collection in the European Union. This applies to the product and all accessories marked with this symbol. Products marked as such may not be discarded with normal domestic waste, but must be taken to a collection point for recycling electrical and electronic devices.
VEVOR®
TOUGH TOOLS, HALF PRICE
Technical Support and E-Warranty Certificate
www.vevor.com/support
ETVMLER®
H ÀTOMCO, HALF P RIZ
natural_image
Line drawing of a rectangular electronic device casing with mounting holes and ventilation slots (no text or symbols)BESOIN D'AIDE? CONTACTEZ-NOUS!

natural_image
Line drawing of a closed electronic device with internal components and a handle (no text or symbols)
OUVRIR VOTRE COFFRE-FORT POUR LA PREMIÈRE FOIS
natural_image
Line drawing of a computer monitor with a hand pointing to the front panel (no text or symbols)
natural_image
Line drawing of a closed toolbox with handle and clasp (no text or symbols)avantage
natural_image
Illustration of a closed toolbox containing an open lid with a red object inside (no text or symbols)INSTALLER LA BATTERIE
natural_image
Diagram of a computer chassis showing internal components and a cursor arrow pointing to a device (no text or symbols present)
natural_image
Line drawing of an open computer case with a hand pointing to the internal panel (no text or symbols)Note: Install 4 new batteries of the same brand, avoid using piles au lithium.
PERFORMANCE DU PRODUIT
(20 EMPREINTES DIGITALES PEUVENT ÊTRE ENREGISTRÉES)
FONCTION SILENCIEUX
natural_image
Line drawing of a computer tower with a hand cursor pointing to the front panel (no text or symbols)natural_image
Line drawing of a portable electronic device with two sensors and a lid (no text or symbols)natural_image
Line drawing of a rectangular electronic device casing with mounting holes and a handle (no text or symbols)www.vevor.com/support
ÿ Hydraulikstange ÿ
Verriegelung Haken
natural_image
Line drawing of a closed electronic device with labeled ports and a handle (no text or symbols present)
DAS ERSTE ÖFFNEN IHRES SAFES
natural_image
Isometric line drawing of a computer chassis with an arrow pointing to the internal panel (no text or symbols)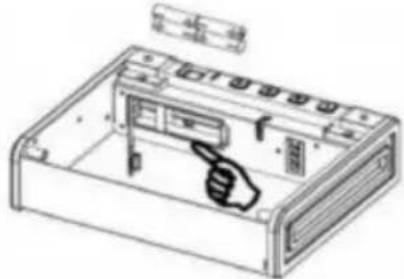
natural_image
Line drawing of an open computer case with a hand pointing to the internal panel (no text or symbols)Note: Install 4 new batteries of the same brand, avoid using
Lithiumbatterien.
PRODUKTLEISTUNG
SCHALLDÄMPFERFUNKTION
natural_image
Line drawing of a computer monitor with control buttons and a hand cursor pointing to the right button (no text or symbols present)natural_image
Line drawing of a portable electronic device with ports and cables (no text or symbols)KORREKTE ENTSORGUNG:

www.vevor.com/support
VEVILR®
TOCCAREH A BISS, HALF P
natural_image
Line drawing of a rectangular electronic device casing with mounting holes and ventilation slots (no text or symbols)
natural_image
Line drawing of a closed electronic device with internal components and a handle (no text or symbols)
CHIUDI LA TUA CASSAFORTE PER LA PRIMA VOLTA
natural_image
Line drawing of a computer monitor with a hand pointing to the front panel (no text or symbols)
natural_image
Line drawing of a closed toolbox with handle and clasp (no text or symbols)beneficio
natural_image
Illustration of a laboratory bench with an open lid containing a red object, no text or symbols present.INSTALLARE LA BATTERIA
Aprire il coperchio del vano batterie interno e installare quattro batterie alcaline AA inserendole nei poli positivo e negativo.
natural_image
Isometric line drawing of a computer chassis with an arrow pointing to the internal panel (no text or symbols)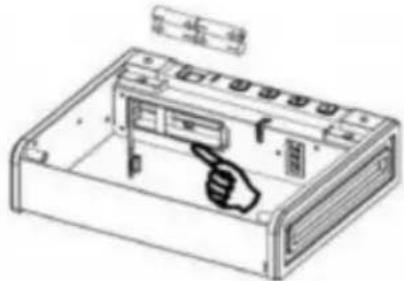
natural_image
Line drawing of an open computer case with a hand pointing to the internal panel (no text or symbols)Note: Install 4 new batteries of the same brand, avoid using batterie al litio.
(POSSONO ESSERE REGISTRATE 20 IMPRONTE DIGITALI)
FUNZIONE MARMITTA
natural_image
Line drawing of a computer tower with a hand cursor pointing to the front panel (no text or symbols)natural_image
Line drawing of a portable electronic device with ports and cables (no text or symbols)www.vevor.com/support
V Y V ELR ^®
OLS, HALF P_ARROZH ATOGO
natural_image
Line drawing of a rectangular electronic device casing with mounting holes and ventilation slots (no text or symbols)Luz LED interior Coloque
las teclas

natural_image
Line drawing of a portable electronic device with open lid and internal compartments (no text or symbols)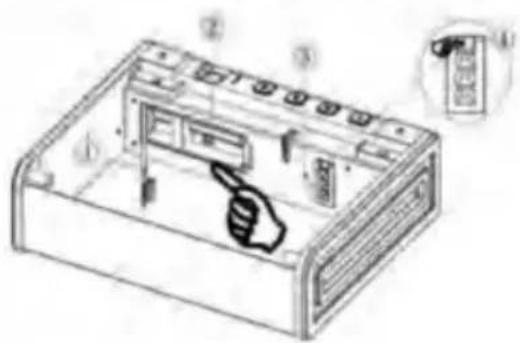
ABRIR SU CAJA FUERTE POR PRIMERA VEZ
natural_image
Line drawing of a computer monitor with a hand pointing to the front panel (no text or symbols)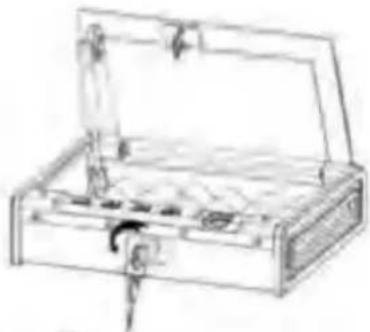
natural_image
Line drawing of a closed toolbox with handle and clasp (no text or symbols)
natural_image
Illustration of a closed toolbox containing an open lid with a red object inside (no text or symbols)beneficio
natural_image
Diagram of an internal device casing with a cursor pointing to a button (no text or symbols present)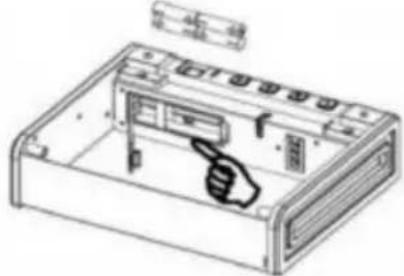
natural_image
Line drawing of an open computer case with a hand pointing to the internal panel (no text or symbols)Note: Install 4 new batteries of the same brand, avoid using
Baterías de litio.
RENDIMIENTO DEL PRODUCTO
(SE PUEDEN REGISTRAR 20 HUELLAS DACTILARES)
natural_image
Line drawing of a computer monitor with control buttons and a hand cursor pointing to the right button (no text or symbols present)natural_image
Line drawing of a portable electronic device with two sensors and a lid (no text or symbols)www.vevor.com/support

VIVTOR®
OLS, H ALF P RYŻH DOTOUG
natural_image
Line drawing of a rectangular electronic device casing with mounting holes and ventilation slots (no text or symbols)POTRZEBUJESZ POMOCY? SKONTAKTUJ SIĘ Z NAMI!

natural_image
Line drawing of a closed electronic device with internal components and a handle (no text or symbols)
PIERWSZE WPISANIE SEJFU
natural_image
Line drawing of a computer monitor with a hand pointing to the front panel (no text or symbols)
natural_image
Line drawing of a closed toolbox with handle and clasp (no text or symbols)
natural_image
Illustration of a closed toolbox containing an open lid with a red object inside (no text or symbols)ZAMONTUJ BATERIĘ
natural_image
Diagram of a computer chassis showing internal components and a cursor arrow pointing to a device (no text or symbols present)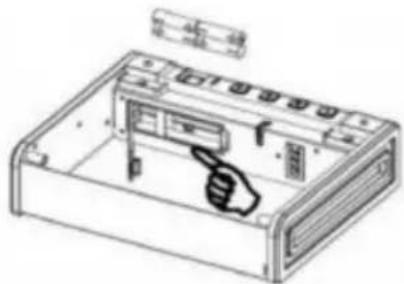
natural_image
Line drawing of an open computer case with a hand pointing to the internal panel (no text or symbols)Note: Install 4 new batteries of the same brand, avoid using
baterie litowe.
WYDAJNOŚĆ PRODUKTU
(MOŻNA ZAREJESTROWAĆ 20 ODCISKÓW PALCÓW)
FUNKCJA TŁUMIKA
natural_image
Line drawing of a computer monitor with control buttons and a hand cursor pointing to the right button (no text or symbols present)natural_image
Line drawing of a portable electronic device with ports and cables (no text or symbols)PRAWIDŁOWA UTYLIZACJA:

www.vevor.com/support

ENVVER®
TOG H NAAROLS, H ALF-P RIJST
Technische ondersteuning en e-garantiecertificaat www.vevor.com/support
HANDWAPENS VEILIG
GEBRUIKERSHANDLEIDING
MODEL:SS-SQH01
natural_image
Line drawing of a rectangular electronic device casing with mounting holes and ventilation slots (no text or symbols)HULP NODIG? NEEM CONTACT MET ONS OP!
www.vevor.com/support
natural_image
Line drawing of a portable electronic device with open lid and internal compartments (no text or symbols)
UW KLUIS VOOR HET EERST BEVESTIGEN
natural_image
Line drawing of a computer rack with a hand pointing to the front panel (no text or symbols)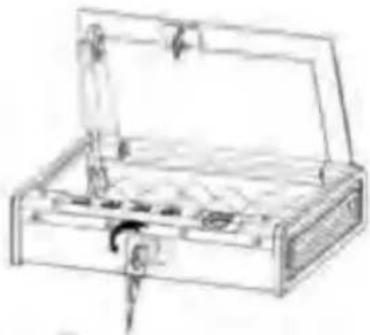
natural_image
Line drawing of a closed toolbox with handle and internal compartments (no text or symbols)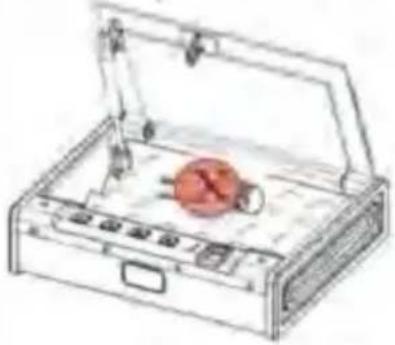
natural_image
Illustration of a closed toolbox containing an open lid with a red object inside (no text or symbols)INSTALLEER DE BATTERIJ
natural_image
Diagram of a computer chassis showing internal components and a cursor arrow pointing to a device (no text or symbols present)
natural_image
Line drawing of an open computer case with a hand inserting a device (no text or symbols)Note: Install 4 new batteries of the same brand, avoid using lithium batterijen.
PRODUCTPRESTATIES
VINGERAFDRUKKEN INSTELLEN
(20 VINGERAFDRUKKEN KUNNEN GEREGISTREERD WORDEN)
FUNCTIE VAN DE UITLAAT
natural_image
Line drawing of a computer tower with a hand cursor pointing to the front panel (no text or symbols)[Druk 3 seconden om de vinger op te tillen
FOUTALARMFUNCTIE
natural_image
Line drawing of a portable electronic device with two sensors and a lid (no text or symbols)CORRECTE VERWIJDERING:

www.vevor.com/support

OCHV DER®
TUGTH TILLORIS, HALF P
natural_image
Line drawing of a rectangular electronic device casing with mounting holes and ventilation slots (no text or symbols)BEHÖVER HJÄLP? KONTAKTA OSS!
www.vevor.com/support

natural_image
Line drawing of a portable electronic device with open lid and internal compartments (no text or symbols)
PENGAR DITT KAFFE FÖR FÖRSTA GÅNGEN
natural_image
Line drawing of a computer monitor with a hand pointing to the front panel (no text or symbols)
natural_image
Line drawing of a closed toolbox with handle and clasp (no text or symbols)
natural_image
Illustration of a closed toolbox containing an open lid with a red object inside (no text or symbols)förmán
Obs: After avslutad operation,
natural_image
Diagram of a computer chassis showing internal components and a cursor arrow pointing to a device (no text or symbols present)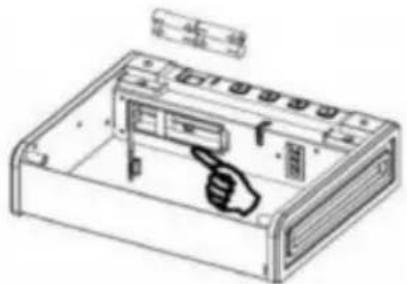
natural_image
Line drawing of an open computer case with a hand pointing to the front panel (no text or symbols)Note: Install 4 new batteries of the same brand, avoid using litiumbatterier.
PRODUKTPRESTANDA
SÄTTA Fingeravtryck
(20 Fingeravtryck KAN REGISTRERAS)
LJUDDAMPARFUNKTION
natural_image
Line drawing of a computer monitor with control panel and mouse pointer (no text or symbols)INSTALLATIONS- OCH FIXERINGSDIAGRAM
natural_image
Line drawing of a portable electronic device with two sensors and a lid (no text or symbols)KORREKT AVFALLSHANTERING:
www.vevor.com/support