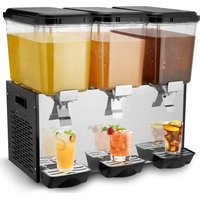
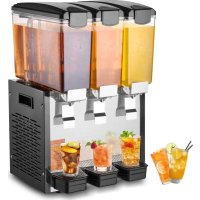
LYJ18LX3 - Water dispenser Vevor - Free user manual and instructions
Find the device manual for free LYJ18LX3 Vevor in PDF.


| Product Type | Beverage Dispenser / Water Dispenser |
| Brand | Vevor |
| Model | LYJ18LX3 |
| Power Supply | 220-240 V ~ 50 Hz / 110-130 V ~ 60 Hz |
| Cooling Power | 512 W |
| Cold Beverage Temperature | 7 °C to 12 °C |
| Cooling Type | Compressor |
| Main Functions | Cooling and beverage dispensing, built-in stirring |
| Tank Capacity | Multiple tanks (quantity per model) |
| Tank Material | Stainless steel (spout, lid) |
| Usage | Indoor only, domestic and light professional use |
| Installation | On worktop, free space >20 cm around for ventilation |
| Daily Maintenance | Clean tanks with mild detergent and regular disinfection |
| Condenser Cleaning | Every 6 months, vacuum or compressed air |
| Safety | Grounding required, unplug before cleaning, do not immerse |
| Certifications | Compliant with FCC Part 15, WEEE directive 2012/19/EU |
| Warranty | Electronic warranty certificate available at www.vevor.com/support |
Frequently Asked Questions - LYJ18LX3 Vevor
User questions about LYJ18LX3 Vevor
0 question about this device. Answer the ones you know or ask your own.
Ask a new question about this device
Download the instructions for your Water dispenser in PDF format for free! Find your manual LYJ18LX3 - Vevor and take your electronic device back in hand. On this page are published all the documents necessary for the use of your device. LYJ18LX3 by Vevor.
USER MANUAL LYJ18LX3 Vevor
Technical Support and E-Warranty Certificate www.vevor.com/support
BEVERAGE DISPENSER
MODEL:LYJ10LX2/LYJ10LX3/LYJ10LX4/LYJ12LX1/LYJ12LX2/LYJ12LX3/LYJ12LX4/LYJ18LX1/LYJ18LX2/LYJ18LX3
We continue to be committed to provide you tools with competitive price. "Save Half", "Half Price" or any other similar expressions used by us only represent estimate of savings you might benefit from buying certain tools with us compared top brands and does not necessarily mean to cover all categories of tools offered are kindly reminded to verify carefully when you are placing an order with us actually saving half in comparison with the top major brands.
MODEL:LYJ10LX2/LYJ10LX3/LYJ10LX4/LYJ12LX1/LYJ12LX2/LYJ12L X3/LYJ12LX4/LYJ18LX1/LYJ18LX2/LYJ18LX3
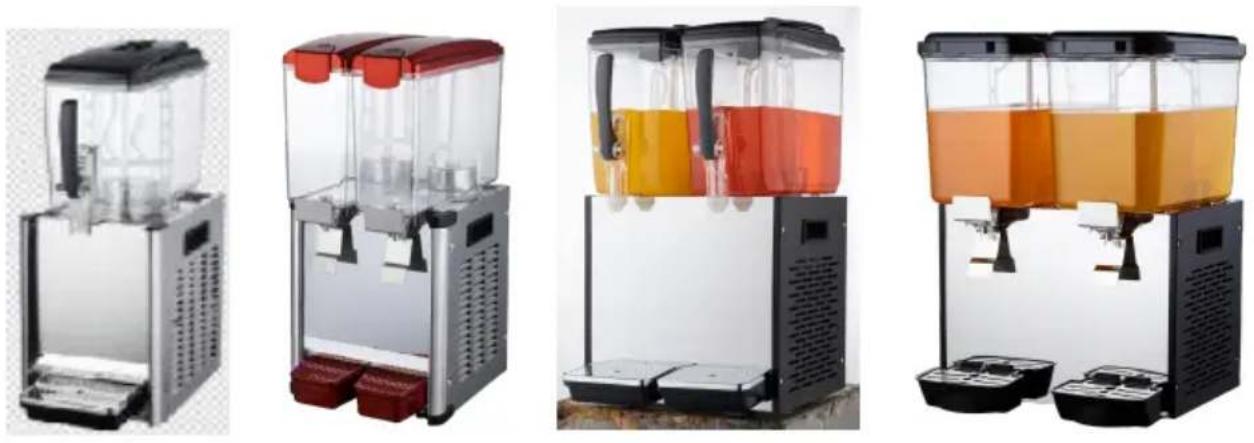
NEED HELP? CONTACT US!
Have product questions? Need technical support? Please feel fr contact us:
Technical Support and E-Warranty Certificate www.vevor.com/support
This is the original instruction, please read all manual instruction carefully before operating. VEVOR reserves a clear interpretation user manual. The appearance of the product shall be subject to product you received. Please forgive us that we won't inform your there are any technology or software updates on our product.
Main technology parameters
| Model | LYJ18L | LYJ18Lx2 | LYJ18Lx3 |
| Power Supply | 220V-240V 50Hz 110V-130V 60Hz | ||
| Power | Cold300w | Cold370W | Cold512W |
| Cold-beverage temperature | 7-12°C | 7-12°C | 7-12°C |
| Model | LYJ12L | LYJ12Lx2 | LYJ12Lx3 | LYJ12Lx4 |
| Power Supply | 220V-240V 50Hz 110V-130V 60Hz | |||
| Power | Cold246W | Cold286W | Cold370W | Cold510W |
| Cold-beverage temperature | 7-12°C | 7-12°C | 7-12°C | 7-12°C |
| Model | LYJ10Lx2 | LYJ10Lx3 | LYJ10Lx4 |
| Power Supply | 220V-240V 50Hz 110V-130V 60Hz | ||
| Power | Cold 270W | Cold 430W | Cold 440W |
| Cold-beverage temperature | 7-12°C | 7-12°C | 7-12°C |
Tips:
Please purchase a model that is suitable for the local voltage
 | Warning-To reduce the risk of injury, user must re instructions manual carefully. |
 | Indoor Use Only |
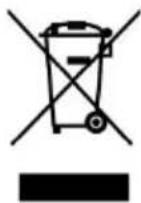 | CORRECT DISPOSALThis product is subject to the provision of european D 2012/19/EU. The symbol showing a wheelie bin cros through indicates that the product requires separate re collection in the European Union. This applies to the and all accessories marked with this symbol. Products as such may not be discarded with normal domestic w must be taken to acollection point for recycling electric electronic devices. |
Important Safeguards
When using electrical appliances, basic safety precautions should be followed, including the following.
- READ ALL INSTRUCTIONS.
- Unplug from outlet when not in use, before putting on or take parts, and before cleaning.
- Please check that the specified supply voltage in the product is consistent with the supply voltage(AC only).
- This appliance can be used by children aged from 8 years and a person with reduced physical, sensory or mental capabilities or I of experience and knowledge if they have been given supervision or instruction concerning use of the appliance in a safe way and unders the hazards involved.
- Children shall not play with the appliance. Cleaning and user maintenance shall not be made by children without supervision.
- To protect against electrical hazards, do not put the Drink Mixer in
or other liquids
-
Avoid contact with moving parts.
-
Do not operate the Drink Mixer or any other electrical equipment damaged cord or plug, or after the unit malfunctions or is dropped out damaged in any manner. Return it to the nearest authorized service for examination, repair, or adjustment.
-
Do not use outdoors. FOR HOUSEHOLD USE ONLY
-
Do not let the cord hang over the edge of the table or counter hot surfaces.
-
Put this instruction manual in a safe place. Do not discard.
-
If the supply cord is damaged, it must be replaced by the manu its service agent or similarly qualified persons in order to avoid a ha
-
Electric Shock Danger! Non-professional personnel are forbidden to repair the products, otherwise it may result in electrical shock. When failures happen, it should be repaired by a qualified maintenance personnel.
-
WARNING! It is strictly prohibited to put the main body of the machine and the power cord into any liquid. The machine must be fully cool cleaning.
-
Do not place the product directly on the fire or near the source otherwise the product will be damaged or even result in danger. Once of the product is on fire, do not directly use water to extinguish the a wet cloth to cover the fire site.
-
When the plug is plugged into the socket, it must be plugged to otherwise it will cause the components overheating and burning due to poor contact.
-
Do not leave the product to work with no one watching. If the I is overheating, please stop working immediately and unplug the power
FCC Information:
CAUTION: Changes or modifications not expressly approved by the pa responsible for compliance could void the user's authority to operate t
equipment!
This device complies with Part 15 of the FCC Rules. Operation is such the following two conditions:
1) This product may cause harmful interference.
2) This product must accept any interference received, including interference that may cause undesired operation.
WARNING: Changes or modifications to this product not expressly approved by the party.responsible for compliance could void the user's authority to operate the product.
Note: This product has been tested and found to comply with the lir a Class B digital device pursuant to Part 15 of the FCC Rules, The are designed to provide reasonable protection against harmful interferer in a residential installation.
This product generates, uses and can radiate radio frequency energy, if not installed and used in accordance with the instructions, may cause harmful interference to radio communications. However, there is no guarantee that interference will not occur in a particular installation. If product does cause harmful interference to radio or television reception, which can be determined by turning the product off and on, user is encouraged to try to correct the interference by one or more following measures.
- Reorient or relocate the receiving antenna.
- Increase the distance between the product and receiver.
- Connect the product to an outlet on a circuit different from that to the receiver is connected.
- Consult the dealer or an experienced radio/TV technician for assista
Chapter One Safety Precaution
 Notice Notice | ·Prevent water and conductive liquid entering into the machine;·Please do not throw stick and other things into the·When the machine is in moving process, the angle not beyond 45°;·The distance between ventilation slot and wall should less than 20CM, to keep good ventilation, dry and cle |
 Safety warning Safety warning | The machine should be operated by professional or of have been trained;·To ensure personal safety, please keep the machine properly grounded;·Ensure that the power supply is the same as the and the working voltage bias between rated voltage is ±10%;·If the power wire is damaged, it should be changed professionals to avoid danger;·When stop using , disassembling or do some clean please cut off the power;·To avoid electric shock, please do not pour water plug, motor and other electrical components.·Foamed material flammable, the user may not arbitra discarded or dispose, should be in accordance with the relevant provisions of the state by the designated dep recycling. |
Chapter Two Basic structure
Exploded view (two bowl) Agitator type
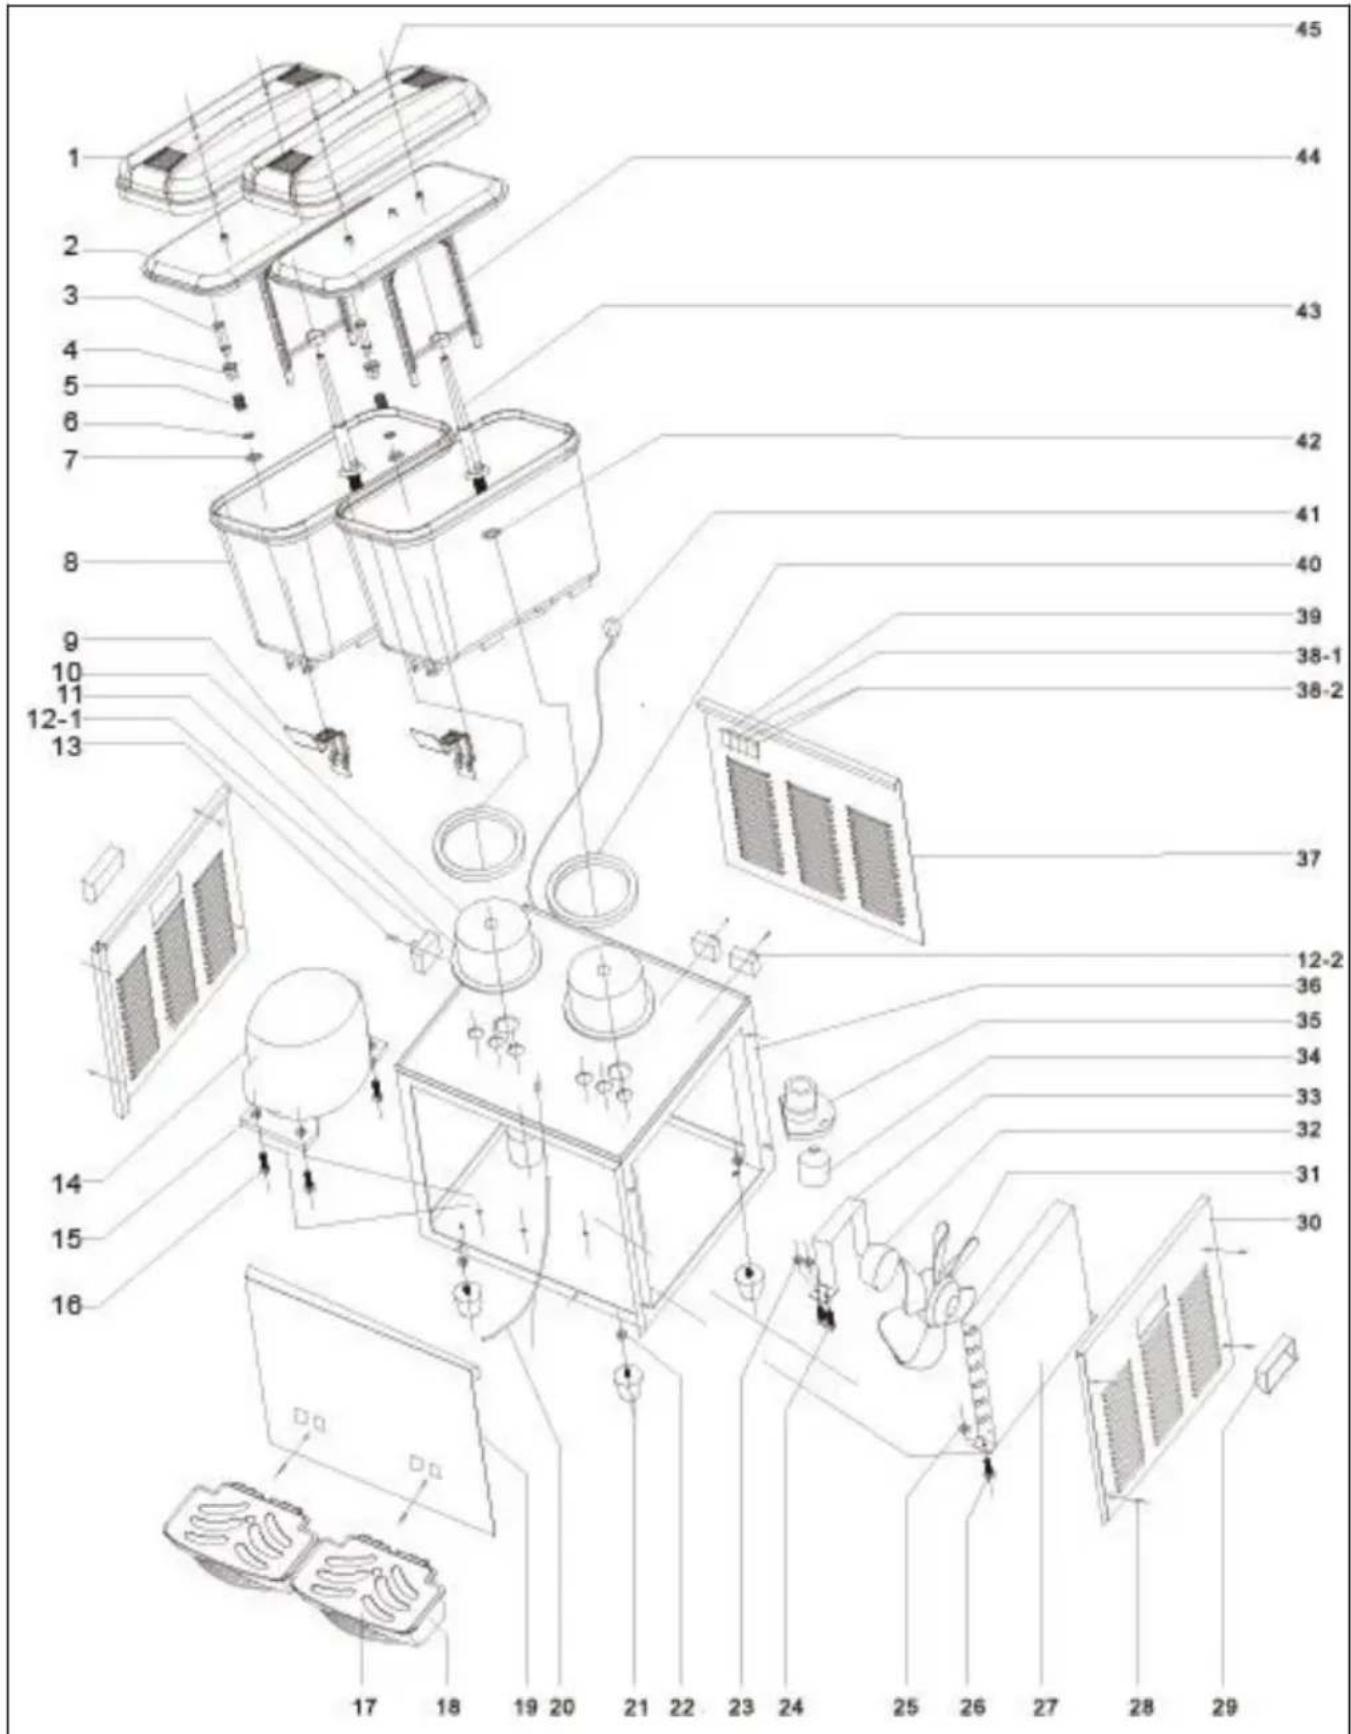
Diagram for reference only, please in kind prevail.
Tips: The structure of other cylinder blocks is similar to this stru the quantity may vary
| 1 | Roof | 24 | Support fixed screw rod |
| 2 | inner Roof | 25 | Outer hex nut |
| 3 | Stainless steel spout | 26 | Outer hex screw |
| 4 | fixed nut | 27 | Condenser |
| 5 | Spring | 28 | Mounting screw for coaming |
| 6 | Stainless steel cover | 29 | Left/right handle |
| 7 | C- snap spring | 30 | Left/right panel |
| 8 | Tank | 31 | Fan |
| 9 | oulet handle | 32 | Fan motor |
| 10 | Evaporator | 33 | holder of fan motor |
| 11 | seal ring of evaporator | 34 | Mix motor |
| 12-1 | Cold temperature contro | 35 | Mixing motor base |
| 13-12-1 | Temperature control screw | 36 | Main body frame |
| 14 | compressor | 37 | Back panel |
| 15 | Outer hex nut | 38-1 | Mix switch |
| 16 | Outer hex screw | 38-2 | Cooling switch |
| 17 | roof of Water tray | 39 | Heating switch |
| 18 | box of watertray | 40 | Seal ring for tank |
| 19 | Front panel | 41 | Power line |
| 20 | Capillary drain | 42 | small seal ring of Mix p |
| 21 | Machine foot | 43 | Mix pole |
| 22 | Outer hex nut | 44 | Mix leaf |
| 23 | Support fixed nut | 45 | Tank screw |
| Exploded view (two bowl) Agitator type | |||
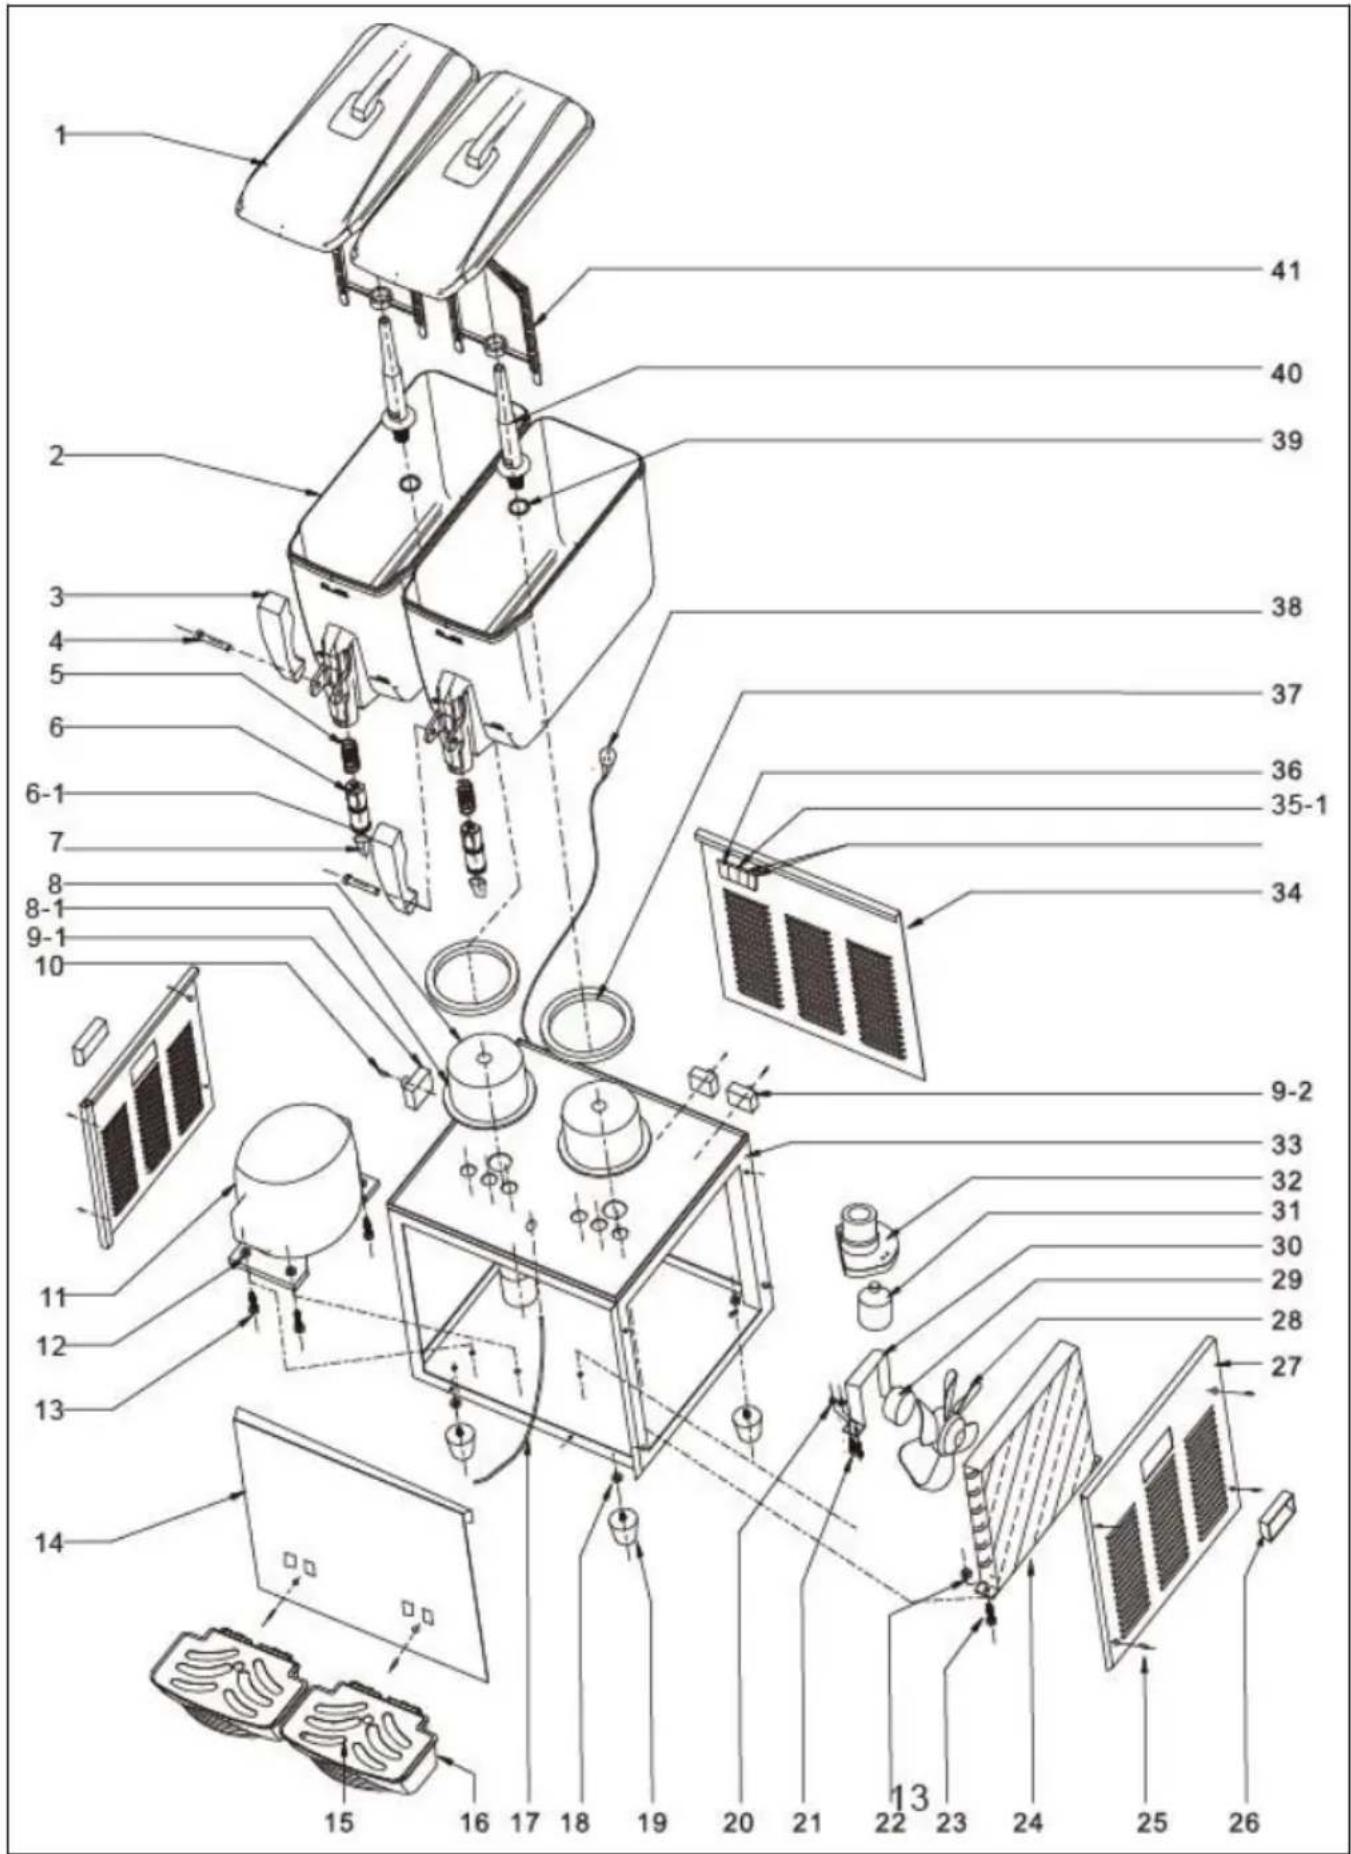
| Diagram for reference only, please in kind prevail. | |||
| Tips:The structure of other cylinder blocks is similar to this stru the quantity may vary | |||
| 1 | Roof | 21 | Support fixed screw rod |
| 2 | Tank | 22 | Outer hex nut |
| 3 | handle | 23 | Outer hex screw |
| 4 | Pin of handle | 24 | Condenser |
| 5 | Spring | 25 | Mounting screw for coaming |
| 6 | Plunger | 26 | Left/right handle |
| 6-1 | small Seal ring | 27 | Left/right panel |
| 7 | Nipple | 28 | Fan |
| 8 | Evaporator | 29 | Fan motor |
| 8-1 | Small Seal ring for Evaporator | 30 | holder of fan |
| 9-1 | Cold temperature contro | 31 | the holder of fan moto |
| 10-9-1 | Temperature control screw | 32 | Mixing motor |
| 11 | Compressor | 33 | Main body frame |
| 12 | Outer hex nut | 34 | Back panel |
| 13 | Outer hex screw | 35-1 | Cooling switch |
| 14 | Front panel | 36 | Startup switch |
| 15 | Roof of Watertray | 37 | Seal ring of tank |
| 16 | the box of watertray | 38 | Power line |
| 17 | Capillary drain | 39 | Seal ring of Mix pole |
| 18 | Support fixed nut | 40 | Mix pole |
| 19 | Machine foot | 41 | Mix leaf |
| 20 | Support fixed nut | ||
Chapter Three Installation and operation
A. Installation
1) Remove the package and move out the machine to a proper place check the goods
according to the packing list, if there exists differences, please contact distributor.
2) Operating environment
a.Ambient temperature range: 10°C\~38°C
Ambient humidity: relative humidity ≤90%
b. The machine should be placed indoors at a drafty environment, for ventilation efficiency, more than 20 ~cm space is required around the machine.
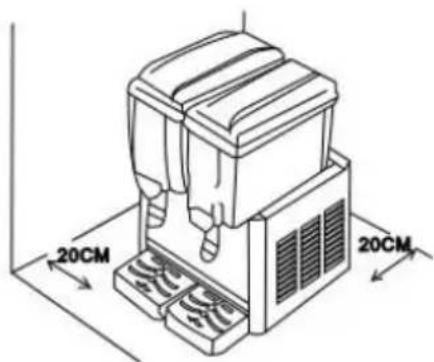
space more than 20CM
c. Avoid direct sunlight and keep the machine away from heat source, order to avoid water and other liquid splashing into machine, do not put at a humid or easily-splashing place.
3) Installation of the Tank Assembly
2)Clean the machine
a.Please wash the machine on time, in order to stay healthy.
b. Turn all the power off.
c. Let the remaining liquid out of cylinder, then remove the cylinder < hold and move slowly >
d.Cleaning cylinder:
Take off the nut or valve plate, then remove the gaske and impeller.
| No | Part | 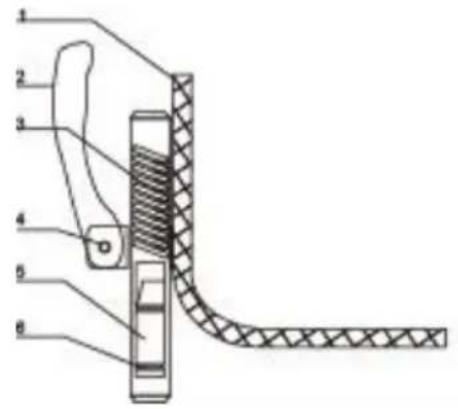 |
| 1 | Cylinder | |
| 2 | Handle | |
| 3 | Spring | |
| 4 | Pin | |
| 5 | Out water mouth | |
| 6 | Outlet sealing ring |
| No | Part | 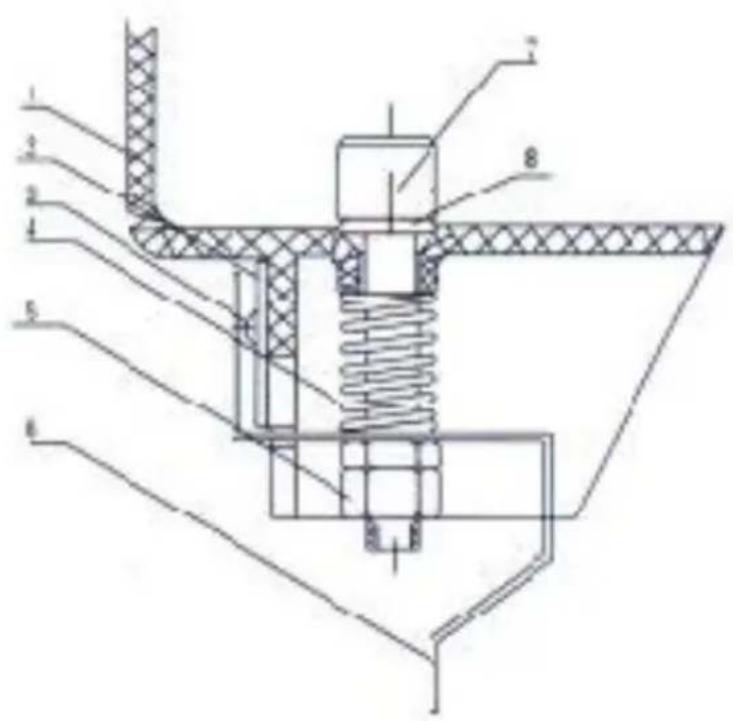 |
| 1 | Cylinder | |
| 2 | Plate | |
| 3 | Self-fapping screws | |
| 4 | Spring | |
| 5 | Nut | |
| 6 | Valve plate | |
| 7 | Spool | |
| 8 | Gasket |
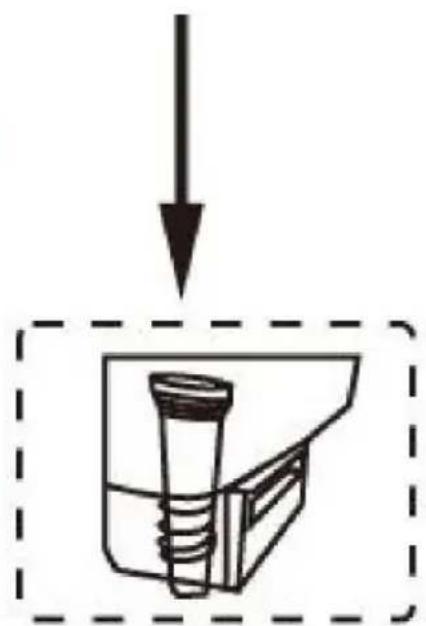
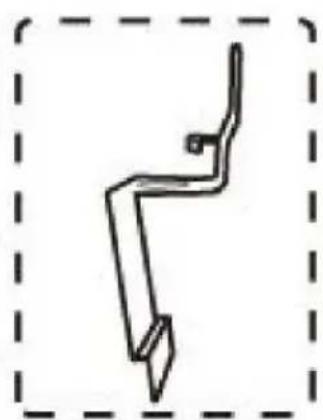
Water Outlet Dismounting Method
The water outlet is installed at the tank, we have toup lift the bottom then pull out in the fron(see②)
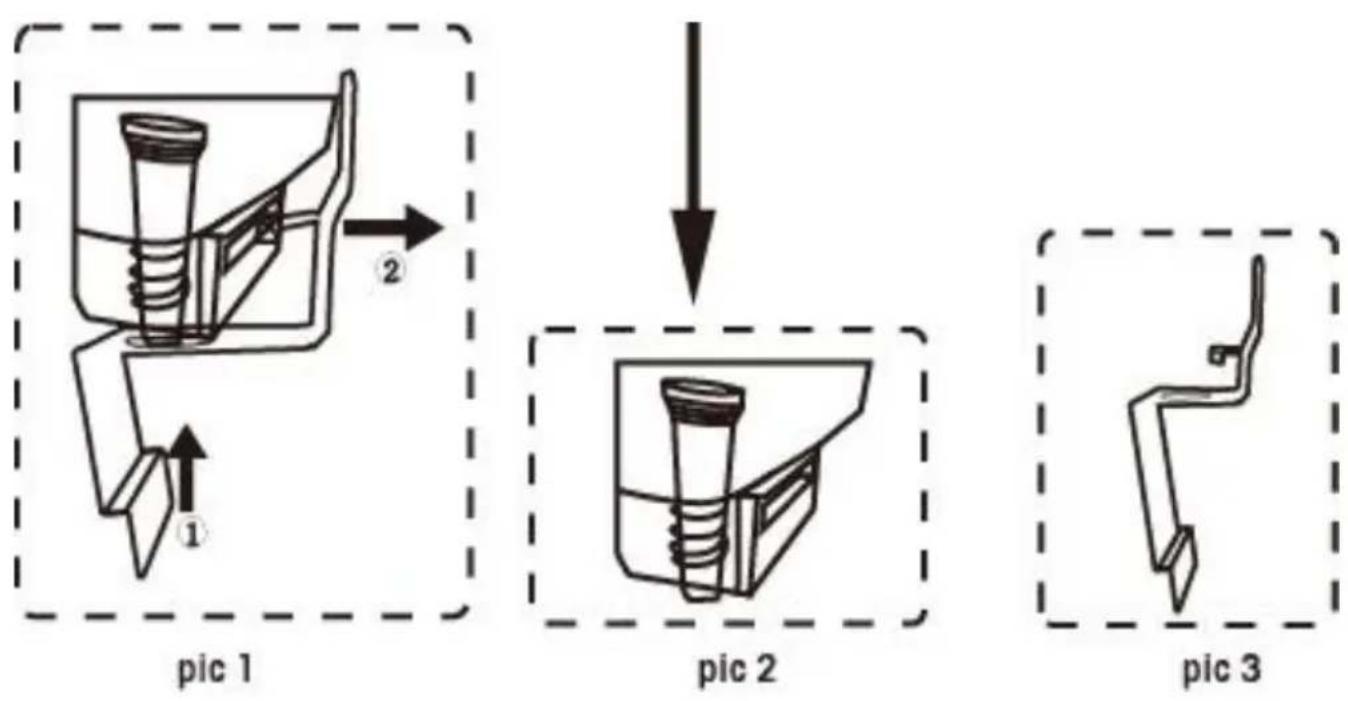
Handle removal method
| pic 1 | pic 2 | pic 3 |
| Pull out the plunger first | Then remove the handle | Finally take out the plunger and spring |
3)Plug in
The socket and other appliance should comply with user's local electr regulations and national rules, also the voltage and current should cor with the rated value according to nameplate, (if use external plug, sh use connection board with right current), and the machines should be properly grounded.
If the voltage ranges too much(beyond the rated value ± 10% ), it may the machine can not start, or break the PCB board, or break compre In this condition, adding a appropriate voltage stabilizer is necessary.
B.Testing
When the tank is installed well, firstly pour in a little drinking water. the bottom of the tank and dispensing mouth, if there is a slight leaf the bottom of the tank, use your hand diagonally to take the tank a downward, to make sure the tank and O-ring into the right place; if leakage on the dispensing mouth, please check the O-ring is in proper place, or change it if it is necessary. Then add beverage into the best switch on cooling.
Chapter Four Usage instruction
A. Ingredients preparation
1) Ingredients include : dried fruit powder, syrup or plum juice and drill water, mix the fruit juice and the drinking water according to certain proportion (for delicious advisable). Stir mixed liquor completely in a c container, and particles are not allowed; otherwise the dispensing mouth will be blocked.
2) The temperature of mixed liquor cannot exceed 35°C.
3) Please remember that do not use too thick juice or drink with prec otherwise easily result in water pipe blockage.

Warning: connect or use drinking water, the formula materials and conform to the requirements of the food hygiene license.
B.Operation method
1) Pour the drink into the tank and make sure the drink shall not e maximum level line, not less than the minimum level line.
2) Plug the power plug after pouring the drink, turn on the refrigerati stirring switches to run the machine. When the machine reaches the temperature, it will stop refrigeration, but will keep rotating.
3) After turning off the refrigeration switch, it need to wait for 3 min, turning on the switch again, otherwise it will damage the compressor.
4) Temperature rage: for cold drink: 7 -12°C;
5) Empty drinks in bowl when it's off business hours to prolong key service lifetime
Chapter Five Daily clean and maintenance
A. Cleaning
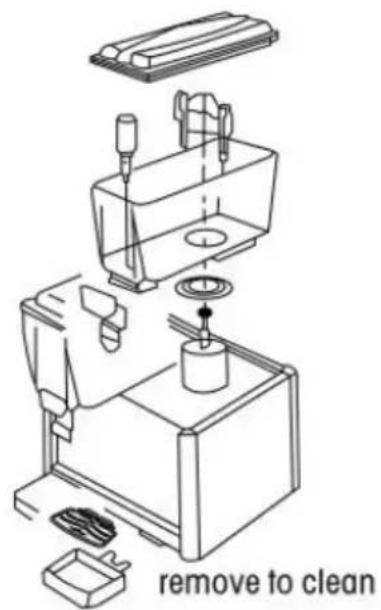
1) Wash all parts of bowl thoroughly in mild detergent and warm water
2) Rinse in clean running water.
3) Reassemble all parts of bowl.
4) Pour sanitizer and water into bowl. Turn on beater motor and allow sanitizer to flow inside of the bowl for a period of time.
5)Drain liquid through the valve completely and thoroughly during each step of the cleaning process (wash, rinse, sanitize, rinse).

Notice: 1. The bowls assembly should be cleaned everyday.
-
O-ring should be checked after cleaning, and must be replaced if are worn.
-
In case of parts heat cracking, with high temperature disinfection is prohibited and do not use more than 60^ C boiled water to clean the and components.
B. Maintenance
Use a cleaning cloth or brush to clear away all the dust and attach the surface or inside of the machine regularly. Do not flush the inter machine with water directly. Before cleaning, please cut off power and disconnect the plug, it is very important.
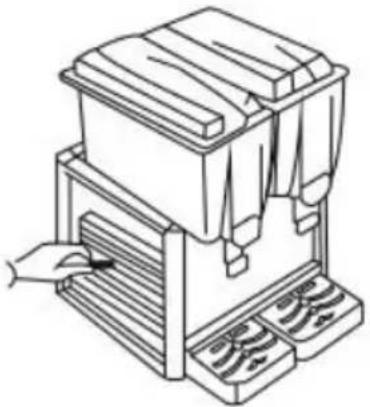
natural_image
Line drawing of a mechanical device with a hand inserting a spring into a base (no text or symbols)turn off clean ash
1) Cut off the power firstly, and disassemble all the panels of machine then clear the dust attached to compressor, copper pipe and bottom Using water is forbidden.
2) After being used over a period of time, the condenser may be thick dust, and this will affect radiating heat and cause bad cooling, so it periodic cleaning (every half year)
Step 1: Disconnected the main power switch.
Step 2: Remove the back panel and side panels.
Panel Dismounting Method
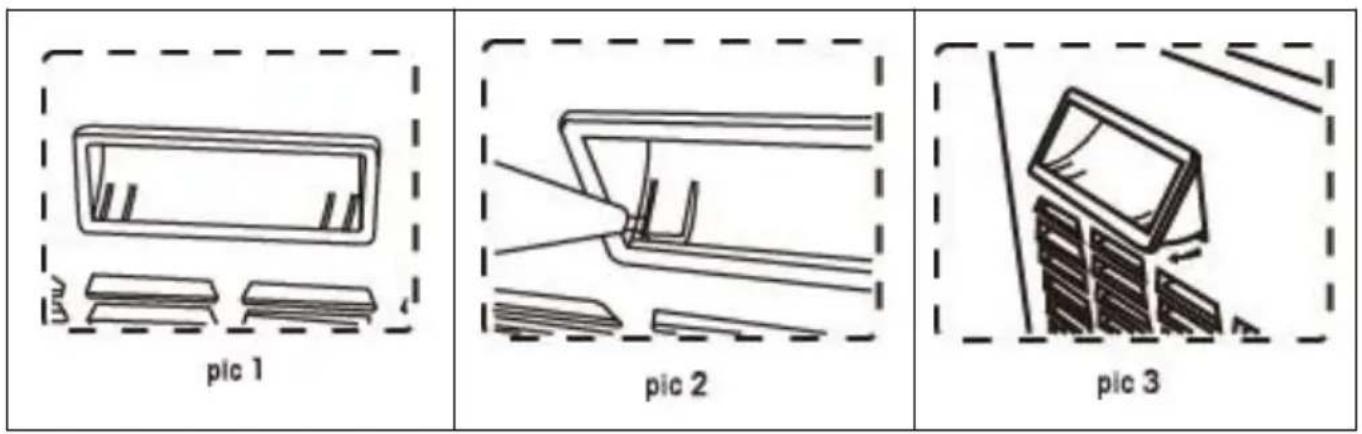
| In order to take off panel ,we have to to off the handle first (see pic 1) | Using slot type screwdriver pry up th panel side( see pic | Pry up both side of handle , then take the handle from par |
Step 3: Clean dust with tools such as vacuum cleaner, high-pressure and hairbrush, be careful while cleaning to avoid damaging the fins of condenser.
3) Check all the screws and nuts if they are loose or rusty, and fast replace them to avoid causing noise.
4) Finally, assemble all the panels, fasten all screws, and clear the su
Chapter Six Trouble shooting
The following table lists showed the possible machine fault and its re and processing method. For general simple fault, can follow the table processing method and processing, such as the fault is still cannot be out, as well as more complex fault, please contact professional maintenance staff immediately, never sloppy handling, so as not to bring you unnecessary loss.
| Troubles | Causes | Repair methods |
| Compressor stops Working | 1 .The supply power off or not connect Switch damaged Circuit trouble Over load and the protector broken | 1 .Check the supply power socket Replace the switch Check and repair Check and replace |
| Compressor runs but no refrigeration | 1 .Capillary stop 2.The refrigeration fluid leaked the electrical broker | 1.replace the capillary or dry filter Check the systems and add the medicine Replace the electrical machin |
| Winnowing water abnormally | 1 .differences in the pump inside impeller and holes damaged circuit damaged big clearance between the impeller and crock | 1.clean2.Replace the impeller and pump3.check and repair4.adjust the clearance |
| Crock leaking | Sealing ring old or installed badly | Replace or re-instal |
| Valve leaking | Sealing ring old or installed badly | Replace or re-instal |
Manufacturer: Shanghaimuxinmuyeyouxiangongsi
Address: Shuangchenglu 803nong11hao1602A-1609shi, baoshanqu, shanghai 200000 CN.
Imported to AUS: SIHAO PTY LTD. 1 ROKEVA STREETEASTWOOD NSW 2122 Australia
Imported to USA: Sanven Technology Ltd. Suite 250, 9166 Anaheim Place, Rancho Cucamonga, CA 91730
| UK | REP |
YH CONSULTING LIMITED. C/O YH Consultin Limited Office 147, Centurion House, London Road, Staines-upon-Thames, Surrey, TW18 4A>
| EC | REP |
Technical Support and E-Warranty Certificate
www.vevor.com/support
VEVOR®
TOUGH TOOLS, HALF PRICE
natural_image
Isometric line drawing of a multi-tiered storage unit with a hand inserting a slot (no text or symbols)turn off clean ash
YH CONSULTING LIMITÉE. C/O YH Consulting Limited Bureau 147, Centurion House, London Road, Staines-upon-Thames, Surrey, TW18 4AX
| REPRÉSENTANT CE |
E-CrossStu GmbH
Mainzer Landstr.69,
natural_image
Exterior view of a modern stainless steel water dispenser with control panel (no visible text or symbols)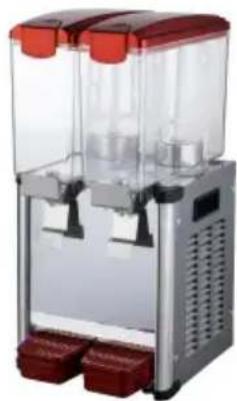
natural_image
Exterior view of a modern beverage dispenser with dual red and silver branding (no text or symbols visible)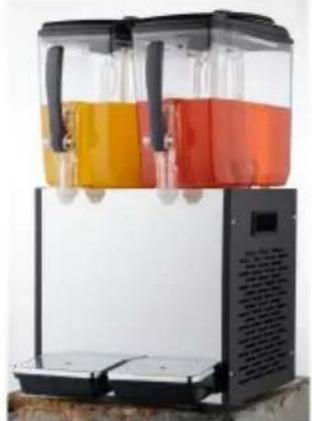
natural_image
Exterior view of a modern sludge brater with two yellow and orange liquid in a black control unit (no text or symbols visible)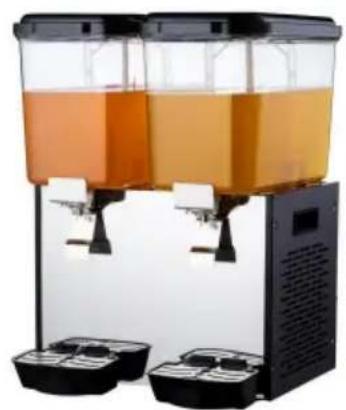
natural_image
Two large beverage jugs with orange and yellow liquid, mounted on a black stand (no visible text or labels)space more than 20CM
pic 1
natural_image
Diagram showing a mechanical component with a downward arrow and dashed border (no text or symbols)pic 2
natural_image
Simple line drawing of a bent pipe or channel with no text or symbolspic 3
natural_image
Isometric line drawing of a multi-tiered storage unit with a hand inserting a slot (no text or symbols)turn off clean ash
YH CONSULTING LIMITED. C/O YH Consulting Limited Office 147, Centurion House, London Road, Staines-upon-Thames, Surrey, TW18 4AX
www.vevor.com/support
VEVOR®
TOUGH TOOLS, HALF PRICE
space more than 20CM
natural_image
Isometric line drawing of a multi-tiered storage unit with a hand inserting a slot (no text or symbols)turn off clean ash
Importato in AUS: SIHAO PTY LTD. 1 ROKEVA STREETEASTWOOD NSW 2122 Australia
Limited Office 147, Centurion House, London Road,
Staines-upon-Thames, Surrey, TW18 4AX
| REP.CE |
E-CrossStu GmbH
Mainzer Landstr.69,
elettronica www.vevor.com/support
VEVOR®
TOUGH TOOLS, HALF PRICE
space more than 20CM
natural_image
Isometric line drawing of a multi-tiered storage unit with a hand inserting a slot (no text or symbols)turn off clean ash
YH CONSULTING LIMITADO. C/O YH Consulting Limited Oficina 147, Centurion House, London Road, Staines-upon-Thames, Surrey, TW18 4AX
E-CrossStu GmbH
Mainzer Landstr.69,
space more than 20CM
natural_image
Isometric line drawing of a multi-tiered storage unit with a hand inserting a slot (no text or symbols)turn off clean ash
ODPOWIEDZIALNOŚCIĄ. C/O YH Consulting Limited Office
147, Centurion House, London Road, Staines-upon-Thames, Surrey, TW18 4,
E-CrossStu GmbH
Mainzer Landstr.69,
60329 Frankfurt nad Menem.
VEVOR®
TOUGH TOOLS, HALF PRICE
www.vevor.com/support
VEVOR®
TOUGH TOOLS, HALF PRICE
Technische ondersteuning en e-garantiecertificaat www.vevor.com/support
DRANKENDISPENSER
MODEL:LYJ10LX2/LYJ10LX3/LYJ10LX4/LYJ12LX1/LYJ12LX2/LYJ12LX3/LYJ12LX4/LYJ18LX1/LYJ18LX2/LYJ18LX3
natural_image
Exterior view of a modern stainless steel water dispenser with control panel (no visible text or symbols)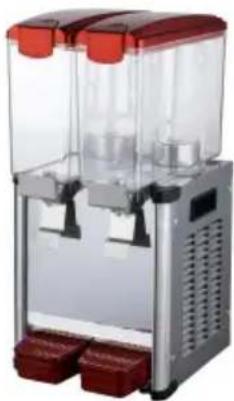
natural_image
Exterior view of a modern glass and silver beverage dispenser with red lid (no text or symbols visible)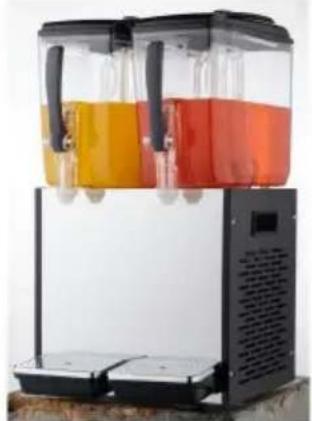
natural_image
Exterior view of a modern slurry-over water dispenser with two side cups filled with yellow and orange liquids (no text or symbols visible)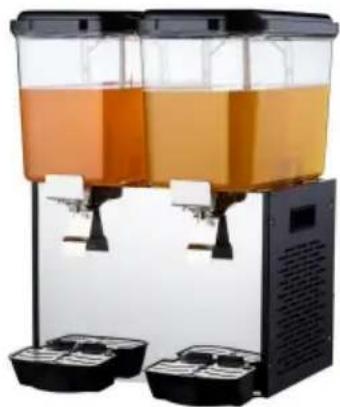
natural_image
Two large beverage jugs with clear liquid, two side by side and one side by side (no visible text or labels)HULP NODIG? NEEM CONTACT MET ONS OP!
- BEVERAGE DISPENSER
- MODEL:LYJ10LX2/LYJ10LX3/LYJ10LX4/LYJ12LX1/LYJ12LX2/LYJ12LX3/LYJ12LX4/LYJ18LX1/LYJ18LX2/LYJ18LX3
- MODEL:LYJ10LX2/LYJ10LX3/LYJ10LX4/LYJ12LX1/LYJ12LX2/LYJ12L X3/LYJ12LX4/LYJ18LX1/LYJ18LX2/LYJ18LX3
- NEED HELP? CONTACT US!
- Tips:
- Important Safeguards
- FCC Information:
- equipment!
- Chapter One Safety Precaution
- Chapter Two Basic structure
- Chapter Three Installation and operation
- Installation
- 2)Clean the machine
- Water Outlet Dismounting Method
- 3)Plug in
- B.Testing
- Chapter Four Usage instruction
- Ingredients preparation
- B.Operation method
- Chapter Five Daily clean and maintenance
- Cleaning
- Maintenance
- Panel Dismounting Method
- Chapter Six Trouble shooting
- VEVOR®
- TOUGH TOOLS, HALF PRICE
- DRANKENDISPENSER
- HULP NODIG? NEEM CONTACT MET ONS OP!
Brand : Vevor
Model : LYJ18LX3
Category : Water dispenser