
Friggisano Lux 13 G10219 - Deep fryer G3 Ferrari - Free user manual and instructions
Find the device manual for free Friggisano Lux 13 G10219 G3 Ferrari in PDF.

User questions about Friggisano Lux 13 G10219 G3 Ferrari
0 question about this device. Answer the ones you know or ask your own.
Ask a new question about this device
Download the instructions for your Deep fryer in PDF format for free! Find your manual Friggisano Lux 13 G10219 - G3 Ferrari and take your electronic device back in hand. On this page are published all the documents necessary for the use of your device. Friggisano Lux 13 G10219 by G3 Ferrari.
USER MANUAL Friggisano Lux 13 G10219 G3 Ferrari
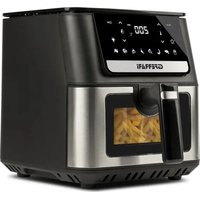
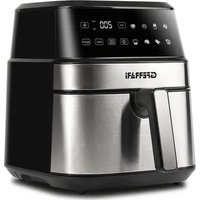
natural_image
Exterior view of a G Ferrari air fryer oven with illuminated grating and digital display (no text or symbols on the device itself)Forno Air Fryer
Air Fryer Oven
FRIGGISANO LUX 13
ITA: INDICE
Simbologia.... p. 2
Safety Instructions.... p. 11
General information.... p. 13
G10219....p. 14
Control panel.... p. 14
Cooking.... p. 14
Functioning.... p. 14
Accessories.... p. 15
Tips.... p. 16
Settings.... p. 16
Cleaning....p. 17
Technical features.... p. 17
Waste of electric and electronic equipment (WEEE
Directive).... p. 40
PORTUGUES:....p. 18
ESPAÑOL ......p. 23
FRANCAIS ......p. 28
DEUTSCH...... p. 34
CLASSI DI PROTEZIONE / PROTECTION CLASSES
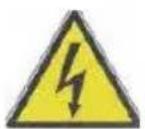
ATTENZIONE RISCHIO DI SCOSSE ELETTRICHE NON ESPORRE A PIOGGIA E UMIDITA'

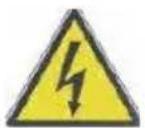
WARNING ELECTRIC SHOCK RISK DO NOT EXPOSE TO RAIN OR MOISTURE

ATTENZIONE: NON APRITE L'APPARECCHIO. ALL'INTERNO NON VI SONO COMANDI MANIPOLABILI DALL'UTENTE NE' PARTI DI RICAMBIO. PER TUTTE LE OPERAZIONI DI SERVIZIO RIVOLGERSI AD UN CENTRO DI ASSISTENZA AUTORIZZATO.
This symbol warns the user that un-insulated dangerous voltage inside the system may cause an electrical shock. Do not open the case.
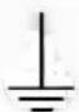
Class I Appliance symbol. This means the appliance must have the chassis connected to electrical earth/ground by an earth conductor.

Caution: this symbol reminds the user to read carefully the important operations and maintenance instructions in this owner's guide.
natural_image
Illustration of a cylindrical battery with mesh pattern and labeled terminals (no text or symbols beyond labels)SPIEDINI (11)
natural_image
Pure technical line drawing of a mechanical tool or tool without any text, numbers, or symbolsnatural_image
Technical line drawing of a mechanical component with no visible text or symbolsSUGGERIMENTI
ENGLISH: SAFETY INSTRUCTIONS
The following are important notes on the installation, use and maintenance; save this instruction manual for future reference; use the equipment only as specified in this guide; any other use is considered improper and dangerous; therefore, the manufacturer cannot be held responsible in the event of damages caused by improper, incorrect or unreasonable use.
Before use, ensure the equipment is undamaged; if in doubt, do not attempt to use it and contact the authorized service center; do not leave packing materials (i.e. plastic bags, polystyrene foam, nails, staples, etc.) within the reach of children as they are potential sources of danger; always remember that they must be separately collected.
Make sure that the rating information given on the technical label are compatible with those of the electricity grid; the installation must be performed according to the manufacturer's instructions considering the maximum power of the appliance as shown on the label; an incorrect installation may cause damage to people, animals or things, for which the manufacturer cannot be considered responsible thereof. If it is necessary to use adapters, multiple sockets or electrical extensions, use only those that comply with current safety standards; in any case do not exceed the power consumption limits indicated on the electrical adapter and / or extensions, as well as the maximum power shown on multiple adaptor.
Do not leave the unit plugged; better to remove the plug from the mains when the device is not in use. Always disconnect from power supply if you leave it unattended.
Cleaning operations should be carried out after unplugging the unit. Do not allow the power cord to get closer to sharp objects or in contact with hot surfaces; do not pull it to disconnect the plug.
If the unit is out of order and you do not want to fix it, it
must be made inoperable by cutting power cord.
- Do not use the appliance in the event of damage to the power cord, plug, or in case of short circuits; to repair the product only address an authorized service center.
- Do not handle or touch the appliance with wet hands or bare feet. Do not expose the appliance to harmful weather conditions such as rain, moisture, frost, etc.. Always store it in a dry place.
- This appliance can be used by children of 8 years and above and persons with reduced physical, sensory or mental capabilities or lack of experience and knowledge if they received supervision or instruction concerning use of the appliance in a safe way and understand hazards involved; children shall not play with the appliance; cleaning and user maintenance shall not be made by children without supervision.
- Children must not play with the appliance.
- Keep the appliance and its cord out of reach of children less than 8 years.
If the power cord is damaged, or in case of failure and / or malfunction do not tamper with the unit. The reparation must be done by manufacturer or by service center authorized by the manufacturer in order to prevent any risk. Failure to comply with the above may compromise the unit safety and invalidate the warranty.
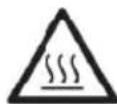
WARNING: This appliance includes heating function. Surfaces, other than functional surfaces may develop high temperatures. Since temperatures are perceived differently by different people, this device should be used with CAUTION. Hold the appliance exclusively to grip surfaces intended to be touched.
- Before every use, unroll the power cord.
- This appliance is intended to be used in household and similar applications such as: staff kitchen areas in shops, offices and other working environments; by clients in
hotels, motels and other residential type environments; farm houses, bed and breakfast type environments.
- The appliance is not intended to be operated by means of an external timer or separate remote-control system.
- Use original spare parts and accessories only.
- Do not subject the product to strong impacts, serious damages may result. Don’t use near or under flammable materials (like curtains), heat, cold spots and steam.
GENERAL INFORMATION
The surfaces of appliance shall not be placed against a wall. Leave at least 10cm free space on the back and sides and 10cm free space above the appliance.
The appliance becomes very hot during use; never touch the glass or the inside of the appliance, but only handles and control panel. Always use pot holders to remove the accessories.
Do not place anything on the door when it is open, as door may be damaged or oven may fall and break.
The appliance needs approximately 30 minutes to cool down for handle or cleaning safely. Do not wash or throw water on glass when is hot, as it may break.
Do not place anything on top of the appliance. Don't move the oven if is hot or if contains food.
Put food only on the trays and accessories included, in order to avoid them from touching the heating element.
Do not fill trays with oil as this may cause a fire hazard
Handle with care cooked food to avoid risk of burning.
Never leave the appliance unattended while it is running. Remove the plug after each use.
Do not place the oven in water or other liquids and avoid splashing of liquids on the unit.
During functioning, hot steam is released through the air outlet openings. Keep your hands and face at a safe distance from air outlet. Also be careful of hot steam
when you open the door after cooking.
Before every use, unroll the power cord.
Do not cover the air inlet and the air outlet openings while the appliance is operating.
Do not use the appliance as a heating unit. Do not insert anything in the ventilation windows. Before cleaning, always unplug the unit from the electrical outlet and wait for the complete cooling of each part of the appliance.
Remove all packaging materials from the cooking compartment. Put on solid and stable surfaces only.
Always leave enough space at every side of the oven when the unit is working.
Do not use the oven as shelf support for objects or as place to store food, pots, containers, etc..
G10219
1 Air inlet 2 Control panel 3 Housing 4 Door
5 Oil tray 6 Holed tray 7 Air outlet 8 Handle
9 Rotisserie 10 Basket 11 Skewers 12 Handle 13 Air fryer basket
CONTROL PANEL
A. Icons for 12 preset programs B. Button for rotation C. Button ON/OFF
D. Button for inner light E. Button increase F. Button decrease
G. Button time/temperature H. Button MENU I. Button START
COOKING
Carefully wash all accessories and the inner housing first. Allow to ventilate the internal compartment keeping all accessories away for about 30 minutes. Before starting with the first cooking, turn on the appliance for 10 minutes at the maximum temperature.
- Connect to a suitable and earthed power socket.
- Place the grease collecting tray (5) at the bottom of cooking chamber.
- Insert food in one of the accessories and put the accessory in the oven.
- If appliance went in standby, press ⏻ on the control panel (2).
- Set program, temperature and time of cooking, as explained in following paragraphs. Press START (I) to start cooking. In any moment you can switch on the internal light with the button (D).
Caution: Do not touch accessories or inner parts of appliance during cooking and until complete cooling. Touch only the handle (8).
- When you ear the timer sound (5 beeps), cooking time is finished. Extract food and check if is ready. If not ready, replace in the oven and set additional cooking of some more minutes.
Note: appliance can be switched off manually, pressing 3 seconds ⏻ on the control panel (2).
Be careful to the hot steam when you remove container after cooking.
- Place the cooked food in a container or in a dish.
- Once cooking finished, if you want to start another one, air fryer is immediately ready.
FUNCTIONING
MANUAL FUNCTION
- If appliance went in standby, press ⏻ on the control panel (2).
- Press Time/Temperature button (G) and set temperature with the buttons (E and F).
- Press Time/Temperature (G) and set time with buttons (E and F). Press START to start cooking.
PRESET PROGRAMS FUNCTION
- If appliance went in standby, press ⏻ on the control panel (2).
Press button MENU (H) and use buttons (E - F) to select one of the 12 preset programs (A).
| Menu | Program | Activate rotation | Temperature default (°C) | Temperature range (°C) | Time default (min) | Time range (min) |
| P01 | Air fryer | 180°C | 80-200 | 15min | 1~60 | |
| P02 | Toast | 200°C | 80-200 | 10min | 1~60 | |
| P03 | Fish | 160°C | 80-200 | 20min | 1~60 | |
| P04 | chicken wings | 200°C | 80-200 | 15min | 1~60 | |
| P05 | heating | 130°C | 80-200 | 8min | 1~60 | |
| P06 | dehydration | 60°C | 30-80 | 4 hours | 2 - 24 hours | |
| P07 | shrimp | 185°C | 80-200 | 10min | 1~60 | |
| P08 | French fries | SI | 200°C | 80-200 | 25min | 1~60 |
| P09 | Cake | 165°C | 80-200 | 30min | 1~60 | |
| P10 | Meat | 175°C | 80-200 | 22min | 1~60 | |
| P11 | Skewers | SI | 190°C | 80-200 | 20min | 1~60 |
| P12 | Chicken rotisserie | SI | 175°C | 80-200 | 35min | 1~60 |
- If you want to change the settings of the program chosen:
- Press Time/Temperature button (G) and set temperature with the buttons (E and F).
- Press Time/Temperature (G) and set time with buttons (E and F). Press START to start cooking.
Note. Time and temperature set on each program are studied to have correct cookings for the relative food. It is advised to change time and temperature only based on experience (eg. Previous cookings not finished or too long). The settings don't include the time needed to reach the temperature set.
During cooking:
- You can switch off pressing button () for 3 seconds.
- You can stop appliance pressing button START. You can change time and temperature.
- Do not open the door of oven (4) if not necessary to mix or check food cooking. If you open the door, cooking goes in standby and when you close it, it restarts from the stopping point.
ACCESSORIES
GREASE COLLECTING TRAY (5)
The tray (5) has grease collecting function, and you should ALWAYS put it at the bottom of cooking chamber. Put some water in the tray to avoid bad smell and fat incrustation.
HOLED TRAY (6) and AIR FRYER TRAY (13)
2 holed trays are included and can be used to cook any kind of food. Place them as in a normal oven on the aisles on the sides of the internal chamber, using pot holders.
It is possible to use trays together, to cook on 2 different levels.
Make sure that the food is at least 3 cm far from heating element (top of chamber).
Do not use baking paper: it would close the holes of the trays, obstructing air circulation, and giving worse cooking result.
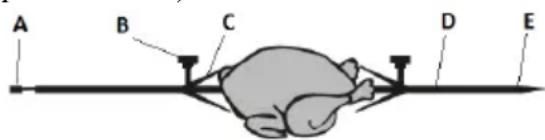
ROTISSSERIE (9)
- Assemble the skewers (C) to the rotisserie (D), secure them tightening the lock nut (B).
- Place the tips of the skewers in the chicken (or roast or whatever) and lock securely.
- Insert the end (E) in the left rotating support. Insert the head (A) in the right support.
- Make sure the rotisserie is properly secured.
- Now close the oven door and set the cooking as explained in the previous paragraphs.
- Press START to start cooking and press "Rotate" (B) to make the rotisserie rotate.
To extract rotisserie when cooking finished, use the handle (12) lift up the accessory and extract it.
CAUTION: risk of burns. Pay attention to not get burnt when extract accessory, and use pot holders.
BASKET (10)
The basket (10) is perfect to cook fries, make pop corn and many other foods (if they don't risk to be ruined by the rotation of the basket during cooking).
- Insert food in the basket. Close the lid and press it to block.
- To mount in the oven, put a head in the left rotating support, and the other head in the right support.
- Now close the oven door and set the cooking as explained in the previous paragraphs.
- Press START to start cooking and press "Rotate" (B) to make the basket rotate.
To extract when cooking finished, use the handle (12) lift up the accessory and extract it.
natural_image
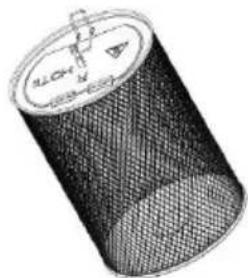
Illustration of a cylindrical container with internal mesh structure and labeled markings (no readable text or symbols)CAUTION: risk of burns. Pay attention to not get burnt when extract accessory, and use pot holders.
SKEWERS (11)
Use the skewers accessory (11) to cook skewers of meat, fish and vegetables.
- Mount the 2 holed wheels (11 b) to the rotisserie bar and secure them tightening the lock nut. Prepare the skewers (11 a) with the food to cook.
- Mount the skewers to the 2 holed wheels as shown in the side figure. You can mount up to 10 skewers. To mount in the oven, put a head in the left rotating support and the other head in the right support.

natural_image
Technical line drawing of a mechanical tool or tool with no visible text or symbols
natural_image
Technical line drawing of a cylindrical mechanical component with internal gears and shafts (no text or symbols)- Now close the oven door and set the cooking as explained in the previous paragraphs.
- Press ⏻ to start cooking and press “Rotate” (B) to make the skewers rotate.
To extract when cooking finished, use the handle (12) lift up the accessory and extract it.
CAUTION: risk of burns. Pay attention to not get burnt when extract accessory, and use pot holders.
TIPS
The preset programs don't include the time needed to reach the temperature set. You use the pre-heat program or add 4 minutes to the cooking time.
If you cook on trays or basket, it is advised to spread evenly a little oil on food, to have more crispyness.
Don't overload of food the accessories, as the cooking quality will be worse.
When placing the food, make sure that the food is at least 3 cm far from heating element (top of chamber).
SETTINGS
This table below will help you to select the basic settings for the ingredients.
Note: these settings are indications, as depend on personal taste, origin and type of food, ecc.
Note: Add 4 minutes to the preparation time when you start frying while the Hot-air fryer is still cold.
- Smaller ingredients usually require a slightly shorter preparation time than larger ingredients.
- A larger amount of ingredients only requires a slightly longer preparation time.
- Shaking smaller ingredients halfway through the preparation time optimizes the end result and can help prevent unevenly fried ingredients. Add some oil to fresh potatoes for a crispy result. Fry your ingredients in the Hot-air fryer within a few minutes after you added the oil.
- Do not prepare extremely greasy ingredients such as sausages in the Hot-air fryer.
- Place a baking tin or oven dish in the Hot-air fryer basket if you want to bake a cake or quiche or if you want to fry fragile ingredients or filled ingredients
| Min-max Amount (g) | Time (min.) | Temp (°C) | Accessory | |
| Potato & fries | ||||
| Thin frozen fries | 600-700 | 15-20 | 200 | Basket |
| Thick frozen fries | 600-700 | 18-23 | 200 | Basket |
| Potato gratin | 700-900 | 15-20 | 200 | Trays |
| Meat and fish | ||||
| Steak | 200-800 | 15-20 | 180 | Trays |
| Pork chops | 400-800 | 12-16 | 180 | Trays |
| Hamburger | 200-800 | 10-15 | 185 | Trays |
| Chicken breast | 400-800 | 15-20 | 180 | Trays |
| Chicken thighs | 400-800 | 25-30 | 190 | Trays |
| Chicken rotisserie | 700-1000 | 40-45 | 180 | Rotisserie |
| Meat Skewers | 400-800 | 15-20 | 185 | Skewers |
| Sausages | 400-800 | 12-16 | 200 | Skewers |
| Fish Skewers | 400-800 | 13-15 | 170 | Skewers |
| Fish | 400-800 | 13-16 | 180 | Trays |
| Snacks | ||||
| Frozen chicken nuggets | 500-800 | 8-14 | 200 | Trays |
| Frozen fish fingers | 500-800 | 6-10 | 200 | Trays |
| Frozen bread crumbed cheese snacks | 500-700 | 8-10 | 180 | Trays |
| Stuffed vegetables | 500-700 | 15-18 | 160 | Trays |
| Baking | ||||
| Cake | 800 | 20-25 | 180 | Use additional baking tin |
| Quiche | 800 | 20-22 | 200 | Use additional baking tin |
| Muffins | 800 | 16-20 | 180 | Use additional baking tin |
| Sweet snacks | 800 | 18-20 | 170 | Use additional baking tin |
CLEANING - Clean after every use. Unplug the unit from the electrical outlet and allow each part to cool down before starting any cleaning procedure.
- Do not place oven in water. In any case prevent splashes of water or other liquids from reaching the unit.
- Wipe the outside of the appliance with a moist cloth.
- Clean the inside of the appliance with hot water and non-abrasive sponge.
- Non stick accessories can be washed as normal non-stick pans, but we suggest to not use dishwasher. Do not use metal kitchen utensils or abrasive sponges or abrasive cleaning materials to clean them.
- Stainless steel accessories can be washed as normal crockery.
TECHNICAL FEATURES
• Power supply: AC 220-240V\~50-60Hz. Power: 1800W
- Chamber with capacity 13 L and internal light
- Adjustable temperature (30° - 200°C) - Timer 60 minutes
• Digital Display - 12 preset programs
- Accessories: 3 trays, basket, skewers, rotisserie, handle.
• Power consumption in standby mode: 0.5 W
- The product enters standby mode after 1 minute of inactivity
PORTUGUÊS: ADVERTÊNCIAS
natural_image
3D wireframe illustration of a cylindrical container with a lid and internal structure (no text or symbols)natural_image
Pure line drawing of a mechanical tool or tool with no text, numbers, or symbols
natural_image
Technical line drawing of a cylindrical mechanical component with internal gears and shafts (no text or symbols)natural_image
Illustration of a cylindrical battery with mesh insulation and a labeled cap (no text or symbols on the diagram itself)PINCHOS (11)
natural_image
Technical line drawing of a mechanical tool or tool with no visible text or symbols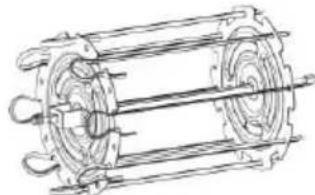
natural_image
Technical line drawing of a mechanical component with no visible text or symbolsFONCTIONNEMENT MANUEL
natural_image
3D wire mesh model of a cylindrical container with a circular top and internal structure (no text or symbols)BROCHETTES (11)
natural_image
Pure line drawing of a mechanical tool or tool with no text, numbers, or symbols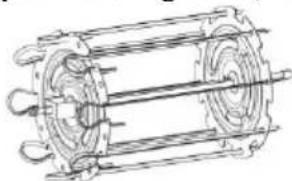
natural_image
Technical line drawing of a cylindrical mechanical component with internal channels and mounting flanges (no text or symbols)natural_image
Illustration of a cylindrical battery with mesh insulation and a labeled cap (no text or symbols on the body)natural_image
Technical line drawing of a mechanical tool or tool with no visible text or symbols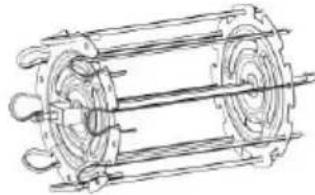
natural_image
Technical line drawing of a cylindrical mechanical component with internal channels and mounting flanges (no text or symbols)The product is made of non-biodegradable and potentially polluting substances if not properly disposed of; other parts can be recycled. It’s our duty to contribute to the ecological health of the environment following the correct procedures for disposal. The crossed out wheelie bin symbol indicates the product complies with the requirements of the new directives introduced to protect the environment (2002/96/EC, 2003/108/EC, 2002/95/EC, 2012/19/EC) and must be properly disposed at the end of its lifetime. If you need further information, ask for the dedicated waste disposal areas at your place of residence. Who does not dispose of the product as specified in this section shall be liable according to the law.
To find the nearest service center, please call the telephone number 0541 694246, fax number 0541 756430 or contact us at assistenzatecnica@trevidea.it asking for the service centers supervisor.


- ITA: INDICE
- CLASSI DI PROTEZIONE / PROTECTION CLASSES
- ATTENZIONE RISCHIO DI SCOSSE ELETTRICHE NON ESPORRE A PIOGGIA E UMIDITA'
- WARNING ELECTRIC SHOCK RISK DO NOT EXPOSE TO RAIN OR MOISTURE
- SPIEDINI (11)
- SUGGERIMENTI
- ENGLISH: SAFETY INSTRUCTIONS
- GENERAL INFORMATION
- G10219
- CONTROL PANEL
- COOKING
- FUNCTIONING
- MANUAL FUNCTION
- PRESET PROGRAMS FUNCTION
- ACCESSORIES
- GREASE COLLECTING TRAY (5)
- HOLED TRAY (6) and AIR FRYER TRAY (13)
- ROTISSSERIE (9)
- BASKET (10)
- SKEWERS (11)
- TIPS
- SETTINGS
- CLEANING - Clean after every use. Unplug the unit from the electrical outlet and allow each part to cool down before starting any cleaning procedure.
- TECHNICAL FEATURES
- PORTUGUÊS: ADVERTÊNCIAS
- PINCHOS (11)
- FONCTIONNEMENT MANUEL
- BROCHETTES (11)
Brand : G3 Ferrari
Model : Friggisano Lux 13 G10219
Category : Deep fryer