
Classic GT - Coffee machine GAGGIA - Free user manual and instructions
Find the device manual for free Classic GT GAGGIA in PDF.

| Product type | Espresso coffee machine |
| Brand | GAGGIA |
| Model | Classic GT |
| Body material | Steel |
| Dimensions (W x H x D) | 260 x 423 x 416 mm |
| Weight | 17.6 kg |
| Water tank capacity | 2 liters |
| Coffee pump pressure | 15 bars |
| Steam pump pressure | 15 bars |
| Coffee boiler | Brass, 120 ml |
| Steam boiler | Stainless steel, 900 ml |
| Cup warmer | Built-in |
| Functions | Automatic and manual pre-infusion, programmable dosing (PRESET), steam for milk frothing, hot water |
| Included filters | Single cup, double cup, blind filter |
| Safety system | Thermal cutoff, overpressure valve |
| Control panel | Front panel with LED display and levers |
| Cable length | 1200 mm |
| Rated voltage | 230 V ~ 50 Hz |
| Warranty | See included leaflet |
| Support | www.gaggia.com |
Frequently Asked Questions - Classic GT GAGGIA
User questions about Classic GT GAGGIA
0 question about this device. Answer the ones you know or ask your own.
Ask a new question about this device
Download the instructions for your Coffee machine in PDF format for free! Find your manual Classic GT - GAGGIA and take your electronic device back in hand. On this page are published all the documents necessary for the use of your device. Classic GT by GAGGIA.
USER MANUAL Classic GT GAGGIA
natural_image
Exterior view of a Gaggia LEA 1500 espresso machine (no signage or text beyond branding)ENGLISH
FRANÇAIS
ESPAÑOL
GAGGIA CLASSIC GT
EG3500 (SIN046)
User manual
Mode d'emploi
When using electrical appliances, basic safety precautions should always be followed, including the following:
- Read all instructions.
- Do not touch hot surfaces. Use handles or knobs.
- To protect against fire, electric shock and injury to persons do not immerse cord, plugs, or appliance in water or other liquid.
- Close supervision is necessary when the appliance is used by or near children.
- Unplug from outlet when not in use and before cleaning. Allow to cool before putting on or taking off parts, and before cleaning the appliance.
- Do not operate any appliance with a damaged cord or plug or after the appliance malfunctions, or has been damaged in any manner. Return appliance to the nearest authorized service facility for examination, repair or adjustment.
- The use of accessory attachments not recommended by the appliance manufacturer may result in fire, electric shock or injury to persons.
- Do not use outdoors.
- Do not let cord hang over edge of table or counter, or touch hot surfaces.
- Do not place on or near a hot gas or electric burner, or in a heated oven.
- Always attach plug to appliance first, then plug cord into wall outlet. To disconnect, turn any control to "off", then remove plug from wall outlet.
- Do not use appliance for other than intended use.
- Save these instructions.
SAVE THESE INSTRUCTIONS
CAUTION
This appliance is for household use only. Any servicing, other than cleaning and user maintenance, should be performed by an authorized service center. Do not immerse machine in water. To reduce the risk of fire or electric shock, do not disassemble the machine. There are no parts inside the machine serviceable by the user. Repair should be done by authorized service personnel only.
-
Check voltage to be sure that the voltage indicated on the nameplate corresponds with your voltage.
-
Never use warm or hot water to fill the water tank. Use cold water only.
-
Keep your hands and the cord away from hot parts of the appliance during operation.
-
Never clean with scrubbing powders or harsh cleaners. Simply use a soft cloth dampened with water.
-
For optimal taste of your coffee, use purified or bottled water.
-
Do not use caramelized or flavored coffee beans.
INSTRUCTIONS FOR THE POWER SUPPLY CORD
A. A short power-supply cord (or detachable power-supply cord) is to be provided to reduce risks resulting from becoming entangled in or tripping over a longer cord.
B. Longer detachable power-supply cords or extension cords are available and may used if care is exercised in their use.
C. If a long detachable power-supply cord or extension cord is used,
-
The marked electrical rating of the detachable power-supply cord or extension cord should be at least as great as the electrical rating of the appliance
-
If the appliance is of the grounded type, the extension cord should be a grounding-type 3-wire cord.
-
The longer cord should be arranged so that it will not drape over the counter top or table top where it can be pulled on by children or tripped over.
Important safety information
This machine is equipped with safety features. Nevertheless, read and follow the safety instructions carefully and only use the machine as described in these instructions, to avoid accidental injury or damage due to improper use of the machine. Keep this safety booklet for future reference.
Warning
General
- Check if the voltage indicated on the machine corresponds to the local mains voltage before you connect the appliance.
- Connect the machine to an earthed wall socket.
- Do not let the power cord hang over the edge of a table or worktop and do not let it touch hot surfaces.
- To avoid the danger of electric shock, never immerse the machine, mains plug or power cord in water or any other liquid.
- Do not pour liquids on the power cord connector.
- To avoid the danger of burns, keep body parts away from hot water jets produced by the machine.
- Do not touch hot surfaces. Use handles and knobs.
-
Switch off the machine with the main switch located on the back (if present) and remove the mains plug from the wall socket:
-
If a malfunction occurs.
-
If you are not going to use the appliance for a long time.
• Before you clean the machine. -
Pull at the plug, not at the power cord.
- Do not touch the mains plug with wet hands.
- Do not use the machine if the mains plug, the power cord or the machine itself is damaged.
- Do not make any modifications to the machine or its power cord.
- Only have repairs carried out by a service center authorized by Gaggia to avoid a hazard.
- The machine should not be used by children younger than 8 years old.
- This machine can be used by children aged from 8 years and above and by persons with reduced physical, sensory or mental capabilities or lack of experience and knowledge if they have been given supervision or instruction concerning use of the machine in a safe way and if they understand the hazards involved.
- Cleaning and user maintenance shall not be made by children unless they are older than 8 and supervised.
- Keep the machine and its cord out of the reach of children aged less than 8 years.
- Children should be supervised to ensure that they do not play with the machine.
- Be careful when you dispense hot water. Dispensing may be preceded by small jets of hot water. Wait until the end of the dispensing cycle before you remove the hot water dispensing spout.
Caution
General
- This machine is intended for normal household use only. It is not intended for use in environments such as staff kitchens of shops, offices, farms or other work environments.
-
Always put the machine on a flat and stable surface. Keep it in upright position, also during transport.
-
Do not place the machine on a hotplate or directly next to a hot oven, heater or similar source of heat.
- Only put ground coffee in the filter holder. Putting coffee beans, instant coffee, unroasted coffee beans or any other substance in the filter holder may cause damage to the machine. In this case repair is not covered by warranty.
- Let the machine cool down before you insert or remove any parts. The heating surfaces may retain residual heat after use.
- Never touch the water drain hose (if any) when using the machine, since it could be hot. Let it cool down first.
- Never fill the water tank with warm, hot or sparkling water, as this may cause damage to the water tank and the machine.
- Never use souring pads, abrasive cleaning agents or aggressive liquids such as petrol or acetone to clean the machine. Simply use a soft cloth dampened with water.
- Do not keep the machine at temperatures below 0^ C/ 32^ F. Water left in the heating system may freeze and cause damage.
- Do not leave water in the water tank when you are not going to use the machine for a long period of time. The water can become contaminated. Use fresh water every time you use the machine.
- Never use any accessories or parts from other manufacturers or that Gaggia does not specifically recommend. If you use such accessories or parts, your warranty becomes invalid.
- Regular cleaning and maintenance prolongs the lifetime of your machine and ensures optimum quality and taste of your coffee.
- The machine is exposed continuously to moisture and coffee. Therefore it is very important to regularly clean and maintain the machine as described in the user manual and shown on the website. If you do not perform these cleaning and maintenance procedures, your machine eventually may stop working. In this case repair is not covered by warranty.
- Do not clean the filter holder in the dishwasher and do not use washing-up liquid or a cleaning agent to clean it. This may cause the filter holder to malfunction and may have a negative effect on the coffee taste.
- Do not dry the brew group with a cloth to prevent fibers from collecting inside the brew group.
- Do not remove the filter holder while brewing coffee. Hot water drips may spill out during the warm-up phase of the brew group.
- The machine shall not be placed in a cabinet when in use.
Machines with professional steam wand
Warning
- To avoid the danger of burns, be aware that dispensing may be preceded by small jets of hot water.
- Never touch the professional steam wand with bare hands, as it may become very hot. Use the appropriate protective handle only.
Caution
- After frothing milk, quickly clean the professional steam wand by dispensing a small quantity of hot water into a container.
Electromagnetic fields (EMF)
This machine complies with all applicable standards and regulations regarding exposure to electromagnetic fields.
Recycling
- This symbol means that this product shall not be disposed of with normal household waste (2012/19/EU).
- Follow your country's rules for the separate collection of electrical and electronic products. Correct disposal helps prevent negative consequences for the environment and human health.
Warranty and support
For service or support, contact your local dealer or an authorized service center. Contact details are included in the warranty booklet supplied separately or visit www.gaggia.com.
Thank you for choosing Gaggia Classic GT!
Built for the home baristas who aspire for more, this machine is for all of you who demand cutting-edge performances in their own home.
Classic GT will give you the possibility to create your bespoke coffee experience, making unforgettable moments and defining your own rituals.
Before using it for the first time, carefully read this user manual - including the safety section. It provides all the information needed to install, use and clean your machine and keep the instructions for future reference.
Contents
Icons and display 10
Machine overview 11
Control panel 11
Multifunction buttons 11
Control panel toggle switches 11
Filters supplied 12
2-cup filter 12
1-cup filter 12
Blind filter 12
Inserting the filter holder 13
Adjusting the grid height 13
Brew pressure adjustment 13
First installation 14
First use or after a period of inactivity of more than 2 weeks ____ 15
Coffee preparation 16
Coffee brewing 16
Coffee brewing with automatic pre-infusion 17
Coffee brewing with manual pre-infusion 17
Coffee brewing with PRESET function 18
Enabling and disabling PRESET function 18
Setting and saving the quantity of your coffee 18
How to lower the temperature of the coffee and hot water/steam boilers 19
Frothing milk to prepare a cappuccino 19
Dispensing hot water 20
Machine settings 20
Automatic pre-infusion 20
Wake-up timer 20
Stand-by 21
Ecomode 21
Button sound 21
Temperature units 21
Steam temperature 21
Cleaning and maintenance 22
Cleaning table 22
Cleaning the steam wand 22
Cleaning the brew unit (backflushing) 22
The filter and filter holder cleaning 23
Cleaning the screen 24
Cleaning the grid and drip tray 24
Cleaning the water tank 24
Warning icons 24
Error code key 24
Troubleshooting 25
Technical specifications 27
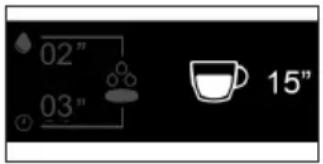
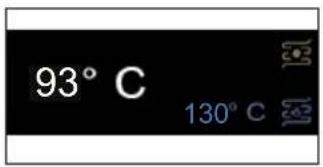
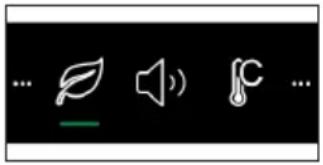
Icons and display
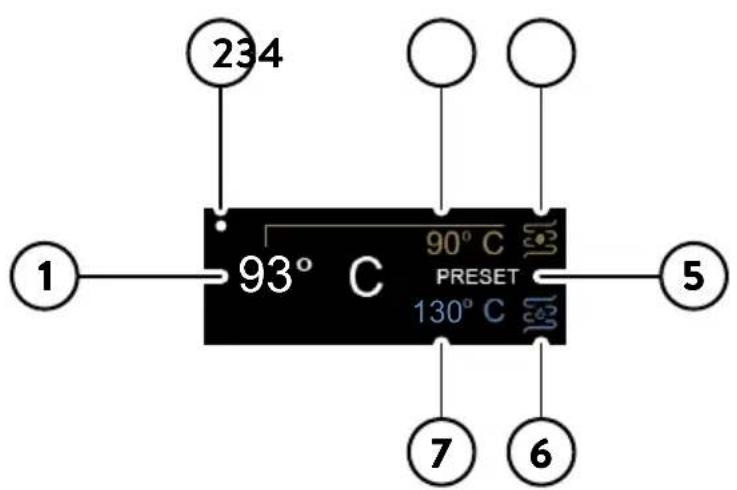

1 Factory set coffee brew temperature
6 Hot water/steam boiler
2 Wake-up time on 7 Factory set steam temperature
3 Actual temperature 8 Steam/water boiler off
4 Coffee boiler 9 Eco-mode on
5 PRESET on
Machine overview
| 1 SETTING/BACK button 18 Power cord socket |
| 2 Navigation button (-) 19 Main power button |
| 3 Navigation button (+) 20 Power cord |
| 4 OK button 21 1 cup filter |
| 5 ON/OFF toggle switch 22 2 cups filter |
| 6 Pre-infusion toggle switch 23 Blind filter |
| 7 Coffee toggle switch 24 Filter holder |
| 8 Water toggle switch 25 Tamper |
| 9 Steam toggle switch 26 Drip tray |
| 10 Water tank lid 27 Drip tray grid |
| 11 Water tank 28 Telescopic drain pipe |
| 12 Cup warmer 29 Screen |
| 13 Steam knob 30 Coffee brew unit |
| 14 Steam wand 31 Water dispenser |
| 15 Steam wand handle 32 Measuring scoop |
| 16 Steam wand nozzle 33 Manometer |
| 17 Brew pressure adjustment screw |
Control panel
Multifunction buttons
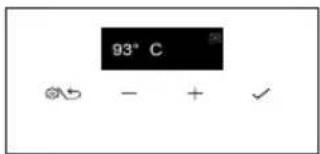
| 1 | SETTING/BACK 📋 button | Click to enter the setting menu or to go back to the previous screen. |
| 2/3 | Navigation + and — buttons | Click to move throughout the menu and to adjust the brew temperature. |
| 4 | OK √ button | Click to confirm the selected option. |
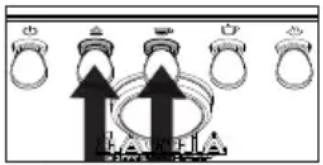
Control panel toggle switches
| 5 | ON/OFF toggle switch | Press to turn the machine on and off.The toggle lights up when the machine is on. |
| 6 | Pre-infusion toggle switch | Press to activate the automatic pre-infusion.When the pre-infusion is activated the toggle lights up.Hold down to activate the manual pre-infusion. |
| 7 | Coffee toggle switch | Press to brew.The toggle is lit when the machine is ready to brew, blinks when it is not at the set temperature. |
| 8 | Water toggle switch | Press to dispense water.The toggle is lit when the machine is ready to dispense water, blinks when it is not at the set temperature. |
| 9 | Steam toggle switch | Press to activate the steaming function, the machine starts warming up.The toggle lights up when the machine is ready to dispense steam, is blinking when it is not at the set temperature. |
natural_image
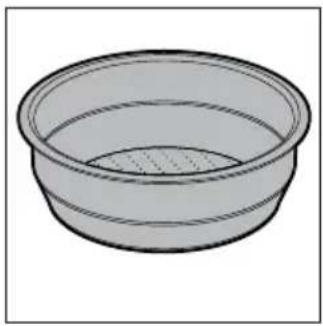
Simple line drawing of a circular basin or filter with no text or symbolsFilters supplied
2-cup filter
The two-cup filter is already fitted to the filter holder to brew 2 cups of espresso with pre-ground coffee.
natural_image
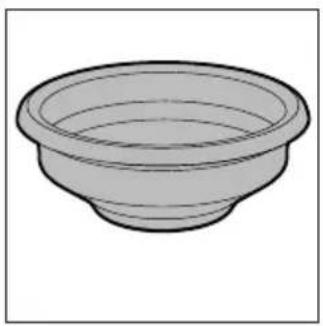
Simple line drawing of a bowl (no text or symbols)1-cup filter
This filter is suited to brew a single cup of espresso with pre-ground coffe.
natural_image
Simple line drawing of a bowl (no text or symbols)Blind filter
To clean the brew group or adjust the brew pressure by means of the adjustment screw (17).
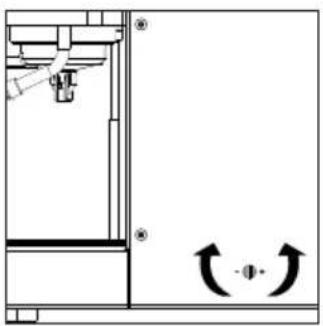
Inserting the filter holder
Insert the filter holder into the brew group from below, aligning the reference mark on the handle of the filter holder with the symbol ● on the housing, rotating from left to right until the filter holder locks into position, i.e. when the reference mark on the handle and the triangle ▼ on the housing are perfectly aligned or slightly shifted to the right.
natural_image
Diagram of a sewing machine with arrows indicating mechanical components (no text or symbols)Adjusting the grid height
To reduce the cup clearance and use smaller espresso cups.
1 Place the telescopic drain tube at its shortest position.
natural_image
Diagram of a 3D printer with a device and mechanical components, showing a press or printer setup (no text or symbols visible)2 Lift the drip tray and position it via the dedicated guides as shown in the drawing
natural_image
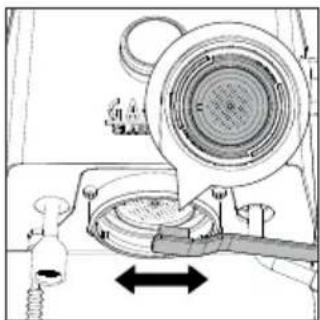
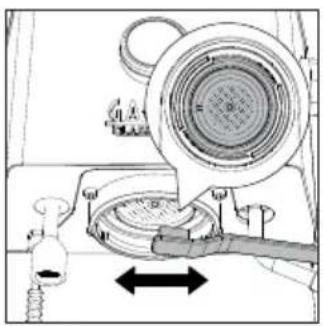
Pure mechanical assembly diagram without any text, numbers, or symbolsBrew pressure adjustment
It is possible to adjust the brew pressure by rotating the external adjustment screw (17) which is factory-set at 9 bars.
To adjust the brew pressure:
1 Disable the PRESET function if active.
2 Insert in the brew unit the filter holder with the blind filter.
3 Press the espresso toggle switch and read the bars on the manometer (34).
4 With a screwdriver rotate anticlockwise (-) to reduce the pressure or clockwise (+) to increase it.
5 Stop the brewing by pressing the espresso toggle switch again when you reach the desired bars on the brew gauge.
6 Remove the filter holder and replace the blind filter with the 1 or 2 cups filter.
7 The machine is now ready for brewing.
Note: do not adjust the brew pressure by using the 1 cup or 2 cups filters. Use only the blind filter.
Note: to avoid the risk of burns, do not remove the filter holder before point 5.
Note: the machine is equipped with a protection system so that if you activate the coffee dispensing with the blind filter inserted for a time longer than 90 seconds, the alarm E16 appears. This is normal, not a product defect.
First installation
Note: this machine has been tested with coffee. Although it has been carefully cleaned, there may be some coffee residues left. We guarantee, however, that the machine is absolutely new.
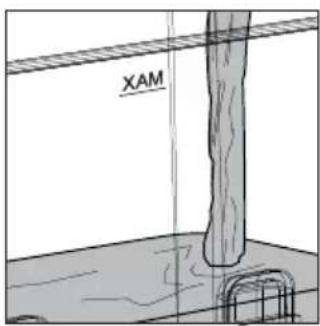
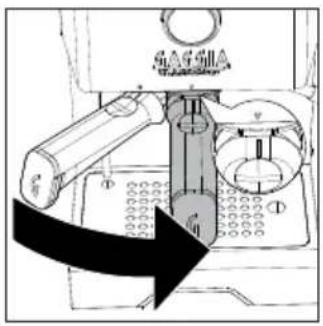
1 Remove the water tank, rinse it out and fill it with cold water to the MAX level. It is recommended to check the water tank is correctly inserted.
natural_image
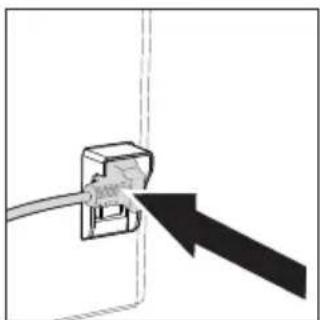
Diagram of a cable inserted into a socket with an arrow pointing to it (no text or symbols present)2 Insert the power cord, plug into a wall socket with suitable supply voltage.
natural_image
Pure electrical circuit lines without any symbols3 Switch the power button, located on the rear of the machine, to "I".
4 The display will light up and show the historical Gaggia logo, before turning off and going into standby.

natural_image
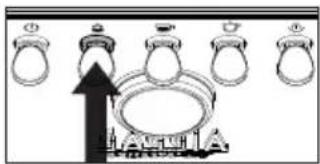
Illustration of ring rings and a central object with no visible text or symbols5 Press the ON/OFF toggle switch to start the machine, the corresponding LED will light up.
6 Place a glass under the brew group and the hot water wand, press the √ navigation button and follow the instructions until the installation is completed.
7 The display shows the factory-set coffee brew temperature and the relevant growing value until the set temperature is reached.
8 The set temperature can be changed using the and navigation buttons.
9 Once the desired temperature has been reached, the coffee and hot water toggle switches light up steadily and the machine is ready for the first brewing.
10 Before brewing, follow the instructions in the chapter "First Use".
First use or after a period of inactivity of more than 2 weeks
Note: new coffee machines may have an unpleasant smell. This is normal, not a product defect. Please follow the instructions below. Water dispensed during this process must be disposed of and cannot be used for feeding.
Note: to protect the machine from limescale, you must not use too hard water. If required, we recommend using a water softener.
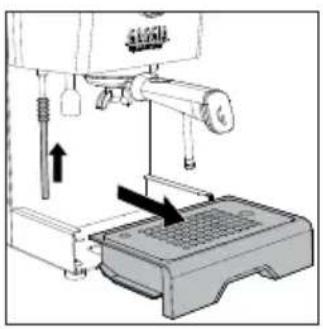
natural_image
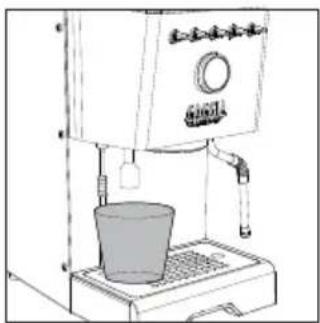
Line drawing of a coffee maker with a cup on a base (no text or symbols)1 Place a large container under the hot water wand.
2 Remove the water tank rinse it out and fill it up to the MAX level.
3 Press the hot water toggle switch and dispense one tank of water from the water dispenser. If the water dispensing stops, just press the water toggle switch again when the LED is steady on until the water alarm appears on the display. Emptying the entire water tank may take a few minutes.
4 Fill the water tank again up to the MAX level.
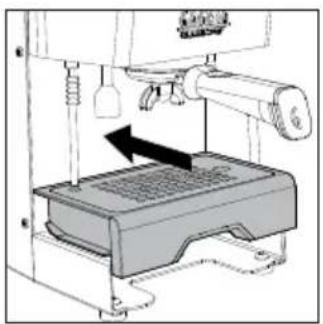
natural_image
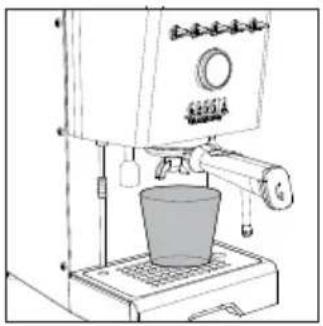
Line drawing of a coffee maker with a cup on a base (no text or symbols)5 Insert the filter holder into the brew group and place a large container under it.
6 Press the coffee toggle switch and dispense water from the brew group. If the water dispensing stops, just press the coffee toggle switch again until the water alarm appears on the display.
7 Remove the filter holder and rinse it under running water.
8 Refill the water tank up to the MAX level.
9 Press the steam toggle switch, when it is steady on, open the steam knob and dispense steam for about one minute.
10 Turn the machine off and on again to ensure that all information is properly saved. The machine is now ready for use.
Coffee preparation
Make sure to use an appropriate grind setting for espresso brewing. For proper grinding, we suggest you use our MDF55 coffee grinder.
Nota: if the set temperature is reduced when the machine is already warmed up, to speed up the cooling follow the instructions in the chapter "How to lower the temperature of coffee boilers and water/steam".
Coffee brewing
The filter holder is factory fitted with a 2-cup filter.
To brew the first coffee, the filter holder must be preheated.
1 Insert the filter holder with the 1 or 2-cup filter into the brew group.
2 Place a cup under the filter holder and press the coffee toggle switch, when it is steady on, dispensing a cup of water (approx. 150 ml).
3 Remove the filter holder and wipe away any traces of water.
4 Fill the filter holder with 1 pre-ground coffee measuring scoop for a single coffee or with 2 measuring scoops for a double coffee taking the reference mark inside the filter as a reference. Tap the filter holder sideways to even out coffee ground powder.

natural_image
Illustration of a hand using a tool to lift a pipe into a container with an arrow indicating direction (no text or symbols)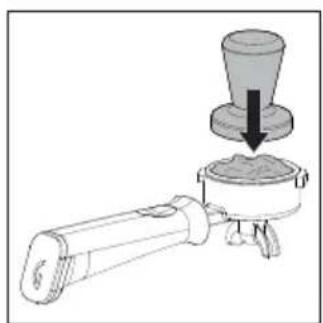
natural_image
Diagram of a mechanical device with a conical component and a base, showing no text or symbols.5 Press the coffee using the appropriate tamper provided. Tamping shall be done in a uniform way, and the coffee surface must be well levelled, parallel to the filter holder edge.
6 Clean the filter holder edge of any coffee residues.
7 Insert the filter holder correctly until it locks into place as described in the chapter "Inserting the filter holder".
8 Place 1 or 2 cups under the filter holder.
9 Wait until the coffee toggle switch is steadily lit before pressing it to start brewing.

natural_image
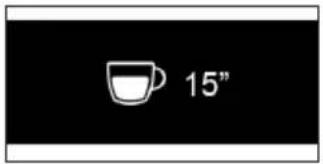
Technical diagram of a mechanical device with a central component and directional arrows indicating movement (no text or symbols)10 When brewing, the display shows the brewing time in seconds.
11 Once the desired quantity is reached, press the coffee toggle switch again to stop brewing.
12 When brewing is over, remove the filter holder and empty the puck from the filter, as well as any residue from both gasket and screen.
13 The display will now show the coffee brew temperature again.
Note: wait about 10 seconds before removing the filter holder. Remove it slowly and carefully by turning it leftwards. Be careful not to scald yourself with any water left on top of the coffee puck.
Note: if a small quantity of water remains in the filter holder, this is considered absolutely normal and is due to the filter holder features.

Coffee brewing with automatic pre-infusion
It is possible to enable the automatic pre-infusion, and change the PRESET pre-infusion via the machine's menu.
1 To activate the automatic pre-infusion press the pre-infusion toggle switch which will light up.
2 When pressing the coffee toggle switch to start brewing, the display will show the PRESET pre-infusion and the brewing time.
3 Once the desired quantity has been reached press the coffee toggle switch again to stop brewing.
Coffee brewing with manual pre-infusion
Warning: to avoid the risk of burns, do not remove the filter holder after you release the pre-infusion lever but only after ending the brewing.
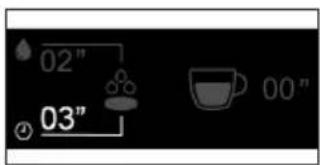
During brewing with manual pre-infusion, the display will show all stages in succession - wetting of the pre-ground coffee with water - soaking time - actual brewing.
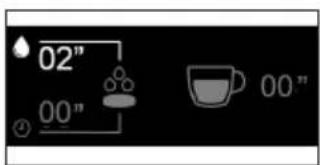
1 Hold down the pre-infusion toggle switch which will start flashing.
2 The display will show the coffee wetting time and the corresponding symbol
3 Once the desired wetting time (maximum 20 seconds) is reached, release the pre-infusion toggle switch.
4 The seconds will continue to run indicating the desired soaking time and the corresponding symbol ⏻
5 After the desired soaking time (maximum 15 seconds) has elapsed, press the coffee toggle switch to start the actual high-pressure brewing.
6 By pressing the coffee toggle switch, the seconds relating to brewing begin to run.
7 When the desired quantity has been reached, press the coffee toggle switch again to stop brewing.
Note: the coffee toggle switch is disabled while holding down the pre-infusion toggle switch.
Note: once the maximum soaking time has elapsed, the machine cancels the dispensing.
Coffee brewing with PRESET function
By enabling this function the machine will automatically stop brewing when a previously set quantity is reached.
Enabling and disabling PRESET function
natural_image
Diagram showing five handbags with upward arrows and a central ring, no text or symbols present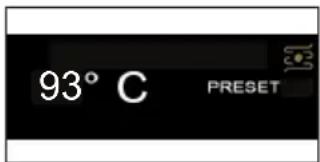
1 In order to enable or disable this function, press and hold down the pre-infusion and the coffee toggle switches simultaneously for a few seconds.
2 The word PRESET on the display will indicate when the relevant function is active.
3 With this function active, the machine will brew the set amount of coffee at each coffee request.
4 Disabling this function will return you to manual mode, where the machine will prompt you to press the coffee toggle switch again each time to stop brewing.
Setting and saving the quantity of your coffee
The machine leaves the factory with a PRESET coffee quantity.
It is possible to change this quantity at any time by following the procedure described below.

1 Hold down the coffee toggle switch for a few seconds, release it when the brewing starts and on the display the timer with the word PRESET will appear flashing.
1 Hold down the coffee toggle switch for a few seconds, release it when the brewing starts and on the display the timer with the word PRESET will appear flashing.
2 Press again the coffee toggle switch once the desired quantity has been reached.
3 A confirmation tick will appear on the display, indicating that the new quantity has been saved, overwriting the one previously set.
4 The display will return to the main screen with the PRESET function active.
Note: the PRESET function saves the volume and not the time. The timer on the display can indicate a different time for the same volume of coffee, due to the type of coffee, the amount of ground coffee or the coarseness of the grind.
Note: the PRESET function is automatically disabled when a coffee with manual pre-infusion is requested, and restored when the brewing process is completed.
How to lower the temperature of the coffee and hot water/steam boilers \_\_\_\_
Coffee boiler
1 Place a cup under the brew group without the filter holder inserted.
2 Press the coffee toggle switch and dispense a cup of water.
3 Press the coffee toggle switch again to stop dispensing water.
4 Repeat if the machine has not yet reached the desired temperature visible on the display.
Hot water/steam boiler
1 Place a cup under the water dispenser.
2 Press the water toggle switch and dispense a cup of water.
3 Press the water toggle switch again to stop dispensing water.
4 Repeat if the machine has not yet reached the desired temperature.
Frothing milk to prepare a cappuccino —
To ensure a perfect result, we recommend using cold whole milk (at about 5^ C) with a protein content of at least 3% and a fat content of at least 3.5%. Good results can also be obtained using semi-skimmed cow's milk, some types of lactose-free milk, soy, almond as well as with oat beverages.

natural_image
Technical line drawing of a mechanical device with no visible text or symbols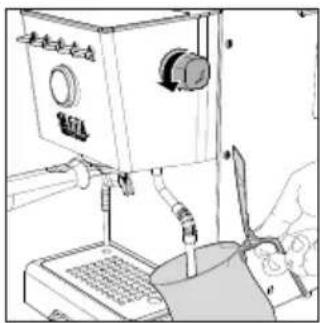
natural_image
Line drawing of a laboratory instrument with control panel and tubing (no text or symbols)1 Press the steam toggle switch, which will start flashing until it has reached the set temperature visible on the display.
2 When the toggle switch lights up steadily, the machine is ready for dispensing steam.
3 Before starting frothing milk, remove any residual condensation by opening the steam knob until only steam is dispensed.
4 Fill a jug with cold milk about 1/3 full, insert the steam wand into the milk and start frothing milk by opening the knob again.
5 When you obtain the desired milk froth, close the knob to stop steam dispensing and remove the jug.
6 Clean the circuit by dispensing a little steam again in order to remove any milk residue and wipe the wand with a damp cloth.
7 Press the steam toggle switch to exit the function and the LED will switch off.
Warning: dispensing may be preceded by small jets of hot water. The dispensing tube may reach high temperatures: never touch it with bare hands.

Dispensing hot water
1 Place a cup or tea glass under the hot water wand.
2 Press the hot water toggle switch when it is steady on and, once desired amount is reached, press it again to stop dispensing. Press again if you need more water.
Note: water can be dispensed even if the water toggle switch is off or blinking. In this case, the water temperature may not be optimal.
Warning: dispensing may be preceded by small jets of hot water. The dispensing tube may reach high temperatures: never touch it with bare hands.
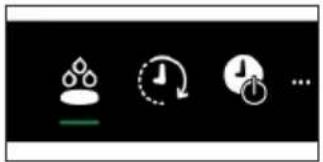
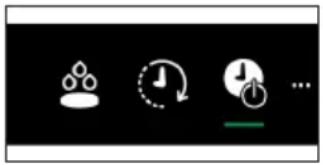
Machine settings
By pressing the button you can activate or modify some of the machine settings using the and the , navigation buttons:
- Automatic pre-infusion
- Wake-up timer
- Stand-by
- Ecomode
- Button sound
- Temperature units
- Steam temperature


natural_image
Three white icons on black background: water droplet, clock with refresh, and power button (no text or symbols)Automatic pre-infusion
Is it possible to set 3 pre-infusion levels by selecting the symbol

LGT Light roast
MED Medium roast
DRK Dark roast

natural_image
Three white icons on black background: a gear, a clock with refresh, and a timer with plus sign (no text or symbols)Wake-up timer
By selecting the symbol Ⓜ you can enable or disable the machine wake-up function.
To enable this function select ON, confirm, select the symbol to set the time and then the symbol to set the wake-up time ( it is adjustable in 15-minute increments). A white dot appears in the top left of the display to show the wake-up timer is on.
natural_image
Pure electrical circuit symbols without any text or labelsStand-by
The machine is equipped with an automatic 30-minute power-off function.
Select the symbol to disable the function or change the stand-by timer.
Ecomode
By selecting the symbol 📄 you can enable or disable the Ecomode function.
With the Ecomode function active, the steam/hot water boiler is disabled. Steam/hot water can still be dispensed on demand, but it will take longer to bring the boiler to the required temperature for dispensing. By doing so, the Ecomode is automatically disabled. It can be activated again via the setting menu.
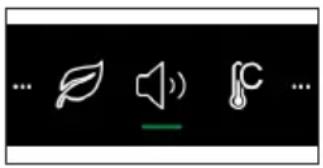
Button sound
To switch button sound on or off, select the symbol
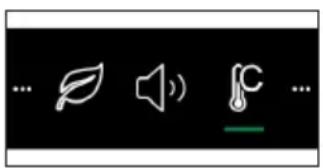
Temperature units
By selecting the symbol you can choose the temperature unit between C^ and F^ .
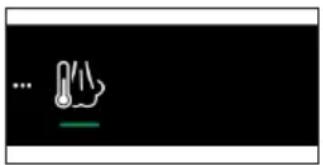
Steam temperature
By selecting the symbol, you can change the steam temperature setting.
Cleaning and maintenance
Regular cleaning and maintenance keep the machine in perfect conditions and ensure perfect coffee flavour, a constant coffee flow and excellent milk froth for a long period of time.
Cleaning table
Part description After use Daily Weekly Monthly
| Cleaning the steam wand | ● | |
| Cleaning the brew unit | ● | |
| Cleaning the filter and the filter-holder | ● | |
| Cleaning the screen | ● | |
| Cleaning the grid and drip tray | ● | |
| Cleaning the water tank | ● |
natural_image
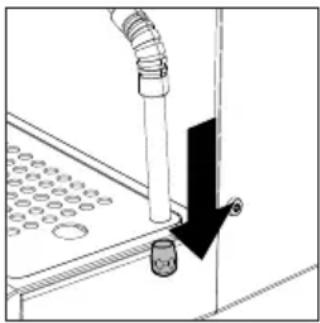
Diagram of a mechanical assembly with a pipe and valve, showing a downward arrow indicating motion (no text or symbols present)Cleaning the steam wand
After each milk frothing:
1 Clean the steam wand with a damp cloth. For a more thorough cleaning unscrew the nozzle and wash it under running water and screw it back.
2 Open the steam knob for a few moments to remove any milk residues and close the knob again.
Cleaning the brew unit (backflushing)
Monthly:
We recommend to clean the coffee brew unit with the Gaggia cleaning tablets "Coffee oil remover" to remove coffee oil residues.
1 Ensure the drain pipe is correctly inserted (28).
2 Insert the blind filter (23) into the filter holder. Split a Gaggia cleaning tablet in 4 pieces and insert it in the blind filter.
3 Insert the filter holder (24) into the brew unit (30).
4 Press the coffee toggle switch to activate the pump and create the required pressure.
5 Wait 5 seconds before pressing the coffee toggle switch again to disable the pump.
6 Water mixed with detergent will flow into the drip tray through the drain pipe. Wait about 30 seconds.
7 Repeat point 4 to 6 for at least 10 times until clear water flows from the drain pipe.
8 Remove the filter holder and the blind filter and wash them carefully under hot tap water.
9 Insert the filter holder with the blind filter again into the coffee brew unit and repeat points 4 and 5 for at least 10 times to complete the rinsing cycle.
10 Remove the filter holder and clean the screen (29) by using a brush as described in the relevant chapter.
11 Press the coffee toggle switch and let a cup of hot water ( ca. 150ml) flow from the brew unit.
12 Empty and wash the drip tray under tap water.
13 The machine is now ready for use.
Note: the machine is equipped with a protection system so that if you activate the coffee dispensing with the blind filter inserted for a time longer than 90 seconds, the alarm E16 appears. This is normal, not a product defect.
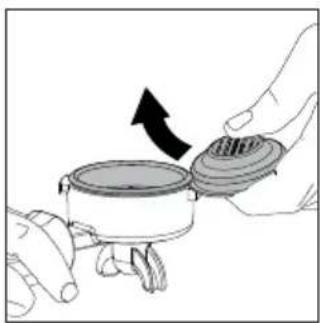
The filter and filter holder cleaning
Filters must be kept clean to ensure a perfect result.
Daily:
1 Remove the filter from the filter holder as described in the picture on the side.
natural_image
Illustration of hands holding a cooking pot with a lid and arrow indicating rotation (no text or symbols)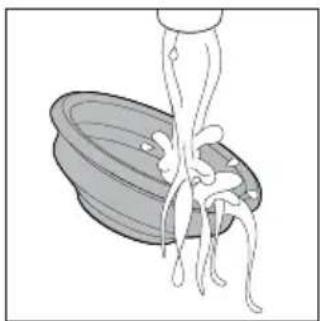
natural_image
Illustration of a spoon lifting a bowl with chopsticks (no text or symbols)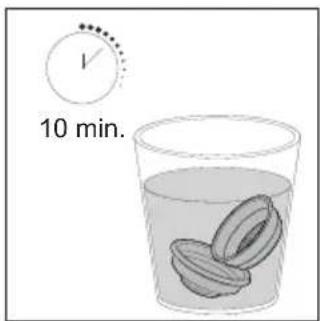
2 Wash using lukewarm water.
3 If you notice a malfunction when brewing coffee, steep the filters in boiling water for 10 minutes and then rinse them with running water.
4 To clean the filters more thoroughly, we recommend using the GAGGIA cleaning tablets specifically designed to keep your machine in perfect working order.
Warning: the filter must only be replaced when the filter holder has cooled down completely to avoid scalds.
natural_image
Technical diagram of a mechanical assembly with no visible text or symbolsCleaning the screen
After each coffee brew:
1 Remove the filter holder from the brew group.
2 Remove any coffee grounds from the screen using a brush.
3 Clean with hot water by pressing the coffee toggle switch and dispensing a cup of water.
Cleaning the grid and drip tray
Remove the drip tray and grid and wash them under running water. Do not use abrasive products.
Cleaning the water tank
1 Remove the water tank and wash it under running water.

natural_image
Simple graphic of a blue water droplet with a red diagonal line, set against a black background (no text or symbols)Warning icons
The water tank needs to be filled with water.
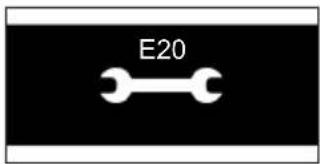
Error code key
Open the steam knob and leave it open until the steam flow is almost over (about 2 minutes). Close the steam knob. Turn the machine off and on again using the main switch. If the error persists, you need to contact an authorized service center.
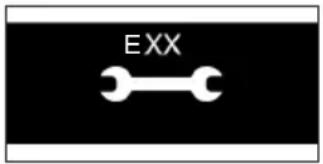
Turn the machine off and on again using the main switch. If inserted, do not remove the filter holder before turning the machine off. Try repeating the operation a couple of times. If the error persists, you need to contact an authorized service center or the distributors in your country, reporting the error code shown on the display above the symbol. Contact details are available on the website www.gaggia.com.
Troubleshooting
This chapter outlines the most common problems you may encounter while using the machine. If you are unable to solve the problem using the information provided below, visit the FAQ sections on www.gaggia.com or contact either the Customer Service Centre or the local distributors in your countrye.
Problem Cause Solution
| The milk does not froth. The type of milk used is not suitable for foaming. | The amount and the quality of froth vary depending on the type of milk (Chapter "Frothing milk to prepare a cappuccino"). | |
| No coffee is brewed after pressing the coffee toggle swtich. | The filter holder is clogged. Press the coffee toggle swtich again. Turn the machine off and let it cool down (approx. 1 hour). Then remove and wash the filter holder thoroughly. If the problem persists, contact the service centre. | |
| The display shows the water alarm even if the water tank is not completely empty. | It is a normal behavior of the machine requiring a reserve of water to avoid possible malfunctions. | Refill the water tank up to the MAX level. |
| Coffee is too cold. The filter holder is not inserted for preheating. | Preheat the filter holder (Chapter "Coffee brewing"). | |
| The cups are cold. Place the cups on the cupwarmer. | ||
| The machine is not ready. Wait until the coffee toggle switch is lit steadily. | ||
| The coffee is too much warm even afterwards having lowered the temperature on display. | Tutte le parti della macchina sono calde | To speed up the cooling of the boiler follow the instructions in the dedicated chapter "How to lower the temperature of the coffee and hot water/steam boilers". |
| The coffee is brewed too fast, crema does not form. | There is too little coffee in the filter holder. | Add coffee. |
| The grind is too coarse. Use a finer grind. | ||
| Coffee has not been tamped or tamped too lightly. | Tamp a bit harder with the supplied tamper paying attention to avoid possible gaps. | |
| The coffee is not fresh. Use a different blend. | ||
Problem Cause Solution
| Coffee does not come out or drips only. | The grind is too fine. Use a coarser grind. | |
| Coffee has been tamped too hard in the filter holder. | Tamp the coffee more lightly. | |
| There is too much coffee in the filter holder. | Reduce the quantity of coffee in the filter holder. | |
| The filter in the filter holder is clogged. | Clean the filter (Chapter "The filter and filter holder cleaning"). | |
| Coffee flows out of the rim. | The filter holder is not correctly inserted in the brew group. | Insert the filter holder as described in the relevant chapter. |
| The upper rim of the filter holder is dirty. | Clean the rim of the filter holder. | |
| There is too much coffee in the filter holder. | Reduce the quantity of coffee using the measuring scoop. | |
| The screen gasket is dirty. Clean the screen gasket as described in the relevant Chapter. | ||
| The coffee pod is too wet. | The grind is to coarse. Use a finer grind. | |
| There is too little coffee in the filter rholder. | Add coffee. | |
| It's difficult to remove the filter from the filter holder. | This is typical of professional filter holders, to avoid them being too loose. | Use another by-packed filter upside down as a lever (Chapter "The filter and filter holder cleaning").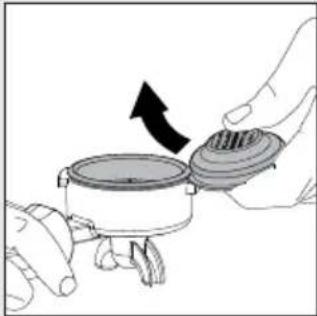 |
| The machine does not turn on. | The machine is not connected to the electric network. | Connect the machine to the electric network. |
| The machine has been just switched off by pressing the ON/OFF switch toggle and it requires a few seconds to complete the procedure. | Wait a few seconds before switch it on again. | |
| The machine does not dispense water. | The water in the boiler has not yet reached the minimum temperature to dispense. | Wait until the water LED is on steadily. |
| Water alarm active. Refill the water tank. | ||
Technical specifications
| Nominal voltage - Power rating - Power supply | See the data plate inside the water tank compartment |
| Machine body material Stainless steel | |
| Dimensions 260 x 423 x 416 mm | |
| Weight 17,6 kg | |
| Power cord length 1200 mm | |
| Control panel Frontale | |
| Water tank 2 liters - Removable | |
| Coffee pump pressure 15 bar | |
| Coffee boiler Brass 120 ml | |
| Steam pump pressure 15 bar | |
| Steam boiler Stainless Steel 900ml | |
| Safety devices Thermal fuse |
IMPORTANT
natural_image
Simple line drawing of a circular basin or filter with no text or symbolsFiltres fournis
Filtre 2 tasses
natural_image
Simple line drawing of a bowl with no text or symbolsFiltre 1 tasse
natural_image
Simple line drawing of a cylindrical bowl or basin (no text or symbols)Filtre aveugle
natural_image
Diagram of a machine tool with arrows indicating movement or force, no visible text or symbolsnatural_image
Diagram of a printer or printer with a device and a base, showing mechanical components and an arrow indicating motion (no text or symbols present)natural_image
Pure technical diagram of a mechanical assembly without any text, numbers, or symbols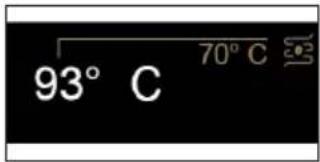


natural_image
Illustration of ring rings and a central object with geometric shapes (no text or symbols)natural_image
Line drawing of a coffee maker with a cup on a base (no text or symbols)natural_image
Line drawing of a coffee maker with a cup and side arm (no text or symbols)natural_image
Illustration of a hand using a tool to interact with a container and pipe (no text or symbols)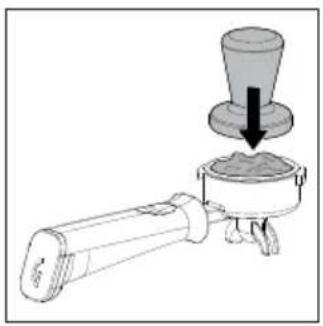
natural_image
Diagram of a portable stove with a lid and a downward arrow indicating process (no text or symbols)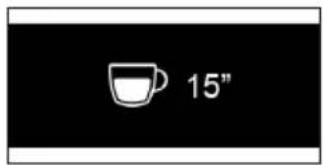
natural_image
Mechanical assembly diagram showing a valve mechanism with a spring and directional arrows (no text or symbols)natural_image
Illustration of a wine glass with three cups and two upward arrows, no text or symbols present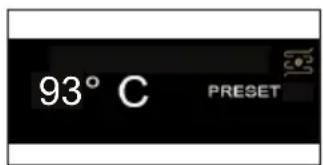
natural_image
Four black-and-white icons representing water drop, refresh, download, and timer (no text or symbols)natural_image
Three white icons on black background: water droplet, clock with hand and arrow, and timer with hour and minute hands (no text or symbols)Wake-up timer
natural_image
Three white icons on black background: water droplet, clock with refresh, and battery with stop/clock (no text or symbols)Stand-by
Mode éco
Son des touches
natural_image
Diagram of a mechanical assembly with a pipe and circular components, showing a downward arrow (no text or symbols present)natural_image
Illustration of hands holding a cooking pot with a lid and arrow indicating rotation (no text or symbols)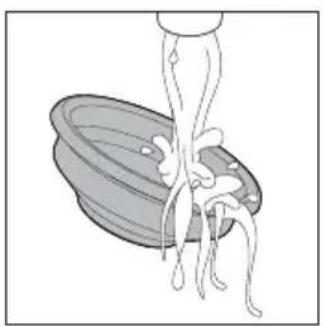
natural_image
Illustration of a person pouring liquid into a bowl (no text or symbols)
natural_image
Diagram of a mechanical device with a dial and lever mechanism (no text or symbols)natural_image
Simple blue water droplet icon with a red diagonal line, set against a black background (no text or symbols)Code d'erreur
natural_image
Simple line drawing of a circular basin or filter (no text or symbols)Filtro de 1 taza
natural_image
Simple line drawing of a bowl (no text or symbols)Filtro ciego
natural_image
Simple line drawing of a bowl or basin (no text or symbols)natural_image
Diagram of a machine tool interacting with a device, showing mechanical components and directional arrows (no text or symbols)natural_image
Diagram of a printer or printer device with a baseplate and mechanical components, showing no text or symbols.natural_image
Pure mechanical diagram showing a vertical assembly with rotational arrows and a base plate (no text or symbols)natural_image
Line drawings of a coffee maker with two views showing its interior and side views (no text or symbols)natural_image
Illustration of a hand pouring liquid into a pipe fitting with an arrow indicating direction (no text or symbols)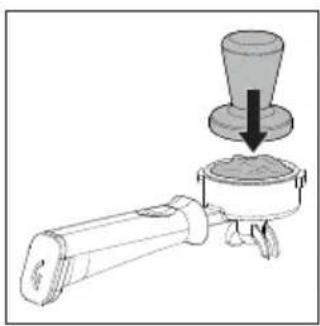
natural_image
Diagram of a coffee maker with a conical cup pouring into a container (no text or symbols)
natural_image
Technical diagram of a mechanical device with gears and a lever, showing alignment arrows (no text or symbols)natural_image
Illustration of a handbag with five circular items, no text or symbols present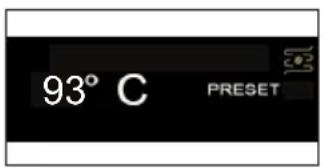
natural_image
Technical line drawing of a mechanical device with no visible text or symbols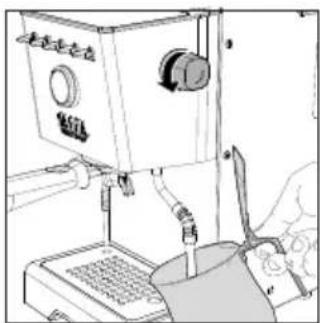
natural_image
Line drawing of a laboratory setup with a test tube, pressure gauge, and control panel (no text or symbols)natural_image
Pure graphical icons for clock, refresh, and timer symbols without any text or labelsnatural_image
Four icons on black background: a robot, clock with downward arrow, a timer, and a play button (no text or symbols)Wake-up timer
natural_image
Pure electrical circuit symbols without any text or labelsStand-by
Modo Eco
natural_image
Pure electrical circuit lines without any symbolsnatural_image
Diagram of a mechanical assembly with a pipe and valve, showing a downward arrow indicating motion (no text or symbols present)natural_image
Illustration of hands holding a cooking pot with a lid and arrow indicating rotation (no text or symbols)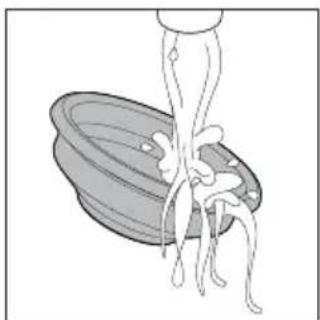
natural_image
Illustration of a spoon lifting a bowl with chopsticks (no text or symbols)
natural_image
Mechanical assembly diagram showing a valve and pump mechanism with no visible text or symbolsnatural_image
Simple blue water droplet icon with a red diagonal line, set against a black background (no text or symbols)Código de error
GAGGIA S.p.A. reserves the right to make any necessary modification.

- GAGGIA CLASSIC GT
- SAVE THESE INSTRUCTIONS
- CAUTION
- INSTRUCTIONS FOR THE POWER SUPPLY CORD
- Important safety information
- Warning
- General
- Machines with professional steam wand
- Electromagnetic fields (EMF)
- Recycling
- Warranty and support
- Contents
- Cleaning and maintenance 22
- Warning icons 24
- Error code key 24
- Troubleshooting 25
- Technical specifications 27
- Icons and display
- Machine overview
- Control panel
- Multifunction buttons
- Control panel toggle switches
- Filters supplied
- 2-cup filter
- 1-cup filter
- Blind filter
- Inserting the filter holder
- Adjusting the grid height
- Brew pressure adjustment
- First installation
- First use or after a period of inactivity of more than 2 weeks
- Coffee preparation
- Coffee brewing
- Coffee brewing with automatic pre-infusion
- Coffee brewing with manual pre-infusion
- Coffee brewing with PRESET function
- Enabling and disabling PRESET function
- Setting and saving the quantity of your coffee
- How to lower the temperature of the coffee and hot water/steam boilers \_\_\_\_
- Coffee boiler
- Hot water/steam boiler
- Frothing milk to prepare a cappuccino —
- Dispensing hot water
- Machine settings
- Automatic pre-infusion
- Wake-up timer
- Stand-by
- Ecomode
- Button sound
- Temperature units
- Steam temperature
- Cleaning and maintenance
- Cleaning table
- Cleaning the steam wand
- After each milk frothing:
- Cleaning the brew unit (backflushing)
- Monthly:
- The filter and filter holder cleaning
- Daily:
- Cleaning the screen
- After each coffee brew:
- Cleaning the grid and drip tray
- Cleaning the water tank
- Warning icons
- Error code key
- Troubleshooting
- IMPORTANT
- Filtres fournis
- Filtre 2 tasses
- Filtre 1 tasse
- Filtre aveugle
- Mode éco
- Son des touches
- Code d'erreur
- Filtro de 1 taza
- Filtro ciego
- Modo Eco
- Código de error
Brand : GAGGIA
Model : Classic GT
Category : Coffee machine