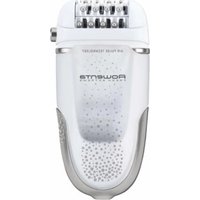
Derma Perfect EP9800 - Electric epilator ROWENTA - Free user manual and instructions
Find the device manual for free Derma Perfect EP9800 ROWENTA in PDF.

| Product type | Electric IPL hair removal device (IPL) |
| Brand | Rowenta |
| Model | Derma Perfect EP9800 |
| Technology | Intense Pulsed Light (IPL) |
| Number of intensity levels | 5 (1 to 5) |
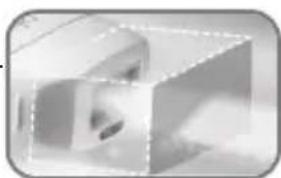
| Disposable lamp capacity | 1000 flashes |
| Safety | Skin tone sensor, Skin contact sensor, Built-in UV filter, Safety lock if skin too dark |
| Allowed use areas | Underarms, bikini line, arms, legs, back, shoulders, chest (not face, neck, nipples) |
| Power supply | Power adapter (model KSAPV0361200300D5) – 12V, 3A |
| Included accessories | Wall adapter, replacement disposable lamp(s), user manual, instruction DVD |
| Maintenance | Clean after each use with a clean, dry cloth. Never immerse. |
| Contraindications | Dark skin (phototype > V), recent sun exposure, pregnancy, breastfeeding, certain medical conditions and medications (see manual) |
| Expected results | 83% visible hair reduction after 6 sessions (test on 33 women) |
| Recommended session frequency | Every 2 weeks for 4 to 6 sessions, then once a month |
| Usage duration | Approximately 12 to 18 months for lasting results |
| Warranty | For domestic use only. Any professional use voids the warranty. |
| Country of manufacture | Not specified |
Frequently Asked Questions - Derma Perfect EP9800 ROWENTA
User questions about Derma Perfect EP9800 ROWENTA
0 question about this device. Answer the ones you know or ask your own.
Ask a new question about this device
Download the instructions for your Electric epilator in PDF format for free! Find your manual Derma Perfect EP9800 - ROWENTA and take your electronic device back in hand. On this page are published all the documents necessary for the use of your device. Derma Perfect EP9800 by ROWENTA.
USER MANUAL Derma Perfect EP9800 ROWENTA
natural_image
White medical device with digital display and laser beam, shown against a dark background (no visible text or symbols)DERMA PERFECT
QUESTIONNAIRE FOR DETERMINING THE TYPE OF SKIN / BODY HA
Before you start epilating with DERMA PERFECT, decide what intensity you need to set the appliance to depending on the colour of your skin and your hair.
| Characteristics and colour of your skin | |||||||
| WHITEskin(will burnwheneverexposed to thesun, No sun-tan) | VERYFAIRskin(burns regularlyin the sun, lighttan) | FAIRskinmay burn in thesun, good tan) | DARKINTERMEDIATESkin(burns rarely in the sun,good and fast tan) | DARKskin(rarely burns in thesun, tans very well) | VERYDARKskin(rarely or neverburns in the sun,very dark tan) | ||
| Colour of your body hair | White/Grey Hair | XXXXXX | |||||
| Red Hair | XXXXXX | ||||||
| Fair Blond hair | XXXXXX | ||||||
| Dark Blond hair /Light | 4-5 4-5 3-4-5 3-4 1-2-3 | X | |||||
| Brown hair | 4-5 4-5 3-4-5 3-4 1-2-3 | X | |||||
| Dark brown hair | 4-5 4-5 3-4-5 3-4 1-2-3 | X | |||||
| Black Hair | 4-5 4-5 3-4-5 3-4 1-2-3 | X | |||||
X = this appliance is not suitable for you
1-2-3-4-5 = intensity level you need to set your appliance to
To help you decide what colour your body hair is, take the natural colour of your hair as a guide.
(Next p.3)
Depending on the intensity level that you decide upon according to the colour of your skin and the colour of your body hair, always use the lower level when you use the appliance for the first time.
Example 1: if your phototype indicates a 3-4 setting intensity, set the appliance to level 3 for the 1^st session. If you don't feel any unpleasantness, you can increase the intensity to power level 4 for the remaining sessions.
Example 2: if your phototype indicates a 3-4-5 setting intensity, set the appliance to level 3 for the 1^st session. If you don't feel any unpleasantness, you can increase the intensity to power level 4 for the 2^d session. If you don't feel any unpleasantness, you can increase the intensity to power level 5 for all the following sessions.
Nevertheless, if you feel the slightest pain, reduce the intensity level until the session becomes comfortable. In this case, it may be necessary to do an extra 1 or 2 sessions to get the best result.
Don't forget to do a tolerance test by emitting a light pulse on to your skin at least 24 hours before treatment, at level 1 intensity (the area being flashed must be shaved beforehand).
IMPORTANT! DO NOT USE THIS APPLIANCE:
Until you have read the warnings and safety instructions in the health warnings section of this manual.
- If the skin that you are treating is darker than the phototype V illustrated in the table for different skin types.
- On parts which are exposed to the sun, UV rays or which have been treated with self-tanning lotion or spray over the last 30 days.
SUMMARY
I- Introduction ......p. 4
II-Safety p. 6
III- In what cases can the DERMA PERFECT appliance be used? ......p. 7
IV- Product description ......p. 8
4.1. Box contents ......p. 8
4.2. Appliance description ......p. 9
V-- Instructions for use ......p. 10
5.1. Getting started ......p. 10
5.2. Setting the power level for the appliance .....p. 12
5.3. Disposable lamp ......p. 14
5.4. In the event of a problem .....p. 15
VI- Health warnings ......p. 16
VII- When not to use DERMA PERFECT....p. 17
VIII- Looking after your DERMA PERFECT appliance ......p. 19
I- INTRODUCTION
Thank you for buying the Derma Perfect appliance from ROWENTA.
Your appliance uses LIP (intense pulsed light) technology which is used by professionals in semi-permanent epilation, but has been adapted for personal use. This appliance can be used on all the parts of the body except for the face, neck and nipples.
PERFORMANCE
If you follow our instructions on use properly, your Derma Perfect appliance will enable you to achieve long-term body hair reduction.
On average, after 6 sessions, you should notice a 83% reduction in visible body hair (test carried out on 33 women from November 2010 to April 2011).
Treatment must be carried out at regular intervals, every 2 weeks over 4 to 6 sessions, then once a month over 2 to 4 sessions depending on how fast your body hair grows back.
You may then use DERMA PERFECT for adding extra touches depending on what you feel is needed, until all the hair has been removed. It takes around 12 to 18 months, depending on the type of body hair you have, to achieve long-lasting results allowing you to enjoy the pleasure of having long-lasting smooth and soft legs.
IMPORTANT: Due to hormonal or physiological changes, some of your body hair may grow back. In this case you will need some follow-up sessions.
EN
SAFETY
Your appliance has been designed by scientists and clinicians and has been tested in accordance with the strictest standards. Your appliance is guaranteed to be as safe as is possible thanks to a:
1) SKIN COLOUR DETECTOR: This exclusive safety process checks the skin's pigmentation at the start of and during each session. If the Sensor detects that the skin is too dark, the appliance will not emit any pulsed light.
2) DERMATOLOGICAL SAFEGUARD: this appliance has been tested dermatologically by an independent laboratory.
3) SKIN CONTACT DETECTOR: a system developed for protecting the eyes. It has been designed so as not to emit any pulsed light if the appliance is pointed towards an empty space. The safety system will only allow the appliance to work when the appliance's window is in complete contact with the skin.
natural_image
Side-by-side comparison of a white electronic device with a black X symbol, no visible text or labels4) "EYE SAFE" TECHNOLOGY: a high performance built-in UV filter to ensure that you can use the appliance without any risk of harm to your skin and eyes (over 20cm).
natural_image
Abstract 3D geometric shape with no visible text or symbolsSIMPLICITY
The DERMA PERFECT appliance is also very easy to use thanks to its ergonomic and compact shape. It functions in 4 stages: shave the area concerned, switch on, select intensity, and flash.
II- SAFETY
Voltage: Please check that the voltage indicated on your appliance corresponds to that of your mains installation. Incorrect use of the appliance in respect of the mains installation may cause irreversible damage which will not be covered by the guarantee.
For your safety this appliance complies with technical regulations and standards which are currently in force (Electromagnetic Compatibility, Low voltage, Environment).
- Unplug the appliance before carrying out any work on it and each time you have finished using it.
•This appliance is for household and personal use only.
•The epilator must only be used with the KSAPV0361200300D5 power pack supplied - Only use the power pack in conjunction with the appliance.
-
Never use the product (appliance or power pack) if it is damaged as a result of a malfunction or after a fall (damage which is not visible may put your safety at risk).
•This appliance may only be repaired using special tools.
•In the event of any after-sales problem (appliance and power pack), please contact the store where you bought the appliance or an approved Service Centre.
•We will not accept any responsibility for damage that may occur as a result of incorrect use of the appliance or from any use not in accordance with the directions for use given in this instruction leaflet.
•Make sure every precaution is taken when the appliance is being used in the presence of children or disabled persons. -
Do not use in temperatures lower than 0 °C and higher than 35 °C
- Never allow the appliance to be used by children unless supervised
- Do not use an extension lead
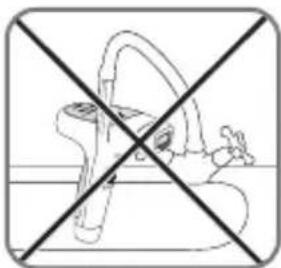
- Never use the appliance when your hands are damp
- Never use the appliance in the bath
- Do not expose the appliance to the sun's rays
- Do not use the appliance at low temperatures.
- Do not immerse in or put under running water
- Do not use corrosive products or solvents for cleaning the appliance
- Do not use on a third party
- This appliance is not intended for use by persons (including children) with reduced physical, sensory or mental capabilities, or lack of experience and knowledge, unless they have been given supervision or instruction concerning use of the appliance by a person responsible for their safety.
Children should be supervised to ensure that they do not play with the appliance.
Guarantee:
This product has been designed for domestic use only. Any commercial use, inappropriate use or failure to comply with the instructions, the manufacturer accepts no responsibility and the guarantee will not apply.
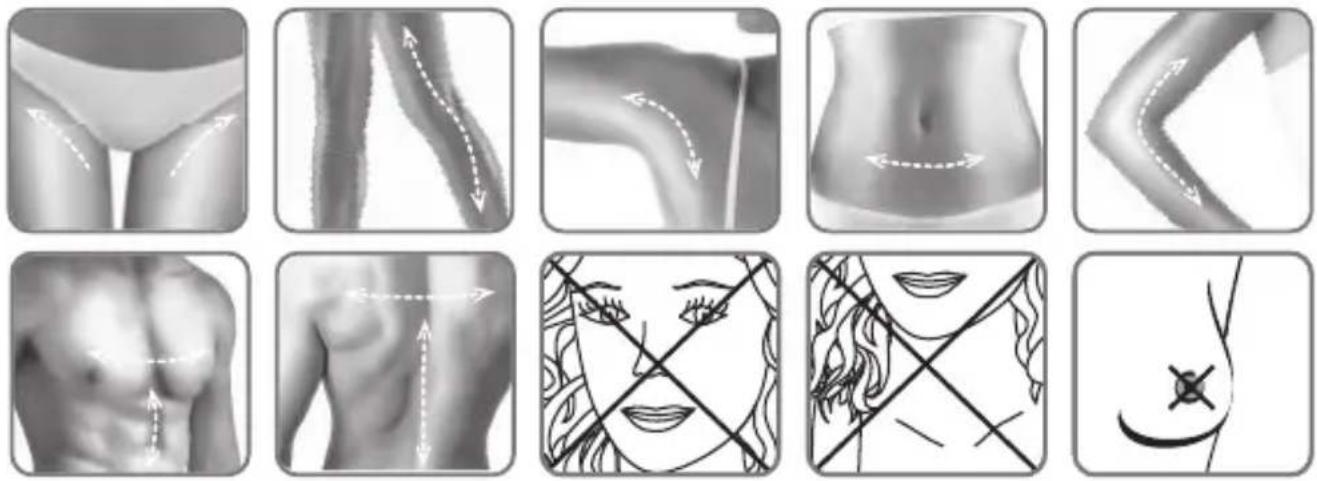
III. IN WHAT CASES CAN THE DERMA PERFECT APPLIANCE BE USED?
- Skin colour
DERMA PERFECT gets rid of unwanted hairs by selectively attacking the pigments in the stem of the hair. The quantity of pigments in the skin of any one person will determine its colour, but also the level of risk to which he or she is exposed when using a method of epilation using light, irrespective of whatever method it is.
The treatment of skin which is too dark using this type of technology can cause side effects such as burns, blisters or changes in skin colour after healing (hyper or hypopigmentation).
DERMA PERFECT has been designed with a colour Sensor which checks the colour of the skin being treated at the beginning of each session and during use. The purpose of this Sensor is to check that the energy is only administered to suitable types of skin. The pulsed light is impeded when the skin is too dark.
- Body hair colour
The appliance is also ineffective on white and grey hairs or if the natural colour of your hair is red or light blond. If your body hair is one of these colours, it is possible that DERMA PERFECT is not suitable for you.
To find out whether the appliance is compatible with your skin/body hair colour, please refer to the skin/ body hair colour table (located on page 2 and 13).
- Areas of the body
The areas of the body that can be treated by DERMA PERFECT include: armpits, trunk, arms, legs, back, shoulders and torso.
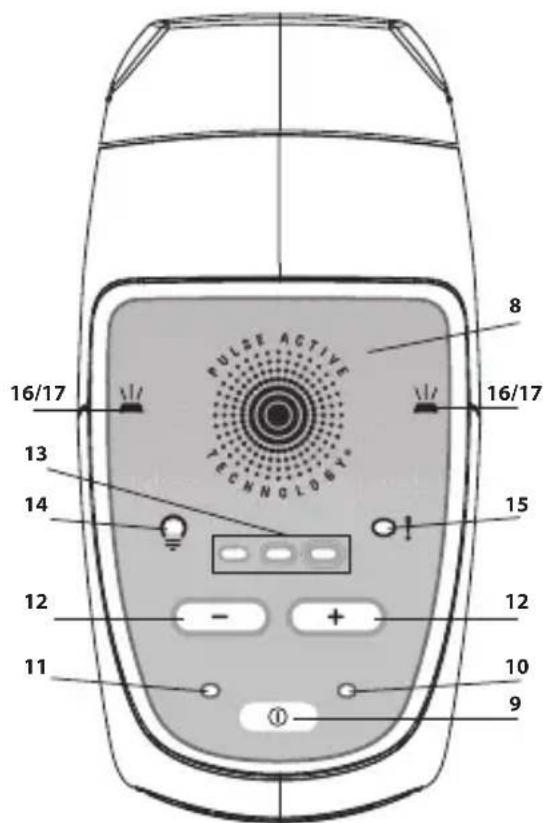
The appliance must not be used on the face, neck or nipples.
IV- PRODUCT DESCRIPTION
The DERMA PERFECT appliance from ROWENTA has been designed to be very easy to use, thanks to its ergonomic and compact shape.
Each time you use your appliance, please check all the parts of the appliance for any signs of damage. If you notice any damage, you must not use the appliance.
4.1. Box contents
Here is what you will find in the box containing your DERMA PERFECT appliance:
- Wall adaptor
- Disposable Spare lamp(s)
- User manual
- A help DVD.
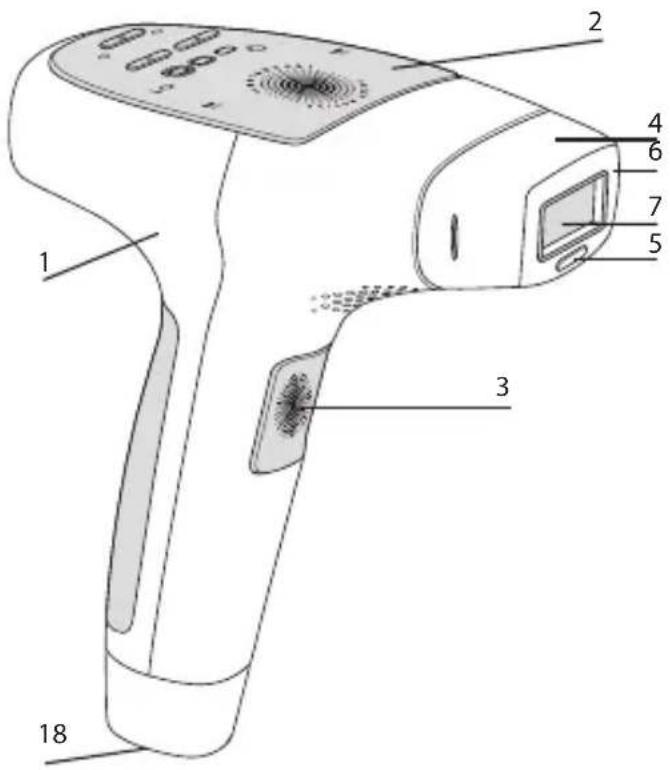
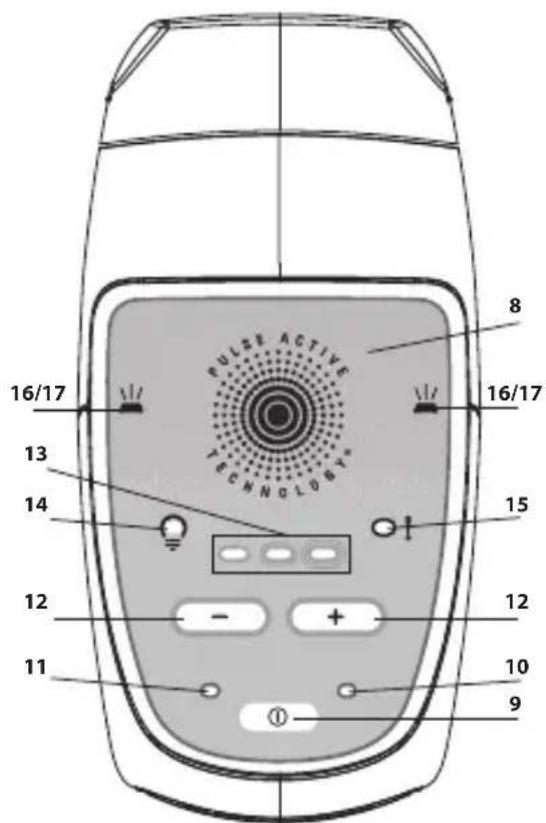
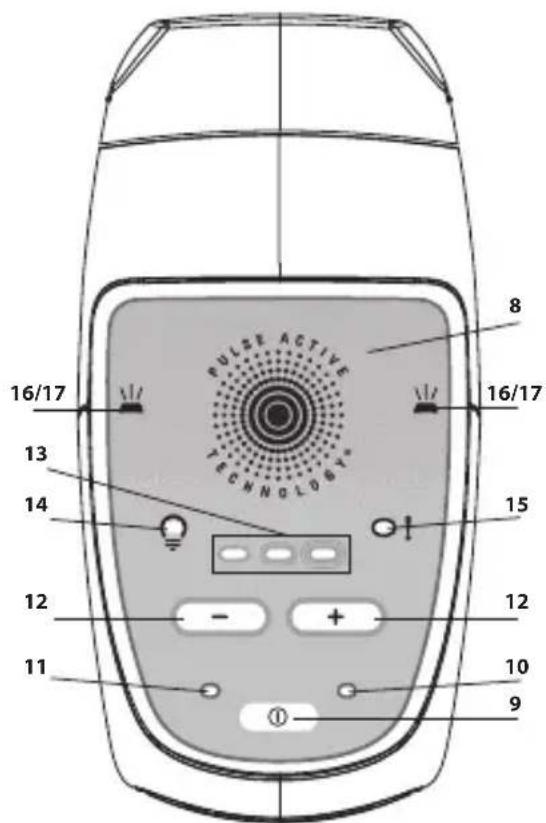
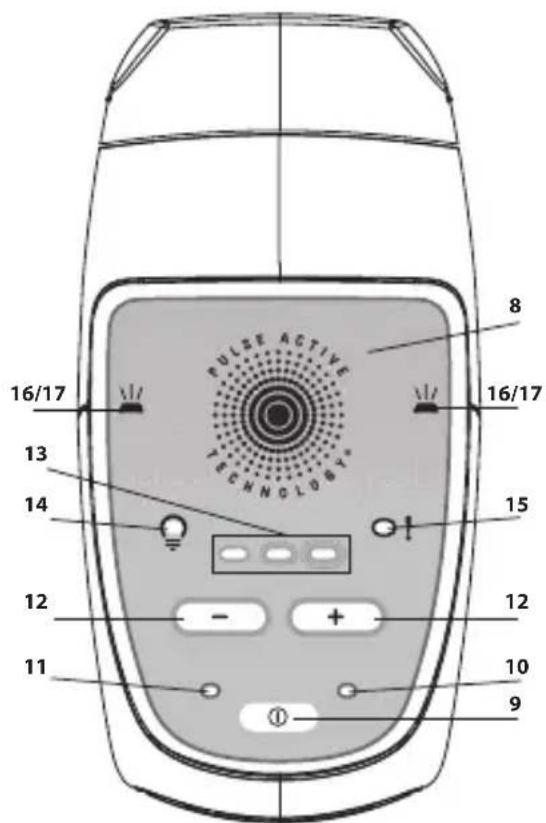
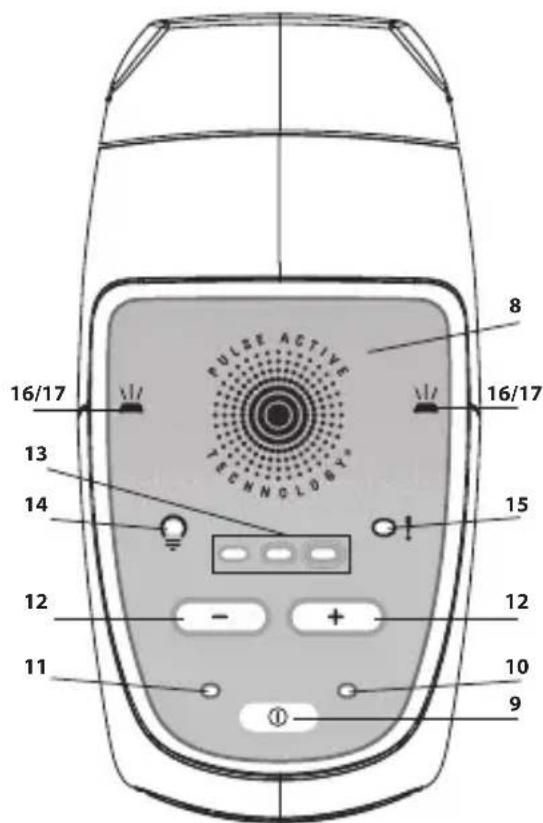
4.2. Appliance description:
1 - Epilator
2 - Control panel
3 - Trigger
4 - Disposable lamp
5 - Safety system: skin colour detector
6 - Safety system: skin contact detector
7 - Treatment surface with in-built high performance UV filter
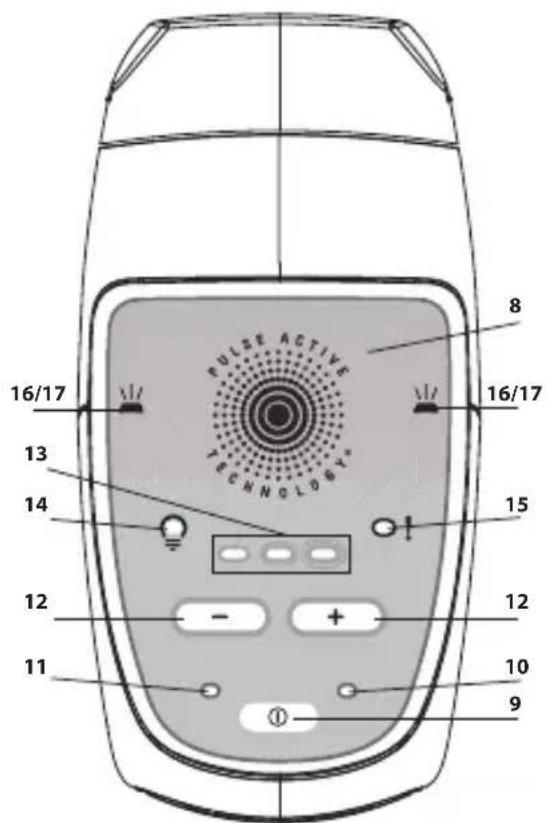
8 - Control panel
9 - On/Off/Standby button
10- "Stand by" mode indicator LED
11- "Start" mode indicator LED
12- "+" Button for increasing intensity (1 to 5)/ " -" Button for reducing intensity
13- Indicator LEDs for power level selected
14- Indicator LEDs for the condition of the Lamp
15- Appliance malfunction light
16- Indicator LEDs remain on = appliance ready to analyse the skin colour
17- Indicator LEDs are flashing = appliance ready to emit a light pulse
18- Appliance handle
V- INSTRUCTIONS FOR USE
5.1 Getting started:
- Take the appliance along with the other components of the DERMA PERFECT out of its box.
- Check that the disposable Lamp is correctly inserted at the end of the appliance.
- Plug the Adaptor power cord into the DERMA PERFECT appliance's socket (no.18 p. 9).
- Plug in the Adaptor to a mains socket: the "stand-by" mode indicator LED comes on: your DERMA PERFECT appliance is now ready for use.
Your skin must be shaven, clean, dry and free of any powder or deodorant residue.
- Press the Start button. The Power Light will come on and you will hear a normal ventilation sound.
- About 3.5 seconds after you press the Start button, the indicator LEDs will come on and stay on. The appliance starts off automatically on minimum power.
The appliance is now ready to emit its first pulse.
- If you want to increase or reduce the power, press either the "+" or "-" on the power selector until you reach the power level you require (see
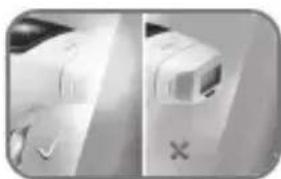
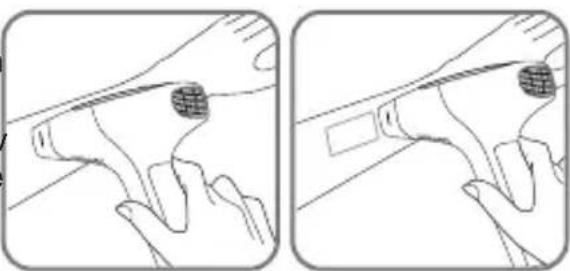
details on power level in chapter 5.2 page 12). - Press the appliance window up against the area of skin to be treated so as to achieve optimal contact.
The Skin Contact Detector will then check that the appliance window is in complete contact with the skin. The indicator LEDs will then start flashing to indicate that the appliance is ready to emit the pulsed light.
- Press on the trigger.
The system will also check the colour of the skin before activating the pulsed light. If the skin colour is sufficiently fair for a safe application, the appliance will then emit a pulse on to the skin and the Indicator LEDs will go out.
You will see a light flash and, simultaneously, you will hear a slight 'beep' at each pulse, which is normal. It is possible that you may feel a slightly hot and tingling sensation.
Your DERMA PERFECT appliance will recharge immediately between each pulse. After 3.5 seconds, the Indicator LEDs will come on again.
If you don't see any light pulse and the indicator LEDs start flashing green and orange, this means that the colour of your skin, measured by the Skin Colour Detector, is too dark for a safe application. If you want to use the appliance again, but on a lighter area, you must switch it off and then switch it back on again, otherwise it will remain locked in safety mode (flashing green and orange).
- Move the appliance's window over to another area of skin to be treated. The traces of pressure left on your skin from the appliance should help you to get into the right position for administering a new pulse, and in so doing to avoid superimposing the pulses or spacing them out too much.
Warning: Do not treat the same area of skin more than once per epilating session. Repeated treatment on the same area can cause side effects.
- Repeat the application starting from stage 8.
natural_image
Two-panel line drawing showing a hand holding a tool, with no visible text or symbolsEN
If any burns or blisters appear, you must STOP THE TREATMENT IMMEDIATELY!
IMPORTANT! DO NOT USE THIS APPLIANCE:
- If the skin to be treated is darker than the phototype V illustrated in the table of the different types of skin / body hair (page 2 and 13).
- On the parts exposed to the sun, to UV rays or treated with self-tanning lotions or sprays over the last 30 days.
- On beauty spots or dark birth marks. You can however use make-up type white pencil (which doesn't contain metallic by-products), white non-transparent sticking plasters or white bandage to cover them up.
- Don't forget to read the sections "WARNING AND SAFETY INSTRUCTIONS" (pages 6 to 8) as well as the pages on HEALTH WARNINGS (pages 16 to 18).
- At least 24 hours before commencing treatment at level 1 intensity you must carry out a tolerance test by emitting a light pulse onto your skin (the area to be flashed must be shaved beforehand).
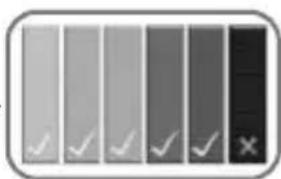
5.2. Setting the power level for the appliance
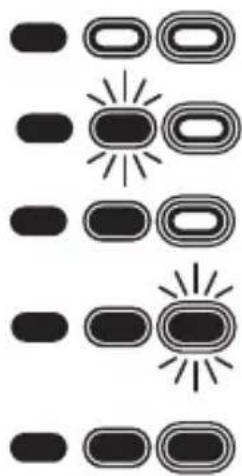
DERMA PERFECT has 5 intensity levels ranging from 1 (the weakest) to 5 (the strongest), represented by 3 energy level lights:
Level 1 : (the weakest): the light on the left is permanently on.
Level 2: the left light is on and the one in the centre is flashing.
Level 3: the two lights: on the left and in the centre are on.
Level 4 : I the two lights: on the left and in the centre are on and the one on the right is flashing.
Level 5 : (the strongest): the 3 lights are permanently on.
natural_image
Abstract diagram with vertical columns of rounded rectangles and stylized sun icons (no text or symbols)When the appliance is functioning, its intensity level will automatically default to the weakest intensity. Only one POWER LIGHT will be on.
To set the light to the required intensity, either stronger or weaker, press the Power Selector by pressing either "+" or "-" until the Light corresponding to the intensity you require comes on.
In order to find out the intensity level which suits your phototype, please refer to the following questionnaire for determining the type of skin / body hair:
| Characteristics and colour of your skin | |||||||
| WHITEskin(will burn whenever exposed to the sun, No sun-tan) | VERYFAIRskin(burns regularly in the sun, light tan) | FAIRskin(may burn in the sun, good tan) | DARKINTERMEDIATESkin(burns rarely in the sun, good and fast tan) | DARKskin(rarely burns in the sun, tans very well) | VERYDARKskin(rarely or never burns in the sun, very dark tan) | ||
| Colour of your body hair | White/Grey Hairs | XXX | XXXX | ||||
| Red Hairs | XXX | XXXX | |||||
| Light blond hairs | XXX | XXXX | |||||
| Dark blond / Light brown hairs | 4-5 4-5 | 3-4-5 3-4 | 1-2-3 | X | |||
| Brown hairs | 4-5 4-5 | 3-4-5 3-4 | 1-2-3 | X | |||
| Dark brown hairs | 4-5 4-5 | 3-4-5 3-4 | 1-2-3 | X | |||
| Black hairs | 4-5 4-5 | 3-4-5 3-4 | 1-2-3 | X | |||
X = this appliance is not suitable for you
1-2-3-4-5 = intensity level that you must set your appliance to
To help you determine the colour of your body hair, take the natural colour of your hair as a reference.
Depending on the intensity level that you decide upon according to the colour of your skin and the colour of your body hair, always use the lower level when you are using the appliance for the first time.
Example 1: if your phototype indicates a 3-4 setting intensity, set the appliance to level 3 for the 1^st session. If you don't feel any unpleasantness, you can increase the intensity to power level 4 for the remaining sessions.
Example 2: if your phototype indicates a 3-4-5 setting intensity, set the appliance to level 3 for the 1^st session. If you don't feel any unpleasantness, you can increase the intensity to power level 4 for the 2^rd session. If you don't feel any unpleasantness, you can increase the intensity to power level 5 for all the following sessions.
Nevertheless if you feel the slightest pain, reduce the intensity level until the session becomes comfortable. In this case, it may be necessary to do an extra 1 or 2 sessions to get the best result
Don't forget to do a tolerance test by emitting a light pulse on to your skin at least 24 hours before treating at level 1 intensity (the area being flashed must be shaved beforehand).
IMPORTANT! DO NOT USE THIS APPLIANCE:
Until you have read the warnings and safety instructions in the health warnings section of this manual.
- If the skin you are treating is darker than the phototype V illustrated in the table for different skin types.
- On parts exposed to the sun, to UV rays or which have been treated with self-tanning lotions or sprays over the last 30 days.
5.3. Disposable lamp
The DERMA PERFECT Disposable Lamp has a 1,000 pulse capacity (irrespective of the intensity level used).
The intensity of the pulses is determined only by the setting of the power level of the appliance. There is no drop in energy level throughout the whole lifespan of the lamp. When this lamp has reached 95% of its lifespan, the LED which indicates the condition of the Lamp will start flashing on the control panel to warn you that the lamp soon needs to be replaced. This flashing will slow down as the lamp reaches the end of its life.
Once the disposable lamp has emitted 1,000 pulses, the LED which indicates the condition of the Lamp will come on and stay on, warning you that no more pulses are possible. If you want to continue with the epilation you must replace the disposable Lamp.
Please note: a disposable lamp must also be replaced if you notice that large stains have appeared on the inside or if the lamp's window is broken.
EN

Please keep the appliance well away from your eyes. It must not be used for treating facial or neck hair or for hair around the nipples. During treatment of the other body areas, we strongly recommend that you never stare directly into the light emitted by DERMA PERFECT.
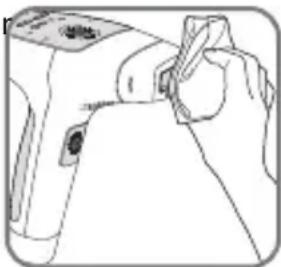
How to replace the disposable lamp:
-
Press the Start/Stop/Stand-by Button on the appliance so as to put it into stand-by mode.
-
Unplug the Adaptor from the mains socket.
-
Take hold of the two sides of the worn-out lamp and pull on it to remove it from it from its socket and then throw it out with the household rubbish.
-
Unwrap a new disposable lamp.
-
Insert the new disposable lamp by carefully positioning it until it is completely locked in the appliance.

Please note: Once you have replaced the disposable lamp, always set the energy level to a level which is lower than what you're used to. Only return to your usual power level if you haven't felt any unusual unpleasantness either during or after your treatment.
5.4. In the event of a problem:
•The appliance won't start:
- Check that the adaptor is correctly plugged into the appliance.
- Check that the mains adaptor is correctly plugged into the wall socket.
- If no light comes on when the appliance has been correctly plug in, take the appliance to your service centre.
•The appliance does not emit any light flashes:
- If the lamp LED remains on permanently, check that the lamp is correctly inserted in the appliance.
- If the lamp LED light remains on permanently, this means that you have reached the maximum number of flashes for the lamp. Change the lamp so that you can carry on using your appliance.
- If the malfunction indicator light remains on permanently, take the appliance to your service centre.
- The skin detection lights are flashing alternately green and orange: the skin colour measured by the detector is too dark and the appliance has gone into safety mode. Please refer to the table for determining the type of skin /body hair.
- The skin detection lights remain permanently on green: check that the whole of the lamp's surface is in contact with the skin.
•In the event of the appliance suffering a fall:
- Check that the UV filter is not broken or taut. If this is the case, replace the lamp before using the appliance again.
- If the appliance does not emit any more flashes after suffering a fall: replace the lamp. If replacing the lamp does not solve the problem, take the appliance back to your service cent
- If you feel any unpleasantness arising from the intensity of the light from the flashes during use:
- Look away from the area being treated when you press on the trigger (in particular when treating armpits).
- For extra comfort when treating, you can use a pair of sunglasses with a filter index of S3 or greater.
VI. HEALTH-WARNINGS
Important safety information – please read before use
DERMA PERFECT is not suitable for everybody. Before using it, please read the following instructions. For more information or personal advice, please visit www.rowenta.co.uk or your regional distributor's web site.
Finally, if you are unsure about how using DERMA PERFECT may affect you personally, please consult your dermatologist or GP.
DO NOT USE your DERMA PERFECT appliance on sun-tanned skin or on skin which has recently been exposed to the sun. Doing this can cause severe burns or damage of the skin. Using the appliance on a skin which has recently been exposed to the sun cause side effects such as burns, blisters and changes in its colour (hyper or hypopigmentation).

EN
Avoid exposing yourself to the sun's rays in the 4 weeks preceding any treatment using DERMA PERFECT.
Do not expose the treated areas to the sun. By this we mean exposure of your skin to the sun's rays without any protection from direct sunlight for a continuous period of fifteen minutes or without any protection from indirect sunlight (which you are exposed to if you are close to the sun but in the shade) for a period of one hour non-stop.
Make sure you protect the skin that has been treated with sun-block of FPS 30 or more, for the whole treatment period and at least two weeks after the last epilation session.

Please keep the appliance well away from your eyes. It must not be used for treating facial or neck hair or for hair around the nipples. During treatment of the other body areas, we strongly recommend that you never stare directly into the light emitted by DERMA PERFECT.
Keep the appliance well out of the reach of children. Do not use DERMA PERFECT on children and don't allow children to use it.
VII. WHEN NOT TO USE DERMA PERFECT
YOU MUST NOT use DERMA PERFECT in any of the following cases:
- If you are pregnant or if you have recently given birth and in this case not before your periods return.
- If you are breast-feeding.
- If the skin to be treated is darker than the colour of type 5 skin as shown on the table for determining the type of skin /body hair on page 2 and 13.
- If you've been exposed to the sun or a UV machine in the last 30 days or if you've been using tanning accelerators or preparations and self-tanning lotions and sprays.
- If you have permanent tattoos or make-up on the area to be treated.
-
On the face, neck and nipples. On pubic lips, please reduce the intensity to one level below the intensity corresponding to your phototype.
-
On your hair.
- On the same part of your skin more than once a week.
- If there is any abnormality to the area of the skin to be treated: red or pigmented birth marks, brown or black spots on the skin like freckles or beauty spots. If you are using a make-up type white pencil (which does not contain metallic by-products), white non-transparent sticking plasters, or bandages to cover them up.
- If the skin has become dried out or made fragile as a result of chemical, glycolic or Alpha Hydroxy Acid induced peeling.
- Close to a body piercing: as a rule remove any body piercing before using the appliance.
- If you have eczema, psoriasis, lesions which are healing or an infection which is developing in the area to be treated. You must wait for the area affected to heal before using the appliance
- If you have abnormal skin pigmentation (vitiligo or albinism for example)
- If you have an abnormal skin condition caused by diabetes, for example, or by other systemic or metabolic diseases.
- If you have a previous history of herpes rashes on the area to be treated, unless you have seen your doctor about this and have received preventative treatment before using the appliance.
- On any area containing any silicone implants, a pace maker, any implant for urinary incontinence, an insulin pump or any metal implant.
- In the case of any pathology to do with photosensitivity (e.g.: porphyria, any polymorphous rash as a result of being exposed to light, sun urticaria, lupus...) or caused by any medicine taken over the last 3 months.
- If you've had medical treatment in respect of acne or other skin diseases such as oral isotretin (Roaccutane®); medicines made from topical retinoids such as Tretinoin (rétin®; vitamin A, carotenoid or beta carotene over the last two months.
- If you've taken Minocycline or other medicines made from tetracycline over the previous month.
This list of medicines is not exhaustive, so ask your doctor for advice if you are following a course of treatment. - If you've been on a steroid based diet over the last 3 months.
• 14 days after a course of microdermabrasion treatment. - If you are already undergoing other courses of treatment for reducing body hair.
- If you have a previous history of skin cancer or if other areas of your body have been affected by malignant skin tumours.
- If you have undergone radio or chemotherapy over the last 3 months.
- If you have had treatment with immunosuppressive drugs.
- If you are prone to epilepsy.
- Any other case which in the view of your doctor may make the treatment dangerous.

Never use DERMA PERFECT whenever there are very young children or babies in the same room because the light which is released from the appliance may be unpleasant for them.
This list is not exhaustive. If you have the slightest doubt about the risks involved when using the DERMA PERFECT appliance, you should consult your local G.P. or your dermatologist.
VIII. Looking after your DERMA PERFECT appliance
We recommend you clean your appliance after every session, in particular the appliance's window.
Unplug the appliance before cleaning it.
Use a clean and dry cloth. You can also use a cleaner which has a special formula for cleaning electronic equipment and with which you should gently wipe the DERMA PERFECT appliance and especially its window.
Never immerse your appliance or any of its components in water.
natural_image
Line drawing of a hand holding a small object, possibly a tool or device (no text or symbols visible)
natural_image
Cross-sectional diagram of a toilet with no text or symbols
Help us look after the environment!
i Your appliance contains many materials which can be recovered or recycled.
Leave it at a local civic waste collection point.
SOMMAIRE
natural_image
Close-up of a white electronic device with a close button and 'X' mark, no visible text or symbolsnatural_image
Abstract 3D geometric shape with soft lighting and shadow (no text or symbols)SIMPLICITE
natural_image
Close-up of a white object with curved surfaces and highlights, possibly part of a garment or abstract design (no text or symbols visible)
natural_image
Abstract grayscale image with two curved arrows pointing downward, no text or symbols present
natural_image
Close-up of a curved mechanical part with dashed arrows indicating direction (no text or symbols)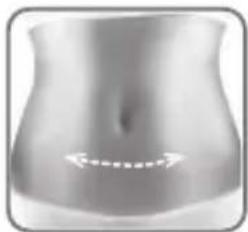
natural_image
Grayscale medical scan image of a human abdomen with measurement arrows (no text or symbols)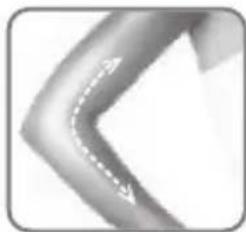
natural_image
Abstract grayscale curved shape with arrow-like highlights, no text or symbols present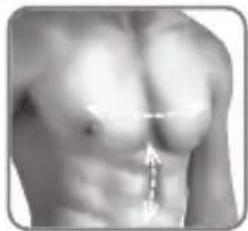
natural_image
Close-up of a human torso with a measurement arrow pointing to the chest area (no text or symbols visible)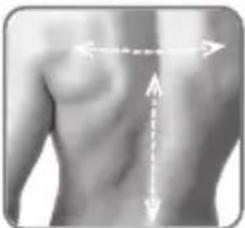
natural_image
Human torso with arrows indicating anatomical or directional pressure lines (no text or symbols)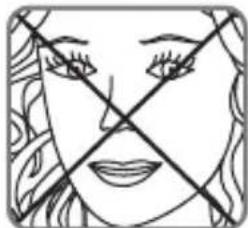
natural_image
Simple line drawing of a face with crossed lines indicating crossed sections (no text or symbols)
natural_image
Simple line drawing of a human face with crossed lines indicating crossed sections (no text or symbols)
natural_image
Simple line drawing of a human abdomen with a cross mark symbol (no text or labels)IV- DESCRIPTIF PRODUIT
V- MODE D'EMPLOI
natural_image
Two-panel line drawing showing a hand holding a tool, with no visible text or symbols.natural_image
Abstract diagram with vertical columns of rounded rectangles and stylized sun-like shapes (no text or symbols)natural_image
Two-step illustration showing a hand holding a device with a scroll, connected by arrows indicating motion (no text or symbols present)natural_image
Line drawing of a hand holding a small object near a device (no text or symbols)
natural_image
Cross-sectional diagram of a mechanical component with no visible text or symbols

natural_image
Side-by-side comparison of a white object with a checkmark and a cross mark, no visible text or symbols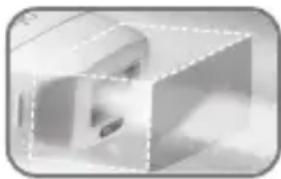
natural_image
Exterior view of a modern office building (no signage)GEBRUIKSGEMAK
IV- BESCHRIJVING VAN HET PRODUCT
natural_image
Two-panel line drawing showing a hand holding a tool with a grid-like object, no text or symbols present.NL
WAARSCHUWING! GEBRUIK DIT APPARAAT NIET:
natural_image
Abstract diagram with vertical columns of rounded rectangles and horizontal lines, no text or symbols presentWAARSCHUWING, GEBRUIK DIT APPARAAT NIET:
natural_image
Two-step illustration showing a hand holding a device with a scroll, demonstrating a press or adjustment process (no text or symbols present)natural_image
Line drawing of a hand using a handheld device to press or adjust a circular component (no text or symbols visible)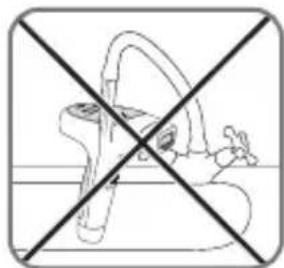
natural_image
Cross-sectional diagram of a human hip joint with no text or labels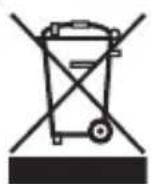
natural_image
Side-by-side comparison of a white object with a small cross mark, no visible text or symbolsnatural_image
Abstract 3D geometric shape with soft shadows and no visible text or symbolsEINFACHHEIT
natural_image
Two-panel line drawing showing a hand holding a tool or object, with no visible text or symbols.DE
natural_image
Abstract diagram with vertical bars and circular shapes, no text or symbols presentnatural_image
Two-step illustration showing a hand holding a device with a scroll, no text or symbols presentnatural_image
Line drawing of a hand holding a small object near a device (no text or symbols)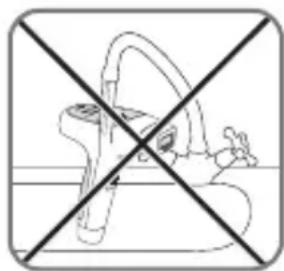
natural_image
Cross-sectional diagram of a medical device with no visible text or symbols
ES
natural_image
Close-up of a white car door panel with a red X mark on the side (no visible text or symbols)natural_image
Abstract 3D geometric shapes with soft shadows, no text or symbols visibleSIMPLICIDAD
V- MODO DE EMPLEO
natural_image
Two-panel line drawing showing a hand holding a tool or object, with no visible text or symbols.Si aparecen quemaduras o ampollas, PARE INMEDIATAMENTE.
natural_image
Abstract diagram with vertical lines and circular shapes, no text or symbols presentnatural_image
Two-step illustration showing a hand holding a device with a scroll, no text or symbols presentnatural_image
Line drawing of a hand using a handheld device to press or adjust a circular component (no text or symbols visible)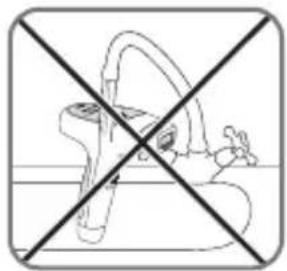
natural_image
Cross-sectional diagram of a mechanical component with no visible text or symbols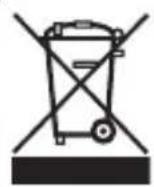
IT
natural_image
Close-up of a white electronic device with a small screen and a cross symbol, no visible text or labelsnatural_image
Abstract 3D cube illustration with no visible text or symbolsSEMLICITA'
V- MODALITA' D'USO
natural_image
Two-panel line drawing showing a hand holding a tool, with no visible text or symbolsnatural_image
Abstract diagram with vertical columns of rounded rectangles and stylized sun icons (no text or symbols)natural_image
Line drawing of a hand holding a device with an arrow pointing to the component (no text or symbols present)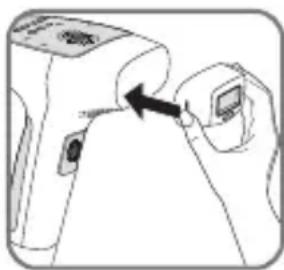
natural_image
Line drawing of a hand holding a device with an arrow pointing to the component (no text or symbols present)natural_image
Line drawing of a hand holding a small object, possibly a tool or device (no text or symbols visible)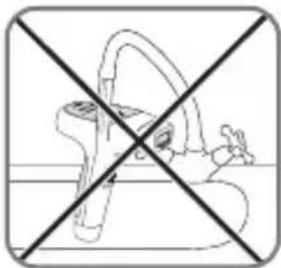
natural_image
Cross-sectional diagram of a medical device with no visible text or symbols
natural_image
Close-up of a white electronic device with a close-up view showing a small screen and a cross symbol (no readable text or labels)natural_image
Abstract 3D geometric shape with shading, no visible text or symbolsΑΠΛΟΤΗΤΑ
natural_image
Two-panel line drawing showing a hand holding a tool, with no visible text or symbolsnatural_image
Abstract diagram with two rounded rectangles and a central sun-like shape, no text or symbols presentnatural_image
Line drawing of a hand holding a small electronic device with a black arrow pointing to the device (no text or symbols present)
natural_image
Line drawing of a hand holding a device with an arrow pointing to the device (no text or symbols present)natural_image
Line drawing of a hand holding a small object near a device (no text or symbols)
natural_image
Cross-sectional diagram of a human pelvic bone with no text or labels
natural_image
Close-up of a white electronic device with a close-up view showing a small screen and a cross symbol (no readable text or labels)natural_image
Abstract 3D cube illustration with no visible text or symbolsSIMPLICIDADE
natural_image
Close-up of a white object with curved surfaces and highlights, possibly part of a garment or abstract design (no text or symbols visible)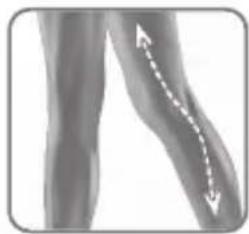
natural_image
Illustration of human leg with two arrows indicating movement or direction (no text or symbols)
natural_image
Close-up of a curved mechanical joint or pipe with directional arrows indicating movement (no text or symbols)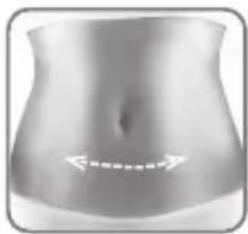
natural_image
Grayscale illustration of a human abdomen with no visible text or symbols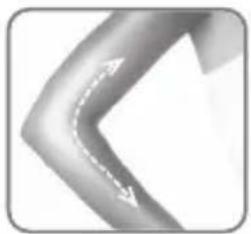
natural_image
Abstract grayscale curved shape with dashed white arrows, no text or symbols present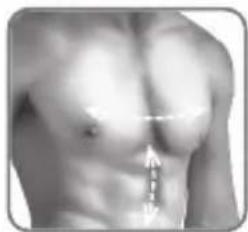
natural_image
Close-up of a human torso with a visible anatomical measurement arrow (no text or symbols)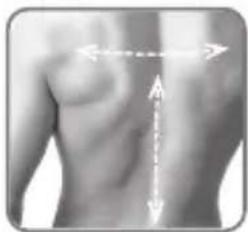
natural_image
Human torso with measurement arrows indicating vertical and horizontal measurements (no text or symbols present)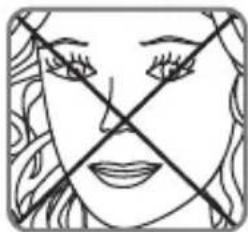
natural_image
Simple line drawing of a human face with crossed lines indicating crossed eyes and mouth (no text or symbols)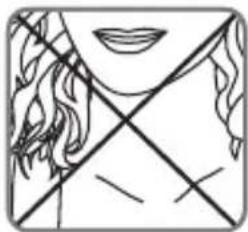
natural_image
Simple line drawing of a human face with crossed lines indicating crossed sections (no text or symbols)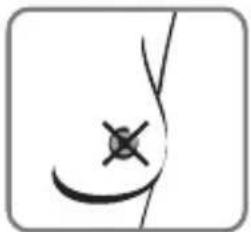
natural_image
Simple line drawing of a human abdomen with a cross mark on the inner lumen (no text or symbols)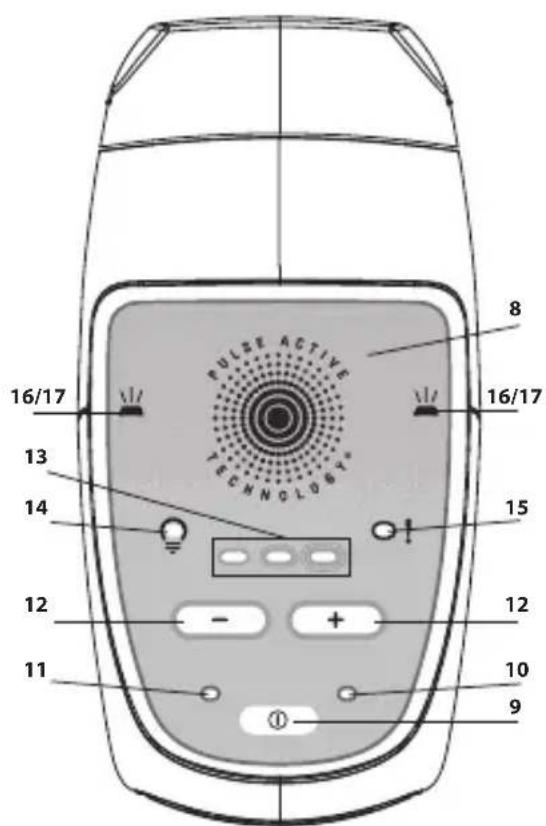
V- MANUAL DE INSTRUÇÕES
natural_image
Two-panel line drawing showing a mechanical component with a handle and a tool, no text or symbols present.natural_image
Abstract diagram with vertical bars and circular shapes, no text or symbols presentnatural_image
Two-step illustration showing a hand holding a device with a scroll, no text or symbols presentnatural_image
Line drawing of a hand using a handheld device to press or adjust a circular component (no text or symbols visible)PT
natural_image
Cross-sectional diagram of a medical device with no visible text or symbols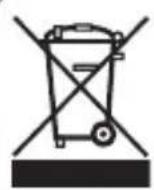
natural_image
Two grayscale images showing a device with a checkmark and an 'X' symbol, no readable text or labels present.natural_image
Abstract 3D geometric shape with dashed outlines, no visible text or symbolsSADELİK
natural_image
Close-up of a white garment with a V-shaped cutout and light reflections (no text or symbols)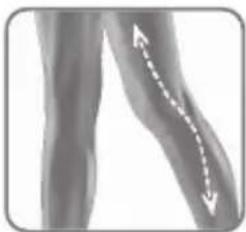
natural_image
Illustration of human legs with a dotted arrow indicating movement or direction (no text or symbols)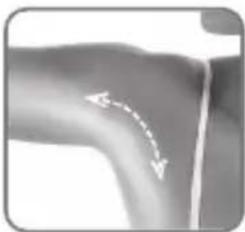
natural_image
Close-up of a curved mechanical joint or pipe with directional arrows indicating movement (no text or symbols)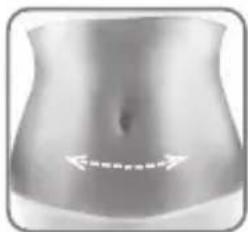
natural_image
Human abdomen with white arrows pointing to the lower abdomen area (no text or symbols)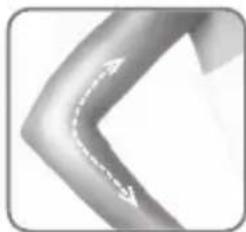
natural_image
Abstract curved arrow graphic with dashed white arrows, no text or symbols present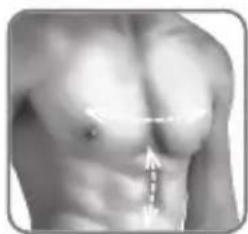
natural_image
Close-up of a human torso with arrows pointing to specific areas (no text or symbols visible)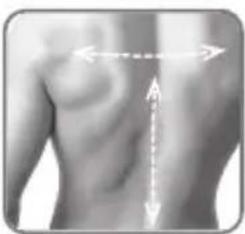
natural_image
Human torso with vertical measurement arrows indicating anatomical alignment (no text or symbols)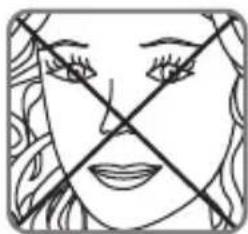
natural_image
Simple line drawing of a face with crossed lines indicating crossed sections (no text or symbols)
natural_image
Simple line drawing of a human face with crossed lines indicating crossed sections (no text or symbols)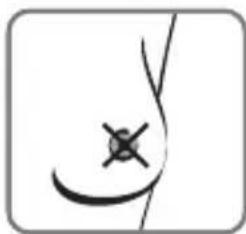
natural_image
Simple line drawing of a human abdomen with a cross mark symbol (no text or labels)IV- ÜRÜNÜN TANIMI

V- KULLANIM KILAVUZU
natural_image
Two technical line drawings showing a hand holding a tool, with no visible text or symbols.natural_image
Abstract diagram with vertical columns of rounded rectangles and stylized sun icons (no text or symbols)natural_image
Two-step illustration showing a hand holding a device with a scroll, no text or symbols presentnatural_image
Line drawing of a hand holding a small object near a device (no text or symbols)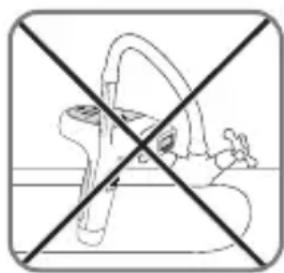
natural_image
Cross-sectional diagram of a human hip joint with no text or labels