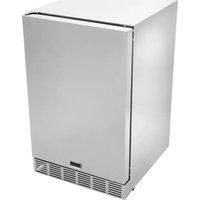
K00AA3314 - Refrigerator SABER - Free user manual and instructions
Find the device manual for free K00AA3314 SABER in PDF.


| Product Type | Refrigerator |
| Brand | SABER |
| Model | K00AA3314 |
| Dimensions (W x D x H) | 520 x 572 x 840 mm |
| Net Weight | 41.5 kg |
| Rated Voltage | 115 V AC |
| Rated Frequency | 60 Hz |
| Rated Current | 1.55 A |
| Rated Power | 115 W |
| Energy Consumption | 0.85 kWh/24h |
| Net Volume | 4.1 cu ft (approx. 116 L) |
| Refrigerant | R134a |
| Refrigerant Charge | 0.0883 lb |
| Insulation | Polyurethane |
| Reversible Door Swing | Yes (left or right) |
| Temperature Adjustment | Rotary control (OFF to 5) |
| Interior Cleaning | Warm water and baking soda |
| Exterior Cleaning | Mild detergent and warm water |
| Safety | Grounding required, do not use extension cord |
| Warranty | 1 year limited (parts) |
| Spare Parts Available | Yes (contact SABER) |
| After-Sales Service | 1-888-947-2237 / www.sabergrills.com |
Frequently Asked Questions - K00AA3314 SABER
User questions about K00AA3314 SABER
0 question about this device. Answer the ones you know or ask your own.
Ask a new question about this device
Download the instructions for your Refrigerator in PDF format for free! Find your manual K00AA3314 - SABER and take your electronic device back in hand. On this page are published all the documents necessary for the use of your device. K00AA3314 by SABER.
USER MANUAL K00AA3314 SABER
PRODUCT GUIDE MODEL K00AA3314
IMPORTANT: Fill out the product record information below.
natural_image
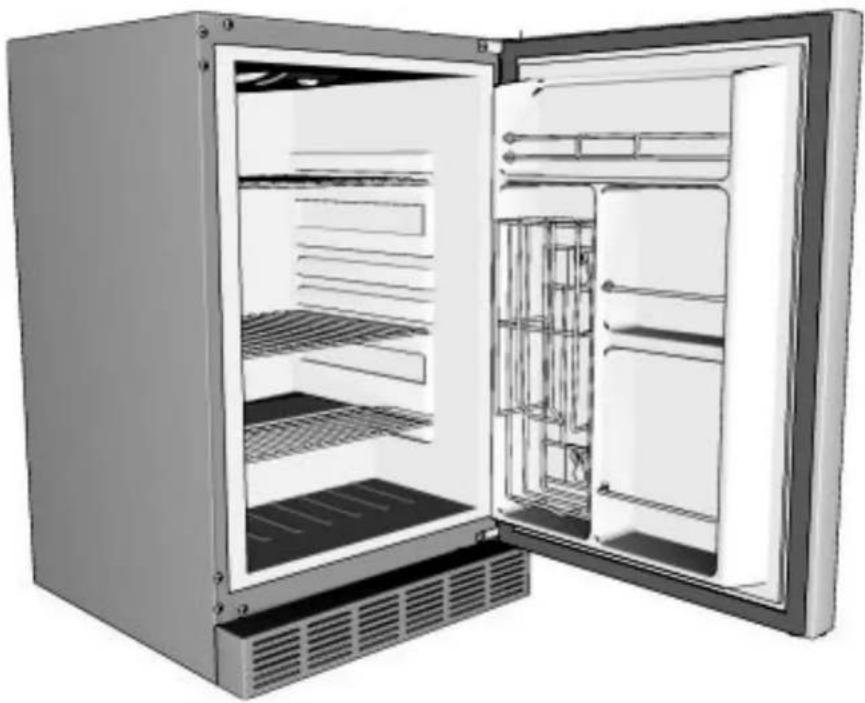
Interior view of an open refrigerator with visible door, shelves, and ventilation grilles (no text or symbols)If you have questions or need assistance during assembly, please call 1-888-94-SABER (1-888-947-2237)
For support and to register your grill, please visit us at www.sabergrills.com

For Residential Use Only Read all instructions before operating your refrigerator. Save these instructions!
To installer: Leave this manual with refrigerator for future reference. To consumer: Keep this manual for future reference.
For patents see www.sabergrills.com/patents
TABLE OF CONTENTS
Safety Information 2-3
Unpacking 3
Placement and location....3
Electrical requirements....4
Door Reversal 4
Operating your refrigerator 5
Limited Warranty 6-7
Parts List....8
Parts Diagram....8
Troubleshooting 9
Technical Data 10
Safety Symbols
The symbols and boxes shown below explain what each heading means. Read and follow all of the messages found throughout the manual.
WARNING
WARNING: Indicates a potentially hazardous situation which, if not avoided, could result in death or serious injury.
CAUTION
CAUTION: Indicates a potentially hazardous situation or unsafe practice which, if not avoided, may result in minor or moderate injury.
DANGER
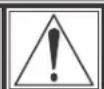
DANGER: Indicates an imminently hazardous situation which, if not avoided, will result in death or serious injury.
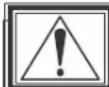
CAUTION
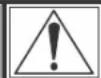
Read and follow all safety statements, assembly instructions, and use and care directions before attempting to assemble and use.
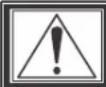
WARNING
Failure to follow all manufacturer's instructions could result in serious personal injury and/or property damage.
CAUTION
Some parts may contain sharp edges – especially as noted in the manual! Wear protective gloves if necessary.
Congratulations! We thank you for your purchase of a new Saber® Refrigerator! We are very proud of our product and we are completely committed to providing you with the best service possible. Your satisfaction is our #1 priority.
Please read this manual carefully to understand all the instructions about how to install, operate and maintain for optimum performance and longevity. We know you'll enjoy your new refrigerator and thank you for choosing our product.
Unpacking:
Your Refrigerator arrives nearly ready to use and requires little assembly. Carefully follow these steps:
- Unpack the grill.
- Remove all packing material from the exterior and the interior of the refrigerator.
- Remove all protective film.
- Before connecting the unit to the power source, let it stand upright for approximately 2 hours. This will reduce the possibility of a malfunction in the cooling system from handling during transportation.
- Clean the interior and exterior surfaces with lukewarm water using a soft cloth.
WARNING

CALIFORNIA PROPOSITION 65
- This product is produced with or contains chemicals known to the State of California to cause cancer, birth defects, and other reproductive harm.
- This product contains chemicals, including lead and lead compounds, known to the State of California to cause cancer, birth defects or other reproductive harm.
Wash your hands after handling this product.
DANGER

DANGER: Before the refrigerator is used, it must be properly positioned and installed as described in this manual, so read the manual carefully. To reduce the risk of fire, electrical shock, or injury when using the refrigerator, follow these precautions:
- Plug into a grounded, 3-prong outlet, do not remove grounding prong, do not use an adapter, and do not use an extension cord.
- It is recommended that a separate circuit, serving only your refrigerator be provided. Use receptacles that cannot be accidentally turned off by a switch or pull chain.
- Never clean refrigerator parts with flammable fluids. Fumes can create a fire hazard or explosion. Do not store or use gasoline or other flammable vapors and liquids in the vicinity of this or any other appliance. The fumes can create a fire hazard or explosion.
- Before proceeding with cleaning and maintenance operations, make sure the power cord of the unit is disconnected.
- Do not connect or disconnect the electric plug when your hands are wet.
- Unplug the refrigerator or disconnect power before cleaning or servicing. Failure to do so can result in electrical shock or death.
- Do not attempt to repair or replace any part of your refrigerator unless it is specifically recommended in this manual. All other servicing should be referred to a qualified technician.
- Use two or more people to move and install refrigerator. Failure to do so can result in serious injury.
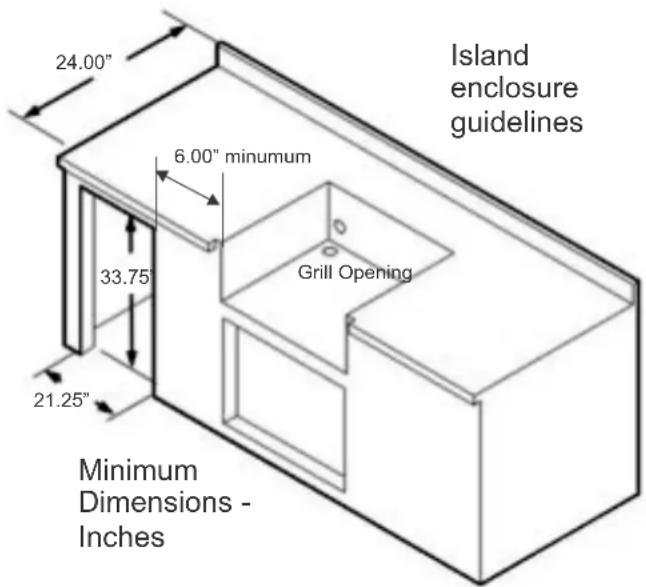
- To ensure proper ventilation for your refrigerator, the front of the unit must be completely unobstructed. For proper operation, choose a well-ventilated area with temperatures above 40ircF (5°C) and below 105ircF (40°C). This unit should be installed in an area protected from the direct elements, such as wind, rain, and direct sunlight. See Island Enclosure Guidelines for details.
- The refrigerator should not be located directly next to ovens, grills or other sources of high heat.
- The refrigerator must be installed with all electrical, water and drain connections in accordance with state and local codes.
- A standard electrical supply (115 V AC only, 60 Hz), properly grounded in accordance with the National Electrical Code and local codes and ordinances is required.
- Do not crimp or pinch the power supply cord of refrigerator.
- The circuit breaker size should be 15 amps.
-
It is important for the refrigerator to be leveled in order to work properly. You may need to make several adjustments to level it.
-
Installation must be in accordance with local plumbing code requirements.
- Never allow children to operate, play with, or crawl inside the refrigerator.
- Do not use solvent-based cleaning agents or abrasives on the interior. These cleaners may damage or discolor the interior.
- Do not use this apparatus for other than its intended purpose.
Placement and Location
- Place your unit on a floor that is strong enough to support the unit when it is fully loaded. To level your unit, adjust the leveling legs at the bottom of the unit.
- Locate the unit away from direct sunlight and sources of heat (stove, heater, radiator, etc.). Direct sunlight may affect the acrylic coating and heat sources may increase electrical consumption.
- Ambient temperatures less than 40ircF (5°C) may cause the unit not to perform properly.
- Plug the unit into an exclusive, properly installed, grounded wall outlet. Do not under any circumstances cut or remove the third (ground) prong from the power cord. Any questions concerning power and/or grounding should be directed toward a certified electrician.
- After plugging the appliance into a wall outlet, allow the unit to cool down for 24 hours before placing food in the refrigerator compartment.
Minimum Clearances:
| BACK | >7 7/8" |
| LEFT | >4" |
| RIGHT | >4" |
| TOP | >4" |
Electrical Connection
WARNING
WARNING: Improper use of the grounded plug can result in the risk of electrical shock. If the power cord is damaged, have it replaced by an authorized service center.
- This unit should be properly grounded for your safety. The power cord of this unit is equipped with a three-prong plug which mates with standard three prong wall outlets to minimize the possibility of electrical shock.
- Do not under any circumstances cut or remove the third ground prong from the power cord supplied. For personal safety, this appliance must be properly grounded.
- This unit requires a standard 115 Volt AC 15 amp /60Hz electrical outlet with three-prong ground. Have the wall outlet and circuit checked by a qualified electrician to make sure the outlet is properly grounded. When a standard 2-prong wall outlet is encountered, it is your responsibility to have it replaced with a properly grounded 3-prong wall outlet.
- The cord should be secured behind the unit and not left exposed or dangling to prevent accidental injury.
- The unit should always be plugged into its own individual electrical outlet which has a voltage and power rating that matches the rating label on the appliance. This provides the best performance and also prevent overloading house wiring circuits that could cause a fire hazard from overheating.
- Never unplug the unit by pulling the power cord. Always grip the plug firmly and pull straight out from the receptacle.
- Repair or replace immediately all power cords that have become frayed or otherwise damaged.
- Do not use a cord that shows cracks or abrasion damage along its length or at either end. When moving the unit, be careful not to damage the power cord.
Extension Cords
Because of potential safety hazards under certain conditions, it is strongly recommended that you do not use an extension cord with this unit.
Reversible Door Swing
This refrigerator can be opened either from the left or right side. The default way of opening the door is from the left side, with the hinges on the right side. If you want to open the door from the right side with hinges on the left side, please follow the instructions below.
- Remove the top hinge pin screw located in the top hinge. Keep pin screw to mount the door in the new hinge on the opposite side location.
- Remove the door from the lower hinge, and keep the padded surface upwards to prevent scratching.
- Remove the 3 screws that hold the top hinge on the refrigerator. Keep screws to mount the new hinge on the opposite side location.
- Remove the 3 screws that hold the lower hinge on the refrigerator. Keep screws to mount the new hinge on the opposite side location.
- Install the lower hinge provided in the hardware bag onto the left side of the door opening using the 3 screws from right side lower hinge.
- Install the top hinge provided in the hardware bag onto the left side of the door opening using the 3 screws from the right side top hinge.
- Install the door by locating it on the left side lower hinge pin.
- Position the door into the top hinge on the left side and align the pin screw location. Insert the pin screw from the right side into the door and secure.
- Ensure the door is aligned properly to the refrigerator body and swings level. Adjust hinges as needed to level the door.
Operating the Refrigerator
Temperature Control
- Turning the temperature control to "OFF" position stops the cooling cycle but does not shut off the power to the unit. If the unit is unplugged, has lost power, or is turned off, you must wait 3 to 5 minutes before restarting the unit. If you attempt to restart before this time delay, the unit will not start. Your unit has only one control for regulating the temperature in the compartment. The temperature control is located on the upper right hand side of the compartment.
- NOTE: Wait 24 hours for your refrigerator to cool completely before adding food. Adding food before the refrigerator has completely cooled may cause your food to spoil.
- The first time you turn the unit on, set the temperature control to "5".
- The range of the temperature control is from position "OFF" to "5". After 24 to 48 hours, adjust the temperature control to the setting that best suits your needs. The setting of "3" should be appropriate for most needs.
- To turn the appliance off, turn the temperature control to "OFF".
Energy Saving Tips
- The unit should be located in the coolest area possible, away from heat producing appliances, and out of the direct sunlight.
- Let hot foods cool to room temperature before placing in the unit. Overloading the unit forces the compressor to run longer.
- Be sure to wrap foods properly, and wipe containers dry before placing them in the unit. This cuts down on frost build-up inside the unit.
- Unit storage bin should not be lined with aluminum foil, wax paper, or paper towels. Liners interfere with cold air circulation, making the unit less efficient.
- Organize and label food to reduce door openings and extended searches. Remove as many items as needed at one time, and close the door as soon as possible.
Moving the Refrigerator
- Remove all the food.
- Securely tape down all loose items inside your unit.
- Turn the leveling legs up to the base to avoid damage.
- Tape the door shut.
- Be sure the unit stays secure in the upright position during transportation. Also protect the outside of unit with a blanket, or similar item.
Vacation Time
Short vacations: Leave the unit operating during vacations of less than three weeks.
Long vacations: If the appliance will not be used for several months, remove all food and unplug the power cord. Clean and dry the interior thoroughly. To prevent odor and mold growth, leave the door open slightly, blocking it open if necessary.
CAUTION
CAUTION: Do not use boiling water because it may damage the plastic parts. In addition, never use a sharp or metallic instrument to remove frost as it may damage the cooling system and will void the warranty. We recommend using a plastic scraper.
Cleaning your Refrigerator
- Turn the temperature control to "OFF", unplug the unit, and remove the food, shelf, and tray.
- Wash the inside surfaces with a warm water and baking soda solution. The solution should be about 2 tablespoons of baking soda to a quart of water.
- Wash the shelf and tray with a mild detergent solution.
- The outside of the unit should be cleaned with mild detergent and warm water.
- Wring excess water out of the sponge or cloth before cleaning the area of the controls, or any electrical parts.
- Wash the outside cabinet with warm water and mild liquid detergent. Rinse well and wipe dry with a clean soft cloth.
CAUTION
CAUTION: Failure to unplug the unit could result in electrical shock or personal injury.
In Case of Power Failure:
Most power failures are corrected within a few hours and should not affect the temperature of your unit if you minimize the number of times the door is opened. If the power is going to be off for a longer period of time, you need to take the proper steps to protect your food.
WARRANTY
| Item | Warranty Term |
| Refrigerator | Limited One (1) Year |
Saber ® warrants the stainless steel all fabricated stainless steel components to be free from defects in materials and workmanship under normal residential use for a period of one year from the original purchase date. Saber ® will replace the part that failed or is found to be defective during the warranty period, at no cost to the original purchaser.
Costs associated with the installation of replacement warranty parts are not covered by this warranty and is the sole responsibility of the owner.
This warranty excludes discoloration, surface scratches, weather and atmospheric related staining, and minor surface rust and oxidation which are normal conditions and to be expected with any outdoor product.
Owner shall be responsible for proper installation, providing normal care and maintenance, and providing proof of purchase upon request.
Saber ® reserves the right, PRIOR to shipping warranty replacement parts, to require the part in question be returned for inspection and analysis. Requested parts should be returned to Saber ® , freight pre-paid by the consumer.
WARRANTY LIMITATIONS & EXCLUSIONS
This warranty excludes units purchased for use in all types of commercial and or community use locations such as restaurants, hotels, catering operations food service establishments, condominium/apartment complexes, rental properties, and to products with altered or removed serial numbers.
This warranty shall apply ONLY to the products purchased and located in the continental United States and Canada.
The warranty coverage begins on the original date of purchase and proof of date of purchase is required for warranty service. Please retain your original sales receipt. Refrigerators and outdoor kitchen components will require the sales receipt for warranty service.
This warranty applies only to the original refrigerator or outdoor kitchen component owner and cannot/may not be transferred.
This warranty does not apply to damages resulting from negligence, alteration, misuse, abuse, accident, natural disaster, loss of electrical power to the product for any reason, improper installation or improper operation, unauthorized adjustments or calibrations, dings, dents, scratches, or damages due to harsh cleaning chemicals.
Saber ® shall not be liable for incidental, consequential, special or contingent damages resulting from its breach of this written warranty or any implied warranty.
In the event of any warranty replacement, all removal, replacement and installation are the responsibility of the grill owner.
Saber ® reserves the right to replace any defective product with a product equal in value to the original purchase price. Warranty repair or replacement is at the sole discretion of Saber ® .
Dealers and Distributors may not, under any circumstances, adjust, alter or extend the conditions and terms of the original warranty.
Your Saber ® warranty does not cover the following:
- Labor charges related to installation or set-up, diagnosis of a problem, or repairs.
• Normal recommended routine maintenance and care. - Damage resulting from accident, alteration, misuse, abuse, hostile environments, improper installation, or installation not in accordance with local, state and federal codes and regulations.
- The use of unauthorized or "universal" parts.
- Damage or corrosion caused by lack of maintenance, neglect in following the manufacturer's care and usage instructions, animals and insects.
- Any damage resulting from the commercial and or community use of this product.
- Retail Display models are generally sold "AS IS." If you have purchased a display model, please be advised that it is sold "AS IS" and that it is subject to the following warranty exclusions:
- Any exterior or cosmetic damage is non-warrantable.
- Any missing components will be replaced at the consumer's sole expense.
DISCLAIMER OF IMPLIED WARRANTIES AND LIMITATION OF REMEDIES
CUSTOMER'S SOLE AND EXCLUSIVE REMEDY UNDER THIS LIMITED WARRANTY SHALL BE PRODUCT REPAIR OR REPLACEMENT AS PROVIDED HEREIN. IMPLIED WARRANTIES, INCLUDING WARRANTIES OF MERCHANTABILITY OR FITNESS FOR A PARTICULAR PURPOSE, ARE EXCLUDED OR LIMITED TO ONE YEAR OR THE SHORTEST PERIOD ALLOWED BY LAW. SABER® SHALL NOT BE LIABLE FOR INCIDENTAL OR CONSEQUENTIAL DAMAGES. SOME STATES OR PROVINCES DO NOT ALLOW THE EXCLUSION OR LIMITATION OF INCIDENTAL OR CONSEQUENTIAL DAMAGES, OR LIMITATION ON THE DURATION OF IMPLIED WARRANTY OF MERCHANTABILITY OR FITNESS, SO THESE EXCLUSIONS OR LIMITATION MAY NOT APPLY TO YOU. THIS WARRANTY GIVES YOU SPECIFIC LEGAL RIGHTS, AND YOU MAY ALSO HAVE OTHER RIGHTS WHICH CAN VARY FROM STAT TO STATE OR PROVINCE TO PROVINCE.
How to Obtain Warranty Service or Repair Parts:
Call your authorized Saber ® dealer. A list of Saber ® dealer and their contact information can be found at http://www.sabergrills.com.
Utilize our online customer service at http://www.sabergrills.com/warrantyservice
Call Saber ® directly at 1-(888)-94S-ABER (947-2237). We look forward to assisting you!
Or write us at:
Saber
Warranty Service
P. O. Box 1977
Columbus, GA. 31902
Please be prepared to furnish the following information: Purchaser's name and model of the refrigerator, date of purchase and the accurate description of the problem.
| Date of Purchase: | |
| Dealer Where You Purchased Your Grill, built in side burner, or refrigerator: | |
| Dealer Phone Number: | |
| Model Number:(located on the cover of your instruction manual or rating label) |
PARTS LIST
| Key Qty Description |
| 1 1 REFRIGERATOR BODY ASSEMBLY |
| 2 1 DOOR ASSEMBLY |
| 3 1 BOTTOM HINGE, RIGHT SIDE |
| 4 1 TOP HINGE, RIGHT SIDE |
| 5 2 UPPER WIRE SHELF |
| 6 1 LOWER WIRE SHELF |
| 7 1 CAN DISPENSER |
| 8 1 CONDIMENT BAR |
| 9 2 DOOR BAR |
| 10 1 VENT COVER |
| 11 4 LEG LEVELING |
| 12 1 LIGHT LENS COVER |
| 13 1 TEMPERATURE CONTROL KNOB |
| ... 1 BOTTOM HINGE, LEFT SIDE |
| ... 1 TOP HINGE, LEFT SIDE |
| ... 1 ASSEMBLY MANUAL, ENGLISH, FRENCH, SPANISH |
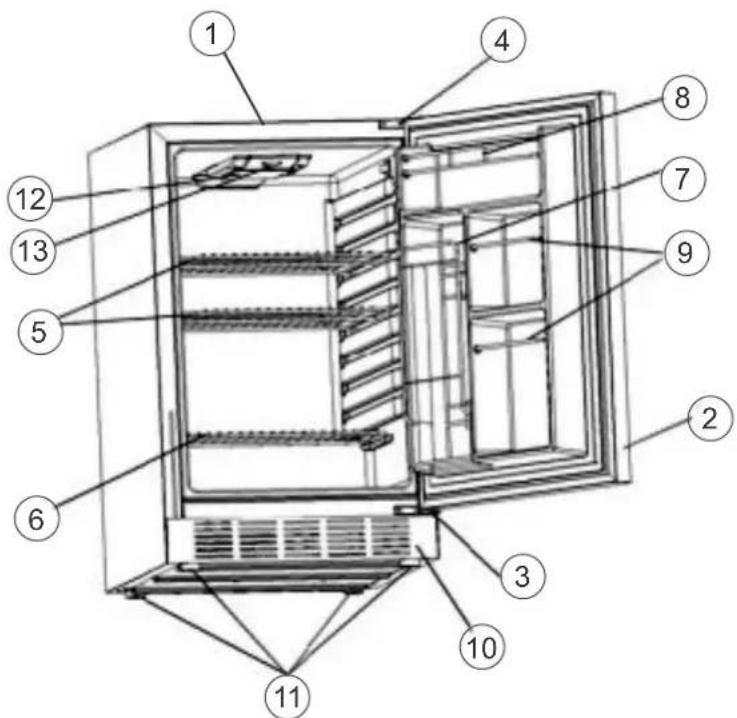
Troubleshooting
| Problem Possible Cause | Prevention/Solution | |
| Unit does not operate. | The Unit is not plugged in.Circuit breaker is tripped or a fuse is blown.The unit's temperature control is set to "OFF". | Plug the unit into an operational electrical circuit and retry.Reset the circuit breaker or replace the fuse. If circuit breaker trips again, of if fuse blows again, stop and call a certified electrician to troubleshoot the problem.Adjust the temperature control to the "5" position and retry. |
| Unit turns on and off frequently. | The ambient temperature is hotter than normal.A large amount of food has been added to unit.The door is opened frequentlyThe door is not completely closedThe temperature control is set too low.The door gasket is not sealing properly. | High ambient temperatures will cause the unit to cycle more frequentlyThe unit must cycle more frequently to cool a large amount of food.Do not open the door as frequently.Ensure no obstructions are holding the door open.Raise the temperature control to a higher setting.Clean and inspect the door gasket for damage. ensure no obstructions are holding the door open. If the door gasket is damaged, replace the gasket. |
| Vibrations | The unit is not level.Island components are in contact with the unit. | Check to make sure the unit is level.Be sure recommended clearances are maintained. |
| The unit is noisy. | A rattling noise may result from the flow of refrigerant.As each cycle ends, you may hear a gurgling noise from refrigerant flow.Contraction and expansion of the interior walls.The unit is not level. | This is normalThis is normalThis is normal.Check to make sure the unit is level. |
| The door will not close properly. | The unit is not level.The door was reversed and was not properly installed.The door gasket is dirty or bent.Shelves, bins, baskets, or food may be blocking the door. | Check to make sure the unit is level.Check to make sure the door was properly installed.Clean the gasket or replace it if damaged.Reposition items inside to ensure the door will close properly. |
TECHNICAL DATA
| ITEM | UNITS | VALUE |
| VOLTAGE | VAC | 110~ |
| FREQUENCY | Hz | 60 |
| CURRENT | A | 1.55 |
| WATTS | W | 115 |
| ENERGY CONSUMPTION | KwHR per DAY | .85 |
| VOLUME | FT3 | 4.1 |
| DIMENSIONS (WxDxH) | mm | 520x572x840 |
| REFRIGERANT | R134a | |
| REFRIGERANT CHARGE | LBS. | .0883 |
| HIGH PRESSURE | PSIG | 218 |
| LOW PRESSURE | PSIG | 130 |
| WEIGHT | Kg | 41.5 |
| INSULATION | POLYURETHANE |
WIRING DIAGRAM
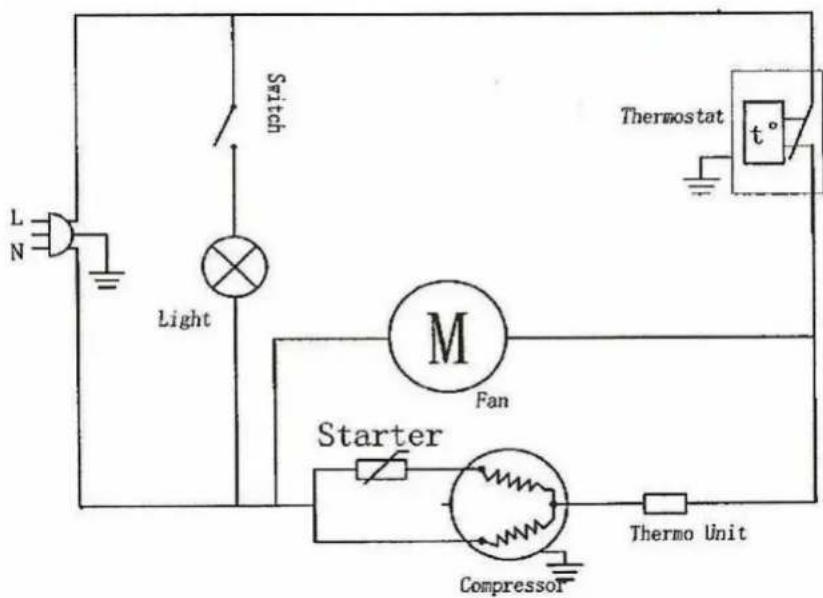
NOTE: This wiring diagram is for reference only. The wiring label on the rear of the refrigerator will be accurate.
SABER®
MANUEL DU PRODUIT MODÈLE K00AA3314
natural_image
Interior view of an open refrigerator with visible door, shelves, and ventilation grilles (no text or symbols)natural_image
Interior view of an open refrigerator with visible door, shelves, and ventilation grilles (no text or symbols)
- PRODUCT GUIDE MODEL K00AA3314
- For Residential Use Only Read all instructions before operating your refrigerator. Save these instructions!
- TABLE OF CONTENTS
- Safety Symbols
- WARNING
- CAUTION
- DANGER
- Unpacking:
- CALIFORNIA PROPOSITION 65
- Placement and Location
- Electrical Connection
- Extension Cords
- Reversible Door Swing
- Operating the Refrigerator
- Temperature Control
- Energy Saving Tips
- Moving the Refrigerator
- Vacation Time
- Cleaning your Refrigerator
- In Case of Power Failure:
- WARRANTY
- WARRANTY LIMITATIONS & EXCLUSIONS
- Your Saber ® warranty does not cover the following:
- DISCLAIMER OF IMPLIED WARRANTIES AND LIMITATION OF REMEDIES
- How to Obtain Warranty Service or Repair Parts:
- PARTS LIST
- WIRING DIAGRAM
- SABER®
- MANUEL DU PRODUIT MODÈLE K00AA3314
Brand : SABER
Model : K00AA3314
Category : Refrigerator