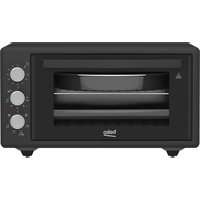
BMF40B - Electric oven BEKO - Free user manual and instructions
Find the device manual for free BMF40B BEKO in PDF.


User questions about BMF40B BEKO
0 question about this device. Answer the ones you know or ask your own.
Ask a new question about this device
Download the instructions for your Electric oven in PDF format for free! Find your manual BMF40B - BEKO and take your electronic device back in hand. On this page are published all the documents necessary for the use of your device. BMF40B by BEKO.
USER MANUAL BMF40B BEKO
natural_image
Simple line drawing of a steaming cupcake (no text or symbols)BSUF 4000 MEB
Please read this guide first!
Dear Customer,
Thank you for choosing this Beko product. We would like you to achieve the optimal efficiency from this high quality
product which has been manufactured with state of the art technology. To do this, carefully read this manual and any other documentation provided
before using the product and keep it as a reference.
If you give the product to someone else, give the manual with it. Follow the instructions, taking into account all the information and warnings stated in the user's manual.
Remember that this user's manual is also applicable for several other models. Differences between models will be identified in the manual.
Symbols and their explanations
The user's manual contains the following symbols:

Important information or useful usage tips.

Warning against health and property risks.
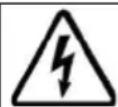
Warning against electric shock.
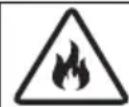
Warning against fire.
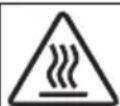
Warning against hot surfaces.

This product has been manufactured at modern facilities respectful to the environment without harming nature.
1 Important safety and environmental instructions 4
General safety 4
Electrical safety 5
Product safety 6
Intended use 7
Safety for children 9
Compliance with WEEE Regulations and Waste Disposal ....10
Packaging information 10
2 Your appliance 11
General appearance....11
Scope of delivery 12
Technical specifications 13
3 Installation 14
Right place for installation ....14
Installation and connections .....14
Future transport operations ....15
4 Preparation 16
What to do for energy saving....16
Initial operation 16
Initial cleaning 16
First heating 16
5 Using the oven 17
General information on cooking, frying and grilling 17
Using the electrical oven 17
Operating modes .....18
Using the oven clock 19
Cooking times chart 20
Operation of the grill 21
Using the Yoghurt Curing and Steam Cleaning features 22
6 Maintenance and cleaning 23
General cleaning information .....23
Cleaning the accessories 24
Cleaning the control panel 24
Cleaning the inside of the oven (cooking area) 24
Cleaning the oven lamp 25
Removal and installation of the lower resistance concealing accessory....26
7 Troubleshooting 27
1 Important safety and environmental instructions
This section contains safety instructions that will help protect from risk of personal injury or property damage. Failure to follow these instructions shall void any warranty.
General safety
- This product can be used by children 8 years of age and older, and people who are underdeveloped in physical, sensory or mental skills, or people with lack of experience and knowledge, as long as they are supervised or trained about the safe use and hazards of the product.
Children shall not play with the appliance. Cleaning and user maintenance shall not be made by children without supervision.
- This appliance shall not be used by persons (including children) with reduced physical, sensory or mental capabilities, unless they are supervised or provided with the required instructions.
Children who are not supervised shall not play with the appliance.
- If the product is handed over to someone else for personal use or second-hand use purposes, the user's manual, product labels and other relevant documents and parts shall also be given.
- Installation and repair operations shall always be performed by the Authorized Service. Manufacturer cannot be held responsible for damages caused by operations performed by unauthorized persons.
- If the product is faulty or in case of a visible damage, do not operate the product.
- Make sure that the product is turned off after each use.
Electrical safety
- If the product is faulty, it shall not be operated before it is repaired by the authorized service! There is the risk of electric shock!
- Connect the appliance to a grounded outlet/line with the voltage and protection as specified in the “Technical specifications” only. Whether operating with a transformer or not, always have a qualified electrician to perform
the grounding installation. Our company shall not be held responsible for any damages that may occur if the product is used without providing proper grounding in accordance with local regulations.
- Never wash the appliance by spraying or pouring water onto it! There is a risk of electric shock!
- Never touch the plug with wet hands! Do not pull the cable to plug off, always hold the plug.
- Unplug the product during installation, maintenance, cleaning and repairing procedures.
- If the connection cable is damaged, it shall be replaced by the manufacturer, after sales service or similarly qualified, certified person (preferably an electrician) or a person to be specified by the importer company in order to prevent possible risks.
- The appliance shall be installed so that it can be completely disconnected from the mains supply. The disconnection shall be
provided by a switch built into the fixed electrical installation, according to the construction regulations.
- The rear surface of the oven gets hot when it is in use. Power connections shall not touch the back surface, the connections may be damaged.
- Do not jam the electric cables into the oven door and do not pass them over hot surfaces. Otherwise, cable insulation may melt and cause fire as a result of short circuit.
- Any work on electrical equipment and systems shall only be carried out by authorised and qualified persons.
- In case of any damage, switch off the appliance and disconnect it from the mains. To do this, switch off the domestic fuse.
- Ensure that the fuse amperage match with the amperage of the appliance.
Product safety
- WARNING: Exposed parts of the appliance will be hot while working.
Do not touch the appliance and heating elements. Children under the age of 8 shall not be brought close to the product without an adult.
- This appliance is manufactured in compliance with the safety regulations.
- Operation against the rules cause harm both to the person and the appliance.
- Do not put any flammable, ignitable materials or material that may melt or deform due to the heat inside the oven against possible risks even if the oven is not operated.
- It is not designed to operate with the system.
- Do not pour cold water to the tray or inside the oven while the surface of the appliance is still hot. Surface of the appliance may get damaged as a result of the sudden change in the temperature, and it may cause scaldings.
- Long term intense use of the appliance may require extra ventilation, for example, opening a window, or a better ventilation, such as increasing the mechanical ventilation level.
- Do not apply pressure on the oven door with heavy objects when the door is open; do not lean, place heavy objects on the door or do not handle
the appliance by holding its door.
- Never use the product when your judgement or coordination is impaired by drug or alcohol usage.
- Be careful when using alcohol in your food. Alcohol evaporates at high temperatures and may cause fire as it can ignite when it comes into contact with hot surfaces.
- Food Poisoning Hazard: Do not keep food in the oven for more than an hour before and after cooking. Otherwise, food poisoning or diseases may occur.
- Do not place any flammable materials close to the appliance as its sides may become hot during operation.
- The appliance may be hot during operation. Do not touch hot compartments, inside of the oven and heating elements.
- Keep all ventilation ducts and their surroundings open.
- Do not heat closed tins and glass jars. Built up pressure may cause the jar to burst.
- Do not place baking trays, plates or aluminium foil directly on the bottom of the oven.
The accumulated heat can damage the base of the oven.
- The accessible surfaces of the appliance get very hot. Never touch the hot surfaces.
- Consider the information provided in the installation section. The appliance becomes very hot, therefore it must not be installed in built-in unit.
-
This appliance is intended for use at home and in applications as follows:
-
staff kitchen areas in shops, offices and other working environments;
- farm houses;
- by clients in hotels, motels and other residential type environments;
-
bed and breakfast type environments.
-
The oven must not be covered when it is operated.
- If the product is handed over to someone else for personal use or second-hand use purposes, the user's manual, product labels and other relevant documents and parts shall also be given.
- Do not use harsh abrasive
cleaners or sharp metal scrapers to clean the oven door and glass since they can scratch the surface, which may result in shattering of the glass.
- Do not clean the product with steam cleaners as this may cause electric shock.
- (This varies depending on the product model.) The wire shelf and tray shall be placed onto the wire racks properly.
- It is important that the wire grill and trays are placed correctly on the wire shelves.
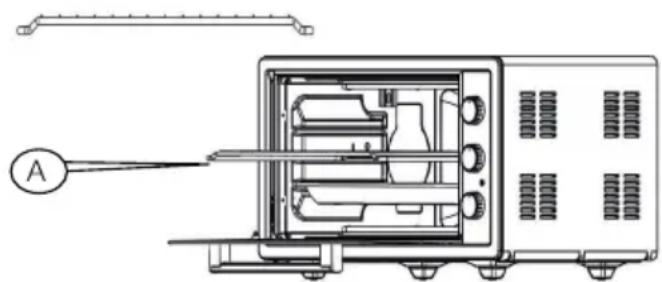
- WARNING: The grill shall be placed properly as shown in Figure A on the selected rack and pushed to the end.
natural_image
Technical line drawing of an internal device with labeled component A (no text or symbols beyond label)- Do not use the appliance of the front door glass is removed or cracked.
- Do not apply pressure on the oven door with heavy objects when the door is open; do not lean, place heavy objects on the door or do not handle the appliance by holding its door.
The oven handle is not a tow-el dryer. Do not hang towels, gloves or similar textiles while grilling with the door open.
- Always use heat resistant oven gloves while placing food in the hot oven, or removing the food from the hot oven, etc.
- Place the greaseproof paper in a cookware or on the oven accessory (tray, wire grill, etc.) with food and place it in the preheated oven. Remove any excessive pieces of grease-proof paper hanging from the accessory or container to avoid the risk of touching the oven heating elements. Never use greaseproof paper at an oven temperature higher than the maximum use temperature specified on the greaseproof paper you are using. Never place greaseproof paper on the oven base.
- WARNING: Before replacing the oven lamp, be sure to disconnect the product from the mains supply to avoid the risk of electric shock.
- To prevent overheating, the appliance shall not be installed
behind decorative doors. The appliance shall be placed directly on the floor. It should not be placed on a plinth or bedplate.
- This product is not suitable for use with a remote control or an external clock.
For fire safety of the appliance; - Make sure that the product plug is securely plugged into the outlet to avoid arcing.
- Do not use cut or damaged cables or extension cables other than the original cables.
- Make sure that the outlet that the product is plugged is free of fluids or humidity. Purpose of usage
- This product is designed for home use. It is not intended for commercial use.
- CAUTION: This product shall be used for cooking purposes only. It should not be used for different purposes, such as heating the room.
- This product shall not be used for heating plates under the grill, hanging towels or clothes on the handle for drying or for heating the room.
- The manufacturer assumes no responsibility
for any damage due to mis-use or mishandling.
- The oven compartment can be used to defrost, bake, fry and grill food.
- This product's service life is 10 years.
This is the period during which the manufacturer will keep the spare parts required for proper operation of the appliance.
Safety for children
- WARNING: During its operation, the accessible surfaces of the appliance are hot. Keep the children away from the appliance.
- Packaging materials are hazardous for children. Keep the packaging materials away from the reach of children.
- Electrical products are dangerous for children. Keep the children away from the oven while it is operated and do not let them play with the product.
- Do not place objects that may be reached by children on the oven.
- When the door is open,
do not put any heavy objects on it or allow children to sit on it. You may cause the oven to tip over or damage the door hinges.
Compliance with WEEE regulation and disposal of waste products
- This product does not contain harmful and forbidden materials described in the “Directive on the Restriction of the Use of Certain Hazardous Substances in Waste Electrical and Electronic Equipment” (WEEE) issued by the T.R. Ministry of Environment and Urbanization.
Complies with the WEEE Directive.
- This product has been manufactured with high quality parts and materials which can be reused and are suitable for recycling. Therefore, do not dispose of the waste product with normal domestic and other wastes at the end of its service life. Take it to a collection point for the recycling of electrical and electronic equipment. You can ask your local administration about these collection points. Help protect the environment and natural resources by recycling used products. Before disposing of the product, cut off the power cable plug and make the door lock (if any) unusable to avoid dangerous conditions to children.
Package information
- Packaging materials of the product are manufactured from recyclable materials in accordance with our National Environment Regulations. Do not dispose of the packaging waste with the household or other wastes, take them to the packaging material collection points designated by the local
2 Your Product
General Appearance
text_image
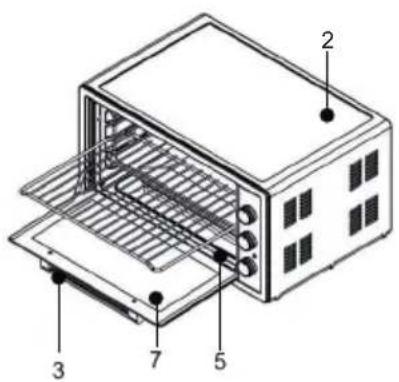
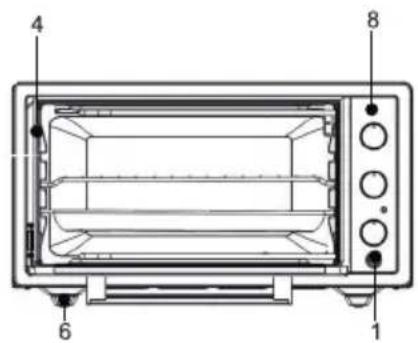
Technical diagram of an oven with numbered components for identification1- Control Panel
2- Oven body
3- Handle
4- Cooker
5- Heaters
6- Oven legs
7- Oven glass door
8- Control Buttons
text_image
1 2 3 4 5 6 7 8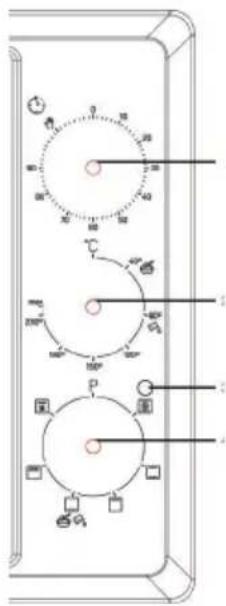
text_image
Diagram of a device control panel with labeled rotary dial indicators and component symbols| External width 590 mm | |
| External depth 460 mm | |
| External height 330 mm | |
| Internal width 440 mm | |
| Internal depth 420 mm | |
| Internal height 240 mm | |
| Thermostat 40-240 °C | |
| Timer 0 to 90 min. | |
| Bottom heater 800 W | |
| Upper heater 600 W | |
| Grill heater 1200 W | |
| Supply voltage 220-240V, ~ 50/60Hz. | |
| Turbo fan 13 - 15 W | |
| Oven light 15 - 25 W | |
Scope of delivery

Depending on the product model, the supplied accessories vary. All accessories described in the user's manual may not be available in your product.
1. User's Manual
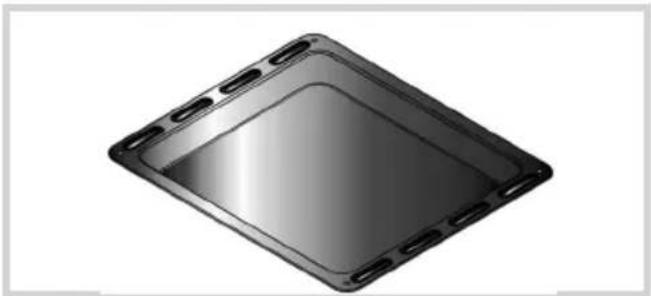
2. Oven tray
Used for soft cakes, cakes, pies, cookies, deep-frozen meals and large meat dishes.
natural_image
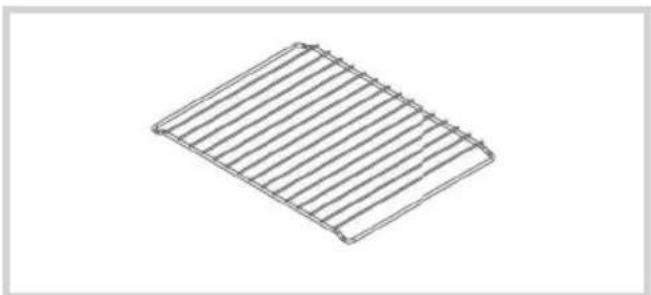
3D rendering of a square metallic component with mounting holes and a reflective surface (no text or symbols)3. Wire grill
Used for cups, moulds, meat dishes, roasts and frozen meals.
natural_image
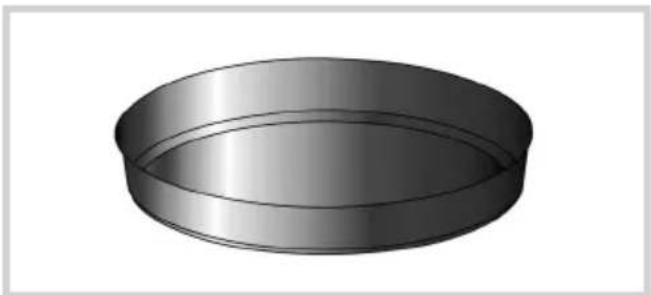
Isometric line drawing of a rectangular grid structure with vertical lines (no text or symbols)4. Round tray
Used for soft cakes, cakes, pies, cookies, deep-frozen meals and large meat dishes. Always use it together with the wire grill. Place the tray on the center of the wire grill to cook both sides equally.
natural_image
3D rendering of a cylindrical metallic bowl or plate (no text or symbols)Technical Specifications
| External dimensions (height / width / depth) | 640x510x395 mm |
| Voltage / frequency 220-240 V~, 50/60 Hz | |
| Total electric power 1.4 kW | |
| Fuse min. 13 A | |
| Cable type / section RR-F 3x1.0 mm2 | |
| Main oven Multifunctional oven | |
| Inner lamp 15/25 W |

Technical specifications may be changed without prior notice to improve the quality of the product.

Figures in this manual are schematic and may not exactly match your product.

The values stated on the product labels or in the documentation accompanying it are obtained in laboratory conditions in accordance with relevant standards. These values may vary depending on operational and environmental conditions of the product.
3 Installation
Refer to the nearest Authorised Service Agent for installation of the product. Make sure that the electric and gas installations are in place before calling the Authorised Service Agent to have the product ready for operation. If not, call a qualified electrician and fitter to have the required arrangements made. The manufacturer shall not be held responsible for damages arising from procedures carried out by unauthorized persons which will also void the warranty.

It is customer's responsibility to prepare the location the appliance shall be placed on and to have the electrical installation prepared.

WARNING:
The product must be installed in accordance with all local gas and/or electrical regulations.

WARNING:
Prior to installation, visually check if the product has any defects on it. If the product is damaged, do not install it. Damaged products cause risks for your safety.
Right place for installation
This product is intended for use only on a counter.

Do not use the product in a closed cabinet or on the floor level.
The kitchen floor must be able to carry the weight of the appliance plus the additional weight of cookware and bakeware and food.
- Any kitchen furniture next to the appliance shall be heat-resistant (at least 100 °C).
Installation and connection
Product can only be installed and connected in accordance with the statutory installation rules.

Do not install the appliance beside refrigerators or coolers. The heat emitted by the appliance increases the energy consumption of the cooling units.

Do not use the door and/or handle to transport or move the product. The door, handle or hinges may be damaged.
Electrical connection
Plug the appliance in a grounded socket protected by a fuse conforming to the values specified in the “Technical specifications” chart. Whether operating with a transformer or not, have the grounding installation made by an Authorized Electrician. Our company shall not be held responsible for any damages that may occur if the product is used without providing proper grounding in accordance with local regulations.

WARNING:
The product can only be connected to the mains electricity connection by an authorized and qualified person, and the warranty of the product starts only after correct installation. The manufacturer cannot be held responsible for any damages that may arise due to operations made by unauthorized persons.

WARNING:
The electric cable shall not be crushed, folded, jammed or touch hot parts of the product.
If the electric cable is damaged, it shall be replaced by a qualified electrician.
The mains supply data shall correspond to the data specified on the type label of the product. The rating plate is either seen when the door or the lower cover of the appliance is opened or it is located at the rear wall of the appliance depending on the appliance type. Power cable of your product shall comply with the values in "Technical specifications" table.

Power cable plug must be within easy reach after installation (do not route it above the hob).
Do not use extension cables or multi sockets for power connection.

Power cable plug must be within easy reach after installation (do not route it above the hob).
Do not use extension cables or multi sockets for power connection.
Manufacturer is not responsible for damages caused by unearthed outlets.
If the mains cord (plugged cord) is damaged, this cord must be replaced by the manufacturer or its service agent or an equally qualified personnel to prevent a hazardous situation.
Power cord of your appliance shall not come into contact with the hot components of the appliance.

While performing the wiring, you must comply with the national/local electrical regulations and must use the appropriate socket outlet/line and plug for oven.
In case of the product's power limits are out of current carrying capability of plug and socket outlet/line, the product must be connected to fixed electrical installation directly without using plug and socket outlet/line.

WARNING:
Disconnect the product from the electric connection before starting any work on the electrical installation. There is an electric shock hazard.
Connect the power cable into the socket.
- Push the product towards the kitchen wall.
Final inspection
- Check electrical functions.
Electrical connection of your appliance shall only be performed with earthed outlets installed as per the regulations.
Contact authorized service if an earthed outlet is not available where the appliance shall be placed.
Future transport operations
- Keep the original packaging of the appliance and carry the appliance in this box. Follow the instructions on the box. If the original packaging is not available, wrap the appliance with bubble wrap material or with a thick cardboard and tape it tightly.
To prevent damage to the oven door by the wire grill and tray, place a cardboard strip as aligned with these trays on the inside of the oven door. Tape the oven door to the side walls.
- Do not use the door and/or handle to transport or move the product.

Do not place items on the appli- ance and carry the product upright.

Check the overall appearance of the appliance for any damage that may have occurred during transportation.
4 Preparation
What to do for energy saving
The following suggestions
will help you use your product in an ecological and energy-efficient way:
- In the oven, use dark or enamelled containers that transmit heat better.
- While cooking your food, pre-heat the oven if the recipe or the table in the user's manual recommends pre-heating.
- Do not open the oven door frequently during cooking.
- Try to cook more than one dish at a time in the oven. You can cook by placing two cooking pots on the wire shelf.
- Cook multiple dishes successively. The oven will not lose heat.
- Turn off the oven a few minutes before the ending time of the cooking. Do not open the door of the oven in such a case.
- Thaw frozen food before cooking.
First use
Initial cleaning

Some detergents or cleaning agents may damage the surface. Do not use abrasive detergents, cleaning powders, cleaning creams or sharp objects during cleaning.
- Remove all packaging materials.
- Wipe the surfaces of the product with a wet cloth or sponge and dry with a cloth.
First heating
Heat the product for about 30 minutes and then turn it off. This way, residues and layers that may have remained in the oven during production are burned and cleaned.

WARNING
Hot surfaces cause burns!
The product will be hot while working. Do not touch hot surfaces, inside of the appliance or to the heaters. Keep children away from the product.
Always use heat resistant oven gloves while placing food in the hot oven, or removing the food from the hot oven, etc.
Electrical oven
- Remove all baking trays and the wire grill from the oven.
- Close the door of the oven.
- Select the lower/upper heating position.
- Select the highest temperature, see Using the electrical oven, page 19.
- Run for approximately 30 minutes.
- Turn off your oven; see Using the electrical oven, page 20
Oven with grill
- Remove all baking trays and the wire grill from the oven.
- Close the door of the oven.
- Choose the highest power of the grill; see Operation of the grill, page 22.
- Run for approximately 30 minutes.
- Turn off your grill; see Operation of the grill, page 22

During the first operation, smoke and odour may occur for a few hours. This is normal and you just need good ventilation to remove it. Avoid directly inhaling the smoke and odours that are formed.
5 Using the oven
General information on cooking, frying and grilling

WARNING
Hot surfaces cause burns!
The product will be hot while working Do not touch hot surfaces, inside of the appliance or to the heaters. Keep children away from the product.
Always use heat resistant oven gloves while placing food in the hot oven, or removing the food from the hot oven, etc.

WARNING:
As steam may be exhaled, keep away while opening the oven door.
The steam may burn your hand, face and/or eyes.
Hints for cooking in the oven
- Use suitable metal dishes with non-sticking coating, or aluminium pots or heat-resistant silicon pots.
- Utilize the area on the rack efficiently.
- Place the cooking mould to the center of the rack while cooking in the oven.
- Before operating the oven or the grill, select the correct shelf position. Do not change the rack position while the oven is hot.
- Keep the oven door closed.
Hints for frying
- Seasoning with lemon juice and pepper before cooking all chicken, turkey and large pieces of meat will increase cooking performance.
- It takes 15 to 30 minutes more to cook boned meat than fillet by frying.
- You shall calculate about 4 to 5 minutes of cooking time per each centimetre of the meat thickness.
- Keep the meat inside the oven for 10 minutes after the cooking time has expired. The juice of the meat is better distributed to the fried meat and does not come out when the meat is cut.
- Fish should be placed on a medium or low level shelf in a heat resistant plate.
Hints related to grilling
Red meat, fish and poultry meat will quickly turn brown when grilled, hold a beautiful crust and do not dry out.
Fillet meats, skewer meats, sausages as well as juicy vegetables (tomatoes, onions, etc.) are particularly suitable for grilling.
- Place the pieces to be grilled on the wire grill or wire grill tray by distributing them without exceeding the dimensions of the heater.
- Slide the wire grill or the wire grill tray to the desired level in the oven. If you are grilling in the wire grill, place an oven tray to the bottom to collect the grease. If you put some water in the oven tray, you may clean it easily later.
Food not suitable for grilling carries a fire hazard. Grill only food that is suitable for heavy grill fire. Also, do not place the food too far in the back of the grill. This is the hottest area and fatty foods may catch fire.
Using the electrical oven
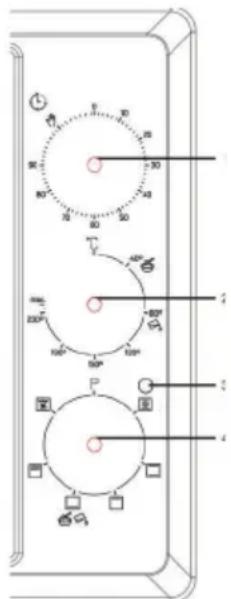
Selecting the temperature and operation mode.
text_image
Technical diagram of a device control panel with labeled rotary dials and indicator lights1 - Mechanical clock
3 - Temperature lamp
2 - Temperature button
4 - Function button
-
Set the oven clock to the cooking time; see Operation of the oven clock, page 20.
-
Switch the temperature button to the desired temperature.
-
Bring the function knob to the desired operation mode.
» The oven is heated to the desired temperature and keeps this temperature. The temperature light illuminates while heating. » Oven programmer is used with control button. Thermostat breaks the circuit and the thermostat light turns off when the temperature of the oven reaches the set temperature. When it decreases below the set value, thermostat engages again and the thermostat light turns on.
Turning off the electrical oven
Switch the oven clock off.

If the clock has been set to a specific time, the clock shall turn off automatically, see Using the oven clock, page 20.
Turn the function knob and temperature knob to off (top) position.
Operating modes
Oven functions may vary by product model: Each mini-midi oven model may not feature all oven functions specified here.
Upper heating

Only the upper heater is activated. Thanks to the turbo fan feature the heat is dissipated homogeneously inside the oven It is applicable for instance for cooking cake, patty or cakes or stew in the moulds or containers. Cook with a single tray.
Lower heating

Only the lower heater is activated. It is suitable for pizza and foods that need browning on the bottom, for example.
Upper and lower heating

Upper and lower heaters are activated.
Food is heated from above and below at the same time. It is applicable for instance for cooking cake, patty or cakes or stew in moulds or containers. Cook with a single tray.
Turbo fan assisted lower and upper heating

Turbo fan is activated together with the upper and lower heaters. The heat is dissipated homogeneously inside the oven thanks to the turbo fan feature. It is applicable for instance for cooking cake, patty or cakes or stew in moulds or containers. Cook with a single tray.
Grill heating turbo fan assisted heating

To grill, place small or medium portions in the correct rack position under the grill heater. Bring it to the desired temperature. Turn the food upside down halfway through the cooking process.
Grill heating

The large grill on the oven ceiling works. It is suitable for grilling large amounts of meat.
Using the oven clock
text_image
0 10 20 30 40 50 60 70 80 90 100Starting the cooking process

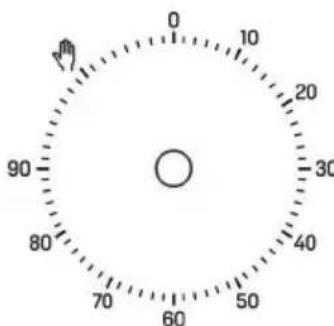
To operate the oven, you shall also set the time while selecting the cooking mode and the desired temperature. Otherwise, the oven will not operate.
- Set the cooking time by rotating the time setting button clockwise.
- It allows you to adjust the cooking time.
- Put your food into the oven.
- When the set time has expired, timer shall cut off the power of the heaters and the hobs and shall issue a warning with a tingling sound.
- If you want to set the timer to less than 10 minutes, rotate the timer button 90 degrees first, and then bring it to the desired time.
- Select the operation mode and temperature; see Using the electrical oven, page 18

If you do not want to use the timer function, rotate the switch counter-clockwise, towards the hand symbol.
-
Turn the oven off with the time setting button, function button and temperature button.
-
Set the timer, program and thermostat buttons to "0" to turn off your appliance.
- Turn the oven off with the function and/or temperature button.
Cooking times chart

The stated values were determined in the laboratory. Values suitable for you may differ from these values.
» The oven heat up to the preset temperature and keeps this temperature until the end of the cooking time you have selected.
» Cooking times may vary as per mains voltage, quality, amount of the ingredients to be cooked, and the temperature.
- When the cooking time has expired, the setting button rotates automatically counter-clockwise. The warning that indicates the expiration of the time is heard and power is cut off.
Baking and frying

1st shelf of the oven is the bottom shelf.
| Food Thermostat setting | (°C) Cooking time (min.) | Shelf order | |
| Cookie 170-180 25-30 Center shelf | |||
| Cake 170-190 30-40 Center shelf | |||
| Pie 180-220 40-50 Center shelf | |||
| Muffin 160-180 30-40 Center shelf | |||
| Pasta (baked) 190-210 20-30 Center shelf | |||
| Fish 220-MAX 30-40 Center shelf | |||
| Lamb 220-MAX 90-120 Center shelf | |||
| Mutton | 220-MAX 90-120 Center shelf | ||
| Veal 220-MAX 90-120 Center shelf | |||
| Turkey | 220-MAX 45-55 Center shelf | ||
| Poultry | 220-MAX 75-100 Center shelf | ||
| Defrost | 60-120 55-60 Center shelf | ||
| Bread 190-200 25-35 Center shelf | |||
"Pre-heat your oven before cooking.
You may consider the time required until the temperature light is turned off for the first time as the pre-heating time."
Some smoke and odour may occur while the protective materials on the heaters harden during the first operation of your oven. This is normal and not a manufacturing fault.
Thawing:
Remove the food to be thawed from its container and place it on the grill. Slide the rectangular tray under the grill to collect dripping water. Thus, thawed food shall not be kept inside its thawed water. Do not use thawed water (for health purposes) and discharge it.
You may use thawing feature as specified in the cooking chart. It is recommended that you use (☒) functions while thawing.
As the thawing times vary as per the weight of the food, check it once in a while. Do not cook using the rectangular and circular trays at the same time in the oven. We recommend you to pre-heat your oven 8 to 10 minutes before cooking.
This oven is intended for household cooking using the only. Do not use for other purposes.

WARNING
Close the oven door during grilling. Hot surfaces may cause burns!
- While grilling, rotate the time setting button counter-clockwise towards the "hand" symbol.
Opening the grill
- Bring the function knob to the desired grill symbol.
- Then, set it to the desired grill temperature.
- If necessary, pre-heat for about 5 minutes.
» The temperature light illuminates.
Turning off the grill
- Set the function button to the off (upper) position.
Food not suitable for grilling carries a fire hazard.
Grill only food that is suitable for heavy grill fire. Also, do not place the food too far in the back of the grill. This is the hottest area and fatty foods may catch fire.
Tips for cooking pastries
- If the pastry is too dry, increase the temperature by 10 °C and shorten the cooking time. Wet the dough sheets with a sauce consisting of milk, oil, egg and yoghurt mixture.
- If the pastry is getting cooked slowly, make sure that the thickness of the pastry you have prepared does not overflow the tray.
- If the pastry is browned on the surface but the bottom is not cooked, make sure that the amount of sauce you will use for the pastry is not too much at the bottom of the pastry. For an even browning, try to spread the sauce evenly between the dough sheets and the pastry.
Fermenting Yoghurt
While the oven is empty, M select from thermostat section, □ set the button, pre-heat for 10 minutes and start fermenting in a different location.
For fermenting, boil the raw milk you have purchased at 90 °C for a few minutes and then cool it to the 43-45 °C (fermentation temperature). While the milk is at this temperature, add 1 - 3% yeast and mix slowly.
Place the milk with the yeast added without closing its cover to the 1st shelf of the pre-heated oven, close the door of the oven and bring the function knob to the position. After 5 hours, remove the fermented yoghurt from the oven and keep it at room temperature for 15-20 minutes and keep the yoghurt at 4^ in the fridge for 1 day without shaking it. Yoghurt is ready to be consumed after 1 day.
Enjoy your meal.
Steam Cleaning
Steam occurring during this operation, allows the softening of the dirt on the internal surface of the oven.
Softened dirt may be cleaned easily without using chemicals.
Remove all accessories inside the oven. Add 2 glasses of water inside the round tray and place it on the bottom rack.
Bring the thermostat to steam cleaning mode.
Set timer to 30 minutes. Bring the function button to position. After operating the oven for 30 minutes open its door and wipe the interior surface of the oven with a damp cloth.

6 Maintenance and cleaning
General cleaning information General warnings
- Wait for the appliance to cool down before cleaning the appliance. Hot surfaces may cause burns!
- Do not apply the detergents directly on the hot surfaces. This may cause permanent stains.
- The appliance should be thoroughly cleaned and dried after each operation. Thus, food residues shall be easily cleaned and these residues shall be prevented from burning when the appliance is used again later. Thus, the service life of the appliance extends and frequently faced problems are decreased.
- Do not use steam cleaning products for cleaning.
- Some detergents or cleaning agents may cause damage to the surface. Do not use abrasive detergents, cleaning powders, cleaning creams, descalers or sharp objects during cleaning.
- No special cleaning agent is required for cleaning made after each operation. Clean the appliance using dishwashing detergent, warm water and a soft cloth or sponge and dry it with a dry microfiber cloth.
- Be sure to completely wipe off any remaining liquid after cleaning and immediately clean any food splashing around during cooking.
- Do not wash any component of your appliance in a dishwasher.
Inox - stainless surfaces
- Do not use acid or chlorine-containing cleaning agents to clean stainless or inox surfaces and handles.
- Stainless-inox surfaces may change colour in time. This is normal. After each operation, clean with a detergent suitable for the stainless or inox surface.
- Clean with a soft soapy cloth and liquid (non-scratching) detergent suitable for inox surfaces, taking care to wipe in one direction.
- Remove lime, oil, starch, milk and protein stains on the surfaces immediately without waiting. Stains may rust in long periods of time.
Enamelled surfaces
- After each use, clean the enamel surfaces using dishwashing detergent, warm water and a soft cloth or sponge and wipe with a dry cloth.
- If your product has an easy steam cleaning function, you can make easy steam cleaning for light non-permanent dirt. (See the "Easy steam cleaning" section)
- You may use the Quick&Shine cleaning agents for the oven interiors and grills, used on enamelled surfaces and recommended by the authorized service, for persistent stains. Do not use any other oven cleaner.
- The oven shall be cooled down for cleaning in the cooking area. Cleaning on hot surfaces shall create both fire hazard and damage the enamel surface.
Catalytic surfaces
- The side walls in the cooking area can only be covered with enamel or catalytic walls. It varies by model.
- The catalytic walls have a light matte and porous surface. The catalytic walls of the oven shall not be cleaned.
- Catalytic surface absorbs oil thanks to its porous structure and starts to shine when the surface is saturated with oil, in this case it is recommended to replace the parts.
Glass surfaces
- When cleaning glass surfaces, do not use hard metal scrapers and abrasive cleaning materials. They can damage the glass surface.
- Clean the appliance using dishwashing detergent, warm water and a microfiber cloth specific for glass surfaces and dry it with a dry microfiber cloth.
- If there is residual detergent after cleaning, wipe it with cold water and dry with a clean and dry microfiber cloth. Residual detergent may damage the glass surface next time.
- Under no circumstances should the dried-up residue on the glass surface be
cleaned off with serrated knives, wire wool or similar scratching tools.
- You can remove the calcium stains (yellow stains) on the glass surface with the commercially available descaling agents, with a descaling agent such as vinegar or lemon juice.
- If the surface is heavily soiled, apply the cleaning agent on the stain with a sponge and wait a long time for it to work properly. Then, clean the glass surface with a wet cloth.
- Discolorations and stains on the glass surface are normal and not defects.
Plastic parts and painted surfaces
- Clean plastic parts and painted surfaces using dishwashing detergent, warm water and a soft cloth or sponge and dry them with a dry cloth.
- Do not use hard metal scrapers and abrasive cleaners. They may damage the surfaces.
- Ensure that the joints of the components of the appliance are not left as damp and with detergent. Otherwise, corrosion may occur on these joints.
Cleaning the accessories
Do not wash the accessories of the product in the dishwasher unless otherwise specified in the user's manual.
If a circular tray is supplied with the appliance,
- Wash the tray with dishwashing detergent before its first use.
- Ensure to wash after each operation.
- Use lemon juice or vinegar for hard stains.
Cleaning the control panel
- When cleaning the control panels with buttons, wipe the panel and buttons with a damp soft cloth and dry with a dry cloth. Do not remove the buttons and gaskets underneath to clean the panel. Control panel and the buttons may be damaged.
- While cleaning the inox panels with button control, do not use inox cleaning agents around the button. The indicators around the button may be deleted.
- Clean the touch control panels with a damp soft cloth and dry with a dry cloth. If your product has a key lock feature, set the key lock before performing control panel cleaning. Otherwise, incorrect detection may occur on the keys.
Cleaning the inside of the oven (cooking area)
Unplug your appliance.
Appliance may be very hot while it is being operated or after a short while when it is operated. In this case, do not touch hot parts.
Follow the cleaning steps described in the "General cleaning information" section according to the surface types in your oven.
Cleaning the side walls of the oven
The side walls in the cooking area can only be covered with enamel or catalytic walls. It varies by model. Then complete the cleaning as described in the "General cleaning information" section according to the side wall surface type.)
Cleaning the oven lamp
In the event that the glass door of the oven lamp in the cooking area becomes dirty; clean using dishwashing detergent, warm water and a soft cloth or sponge and dry with a dry cloth. In case of oven lamp failure, you can replace the oven lamp by following the sections that follow.
Replacing the oven lamp
General Warnings
• To avoid the risk of electric shock before replacing the oven lamp, disconnect the electrical connector and wait for the oven to cool. Hot surface may cause burns!
- The oven lamp is a special electric bulb resistant to 300 °C heat. Oven lamps can be procured from Authorized Services.
- The position of the lamp may differ from that is shown in the figure.
- The lamp used in this product is not suitable for use in the lighting of home rooms. The purpose of this lamp is to help the user see food products.
- The lamps used in this product must withstand extreme physical conditions such as temperatures above 50 °C.
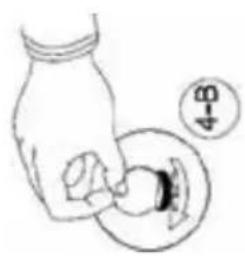
If your oven has a round lamp,
- Disconnect the product from the electricity.
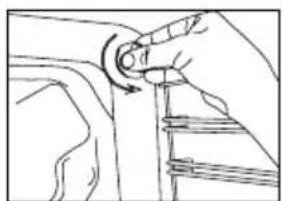
- Remove the glass cover by turning it counter clockwise.
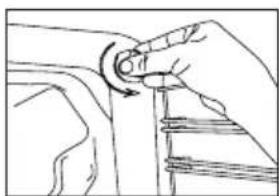
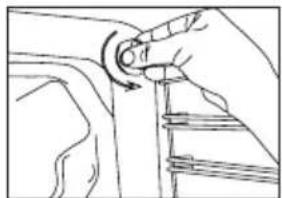
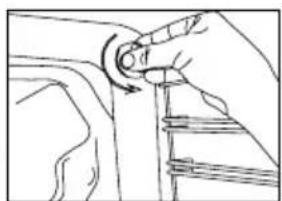
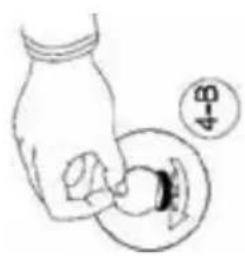
- If your oven lamp is type (A) shown in the figure below, rotate and remove the oven lamp as shown in the figure and replace it with a new one. If it is type (B) model, pull it out as shown in the figure and replace it with a new one. If you have difficulty in rotating it, using plastic gloves may help you rotating.
Type G9 Lamp Type E14 Lamp
natural_image
Line drawing of a hand adjusting a mechanical component with a circular arrow (no text or symbols)natural_image
Line drawing of a mechanical component with a knob and lever mechanism (no text or symbols)natural_image
Pure diagram of a device with directional arrows and internal components, no text or symbols presentFigure 1 Figure 2
natural_image
Line drawing of a hand adjusting a curved mechanical component with a knob (no text or symbols)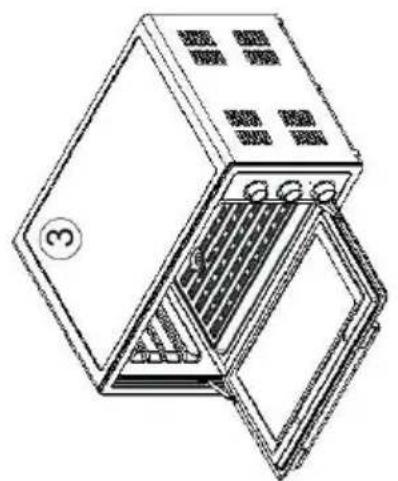
natural_image
Line drawing of a device with open lid and internal compartments (no text or symbols)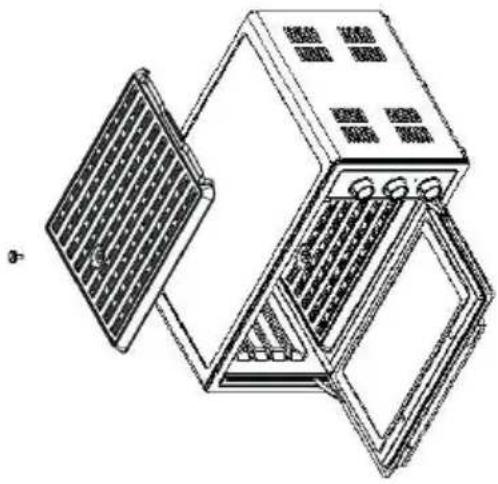
natural_image
Technical line drawing of a modular device with two panels and internal components (no text or symbols)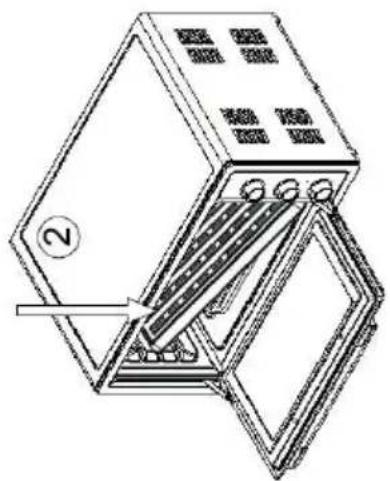
natural_image
Diagram of a mechanical device with a numbered component and internal components (no text or symbols)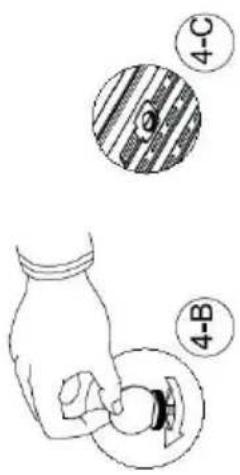
text_image
4-C 4-B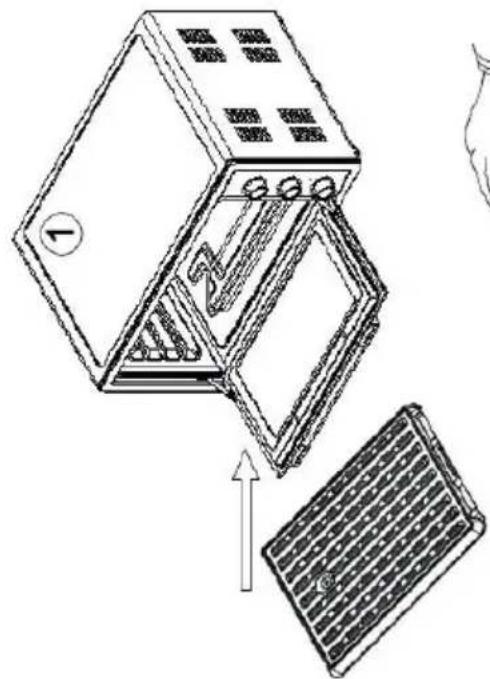
natural_image
Diagram of a mechanical device with internal components and an external panel, showing no text or symbols.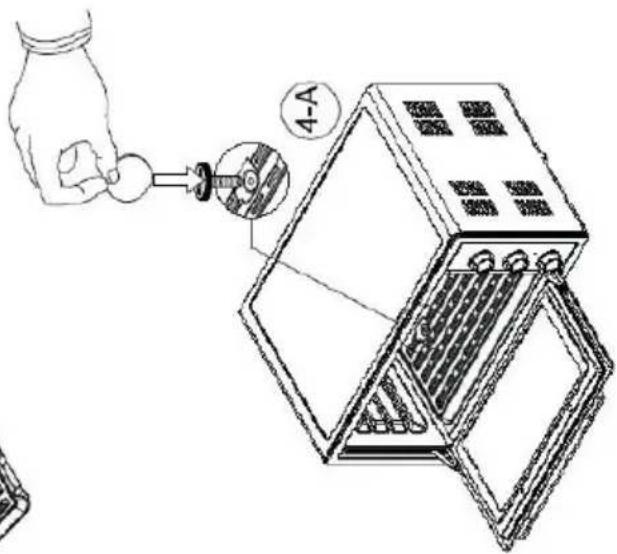
text_image
Diagram showing a hand inserting a component into a device labeled 4-A, with an inset view of the device's internal structure.7 Troubleshooting
Steam is emanated as the appliance is working.
- It is normal to see vapour during operation. >>> This is not a fault.
Metal sounds are heard when the appliance is heated.
- Metal parts may expand and make sounds when heated. >>> This is not a fault. Appliance is not working.
- Fuse may be faulty or blown. >>> Check the fuses in the fuse box. Change them if necessary or reactivate them.
- The appliance may not be plugged to the (grounded) outlet. >>> Check if the appliance is plugged in to the outlet.
Oven light is not illuminated.
- Oven lamp may be faulty. >>> Replace oven's lamp.
- No electricity. >>> Ensure the mains is operational and check the fuses in the fuse box. Change the fuses if necessary or reactivate them.
Oven is not heating.
- Function and/or Temperature button may not be set. >>> Set the functions and temperature with the Function and/or Temperature button.
- No electricity. >>> Ensure the mains is operational and check the fuses in the fuse box. Change the fuses if necessary or reactivate them.
(For models with clock) The clock display flashes or the clock symbol is left open.
- There has been a power outage before. >>> Set the time / Turn off the function buttons of the product, and bring them back to the desired position.

If the problem persists after following the instructions in this section, contact your vendor or an Authorized Service. Never try to repair your product yourself.
Customer Services
Customer Satisfaction Policy
- We are glad to respond to the requests and suggestions of our customers from every channel.
Our Channels:
* Our Call Center:
0850 21 00 888
(Please call without dialling the area code from land lines or mobile phones*)
* Other Number
0216 585 8 888
- Our Call Centre is available 24/7.
Calls to our call centre are charged according to the tariff designated by the mobile/land line operator.
- You may ask for your desired service by calling our call center without dialling the area code from your land lines or mobile phones.
* Our WhatsApp Number: 0544 444 08 88
* Our Fax Number: 0216 423 2353
* Our Website:
- www.beko.com.tr
* Our e-mail:
- musteri.hizmetleri@beko.com
* Our Social Media accounts:
- https://www.instagram.com/bekoturkiye/
- https://twitter.com/beko tr
- https://www.facebook.com/bekoturkiye/ -https://www.youtube.com/user/BekoChannel
* Our Address:
* Our Authorized Services,
- All information on the authorized service stations may be accessed through the “Service Information System” (www.servis.gov.tr) established by the Ministry of Trade.
- Spare parts may be procured from our Authorized Services.
- We inform our customer on the fact that their requests and suggestions are received by Beko, within 24 hours, regardless of the customer profile.
• Our Customer Service process:
Requests and suggestions of our customers;
* are collected in a single, reportable, transparent and secure information pool.
* are treated and evaluated objectively, fairly and confidentially in accordance with legal regulations.
* We use these feedbacks to make our processes more perfect.
- As Beko, we accept maintaining the perfect customer experience as our main principle and adopt a customer-oriented approach.
- We ensure the development of a structure that checks each other by integrating all our processes with the management system.
We also feed the management objectives through this system.
Please follow the following recommendations.
- When you purchase the product, have the warranty certificate approved by your Authorized Dealer.
- Use your product in accordance with the principles of the manual.
- Call our Call Center from the phone numbers provided above if you have a service request related with your product.
- Ask for the "technician ID" to the technician that comes for the service.
- Remember to ask for a “Service Receipt” from the Authorized Service technician when your work is done. The service receipt that you would take will provide advantages if you experience any problem with your appliance in the future.
- The service life of the appliance is: 10 years. (Spare parts retaining period to ensure functioning of the product)
Assessment of the service request
1 Customer application

Website: Auth

08501210 0 888
Call Centre

Service

@beko.com

2 Application record
Subject of application
Name and Surname of the Customer Customer's
Phone
Customer's Address
3 Taking the request
- Service request analysis
- Informing the customer about the nature of the service (Survey, transportation, installation, information, repair, replacement, etc.) - Handling the service as required
4 Receiving customer satisfaction
Satisfied
Not
Satisfied
5 Closing the application record and storing the records
Important Notes on Proper Use and Warranty; Do not operate the appliance without reading this manual.
Paid repair service is required for failures listed below. Warranty terms do not apply for these conditions.
1) Damages and malfunctions due to incorrect use,
2) Damages and malfunctions occurring during the loading, unloading and handling after the product is delivered to the customer,
3) Damages and malfunctions caused by the electrical (outlets, voltage, earthing, etc.), water (water pressure, taps, etc.), natural gas, telephone, internet, etc. installations and/or infrastructure (drain, ground, ambient conditions, etc.) of the location of operation of the product,
4) Damages and malfunctions caused by acts of nature and fire, flood, etc.
5) Damages and malfunctions occurring due to the product being used against the conditions specified in the instruction and user's guides.
6) Damages and malfunctions arisen in case of utilization of the product for commercial or occupational purposes with the method as prescribed in 6502 numbered law on the protection of the consumer.
7) In case intervention is made on the product by unauthorized people such as repair and maintenance or any other reason, the warranty granted for the product shall expire. The warranty period for the product changed during warranty application is limited to the remaining warranty period of the changed product.
Manufactured by Arçelik AŞ.
Country of Origin: Turkey
WARRANTY CONDITIONS
1) The warranty period starts from the delivery date of the goods and is 2 years.
2) This item and all its incorporating parts are covered under a warranty against material, workmanship and manufacturing defects for the duration of aforementioned period starting with the date of delivery provided that the item is used in accordance with the instruction and user's manuals and is not tampered except for service personnel authorized by Arçelik A.Ş. for repair or any other reason.
3) If the item turns out to be defective, in accordance with the Law on Protection of Consumers No. 6502 Article 11, the consumer is entitled to:
a- Renegé on contract,
b- Request discount on sale price,
c- Request free repair,
d- Request the purchased good to be exchanged for a non-defective good.
4) If the consumer opts for the right of free repair, the seller is obliged to conduct or have conducted the repair of the product without requesting cost of workmanship, replaced parts or any other fee. Consumer can use the right of free repair against the manufacturer or the importer as well. The seller, the producer, and the importer are jointly liable for the exercise of this right of the consumer.
5) If the consumer uses the right of free repair and;
- the product fails again during warranty period,
- maximum term necessary to repair is exceeded,
- it is determined that repair is not possible by a report issued by authorized service station, seller, manufacturer or importer; consumer may request the refund of the product cost, a discount amounting to the fault or replacing the product with a non-faulty one, if possible. The seller may not refuse such a claim of the consumer. The seller, the producer, and the importer are jointly liable in the event that this claim is not met.
6) Repair time cannot exceed 20 working days during the useful life of the product in accordance with the respective regulations. This duration starts from the date that the malfunction is notified to the authorized service station within the warranty period or the date of the good's delivery to the authorized service station outside the warranty period. If the malfunctioning of the product covered by the warranty cannot be repaired within 10 work days manufacturer or importer is obliged to present the consumer with the use of another product with similar characteristics until the product repair is completed. The manufacturer or the importer will be relieved from this obligation if the consumer does not request a product with similar characteristics. In case the product has a failure during the guarantee period, the period of the repair process is added to the guarantee period.
7) Damages and malfunctions caused by failure to comply with the instructions contained in the user guide are not covered by the warranty.
8) Consumer can apply to Consumer Arbiter Committee or Consumer Court where the consumer action is conducted in cases of disputes arising from issues regarding using the warranty rights.
9) If this Warranty Certificate is not provided by the seller, the user may apply to Ministry of Market Surveillance Head Office.
| Manufacturer's or Importer's: Product's: | |||
| Name: Brand: | Beko | ||
| Address: | Arçelik AŞ. Karaağaç CaddesiNo:2-6, 34445,Sütlüce / ISTANBUL | Type: | Midi Oven |
| Model: | |||
| Fax: | (0216) 585 8 888 | Label and Serial Number: | |
| Website: | (0216) 423 23 53 | Warranty Period: | 2 YEARS |
| Maximum Repair Period: | 20 Work days | ||
| GENERAL MANAGER VICE GENERALMANAGER Arcelik A.S. | |||
| Seller's: | |||
| Name: Invoice Date and Number: | |||
| Address: Delivery Date and Place: | |||
| Phone: Authorized Signature: | |||
| Fax: Company Stamp: | |||
| e-mail: | |||
This part is to be signed and stamped by the Authorized Dealer.
beko
Four Midi
natural_image
Simple line drawing of a steaming cupcake (no text or symbols)BSUF 4000 MEB
Cher client, chère cliente
Installation et raccordements .....14
text_image
Technical diagram of an oven with numbered components for identificationtext_image
Technical diagram of a mechanical or electrical component with labeled components and directional arrows indicating motion or flow.natural_image
3D rendering of a square metallic component with mounting holes (no text or symbols)natural_image
Isometric view of a slanted rectangular structure with horizontal lines, no text or symbols present4. Plateau rond
natural_image
3D rendering of a metallic cylindrical object with concentric rings (no text or symbols)Installation et raccordement
text_image
Diagram of a device control panel with labeled rotary terminals and indicator lightsnatural_image
Circular diagram with numbered axes (0–90) and a central circle, no text or symbols present.natural_image
Line drawing of a hand adjusting a mechanical component with a circular arrow (no text or symbols)natural_image
Line drawing of a mechanical component with a knob and layered structure (no text or symbols)natural_image
Simple line drawing of a device with directional arrows indicating motion (no text or symbols)Figure 1 Figure 2
natural_image
Line drawing of a hand holding a tool with a circular arrow, no text or symbols present
natural_image
Line drawing of a device with a lid and internal panel, no text or symbols present
natural_image
Diagram of a solar panel assembly with two panels and a housing (no text or symbols)
natural_image
Line drawing of a device with a numbered component (2) and internal components, no text or symbols present.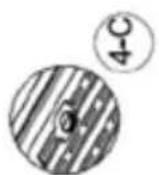
natural_image
Simple line drawing of a jar with a circular object and a numbered circle (no text or symbols)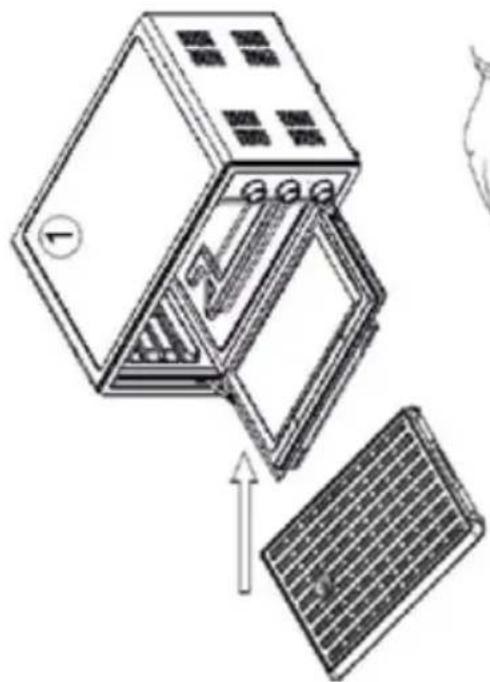
natural_image
Diagram of a solar panel installation with an open box and internal structure, showing no text or symbols.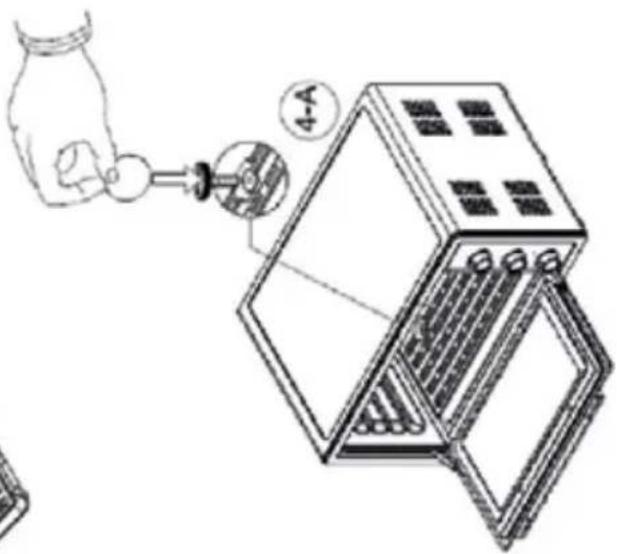
text_image
Diagram showing a hand pouring liquid into a device with a labeled component '4-A' and a numbered circle marker.7 Dépannage
- https://www.facebook.com/bekoturkiye/ -https://www.youtube.com/user/BekoChannel
* Notre adresse :
CONDITIONS DE GARANTIE
natural_image
Simple line drawing of a steaming cupcake (no text or symbols)BSUF 4000 MEB
AR
text_image
Technical diagram of an oven with numbered components for identification
text_image
Technical diagram of a mechanical or electrical component with labeled components and directional arrows indicating motion or flow.natural_image
Exterior view of a modern office building (no signage)- الشواية السلكية
natural_image
Pure geometric diagram of a tilted rectangular plate with horizontal slats (no text or symbols)- صينية مستديرة
natural_image
3D rendering of a metallic cylindrical object with concentric rings (no text or symbols)text_image
Diagram of a device control panel with labeled rotary dials and indicator lightsnatural_image
Circular diagram with numbered axes (0–90) and a central circle, no text or symbols present.بدء عملية الطهي
natural_image
Line drawing of a hand adjusting a mechanical component with a circular arrow (no text or symbols)natural_image
Line drawing of a mechanical component with a knob and ribbed base (no text or symbols)natural_image
Pure diagram of a device with directional arrows and a rectangular block, no text or symbols present1 الشكل 2 الشكل
natural_image
Line drawing of a hand turning a circular component with a tool, no text or symbols present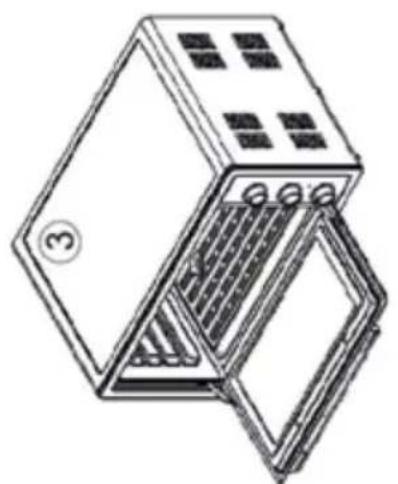
natural_image
Line drawing of a device with a lid and internal panel, no text or symbols present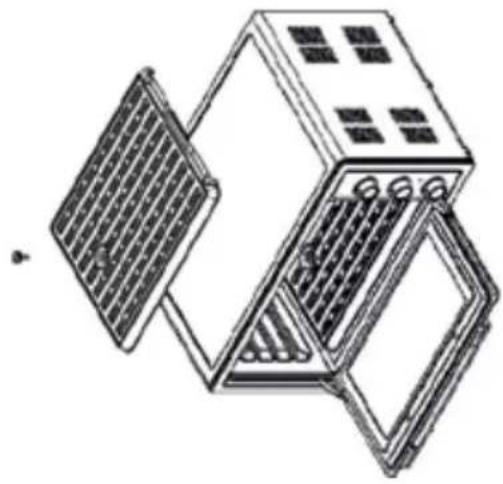
natural_image
Diagram of a solar panel assembly with two panels and a housing (no text or symbols)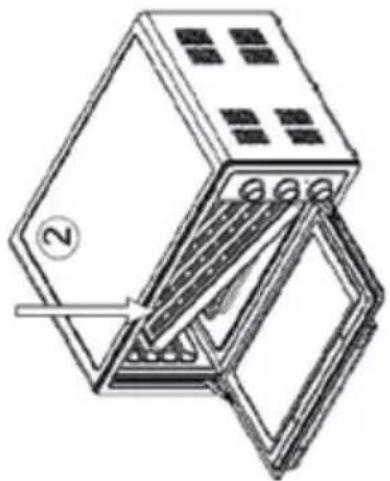
natural_image
Line drawing of a device with a numbered component (2) and internal components, no text or symbols present.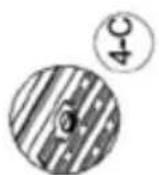
natural_image
Simple line drawing of a jar with a circular object and a numbered circle (no text or symbols)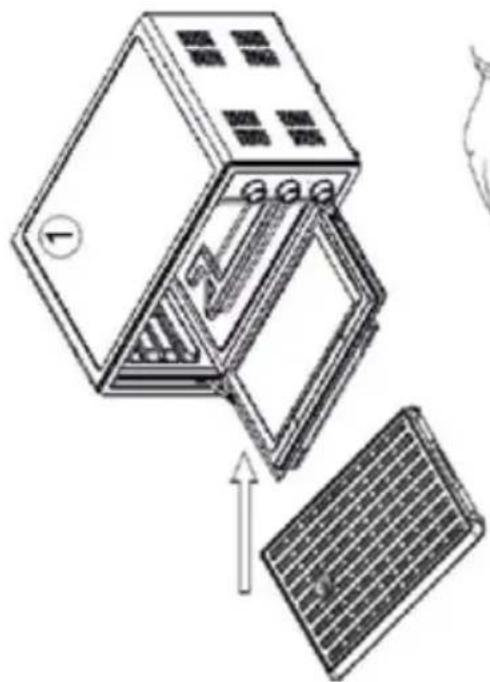
natural_image
Diagram of a solar panel installation with an open box and internal structure, showing airflow direction (no text or labels)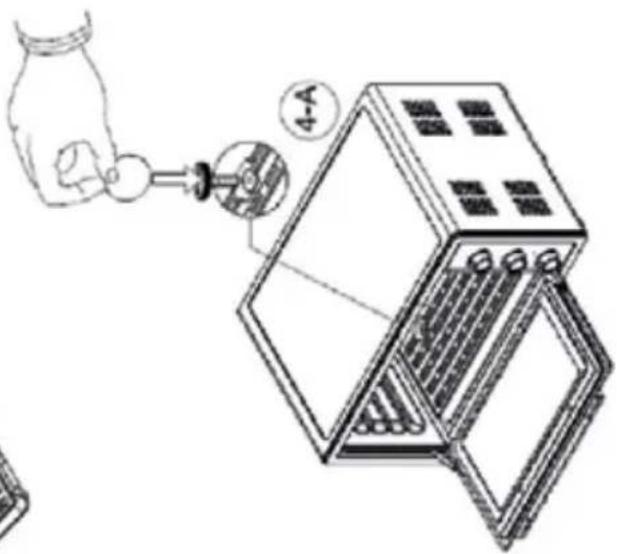
text_image
Diagram showing a hand pouring liquid into a device with a labeled component '4-A' and a numbered circle marker./https://www.instagram.com/bekoturkiye -
https://twitter.com/beko tr -
/https://www.facebook.com/bekoturkiye-
https://www.youtube.com/user/BekoChannel-
عنواننا: