
Serie 6 BGS41PETAU - Vacuum Cleaner BOSCH - Free user manual and instructions
Find the device manual for free Serie 6 BGS41PETAU BOSCH in PDF.

| Brand | Bosch |
| Model | Series 6 BGS41PETAU |
| Product type | Vacuum cleaner |
| Power supply | Mains, alternating current |
| Suction power | Adjustable (power selector) |
| Automatic control | Sensor Control (indicator light) |
| Floor brush | Adaptable with click fastening |
| Telescopic tube | With push button and clip fastening |
| Hose | Yes |
| Dust container | With handle and release button |
| Lint filter | Yes, washable |
| Dust container filters | Washable |
| Exhaust air filter | Washable |
| Parking position | Yes |
| Storage position | Yes |
| Intended use | Domestic, enclosed rooms |
| Maximum altitude | 2000 m above sea level |
| Safety | Do not vacuum liquids, hot or hazardous substances |
| After-sales service | Original spare parts available for up to 10 years |
| Instruction manual | Available in French (PDF, 108 pages) |
| Cleaning | Soft cloth and plastic cleaner |
| Troubleshooting | Red indicator light indicates full container or dirty filter |
Frequently Asked Questions - Serie 6 BGS41PETAU BOSCH
User questions about Serie 6 BGS41PETAU BOSCH
0 question about this device. Answer the ones you know or ask your own.
Ask a new question about this device
Download the instructions for your Vacuum Cleaner in PDF format for free! Find your manual Serie 6 BGS41PETAU - BOSCH and take your electronic device back in hand. On this page are published all the documents necessary for the use of your device. Serie 6 BGS41PETAU by BOSCH.
USER MANUAL Serie 6 BGS41PETAU BOSCH
now at MyBosch and enjoy benefits free of charge:
bosh-home.com/welcome
Bagless vacuum cleaner
BGS41... BGC41...
natural_image
Illustration of two blue cylindrical objects with black arrows indicating upward motion (no text or symbols)6

natural_image
Illustration of a hand using a blue screwdriver to adjust the component of a car (no text or symbols present)7
natural_image
Line drawing of a hand adjusting a blue component on a mechanical device (no text or symbols)8

9
10
natural_image
Diagram of a car's front-mounted vacuum cleaner with a blue clamp attachment (no text or symbols)11
12
The image is too blurry to recognize any text content.
natural_image
Illustration of a vacuum cleaner with a blue brush and black arrow indicating motion (no text or symbols)14
The image is too blurry to recognize any text content.
16
17
18
The image is too blurry to recognize any text content.
20

21
natural_image
Illustration of a blue industrial container pouring granular material into a rectangular basin (no text or symbols)22

natural_image
Diagram of a water purifier with a blue component and black upward arrow indicating flow or movement (no text or symbols)The image is too blurry to recognize any text content.
natural_image
Illustration of a blue showerhead spraying water from a faucet (no text or symbols)24

25

natural_image
Illustration of a hand holding a blue digital device next to a container with a lid (no text or symbols)26
natural_image
Diagram of a kitchen sink with a blue mesh drain and black arrow indicating airflow direction (no text or symbols)27
natural_image
Diagram showing a blue textured surface being removed from a container, with no visible text or symbols.28
natural_image
Illustration of a hand holding a blue mesh material with triangular patterns (no text or symbols)m = 311
natural_image
Diagram showing a blue showerhead spraying water onto a meshed surface (no text or symbols)30

m = 311
32

m = 311

natural_image
Technical line drawing of a mechanical device with no visible text or symbols34
natural_image
Diagram of a car seatbelt mechanism with hand placement and black arrow indicating rotation (no text or symbols)The Ground Truth image displays a single, solid horizontal line. According to Rule 2 (UNDERSCORE & LINE RULES), this is a stylistic or background line, not a placeholder underscore. Therefore, the OCR result must ignore it. The provided OCR content is "____", which consists of four underscores. This is an incorrect interpretation of the line as a placeholder, violating the rule that stylistic lines must be ignored. The OCR has hallucinated underscores where none should exist based on the GT's visual context. Hence, the OCR result is inconsistent with the Ground Truth.
natural_image
Diagram of a car interior showing engine, dashboard, and air vent with blue plastic components (no text or labels)36
m = 311
natural_image
Diagram of a car interior showing a blue mesh component inserted into a housing, with an upward arrow indicating direction (no text or symbols present)38
natural_image
Illustration of a hand holding a blue grid device with a dashed line indicating motion (no text or symbols)m = 311
natural_image
Diagram showing a blue hand spraying water into a grid-patterned container (no text or symbols)40
m = 311
natural_image
Diagram of a car interior showing a grid and battery compartment with an upward arrow indicating flow or movement (no text or symbols present)42
natural_image
Illustration of a hand pressing down on a blue rectangular object with motion lines indicating motion (no text or symbols)m = 311

natural_image
Illustration of a blue showerhead spraying water onto a rectangular surface (no text or symbols)44
The Ground Truth image displays a single, solid horizontal line. According to Rule 2 (UNDERSCORE & LINE RULES), this is a stylistic or background line, not a placeholder underscore. Therefore, the OCR result must ignore it. The provided OCR content is "____", which consists of four underscores. This is an incorrect interpretation of the line as a placeholder, violating the rule that stylistic lines must be ignored. The OCR has hallucinated underscores where none should exist based on the GT's visual context. Hence, the OCR result is inconsistent with the Ground Truth.

46
4 Sicherheit
- Read this instruction manual carefully.
- Keep the instruction manual and the product information safe for future reference or for the next owner.
■ Do not connect the appliance if it has been damaged in transit.
Only use this appliance:
■ with genuine parts and accessories. Damage caused by using third-party products is not covered under the warranty.
■ for cleaning surfaces.
■ in private households and in enclosed spaces in a domestic environment at room temperature.
■ up to an altitude of max. 2000 m above sea level.
Do not use the appliance:
■ for vacuum-cleaning persons or animals.
■ for vacuuming up harmful, sharp-edged, hot or burning substances.
■ for vacuuming up damp substances or liquids.
■ for vacuuming up highly flammable or explosive materials and gases.
■ for vacuuming up ash or soot from stoves and central heating systems.
■ for vacuuming up toner dust from printers and photocopiers.
■ for vacuuming up building rubble.
Disconnect the appliance from the power supply when:
■ cleaning the appliance.
This appliance may be used by children aged 8 or over and by people who have reduced physical, sensory or mental abilities or inadequate experience and/or knowledge, provided that they are supervised or have been instructed on how to use the appliance safely and have understood the resulting dangers.
Do not let children play with the appliance.
Cleaning and user maintenance must not be performed by children unless they are being supervised.
- Repairs to the appliance should only be carried out by trained specialist staff.
▶ Only use genuine spare parts when repairing the appliance.
en
Safety
If the power cord of this appliance is damaged, it must be replaced by the manufacturer, the manufacturer's Customer Service or a similarly qualified person in order to prevent any risk.
▶ Never operate a damaged appliance.
▶ Never operate an appliance with a cracked or fractured surface.
▶ Never pull on the power cord to unplug the appliance. Always unplug the appliance at the mains.
▶ Never pull or carry the appliance by the power cord.
- If the appliance or the power cord is damaged, immediately unplug the power cord or switch off the fuse in the fuse box.
▶ Call customer services.→Page 18
▶ Only use the appliance in enclosed spaces.
▶ Never expose the appliance to intense heat or humidity.
- Do not use steam- or high-pressure cleaners to clean the appliance.
▶ Never let the power cord come into contact with hot appliance parts or heat sources.
▶ Never let the power cord come into contact with sharp points or edges.
▶ Never kink, crush or modify the power cord.
- Connect and operate the appliance only in accordance with the specifications on the rating plate.
- Connect the appliance to a power supply with alternating current only via a properly installed socket with earthing.
- The protective conductor system of the domestic electrical installation must be properly installed.
- Do not apply flammable substances or substances containing alcohol to the filter.
- When cleaning the appliance, do not use flammable substances or substances that contain alcohol.
▶ Pull out the power cord completely.
- Keep clothing, hair, fingers and other body parts away from the openings on the appliance and the moving parts.
▶ Never point the pipe or the nozzles towards eyes, hair, ears or mouths.
- When vacuuming stairs, ensure that there are no persons underneath the appliance.
- When taking a break from vacuuming, switch off the appliance and pull out the mains plug.
▶ Retract the power cord.
- When the cord is being rewound automatically, ensure that the mains plug is not thrown in the direction of persons, body parts, animals or objects.
- Keep packaging material away from children.
- Do not let children play with packaging material.
Preventing material damage
▶ Never place the appliance on the hose.
▶ Regularly check the running surfaces of the nozzles for wear.
▶ Replace worn nozzles.
▶ Never operate the appliance without the motor protection filter.
▶ Never operate the appliance without the exhaust filter.
Overview
You can find an overview of the parts of your appliance here.
Note: Individual details and colours may differ, depending on the appliance model.
→Fig. 1
1 Adjustable floor tool with click connection ^1
2 Hose
3 Telescopic tube with sliding switch and click connection ^1
4 Handle
5 Power cord
6 Sensor Control indicator
7 Parking aid
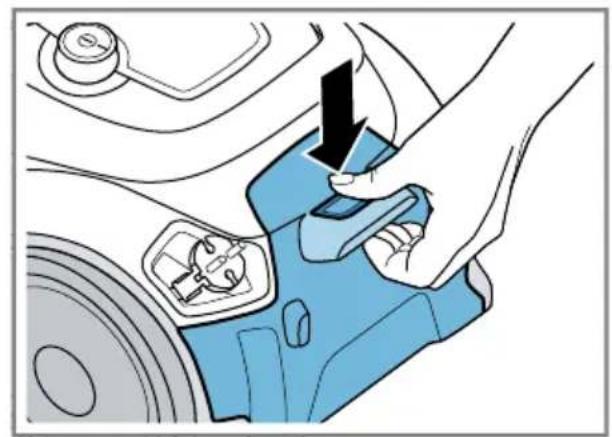
8 Rear flap release button
9 Rear flap
10 Handle
11 Power control and on/off switch
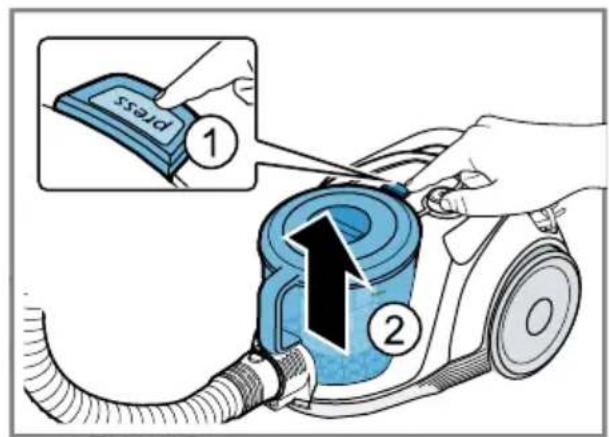
12 Dust container release button
13 Fluff filter
14 Dust container
15 Dust container handle
16 Storage aid
Operation
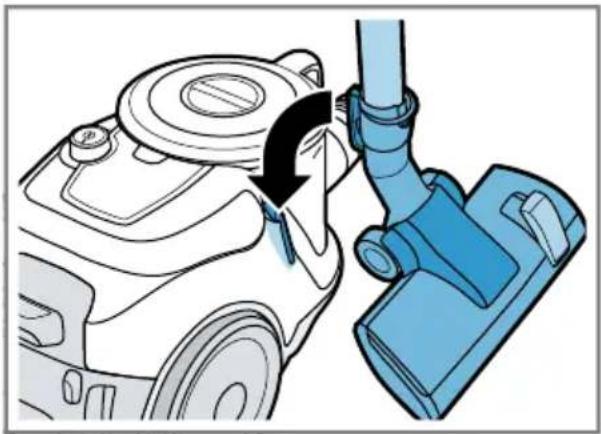
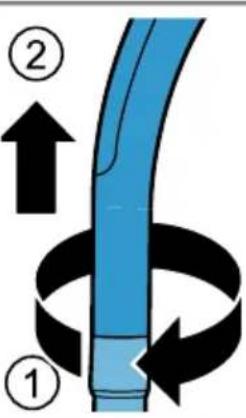
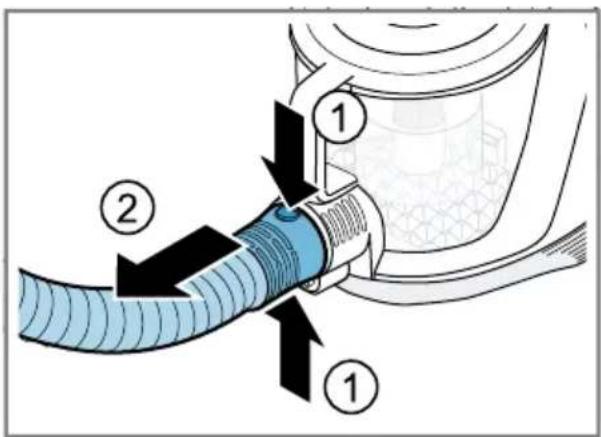
Installing the appliance
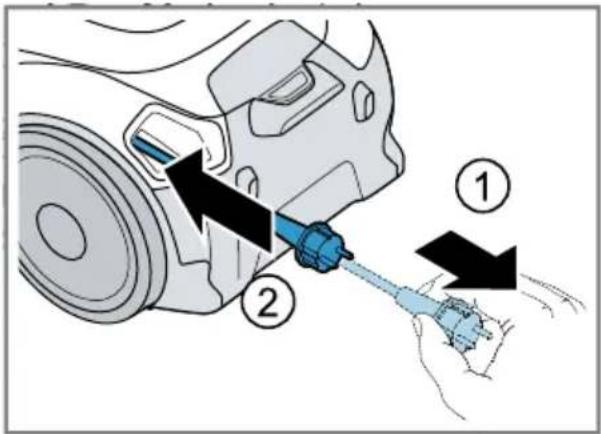
→Fig. 2 - 5
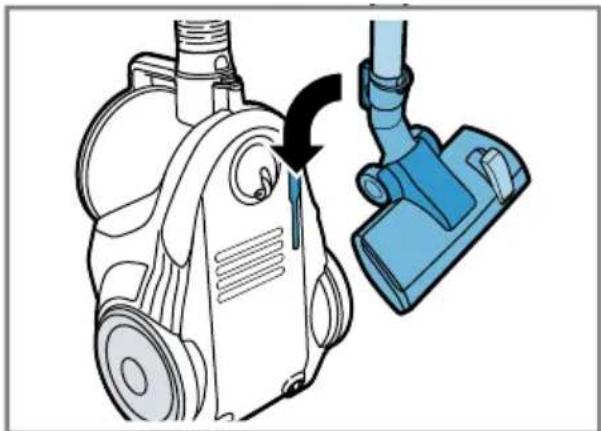
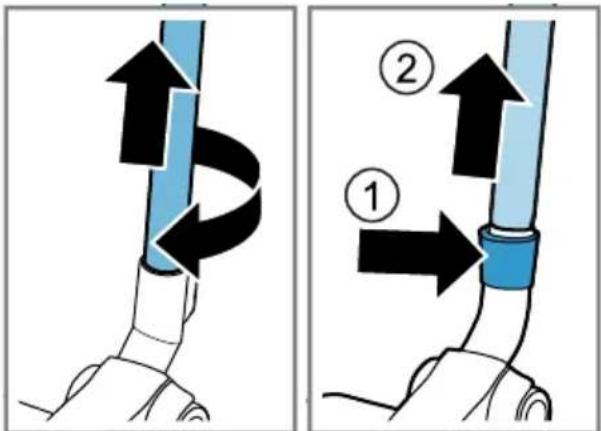
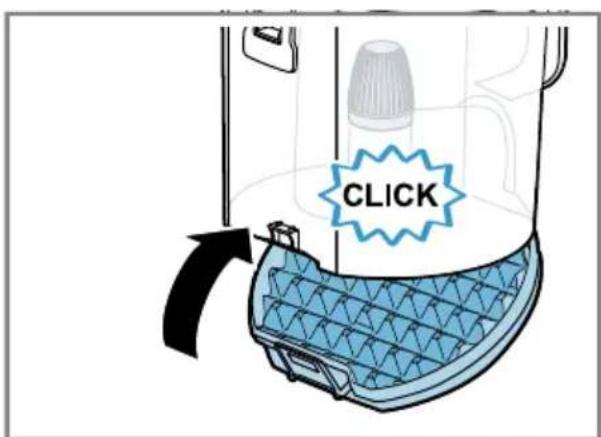
Operating the appliance
→Fig. 6 - 14
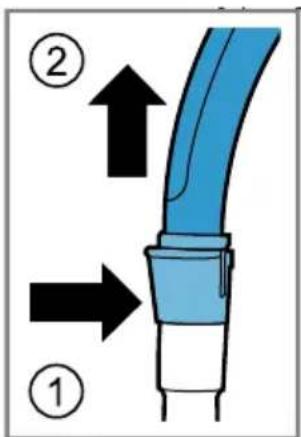
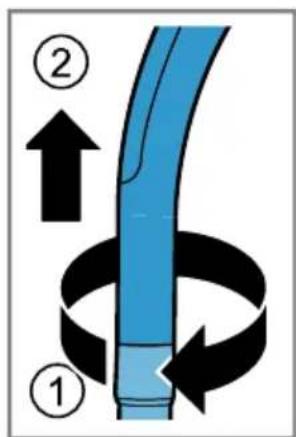
Removing the appliance
→Fig. 15 - 17
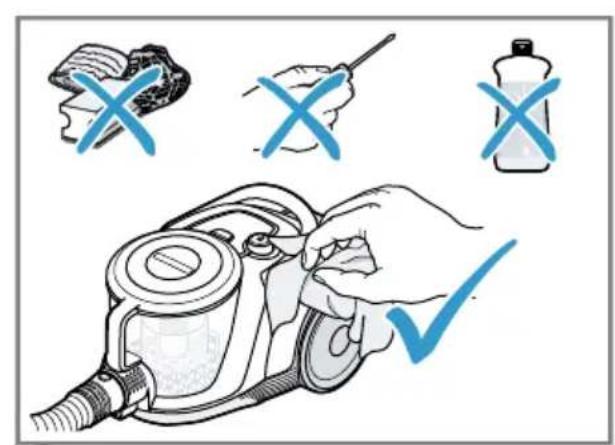
Cleaning and servicing
To keep your appliance working efficiently for a long time, it is important to clean and maintain it carefully.
Cleaning the appliance
Requirement: The appliance is switched off.
- Clean the appliance and the accessory using a soft cloth and a commercially available plastic cleaner.
→Fig. 18
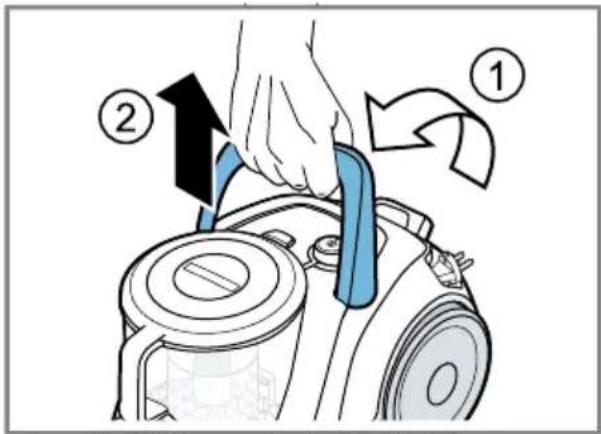
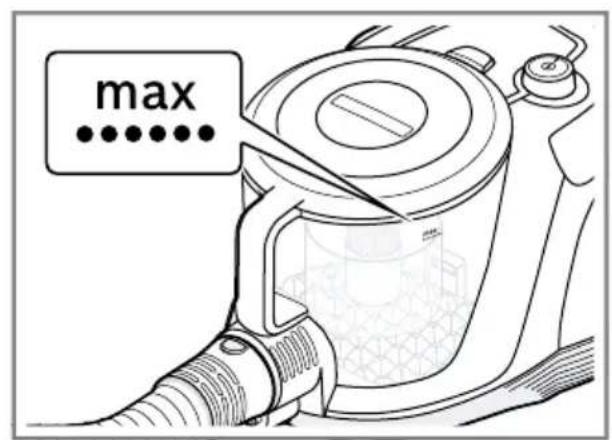
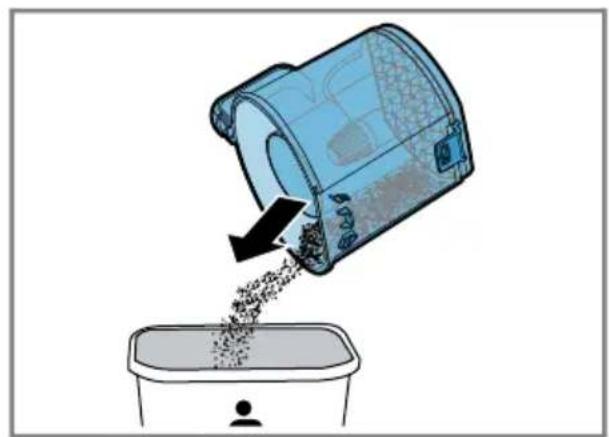
Emptying the dust container
→Fig. 19 - 22
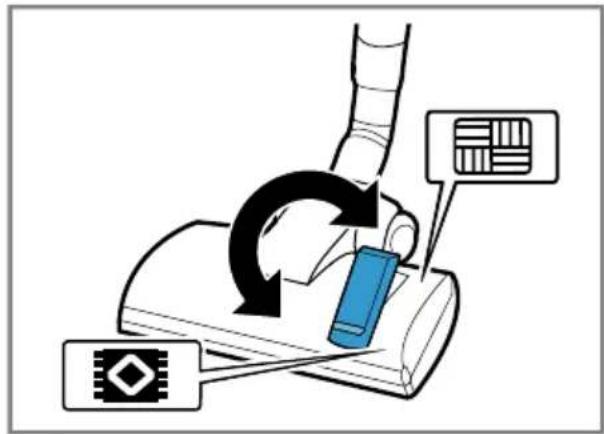
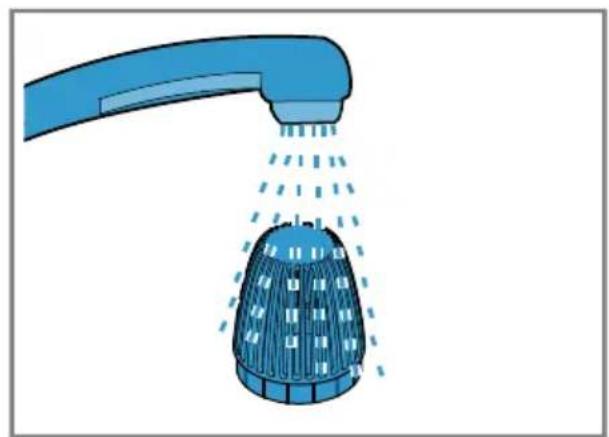
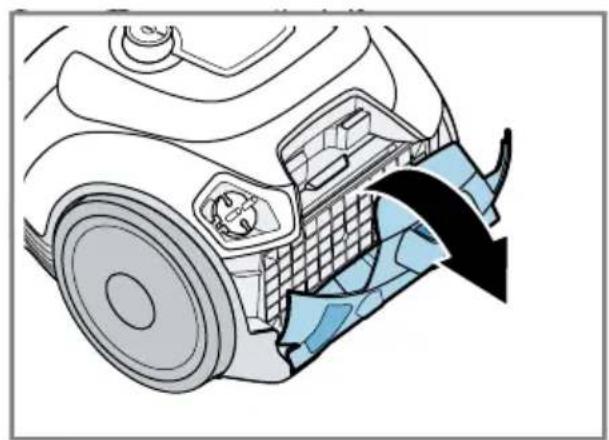
Cleaning the fluff filter
→Fig. 23 - 25
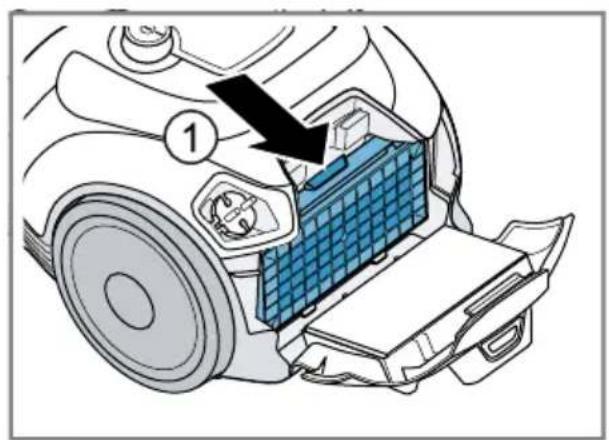
Cleaning the filter in the dust container
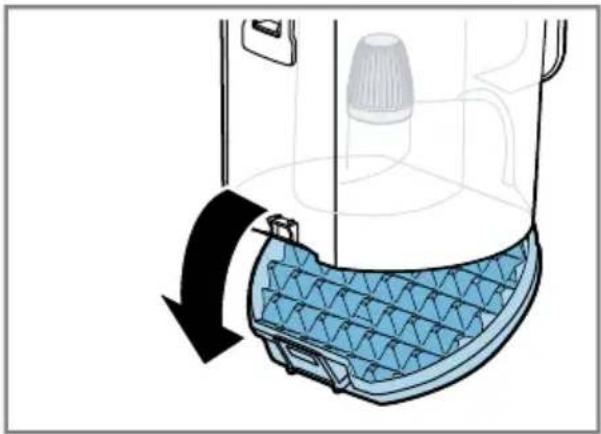
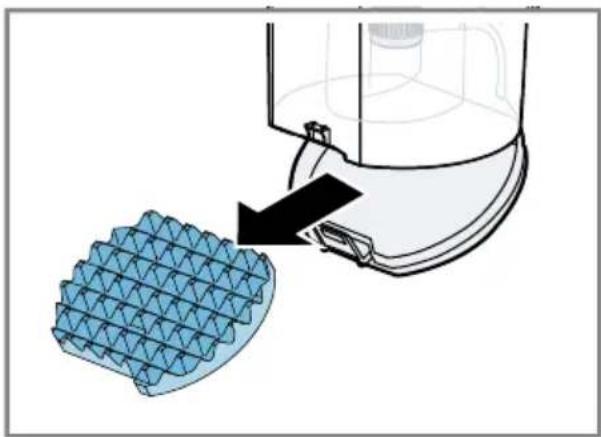
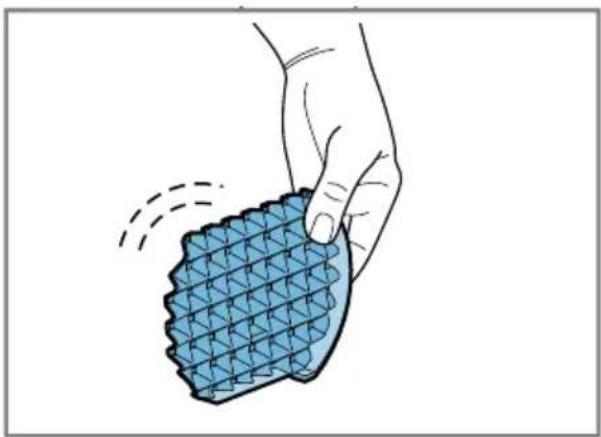
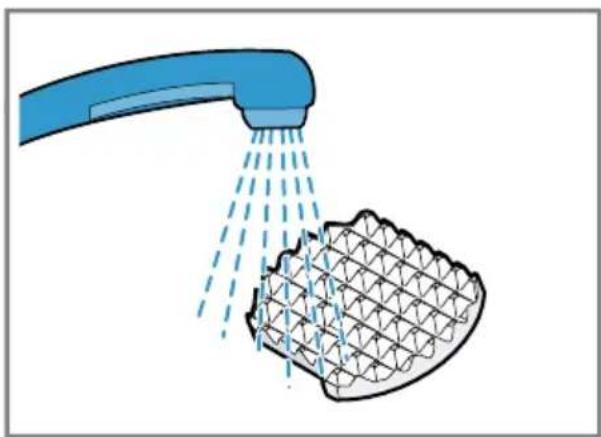
→Fig. 26 - 33
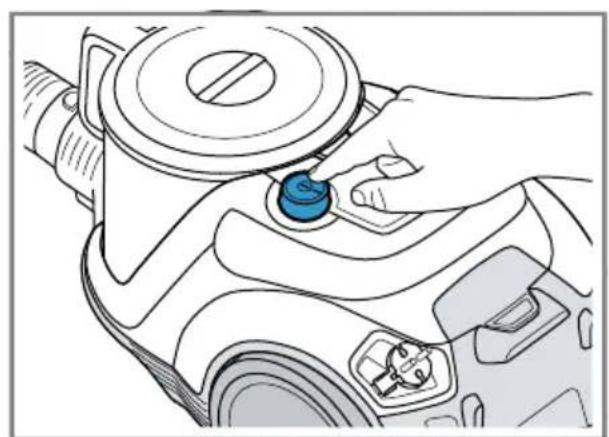
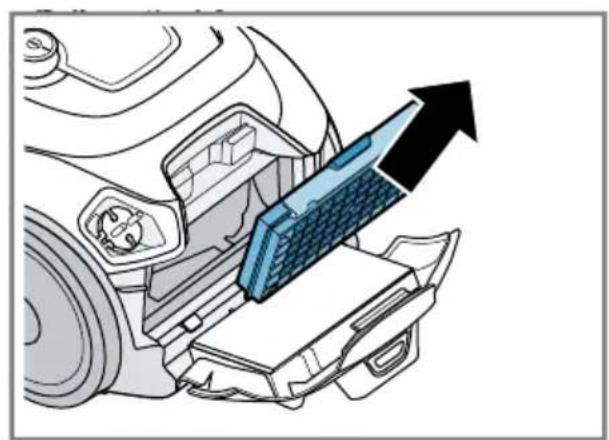
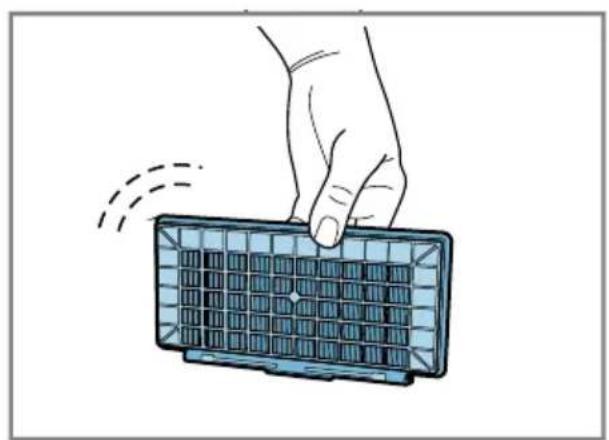
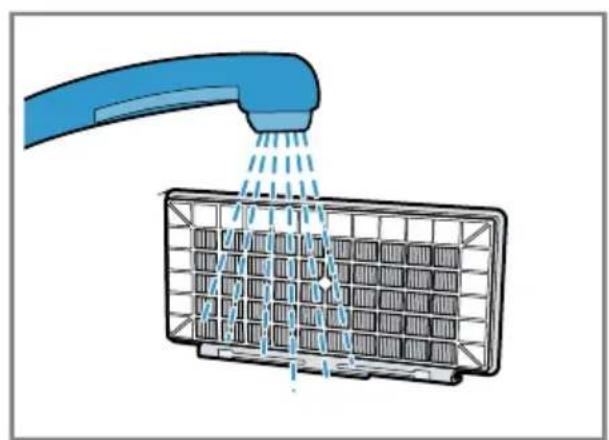
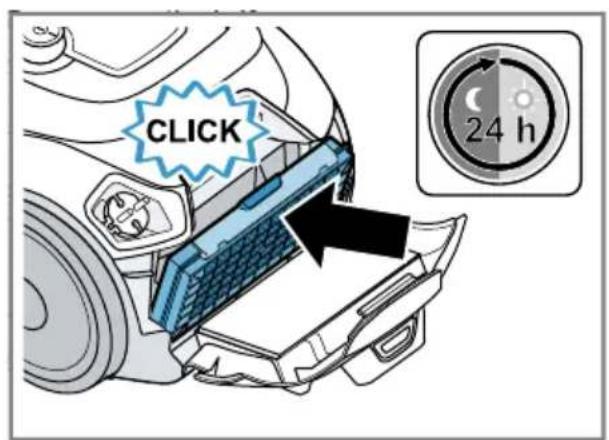
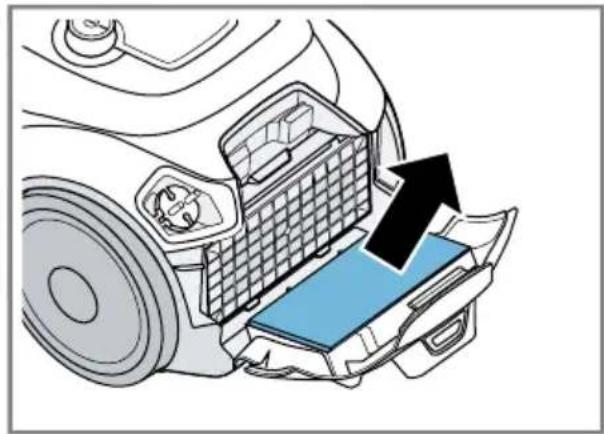
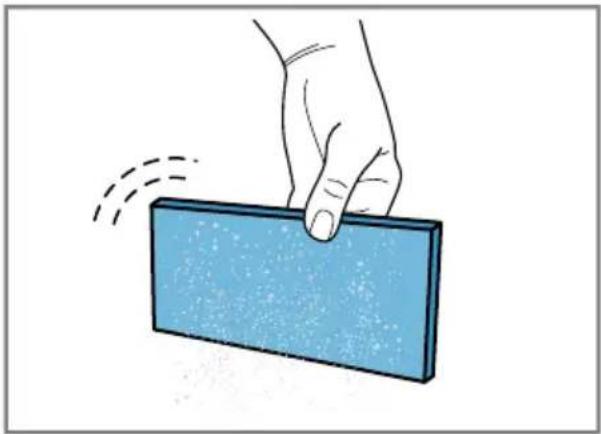
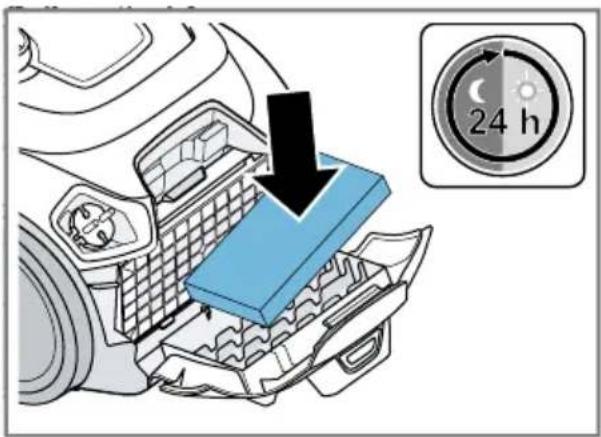
Cleaning the exhaust filter
→Fig. 34 - 46
Troubleshooting
▶ Repairs to the appliance should only be carried out by trained specialist staff.
▶ Only use genuine spare parts when repairing the appliance.
If the power cord of this appliance is damaged, it must be replaced by the manufacturer, the manufacturer's Customer Service or a similarly qualified person in order to prevent any risk.
Fault Cause and troubleshooting
| The appliance is adjusted to the lowest power level. | Filter in the dust container is soiled.1. Switch off the appliance.2. Clean the filter in the dust container. |
| The Sensor Control indicator flashes red. | Exhaust filter is dirty.▸ Clean the exhaust filter. |
| The appliance is adjusted to the lowest power level. | Dust container is full1. Check the fill level of the dust container.2. Empty the dust container as needed. |
| The Sensor Control indicator lights up red. | Fluff filter is soiled.▸ Clean the fluff filter. |
| Nozzle, telescopic tube or hose are blocked.1. Switch off the appliance.2. Dismantle the appliance.3. Remove the blockage. | |
| Brush on the turbo nozzle does not turn. | Brush roller is soiled.▸ Clean the brush roller. |
| Suction power is too low.▸ Turn the power controller to maximum suction power. |
Disposing of old appliance
- Dispose of the appliance in an environmentally friendly manner. Information about current disposal methods are available from your specialist dealer or local authority.

This appliance is labelled in accordance with European Directive 2012/19/EU concerning used electrical and electronic appliances (waste electrical and electronic equipment - WEEE).
The guideline determines the framework for the return and recycling of used appliances as applicable throughout the EU.
Customer Service
You can obtain function-relevant and storable genuine spare parts from our Cus-
tomer Service for up to 10 years from the date on which your appliance was placed on the market.
For more information, please contact our Customer Service team.
Detailed information about the warranty period and the warranty conditions in your country is available via the QR code on the enclosed document on service contacts and warranty conditions, from our customer service or on our website.
You can find the contact details for our customer service via the QR code on the enclosed document on service contacts and warranty conditions or on our website.
You can find the information required as per Regulation (EU) 2023/826 online at www.bosch-home.com on the product and service pages for your appliance, in the area of user manuals and additional documents.
Information on the Ecodesign Regulation
This vacuum cleaner is a household vacuum cleaner classed as a general purpose vacuum cleaner.
Use the interchangeable universal nozzle for cleaning carpets.
For cleaning hard floors, use the hard floor nozzle designed for cleaning hard floors and test crevices, if supplied.
The performance data for this appliance is based on the measurement and calculation methods specified in Regulation (EU)
No 666/2013 and the standards
EN 60312-1, EN 60704-2-1, EN 60335-2-2.
4Sécurité
e-mail: ala-infokz@bshg.com
electrical and electronic
equipment – WEEE)进行标记。
Many thanks for choosing a Bosch home appliance!
Register your new appliance now on MyBosch and benefit directly from:
- Expert advice and tips to make the most of your appliance
- Options for warranty extension
• Discounts on spare parts and accessories
• Digital information for use and all appliance data to hand - Easy access to Bosch Home Appliance Service
Simple to register, free of charge – including on mobile devices:
www.bosch-home.com/welcome
BOSCH HOME APPLIANCES SERVICE
Need some help? You can find it here.
Expert advice on your Bosch home appliances, help with problems or repairs by professionals from Bosch.
Discover all the different ways Bosch can assist you:
www.bosch-home.com/service
The contact details of all countries are listed in the attached service directory.
BSH Hausgeräte GmbH
Carl-Wery-Straße 34
81739 München, GERMANY
www.bosch-home.com
A Bosch Company
Valid within Great Britain:
Imported to Great Britain by
BSH Home Appliances Ltd.
Grand Union House
Old Wolverton Road
Wolverton, Milton Keynes
MK12 5PT
United Kingdom

8001346301 (060226)
de, en, fr, it, nl, es, pt, el, tr, pl, hu, kk, ru, bg, uk, az, ka, zh, th, ar