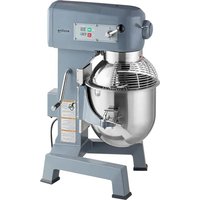
EMM20 - Food Processor Ecoline - Free user manual and instructions
Find the device manual for free EMM20 Ecoline in PDF.


| Product type | Food mixer (stand mixer) |
| Brand | Ecoline |
| Model | EMM20 |
| Capacity | 20 quarts (approximately 18.9 liters) |
| Speeds | 3 speeds: low (1), medium (2), high (3) |
| Timer | Digital, adjustable, auto shut-off |
| Lift type | Manual (manual bowl lift support) |
| Attachment hub | #12 |
| Bowl material | Stainless steel |
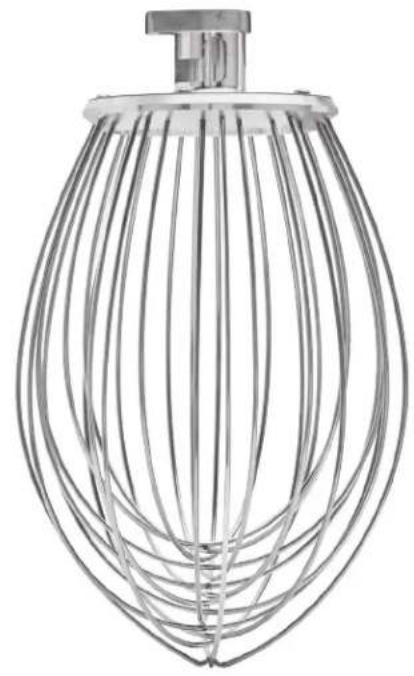
| Included agitators | Dough hook, flat beater, wire whip (typical) |
| Power supply | 208-240V, 50/60 Hz (per nameplate) |
| Safety | Guard with interlock, shut-off if bowl lowered |
| Cleaning | Damp cloth, bowl washable in sink, no hose |
| Maintenance | Lubricate slides every 2 years, planetary gear seal |
| Adjustment | Bowl/agitator clearance adjustable |
| Service | Contact Hobart at 1 888 4HOBART |
| Plug type | Three-prong grounding plug |
| Display | Digital timer display |
| Controls | ON/PAUSE, OFF buttons, up/down arrows, speed lever |
Frequently Asked Questions - EMM20 Ecoline
User questions about EMM20 Ecoline
0 question about this device. Answer the ones you know or ask your own.
Ask a new question about this device
Download the instructions for your Food Processor in PDF format for free! Find your manual EMM20 - Ecoline and take your electronic device back in hand. On this page are published all the documents necessary for the use of your device. EMM20 by Ecoline.
USER MANUAL EMM20 Ecoline
natural_image
Exterior view of a modern mixing bowl on a stand (no visible text or symbols)701 S. RIDGE AVENUE
TROY, OHIO 45373
937-332-3000
www.hobartcorp.com
TABLE OF CONTENTS
GENERAL....3
INSTALLATION 3
Unpacking....3
Location 3
Electrical Connections (Cord Connected Mixers)....4
Check Initial Operation 4
OPERATION 5
STANDARD CONTROLS 6
Model EMM20 (With Three Mix Speeds)....6
Mixer Speeds....6
Button Function Description 6
BOWL PLACEMENT 7
Agitator 7
To Install....7
To Remove....7
Prepare For Mixing 8
Untimed Mixing Mode 8
Timed Mixing Mode 9
Operating Notes 9
Unloading 10
Wire Cage Assembly 10
Agitators and Attachments....11
CLEANING 12
Remove and Clean Bowl 12
MAINTENANCE 13
Lubrication 13
Slideways.... 13
Planetary Seal 13
Adjustments.... 14
Agitator Clearance 14
Measure Clearance 14
Adjust the Bowl/Agitator Clearance 14
TROUBLESHOOTING 15
Service....15
Installation, Operation and Care of Ecoline by Hobart 20-Quart Mixer
SAVE THESE INSTRUCTIONS
GENERAL
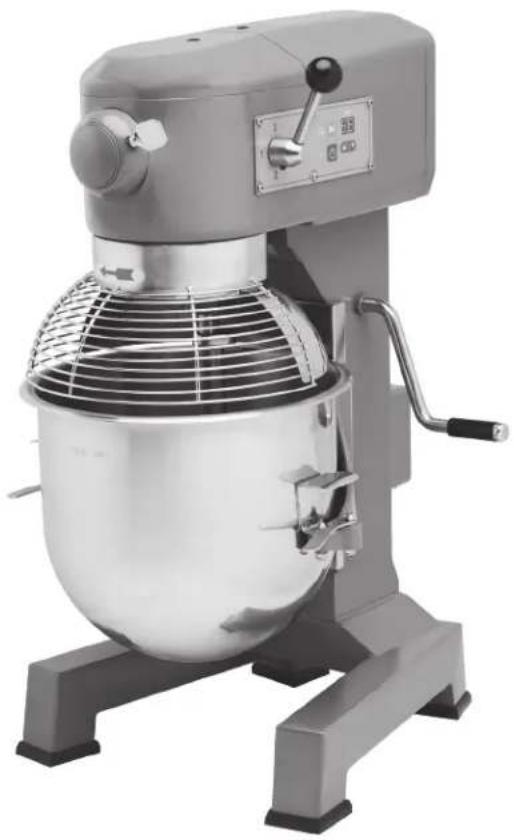
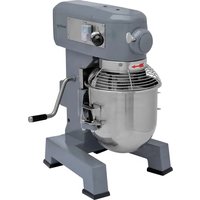
The Ecoline by Hobart 20-quart mixer is a bench-type mixer which features three-speeds, a digital timer, a manual bowl lift, and a #12 attachment hub as standard equipment.
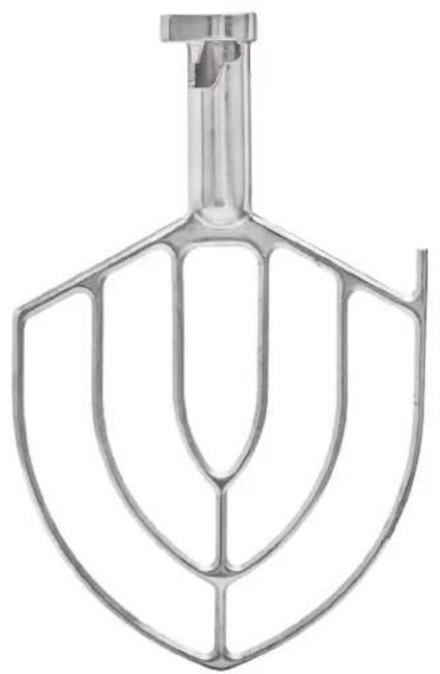
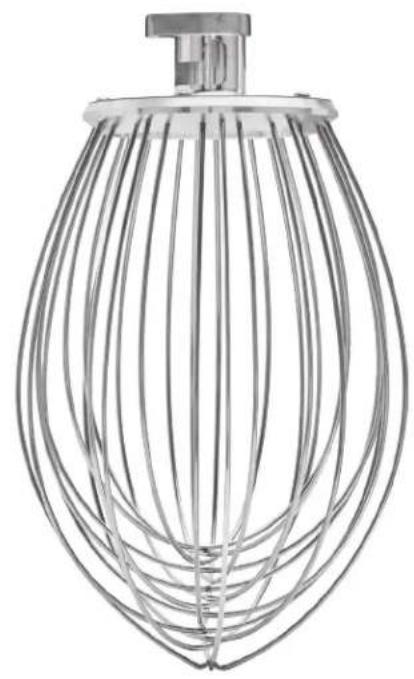
A variety of attachments, agitators, and accessories are available. These are described in the Agitators and Attachments section of this manual.
INSTALLATION
UNPACKING
The mixer was inspected before leaving the factory. The carrier assumes full responsibility for safe delivery upon acceptance of the shipment. Check for possible shipping damage immediately after receipt.
If the mixer is found to be damaged, complete the following steps:
- Carrier must be notified within five business days of receipt.
- Carrier's local terminal must be notified immediately upon discovery (note the time, date, and who was spoken to), and follow up and confirm with written or electronic communication.
- All original packing materials must be kept for inspection purposes.
- The mixer cannot have been moved, installed, or modified.
- Notify Hobart customer care at (800) 333-7447.
LOCATION
Prior to installation, test the electrical service to ensure it agrees with the specifications on the mixer data plate.
Place the mixer on a suitable sturdy level surface. There should be adequate space around the mixer for the user to operate the controls and to install and remove bowls.
ELECTRICAL CONNECTIONS (Cord Connected Mixers)
WARNING The electrical cord on this mixer is equipped with a three-pronged grounding plug which must be connected to a properly grounded receptacle. If the receptacle is not the proper grounding type, contact an electrician. DO NOT remove the grounding prong from the plug.
⚠ WARNING Electrical and grounding connections must comply with the applicable portion of the National Electrical Code and/or other local electrical codes.
Check Initial Operation
- Apply power to the mixer by inserting the cord plug into a properly grounded outlet.
- Install the bowl on the bowl support and raise into the mix position, with the bowl support up and bowl guard wire cage closed.
- Turn the speed gear shift lever to 1.
- Run the mixer by pushing the ON/PAUSE button.
OPERATION
WARNING Moving agitator in bowl. Keep hands, clothing and utensils out of bowl while in operation. Do not use without interlocked guards.
The Ecoline by Hobart mixers are equipped with a timer and controls. Refer to Fig. 1 for operating parts and OPERATION section for their functions.
The bowl guard wire cage must be in closed position or the mixer will not operate.
The bowl must be mounted, and the bowl support must be raised (mix position) or the mixer will not operate.
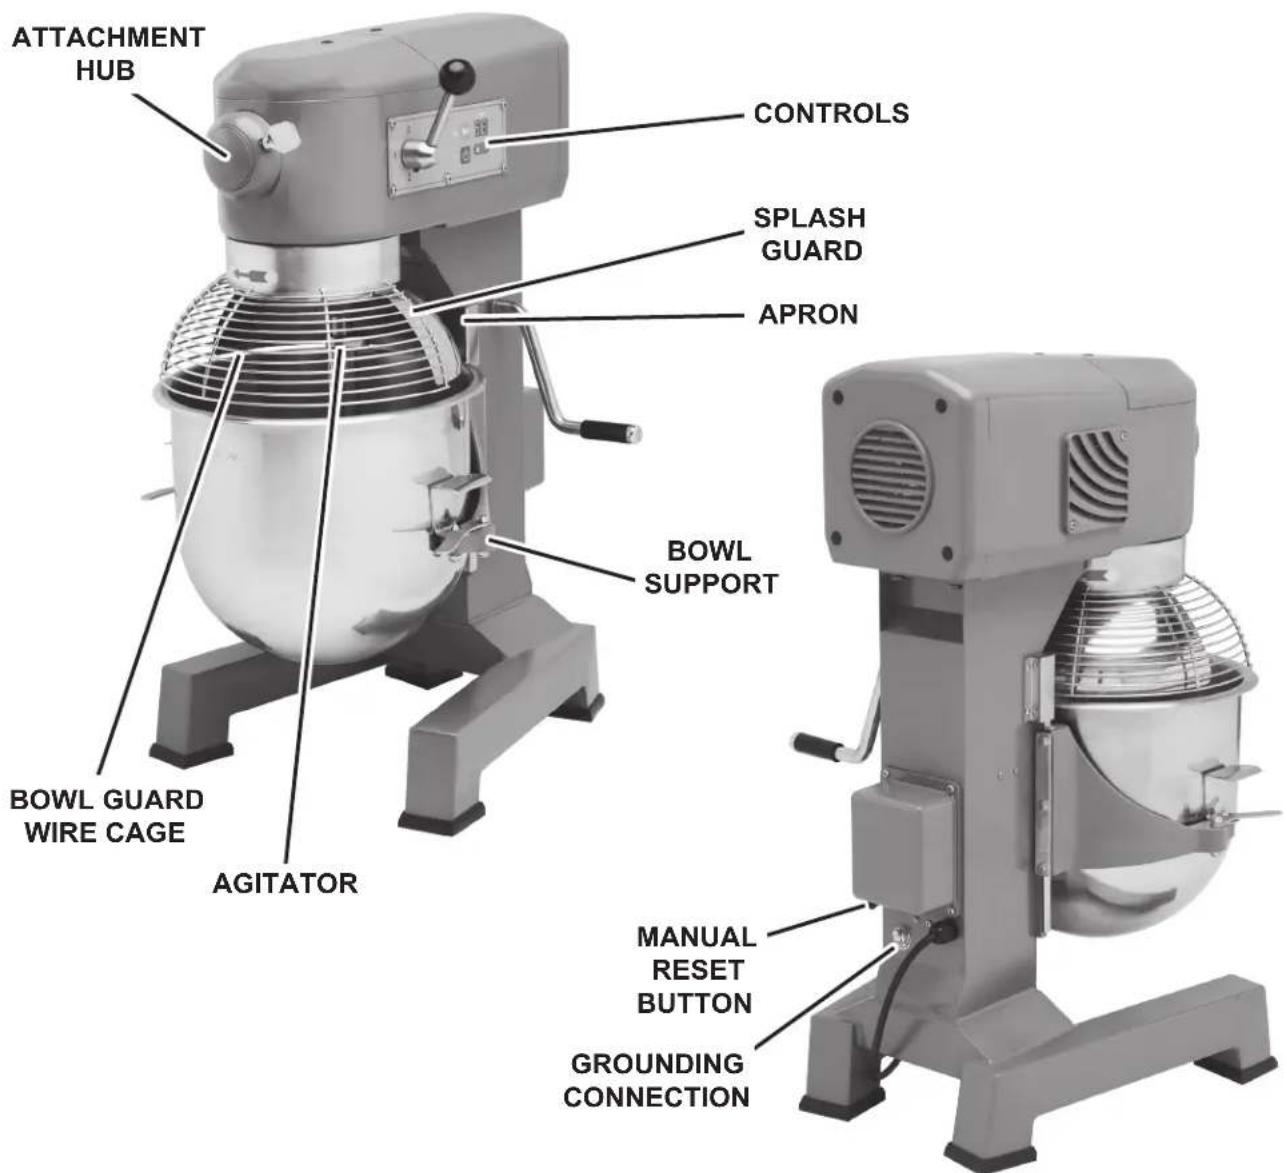
Fig. 1
STANDARD CONTROLS
MODEL EMM20 (WITH THREE MIX SPEEDS)
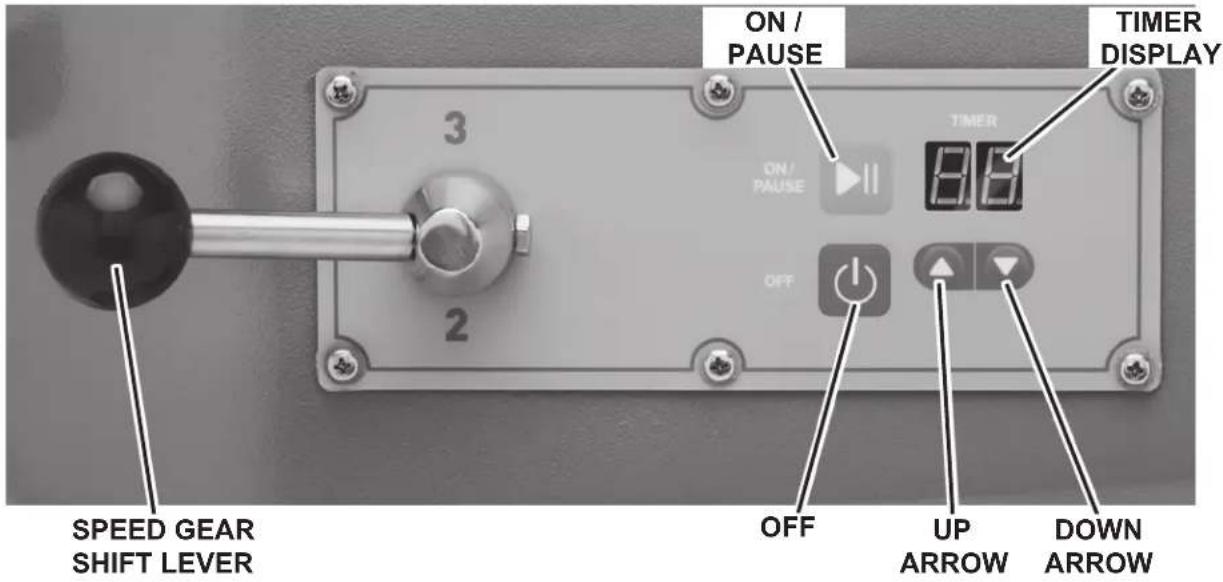
Fig. 2
MIXER SPEEDS
SPEED 1 (Low) This speed is for heavy mixtures such as heavy batters, potatoes, pizza dough, and bread dough.
SPEED 2 (Medium) This speed is for mixing cake batters and mashing potatoes.
SPEED 3 (High) This speed is for incorporating air into light batches, as well as finishing whipped items.
BUTTON FUNCTION DESCRIPTION
NOTE: The mixer will beep once when any button is pressed.

ON/PAUSE
Press the ON/PAUSE button to start the mixer. If the mixer is running, press the ON/PAUSE button to pause the mixer.

OFF Press the OFF button to stop the mixer.

UP ARROW
Press once to increase the time in 1 minute increments. Press and hold to quickly increase time until released. Range is 0-59.

DOWN ARROW
Press once to decrease the time in 1 minute increments. Press and hold to quickly decrease time until released. Range is 0-59.
NOTE: The ON/PAUSE button is used to clear overload error.
BOWL PLACEMENT
The bowl must be installed on the bowl support before the agitator is installed.
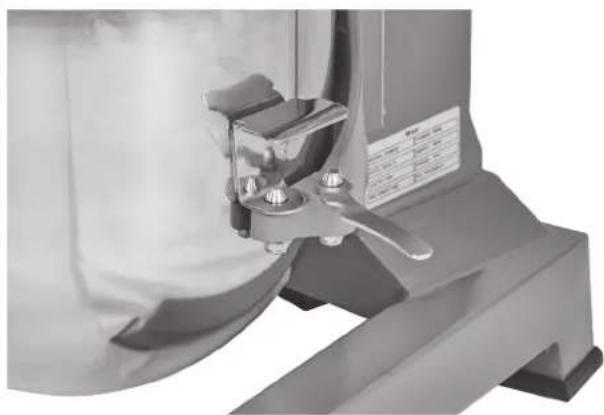
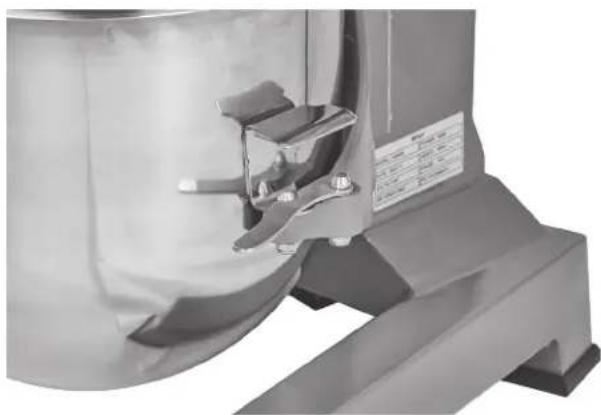
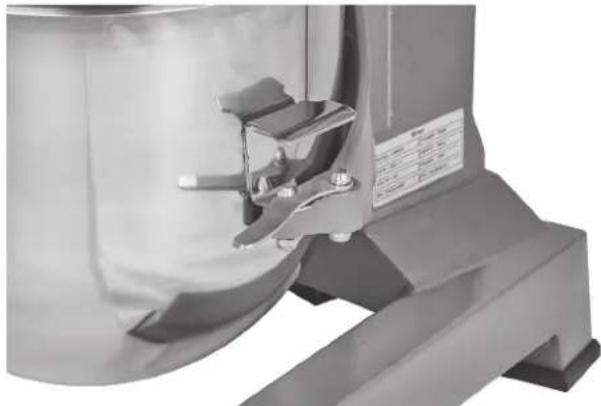
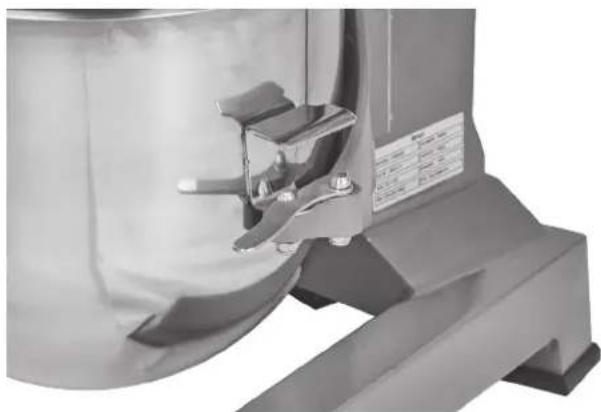
To install the bowl, lower the bowl support and move bowl clamps to the open position (Fig. 3). Position the bowl so the alignment bracket on the back of the bowl is in the bowl retainer and the alignment pins on the front of the bowl support fit in the holes on the sides of the bowl. Lock the bowl in place by rotating the bowl clamps (Fig. 4).
natural_image
Close-up of a mechanical device with a handle and label, no visible text or symbols on the main subject.Fig. 3 Fig. 4
natural_image
Close-up of a mechanical device with a metallic component and lever mechanism (no visible text or symbols)AGITATOR
To install an agitator, the bowl must be on the bowl support.
To Install
- Lower the bowl.
- Open the bowl guard wire cage.
- Place the agitator inside the bowl and align the horizontal slot on the agitator with the agitator shaft pin.
- Slide the agitator up the agitator shaft and turn it clockwise to seat the shaft pin in the slot of the agitator shank.
To Remove
- Open the bowl guard wire cage.
- Lower the bowl.
- Lift the agitator and turn it counterclockwise. Slide agitator down and off the agitator shaft.
PREPARE FOR MIXING
-
Place the mixing bowl on the bowl support.
-
Pour ingredients into the bowl.
-
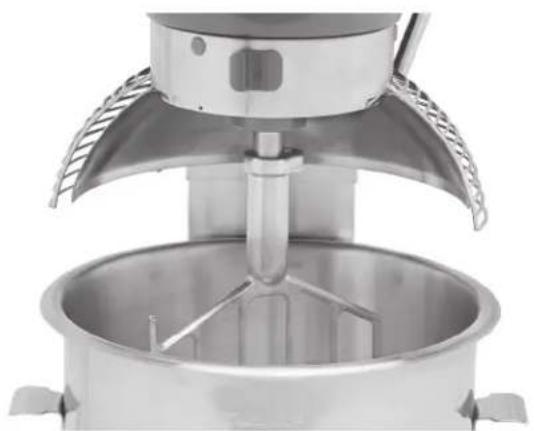
Place the agitator inside the bowl, and then attach it to the agitator shaft (Fig. 5).
-
Lift bowl support.
-
Correctly close the bowl guard wire cage.
-
The mixer is now ready for mixing.
natural_image
Close-up of a stainless steel kitchen mixer with a central dish and fan (no visible text or symbols)Fig. 5
UNTIMED MIXING MODE
-
Turn the speed gear shift lever (Fig. 6) to select a mix speed. The timer display reads 00.
-
Press the ON/PAUSE button (Fig. 6) to begin mixing. The timer display reads 00.
NOTE: If the bowl guard wire cage is opened or the bowl is lowered at any time, the mixing operation will stop. To resume the mixing operation, close the wire cage or raise the bowl and press the ON/PAUSE button.
-
Press the ON/PAUSE button to pause the mixer.
-
Press the ON/PAUSE button to resume mixing operation if needed.
-
Press the OFF button (Fig. 6) to stop the mixing operation and the timer will reset, nothing will show on the display.
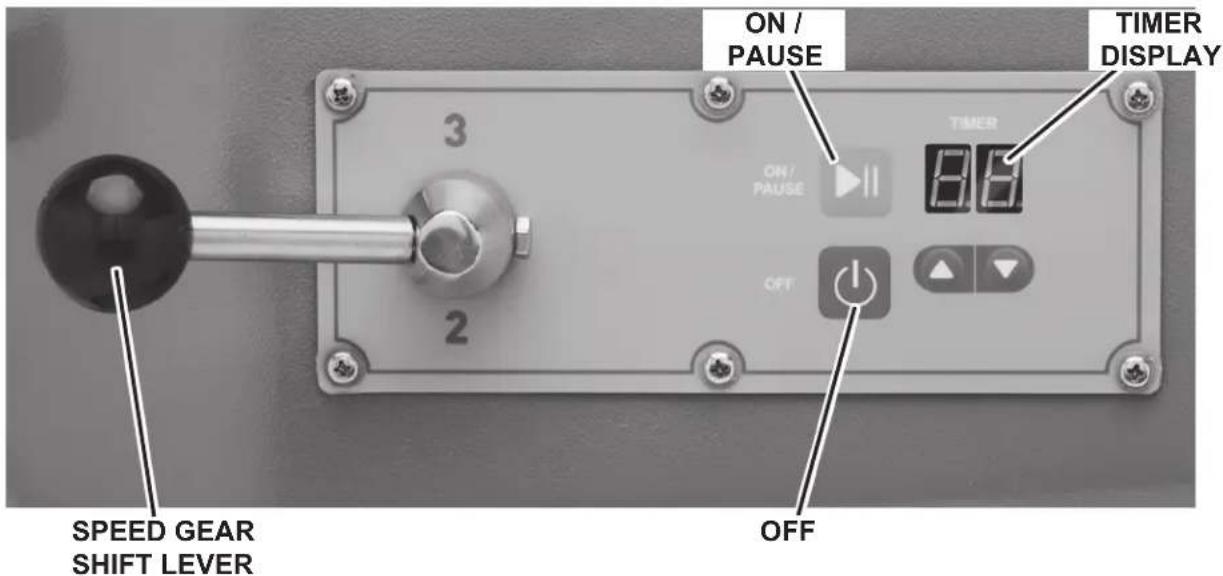
Fig. 6
TIMED MIXING MODE
- Turn the speed gear shift lever (Fig. 7) to select a mix speed. The timer display reads 00.
- Press the UP/DOWN arrows (Fig. 7) until the timer display reads the desired mixing time. This is the set time.
- Press the ON/PAUSE button (Fig. 7) to begin mixing; the timer starts counting down from the set time.
- To pause the mixer at any time, press the ON/PAUSE button. To resume mixing, press the ON/PAUSE button. For example: The mixer is started at speed 1 for 3 minutes and is stopped after 10 seconds. Pressing the ON/PAUSE button will resume the mixing operation and the remaining time will count down.
NOTE: If the wire cage is opened or the bowl is lowered at any time, the mixing operation will stop. To resume the mixing operation, close the wire cage or raise the bowl and press the ON/PAUSE button.
- When the timer reaches 00, the mixer stops and beeps once.
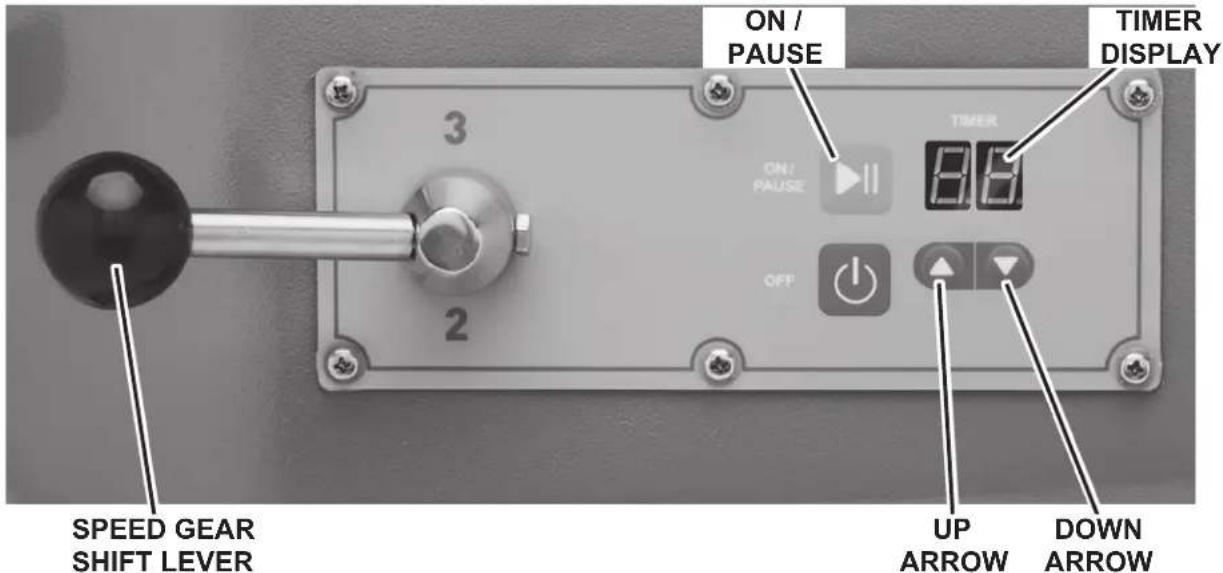
Fig. 7
OPERATING NOTES
- If the mixer is stopped during a mixing operation, the timer also stops. The timer starts again (with the time remaining) when the ON/PAUSE button is pressed.
UNLOADING
- Open the bowl guard wire cage assembly.
- Lower bowl support.
- Remove the agitator from the agitator shaft.
- Open the bowl clamps.
- Lift the bowl off the pins and remove from the bowl support.
WIRE CAGE ASSEMBLY
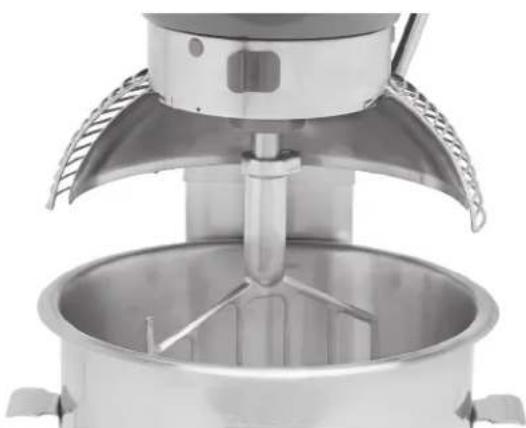
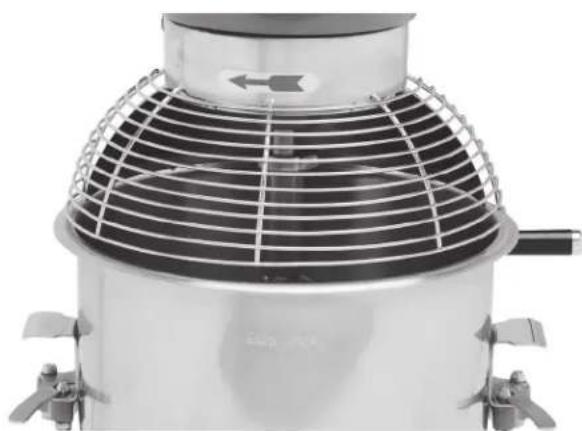
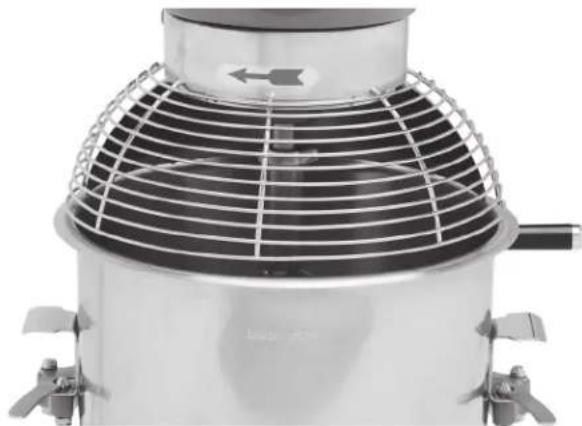
The bowl guard wire cage assembly can be rotated out-of-the-way to the right to add ingredients or to access the bowl and agitator.
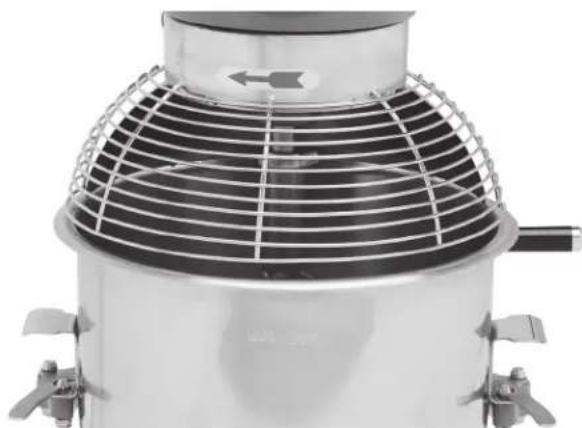
- Open the bowl guard wire cage: rotate it to your right (Fig. 8).
- Close the bowl guard wire cage: rotate it to your left until it stops in the closed position (Fig. 9).
NOTE: The bowl guard wire cage must be returned to the closed position for the mixer to operate.
natural_image
Close-up of a stainless steel kitchen mixer with a central bowl and fan (no visible text or symbols)Fig. 8
natural_image
Close-up of a stainless steel industrial fan or boiler with mesh grille and side-mounted blades (no visible text or symbols)Fig. 9
AGITATORS AND ATTACHMENTS
natural_image
Metallic kitchen mixer blade with curved blades (no text or symbols visible)Flat Beater Wire Whip
natural_image
Metal wire mesh ball head with no visible text or symbols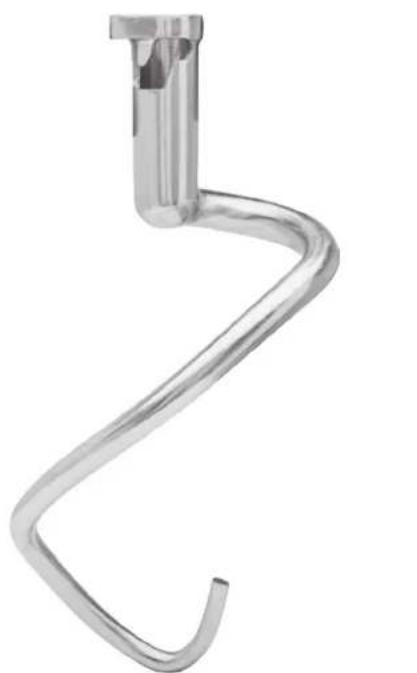
natural_image
Metallic hook-shaped object with a vertical rod inserted into the top (no text or symbols visible)Dough Hook Bowl (SST)
natural_image
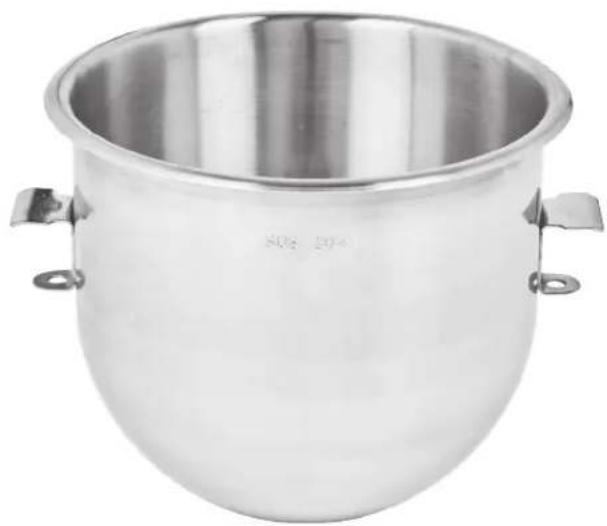
Metallic stainless steel mixing bowl with side handles (no visible text or symbols)CLEANING
WARNING Unplug mixer power cord before beginning any cleaning procedure.
The mixer should be thoroughly cleaned daily. DO NOT use a hose to clean the mixer; it should be washed with a clean, damp cloth. The base allows ample room for cleaning under the mixer. The apron (Fig. 1) may be removed for cleaning by loosening the screws.
REMOVE AND CLEAN BOWL
Lower the bowl. Rotate the wire cage assembly to the right until it is positioned over the splash guard. Remove the agitator and bowl.
Wash the bowl in a sink, rinse with clear water, and dry with a clean cloth.
The splash guard can be wiped off and/or washed with a cloth or sponge using warm, soapy water. Rinse with clear water and dry with a clean cloth.
The wire cage can be wiped off and/or washed with a cloth or sponge using warm, soapy water. Rinse with clear water and dry with a clean cloth.
MAINTENANCE
WARNING Unplug mixer power cord before beginning any maintenance procedure.
LUBRICATION
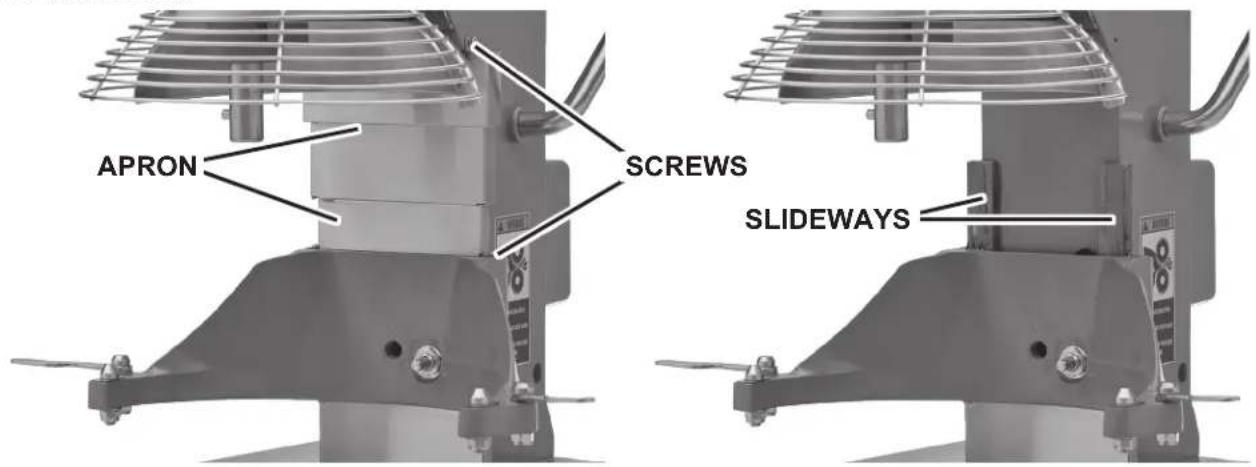
Fig. 10
Slideways
The slideways (Fig. 10) should be lubricated approximately twice a year. To reach these areas, fully lower the bowl support and remove the apron (Fig. 10), which is secured by screws. Wipe a thin coat of Lubriplate 630AA on each slideway. Install the apron.
Planetary Seal
Occasionally, the planetary seal (Fig. 11) may become dry and begin to squeak. To correct this, work a little lubrication (mineral oil) under the lip of the seal.
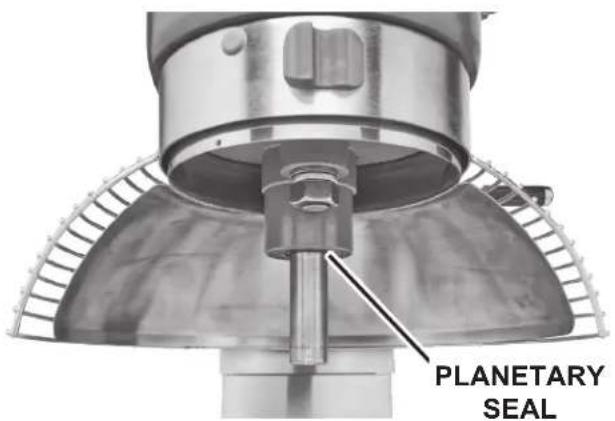
Fig. 11
ADJUSTMENTS
Agitator Clearance
The agitator clearance should be checked periodically. The agitator must not touch the bowl. The maximum clearance between the bottom of the bowl and the B flat beater is 1/8" (3mm).
Install a bowl and agitator (e.g., beater). If the bowl and beater come into contact before the bowl support reaches its stop, adjust the stop screw. Refer to Adjust the Bowl/Agitator Clearance.
Measure Clearance
Pour enough flour in the bowl to cover the bottom of the bowl where the beater travels. With the bowl fully raised (beater should not touch the bottom of the bowl), briefly run the mixer at the lowest speed.
Turn off the mixer, disconnect the electrical power supply, and measure the depth of flour where the beater has traced a path. This measurement should be taken at several points around the bowl to assure accuracy.
Adjust the Bowl/Agitator Clearance
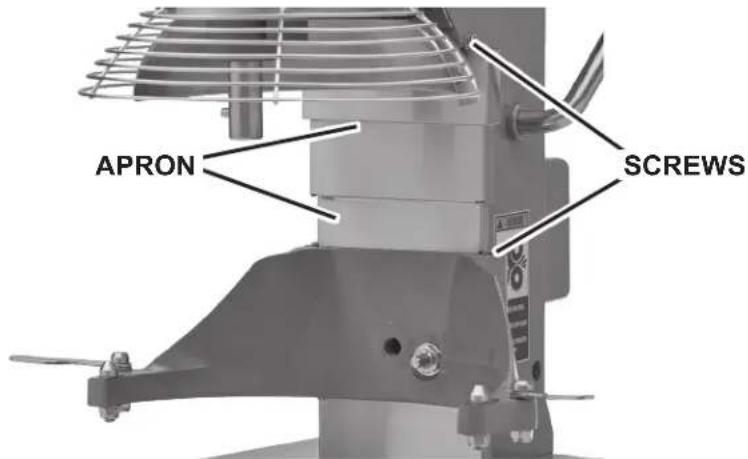
Fig. 12
- Remove the apron (Fig. 12), which is secured by screws.
- Adjust the clearance by loosening the stop nut and moving the screw (Fig. 13) clockwise to increase the clearance or counterclockwise to decrease the clearance.
• After the adjustments are made, tighten the stop nut and replace the apron, and secure it with the screws.
- Carefully operate the bowl lift several times to check the adjustment.
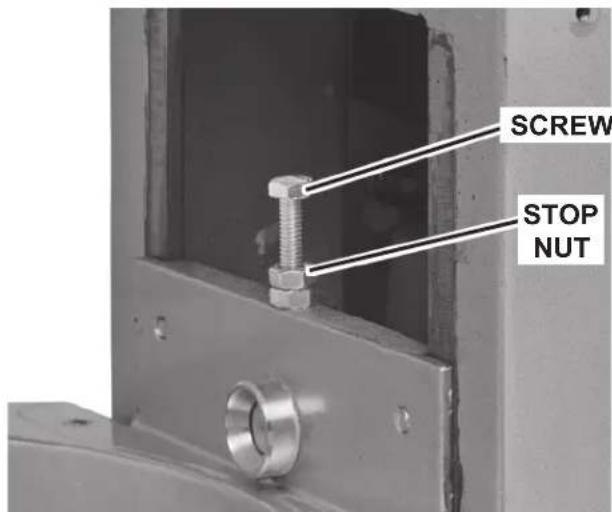
Fig. 13
TROUBLESHOOTING
| Symptoms Possible Causes | |
| Mixer will not start Flashing time display – see below | low. |
| Branch circuit protector is in open position - check fuse or disconnect switch. | |
| Mixer is overloaded. | |
| Wire cage is not in the closed position. | |
| Bowl is not in closed (mix) position or bowl is not in up position. | |
| Agitator touches bowl Improper agitator clearance | - see Maintenance for adjustment procedure. |
| Agitator is not installed properly. | |
| Planetary seal squeaks Seal requires occasional lu | brication - see Maintenance. |
| Timer display flashing time and machine is beeping | If the timer display is flashing and machine is beeping, press OFF button to reset. If symptom still exists, contact your local Hobart Service office. |
SERVICE
If service is needed on this equipment, contact your local Hobart Service office at (888) 4HOBART.
ecoline
by HOBART
natural_image
Exterior view of a modern kitchen mixer with control panel and side legs (no visible text or symbols)701 S. RIDGE AVENUE
TROY, OHIO 45373
937-332-3000
www.hobartcorp.com
TABLA DE CONTENIDO
GENERAL....3
INSTALACIÓN 3
Desembalaje....3
Ubicación....3
natural_image
Mechanical device with a metallic clamp and control lever, no visible text or symbolsFig. 3 Fig. 4
natural_image
Close-up of a metallic industrial mixing press or reactor component with no visible text or symbolsBATIDOR
natural_image
Close-up of a stainless steel kitchen mixer with a central dish and fan (no visible text or symbols)Fig. 5
MODO DE MEZCLADO NO PROGRAMADO
natural_image
Close-up of a stainless steel kitchen mixer with a central dish and fan (no visible text or symbols)Fig. 8
natural_image
Close-up of a stainless steel industrial fan or boiler with mesh grille and side-mounted blades (no visible text or symbols)Fig. 9
natural_image
Metallic kitchen mixer blade with curved blades (no text or symbols visible)natural_image
Metal wire mesh ball head with no visible text or symbols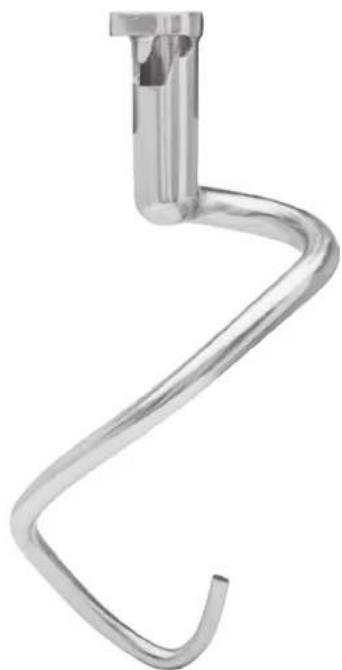
natural_image
Metallic hook-shaped object with a vertical rod inserted into the top (no text or symbols visible)natural_image
Metallic stainless steel mixing bowl with side handles (no visible text or symbols)LIMPIEZA
MANUEL D'INSTRUCTION
MODÈLE EMM20
natural_image
Exterior view of a modern kitchen mixer with control panel and fan (no visible text or symbols)701 S. RIDGE AVENUE
TROY, OHIO 45373
937-332-3000
www.hobartcorp.com
TABLE DES MATIÈRES
RENSEIGNEMENTS GÉNÉRAUX....3
INSTALLATION 3
Déballage 3
Emplacement.... 3
natural_image
Vertical row of four gray square buttons with play, power, and download icons (no text or symbols)natural_image
Mechanical component with clamping mechanism and label (no readable text or symbols)Fig. 3 Fig. 4
natural_image
Industrial mixing machine component with handle and control knob (no visible text or symbols)AGITATEUR
natural_image
Close-up of a stainless steel kitchen mixer with a central blade and fan (no visible text or symbols)Fig. 5
MODE DE MÉLANGE NON MINUTÉS
natural_image
Close-up of a stainless steel kitchen mixer with a central dish and fan (no visible text or symbols)Fig. 8
natural_image
Close-up of a stainless steel industrial fan or boiler with mesh grille and side-mounted blades (no visible text or symbols)Fig. 9
natural_image
Metallic kitchen mixer blade with curved blades (no text or symbols visible)Batteur plat Fouet
natural_image
Metallic wire mesh ball head with no visible text or symbols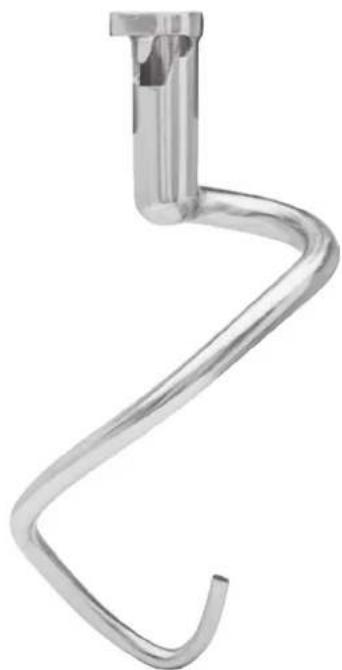
natural_image
Metallic hook-shaped object with a vertical rod inserted into the top (no text or symbols visible)natural_image
Metallic stainless steel mixing bowl with side handles (no visible text or symbols)NETTOYAGE
- TABLE OF CONTENTS
- GENERAL....3
- INSTALLATION 3
- OPERATION 5
- STANDARD CONTROLS 6
- BOWL PLACEMENT 7
- CLEANING 12
- MAINTENANCE 13
- TROUBLESHOOTING 15
- Installation, Operation and Care of Ecoline by Hobart 20-Quart Mixer
- GENERAL
- INSTALLATION
- UNPACKING
- LOCATION
- ELECTRICAL CONNECTIONS (Cord Connected Mixers)
- Check Initial Operation
- OPERATION
- STANDARD CONTROLS
- MIXER SPEEDS
- BUTTON FUNCTION DESCRIPTION
- BOWL PLACEMENT
- AGITATOR
- To Install
- To Remove
- PREPARE FOR MIXING
- UNTIMED MIXING MODE
- TIMED MIXING MODE
- OPERATING NOTES
- UNLOADING
- WIRE CAGE ASSEMBLY
- CLEANING
- REMOVE AND CLEAN BOWL
- MAINTENANCE
- Slideways
- Planetary Seal
- ADJUSTMENTS
- Agitator Clearance
- Measure Clearance
- Adjust the Bowl/Agitator Clearance
- SERVICE
- ecoline
- TABLA DE CONTENIDO
- INSTALACIÓN 3
- BATIDOR
- MODO DE MEZCLADO NO PROGRAMADO
- LIMPIEZA
- MANUEL D'INSTRUCTION
- TABLE DES MATIÈRES
- RENSEIGNEMENTS GÉNÉRAUX....3
- AGITATEUR
- MODE DE MÉLANGE NON MINUTÉS
- NETTOYAGE
Brand : Ecoline
Model : EMM20
Category : Food Processor