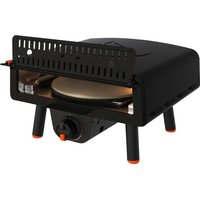
2238 - Pizza oven Blackstone - Free user manual and instructions
Find the device manual for free 2238 Blackstone in PDF.


| Product Type | Outdoor Gas Pizza Oven |
| Brand | Blackstone |
| Model | 2238 |
| Usage | Outdoor only |
| Fuel | Propane (453 g / 1 lb bottle) |
| Ignition | Piezo electric with AA battery (not included) |
| Safety | Thermocouple (automatic shutoff if flame goes out) |
| Cooking Surface | Rotating pizza stone on turntable |
| Maximum Temperature | Approx 482°C (900°F) |
| Rotating Motor Power | 4 AA batteries or AC adapter (not included) |
| Dimensions (approx.) | Approx 50 x 50 x 35 cm |
| Weight (approx.) | Approx 15 kg |
| Included Accessories | Pizza stone, turntable, regulator, power cord, manual |
| Warranty | 1 year parts and workmanship (North Atlantic Imports) |
| Maintenance | Clean stone without soap; removable burner for cleaning |
| Additional Safety | Regulator with flow limiter; leak test recommended |
| Country of Origin | United States (distributed by North Atlantic Imports, Logan, UT) |
Frequently Asked Questions - 2238 Blackstone
User questions about 2238 Blackstone
0 question about this device. Answer the ones you know or ask your own.
Ask a new question about this device
Download the instructions for your Pizza oven in PDF format for free! Find your manual 2238 - Blackstone and take your electronic device back in hand. On this page are published all the documents necessary for the use of your device. 2238 by Blackstone.
USER MANUAL 2238 Blackstone
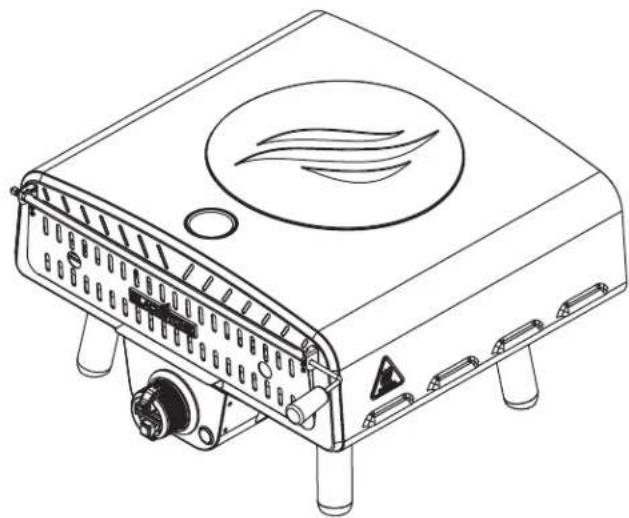
natural_image
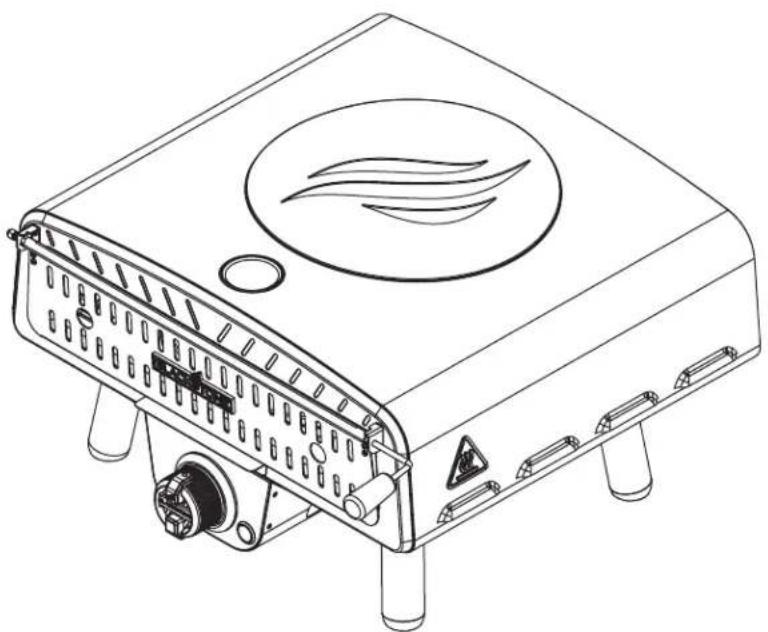
Line drawing of a portable electronic device with ventilation slots, a circular vent, and mounting feet (no text or symbols)OWNER'S MANUAL
LEGGERO PIZZA OVEN
TABLE OF CONTENTS
IMPORTANT SAFETY INFORMATION ....02
WARRANTY 03
ASSEMBLY GUIDE 04
USING YOUR BLACKSTONE 08
TROUBLESHOOTING 13
IMPORTANT:
This instruction manual contains important information necessary for the proper assembly and safe use of the appliance.
Read and follow all warnings and instructions before assembling and using the appliance.
Follow all warnings and instructions when using the appliance.
Keep this manual for future reference.
Installer/Assembler: Leave these instructions with the consumer.

For the latest version of this manual, scan this code or visit
BlackstoneProducts.com/support
SAFETY ALERT KEY
! DANGER
Indicates a hazardous situation that, if not avoided, will result in death or serious injury.
CAUTION
Indicates a hazardous situation that, if not avoided, could result in minor or moderate injury.
WARNING
Indicates a hazardous situation that, if not avoided, could result in death or serious injury.
NOTICE
Indicates information considered important, but not hazard-related (e.g. messages related to property damage).
IMPORTANT SAFETY INFORMATION
DANGER
If you smell gas:
- Shut off gas to the appliance.
- Extinguish any open flame.
- If odor continues, keep away from the appliance and immediately call your gas supplier or your fire department.
Failure to follow these instructions could result in fire or property damage, personal injury or death.
! DANGER
- NEVER operate this appliance unattended.
- If a fire should occur, keep away from the appliance and immediately call your fire department. DO NOT attempt to extinguish an oil or a grease fire with water.
Failure to follow these instructions could result in fire or property damage, personal injury or death.
ELECTRIC APPLIANCE SAFETY
TO PROTECT AGAINST ELECTRIC SHOCK:
- DO NOT immerse cord or plugs in water or other liquid.
- Unplug from the outlet when not in use and before cleaning. Allow to cool before putting on or taking off parts.
- DO NOT use an outdoor cooking gas appliance for purposes other than intended.
- DO NOT operate this appliance with a damaged cord, plug, or after the appliance malfunctions or has been damaged in any manner. Contact the manufacturer for repair.
- DO NOT let the cord hang over the edge of a table or touch hot surfaces.
- Keep any electrical supply cord and the fuel supply hose away from heated surfaces.
- When connecting, first connect plug to the appliance then into the outlet.
USE ONLY A GROUND FAULT INTERRUPTER (GFI) PROTECTED CIRCUIT WITH THIS APPLIANCE.
- This appliance, when installed, must be electrically grounded in accordance with local codes or, in the absence of local codes, with NFPA 70 Canadian Electrical Code, Part I.
- DO NOT remove the grounding plug or use with an adapter of 2 prongs.
- Use only extension cords with a 3 prong grounding plug, rated for the power of the equipment, and approved for outdoor use with a W-A marking.
WARNING
- DO NOT store or use gasoline or other flammable liquids or vapors in the vicinity of this or any other appliance.
- An LPG cylinder not connected for use shall not be stored in the vicinity of this or any other appliance.
GAS APPLIANCE SAFETY
- The use of alcohol, prescription, or non-prescription drugs may impair the consumer's ability to properly assemble or safely operate the appliance.
- Keep children and pets away from the appliance at all times.
- Have a type BC or ABC fire extinguisher readily available.
DO NOT USE FOR PURPOSES OTHER THAN INTENDED.
- DO NOT use for commercial cooking.
- DO NOT use this appliance as a heater.
WARNING
Improper installation, use, adjustment, alteration, service, modification, or maintenance can cause injury or property damage. Refer to this manual.
INSTALLATION MUST CONFORM WITH LOCAL CODES.
In the absence of local codes, installation must conform with either ANSI Z223.1/NFPA 54, CSA B149.1, or CSA B149.2.
FOR OUTDOOR USE ONLY.
WARRANTY
The North Atlantic Imports LLC 1-Year Warranty covers replacement parts up to one year after the date of purchase.
TO ENABLE THIS WARRANTY, YOU WILL NEED TO PROVIDE:
Your appliance's Serial Number
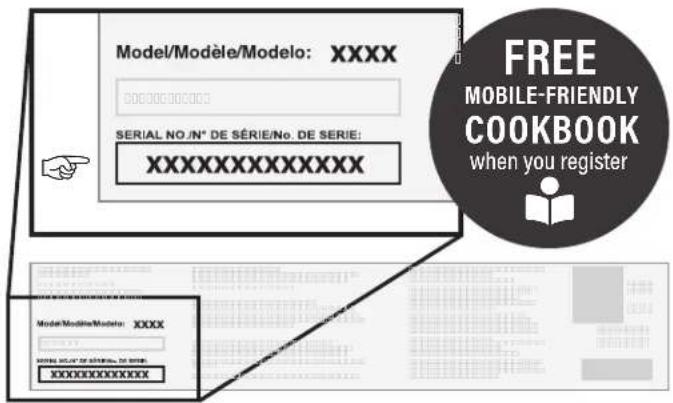
The Serial Number can be found on your appliance's Manufacturer Label.
(The Manufacturer Label is a large silver sticker found on the body of your appliance.)

Register your appliance at BlackstoneProducts.com/register
WARRANTY OVERVIEW
North Atlantic Imports, the manufacturer, will warranty for one year from purchase all parts, workmanship, and finishes. It will be the manufacturer's option as to whether to repair or replace any of the above items. All warranties are limited to the original purchaser only. This warranty does not cover any liability on the part of North Atlantic Imports, its agents or employees, for any indirect or consequential damages for breach of warranty. The purchaser must follow the manufacturer's usage instructions.
Under no circumstances is the manufacturer responsible for damages from the failure to operate the cooking station properly. It is the responsibility of the purchaser to establish the warranty period by verifying the original purchase date with original sales receipt.
DETAILED EXPLANATION OF THE WARRANTY
North Atlantic Imports LLC warrants to the owner that the product covered by this agreement is free from defects in material and workmanship under normal use and service for which it was intended if, but only if, it has been operated in accordance with North Atlantic Imports LLC instructions exclusively for domestic use, and not for private or public club, institutional or commercial purposes.
North Atlantic Imports LLC's obligation under this warranty is limited to replacing or repairing, free of charge, any part or parts that may prove, to the satisfaction of North Atlantic Imports LLC, to be defective under normal home use and service within the following stated periods of time from the date of purchase; for one year from purchase, all parts, finish, and workmanship. Should any failure to conform to this warranty become apparent during applicable warranty periods stated above, the original purchaser must notify North Atlantic Imports LLC of breach of warranty within the applicable warranty period.
North Atlantic Imports LLC shall upon notice and compliance by the original purchaser with such instructions, correct such nonconformity by repair or replacement of the defective part or parts.
Correction in the manner provided above shall constitute a fulfillment of all obligations of North Atlantic Imports LLC with respect to the quality of the product.
North Atlantic Imports LLC does not warrant this equipment to meet the requirement of any safety code of any state, municipality or other jurisdiction, and the original purchaser assumes all risk and liability whatsoever resulting from the use thereof, whether used in accordance with North Atlantic Imports LLC instructions or otherwise.
This warranty does not cover and is intended to exclude any liability on the part of North Atlantic its agents, servants or employees whether under this warranty or implied by law for any indirect or consequential damages for breach on any warranty. The purchaser must establish all applicable warranty periods pursuant to this warranty by verifying the original purchase date by producing the dated sales receipt. This warranty shall not apply to this product or any other part thereof which has been subject to accident, negligence, alteration, abuse, or misuse or which has been repaired or altered without North Atlantic written consent, outside of North Atlantic Imports LLC factory. The full manufacturer warranty is not valid for griddles purchased from unlicensed, third-party resellers, purchased at a discount due to missing or damaged parts, or purchased as a floor model; at the discretion of North Atlantic Imports.
North Atlantic Imports LLC makes no warranty whatsoever in respect to accessories or parts not supplied with it. This warranty shall apply only within the boundaries of the United States of America and Canada. This warranty gives the original purchaser specific rights, and the original purchaser may also have other rights, which vary from state to state.

ASSEMBLY GUIDE
EXPLODED VIEW
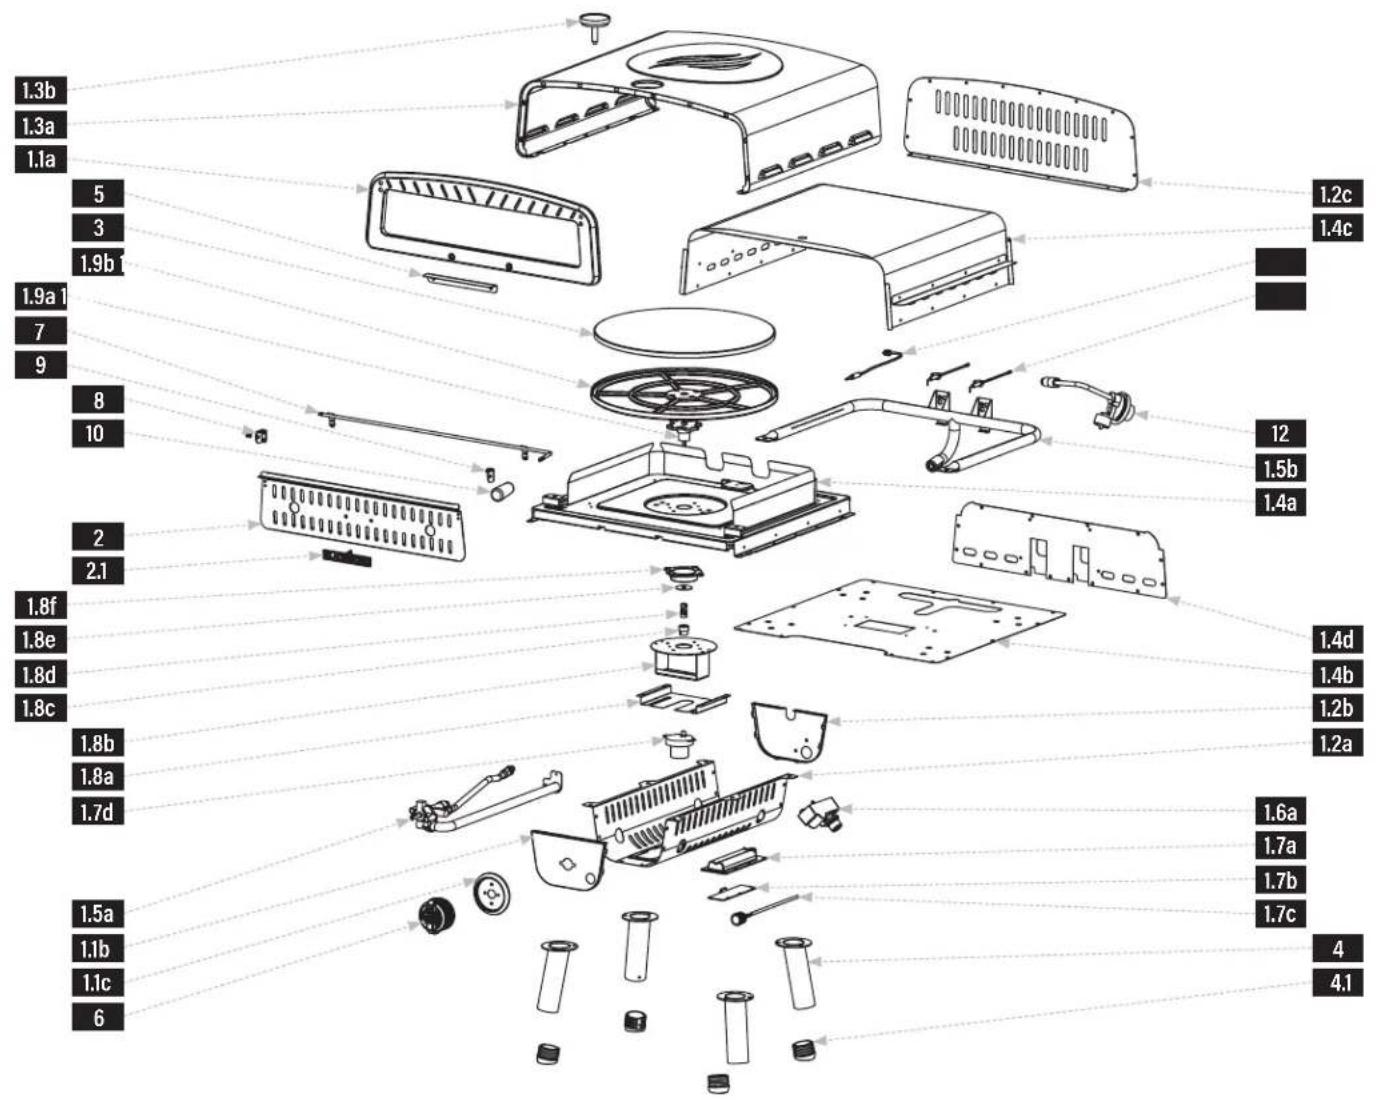
PARTS LIST
| PARTS | QTY | PARTS | QTY | PARTS | QTY | PARTS | QTY | ||||
| 1.1a | Upper front panel 1 | 1.4b | Sealing plate 1 | 1.6c | Thermoelectriccouple | 1 | 1.8c | Shaft connectingblock | 1 | ||
| 1.1b | Lower front panel | 1 | 1.4c | Inner cap | 1 | ||||||
| 1.1c | Control knob bezel | 1 | 1.4d | Inner cover rearplate | 1 | 1.7a | Battery box | 1 | 1.8d | Coupling | 1 |
| 1.2a | Base panel cover | 1 | 1.7b | Battery box cover | 1 | 1.8e | Stop plate | 1 | |||
| 1.2b | Lower rear panel | 1 | 1.5a | Gas line | 1 | 1.7c | Motor button | 1 | 1.8f | Shaft bearing sleeve | 1 |
| 1.2c | Upper rear panel | 1 | 1.5b | Burner | 1 | 1.7d | Motor | 1 | 1.9a | Turntable support | 1 |
| 1.3a | Oven lid | 1 | 1.6a | Ignitor | 1 | 1.8a | Motor heat shield | 1 | 1.9b | Turntable | 1 |
| 1.3b | Thermometer | 1 | 1.6b | Ignition needles | 2 | 1.8b | Motor support | 1 | 2.1 | Nameplate | 1 |
| 1.4a | Bottom plate 1 | 4.1 | Foot base | 4 | |||||||
1 Oven body(1 piece)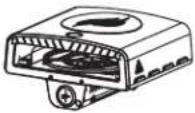 | 2 Oven door(1 piece)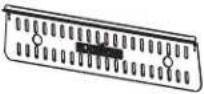 | 3 Pizza stone(1 piece) | 4 Legs (4 pieces)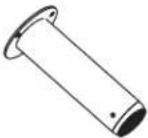 | 5 Baffle panel(1 piece)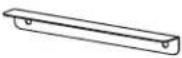 | 6 Control knob(1 piece)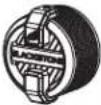 |
7 Door shaft(1 piece)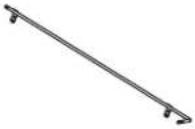 | 8 Door shaft seat(L) (1 piece)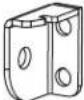 | 9 Door shaft seat(R) (1 piece)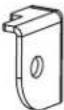 | 10 Door handle(1 piece)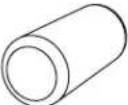 | 11 Power cord(1 piece)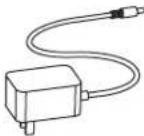 | 12 Regulator(1 piece)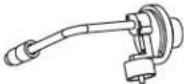 |
a. M3x6 screws(4 pieces)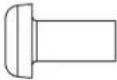 | b. M3 lid nuts(4 pieces) | c. M4x16 bolts(18 pieces)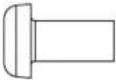 | d. Spring (1 piece)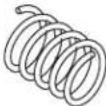 | e. M5 lidnut (1 piece) |
ASSEMBLY INSTRUCTIONS
Find a large, clean area to assemble your appliance. Remove all packing material before assembling.
CAUTION
Sharp edges. Wear gloves while assembling.
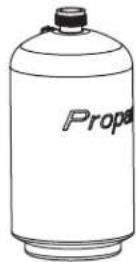
NOT INCLUDED:
LPG cylinder
Size: 4 x 8 in (10 x 20 cm), 1 lb (453 g)

natural_image
Five identical cylindrical batteries with white battery symbols, arranged horizontally (no text or labels)NOT INCLUDED:
One (1) AA battery (for ignition) Optional four (4) AA batteries (for the motor)
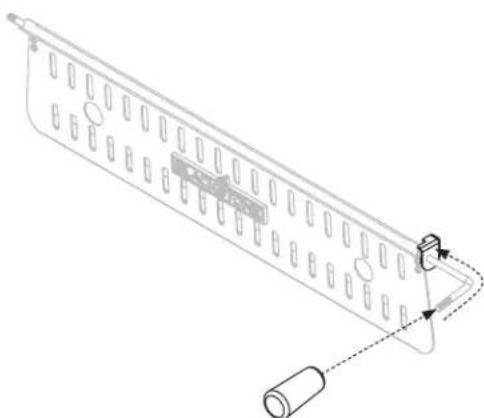
STEP 01 Use four (4) M3x6 bolts [a.] and four (4) M3 lid nuts [b.] to attach the door shaft to the oven door.
![[a.] × 4 [b.] × 4](/content/2026/04/724840/images/02164e3e66d2985a0938fe8e6534f0267270ea807183e4a0b6b211d502c36c0e.jpg)
STEP 02 Slide the door shaft seat (R) onto the door shaft. Screw the door handle onto the door shaft.
natural_image
Technical line drawing of a mechanical component with a cylindrical base and attached cable (no text or symbols)STEP 03 Set the pizza oven on its back.
Use twelve (12) M4x16 bolts [c.] to attach the four (4) legs to the bottom of the pizza oven.
![[c.] × 12](/content/2026/04/724840/images/cfe7bbdbb39f554e17a8d5ae21fc72bd9d356542e5901e9a63964e67d2ed7be0.jpg)
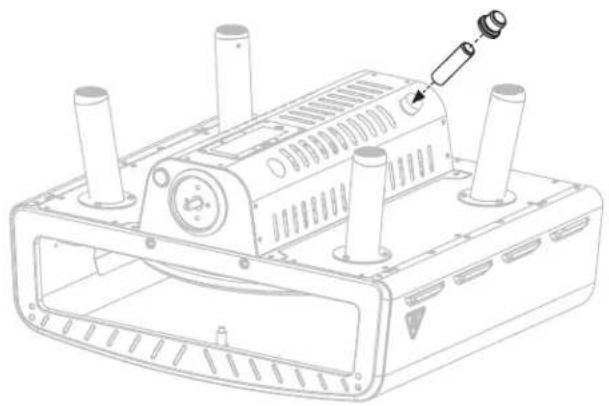
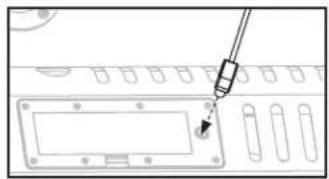
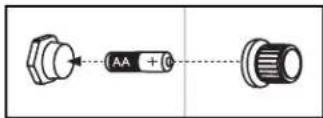
STEP 04 Insert one (1) AA battery (not included) under the battery cap.
Screw the cap into place over the positive terminal.
natural_image
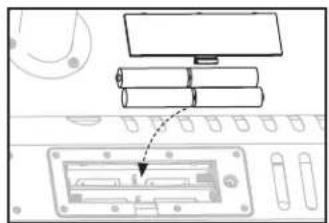
Technical line drawing of a mechanical device with multiple cylindrical components and a central housing (no text or symbols)STEP 05 To power the motor:
OPTION A: Plug the power cord into the motor.
natural_image
Diagram showing a tool inserted into a device panel with a cursor pointing to a component (no text or symbols present)STEP 06 Use two (2) M4x16 bolts [c.] to attach the baffle panel to the front panel.
Install the control knob by pushing it into place in the OFF position.
OPTION B: Insert four (4) AA batteries into the motor. (DO NOT use the batteries and the AC power supply at the same time.)
![[c_n] × 2](/content/2026/04/724840/images/fdfd6bc674bbfb85444595d1b42326e19580e692d993a18de7d596689f0597a6.jpg)
STEP 07 Slide the door shaft seat (I) onto the door shaft.
Use four (4) M4x16 bolts [c.] to attach the door shafts to the front of the oven.
![[c.] × 4](/content/2026/04/724840/images/a9d4c4288480df0574021a51ae96260ba47fbacb9f85cd4c1c6901c34e58e482.jpg)
STEP 08 Secure the spring [d.] to the door shaft with the M5 lid nut [e.].
![[d.] × 1 [e.] × 1](/content/2026/04/724840/images/977d9ef4a753c94514c81486ad2cf6d7301b5d52fcf0a56409998e8889d9d3cc.jpg)
STEP 09 Place the pizza stone on the turn table.
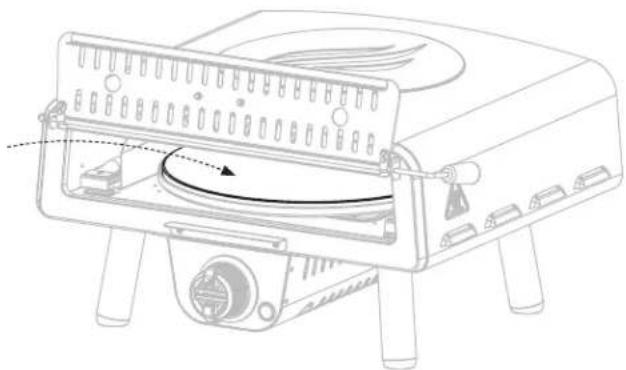
natural_image
Technical line drawing of a portable electronic device with ventilation slots and a rotary knob (no text or symbols)STEP 10 Proceed to USING YOUR BLACKSTONE.
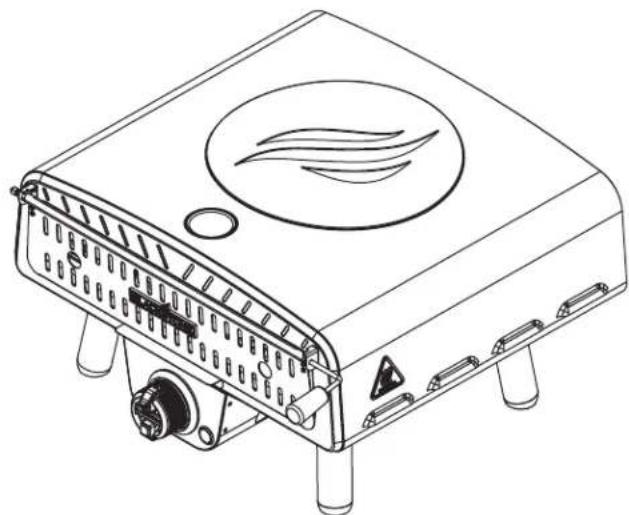
natural_image
Line drawing of a portable electronic device with ventilation grilles and a circular vent (no text or symbols)| NOTICE |
| ·DO NOT mix old and new batteries.·DO NOT mix alkaline, standard (carbon-zinc) or rechargeable (ni-cad, ni-mh, etc.) batteries. |
| NOTICE |
| Place appliance on a heat-resistant and flame-resistant surface while in use. |
USING YOUR BLACKSTONE
BEFORE COOKING
CHECK BURNERS
Prior to connection and use, ensure that there is no debris caught in, or damage to, the head of the gas cylinder, regulator, hose, burner and burner ports.
Spiders and insects can nest within and clog the burner/venturi tube at the orifice.
Please reference the Troubleshooting chapter for burner cleaning instructions.
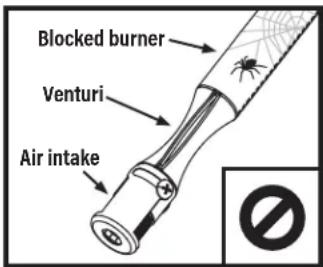
WARNING
A clogged burner can lead to a fire beneath the appliance.
Burner should be removed and cleaned whenever blockages are found.
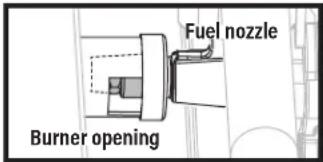
⚠ Ensure that the gas rail fuel nozzle orifice is correctly engaged within the burner opening.
DANGER
Flammable items can combust if placed near the appliance. Keep the appliance area clear and free from combustible materials, aerosol containers, gasoline and other flammable vapors and liquids.
THE MINIMUM AMBIENT OPERATING TEMPERATURE IS 0°F (-18°C).
SETTING UP YOUR OUTDOOR SPACE
THIS APPLIANCE MUST ONLY BE USED OUTDOORS.
- DO NOT use this appliance inside buildings, garages, or any other enclosed area.
- DO NOT install this appliance in or on a boat.
- DO NOT install this appliance in or on a recreational vehicle.
MAINTAIN PROPER CLEARANCES FROM COMBUSTIBLE MATERIAL.
- DO NOT use this appliance on or under any apartment or condominium balcony or deck.
- DO NOT obstruct the flow of combustion and ventilation air.
- DO NOT operate this appliance any closer than 36 in (1 m) from the sides and back of the appliance to combustible construction.
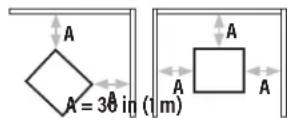
- DO NOT use this appliance under overhead combustible construction.
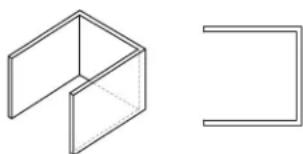
SHELTERED OUTDOOR AREAS:
All openings must be permanently open; sliding doors, garage doors, windows or screened openings are not considered as permanent openings.
An appliance is considered to be outdoors if installed with shelter no more inclusive than:
a. With walls on three sides, but with no overhead cover.
natural_image
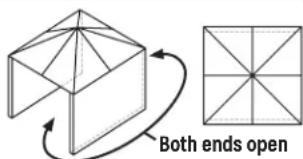
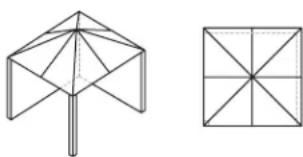
Pure geometric line drawing of a 3D cube and a right-angle bracket (no text or symbols)b. Within a partial enclosure that includes an overhead cover and no more than two sidewalls. The sidewalls may be parallel, as in a breezeway, or at right angles to each other.
natural_image
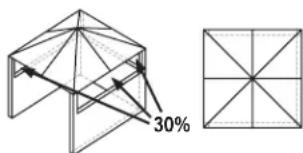
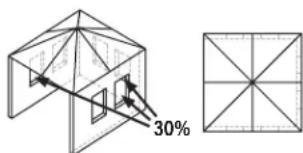
Two geometric line drawings: a triangular prism with internal diagonals and a square grid with intersecting lines (no text or symbols)c. Within a partial enclosure that includes an overhead cover and three sidewalls, as long as 30% or more of the horizontal periphery of the enclosure is permanently open.
CONNECT THE LPG CYLINDER ONLY USE A 1 LB (453 G) CYLINDER
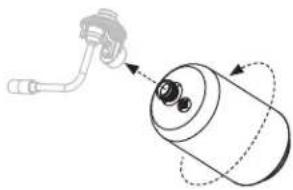
STEP 01 Screw in the LPG cylinder into the gas regulator, turning the cylinder clockwise.
The regulator may make a humming or whistling noise during operation. This will not affect safety or use of the appliance.
natural_image
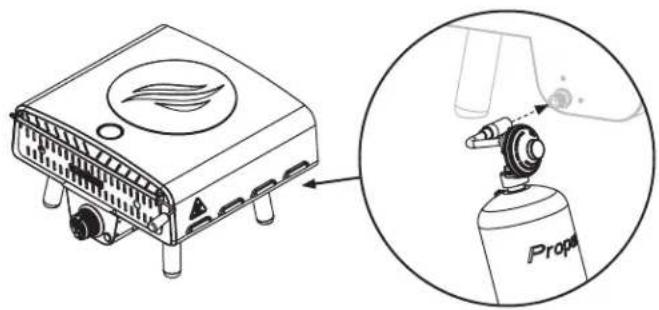
Diagram of a mechanical device with a lever and rotating component (no text or symbols)STEP 02 Insert the regulator and LPG cylinder into the gas line of the appliance. Turn the collar of the regulator clockwise to secure it to the gas line.
natural_image
Line drawing of a portable gas stove with a flame logo, shown in an inset view (no text or symbols)LPG CYLINDER SAFETY
- The LPG supply cylinder to be used must be constructed and marked in accordance with the specifications for LP gas cylinders, U.S. Department of Transportation (DOT) or the Standard for Cylinders, Spheres and Tubes for the Transportation of Dangerous Goods, CAN/CSA-B339.
- Only LPG cylinders marked "propane" shall be used.
- The cylinder used, if in excess of 2.2 lb (1.00 kg) propane capacity, must include a collar to protect the cylinder valve.
- The LPG cylinder supply system must be arranged for vapor withdrawal.
Always keep new LPG cylinders in upright position during use, transit or storage.
Ensure that the LPG cylinder is positioned below the regulator. (If the liquid level of the propane is above the regulator, the regulator will frost.)

IF FROSTING PERSISTS AFTER BOTTLE IS ANGLED CORRECTLY:
STEP 01 Turn off the appliance and disconnect LPG cylinder immediately. This indicates a problem with the LPG cylinder and it should not be used on any product.
STEP 02 Return LPG cylinder to supplier.
REGULATOR SAFETY
- Use this appliance, as purchased, only with gas and regulator/ valve assembly supplied. DO NOT use quick connect fittings or other add-ons.
- DO NOT cross thread (force at an improper angle) the connection between your LPG cylinder and regulator.
- If you can not connect the regulator, DO NOT use the regulator. Regulator must be replaced with a Blackstone approved model by a professionally licensed, authorized dealer.
LEAK TEST INSTRUCTIONS
STEP 01 Turn the control knobs to OFF.
STEP 02 Connect the LPG cylinder to the regulator. Connect the regulator to the appliance.
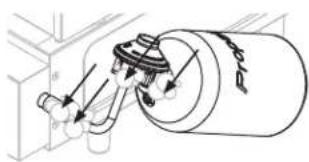
STEP 03 Use a clean paintbrush to brush a 1 19 % mild soap and water solution onto joint areas of valves and regulator.
Leaks are indicated by growing bubbles.
natural_image
Technical diagram of a mechanical assembly with labeled components (no text or symbols present)STEP 04 If growing bubbles appear, re-tighten connections.
WARNING
If leaks cannot be stopped, DO NOT try to repair. Regulator must be replaced with a Blackstone approved model by a professionally licensed, authorized dealer.
DISCONNECTING THE LPG CYLINDER 1 LB (453 G)
STEP 01 Ensure that the control knob(s) are turned to OFF.
STEP 02 Once the appliance has cooled, disconnect the regulator from the gas line by unscrewing the collar.
STEP 03 Unscrew the LPG cylinder from the regulator.
STEP 04 Place dust cap on LPG cylinder valve outlet whenever cylinder is not in use.
Only install the type of dust cap on cylinder valve outlet that is provided with the cylinder valve. Other types of caps or plugs may result in leakage of propane.
STORING LPG CYLINDERS
WARNING
- DO NOT store a spare LPG cylinder under or near this appliance.
- DO NOT fill an LPG cylinder beyond 80% full.
If the information above is not followed exactly, a fire causing death or serious injury may occur.
- The LPG cylinder must be disconnected when the appliance is not in use.
- Only store the appliance indoors if the LPG cylinder is disconnected and removed from the appliance.
IGNITION INSTRUCTIONS
1. CHECK VALVES
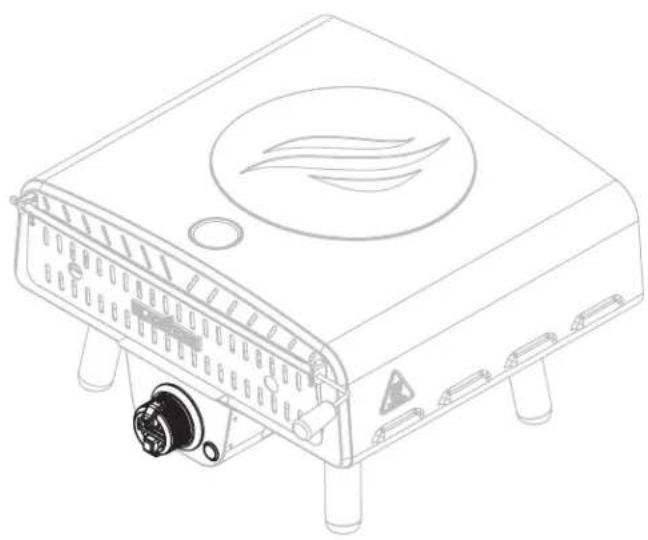
STEP 01 Turn knob to OFF position.
STEP 02 Push in knob and release. Knob should spring back. If knobs DO NOT spring back, replace valve assembly before using appliance.
STEP 03 Rotate knob to LOW then turn back to OFF. Knob should turn smoothly.
natural_image
Line drawing of a portable electric stove with ventilation grilles and a control panel (no text or symbols)3. CHECK BURNER FLAME
Always check burner flame before use.
STEP 01 Light burners and rotate knobs from HIGH to LOW.
STEP 02 Look below the cooking top to view burners. When knob is at HIGH, flames should be larger than when knob is at LOW.
2. THERMOCOUPLE SURE-START IGNITION
⚠ Keep the oven door closed as much as possible to reach and maintain temperature.
STEP 01 Ensure there is one (1) AA battery (not included) under the battery cap.
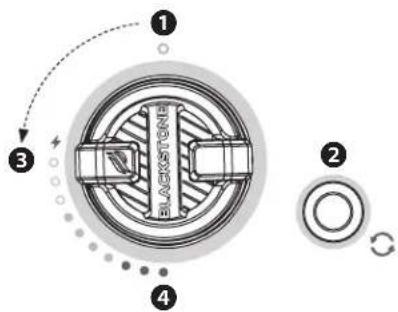
STEP 02
① Turn the Pizza Oven control knob to OFF.
② Turn on the motor.
3 Push in the control knob and turn counterclockwise a quarter turn to LOW. Hold in for 10\~20 seconds until thermocouple heats up. You should hear the igniter clicking the entire time. (When you release the knob, the oven should remain lit.)
STEP 03 Once the flame is consistent, adjust to desired temperature ④.
Before first use, run the oven for 15-20 minutes on HIGH to burn off manufacturing remnants.
HEALTHY BURNER FLAME PATTERN
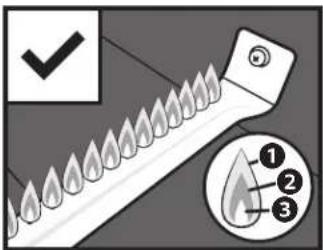
① Flickers of yellow color.
② Dark blue color.
③ Vibrant blue.
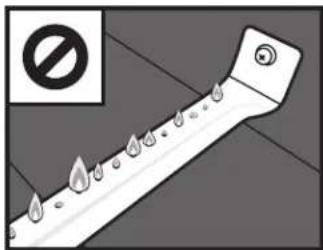
BURNER FLAMES ARE YELLOW OR IRREGULAR
natural_image
Diagram of a pipe with water droplets and a prohibition symbol (no text or labels)If there is a sudden drop or low flame issue, please reference the Troubleshooting chapter.
COOKING ON YOUR BLACKSTONE
CAUTION
This appliance will be hot during and after use. Use long-handled utensils and oven mitts/ protective gloves when handling potentially hot parts to protect against burns and splatters.
CAUTION
If the appliance is fitted with a paper towel holder, the arm must be in the open position while the appliance is in use.
NOTICE
DO NOT store any items within 3 in (8 cm) of the cooking surface while in use.
IF GREASE OR OTHER HOT MATERIAL DRIPS ONTO VALVE, HOSE OR REGULATOR:
STEP 01 Turn off gas supply immediately.
STEP 02 Determine the cause and correct it.
STEP 03 Clean and inspect valve, hose and regulator.
STEP 04 Perform a leak test. (Please reference the Leak Test Instructions)
VIDEO RECIPES
Find recipes and cooking tips at:
BlackstoneProducts.com/blogs/recipes
youtube.com/c/BlackstoneGriddles
natural_image
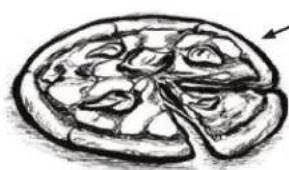
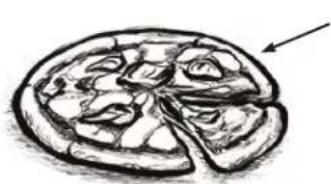
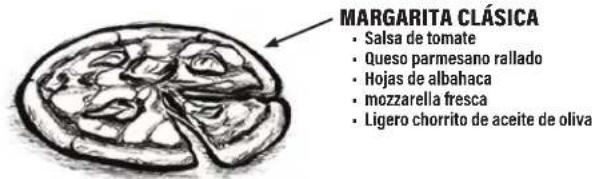
Sketch of a sliced pizza with visible segments and a small arrow pointing to the side (no text or symbols)CLASSIC MARGHERITA
- Tomato sauce
- Grated parmesan cheese
- Basil leaves
- Fresh mozzarella
• Light drizzle of olive oil
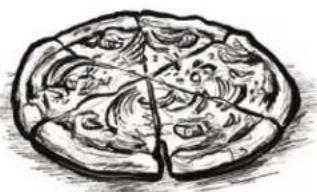
BBQ CHICKEN
- Your favorite BBQ sauce
- Chopped cooked chicken
- Thinly sliced red onion
- Shredded mozzarella cheese
natural_image
Sketch-style illustration of a pizza with visible toppings and flourishes (no text or symbols)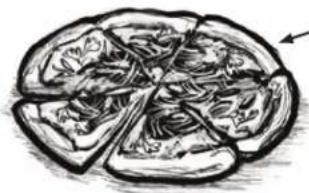
natural_image
Sketch of a sliced pizza with visible segments and a small arrow pointing to the slice (no text or symbols)THAI SWEET CHILI
- Sweet Thai chili sauce
- Chopped cooked chicken
- Thinly sliced red onion
- Chopped fresh cilantro
- Shredded mozzarella cheese
NEW YORK STYLE PIZZA DOUGH
1 hour 30 min.
INGREDIENTS
- 4 cups of bread flour
- 1 and 12 cups of warm water
- 1 teaspoon of instant dry yeast
- 3 teaspoons of honey
- 2 teaspoons of salt
- 4 teaspoons of olive oil
natural_image
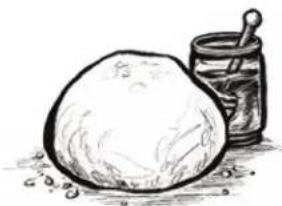
Sketch of a large ball and a mortar with chopsticks beside it (no text or symbols)STEP 01 Add water, flour, yeast, honey and salt together in a large bowl. (Don't add the oil yet. You want the flour to hydrate first before adding oil.)
STEP 02 Mix the dough until most of the flour is incorporated.
STEP 03 Add the oil and knead your dough for 5-10 minutes.
STEP 04 Cover dough and let it rest for 10-15 minutes.
STEP 05 Divide the dough into 3 pieces and round into balls. Wipe the dough balls with oil or cooking spray.
STEP 06 Cover dough balls and let rise for about an hour.
HOW TO STRETCH PIZZA DOUGH
Important: Having your dough at room temp will make stretching it much easier. Cold dough is very difficult to work with.
STEP 01 Generously flour your prep surface to prevent dough from sticking.
STEP 02 Flatten the dough with the palm of your hand, starting from the center out. Using a rolling pin is fine but won't give you a puffy crust.
STEP 03 Pick up the dough and put it on the back of your hands. Rotate the dough from hand to hand letting gravity do most of the work stretching it out.
Note: Use a small amount of flour, semolina, or cornmeal on your pizza peel to prevent sticking.
HOW TO USE YOUR PIZZA OVEN
FRESH PIZZA
STEP 01 Preheat your oven on high for about 12-15 minutes.
For best results, use an infrared thermometer (not included) to measure the bottom stone temperature.
STEP 02 Once the desired temperature is reached (900°F (482°C) for fresh dough pizza), turn the control knob to low.
STEP 03 Pizza cooking time is about 2-4 minutes depending on the size and thickness of the pizza.
STEP 04 Pull the pizza out when the crust has reached your desired readiness, or when the edges of the pizza crust are golden-brown.
FOR BEST RESULTS:
- DO NOT put in a new pizza until the temperature is back to desired temperature. Set temp to High inbetween cook times.
- Keep the door closed as much as possible.
FROZEN PIZZAS, COOKIES, ETC.
Follow the food manufacturer's directions on box/ recipe.
Let frozen food thaw a little bit before putting into the hot oven. This will prevent your pizza stone from cracking.
CLEANING YOUR PIZZA STONE
STEP 01 Set your oven to HIGH for 15\~20 min to burn off residue.
STEP 02 Once your oven has cooled completely, flip the stone over and use the cleaner side.
NOTICE
DO NOT use soap on the cooking stone. This will leave a soap taste in food.
CARE AND MAINTENANCE
WARNING
Grease build up can cause a fire. Clean any part of the appliance that gets hot and experiences grease build up after each use.
CAUTION
All cleaning and maintenance should be carried out when the appliance is cool and everything is turned OFF.
- DO NOT use abrasive pad on areas with graphics.
- If a bristle brush is used to clean any of the cooking surfaces, ensure no loose bristles remain on cooking surfaces prior to cooking.
APPLIANCE BODY:
Wash with warm soapy water and immediately wipe dry with a non-abrasive cloth. (DO NOT allow cleaning agents to rest on any porous surface for a prolonged amount of time.)
NOTICE
DO NOT use Citrisol, abrasive cleaners, or a concentrated cleaner on the appliance. This may result in damage to and failure of parts.
APPLIANCE STORAGE
WARNING
DO NOT move the appliance when in use. Allow the appliance to cool to 115irc F ( 45irc C) before moving or storing.
Storage of an appliance indoors is only permissible if the gas supply is disconnected and removed from the appliance.
COVER FIT GUIDE
Always cover your appliance when stored outdoors.

To find a cover that will fit your appliance, visit BlackstoneProducts.com/support.
TROUBLESHOOTING
IGNITION TROUBLESHOOTING
BURNER WILL NOT IGNITE:
If ignition does not occur in 5 seconds:
STEP 01 Turn the burner control knob OFF.
STEP 02 Wait 5 minutes.
STEP 03 Repeat the lighting procedure.
If this does not work, to determine the cause, please try to ignite your appliance with a match.
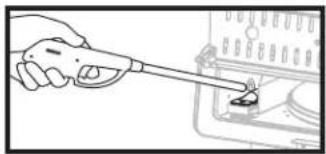
MATCH LIGHTING INSTRUCTIONS
Before beginning, check for gas leaks. Open hood (if applicable).
STEP 01 Turn control knob to OFF position.
STEP 02 Light a match (or long lighter) no shorter than 11 inches long.
STEP 03 Place the flame next to the burner.
natural_image
Illustration of a hand holding a tool near a device (no text or symbols visible)STEP 04 Push in and turn the control knob to start gas flowing. Ensure burner lights and stays lit.
IF YOU CAN IGNITE YOUR APPLIANCE WITH A MATCH:
POSSIBLE CAUSES SOLUTION
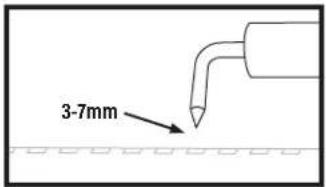
| Ignitor wire misaligned. | Ensure that the ignitor needle is positioned 3-7mm away from the burner, and aligned with the burner holes. |
 | |
| Damage to the ignition system. | Contact customer support for replacement parts. |
| Dead / improperly installed battery. | Replace with new battery. |
IF YOU CAN NOT IGNITE YOUR APPLIANCE WITH A MATCH:
POSSIBLE CAUSES SOLUTION
| Burner tubes are not receiving fuel. | Clean the burner assembly to remove the obstruction. |
GAS FLOW TROUBLESHOOTING
BURNER FLAMES ARE YELLOW OR IRREGULAR:
- Appliance will not achieve a high heat or heats unevenly.
- Burner flames start strong, then immediately drop to low even when burner is set to high position.
- Flame height drops when a second burner is lit.
- Flames DO NOT extend the full length of the burner, or only run on one side of the burner.
- Burner flames are inconsistent.
POSSIBLE CAUSES SOLUTION
| Obstructions in the burner, gas jets, or fuel rail. | Clean the burner, jets, and gas hose. |
| LPG cylinder is empty or low. | Refill or replace the LPG cylinder. |
| The regulator's flow limiting device was triggered. | Reset the safety system:STEP 01Turn OFF the appliance, close the LPG cylinder valve, and disconnect the regulator from the LPG cylinder.STEP 02Wait five minutes to allow the pressure to dissipate, then reconnect the regulator to the LPG cylinder and slowly open the OPD hand wheel one half turn.STEP 03Ignite your appliance. |
| Regulator stuck in safety position. | Contact customer support for replacement parts. |
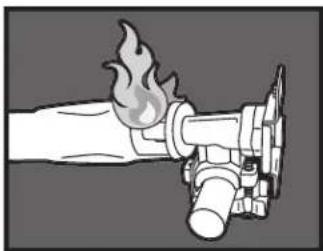
A FLAME IS COMING OUT OF THE AIR GATE:
natural_image
Illustration of a fire extinguisher with flame and valve (no text or symbols)POSSIBLE CAUSES SOLUTION
| Something is blocking the venturi in the burner. | Clean the burner assembly to remove the obstruction. |
CLEANING THE BURNER ASSEMBLY
CAUTION
All cleaning and maintenance should be carried out when the appliance is cool and with the fuel supply turned OFF at the gas cylinder.
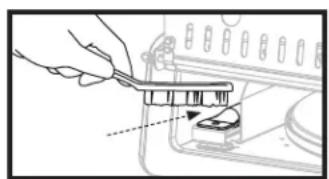
STEP 01 Run a nylon brush over the outer surface of the burner to remove grime.
natural_image
Hand using a tool to adjust or install a component, no visible text or symbolsSTEP 02
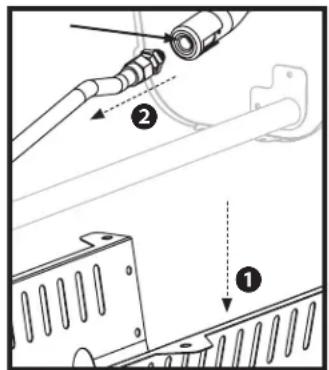
① Remove the base panel cover from the base of the unit.
② Disconnect the orifice nozzle and gas line from the burner tube.
STEP 03 Use compressed air to clear the burner tubes.
Note: Once reinstalled, the gas line should be leak tested to ensure there are no holes in the line.
CUSTOMER SUPPORT
Visit us online at BlackstoneProducts.com/support for assistance concerning appliance use, replacement parts, or your warranty.
CUSTOMER SUPPORT HOURS:

Monday - Friday
7:00 am - 5:00 pm (Mountain Time)
This page intentionally left blank
BLACKSTONE®
This product may be covered by one or more issued U.S. and/or international patents and may include patent applications pending. For more information, please visit: BlackstoneProducts.com/patents
DISTRIBUTED BY NORTH ATLANTIC IMPORTS, LLC 1073 W 1700 N LOGAN, UT 84321 USA | BLACKSTONE IS A REGISTERED TRADEMARK OF NORTH ATLANTIC IMPORTS, LLC
MODÈLE: 2238 v01
natural_image
Line drawing of a portable electronic device with ventilation slots, a circular vent, and mounting feet (no text or symbols)MANUEL DU PROPRIÉTAIRE
FOUR À PIZZA LEGGERO
TABLE DES MATIÈRES
INFORMATIONS DE SÉCURITÉ IMPORTANTES .....02
GARANTIE....03
GUIDE D'ASSEMBLAGE....04
UTILISATION DE VOTRE BLACKSTONE 08
DÉPANNAGE....13
IMPORTANT:
BlackstoneProducts.com/support
CLÉ D'ALERTE DE SÉCURITÉ
! DANGER
natural_image
Five identical cylindrical batteries with black bases and white battery symbols, arranged horizontally (no text or labels)NON INCLUS:
natural_image
Technical line drawing of a mechanical component with holes and a cylindrical shaft (no text or symbols)natural_image
Technical line drawing of a mechanical device with multiple cylindrical components and a central housing (no text or symbols)natural_image
Diagram of a device with a screwdriver inserted into a panel, showing no text or symbols![[c.] × 2](/content/2026/04/724840/images/1629129c8a0077b9933cfe78bb0e9da4c39eac394694d8d66486b03b454f0fbe.jpg)
natural_image
Technical line drawing of a portable electronic device with a rotary knob and control panel (no text or symbols)natural_image
Line drawing of a portable electronic device with ventilation grilles and a circular vent (no text or symbols)natural_image
Pure geometric line drawing of a 3D cube and a right-angle bracket (no text or symbols)natural_image
Two geometric line drawings: a triangular prism with internal lines and a square grid with intersecting diagonals (no text or symbols)natural_image
Diagram of a mechanical device with a lever and rotating component (no text or symbols)natural_image
Line drawing of a portable air conditioner unit with a close-up inset showing its internal components (no text or symbols)SÉCURITÉ DES BOUTEILLES DE GPL
natural_image
Line drawing of a propeller with a handle and label (no text or symbols beyond the label)SI LE GIVRAGE PERSISTE APRÈS QUE LA BOUTEILLE A ÉTÉ CORRECTEMENT INCLINÉE:
natural_image
Technical line drawing of a mechanical assembly with no visible text or symbolsINSTRUCTIONS D'ALLUMAGE
1. CLAPETS ANTI-RETOUR
ÉTAPE 01 Tourner le bouton en position OFF.
natural_image
Line drawing of a portable electric stove with ventilation grilles and a control panel (no text or symbols)3. VÉRIFIER LA FLAMME DU BRÛLEUR
natural_image
Diagram of a pipe with water droplets and a prohibition symbol (no text or labels)BlackstoneProducts.com/blogs/recipes
youtube.com/c/BlackstoneGriddles
@blackstoneproducts
natural_image
Sketch of a sliced pizza with an arrow pointing to the slice (no text or symbols)MARGUERITE CLASSIQUE
natural_image
Illustration of a sliced pizza with visible toppings and a pointing arrow (no text or symbols)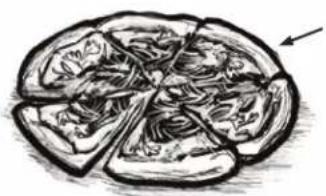
natural_image
Sketch of a sliced pizza with visible segments and an arrow pointing to the slice (no text or symbols)PIMENT DOUX THAÏ
natural_image
Sketch of a large ball resting next to a jar with a spoon (no text or symbols)LLE BRÛLEUR NE S'ALLUME PAS:
INSTRUCTIONS D'ALLUMAGE DES ALLUMETTES
natural_image
Line drawing of a hand holding a tool near an electrical outlet (no text or symbols)CAUSES POSSIBLES LA SOLUTION
CAUSES POSSIBLES LA SOLUTION
CAUSES POSSIBLES LA SOLUTION
natural_image
Illustration of a fire extinguisher with flame and valve (no text or symbols)CAUSES POSSIBLES LA SOLUTION
natural_image
Illustration of a hand using a tool to adjust or install a component, with no visible text or symbols.ÉTAPE 02
SERVICE CLIENTS
natural_image
Line drawing of a portable electronic device with ventilation slots, a circular vent, and mounting feet (no text or symbols)MANUAL DEL PROPIETARIO
HORNO DE PIZZA LEGGERO
TABLA DE CONTENIDO
INFORMACION DE SEGURIDAD IMPORTANTE....02
GARANTÍA 03
GUÍA DE MONTAJE....04
USANDO SU BLACKSTONE....08
BlackstoneProducts.com/support
BlackstoneProducts.com/register
natural_image
Five identical cylindrical batteries with black bases and white battery symbols, arranged horizontally (no text or labels)NO INCLUIDO:
natural_image
Technical line drawing of a mechanical component with no visible text or symbolsnatural_image
Line drawing of a mechanical device with multiple cylindrical components and a central housing (no text or symbols)natural_image
Diagram showing a tool inserted into a device panel with a cursor pointing to a component (no text or symbols present)natural_image
Technical line drawing of a portable electronic device with a rotary knob and control panel (no text or symbols)PASO 10 Continúe con USANDO SU BLACKSTONE.
natural_image
Line drawing of a portable electronic device with ventilation grilles and a circular vent (no text or symbols)USANDO SU BLACKSTONE
ANTES DE COCINAR
COMPROBAR QUEMADORES
natural_image
Pure geometric line drawing of a 3D cube and a right-angle bracket (no text or symbols)natural_image
Two geometric line drawings: a triangular prism with internal lines and a square grid with intersecting lines (no text or symbols)natural_image
Diagram of a mechanical device with a lever and rotating component (no text or symbols)natural_image
Line drawing of a portable air conditioner unit with a close-up inset showing the internal components (no text or symbols)natural_image
Technical diagram of a mechanical assembly with labeled components (no text or symbols present)natural_image
Line drawing of a portable electronic device with ventilation grilles and a control panel (no text or symbols)3. VERIFIQUE LA LLAMA DEL QUEMADOR
natural_image
Diagram of a fire extinguisher with smoke trail, no text or symbols presentCOCINAR EN TU BLACKSTONE
ATENCIÓN
BlackstoneProducts.com/blogs/recipes
youtube.com/c/BlackstoneGriddles
@blackstoneproducts
POLLO A LA BARBACOA
natural_image
Illustration of a pizza with visible toppings and a slice divided into sections (no text or symbols)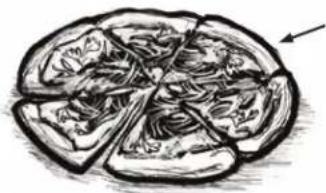
natural_image
Sketch of a sliced pizza with visible toppings and a small arrow pointing to the slice (no text or symbols)CHILE DULCE TAILANDÉS
natural_image
Sketch of a round dough ball next to a jar with a spoon (no text or symbols)natural_image
Illustration of a hand using a tool to apply liquid into a gas stove (no text or symbols visible)natural_image
Illustration of a fire extinguisher with flame and valve (no text or symbols)ATENCIÓN AL CLIENTE



- LEGGERO PIZZA OVEN
- TABLE OF CONTENTS
- IMPORTANT:
- SAFETY ALERT KEY
- ! DANGER
- CAUTION
- WARNING
- NOTICE
- IMPORTANT SAFETY INFORMATION
- DANGER
- If you smell gas:
- ELECTRIC APPLIANCE SAFETY
- TO PROTECT AGAINST ELECTRIC SHOCK:
- USE ONLY A GROUND FAULT INTERRUPTER (GFI) PROTECTED CIRCUIT WITH THIS APPLIANCE.
- GAS APPLIANCE SAFETY
- DO NOT USE FOR PURPOSES OTHER THAN INTENDED.
- INSTALLATION MUST CONFORM WITH LOCAL CODES.
- FOR OUTDOOR USE ONLY.
- WARRANTY
- TO ENABLE THIS WARRANTY, YOU WILL NEED TO PROVIDE:
- WARRANTY OVERVIEW
- DETAILED EXPLANATION OF THE WARRANTY
- ASSEMBLY GUIDE
- ASSEMBLY INSTRUCTIONS
- USING YOUR BLACKSTONE
- BEFORE COOKING
- CHECK BURNERS
- SETTING UP YOUR OUTDOOR SPACE
- THIS APPLIANCE MUST ONLY BE USED OUTDOORS.
- MAINTAIN PROPER CLEARANCES FROM COMBUSTIBLE MATERIAL.
- SHELTERED OUTDOOR AREAS:
- CONNECT THE LPG CYLINDER ONLY USE A 1 LB (453 G) CYLINDER
- LPG CYLINDER SAFETY
- IF FROSTING PERSISTS AFTER BOTTLE IS ANGLED CORRECTLY:
- REGULATOR SAFETY
- LEAK TEST INSTRUCTIONS
- DISCONNECTING THE LPG CYLINDER 1 LB (453 G)
- STORING LPG CYLINDERS
- IGNITION INSTRUCTIONS
- CHECK VALVES
- CHECK BURNER FLAME
- THERMOCOUPLE SURE-START IGNITION
- STEP 02
- COOKING ON YOUR BLACKSTONE
- IF GREASE OR OTHER HOT MATERIAL DRIPS ONTO VALVE, HOSE OR REGULATOR:
- VIDEO RECIPES
- CLASSIC MARGHERITA
- BBQ CHICKEN
- THAI SWEET CHILI
- NEW YORK STYLE PIZZA DOUGH
- INGREDIENTS
- HOW TO STRETCH PIZZA DOUGH
- HOW TO USE YOUR PIZZA OVEN
- FRESH PIZZA
- FOR BEST RESULTS:
- FROZEN PIZZAS, COOKIES, ETC.
- CLEANING YOUR PIZZA STONE
- CARE AND MAINTENANCE
- APPLIANCE BODY:
- APPLIANCE STORAGE
- COVER FIT GUIDE
- TROUBLESHOOTING
- IGNITION TROUBLESHOOTING
- BURNER WILL NOT IGNITE:
- MATCH LIGHTING INSTRUCTIONS
- IF YOU CAN IGNITE YOUR APPLIANCE WITH A MATCH:
- IF YOU CAN NOT IGNITE YOUR APPLIANCE WITH A MATCH:
- GAS FLOW TROUBLESHOOTING
- BURNER FLAMES ARE YELLOW OR IRREGULAR:
- A FLAME IS COMING OUT OF THE AIR GATE:
- CLEANING THE BURNER ASSEMBLY
- CUSTOMER SUPPORT
- CUSTOMER SUPPORT HOURS:
- BLACKSTONE®
- FOUR À PIZZA LEGGERO
- TABLE DES MATIÈRES
- CLÉ D'ALERTE DE SÉCURITÉ
- NON INCLUS:
- SÉCURITÉ DES BOUTEILLES DE GPL
- SI LE GIVRAGE PERSISTE APRÈS QUE LA BOUTEILLE A ÉTÉ CORRECTEMENT INCLINÉE:
- INSTRUCTIONS D'ALLUMAGE
- CLAPETS ANTI-RETOUR
- VÉRIFIER LA FLAMME DU BRÛLEUR
- MARGUERITE CLASSIQUE
- PIMENT DOUX THAÏ
- LLE BRÛLEUR NE S'ALLUME PAS:
- INSTRUCTIONS D'ALLUMAGE DES ALLUMETTES
- CAUSES POSSIBLES LA SOLUTION
- ÉTAPE 02
- SERVICE CLIENTS
- HORNO DE PIZZA LEGGERO
- TABLA DE CONTENIDO
- USANDO SU BLACKSTONE
- ANTES DE COCINAR
- COMPROBAR QUEMADORES
- VERIFIQUE LA LLAMA DEL QUEMADOR
- COCINAR EN TU BLACKSTONE
- ATENCIÓN
- POLLO A LA BARBACOA
- CHILE DULCE TAILANDÉS
- ATENCIÓN AL CLIENTE
Brand : Blackstone
Model : 2238
Category : Pizza oven