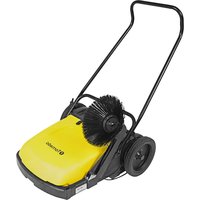
96190 - Sweeper TORNADO - Free user manual and instructions
Find the device manual for free 96190 TORNADO in PDF.


| Product type | Manual sweeper |
| Brand | Tornado |
| Model | 96190 |
| Sweeping width (without side brush) | 460 mm |
| Sweeping width (with side brush) | 650 mm |
| Dimensions (L x W x H with handle) | 1000 x 785 x 1020 mm |
| Dimensions (without handle) | 800 x 725 x 400 mm |
| Weight (with side brush unit) | 26 kg |
| Drive wheel diameter | 280 mm |
| Main brush diameter | 230 mm |
| Bristle diameter (main brush) | 0.18 mm |
| Bristle diameter (side brush) | 0.4 mm |
| Brush rotation speed | 273 rpm at 4 km/h |
| Hopper capacity | 40 liters |
| Maximum cleaning surface | Up to 2,600 m²/h at 4 km/h |
| V-belt | 8 x 1680 mm |
| Power source | Manual (push) |
| Use | Dry sweeping indoors and outdoors |
| Parts warranty | 2 years (except normal wear and tear) |
| Labor warranty | 1 year |
| Daily maintenance | Empty hopper, exterior cleaning, inspect brushes and seals |
| Monthly maintenance | Lubricate drive wheels, check V-belt tension |
| Safety | Do not use on wet surfaces or in explosive areas |
| Spare parts | Brushes, belt, seals, wheels available |
Frequently Asked Questions - 96190 TORNADO
User questions about 96190 TORNADO
0 question about this device. Answer the ones you know or ask your own.
Ask a new question about this device
Download the instructions for your Sweeper in PDF format for free! Find your manual 96190 - TORNADO and take your electronic device back in hand. On this page are published all the documents necessary for the use of your device. 96190 by TORNADO.
USER MANUAL 96190 TORNADO
Operations & Maintenance Manual
For Commercial Use Only
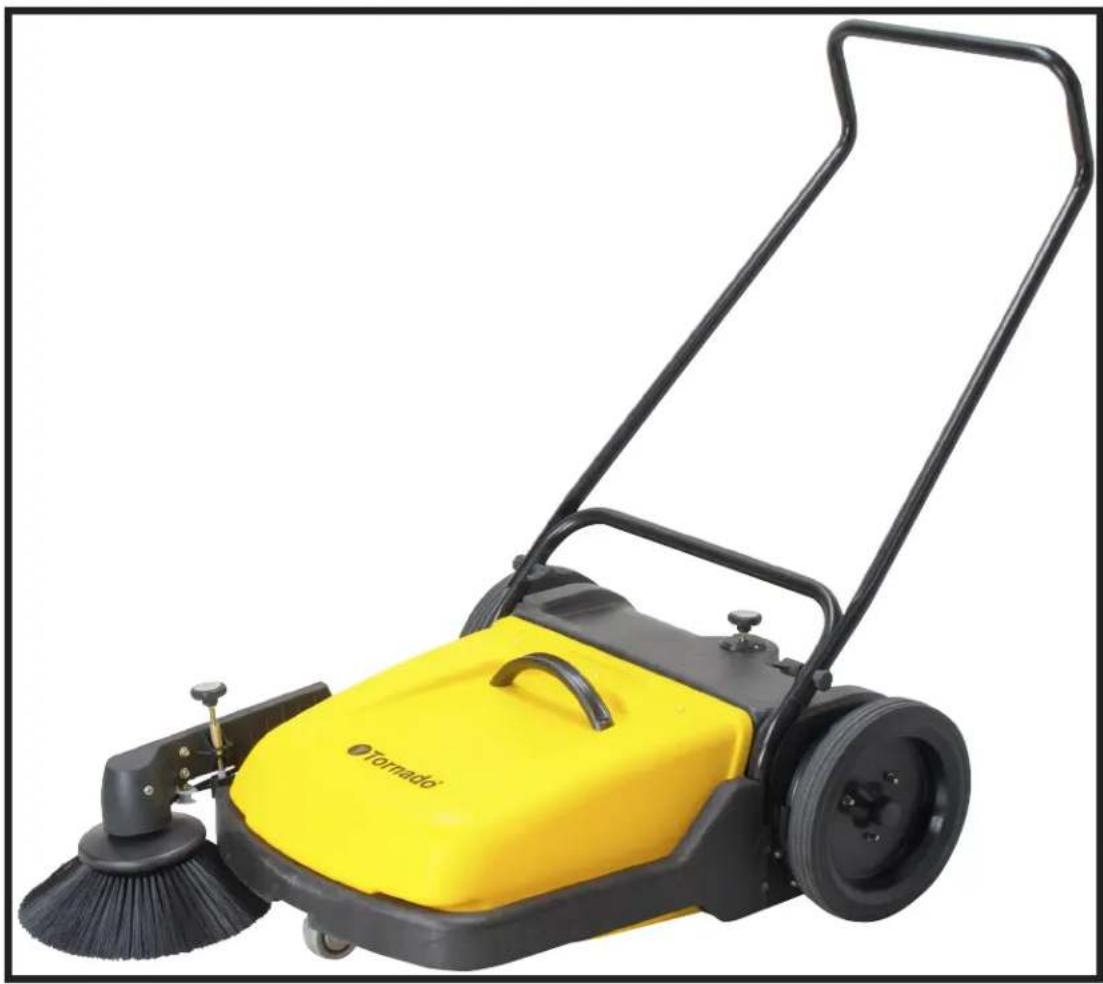
MANUAL PUSH SWEEPER
MODEL NO: 96190
Tornado Industries, LLC. (Tornado) warrants to the end/user customer that the Tornado product(s) will be free from defects in material and workmanship for the duration(s) described below. This limited warranty DOES NOT cover machines and/or components subject to normal wear and tear, damage that occurs in shipping, failures resulting from modification, accident, unsuitable operating environment, misuse, abuse, neglect, or improper maintenance by you. For full details, contact your Authorized Tornado Distributor, Service Center, or the Tornado Technical Service Department. Tornado sales and service representatives are not authorized to waive or alter the terms of this warranty, or to increase the obligations of Tornado under the warranty.
10 Years*
Plastic water tanks and Rotationally-molded bodies
2 Years*
Parts on all Tornado cleaning equipment
1 Year*
Labor on all Tornado cleaning equipment
1 Year*
Warranty on batteries, one year prorated
All battery warranties are handled directly by the battery manufacturer, on a one year prorated basis
Terms subject to change without notice
- Except all Windshears™ Blowers, Storm, TV2SS, Side and Downdraft, Insulation Blowers, CV 30, CV 38, CK14/1 PRO, CK 14/2 PRO, SWM 31/9, CK LW13/1, CK LW 13/1 ROAM, CV 38/48 Dual, PV6, PV10, PV6 ROAM, Wall Mount Vacuum and all chargers are warranted for 1 (one) year for both parts and labor.
- All non-wear item parts purchased after warranty expiration are warranted for 90 days.
- Warranty starts from the date of sale to the consumer or, at Tornado's discretion, 6 months after the dealer purchased the unit from Tornado, whichever comes first.
- The EB 30 is warranted for a period of 90 days for both parts and labor.
- The warranty on engines used on propane powered equipment is limited to motor manufacturer's warranty.
- Ride-on Scrubbers are warranted for 24 months, parts, 6 months labor or 1,000 hours, whichever occurs first.
Note: Tornado, The Latest Dirt, Floorkeeper,
Carpetkeeper, Carpetrinser, Carpetrinser/Dryer,
Headmaster, Taskforce, PAC-VAC, T-Lite, Glazer,
Windshear, Max-Vac and Trot-Mop are trademarks
of Tornado Industries
Website: www.tornadovac.com
Phone 1-800-VACUUMS
Fax 817-551-0719
Address 3101 Wichita Court
Fort Worth, TX 76140
1-800-VACUUMS
90 Years of Cleaning Innovation A Tacony Company

Form F2662.2017. All rights reserved
NOTES
Your new Tornado unit is a high quality, precision-made product. All parts used in the manufacturing of this unit have passed rigid quality control standards prior to assembly. Please safeguard the original receipt / invoice. If you experience any problems with your unit during the warranty period, the original receipt / invoice will act as proof of purchase. Contact Tornado for any warranty inquiries.
IMPORTANT SAFETY INSTRUCTIONS
READ AND UNDERSTAND ALL INSTRUCTIONS BEFORE USING THIS UNIT
Read and understand this owner's manual and all labels on the unit before operating. Safety is a combination of common sense, staying alert and knowing how your unit works. Use this unit only as described in this manual.
Use only manufacturer's recommended attachments. To reduce the risk of personal injury or damage to your unit use only Tornado recommended accessories.
Floor cleaning machines should be run by qualified personnel only.
Do not use the machine in wet or slushy areas.
Park the machine in a dry place.
Do not use the machine in areas where there are no properly paved roads.
Use of the machine on public roads and places is prohibited.
Only qualified personnel are allowed to perform maintenance and repair work.
Do not clean the machine by means of vapor or steam jets or high pressure cleaning equip
!
ment.
Do not Use the machine in areas endangered by an explosion hazard.
| Limited Warranty 2 | |
| General Safety Instructions 4 | |
| Preface 4 | |
| Introduction 5 | |
| Proper use 5 | |
| Acceptance of the machine 5 | |
| How to put the machine into operation 5 | |
| Assembly 5 | |
| Side Brush Assembly | 5 |
| Operation Controls | 6 |
| Technical Specification | 9 |
| Maintenance Schedule | 9 |
| Trouble Shooting | 9 |
Preface
The SWM 31/9 is an ideal machine to clean outdoors in large and medium areas like Offices, Hospitals, Restaurants, Shopping Centers and many other commercial applications.
The exclamation mark symbol has been used in this manual at several places and identifies
particular areas that are for your safety. Please pass all safety instructions on to other persons operating this machine.

This symbol has been used in the manual in several places and identifies particular areas that the operator should note at the time of operation.

first operation, read the manual carefully and strictly comply with the instructions contained herein
Introduction
Proper Use
The unit has been exclusively designed for floor cleaning, such as dry sweeping. Whatever use beyond this specified use will be deemed improper use and the manufacturer cannot be held liable for damages.
The term "proper use" also includes compliance with the manufacturer's instructions about operation, maintenance and repair.
The unit must be serviced and repaired by an authorized service center. The appropriate safety precautions as well as applicable general regulations about safety and health at work should be complied with.
Modifications made to the unit will relieve the manufacturer from liability and damages.
This machine is not suitable for evacuation of dust or dust particles, which are explosive or otherwise dangerous to health.
Acceptance of the Machine
Upon receipt, check your machine for possible transit damage and contact your freight company if you suspect damage.
How to put the machine into operation
Assembly
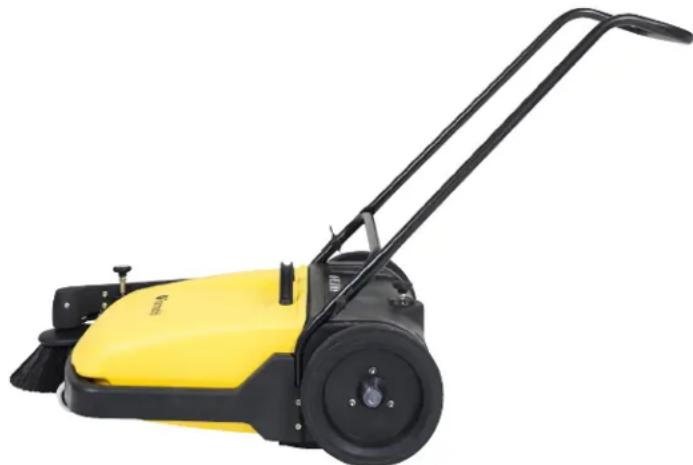
For ease of packing, the handle and side brush assembly are packed separately. These parts must be installed before the machine is put into operation. The handle is mounted by means of knobs. The handle can be fixed in two different positions as shown below.

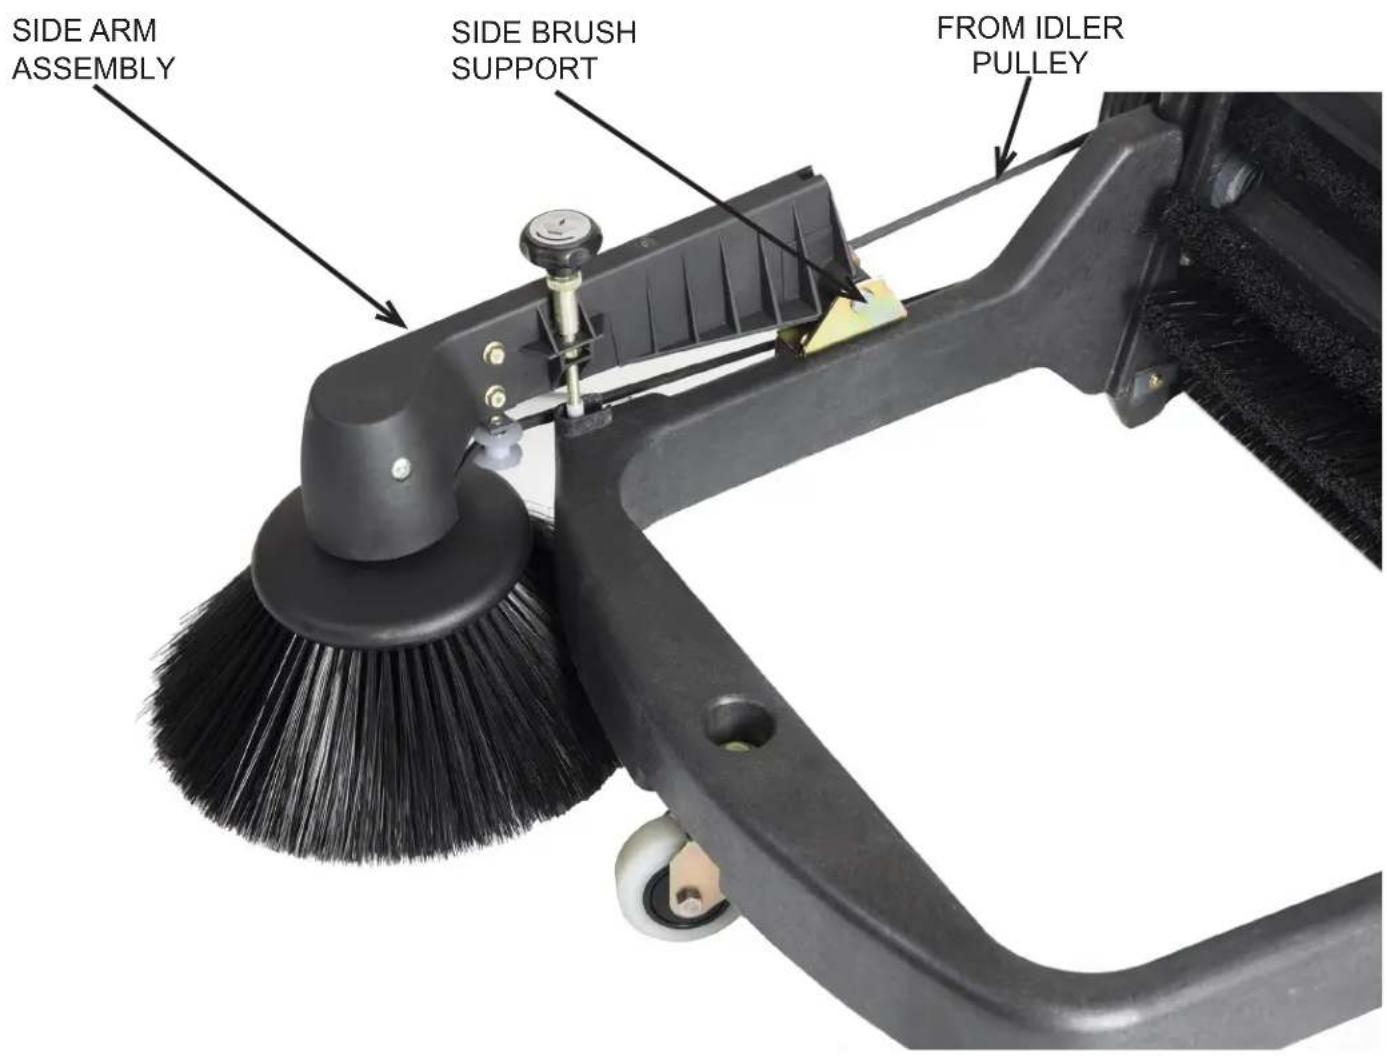
Side Brush Assembly
- Mount the side broom to the brush plate on the side arm assembly using hex head bolt and nylock nut
- Position the V-Belt from the side arm assembly around the pulley attached to the backside of the right wheel. In order to do this it will be necessary to twist the V-Belt. The lower loop of the V-belt should be coming from the idler pulley (not from the broom pulley).
- Attach the side arm assembly to the support side brush on the frame by aligning the bushing in the side arm with holes in the sides of the support side brush and inserting a pin. Secure the pin in place by inserting a retaining ring into the groove in the pin.
- Check for proper rotation and operation of the side broom. The broom should rotate counter clockwise when the sweeper is pushed forward-if not the V-belt was installed incorrectly. If the belt slips the tension can be adjusted by loosening the 2 screws that attach the support side brush to the frame, move the bracket forward, then re-tighten the screws.
Operation
Controls
- Pressure adjustment knob for Side Brush Used for setting of the side brush. The side brush may touch the floor only by its one third section, so as to throw the swept matter into the machine. The castor wheel is to keep the pre-set working height of the side brush.
- Pressure adjustment knob for Main Brush Used for setting of the main brush pressure. The pressure must be set so as to assure perfect cleaning operation.
- Knobs Used to secure the handle to the machine or to reposition it.
Excess pressure will cause unnecessary wear of the brush and increased load for the operator.
- Main Brush Pressure Reading Scale Indicates the pressure at which the main brush has been set. Setting must be performed as described below:
Set the main brush by turning the knob clock-wise to increase the pressure, at this position the scale should read 5^
Starting with this setting, the main brush pressure can be increased to meet the requirement. (As the brush wears out)
Turn the knob in counter-clockwise direction to reduce the main brush pressure according to the task.
1. Pressure adjustment knob for Side Brush
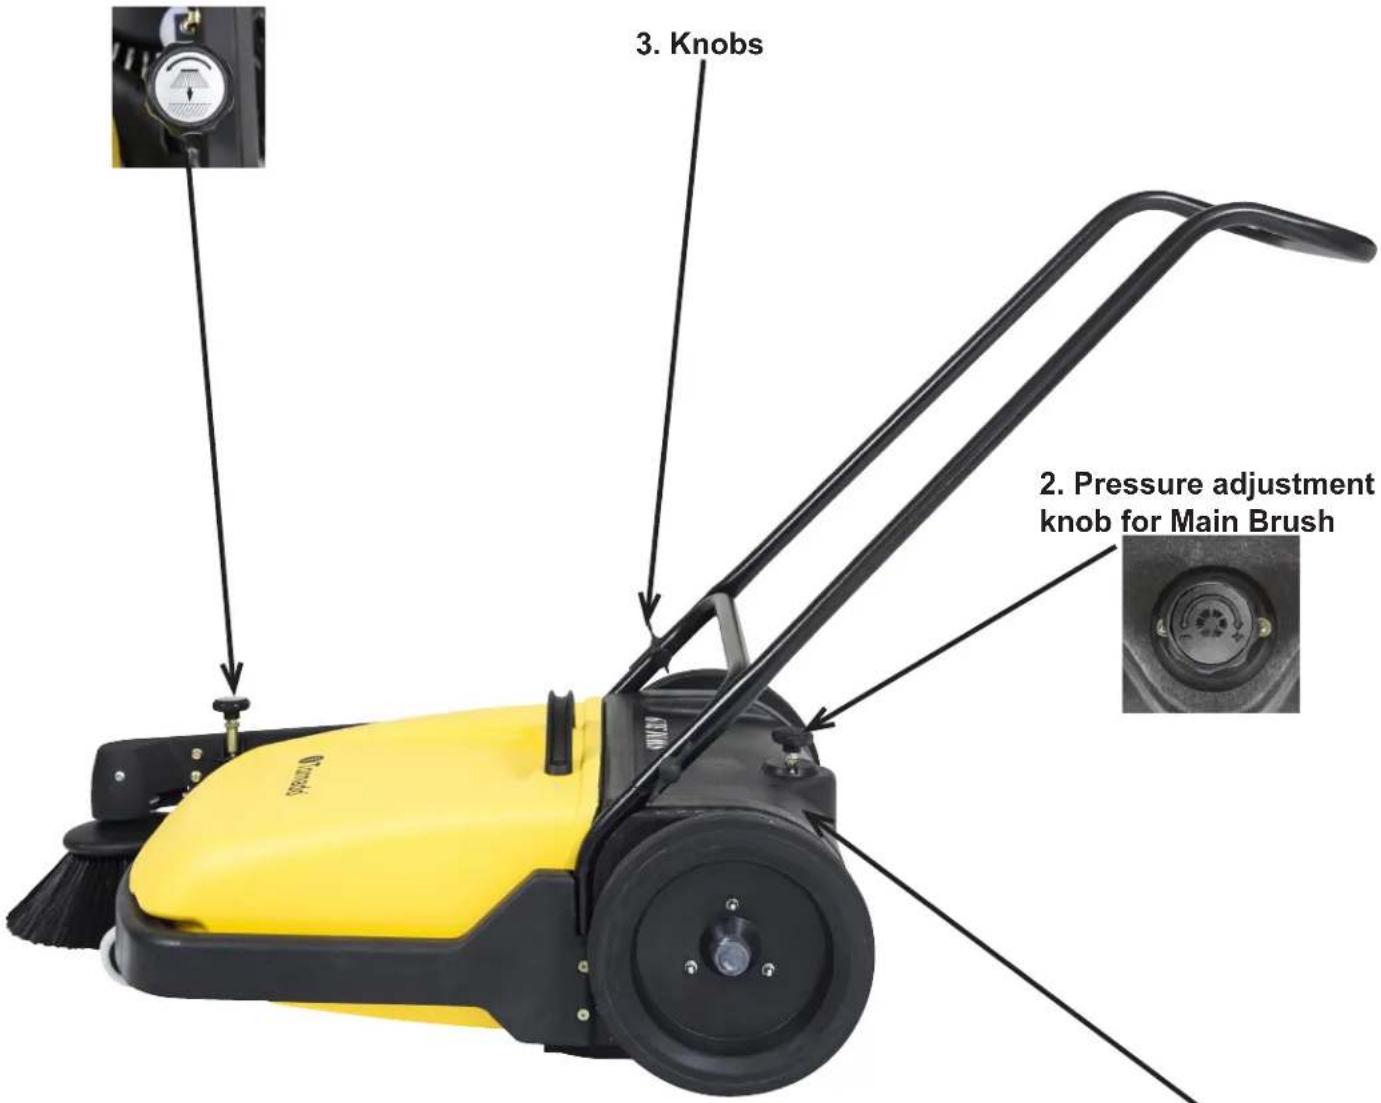
4. Main Brush Pressure Reading Scale
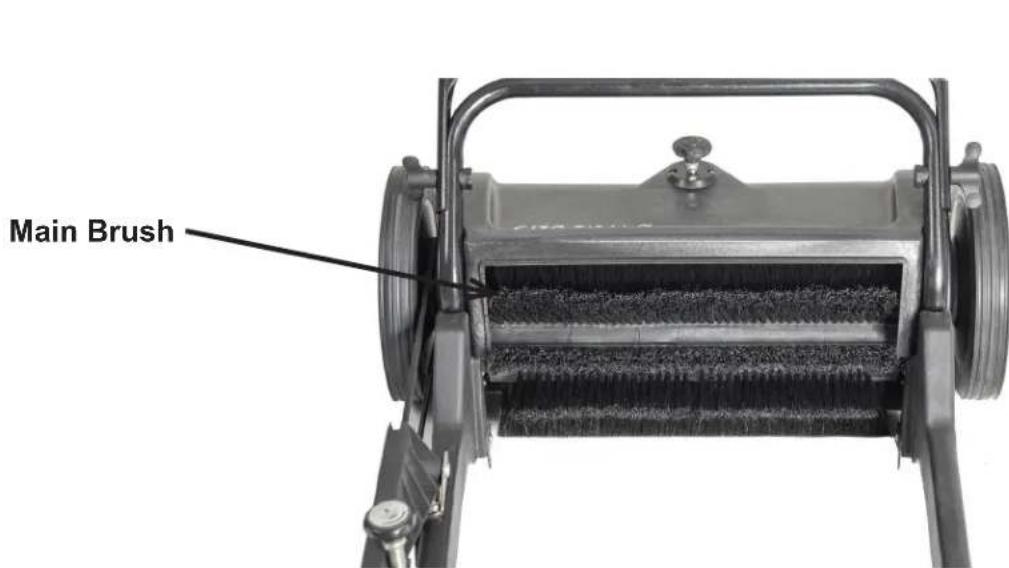

Operation of SWM 31/9
The unit operates with two brushes. The side brush takes dirt from the side into the reach of the main brush. The main brush maintains its direction of rotation to throw the dirt into the hopper in forward direction of the machine.
Overcoming Obstacles
In case of normal obstacles coming in the way of sweeping the unit should be pressed down at the handle. This will cause the two brushes to lift off from the floor and the machine can easily surmount these obstacles.
Emptying of Hopper
The hopper can be easily lifted by using the handle provided. The hopper is secured to the machine by means of the frame. The hopper must be in direct contact with the brush compartment in order to prevent leakage of dirt.
Renewal of Brush Assemblies
The main brush consists of a brush shaft with two brush core assemblies fastened with six self tapping screws. The brush cores can be replaced as below:
- Unscrew the self tapping screws
- Pull the brush core assembly to the front (broom viewed from user side) to remove it from the brush shaft.
When reassembly of the brush ensures the split pins are fixed in the holes to guide the brush.
Rubber Gaskets
The rubber gaskets avoid dust leakage produced by the brush. Damaged or used gaskets that fail must be replaced.
Greasing of the Main Wheels
For cleaning and greasing of the wheel axle and the gear ring, the main wheels must be removed as described below.
- Remove hood, remove the bolt and domed cap nut from the wheel and pull the main wheel.
- Unscrew the gear cover and apply grease in the gear area.
- Reposition the main wheel.
Replacement and Tensioning of the V-belt
- Lift up the side brush arm
- Loosen the clamp screw and pull out the side brush from the brush arm.
- Place the V-belt through the brush arm and put it on the V-belt pulley on the brush shaft.
- Push the side brush back into the brush arm and re-tighten the clamp screw.
- Place V-belt into the groove of the right-hand main wheel.
When the brush arm is put down, the V-belt must be tensioned so as to allow a perfect drive transmission, if necessary re-tighten by shifting of the side brush arm bearing.
Replacement of the Side Brush
The side brush can be replaced after removing hex-bolts from the side brush.
Reshaping of Bristles
If the bristles have been bent inwards in transit the side brush must be placed on a flat base, the bristles pointing outward and a weight must be placed on the plate. The bristles will regain their correct position gradually. If the bristles have been bent outwards, bring them together apply a rubber band around the bristles and allow it to stay for sometime. The bristles will regain their correct position gradually.
Technical Specification
| DESCRIPTION | ||
| WIDTH mm/in 725/28.5 | ||
| WIDTH WITH SIDE BRUSH mm/in 785/31.0 | ||
| HEIGHT WITH HANDLE mm/in 1020/40.14 | ||
| HEIGHT WITHOUT HANDLE mm/in 400/15.75 | ||
| LENGTH WITH SIDE BRUSH mm/in 1000/39.4 | ||
| LENGTH WITHOUT SIDE BRUSH mm/in 800/31.5 | ||
| WEIGHT WITH SIDE BRUSH GROUP kg/lbs 26/57.0 | ||
| DIAMETER OF DRIVE WHEEL mm/in 280/11.0 | ||
| SWEEPING WIDTH WITHOUT SIDE BRUSH mm/in 460/18.0 | ||
| SWEEPING WIDTH WITH SIDE BRUSH mm/in 650/25.4 | ||
| DIAMETER OF MAIN BRUSH mm/in 230/9.0 | ||
| MAIN BRUSH BRISTLE DIAMETER | mm/in 0.18/0.01 | |
| BRUSH SPEED (THEORETICAL) | rpm | 273 at 4 kmph@2.5 mph |
| SIDE BRUSH BRISTLE DIAMETER | mm/in 0.4/0.015 | |
| V-BELT (SIDE BRUSH) | mm/in 8 x 1680/0.31 x 66 | |
| HOPPER CAPACITY | Lit/Gal | 40/9.0 |
| DIRECTION OF ROTATION FOR SWEEPING | Forward | |
| AREA COVERAGE | Up to 2600 sq. mtr/hr at 4 kph, 28,000 sqft/hr@2.5 mph | |
Maintenance Schedule
Maintenance
Compliance with the operating and maintenance instructions will ensure trouble free and smooth operation of the machine. If you are not capable of performing the actions according to the maintenance schedule by yourself, please contact Tornado. When ordering spare parts, please quote the machine No. indicated on the name plate. The nameplate is installed on the left side of the frame.
Maintenance Intervals
Daily - empty hopper - clean the unit - check brushes and gaskets
Weekly - remove the ropes, tapes etc entangled in the main brush shaft
Monthly - grease the track wheels - check V-belt tension, if necessary, re-tighten
Trouble Shooting
| TROUBLE | SOLUTION |
| Machine hard to push/pull | Decrease main brush pressure setting Grease main Wheels |
| Sweeping unsatisfactory | Increase Main/Side Brush Pressure Clean Main/Side Brush Check Main Brush for loose bristles |
| Traces of dirt left behind the machine | Check side/rear rubber gaskets |
| Side Brush not rotating | Check V-Belt for tension |
Warranty Registration Form
| Please provide additional information on Tornado equipment: (Check choices below) |
| Automatic Scrubbers Sweepers Propane Floor Machines Rotary Floor Machine High Speed Burnishers Carpet Vacums Carpet Extractors & Spotters Wet/Dry Vacs Steam Cleaners Jumbo Vacs Ride-On Equipment Pressure Washers |
Please Print Clearly
| Company/Institution | |
| Contact Name | Title |
| Address | City/State/Zip Code |
| Phone | Fax |
| Date of Purchase | |
See white metal plate or sticker on unit for this information.
| MACHINE TYPE/MODEL NUMBER: MACHINE SERIAL NUMBER: | |
| 1. 1. | |
| 2. 2. | |
| 3. 3. | |
| 4. 4. | |
Facility Description (please circle all that apply)
-
School
-
Hospital
-
U.S. Govt.
-
Retail Store
-
Nursing Home
-
Other Govt.
-
Restaurant
-
Religious Institution
-
Auto Service
-
Office Building
-
Airport
-
Airport
-
Contract Cleaning
-
Warehouse
-
Non-Profit
6.Light Manufacturing
-
Apartment/Condo
-
Other (specify)
-
Heavy Manufacturing
-
Warehouse
-
College/University
-
Supermarket
| How did you first learn about Tornado cleaning and maintenance equipment? | In square feet (meters) | |
| Total Hard Floor Area | Total Carpeted Area Square feet (square meters) | |
| ○ Contacted by local dealer | ○ 0-10,000 (0-930) | ○ 0-10,000 (0-930) |
| ○ Previous experience with Tornado products | ○ 10-50,000 (930-4,650) | ○ 10-50,000 (930-4,650) |
| ○ Reputation/ Recommendation | ○ 50-250,000 (4,650-23,250) | ○ 50-250,000 (4,650-23,250) |
| ○ Over 250,000 (over 23,260) | ○ Over 250,000 (over 23,260) | |
| ○ Advertising | ||
| ○ Direct mail | ||
| ○ Internet | ||
| ○ Other | ||
Damage or defect arising from abuse, neglect or other misuse is excluded from this warranty. Other items may or may not apply based on your specific machine. If any defect occurs, the warranty is voided if service is attempted by non-Authorized Tornado Service Centers.
©2017 Tornado Industries. All rights reserved.
X8449-TOR 1/2017
Return to
Tornado Industries
3101 Wichita Court
Fort Worth, TX 76140
Fax:817-551-0719
or online at
www.tornadovac.com
Telephone 1.800.VACUUMS
90 Years of Cleaning Innovation A Tacony Company
TGY
REMARQUES
Long Term Buyer Protection Limited Warranty
Note: Tornado, The Latest Dirt, Floorkeeper, Carpetkeeper, Carpetrinser, Carpetrinser/Dryer, Headmaster, Taskforce, PAC-VAC, T-Lite, Glazer, Windshear, Max-Vac,y Trot-Mop son marcas registradas de Tornado Industries
Sittio web: www.tornadovac.com
90 Years of Cleaning Innovation A Tacony Company
Form F2662.2017. All rights reserved

NOTAS
- Years*
- Years*
- Year*
- Terms subject to change without notice
- IMPORTANT SAFETY INSTRUCTIONS
- READ AND UNDERSTAND ALL INSTRUCTIONS BEFORE USING THIS UNIT
- Preface
- Introduction
- Proper Use
- Acceptance of the Machine
- How to put the machine into operation
- Assembly
- Side Brush Assembly
- Operation
- Controls
- Excess pressure will cause unnecessary wear of the brush and increased load for the operator.
- Pressure adjustment knob for Side Brush
- Operation of SWM 31/9
- Overcoming Obstacles
- Emptying of Hopper
- Renewal of Brush Assemblies
- Rubber Gaskets
- Greasing of the Main Wheels
- Replacement and Tensioning of the V-belt
- Replacement of the Side Brush
- Reshaping of Bristles
- Maintenance Schedule
- Maintenance
- Maintenance Intervals
- Warranty Registration Form
- REMARQUES
- Long Term Buyer Protection Limited Warranty
Brand : TORNADO
Model : 96190
Category : Sweeper