
SS-5236 - Coffee grinder Sogo - Free user manual and instructions
Find the device manual for free SS-5236 Sogo in PDF.

| Brand | Sogo |
| Model | SS-5236 |
| Product Type | Electric conical burr coffee grinder |
| Power supply | 220-240 V ~ 50/60 Hz |
| Power | 150 W |
| Bean hopper capacity | Max 200 g |
| Maximum number of cups | 12 cups |
| Grind settings | 14 fineness levels (from fine to coarse) |
| Grind type | Conical burr grinding |
| Main functions | Automatic grinding with timer, cup quantity selector, coarseness selector |
| Safety devices | Safety switches on lid and ground coffee container (prevent operation if not properly placed) |
| Housing material | ABS plastic |
| Burr material | Stainless steel |
| Dimensions (approx) | 20 x 15 x 30 cm |
| Weight (approx) | 1.5 kg |
| Cord length | Short (extension cord not recommended) |
| Maintenance and cleaning | Clean the ground coffee container and its lid with warm soapy water; wipe the body with a damp cloth; use the provided brush for the grinding head; do not immerse in water |
| Included spare parts | Cleaning brush |
| Repairability | Repairs by qualified technician only; contact customer service |
| General information | For household use only; do not use grains other than coffee; do not grind hard or oily food |
| Standards and certifications | Low Voltage Directive 2014/35/EU, Electromagnetic Compatibility 2014/30/EU, RoHS 2015/863/EU, Ecodesign 2009/125/EC |
Frequently Asked Questions - SS-5236 Sogo
User questions about SS-5236 Sogo
0 question about this device. Answer the ones you know or ask your own.
Ask a new question about this device
Download the instructions for your Coffee grinder in PDF format for free! Find your manual SS-5236 - Sogo and take your electronic device back in hand. On this page are published all the documents necessary for the use of your device. SS-5236 by Sogo.
USER MANUAL SS-5236 Sogo
natural_image
Exterior view of a modern SOGO 150W kitchen grater with control knobs and glass casing (no visible text or symbols on main body)
MOLINILLO DE CAFÉ ELÉCTRICO ELECTRIC COFFEE GRINDER BROYEUR À CAFÉ ÉLECTRIQUE MOEDOR DE CAFÉ ELÉTRICO ELEKTRISCHE KAFFEEMÜHLE MACINACAFFÈ ELETTRICO
Caution: please read and preserve these important instructions
ÍNDICE
-
Important Note P. 12
-
Symbol definitions P. 12
-
Safety instructions for the user P. 12
I. General precautions during the use of electrical equipment P. 12
II. Restrictions on use to avoid personal injury P. 13
III. Product use restrictions due to poor condition or breakdown P. 14
IV. Restrictions on use when used with children and elders P. 15
V. IMPORTANT WARNING P. 16
VI. Instructions to follow while using the device P. 16
- Technical specifications P. 18
- Parts description P. 18
- Instructions for use P. 18
- Cleaning and maintenance P. 19
- Declaration of conformity P. 58
- Responsibility of disposal, details of the manufacturer and after-sales service P. 59
ÍNDICE
6. INSTRUCCIONES DE USO
natural_image
Line drawing of a kitchen grater with lid and side panel (no text or symbols)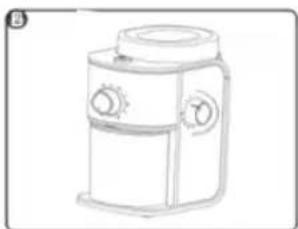
natural_image
Line drawing of a vintage kitchen grater with handle and side panel (no text or symbols)natural_image
Line drawing of a kitchen grater with control knobs and a lid (no text or symbols)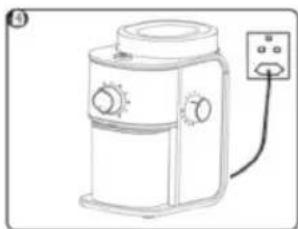
natural_image
Line drawing of a kitchen appliance with a control panel (no text or symbols)natural_image
Line drawing of a kitchen grater with control knobs and a lid (no text or symbols)
natural_image
Line drawing of a kitchen mixer with a cylindrical container beside it (no text or symbols)natural_image
Line drawing of a kitchen appliance with control panel and fan (no text or symbols)
natural_image
Simple line drawing of a cup with a teapot and a cross mark, no text or symbols present
natural_image
Line drawing of a kitchen oven with control knobs and a handle (no text or symbols)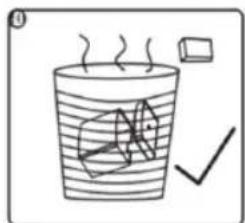

natural_image
Simple line drawing of a kitchen appliance with a lid and handle (no text or symbols)• Always read the instruction book carefully before using.
- This manual can be downloaded from our web page www.sogo.es
- Keep these instructions for future reference.
2. Symbol definitions

1- Important information and useful hinds on use
2- Warning against dangerous situations in terms of life and property
3- Cautions while using electrical and electronic equipment.
3. Safety instructions for the user
GENERAL PRECAUTIONS General precautions during the use of electrical equipment
- Do not use the appliance for any other purpose than described in this manual.
- Do not use or store the appliance outdoors.
- Always place the appliance on to the flat and even surface.
-
This product is intended for indoor, non-industrial, non-commercial and only for household use. Do not use the item outdoors or for any other purpose. Misuse or improper handling may cause problems in the appliance and cause injury to the user.
-
The unit must be used only for the intended purposes. No liability is accepted for damages arising from improper use or wrong handling.
- Ensure that the voltage indicated on the nameplate matches the mains voltage before plugging in the appliance.
• Always remove the plug from the power socket when the appliance is not in use. Do not leave the appliance unattended when switched on. - Close supervision is necessary when any appliance is being used by or near children.
- Before cleaning or storing your appliance, always unplug the appliance from the power supply and let it cool down.
- The device is not completely disconnected from the power source, even after it has been turned off. To disconnect it completely, disconnect it from the mains plug.
- The appliances are not intended to be operated by means of an external timer or separate remote-control system.
II. Restrictions on use to avoid personal injury
- Do not let the appliance operate unattended.
- Do not place or operate this appliance near water sources.
- Do not place or operate the appliance and its power cord on or near hot surfaces (e.g., stove plates) or open flames.
- Do not leavé the power cord hanging from
sharp edges and keep away from hot objects and flames. Do not wind the cord around the appliance and do not bend it.
- Neither immerse the housing, which contains electrical components and the heating elements in water, nor rinse it under the tap.
- Never use accessories that are not recommended by the manufacturer.
- The use of accessories not recommended or sold by the appliance manufacturer may result in fire, electric shock or injury to persons.
- When you want to remove the plug from the wall contact, please do this at the plug itself and not by pulling on the cable or the appliance itself.
- To avoid electric shock, make sure your hands are dry before plugging or unplugging.
- Do not use the device with wet hands, on damp floors or when the atmosphere is humid, there is a risk of electric shock.
- While using the appliance, make sure that the power cord must not be caught or crushed.
- Do not let the motor unit, cord or plug get wet to protect against risk of electric shock.
III. ▲Product use restrictions due to poor condition or breakdown
- Never immerse the appliance or the plug-in water or any other liquid. In the event of the appliance falling in water, disconnect immediately from the mains supply and take it to
an authorized service agent for repair before reusing.
- Do not use the appliance if it has fallen on the floor, if there are visible signs of damage or if it has a leak.
- Do not use the appliance if the cable or plug is damaged. In case of the cord be damaged, it must be replaced only by the manufacturer, its service agent or similarly qualified persons in order to avoid Hazard.
- In case of appliance malfunction, or if it has been damaged in any manner, return the appliance to the nearest authorized service facility for examination, repair or adjustment.
- In case of hardware problems, do not attempt to repair the product yourself. Repairs should only be carried out by qualified technicians.
IV. Restrictions on use when used with children and elders
- The appliance is not to be used by persons (including children) with reduced physical, sensory or mental capabilities, or lack of experience and knowledge, unless they have been given supervision or instruction.
• Children should be supervised to ensure that they do not play with the appliance. - Cleaning and user maintenance shall not be made by children without supervision.
- Keep the appliance and its cord out of the reach of the children.
• Children shall not play with the appliance. - This appliance can be used by children
aged from 8 years and above and persons with reduced physical, sensory or mental capabilities or lack of experience and knowledge if they have been given supervision or instruction concerning use of the appliance in a safe way and understand the hazards involved.
- Appliances can be used by persons with reduced physical, sensory or mental capabilities or lack of experience and knowledge if they have been given supervision or instructions concerning use of the appliance in a safe way and understand the hazards.
V. IMPORTANT WARNING
- To avoid a circuit overload when using this product, do not operate another high-wattage product on the same electrical circuit.
- A short power supply cord is provided with this product. An extension cord is not recommended for use with this product, but if one must be used:
- The marked electrical rating of the cord must be at least as great as that of the product.
- Arrange the extension cord so that it does not hang where it can be tripped over or pulled unintentionally.
VI. Instructions to follow when using the device
- The appliance cannot be used for chopping hard and dry substance, otherwise the blades might get blunt.
- WARNING: The blades are very sharp!
- Avoid contacting moving parts of the appliance while in function.
- Turn off the appliance and disconnect from the mains supply before changing accessories or approaching movable parts in use.
- Care must be taken when handling the sharp blades, emptying the bowl and during cleaning.
- Do not connect the appliance to the mains until it is completely assembled and always disconnect the appliance before disassembling or handling the blade.
- Keep hands and utensils out of bowl while chopping to reduce the risk of severe injury to persons or damage to the chopper. A scraper may be used but must be used only when the chopper is not working.
CLEANING AND MAINTENANCE
Kindly refer to the cleaning and maintenance section for details on how to clean surfaces which comes in the contact of food.
4. TECHNICAL SPECIFICATIONS
| Voltage Power Frequency | |
| 220-240V 150W 50 – 60Hz |
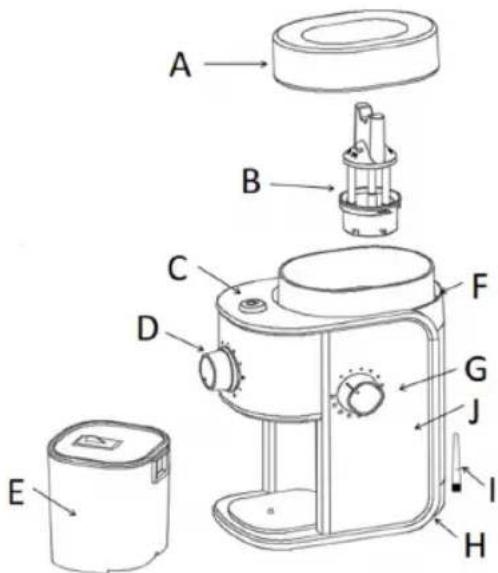
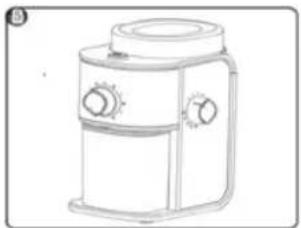
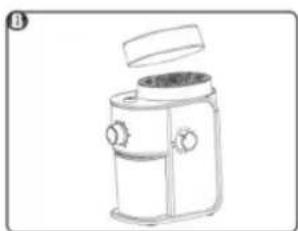
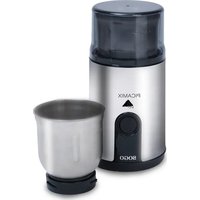
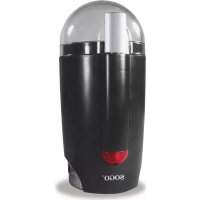
5. PARTS DESCRIPTION
A. Coffee bean container lid
B. Removable upper burr blade
C. On/off Button
D. Cup quantity selector knob
E. Ground coffee container
F. Coffee beans container
G. Coarseness selector knob
H. Base
I. Cleaning Brush
J. Body
6. INSTRUCTIONS FOR USE

natural_image
Line drawing of a kitchen grater with lid and side panel (no text or symbols)
natural_image
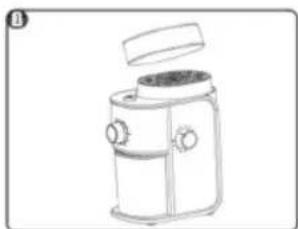
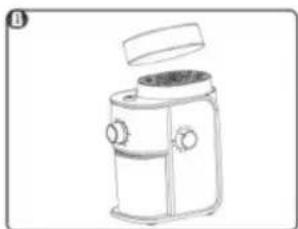
Line drawing of a kitchen grater with handle and side panel (no text or symbols)- Remove the lid of coffee beans container. Place the desired quantity of coffee beans into the container, Max, quantity is 200gm, but you can fill as per your desire and requirement.
- Place the coffee bean container lid in its position. Make sure it should be placed properly. Note: As there is safety switch inside the housing. The appliance will not work if the lid is not placed in right position to push the safety switch.
natural_image
Line drawing of a kitchen grater with control knobs and a lid (no text or symbols)
natural_image
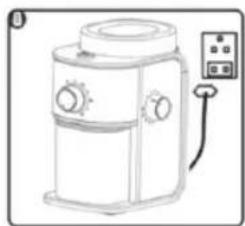
Line drawing of a kitchen mixer with control panel and power outlet (no text or symbols)- Place the ground coffee container in its correct position. It is necessary to place correctly Coffee bean container lid and Ground coffee container as in case any of those will not be placed properly, the coffee grinder will not work.
Note: As there is safety switch inside the housing. The appliance will not work if the ground coffee container is not placed in right position to push the safety switch. - To get the desired coarseness of grounded coffee, turn coarseness selector knob situated on the left of the appliance. This knob is marked with dots to choose from FINE to COARSE setting. For
coarsely ground coffee, turn the knob to the THICKEST POINT, and in case if need fine grounded coffee turn to the thinner point setting.
natural_image
Line drawing of a kitchen blender with control knobs and lid (no text or symbols)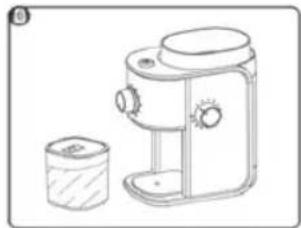
natural_image
Line drawing of a kitchen mixer with a cylindrical container beside it (no text or symbols)- Turn the cup selector knob to the desired setting. With the help of this coffee grinder, you can ground coffee up to 12 cup preparation at once. For example, if the dial is set to 12, it will grind enough coffee to serve approximately 12 cups.
- Note: The definition given above is just for reference and it vary depending on preferred taste, type and roast of bean and the grind selected.
- Plug in the grinder.
- Once you have both coarseness selector knob and the cup selector knob selected, press on/off Button to start the grinder. The grinder will stop automatically once it finishes working as per desired setting. You can also press the on/Off Button at any time to stop it. Make sure to unplug appliance after use.
- Remove the Ground Coffee Container and prepare the coffee as per your desire.
Note: Do not use it more than two cycles at a time, and must give rest of 2 min between two cycles. After finishing 1st cycle, turn off the appliance and let it cool down for at least 1 minute before starting again. Remember to switch off the appliance and remove the plug to cool down the motor, after using 2 working cycles to avoid over heat of motor.
Note: Clean the appliance after each use, do not use this appliance to grind the food with too many oil, such as peanut. Do not use this appliance to grind the food which is too hard, such as rice.
7. CLEANING AND MAINTENANCE
natural_image
Line drawing of a kitchen mixer with control panel and indicator lights (no text or symbols)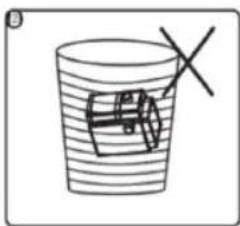
natural_image
Simple line drawing of a cup with a small object inside, no text or symbols present
natural_image
Line drawing of a kitchen grater with control knobs and a handle (no text or symbols)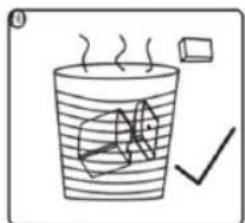
natural_image
Simple line drawing of a cup with steam rising, a cube, and a checkmark (no text or symbols)
natural_image
Simple line drawing of a kitchen appliance with a lid and handle (no text or symbols)- Unplug the appliance.
- Do not clean the appliance under running water and never immerse it in water.
- To clean, wipe the appliance with a damp cloth and then with a dry one.
- The ground coffee container and its lid must be washed in hot soapy water and then thoroughly dried.
- Once the container Lid is removed and the grinder is unplugged, you can clean the grind head to remove any remaining coffee parts by using the included Cleaning Brush.
Storage
Store the components together with housing base after cleaning. Keep the appliance away from the children.
Tips:
Helpful Hints
- The Electric Burr Coffee Grinder is fully automatic. To get good results and have a good and perfect taste, use correct grounded coffee thickness. There are 14 grind settings available to get the correct thickness. Rotate the coarseness selector knob to select between coarse, medium and fine grind coffee.
- Select fine grind coffee for espresso coffee makers (rotate coarseness selector to the FINE), medium grind for drip makers and coarse grind for French press or percolator.
- The actual grind size for a particular setting will vary depending on many factors, including: degree of roast (light vs. dark), freshness, humidity, type of bean, oil content, etc. With use, you will discover which setting best meets your taste, brewing style and other coffee-making preferences.
- For optimum freshness of your coffee beans, do not store them in the bean container or in Ground Coffee Container for extended periods of time.
- To avoid overheating of motor, do not grind more than two full whole bean containers at a time or two full 12-cup cycles without a break. Allow the motor to cool at least 2 minutes between cycles.
- The container Lid and Ground Coffee Container must always be on correct place while using this appliance.
- Use only coffee beans in this appliance.
1. IMPORTANT:
6. MODE D'EMPLOI
natural_image
Line drawing of a kitchen grater with lid and side panel (no text or symbols)
natural_image
Line drawing of a kitchen grater with handle and side panel (no text or symbols)natural_image
Line drawing of a kitchen grater with control knobs and a lid (no text or symbols)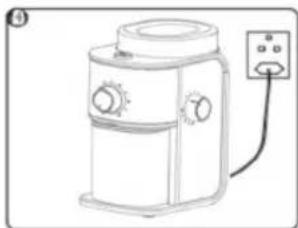
natural_image
Line drawing of a kitchen appliance with a power outlet (no text or symbols)natural_image
Line drawing of a kitchen grater with two side knobs and a lid (no text or symbols)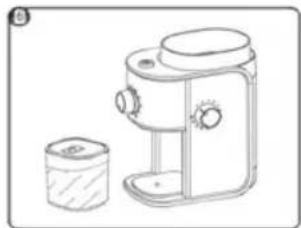
natural_image
Line drawing of a kitchen mixer with a cylindrical container beside it (no text or symbols)natural_image
Line drawing of a kitchen appliance with control panel and fan (no text or symbols)
natural_image
Simple line drawing of a cup with a teapot and a cross mark, no text or symbols present
natural_image
Line drawing of a kitchen mixer (no text or symbols)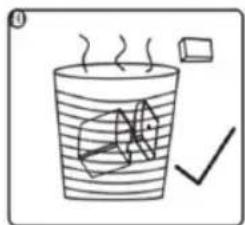
natural_image
Simple line drawing of a cup with steam rising and a checkmark below it (no text or symbols)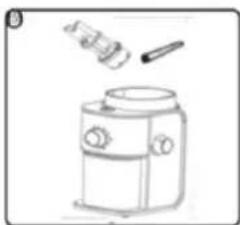
natural_image
Simple line drawing of a kitchen appliance with a lid and handle (no text or symbols)6. INSTRUÇÕES DE USO
natural_image
Line drawing of a kitchen grater with lid and side panel (no text or symbols)
natural_image
Line drawing of a portable kitchen grater with handle and side panel (no text or symbols)natural_image
Line drawing of a kitchen grater with control knobs and a lid (no text or symbols)
natural_image
Line drawing of a kitchen appliance with a control panel (no text or symbols)natural_image
Line drawing of a kitchen oven with control knobs and a lid (no text or symbols)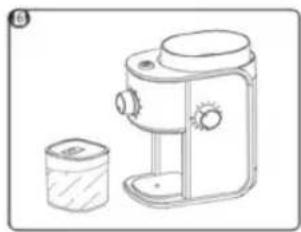
natural_image
Line drawing of a kitchen mixer with a cylindrical container beside it (no text or symbols)natural_image
Line drawing of a kitchen appliance with control panel and fan (no text or symbols)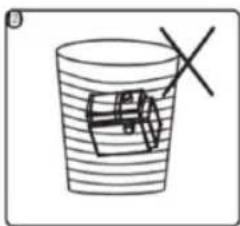
natural_image
Simple line drawing of a cup with a cross mark and a small object inside, no text or symbols present.
natural_image
Line drawing of a kitchen oven with control knobs and a handle (no text or symbols)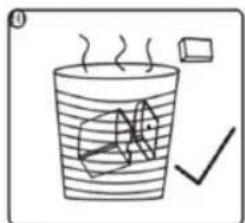

natural_image
Simple line drawing of a kitchen appliance with a handle and lid (no text or symbols)natural_image
Line drawing of a kitchen grater with lid and side panel (no text or symbols)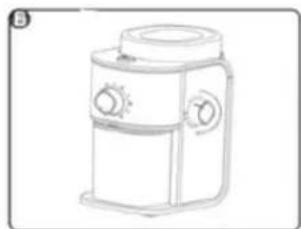
natural_image
Line drawing of a kitchen grater with handle and side panel (no text or symbols)natural_image
Line drawing of a kitchen grater with control panel and side buttons (no text or symbols)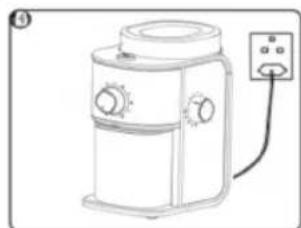
natural_image
Line drawing of a kitchen mixer with control panel and power outlet (no text or symbols)natural_image
Line drawing of a kitchen grater with control knobs and a lid (no text or symbols)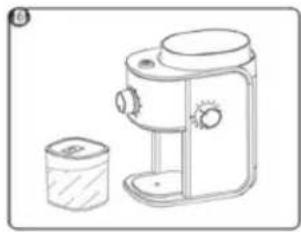
natural_image
Line drawing of a kitchen mixer with a cylindrical container beside it (no text or symbols)natural_image
Line drawing of a kitchen appliance with control panel and fan (no text or symbols)
natural_image
Simple line drawing of a cup with a teapot inside and a cross mark on the side (no text or symbols)
natural_image
Line drawing of a kitchen oven with control panel and side door (no text or symbols)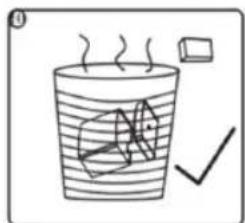
natural_image
Simple line drawing of a cup with steam rising, a cube, and a checkmark (no text or symbols)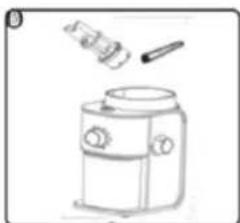
natural_image
Simple line drawing of a kitchen appliance with a lid and handle (no text or symbols)6. ISTRUZIONI PER L'USO

natural_image
Line drawing of a kitchen grater with lid and side panel (no text or symbols)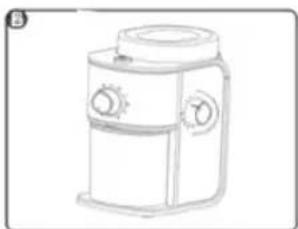
natural_image
Line drawing of a portable kitchen grater with handle and side panel (no text or symbols)natural_image
Line drawing of a kitchen grater with control knobs and a lid (no text or symbols)
natural_image
Line drawing of a kitchen appliance with a control panel and indicator lights (no text or symbols)DECLARATION OF CONFORMITY
This device complies with EU Low Voltage Directive 2014/35/EC.
Electromagnetic Compatibility Directive 2014/30/EU. Directive 2015/863/EU on the restriction of the use of certain hazardous substances in electrical.
Directive 2009/125/EC on the eco-design requirements applicable to energy-related products.


This symbol on the product or on the packaging indicates that this product can't be disposed as normal rubbish or household waste. All the electrical, electronic equipment's and battery-operated units must recycle in proper manner and according to the local municipal laws. You can recycle them by taking them to government authorized disposal centres or specialized bins which you can find in any nearby big super markets, electronics or electro domestics products stores or malls who have these types of facilities available.
Designed by: SOGO based on European quality standards Imported by: Sanysan Appliances S.L, NIF: B98753056, C/ Barcas 2, 2, 46002 Valencia, Spain Product manufactured in CHINA. After-sales service: www.sogosat.com sogosat@sogosat.com / 0034 902 222 161


- ÍNDICE
- INSTRUCCIONES DE USO
- Symbol definitions
- Safety instructions for the user
- Restrictions on use to avoid personal injury
- ▲Product use restrictions due to poor condition or breakdown
- Restrictions on use when used with children and elders
- IMPORTANT WARNING
- Instructions to follow when using the device
- CLEANING AND MAINTENANCE
- TECHNICAL SPECIFICATIONS
- PARTS DESCRIPTION
- INSTRUCTIONS FOR USE
- CLEANING AND MAINTENANCE
- Storage
- Tips:
- Helpful Hints
- IMPORTANT:
- MODE D'EMPLOI
- INSTRUÇÕES DE USO
- ISTRUZIONI PER L'USO
- DECLARATION OF CONFORMITY
Brand : Sogo
Model : SS-5236
Category : Coffee grinder