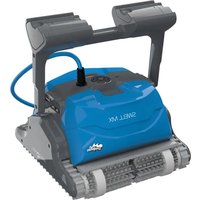
Dolphin Swell MX - Robot vacuum MAYTRONICS - Free user manual and instructions
Find the device manual for free Dolphin Swell MX MAYTRONICS in PDF.


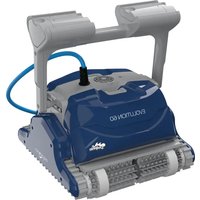
| Product type | Robotic pool cleaner |
| Brand | Maytronics |
| Model | Dolphin Swell MX |
| Motor protection rating | IP 68 |
| Operating depth | 0.80 m to 5 m |
| Power supply - input | 100-250 V AC, 50-60 Hz, 180 W |
| Power supply - output | <30 V DC |
| Power supply protection rating | IP 54 |
| Brush types | Universal brush (all surfaces), PVC brush (concrete, PVC, fiberglass, coating), Wonder brush (smooth ceramics) - optional |
| Filtration | Filter cartridges with mesh filter (×4), ultrafine filter (×4 optional) |
| Water operating temperature | 6 °C to 34 °C |
| Water chemical parameters | Chlorine max 4 ppm, pH 7.0-7.8, NaCl max 5000 ppm |
| Storage temperature | 5 °C to 45 °C |
| Power cable | Floating cable |
| Handle | Adjustable with locking latch |
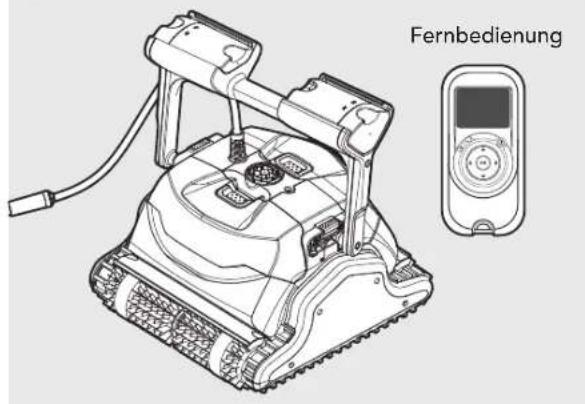
| Remote control | Included |
| Maintenance | Cleaning of filter cartridges and impeller |
| Safety | Ground fault circuit interrupter recommended, disconnect before maintenance, do not enter water during operation |
| Main functions | Automatic cleaning, active brushing, wall climbing, programmed cleaning cycle |
Frequently Asked Questions - Dolphin Swell MX MAYTRONICS
User questions about Dolphin Swell MX MAYTRONICS
0 question about this device. Answer the ones you know or ask your own.
Ask a new question about this device
Download the instructions for your Robot vacuum in PDF format for free! Find your manual Dolphin Swell MX - MAYTRONICS and take your electronic device back in hand. On this page are published all the documents necessary for the use of your device. Dolphin Swell MX by MAYTRONICS.
USER MANUAL Dolphin Swell MX MAYTRONICS
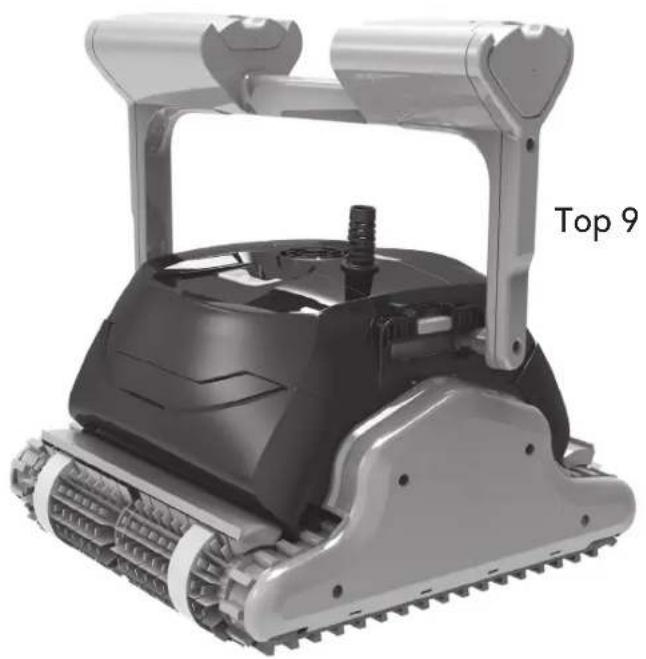
Dolphin Explorer Classic 9 / Top 9
EN
User Instructions...... p. 1
FR
EN
Dolphin Explorer Classic 9 / Top 9
User Instructions
Contents
- INTRODUCTION ...... 2
- SPECIFICATIONS.... 2
- WARNINGS AND CAUTIONS 2
3.1. Warnings....2
3.2. Cautions....2
- POOL CLEANER PARTS 3
- USING THE POOL CLEANER....4
5.1. Setup....4
5.1.1. Adjusting the handle angle 4
5.2. Putting the Pool Cleaner into the pool....5
5.3. Removing the Pool Cleaner from the pool....6
- ROUTINE MAINTENANCE....7
6.1. Cleaning the filter cartridges 7
6.2. Dismantling and cleaning the impeller....8
- OFF SEASON STORAGE....9
- TROUBLESHOOTING....10
Dolphin Explorer Classic 9 / Top 9
User Instructions
1. INTRODUCTION
Thank you for purchasing a Maytronics Robotic Pool Cleaner.
We are sure that your Maytronics Robotic Pool Cleaner will provide you with reliable, convenient and cost effective pool cleaning. Its reliable filtration in all pool conditions, active brushing, and all-surface climbing brush enhance maximum pool hygiene.
The Robotic Pool Cleaners by Maytronics deliver advanced cleaning technology, long lasting performance and easy maintenance. You and your family will be free to enjoy swimming with full confidence that your pool is completely clean.
2. SPECIFICATIONS
Motor protection: IP 68
Minimum depth: 0.80m/2.6ft
Maximum depth: 5m/16.4ft
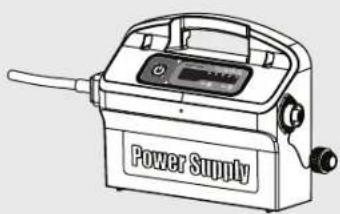
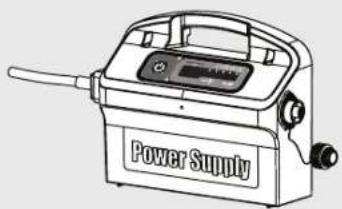
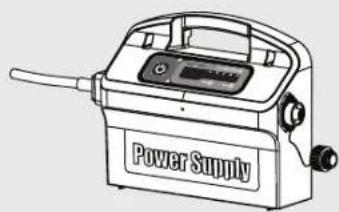
Digital switch-mode power supply
• Input - 100-250 AC VOLTS
50-60 Hertz
180 Watt
• Output - <30 VDC
IP 54
3. WARNINGS AND CAUTIONS
3.1. Warnings

• Use the originally supplied power supply only
- Ensure the electrical outlet is protected by a ground fault interrupter (GFI) or an earth leakage interrupter (ELI)
- Keep the power supply out of standing water
- Position the power supply at least 3m/10ft away from the edge of the pool
- Do not enter the pool while the Pool Cleaner is working
• Unplug the power supply before servicing
3.2. Cautions
When not in use store the Pool Cleaner on its Caddy in a shaded area.
Use the Pool Cleaner in the following water conditions only:
| Chlorine Max 4 ppm | |
| pH 7.0 - 7.8 | |
| Temperature 6-34°C (43-93°F) | |
| NaCl Maximum = 5000 ppm | |
4. POOL CLEANER PARTS
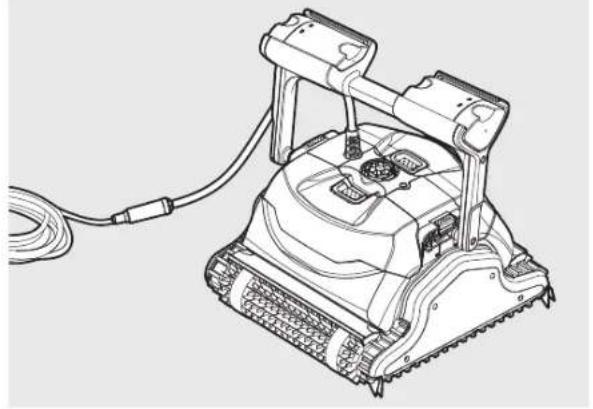
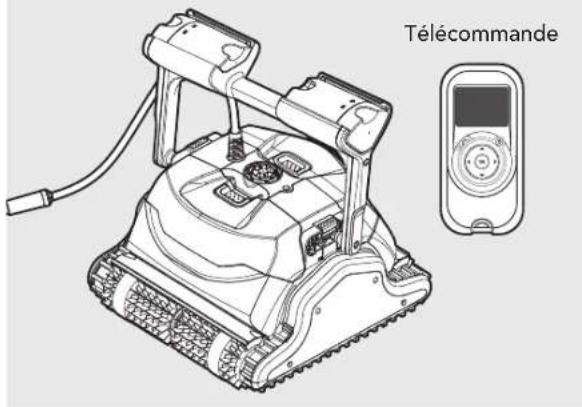
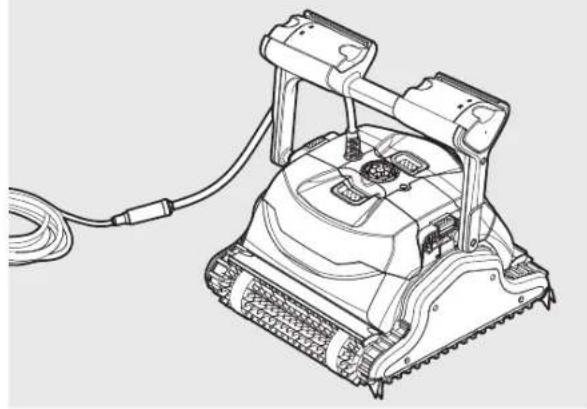
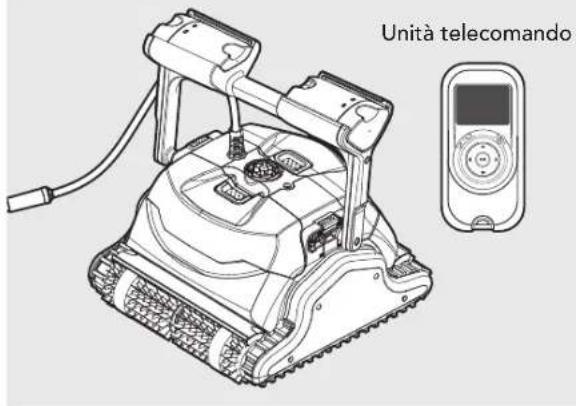
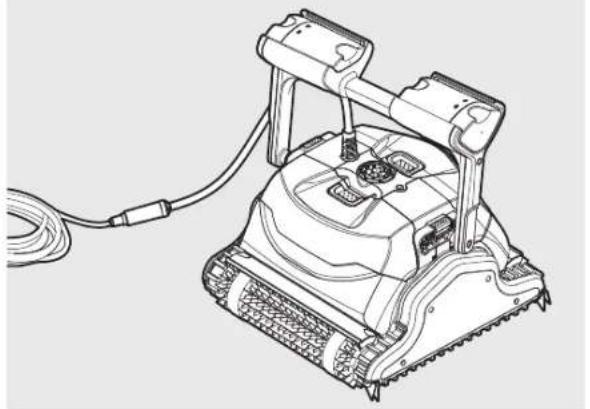
▶Dolphin Explorer Classic 9
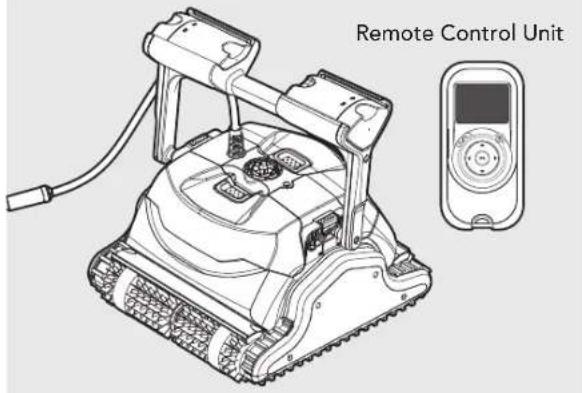
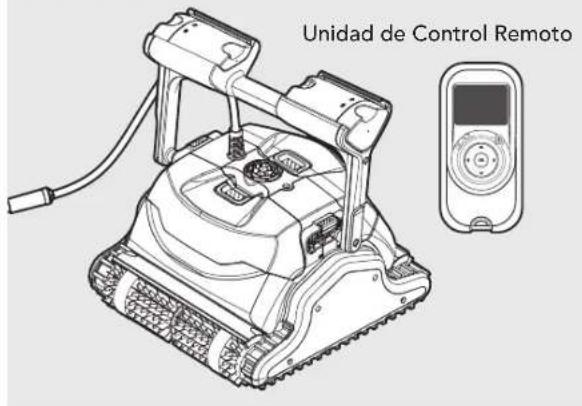
▶Dolphin Explorer Top 9
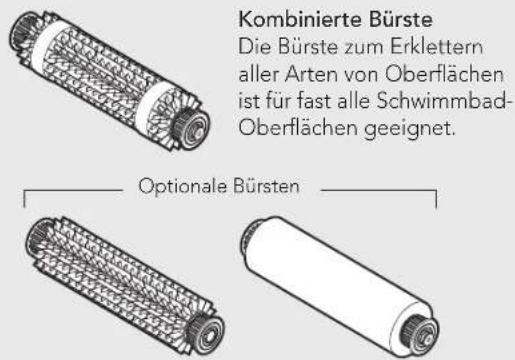
Brushes
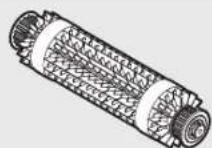
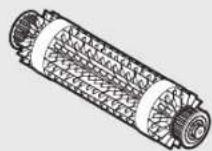
Combined Brush
All surface climbing brush, ideal for most pool surfaces.
Optional Brushes
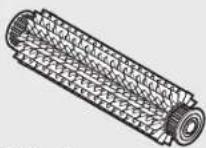
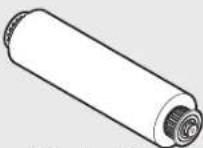
PVC Brush
For concrete, PVC, fiberglass and liner.
For smooth ceramics.
Wonder Brush
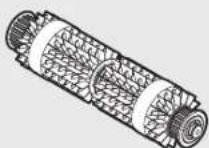
Combined Brush
All surface climbing brush, ideal for most pool surfaces.
Optional Brushes
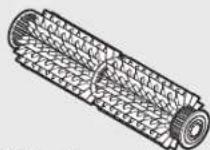
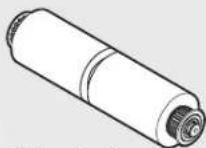
PVC Brush
For concrete, PVC, fiberglass and liner.
For smooth ceramics.
Wonder Brush
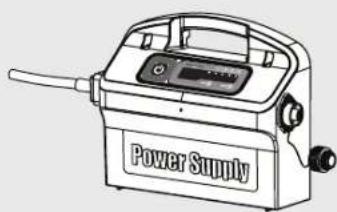
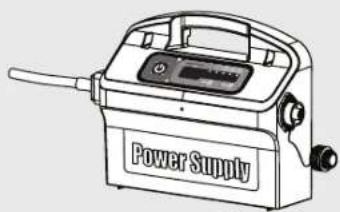
▶ Power supply unit

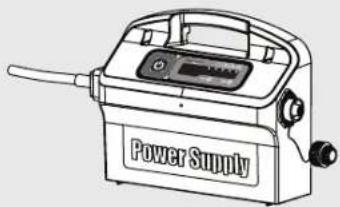
▶ Filtration
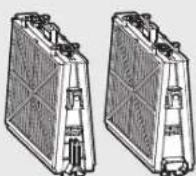
Cartridge with Net filters (X4)
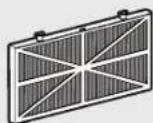
Ultra-fine filter (X4)
(optional)
5. USING THE POOL CLEANER
The Pool Cleaner is very simple to use. Simply put it into the pool and make sure that it is properly sitting on the floor of the pool. Turn it ON and let it get the job done.
5.1. Setup
Before using the Pool Cleaner for the first time perform the following steps:
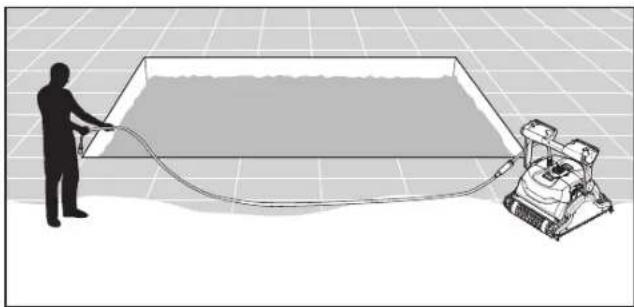
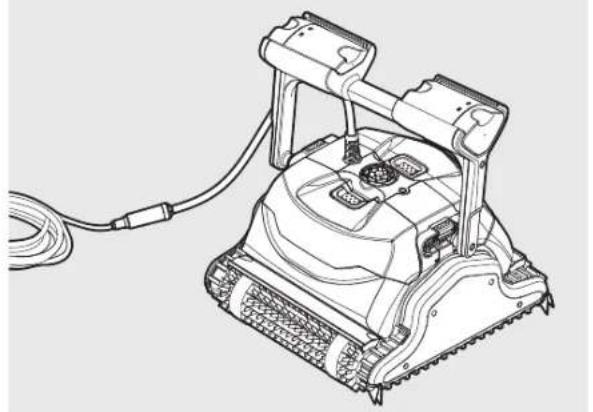
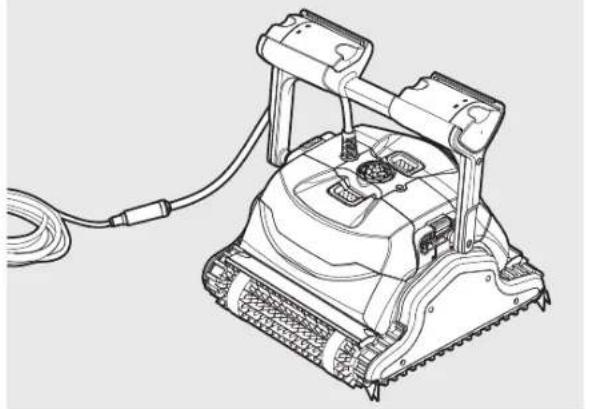
Unwind the cable and stretch it out completely so that it has no kinks.
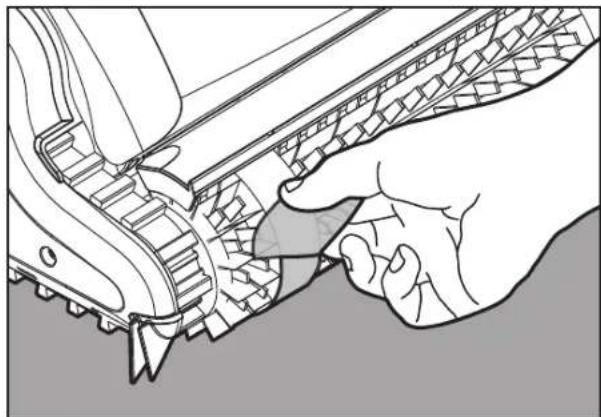
Some models arrive with plastic coverings on the brushes.
Remove them before use.
5.1.1. Adjusting the handle angle
The robot's handle should be adjusted and locked diagonally in order to ensure optimum cleaning results.
The handle angle can be adjusted also to determine the speed at which the robot advances along the water-line.
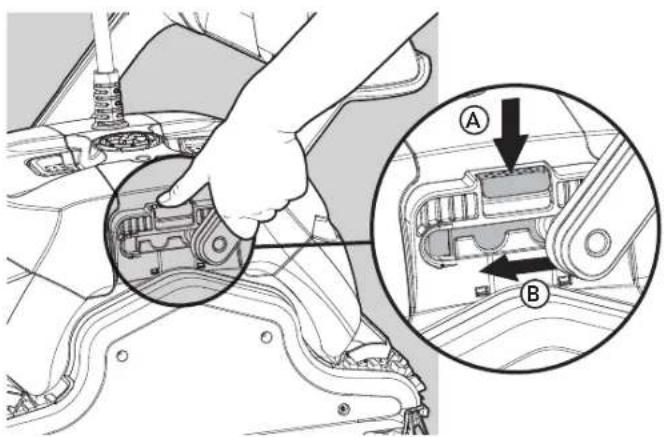
To adjust the handle angle:
A. Press the latch down and hold it in position.
B. Move the handle to the desired position and release the latch to hold the handle in place.
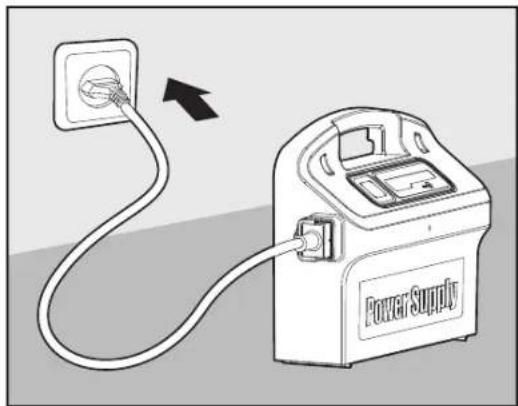
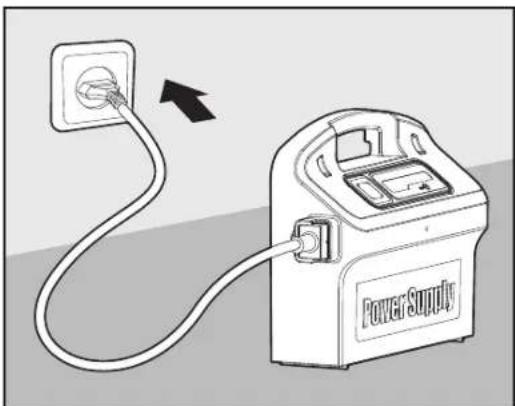
Position the power supply so that it is approximately in the middle of the long side of the pool at a distance of 3m/10ft.
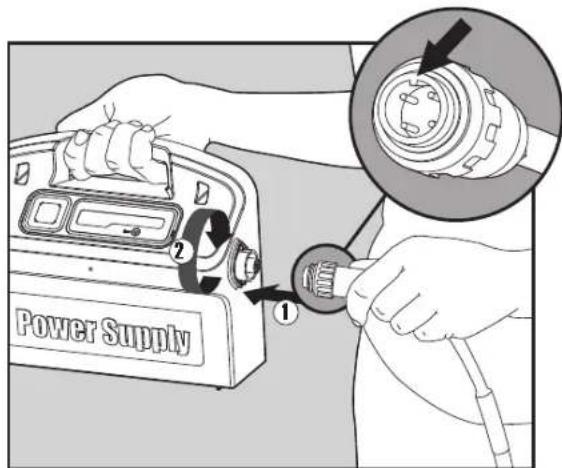
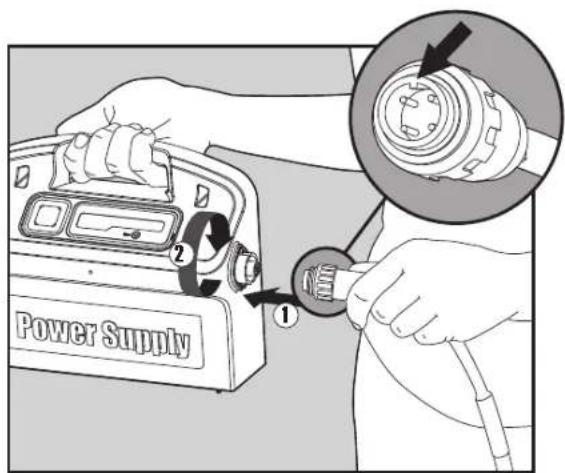
Attach the floating cable to the power supply by inserting it with the notch on the connector (1) lined up with the groove in the socket on the power supply and turning clockwise (2).
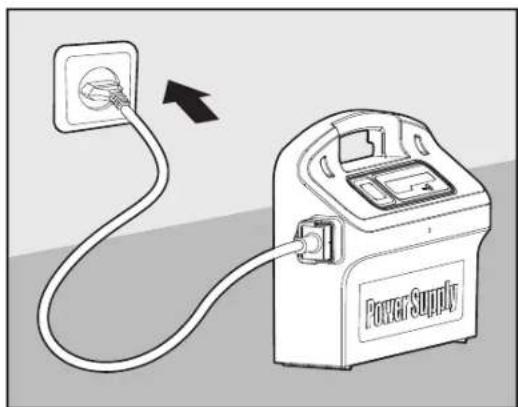
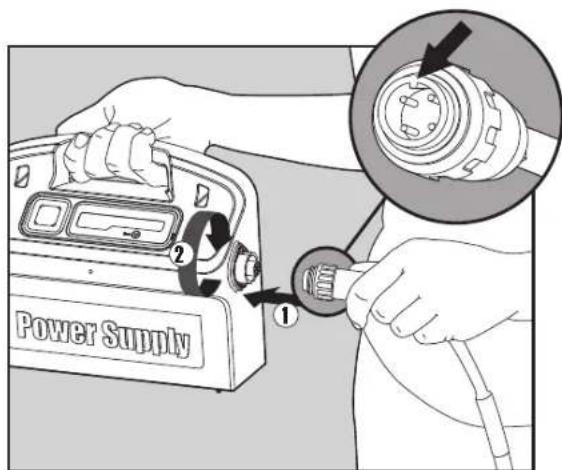
Plug in the power supply and leave it in the OFF position.
5.2. Putting the Pool Cleaner into the pool
If your Pool Cleaner is equipped with brushes that contain sponges, dip the brushes in the water and squeeze them so that they will absorb water the first time you use the Pool Cleaner, or if the brushes have dried out between uses.
Release the Pool Cleaner and let it sink to the floor of the pool.
Make sure that the floating cable is free of any obstructions.
To avoid kinks in the floating cable, place approximately enough cable in the water for the Pool Cleaner to reach the farthest corner of the pool.
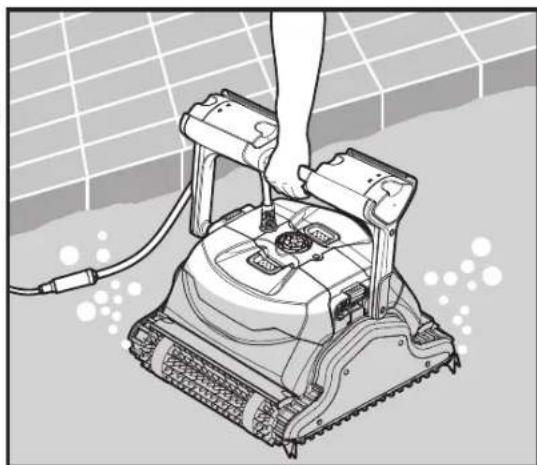
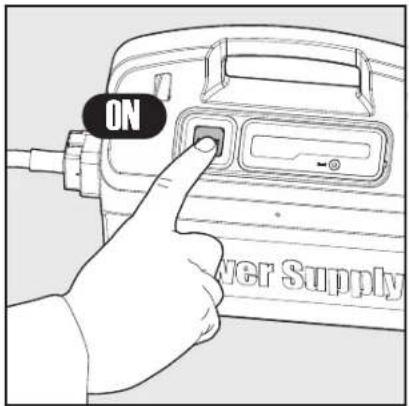
Turn the power supply ON.
The Pool Cleaner will now operate until it has reached the end of the cleaning cycle.
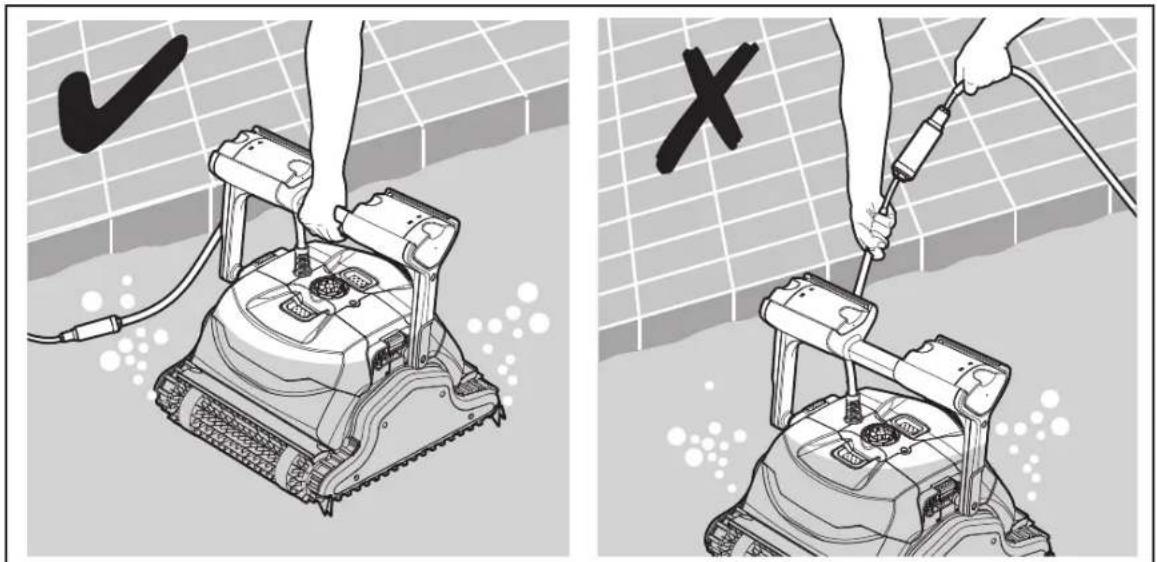
5.3. Removing the Pool Cleaner from the pool
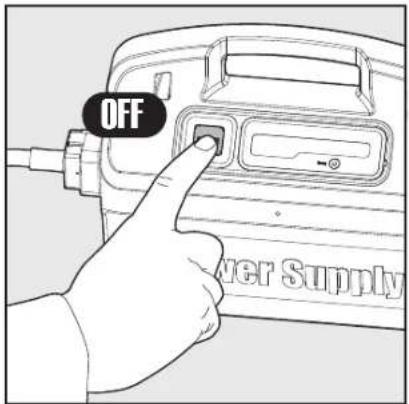
⚠️ Turn OFF and unplug the power supply.
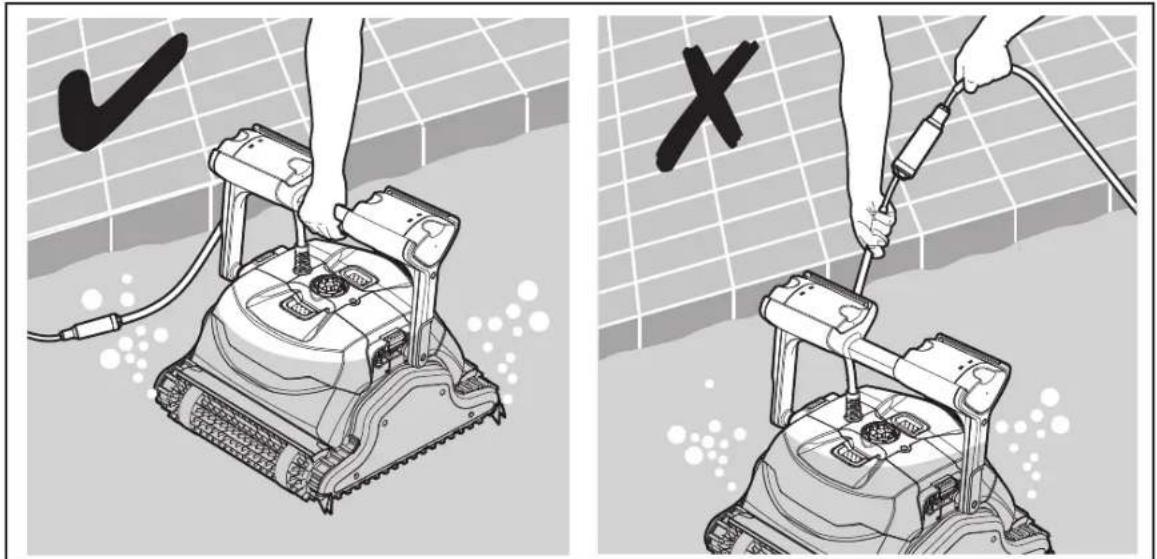
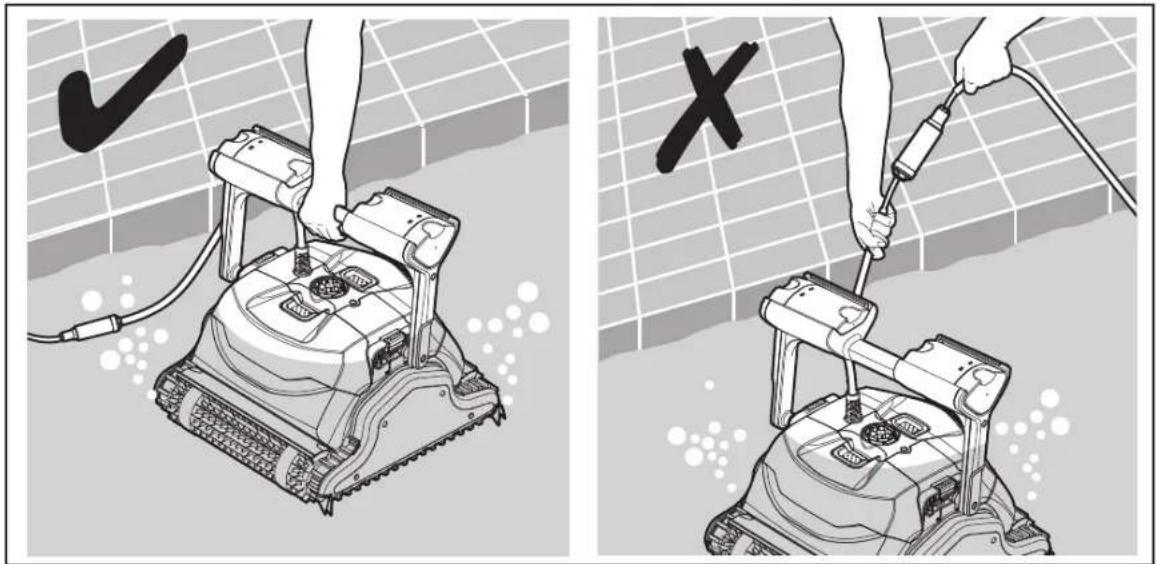
Using the floating cable, bring the Pool Cleaner to the pool's edge.
Using the handle remove the Pool Cleaner from the pool.
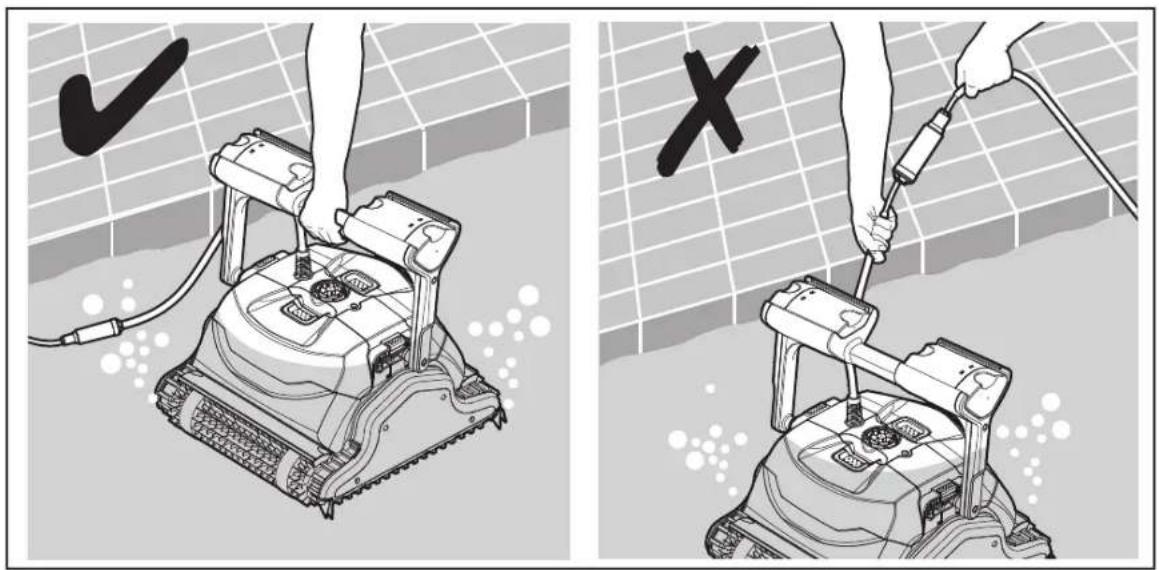
DO NOT PULL THE POOL CLEANER FROM THE POOL USING THE CABLE.
6. ROUTINE MAINTENANCE
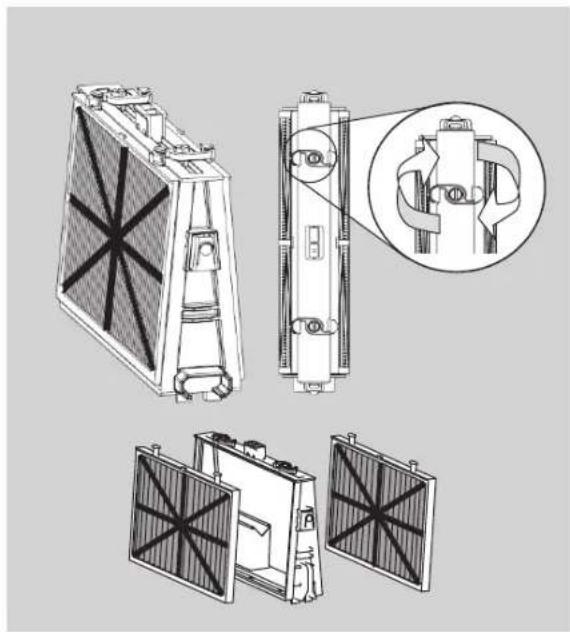
6.1. Cleaning the filters of the cartridges

Unplug the power supply before any servicing activity.
Note: Do not let the filters of the cartridges dry out before cleaning.
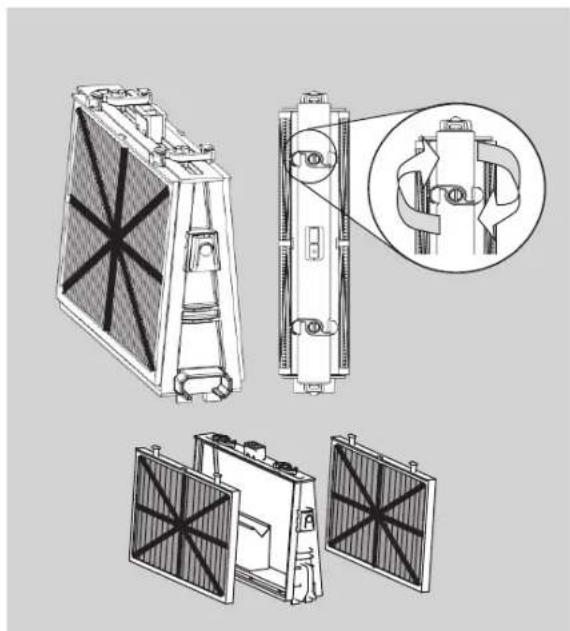
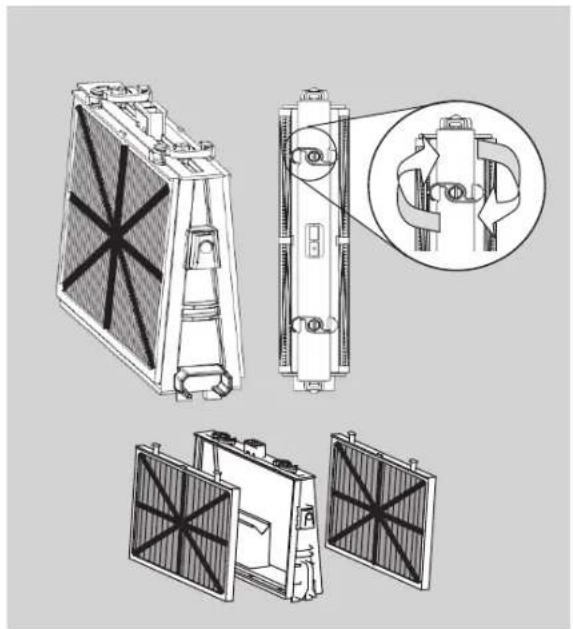
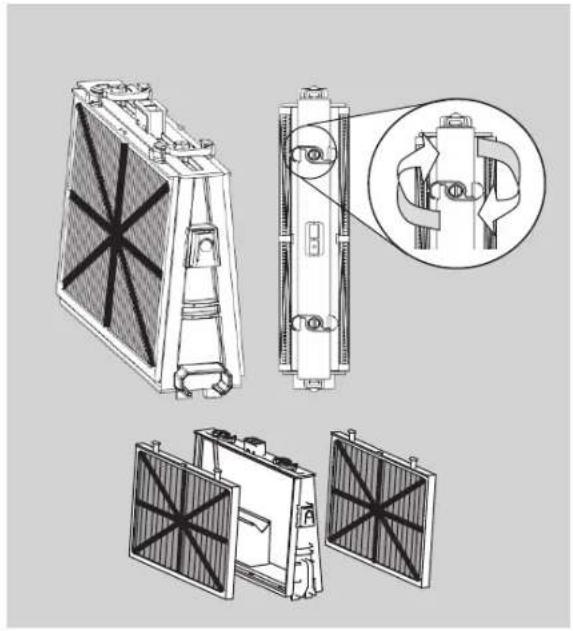
- Open the filter covers and remove the cartridges from both sides of the robot.
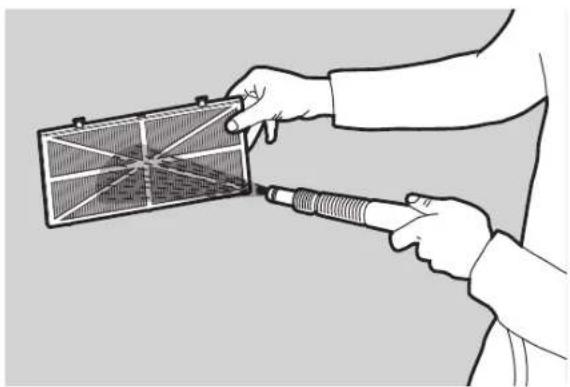
- Open the clips and remove the filters.
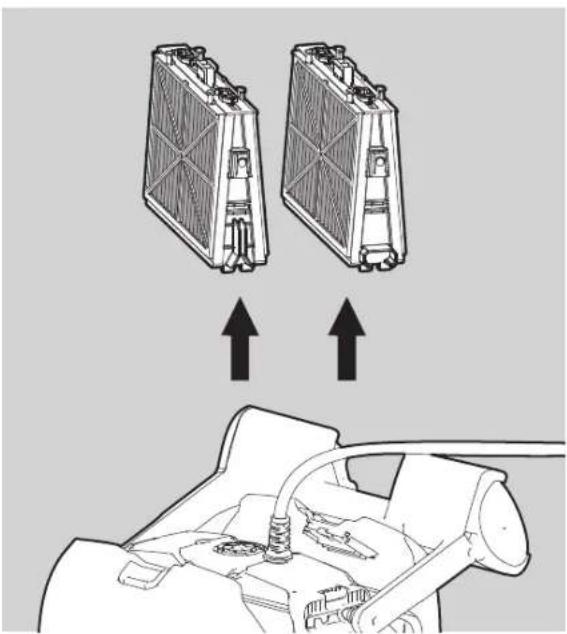
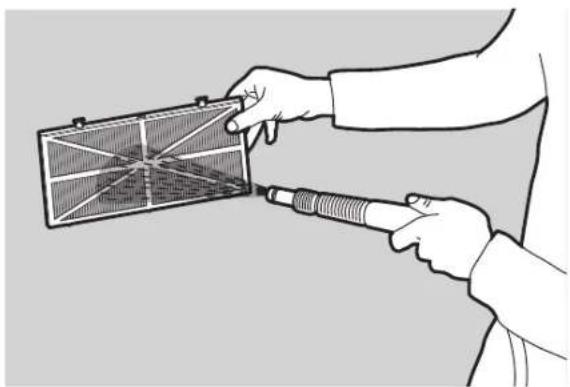
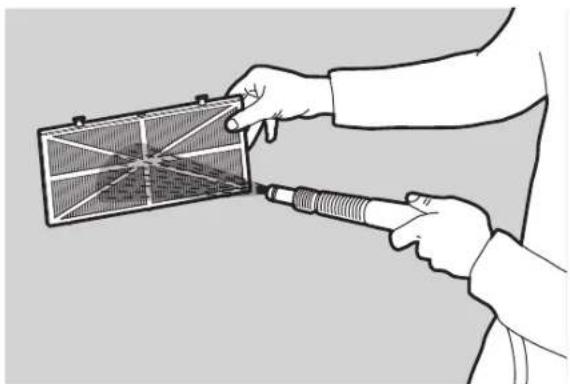
- Clean the filters with a hose.
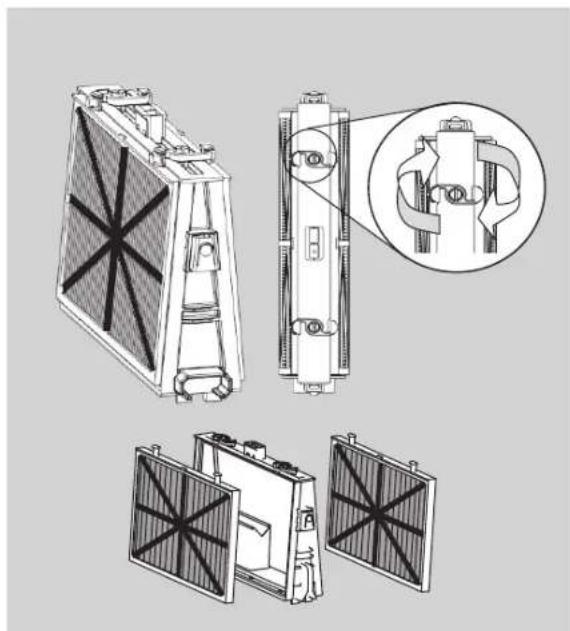
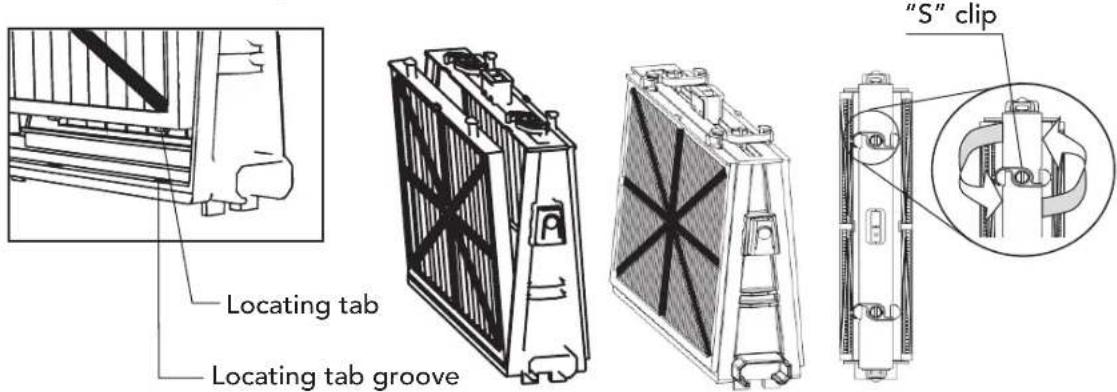
- Reassembling the filter elements
Insert the locating tabs at the bottom of the filter element into their grooves on the base frame then close the "S" clip.
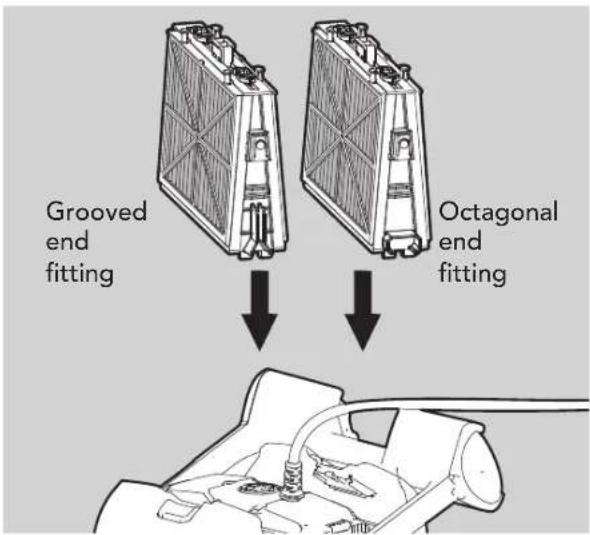
Reinstall the base frames with filters according to the diagram.
Do not force the filters into place.
6.2. Dismantling and cleaning the impeller
Unplug the power supply before cleaning.
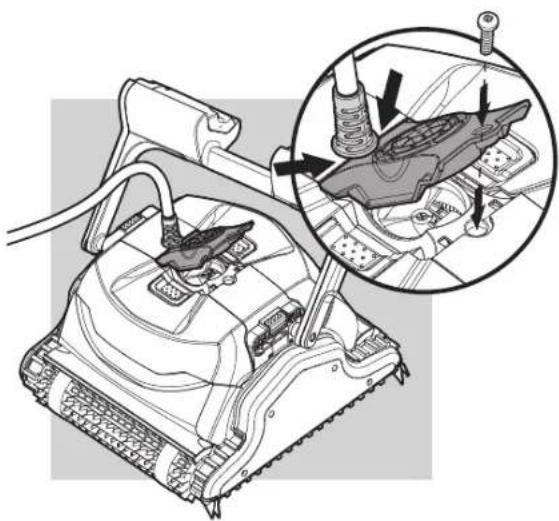
Dismantle the impeller cover and clean around the impeller housing, then reassemble.
(Use Phillips head screwdriver).
If the Pool Cleaner will not be in use for an extended period, perform the following storage steps:
• Make sure that no water is left in the Pool Cleaner
• Thoroughly clean the filters of the cartridges and insert in place
• Roll up the cable so that it has no kinks and place on the Caddy
- Store the pool cleaner upright on the Caddy in a protected area out of direct sun/rain/frost at a temperature of between 5°-45°C / 41°-113°F
8. TROUBLESHOOTING
If the suggested solutions do not solve the problem contact your dealer
| Problem Solution | |
| Pool Cleaner does not move 1. | Check that the power supply cable is plugged properly into the power supply socket. Check power to the socket and reconnect Pool CleanerEnsure the power outlet is functioning properly and that it has not tripped the breaker in the fuse boxTurn the power supply off. Wait 30 seconds then turn it back onUnplug the power supply. Open the impeller cover and check that nothing is trapped in the impeller |
| The Pool Cleaner moves but does not clean the pool | Clean the filters of the cartridgesAfter the Pool Cleaner starts moving observe it for several minutes and make sure that it keeps moving. If it stops moving check the impeller and the drive system to see if any debris is stuck there |
| The Pool Cleaner cleans only part of the pool | Check that there is enough slack in the cable for the Pool Cleaner to reach all of the poolClean the filters of the cartridgesForClassic 9only:You may enhance the pool coverage by adjusting the handle float. For optimal pool coverage the Pool Cleaner should turn on the floor at 90° angle (the Pool Cleaner rotates twice before completing the 90° turn).If the Pool Cleaner turns in an angle wider than 90° , pull out the handle float on the cable’s entry-side (A)If the Pool Cleaner does not complete a 90° turn, pull out the handle float opposite to the cable’s entry–side (B)Check the brushes to see if they are obstructed or worn out |
| The Pool Cleaner floats instead of sitting on the floor of the pool | Try removing the air againWith the Pool Cleaner in the water squeeze the combined brush/Wonder brush to make sure that they are completely water absorbent |
| Cable has kinks 1. To remove the kinks stretch the cable out completely and let it lie for at least a day in the sunClean the filters of the cartridges | |
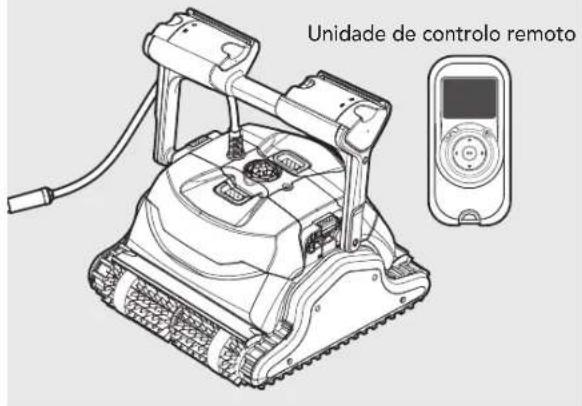
| The Pool Cleaner doesn’t climb the walls | Clean the filters of the cartridgesCheck the level of the chemicals of the water. Improper levels may allow the growth of algae making the walls slippery. If so, adjust the levels and scrub the wallsCheck that the brushes aren’t worn outForTop 9only: Check that the wall climbing mode hasn’t been cancelled via the remote control unit |
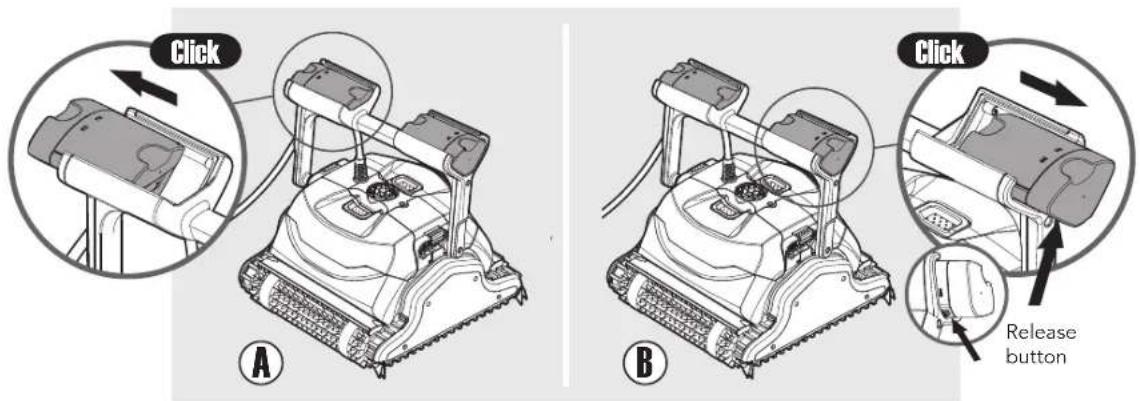
To move the floats back to their original position: while pressing the release button on the base of the handle float – push the handle float back.
FR
Dolphin Explorer Classic 9 / Top 9
▶Dolphin Explorer Classic 9
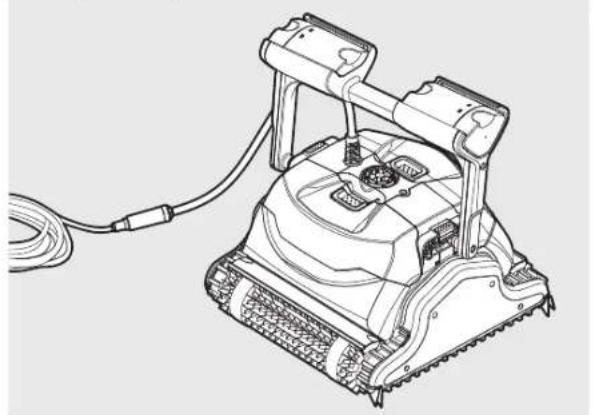
▶Dolphin Explorer Top 9
▶ Brosses
Brosse combinée

NE PAS RETIRER LE NETTOYEUR DE LA PISCINE EN TIRANT SUR LE CABLE.
6. EFFECTUEZ LA MAINTENANCE ROUTINIÈRE
▶Dolphin Explorer Classic 9
▶Dolphin Explorer Top 9
Spazzola "Wonder Brush"
! NON ESTRARRE IL PULITORE DALLA PISCINA TIRANDO IL CAVO.
- Pulire i filtri con una pompa.
▶Dolphin Explorer Classic 9
▶Dolphin Explorer Top 9
▶Dolphin Explorer Classic 9
▶Dolphin Explorer Top 9
Bürsten

ZIEHEN SIE DEN POOLREINIGER NICHT AM KABEL AUS DEM POOL.
▶Dolphin Explorer Classic 9
▶Dolphin Explorer Top 9

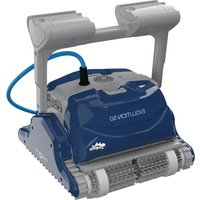
- DOLPHIN EXPLORER CLASSIC 9 / TOP 9
- EN
- FR
- USER INSTRUCTIONS
- CONTENTS
- INTRODUCTION
- SPECIFICATIONS
- DIGITAL SWITCH-MODE POWER SUPPLY
- WARNINGS AND CAUTIONS
- WARNINGS
- CAUTIONS
- POOL CLEANER PARTS
- USING THE POOL CLEANER
- SETUP
- ADJUSTING THE HANDLE ANGLE
- PUTTING THE POOL CLEANER INTO THE POOL
- REMOVING THE POOL CLEANER FROM THE POOL
- ROUTINE MAINTENANCE
- CLEANING THE FILTERS OF THE CARTRIDGES
- TROUBLESHOOTING
- EFFECTUEZ LA MAINTENANCE ROUTINIÈRE
- NON ESTRARRE IL PULITORE DALLA PISCINA TIRANDO IL CAVO
Brand : MAYTRONICS
Model : Dolphin Swell MX
Category : Robot vacuum