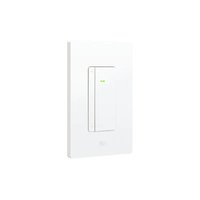
Dimmer Switch - Electrical switch EVE - Free user manual and instructions
Find the device manual for free Dimmer Switch EVE in PDF.


| Product Type | Smart Dimmer Switch |
| Brand | EVE |
| Model | Dimmer Switch |
| Power Supply | 120 V AC, 60 Hz |
| Max Power (LED) | 150 W / 1.25 A |
| Max Power (Incandescent/Tungsten) | 600 W / 5 A |
| Max Power (MLV) | 300 VA |
| Max Power (Halogen) | 600 W / 5 A |
| Min Power | 3 W |
| Wireless Technology | Thread (Matter) |
| Compatibility | Apple HomeKit, Google Home, Amazon Alexa |
| Main Functions | Brightness dimming, remote control, scheduling, statistics |
| Installation | Requires neutral wire, replaces single-pole or 3-way switch |
| Material | Fireproof plastic |
| Color | White |
| Dimensions (approx.) | 4.5 x 4.5 x 4.5 cm |
| Weight (approx.) | 100 g |
| Maintenance | Clean with a dry, soft cloth |
| Safety | Turn off power at the circuit breaker before installation; use an air gap switch for maintenance |
| Repairability | Spare parts not available; contact EVE customer service |
| Warranty | 2 years (depending on country) |
| Box Content | Eve Dimmer Switch, trim frame, finish plate, connection terminals |
| General Information | Works with a Thread border router; no Eve cloud, privacy respecting |
Frequently Asked Questions - Dimmer Switch EVE
User questions about Dimmer Switch EVE
0 question about this device. Answer the ones you know or ask your own.
Ask a new question about this device
Download the instructions for your Electrical switch in PDF format for free! Find your manual Dimmer Switch - EVE and take your electronic device back in hand. On this page are published all the documents necessary for the use of your device. Dimmer Switch by EVE.
USER MANUAL Dimmer Switch EVE
Eve Dimmer Switch requires a neutral wire and replaces a single-pole or 3-way switch. Only for use with copper or copper clad wire in dry, indoor locations. Not suitable for controlling ceiling fans.
If you are unsure or uncomfortable about installing Eve Dimmer Switch, consult a qualified electrician. To be installed and/or used in accordance with appropriate electrical codes and regulations.
120 VAC; Min. 3 W; Max. 150 W/ 1.25 A (LED); Max. 600 W/ 5 A (incandescent/tungsten); 300 VA (MLV); Max. 600 W/ 5 A (Halogen)

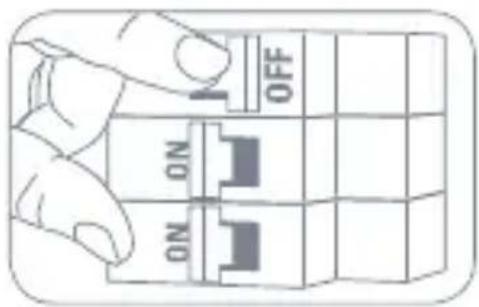
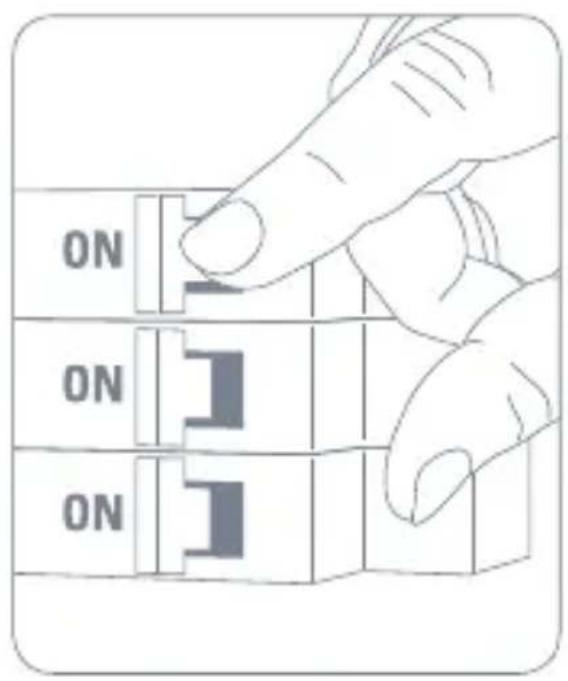
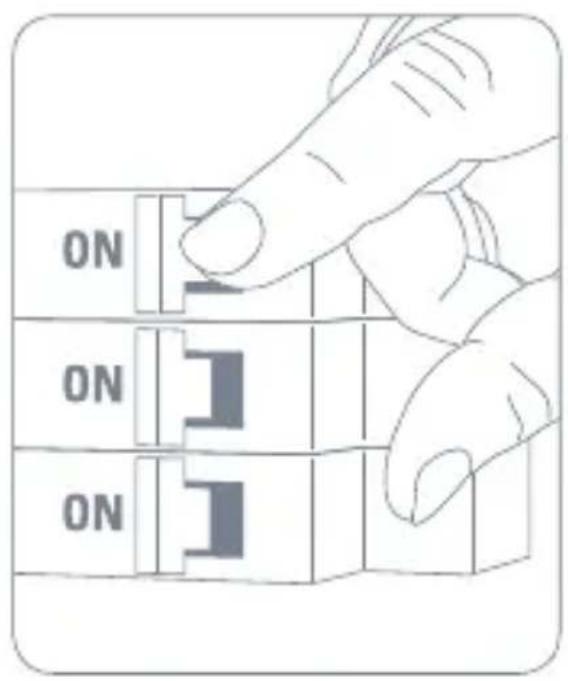
Turn off power at the circuit breaker that controls the light switch. Ensure power is off by switching your existing light switch on and off multiple times.

Get Started
2
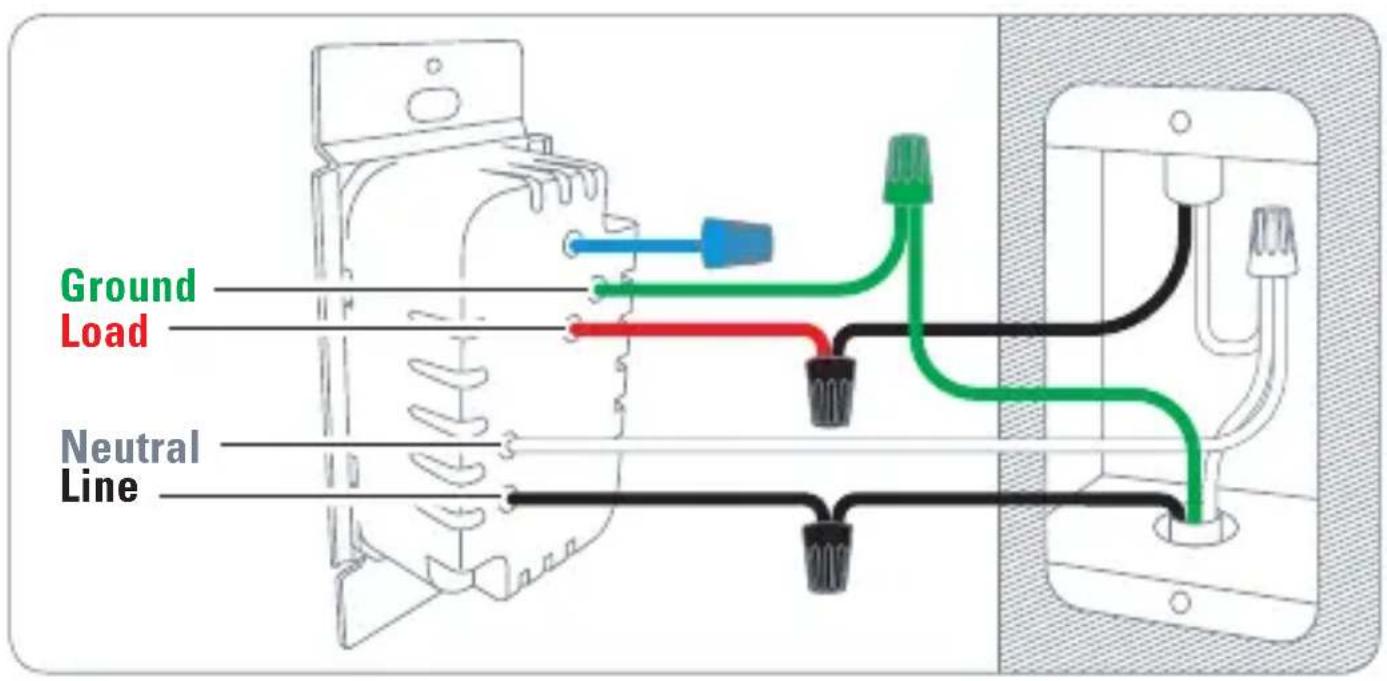
Remove your existing wall plate and light switch. Only proceed with the installation if there is a neutral wire (usually white) in the switch box. If you need to identify
the line and load cables, turn the power at the circuit breaker back on, then use a voltage tester to determine which wire connects to the source (line) and which to the fixture (load). Turn the power at the circuit breaker off again. Mark the line and load wires with tape.


Get Started
③ Replace a single-pole switch


Get Started

Get Started
④ Replace a 3-way switch
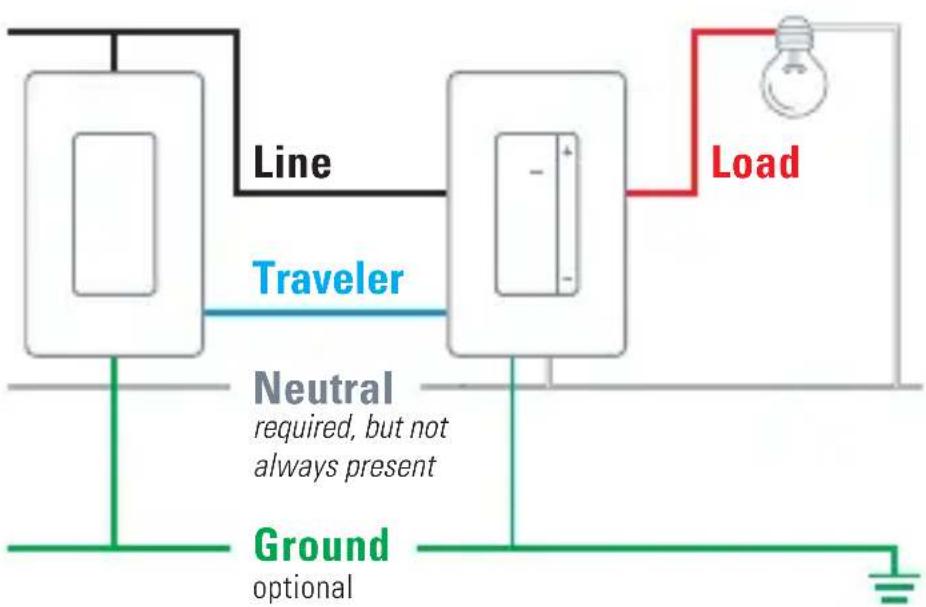
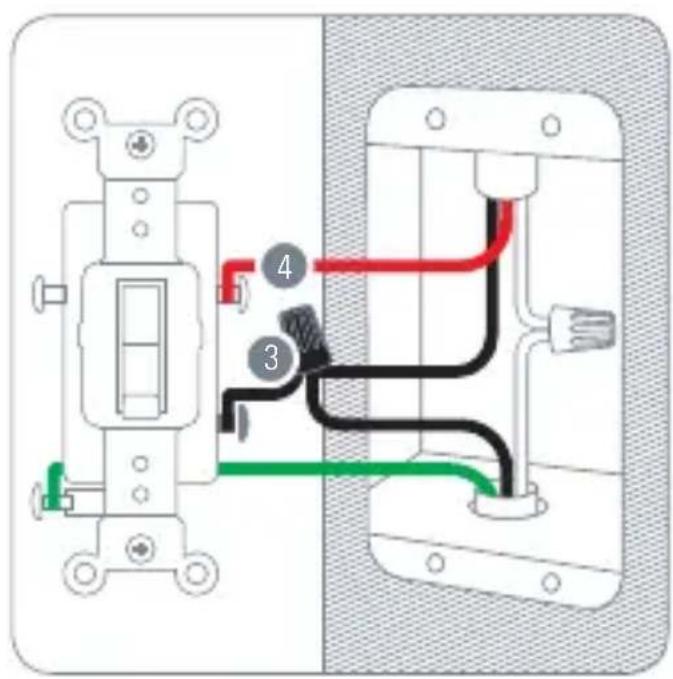
In a 3-way switch setup, Eve Dimmer Switch can only be installed in the location where the load wire connects to the light fixture. The other switch in the setup must remain a conventional switch.
If no neutral wire is present, Eve Dimmer Switch is not compatible at this location.

Get Started
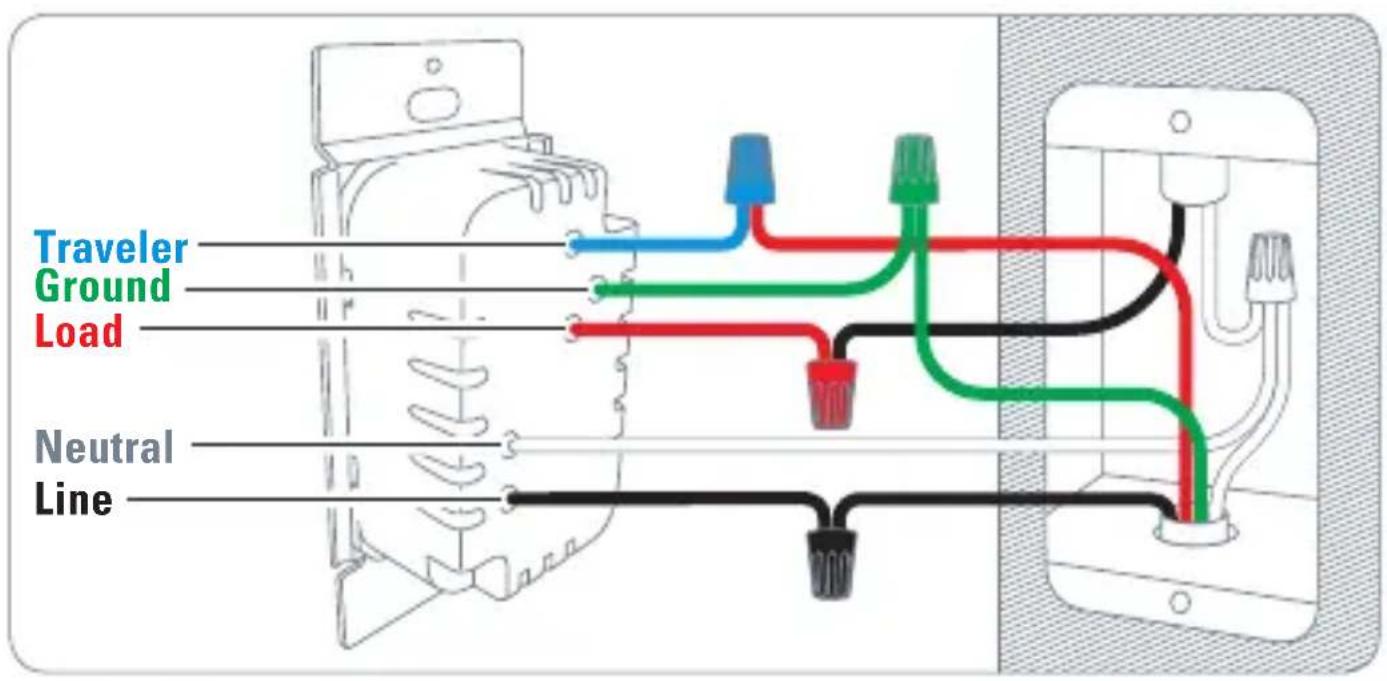

Get Started
⑤ Verify the wiring
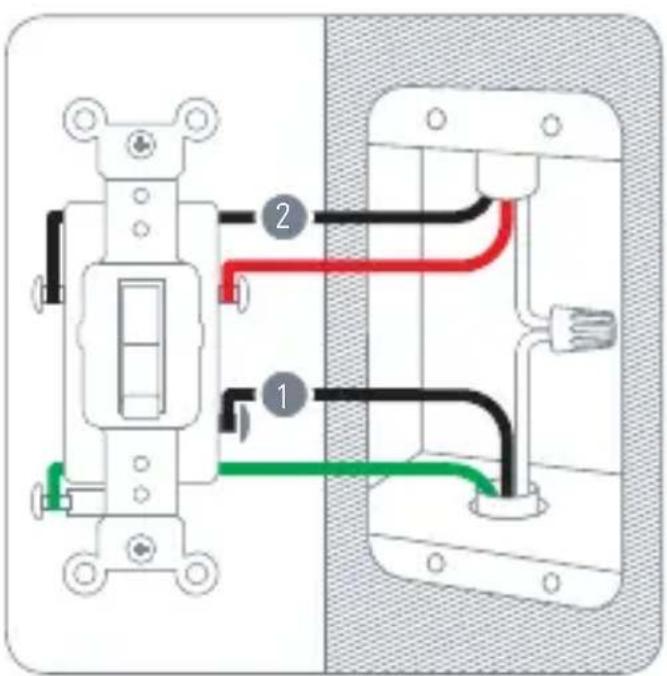
You may need to modify the wiring of the conventional 3-way switch so that both switches have a permanent line connection. Before doing this, use the circuit breaker and a voltage tester to make sure no current is flowing.
Identify the line wire 1, which is usually attached with a different colored screw or to a terminal marked Common. Disconnect this wire.
Use its color to identify the Traveler wire ② which is not connected to the blue wire of Eve Dimmer Switch. Disconnect this wire as well.
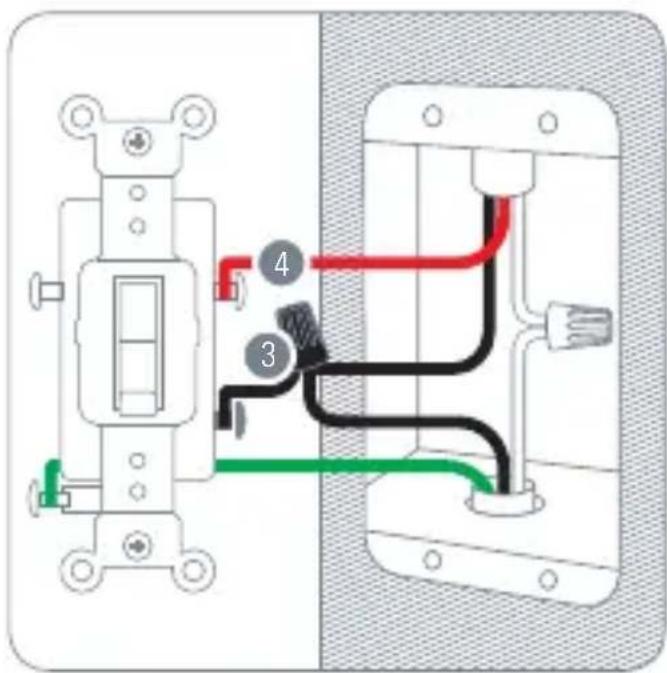
Use a wire nut and the included extra piece of wire 3 to feed the line connection to both switches: For the conventional 3-way switch, connect the extra piece of wire to the original terminal (different colored screw/Common) and to the black wire/Line. For Eve Dimmer Switch, connect the detached traveler wire to the black wire/Line.
Leave the traveler 4 which attaches to the blue input of Eve Dimmer Switch connected to one of the traveler terminals of the conventional 3-way switch.

Get Started

Get Started
6
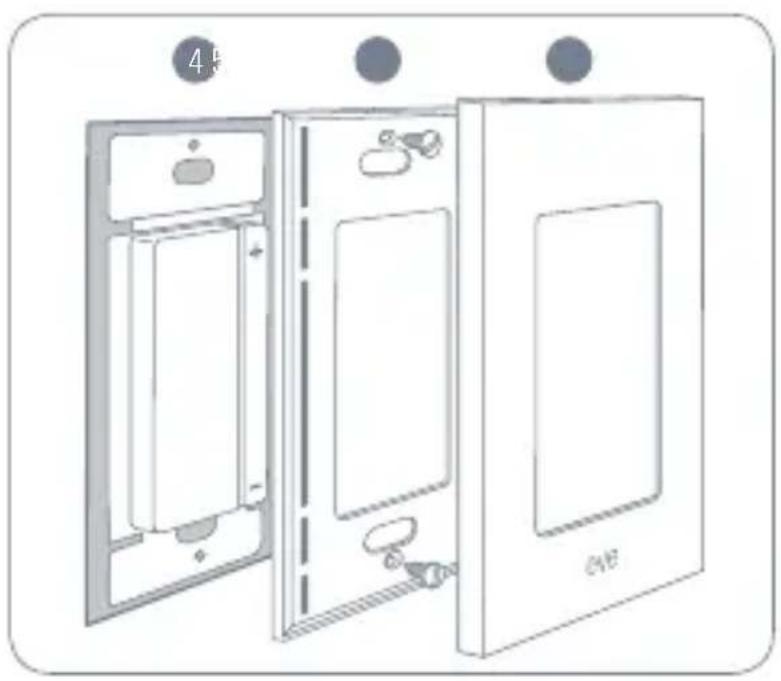
Mount Eve Dimmer Switch 4 into the wall.
7
Screw in the snap plate 5a and push the face plate onto it 5b. Alternatively, use your existing wall plate.
8
Turn on power at the circuit breaker that controls the light switch. Tap the sensor button of Eve Dimmer Switch - your lights should now turn on.

Get Started

Get Started
9
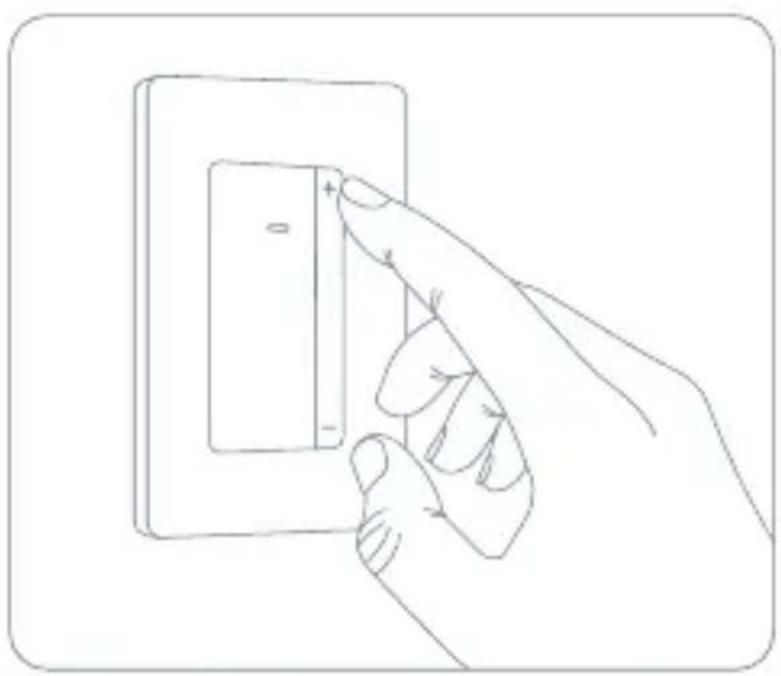
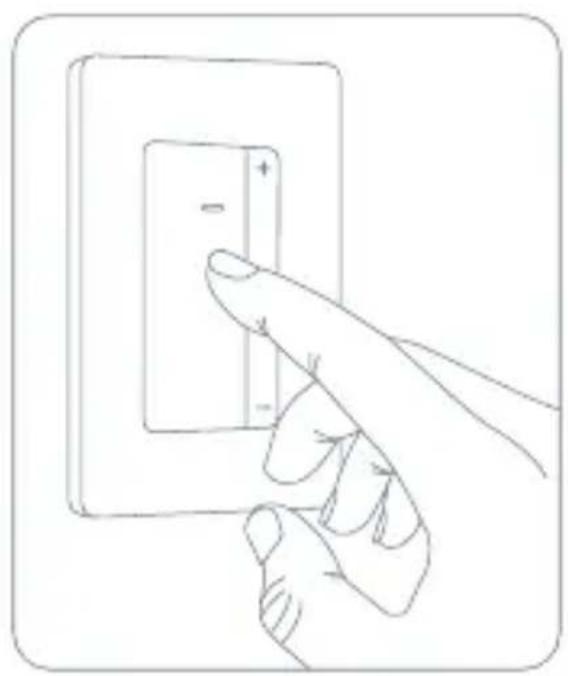
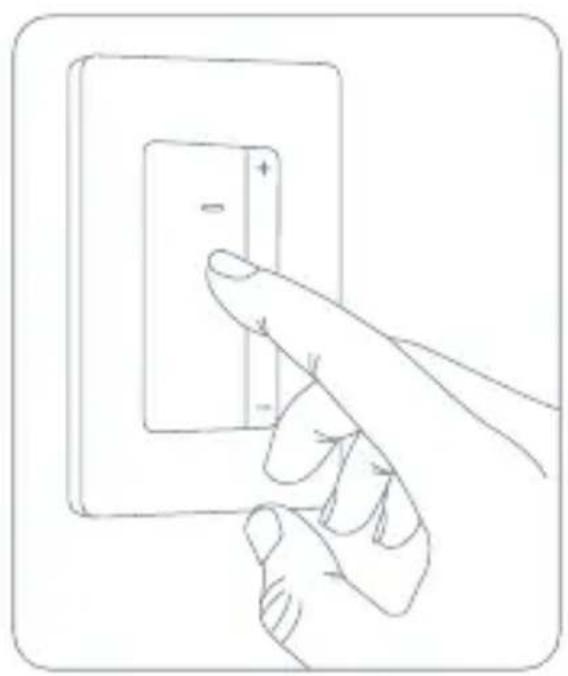
Use the plus and minus buttons on the rocker to increase or decrease the brightness.
10
Tap the sensor button again to switch the light off.

Get Started

Get Started
11
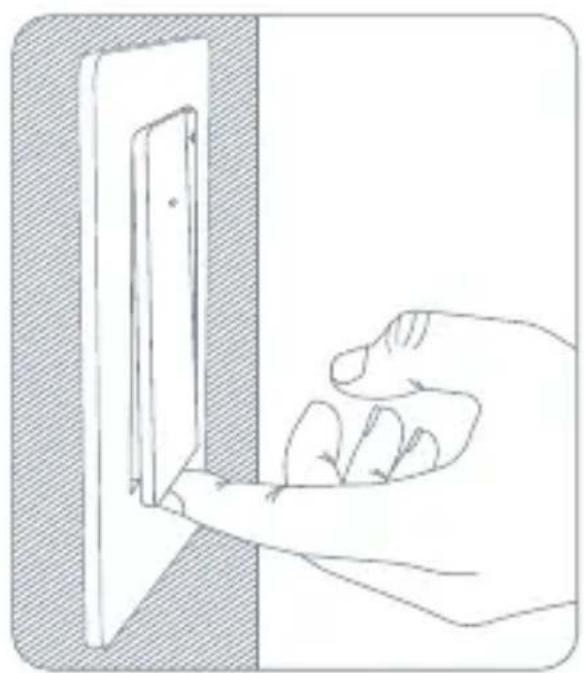
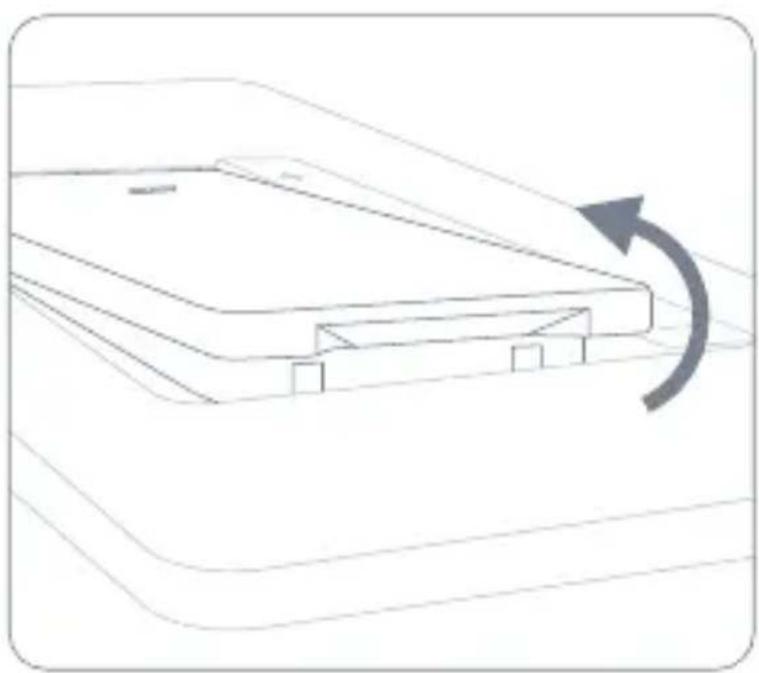
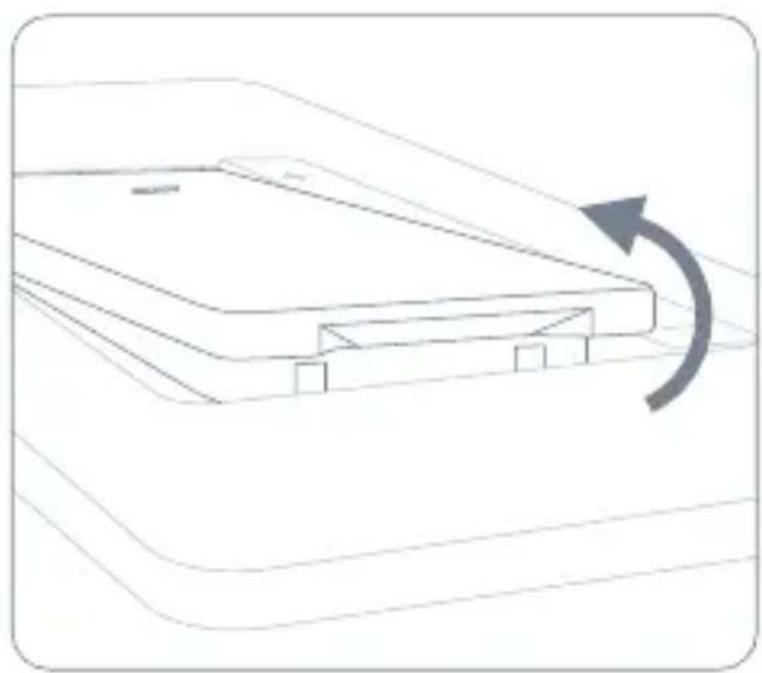
When replacing your light fixture or bulb, use the air-gap switch to ensure that no accidental contact with live wires occurs. For more extensive electrical work, turn off the power at the circuit breaker.

Get Started

Get Started
12
Add Eve Dimmer Switch to the platform of your choice and make sure to have a compatible Thread Border Router.

Learn more at evehome.com/hub

Get Started
View time and duration statistics
Set schedules
Configure Eve Dimmer Switch and adjust it to the characteristics of your load



Access Eve Dimmer Switch using the Eve App, or the apps or voice assistants of your preferred platforms. Feature sets may vary, depending on your platform.
More information at evehome.com/eve-dimmer-switch

Enjoy

100% Privacy

Eve is designed to safeguard your privacy. Eve does not harvest your personal data by forcing you to set up an account or registering your devices. No Eve cloud or any proprietary technology can ever breach your most personal data.
Learn more at evehome.com/privacy
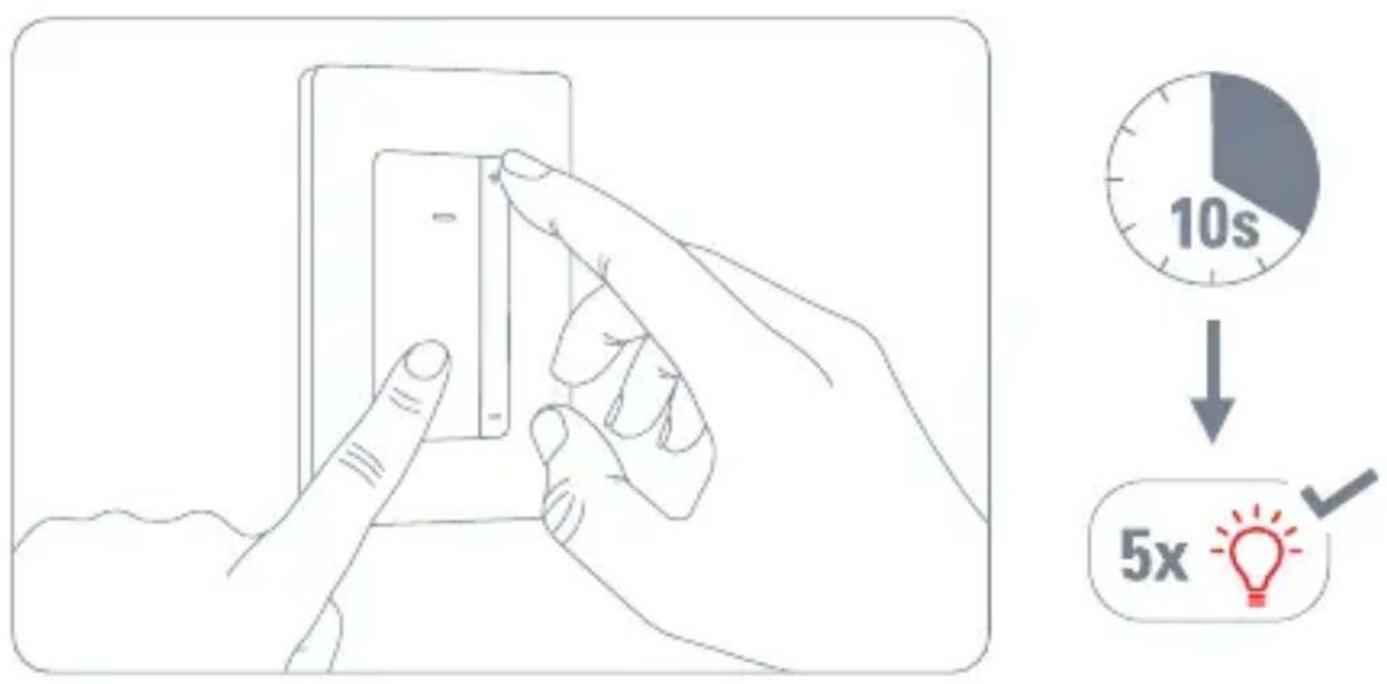
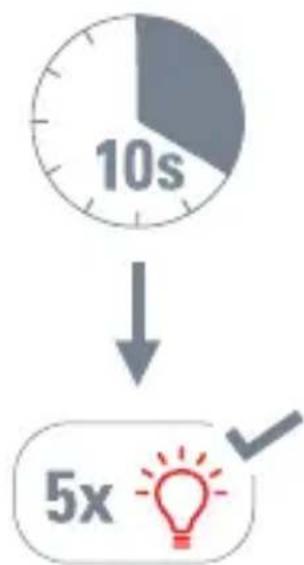
Reset

Prise en main


Prise en main

Prise en main
6

Prise en main
9

Prise en main
11

Prise en main
12

Legal Information
This device complies with part 15 of the FCC Rules and Industry Canada licence-exempt RSS standard(s). Operation is subject to the following two conditions: (1) This device may not cause interference, and (2) this device must accept any interference received, including interference that may cause undesired operation.
This equipment has been tested and found to comply with the limits for a Class B digital device, pursuant to part 15 of the FCC Rules. These limits are designed to provide reasonable protection against harmful interference in a residential installation. This equipment generates, uses and can radiate radio frequency energy and, if not installed and used in accordance with the instructions, may cause harmful interference to radio communications. However, there is no guarantee that interference will not occur in a particular installation. If this equipment does cause harmful interference to radio or television reception, which can be determined by turning the equipment off and on, you are encouraged to try to correct the interference by one or more of the following measures: reorient or relocate the receiving antenna; increase the separation between the equipment and receiver; connect the equipment into an outlet on a circuit different from that to which the receiver is connected; consult the dealer or an experienced radio/TV technician for help.
This Class B digital apparatus complies with Canadian ICES-003.
This equipment complies with FCC RF, IC RSS-102 and CE radiation exposure limits set forth for an uncontrolled environment. This equipment should be installed and operated with a minimum distance of 20 centimeters between the radiator and your body. This transmitter must not be co-located or operating in conjunction with any other antenna or transmitter.
Legal Information
Changes or modifications not expressly approved by Eve Systems could void your authority to operate this device.
For questions about Eve product compliance with FCC regulations, please contact: Compliance Officer, Eve Systems, 100 Pine St., Suite 1250, San Francisco CA 94111, USA • www.evehome.com
Purpose of control: operating control; construction of control: independently wall mounted control; type 1 action; operating time: continuous; control pollution degree: 2; frequency range: 2402 - 2480 MHz (BLE) / 2405 - 2480 MHz (Thread); max. EIRP: 10 dBm; temperature range: 32 °F - 104 °F; rated impulse withstand voltage: 2.5 kV
Product: 10ECQ4151 • Model: 20ECQ4101 • Part: 51ECQ4151 • FCC ID: SNE-EDS-001 • IC: 11192A-EDS001
Facebook facebook.com/meeteve

X @meeteve

Eve Newsletter evehome.com/newsletter

YouTube @MeetEve

Instagram @meet_eve

Eve Blog blog.evehome.com
Visit our knowledge base or contact our support team
Please keep your Matter Setup Code in a safe place. You need it to securely add Eve to your home, and nobody but you has a copy.


Brand : EVE
Model : Dimmer Switch
Category : Electrical switch