
Iridea D2DFA05IRCH - Deep fryer Tognana - Free user manual and instructions
Find the device manual for free Iridea D2DFA05IRCH Tognana in PDF.



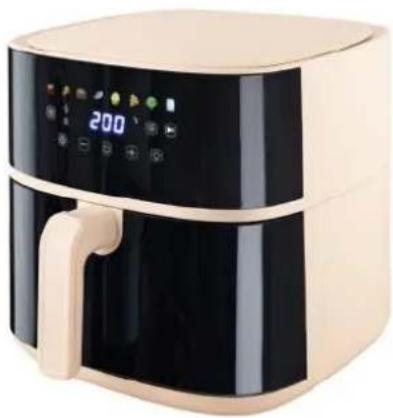
| Product type | Oil-free fryer (Airfryer) |
| Brand | Tognana |
| Model | Iridea D2DFA05IRCH |
| Capacity | 8 L |
| Power | 2000 W |
| Supply voltage | 220-240 V~ 50-60 Hz |
| Dimensions (W x D x H) | 32.5 x 41 x 32 cm |
| Net weight | 6600 g |
| Basket material | Steel with non-stick coating |
| Number of preset programs | 9 (Fries, Chicken thighs, Steaks, Fish, Cakes, Pizza, Vegetables, Custom, Defrost) |
| Temperature range | 80 to 200 °C |
| Time range | 1 to 60 minutes |
| Preheat function | Yes (approx. 3 minutes) |
| Shake indicator (SHAKE) | Yes, for certain programs |
| Display | Digital touch control panel |
| Internal light | Yes, with dedicated button |
| Automatic shut-off | Yes, at end of cycle and when door is opened |
| Safety | Overheat protection, grounding required |
| Cleaning of basket and grid | Dishwasher safe (max 55 °C) or hand wash with non-abrasive sponge |
| Cleaning of exterior | Soft slightly damp cloth |
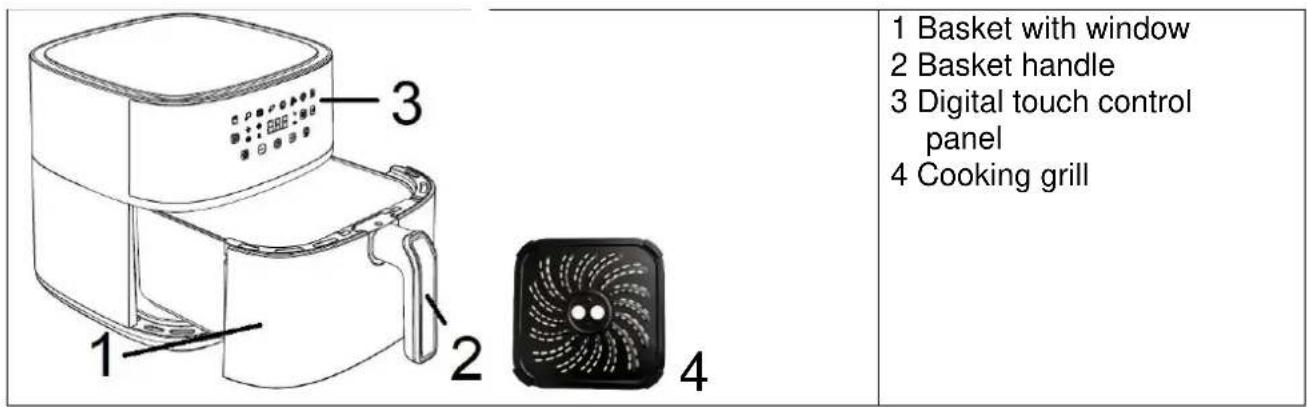
| Included accessories | Basket with window, basket handle, cooking grid, user manual |
| Warranty | 2 years |
| Usage | Household only |
Frequently Asked Questions - Iridea D2DFA05IRCH Tognana
User questions about Iridea D2DFA05IRCH Tognana
0 question about this device. Answer the ones you know or ask your own.
Ask a new question about this device
Download the instructions for your Deep fryer in PDF format for free! Find your manual Iridea D2DFA05IRCH - Tognana and take your electronic device back in hand. On this page are published all the documents necessary for the use of your device. Iridea D2DFA05IRCH by Tognana.
USER MANUAL Iridea D2DFA05IRCH Tognana
Cod. D2DFA05IRZU
Cod. D2DFA05IRCH
| B | |
| Bosanski | |
| D | |
| Deutsch | 67 |
| E | |
| English | 20 |
| Español | 51 |
| F | |
| Français | 35 |
| H | |
| Hrvatski | 84 |
| I | |
| Italiano | 4 |
| S | |
| Srpski | 129 |
| Slovenščina | 99 |
Dear Customer,
Ingredients
- Potatoes
500 g
• Oil
2 teaspoons
- Salt
to taste
- Pepper
to taste
Ingredients
Ingredients
Ingredients
Ingredients
Thank you for choosing our air fryer for cooking and heating food for home consumption. Tognana Porcellane S.p.A. declines any liability for any damage that may arise, directly or indirectly, to persons, things, and pets as a result of failure to comply with all the requirements indicated in the appropriate “Manual of Use” regarding the installation, use, and maintenance of the appliance.
SYMBOLS IN THE MANUAL/PRODUCT AND THEIR MEANING
 | This symbol indicates that you need to read this manual carefully before use. Pay particular attention to safety guidance. Keep this manual as an integral part of the product. |
 | DANGER: the word indicates a potential imminent danger with a high level of risk that, if not avoided, has a high probability of causing serious injury or death. |
 | WARNING: the word indicates a potential hazard with an average level of risk that, if not avoided, has a high probability of causing serious injury or death. |
 | ATTENTION: the word indicates a potential hazard with a low level of risk that, if not avoided, could lead to minor or moderate injuries. |
 | this symbol indicates that the protection of the appliance is not based solely on the main insulation, but requires an additional safety measure. |
 | ATTENTION – HOT SURFACE!: The symbol indicates that the surface temperature of the area of application can reach become dangerously high and for this reason direct contact with the skin and heat sensitive fabrics/materials should be avoided. |
 | IMPORTANT NOTICE: the words indicate useful information for the correct use of the product. |
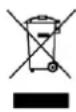 | This symbol on the product or packaging indicates that the appliance at the end of its useful life must be collected separately from other waste for proper treatment and recycling. |
 | This symbol indicates that the appliance complies with the safety requirements laid down in EU regulations/directives. |
 | This symbol indicates that the materials and objects in contact with food (MOCA) are suitable for food contact. |

IMPORTANT NOTES ON CORRECT USE
- This appliance is intended exclusively for cooking and heating food for domestic consumption.
- This appliance is intended for domestic use and similar applications, such as:
Kitchen areas of shop staff, offices, and other working environments;
Agrotourism; customers of hotels, guesthouses, and other residential environments; rooms like bed and breakfast.
- This product is not a toy.
- Do not leave parts of the packaging (plastic bags, polystyrene foam, etc.) within reach of children or dependent persons, as these objects are potential sources of danger (e.g., risk of suffocation).
- Use the product for the sole purpose for which it was designed. The manufacturer is not liable for damage or injury caused by improper use.
- Unauthorized repairs or modifications will invalidate the warranty.
- Do not use outdoors.
- Never leave the turned-on appliance unattended.
- Do not place on or near a gas or electric stove, or in a hot oven.
- Before use, place the appliance on a solid, flat, horizontal and non-flammable surface.
- To turn off the appliance manually, press the shutdown button.
- Never put the appliance in the dishwasher.
- Do not soak the appliance in water or rinse it under the tap, as it contains electronic components and heating elements.
- Use only original or manufacturer-recommended spare parts and accessories.

DANGER
PRODUCT
- Before connecting the appliance to the power supply, check that the voltage indicated on the appliance corresponds to the voltage available in your home.
Connect the appliance to a power outlet equipped with efficient grounding. The manufacturer cannot be held responsible for any accidents caused by the lack of grounding of the system.
- The appliance may be used by children of at least 8 years of age and by persons with reduced physical, sensory or mental abilities, or without experience or knowledge, provided that they are supervised or have received instructions on the safe use of the appliance and the understanding of the hazards inherent thereto. Children should not play with the appliance. Cleaning and maintenance intended to be carried out by the user shall not be carried out by children without supervision.
- Supervise the children so that they do not play with the appliance.
- Do not insert metal objects into the slots of the appliance.
- Do not cover the air inlet and outlet when the appliance is in operation or when it is connected to the power outlet.
- Do not place the product against the wall or other objects: the back of the product, the middle side and the upper side of the product must have a free space of at least 10 cm. Do not place objects on top of the product.
- Do not add oil to the air fryer as this may cause a fire hazard.
- To avoid short circuits, do not put bulky food that can touch the resistors in the oven. In addition, do not put food wrapped in aluminium or metal tools in the oven.
- Disconnect the appliance from the socket when moving and not in use.
- Let the appliance cool about 30 minutes before cleaning.
- Remove any burnt food residues.
- Incorrect use of the product can cause damage or injury.
- In order to avoid electric shocks, do not immerse the body of the product in water or other liquids.
- This product does not contain repairable parts. Don't try to fix it yourself. Have maintenance performed by a qualified service centre using only identical spare parts. This will ensure that the safety of the product is maintained.
- Do not use the appliance at high temperatures, in very humid or wet environments or in the vicinity of flammable material (curtains, tablecloths, etc.).
- Do not use if the appliance has fallen or has been damaged in any way. Do not attempt repairs yourself. Contact your dealer for
repair/replacement, if under warranty, or customer support.
- If the product emits black smoke, disconnect the power supply immediately. Wait until the product has stopped emitting smoke before you remove the basket from the fryer.

DANGER OF SCALDING!
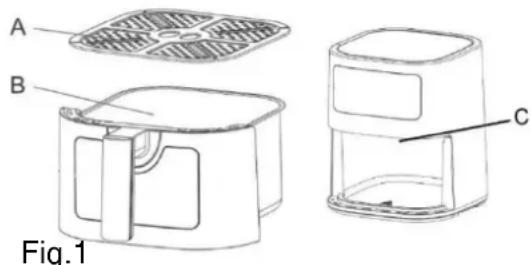
- Do not touch the hot parts of the appliance to avoid burns (See A, B, C on Fig. 1). Use handles, tongs or suitable protective equipment to remove food from the basket.
- This appliance can release heat, steam or condensation during and after operation. Hands and face should be kept safe from steam and air intakes. Also pay attention to hot steam and heat when removing accessories to prevent the risk of burns, scalds or other injuries, as well as property damage.
- When the appliance is in operation and for a few minutes after the end of operation, the temperature of the outside surface and air outlet can be very high. Do not touch or move the appliance to avoid danger of burns.
- For the air fryer you can use baking paper or aluminum/tin film of suitable size. Do not use too large sheets to prevent them from touching the heating elements during operation.
CABLE AND PLUG
- The power cord must be connected to an AC electrical outlet (standard household current). Do not use other electrical outlets.
- In case of incompatibility between the socket and the plug of the appliance, have the socket replaced by another suitable type by qualified personnel. The use of adapters, multiple sockets, and/or extensions is not recommended. Should their use be necessary, use only simple or multiple adapters and extensions complying with the current safety standards, taking care not to exceed the power limit marked on the adapter and/or extension.
- Do not use the power cord if damaged.
- Use only the power cord supplied in the package.
- In order to avoid electric shock, do not immerse the power cord in water or other liquids.
- The power cord should be used in a dry and clean place. Use in wet or dirty environments may lead to risks of fire, electric shock or electrocution.
- Do not touch the cable or power plug with wet hands.
- Do not let the cable dangle or fall down from a countertop.
- Be careful not to pull or trip over the power cord. Keep the cable away from sources of heat, hot objects or open flames.
- Disconnect the cable from the power outlet before cleaning and when the appliance is not in use. To disconnect, turn off the appliance, then remove the plug from the wall outlet. Don't pull the cable but grab the plug.
- Always connect the plug to the appliance first, then connect the cable to the wall outlet. Make sure the cable is fully extended.
- The cable should not be twisted or wrapped around the appliance.
- Do not use the appliance if the power cord is damaged. Do not attempt repairs yourself. Contact your dealer for repair/replacement, if under warranty, or customer support.
- Do not use extension cables or timer devices.
CONFORMITY OF THE PRODUCT
The manufacturer Tognana Porcellane S.p.A. declares that the product Air fryer 8L Mod. Iridea complies with Directive 2014/30/EU of the European Parliament and of the Council of 26 February 2014 on the harmonisation of the laws of the Member States relating to electromagnetic compatibility.
The manufacturer Tognana Porcellane S.p.A. declares that the product Air fryer 8L Mod. Iridea complies with Directive 2014/35/EU of the European Parliament and of the Council of 26 February 2014 on the harmonisation of the laws of the Member States relating to the making available on the market of electrical equipment intended for use within certain voltage limits.
The manufacturer Tognana Porcellane S.p.A. declares that the product Air fryer 8L Mod. Iridea complies with Directive 2009/125/EU of the European Parliament and of the Council of 21 October 2009 on the establishment of a framework for the development of specifications for the ecodesign of energy-related products
The manufacturer Tognana Porcellane S.p.A. declares that the product Air fryer 8L Mod. Iridea complies with Directive 2011/65/EU of the European Parliament and of the Council of 8 June 2011 and subsequent Commission Delegated Directive 2015/863 on restriction the use of certain hazardous substances in electrical and electronic equipment.
TECHNICAL DATA
• Power: 2000 W - Capacity: 8L - Input voltage: 220-240 Vac \~ 50–60 Hz • Dimensions: 32.5 x 41 x 32 cm • Net weight: 6600 g
COMPONENTS
BEFORE FIRST USE
- Remove the different components from the packaging, check that they are complete and intact, carefully remove any protections and labels. The package contains:
- No. 1 Air fryer • No. 1 Basket handle • No. 1 Cooking grill • No. 1 User Manual
- Make sure that all parts are assembled correctly and in place before use.
- If you are using the fryer for the first time, it is recommended that you wash all removable parts that will come into contact with food following the instructions in the section "CLEANING AND MAINTENANCE".
- Operate the empty appliance at 200 °C without food for 10 - 15 minutes. The appliance may emit smoke and odours due to the residues of the manufacturing process. This is normal and does not indicate any defect or danger.
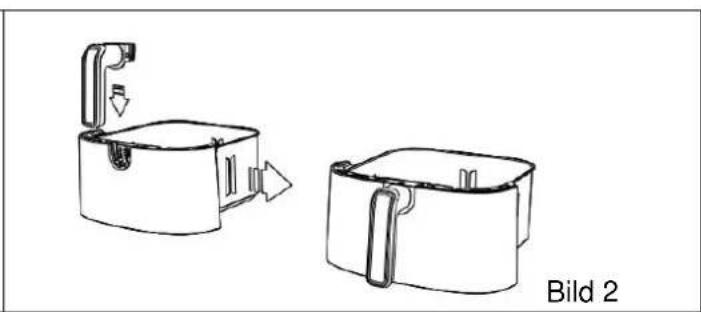
Assemble the basket handle
The handle may not be assembled to the basket. To attach the basket handle, follow these steps:
- Remove the basket from the appliance, removing any labels (Fig. 1).
- Insert the handle as shown in Fig. 2 and slide downwards until it is securely attached.
- The basket handle should lock into place and should not detach once locked. Shake the handle to verify that it is securely locked.

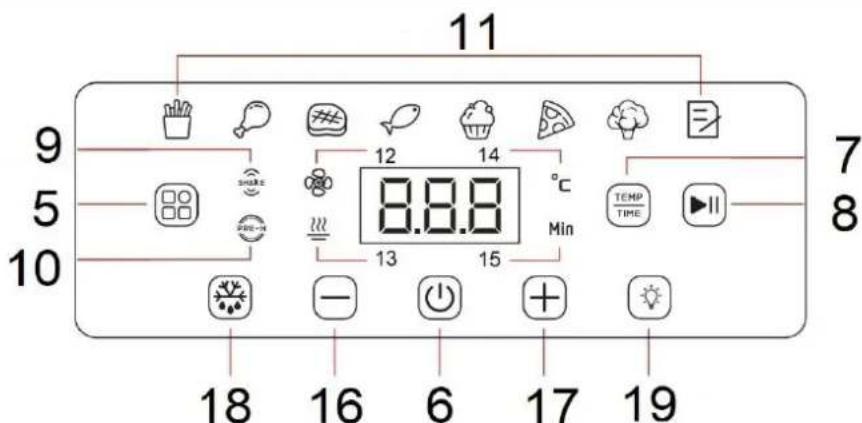
DISPLAY BUTTONS DESCRIPTION
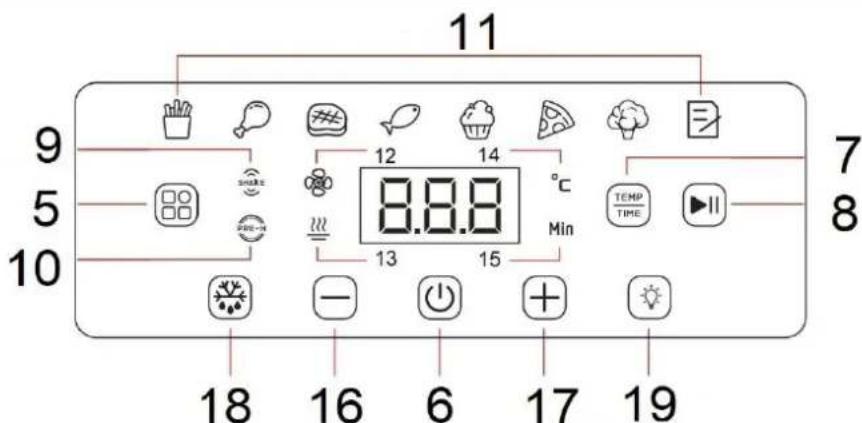
- Pre-set menu selection button
- On/Off button
- Temperature/time selection button
- Start/pause button
- Shake function indicator "SHAKE"
- Preheating function indicator "PRE-H"
- Pre-set menus
- Fan indicator
- Heating element indicator
- Set temperature indicator (°C)
- Set time indicator (min)
- Temperature/time adjustment button (-)
- Temperature/time adjustment button (+)
- Defrost button
- Internal light on/off button
5 Pre-set menu selection button

Select the desired menu by pressing this button; the indicator for the selected program will flash, and the display will show the default time and temperature. These values can be changed by pressing the temperature and time adjust buttons (16-17). Confirm the program by pressing the start button.
6 On/off button

Once the appliance is plugged into the power outlet, the indicator light for the power on/off button will illuminate. Press the button, and the entire control panel will light up.

7 Temperature/time selection button
This button allows you to adjust the cooking temperature or time.
Press the button once, the display will indicate the preset temperature.
Press the -/+ buttons (16,17) to adjust the desired temperature in 5°C intervals.
Press the button again, the display will show the preset time.
Press the -/+ buttons (16,17) to adjust the desired cooking time per minute, from 1 to 60 minutes in all modes.
You can change the default time and temperature of the menu by pressing and holding the temperature/time adjustment button for about 5 seconds until you hear three beeps. The new settings will replace the original ones and will be saved accordingly.
8 Start/Pause button
Confirm the setting by pressing this button, and the appliance will start operating. Press this button again to pause the function during the cooking cycle.
18 Defrost button
Confirm the setting by pressing this button, and the appliance will start operating. To pause the function during the defrost cycle, press the Start/Pause button.
You can adjust the time by pressing the -/+ buttons (16,17), while the temperature is fixed.
19 Internal light
Pressing this button allows you to monitor the cooking progress while the appliance is in operation. Opening the door during the cooking process will pause the appliance. The internal light activates when the door is opened.
INSTRUCTIONS FOR USE
- Place the appliance on a flat, stable, heat-resistant, and dry surface.
- Insert the power plug into a grounded wall outlet; an audible signal will be emitted, indicating that the air fryer-oven is in standby mode, and the display will show the power on/off button indicator (6).
- Take out the basket and insert the grill properly.
- Place food in the basket.
- Insert the basket properly into its compartment.
- Press the on/off button (6) ⏻, and the preset temperature and time will be displayed on the screen.
- At this point, you can manually adjust the time and temperature using the time and temperature adjustment buttons -/+ (16,17) or select one of the menu functions by pressing the pre-set menu selection button (5).
- Press the start button (8) to start cooking.
- Some cooking programs start with a preheating phase of about 3 minutes. During the preheating
phase, the indicator light (10), the fan indicator (12) and the heating element indicator (13) will light up. At the end of the preheating cycle, the appliance will emit 3 beeps to indicate the start of the cooking cycle.
- Shaking indicator (9) SHAKE: The shake indicator is signaled by an audible sound during the cooking cycle of certain programs (refer to the "pre-set menu" table). This function allows you to shake the food inside, ensuring more even cooking. Note: If you do not open the door and shake the food, the SHAKE light on the control panel will continue to flash. Once the door is opened, the shake indicator (SHAKE) will stop flashing.
- At the end of the cooking cycle, an audible signal will be emitted, and "END" will be displayed on the screen.
PRESET MENU TABLE
| Menu | Suggested weight (g) | Set time (min) | Set temperature (°C) | Adjustable temperature | Shake function active | Pre-heating | ||
| 1. |  | French Fries | 500 | 15 | 200 | 80-200 | YES | YES |
| 2. |  | Chicken thighs | 700 | 15 | 200 | 80-200 | YES | YES |
| 3. |  | Steaks | 300 | 8 | 180 | 80-200 | YES | YES |
| 4. |  | Fish | 500 | 18 | 190 | 80-200 | YES | YES |
| 5. |  | Cakes | 500 | 35 | 150 | 80-200 | N/A | N/A |
| 6. |  | PIZZA | 200 | 8 | 160 | 80-200 | N/A | YES |
| 7. |  | Vegetables | 300 | 10 | 120 | 80-120 | YES | YES |
| 8. |  | Custom | 15 | 180 | 80-200 | YES | YES | |
| 9. |  | Defrost | 15 | 60 | N/A | N/A | N/A | |
The table "Preset menu" is suggestive, the cooking time and temperature depend on the type of food and its consistency. Therefore, the pre-set values are to be understood only as a reference.
NOTES:
- We advise you never to use the basket without the grill in it.
- Avoid overturning the basket with the tray still inserted, as any excess oil accumulated at the bottom of the basket may drip onto the ingredients.
- The temperature adjustment range is between 80 and 200°C.
- The time adjustment range is between 1 and 60 minutes.
- The appliance automatically shuts off when the door is opened. Once the door is closed, the appliance restarts and continues the cooking process.
- During use, steam may escape from the appliance. This is normal and does not indicate any defect or danger.
- At the end of cooking, the motor may continue to run for about 1 minute, then the appliance will start to cool down and enter standby mode.
- The cooking time in the air fryer is different from that of a traditional oven.
- Smaller foods and smaller quantities of food require only slightly shorter preparation times than larger ones.
- For optimal results, it is recommended to use pre-cooked French fries (the ideal quantity is 500g). If you want to prepare homemade French fries, follow the steps outlined in the recipe book.
- Do not prepare very fatty food in the appliance. • To bake a cake/quiche or fry delicate or filled foods, place a baking tray or dish in the basket.
- If the food is not yet ready, simply reinsert the basket into the appliance and cook for a few more minutes.
USEFUL SUGGESTIONS:
- During use, you can adjust the cooking time and temperature at any time.
- It may be necessary to check and shake some foods during the cooking cycle. Shaking small-sized foods optimizes the final result and prevents uneven cooking. Remove the basket from the main unit and shake it lightly. Reinsert the basket into the main unit to continue the cooking process.

ATTENTION: The basket can be very hot. We recommend that you always hold the basket by its handle.
COOKING TIPS
| Food | Quantity (gr) min-max | Cooking time (min) | Temperature (°C) | Shake | Notes |
| Potatoes and fries | |||||
| Thin frozen fries | 300-700 | 9-16 | 200 | yes | |
| Thick frozen fries | 300-700 | 11-20 | 200 | yes | |
| Homemade French fries (8x8 mm) | 300-800 | 10-16 | 200 | yes | Add 1/2 tablespoon of oil |
| Homemade potato wedges | 300-800 | 18-22 | 180 | yes | Add 1/2 tablespoon of oil |
| Homemade potato cubes | 300-750 | 15-18 | 180 | yes | Add 1/2 tablespoon of oil |
| Potato gratin | 500 | 15-18 | 200 | yes | |
| Meat and poultry | |||||
| Steak | 100-500 | 8-12 | 180 | yes | |
| Pork ribs | 100-500 | 10-14 | 180 | yes | |
| Hamburger | 100-500 | 7-14 | 180 | yes | |
| Sausage | 100-500 | 13-15 | 200 | yes | |
| Chicken nuggets | 100-500 | 18-22 | 180 | yes | |
| Chicken breast | 100-500 | 10-15 | 180 | yes | |
| Bacon | 100-500 | 10-12 | 180 | yes | |
| Snacks | |||||
| Spring rolls | 100-400 | 8-10 | 200 | - | |
| Frozen chicken nuggets | 100-500 | 6-10 | 200 | yes | |
| Frozen fish sticks | 100-400 | 6-10 | 200 | - | |
| Frozen cheese snacks | 100-400 | 8-10 | 180 | - | |
| Stuffed vegetables | 100-400 | 1-10 | 160 | - | |
| Cakes | |||||
| Cakes | 300 | 20-25 | 160 | - | Use a baking trey |
| Quiche | 400 | 20-22 | 180 | - | Use a baking trey |
| Muffins | 300 | 15-18 | 200 | - | Use a baking trey |
| Sweet snacks | 400 | 1-20 | 160 | - | Use a baking trey |
Notes:
- Cooking time and temperature depend on the type of food and its consistency. Therefore, the values indicated are only to be considered as reference.
- Add a maximum of 1/2 tablespoon of oil. Exceeding quantities may compromise the integrity of the appliance.
CLEANING AND MAINTENANCE
Before proceeding with the cleaning, always disconnect the plate from the power outlet and let it cool completely.
Remove the cooking basket to expedite cooling of the appliance.
The appliance should be cleaned immediately after each use.
1. CLEANING
Cleaning the outside of the air fryer oven
Clean the outside of the oven with a soft cloth or a slightly moistened sponge and dry with a cloth.

DANGER! DO NOT PUT IN THE DISHWASHER OR SOAK IN AIDS.
Clean the basket and the cooking grill
Clean the basket and cooking grill by using warm water, mild dish detergent, and a non-abrasive sponge. Otherwise, the non-stick coating will be damaged.
The grill and basket are dishwasher safe at temperatures not exceeding 55°C.
IMPORTANT NOTE: Do not use chemical detergents, steel wool or abrasive cleaners for cleaning.
Cleaning the heating element
Clean with a brush to remove any food residues.
2. STORING
Allow the appliance to cool completely before storing it or wrapping the supply cable around it.
Check that there are no food residues inside the appliance.
Make sure all parts are clean and dry before storing them.
Never store the appliance when it is still wet.
It is recommended to store the appliance in a dry place, clean and away from moisture and dust.
TROUBLESHOOTING
| Problem | Possible cause | Solution |
| The appliance is not working | The plug has not been inserted correctly | Connect the plug into the power outlet |
| The cooking basket has not been inserted | Insert the cooking basket properly | |
| The cooking time and temperature were not selected | Set the time and the desired cooking temperature | |
| Protection against overheating has been activated | Turn off the appliance and wait for it to cool completely before turning it back on | |
| The food is not well cooked | The amount of food is excessive | Reduce the amount of food |
| The temperature set is too low | Set a higher temperature | |
| The cooking time set is too short | Set a longer cooking time | |
| The food is not cooked evenly | The food should be shaken halfway through the cooking process | Shake the food and check if it is done |
| The snacks are not crispy | Ensure that snacks suitable for air frying have been used | Use oven-ready snacks or brush some oil on the snacks |
| The cooking basket does | Too much food in the basket | Do not overfill the basket |
| not fit correctly in the main unit | ||
| From the appliance white smoke comes out and the outside of the appliance is warmer than usual | Greasy foods are being cooked. | Normal phenomenon that does not affect the appliance or the result of cooking |
| The cooking basket contains grease from previous cooking | Clean the container after each use | |
| Fresh fries are unevenly cooked or are not crispy | The potato sticks were not rinsed and dried properly before cooking | Rinse the potato sticks well to remove starch and dry thoroughly |
| The potato sticks are too large | Cut the sticks into smaller pieces | |
| Insufficient oil | Add a bit more oil | |
| The problem is not solved | Contact an authorized service center |
COOKBOOK
1. French fries with fresh potatoes
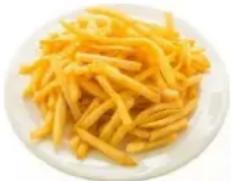
Ingredients:
- Potatoes
500 g
- Oil
2 teaspoons
- Salt
to taste
- Pepper
to taste
a. Peel the potatoes and cut them into sticks.
b. Soak the potato sticks in salted water for at least 20 minutes and boil for 2 minutes, then dry the sticks with kitchen paper.
c. Pour 1/2 tablespoon olive oil into a bowl, pour in the sticks and stir until they are coated with oil.
d. Remove the sticks from the bowl with your fingers or a kitchen utensil so that excess oil remains in the bowl.
e. Arrange the potato sticks evenly on the grill inside the basket, insert the basket into the appliance, and set the 'French fries' program, or adjust the time and temperature according to the size and quantity of the fries, or until they become golden brown.
f. At the end of cooking, place the potatoes in a bowl, add salt and pepper to taste, and serve.
TIP: for better results, shake the basket with the fries halfway through cooking.
2. Fried chicken wings
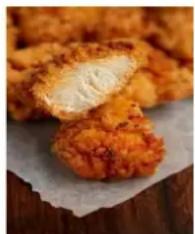
Ingredients:
- Chicken wings
350 g
- Garlic
2 cloves
- Oil
2 teaspoons
- Salt
1 teaspoon
- Pepper
1 teaspoon
a. Mix the wings with oil, garlic, salt, and pepper, and let marinate for 20 minutes. b. Arrange the chicken wings evenly in the cooking basket on the grill inside the basket, insert the basket into the appliance, and set the 'Chicken Thighs' program
or set the time and temperature according to the size and quantity of the wings or until the wings become golden brown.
c. At the end of cooking, place the wings in a bowl and serve.
TIP: for best results, shake the basket with the wings halfway through cooking.
3. Beef steak
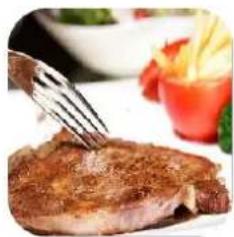
Ingredients:
- Beef steak
- Garlic powder • Oil
- Salt
- Pepper
- Soy sauce
350 g
1 teaspoon 2 teaspoons 1/2 teaspoon 1 teaspoon to taste
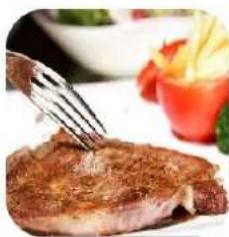
a. Mix the steak with oil, garlic, soy sauce, salt, and pepper, and let marinate for 20 minutes. b. Place the steak on the grill inside the basket, insert the basket into the appliance, and set the "Steaks" program or adjust the time and temperature according to the size and quantity of the steaks until they become golden brown. c. Halfway through cooking, turn the steak, reduce the temperature to 150°C, and cook for another
4 minutes or until golden brown.
TIP: for best results, flip the steak halfway through cooking.
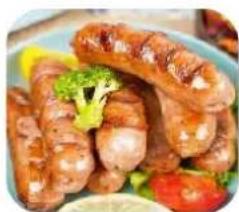
4. Grilled sausage
Ingredients:
- Fresh sausage
- Oil
250 g
1 teaspoon
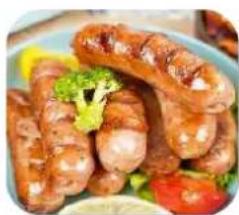
a. Mix the sausages with the oil. b. Arrange the sausages evenly on the grill inside the basket, insert the basket into the appliance, and set the program to "Sausages" or adjust the time and temperature according to the size and quantity of sausages until they become golden brown. c. At the end of cooking, place the sausages in a bowl and serve.
TIP: for best results, shake the basket with the sausages halfway through cooking.
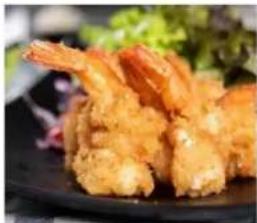
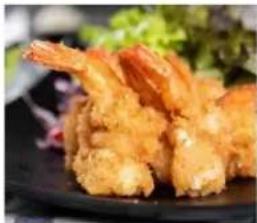
5. Fried shrimps
Ingredients:
- Fresh shrimps
300 g
- Oil
1 teaspoon
- Semolina flour
as needed
- Salt
as needed
g. Clean the shrimps, wash them and dry them very well with paper towels.
a. Take a bowl and put the shrimps into the bowl.
b. Season with a little oil and coat with semolina flour.
c. Sprinkle some oil over the shrimps.
d. Arrange the shrimp evenly on the grill inside the basket, place the basket in the appliance, and set the "Fish" program or adjust the time and temperature according to the size and quantity of the shrimp, or until they become golden brown.
e. At the end of cooking, place the shrimps in a bowl, add salt, and serve.
TIP: for best results, shake the shrimps halfway through the cooking process.
INFORMATION ON THE DISPOSAL OF THE PRODUCT
PRODUCT
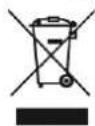
Pursuant to art. 26 of Legislative Decree No. 49 of 14 March 2014 “Implementation of Directive 2012/19/EU on waste electrical and electronic equipment (WEEE)”, the presence of the wheeled bin symbol indicates that this product is not to be considered urban waste: Non-separate disposal can be a potential harm to the environment and health. This product may be returned to the distributor upon purchase of a new
appliance.
Improper disposal of the product constitutes fraudulent conduct and is subject to sanctions by the Public Safety Authority. For more information, please contact the local environmental authority.
PACKAGING
For information on how to properly dispose of the packaging that protects this product and its parts and/or accessories, follow the instructions in the packaging.
WARRANTY CONDITIONS
The Company Tognana Porcellane S.p.A. thanks you for your choice and guarantees that its products are the result of the latest technologies and research.
The appliance is covered by the conventional warranty for a period of TWO YEARS from the date of first purchase by the user. This guarantee is without prejudice to the validity of the legislation in force concerning consumer goods (Legislative Decree No. 206 of 6 September 2005).
In order to file a complaint under the Warranty, the consumer must present the receipt or invoice certifying the purchase of the product.
If the consumer wishes to file a complaint under the Warranty, he or she must contact the retailer or contact Tognana Porcellane S.p.A. directly at the e-mail address: support@tognana.com, or phone number +39 0422 - 6721.
Components or parts that are defective due to proven manufacturing causes will be repaired or replaced free of charge at our authorised service network, during the above warranty period.
Repair costs, including spare parts costs, and shipping costs for the delivery of a defective product or component will be borne by Tognana Porcellane S.p.A.
Tognana Porcellane S.p.A. must also bear the shipping costs for the return of the product or the defective component,
if Tognana Porcellane S.p.A. or the service centre requires the return of the defective product or component. However, the consumer will have to bear the costs of suitable packaging for the return of the defective product or component.
Tognana Porcellane S.p.A. reserves the right to make the complete replacement of the appliance, if repairability is impossible or too costly, with another product the same (or similar) during the course of the warranty period.
In this case, the start of the guarantee remains that of the first purchase:
the performance carried out under the warranty does not extend the warranty period itself.
This appliance will never be considered defective for materials or manufacture should it be
This equipment will never be considered defective for materials or manufacture if it is adapted, changed or regulated, to comply with national or local safety standards and/or techniques, in force in a country other than the one for which it was originally designed and manufactured.
This appliance has been designed and built exclusively for domestic use: any other use makes the warranty void.
The guarantee does not cover:
- parts subject to wear, nor those parts that require periodic replacement and/or maintenance; • professional use of the product;
- malfunctions or any defects due to incorrect installation, configuration, software update/BIOS/firmware not performed by authorized personnel of Tognana Porcellane S.p.A; • repairs or interventions carried out by persons not authorized by Tognana Porcellane S.p.A;
- manipulation of assembly components or, where applicable, software.
Further claims, in particular claims for compensation, are excluded, unless liability is mandatory by law.
At the end of the period of validity of the Warranty, or for products that are not covered by the Warranty, Tognana Porcellane S.p.A. remains at the end customer's disposal for any questions or information. Further information is also available on our website: www.tognana.com
Tognana reserves the right to make any necessary changes for aesthetic and qualitative improvement of the product, at any time and without notice.
Dear customer,
PRODUCT CONFORMITY
Fig. 1
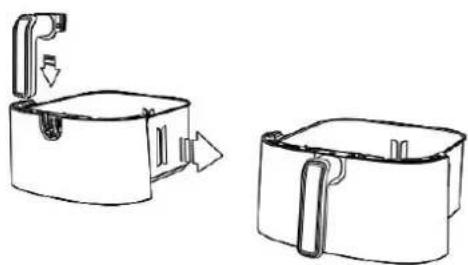
Fig. 2
DESCRIPTION OF SCREEN BUTTONS
Ingredients:
Ingredients:
Ingredients:
Ingredients:
Ingredients:
WARRANTY CONDITIONS
PRODUCT CONFORMITY
Fig. 1
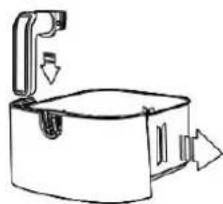
Fig. 2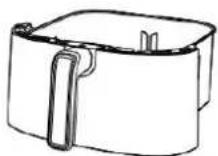
Ingredients:
Ingredients:
Ingredients:
Ingredients:
- Fresh sausage
- Oil
250 g
1 teaspoon
Ingredients:
Fresh shrimp - Oil - Semolina flour • Salt
300 g
1 teaspoon
as needed
as needed
PRODUCT CONFORMITY
- Potatoes
500 g
• Oil
2 teaspoons
- Salt
to taste
- Pepper
to taste
Ingredients:
- Chicken wings
350 g
- Garlic
2 cloves
- Oil
2 teaspoons
- Salt
1 teaspoon
- Pepper
1 teaspoon
Ingredients:
Ingredients:
Ingredients:
- potatoes
500 g
- oil
2 tablespoons
- salt
to taste
- pepper
to taste
a. Peel the potatoes and cut them into sticks. b. Soak the potatoes in salted water for at least 20 minutes, then boil them for 2 minutes and dry them with a kitchen towel. c. Pour half a tablespoon of olive oil into a bowl, add the potatoes and mix until they are well coated with oil. d. Remove the potatoes from the bowl with your fingers or kitchen utensils so that the excess oil remains in the bowl. e. Place the potatoes in the basket, insert the basket into the appliance, select the "Fries" program or adjust the cooking time and temperature according to the size and thickness of the fries, or cook until they are golden brown. f. At the end of cooking, put the fries in a bowl, add salt and pepper, and serve.
TIP: for better results, shake the basket with the fries halfway through cooking.
2. Fried chicken wings

Ingredients:
- chicken wings
350 g
- garlic
2 cloves
- oil
2 tablespoons
- salt
1 tablespoon
- pepper
1 tablespoon
a. Mix the wings with oil, garlic, salt, and pepper, and let them marinate for 20 minutes. b. Place the wings on the grill rack, insert the rack into the appliance, select the "Chicken Drumsticks" program or adjust the cooking time and temperature according to the size and quantity of the wings, or cook until golden brown.
Ingredients:
| • biftek | 350 g |
| • češnjak u prahu | 1 žlica |
| • ulje | 2 žlice |
| • sol | 1/2 žlice |
| • papar | 1 žlica |
| • umak od soje | po ukusu |
a. Mix the steak with oil, garlic, soy sauce, salt, and pepper, and let it marinate for 20 minutes.
b. Place the steak in the basket, insert the basket into the appliance, select the "Steaks" program or adjust the cooking time and temperature according to the size and thickness of the steak, or cook until golden brown.
c. Halfway through cooking, turn the steak over, reduce the temperature to 150 °C, and cook for another 4 minutes until it turns golden brown.
TIP: For best results, turn the steak over halfway through cooking.
4. Grilled sausage
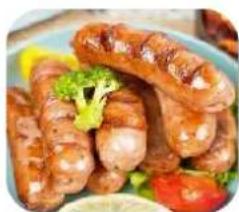
Ingredients:
Ingredients:
- fresh shrimp
300 g
- oil
1 tablespoon
- wheat flour
to taste
- salt
to taste
a. Clean the shrimp, wash them, and dry them well with kitchen towels.
Ingredients:
- Potatoes
500 g
- Oil
2 teaspoons
- Salt
to taste
- Pepper
to taste
a. Peel the potatoes and cut them into sticks. b. Soak the potatoes in salted water for at least 20 minutes, then boil them for 2 minutes and then dry them with kitchen paper. c. Pour half a tablespoon of olive oil into a bowl, add the potatoes and mix until everything is well coated with oil. d. Remove the potatoes with your fingers or a kitchen utensil, so that the excess oil remains in the bowl. e. Place the potatoes in the basket, insert the basket into the appliance, select the "French Fries" program or adjust the cooking time and temperature according to the size and thickness of the fries, or cook them until golden brown. f. At the end of cooking, put the fries in a bowl, salt and pepper them, and serve.
TIP: for better results, shake the basket of fries halfway through cooking.
Ingredients:
- Chicken
350 g
winglets
2 cloves
- Garlic
2 teaspoons
- Oil
1 teaspoon
- Salt
1 teaspoon
- Poper
a. Mix the peppers with oil, garlic, salt, and pepper, and let them marinate for 20 minutes.
Ingredients:
• Beef steak 350 g - Garlic powder 1 teaspoon • Oil 2 teaspoons • Salt 1/2 teaspoon • Pepper 1 teaspoon - Soy sauce to taste
a. Mix the beef steak with oil, garlic, salt, and pepper, and let it marinate for 20 minutes. b. Place the steak in the basket, insert the basket into the appliance, select the "Steaks" program or adjust the cooking time and temperature according to the size and thickness of the steak, or cook until golden brown. c. Halfway through cooking, turn the steak, lower the temperature to 150 °C, and cook for another 4 minutes until golden brown.
TIP: For best results, turn the steak halfway through cooking.
4. Grilled sausage
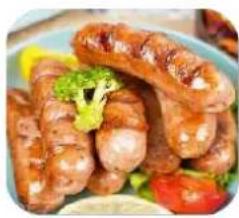
Ingredients:
• Fresh sausage 250 g - Oil 1 teaspoon
a. Mix the sausages with oil. b. Place the sausages on the grill in the basket, insert the basket into the appliance, and select the "Sausages" program or adjust the cooking time and temperature according to the size and thickness of the sausages, or cook until golden brown. c. After cooking, transfer the sausages to a bowl and serve.
TIP: For best results, shake the basket for the sausages halfway through cooking.
5. Fried shrimp
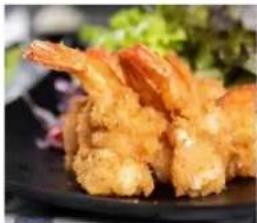
Ingredients:
1 Basket with window 2 Basket handle 3 Digital control screen 4 Grill
BEFORE FIRST USE
Ingredients
- potatoes
500 g
- oil
2 tablespoons
- salt
to taste
- pepper
to taste
a. Peel the potatoes and cut them into sticks. b. Soak the potatoes in salted water for at least 20 minutes, then boil them for 2 minutes and then dry them with paper towels. c. Pour half a tablespoon of olive oil into a bowl, add the potatoes and stir until everything is well coated with oil. d. Remove the potatoes from the bowl with your fingers or kitchen tongs so that excess oil remains in the bowl. e. Place the potatoes in the basket, insert the basket into the appliance, select the "Fries" program or adjust the cooking time and temperature according to the size and thickness of the fries, or cook until golden brown. f. At the end of cooking, put the fries in a bowl, add salt and pepper, and serve.
TIP: for better results, shake the basket with the fries halfway through cooking.
2. Fried chicken wings
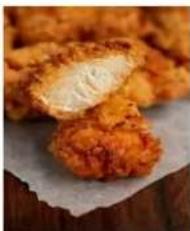
Ingredients
- chicken wings 350 g
- garlic 2 cloves • oil 2 tablespoons • salt 1 tablespoon • pepper 1 tablespoon
a. Mix the wings with oil, garlic, salt, and pepper, and let them marinate for 20 minutes. b. Place the wings on the rack, insert the rack into the appliance, select the "Chicken Drumsticks" program or adjust the cooking time and temperature according to the size and quantity of the wings, or cook until golden brown. c. At the end of cooking, place the wings in a bowl and serve.
TIP: For best results, shake the basket with the wings halfway through cooking.
3. Beef Steak
Ingredients
- beef steak 350 g
- garlic powder 1 tablespoon • oil 2 tablespoons • salt 1/2 tablespoon • pepper 1 tablespoon
- soy sauce to taste
a. Mix the beef steak with oil, garlic, soy sauce, salt, and pepper, and let it marinate for 20 minutes. b. Place the steak in the basket, insert the basket into the appliance, select the "Steaks" program or adjust the cooking time and temperature according to the size and thickness of the steak, or cook until golden brown. c. Halfway through cooking, turn the steak over, reduce the temperature to 150 °C and cook for another 4 minutes until it turns golden brown.
TIP: For best results, turn the steak over halfway through cooking.
4. Grilled Sausage
Ingredients
Ingredients
• fresh shrimp 300 g - oil 1 tablespoon • wheat flour to taste • salt to taste
a. Clean the shrimp, wash them, and dry them well with kitchen towels. b. Take a bowl and place the shrimp in the bowl. c. Season with a little oil and sprinkle with wheat flour. d. Spray a little oil on the shrimp. e. Place the shrimp on the rack in the basket, insert the basket into the appliance, select the "Fish" program or adjust the cooking time and temperature according to the size and thickness of the shrimp, or cook until golden brown. f. At the end of cooking, place the shrimp in a bowl and serve.
DESCRIPTION OF BUTTONS ON THE DISPLAY

Ingredients
- potatoes 500 g
- oil 2 tablespoons • salt to taste • pepper to taste
Ingredients
- chicken wings 350 g
- garlic 2 cloves
- oil 2 tablespoons • salt 1 tablespoon • pepper 1 tablespoon
a. Mix the wings with oil, garlic, salt, and pepper and let them marinate for 20 minutes.
b. Place the wings on the grill rack, insert the rack into the appliance, select the "Chicken Drumsticks" program or set the cooking time and temperature according to the size and quantity of the wings, or cook until golden brown.
c. When cooking is done, put the wings in a bowl and serve.
TIP: For best results, shake the basket with the wings halfway through cooking.
3. Beef Steak
Ingredients
- beef steak 350 g • garlic powder 1 tablespoon
- oil 2 tablespoons • salt 1/2 tablespoon • pepper 1 tablespoon
- soy sauce to taste
a. Mix the steak with oil, garlic, salt, and pepper and let it marinate for 20 minutes.
b. Place the steak in the basket, insert the basket into the appliance, select the "Steaks" program or adjust the cooking time and temperature according to the size and quantity of the steak, or cook until browned.
c. Halfway through cooking, turn the steak, reduce the temperature to 150 °C, and cook for another 4 minutes until golden brown.
TIP: for best results, turn the steak halfway through cooking.
4. Grilled sausage
Ingredients
• fresh sausage 250 g - oil 1 tablespoon
a. Mix the sausages with oil. b. Place the sausages on the grill, insert the basket into the appliance, select the "Sausages" program or adjust the cooking time and temperature according to the size and quantity of the sausages, or cook until browned. c. At the end of cooking, place the sausages in a bowl and serve.
TIP: for best results, shake the basket with the sausages halfway through cooking.
5. Fried shrimp
Ingredients
- DEAR CUSTOMER
- INGREDIENTS
- IMPORTANT NOTES ON CORRECT USE
- DANGER
- PRODUCT
- DANGER OF SCALDING
- CABLE AND PLUG
- CONFORMITY OF THE PRODUCT
- TECHNICAL DATA
- COMPONENTS
- BEFORE FIRST USE
- ASSEMBLE THE BASKET HANDLE
- DISPLAY BUTTONS DESCRIPTION
- PRE-SET MENU SELECTION BUTTON
- ON/OFF BUTTON
- TEMPERATURE/TIME SELECTION BUTTON
- START/PAUSE BUTTON
- DEFROST BUTTON
- INTERNAL LIGHT
- INSTRUCTIONS FOR USE
- NOTES
- USEFUL SUGGESTIONS
- ATTENTION: THE BASKET CAN BE VERY HOT. WE RECOMMEND THAT YOU ALWAYS HOLD THE BASKET BY ITS HANDLE
- CLEANING AND MAINTENANCE
- CLEANING
- CLEANING THE OUTSIDE OF THE AIR FRYER OVEN
- DANGER! DO NOT PUT IN THE DISHWASHER OR SOAK IN AIDS
- CLEAN THE BASKET AND THE COOKING GRILL
- IMPORTANT NOTE: DO NOT USE CHEMICAL DETERGENTS, STEEL WOOL OR ABRASIVE CLEANERS FOR CLEANING
- CLEANING THE HEATING ELEMENT
- STORING
- COOKBOOK
- FRENCH FRIES WITH FRESH POTATOES
- FRIED CHICKEN WINGS
- BEEF STEAK
- GRILLED SAUSAGE
- FRIED SHRIMPS
- INFORMATION ON THE DISPOSAL OF THE PRODUCT
- PACKAGING
- WARRANTY CONDITIONS
- PRODUCT CONFORMITY
- DESCRIPTION OF SCREEN BUTTONS
- FRIED SHRIMP
- DESCRIPTION OF BUTTONS ON THE DISPLAY
Brand : Tognana
Model : Iridea D2DFA05IRCH
Category : Deep fryer