
HOI Ride+ - Indoor bike trainer KETTLER - Free user manual and instructions
Find the device manual for free HOI Ride+ KETTLER in PDF.

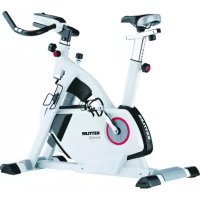
| Product type | Indoor bike trainer |
| Brand | Kettler |
| Model | HOI Ride+ |
| Console | Digital screen with 5 buttons (Workout, Connexion, Start/Enter, Minus, Plus) |
| Training modes | Manual, Hills, Intervals, Heart Rate Control (HRC), Custom |
| Resistance modes | Auto (target power in Watts, independent of RPM) and Manu (fixed resistance level, dependent on RPM) |
| Connectivity | Bluetooth BLE (for smartphone/tablet apps) and ANT+ (for heart rate belt) |
| Compatible apps | Kinomap, Zwift, GymTrakr, etc. (FTMS compatible) |
| Heart rate sensors | ANT+ or BLE heart rate belt (not included) |
| User management | Up to 4 user profiles (U1-U4) with Age, Gender, Height, Weight, Initials |
| Training goals | Time, Distance, Energy (KCAL or KJ) |
| Display | Speed (km/h or mph), RPM, Watts, Heart rate, Time, Distance, Energy, Level/Watt, Profile |
| Auto shut-off | After 4 minutes of inactivity |
| Software update | Via www.kettlersport.com website |
| Reset | Hold the Workout button for 5 seconds |
| Adjustable settings | Distance unit (KM/Mile), energy unit (KCAL/KJ), buzzer volume |
| Power supply | Not specified in the manual; estimate: mains adapter or batteries (check full manual) |
| Dimensions (L x W x H) | Not specified; typical dimensions: approx 100 x 50 x 120 cm |
| Weight | Not specified; estimate: approx 40 kg |
| Maintenance | Clean with a damp cloth; do not use solvents |
| Spare parts | Contact Kettler after-sales service or visit kettlersport.com |
| Warranty | According to Kettler general terms |
Frequently Asked Questions - HOI Ride+ KETTLER
User questions about HOI Ride+ KETTLER
0 question about this device. Answer the ones you know or ask your own.
Ask a new question about this device
Download the instructions for your Indoor bike trainer in PDF format for free! Find your manual HOI Ride+ - KETTLER and take your electronic device back in hand. On this page are published all the documents necessary for the use of your device. HOI Ride+ by KETTLER.
USER MANUAL HOI Ride+ KETTLER
·MANUAL
·HILLS
- INTERVALS
H.R.C.
-CUSTOM
- Valley Trail (P01) 4. The Alpine Pass (P04)

- Rolling Hills (P02) 5. The Pyramid (P03)

- In The Mountains (P03) 6. Random (P06)

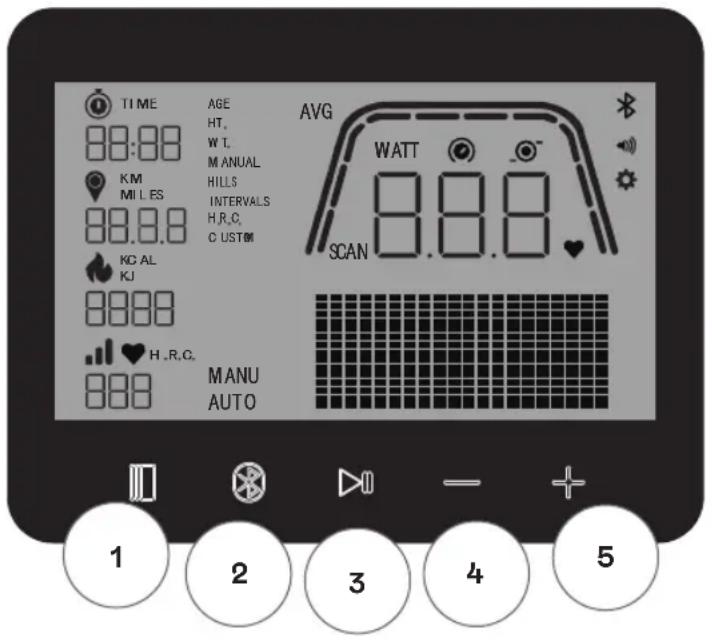
The training computer is equipped with five buttons: The following functions are allocated to these buttons:
In the Idle Mode
When switching on the display, you will enter the Idle Mode. You can start a Quick Start workout, access alternative workouts options, connect to peripheral devices, or access console settings.
1 workout button
Select between user management, connectivity functions, settings and workouts or accept a selection choice as applicable.
Also, you can press and hold this button for 5 seconds to force the console to shutdown and restart.
2 Connect button
Connect to Bluetooth LE/ANT+ devices to the console.
3 Start/Enter button
Provides the user with the ability to begin and end a work-out.
4 Minus button
Used to decrease the current settings value.
5 Plus button
Used to increase the current settings value.
Display switch-off
After 4 minutes of inactivity, the display switches off.
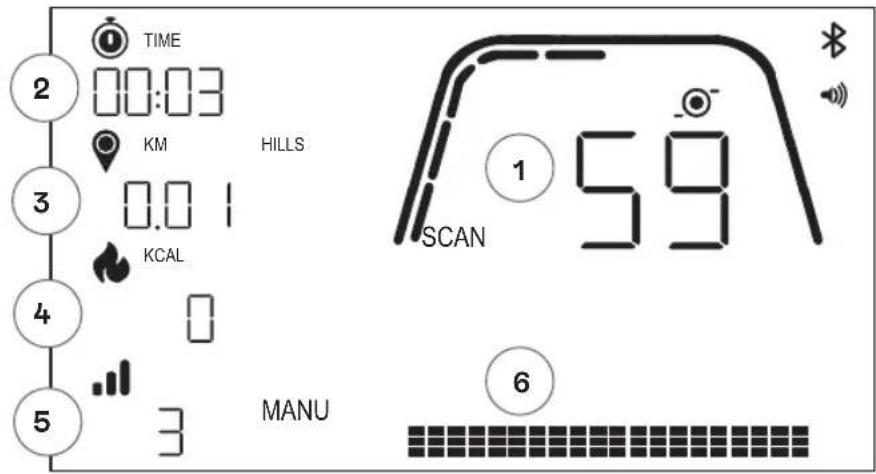
IDLE SCREEN
The default screen for IDLE MODE is the IDLE screen shown below:

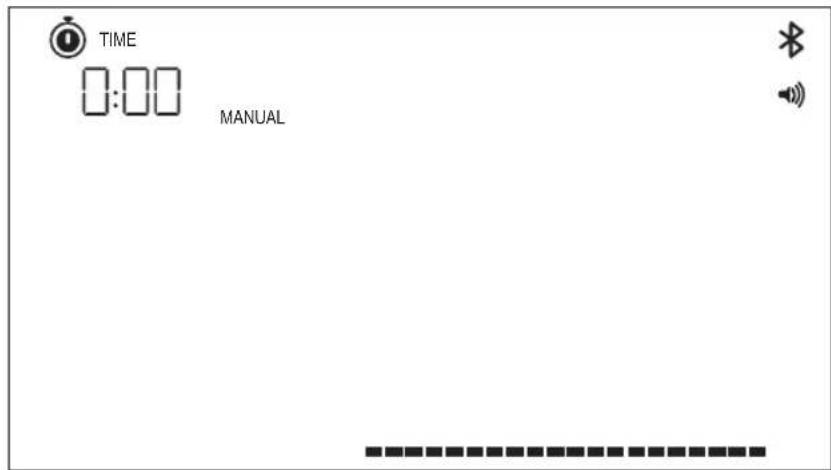
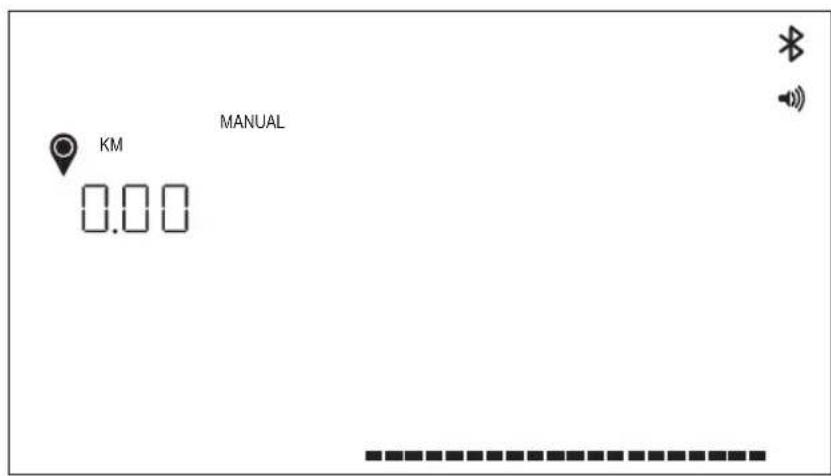
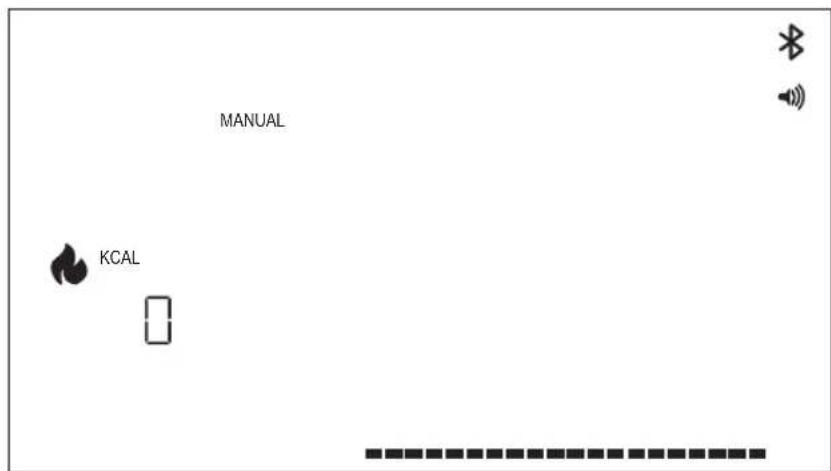
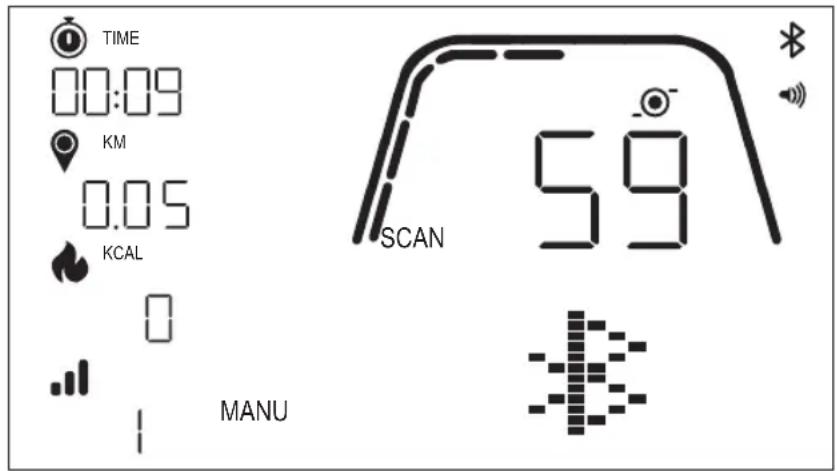
WORKOUT SCREEN
The WORKOUT screen provides the following information for you:
1 Key Metrics Display
This area of the display can show either Speed (KM/H or MPH), RPM, Watt or Heart Rate. Surrounding the numeric readout is a gauge which shows the relative intensity of each of the selectable data elements listed above.
2 Time Display
This is the numeric indicator of the elapsed time for the current workout or the remaining time for an active time interval segment.
3 Distance Display
This is the numeric indicator of the accumulated distance for the current workout or the remaining distance for an active distance interval segment. Distance can be displayed in either kilometers (KM) or miles. The selection between KM or Miles can be done in Settings Mode.
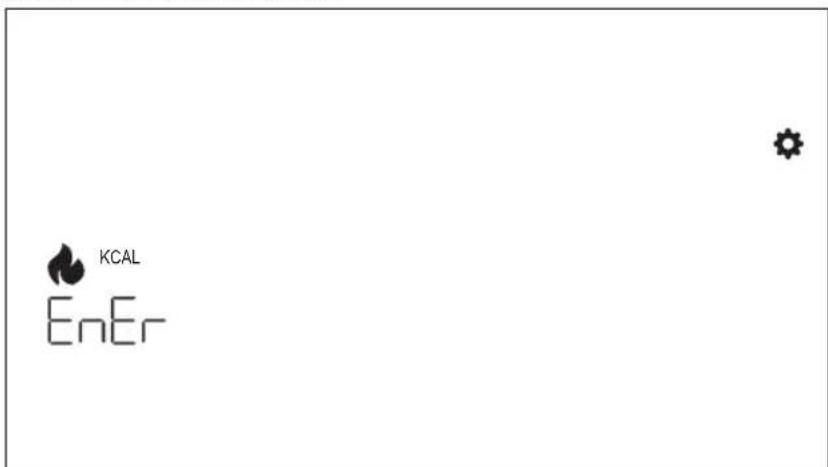
4 Energy Display
This is the numeric indicator of the accumulated energy burned for the current workout. Energy can be displayed in either KCAL or KJ. The selection btwteen KCAL or KJ can be done in Settings Mode.
5 Level/Watt Display
Shows current resistance level in MANU-Mode or WATT in AUTO-Mode.
6 Profile Display
Shows training profile in levels (MANU-Mode) or in WATT (AUTO-Mode)
GENERAL FUNCTIONS
Sleep Mode - if no RPM signal or no key pressed after 4min, the console will enter Sleep Mode. Pressing any key or start pedaling will wake up the display.
Software Updates - Information regarding software updated will be provided on www.kettlersport.com
USER MANAGEMENT
To enter USER MANAGEMENT press WORKOUT button and navigate with + / - to USER. To select a user (U1-4 press + / - button, confirm user with WORKOUT button to enter more specific information and press WORKOUT button to save user settings. Press START/ENTER to continue.
You can define age, gender, height and weight. You can also enter a username by using any 3 letters that identify the user. It's recommended to use initials. U00 stands for Guest User, please note that workout data for Guest User won't be stored.


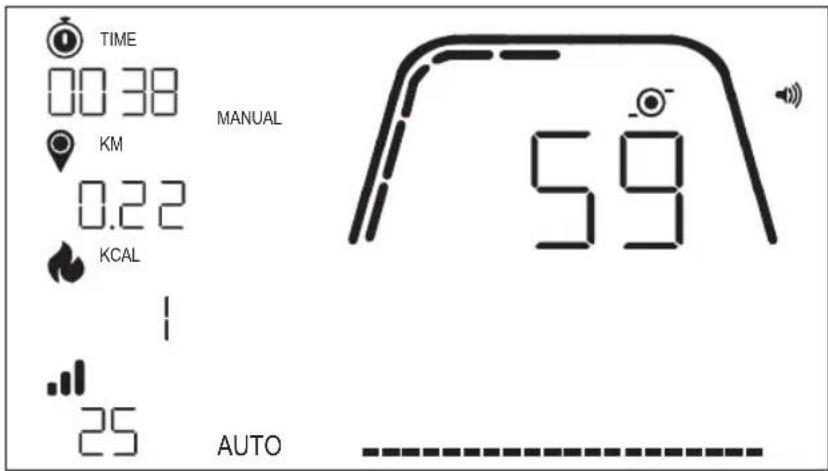
QUICK START MODE
MANU
To begin a workout quickly the user can press the START/ENTER button. Then start pedaling. To pause your workout stop pedaling and start pedaling to return to WORKOUT mode again.
To end the workout long press START/ENTER button. If there is no activity for more than 4 minutes the session will be finished and display your average training data.
AUTO AND MANU MODE
All Kettler HOI ergometers are equipped with AUTO and MANU mode. After the training has started, you have the option to switch between AUTO and MANU modes by pressing the Start/Enter key.
AUTO mode (RPM independent)
In this mode, you enter the target output in Watt by pushing + / - button the target value will change. The ergometer system will calculate the braking resistance from the Watt target value and the current pedalling frequency and will change it immediately, when the pedalling frequency is changed. This will ensure
that you train constantly at the pre-set Watt output.
MANU mode (RPM dependent)
Choose brake resistance (or "a gear") in MANU mode. This stays constant, regardless of your pedal frequency. The power in Watt is the end result and changes in the case of changes to the resistance level or pedal frequency.
WORKOUT MODES
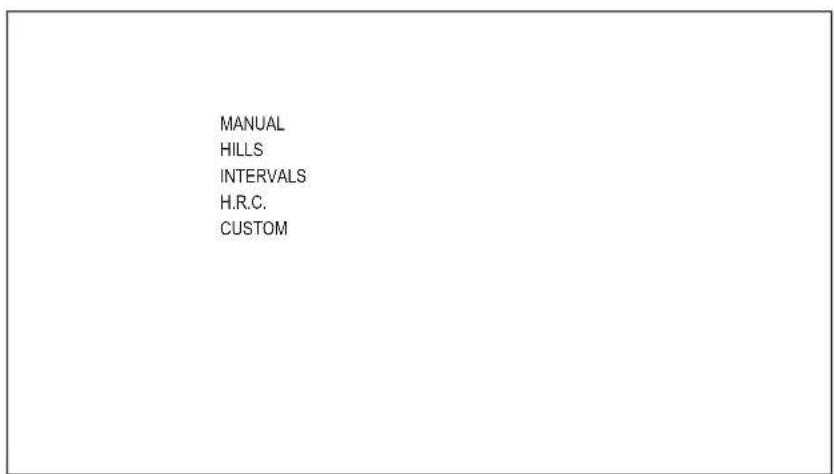
To select specific workouts, press the WORKOUT button. You can choose between the following options:
·MANUAL
HILLS
-INTERVALS
H.R.C.
-CUSTOM
To navigate between workouts use the +/- button and WORKOUT button to confirm.
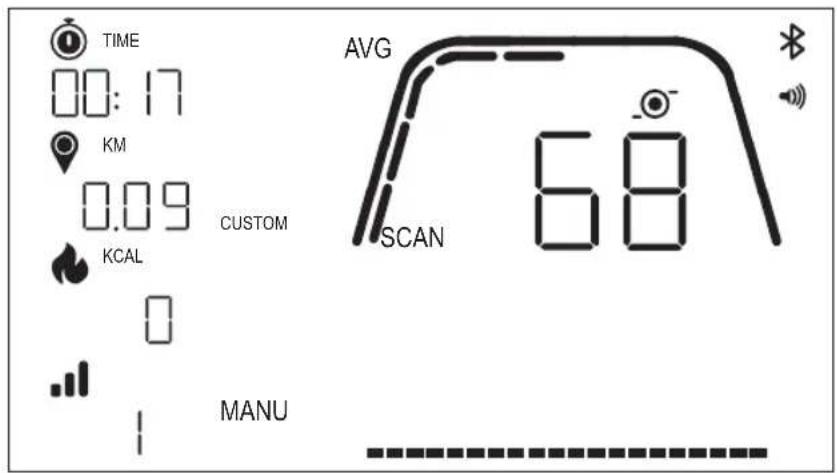
MANUAL WORKOUT
To select this workout press WORKOUT button. Now you can select your goals based on time, distance, and energy and confirm with WORKOUT button. To start the workout press START/ENTER button. (see example screens below)
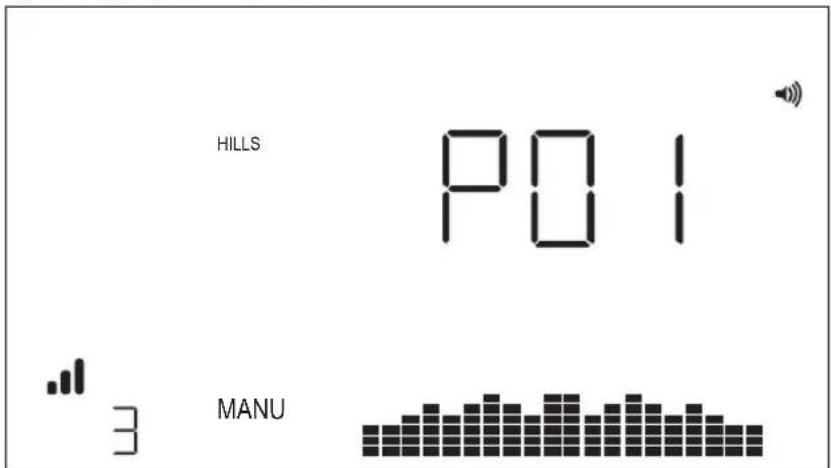
HILLS WORKOUT
To select this workout press WORKOUT button. Now you can then select between AUTO and MANU mode by using + / - button, press WORKOUT button to confirm.
Now you choose between 6 different workout profiles (P01-06)

- Valley Trail (P01) 4. The Alpine Pass (P04)

- Rolling Hills (P02) 5. The Pyramid (P05)

- In The Mountains (P03) 6. Random (P06)


To navigate between the workout profi les use the + / - button. To select a specific workout profi le press WORKOUT button.
You can then select your workout goals (+/- Button), confirm with WORKOUT button. Then start pedaling to begin your workout.
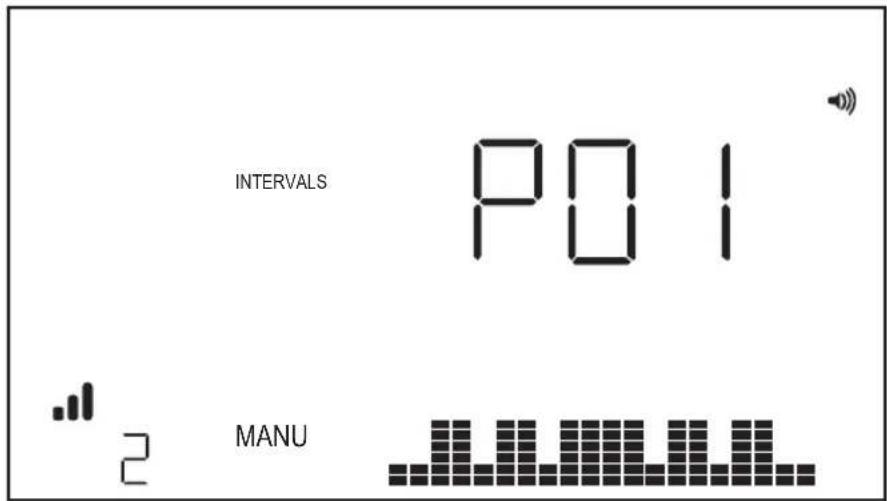
INTERVALS WORKOUT
To select this workout press WORKOUT button. Now you can then select between AUTO and MANU mode by using + / - button, press WORKOUT button to confirm.
Now you can choose between the following options:

- Interval (P01) 4. Interval (P04


- Interval (P02) 5. Interval (P05)


- Interval (P03) 6. Interval (P06)

To navigate between the workout profles use the + / - button. To select a specific workout profle press WORKOUT button.
You can then select your workout goals (+/- Button), confirm with WORKOUT button. Then start pedaling to begin your workout.
H.R.C.WORKOUT
To select this workout press WORKOUT button. You then define your target heart rate by +/- button and confirm with WORKOUT button. You can then select your workout goals (+/- Button), confirm with WORKOUT button. Then start pedaling to begin your workout. It is required that a heart rate signal is constantly available on the console.
HRC Workout - CONSTANT HR
For a CONSTANT HR workout the user shall first enter their Age and Target HR for the workout. The Target HR is initially determined based on the following formula:
TARGETHR=(220-AGE)×0.7
The above equation essentially states that the suggested target is 70% of the user's suggested maximal heart rate.
As an example, for a 40-year-old, the suggested TARGET HR is (220-40) x 70% or 180 x 0.7 or 126 BPM.
Once the TARGET HR value has been entered, press the WORKOUT button. You can then select your workout goals. To start the workout press START/ENTER button.

CUSTOM WORKOUT
To select this workout press WORKOUT button. Now you can then select between AUTO and MANU mode by using + / - button, press WORKOUT button to confirm.
To select resistance level choose your level by pressing + / - button and to save the custom workout by pressing WORKOUT button. You can then select your workout goals by using + / - button, confirm with WORKOUT button. Then start pedaling to begin your workout.

CONNECTIVITY MODE
GENERAL
This console is capable of connecting to both ANT+ and BLE heart rate straps. In addition, the console shall be able to connect to smartphone or tablet apps via BLE. The console shall also be able to connect to both a heart rate strap (ANT+ or BLE) and simultaneously connect to a smartphone app.
CONNECTING TO A SMARTPHONE OR TABLET APP VIA BLUETOOTH LE (FTMS)
The Bluetooth pairing process is initiated automatically after start of the console. The Bluetooth icon at the top right of the display shall begin to flash at a 1Hz rate to indicate that the Bluetooth radio is advertising and is looking for an available mobile device App to pair with.
KETTLER
While the console is advertising a user may connect to a compatible App (e.g. Kinomap, Zwift, GymTrakr, etc.) via their smartphone or tablet. Refer to the apps documentation regarding how to connect to fitness equipment that supports FTMS. When the console successfully pairs with a smartphone or tablet App, the BT advertising will end, the console will return to normal function, and the Bluetooth icon shall stay on and no longer blink. During the workout the console transmits the user's workout data to the connected App.
In the respective APP the advertised label will be "Kettler ###". Note that this advertised label is not visible in all App's.
CONNECTING TO A BLE HR STRAP
When connecting to a BLE HR strap, "BLE" shall be displayed in the HR window and the console will connect to the HR strap. Once the connection to the BLE HR strap has been made, the detected heart rate value shall be displayed in the HR window and the heart icon shall blink.

Once a connection has been made to a BT HR strap the console shall also be able to connect a smartphone app simultaneously. The behavior described above applies. Note that a connection must be made to a heart rate strap prior to establishing a connection to a smartphone if you want to connect to both simultaneously.
CONNECTING TO AN ANT+ HR STRAP
In order to connect to an ANT+ HR strap no connections to the console shall be active. To connect the console to an ANT+ compatible heart rate chest strap, press and hold the CONNECT button for 5 seconds. When connecting to an ANT+ HR strap "Ant" shall be displayed in the HR window and the console shall connect to the HR strap. Once the connection to the ANT+ HR strap has been made, the detected heart rate value shall be displayed in the HR window and the heart icon shall blink.
9202
Ant
*
If a connection has been made to an ANT+ HR strap the console shall also be able to connect a smartphone app simultaneously via BLE. The behavior described above applies. Note that the user must connect to a heart rate strap prior to establishing a connection to a smartphone if they want to connect to both simultaneously.
CONNECTION RESET
If you are having an issue connecting with any device, you can try to reset the console. Resetting the console also resets the state of the connections to peripheral devices.
A console reset can be performed by holding the WORKOUT button down for 5 seconds. The console will then shutdown and restart. Note that it may be necessary to close and reopen any smartphone or tablet app that you would like to connect to in order to ensure that the app's connection state has also been reset.
SETTINGS MODE
SETT
To enter SETTINGS MODE press WORKOUT button and navigate with + / - to SETTINGS MODE and confirm with WORKOUT button.
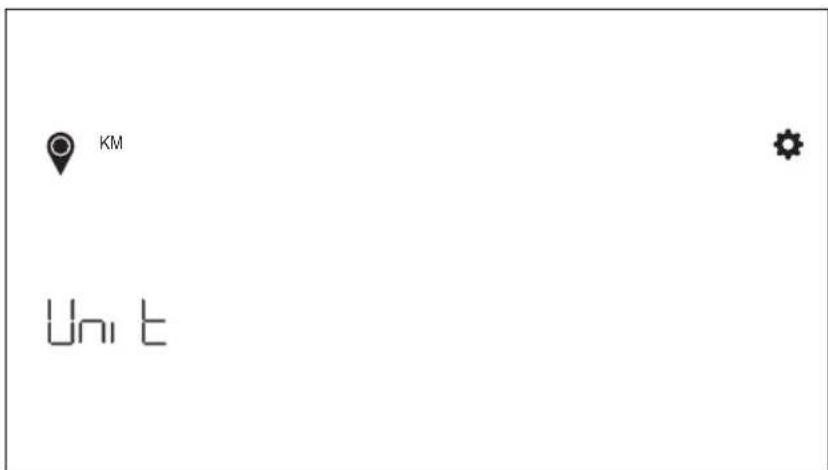
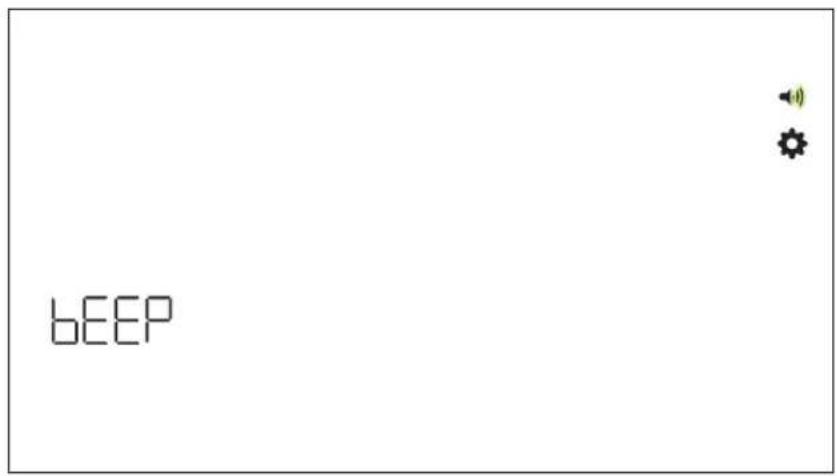
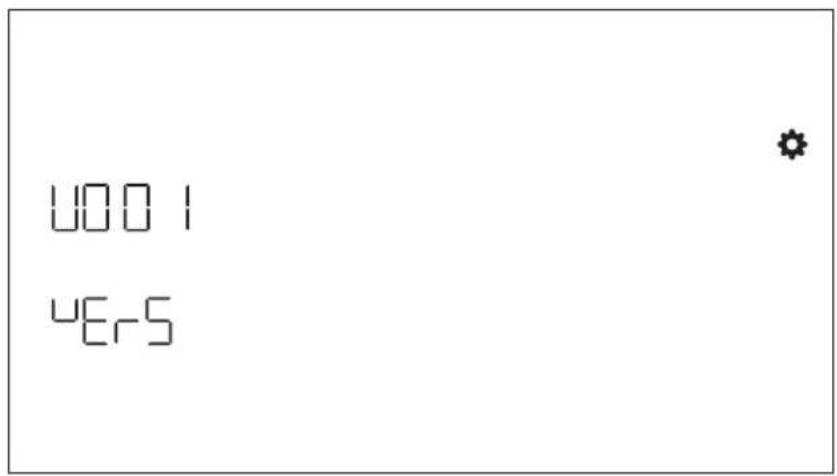
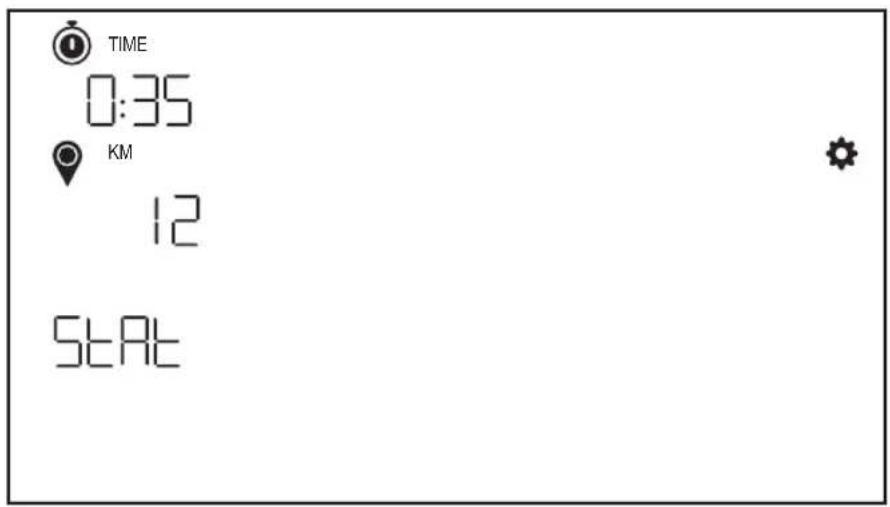
To select different settings use WORKOUT button and then use + / - button to change detailed settings of distance unit, energy unit, buzzer volume on/off. You can also display the software version (U x.xx) and statistics such as total time and distance. FACT is only for service purposes.
Distance unit select
Press + - to select unit of KM and Mile.
Energy unit select
Press + - to select unit of KCAL and KJ.
Buzzer volume setting
Press + - to select volume setting.
Software Version
Display software version.
Workout statistics
Cleared after factory reset.
KETTLER
FONCTION DES BOUTONS 31
ÉCRAN DE VEILLE 32
ÉCRAN D'ENTRAJINEMENT 32
FONCTIONS GENÉRALES 33
MODES ENTRAINMENT 35
MODE CONNECTIVITÉ 39
MODE PARAMÉTRAGE 42
FONCTION DES BOUTONS
- Valley Trail (P01) 4. The Alpine Pass (P04)

- Rolling Hills (P02) 5. The Pyramid (P03)

- In The Mountains (P03) 6. Random (P06)

CONNEXION A UNE APPLICATION POUR SMARTPHONE OU TABLETTE VIA BLUETOOTH LE (FTMS)

- In the Idle Mode
- workout button
- Connect button
- Start/Enter button
- Minus button
- Plus button
- Display switch-off
- IDLE SCREEN
- WORKOUT SCREEN
- Key Metrics Display
- Time Display
- Distance Display
- Energy Display
- Level/Watt Display
- Profile Display
- GENERAL FUNCTIONS
- USER MANAGEMENT
- QUICK START MODE
- AUTO AND MANU MODE
- AUTO mode (RPM independent)
- MANU mode (RPM dependent)
- WORKOUT MODES
- MANUAL WORKOUT
- HILLS WORKOUT
- INTERVALS WORKOUT
- H.R.C.WORKOUT
- HRC Workout - CONSTANT HR
- CUSTOM WORKOUT
- CONNECTIVITY MODE
- GENERAL
- CONNECTING TO A SMARTPHONE OR TABLET APP VIA BLUETOOTH LE (FTMS)
- KETTLER
- CONNECTING TO A BLE HR STRAP
- CONNECTING TO AN ANT+ HR STRAP
- CONNECTION RESET
- SETTINGS MODE
- Distance unit select
- Energy unit select
- Buzzer volume setting
- Software Version
- Workout statistics
- FONCTION DES BOUTONS
- CONNEXION A UNE APPLICATION POUR SMARTPHONE OU TABLETTE VIA BLUETOOTH LE (FTMS)
Brand : KETTLER
Model : HOI Ride+
Category : Indoor bike trainer