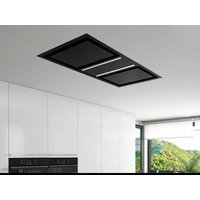
E-250 - Range hood Pando - Free user manual and instructions
Find the device manual for free E-250 Pando in PDF.


| Product type | Extractor hood |
| Brand | Pando |
| Model | E-250 |
| Category | Hood |
| Dimensions (L x D x H) | 1230/1485/1825 x 720 x 360 mm (depending on version) |
| Approximate weight | 25 kg |
| Power supply | 220-240 V, 50 Hz |
| Estimated power consumption | 250 W |
| Motorization | External motor V.2450 or roof motor V.2350 |
| Number of speeds | Several (3 or 4 depending on version), with ecodesign timer |
| Maximum airflow rate | Up to 650 m³/h (or more depending on version) |
| Control type | Synchronizable remote control + touch buttons |
| Lighting | Integrated LED (replacement by after-sales service only) |
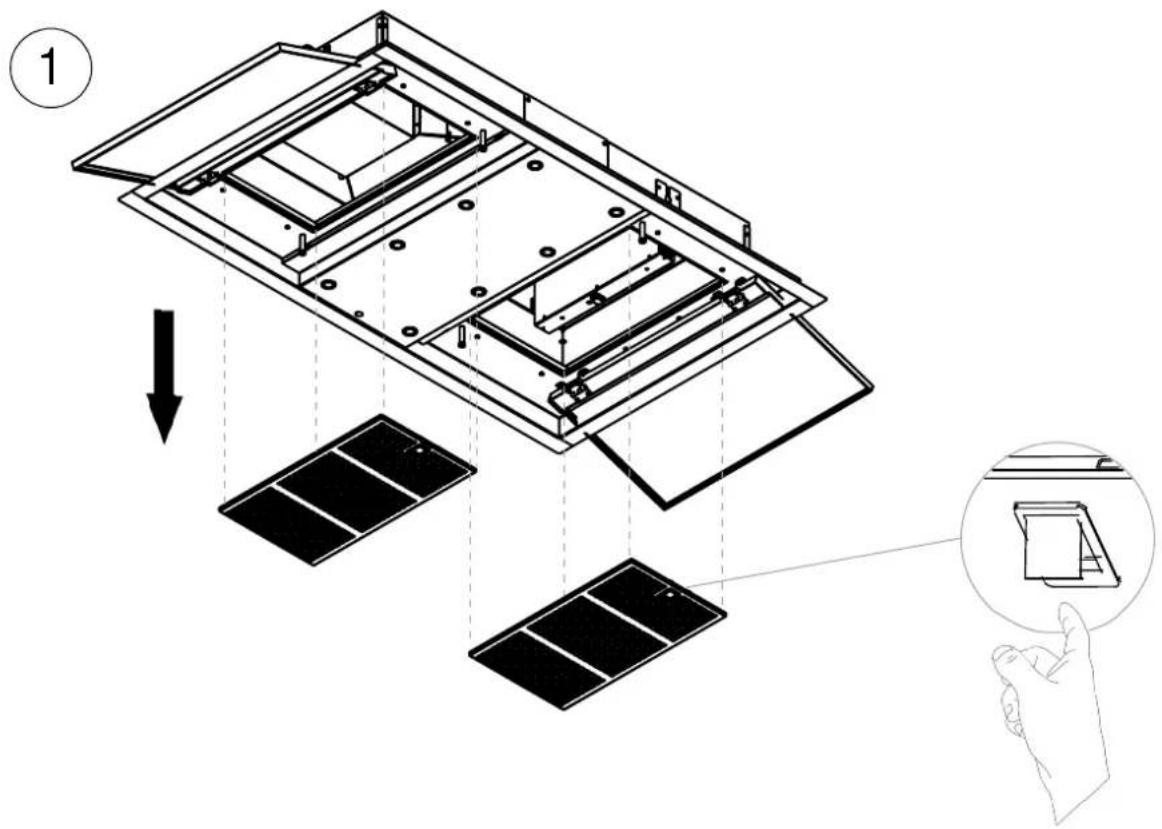
| Filters | Metal grease filter included, charcoal filter optional |
| Material | Stainless steel |
| Estimated noise level | 50-65 dB |
| Minimum distance from cooking surface | 65 cm for gas cooking |
| Recommended maximum installation height | 2.5 m from the floor |
| Special functions | 5 min timer, courtesy light, remote synchronization |
| Maintenance | Pando Stainless Steel Cleaner (ref. 1059) recommended |
| Safety | WEEE compliant, corrosion protection, installation by professional |
| Warranty | 2 years (standard) |
| Included accessories | 5 m extraction tube (depending on version), remote control |
| Repairability | LED lamps and internal components reserved for approved after-sales service |
Frequently Asked Questions - E-250 Pando
User questions about E-250 Pando
0 question about this device. Answer the ones you know or ask your own.
Ask a new question about this device
Download the instructions for your Range hood in PDF format for free! Find your manual E-250 - Pando and take your electronic device back in hand. On this page are published all the documents necessary for the use of your device. E-250 by Pando.
USER MANUAL E-250 Pando
EN – User and installation Manual.
E-250/265
MOTOR INTERIOR
natural_image
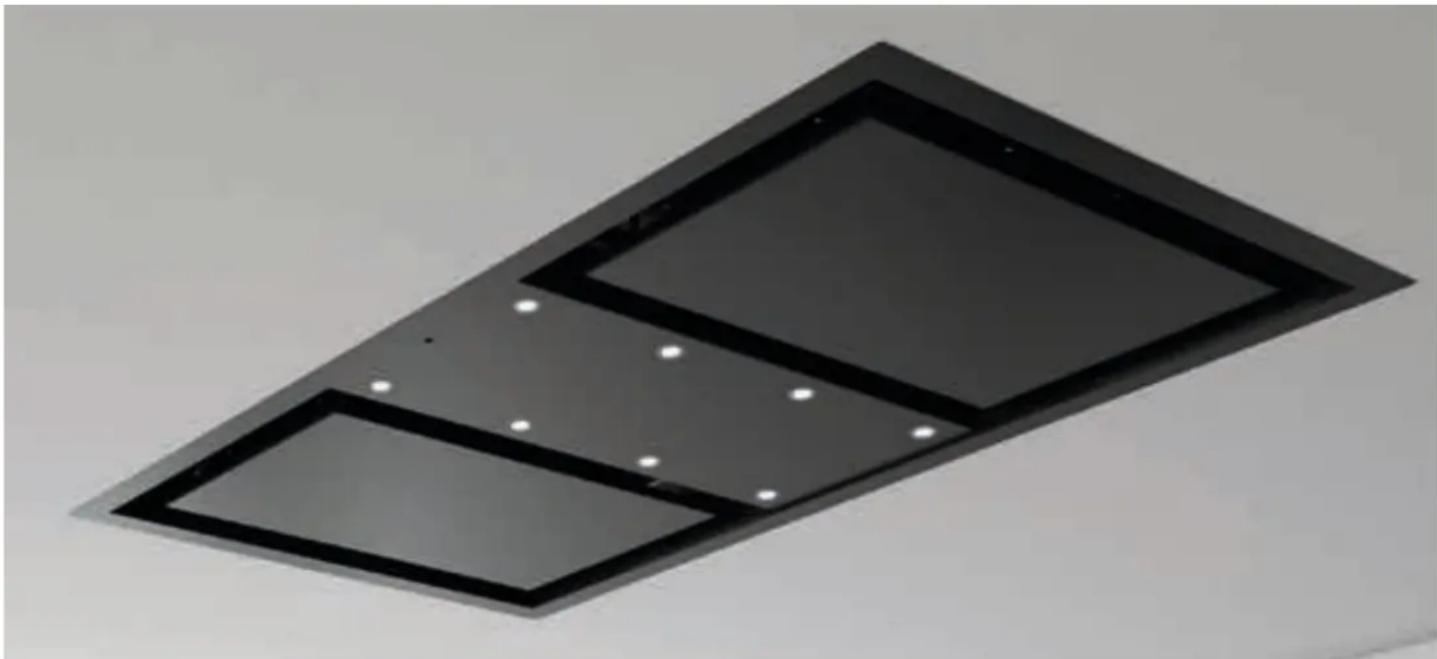
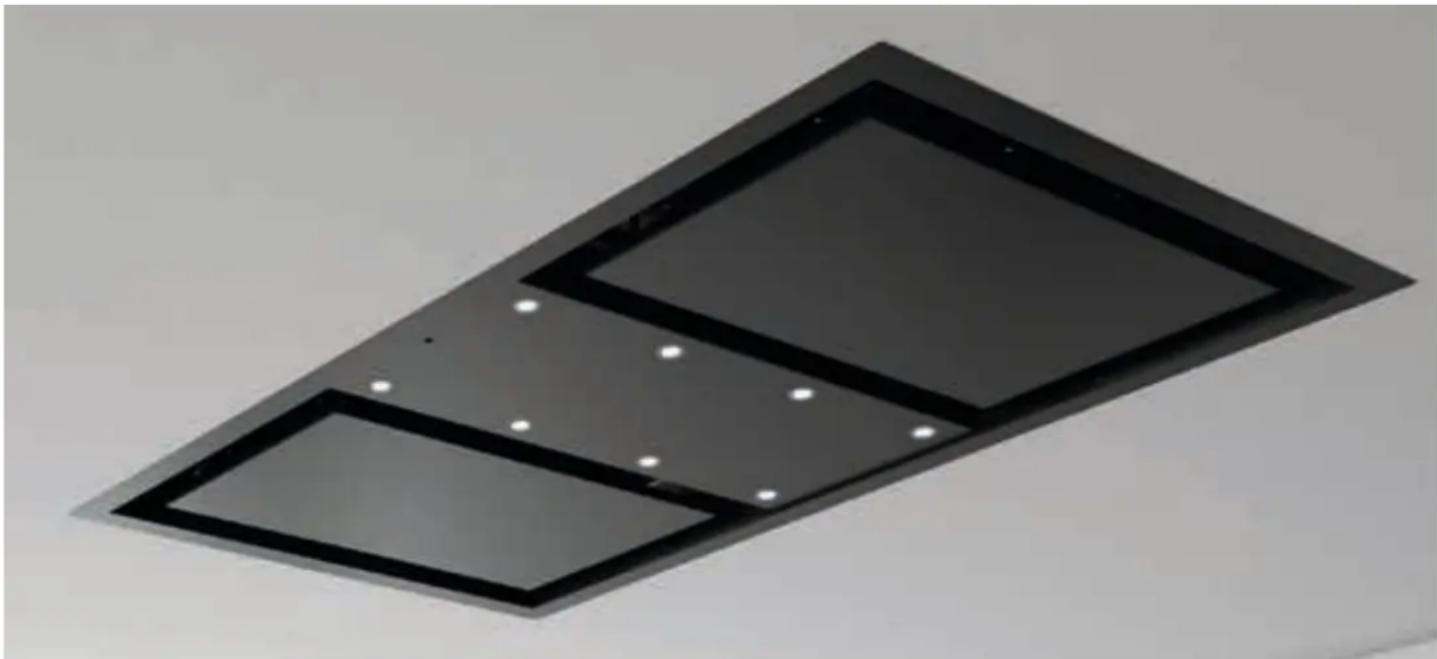
Exterior view of a modern black ceiling light fixture with two square recesses and white spotlights (no text or symbols)The International Certification Network Quality Management System ISO 9001:2015

ES - Español
The symbol on the product or its packaging indicates that this product cannot be disposed of like normal domestic waste. The product must be handed over at a collection point for recycling electrical and electronic equipment. If you ensure that this product is correctly disposed of, you will help to avoid the possible negative environmental and public health effects that could arise from incorrect disposal. For more detailed information about recycling this product, please contact your city authorities, the domestic waste service or the establishment where you purchased it. This electrical appliance is marked in compliance with European Directive 2002/96/EC on electrical and electronic appliance waste (WEEE).
EN - INTRODUCTION
Firstly, we would like to thank you for your confidence in our firm when you chose a Pando extractor hood.
This manual and its annexes are a guide for the correct installation, usage and maintenance of your new Extractor Hood.
To learn everything about your hood, we recommend you read these instructions carefully from beginning to end and keep them for future reference.
Before starting the installation process read with care this installation manual and the attached user's manual, There are also instructions for the correct installation of the product.
Installation should only be carried out by qualified professionals, professional installers or the official technical service. The manual or installation guide must be read with care before starting the installation process.
When opening the packaging, check that all the components are in perfect state and all the accessories are present. If this is not the case, contact the dealer and do not install. Once installed, any damage to the exterior such as scratches, dents, stains, etc. will not be covered by the guarantee.
The manufacturer will not be held liable for any possible inaccuracies due to printing or trans-cription errors in this manual. The manufacturer reserves the right to incorporate modifications considered useful or necessary into the products, which will not alter their essential functional and safety characteristics.
EN - RECOMMENDATIONS TO BEAR IN MIND BEFORE INSTALLATION.
VERY IMPORTANT!
DO NOT REMOVE THE PROTECTIVE PLASTIC FROM THE HOOD UNTIL IT IS COMPLETELY INSTALLED, IF THIS PLASTIC IS NOT PRESENT IN AREAS THAT COULD HAVE A RISK OF DAMAGE DURING INSTALLATION, IT IS RECOMMENDED TO APPLY PROTECTIVE MATERIALS AGAINST IMPACT, SCRATCHES AND CONTACT WITH CORROSIVE AGENTS.
TAKE ESPECIAL CARE DURING THE INSTALLATION IF OTHER WORK IS ALSO IN PROGRESS, BECAUSE PAINT, SILICON, PLASTER AND OTHER MATERIALS COULD CONTAIN CORROSIVE CHEMICALS THAT MAY DAMAGE THE PRODUCT, IN THESE CASES IT IS RECOMMENDED TO ADEQUATELY PROTECT THE HOOD, BY FOR EXAMPLE, HERMETICALLY COVERING AREAS THAT COULD BE AFFECTED WITH PLASTIC.
THIS WILL AVOID DAMAGE TO THE OUTSIDE OF THE APPLIANCE, SOMETHING THAT WILL NOT BE COVERED BY THE GUARANTEE.
EN - SAFETY INSTRUCTIONS
- If the hood is to be used at the same time as gas fuelled or other fuelled appliances (not applicable to appliances exclusively designed to blow air into the room) the room must be properly ventilated.
- The exhausted air must not be led through a conduit that is used for exhausting fumes from other appliances using gas or other fuels (not applicable to devices destined exclusively to discharge the air inside the room).
-The minimum distance between the surface of the cooktop and the lower edge of the hood must be 65 cm if the the extractor hood is fitted over gas cooker. If the installation instructions of the gas cooker indicates a greater distance, this must be followed.
- Regulations regarding air evacuation must be respected.
- If the hood does not have a power cable with a plug, or other means for disconnection from the mains, with a separation of all poles to ensure total disconnection under category III conditions of overvoltage, means for disconnection of the fixed installation must be incorporated in accordance with installation regulations.
EN - AFETY INSTRUCTIONS
- Once the appliance has been delivered, within 24h, remove the packaging and check that it is in good state, visually inspecting the general state of the outside. If any anomaly or damage is observed, do not install and immediately inform the dealer or installer within 24h of reception.
- This hood has been designed for normal domestic use. It must not be used for industrial, professional, or any other use different from what it has been designed for.
- Pando will not be held liable for consequences or damages resulting from incorrect installation or misuse of the appliance.
- Do not try to alter any of the characteristics of this appliance, this could be dangerous and will automatically render the guarantee void.
- It must be possible and accessible for the user to disconnect the appliance from the mains after installation. The power plug should be easily accessible, if this is not the case, a switch for electrical disconnection, compliant with electrical installation regulations, must be fitted.
- Take special care when perforating walls or ceilings and ensure that there are no hidden electrical cables, pipes, metal beams, etc., as perforating them could cause great damage, short circuits or the transmission of noise and vibrations.
- IMPORTANT: Before connecting the appliance to the mains, make sure the current is first turned off (differential or circuit breaker on the general electrical panel of the house).
- Hood and conduit installation must comply with regulations on ventilation of closed spaces. More specifically, the exhausted air must not be led through a conduit that is used for exhausting fumes from other appliances using gas or other fuels (central heating installations, etc.).
- Negative pressure in the premises must not exceed 0.04 mbar. This will allow the hood to operate in optimum conditions. To achieve this, it is necessary to have a permanent entry of fresh air to avoid air stagnation, it is recommended to have a ventilation grille for this purpose. Doors and windows are not enough.
EN - SAFETY INSTRUCTIONS

- Attention! When the hood is in operation “in suction” at the same time as a heating system that depends on ambient air (gas, oil, coal boiler, chimney, etc.), take special care to avoid the hood absorbing air needed for combustion, this could cause dangerous accumulations of carbon monoxide in the premises or home, which could be deadly. If the extractor hood is installed together with a combustion appliance such as a boiler, chimney or local heating, the manufacturers of these appliances must be contacted to ensure optimum and risk-free operation.

- Electrical power supply must be stable and meet the electrical requirements of the appliance (see the nameplate of the appliance). If the power supply is unstable, with variations in voltage, current, surges and cuts, electrical storms, etc., the hood could malfunction and even be damaged, in which case repairs will not be covered by the guarantee. If any of these things happen, disconnect the hood and contact an electrician or your electrical company to solve the problem.
- To avoid hazards, it is forbidden to manipulate the appliance. If the power cable is damaged it must be replaced by the manufacturer through an authorised technical service. Any repairs that involve manipulating the appliance or its components must only be done by an authorised technical service.
- Improper and unauthorised handling of the hood, as well as modifying, cutting or perforating the body, structure, motor or wiring of the hood are expressly forbidden. In case of any of the above, the guarantee will be automatically void and the manufacturer will not be held liable for any possible harm or damages.
- The hood is an electrical appliance for fume extraction and must not be used as a support for objects or utensils.
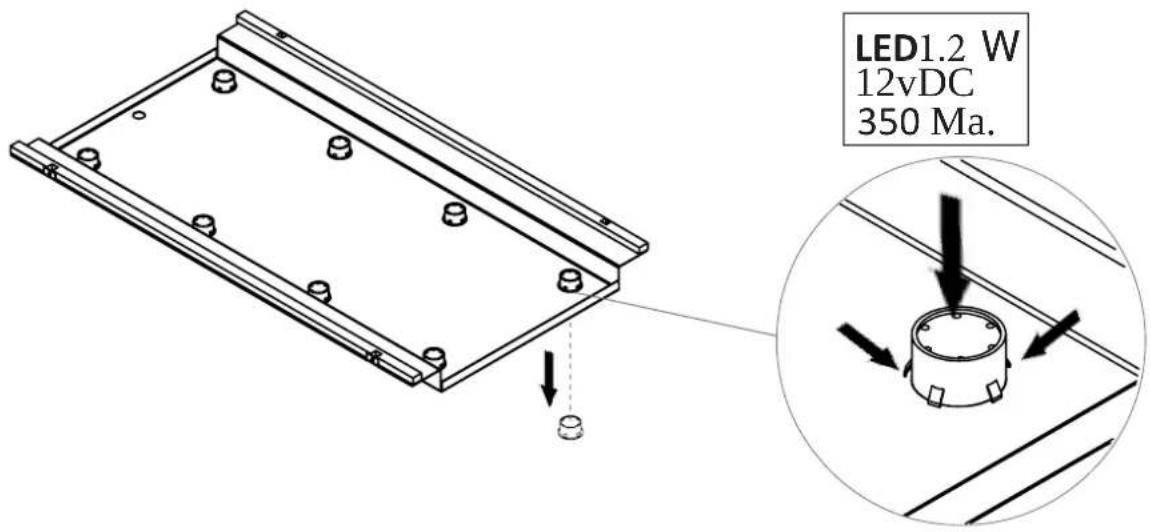
- The LED lamps can not be manipulated by the user as there are risks of electric shock, handling, maintenance or replacement is a task reserved exclusively for official technical assistance service or authorized specialist installer.
- With the aim of constantly improving our products, we reserve the right to modify their functional characteristics or their appearance.
EN - Features and recommendations for ceiling-mounted hoods.
QUALITY ASSURANCE:
In order to ensure that your project does not come up against any unexpected difficulties, to ensure the product works successfully.
FORM OF THE CEILING:
The “ideal” ceiling to install these hood units must be completely unobstructed and flat over all of its surface. If for design reasons you choose to have different heights or steps in the ceiling, it must be ensured that the
suction losses (you must send us a plan to determine whether the surrounding ceiling is suitable).
CEILING HEIGHT:
The recommended distance between the floor and the hood is a maximum of 2.50 m. For greater heights consult our Technical Division.
POSITION OF THE HOOD:
The hood must be centred over the cooking area.
AIR INTAKE GRILLE:
To ensure optimum suction by the hood it is essential that the kitchen has a constant inward flow of air; a ventilation grille at floor level is the perfect solution for this.
INSTALLING THE FLUE PIPE:
We strongly recommend that you use S.E.C. System ^® fume extractor flue pipes from Pando, as these considerably improve convenience in use and the soundproofing of the unit.
INCLUDED:
All units with V.2450 Exterior and V.2350 Roof motors come with 5 m of S.E.C. System® fume extractor flue with interior ∅ 203 mm and exterior ∅ 253 mm as standard.
CONTENIDO / CONTEÚDO / CONTENU / CONTENT
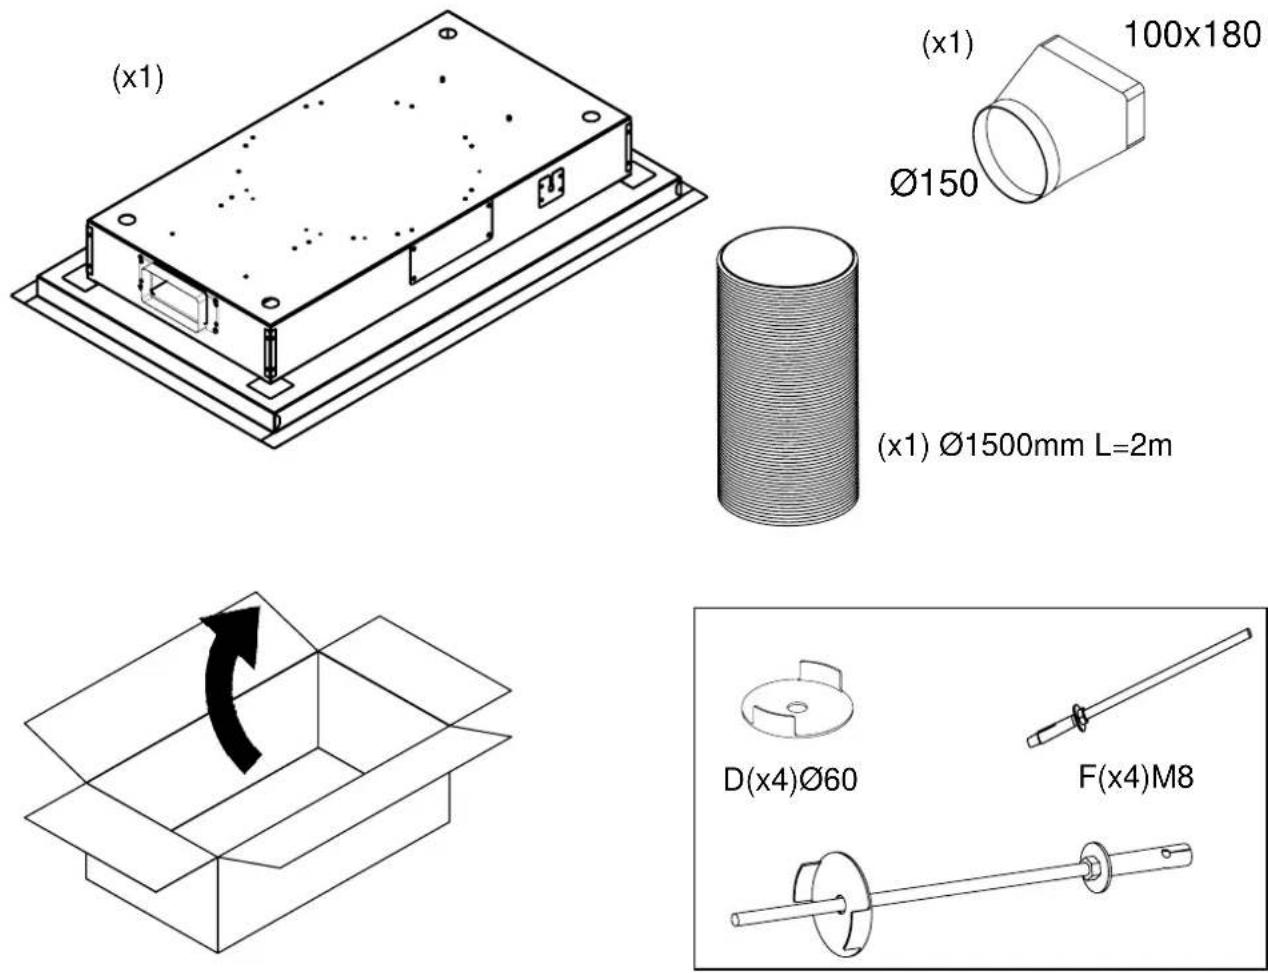
(x1) ∅1500mm L=2m
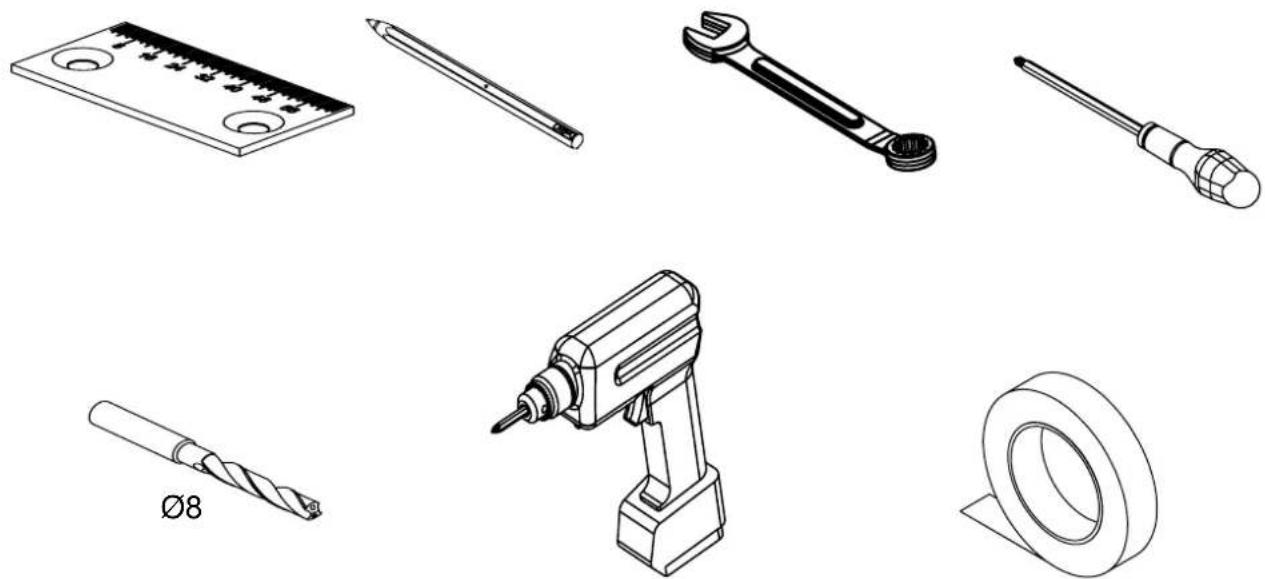
HERRAMIENTAS NECESARIAS / FERRAMENTAS NECESSÁRIAS / LES OUTILS NÉCESSAIRES / TOOLS NEEDLE
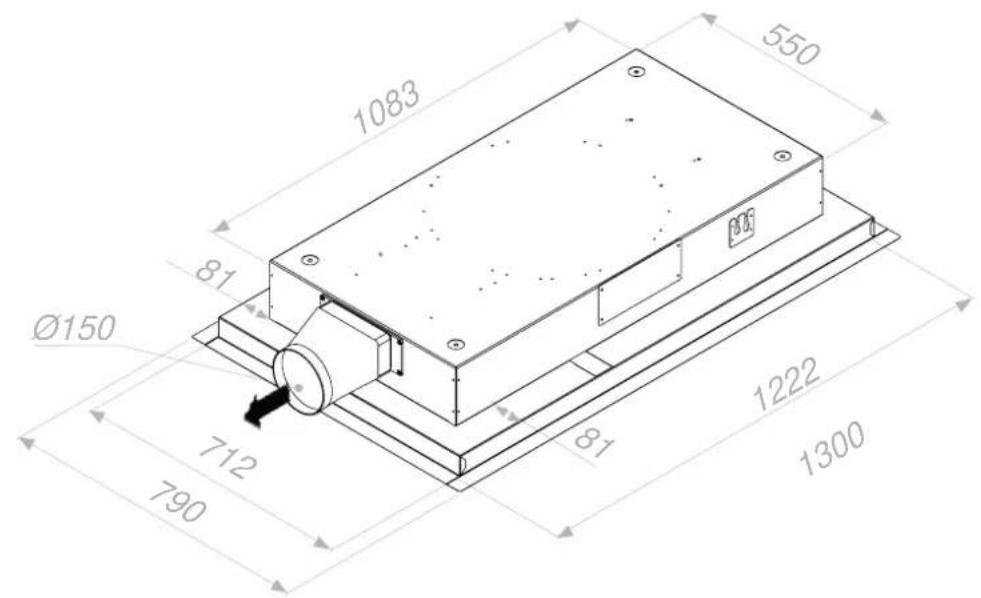
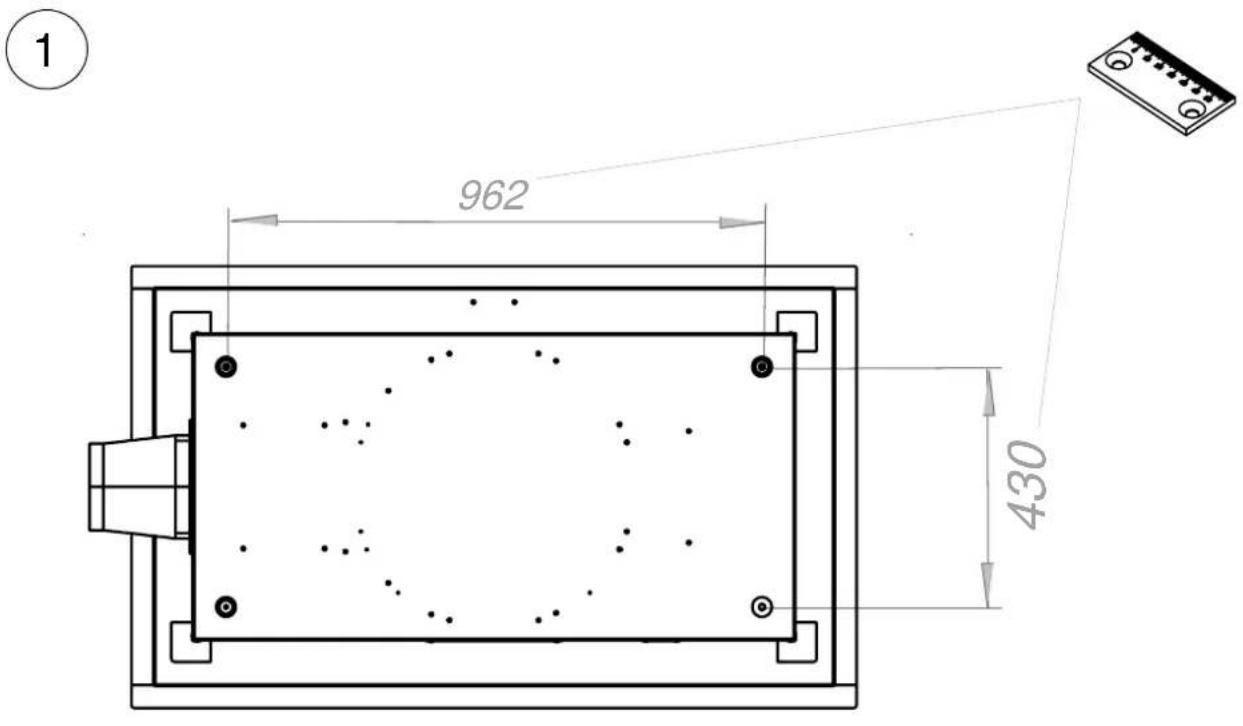
COTAS / DIMENSÕES / REPÈRES / DIMENSIONS
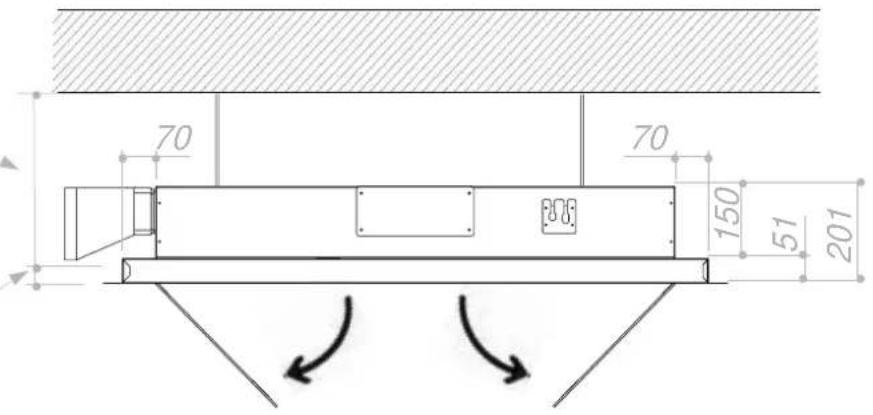
MONTAJE DE SERIE / ASSEMBLÉIA SÉRIE / ASSEMBLAGE SÉRIE / ASSEMBLY SERIES
Altura falso techo
Height of false ceiling
min.210mm max.370mm
Thickness false ceiling plate
20 mm max.
ENCASTRE SERIE / INSIRA SÉRIE / ENCASTREMENT SÉRIE / INSERT SERIES
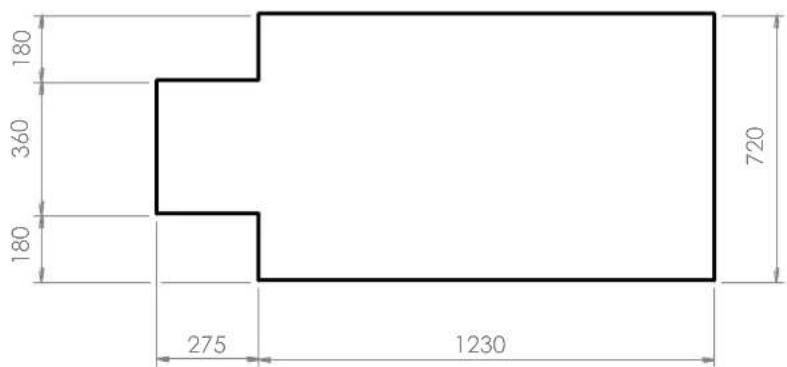
COTAS / DIMENSÕES / REPÈRES / DIMENSIONS
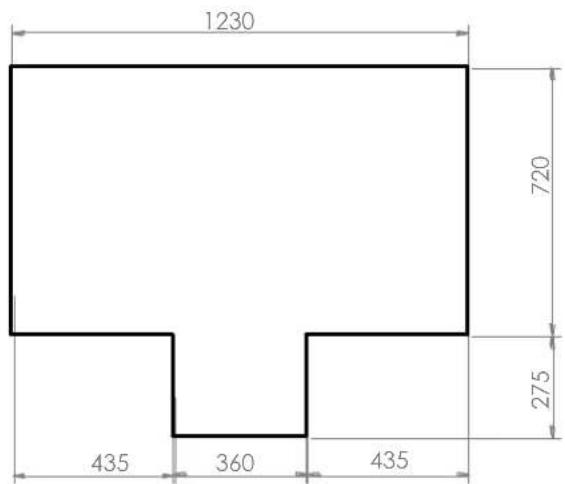
SALIDA OPCIONAL / SAÍDA OPCIONAL / SORTIE OPTIONNELLE / OPTIONAL OUTPUT
CONVERSIÓN OPCIONAL, SÓLO BAJO PEDIDO Y EJECUCIÓN EN FÁBRICA CONVERSÃO OPCIONAL, SOMENTE MEDIANTE SOLICITAÇÃO E EXECUÇÃO DE FÁBRICA CONVERSION FACULTATIVE, UNIQUEMENT SUR DEMANDE ET EXECUTION EN USINE. OPTIONAL CONVERSION, ONLY UPON REQUEST AND FACTORY EXECUTION.
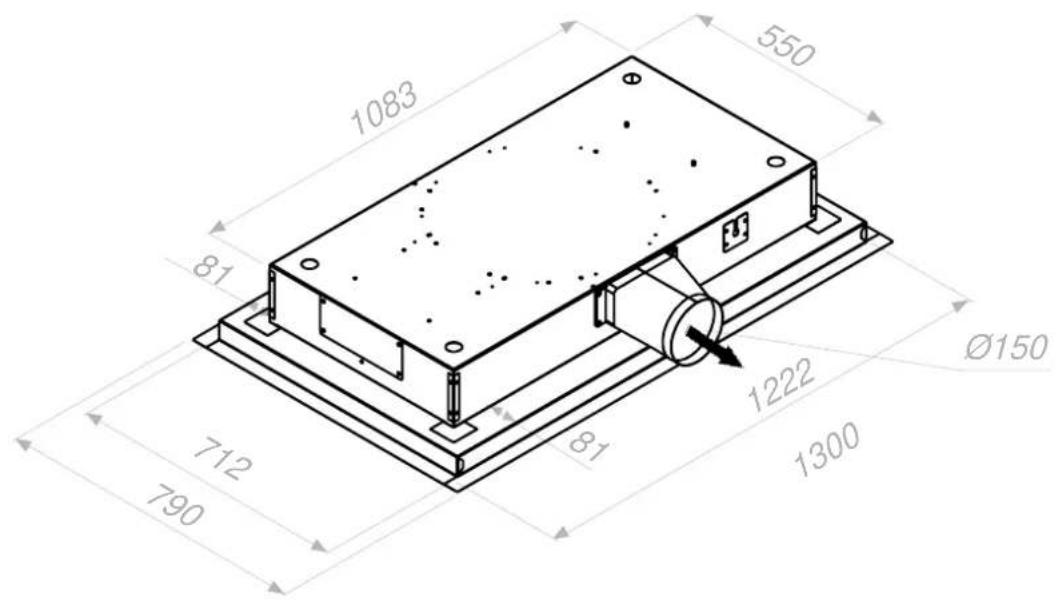
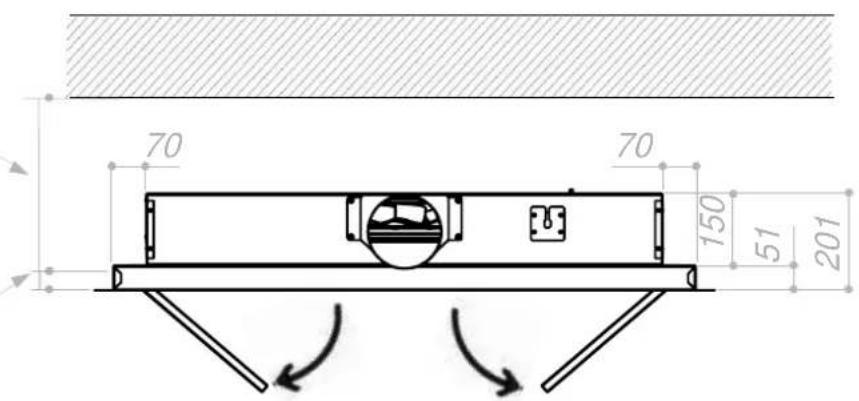
Altura falso techo
Height of false ceiling
min.210mm max.370mm
Thickness false ceiling plate
20 mm max.
ENCASTRE SALIDA OPCIONAL / INSIRA OPCIONAL / ENCASTREMENT OPTIONEL / INSERT OPTIONAL
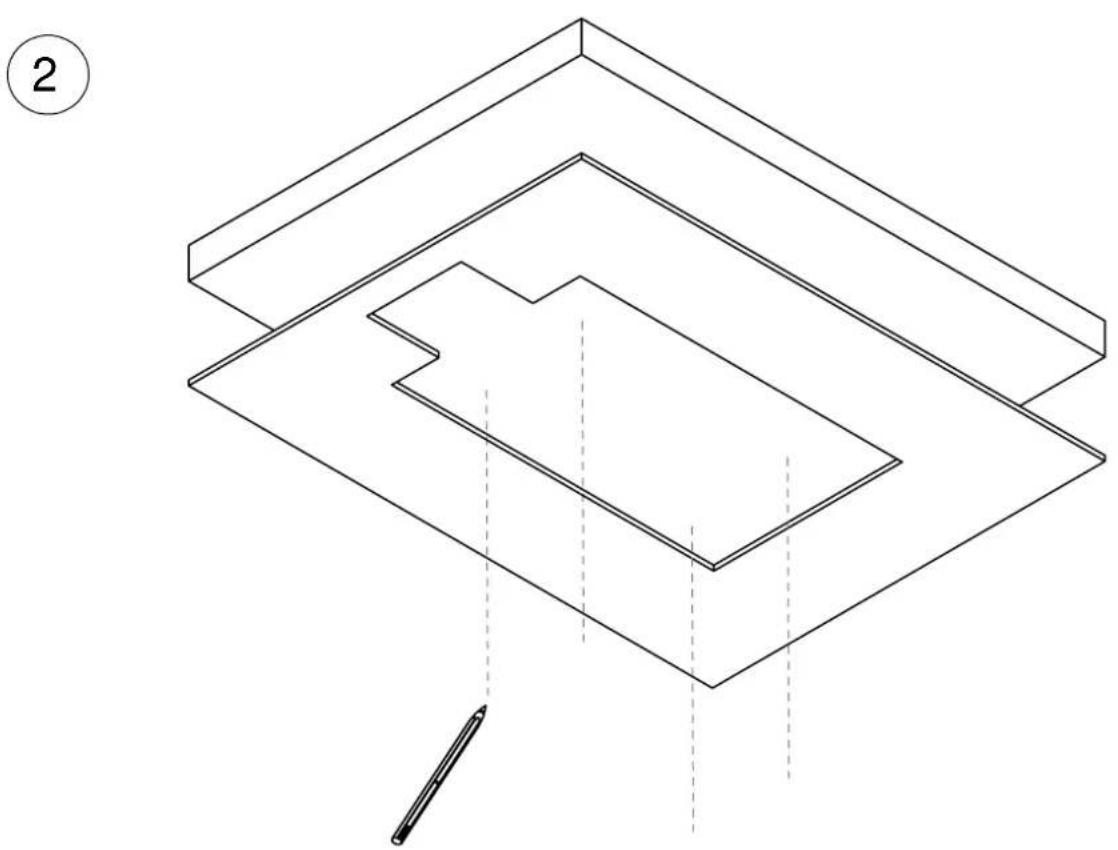
INSTALACIÓN / INSTALAÇÃO / INSTALLATION / INSTALLATION
natural_image
Isometric diagram of nested rectangular planes with a pencil, no text or symbols presentINSTALACIÓN / INSTALAÇÃO / INSTALLATION / INSTALLATION
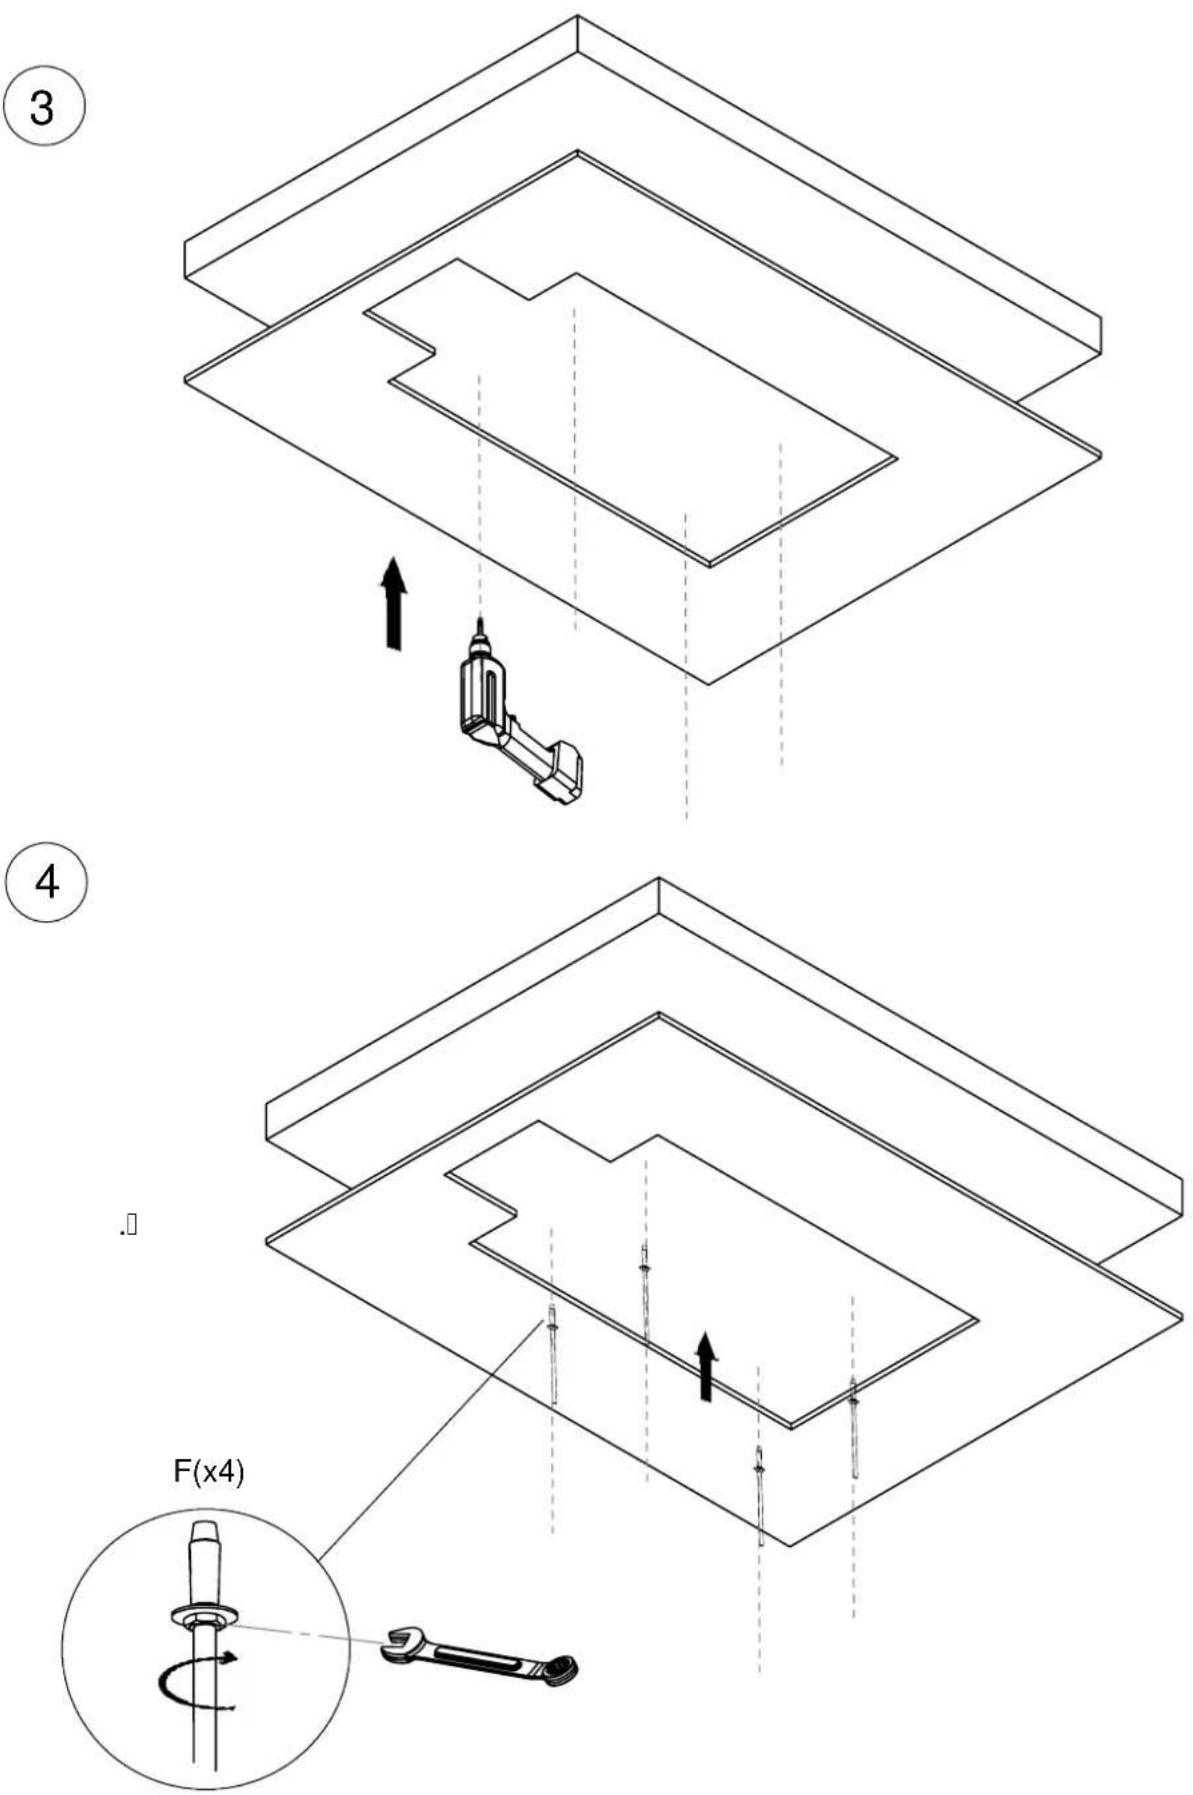
INSTALACIÓN / INSTALAÇÃO / INSTALLATION / INSTALLATION
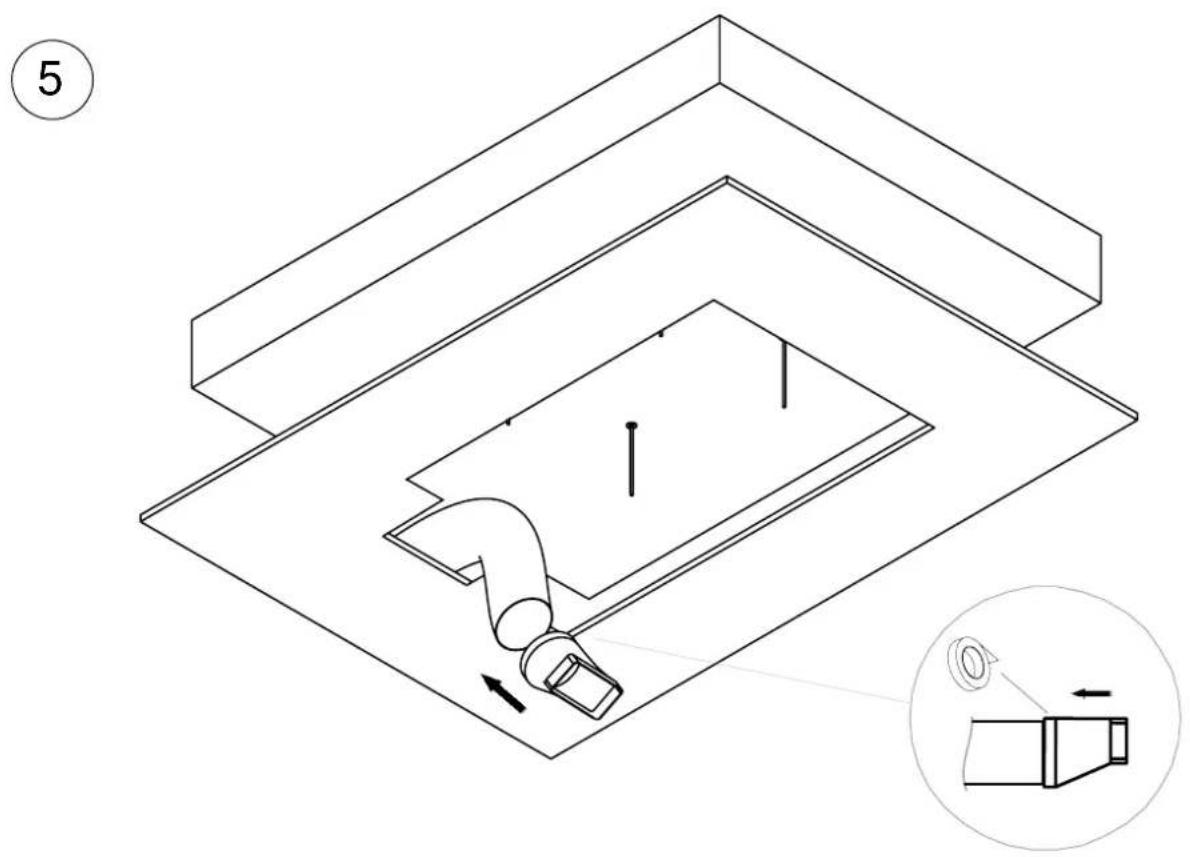
6
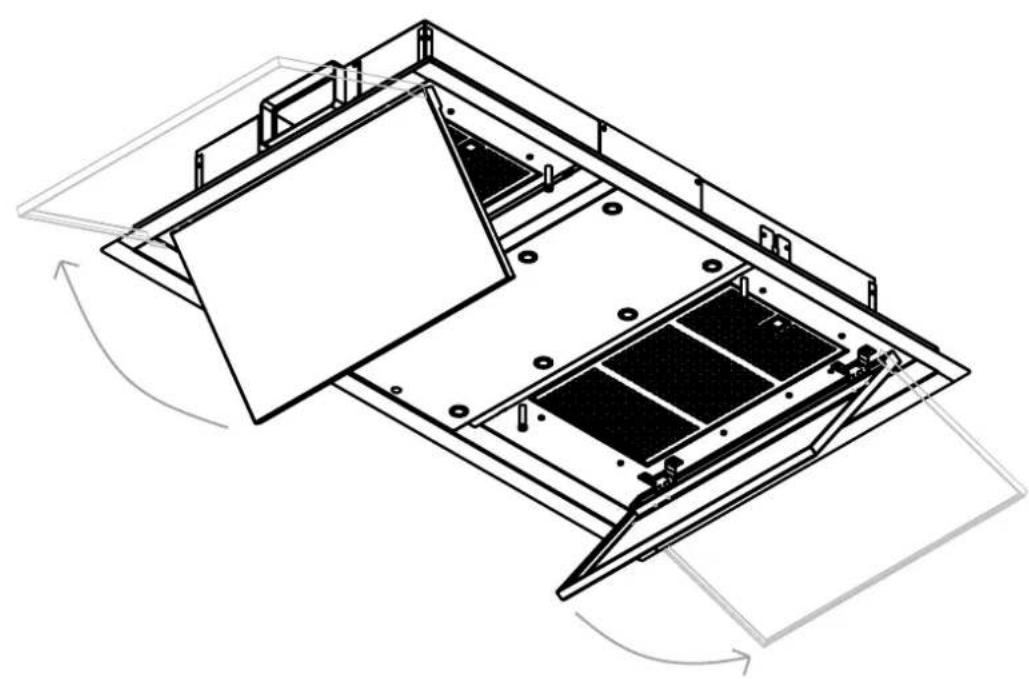
natural_image
Technical line drawing of a mechanical assembly with no visible text or symbolsINSTALACIÓN / INSTALAÇÃO / INSTALLATION / INSTALLATION
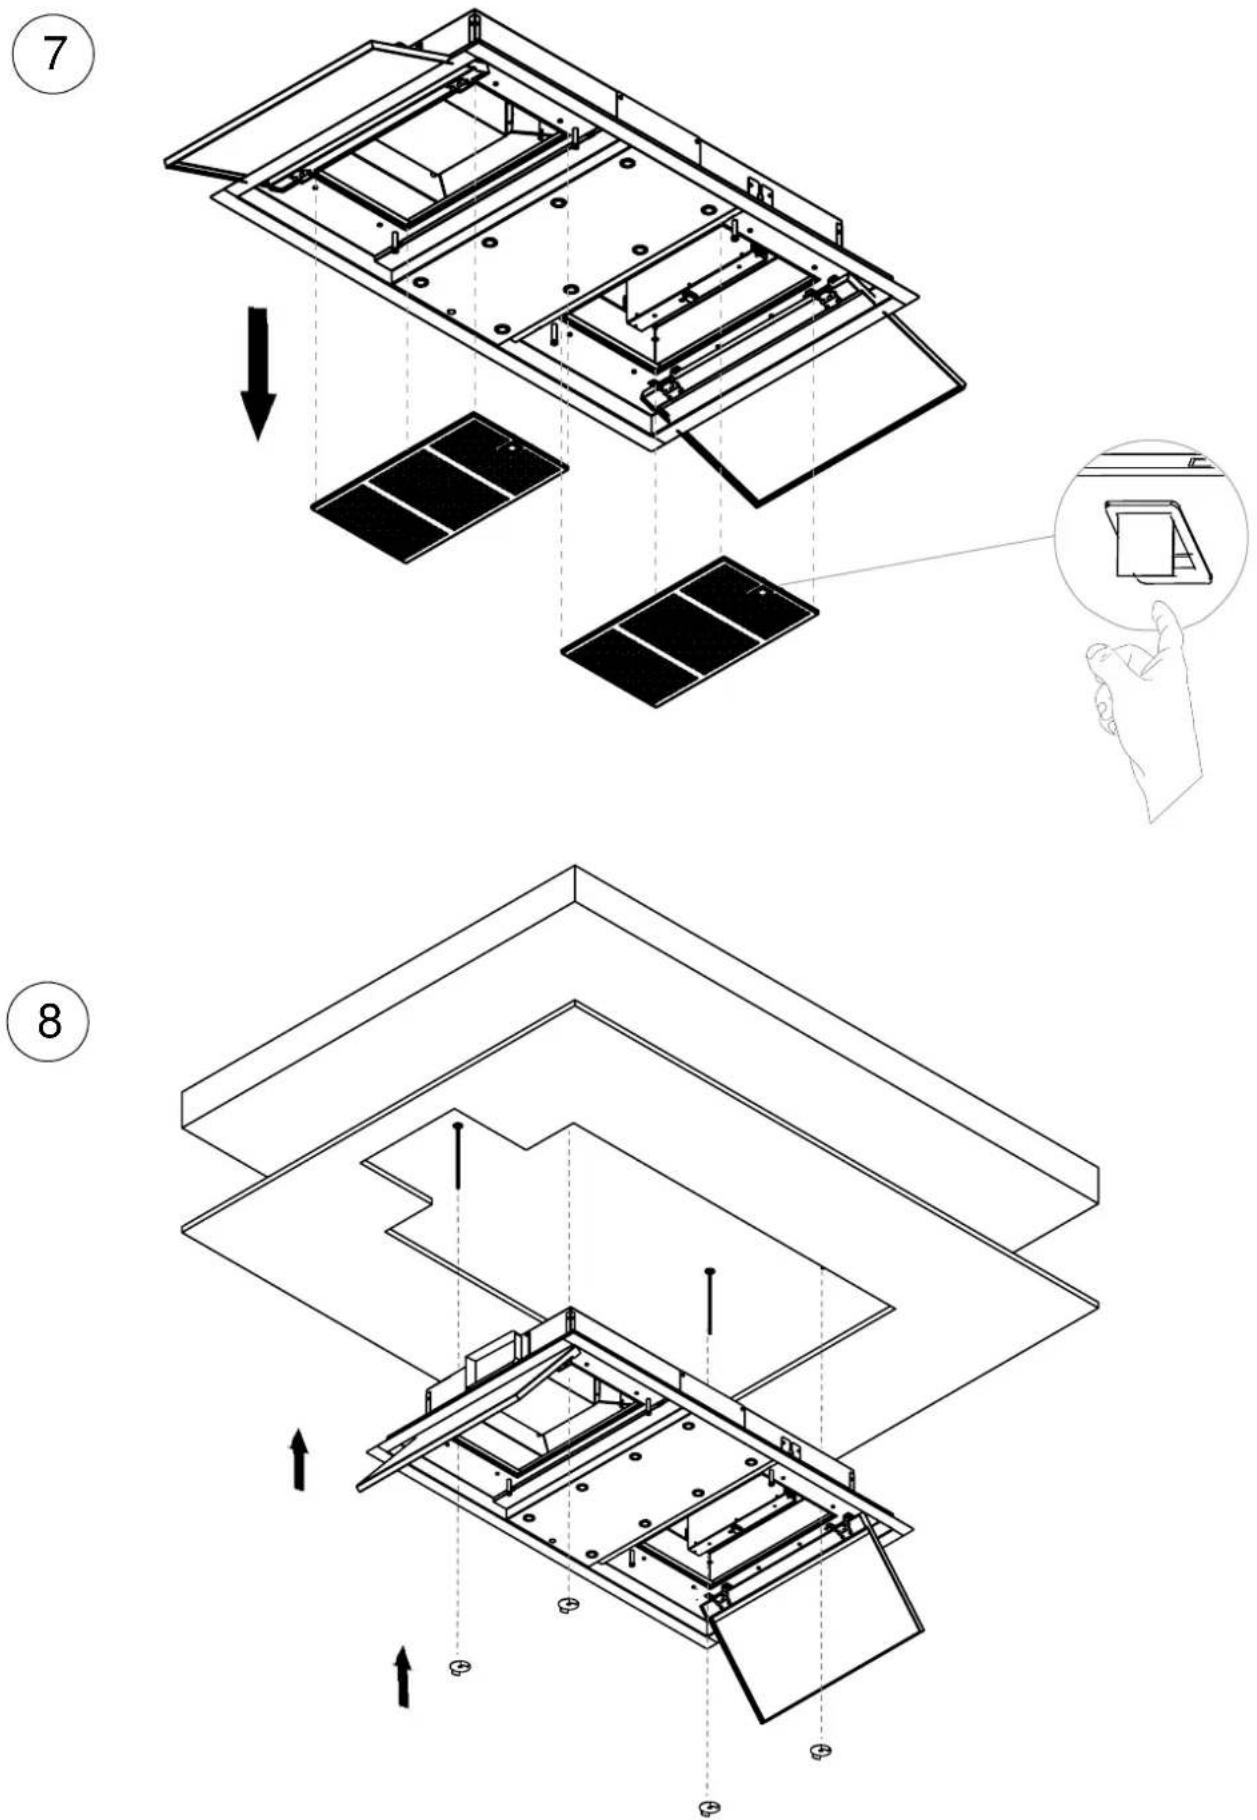
INSTALACIÓN / INSTALAÇÃO / INSTALLATION / INSTALLATION
9
(Dx4)
10
11
INSTALACIÓN / INSTALAÇÃO / INSTALLATION / INSTALLATION
12
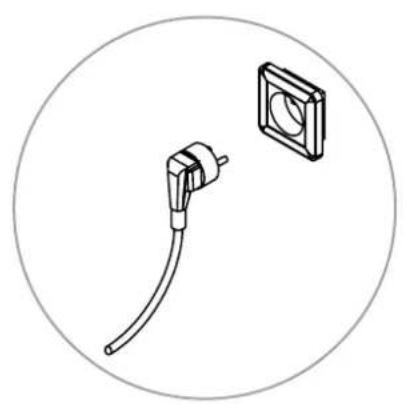
natural_image
Simple line drawing of a cable connector and a square component (no text or symbols)13
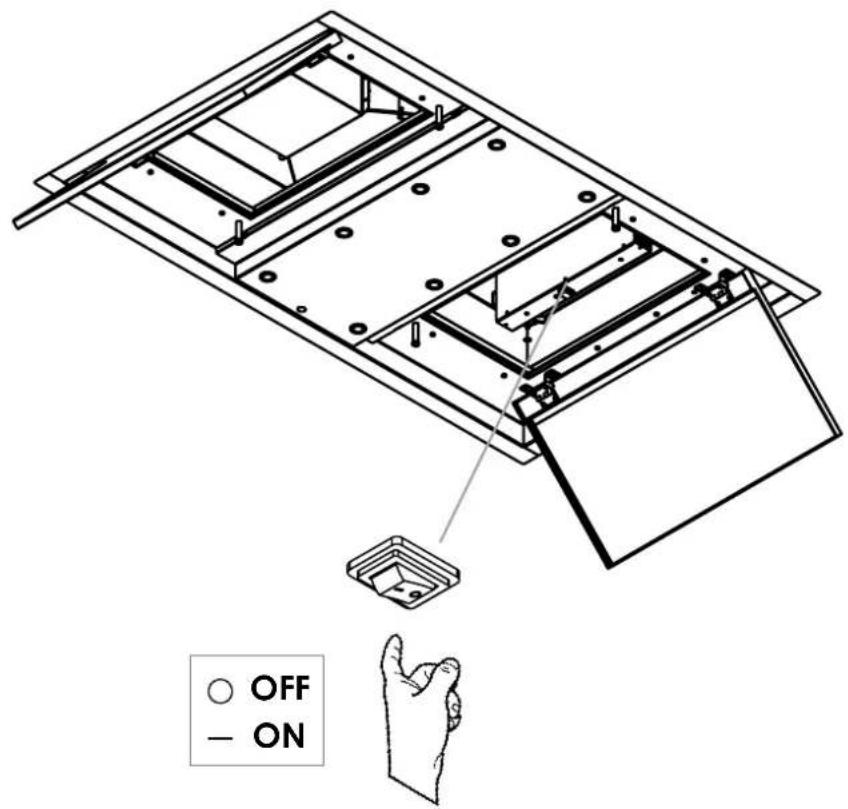
INSTALACIÓN / INSTALAÇÃO / INSTALLATION / INSTALLATION
14
natural_image
Technical diagram of a solar panel installation with mounting brackets and structural supports (no text or symbols)15
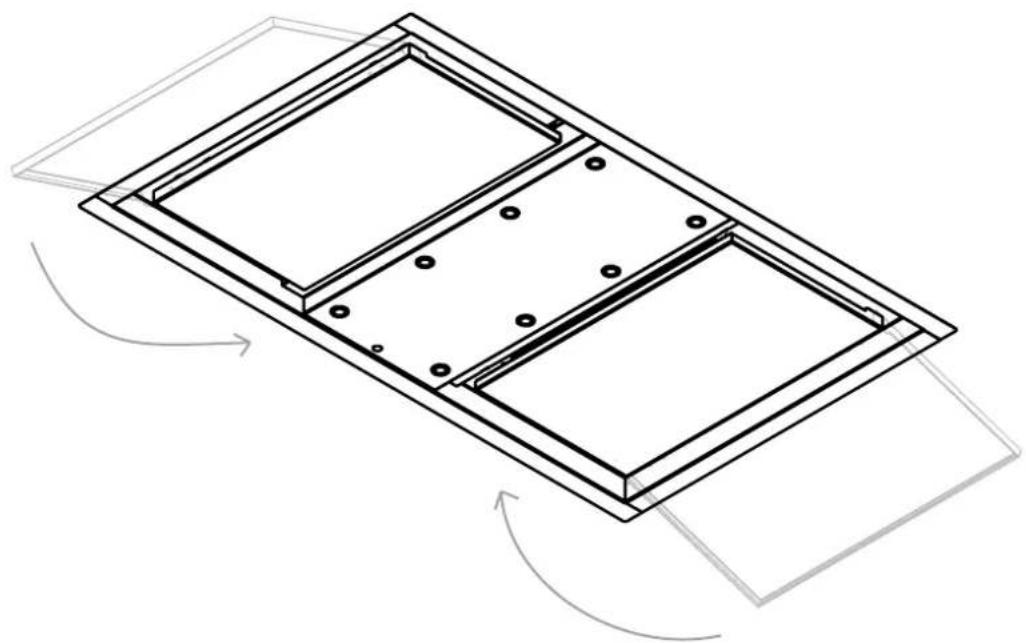
natural_image
Technical line drawing of a rectangular frame with internal compartments and mounting holes, showing rotational motion arrows (no text or symbols) | ON/OFF, Press this symbol to turn on the motor, press again to turn off. |
 | Press this symbol to lower the motor speed. |
 | Press this symbol to increase motor speed,Note: If you have a motor version that exceeds 650m3/h, 3rd or 4th speed will be timed. (*see Ecodesign Timer section, Page 17). |
 | LAST TIME: When the motor is on at any speed, pressing this button will start a 5-minute timer, at the end of which time the motor and lights will switch off. When on, it is possible to adjust the speed to the desired level. This function is indicated on the display by flashing dots.This function offers a visual indicator by flashing the pilot lamp. |
 | Red LED that will light up whenever a function is pressed. |
 | MAIN OR WORKING LIGHT: Press to switch on main lights and press again to switch off. COURTESY OR AMBIENT LIGHT: (Optionally, depending on model and version) Keeping the key pressed for 2 seconds will switch on the courtesy light, and continuing pressing will switch it off again. |
SYNCHRONIZATION REMOTE CONTROL (\* only if necessary, it is already synchronized):
- Connect the hood to the mains or turn on the hood switch, optional under filters or panel.
- ATTENTION!: once step 2 is completed, when connecting the hood to the electricity:

DO NOT TOUCH ANY COMMAND KEY UNTIL AFTER 5 SECONDS

- After the first 5 seconds, in the interval time between 5 and 20 seconds, with the remote control facing the hood, press or hold the LIGHT button 📋 on the remote control, and the lights on the hood will light up, confirming that the process has been successfully performed.
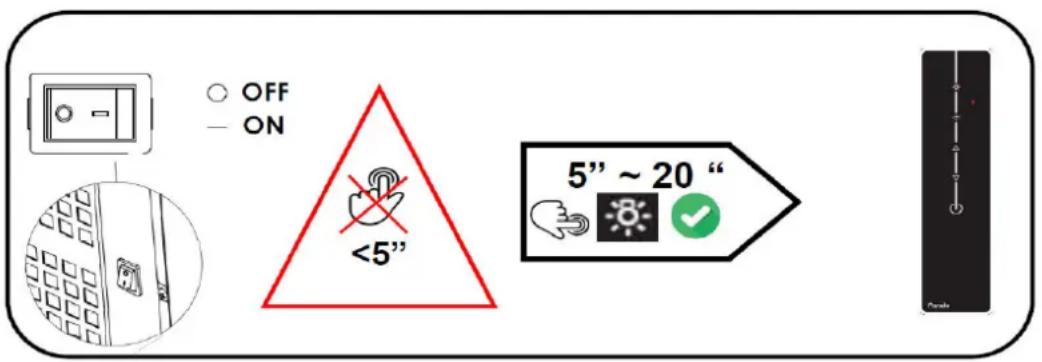
If it takes more than 20 seconds to synchronize the control, the hood switchboard closes the reception and does not record any code, you must repeat the process, making sure to press the key between 5 "and 20".
MANTENIMIENTO / MANUTENÇÃO / MAINTENANCE / MAINTENANCE
ILUMINACION Y CARACTERISTICAS LED / ILUMINAÇÃO E CARATERISTICA LED ÉCLAIRAGE ET CARACTÉRISTIQUES LED / LED LIGHTING AND FEATURES
ATENCIÓN!
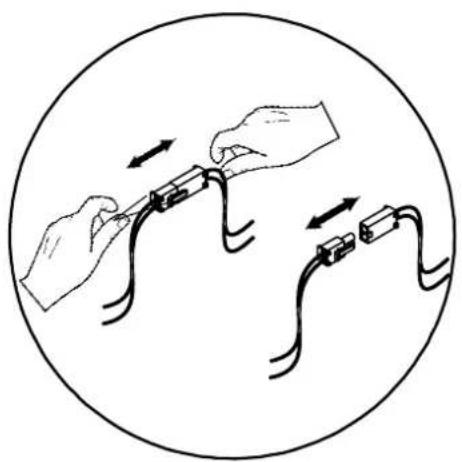
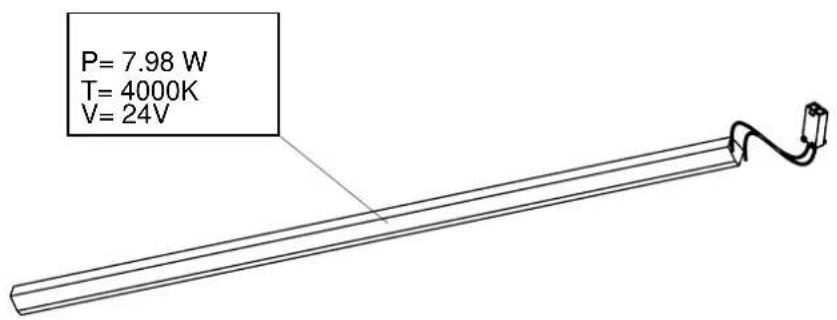
LED type lights involve a complex manipulation in addition to an air connection involving an internal connector risk of electric shock, therefore this type of handling must be done by the Pando official technical service or a qualified and authorized professional. The manufacturer will not be liable for any damage caused by mishandling of the LED lights by unauthorized personnel.

MANTENIMIENTO / MANUTENÇÃO / MAINTENANCE / MAINTENANCE
ILUMINACION Y CARACTERISTICAS LED / ILUMINAÇÃO E CARATERISTICA LED ÉCLAIRAGE ET CARACTÉRISTIQUES LED / LED LIGHTING AND FEATURES
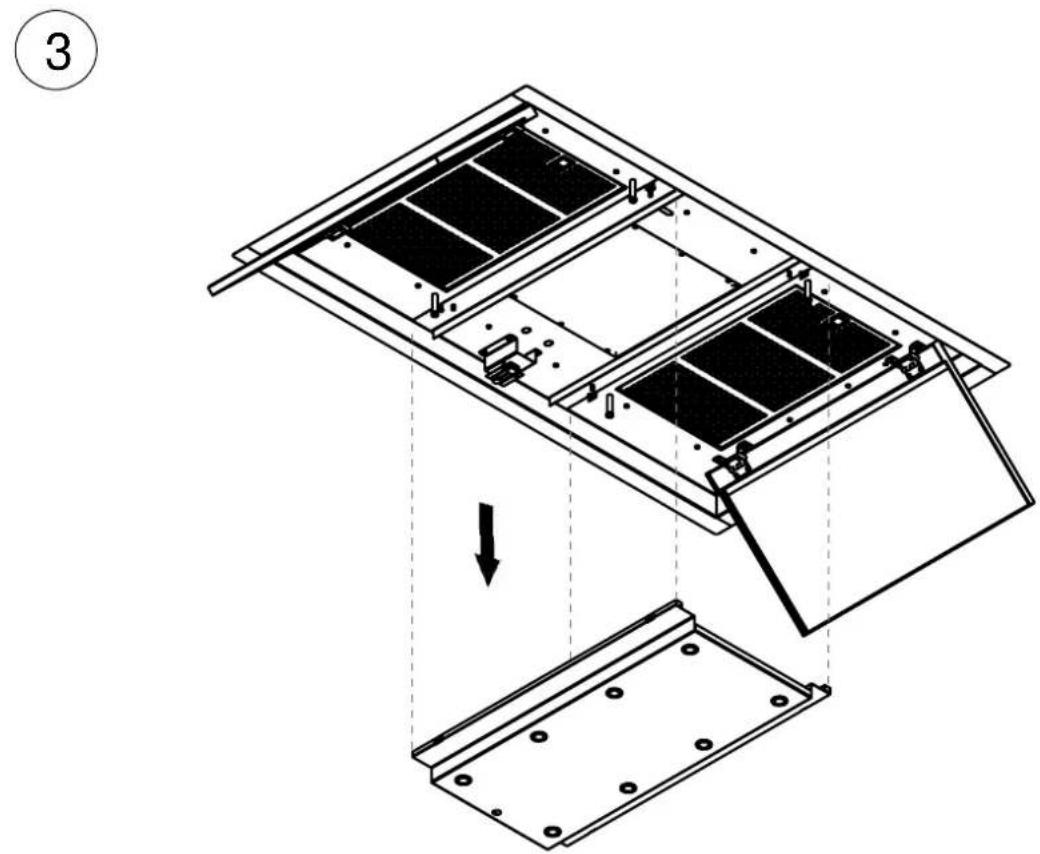
MANTENIMIENTO / MANUTENÇÃO / MAINTENANCE / MAINTENANCE
ILUMINACION Y CARACTERISTICAS LED / ILUMINAÇÃO E CARATERISTICA LED ÉCLAIRAGE ET CARACTÉRISTIQUES LED / LED LIGHTING AND FEATURES
4
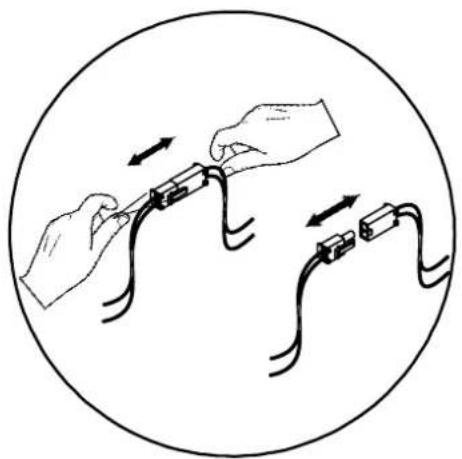
natural_image
Diagram showing hands connecting wires to a connector, with arrows indicating direction (no text or symbols)5 E-250
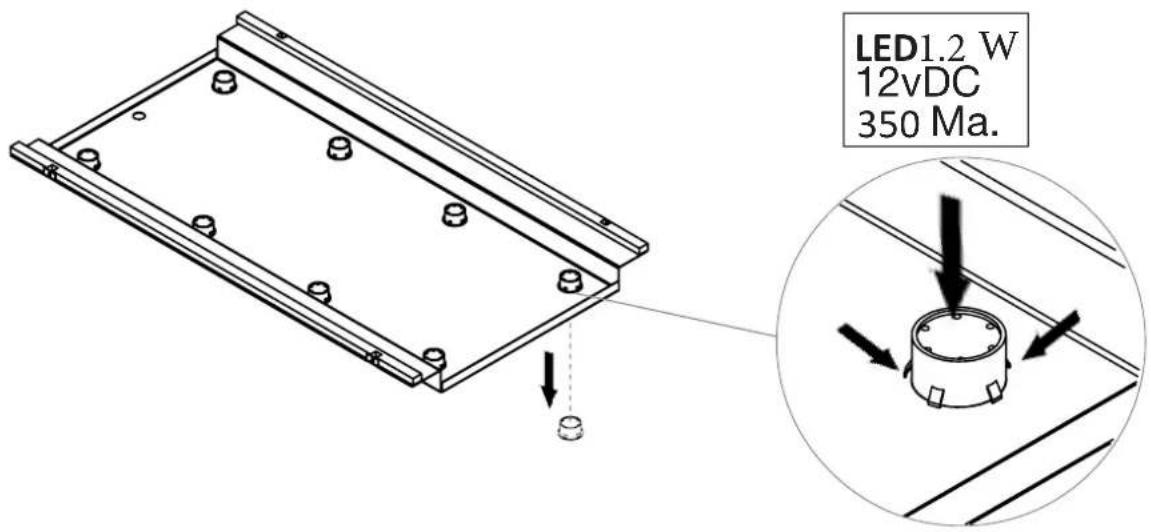
5 E-265
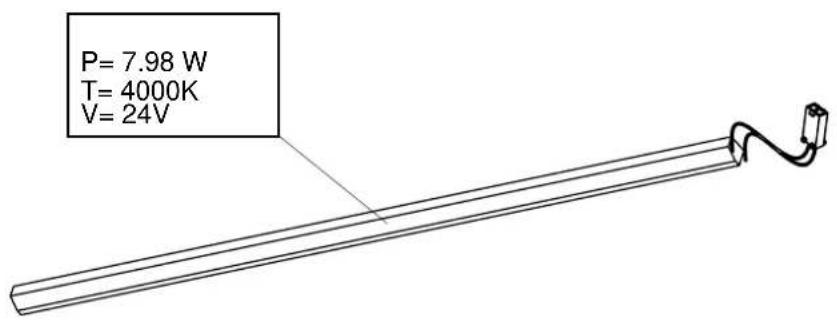
MANTENIMIENTO / MANUTENÇÃO / MAINTENANCE / MAINTENANCE
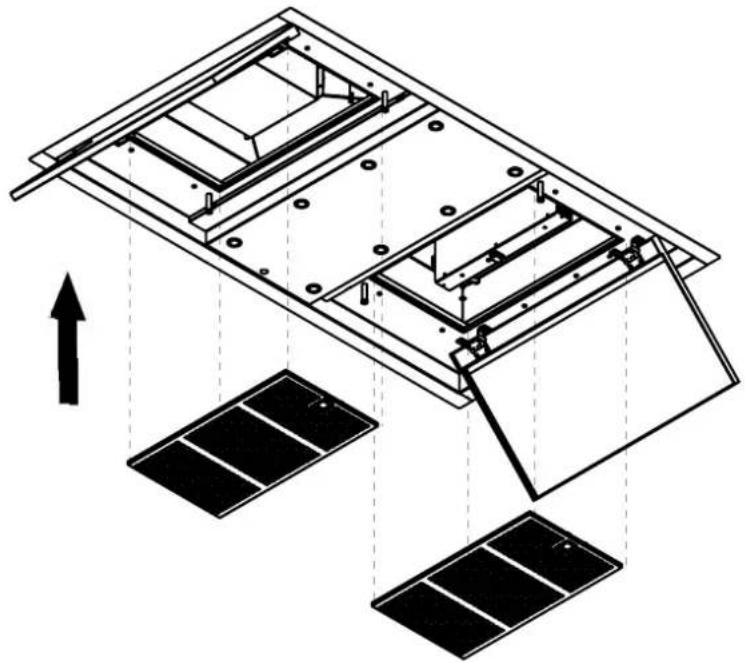
FILTRO INOX / FILTRO INOX / FILTRE D'INOX / INOX FILTER
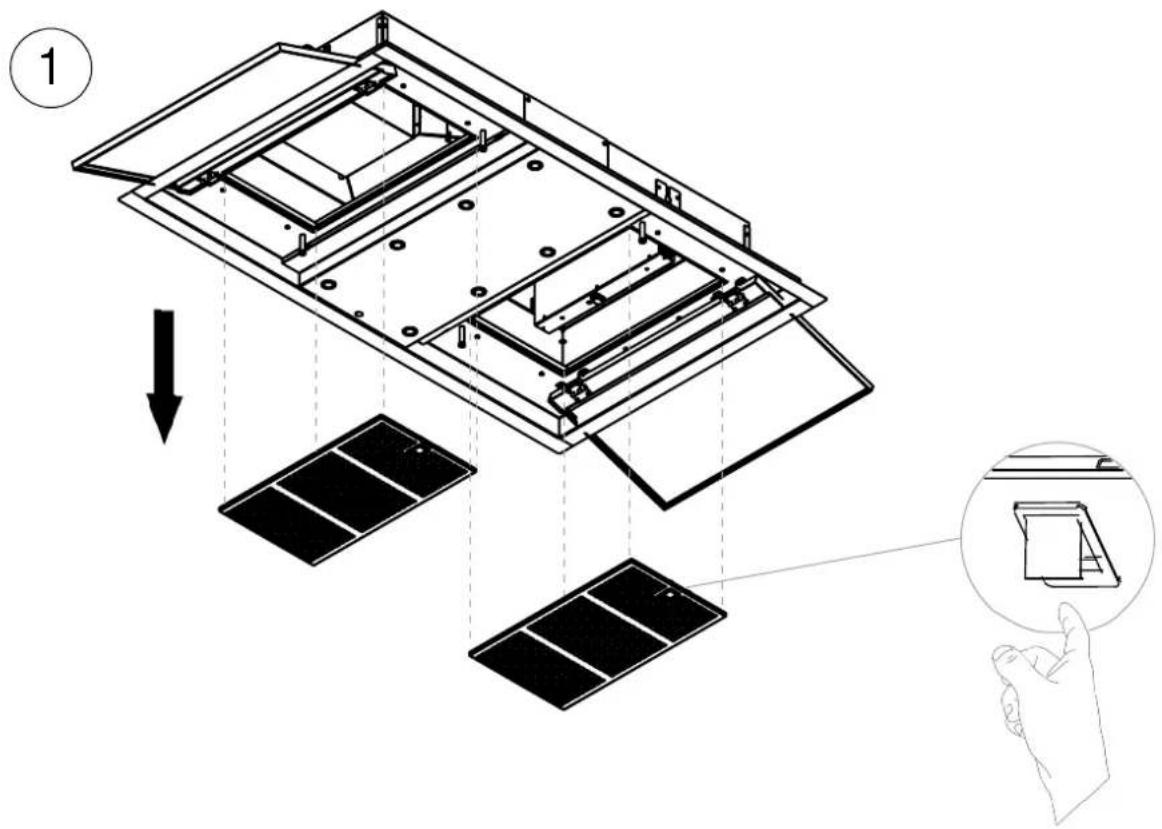
FILTRO DE CARBON ACTIVADO (FCLR), LAVABLE Y REACTIBABLE (OPCIONAL)
FILTRO DE CARVAO ATIVADO (FCLR), LAVÁVEL E REACTIBABLE. (OPCIONAL) FILTRE AU CHARBON ACTIVÉ (FCLR), LAVABLE ET RETIGGERABLE. (EN OPTION) ACTIVATED CARBON FILTER (FCLR), WASHABLE AND RETRIGGERABLE. (OPTIONAL)
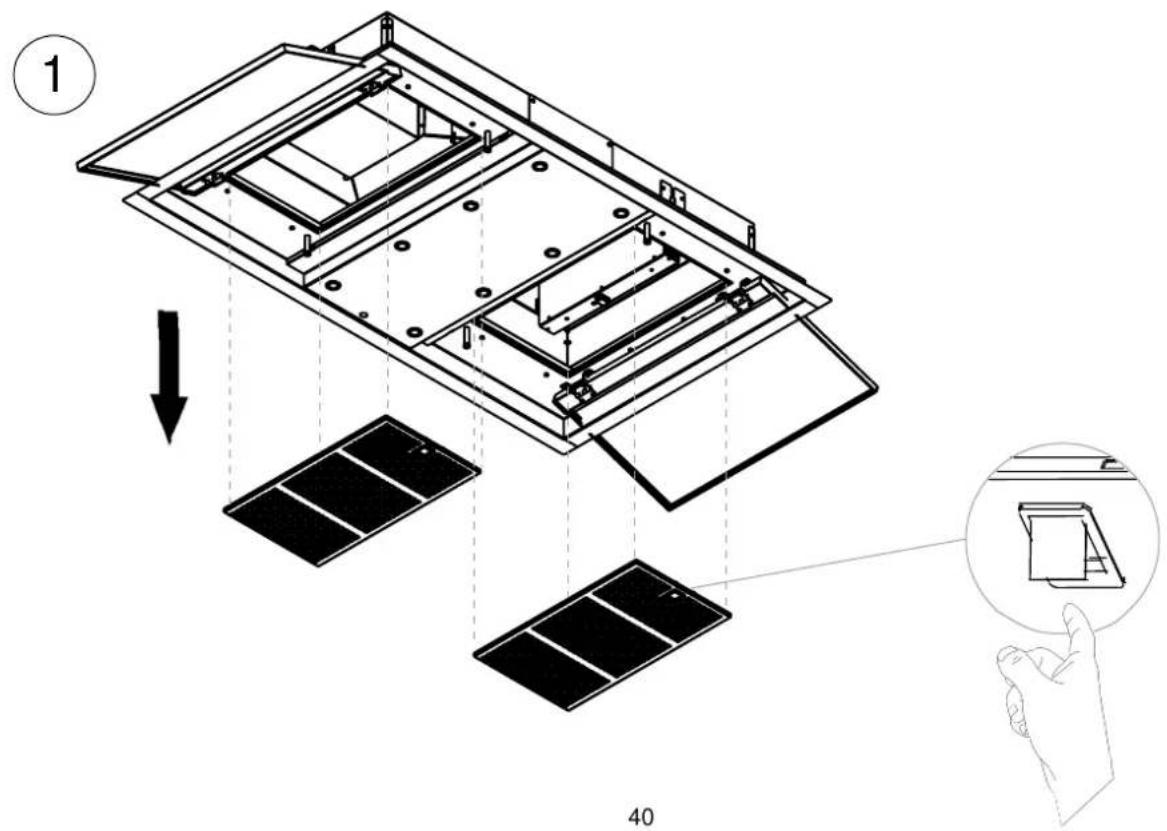
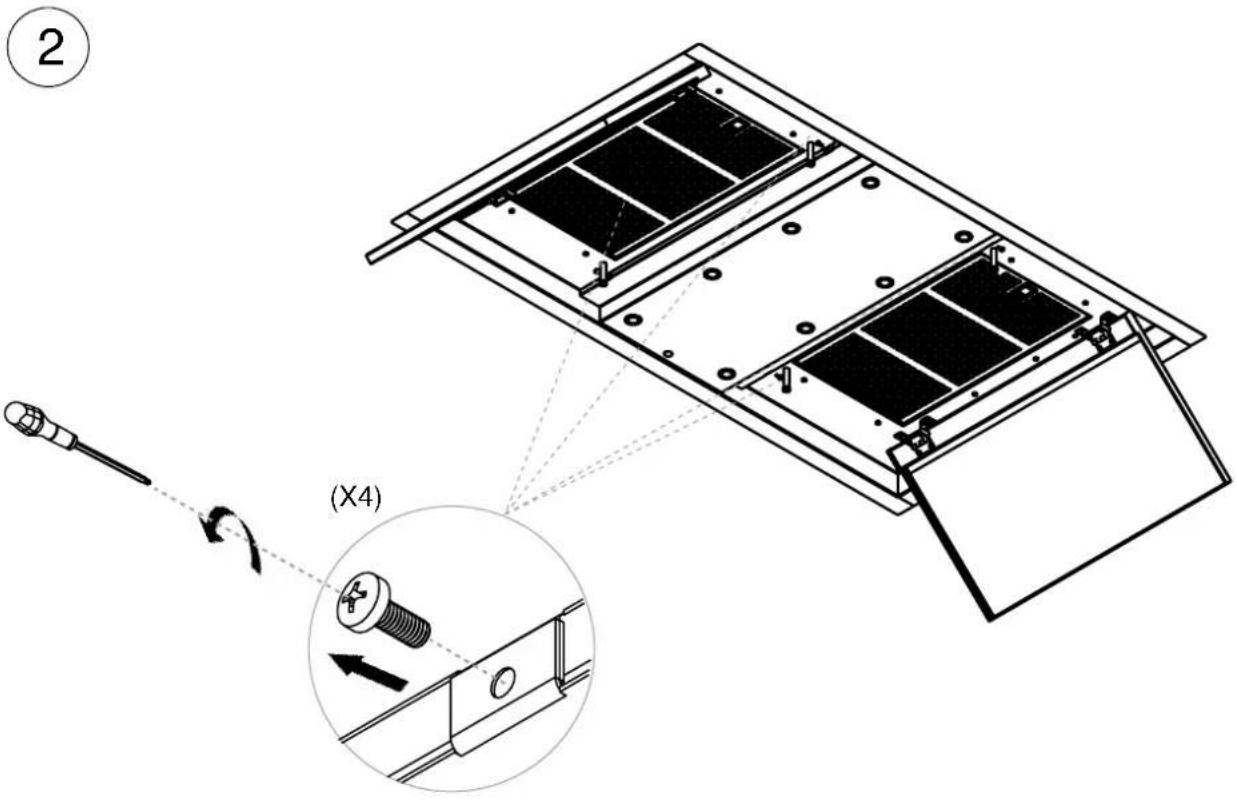
MANTENIMIENTO / MANUTENÇÃO / MAINTENANCE / MAINTENANCE
FILTRO DE CARBON ACTIVADO (FCLR), LAVABLE Y REACTIBABLE (OPCIONAL) FILTRO DE CARVAO ATIVADO (FCLR), LAVÁVEL E REACTIBABLE. (OPCIONAL) FILTRE AU CHARBON ACTIVÉ (FCLR), LAVABLE ET RETIGGERABLE. (EN OPTION) ACTIVATED CARBON FILTER (FCLR), WASHABLE AND RETRIGGERABLE. (OPTIONAL)
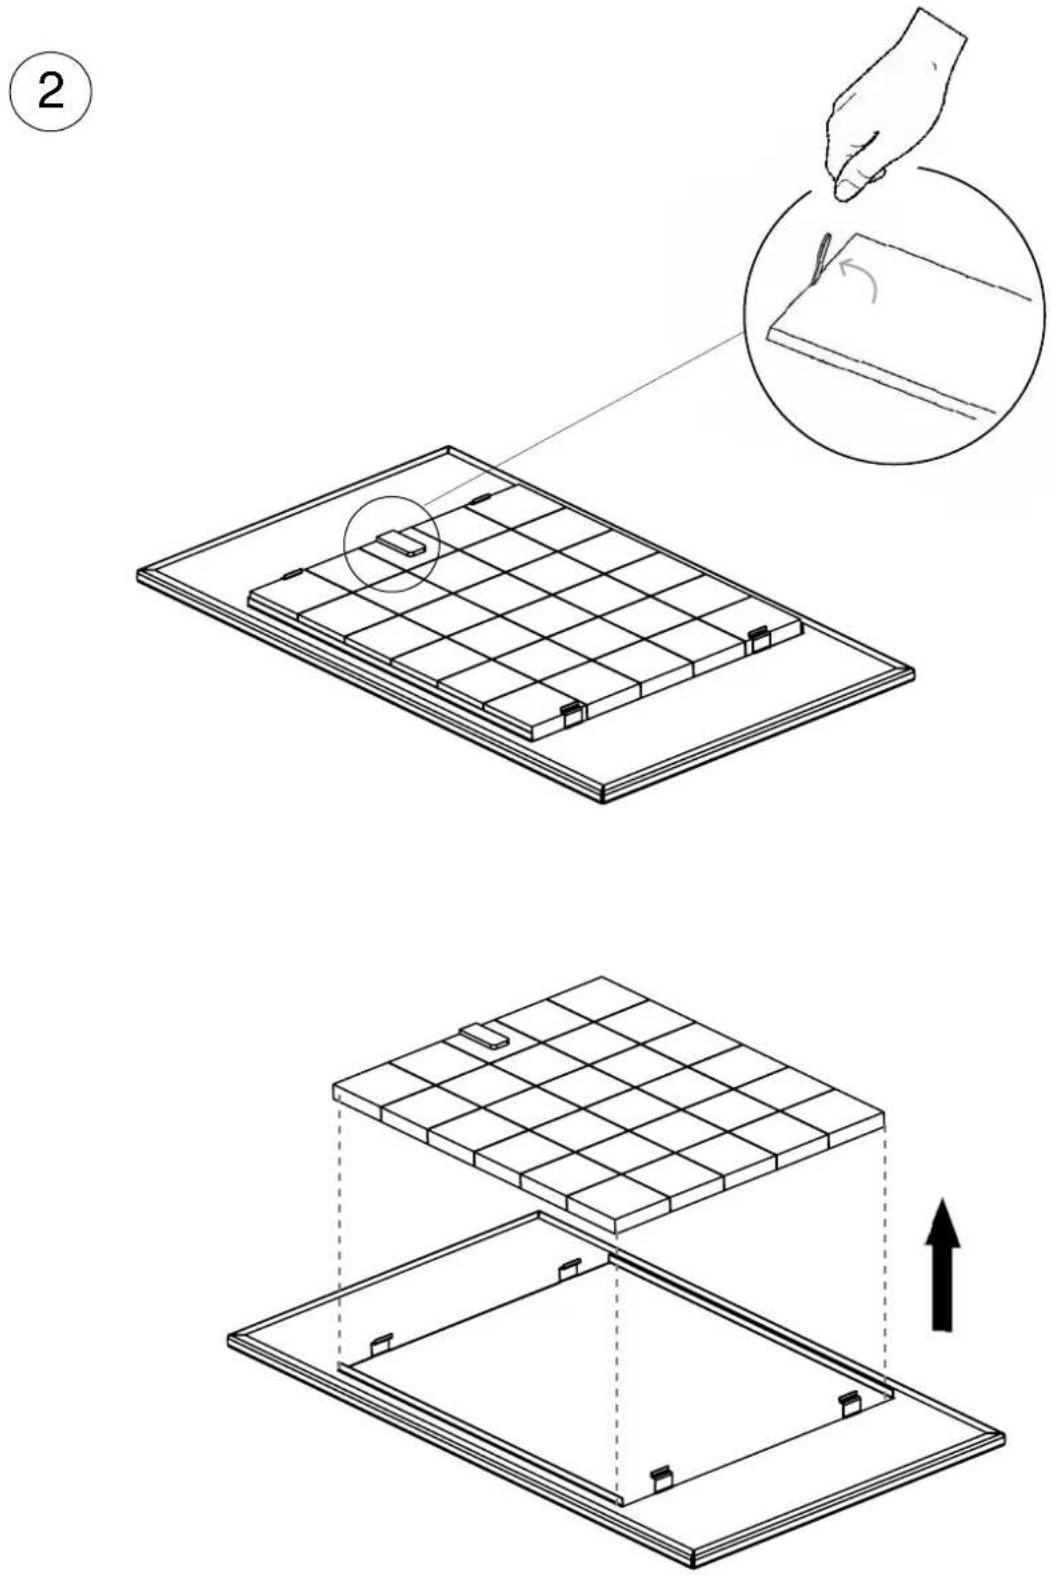
NOTAS/ NOTAS/ REMARQUES/ NOTES:
ES
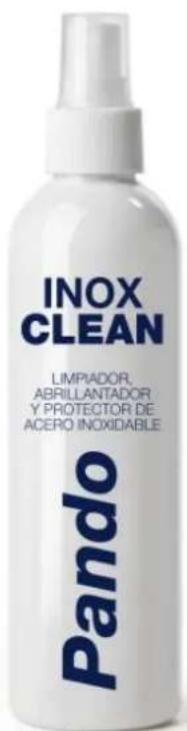
ESPRODUCTO EXCLUSIVO
LIMPIADOR,
ABRILLANTADOR Y
PROTECTOR DE ACERO INOXIDABLE
INOX PANDO, Referencia 1059.
PROPIEDADES:
Degreaser especially recommended for polishing stainless steel surfaces, with its complex formula based on paraffin it leaves an invisible film that acts as a protector and makes it shine.
APPLICATIONS:
Cleans, polishes and evens out stainless steel surfaces of extractor hoods and stainless steel kitchen furniture.
INOXPAN S.L.
Pol. Ind. El Cros
The International Certification Network
Quality Management System ISO 9001:2015

Pando
EN – User and installation Manual.
E-250/265
MOTOR EXTERIOR
natural_image
Exterior view of a modern black ceiling light fixture with two square recesses and white spotlights (no text or symbols)The International Certification Network Quality Management System ISO 9001:2015

ES - Español

The symbol on the product or its packaging indicates that this product cannot be disposed of like normal domestic waste. The product must be handed over at a collection point for recycling electrical and electronic equipment. If you ensure that this product is correctly disposed of, you will help to avoid the possible negative environmental and public health effects that could arise from incorrect disposal. For more detailed information about recycling this product, please contact your city authorities, the domestic waste service or the establishment where you purchased it. This electrical appliance is marked in compliance with European Directive 2002/96/EC on electrical and electronic appliance waste (WEEE).
EN - INTRODUCTION
Firstly, we would like to thank you for your confidence in our firm when you chose a Pando extractor hood.
This manual and its annexes are a guide for the correct installation, usage and maintenance of your new Extractor Hood.
To learn everything about your hood, we recommend you read these instructions carefully from beginning to end and keep them for future reference.
Before starting the installation process read with care this installation manual and the attached user's manual, There are also instructions for the correct installation of the product.
Installation should only be carried out by qualified professionals, professional installers or the official technical service. The manual or installation guide must be read with care before starting the installation process.
When opening the packaging, check that all the components are in perfect state and all the accessories are present. If this is not the case, contact the dealer and do not install. Once installed, any damage to the exterior such as scratches, dents, stains, etc. will not be covered by the guarantee.
The manufacturer will not be held liable for any possible inaccuracies due to printing or trans- cription errors in this manual. The manufacturer reserves the right to incorporate modifications considered useful or necessary into the products, which will not alter their essential functional and safety characteristics.
EN - RECOMMENDATIONS TO BEAR IN MIND BEFORE INSTALLATION.
VERY IMPORTANT!
DO NOT REMOVE THE PROTECTIVE PLASTIC FROM THE HOOD UNTIL IT IS COMPLETELY INSTALLED, IF THIS PLASTIC IS NOT PRESENT IN AREAS THAT COULD HAVE A RISK OF DAMAGE DURING INSTALLATION, IT IS RECOMMENDED TO APPLY PROTECTIVE MATERIALS AGAINST IMPACT, SCRATCHES AND CONTACT WITH CORROSIVE AGENTS.
TAKE ESPECIAL CARE DURING THE INSTALLATION IF OTHER WORK IS ALSO IN PROGRESS, BECAUSE PAINT, SILICON, PLASTER AND OTHER MATERIALS COULD CONTAIN CORROSIVE CHEMICALS THAT MAY DAMAGE THE PRODUCT, IN THESE CASES IT IS RECOMMENDED TO ADEQUATELY PROTECT THE HOOD, BY FOR EXAMPLE, HERMETICALLY COVERING AREAS THAT COULD BE AFFECTED WITH PLASTIC.
THIS WILL AVOID DAMAGE TO THE OUTSIDE OF THE APPLIANCE, SOMETHING THAT WILL NOT BE COVERED BY THE GUARANTEE.
EN - SAFETY INSTRUCTIONS
- If the hood is to be used at the same time as gas fuelled or other fuelled appliances (not applicable to appliances exclusively designed to blow air into the room) the room must be properly ventilated.
- The exhausted air must not be led through a conduit that is used for exhausting fumes from other appliances using gas or other fuels (not applicable to devices destined exclusively to discharge the air inside the room).
-The minimum distance between the surface of the cooktop and the lower edge of the hood must be 65 cm if the the extractor hood is fitted over gas cooker. If the installation instructions of the gas cooker indicates a greater distance, this must be followed.
- Regulations regarding air evacuation must be respected.
- If the hood does not have a power cable with a plug, or other means for disconnection from the mains, with a separation of all poles to ensure total disconnection under category III conditions of overvoltage, means for disconnection of the fixed installation must be incorporated in accordance with installation regulations.
- Once the appliance has been delivered, within 24h, remove the packaging and check that it is in good state, visually inspecting the general state of the outside. If any anomaly or damage is observed, do not install and immediately inform the dealer or installer within 24h of reception.
- This hood has been designed for normal domestic use. It must not be used for industrial, professional, or any other use different from what it has been designed for.
- Pando will not be held liable for consequences or damages resulting from incorrect installation or misuse of the appliance.
- Do not try to alter any of the characteristics of this appliance, this could be dangerous and will automatically render the guarantee void.
- It must be possible and accessible for the user to disconnect the appliance from the mains after installation. The power plug should be easily accessible, if this is not the case, a switch for electrical disconnection, compliant with electrical installation regulations, must be fitted.
- Take special care when perforating walls or ceilings and ensure that there are no hidden electrical cables, pipes, metal beams, etc., as perforating them could cause great damage, short circuits or the transmission of noise and vibrations.
- IMPORTANT: Before connecting the appliance to the mains, make sure the current is first turned off (differential or circuit breaker on the general electrical panel of the house).
- Hood and conduit installation must comply with regulations on ventilation of closed spaces. More specifically, the exhausted air must not be led through a conduit that is used for exhausting fumes from other appliances using gas or other fuels (central heating installations, etc.).
- Negative pressure in the premises must not exceed 0.04 mbar. This will allow the hood to operate in optimum conditions. To achieve this, it is necessary to have a permanent entry of fresh air to avoid air stagnation, it is recommended to have a ventilation grille for this purpose. Doors and windows are not enough.
EN - SAFETY INSTRUCTIONS

- Attention! When the hood is in operation “in suction” at the same time as a heating system that depends on ambient air (gas, oil, coal boiler, chimney, etc.), take special care to avoid the hood absorbing air needed for combustion, this could cause dangerous accumulations of carbon monoxide in the premises or home, which could be deadly. If the extractor hood is installed together with a combustion appliance such as a boiler, chimney or local heating, the manufacturers of these appliances must be contacted to ensure optimum and risk-free operation.

- Electrical power supply must be stable and meet the electrical requirements of the appliance (see the nameplate of the appliance). If the power supply is unstable, with variations in voltage, current, surges and cuts, electrical storms, etc., the hood could malfunction and even be damaged, in which case repairs will not be covered by the guarantee. If any of these things happen, disconnect the hood and contact an electrician or your electrical company to solve the problem.
- To avoid hazards, it is forbidden to manipulate the appliance. If the power cable is damaged it must be replaced by the manufacturer through an authorised technical service. Any repairs that involve manipulating the appliance or its components must only be done by an authorised technical service.
- Improper and unauthorised handling of the hood, as well as modifying, cutting or perforating the body, structure, motor or wiring of the hood are expressly forbidden. In case of any of the above, the guarantee will be automatically void and the manufacturer will not be held liable for any possible harm or damages.
- The hood is an electrical appliance for fume extraction and must not be used as a support for objects or utensils.
- The LED lamps can not be manipulated by the user as there are risks of electric shock, handling, maintenance or replacement is a task reserved exclusively for official technical assistance service or authorized specialist installer.
- With the aim of constantly improving our products, we reserve the right to modify their functional characteristics or their appearance.
EN - Features and recommendations for ceiling-mounted hoods.
QUALITY ASSURANCE:
In order to ensure that your project does not come up against any unexpected difficulties, to ensure the product works successfully.
FORM OF THE CEILING:
The “ideal” ceiling to install these hood units must be completely unobstructed and flat over all of its surface. If for design reasons you choose to have different heights or steps in the ceiling, it must be ensured that the
suction losses (you must send us a plan to determine whether the surrounding ceiling is suitable).
CEILING HEIGHT:
The recommended distance between the floor and the hood is a maximum of 2.50 m. For greater heights consult our Technical Division.
POSITION OF THE HOOD:
The hood must be centred over the cooking area.
AIR INTAKE GRILLE:
To ensure optimum suction by the hood it is essential that the kitchen has a constant inward flow of air; a ventilation grille at floor level is the perfect solution for this.
INSTALLING THE FLUE PIPE:
We strongly recommend that you use S.E.C. System ^® fume extractor flue pipes from Pando, as these considerably improve convenience in use and the soundproofing of the unit.
INCLUDED:
All units with V.2450 Exterior and V.2350 Roof motors come with 5 m of S.E.C. System® fume extractor flue with interior ∅ 203 mm and exterior ∅ 253 mm as standard.
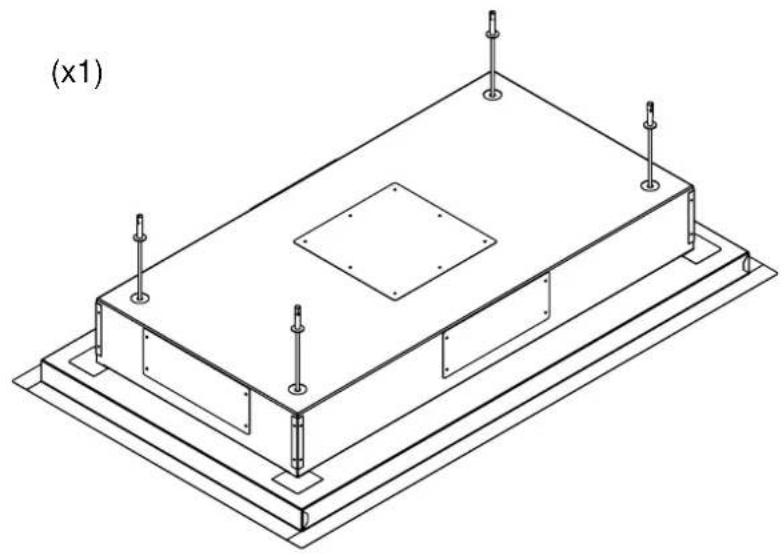
CONTENIDO / CONTEÚDO / CONTENU / CONTENT
natural_image
Isometric technical drawing of a rectangular electronic component with mounting flanges and mounting holes (no text or symbols)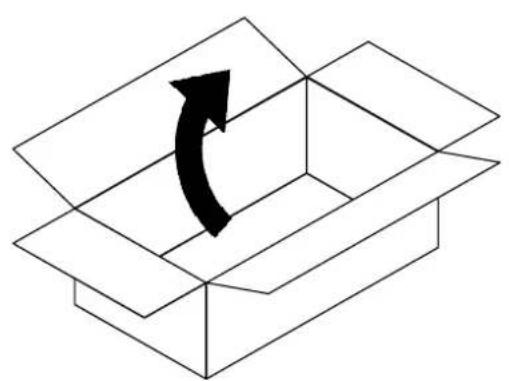
natural_image
Isometric line drawing of a box with an arrow indicating rotation or direction (no text or symbols)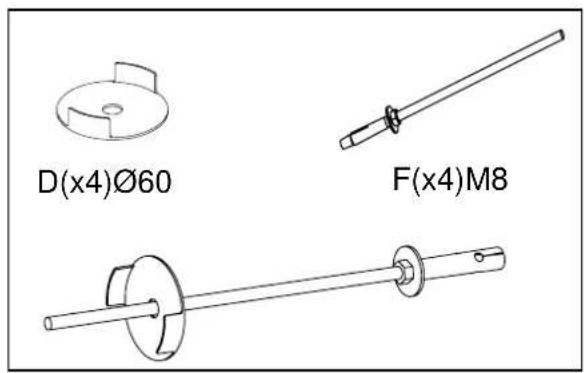
| OPCION-A SALIDA LATERAL | OPCION-B SALIDA SUPERIOR | |||
| MOTOR V.1550 | ||||
∅150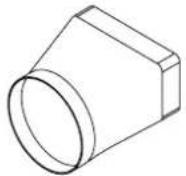 |  | 100x180 | ∅150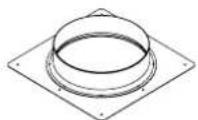 | |
| MOTOR V.2450/2350 | ||||
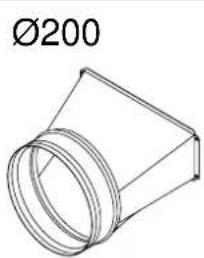 | 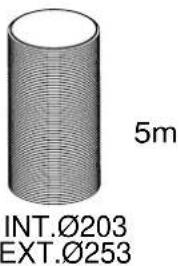 | 100x260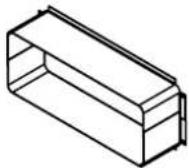 | ∅200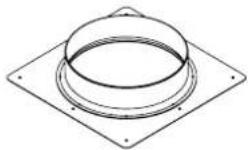 | 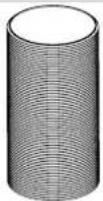 5mINT.∅203EXT.∅253 5mINT.∅203EXT.∅253 |
HERRAMIENTAS NECESARIAS / FERRAMENTAS NECESSÁRIAS / LES OUTILS NÉCESSAIRES / TOOLS NEEDLE
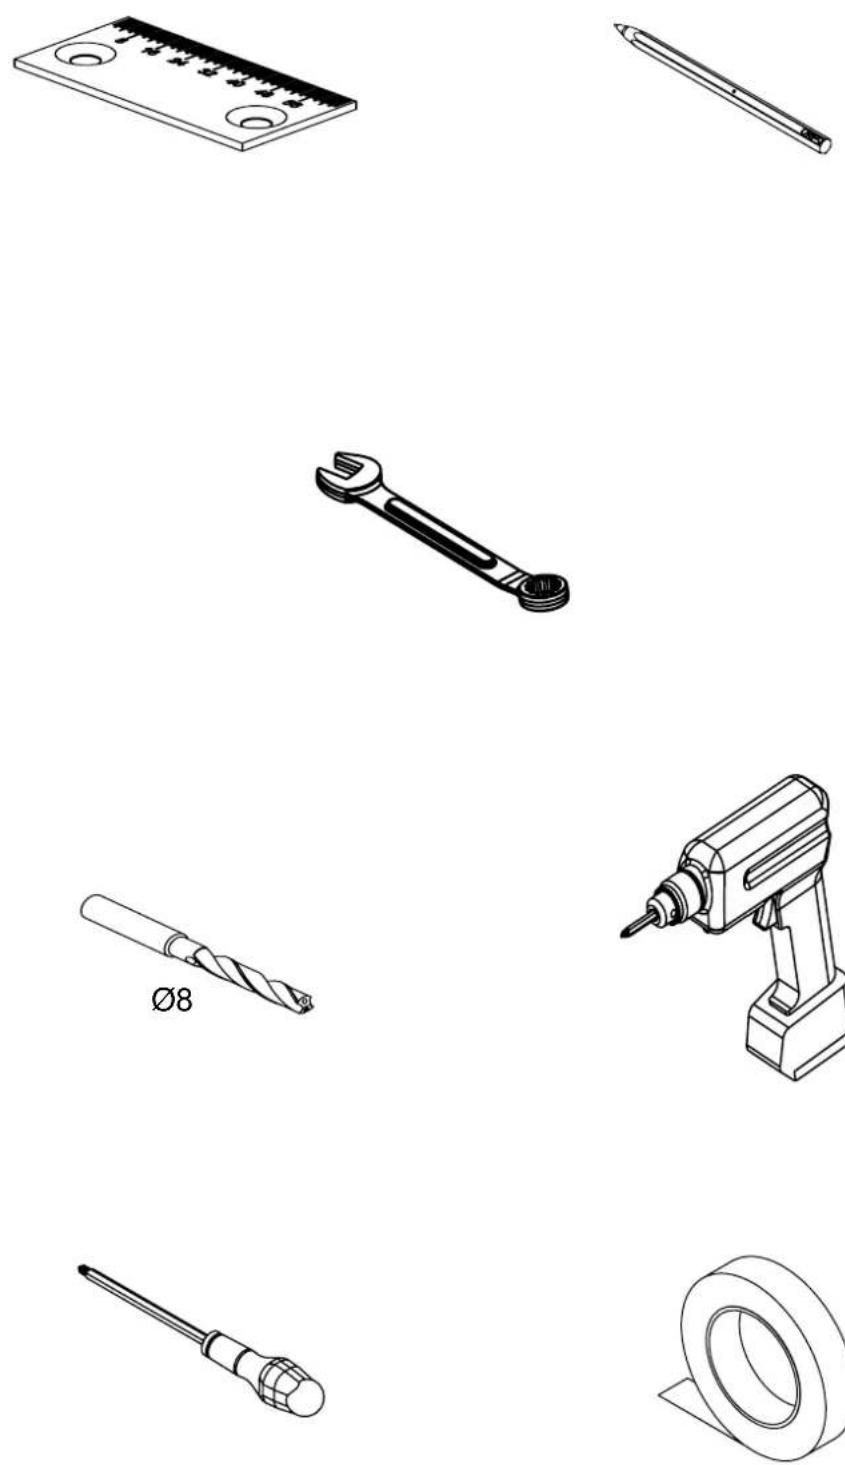
COTAS / DIMENSÕES / REPÈRES / DIMENSIONS
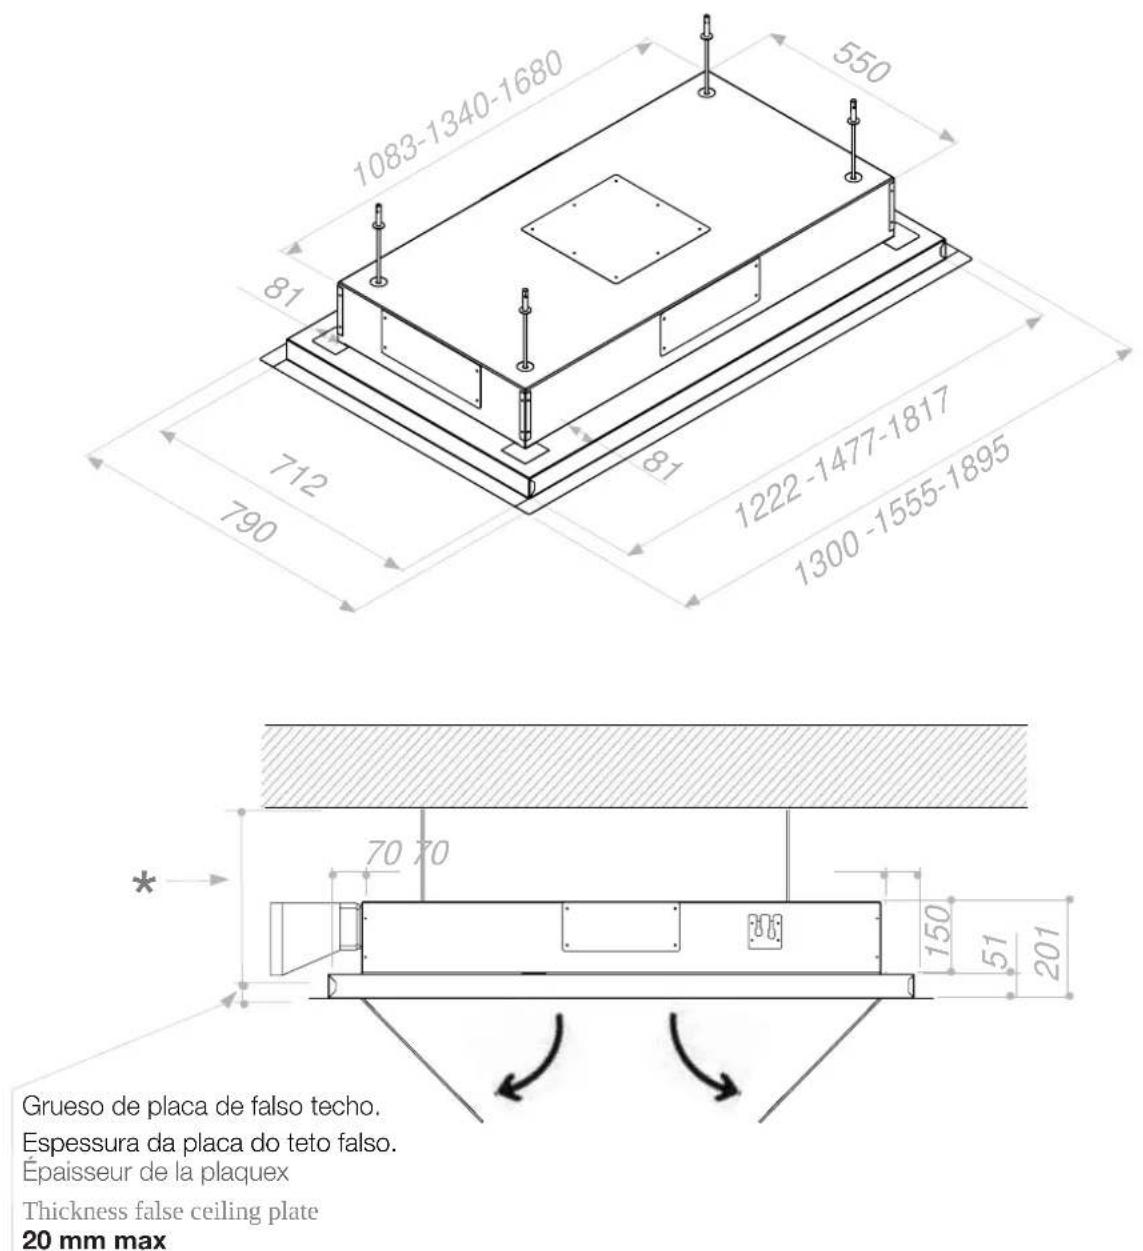
* Altura falso techo / Altura do teto falso Hauteur du faux-plafond / False ceiling height
| SALIDA LATERALSaída de fumo lateralÉvacuation de fumées côtéSide fume outlet | min. | max. | |
| 150 | 210 mm | 370 mm | |
| 200 | 300 mm | 370 mm | |
| 260 × 100 | 210 mm | 370 mm | |
| 180 × 100 | 210 mm | 370 mm | |
| SALIDA SUPERIOREvacuação do tetoÉvacuation au plafondCeiling fume outlet | 150 | 210 mm | 370 mm |
| 200 | 210 mm | 370 mm |
COTAS / DIMENSÕES / REPÈRES / DIMENSIONS
ENCASTRE / INSIRA / ENCASTREMENT / OPTIONAL
OPCION-A SALIDA LATERAL
Salida lateral corto
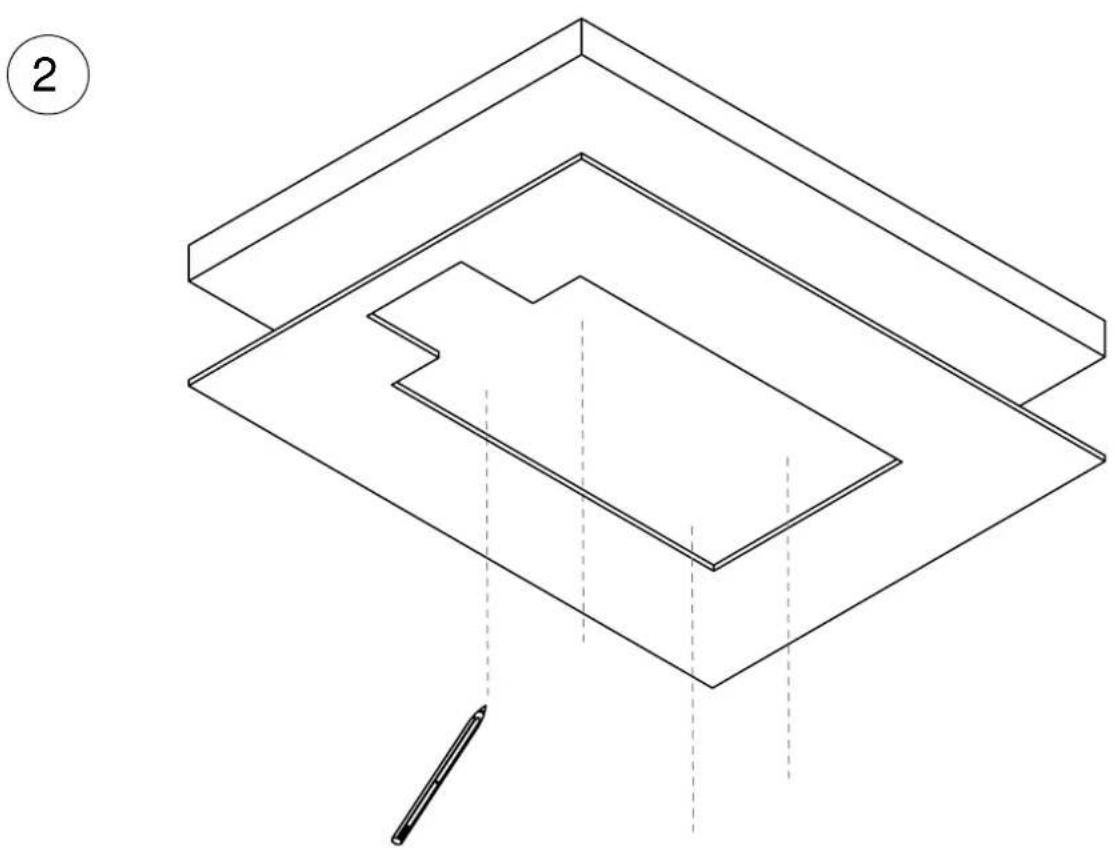
natural_image
Isometric diagram of nested rectangular planes with a pencil, no text or symbols presentINSTALACIÓN / INSTALAÇÃO / INSTALLATION / INSTALLATION
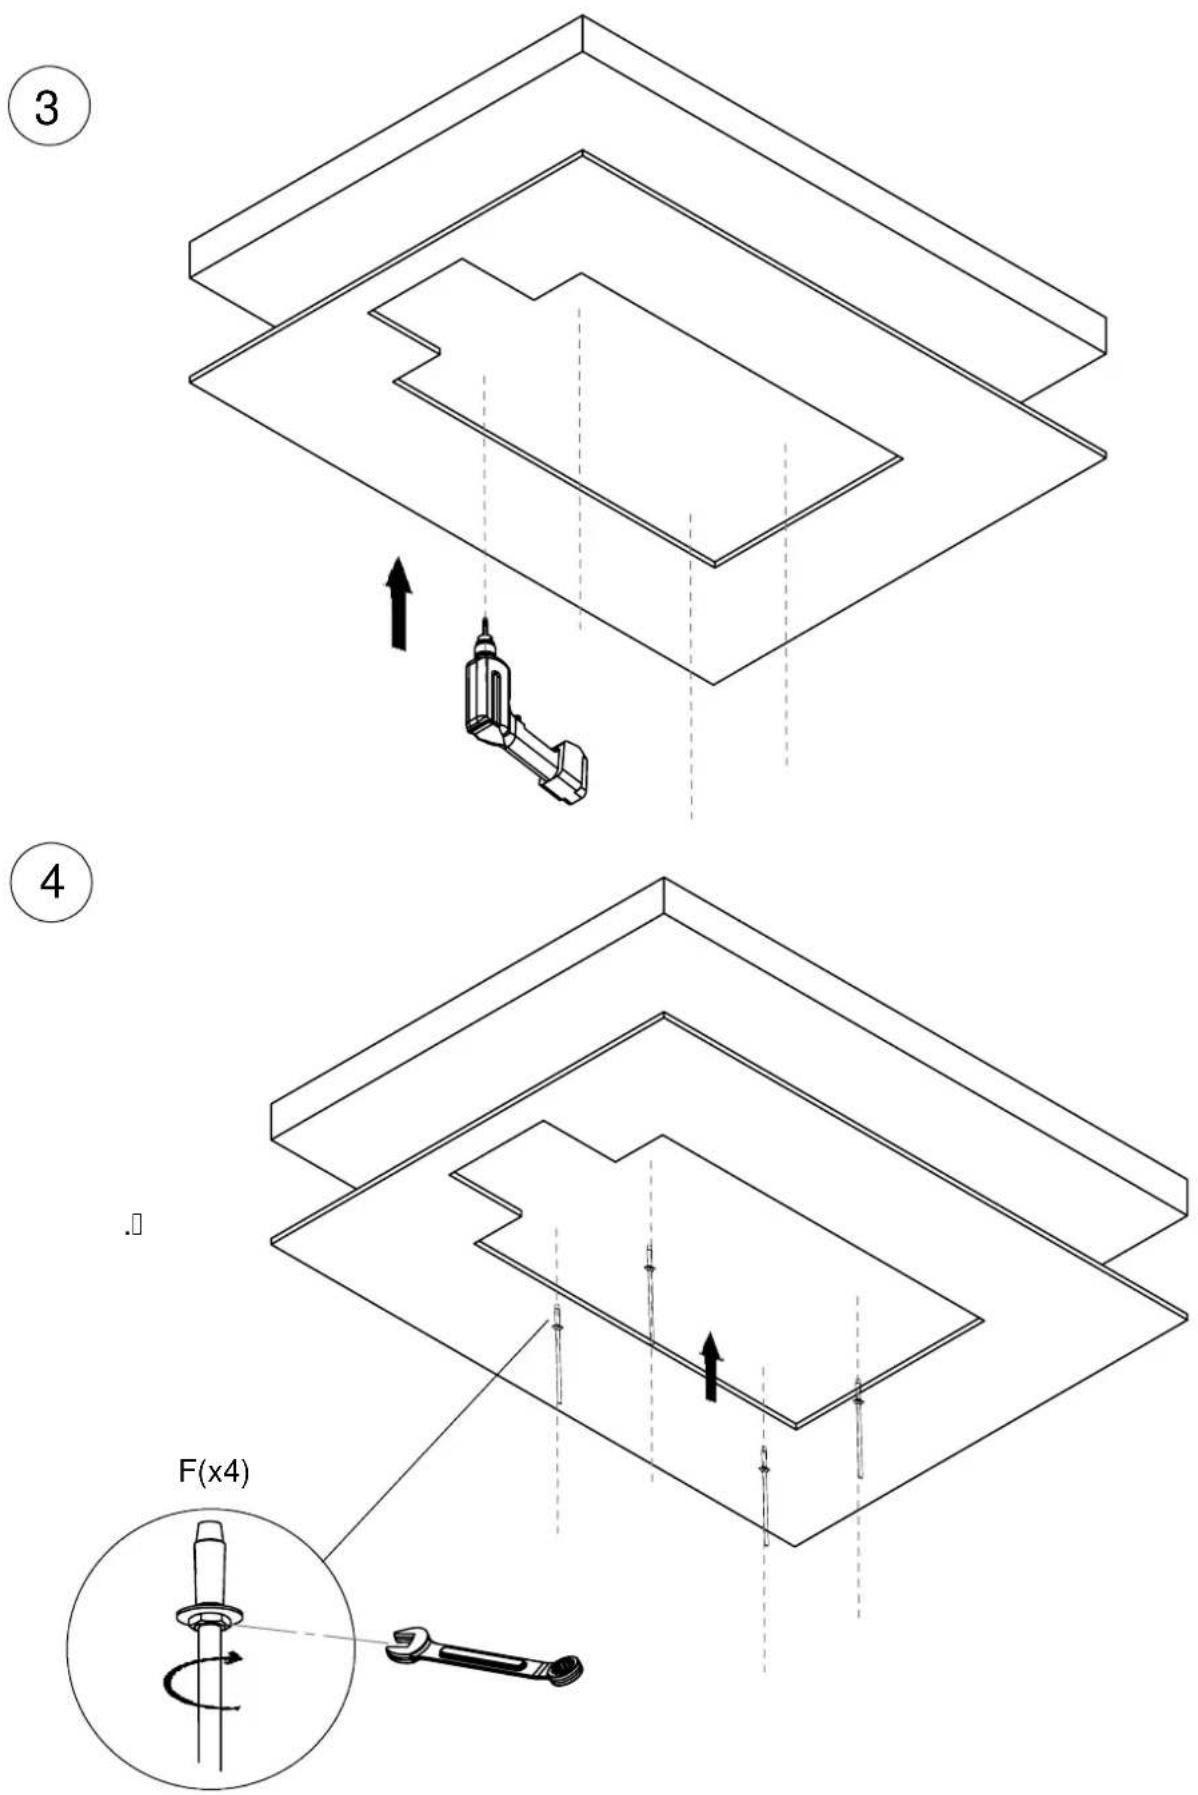
INSTALACIÓN / INSTALAÇÃO / INSTALLATION / INSTALLATION

Solo para MOTOR V.1550 salida lateral ∅150 Somente para MOTOR V.1550 saída de fumo lado ∅150 Juste pour MOTOR V.1550 evacuation de fumées côté ∅150 Only for MOTOR V.1550 side fume outlet ∅150
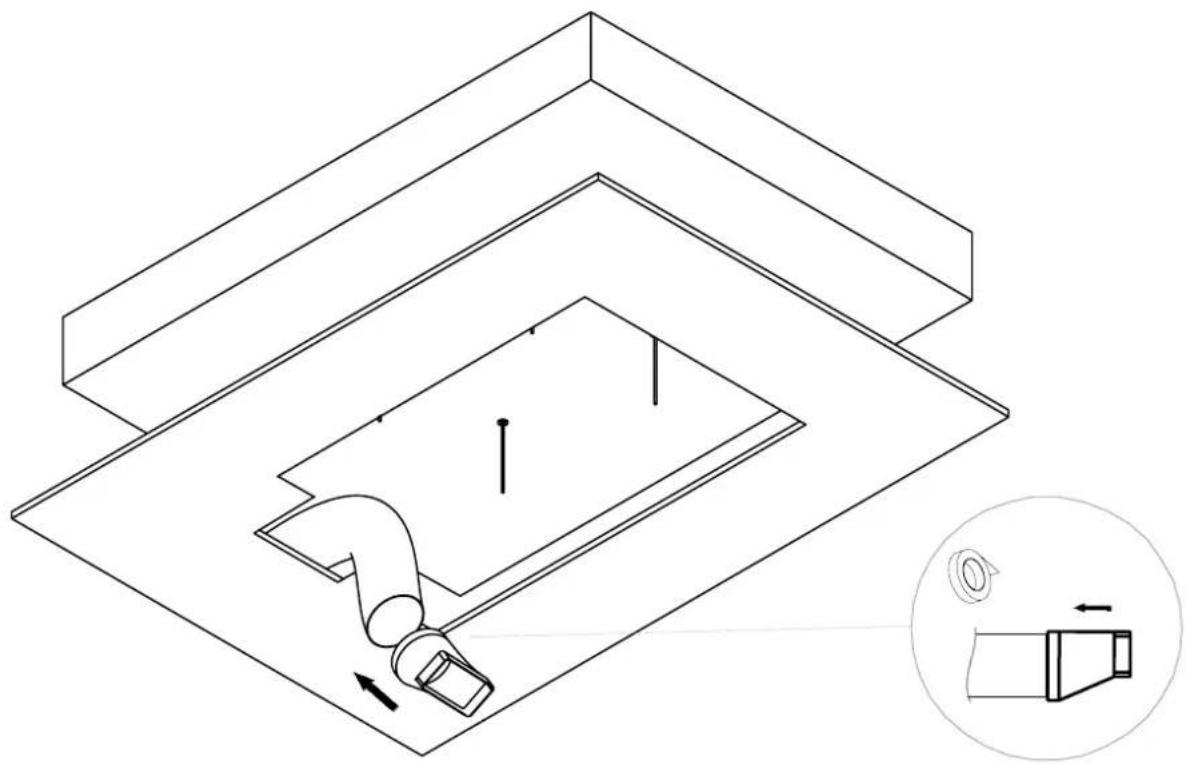
natural_image
Technical line drawing of a mechanical assembly with a magnified inset showing internal components (no text or symbols)
OPCION-B
Solo para salida superior Somente para evacuação de fumaça do teto Juste pour évacuation de fumées au plafond Only for ceiling fume outlet
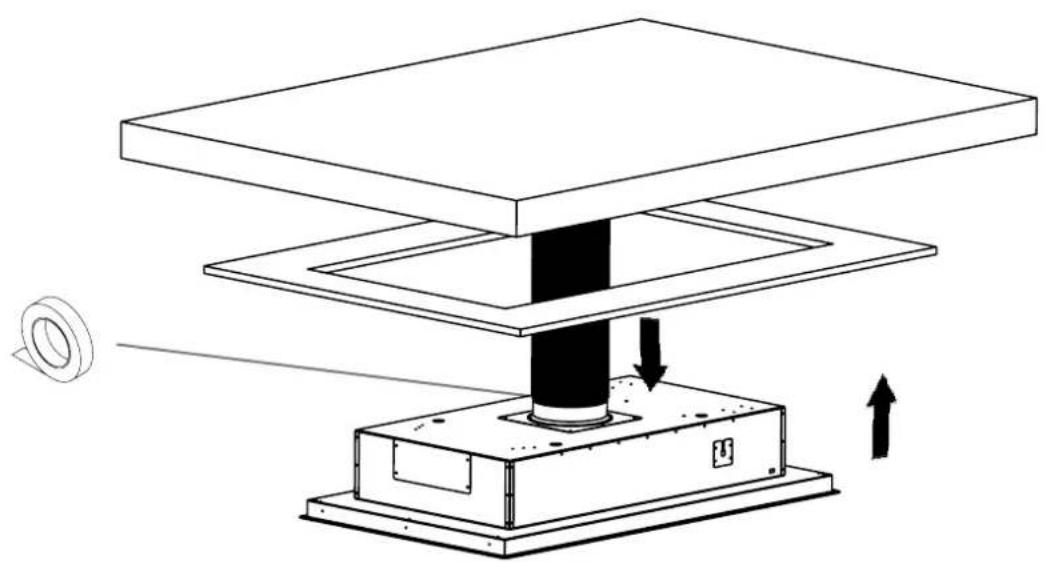
natural_image
Technical diagram of a mechanical assembly with layered components and directional arrows (no text or symbols)INSTALACIÓN / INSTALAÇÃO / INSTALLATION / INSTALLATION
6
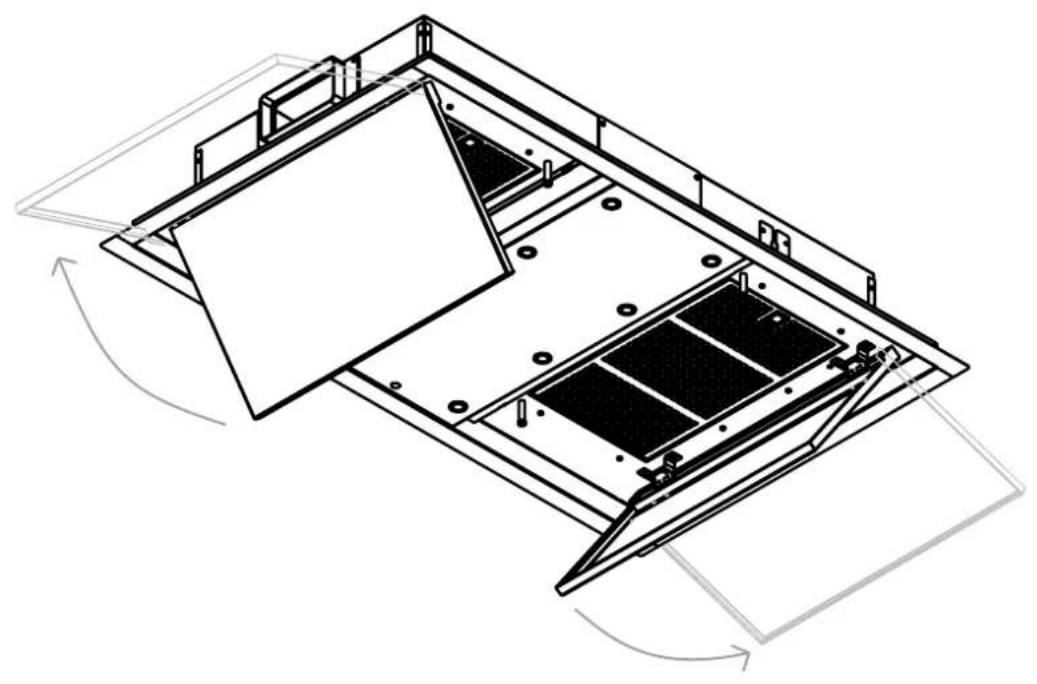
natural_image
Technical line drawing of a mechanical assembly with no visible text or symbols7
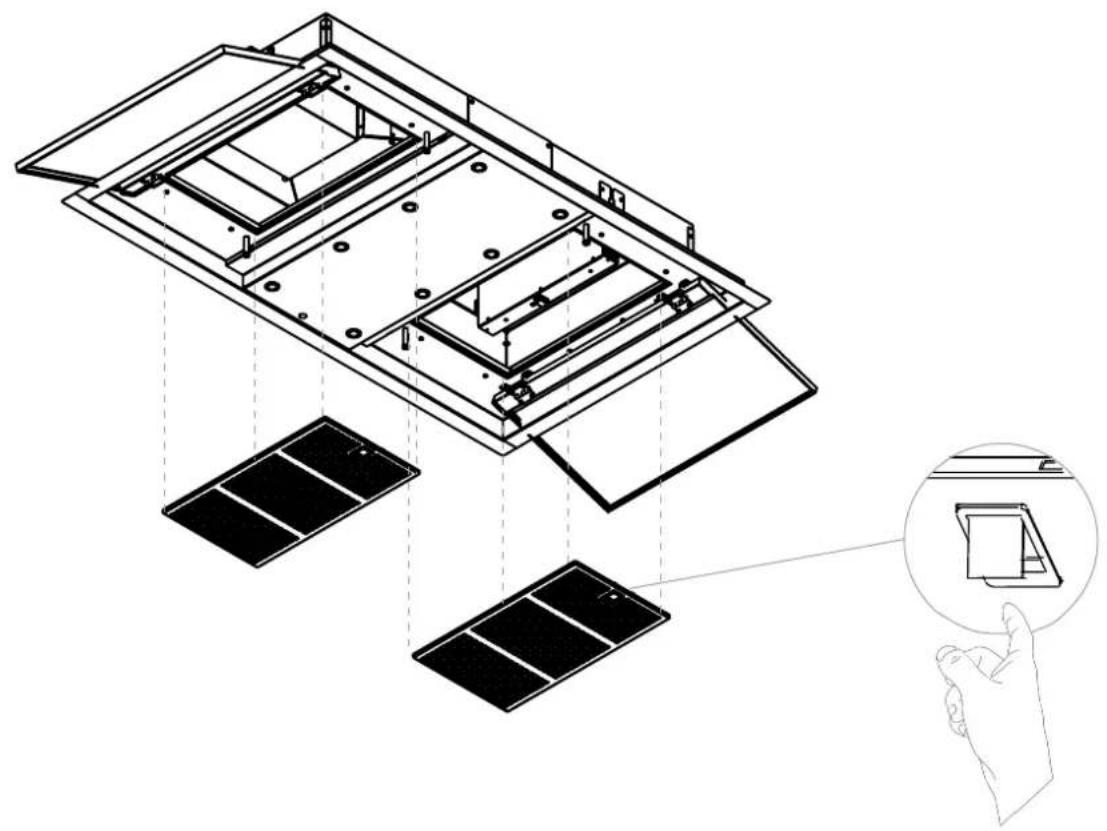
natural_image
Technical line drawing of a solar panel assembly with a hand pointing to a device (no text or symbols present)INSTALACIÓN / INSTALAÇÃO / INSTALLATION / INSTALLATION
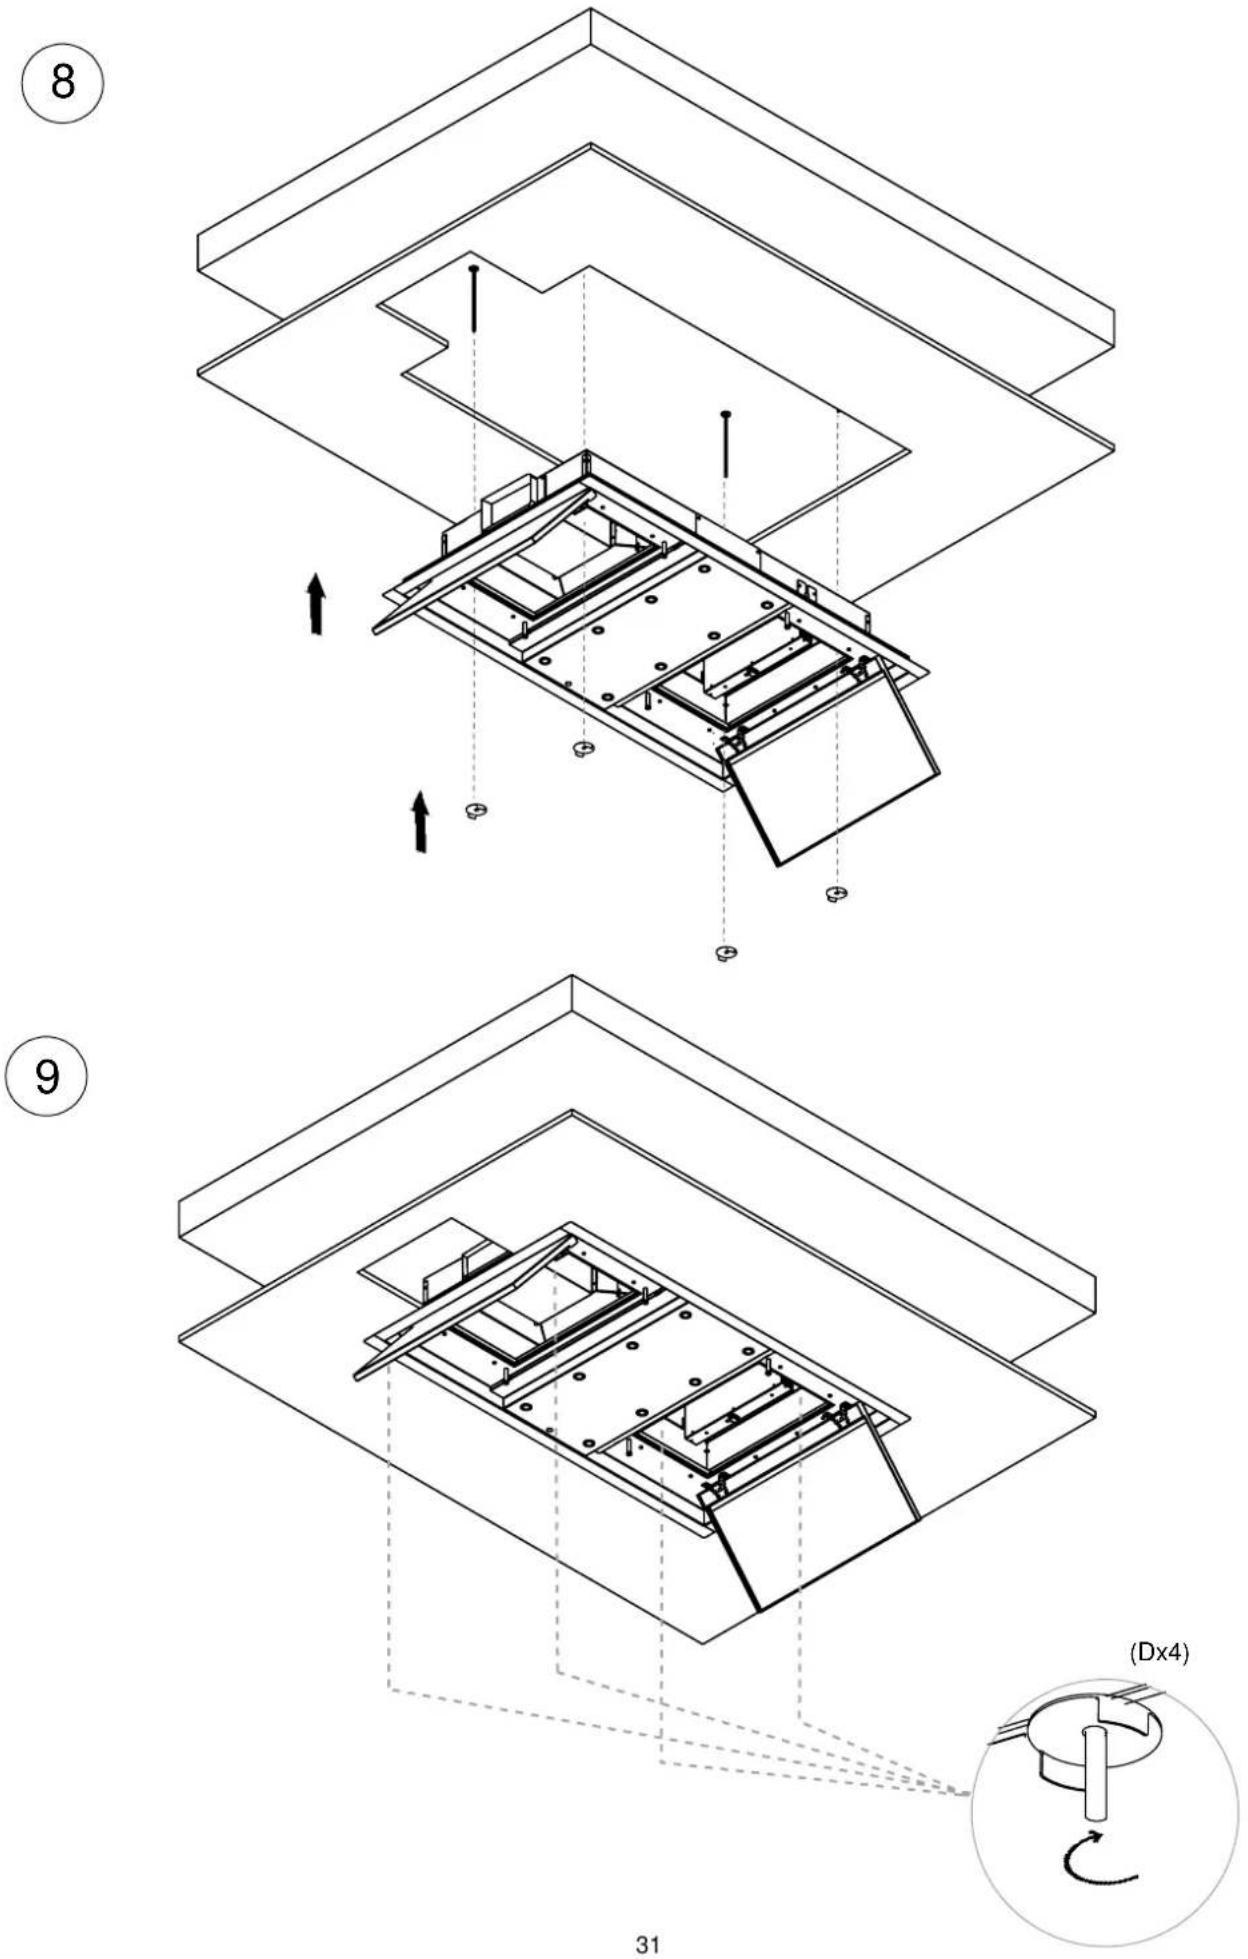
INSTALACIÓN / INSTALAÇÃO / INSTALLATION / INSTALLATION
10A
OPCION-A
Solo para salida lateral Somente para saída de fumo lado Juste pour evacuation de fumées côté Only for side fume outlet
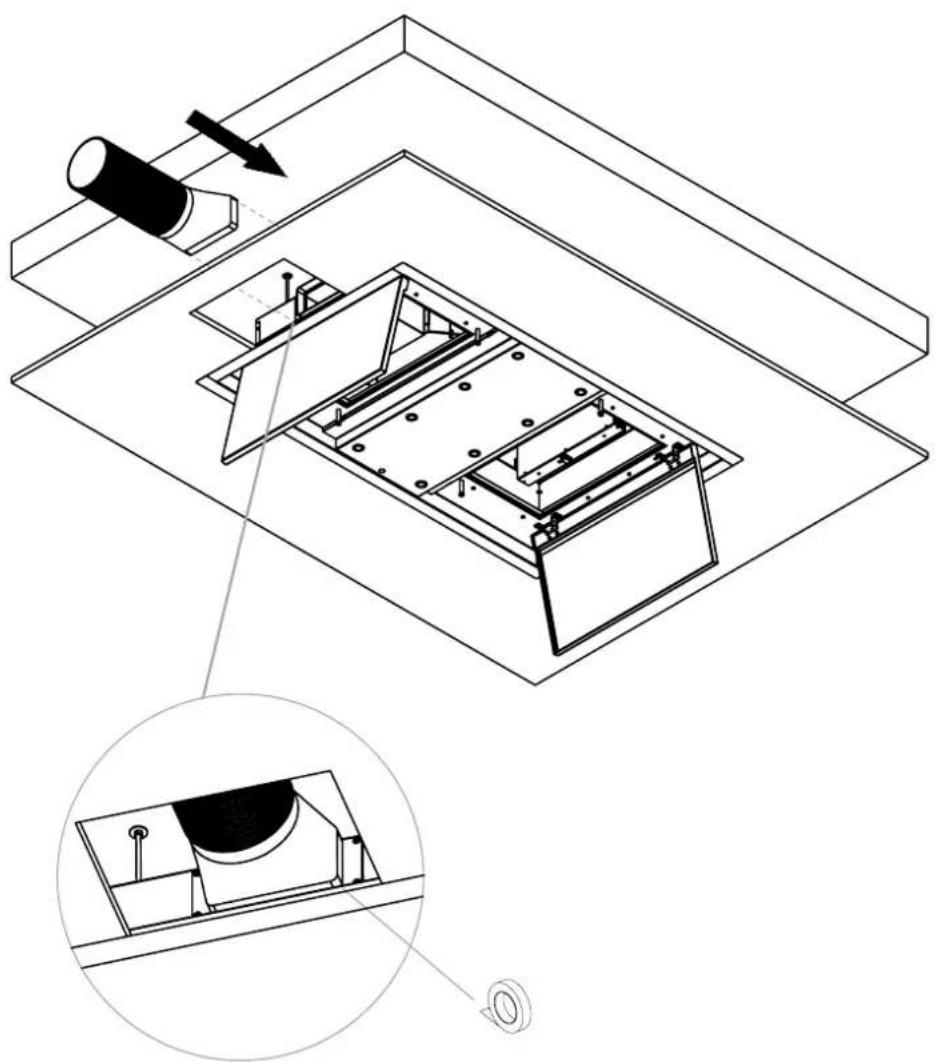
natural_image
Technical line drawing of a mechanical assembly with an inset close-up showing internal components (no text or symbols)INSTALACIÓN / INSTALAÇÃO / INSTALLATION / INSTALLATION
11
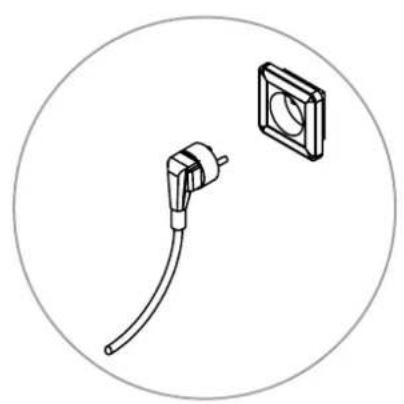
natural_image
Simple line drawing of a cable connector and a square component (no text or symbols)12
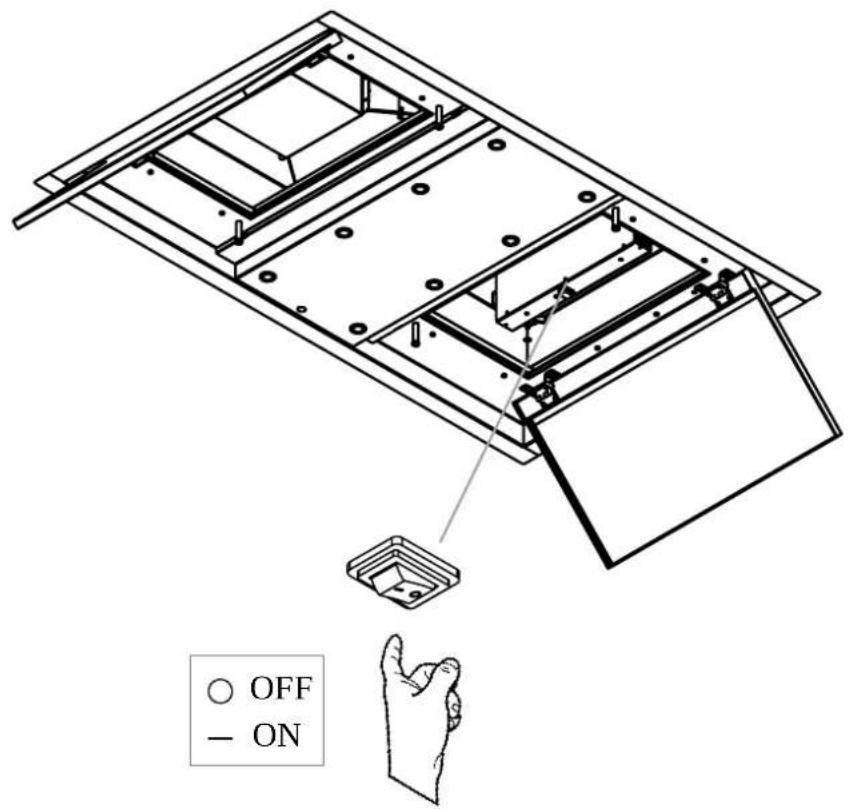
INSTALACIÓN / INSTALAÇÃO / INSTALLATION / INSTALLATION
13
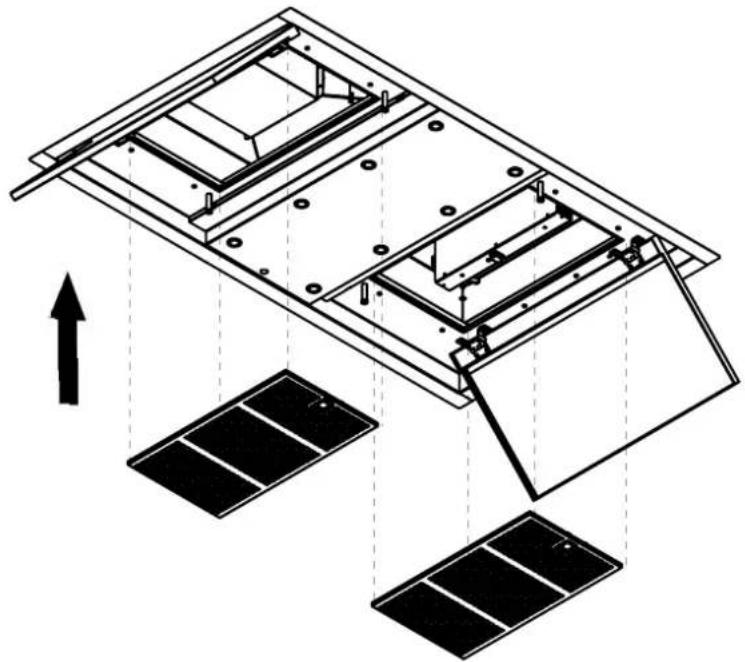
natural_image
Technical diagram of a solar panel installation with mounting brackets and structural supports (no text or symbols)14
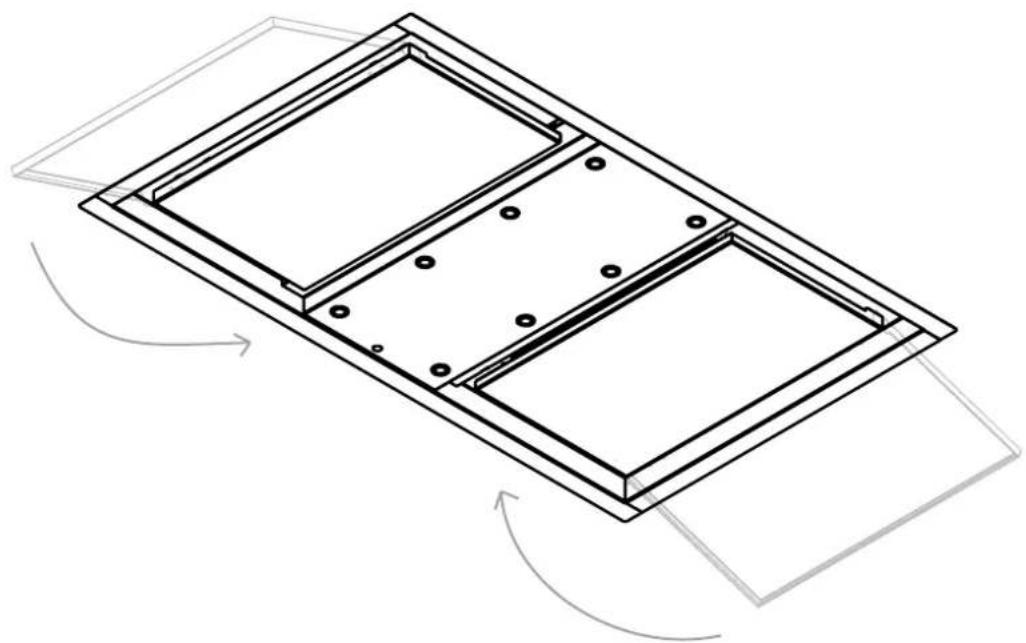
natural_image
Technical line drawing of a rectangular frame with internal compartments and mounting holes, showing rotational motion arrows (no text or symbols) | ON/OFF, Press this symbol to turn on the motor, press again to turn off. |
| Press this symbol to lower the motor speed. |
| Press this symbol to increase motor speed, Note: If you have a motor version that exceeds 650m3/h, 3rd or 4th speed will be timed. (*see Ecodesign Timer section, Page 17). |
| LAST TIME: When the motor is on at any speed, pressing this button will start a 5-minute timer, at the end of which time the motor and lights will switch off. When on, it is possible to adjust the speed to the desired level. This function is indicated on the display by flashing dots. This function offers a visual indicator by flashing the pilot lamp. |
| Red LED that will light up whenever a function is pressed. |
| MAIN OR WORKING LIGHT: Press to switch on main lights and press again to switch off. COURTESY OR AMBIENT LIGHT: (Optionally, depending on model and version) Keeping the key pressed for 2 seconds will switch on the courtesy light, and continuing pressing will switch it off again. |
SYNCHRONIZATION REMOTE CONTROL (\* only if necessary, it is already synchronized):
- Connect the hood to the mains or turn on the hood switch, optional under filters or panel.
- ATTENTION!: once step 2 is completed, when connecting the hood to the electricity:

DO NOT TOUCH ANY COMMAND KEY UNTIL AFTER 5 SECONDS

- After the first 5 seconds, in the interval time between 5 and 20 seconds, with the remote control facing the hood, press or hold the LIGHT button 📋 on the remote control, and the lights on the hood will light up, confirming that the process has been successfully performed.
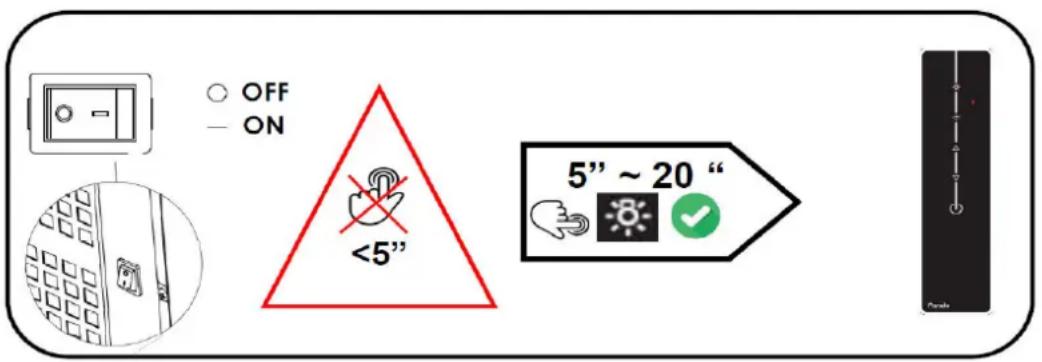
If it takes more than 20 seconds to synchronize the control, the hood switchboard closes the reception and does not record any code, you must repeat the process, making sure to press the key between 5 "and 20".
MANTENIMIENTO / MANUTENÇÃO / MAINTENANCE / MAINTENANCE
ILUMINACION Y CARACTERISTICAS LED / ILUMINAÇÃO E CARATERISTICA LED ÉCLAIRAGE ET CARACTÉRISTIQUES LED / LED LIGHTING AND FEATURES
ATENCIÓN!
LED type lights involve a complex manipulation in addition to an air connection involving an internal connector risk of electric shock, therefore this type of handling must be done by the Pando official technical service or a qualified and authorized professional. The manufacturer will not be liable for any damage caused by mishandling of the LED lights by unauthorized personnel.
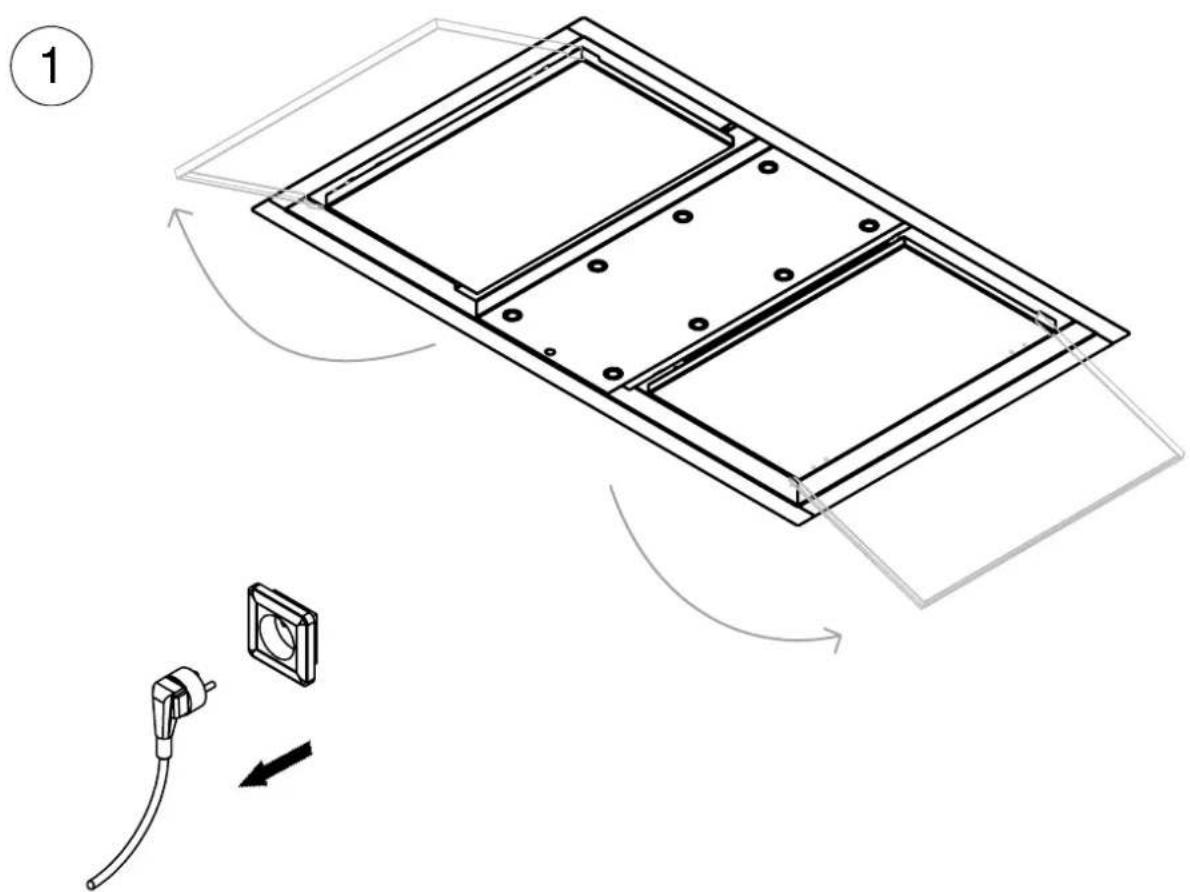
MANTENIMIENTO / MANUTENÇÃO / MAINTENANCE / MAINTENANCE
ILUMINACION Y CARACTERISTICAS LED / ILUMINAÇÃO E CARATERISTICA LED ÉCLAIRAGE ET CARACTÉRISTIQUES LED / LED LIGHTING AND FEATURES
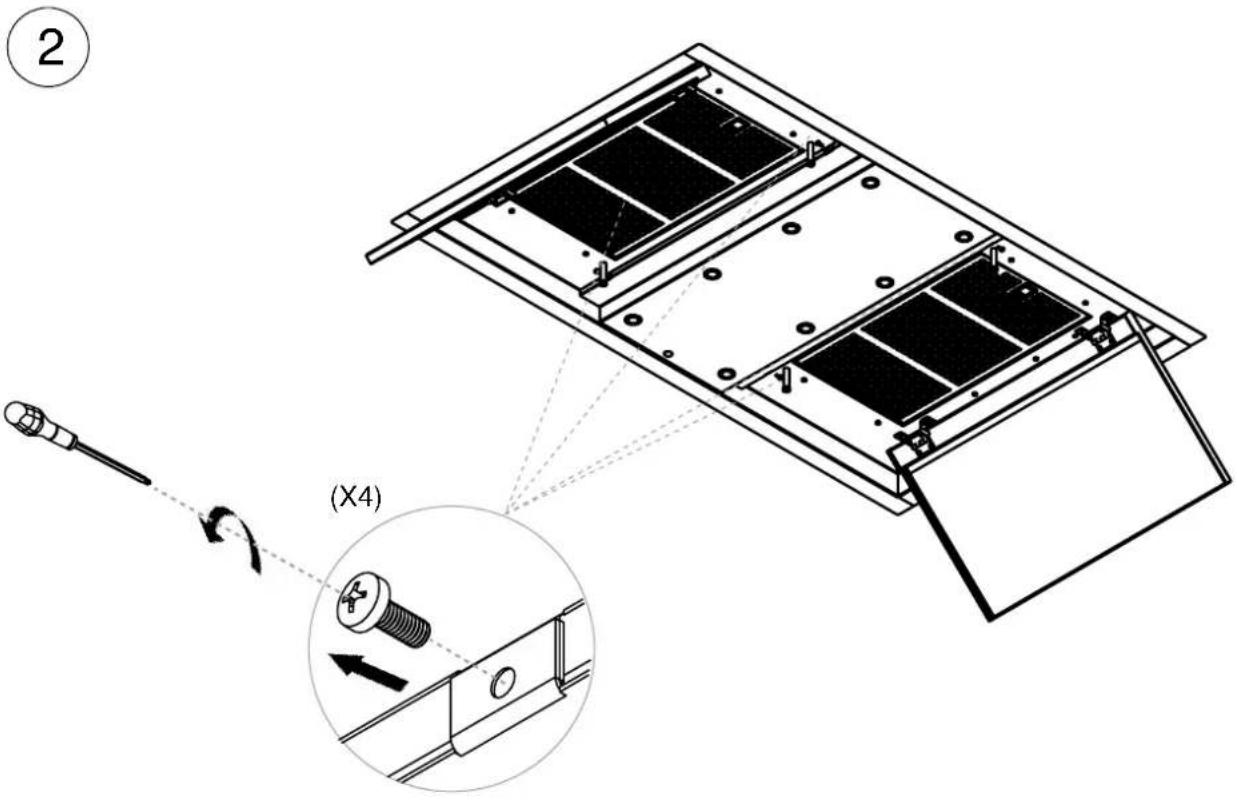
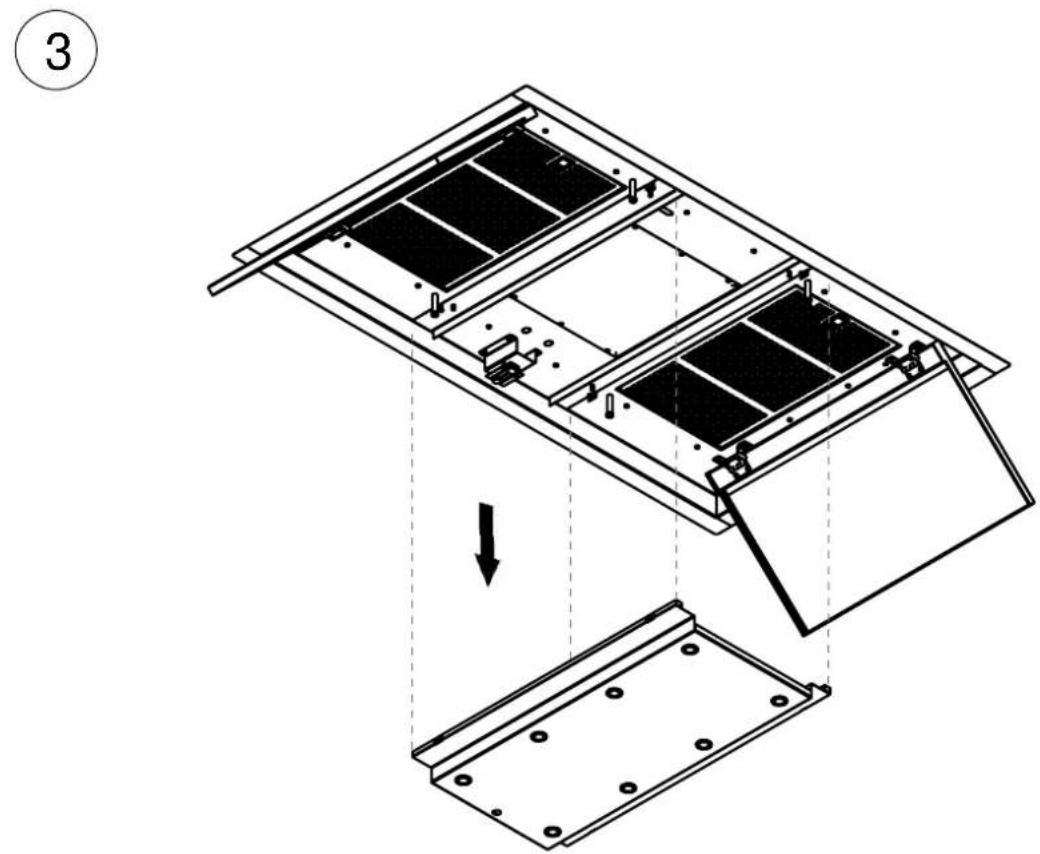
MANTENIMIENTO / MANUTENÇÃO / MAINTENANCE / MAINTENANCE
ILUMINACION Y CARACTERISTICAS LED / ILUMINAÇÃO E CARATERISTICA LED ÉCLAIRAGE ET CARACTÉRISTIQUES LED / LED LIGHTING AND FEATURES
4
natural_image
Diagram showing hands connecting cable connectors to a terminal block, with arrows indicating direction (no text or symbols)5 E-250
5 E-265
MANTENIMIENTO / MANUTENÇÃO / MAINTENANCE / MAINTENANCE
FILTRO INOX / FILTRO INOX / FILTRE D'INOX / INOX FILTER
FILTRO DE CARBON ACTIVADO (FCLR), LAVABLE Y REACTIBABLE (OPCIONAL)
FILTRO DE CARVAO ATIVADO (FCLR), LAVÁVEL E REACTIBABLE. (OPCIONAL) FILTRE AU CHARBON ACTIVÉ (FCLR), LAVABLE ET RETIGGERABLE. (EN OPTION) ACTIVATED CARBON FILTER (FCLR), WASHABLE AND RETRIGGERABLE. (OPTIONAL)
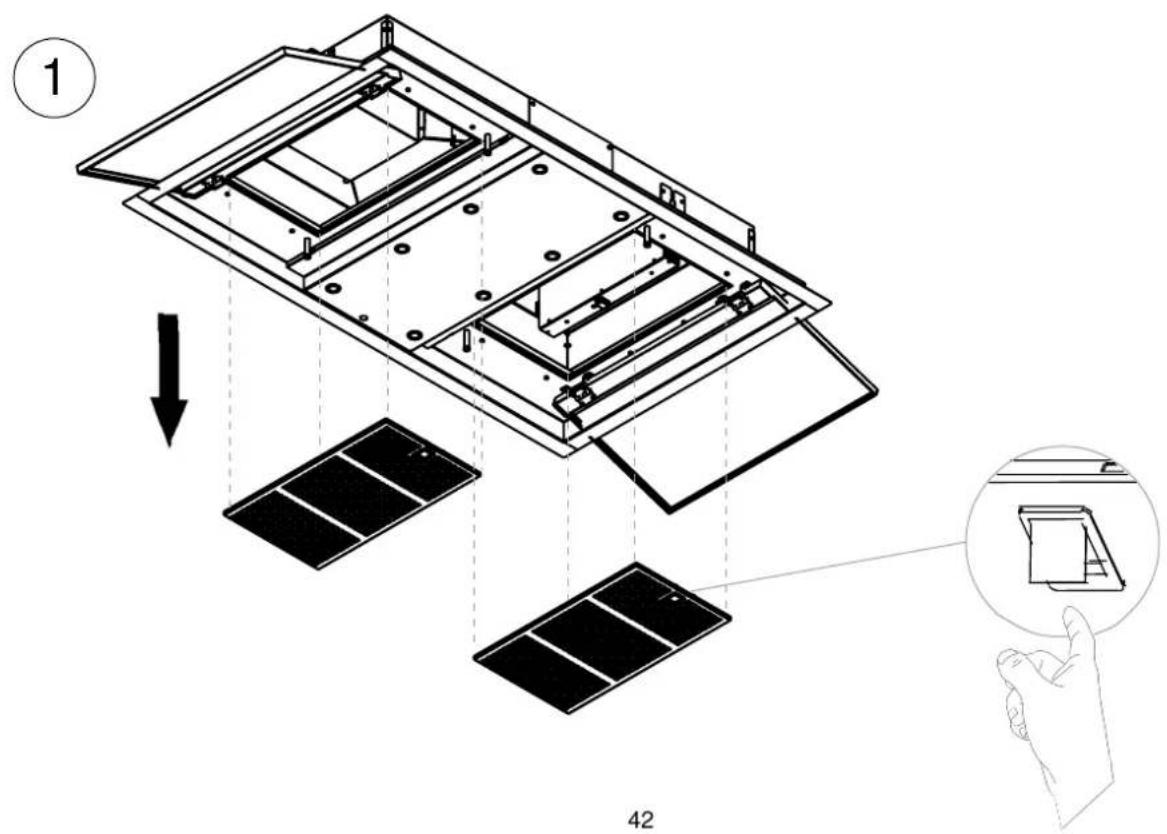
MANTENIMIENTO / MANUTENÇÃO / MAINTENANCE / MAINTENANCE
FILTRO DE CARBON ACTIVADO (FCLR), LAVABLE Y REACTIBABLE (OPCIONAL) FILTRO DE CARVAO ATIVADO (FCLR), LAVÁVEL E REACTIBABLE. (OPCIONAL) FILTRE AU CHARBON ACTIVÉ (FCLR), LAVABLE ET RETIGGERABLE. (EN OPTION) ACTIVATED CARBON FILTER (FCLR), WASHABLE AND RETRIGGERABLE. (OPTIONAL)
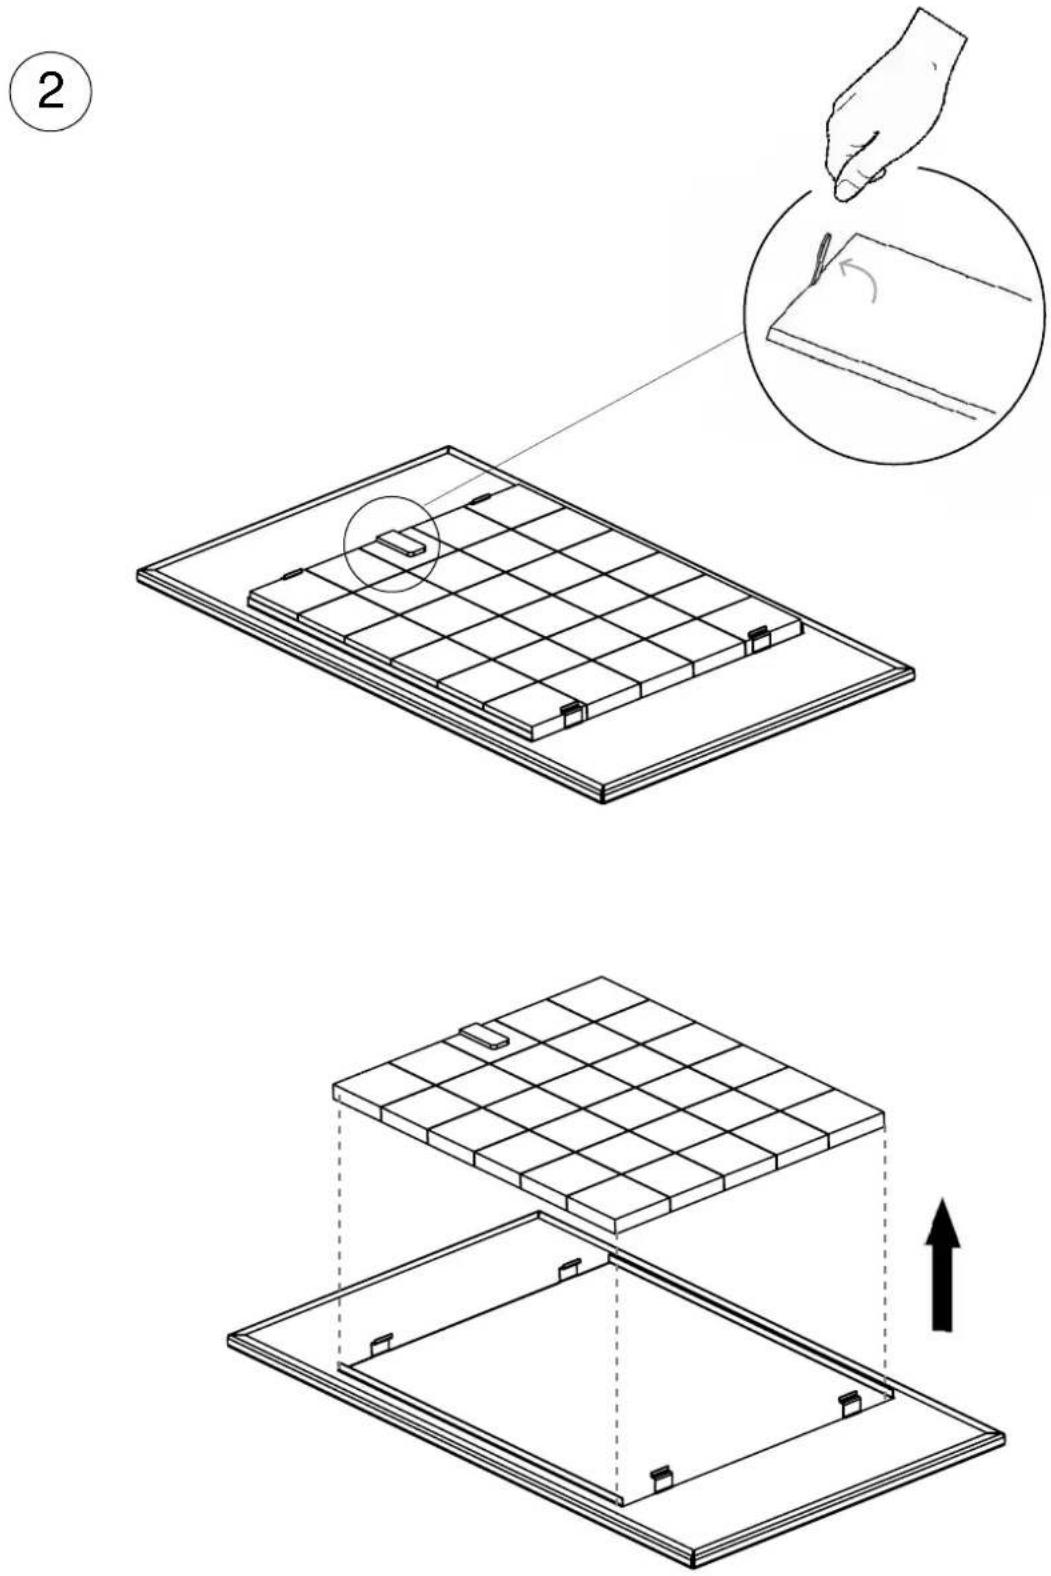
NOTAS/ NOTAS/ REMARQUES/ NOTES:
NOTAS/ NOTAS/ REMARQUES/ NOTES:
INOXPAN S.L.
NOTAS/ NOTAS/ REMARQUES/ NOTES:
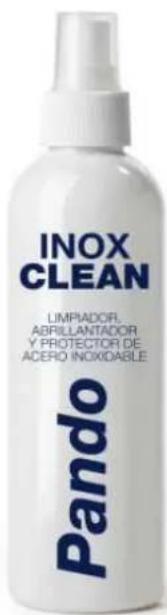
PT
PRODUTO EXCLUSIVO PRODUTO DE LIMPEZA, ABRILHANTADOR E PROTETOR DE AÇO INOXIDÁVEL
EXCLUSIVE PRODUCT CLEANER, POLISH AND STAINLESS PROTECTOR
INOX PANDO, Reference 1059.
PROPERTIES:
Degreaser especially recommended for polishing stainless steel surfaces, with its complex formula based on paraffin it leaves an invisible film that acts as a protector and makes it shine.
APPLICATIONS:
Cleans, polishes and evens out stainless steel surfaces of extractor hoods and stainless steel kitchen furniture.
INOXPAN S.L.
Pol. Ind. El Cros
The International Certification Network
Quality Management System ISO 9001:2015



- E-250/265
- MOTOR INTERIOR
- ES - Español
- EN - INTRODUCTION
- EN - RECOMMENDATIONS TO BEAR IN MIND BEFORE INSTALLATION.
- VERY IMPORTANT!
- EN - SAFETY INSTRUCTIONS
- EN - AFETY INSTRUCTIONS
- EN - Features and recommendations for ceiling-mounted hoods.
- QUALITY ASSURANCE:
- FORM OF THE CEILING:
- CEILING HEIGHT:
- POSITION OF THE HOOD:
- AIR INTAKE GRILLE:
- INSTALLING THE FLUE PIPE:
- INCLUDED:
- CONTENIDO / CONTEÚDO / CONTENU / CONTENT
- HERRAMIENTAS NECESARIAS / FERRAMENTAS NECESSÁRIAS / LES OUTILS NÉCESSAIRES / TOOLS NEEDLE
- COTAS / DIMENSÕES / REPÈRES / DIMENSIONS
- INSTALACIÓN / INSTALAÇÃO / INSTALLATION / INSTALLATION
- SYNCHRONIZATION REMOTE CONTROL (\* only if necessary, it is already synchronized):
- DO NOT TOUCH ANY COMMAND KEY UNTIL AFTER 5 SECONDS
- MANTENIMIENTO / MANUTENÇÃO / MAINTENANCE / MAINTENANCE
- ATENCIÓN!
- FILTRO DE CARBON ACTIVADO (FCLR), LAVABLE Y REACTIBABLE (OPCIONAL)
- PROPIEDADES:
- APPLICATIONS:
- Pando
- MOTOR EXTERIOR
- ENCASTRE / INSIRA / ENCASTREMENT / OPTIONAL
- OPCION-A SALIDA LATERAL
- OPCION-B
- 10A
- OPCION-A
- PROPERTIES:
- INOXPAN S.L.
Brand : Pando
Model : E-250
Category : Range hood