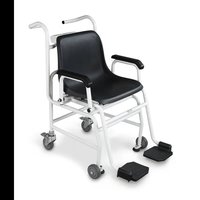
TMCN 200K-1M-A - Wheelchair Kern - Free user manual and instructions
Find the device manual for free TMCN 200K-1M-A Kern in PDF.


| Product type | Wheelchair scale (weighing wheelchair) |
| Brand | Kern |
| Model | TMCN 200K-1M-A |
| Dimensions (L x W x H) | 625 x 990 x 985 mm |
| Net weight | 23.3 kg |
| Weighing range | 0 – 250 kg (max 250 kg) |
| Readability (d) | 0.1 kg |
| Display | LCD, digit height 25 mm, 6 digits |
| Power supply | Mains (6 V/1 A adapter, EN60601-1) or 6 AA 1.5 V batteries (not supplied) or optional rechargeable battery 3.8–4.2 V/3700 mAh |
| Battery life | 48 h (backlight off), 24 h (backlight on) |
| Main functions | Weighing, tare (sequential tare, pre-tare), HOLD function (stabilized measurement), body mass index (BMI) determination, adjustable auto-off, key beep |
| Interfaces | KUP (RS-232, USB, Bluetooth, Ethernet, Extension box), WLAN (IEEE 802.11 b/g/n), Bluetooth Low Energy (optional) |
| Operating temperature | 10°C to +40°C |
| Maintenance and cleaning | Clean with household detergent or disinfectant (e.g., 70% isopropanol). Do not spray, wipe. No sterilization permitted. |
| Safety | Parking brakes, mandatory leveling, do not use for transport, max load 250 kg, do not sit without assistance |
| Spare parts | Mains power adapter (original reference), AA 1.5 V batteries, rechargeable battery KERN YMR-01 (RC 193650), protective cover |
| Warranty | Warranty void if instructions not followed, modification, opening, mechanical damage |
Frequently Asked Questions - TMCN 200K-1M-A Kern
User questions about TMCN 200K-1M-A Kern
0 question about this device. Answer the ones you know or ask your own.
Ask a new question about this device
Download the instructions for your Wheelchair in PDF format for free! Find your manual TMCN 200K-1M-A - Kern and take your electronic device back in hand. On this page are published all the documents necessary for the use of your device. TMCN 200K-1M-A by Kern.
USER MANUAL TMCN 200K-1M-A Kern
natural_image
White mobile medical mobility chair with black seat and wheels, no visible text or symbolsGB Further language versions you will find online under www.kern-sohn.com/manuals
natural_image
Close-up of a metallic industrial control wheel with blue and gray wheels (no text or symbols visible)natural_image
Close-up of a metallic industrial control lever with a blue circular wheel and white head (no text or symbols visible)natural_image
Close-up of a black and white manual pushper on carpet, next to a gray wheel (no text or symbols visible)natural_image
Modern mobile medical chair with black seat and metal frame, no visible text or symbolsnatural_image
Close-up of a white cylindrical object with a circular indentation and concentric rings (no text or symbols visible)
natural_image
Close-up of a metallic industrial control wheel with blue and gray wheels (no text or symbols visible)natural_image
Close-up of a mechanical pulley system with black and white wheels and a central tire (no text or symbols visible)natural_image
Black flexible coiled cable with a metallic connector (no text or symbols visible)Anwendung:
10.7 Druckfunktion
| Write characteristic UUID |
| 0000fff2-0000-1000-8000-00805f9b34fb |
natural_image
Simple line drawing of a trash bin with crossed lines indicating no waste or prohibition (no text or symbols)2 Declaration of conformity 4
3 Appliance overview 5
3.1 Overview of displays....7
3.2 Keyboard overview 8
3.3 Dimensions....9
4 Basic Information (General).... 10
4.1 Proper use....10
4.2 Non-intended product use / contraindications 11
4.3 Warranty....11
4.4 Monitoring of Test Resources 12
4.5 Plausibility check 12
5 Basic Safety Precautions.... 13
5.1 Pay attention to the instructions in the Operation Manual 13
5.2 Preparation for use 13
6 Transport and storage.... 14
6.1 Testing upon acceptance....14
6.2 Packaging / return transport....14
7 Unpacking, Installation and Commissioning.... 15
7.1 Place of installation / place of operation....15
7.2 Unpacking....15
7.3 Scope of delivery....15
7.4 Installing the chair scales....16
7.4.1 Levelling 17
7.5 Battery operation....19
7.6 Rechargeable battery operation using an optional battery power pack ....21
7.7 Mains connection....22
7.7.1 Safety cable 22
7.8 Initial Commissioning....22
8 Operation.... 23
8.1 Weighing....23
8.2 Taring 24
8.2.1 Subsequent tare 24
8.2.2 Pretare 24
8.3 HOLD function 27
8.5 Calculation of the Body Mass Index 28
8.5.1 Classification of BMI values 29
8.6 Automatic switch-off function „AUTO OFF“ 30
8.7 Acoustic signal when pressing button 32
8.8 Setting time and date....33
9 Menu 34
9.1 Navigation in the menu 34
9.2 Menu overview....35
10 Communication with peripheral devices via KUP connection.... 37
10.1 KERN Communications Protocol (KERN Interface Protocol)....38
10.2 Data output after pressing the PRINT button < manual >......39
10.3 Automatic data output < auto>....39
10.4 Continuous data output < cont >......40
10.5 Data format....41
10.6 WLAN 42
10.7 Print function....43
11 Bluetooth 44
12 Alibi memory (optional).... 44
13 Error messages.... 45
14 Servicing, maintenance, disposal 46
14.1 Cleaning 46
14.2 Cleaning / disinfecting....46
14.3 Sterilisation....46
14.4 Servicing, maintenance....46
14.5 Disposal....46
15 Instant help for troubleshooting.... 47
16 Adjustment 48
1 Technical data
| KERN | MCN 200K-1M |
| Item no./ Type | TMCN 200K-1M-A |
| Display | 6-digit |
| Readability (d) | 0.1 kg |
| Weighing range (max) | 250 kg |
| Linearity | ± 0.1 kg |
| Display | LCD with 25mm high digits |
| Recommended adjustment weight, not added (Category) | 200 kg(M1) |
| Warm-up time | 10 min |
| Operating temperature | 10°C .... + 40°C |
| Storage and transportation environment | -20 to +60°C, and 30% to 90% relative humidity |
| Humidity of air | max. 80 % (not condensing) |
| Atmospheric pressure (kPa) | 70kpa-106kpa |
| Input Voltage | 6 V / 1 A |
| Battery use | 6 x 1.5 V AA |
| Battery working range:48 hours background illumination off24 hours background illumination onLoading time: 8 hours | |
| Auto Off | after 3, 5, 15, 30 min without load change (adjustable) |
| Dimensions fully mounted (W x D x H) mm | 625 x 990 x 985 |
| Dimensions Weighing surface | 390 x 360 |
| Weight kg (net) | 23.3 |
| Rechargeable battery operation | optional; 3.8 VDC – 4.2 VDC / 3700 mAh |
| Data interface | Internal: Wi-FiOptional / External:KUP (RS232, Bluetooth, USB-D, Extension box) |
2 Declaration of conformity
The current EC/EU Conformity declaration can be found online in:
www.kern-sohn.com/ce
3 Appliance overview
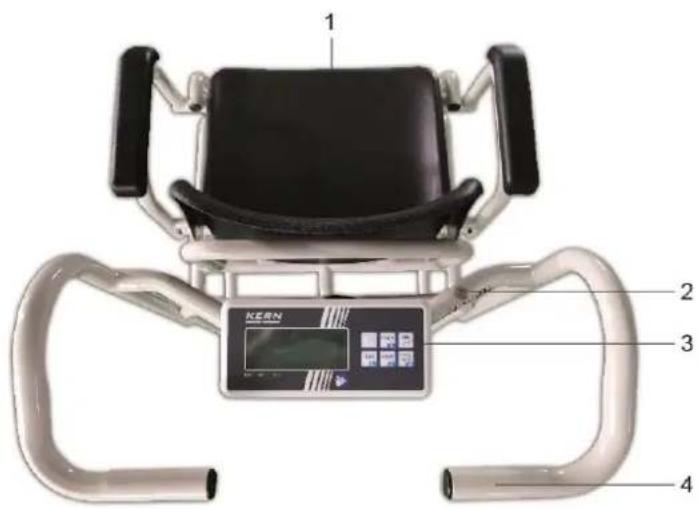
- Seat pan
- Bubble level
- Display Unit
- Manipulations
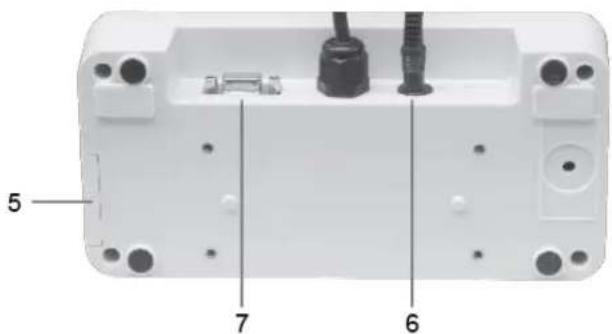
5 Rechargeable battery compartment
6 Mains connection 7 KUP
Parking brake and adjustment foot
Parking brake opened
Parking brake closed
Foot rest and adjustment foot
Folding arm rests
3.1 Overview of displays
 | Stability display | Scales are in a steady state |
 | Zeroing display | Should the balance not display exactly zero despite empty weighing plate, press  the. Your balance will be set to zero after a short standby time. the. Your balance will be set to zero after a short standby time. |
| NET | Net weight display | Illuminated when net weight is displayedIlluminated after weighing scale was tared |
| GROSS | Gross weight display | Illuminated when gross weight is displayed |
| HOLD | HOLD function | HOLD function active |
| BMI | BMI function | Illuminated while BMI function is enabled |
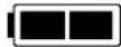 | Battery symbol | Shows the charging capacity of the batteries |
| kg | Weighing unit | Displays the weighing unit |
 | WiFi-interface | Shows the connection to the cableless network |
3.2 Keyboard overview
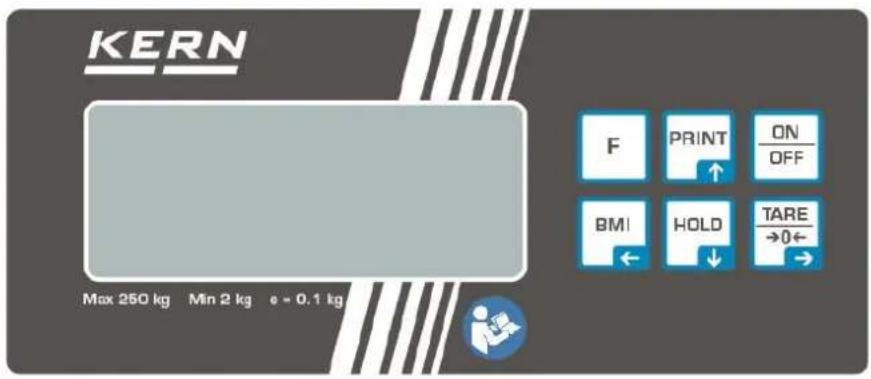
| Button | Designation | Function |
 | ON/OFF button | Turn on/off |
 | HOLD button | Hold function/Calculation of a stable weight valueIn menu:Select menu itemsFor numeric entry:Lowering numeric value |
 | BMI button | Calculation of the Body Mass IndexIn menu:Return to weighing mode |
 | Print button | Data transfer via interfaceIn menu:Select menu itemsFor numeric entry:Increase numerical value |
 | Function key | Function quick keyQuick call-up of a function stored before |
 | Zeroing key | Weighing scale will be reset to „0.0"In menu:Confirm selectionFor numeric entry:Change decimal digitConfirm entry |
| Tare key | Tare balance |
3.3 Dimensions
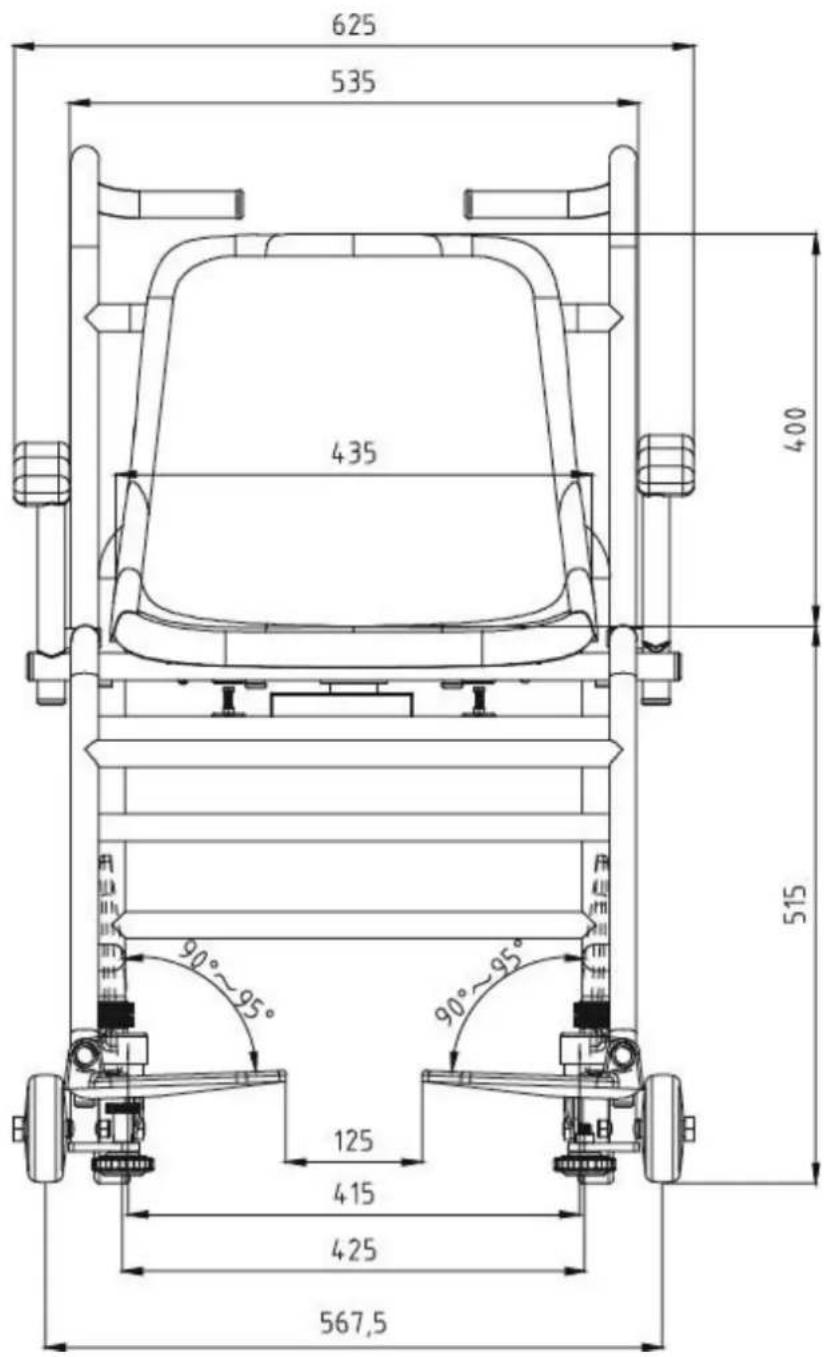
4 Basic Information (General)
4.1 Proper use
These scales are used to determine weight of people sitting at rest, The person to be weighed should carefully sit down on the center of the seat and remain seated quietly.
As soon as a stable weighing value is reached, the weighing value can be read. The balances are designed for long-term usage.
Determination of the body weight.
Use as „non-standalone weighing scale“, that is, a person sits carefully onto the seating surface’s centre. Once a steady display value is shown, you can read the weight value.

The balances shall only be used by people who can sit still.
The WIFI interface allows a wireless transfer of the measurement results to a PC.

Scales fitted with a serial interface may only be connected to appliances in compliance with Directive EN60601-1.
The balances should be checked for correct condition prior to each utilisation by a person familiar with proper operation of the balance.
4.2 Non-intended product use / contraindications

- Do not use these scales for dynamic weighing processes.
- Do not leave permanent load on the weighing pan. This may damage the measuring system.
- Impacts and overload exceeding the stated maximum load (max) of the weighing plate, minus a possibly existing tare load, must be strictly avoided. This could cause damage to the balance.
- Never operate balance in explosive environment. The serial version is not explosion protected. It should be noted that a flammable mixture of anaesthetics and oxygen or laughing gas may occur.
- The structure of the balance may not be modified. This may lead to incorrect weighing results, safety-related faults and destruction of the balance.
- The balance may only be used according to the described conditions. Other areas of use must be released by KERN in writing.
- If the balance is not used for a longer time, take out the batteries and store them separately. Leaking battery liquid could damage the balance.
- The balance may only be used for weighing persons. Persons who are heavier than the indicated maximum load, may not step onto the balance.
4.3 Warranty
Warranty claims shall be voided in case:
- Our conditions in the operation manual are ignored
- The appliance is used outside the described uses
- The appliance is modified or opened
- Mechanical damage and damage caused by media, liquids,
• Natural wear and tear - The appliance is improperly set up or incorrectly electrically connected
- The measuring system is overloaded
- Dropping the balance
4.4 Monitoring of Test Resources
In the framework of quality assurance the measuring-related weighing properties of the balance and, if applicable, the testing weight, must be checked regularly. The responsible user must define a suitable interval as well as type and scope of this test. Information is available on KERN's home page (www.kern-sohn.com) with regard to the monitoring of balance test substances and the test weights required for this. In KERN's accredited DKD calibration laboratory test weights and balances may be calibrated (return to the national standard) fast and at moderate cost.
4.5 Plausibility check
Please make sure that the measurement values computed by the appliance are plausible and are allocated to the respective person, before storing and using the values for further purposes. This applies especially also for values transferred via interface.



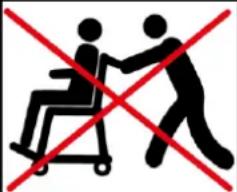
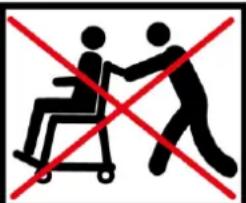
- The chair scales may not be used for the transport of people and objects!
- As long as the person is sitting on the chair scales, the wheel brakes must be locked without fail
- The arm rests of the chair scales may only be used to rest the lower arms, not for bracing
- When leaving the balance, fold up the arm rests and have the person braced by a trained person
- Install the chair scales always on a level, even surface
- Do not step onto the foot rests when stepping or leaving the chair scales!

If the balance doesn't have any contact with the transfer cable, do not touch the transfer port in order to avoid an ESD-failure.

5 Basic Safety Precautions
5.1 Pay attention to the instructions in the Operation Manual

→ Carefully read this operation manual before setup and commissioning, even if you are already familiar with KERN balances.

5.2 Preparation for use
- Check the balance for damage before any use
- Maintenance and re-verification The balance must be serviced and re-verified at regular intervals.
- Do not use the appliance on slippery surfaces or in facilities with risk of vibration
- During installation the balance must be levelled.
- If possible, the product must remain in its original packaging for transportation purpose. Should this not be possible, make sure that the product is protected against damage
- Have a seat on the balance only when a qualified person is present
6 Transport and storage
6.1 Testing upon acceptance
When receiving the appliance, please check packaging immediately, and the appliance itself when unpacking for possible visible damage.
6.2 Packaging / return transport

Keep all parts of the original packaging for a possibly required return.
⇒ Only use original packaging for returning.
Prior to dispatch disconnect all cables and remove loose/mobile parts.
→ Reattach possibly supplied transport securing devices.
→ Secure all parts against shifting and damage.
7 Unpacking, Installation and Commissioning
7.1 Place of installation / place of operation
The balances are designed in a way that reliable weighing results are achieved in common conditions of use. You will work accurately and fast, if you select the right location for your balance.
On the installation site observe the following:
- Place the balance on a stable, even surface
- Avoid extreme heat as well as temperature fluctuation caused by installing next to a radiator or in the direct sunlight
- Protect the balance against direct draughts due to open windows and doors
- Avoid jarring during weighing
- Protect the balance against high humidity, vapours and dust
- Do not expose the device to extreme dampness for longer periods of time. Non-permitted condensation (condensation of air humidity on the appliance) may occur if a cold appliance is taken to a considerably warmer environment. In this case, disconnect the appliance from mains and acclimatize it for approx. 2 hours at room temperature
- Avoid static charge of the balance and of the person to be weighed
- Avoid contact with water
Major display deviations (incorrect weighing results) may be experienced, should electromagnetic fields (e.g. due to mobile phones or radio equipment), static electricity accumulations or instable power supply occur. In that case, the location must be changed.
7.2 Unpacking
Take the balance out of its packaging and place it at the intended position. When using the power supply unit, ensure that the power cable does not produce any risk of stumbling.
7.3 Scope of delivery
Balance
■ Mains adapter (in conformity with EN 60601-1)
■ Battery function (batteries not included)
- Protective hood
- Operating instructions
7.4 Installing the chair scales
Carefully remove the balance from the packaging, remove plastic cover and setup balance at the intended workstation.
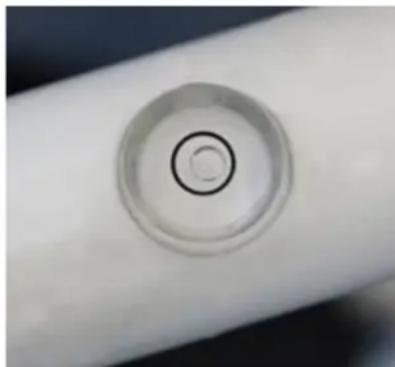
Levelling:
natural_image
Close-up of a white cylindrical object with a circular indentation on its surface (no text or symbols visible)
→ Place scales on an even surface.
→ Check if the air bubble of the level is within the prescribed circle.
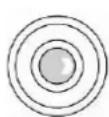
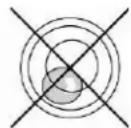
If the air bubble of the bobble level is not in the required circle, level the balance using the adjustment feet as specified in the following chapter 7.4.1.
→ Check levelling regularly

Once installation is complete, check all screws for tight fit. Otherwise the person to be weighed may suffer injury.
7.4.1 Levelling

Levelling is restricted to specialist staff possessing well acquainted with the workings of weighing scales.
→ Place scales on an even surface.
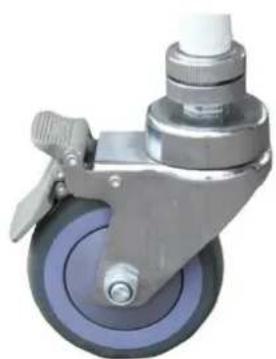
→ Lock brakes
natural_image
Close-up of a metallic industrial control wheel with blue and silver wheels (no text or symbols visible)Turn the wheel (1) until the air bubble of the bubble level is in the black circle
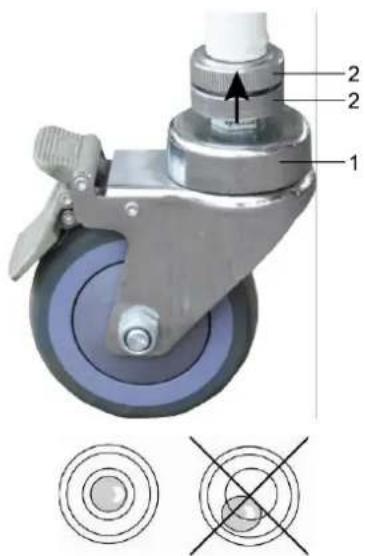

⇒ Turn the counternuts (2) right to the top.
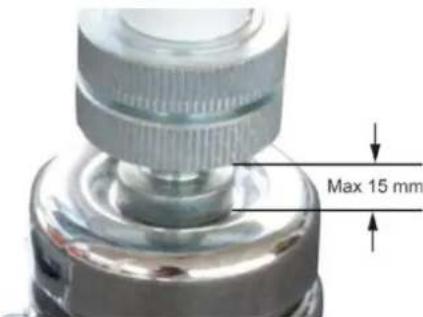

Gap width must not exceed 15 mm!

natural_image
Close-up of a mechanical pulley system with black and gray components, no visible text or symbolsUse the adjustment feet to fix the chair at the front rollers
7.5 Battery operation
As an alternative for the rechargeable battery operation, the balance offers also the possibility to be operated with 6x AA-batteries.
Open the battery cover (1) at the lower side of the display unit and insert the batteries according to the example shown below. Lock again the battery compartment cover. If
the batteries are exhausted, the symbol "and "Lo bAt" is displayed on the balance; replace the batteries. To save the battery, the balance switches automatically off (see chap. 8.6 Auto off).
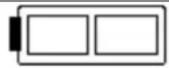 +Lo bAt +Lo bAt | Capacity of batteries exhausted. |
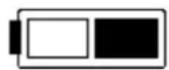 | Capacity of batteries will soon be exhausted. |
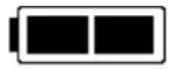 | Batteries completely charged |
Disclaimer:
Only use KERN type rechargeable battery YMR-01 (RC 193650) or batteries AA 1.5 V (6x). Other may cause damages to the product, which can lead to injuries of persons

If the balance is not used for a longer time, take out the batteries and store them separately. Leaking battery liquid could damage the balance.

Replacement for rechargeable battery by inadequately trained personnel could result in a hazard
Insert batteries:
| Remove the battery compartment cover at the side of the display unit (1) | 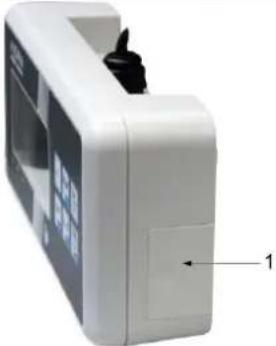 |
| Remove the battery holder (2) | 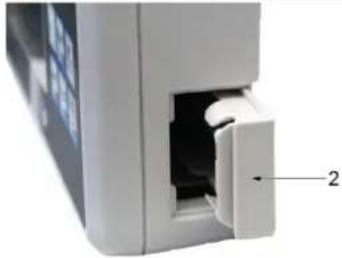 |
| Insert the batteries into the battery holder | 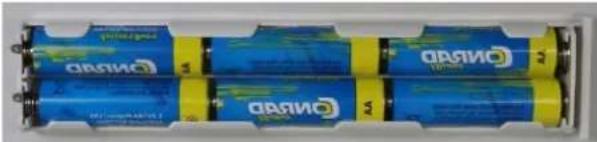 |
| Insert batteries with the battery holder into the battery compartment and lock it with battery compartment cover. | 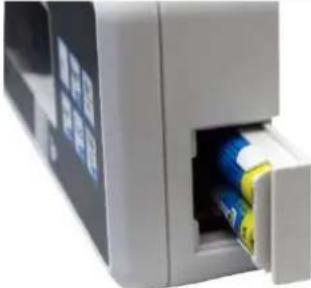 |
| Insert batteries in the battery compartment and lock them with battery compartment cover. | 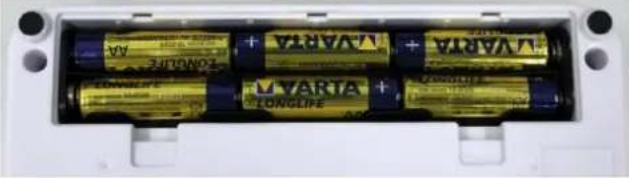 |
7.6 Rechargeable battery operation using an optional battery power pack
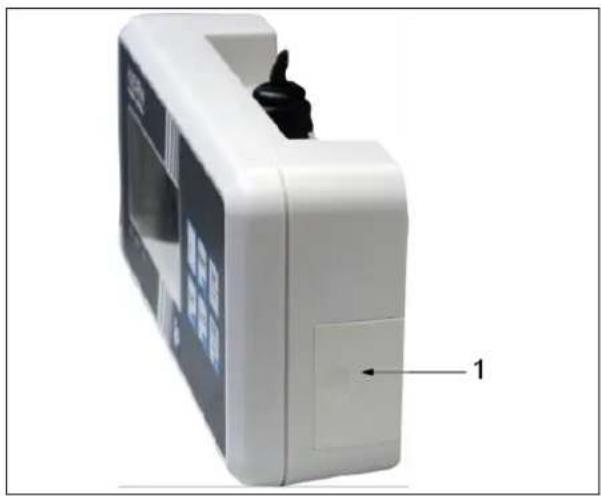
natural_image
White portable electronic device with a black handle and labeled component '1' (no visible text or symbols on the device body)Open the battery compartment cover (1) at the base of the display unit and insert the rechargeable battery. Charge the rechargeable battery for at least 12 hours before initial use.
The appearance of the symbol in the weight display indicates that the rechargeable battery is almost exhausted. The weighing scale will remain ready for operation for a few more minutes before switching off automatically in order to save the rechargeable battery (see chap. 9.6 Auto off). Charge rechargeable battery.
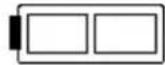 | Voltage has dropped below prescribed minimum |
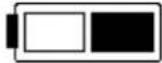 | Rechargeable battery very low |
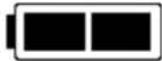 | Rechargeable battery completely recharged |
 | ·If the rechargeable battery is exhausted, „LobAt“ is displayed. The rechargeable battery is charged via the provided plug-in power supply unit (charging time 12 h for a complete charging).·If the balance is not used for a longer time, take out the rechargeable battery and store it separately. Leaking liquid could damage the balance. |
7.7 Mains connection
Power is supplied by the external mains adapter which also serves to isolate the mains supply from the scale. The stated voltage value must be the same as the local voltage. Only approved genuine KERN mains adapters may be used in compliance with Directive EN 60601-1.
The small sticker attached to the side of the display unit indicates the power port:
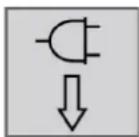
If the symbol 📄 appears in the display, the rechargeable battery will soon be exhausted. Connect the power supply unit and charge the rechargeable battery.
The flashing symbol informs you during charging about the charging status of the rechargeable battery.

When the optional WIFI-interface is used, power consumption increases
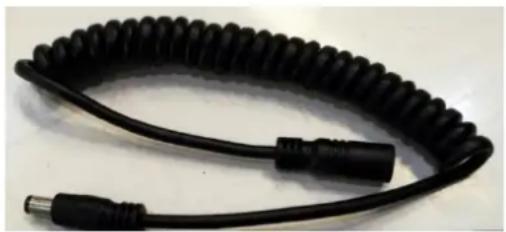
7.7.1 Safety cable
Safety cable for strain relief of the mains cable.
(cable length incl. mains cable less than 3 m)
natural_image
Black flexible coiled cable with a metallic connector (no text or symbols visible)Application:
Installation for strain relief between mains cable (plug-in power supply unit) and display unit.
7.8 Initial Commissioning
In order to obtain exact results with the electronic balances, your balance must have reached the operating temperature (see warming up time chap.1). During this warming up time the balances must be connected to the power supply (mains, accumulator or battery) and be switched on.
The accuracy of the balance depends on the local acceleration of gravity. The value of gravity acceleration is shown on the type plate.
8 Operation
After the balance having been transported to the person, the balance must be levelled prior to weighing, see graphic below.
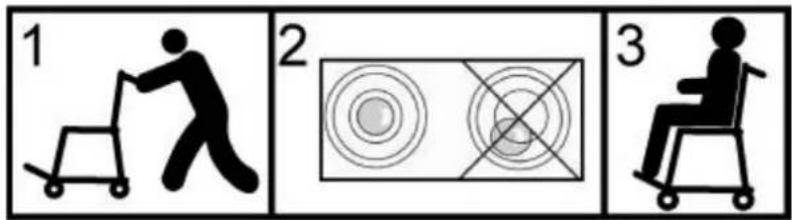
Step onto and leave the balance
Step onto and leave the chair scales only when a qualified person is present
8.1 Weighing
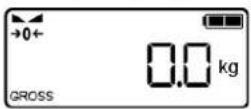
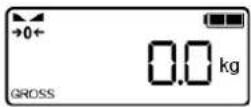
| → Start balance by pressingThe balance will carry out a self-testThe balance is ready for operation as soon as the weight display for “0.0 kg” has appeared. |
 | ■ However, you can reset the weighing scale to zero by pressing  the the |
→ Have person sit in the centre of the scales.
⇒ Fold the footrests and the arm rests downwards. Put both feet of the person on the respective foot rest.
⇒ Put the lower arms of the person on the arm rests.
→ Wait for the rest position display, then read the weighing result.
⇒ Once the weighing process is completed fold up the foot- and arm rests.

8.2 Taring
The tare weight of any preloads can be deducted by pressing a button so that the actual weight of the person is displayed in subsequent weighings.
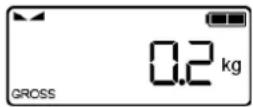 (example) (example) | ⇒ Put object (such as towel or padding) on the seating pan. |
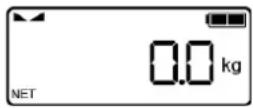 | ⇒ Press , the → display appears.⇒ „NET” is shown at the bottom on the left. |
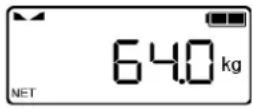 (example) (example) | ⇒ Seat person in the centre of the seat pan.Wait until the stability display appears, then read the weighing result. |
 | ■ When the balance is unloaded the saved taring value is displayed with negative sign.■ To delete the stored tare value, unload the balance and press  |
8.2.1 Subsequent tare
The balance can be tared several times successively.
8.2.2 Pretare
The possibility exists to enter either a known pre-tare value via the keyboard or to store the weight of an object placed on the weighing plate as a pre-tare value.
Store the weight of an object placed on the weighing plate:
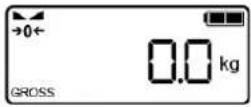 |  |
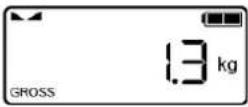 | Start balance by pressingWait for stability display |
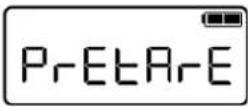 | Place the object whose weight shall be stored as a pre-tare value, on the seat pan. (in this example „1.3 kg“) Press ____ep pressed, the application menu is called up. „ApcMen“, followed by „WghMod“ is displayed Then „PtArE“ appears automatically. Press ____ep pressed, the application menu is called up. „ApcMen“, followed by „WghMod“ is displayed Then „PtArE“ appears automatically. |
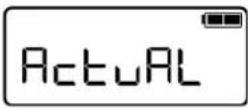 |  Confirm by AL“ will be shown. Confirm by AL“ will be shown. |
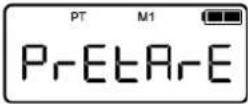 |  Confirm by display „PT“ and „M1“ appear flashing.Now select the desired memory location between 1 and 4using buttonF Confirm by display „PT“ and „M1“ appear flashing.Now select the desired memory location between 1 and 4using buttonF |
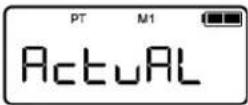 |  Press „ActuAL“ appears anew, „PT“ and „M1“ stop flashing Press „ActuAL“ appears anew, „PT“ and „M1“ stop flashing |
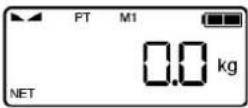 |  Press „Wait“ appears shortly, the weight placed on the weighing plate at this moment, will be taken over as pre-tare value. The scales will change to zero display. “NET” appears. Press „Wait“ appears shortly, the weight placed on the weighing plate at this moment, will be taken over as pre-tare value. The scales will change to zero display. “NET” appears. |
Enter the pre-tare value manually via the keyboard:
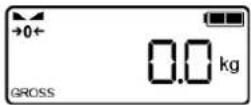 |  |
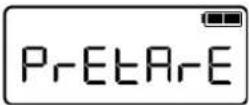 | Start balance by pressingWait for stability display Press ###pressed, the application menu is called up. „ApcMen“, followed by „WghMod“ is displayed Then „PtArE“ appears automatically. Press ###pressed, the application menu is called up. „ApcMen“, followed by „WghMod“ is displayed Then „PtArE“ appears automatically. |
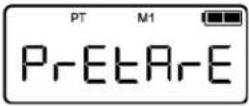 |  Confirm by ,display „PT“ and „M1“ appear flashing.Now select the desired memory location between 1 and 4using button.F Confirm by ,display „PT“ and „M1“ appear flashing.Now select the desired memory location between 1 and 4using button.F |
 |  Press ### „ActuAL“ is displayed. Press ### „ActuAL“ is displayed. |
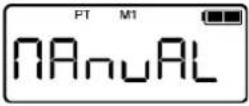 |  Press ,AL" is displayed. Press ,AL" is displayed. |
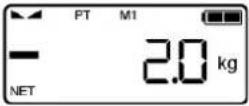 |  Press ,play to enter the pre-tare value appearsflashing.Enter numeric values using an[TARE→0←press to change over to the next decimal digit and finally acknowledge the entered value.The balance changes into the weighing mode, the entered pre-tare value is displayed with a minus as a negative value. Press ,play to enter the pre-tare value appearsflashing.Enter numeric values using an[TARE→0←press to change over to the next decimal digit and finally acknowledge the entered value.The balance changes into the weighing mode, the entered pre-tare value is displayed with a minus as a negative value. |
Delete pre-tare value:
- Unload the weighing plate and press

• Or after adjustment „ManuAL“ press


the pre-tare value is deleted.
balance goes to zero display.
„cLEAr“ appears. After that press
8.3 HOLD function
The balance has an integrated standstill function (mean value calculation). This allows correct weighing determination of a person although the latter is not keeping still on the seat surface.
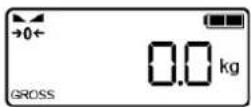 |  → Start balance by pressingWait for stability display ▶ ▶ → Start balance by pressingWait for stability display ▶ ▶ |
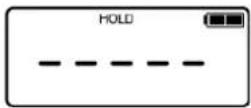 |  → Press, in the display „----“ will appear and the „HOLD“ symbol appears flashing.→ During this display place the person in the middle of the seat surface. → Press, in the display „----“ will appear and the „HOLD“ symbol appears flashing.→ During this display place the person in the middle of the seat surface. |
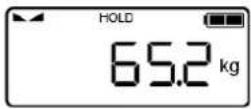 (example) (example) | → As soon as the „HOLD“-symbol does not more flash and the stability display ▶ appears, the weighing value of the person will be displayed and „frozen”.After unloading the balance, the weighing value remains displayed for approx. 10 seconds, the „HOLD“ symbol appears flashing during that time.Then the balance returns automatically into the weighing mode.The „HOLD“ symbol goes out, and the zero display appears. |
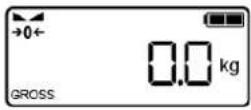 |

8.5 Calculation of the Body Mass Index
You need to know a person's body height before you can calculate the BMI for that person. This should be known.
→ Start balance by
Wait for stability display .
⇒ Press . The most recently entered body height will be shown in centimeters, the enabled digit flashes.
⇒ To enter body height, press the buttons and .
→ Confirm the value entered with . „StEPon“ is displayed
Seat person in the centre of the seat pan. "----, appears shortly, followed by the person's BMI value. The "BMI" symbol appears.
Relief the seat pan The balance returns automatically to the weighing mode; the „BMI“ symbol goes out, the zero display appears.
- Reliable calculation of BMI is restricted to a body height of 100 cm to 200 cm and a weight of >10 kg.
- If weighing has to take place under unsteady conditions, you can be stabilise the display by applying the Hold function.
8.5.1 Classification of BMI values
Weight classification for adults over 18 years of age using the BMI in accordance with WHO, 2000 EK IV and WHO 2004.
| Category | BMI (kg/m2) | Risk of diseases associated with overweight |
| Underweight | < 18.5 | Low |
| Normal weight | 18.5 – 24.9 | Average |
| Overweight | ≥ 25.0 | |
| Pre-adipose | 25.0 – 29.9 | A bit increased |
| Adipose degree I | 30.0 – 34.9 | Increased |
| Adipose degree II | 35.0 – 39.9 | High |
| Adipose degree III | ≥ 40 | Very high |
8.6 Automatic switch-off function „AUTO OFF“
The weighing scale will switch off automatically after the allotted time as long as neither the display unit nor the weighing surface is operated.
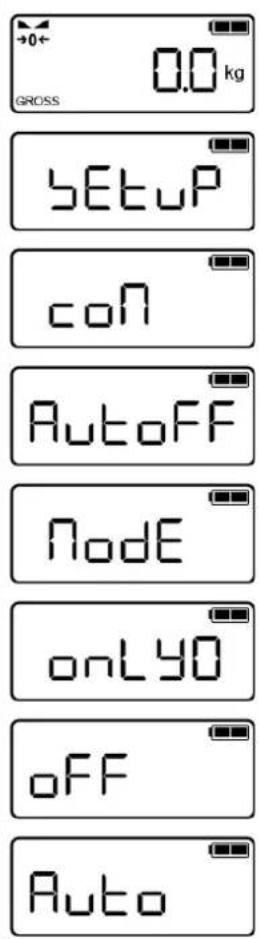
In weighing mode press simultaneously, „SetuP“ followed by „coM“ will appear.
⇒ Press repeatedly until „AutoFF“ appears.
⇒ Press , "ModE" is displayed
⇒ Press lag, „onLY0“ is displayed
Here you can select between these settings:
onLY0: Auto Off only with zero display
oFF: Auto Off switched off
Auto: Auto off independent on the load on the balance
→ Select the required setting by an ↓ acknowledge on

→ Press repeatedly until the zero display appears. The balance is now in weighing mode
To set a determined switch-off time, proceed as follows:
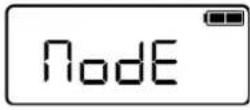 | ⇒ As described above, call-up the menu item „ModE“ |
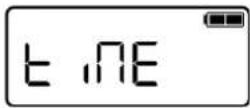 | ⇒ Press 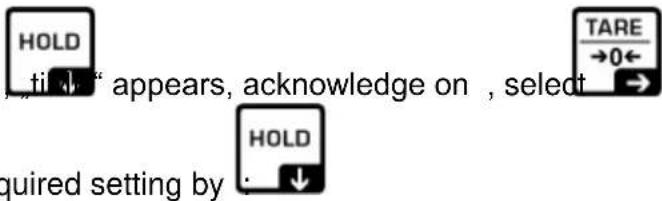 the re the re |
| [2 min] | Weighing system will be turned off after 2 min. |
| [5 min] | Weighing system will be turned off after 5 min. |
| [30 min] | Weighing system will be turned off after 30 min. |
| [60 min] | Weighing system will be turned off after 60 min. |
| [30 S] | Weighing system will be turned off after 30 sec. |
| [1 min] | Weighing system will be turned off after 1 min. |
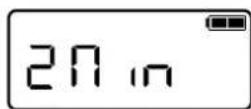
→ Confirm selected time with
mode using


8.7 Acoustic signal when pressing button
The balance offers the possibility to switch off or on an acoustic signal by pressing the keys.

- Menu settings: [bEEPER] [KEYS-on/oFF]
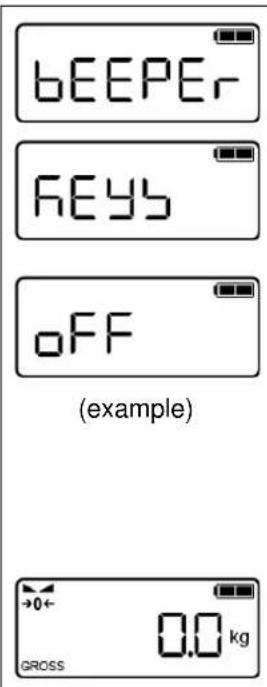
⇒ In menu call-up the menu item „bEEPER“
⇒ Press "KIRS" is displayed
→ Press lag, the last saved setting will be displayed. Here as example "OFF"
→ Select desired setting with lan ↓ acknowledge by

→ Press repeatedly until the zero display appears. The balance is now in weighing mode
8.8 Setting time and date
(only available with Real Time Clock)

- Menu settings:
[dAtiME]
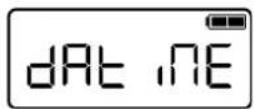
(example)
(example)
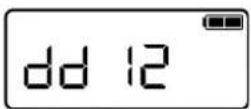
(example)
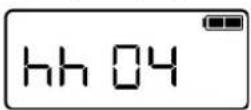
(example)
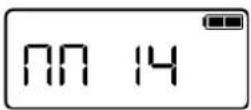
(example)
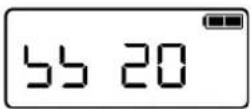
(example)
Setting date:
⇒ In menu call-up the menu item „dAtiME“

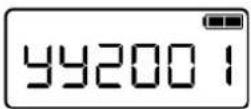
→ Press repeatedly until the prompt for entering the year
appears „YY20xx“. Enter the current year with


and confirm on
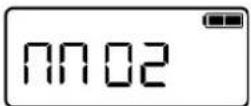
⇒ The display changes automatically to the prompt for entering the month: „MM xx“
→ Enter the current month with ↓ or ↑ and confirm on
⇒ The display changes to the prompt for entering the day:
„dd xx“. Enter the current day with
confirm on

Setting time:
Now the display changes automatically to the prompt for entering the time, first the hour: „hh xx“.
→ Enter the hour with or and confirm by .
⇒ The minutes appear: „MM xx“. Enter the current minutes and

confirm on
⇒ The seconds appear: „SS xx“. Enter the seconds and
confirm on

→ Date and time have now been entered; the display changes to the weighing mode.
9 Menu

Access to service menu „tCH“ is locked in verified balances.
To disable the access lock, destroy the seal mark and actuate the adjustment switch.
Attention:
After destruction of the seal the weighing system must be re-verified by an authorised agency and a new verification wire/seal mark fitted before it can be reused for applications subject to verification.
9.1 Navigation in the menu
| Call up menu | In weighing mode press simultaneously, „SetuP“ followed by „coM“ will appear. |
| Select function |   With help of the 1al functions can be selected one after the other. With help of the 1al functions can be selected one after the other. |
| Change settings | Confirm selected function by current setting will be displayed. Select desired setting with  by by  , the balance returns to the menu. , the balance returns to the menu. |
| Exit menu/Return to weighing mode | Press repeatedly until the zero display appears. The balance is now in weighing mode. |
9.2 Menu overview
| Menu blockMain menu | Menu item Submenu | Available settings / explanation | |
| SEtup | |||
| coMInterface parameter | rS232 | RS232 mode | |
| bAUd | Baud rate 9600, 14400, 19200, 38400, 57600, 115200, 128000, 256000, 600, 1200, 2400, 4800 | ||
| dAtA | Data bits: 8dbitS, 7dbitS | ||
| PAritY | Parity nonE, odd, EVEn | ||
| StoP | Stop bits: 1Sbit, 2SbitS | ||
| HAndSh | Handshake: nonE | ||
| Protoc | Communication Protocol: KCP, | ||
| uSb-d | USB interface | ||
| bAud | Baud rate 9600, 14400, 19200, 38400, 57600, 115200, 128000, 256000, 600, 1200, 2400, 4800 | ||
| dAtA | Data bits: 8dbiTS, 7dbiTS | ||
| PAritY | Parity nonE, odd, EVEn | ||
| StoP | Stop bits: 1Sbit, 2SbitS | ||
| HAndSh | Handshake: nonE | ||
| Protoc | Communication Protocol: KCP, | ||
| WLAN | WLAN interface: on, oFF | ||
| PrintPrinter settings | intFcE | Interface | |
| rS232 | RS232 interface | ||
| uSb-d | USB interface | ||
| PrModE | Printer settings | ||
| MAnUAL | The weighing value is printed out when pressingPRINT | ||
| Auto | The weighing value is automatically printed out | ||
| cont | Continuous data output | ||
| ForMAt | long, short | ||
| LAYout | USER | ||
| bEEPER Tone | KEYS | Acoustic signal when pressing button | |
| on | Acoustic signal on | ||
| oFF | Acoustic signal off | ||
| AutoFF Automatic shutdown function | Mode | Settings autom. shutdown function | |
| oFF | Automatic shutdown function switched off | ||
| Auto | Automatic switch-off independent on the load on the balance | ||
| onLY0 | Automatic switch-off only with zero display | ||
| timE | Setting the switch-off time | ||
| 30 S, xMin | Automatic switch off after: 30 sec, 1 min, 2 min, 5 min, 30 min, 60 min | ||
| dAt iME Date and time | Setting date and time | ||
| YY.2021 | Setting date: Year | ||
| MM 06 | Month | ||
| dd 22 | Date | ||
| hh 11 | Setting time: Hour | ||
| MM 53 | Minutes | ||
| SS 33 | Seconds | ||
| rESEt back to default setting | Balance is reset to default setting | ||
10 Communication with peripheral devices via KUP connection
Via the interfaces weighing data may be exchanged with connected peripheral devices.
Issue may be made to a printer, PC or check displays. In reverse order, control orders and data inputs may be made via the connected devices.
The balances of the TMCN series are equipped with a KUP connection (KERN Universal Port) as per standard.
The following options are available as interfaces:
| Interface adapter with cable | ||
| Model | Example for application | |
| RS232 | YKUP-01 | Serial printer |
| USB | YKUP-03 | PC |
| Ethernet | YKUP-04 | PC |
| Bluetooth | YKUP-06 | Android terminal unit or PC |
| Kern Extension Box | YKUP-13 | Several interfaces in parallel |
i
The available interfaces can be used via the KUP (YKUP-13) in parallel manner.
Connector assignment balance:

Warning: Only for use with KUP interfaces

Max. length of externally attached cables on the KUP interface: 10 m.
10.1 KERN Communications Protocol (KERN Interface Protocol)
KCP is a standardized set of interface orders for KERN balances, which allows many parameters and device functions to be called up and controlled. KERN devices that have KCP can use it to connect easily to computers, industrial control systems and other digital systems. A detailed description you will find in the „KERN
Communications Protocol" manual, available in the download area on our KERN homepage (www.kern-sohn.com).
To activate KCP please observe the menu overview of your balance's operating instructions.
KCP is based on simple ASCII orders and replies. Every interaction consists of an order, possibly with arguments separated by spaces and finished by
Extract of the mostly used KCP orders:
| I0 | Shows all implemented KCP orders |
| S | Sending stable value |
| SI | Sending current value (also instable) |
| SIR | Sending current value (also instable) and repeating |
| T | Taring |
| Z | Zeroing |
Example:
| Order | S | |
| Possible replies | S__100.00_ S_ S_+ or S_- | Order accepted, execution of the order started, currently another order is executed, timeout reached, over- or underload |
10.2 Data output after pressing the PRINT button < manual >
Activate function:
⇒ In Setup menu invoke the menu setting
⇒ For a manual data output select the menu setting <ΠΑπυΑL> with the navigation keys ↓↑ and confirm on the → button.
⇒ Use the navigation keys ↓↑ to select the setting < □n > and confirm on → button.
⇒ To exit the menu press the navigation key ← repeatedly.
Place goods to be weighed on balance:
⇒ If required, place empty container on scale and tare.
Place goods to be weighed. The weighing value is edited by pressing the PRINT-button.
10.3 Automatic data output < auto>
Data output happens automatically without having to press the PRINT-key as soon as the corresponding output condition has been met, dependent on the setting in the menu.
Enable function and set the output condition:
In Setup menu invoke the menu setting
For an automatic data output select the menu setting
Use the navigation keys ↓↑ to select the setting
Acknowledge by -button and set the required output condition with the navigation keys .
⇒ Acknowledge by →-button.
⇒ To exit the menu press the navigation key ← repeatedly.
Place goods to be weighed on balance:
⇒ If required, place empty container on scale and tare.
→ Place weighed goods and wait until the stability display (↓) appears. The weighing value is issued automatically.
10.4 Continuous data output < cont > Enable function and set the output interval:
In Setup menu invoke the menu setting
For a continuous data output select the menu setting
Use the navigation keys ↓↑ to select the setting < on > and confirm on → button.
⇒
Acknowledge by -button and set the required time interval using the navigation keys .
⇒ To exit the menu press the navigation key ← repeatedly.
Place goods to be weighed on balance
⇒ If required, place empty container on scale and tare.
→ Place goods to be weighed.
⇒ The weighing values are issued according to the defined interval.
Sample log (KERN YKB-01N):
| S D | 1.9997 kg |
| S D | 1.9999 kg |
| S D | 1.9999 kg |
| S D | 1.9999 kg |
| S S | 2.0000 kg |
| S S | 2.0000 kg |
| S S | 2.0000 kg |
| S S | 2.0000 kg |
| S D | 1.9998 kg |
| S D | 1.9998 kg |
| S D | 2.0002 kg |
| S D | 2.4189 kg |
| S D | 2.9998 kg |
| S D | 2.9996 kg |
| S D | 2.9996 kg |
| S D | 2.9997 kg |
| S D | 2.9997 kg |
| S S | 2.9996 kg |
| 2.9996 kg |

The balances which have a serial interface, may only be connected to electrical office machines.
10.5 Data format
In Setup menu invoke the menu setting
⇒ Use the navigation keys ↓↑ to select the menu setting
→ Use the navigation buttons ↓↑ to select the desired setting.
Options:
<Short> Standard measuring protocol
<LonG> Detailed measuring protocol
→ Confirm setting with →-button.
To exit the menu press the navigation key repeatedly.
Sample log (KERN YKB-01N):

10.6 WLAN
W-LAN standard: IEEE 802.11 b/g/n (Wi-Fi)
▶ Network log: TCP/IP with DHCP
▶ Supported encryption methods: WPA, WPA2
➢ Transmission frequency: 2412 - 2472 MHz
➢ Maximum transmission performance: < 20dBm
➢ Application log: KCP (KERN Communications Protocol):
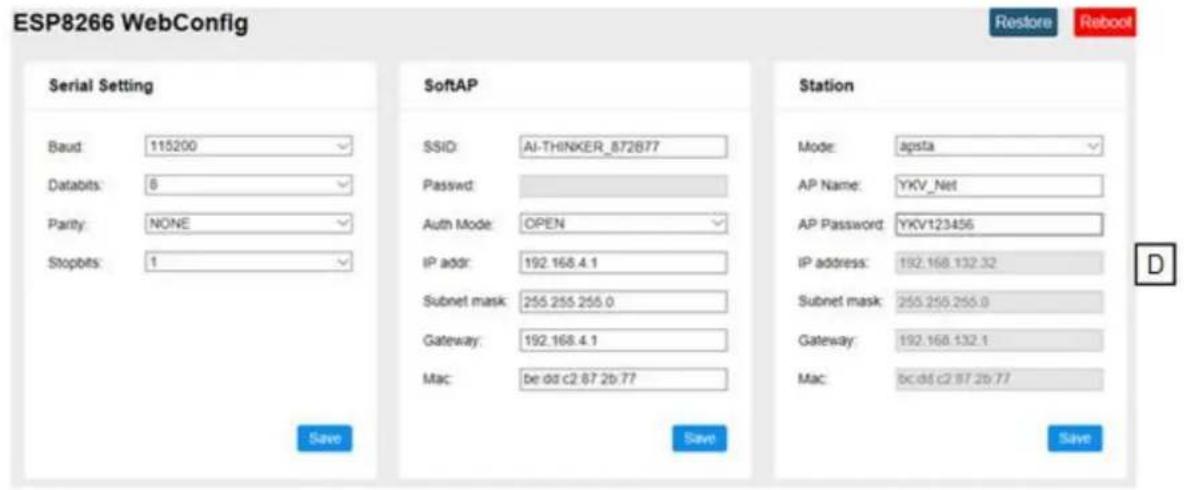
Set up WIFI connections:
- The balance creates a WIFI access point as soon as it has started up (WLAN symbol in the balance display appears).
Use your computer to connect to this access point.
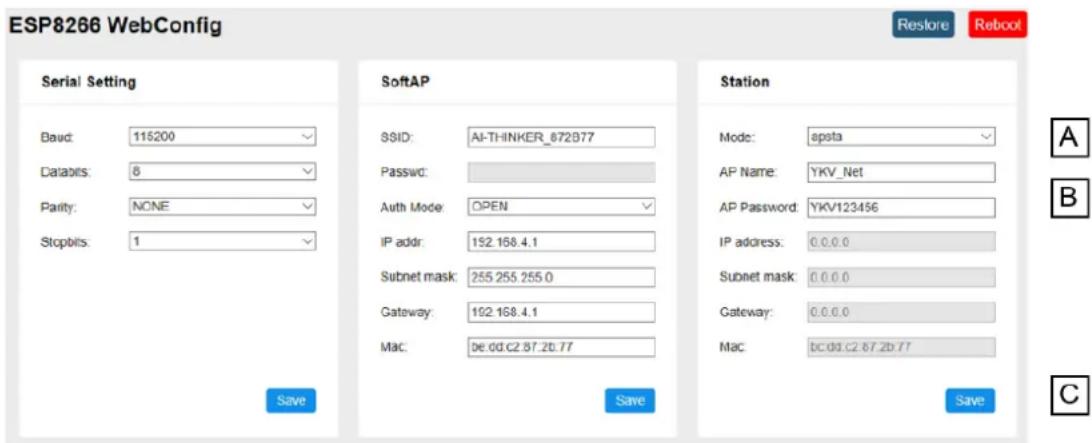
The SSID (name of the balance's access point) is „AI_THINKER_xxxxxx“
- Using a web browser visit the website http://192.168.4.1/.
In the website:
A. Set the mode „Mode“ to “apsta”
B. Enter information about the network which you want to integrate the balance into (network „AP Name“ and password „AP Password“)
C. Save the settings „Save“ and update the site
- Separate the access point from the computer
- Cut the power supply to the balance for a short moment
- Connect the computer again to the access point of the balance and update the website
D. Now the IP-address „IP address“ is displayed
- Close the website
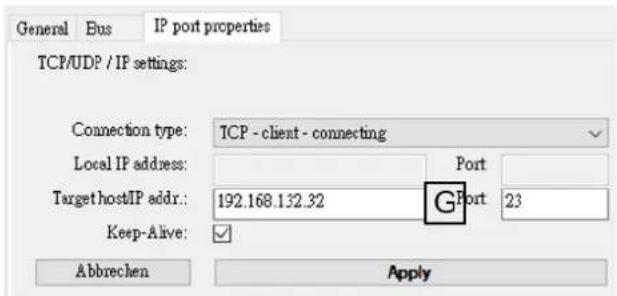
- Connect the computer to the selected network
- Enter the IP / Port into the target software: 23
10.7 Print function
After a correct connection of the software and the balance, the weighing data can be
PRINT transferred using the button on the balance.
11 Bluetooth
The balance is optionally available with Bluetooth Low Energy (BLE) and will then be visible to Bluetooth Master devices using its serial number.
To access this, please use an appropriate software program / app which supports Bluetooth Low Energy (BLE). Applications exclusively using Bluetooth Classic (BLC) will not work.
The following profile must be adjusted:
| Service UUID |
| 0000fff0-0000-1000-8000-00805f9b34fb |
| Read characteristic UUID |
| 0000fff1-0000-1000-8000-00805f9b34fb |
| Write characteristic UUID |
| 0000fff2-0000-1000-8000-00805f9b34fb |
➢ Transmission frequency: 2402 - 2480MHz
➢ Maximum transmission performance: < 20dBm
12 Alibi memory (optional)
The balance stores weighing data after pressing be retrieved from there at any time.

alibi memory. They can
13 Error messages
| Display | Description |
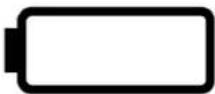 | Battery capacity exhausted |
 | Battery capacity soon exhausted |
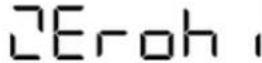 | Zero setting range exceeded |
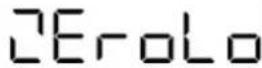 | Zero setting range not achieved |
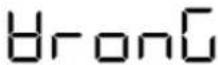 | Adjustment error |
 | Load instable |
| 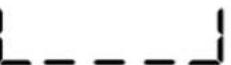 | Underload |
| 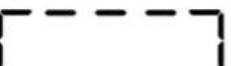 | Overload |
Should other error messages occur, switch balance off and then on again. If the error message remains inform manufacturer.
14 Servicing, maintenance, disposal
14.1 Cleaning

Before any maintenance, cleaning and repair work disconnect the appliance from the operating voltage.
14.2 Cleaning / disinfecting
Clean weighing platform (such as seat) as well as casing with household detergents or commercially available disinfectants, e.g. 70% isopropanol. We recommend a disinfectant suitable for wiping disinfection. Please follow manufacturer's instructions.
Do not use abrasive or aggressive cleaners such as spirits or alcohol or similar as they might damage the high-quality surface.
To prevent cross-contamination (fungal skin infection) please observe the following time intervals for disinfection:
- Weighing plate before and after any measurement with direct skin contact
- When required:
○ Display
- Touch-sensitive keyboard

Do not spray the device with disinfectant, just wipe it.
Make sure that disinfectant does not penetrate the interior of the balance.
Remove dirt immediately.
14.3 Sterilisation
Sterilisation of the appliance not allowed.
14.4 Servicing, maintenance
The appliance may only be opened by trained service technicians who are authorized by KERN.
We recommend a regular safety-related technical check (STK).
Disconnect scales from mains before opening.
14.5 Disposal
Disposal of packaging and appliance must be carried out by operator according to valid national or regional law of the location where the appliance is used.
15 Instant help for troubleshooting
In case of a fault in the program sequence, the balance should be shortly switched off. The weighing process must then be restarted from the beginning.
Fault:
The weight display does not glow.
Possible causes:
• The balance is not switched on
- The mains supply connection has been interrupted (mains cable not plugged in/faulty).
• Power supply interrupted.
- Rechargeable battery inserted incorrectly or empty
- No rechargeable battery inserted
The displayed weight is permanently changing
- Draught/air movement
- Table/floor vibrations
- The seating surface is in contact with foreign bodies or is not correctly positioned.
- Electromagnetic fields / static charging (choose different location/switch off interfering device if possible)
The weighing result is obviously incorrect
• The display of the balance is not at zero
- Adjustment is no longer correct
• Great fluctuations in temperature
- The balance is on an uneven surface
- Electromagnetic fields / static charging (choose different location/switch off interfering device if possible)
No data can be transferred to the WIFI interface
- The mains signal is not stable or too weak
- Wrong interface configuration
Should other error messages occur, switch balance off and then on again. If the error message remains inform manufacturer.
16 Adjustment
As the acceleration value due to gravity is not the same at every location on earth, each display unit with connected weighing plate must be coordinated - in compliance with the underlying physical weighing principle - to the existing acceleration due to gravity at its place of location (only if the weighing system has not already been adjusted to the location in the factory). This adjustment process must be carried out for the first commissioning, after each change of location as well as in case of fluctuating environment temperature. To receive accurate measuring values it is also recommended to adjust the display unit periodically in weighing operation.

- Prepare the required adjustment weight. The adjustment weight to be applied depends on the capacity of a weighing scale, see chap. 1. Carry out adjustment as closely as possible to admissible maximum load of weighing scale. Info about test weights can be found on the Internet at: http://www.kern-sohn.com.
- Observe stable environmental conditions. For warm-up time required for stabilisation see chap.1.
Procedure:
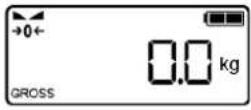 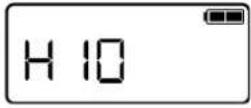 | ⇒ In weighing modeActuate adjustment switch. The service menu is called up. The first menu item “X10“ appears. |
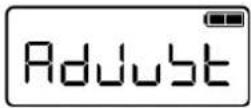 | ⇒ Press the next menu item “AdJuSt” appears |
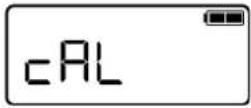 | ⇒ Confirm by, cALEXt is displayed. |
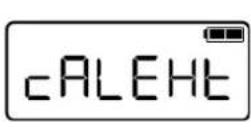 | ⇒ Press (again), „CALEXt“ is displayed.(should this not be displayed, press repeated) until „CALEXt“ is displayed |
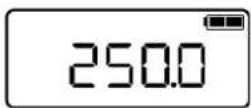 | ⇒ Press the required adjustment weight is shown⇒ Acknowledge by, 7→“ is shortly displayed:Ensure that there are no objects on the weighing plate. |
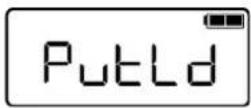 | ⇒ „PutLd“ is displayed. During this display place the required adjustment weight on the weighing surface |
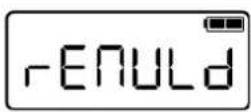  | ⇒ Press „eVLD“ is displayed. Remove the adjustment weight.The balance changes automatically into the weighing mode, the adjustment is concluded now. |
An adjusting error or incorrect adjustment weight will generate an error message („WronG“), repeat the adjustment process.
Table des matières
natural_image
Close-up of a mechanical control lever with blue and white wheels (no text or symbols visible)natural_image
Close-up of a mechanical control lever with blue and silver wheels and a white head (no text or symbols visible)natural_image
Close-up of a black and white manual pushper and a gray wheeled cart on a textured gray surface (no text or symbols visible)natural_image
Medical mobility chair with blue seat and metal frame, no visible text or symbolsnatural_image
Silhouette of a person in a wheelchair, no text or symbols present
natural_image
Close-up of a white cylindrical object with a circular indentation and concentric rings (no text or symbols visible)
natural_image
Close-up of a metallic industrial control lever with a blue circular wheel and handle (no text or symbols visible)natural_image
Close-up of a mechanical pulley system with black and white components, no visible text or symbolsnatural_image
Close-up of a printer's internal structure with a blue and yellow component, no visible text or symbols.natural_image
Four yellow and blue batteries labeled 'V-AYA1', 'V-AYA2', 'MYARIA', and 'CONCIDE' arranged in a row (no additional text or symbols visible)natural_image
White portable electronic device with a black handle and label pointing to a button, labeled '1' (no visible text or symbols on the device body)natural_image
Black coiled cable with a metallic connector, no visible text or symbolsEmploi:
Read characteristic UUID
0000fff1-0000-1000-8000-00805f9b34fb
Write characteristic UUID
0000fff2-0000-1000-8000-00805f9b34fb
Fréquence de transmission: 2402-2480MHz
▶ Capacité maximale de transmission: < 20dBm
12 Mémoire Alibi (en option)

- Druckfunktion
- Technical data
- Declaration of conformity
- Appliance overview
- Overview of displays
- Keyboard overview
- Dimensions
- Basic Information (General)
- Proper use
- Non-intended product use / contraindications
- Warranty
- Monitoring of Test Resources
- Plausibility check
- Basic Safety Precautions
- Pay attention to the instructions in the Operation Manual
- Preparation for use
- Transport and storage
- Testing upon acceptance
- Packaging / return transport
- Unpacking, Installation and Commissioning
- Place of installation / place of operation
- On the installation site observe the following:
- Unpacking
- Scope of delivery
- Installing the chair scales
- Levelling
- Battery operation
- Disclaimer:
- Insert batteries:
- Rechargeable battery operation using an optional battery power pack
- Mains connection
- Safety cable
- Safety cable for strain relief of the mains cable.
- Application:
- Initial Commissioning
- Operation
- Weighing
- Taring
- Subsequent tare
- Pretare
- Store the weight of an object placed on the weighing plate:
- Enter the pre-tare value manually via the keyboard:
- Delete pre-tare value:
- HOLD function
- Calculation of the Body Mass Index
- Classification of BMI values
- Automatic switch-off function „AUTO OFF“
- Acoustic signal when pressing button
- Setting time and date
- Setting date:
- Setting time:
- Menu
- Attention:
- Navigation in the menu
- Menu overview
- Communication with peripheral devices via KUP connection
- Connector assignment balance:
- KERN Communications Protocol (KERN Interface Protocol)
- Data output after pressing the PRINT button < manual >
- Activate function:
- Place goods to be weighed on balance:
- Automatic data output < auto>
- Enable function and set the output condition:
- Continuous data output < cont > Enable function and set the output interval:
- Place goods to be weighed on balance
- Data format
- Sample log (KERN YKB-01N):
- WLAN
- Print function
- Bluetooth
- Alibi memory (optional)
- Servicing, maintenance, disposal
- Cleaning
- Cleaning / disinfecting
- Sterilisation
- Servicing, maintenance
- Disposal
- Instant help for troubleshooting
- Fault:
- Possible causes:
- Adjustment
- Table des matières
- Emploi:
- Read characteristic UUID
- Write characteristic UUID
- Mémoire Alibi (en option)
Brand : Kern
Model : TMCN 200K-1M-A
Category : Wheelchair