ULX-DRY V - Dryer Ulsonix - Free user manual and instructions
Find the device manual for free ULX-DRY V Ulsonix in PDF.

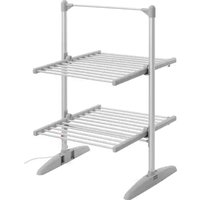
| Product type | Electric shoe dryer |
| Model | ULX-DRY V |
| Rated voltage | 230 V~ / 50 Hz |
| Rated power | 80 W |
| Protection class | I (mandatory grounding) |
| Protection rating | IPX1 (protection against vertical water drops) |
| Dimensions (L x W x H) | 610 x 350 x 315 mm |
| Weight | 1.3 kg |
| Maximum heating temperature | 55 °C (constant after 5 min) |
| Number of heating elements | 8 |
| Maximum load capacity | 30 kg |
| Installation | On stand (screw fixing) |
| Control | On/off switch with indicator light |
| Usage | Indoor use only |
| Maintenance | Clean with a damp cloth, then dry; do not use alcohol or solvents |
| Safety | Unplug before cleaning; keep out of reach of children; do not immerse |
| Repairability | Power cord replaceable only by a professional |
| Disposal | Do not dispose of with household waste; recycle at a WEEE collection point |
Frequently Asked Questions - ULX-DRY V Ulsonix
User questions about ULX-DRY V Ulsonix
0 question about this device. Answer the ones you know or ask your own.
Ask a new question about this device
Download the instructions for your Dryer in PDF format for free! Find your manual ULX-DRY V - Ulsonix and take your electronic device back in hand. On this page are published all the documents necessary for the use of your device. ULX-DRY V by Ulsonix.
USER MANUAL ULX-DRY V Ulsonix
This User Manual has been translated for your convenience using machine translation. Reasonable efforts have been made to provide an accurate translation; however, no automated translation is perfect nor is it intended to replace human translators. The official User Manual is the English version. Any discrepancies or differences created in the translation are not binding and have no legal effect for compliance or enforcement purposes. If any questions arise related to the accuracy of the information contained in the User Manual, please refer to the English version of those contents which is the official version.
Technical data
| Parameter description Parameter value | ||
| Product name | Electric shoe dryer | |
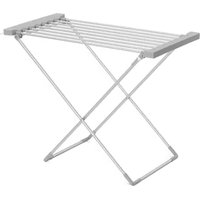
| Model | ULX-DRY V | ULX-DRY J |
| Rated voltage [V~] / frequency [Hz] | 230 / 50 | |
| Rated power [W] | 80 | 40 |
| Protection class | I | |
| Protection rating IP | IPX1 | |
| Dimensions [width x depth x height; mm] | 610 x 350 x 315 | 610 x 110 x 220 |
| Weight [kg] | 1.3 | 0.8 |
| Heating temperature [°C] | Up to 55 | |
| Number of heating elements | 8 | 4 |
| Load capacity [kg] | ≤30 | ≤8 |
Warning
- Keep away from children and disabled people when using this product.
- Always unplug the power cord when you not in using.
- If the supply cord is damaged it must be replaced by the manufacturer, a service agent or similarly qualified persons in order to avoid a hazard.
- For household indoor use only. Do not use outdoors.
- Never put the product in water, in the bath or other water containers.
- Do not use the power cord under the floor mats, slide or carpet to avoid the tripping hazard.
- Do not unplug the device by the power cord, hold the plug, not the cord.
- Do not place objects into air vents and vents as this may result in electric shock, fire and equipment damage.
- Do not use in areas where gasoline, paint or flammable liquids are used or stored.
- Use this product strictly as described in this manual to avoid the cause of fire, electric shock or personal injury.
- Children should be supervised to ensure they do not play with the device.
- Children, elderly people with reduced mobility, people with physical, sensory or mental disabilities and lack of experience and knowledge should use the product under the supervision or guidance of a person responsible for their safety.
- After being on for 5 minutes, the heating temperature around remains constant at 45-55 °C (can be affected by the environment).
- The weight of the shoes should be evenly distributed on the device.
- Maintenance: If the power cord is damaged, it must be replaced by the professionals from the maintenance department or similar department from manufacturer to avoid the danger.
Installation
ULX-DRY V:
Fit the product body into the foot recess and screw them on together:
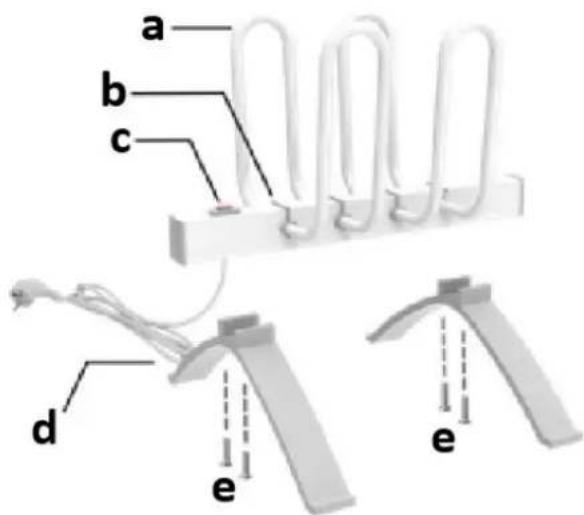
a) Heating tubes
b) Reinforced buckles
c) ON/OFF-switch
d) Electrical plug
e) Feet
f) Fixing screws
ULX-DRY J
- Secure wall-mount brackets to the shoe dryer with flat head screws, Mark 2 circles of each corner. Then find the centre of the 2 mark circles to drill holes:
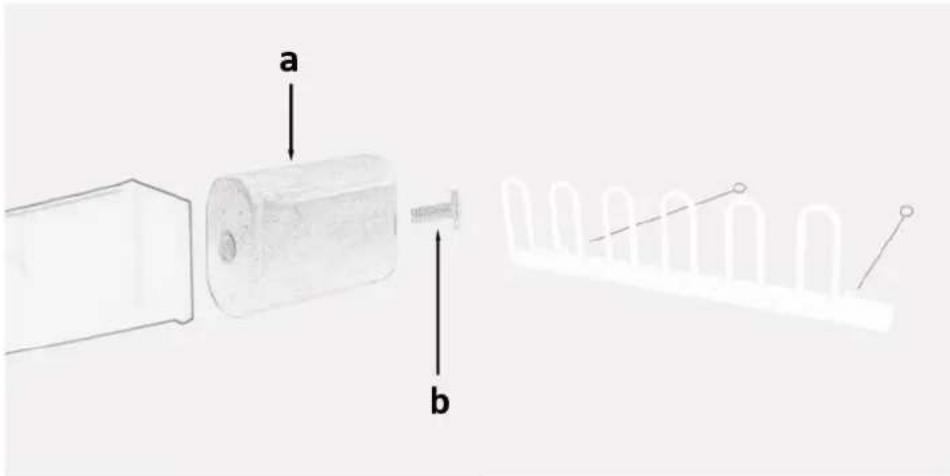
a. Wall-mount brackets
b. Flat-head screw
- Insert the wall plug into the 2 holes as illustrate at right. Attach the other half wall-mount brackets to the wall:
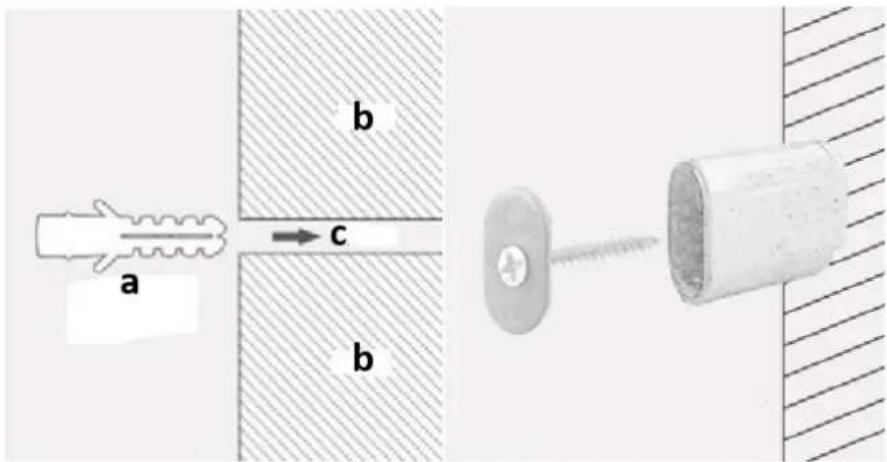
a. Wall plug
b. Wall (cross-section)
c. Hole (drilled)
- Adjust the retractable wall foot to the proper position, Fix the retractable wall foot on the device with screws, and then buckle it to the fixing piece on the wall:
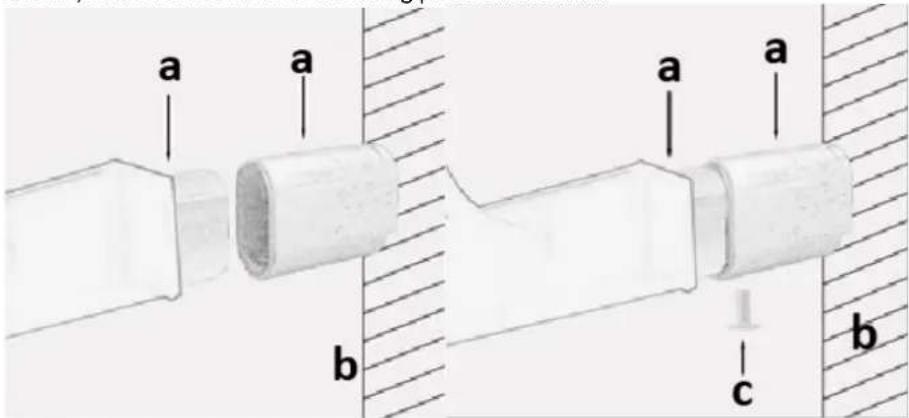
a. Wall-mount brackets
b. Wall
c. Flat-head screw
Product use instructions
- Make sure the installation is completed.
- Press the power switch to [OFF-O] position.(i.e. Power switch lighting is off).
- Plug the power cord into an electrical outlet.
- After connecting to suitable power supply, press the power switch (I/O), the power indicator lights up and then the warmer starts the heating work.
- When not using the device anymore please turn it off by putting the power switch to the OFF (O) position – the switch lighting turns also off.
- When not using the device for a longer time period please unplug it form the power source.
Cleaning
- Before cleaning, please unplug the product and let it cool down.
- Do not put the product, power cord and plug into the water. Keep the cord dry.
- Never clean the product with alcohol or solvent-based cleansers.
- Please clean the surface by wet towel first and then dry it with a soft cotton cloth.
NOTE: Do not use a hard brush or a rough cloth to wipe the product, it will scratch the surface of the product. - Please do not use alcohol or solvents on plastic components, it will cause ageing or even cracking of these parts.
Correct Disposal of this product
Do not dispose of this device in municipal waste systems. Hand it over to an electric and electrical device recycling and collection point. Check the symbol on the product, instruction manual and packaging. The plastics used to construct the device can be recycled in accordance with their markings. By choosing to recycle you are making a significant contribution to the protection of our environment.
Contact local authorities for information on your local recycling facility.

a. Supports de montage mural
b. Mur
c. Vis à tête plate
a. Seinäkiinnikkeet
b. Seinä
a. Muurbeugels
b. Muur
c. Platte schroef
a. Veggmonterte braketter
b. Vegg
c. Flathodeskrue
Bruksanvisning for produktet
a. Konzoly pre montáž na stenu
b. Stena
c. Skrutka s plochou hlavou
a. Скоби за стенен монтаж
b. Стена
a. Zidni nosači
b. Zid
a. Suporturi de montare pe perete
b. Perete
c. Šurub cu cap plat
a. Stenski nosilci
b. stena
c. Vijak s ploščato glavo
For the disposal of the device please consider and act according to the national and local rules and regulations.
CONTACT
expondo Polska sp. z o.o. sp. k.