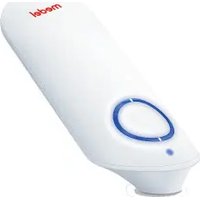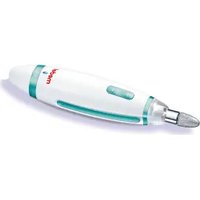
Manicure/Pedicure Expert - Manicure and pedicure set Medel - Free user manual and instructions
Find the device manual for free Manicure/Pedicure Expert Medel in PDF.


User questions about Manicure/Pedicure Expert Medel
0 question about this device. Answer the ones you know or ask your own.
Ask a new question about this device
Download the instructions for your Manicure and pedicure set in PDF format for free! Find your manual Manicure/Pedicure Expert - Medel and take your electronic device back in hand. On this page are published all the documents necessary for the use of your device. Manicure/Pedicure Expert by Medel.
USER MANUAL Manicure/Pedicure Expert Medel
natural_image
White and teal dental tool with a toothed tip, no visible text or symbols on the device bodyInstruction for Use......10
D Maniküre/Pediküre-Set
natural_image
Close-up of a metallic tool with a rounded tip and cylindrical shaft (no text or symbols visible)A - Cono in zaffiro
natural_image
White dental implant with metallic handle and bulb (no text or symbols visible)B - Cono in feltro
natural_image
Close-up of a metallic mechanical component with textured surface and cylindrical shaft (no visible text or symbols)C – Disco in zaffiro, grana fine
natural_image
Metal mechanical component with threaded end and tapered shaft (no visible text or symbols)D - Fresa cilindrica
natural_image
Close-up of a metallic tool or probe with a pointed tip and textured end (no visible text or symbols)E - Fresa a fiamma
natural_image
Close-up of a metallic tool or probe with a spherical end (no visible text or symbols)F – Fresa allo zaffiro rotonda
- Important notes....11
- Commencing operation...... 13
2.1 Information concerning the instrument....13
2.2 Power supply......13 - Application....13
3.1 General....13
3.2 Attachments ...... 14
4. Cleaning 15
5. Disposal......15
Dear Customer,
We are very pleased that you have decided in favor of a product from our range. Our name stands for high quality and thoroughly tested products in the fields of blood pressure/ diagnosis, weight and air. Please read these instructions for use carefully and comply with the directions.
With best regards
Your MEDEL Team

Items included in the package
- Manicure and pedicure device
- 6 high-quality attachments made from sapphire and felt
- Adapter
- Storage pouch
- These instructions for use

Warning
- This device may be used by children over the age of 8 and by people with reduced physical, sensory or mental skills or a lack of experience or knowledge, provided that they are supervised or have been instructed on how to use the device safely, and are fully aware of the consequent risks of use.
- Children must not play with the device.
- Cleaning and user maintenance must not be performed by children unless supervised.
- Do not use the device if it shows signs of damage or does not function properly. In these cases, contact Customer Services.
• Repairs must only be carried out by Customer Services or authorised suppliers.
1. Important notes
Read through these instructions for use carefully before first use. Keep them to hand for later use and ensure that they are accessible to other users.
ATTENTION:
During use, considerable heat may be experienced on the skin.
- Check the results regularly during the treatment. It is particularly important for diabetics to do so as they have a lower sensitivity to pain and could injure themselves more easily. In principle, the attachments that are supplied with the device are suitable for diabetics.
However, please use with particular care and do not use at high speed.
If you have any doubts, consult your doctor.
- This instrument must be used only for the purpose for which it has been deve-
loped, and in the manner described in the instructions for use. Any improper use can be dangerous.
- In case of prolonged intensive use (e.g. milling of dead skin from your feet) the device might get very hot. In order to prevent skin burns in these situations, there should be longer breaks between each application. For your own safety, constantly monitor heat build up in the device. This particularly applies to people who are insensitive to heat.
- The device is only for private use and is not intended for medical or commercial purposes.
- The manager is not responsible for damage or injury caused by improper or incorrect use.
- The appliance must be checked frequently for signs of wear or damage. If such signs are present, or if the appliance has been used improperly, it must be taken to either the manufacturer or the dealer before further use.
- Switch off the instrument immediately in the event of defects or malfunctions.
– Repairs may be carried out only by the customer service or authorized dealers. - On no account try to repair the instrument yourself!
- Use the instrument only with the accessories provided.
- Never leave the instrument unattended when it is in operation.
- Keep the instrument away from children to prevent any possible danger.
- Keep the instrument away from sources of heat.
- Do not use the instrument under blankets, pillows etc.
- The instrument must not be operated continuously for longer than 15 minutes. After this time, wait an interval of at least 30 minutes to prevent the motor from overheating.
- Do not use the instrument when bathing or showering. Do not store or keep the instrument in places from where it could fall into a bath or wash basin.
- Never immerse the instrument in water or other liquids.
- If the instrument has dropped into water, unplug the plug-in power unit immediately.
- Ensure your hands are dry before handling either the instrument or the plug-in power unit.
- Do not pull on the power cord or instrument to unplug the plug-in power unit from the socket outlet.
- The plug-in power unit must be operated only from a power supply as specified on it.
- If the power supply is damaged, don't use the adaptor anymore!
- For reasons of hygiene, the device should only be used on one person.


2. Commencing operation
2.1 Information concerning the instrument
This manicure and pedicure device comes with high-quality attachments. The supplied 6 attachments are made with durable sapphire coating / polishing felt. Together with the continuously adjustable speed regulation and right/left rotation, professional foot and nail care at the standard of a pedicurist is possible. All the attachments can be easily integrated into the storage pouch of the MANICURE/PEDICURE EXPERT.
The integrated LED light additionally creates ideal light conditions during application.
2.2 Power supply
To ensure adequate power at all times for good and powerful treatment of the feet and nails, this instrument is provided with a permanently attached power unit.
After use, before cleaning and changing any accessory parts, the power unit should always be disconnected. Ensure that the sliding switch on the device is in the centre position (= off) before you connect the device to a power supply.
3. Application
3.1 General
- This instrument is intended only for the treatment of hands (manicure) and feet (pedicure).
- Make sure that the device is switched off beforehand.
- Select an attachment and push it onto the instrument spindle using a slight pressure. The attachments can be heard to engage. To remove: pull the attachment and instrument apart in the axial direction (straight).
- Turn the control ring to the left (anti-clockwise rotation) or to the right (clockwise rotation) to switch the device on. The LED lights up blue. The two buttons marked with plus (+) and minus (-) allow you to select the speed of rotation. Start every application at low speed and increase it only as required.
- All file and cutting attachments are coated with a sapphire grain. This guarantees extremely long life and almost guarantees freedom from wear.
- Do not exert heavy pressure and always guide the attachments carefully over the surface to be treated.
- Move the instrument under light pressure in circular movements slowly over the parts to be treated.
- Note that the cutting attachments will have a reduced effect if the skin is softened or moist. For this reason, do not carry out any pretreatment in a bath.


- Do not remove all the callus skin in order to retain the natural protection of the skin.
- Always ensure that the spindle can rotate freely. It must never be permanently jammed, otherwise the instrument will become too hot and suffer damage.
- After every use, apply moisturizing cream to the parts treated.
Important:
Check the results during treatment. This is particularly important for diabetics, since their hands and feet are less sensitive.
3.2 Attachments
Since the attachments are of a high quality and improper use can lead to injury, we ask that you handle the attachments carefully. At high speeds in particular, we advise that you proceed with caution.
The following attachments are included:
natural_image
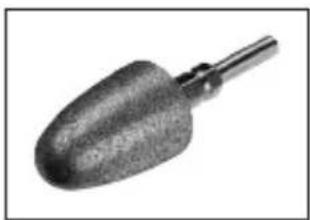
Close-up of a metallic tool or knob with a rounded body and shaft (no visible text or symbols)A - Sapphire cone
Removal of dry skin or calluses from the soles of the feet and from the heels and for manicuring the nails.
natural_image
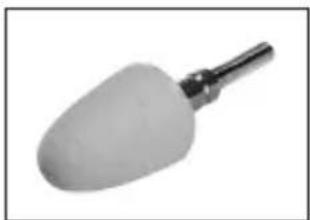
Close-up of a white dental implant with a metallic handle and rounded body (no text or symbols visible)B - Felt cone
Smoothing and polishing the edge of the nail after filing as well as for cleaning the nail surface. Always polish in circular movements and do not allow the felt cone to rest in one place, otherwise friction could cause heat to develop.
natural_image
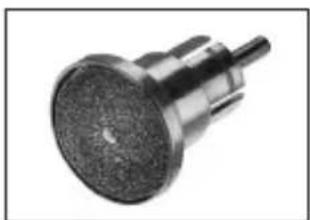
Close-up of a metallic mechanical component with textured surface and cylindrical body (no visible text or symbols)C – Sapphire disk, fine
Filing and treatment of the nails, fine grained sapphire disk.
The specific aspect of this sapphire disk is that only the inner disk rotates, while the outer support is stationary. This enables precise filing of the nails without the risk of burning the skin with the fast rotating disk.
natural_image
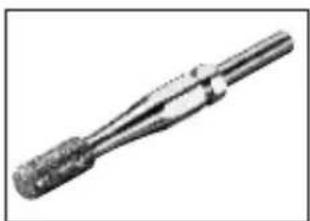
Metal mechanical component with threaded end and central shaft (no visible text or symbols)D – Cylindrical milling cutter
Grinding of lignified foot nail surfaces as well as smoothing of these. For this purpose, apply the milling cutter horizontally to the nail surface and remove the unwanted layer of nail using slow circular movements.


natural_image
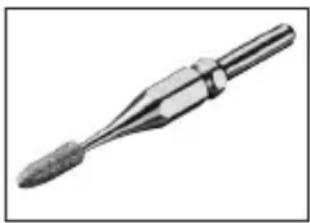
Close-up of a metallic tool or probe with a pointed tip and textured end (no visible text or symbols)E - Flame milling cutter
For removing ingrowing nails. Carefully guide the flame cutter up to the part to be treated and remove parts of the nail as necessary.
natural_image
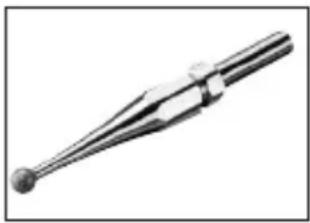
Metallic tool or probe with a spherical end, no visible text or symbolsF – Sapphire milling cutter, round
This accessory attachment is for the careful removal of corns. When using this attachment, please remember when removing the layer of skin from the corn that you will quickly penetrate deeper into the skin and this could injure the periosteum.

When filing, always work from the outside of the nail towards the tip!
Always check results regularly during treatment. As soon as the application becomes unpleasant, stop the treatment.
4. Cleaning
Before cleaning the power unit, always unplug it from the socket outlet!
- Clean the instrument with a slightly moistened cloth. You can also moisten the cloth with mild soap suds to remove more stubborn dirt.
- If necessary, for reasons of hygiene, the attachments can be cleaned with a cloth or brush moistened with alcohol. Dry them carefully afterwards.
- Do not drop the instrument.
- Make sure that no water enters the instrument. But if this should happen, do not use the instrument again until it is completely dry.
- Do not use chemical detergent or scouring agents for cleaning.
- Never immerse the instrument or plug-in power unit in water or other liquids.
5. Disposal
Please dispose of the device in accordance with EC Directive – WEEE (Waste Electrical and Electronic Equipment).
DEUTSCH
Inhalt
natural_image
Close-up of a metallic tool or knob with a cylindrical shaft and rounded body (no visible text or symbols)A - Saphirkegel
natural_image
Close-up of a dental implant with a metallic handle and rounded body (no text or symbols visible)B - Filzkegel
natural_image
Close-up of a metallic mechanical component with textured surface and cylindrical shaft (no visible text or symbols)C – Saphirscheibe, fein
natural_image
Close-up of a mechanical tool or drill bit with threaded end and central shaft (no visible text or symbols)D - Zylinderfräser
natural_image
Close-up of a metallic tool with a pointed tip and handle (no text or symbols visible)E - Flammenfräser
natural_image
Close-up of a metallic mechanical tool or probe with a spherical end (no visible text or symbols)natural_image
Color palette bar with grayscale shades and a central crosshair symbol (no text or labels)

natural_image
Close-up of a metallic tool with a rounded tip and cylindrical shaft (no text or symbols visible)A - Cône saphir
natural_image
Close-up of a white dental implant with a metallic handle and rounded body (no text or symbols visible)B – Cône feutre
natural_image
Close-up of a metallic mechanical component with textured surface and cylindrical shaft (no visible text or symbols)natural_image
Close-up of a metallic mechanical tool or drill bit (no visible text or markings)natural_image
Close-up of a metallic tool or probe with a pointed tip and cylindrical body (no text or symbols visible)natural_image
Metallic mechanical tool or probe with a spherical end, no visible text or symbolsF – Fraiseuse saphir ronde
natural_image
Close-up of a metallic tool or knob with a rounded body and a cylindrical shaft (no text or symbols visible)A - Cono de zafiro
natural_image
White dental implant with a metallic shaft and rounded body (no text or symbols visible)B - Cono de fieltro
natural_image
Close-up of a metallic mechanical component with textured surface and cylindrical shaft (no visible text or symbols)natural_image
Mechanical component with threaded shaft and flanged end (no visible text or symbols)natural_image
Close-up of a metallic tool with a pointed tip and textured end (no visible text or symbols)natural_image
Close-up of a metallic mechanical tool or probe with a spherical end (no visible text or symbols)F – Fresa de zafiro redonda
natural_image
Color palette bar with grayscale shades and a central crosshair symbol (no text or labels)


natural_image
Color palette bar with grayscale shades and a central crosshair symbol (no text or labels)


natural_image
Color palette bar with grayscale shades and a central crosshair symbol (no text or labels)

REV.00_NOVEMBER 2016_CODE 100127