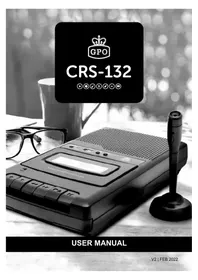
CRS-132 - Cassette player GPO - Free user manual and instructions
Find the device manual for free CRS-132 GPO in PDF.


| Product Type | Cassette Recorder |
| Brand | GPO |
| Model | CRS-132 |
| Power | 4 R14 (C) 1.5 V batteries (not included) or 6 V DC mains adapter (included) |
| Main Functions | Playback, recording, fast forward, rewind, pause, auto stop |
| Headphone Jack | Yes (3.5 mm jack) |
| Built-in Microphone | Yes (condenser) |
| External Microphone Input | Yes (MIC jack) |
| USB Port | Yes (playback and recording) |
| USB/Tape Switch | Yes |
| Built-in Speaker | Yes |
| Automatic Level Control (ALC) | Yes |
| Auto Stop | Yes at tape end (playback/recording) |
| Care and Cleaning | Clean with a dry cloth; remove batteries if not used for a long time |
| Safety | Remove batteries during long storage; dispose of batteries according to regulations |
| Spare Parts and Repairability | Mains adapter included; batteries not included |
Frequently Asked Questions - CRS-132 GPO
User questions about CRS-132 GPO
0 question about this device. Answer the ones you know or ask your own.
Ask a new question about this device
Download the instructions for your Cassette player in PDF format for free! Find your manual CRS-132 - GPO and take your electronic device back in hand. On this page are published all the documents necessary for the use of your device. CRS-132 by GPO.
USER MANUAL CRS-132 GPO
Battery installation
12
●
●
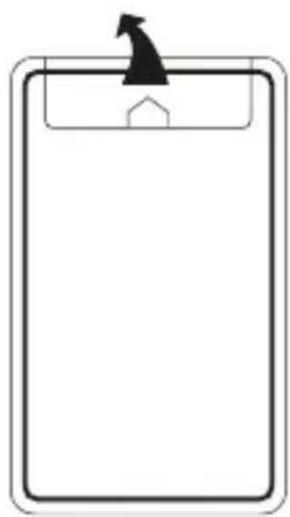
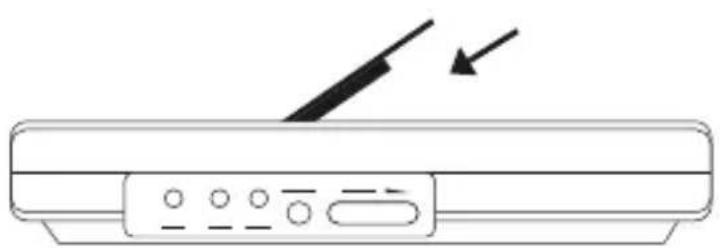
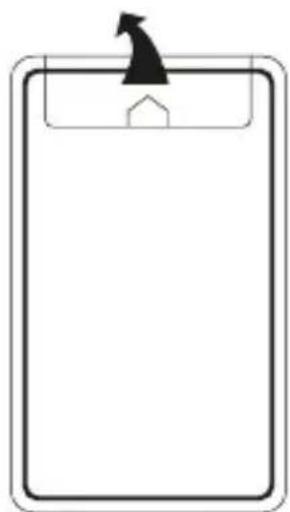
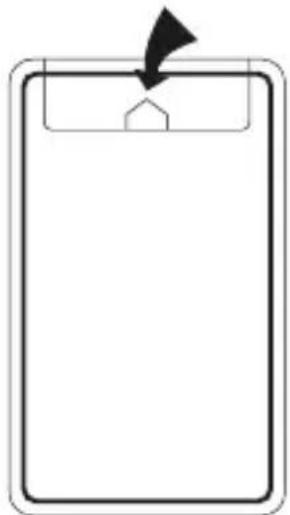
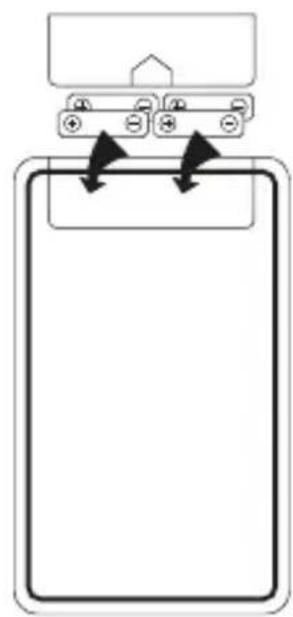
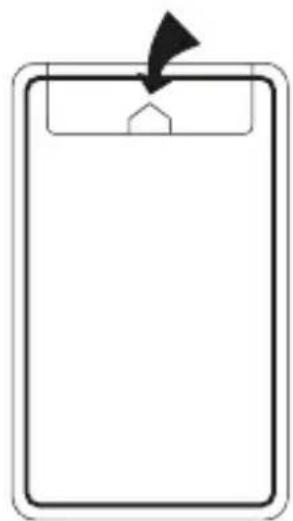
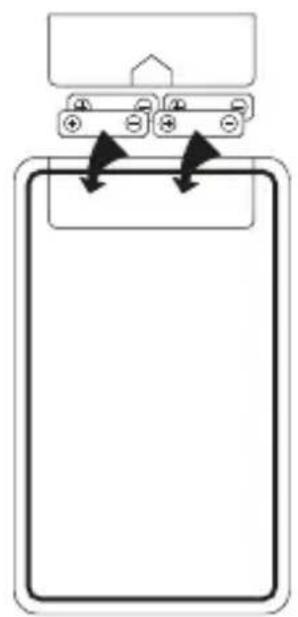
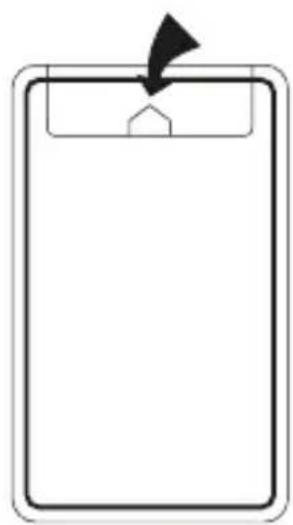
1 To remove the battery compartment door (located on the cabinet base) press the snap tab and lift the door off the rear of the cabinet.
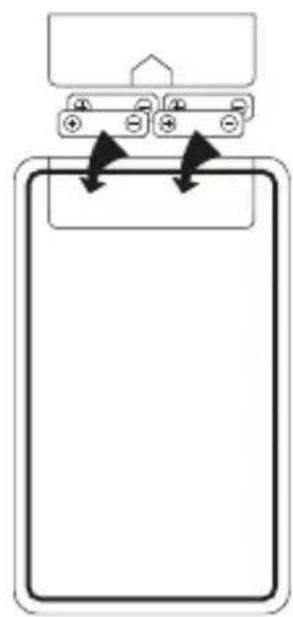
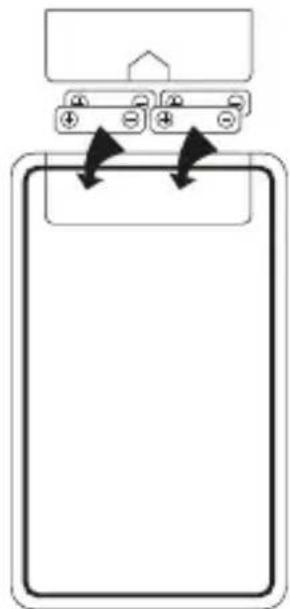
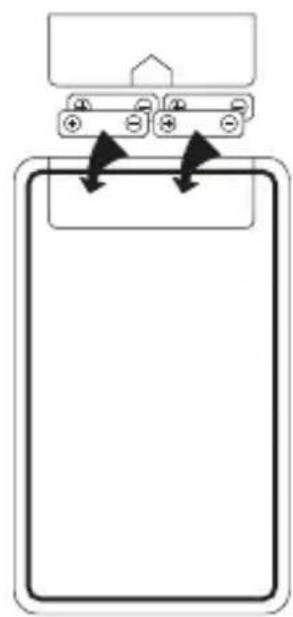
2. Insert 4 "R14" (C CELL)-size batteries (not included) into the battery compartment. Be sure the (+) or cap end of each battery is installed as show on the battery diagram.
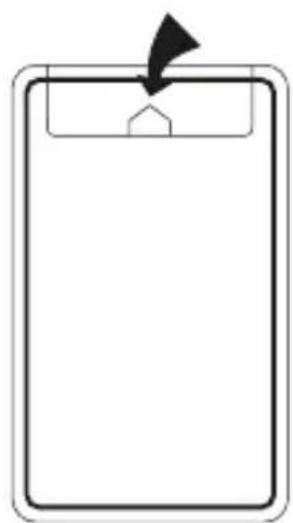
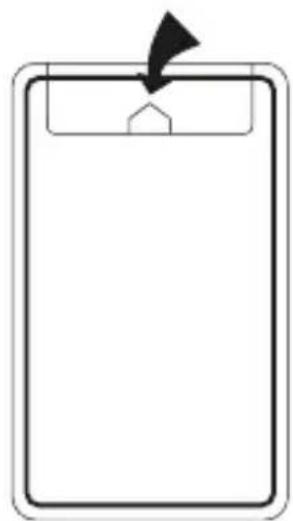
- Replace the battery door.
NOTE: If the recorder begins to sound distorted, or the tape reels turn very slowly or not at all, be sure to try a new set of batteries or another cassette before seeking service.
IMPORTANT: Be sure to remove the batteries when storing the set for more than a few weeks at a time. Leaking batteries can badly damage the recorder. When discarding batteries, be sure to dispose of them in the proper manner, according to national and regional regulations.
Always press STOP before storing. This will relieve pressure on certain parts in the recorder that might deform after long periods of time.
AC/DC power converter
Use the provided AC/DC Power Converter to plug into the 6-V DC PWR JACK on the recorder (which automatically disconnects the batteries), and the other end into the mains supply.
IMPORTANT: The AC/DC Power Converter included with this unit is intended to be correctly orientated in a vertical or floor mount position.
Headphone (Not included)
Your can plug a set of headphones into the PHONE jack on your set. With the headphone plugged in, the speaker is automatically silenced for private listening. Your set is also equipped with EARPHONE MONITOR capability when recording directly from other sound source such as other tape recorders or radios. You can listen to what's being recorded by plugging in a set of headphones and an adapter.
Using your Cassette/Recorder
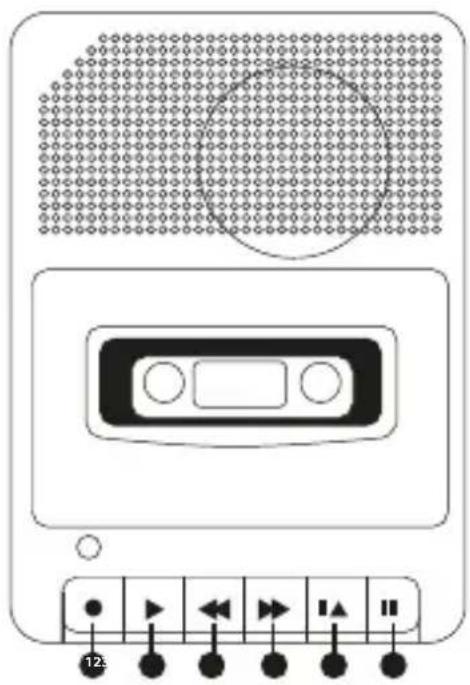
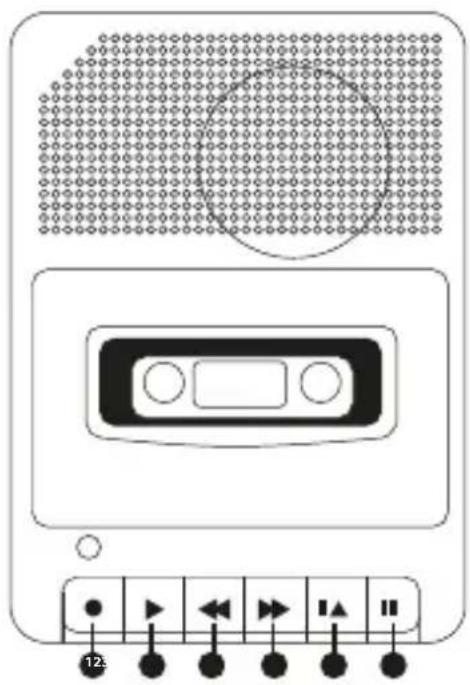
To insert or remove cassette
- Press STOP/EJECT if any of the buttons are depressed.
- Press STOP/EJECT to open the CASSETTE DOOR.
- Insert a cassette tape with a full reel at its left and open the edge facing towards you, then press on the deck door to close. Unload a cassette tape by following the above steps 1 and 2, take out the tape and press on the deck door to close.
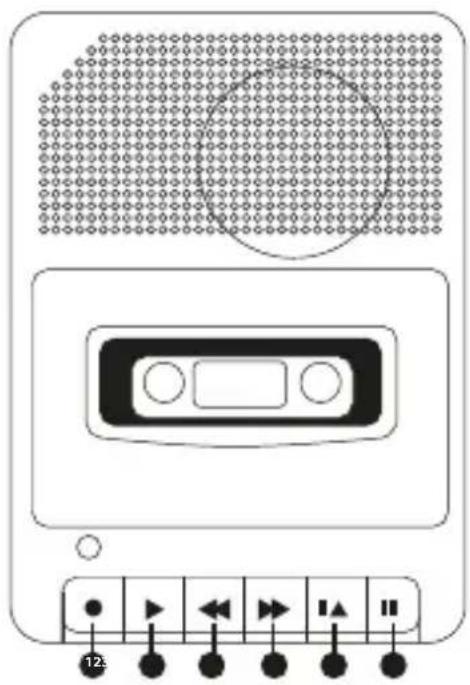
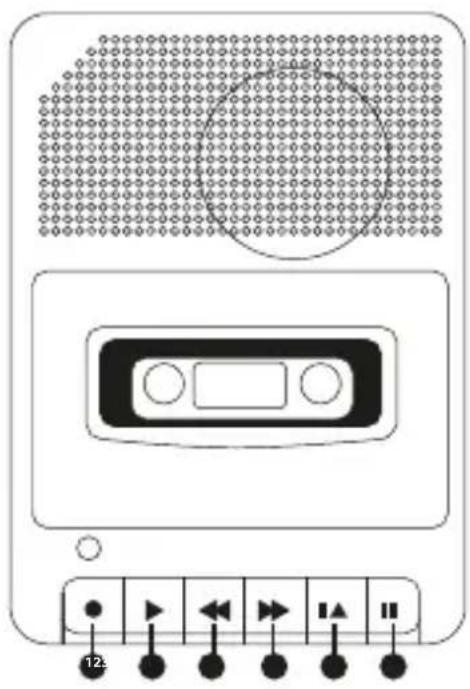
-
Record
-
Rewind
-
Stop/Eject
-
Play
-
Fast Forward
-
Pause
NOTE: Some special formula tapes (chromium dioxide and metal particle tapes) cannot be properly for recording with this product. These tapes can, however, be used for playback.
Tape Play
To listen to your recorded cassette tapes:
- Insert cassette as explained above.
- Rewind tape to the starting point if necessary. (See REWIND operation.)
- Press PLAY.
- Adjust VOLUME control.
Built-in microphone recording
- Insert cassette as previously described. Press RECORD (the PLAY button is depressed with it). You are now recording. If the RECORD button does not depress, see “PREVENT ACCIDENTAL ERASURE”.
- Talk normally into the BUILT-IN CONDENSER MICROPHONE. To obtain optimum recording quality, place the recorder with the microphone freely exposed and as close as convenient to the sound source.
NOTE: The automatic level control (ALC) will set the record level for optimum recording, regardless of volume setting.
Automatic stop
When your recorder is operating in PLAY or RECORD mode and the end of the tape is reached, your unit will automatically shut itself off and return the buttons to the OFF position.
Stand-up microphone recording
To record with stand-up microphone, plug the microphone into the MICROPHONE jack and follow the built-in microphone recording instructions. When the stand-up microphone is used, the built-in microphone is automatically disconnected.
Tape erase
To erase a tape simply record over the unwanted recording.
Rewind
To run the tape back to the beginning of your recording, press REWIND. Then press STOP after you have rewound to the desired point on the tape.
Fast Forward(F-fwd)
Press F-FWD to skip over portions of the tape quickly. Press STOP after you have advanced to the desired point on the tape.
Pause control
Your recorder is equipped with a PAUSE control which will stop PLAY & RECORD operations. Press PAUSE to stop PLAY or RECORD operation. Press again to release PAUSE for continued operation.
USB Play and Recording from MIC
- Insert the USB device to USB port on the top of unit.
- Set USB/TAPE switch to USB.
- Press PLAY/PAUSE button to playback music from USB device. Press PLAY/PAUSE button again to stop playback, at the same time the red USB/REC indicator will blink once about a second.
- Press and hold the PLAY/PAUSE/REC button to record from the built-in mic or stand-up mic: the red USB/REC indicator will keep blinking rapidly. Press the PLAY/PAUSE/REC button again to stop recording.
- Then press and hold the PLAY/PAUSE/REC button once again to play music or the sound recording from USB device. Press PLAY/PAUSE button again to stop play.
- Set the USB/TAPE switch to TAPE to stop USB playing mode and back to TAPE mode.
Recording from Tape to USB
- Set USB/TAPE switch to TAPE and play the tape, insert the USB device into the USB port, press and hold the PLAY/PAUSE/REC button to record from the tape, the red USB/REC indicator will keep blinking rapidly. Press the PLAY/PAUSE/REC button again to stop recording.
- Set USB/TAPE switch to USB, Press PLAY/PAUSE button to playback music from USB device. Press PLAY/PAUSE button again to stop play, at the same time the red USB/REC indicator will blink approximately once a second.
German
Batterie wechseln
12
●
●
12
●
●
12
●
●
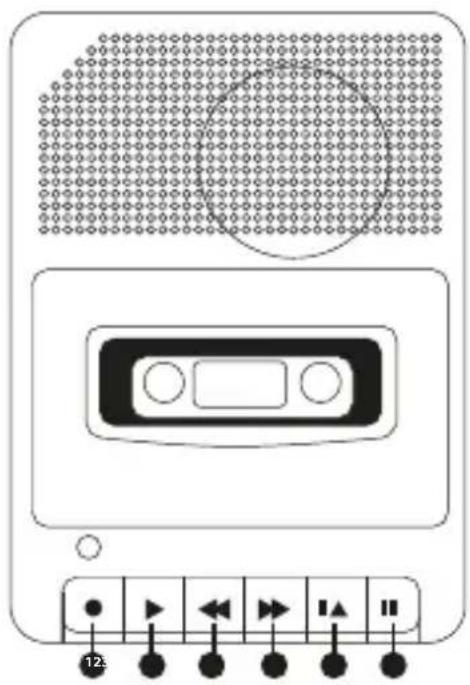
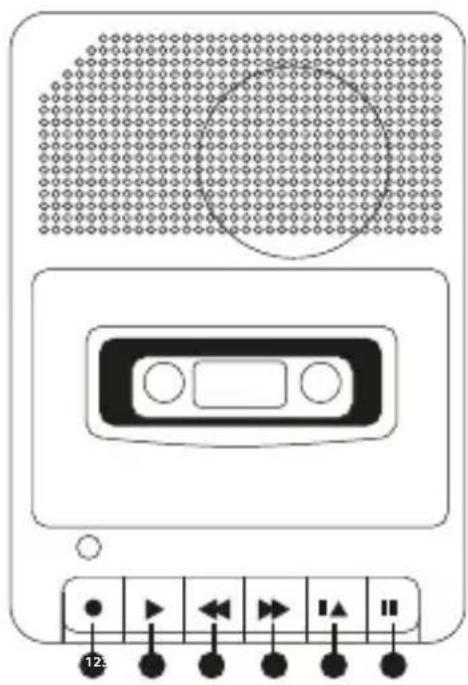
- Registro
- Rebobinar
- Detener/Expulsar
- Tocar
- Avance rápido
- Pausa
12
●
●
Hereby ProtelX, declares that this equipment (GPO CRS-132) is in compliance with the essential requirements and other relevant provisions of Directive, you can access a copy of this certificate on www.gporetro.com/Certificate-of-Conformity
DE
The image is too blurry to recognize any text content.
ProTelX Ltd, Unit 6, Park 17 Industrial Estate, Moss Lane, Whitefield, Manchester, M45 8FJ UK

- BATTERY INSTALLATION
- AC/DC POWER CONVERTER
- HEADPHONE (NOT INCLUDED)
- USING YOUR CASSETTE/RECORDER
- TO INSERT OR REMOVE CASSETTE
- TAPE PLAY
- BUILT-IN MICROPHONE RECORDING
- AUTOMATIC STOP
- STAND-UP MICROPHONE RECORDING
- TAPE ERASE
- REWIND
- FAST FORWARD(F-FWD)
- PAUSE CONTROL
- USB PLAY AND RECORDING FROM MIC
- RECORDING FROM TAPE TO USB
- BATTERIE WECHSELN
- DE
- THE IMAGE IS TOO BLURRY TO RECOGNIZE ANY TEXT CONTENT
Brand : GPO
Model : CRS-132
Category : Cassette player