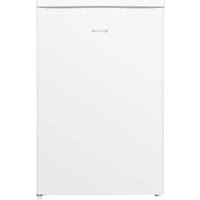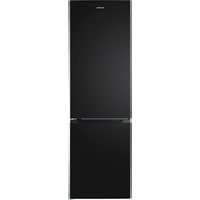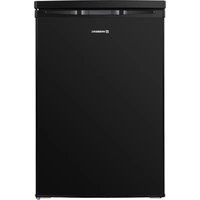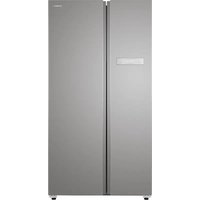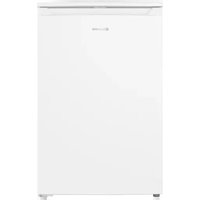
WBKV55DW - Fridge Wisberg - Free user manual and instructions
Find the device manual for free WBKV55DW Wisberg in PDF.


| Brand | Wisberg |
| Model | WBKV55DW |
| Product type | Refrigerator-freezer |
| Dimensions (W × D × H) | 55.3 cm × 57.4 cm × 84.5 cm |
| Power supply | 220-240 V ~ 50 Hz |
| Climate class | N, ST (from +16 °C to +38 °C) |
| Refrigerant | R600a (freon-free) |
| Freezing capacity | 2 kg / 24 h |
| Number of compartments | Refrigerator + freezer |
| Temperature setting | 4 positions: Cold, Colder, Coldest, Super (6 h) |
| Defrosting | Manual (approximately every 3 months) |
| Insulation material | Cyclopentane foam (eco-friendly) |
| Warranty | 3 years |
| Spare parts | Available at wisberghome.com |
| Intended use | Indoor household use only |
| Door reversal | Possible (except freezer door) |
| Cleaning | Warm water and neutral soap, no abrasive products |
| Adjustable feet | Yes (front) |
| Included accessories | Door bins, shelves, vegetable drawer |
| Minimum ambient temperature | +16 °C |
| Maximum ambient temperature | +38 °C |
| Energy consumption | See energy label and EPREL database |
Frequently Asked Questions - WBKV55DW Wisberg
User questions about WBKV55DW Wisberg
0 question about this device. Answer the ones you know or ask your own.
Ask a new question about this device
Download the instructions for your Fridge in PDF format for free! Find your manual WBKV55DW - Wisberg and take your electronic device back in hand. On this page are published all the documents necessary for the use of your device. WBKV55DW by Wisberg.
USER MANUAL WBKV55DW Wisberg
text_image
WISBERG WBKV55DW Fridge-Freezer Combination Main Control Board Serial Number: Batchcode: Wispick Productions B.V. Weere 664 3012CN, Rotterdam The Netherlands Made in China Climate classification N / ST Total storage volume 113L Refrigerator storage volume 97L Freezer compartment volume 1dL Voltage 220-240V~ Frequency 50Hz Rapid current D 6A Max lamp power MAX 2W Energy Consumption E16 D 162kWh/24h Energy Consumption E32 D 464kWh/24h Refrigerant 8600s, 26g Involating agent Cycloperitone Freezing capacity 2kg/24h Temperature rise value 3h Product code 942068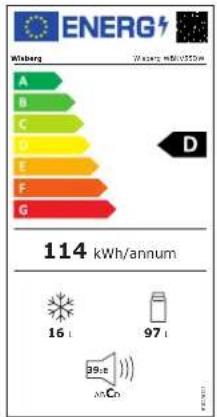
bar
| Level | Energy Consumption (kWh/annum) | |---|---| | A | 16 | | B | 97 | | C | 39 | | D | 39 | | E | 39 | | F | 39 | | G | 39 | The chart displays a single numerical value of 114 kWh/annum, accompanied by icons representing different energy levels. The label 'ENERG' is displayed on the left, and the text '114 kWh/annum' is below it.WBKV55DB
Zwart - Black - Noir - Schwarz
text_image
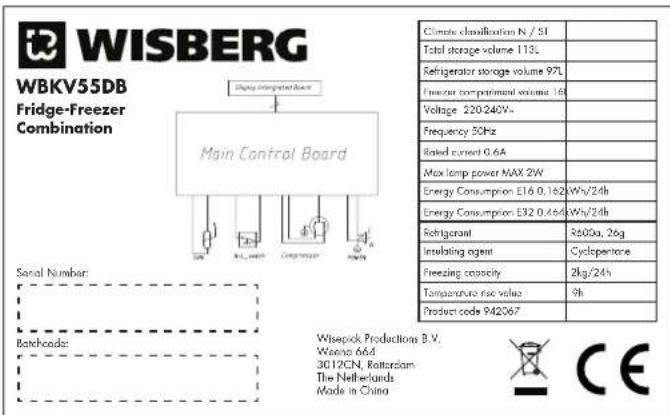
WISBERG WBKV55DB Fridge-Freezer Combination Display Integrated Board Main Control Board Signal Number: Batchcode: Wispick Productions B.V. Wesno 66d 3012CN, Rotterdam The Netherlands Made in China Climate classification N / SI Total storage volume 113L Refrigerator storage volume 97L Freezer compartmental volume 16L Voltage 220-240V~ Frequency 50Hz Rated current 0.6A Max lamp power MAX 2W Energy Consumption E16 0.162 Wh/24h Energy Consumption E32 0.464 Wh/24h Refrigerant ≥600a, 26g Involating agent Cyclopentene Freezing capacity 2kg/24h Temperature rise value 9h Product code 942067 CE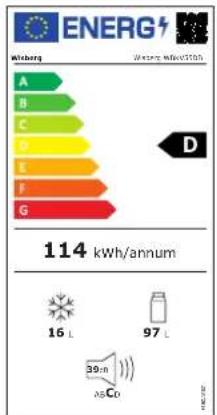
bar
| Category | Value (kWh/annum) | |---|---| | A | 16 L | | B | 97 L | | C | 39 n | | D | 25 Co | | E | 16 L | | F | 16 L | | G | 16 L | | Total | 114 kwh/annum || Climate classification - | Klimaatklasse / Classification climatique / Klimaklassifizierung |
| Total storage volume - | Totale inhoud / Volume total / Gesamtvolumen |
| Refrigerator storage volume - | Opslagvolume koelkast / Volume de stockage du réfrigérateur / Speichervolumen des Kühlschranks |
| Freezer compartment volume - | Volume vriesvak / Volume du compartiment congélateur / Volumen des Gefrierfachs |
| Voltage-Spanning / Tension / Spannung | |
| Frequency - | Frequentie / Fréquence / Frequenz |
| Rated current - | Nominale spanning / Tension nominale / Nennspannung |
| Max lamp power - | Max. lampvermogen / Puissance maximale de la lampe / Max. Lampenleistung |
| Energy Consumption E16 - | Energieverbruik E16/ Consommation d'énergie E16/ Energieverbrauch E16 |
| Energy Consumption E32 - | Energieverbruik E32/ Consommation d'énergie E32/ Energieverbrauch E32 |
| Refrigerant - | Koelmiddel / Réfrigérant / Kältemittel |
| Insulating agent - | Isolatie blaasgas / Gaz de soufflage pour l'isolation / Gas zum Einblasen von Dämmstoffen |
| Freezing capacity - | Vriescapaciteit / Capacité de congélation / Gefriervermögen |
| Temperature rise value - | Waarde temperatuurstijging / Valeur de l'augmentation de la température / Wert des Temperaturanstiegs |
| Product code - | Productcode / Code produit / Produktcode |
INHOUDSOPGAVE
VOORWOORD
4
1. VEILIGHEID 5
Wisepick Productions B.V.
Weena 664
3012 CN Rotterdam
Nederland
Made in China
1. VEILIGHEID
1.2 VEILIGHEIDSWAARSCHUWINGEN EN -VOORSCHRIFTEN

WAARSCHUWING!
natural_image
Simple line drawing of a square frame with an 'X' symbol on top and two base supports at the bottom (no text or labels)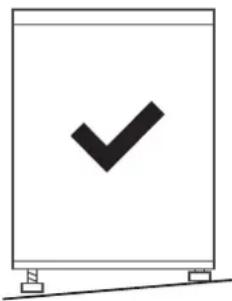
natural_image
Simple line drawing of a rectangular frame with a black checkmark on the side (no text or symbols)4. Reinig
natural_image
Illustration showing a hand holding a shelf and a close-up of a mechanical device with two upward arrows (no text or symbols)
3.2 DE DRAAIRICHTING VAN DE DEUR OMKEREN
natural_image
Line drawing of a screwdriver with a pointed tip (no text or symbols)natural_image
Line drawing of a screwdriver with no text or symbolsnatural_image
Line drawing of an adjustable wrench with a spring and handle (no text or symbols)Wisepick Productions B.V.
Weena 664
3012 CN Rotterdam
Nederland
Made in China
INSTRUCTIONS FOR USE
REFRIGERATOR
WBKV55DW
WBKV55DB

WISBERG
TABLE OF CONTENTS
FOREWORD 22
1. SAFETY 23
1.1 Intended use and anticipated unintended use 23
1.2 Safety warnings and regulations 23
1.3 Safety instructions: installation 24
1.4 Safety instructions: use 25
2. PRODUCT FEATURES 26
2.1 Dimensions 26
2.2 Guarantee 27
2.3 Technical Data 27
3. INSTALLATION 28
3.1 Installing the appliance 28
3.2 Reversing the direction in which the door opens 29
4. USE 31
4.1 Precautions for use 31
4.2 Setting the temperature 31
4.3 Storage of food 32
5. MAINTENANCE AND CLEANING 33
6. TROUBLESHOOTING 34
6.1 Error codes 35
7. TAKING OUT OF SERVICE 36
8. SAFE DISPOSAL 36
FOREWORD
About this document
- This manual contains all information for the correct, efficient and safe use of the appliance.
- This manual is intended for the end user and/or buyer of this appliance.
- Make sure you have read and understood the instructions in this manual completely before installing or using the appliance. Keep this document for future use as long as you use and/or own the appliance.
- Wisepick Productions B.V. cannot in any way be held liable for material or immaterial damage to you or to others, the appliance, your other belongings or belongings of others caused by not following the instructions in this manual.
- The warnings and safety instructions in this manual do not cover all possible circumstances and situations.
- If you contact our customer service, make sure you have the model number ready. The information can be found on the type plate or on the front of this manual.
Original instructions
This manual was originally written in Dutch. All other languages are translated documents. In the case of translation errors, the Dutch version is leading.
SYMBOL DESCRIPTION
 DANGER! DANGER! | Fire hazard and/or flammable materials |
 WARNING! WARNING! | Indicates a dangerous situation which, if not avoided, may result in serious immaterial damage to you or others. |
 CAUTION! CAUTION! | Indicates a dangerous situation which, if not avoided, may result in slight immaterial damage to you or others. |
 ATTENTION! ATTENTION! | Indicates a situation related to material damage. |
 NOTE NOTE | Indicates useful additional information. |

NOTE
You can also find the latest version of this manual online, at wisberghome.com if you search for the article number.
Copyright
The data depicted in this manual, including texts, photographs, graphic drawings, trademarks, (trade) names and logos, are the property of Wisepick Productions B.V. and are protected by copyright, trademark law and/or any other intellectual property right, unless these data belong to a third party. You are never allowed to reproduce, transfer, distribute, store or make the contents of the manual available to third parties, in whole or in part, without the prior written consent of Wisepick Productions B.V. and/or the third party to whom the data belong.
Wisberg contact details
Customer service can be reached at: wisberghome.com
Wisepick Productions B.V.
Weena 664
3012 CN Rotterdam
The Netherlands
Made in China
1. SAFETY
1.1 INTENDED USE AND ANTICIPATED UNINTENDED USE
• This appliance is only intended for use indoors.
- This appliance is not intended for use as a built-in appliance.
- This appliance is intended for domestic use and similar applications such as: - staff kitchens in shops, offices and other work environments; - farms and guests in hotels, motels, B&B and other residential environments; - catering and similar non-retail applications.
- This appliance is not intended for use by persons (including children) with limited physical, sensory or mental capabilities or lack of experience and knowledge, unless they have been given supervision or instructions concerning use of the appliance by a person responsible for their safety.
- Any use of the appliance other than as described in this manual is considered to be unintended use and may result in property and immaterial damage to you or to others, the appliance, your other property or other people's property and the expiry of the warranty.
1.2 SAFETY WARNINGS AND REGULATIONS

WARNING!
- Keep the vents in the appliance housing open.
- Do not use mechanical devices, electrical appliances (such as a hairdryer or heater) or other means to defrost your freezer.
- Ensure that no components of the cooling circuit are damaged during transport and installation of the appliance.
- Do not place electrical appliances in the food storage compartments of the freezer (such as ice cream machines) unless they are of a type expressly declared suitable by the manufacturer.
- Never open the appliance and do not perform any repairs to the appliance that are not described in this manual. The appliance may only be opened for maintenance by an authorised service technician.
- It is dangerous to change the characteristics or specifications of the appliance or to try to modify this product in any way.

DANGER!
- Do not use this appliance with extension leads or power strips.
- Never use a timer, inverter or a separate remote control that automatically turns the appliance on or off. Do not connect the appliance to an earthed power socket that is regularly switched on or off.
- Do not twist or kink the power cable or roll the cable up. Do not clamp the power cable between the surface and the appliance. This can damage the cable's insulation.
- Never pull on the power cable to move the appliance or to unplug it from the earthed socket.
- Keep the power cable away from heat, oil, sharp edges or moving parts.
- Do not use the appliance if the power cable is damaged. Never replace the power cable yourself. The power cable may only be replaced by an authorised service technician.
- Before use, check that the voltage on the socket you want to use matches that on the type plate of the appliance (220-240V\~50Hz). Only connect the appliance to an earthed power socket. Damage caused by faulty voltage is not covered by the guarantee.
- Do not store containers containing flammable materials, propellant or explosive substances such as aerosols, refill cartridges for fire extinguishers, etc. in the appliance.
ELECTROCUTION HAZARD DUE TO SHORT CIRCUIT
- Do not use the appliance if any of its components are damaged or faulty. Replace a damaged or faulty appliance immediately. Remove the plug from the earthed socket and contact customer service.
• Always place the appliance on a moisture-resistant and dry surface. - Never use the appliance in a damp room, such as a bathroom, or in the vicinity of a bath, shower or swimming pool.
- Do not touch the appliance or power cable with wet hands.
1.3 SAFETY INSTRUCTIONS: INSTALLATION

CAUTION!
- Never leave the power cable in such a way that someone could trip over it or accidentally pull it.
- Always move the appliance with two people. Use two hands when moving, lifting or turning the appliance.

ATTENTION!
- Use only the original accessories provided for the installation.
- Make sure that the power cable is not stuck or damaged during installation or positioning the appliance.
- Never clean the appliance with aggressive or abrasive cleaners, or sharp objects.
- Cleaning and user maintenance must not be carried out by children without supervision.
- Never drop the appliance and avoid bumping. Dropping or bumping the appliance may affect the proper operation of the appliance. Do not use the appliance if it has been dropped.
• Make sure that the power cable of the installed appliance is always easily accessible. - Ensure that air can circulate around the appliance.
- Pull the plug out of the socket before carrying out any actions on the appliance (e.g. turning the door).
-
The correct operation of the appliance can only be guaranteed if the specified temperature range is respected. If, as a result of another installation, the correct ventilation requirements are not met, the appliance will function correctly, but energy consumption may increase slightly.
-
Do not install the appliance near radiators, stoves, ovens or hobs.
- Do not install the appliance in direct sunlight.
- If you want to avoid forming a combustible gas-air mixture in the event of a leak in the cooling circuit, consider the size of the space in which the appliance is located and the amount of refrigerant used.
- The total volume of the space in which the appliance is installed divided by the amount of refrigerant of the appliance must not be less than 8 g/m3. The amount of refrigerant contained in the appliance can be found on the type plate.
- The appliance may not operate optimally if it is in a place where the ambient temperature is below the minimum or above the maximum of the temperature range for which the appliance is designed for a longer period of time. Please refer to the "Climate Range" table.
Climate Range
The information about the climate range of the appliance is stated on the type plate. It indicates at which ambient temperature (or room temperature) the operation of the appliance is optimal (correct). This type of refrigerator has climate range N and ST.
| CLIMATE RANGE PERMISSIBLE AMBIENT TEMPERATURE | |
| SN From +10°C to +32°C | |
| N From +16°C to +32°C | |
| ST From +16°C to +38°C | |
| T From +16°C to +43°C | |
1.4 SAFETY INSTRUCTIONS: USE

CAUTION!
- Do not place carbonated or sparkling drinks in the freezer compartment.
- Do not remove objects from the freezer compartment if your hands are wet/damp as this may cause grazes or frostbite.
- Food storage times recommended by the food manufacturer must be observed.
- When the door is open for a long time, the temperature in the compartments of the appliance can rise considerably.
- Clean surfaces that may come into contact with food and accessible drainage systems regularly.
- Store raw meat and fish airtight in suitable containers or freezer bags in the appliance so that they do not come into contact with or drip on other foods.
- If the appliance remains empty for a long time, switch it off, clean and dry it and leave the door open to prevent mould forming in the appliance.
2. PRODUCT FEATURES
2.1 DIMENSIONS

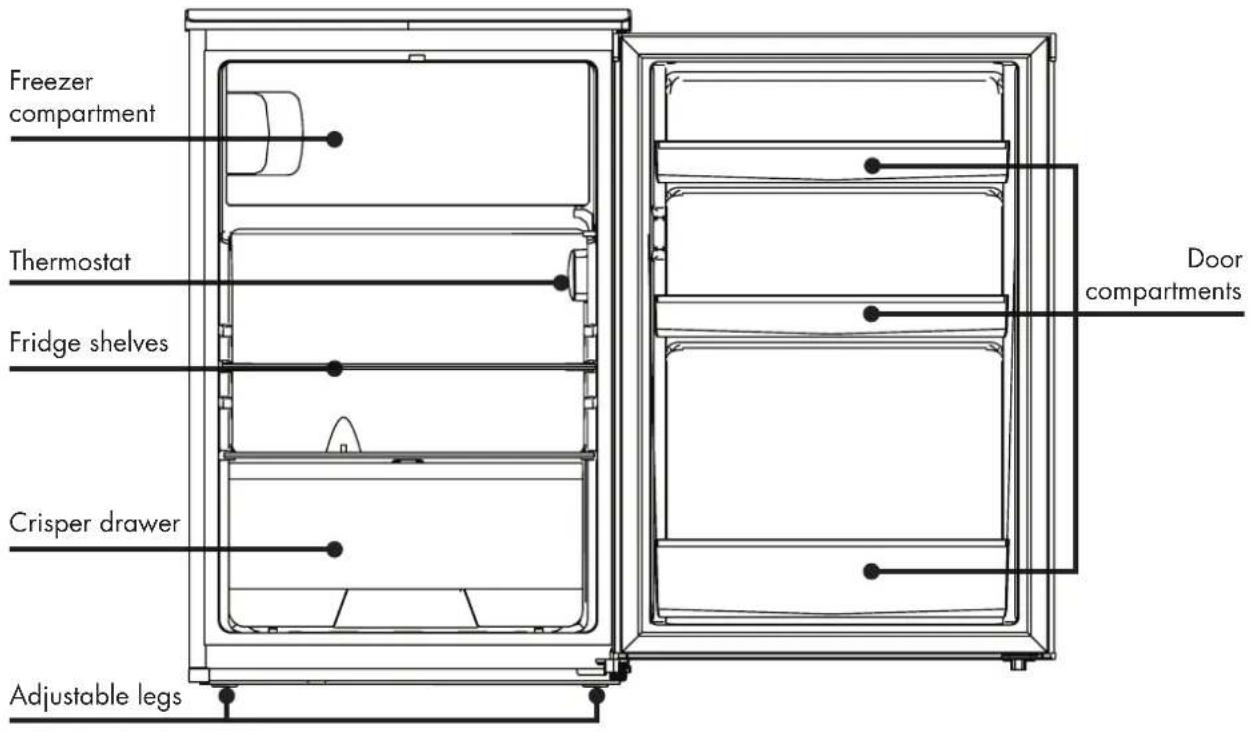
text_image
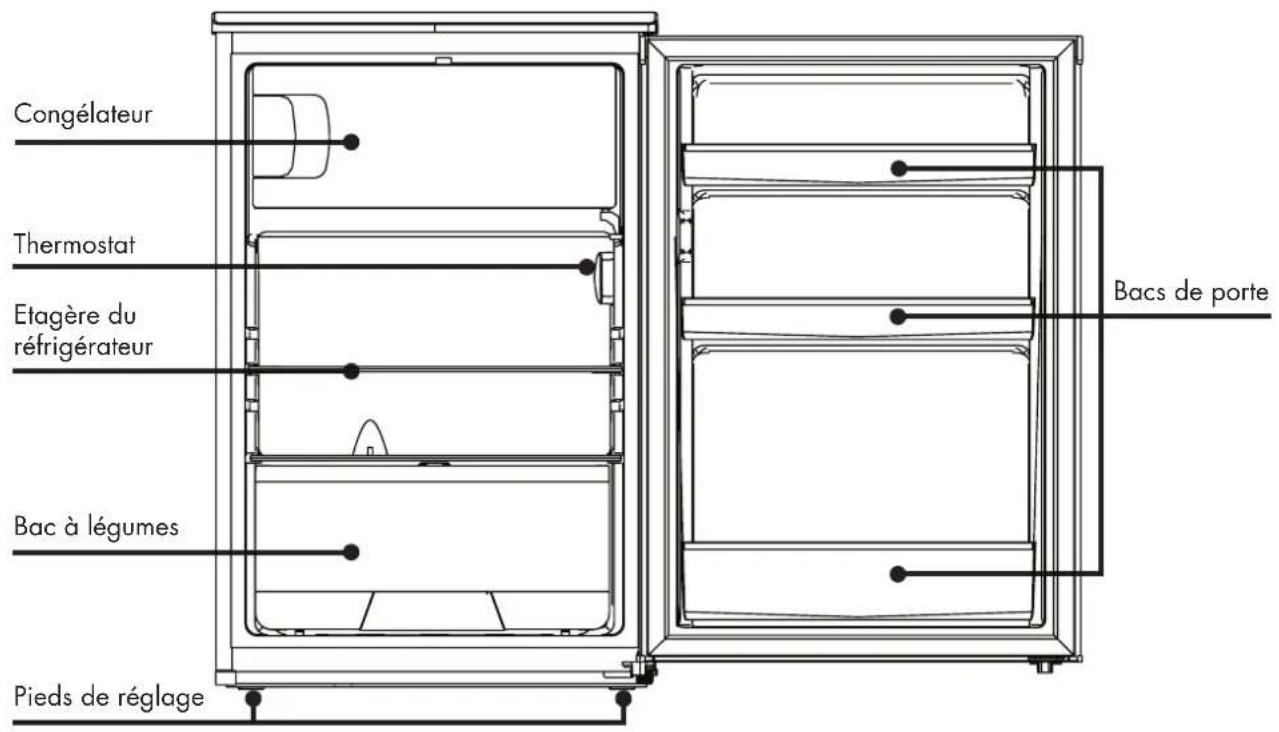
Freezer compartment Thermostat Fridge shelves Crisper drawer Adjustable legs Door compartments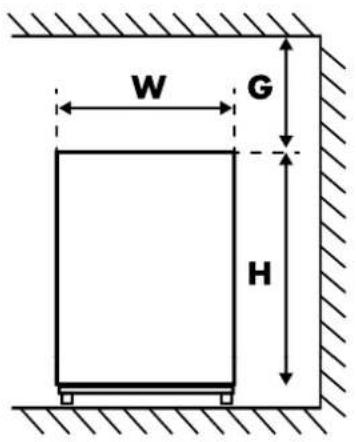
text_image
W G H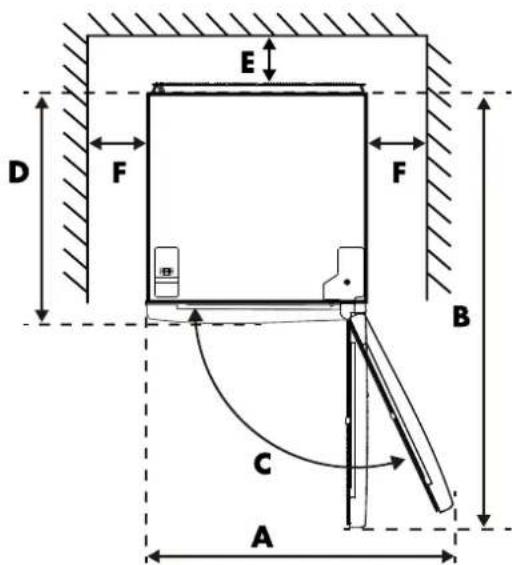
text_image
E D F F B C A• Figure 1: Front view • Figure 2: Top view
WDHABC(°) EFG
55,3cm 57,4cm 84,5cm 93,5cm 96cm 135 7,5cm 10cm 10cm
Figures 1 and 2 only illustrate the space required for the appliance.
2.2 GUARANTEE
This appliance comes with a guarantee period of three years after purchase. For more information on guarantee conditions, please visit wisberghome.com. In any case, you must have the purchase order with purchase and/or delivery date in order to be able to claim the guarantee. If you place the appliance in an ambient temperature that is colder than the minimum temperature, the guarantee lapses.
Spare parts
Spare parts for this appliance are available. To order or find out more, visit wisberghome.com.
2.3 TECHNICAL DATA
Does not contain freon
The freon-free freezerrant (R600a) and the environmentally friendly foam insulation (cyclopentane) used for the appliance do not affect the ozone layer and have a very small impact on global warming.
Technical data and energy label
The technical data is indicated on the type plate on the inside of the appliance and on the energy label (both also printed on page 2). The QR code on the energy label provided with the appliance provides a web link to the information related to the appliance performance in the EU EPREL database. Keep the energy label for reference together with the user manual and any other documents provided with this appliance. It is also possible to find the same information in EPREL via the link https://eprel.ec.europa.eu and the model name and product number that can be found on the type plate of the appliance. See link www.theenergylabel.eu for detailed information on the energy label.
3. INSTALLATION
3.1 INSTALLING THE APPLIANCE
Before installing the appliance, carefully review the safety information (chapter 1).
1. Unpack
Remove the packaging materials and dispose of them properly. Check that the appliance is not damaged. Do not connect the appliance if it is damaged. Report any damage immediately to the salesperson via customer service. In that case, keep the packaging.
2. Location
- The location where you place your appliance should be well ventilated.
• Always move the appliance with two people. Use two hands when moving, lifting or turning the appliance. - Do not place the appliance near a heat source, such as a stove or boiler, and avoid direct sunlight, so as to guarantee the cooling effect and save on energy consumption.
- Do not place the appliance in a damp place so that it cannot rust and there is no leakage current.
- Do not use the appliance outdoors. This appliance is only intended for use indoors.
3. Installation of the appliance
- This appliance is not intended for use as a built-in appliance.
- Use only the original accessories provided for the installation.
- To reverse the direction in which the door opens, go to section 3.2.
- During operation, the appliance emits heat to the environment. Therefore there must be at least 10cm clearance on the top, at least 10cm on both sides and at least 7.5cm on the back of the appliance (see also section 2.1).
- Use the front adjusting legs to level the appliance. If the appliance is not level, it is possible that the door may not close properly, reducing the cooling performance of the appliance. If the appliance is not level, this can also lead to malfunctions.
- Make sure that the power cable is not stuck or damaged during installation or positioning the appliance.
- It must be possible to disconnect the appliance from the mains power supply. The plug must therefore be easily accessible after installation.
• Always place the appliance on a moisture-resistant and dry surface.
- Place the appliance on a firm and flat surface (floor) so that it is stable, otherwise vibrations and noise may occur. When placing the appliance on floor coverings such as carpets, straw mats or polyvinyl chloride (PVC), place a solid sheet or cover under the appliance to prevent colour change due to heat dissipation.

natural_image
Simple line drawing of a square frame with an 'X' symbol on the top and two side supports at the bottom (no text or labels)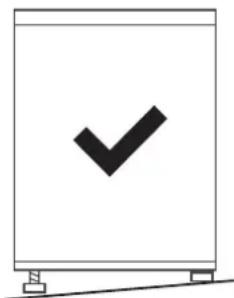
natural_image
Simple line drawing of a rectangular box with a black checkmark on top and a diagonal line at the bottom (no text or symbols)4. Clean
Before putting the appliance into use, clean the interior and all associated accessories with lukewarm water and neutral soap. Dry everything carefully. Do not use solvents or abrasive powders; these may damage the coating.
5. Wait
On first installation (or after turning the door) wait at least four hours before plugging in the appliance. This allows the oil to flow back into the compressor.
6. Switch on
Before plugging in the power cable, check that the voltage and frequency of the type plate match your power supply network. Only connect the appliance to an earthed power socket. After one hour, open the door of the appliance. If the temperature in the appliance is noticeably lower, this indicates that the cooling system is operating normally.
7. Mounting accessories
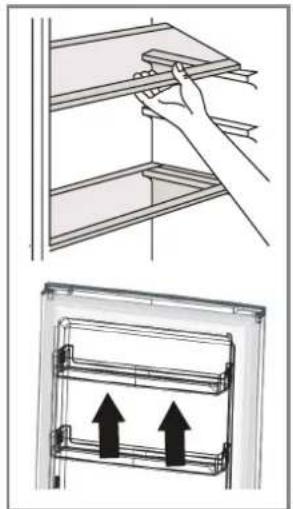
- Adjustable shelves
The walls of the appliance are equipped with a series of guide profiles so that the shelves can be inserted if desired.
- Installing the door compartments
To store food of different sizes, the door compartments can be set to different heights. Proceed as follows: gradually pull the compartment in the direction of the arrows until it comes loose and put it in the desired position.
8. Storing food
See Section 4 "Use".
natural_image
Illustration showing two steps of installing or maintaining a shelf panel, with arrows indicating movement (no text or symbols present)
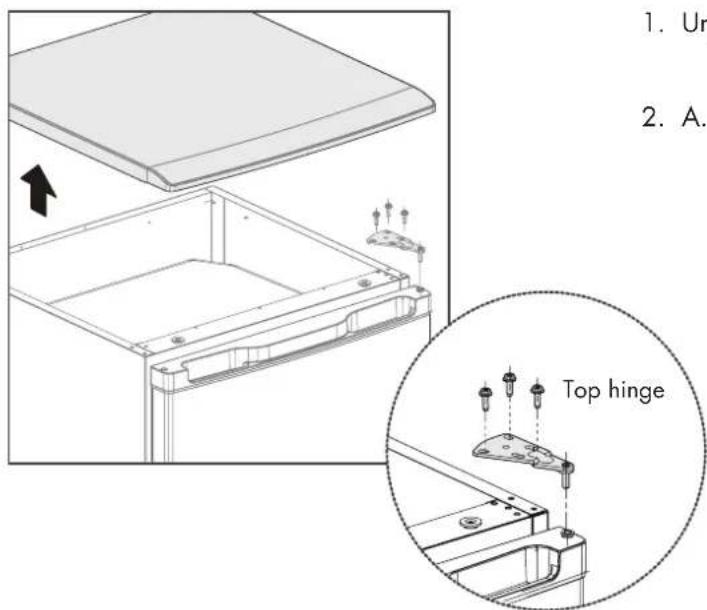
3.2 REVERSING THE DIRECTION IN WHICH THE DOOR OPENS
- To remove the door, the appliance must be tilted backwards. We recommend doing this with two people. Rest the appliance on a firm surface so that it does not slip away as you reverse the door.
- Keep all removed parts to remount the door later.
- Do not lay the appliance down flat. This can damage the cooling system. If the appliance does have to be placed on its back or side for some time during this process, it must be able to stand upright for four hours before connecting it to prevent damage to the internal components.
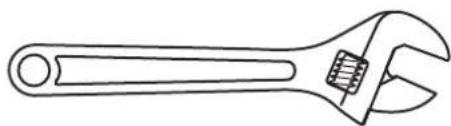
Necessary tools:

natural_image
Line drawing of a screwdriver with a pointed tip (no text or symbols)• Crosshead screwdriver

natural_image
Line drawing of a screwdriver with no text or symbols- Flat head screwdriver
natural_image
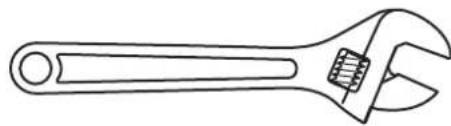
Line drawing of an adjustable wrench with a spring and handle (no text or symbols)- Adjustable spanner
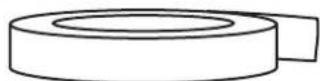
- Masking tape

ATTENTION!
The freezer door direction cannot be changed and must remain in place.
text_image
1. Un 2. A. Top hinge-
Unplug and empty the appliance.
-
A. Remove the top cover, screws and top hinge.
B. Remove the clasp on the left side and install it on the right side.

text_image
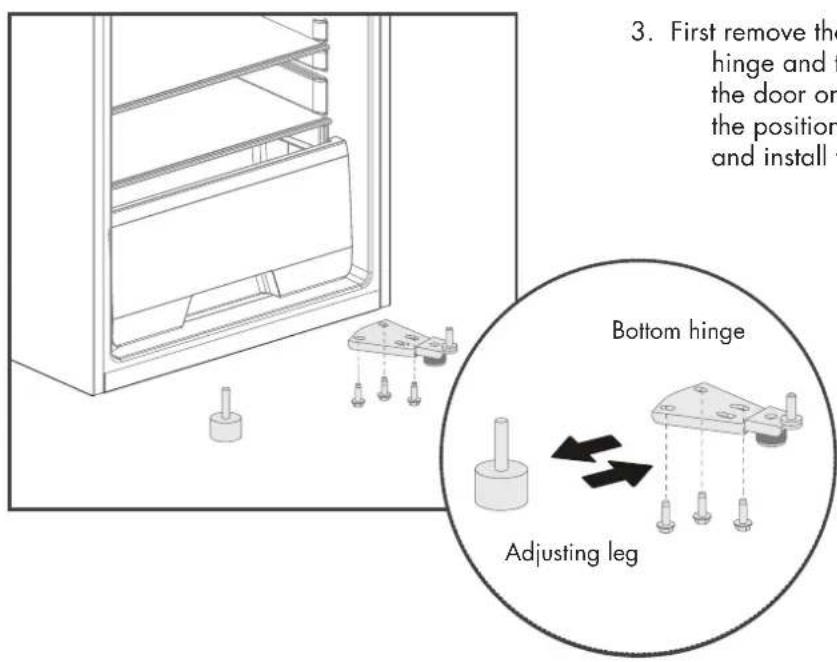
3. First remove the hinge and t the door on the position and install t Bottom hinge Adjusting leg- First remove the door, then remove the lower-right hinge and the adjusting leg on the left-hand side. Lay the door on a soft surface to avoid scratches. Swap the positions of the lower hinge and the leveling feet and install them.
text_image
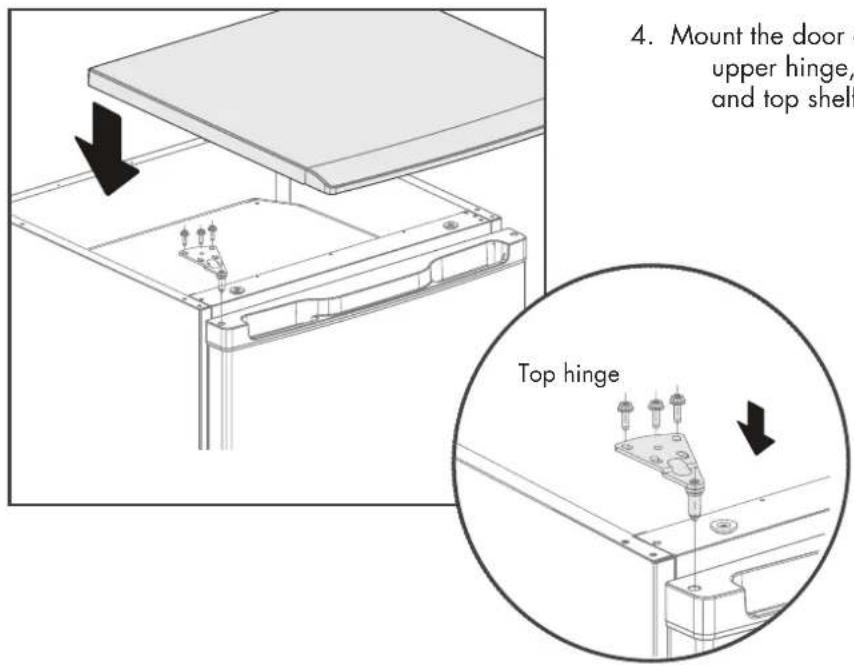
4. Mount the door upper hinge, and top shelf Top hinge- Mount the door on the lower hinge, then reinstall the upper hinge, hinge cover, pins and the cap and pins and top shelf in sequence.
4. USE
4.1 PRECAUTIONS FOR USE
- When first used or after a long period of downtime: run the appliance on the 'coldest setting' for at least 4 hours before placing products in the fridge freezer. After 4 hours, set the temperature control to the recommended setting.
- The appliance may not operate optimally (risk of thawing or too high a temperature in the freezer) if it is in a place where the ambient temperature is below the minimum of the temperature range for which the appliance is designed for a longer period of time. The information about the temperature range (climate type) of the appliance is stated on the type plate, which is explained in section 1.3.
- The interior temperature may be affected by factors such as the location of the cooling unit, the ambient temperature and the frequency with which the door is opened. Adjust the temperature setting if desired.
- If vibration noise occurs because the appliance is positioned against the wall or if the wall becomes black due to air circulation around the compressor, you should place the appliance away from the wall.
- Do not place filled glass or can packages in the freezer to avoid breakage due to volume expansion.
- Do not place electrical appliances in the freezer (such as ice cream machines) unless they are of a type expressly declared suitable by the manufacturer.
- Packaging with flammable gases or liquids may leak at low temperatures, do not store flammable gases or liquids in the appliance.
- Do not store containers containing flammable materials, propellant or explosive substances such as aerosols, refill cartridges for fire extinguishers, etc. in the appliance.
- Do not place carbonated or sparkling drinks in the freezer compartment.
- Do not use the appliance if any of its components are damaged or faulty. Replace a damaged or faulty appliance immediately. Remove the plug from the earthed socket and contact customer service.
- Only use the power cable installed on the appliance from the factory. Do not change the power cable. The power cable may only be replaced by an authorised service technician.
- Never use the appliance in a damp room, such as a bathroom, or in the vicinity of a bath, shower or swimming pool.
- Before use, check that the voltage on the socket you want to use matches that on the type plate of the appliance (220-240V\~50Hz). Only connect the appliance to an earthed power socket. Damage caused by faulty voltage is not covered by the guarantee.
4.2 SETTING THE TEMPERATURE
Carefully review the safety information (Section 1) before you start using the appliance.
1. Control panel
| DISPLAY BUTTON | |||
| 1 | LED1: COLD | A | Temperature setting of the refrigerator compartment |
| 2 | LED2: ■ | ||
| 3 | LED3: COLDEST | ||
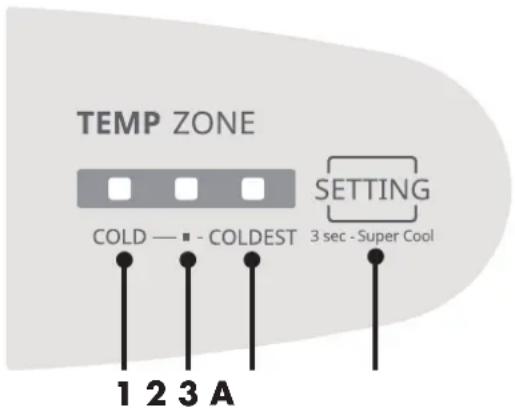
text_image
TEMP ZONE COLD — - COLDEST SETTING 3 sec - Super Cool 1 2 3 A2. Temperature setting
The temperature of the refrigerator can be set by pressing the 'Set' button. The temperature setting is confirmed if the 'Set' button is not pressed within 15 seconds. After this, the desired temperature is set and the LED for the selected setting lights up. The following settings are possible: 'Cold', 'Colder', 'Coldest' and hold for three seconds for 'Super'. The recommended setting is between 'Colder' and 'Coldest' (LED 2).

text_image
(COLD) → (■) → (COLDEST) → (■ + COLDEST) → (OFF)3. Super mode
Press and hold the 'Set' button for three seconds to enter 'Super' mode. The temperature setting is confirmed if the 'Set' button is not pressed within 15 seconds. LED 1 and LED 2 light up on the display. Press the 'Set' button again and go to 'Cold', 'Colder' 'Coldest' to switch off the 'Super' mode.
When 'Super' mode is switched on, the temperature inside the compartment cools down quickly, which prevents the loss of nutritional value of the food and keeps freshness intact. The 'Super' mode switches off automatically 6 hours after switching on, and the temperature will return to the last set temperature.
4.3 STORAGE OF FOOD
- The freezer is suitable for freezing fresh food and storing frozen food for a long time.
- The maximum amount of food that can be frozen in 24 hours is for this appliance: 2 kg.
- The freezing process takes 24 hours. Do not add any other food to freeze during this period.
- Allow hot food to cool to room temperature before putting it in the freezer.
- Only freeze fresh and thoroughly cleaned foods.
- Prepare the food in small portions so that it is soon completely frozen and can then be thawed in the desired amount.
- Do not allow fresh, non-frozen food to come into contact with food that has already been frozen, and prevent the temperature of the food that has already been frozen from rising.
- Lean foods are better and more durable than fatty foods; salt shortens the shelf life of food.
- Ice lollies, if eaten directly from the freezer, can cause frostbite.
- It is advisable to indicate the freezing date on each individual package in order to keep track of the shelf life.
- It is advisable to keep the time between buying the food and putting it in the freezer as short as possible.
- Pack the food airtight into food freshness bags before distributing it evenly over the freezer drawers.
- Packaging bags you use should be dry, in case several packaging bags are frozen together.
- Ensure there is sufficient space between foods. Putting them too close together blocks the cold airflow, affecting the cooling effect.
- To prevent cross-contamination and odour transfer, food should be packed in suitable materials that are sturdy, flavourless, impermeable to air and water, non-toxic and pollution-free.
5. MAINTENANCE AND CLEANING
Before cleaning the appliance, carefully review the safety information (Section 1).

CAUTION!
• Always remove the plug from the earthed socket before cleaning the appliance.
- Cleaning and user maintenance must not be carried out by children without supervision.
- Never touch the plug with wet or moist hands because of the risk of electric shocks and injury.
- Do not remove objects from the freezer compartment if your hands are wet/damp as this
- may cause grazes or frostbite.
- Do not put your hands unprotected in the bottom of the appliance as the sharp metal corners can cause scratches.
- Do not use mechanical devices, electrical appliances (such as a hairdryer or heater) or other means to defrost your appliance.
- Do not use the appliance if any of its components are damaged or faulty. Replace a damaged or faulty appliance immediately. Remove the plug from the earthed socket and contact customer service.

ATTENTION!
- Clean surfaces that may come into contact with food and accessible drainage systems regularly.
- Never open the appliance. The appliance may only be opened for maintenance by an authorised service technician.
- Do not spill water directly onto the appliance to prevent rust, leakage and accidents.
- Do not use water jets and steam to clean the appliance.
- To prevent damage, do not use a hard brush, steel brush, detergent, soap powder, alkaline detergent, benzene, petrol, acids, chlorine, abrasive powders, hot water or other corrosive or soluble substances to clean the cabinet surface, door gasket or plastic decorative parts etc.
- The electrical parts of the appliance may only be cleaned with a dry cloth.

NOTE
Once in use, it is best to use the appliance continuously. Under normal circumstances it is best not to interrupt its use in order not to affect the lifetime of the appliance.
DEFROSTING
When the appliance is in use for some time, a thin layer of ice is formed on the surface of the inner wall of the freezer compartment (or evaporator). If this layer is more than 3 mm thick, it can affect the cooling effect. Energy consumption increases by about 10 percent for every 2 millilitres of ice. The ice layer should be removed approximately every three months.
Go through the following steps to remove the ice layer:
- Remove frozen food from the appliance. Place the food temporarily in a cool box, cooler bag or an extra freezer.
- Turn the appliance off, open the door and allow the freezer to defrost.
- Place a drip tray under the freezer, or place towels in and under the freezer. Stay nearby to drain meltwater.
- Remove the fixed ice crust when it softens. Do not use scrapers or spatulas as this can damage the freezer.
• After defrosting, clean the inside of the appliance and turn the appliance on. - Run the unit for at least four hours on position 'COLDEST' before putting products back in the freezer. After 24 hours, set the temperature control back to the middle position.
INTERIOR AND EXTERIOR CLEANING
- Food residues in the appliance can cause a bad smell. The appliance should therefore be cleaned regularly.
- Remove all drawers, shelves, door compartments etc. and clean with a soft cloth or sponge moistened with warm water or a neutral detergent.
- If you are using cleaning agents, clean with a soft cloth or sponge, and wipe dry.
• Regularly remove the dust from the back panel and side plates of the appliance. Use a dry cloth for this (no water). - If the appliance will not be used for several months, switch it off, unplug it from the socket, clean and dry it and leave the door open to prevent mould forming in the appliance. For more information on switching off and storage, see Section 7.
6. TROUBLESHOOTING
You can solve some problems easily yourself using the table below. If the following descriptions do not solve your problem, please contact our customer service: wisberghome.com
Only an authorised service technician may solve the malfunctions that are not listed in this manual. Repairs carried out by unauthorised persons may cause injury and/or serious damage to persons and property.
PROBLEM POSSIBLE CAUSE SOLUTIONS
| The appliance does not cool at all | - The temperature control knob is in the Coldest position.- The plug is not inserted properly.- There is no voltage on the socket.- The fuse is blown or defective.- Where is the device installed? Is it located on a balcony, in a garage, storage room or other place where the ambient temperature is less than 16°C? | - Switch the thermostat to another position.- Insert the plug properly.- Open the door and check if lamp is on. If the lamp is off, there may be no voltage on the socket. Have the socket repaired by an electrician.- Check the fuse and replace if necessary.- Install the appliance in a protected location where the ambient temperature is higher than 16°C. If the appliance is installed in a room with too low a temperature, the internal cooling system may not operate correctly. |
| The door does not open easily. | - You tried to open the door immediately after closing. | - Wait a few seconds between closing and re-opening the door. |
| Water runs over the back of the appliance | - During the automatic defrosting process, icing thaws against the back wall. | - Wipe up the water with a soft cloth. |
| Water enters the appliance | - Products prevent water from entering the water collection container.- The water collection channel is blocked. | - Ensure products do not touch the back wall.- Clean the water collection channel. |
| There is too much condensation on the back wall of the appliance. | - The door has been opened too often.- The door is not completely closed- The stored food was not packed. | - Only open the door if necessary.- Make sure the door is completely closed.- Pack food in suitable material before putting it in the appliance. |
| There is water on the floor. | - The defrost water collection channel is not connected to the evaporator container above the compressor. | - Secure the defrost water collection channel to the evaporator container. |
| The appliance freezes or cools too much. | - The temperature is set too cold or the appliance is in the coldest position. | - Temporarily set the temperature control knob to a warmer position. |
| PROBLEM POSSIBLE CAUSE SOLUTIONS | ||
| The temperature in the appliance is too low/high. | - The temperature is not set correctly.- The door is not closed properly.- The temperature of the food in the fridge is too high.- Many products are stored at the same time.- The door has been opened too often. | - Set a higher/lower temperature.- Find the cause of the door not closing properly, remove or move possible obstacles.- Allow the food to cool to room temperature before preserving.- Preserve fewer products at the same time.- Only open the door if necessary. |
| Strange smell in the refrigerator | - There is spoiled food in the fridge.- The appliance is not clean.- Food with a strong smell is present in the appliance. | - Throw away spoiled food.- Clean the appliance.- Pack food with a strong smell. |
| There is too much frost and ice. | - The door is not closed properly.- The door gasket is deformed or dirty.- The products are not packed correctly.- The temperature is set incorrectly.- The appliance is fully loaded and set to the lowest temperature.- The set temperature in the appliance is too low and the ambient temperature is too high. | - Find the cause of the door not closing properly, remove or move possible obstacles.- As a result, the door does not close properly. Clean the seal and repair the deformation. If necessary, replace the seal, contact customer service.- Pack the products better.- Please refer to Section 4.- Set a higher temperature. Please refer to Section 4.- Set a higher temperature. Please refer to Section 4. |
| The compressor works continuously. | - The temperature is set incorrectly.- Many products are placed at the same time.- The room temperature is too high.- The food placed in the appliance was too hot.- The door is not closed properly. | - Please refer to Section 4.- Wait a few hours and then check the temperature again.- Please refer to Section 4.- Allow food to cool to room temperature before storing.- See the previous section. |
| The lamp does not work. | - The lamp is broken.- The lamp is in the standby position. | - Please contact our customer service.- Close and open the door. |
| The side panels are hot. | - This is normal. The heat exchanger components are on the side. | |
6.1 ERROR CODES
Below is the explanation of the error codes that may appear on the display. These error codes can only be resolved by qualified personnel. Contact customer service to have the problem rectified.
| ERROR CODE DESCRIPTION | |
| LED 2 | - Defrost sensor failure cooling compartment. |
7. TAKING OUT OF SERVICE
Switching off and storage
- If the appliance will not be used for several months, first switch it off and then pull the plug out of the socket.
• Make sure the appliance is completely thawed. - Clean the inside thoroughly and wipe dry. To prevent the formation of odours and moulds, leave the door open: block it.
- Clean the door gasket groove with soap and water and wipe everything dry with a soft cloth.
- Do not use a hard brush, steel brush, detergent, soap powder, alkaline detergent, benzene, gasoline, acids, hot water or other corrosive or soluble substances to clean the appliance.
- Store the cleaned appliance in a dry, ventilated place, away from a heat source. Make sure the appliance is on a level surface and do not place heavy objects on top.
- The appliance in storage must not be accessible to children playing.
8. SAFE DISPOSAL

DANGER!
Waste processing
- Refrigerants and the cyclopentane foam used for the appliance are flammable. When the appliance is disposed of, it must therefore be kept away from sources of fire and collected or returned to a qualified waste processing company.
- The appliance may not under any circumstances be incinerated to prevent damage to the environment or other damage.
- R-600a is used as a refrigerant in this appliance. Therefore, please contact local authorities regarding the safe disposal of this appliance.

The materials used in this appliance marked with this symbol are recyclable. This marking indicates that, throughout the EU, this product must not be disposed of with the household waste.
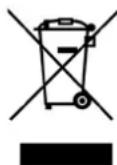
This symbol indicates that the device must not be disposed of with other household waste within the EU. By disposing of the device properly, you help to prevent possible dangers to the environment and human health. The recycling of materials contributes to the conservation of natural resources. Therefore, do not dispose of discarded electronic devices with household waste. When disposing of the device, follow the national and local regulations regarding the environmentally friendly disposal of electronic equipment. You can also contact Wisepick Productions B.V. if you no longer wish to use the device or to return the device.

ATTENTION!
- The refrigerants and insulation materials used in your appliance require special care. When draining, ensure that the pipes on the back of the appliance are not damaged.
- Avoid damaging the cooling unit, especially the heat exchanger.
Wisberg contact details
Customer service can be reached at: wisberghome.com
Wisepick Productions B.V.
Weena 664
3012 CN Rotterdam
The Netherlands
Made in China
MANUEL D'UTILISATION
RÉFRIGÉRATEUR
WBKV55DW
WBKV55DB

WISBERG
TABLE DES MATIÈRES
AVANT-PROPOS
39
1. SÉCURITÉ 40
Wisepick Productions B.V.
Weena 664
3012 CN Rotterdam
Les Pays-Bas
Made in China
1. SÉCURITÉ
1.1 UTILISATION PRÉVUE ET UTILISATION INVOLONTAIRE PRÉVISIBLE
2. CARACTÉRISTIQUES DE PRODUIT 2.1 DIMENSIONS
natural_image
Simple line drawing of a square frame with an 'X' symbol on the top and two side supports at the bottom (no text or labels)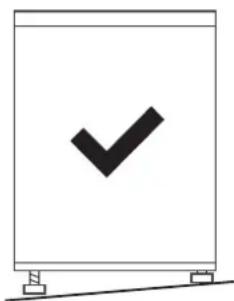
natural_image
Simple line drawing of a rectangular box with a black checkmark on top and two small blocks at the bottom (no text or symbols)4. Nettoyage
natural_image
Illustration showing a hand installing or adjusting a shelf panel and a mechanical device with two upward arrows (no text or symbols)3.2 INVERSION DU SENS DE ROTATION DE LA PORTE
natural_image
Line drawing of a screwdriver with a pointed tip (no text or symbols)- Tournevis cruciforme

natural_image
Line drawing of a screwdriver with no text or symbols- Tournevis plat
natural_image
Line drawing of an adjustable wrench with a handle and screw (no text or symbols)PROBLÈME CAUSE POSSIBLE SOLUTIONS
PROBLÈME CAUSE POSSIBLE SOLUTIONS
Wisepick Productions B.V.
Weena 664
3012 CN Rotterdam
Les Pays-Bas
Made in China
GEBRAUCHSANLEITUNG
KÜHLSCHRANK
WBKV55DW
WBKV55DB

WISBERG

INHALTSVERZEICHNIS
VORWORT
57
1. SICHERHEIT 59
Wisepick Productions B.V.
Weena 664
3012 CN Rotterdam
Die Niederlande
Made in China
1. SICHERHEIT
natural_image
Simple line drawing of a monitor with a black 'X' symbol on its screen (no text or labels)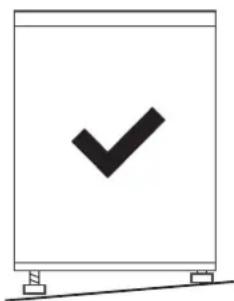
natural_image
Simple line drawing of a rectangular box with a black checkmark on top and two small blocks at the bottom (no text or symbols)4. Reinigung
natural_image
Illustration showing a hand installing or adjusting a shelf panel and a close-up of the internal structure with two upward arrows (no text or symbols)Wisepick Productions B.V.
Weena 664
3012 CN Rotterdam
Die Niederlande
Made in China

Wisberg contact details
Wisepick Productions B.V.
Weena 664
3012 CN Rotterdam
The Netherlands
Made in China