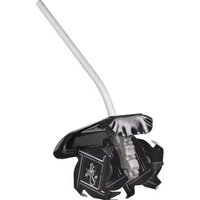
88715 - Grass trimmer TORO - Free user manual and instructions
Find the device manual for free 88715 TORO in PDF.


| Product Type | Cordless Electric Cultivator |
| Brand | Toro |
| Model | 88715 |
| Category | String Trimmer |
| Blade Size | 25.4 cm (10 inches) |
| Working Width | 24 cm (10 inches) |
| Weight | 8.6 kg (19 lb) |
| Power Source | Lithium-ion 60 V MAX battery (compatible with Flex-Force Power System) |
| Motor | Brushless |
| Main Functions | Tilling and leveling soil, mixing compost, fertilizer and landscaping materials |
| Compatibility | Toro power head model 51810T |
| Speeds | 2-speed switch |
| Operating Temperature Range | 0°C to 49°C (32°F to 120°F) |
| Charging Temperature Range | 5°C to 40°C (41°F to 104°F) |
| Blade Material | Steel |
| Number of Blades | 4 (inner and outer blade for each side) |
| Maintenance and Cleaning | Clean with a damp cloth, do not immerse in water; check and tighten fasteners after each use; remove battery before maintenance |
| Safety | Remove battery when not in use; wear safety glasses and non-slip shoes; do not use in rain |
| Spare Parts | Blades, deflector, sleeve, end closure; use only genuine Toro parts |
| Repairability | Repair by an authorized center recommended; user can perform operations described in the manual |
| Warranty | Consult Toro website or authorized dealer |
| Standards | Compliant with UL STD, certified CSA STD No. 147 |
Frequently Asked Questions - 88715 TORO
User questions about 88715 TORO
0 question about this device. Answer the ones you know or ask your own.
Ask a new question about this device
Download the instructions for your Grass trimmer in PDF format for free! Find your manual 88715 - TORO and take your electronic device back in hand. On this page are published all the documents necessary for the use of your device. 88715 by TORO.
USER MANUAL 88715 TORO
Cultivator Attachment
Flex-Force Power System™ 60V MAX Attachment
Model No. 88715 —Serial No. 323000001 and Up
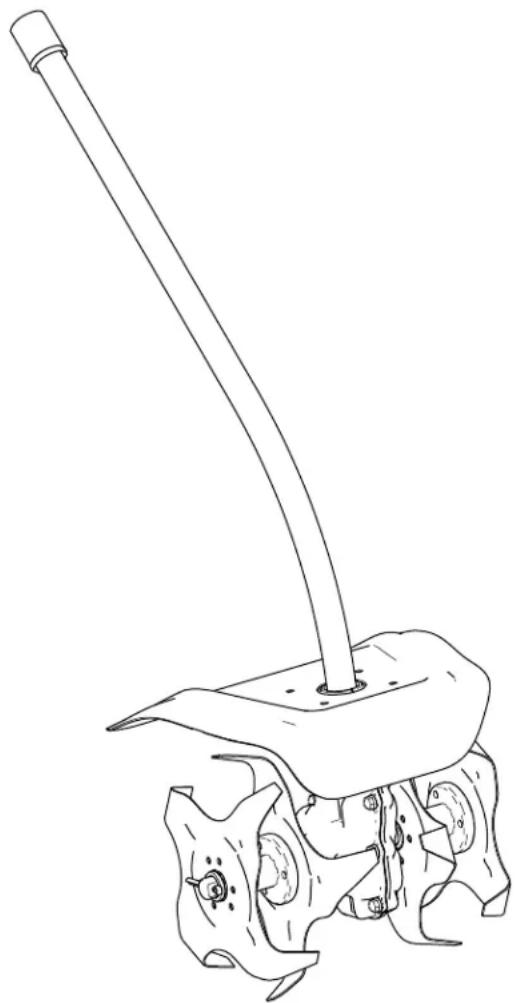
natural_image
Line drawing of a tiller machine tool (no text or symbols present)
For assistance, please see www .T oro.com/support for instructional videos or contact 1-888-384-9939 before returning this product.
| Whenever manufactureran Authorized Customer numbers the location product. | you Service of your of W rite | need parts, Service and product the model the numbers |
⚠️ W ARNING
CALIFORNIA Proposition 65 W arning
| The power cord lead, California or other hands | on chemical to reproductive after | |
| Use to California or other | product kn to cause reproductive | |
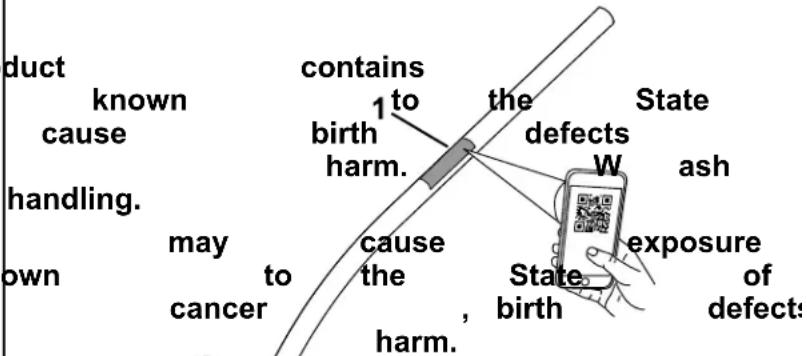
| Important: | W | ith | your | ||
| scan | the | QR | code | (if | |
| number | plate | to | access | ||
| product | information. | ||||
Introduction
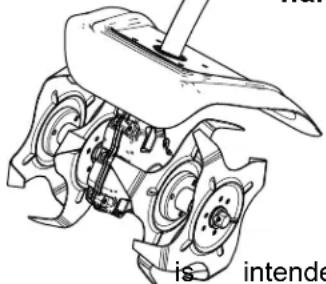
| This residential as well fertilizer to be Power Head other you | cultivator as . used System Model than and this maintain and | attachment homeowners blend to be in combination 60V 51810T its intended bystanders. |
| Read and injury operating | this maintain and | information your product the product |
| V isit training a dealer | www materials, or | .T oro.com acc |
natural_image
Technical line drawing of a mechanical component with no visible text or symbols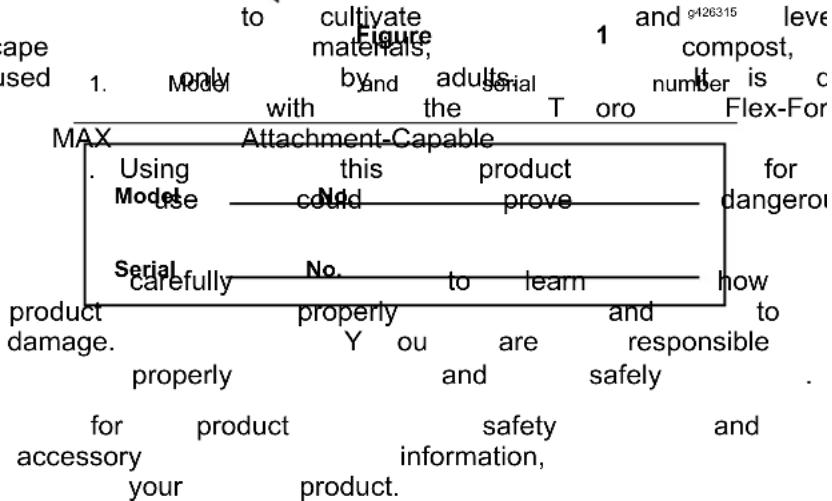
flowchart
graph TD
    A["1. Model"] --> B["2. Use"]
    B --> C["3. Serial"]
    C --> D["4. Property"]
    D --> E["5. Property"]
    style A fill:#f9f,stroke:#333
    style B fill:#ccf,stroke:#333
    style C fill:#cfc,stroke:#333
    style D fill:#fcc,stroke:#333
    style E fill:#ffc,stroke:#333
Safety-Alert Symbol
The safety-alert symbol ( Figure 2 ) shown in this manual and on the machine identifies important messages that you

Figure
Safety-alert
2
g000502
symbol
| The safety-alert that alerts is followed CAUTION | you by | to the | symbol unsafe word |
| DANGER | indicates | ||
| which, injury | if | not | avoided, |
| W ARNING which, injury | if not | indicates avoided, |
| CAUTION | indicates | ||
| which, injury | if | not | avoided, |
| This information. mechanical information | manual |
uses
Important
information
worthy
two
。
other
[Non-Text]
calls
and
of
special
words
attention
Note
attention.
Power
of T oro-approved
with
table
for
more
| Combination | Power Head Model | Attachment Model | Standard |
| StringT rimmer | 51810T | ConformsUL STDCertifiedSTD C22.2 | |
| Edgerappears | 51810T | Conforms 88710UL STDCertifiedSABOVE C22.2 | |
| Pole actionsDANGER | or situationsConformsUL W ARNINGCertifiedSTD C22.2 | ||
| an imminentlyCultivatorwilla potentially | in hazardousConformsUL death STDCertifiedSTD C22.2 | ||
| Hedge couldT rimmera potentially | result hazardousConforms STD 62841-4-2CertifiedC22.2 62841-4-2hazardous | ||
| may result in minor or | |||
to highlight
to
sp
emphasizes
Safety
Read All Instructions
W ARNING—When using electric gardening appliances, always read and follow basic safety warnings and instructions to reduce the risk electric shock, and following:
IMPORT INSTRUCTIONS
I. T raining
-
The operator of the any accidents or hazards their property
-
Do not allow children machine, battery local regulations operator .
-
Do not allow children operate or service who are responsible, instructions, and or service the device.
-
Before battery cautionary using charger using the markers
-
Become familiar use of the machine, charger
II. Preparation
- Keep operating bystanders area.
-
Use Using increase only other the battery accessories the risk of
-
Plugging the battery not 120 V can cause not plug the battery than 120 V. For a dif use an attachment for the configuration
-
Do not use a damaged pack or battery charger unpredictable behavior explosion, or risk of
-
If the supply cord damaged, contact to replace it.
-
Charge charger the battery specified
1 type of battery pack when used with another
-
Charge the battery only
-
Follow all charging not charge the battery of temperature range sonal Otherwise, injury you including may and increase the risk
-
Do not operate the and other safety protective functioning properly
-
Dress properly—W including eye protection; ship and instant is responsible; wards hearing occurring protection. to others not wear loose clothing get to caught or play moving with lack, dusty or the operating battery conditions, or the battery charger; Ⅲ. Operation the age of th
-
A void dangerous ei machine untrained in rain people in this device. Allow only Use the proper machine trained, familiar application—Using capable to operation other an its intended to you and bystanders.
machine, prevent battery unintentional pack, switch all the is in the O FF pc to on these products. pack and with Do the not controls the and machine pr batch opack, energize and batteries in the O N position.
-
Do not grasp the exp cutting edges when and machine children away from
-
Operate back artificial and
-
Injury Remove and before charger specified the machine by T light. attachments fire. the battery adjusting into an outlet
-
a keep or your electric hands shock. an charger and all into moving an outlet parts.
-
ferent Stop style machine connection, plug the adapter, of and the wipe before adjusting, if needed. servic the machine modified battery
-
Remove which they batexhibit whenever that results you leave fire, injury Do not force the mac to ddhe the batterjob bettercharger and an wasAuthorizeddesigned. Service
-
Do not overreach—Keep balance with at only time the batt by neveroro. An charge with the suitable
-
Use extreme caution when reversing or pulling the machine towards you.
- Be careful when operating the machine in hard ground. The blades propel the machine forward.
- If an object becomes of f the machine and removing the object.
- Start the motor careful manufacturer away from instructions the machine.
- Never transport running.
- Stay alert—W atch 7. common sense when Do not use the machine the influence of alcohol 8.
- Ensure that the ventilation means. clear of debris.
- Under abusive eject liquid; avoid come into contact water . If the liquid medical help. Liquid pack may cause
- Do not expose excessive temperature above explosion.
-
CAUTION—A present a risk of fire, burn.
-
Do not disassemble
- Replace the battery T oro battery pack battery pack may
- Keep children and packs you are ready to
IV . Maintenance
- Maintain the machine with care—Keep
and in good repair reduce the risk of for lubricating and handles dry , clean,
- Keep all nuts, bolts the machine is in
- When away coins, the from keys, battery metal nails
connection from the battery terminals
- Keep your hands an parts.
- Stop the machine, the machine, in the and groundwait before adjusting, servic the machine lodged in the blades,
- remove check the battery be are damaged machine guards
whether misaligned parts, may machine instructions, repair according will and mounting, act with and feet of fect, while operation, have the an replace or replace a dan
what the you are doing
if operating blade becomes
replace while it; contact machine
while ill, tired, or an
Do or not drugs. replace the
means on the machine tion openings are means.
Do not attempt battery or battery Battery Indicated the service liquid, dealer your flush with Service your eyes parts seek to Replacement elected from safety or maintained. burns.
very dry Store, secure exposure and tool machine to fire
130°C Do not(265°F) dispose may of cell may explode. Che
possible special disposal ed battery pack
SA explosion, VE THESE
INSTRUCTIONS
pack with a genu
only; using another type cause a fire or risk of inju
out of the reach of original packaging until
them.
and Storage
it clean
for best performance
injury . Follow the instructions
changing accessories.
and free from oil and
best performance
. Follow the instructions
ing accessories.
d free from oil and
and screws tight to e working condition.
and screws tight to e working condition.
and screws tight to e working condition.
and screws tight to e working condition.
and screws tight to e working condition.
and screws tight to e working condition.
and screws tight to e working condition.
and screws tight to e working condition.
and screws tight to e working condition.
and screws tight to e working condition.
and screws tight to e working condition.
and screws tight to e working condition.
and screws tight to e working condition.
and screws tight to e working condition.
and screws tight to e working condition.
and screws tight to e working condition.
and screws tight to e working condition.
Safety and Instructional Decals

Safety decals and instructions are easily visible to the operator and are located near any area of potential danger. Replace any decal
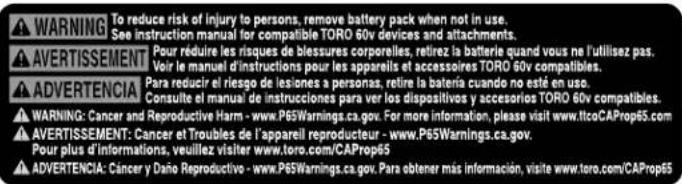
decal139-5346
139-5346

139-5210
decal139-5210
- W arning—read moving parts; do not operate
the operator keep all guards in wet conditions.
's Manual ; stay away in place; wear eye prot
Setup
Loose Parts
Use the chart below to verify that all parts have been shipped.
| Description | Qty . | Use |
| No parts required | - | Connect the attachment to the power head. |
Connecting
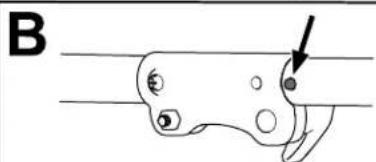
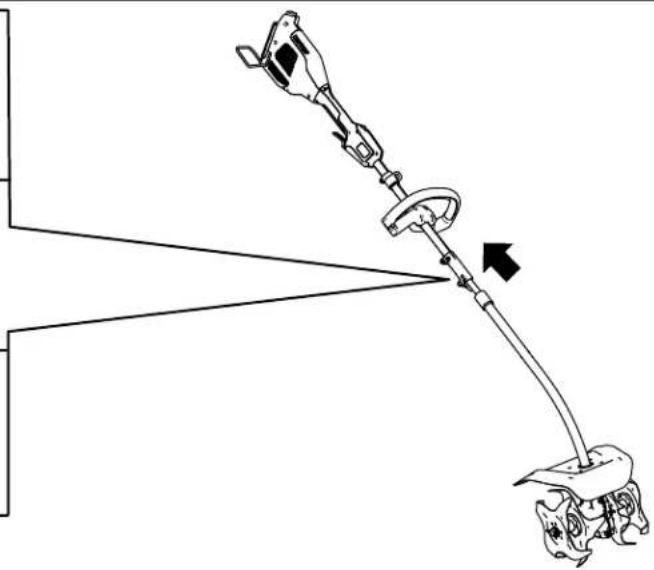
| 1. | Install | the | square | shaft | of | the | attachment | |
| 2. | Align together | the | locking(B and C | button of Figure | on | the 3 ). | lower | shaft |
| 3. | The | locking | button | clicks | into | the | slotted | |
| 4. | Using | the | screw-handle, | tighten | the | screw | ||
the
Attachment
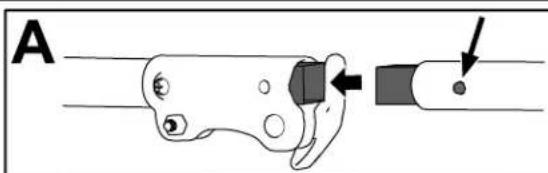
natural_image
Simple line drawing of a biological structure with an arrow pointing to a specific region (no text or symbols present)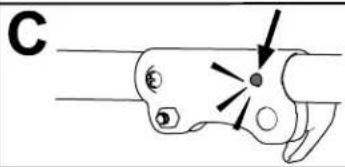
natural_image
Diagram of a mechanical device with a lever and base, showing motion direction (no text or symbols)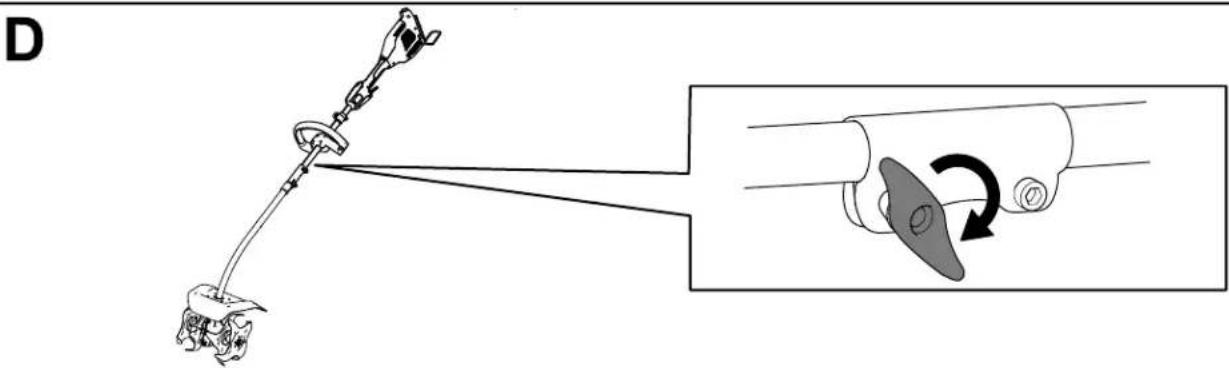
Figure
3
g3631
13
Product Overview

Figure 4
- End cap 5. Pin
- Shaft 6. Inner blade
- Guard 7. Gearbox
- Outer blade 8. Sleeve
Attachments/Accessories
A selection of T oro approve
accessories
to enhance
your Authorized
distributor
approved
T o ensure
certification
replacement
parts and
could be
is available
and expand
Service
or go
attachments
optimum
of the
parts
perfo
machine,
and
accessories
dangerous.
Specifications
| Model 88715, attaches to 51810T | |||
| Blade Size | 25.4 | ||
| T illing W idth | 24.5 cm (10 | ||
| W eight | 8.6 kg (19.0 lbs) | ||
cm (10 inches)
inches)
Appropriate T emperature
| Charge/store at | 5°C (41°F) battery to 40°C | |||
| Use | the | battery | pack°C at (-22°F) | |
| Use | the | machine | at°C (32°F) to 49°C | |
Ranges
(104°F)*
to 49^ (120^)^*
(120°F)*
*Charging time will increase if you do not char battery pack within this range.
Store in an the enclosed machine, clean, battery dry area, pack, and battery
Operation
Starting the Attachment
-
Ensure that the vents on the attachment, power head, and battery are clear of any dust debris.
-
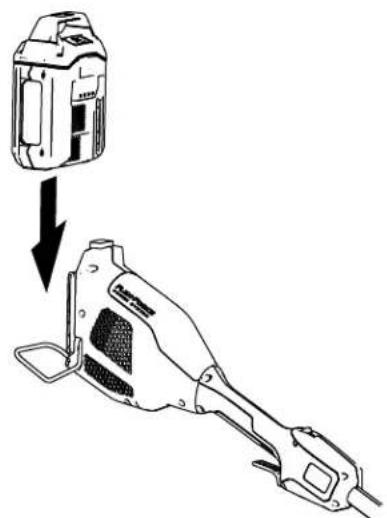
Align the cavity in tongue on the handle
natural_image
Technical line drawing of a mechanical device with a component being inserted (no text or symbols)Figure 5
g357444
-
Push the battery pack battery locks into the
-
T o start the attachment, then squeeze the run Note: Slide the 2-speed speed of the attachment.
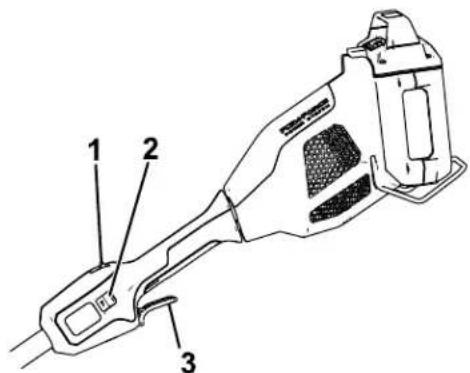
Figure 6
g357456
-
Lockout button
-
2-speed switch
Shutting
Off
T o shut of f the cultivator ( Figure 6 ). Allow at least to stop moving.
Whenever and transporting remove the battery housing you are not the battery pack (Figure with 5).
Removing from
the Power
Press the battery latch battery pack and slide machine ( Figure 7 ).
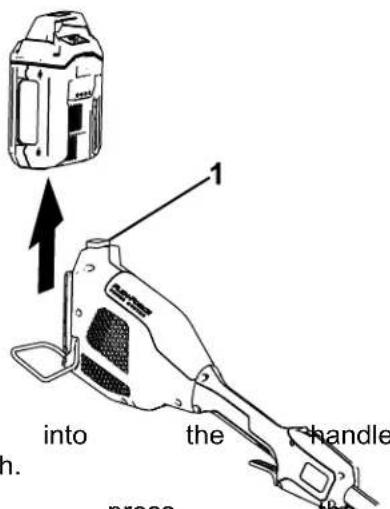
trigger press the lockout Figure (Figure 7 6). Battery switch latch to change
Removing from
the Power
-
Ensure that the battery the power head; refer Pack from the Power
-
Loosen the screw-handle ( Figure 3 ).
-
Press the locking bu 2 shafts apart ( Figure
Operating T ips
- Hold the cultivator with your right hand on the rear handle and your left hand on the front handle.
- Keep a firm grip with both hands while in op
• The cultivator should be held at a comfortable position with the rear handle at about hip h - Inspect and remove trash, and equipment the area all branches damage. where objects where you such before will use as large cultivating the cultivation to the rocks, to
• Always begin cultivating with the slowest possible. Increase the speed if conditions - Do not place excessive body weight on the cultivator Use the weight of the machine more more ef ficiently.
Maintenance
Storage
After each use of the cultivator, complete the following
- Remove the battery from the cultivator.
- Wipe the cultivator not hose the cultivator water.
- Wipe or scrape time there is an
- Check and tighten damaged or lost,
- Brush exhaust on motor from overheating. away
Important:
charger appropriate
only
Store the in temperatures range; re
Important: with a If day you are clot the on-season, or submerge remove tool and charge the b
indicators the cutting turn head green ar a fully charged of debris. or fully
are ready to use the to
pack all fastens. the left any indicate
the charger replace or all 4 LED
the from battery air intake vents housing disconnect to prevent the product (i.e., remove the plug battery pack) and check
- Do not store the tool
- Clean all foreign material
- When not in use, store battery charger out of
- Keep away chemicals
the from tool, corrosive and battery de-icing
• T o reduce the risk of not store the battery - Store the tool, battery in an enclosed clean,
Preparing for Recycling
Important: the battery Do not attempt battery
Upon pack upon or
with to destroy remove
 | Lithium-ion batteryCall2Recycle sealparticipating retailerfacility in the Call2Recycle and Canada only). Tretailer or facility closest or v1-800-822-8837If you cannot locate facility nearby, or is not labeled with please contact your information on how battery . If you are and Canada, pleaseT oro distributor . |
T roubleshooting
Perform only the steps described in these instructions. All further inspection, maintenance, and repair work must be performed by an authorized service problem yourself.
Always remove the battery from the tool when
| Problem | Possible | Cause | Correctiv |
| The tool does not start. | 1. The battery is tool.2. The battery pack2. Remove not charge the battery and charge it.3. The battery pack is damaged.4. There is another with the tool. | 1not Remolve installed and then in into the tool, making installed and latched. | the latterized |
| The tool does not | 1. rea the battery power pack too low .2. The air vents | 1. . Remoage capacity battery and fully charge are Cledocked. the air vents | the head |
| The tool is producing or noise. | 1. There excessive is debris the edger .2. The blade is not properly tightened. | vibrator Clean the cuating debris head area. | |
| 1. The depth The too cultivator . stops 1.2. W alking or cultivating too fast.work ef fectively | 2. W alking or cultivating work ef fectively | ||
| The battery pack | loses charge quickly move . the Battery battery appropriate temperature where it is ridge. and between 5°C (41°F) | battery of theninto | |
| The tool does not | 1. runThere or run is moistureously battery pack.2. The battery is tool. | 1. Allowon the lead battery dry .2not Remolve installed and into the tool making installed and latched. | |
Notes:
California Proposition 65 W arning Information
What is this warning?
Y ou may see a product for sale that has a warning label like

W ARNING:
Cancer
and
Reproductive
What is Prop 65?
| Prop California. reproductive inform | 65 the | applies It mandates harm. the public | to any The about | company that list, exposure | the which | operating Governor is updated to these | in of California annually chemicals. | selling maintain , includes | ||
| Prop the California chemicals | 65 does the product. government have | does not Moreover been | ban | the , has used | sale Prop clarified in everyday | of products 65 warning that | containing does a Prop products | not 65 for | these mean warning years | the |
| A has | Prop chosen | 65 warning to provide | means | that a warning | a based | company on | has its | either understanding | (1) | evalua |
Does this law apply everywhere?
| Prop limited retailers | 65 | warnings to restaurants, provide | are | required grocery Prop | under stores, 65 warnings | on | California hotels, their | law schools, websites | only and or in | The car |
How do the California warnings compare to
| Prop at the | 65 levels federal | standards that and | are far international | often lower | than | more federal standards. | stringent action | than limits. | federal For | and example |
Why don't all similar products carry the warning?
| Products | sold | in | California | require | Prop | 65 | labelling | while | ||
| A company making | similar | involved products | in | a | Prop may | 65 have | lawsuit no | such | reaching requirement. | a settlement |
| The enforcement | of | Prop | 65 | is | inconsistent. | |||||
| Companies product | does | may not | elect mean | not that | to the | provide product | warnings is | free | because of listed | chemi |
Why does the manufacturer include this warning
| the they evaluating may warnings.enforce | manufacturer buy and the be | and the be negligible | use. level or Moreover Prop | has the of well, or if the subject | chosen manufacturer exposure, within manufacturer to substantial | to as the “no” | provide provides not all the significant does penalties. | consumers warnings listed risk” not provide | with in chemicals range, |
Manual del operador
natural_image
Line drawing of a tiller with a long handle and base (no text or symbols)
natural_image
Technical line drawing of a mechanical device with a top component and a base assembly (no text or symbols)Figura 5
g357444
Figura 6
g357456
natural_image
Line drawing of a tiller with a curved blade and mechanical base (no text or symbols)
natural_image
Technical line drawing of a mechanical device with a top component and a base component, showing a downward arrow indicating assembly or motion (no text or symbols present)Figure 5
g357444
Figure 6
m = 311
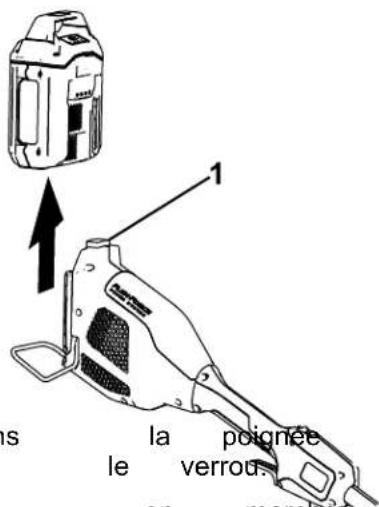
Retrait
de
la
tête
motrice
Appuyez
afin
dernière
sur
le verrou
débloquer
la batte
hors
de la
machine
- Cultivator Attachment
- Flex-Force Power System™ 60V MAX Attachment
- ⚠️ W ARNING
- Introduction
- Safety-Alert Symbol
- Safety
- Read All Instructions
- IMPORT INSTRUCTIONS
- T raining
- Preparation
- IV . Maintenance
- SA explosion, VE THESE
- INSTRUCTIONS
- and Storage
- Safety and Instructional Decals
- Setup
- Loose Parts
- Connecting
- the
- Attachment
- Product Overview
- Attachments/Accessories
- Specifications
- Operation
- Starting the Attachment
- Shutting
- Off
- Removing from
- the Power
- Operating T ips
- Maintenance
- Storage
- Preparing for Recycling
- T roubleshooting
- Notes:
- California Proposition 65 W arning Information
- W ARNING:
- Cancer
- and
- Reproductive
- Manual del operador
- Retrait
- de
- la
- tête
- motrice
Brand : TORO
Model : 88715
Category : Grass trimmer