51249 - Grass trimmer TORO - Free user manual and instructions
Find the device manual for free 51249 TORO in PDF.

| Brand | Toro |
| Model | 51249 |
| Product type | Electric trimmer (weed cutter) |
| Cutting width | 25, 30 and 35 cm |
| Line diameter | 1.65 mm (nylon monofilament) |
| Maximum line length | 9 meters |
| Power supply | Electric with outdoor extension cord |
| Sound level | 70 dB(A) |
| Vibration level | 8.5 m/s² |
| Handle | Height-adjustable and pivoting 180° for decorative cutting |
| Grass guard | With integrated cutting blade |
| Line advance system | By tapping the spool on the ground, motor running |
| Spool | Pre-wound spool: 88176; empty spool: 73-8190 |
| Warranty | 2 years (residential use) |
| Maintenance | Cleaning air intakes, checking fasteners, replacing line |
Frequently Asked Questions - 51249 TORO
User questions about 51249 TORO
0 question about this device. Answer the ones you know or ask your own.
Ask a new question about this device
Download the instructions for your Grass trimmer in PDF format for free! Find your manual 51249 - TORO and take your electronic device back in hand. On this page are published all the documents necessary for the use of your device. 51249 by TORO.
USER MANUAL 51249 TORO
25 cm, 30 cm and 35 cm Cutting Widths
Model No. 51249, 51349, 51449—89000001 & Up
- Model and serial number decal
Français
- Grass shield 2. Long, curved slot in motor housing
Français
- Self-tapping screw (2)
Français
- Vis autotaraudeuse (2)
Español
- Tornillo autoenroscante (2)
Deutsch
- Schneidschraube (2)
Nederlands
- Line taped to cutter head
Français
natural_image
Technical line drawing of a mechanical device inside a circle, showing a blade and base (no text or symbols)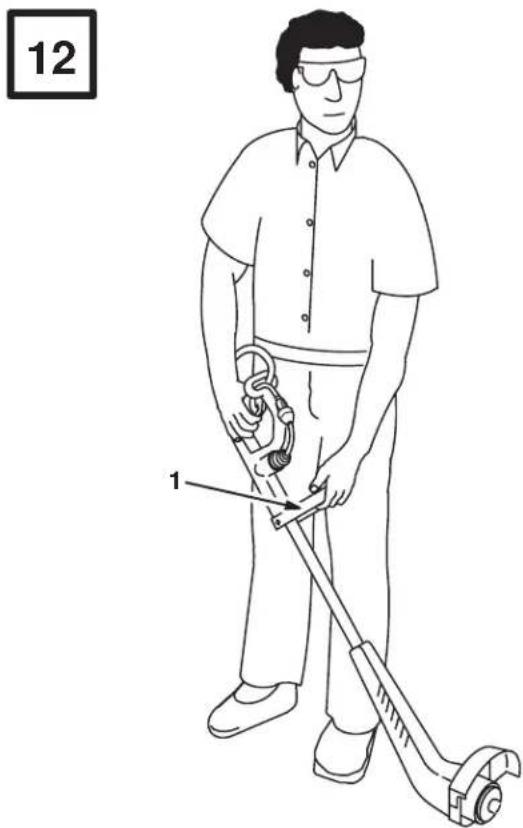
1809
English
- Support handle rotated 180°
Français
English
- Cap & spool
-
Tabs on cap
-
Eyelet
Français
natural_image
Technical line drawing of a mechanical device with labeled parts (no text or symbols beyond labels)English
- Air intake vents
Français
natural_image
Technical line drawing of a mechanical device with a circular target and diagonal line (no text or symbols)English
Contents
Page
Contents 1....
Introduction 1.
Safety 2.
Symbol Glossary 4.
Assembly 5.
Attach Support Handle 5.
Attach Grass Shield 5.
Before Starting 5.
Cutting Line 5
Securing Extension Cord 5
Operation 6.
Lengthening Cutting Line 7
Replacing Cutting Line 8
Rewinding Empty Spools 9
Maintenance 9.
Accessories 10
The Toro Promise 10
Introduction
Thank you for purchasing a Toro product.
All of us at Toro want you to be completely satisfied with your new product, so feel free to contact your local Authorized Service Dealer for help with service, genuine Toro parts, or other information you may require.
Whenever you contact your Authorized Service Dealer or the factory, always know the model and serial numbers of your product. These numbers will help the Service Dealer or Service Representative provide exact information about your specific product. You will find the model and serial number decal located in a unique place on the product (Fig. 1).
For your convenience, write the product model and serial numbers in the space below.
Model No. ____
Serial No. ____
Read this manual carefully to learn how to operate and maintain your product correctly. Reading this manual will help you and others avoid personal injury and damage to the product. Although Toro designs, produces and markets safe, state-of-the-art products, you are responsible for using the product properly and safely. You are also responsible for training persons who you allow to use the product about safe operation.
The Toro warning system in this manual identifies potential hazards and has special safety messages that help you and others avoid personal injury, even death. DANGER, WARNING and CAUTION are signal words used to identify the level of hazard. However, regardless of the hazard, be extremely careful.
DANGER signals an extreme hazard that will cause serious injury or death if the recommended precautions are not followed.
WARNING signals a hazard that may cause serious injury or death if the recommended precautions are not followed.
CAUTION signals a hazard that may cause minor or moderate injury if the recommended precautions are not followed.
Two other words are also used to highlight information. “Important” calls attention to special mechanical information and “Note” emphasizes general information worthy of special attention.
Safety
IMPORTANT SAFETY INSTRUCTIONS
To assure maximum safety, best performance, and to gain knowledge of the appliance, it is essential that you or any other operator of the appliance read and understand the contents of this manual before operating the appliance. Pay particular attention to the safety alert symbol ⚠ which means CAUTION, WARNING OR DANGER — “personal safety instruction.” Read and understand the instruction because it has to do with safety. FAILURE TO COMPLY WITH INSTRUCTION MAY RESULT IN PERSONAL INJURY, RISK OF FIRE OR ELECTRICAL SHOCK.
READ ALL INSTRUCTIONS BEFORE USING THIS APPLIANCE
SAVE THESE INSTRUCTIONS FOR FUTURE REFERENCE!
WARNING—To reduce the risk of fire, electric shock or injury, follow these safety instructions.
- Read and understand the contents of this manual before operating the trimmer. Become familiar with all controls and know how to stop it quickly.
- Keep everyone, especially children and pets, away from area of operation. Never allow children to operate the appliance. It is not a toy. Never allow adults to operate unit without first reading the Operator's Manual.
- Always wear safety goggles or other suitable eye protection when trimmer is used for trimming or decorative edging.
-
Never operate the appliance in wet or damp conditions. DO NOT USE IN THE RAIN.
-
Inspect area thoroughly where trimmer will be used. Pick up any debris or objects that could be entangled in trimmer or picked up by trimmer and thrown. Keep area of operation clear of all persons, particularly small children and pets.
- Dress properly. Do not wear loose clothing or jewelry. They can catch in moving parts. Pin up long hair so that it cannot be drawn into unit's air inlet. Always wear substantial footwear and long pants.
- Use the right appliance—Do not use the appliance for any job except that for which it was intended such as cutting grass and small weeds.
- To reduce the risk of electric shock, use only an extension cord recommended for outdoor use. Replace a damaged extension cord immediately.
- Extension cord—To prevent disconnection of the trimmer from the extension cord during operation, properly connect extension cord prior to operating.
- Avoid unintentional starting. Be sure switch is off when plugging in. Do not carry plugged-in trimmer with finger on switch.
- Turn off all controls before unplugging cord.
- Do not handle plug or appliance with wet hands or while standing in water.
- Do not use appliance with a damaged cord or plug. If appliance is not working as it should, has been dropped, damaged, left outdoors, or dropped into water, return it to an Authorized Toro Service Dealer.
- Don't abuse cord. Do not pull or carry appliance by cord, close a door on cord or pull cord around sharp edges or corners. Do not use cord as a handle. Do not unplug appliance by pulling cord. To unplug, grasp the plug, not the cord.
- Keep cord away from extreme heat, oil, and sharp edges. Replace damaged cords.
-
Do not force the trimmer. It operates better and safer at the rate for which it was designed.
-
Use only in daylight or with good artificial light. Always be sure of your footing. Keep a firm hold on the handle and walk, never run.
- Stop the motor and unplug the supply cord whenever you leave the appliance, before cleaning the housing, and when making any repairs or inspections.
- When not in use, store your trimmer in a dry place; high or locked up out of the reach of children.
- Keep all fasteners tight to be sure the appliance is in safe working condition.
- Make sure spool and cap are properly secured before operation.
- Never operate without factory installed guards or other protective safety devices in place.
- Do not put hands or feet near or under rotating parts. Keep clear at all times.
- If the appliance should start to vibrate abnormally, stop the motor, unplug the cord and check immediately for the cause. Vibration is generally a warning of trouble.
- Do not operate your appliance after it has been dropped or damaged. Return it to your nearest Authorized Toro Service Dealer for inspection or repair.
-
When servicing use only identical TORO replacement parts. Replace or repair damaged cords.
-
Don't Overreach—Keep proper footing and balance at all times when operating the trimmer.
- Maintain Appliance With Care—Keep cutting head and motor housing clean for best performance and to reduce the risk of injury. Follow Maintenance instructions on page 9.
- CAUTION—Cutting knife on grass shield is sharp and care should be taken when cleaning and handling.
- EXTENSION CORD REQUIREMENTS—Use an extension cord suitable for outdoor use and one that complies with requirements specified in your country's electric code. Make sure your cord is in good condition; if damaged, replace. Use a cord that is large enough to carry the current the trimmer will draw.
See Figure 7 for proper cord connection.
Note: Use of an extension cord over 150 feet is not recommended.
Certified to CEE 10
Sound Emissions
This unit has a maximum airborne noise emission, based on measurement of identical machines.
70 dB(A)
Vibration Level
This unit has a maximum vibration level of 8.5 m/s ^2 , based on measurement of identical machines.
Symbol Glossary
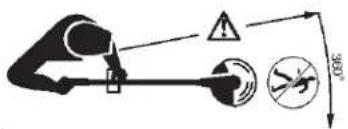
Safety alert triangle — symbol within triangle indicates a hazard
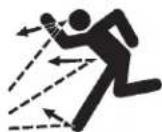
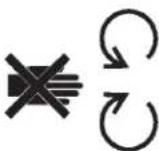
Thrown or flying objects — Whole body exposure
Safety alert symbol Keep dry


Read operator's manual

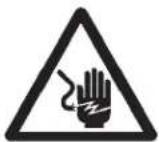
Electrical shock/electrocution
Consult technical manual for proper service procedures

Cutting of finger or hand

Do not open or remove safety shields while engine is running
Cutting of foot

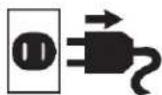
Wear eye protection Disconne

Keep bystanders away
Assembly
Note: Trimmer should appear as shown in Figure 1 when fully assembled.
Attach Support Handle
- Press support handle onto tube with smooth side of support handle facing toward upper handle. Loosely secure support handle to tube with carriage bolt and knob (Fig. 2).
Note: Support handle height may be adjusted by sliding handle up and down tube. When support handle is at desired operating height, tighten knob securely.
Attach Grass Shield

CAUTION
POTENTIAL HAZARD
- Cutting knife on grass shield is sharp.
WHAT CAN HAPPEN
- Contact with cutting knife could cause personal injury.
HOW TO AVOID THE HAZARD
- Be careful when handling shield. Avoid contact with knife blade.
- Fit grass shield into long, curved slot in motor housing (Fig. 3).
- Invert trimmer and secure grass shield to underside of motor housing with (2) two self-tapping screws (Fig. 4).
- Remove tape from cutting knife on grass shield (Fig. 5).
Before Starting
Cutting Line
Note: The cutting line for your trimmer is a special monofilament line. Your trimmer comes complete with a supply of this line already wound onto the spool.
- To avoid line tangle during shipment, the tip of the monofilament line has been taped to the cutter head. The tape must be removed before operation (Fig. 6).
- Check cap to be sure it is securely snapped in place. Align cap tabs with slots in cutter head, press in tabs and push down cap and spool to lock cap in place (Fig. 16).

CAUTION
POTENTIAL HAZARD
- Cap may loosen during shipment. A loose or improperly installed cap or spool could fly off trimmer.
WHAT CAN HAPPEN
- Contact with a thrown spool or cap could cause injury to operator or bystanders.
HOW TO AVOID THE HAZARD
- Be sure spool and cap are fully secured before operating the unit. Replace spool if it is damaged or if cap does not securely snap onto cutter head.
- Keep bystanders and pets away from trimming area.
Securing Extension Cord
Note: The proper extension cord is a requirement for safe and efficient use of your Toro trimmer. Use only an extension cord recommended for outdoor use.
- Plug extension cord into trimmer plug (Fig. 7).
- Form a loop in the extension cord and insert it into the slot in the rear of the upper handle (Fig. 7).
- Secure extension cord in cord lock as as shown in Figure 7.

WARNING
POTENTIAL HAZARD
- Never use an electrical cord that is damaged.
WHAT CAN HAPPEN
- A damaged electrical cord could cause a shock or fire.
HOW TO AVOID THE HAZARD
- Thoroughly inspect electrical cord before using trimmer. If cord is damaged, do not operate trimmer. Replace or repair damaged cord immediately. Contact your TORO service dealer for assistance.
Operation

WARNING
POTENTIAL HAZARD
- Objects can be thrown by the trimmer while it is in operation.
WHAT CAN HAPPEN
- Thrown objects could cause injury to the operator or bystanders.
HOW TO AVOID THE HAZARD
• Always wear safety goggles or other suitable eye protection, long pants and shoes while operating trimmer.
- Keep people and pets away from trimming area.
Your trimmer will cut grass and small weeds in difficult and hard to reach places. However, you will most likely experience some line breakage during your first few uses. As you learn the trimming techniques, you will be able to cut areas around trees, shrubs, foundation walls, fences, sidewalks, patios, etc., with minimal line wear or line breakage.
-
Inspect area to be trimmed for any wire, cord, or string-like matter which could become entangled in the rotating line. Also pick up any objects or debris that could be thrown by the trimmer.
-
Lay out the extension cord so that it won't be in your way and to prevent kinking or tangling.
-
Trim only when grass and weeds are dry.
-
Slowly move unit in and out of area being cut, maintaining unit at desired cutting height. This can be either a forward-backward or side-to-side motion as indicated (Fig. 8 & 9).
-
Grass in excess of eight inches tall or small weeds should be cut by working from the top to the bottom in small increments to avoid premature line wear.
-
DO NOT FORCE THE UNIT. Allow the very tip of the nylon line to do the cutting (especially along walls) (Fig. 10). Cutting with more than the tip will reduce cutting efficiency and overload the motor.
The tip of the cutting line will wear during use and cause a reduction in the cutting swath. If the line is not advanced occasionally, it will wear down to the eyelet. When the trimmer is stopped the line will tend to relax and may retract into the cutter head. Should this occur, remove spool, refeed the line through eyelet, and reassemble spool to trimmer.
- The life of your cutting line is dependent upon following the preceding trimming techniques, as well as what is being cut, and where the cutting is being done. For example, line wears faster when trimming against a foundation wall as opposed to trimming around a tree.
Some line breakage will occur from moving unit too fast, from entanglement with foreign matter, from normal line fatigue, and from attempting to
cut thick, stalky weeds in excess of unit's capability. As cutting line wears, for best performance, lengthen as indicated in Lengthening Cutting Line procedure.
-
NEVER drag the trimmer spool on the ground while trimming (Fig. 11). This causes motor overload and spool wear.
-
After each use, feed out some line to prevent line from retracting into cutting head.
-
Trimmer may be used as a decorative edger by rotating support handle 180^ (Fig. 12).

WARNING
POTENTIAL HAZARD
- When trimmer is used for decorative edging, objects may be thrown in operator's or bystander's direction.
WHAT CAN HAPPEN
- Thrown objects could cause injury to the operator or bystanders.
HOW TO AVOID THE HAZARD
- Always wear safety goggles or other suitable eye protection, long pants and shoes while operating trimmer. - Keep people and pets away from trimming area.
Lengthening Cutting Line
- To lengthen line, firmly tap spool on the ground while the motor continues to run. The line will be fed from the spool and cut off to the proper length by the cutting knife attached to the shield (Fig. 13).
Remember to keep the trimmer ‘on’ while lengthening the line. Just tap the trimmer on the ground; do not hold it on the ground. After the line feeds out, wait until you hear the line being cut to the proper length before continuing to trim.
Note: To help prevent line tangle, tap only once to lengthen line. If additional line is required, wait a few seconds before retapping trimmer head. Do not allow line to wear too short. Keep line length at full cutting diameter as much as possible.
- Lengthen line only when line has been shortened by wear. Unnecessary lengthening will waste line.
Note: The spool may wear during normal use of the line advance feature and may require occasional replacement. Replacement spools are available through your TORO retailer. See page 10 for accessories.
Replacing Cutting Line
Prewound replacement spools can be purchased from your local Toro retailer. The cutting line used by Toro is specially formulated for use on your trimmer. Other line may not provide the same high quality performance.

CAUTION
POTENTIAL HAZARD
- Use of line other than proper monofilament cutting line could cause personal injury.
WHAT CAN HAPPEN
- Wire or other string-like substances could cut through clothes, skin, etc. and cause personal injury.
HOW TO AVOID THE HAZARD
- Do not use any type of wire or other string-like substance.
- Use only TORO .065" dia. nylon monofilament cutting line, 30 feet maximum.

WARNING
POTENTIAL HAZARD
- When trimmer is in operation, the cutting head is rotating.
WHAT CAN HAPPEN
- Contact with rotating cutting head could cause personal injury.
HOW TO AVOID THE HAZARD
• Always be sure cutting head has completely stopped rotating and trimmer is unplugged before inverting trimmer.
- Never activate trimmer when it is in an inverted position.
- Disconnect trimmer from power source.

CAUTION
POTENTIAL HAZARD
- Cutting knife on grass shield is sharp.
WHAT CAN HAPPEN
- Contact with cutting knife could cause personal injury.
HOW TO AVOID THE HAZARD
- Be careful when removing spool. Avoid contact with knife blade.
-
To remove empty spool, invert trimmer, place hand over spool and press in tabs on each side of cap (Fig. 14).
-
If there is any line on spool, hold free end of line with one hand to prevent spool from unraveling and with other hand grasp spool and lift off spool and cap together (Fig. 15).
Note: If spring falls off cutter head during this procedure, reinstall spring before reinstalling spool and cap.
Note: Before reinstalling spool, be sure to thoroughly clean out cutter head and visually inspect for any damaged or worn parts.
-
Unwind no more than three inches of line from new spool and hold line and spool to prevent unraveling.
-
Place cap on spool.
-
Insert line into eyelet in cutter head (Fig. 16) and hold line with one hand while using your other hand to place spool and cap on spring. Align cap tabs with slots in cutter head, press in tabs and push down cap and spool to lock cap in place (Fig. 16).
Note: Spool may need to be rotated slightly to allow it to be fully installed.

CAUTION
POTENTIAL HAZARD
- An improperly installed cap or spool could fly off trimmer.
WHAT CAN HAPPEN
- Contact with a thrown spool or cap could cause injury to operator or bystanders.
HOW TO AVOID THE HAZARD
- Be sure spool and cap are fully secured before operating the unit. Replace spool if it is damaged or if cap does not securely snap onto cutter head.
- Keep bystanders and pets away from trimming area.
- If line should tangle or break at eyelet, unplug trimmer, remove spool, refeed the line through eyelet, and reassemble spool to trimmer.
Rewinding Empty Spools
To rewind an empty spool, follow the steps below:
- Hook one end of line into slot on spool, allowing no more than 1/8" to protrude. Push end of line all the way to the inner end of slot. Wind line in direction of arrow on spool in level rows between spool flanges (Fig. 17).
Note: Trimmer will not function properly if line is wound in the wrong direction or if end of line protrudes more than 1/8" at inner end of slot.
- Do not wind line beyond outer edges of spool; trimmer will not function properly.
Maintenance

WARNING
POTENTIAL HAZARD
- There is the possibility that trimmer could be inadvertently started when the extension cord is plugged into an electrical socket.
WHAT CAN HAPPEN
- Inadvertent starting could cause personal injury to operator or bystanders.
HOW TO AVOID THE HAZARD
• Always be sure your trimmer is unplugged and the cutting head has stopped rotating before attempting any maintenance or repairs.
- To keep the exterior clean, just wipe it off with a damp cloth. Never hose it down.
- Wipe or scrape clean the cutter head and spool area any time there is an accumulation of dirt or cuttings.
- Check and tighten all fasteners. If any part is damaged or lost, repair or replace it.
- Scrape debris away from air intake vents in both sides of motor housing (Fig. 18).
Important: Keeping air intake vents free of grass and debris prevents motor overheating and possible failure.
Important: To avoid damaging shield when storing trimmer, rest trimmer on cutter head or motor housing or hang trimmer from handle(s). DO NOT REST TRIMMER ON GRASS SHIELD AS SHOWN (Fig. 19). THE GRASS SHIELD MAY WARP AND INTERFERE WITH CUTTING LINE.
- Any other servicing should be performed by an authorized Toro Service Dealer.
Accessories
| REPLACEMENTPARTNUMBERS | |
| PREWOUND SPOOL | EMPTY SPOOL |
| Model #88176 Part # | 73–8190 |
The Toro Promise
A Full Two Year Residential Use Warranty
The Toro Company warrants this TORO Product for two years against defects in material or workmanship. To receive a replacement or repair, at Toro's option, just return the complete unit, postage prepaid, to the Distributor (dealer) along with proof of purchase. This warranty covers product defects only. It does not cover incidental or consequential damages. This warranty gives you specific rights, and you may have other rights which vary from country to country. If all other remedies fail, you may contact us at The Toro Company, Dreve Richelle 161, Batiment "C", 1410 Waterloo, Belgium. (Do not return defective product to this address.)
Français
Table des matières
Page
Introduction 1....
Sécurité 2.