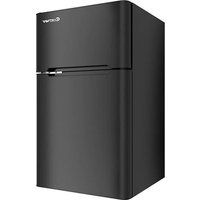
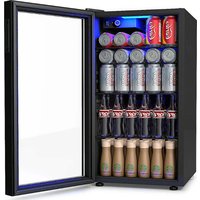
EP22672 - Fridge COSTWAY - Free user manual and instructions
Find the device manual for free EP22672 COSTWAY in PDF.


| Brand | Costway |
| Model | EP22672 |
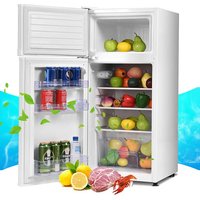
| Product Type | Refrigerator with Freezer Compartment |
| Total Volume | 90 L |
| Climate Class | SN/N/ST (from 10°C to 38°C) |
| Refrigerant | R600a (33 g) |
| Rated Frequency | 60 Hz |
| Rated Current | 1.1 A |
| Required Power Supply | 250 V / 16 A, grounded outlet |
| Dimensions (Clearances Required) | Sides: 19 mm, Top: 50 mm, Back: 50 mm |
| Temperature Setting | 7 positions (1 warm to 7 cold), stop at 0 |
| Interior Light | 10 W bulb, replaceable |
| Can Compartment | Dispenser for cans (up to 6 cans) |
| Vegetable Drawer | Transparent, removable |
| Interior Shelves | Full-width sliding, removable |
| Leveling | 2 adjustable front feet |
| Door Alignment | Adjustable via top hinge |
| Freezer Defrosting | Manual, to be performed when frost > 6 mm |
| Food Storage | Recommendations for meats, fruits, vegetables and frozen foods |
| Cleaning | Baking soda and warm water, avoid abrasive products |
| Safety | Unplug before cleaning, flammable gas R600a, do not puncture tubes |
| Use in case of power failure | Unplug, inspect food, clean before reuse |
| Holidays/Moving | Empty, clean, leave doors open, transport upright |
Frequently Asked Questions - EP22672 COSTWAY
User questions about EP22672 COSTWAY
0 question about this device. Answer the ones you know or ask your own.
Ask a new question about this device
Download the instructions for your Fridge in PDF format for free! Find your manual EP22672 - COSTWAY and take your electronic device back in hand. On this page are published all the documents necessary for the use of your device. EP22672 by COSTWAY.
USER MANUAL EP22672 COSTWAY
Please read all instructions carefully.
Retain instructions for future reference.
Separate and count all parts and hardware.
Read through each step carefully and follow the proper order.
We recommend that, where possible, all items are assembled near to the area in which they will be placed in use, to avoid moving the product unnecessarily once assembled.
Always place the product on a flat, steady and stable surface.
Keep all small parts and packaging materials for this product away from babies and children as they potentially pose a serious choking hazard.
FR
Read all of the instructions before using this appliance. When using this appliance, always exercise basic safety precautions, including the following:
NOTE:
If the refrigerator/freezer has been placed in a horizontal or tilted position for any period of time wait 3 hours before plugging the unit in.
1) Use this appliance only for its intended purpose as described in this use and care guide.
2) This refrigerator/freezer must be properly installed in accordance with the installation instructions before it is used. See grounding instructions in the installation section.
3) This refrigerator/freezer should not be recessed or built-in an enclosed cabinet. It is designed for freestanding installation only.
4) Never unplug your refrigerator/freezer by pulling on the power cord.
Always grasp the plug firmly and pull straight out from the outlet.
5) DANGER - Risk of Fire or Explosion. Flammable refrigerant used. Do not use Mechanical devices to defrost refrigerator. Do not puncture refrigerant tubing.
6) If your old refrigerator/freezer is not being used, we recommend that you remove the doors. This will reduce the possibility of danger to children.
7) WARNING: After your refrigerator/freezer is in operation, do not touch the cold surfaces in the freezer compartment, particularly when hands are damp or wet. Skin may adhere to these extremely cold surfaces.
8) Do not use any electrical device or any sharp instrument in defrosting your refrigerator.
9) Unplug your refrigerator/freezer before cleaning or before making any repairs.
Note: If for any reason this product requires service, we strongly recommend that a certified technician perform service.
10) Do not operate your refrigerator in the presence of explosive fumes.
Technique Index
Model:
EP22672
Climate Type:
SN/N/ST
Volume (L):
90L
Rating Voltage (VAC) :
115V~
Rating Frequency (Hz) :
60 Hz
Rated Current (A):
1,1 A
Refrigerant:
R600a/33g
CAUTION - Risk of Fire or Explosion
Dispose of property in accordance with Local Regulations. Flammable refrigerant used.
DANGER
Risk of child entrapment. Before you throw away your old refrigerator or freezer, take off the doors. Leave the shelves in place so that children may not easily climb inside.
DANGER- Risk Of Fire Or Explosion. Flammable Refrigerant Used. To Be Repaired Only By Trained Service Personnel. Do Not Puncture Refrigerant Tubing
CAUTION Risk Of Fire Or Explosion. Flammable Refrigerant Used. Consult Repair Manual/Owner's Guide Before Attempting To Service This Product. All Safety Precautions Must be Followed
CAUTION--Risk OF Fire Explosion. Dispose of property in accordance with Local Regulations. Flammable refrigerant used.
CAUTION--Risk OF Fire Explosion. Do not puncture refrigerant tubing. Follow the handling instruction carefully. Flammable refrigerant used.
Parts And Features
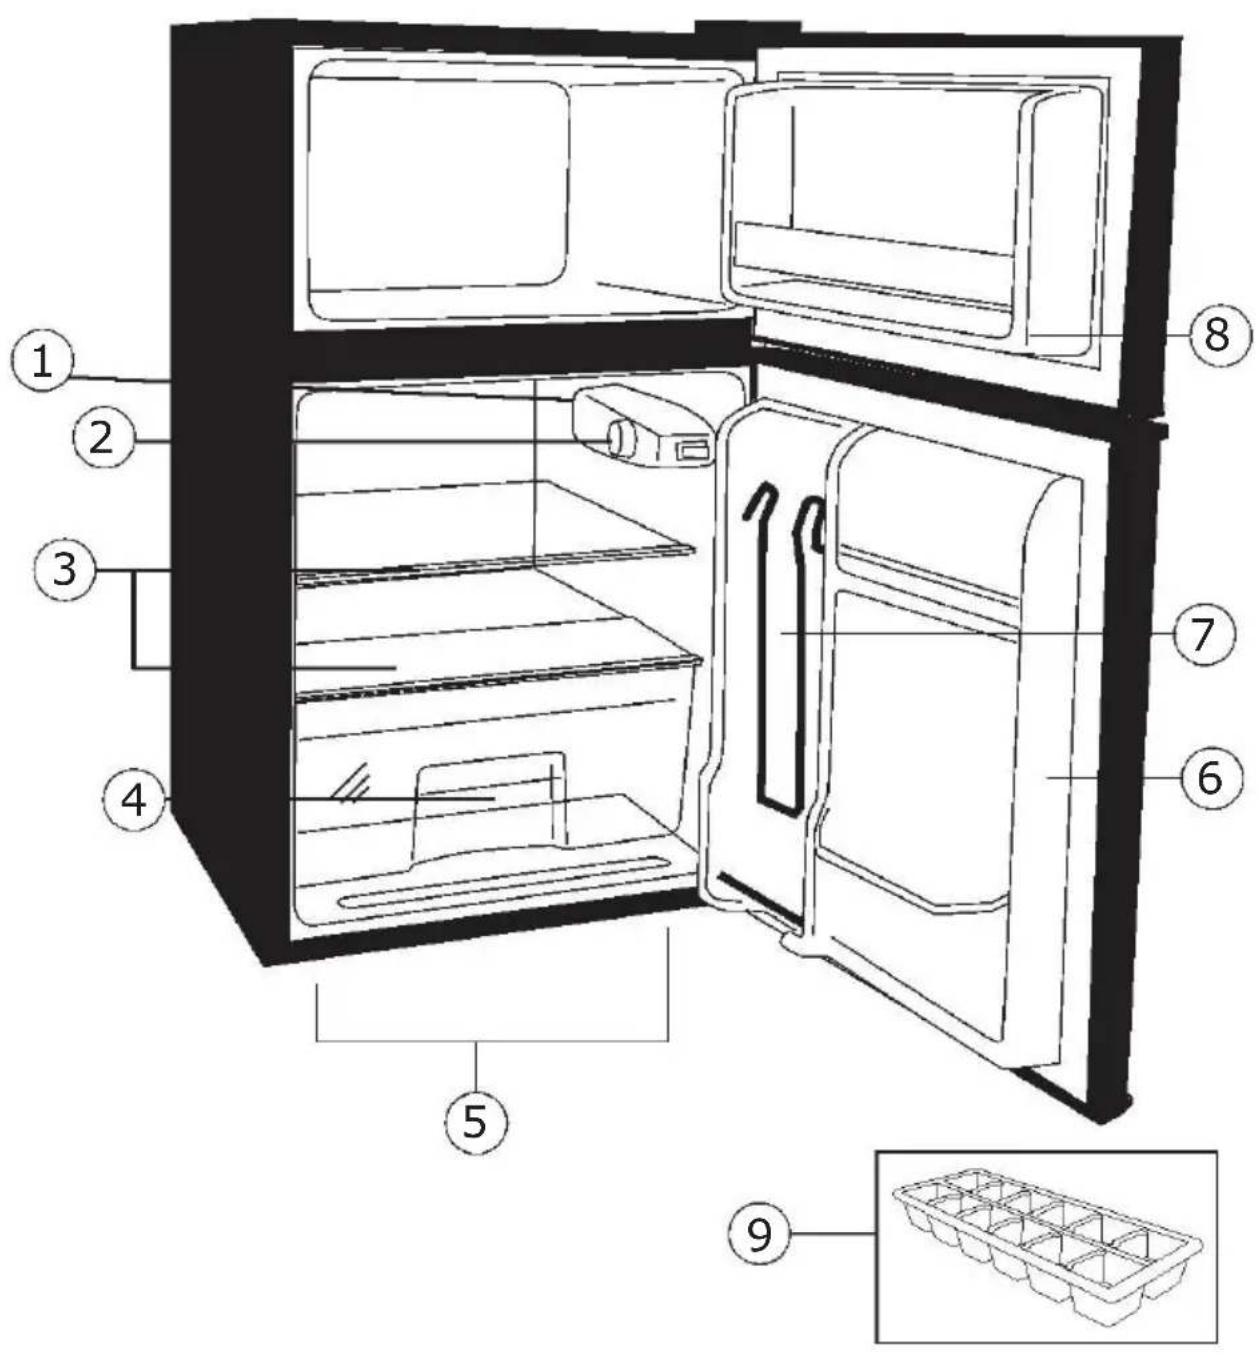
- Interior Light
- Temperature Control
- Refrigerator Shelves
- Crisper
-
Front Leveling Legs
-
Refrigerator Door Shelves
- "Dispense-A-Can" Storage
- Freezer Door Shelf
- Ice Cube Tray
Installing Your Refrigerator
Unpacking Your Refrigerator
- Remove all packaging material. This includes the foam base and all adhesive tape holding the refrigerator accessories inside and outside.
- Inspect and remove any remains of packing, tape or printed materials before powering on the refrigerator.
CAUTION
Risk of Fire or Explosion due to puncture of refrigerant tubing. Flammable refrigerant used. Handle with care when moving refrigerator to avoid either damaging the refrigerant tubing or increasing the risk of a leak.
Leveling Your Refrigerator
- Your refrigerator has two leveling legs which are located in the front bottom corners of your refrigerator. After properly placing your refrigerator in its final position, you can level your refrigerator.
- Leveling legs can be adjusted by turning them counterclockwise to raise your refrigerator or by turning them clockwise to lower your refrigerator. The refrigerator door will close easier when the leveling legs are extended.
Proper Air Circulation
- To ensure your refrigerator works at the maximum efficiency it was designed for, you should install it in a location where there is proper air circulation, plumbing and electrical connections.
- The following are recommended clearances around the refrigerator: Sides. 3/4" (19mm)
Top. 2" (50mm)
Back. 2" (50mm)

WARNING: ELECTRICAL REQUIREMENT - SHOCK HAZARD
Electrical Requirement
- Make sure there is a suitable power outlet (250 volts, 16 amps outlet) with proper grounding to power the refrigerator.
- Avoid the use of three prong adapters or cutting off the third grounding prong in order to accommodate a two prong outlet. This is a dangerous practice since it provides no effective grounding for the refrigerator and may result in shock hazard.

WARNING: USE OF EXTENSION CORDS- POTENTIAL EASY HAZARD
Use of Extension Cords
- Avoid the use of an extension cord because of potential safety hazards under certain conditions. If it is necessary to use an extension cord, use only a 3-wire extension cord that has a 3-blade grounding plug and a 3-slot outlet that will accept the plug. The marked rating of the extension cord must be equal to or greater than the electrical rating of the appliance. DO NOT USE EXTENSION CORD LONGER THAN 12 FT/366CM.
Installation Limitations
-
Do not install your refrigerator in any location not properly insulated or heated, e.g. garage, etc. Your refrigerator was not designed to operate in temperature settings below 13^ .
-
Select a suitable location for the refrigerator on a hard even surface away from direct sunlight or heat source, e.g. radiators, baseboard heaters, cooking appliances, etc. Any floor unevenness should be corrected with the leveling legs located on the front bottom corners of the refrigerator.
Door Alignment
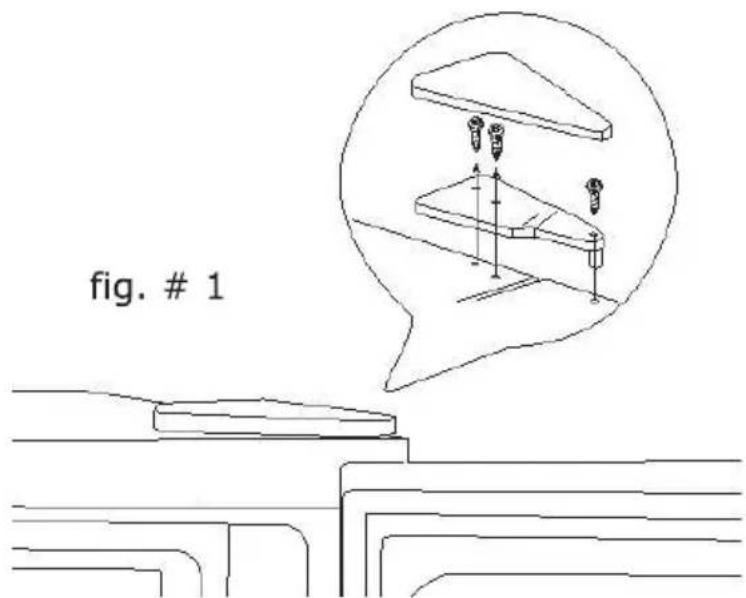
Freezer Door: (see fig. #1)
- Remove the top hinge cover.
- Loosen the top hinge screws using a phillips head screwdriver.
- Adjust the door or put a spacer in between and then tighten the screws.
- Replace the top hinge cover.
Refrigerator Features And Use General Features
Adjustable temperature dial:
Your refrigerator will automatically maintain the temperature level you select.
The temperature control dial has 7 settings plus 0.1 is the warmest. 7 is the coldest. Turning the dial to 0 Stops cooling in both the refrigeration and freezer sections. At first, set the dial to 4 and allow 24 hours to pass before adjusting the temperature to your needs.
(Note: If the refrigerator has been placed in a horizontal or tilted position for any period of time wait 3 hours before plugging the unit in.)
Refrigerator Interior Shelves
To remove or replace a full-width slide-out shelf: (see fig. # 2)
- Gently tilt the shelf up and slide forward until the shelf has been completely removed.
- To replace the shelf, gently slide the shelf back.
Using the Dispense-A-Can
- Your refrigerator is equipped with the convenient "Dispense- A-Can" compartment. Each compartment will hold up to six cans. Simply load the cans from the top. To dispense a can, simply draw one out from the bottom. It is that easy.
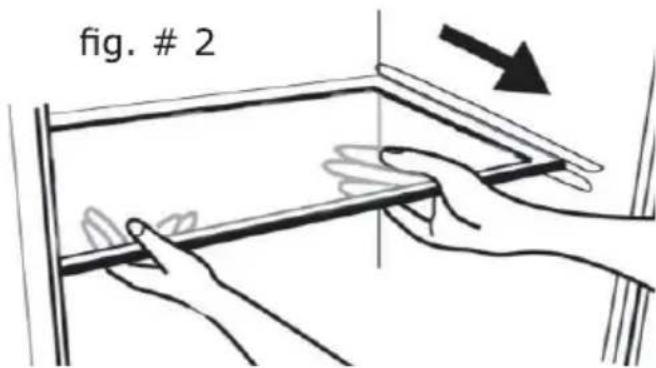
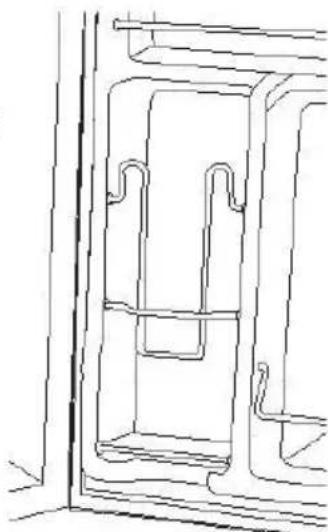
fig.#3
Crisper
- Your refrigerator has a clear crisp.
Grasp the top of the crisper and gently slide our. Push back to replace.
Defrosting Your Refrigerator
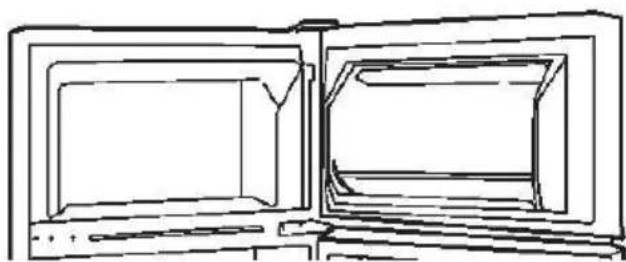
- For maximum energy efficiency, defrost freezer section whenever frost accumulates to a thickness of 1/10CM or more on freezer walls. Note that frost tends to accumulate more during the summer months.
DANGER - Risk of Fire or Explosion due to puncture refrigerant tubing. Flammable refrigerant used. Do not use metal instruments to defrost refrigerator. Do not puncture refrigerant tubing.
- To defrost freezer, remove food and ice cube tray from the freezer section. Turn temperature control dial to "0" position. Defrosting may take a few hours. To speed up defrost time, keep the door open and place a bowl of warm water in the freezer.
- During the defrost, water will accumulate. Use a towel to wipe off excess dripping water. Do not leave unattended.
- After defrosting, empty and wipe down the interior of the freezer. You may now reset your refrigerator to the desired temperature and return food.
- Your freezer has been equipped with an ice scraper for your convenience.
Maintenance
Risk of Fire or Explosion. Flammable refrigerant used. Do not puncture of refrigerant tubing. To be repaired only by trained authorized service personnel.
Consult Repair Manual before attempting to service this product. All Safety Precautions Must be followed. Component parts shall be replaced with like components to minimize the risk of possible ignition due to incorrect parts or improper service.
Food Storage Information
Fresh Food:
- When storing fresh food that is not prepackaged, be sure to wrap or store food in airtight and moisture proof material unless otherwise noted. This will ensure proper shelf life and prevent the transfer of odors and tastes.
- Wipe containers before storing to avoid needless spills.
- Eggs should be stored in an upright position in their original carton to maximize shelf life.
- Fruit should be washed and dried, then stored in sealed plastic bags before storing in the refrigerator.
- Vegetables with skins should be stored in plastic bags or containers.
- Leafy vegetables should be washed and drained and then stored in plastic bags or containers.
- Hot food should be allowed to cool before storing in the refrigeration. This will prevent unnecessary energy use.
-
Fresh seafood should be used the same day as purchased.
-
When storing meats in the fresh food section, keep in the original packaging or rewind as necessary. Follow the suggestions below for safe storage:
Chicken 1-2 Days
Ground Beef 1-2 Days
Cold Cuts 3-5 Days - Steaks/Roasts 3-5 Days
-
Smoked/Cured Meats 7-10 Days
-
Wipe containers before storing to avoid needless spills.
- Hot food should be allowed to cool before storing in the freezer.
- This will prevent unnecessary energy use.
- When storing meats, keep in the original packaging or rewrap as necessary.
- Proper freezer storage requires correct packaging. All foods must be in pack-ages, which do not allow the flow of air or moisture in, or out. Improper storage will result in odor and taste transfer and will result in the drying out of the improperly packaged food.
- Follow package or container instructions for proper storage.
-
Packaging Recommendations: Plastic containers with air tight lids Heavy duty aluminum foil Plastic wrap made from saran film Self-sealing plastic bags
-
Do not refreeze defrosted/thawed foods.
- It is recommended that the freezing date be marked on the packaging.
These are some suggestions for safe storage:
TV Dinners
3 - 4 Months
- Fresh Shrimp, scallops, crawfish
3 - 6 Months
- Hamburger & stew meats
3 - 4 Months
Ground Turkey, veal, pork
3 - 4 Months
Chops
4 - 6 Months
- Steaks
6 - 12 Months
- Chicken or turkey, whole
1 year
Normal Operating Sounds You May Hear
- Boiling water, gurgling sounds or slight vibrations that are the result of the refrigerant circulating through the cooling coils.
- The thermostat control will click when it cycles on and off.
Proper Refrigerator Care and Cleaning
Cleaning and Maintenance
WARNING:
To avoid electric shock, always unplug your refrigerator before cleaning. Ignoring this warning may result in death or injury.
CAUTION:
Before using cleaning products, always read and follow manufacturer's instructions and warnings to avoid personal injury or product damage.
General:
Prepare a cleaning solution of 3-4 tablespoons of baking soda mixed with warm water. Use sponge or soft cloth, dampened with the cleaning solution, to wipe down your refrigerator.
-
Rinse with clean warm water and dry with a soft cloth.
-
Do not use harsh chemicals, abrasives, ammonia, chlorine bleach, concentrated detergents, solvents or metal scouring pads. Some of these chemicals may dissolve, damage and/or discolor your refrigerator.
Door Gaskets:
Clean door gaskets every three months according to general instructions. Gaskets must be kept clean and pliable to assure a proper seal
- Petroleum jelly applied lightly on the hinge side of gaskets will keep the gasket pliable and ensure a good seal.
Light Bulb Replacement
- Switch off power to refrigerator.
- Gently pull out the clear cover
- Replace with same type light bulb rated at 10 watts.
- Push the clear cover back into place.
Power Interruptions
- Occasionally there may be power interruptions due to thunderstorms or other causes. Remove the power cord from AC outlet when a power outage occurs. When power has been restored, replug power cord to AC outlet.
If outage is for a prolonged period, inspect and discard spoiled or thawed food in freezer and refrigerator. Clean refrigerator before reusing.
WARNING:
IF OUTAGE IS FOR A PROLONGED PERIOD, INSPECT AND DISCARD SPOILED OR THAWED FOOD IN FREEZER AND REFRIGERATOR. CLEAN REFRIGERATOR BEFORE REUSING.
Vacation and Moving Care
- For long vacations or absences, empty food from refrigerator and freezer, move the temperature DIAL to the OFF position and clean the refrigerator and door gaskets according to "General cleaning" section. Prop doors open, so air can circulate inside. When moving always move the refrigerator vertically. Do not move with the unit lying down. Possible damage to the sealed system could occur.
Refrigerator does not operate:
- Check if thermostat control is not in the "0" position.
- Check if refrigerator is plugged in.
- Check if there is power at the AC outlet, by checking the circuit breaker.
Food temperature appears too warm:
- Frequent door openings.
- Allow time for recently added warm food to reach fresh food temperature.
- Check gaskets for proper seal.
- Adjust temperature control to colder setting.
Food temperature is too cold:
- If temperature control setting is too cold, adjust to a warmer setting and allow several hours for temperature to adjust.
Refrigerator runs too frequently:
- This may be normal to maintain constant temperature during high temperature and humid days.
- Doors may have been opened frequently or for an extended period of time.
- Check gasket for proper seal.
- Check to see if doors are completely closed.
Moisture build up on interior or exterior of the refrigerator:
- This is normal during high humidity periods.
- Prolonged or frequent door openings.
- Check door gaskets for proper seal.
Refrigerator has an odor:
Interior needs cleaning.
- Foods improperly wrapped or sealed are giving off odors.
Refrigerator door does not shut properly:
- Level the refrigerator.
- Re-align refrigerator door.
- Check for blockages, e.g. food containers, crisper cover, shelves, bins, etc.
Popping or cracking sound when the compressor comes on:
- Check to ensure the refrigerator is level.
- The floor may be uneven or weak. The refrigerator rocks on the floor when it is moved slightly. Be sure the floor can adequately support the refrigerator. Level the refrigerator by putting wood or metal shims under part of the refrigerator.
- The refrigerator is touching the wall. re-level the refrigerator and move it from the wall. See the "Installing Your Refrigerator" section.
Refrigerator light does not work
- Check power supply.
- Tighten bulb in socket.
- Replace burned out bulb.
AVERTISSEMENT:
Tension Nominale (V AC):
115V~
- FR
- NOTE:
- Technique Index
- CAUTION - Risk of Fire or Explosion
- DANGER
- Parts And Features
- Installing Your Refrigerator
- Unpacking Your Refrigerator
- CAUTION
- Leveling Your Refrigerator
- Proper Air Circulation
- WARNING: ELECTRICAL REQUIREMENT - SHOCK HAZARD
- Electrical Requirement
- WARNING: USE OF EXTENSION CORDS- POTENTIAL EASY HAZARD
- Use of Extension Cords
- Installation Limitations
- Refrigerator Features And Use General Features
- Adjustable temperature dial:
- Refrigerator Interior Shelves
- Using the Dispense-A-Can
- Crisper
- Defrosting Your Refrigerator
- Maintenance
- Food Storage Information
- Fresh Food:
- Normal Operating Sounds You May Hear
- Proper Refrigerator Care and Cleaning
- Cleaning and Maintenance
- WARNING:
- CAUTION:
- General:
- Door Gaskets:
- Light Bulb Replacement
- Power Interruptions
- Vacation and Moving Care
- Refrigerator does not operate:
- Food temperature appears too warm:
- Food temperature is too cold:
- Refrigerator runs too frequently:
- Moisture build up on interior or exterior of the refrigerator:
- Refrigerator has an odor:
- Refrigerator door does not shut properly:
- Popping or cracking sound when the compressor comes on:
- Refrigerator light does not work
- AVERTISSEMENT:
Brand : COSTWAY
Model : EP22672
Category : Fridge