THALASSA PRO 90 GWH - Doorbells CATA - Free user manual and instructions
Find the device manual for free THALASSA PRO 90 GWH CATA in PDF.

| Product Type | Extractor hood |
| Brand | CATA |
| Model | THALASSA PRO 90 GWH |
| Width | 90 cm (estimate) |
| Number of speeds | 5 + Boost |
| Lighting | Adjustable LED (L1 to L5) |
| Control type | Electronic touch |
| Timer | Yes (cycle up to 15 min) |
| Boost function | Yes (5 min max) |
| Renova Air function | Yes (10 min/hour) |
| Renova Turbo function | Yes (automatic cycle) |
| Connectivity | With cooking hob (wireless) |
| Filters | Metal + Carbon (recirculation) |
| Filter cleaning alarm | Yes |
| Power supply | 220-240 V (estimate) |
| Maintenance | Regular cleaning of metal filters and replacement of charcoal filters |
| Reparability | Contact CATA customer service |
| Safety | Read the safety guide carefully before use |
Frequently Asked Questions - THALASSA PRO 90 GWH CATA
User questions about THALASSA PRO 90 GWH CATA
0 question about this device. Answer the ones you know or ask your own.
Ask a new question about this device
Download the instructions for your Doorbells in PDF format for free! Find your manual THALASSA PRO 90 GWH - CATA and take your electronic device back in hand. On this page are published all the documents necessary for the use of your device. THALASSA PRO 90 GWH by CATA.
USER MANUAL THALASSA PRO 90 GWH CATA
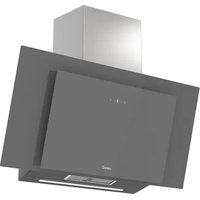
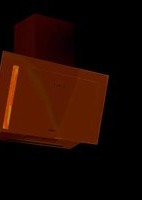
natural_image
Two-panel image showing a black panel with textured edges and a white panel with a light beam, both without any visible text or symbols.EN IMPORTANT - Please read carefully the separate safety guide before use.
WARNING: Read the instructions before using the appliance
FUNCTIONS & SETTINGS
CONTROL PANEL
To obtain the best results from your cooker hood it is recommended that you leave it switched on for a short time after you have finished cooking.
 | Timer |
 | ON, Fan Boost Function and Fan speed increase |
| [521H] | LED display |
| [220X] | OFF and Fan speed decrease |
| [WHZS] | Light ON /OFF |
SETTINGS
Once the appliance is switched off press both, increase (↑) and decrease fan speed (↓) icons. All icons will start blinking in White. The hood is now in setting mode.

IMPORTANT: Once in settings mode, you can adjust the recirculation and lighting ions in any order. However, all actions must be completed within two minutes.
SETTING THE DUCTED OR RECIRCULATION MODE
Once in setting mode, press the Timer (💡) icon and it will blink in red. The LED display will show the current Ducted or Recirculation mode.
Ducted mode: (−) Default setting to extract air to the outside.
Recirculation mode: (≡) Setting to recirculate the air with carbon filters installed.
To change this option press either (↓) or (↑) to select the correct mode and then press Timer(💡) icon to accept the change.
SETTING THE LIGHTING MODE
Once in setting mode, press the Light (💡) icon and it will blink in red. The LED display will show the current lighting mode.
EN
Cool light: (_) Default setting for all lights.
Warm light: (≡) Optional setting for all lights.
To change these settings press (↓) or (↑) and press the Light (○) icon to accept the change.
SETTING CONNECTIVITY MODE
Once in setting mode, press both, the Timer ( ) and the Light ( ) icons. The led display will show (A) blinking waiting hob's signal. Once it receive it, the led display will show (A) fixed.
Note: If the hood controls are manually overridden when the hob and hood are linked, the hood will operate for 5 minutes on this manual setting before returning to control by de hob.
Note: The remote control supplied will already be paired to your ceiling hood.
GENERAL USE
ON/OFF AND INCREASE/DECREASE THE FAN SPEED
Press the decrease fan speed (↓) icon and the fan will turn on at speed 1.
Press the increase fan speed icon (↑) and the fan will turn on at maximum speed (Booster)
If the fan motor is set at speeds 2,3,4, 5 or P, pressing the Fan Decrease (↓) Icon will reduce the speed by one level at a time. If you press the Fan Decrease (↓) Icon for more than three seconds, the fan will turn down. However, the downlight will remain on 8 if enabled).
If the fan motor is set at speed 1, pressing the Fan Decrease ( ↓) Icon the motor will switch off. However, the downlight will remain on (if enabled) and the display will show the current brightness level.
Boost Function
If the fan motor is set at speeds 1,2,3,4 or 5, pressing the Fan Increase (↑) Icon will increase the speed by one at a time. If you press the Fan Increase (↑) Icon for more than two seconds, the speed will increase to full power from any level and the display will flash “P”
NOTA: Full power or Boost (P) only operates for five minutes maximum to conserve energy and the fan speed will automatically drop to speed level 5 after this time.
Light On/Off ( )
Touch the Light ( ) Icon to turn on the downlight.
To change the brightness of the downlight, touch and hold the Light (💡) Icon until the display show the brightness sequence. Remove your finger from the Light (💡) Icon when the desired brightness is achieved. The sequence runs from L1 to L5 and back to L1 in steps. The selected brightness will flash for a few seconds and revert to the fan speed display. This lighting setting will be kept for future uses.
Setting the timer ( ⏰ )
- When the fan motor is on and the Timer ( √ ), icon is pressed the icon will turn in red and the display will show the current fan speed.
- The chosen speed level will remain in use for five minutes before dropping down to the next lowest speed. This speed will remain in operation for two minutes before dropping down again. This will be repeated every two minutes unless the speed is already at level 1 and then the fan will turn off. If the light is already on, this will also be turned off.
- Pressing the Fan Decrease ( ) Icon or Fan Increase ( ↑ ) Icon during a current timer program will restart the countdown process again with the first five minutes cycle.
- If the Timer ( √ ) icon is pressed again during a current timer program, the cycle will be cancelled. The Timer ( √ ) Icon will revert to white and the current fan speed will remain on indefinitely.
- The maximum timer program cycle is 15 minutes: 5 minutes: 5 minutes on 0 and then 2 minutes each on speed 5 down to speed 1.
RENOVA AIR FUNCTION (This function is not available on all models)
Press the timer button (💡) with the hood switched off. A flashingH will appear. You will have activated Renova Air mode. The hood will operate automatically for 10 minutes every hour. In idle mode, a flashingIcon will appear for 1 hour. With this mode activated, the hood can be used as normal. To exit this mode, press the timer button (💡) within the function.
RENOVA TURBO FUNCTION
With the hood switched off. Press and hold the timer and increase speed buttons (💡) at the same time for 3 seconds.
A permanent icon will appear on the display. You have activated the Renova Turbo function.
EN
The icon will start to flash from bottom to top while this function is activated.
At this time, the hood will continue with the following sequence automatically:
- 5 minutes at MAX speed
- 3 minutes at 5th speed
- 3 minutes at 4th speed
This sequence will continue down to the first speed. Once the time has come to an end, the hood will stop.
To exit this mode before it ends, press the timer icon (☐).
During Renova mode, the hood can be used as normal by pressing the (↑) or (↓) icons.
The speed of the Renova function can be increased (↑) or (↓) decreased by pressing the or icons. The Renova
function will automatically continue with the sequence described above from the selected speed.
Filter cleaning warning
Once the cooker hood is off, if the Timer icon (☑) blinks in red and LED display shows “(−)”, you should clean the filters. Once they are cleaned or replaced, press the Timer (☑) icon again and the icon will turn off.
(Only in Recirculation mode). Once the cooker hood is off, if Timer (💡) icon blinks in red and the LED display shows “(≡)” , you should clean the carbon filters (in case you are using washable carbon filters) or replace them ( in case you are using disposable carbon filters). Once they are cleaned or replaced, press the Timer (💡) icon again and the icon will turn off.
| Problem Possible cause Solution | ||
| Excessive vibration. The appliance | ce is not installed properly on the brackets. | Take down the appliance and check it is properly fixed. |
| The fan blade is damaged. Switch | ch off the appliance. Repair to be carried out by qualified service personnel only. | |
| The fan motor is not fixed tightly. | ||
| The light is on, but the fan does not work. | The fan blade is jammed. | |
| The motor is damaged. | ||
| Both the light and motor do not work. | Light bulb blown. Contact Customer Services on. | |
| Power connection loose. Check | power supply. | |
| Suction performance reduced. | Speed may be too low. Select a higher speed. | |
| Optional vent kit might be twisted. | Ensure that the vent kit is fitted according to the manufacturer's instructions. | |
| Top vent might be obstructed. | Clear any obstruction. | |
| The installation may not comply with the manufacturers instructions. | The vent hose should be correct diameter throughout with no reductions or restriction. (See installation section). | |
| Works normally but cooking smells linger. | Carbon filter is not fitted in recirculation mode or is full of grease. | Fit carbon filter or replace the carbon filter (See Care and maintenance section). |
| The hood does not work Check | that the hood is connected to power. Check that the fuses or automatic have not jumped. | |
| The hood still does not work | If, after having checked the points mentioned above, your problem has not yet been solved, contact the technical service or your distributor. | |