65-3001-W - Vacuum packaging machines Weston - Free user manual and instructions
Find the device manual for free 65-3001-W Weston in PDF.


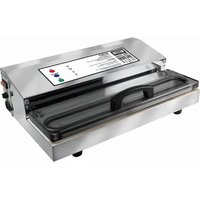
| Product Type | Vacuum Sealer |
| Brand | Weston |
| Model | 65-3001-W |
| Power Supply | 120 V ~ 60 Hz |
| Polarized Plug | Yes (wide blade) |
| Power | Not specified but standard for this type of appliance |
| Main Functions | Vacuum & Seal, Seal, Vacuum Level (High/Low), Seal Time (Normal/Extended), Pulse, Accessory |
| Vacuum Capacity | Adjustable: High or Low |
| Seal Time | Normal or Extended (for moist foods) |
| Pulse Mode | For manual vacuum control of delicate foods |
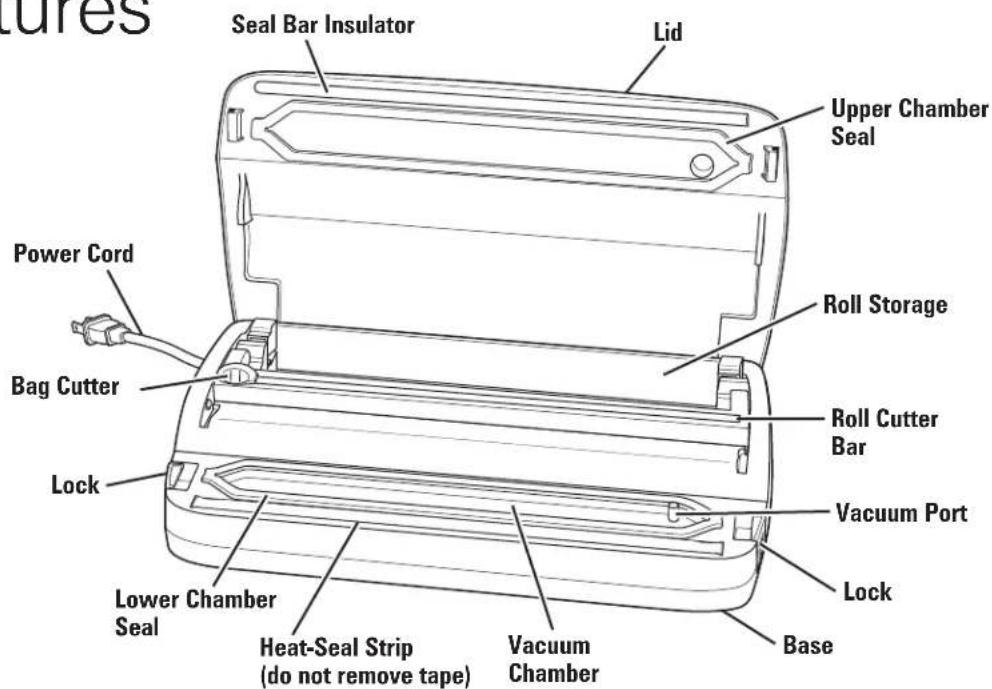
| Integrated Roll Holder and Bag Cutter | Yes |
| Vacuum Chamber | With upper and lower sealing gaskets |
| Heat Sealing Strip | With insulator, do not remove the tape |
| Power Indicator | Green (ready) / Red (operating) |
| Lid Latches | Yes, automatic release after sealing |
| Vacuum Port | Do not allow moisture to enter |
| Accessory Port | Yes (DC, adapter not included) |
| Care and Cleaning | Unplug, wipe with a damp cloth; do not immerse; do not store with lid locked |
| Safety | Household use only; do not use with a damaged cord; do not disassemble |
| Warranty | 1 year limited (USA and Canada) |
| Customer Service | Canada: 1 216 901 6801; USA: 1 800 814 4895 |
| Compatible Accessories | Westons heat sealable bags (textured); rolls; vacuum hose and special containers (not included) |
Frequently Asked Questions - 65-3001-W Weston
User questions about 65-3001-W Weston
0 question about this device. Answer the ones you know or ask your own.
Ask a new question about this device
Download the instructions for your Vacuum packaging machines in PDF format for free! Find your manual 65-3001-W - Weston and take your electronic device back in hand. On this page are published all the documents necessary for the use of your device. 65-3001-W by Weston.
USER MANUAL 65-3001-W Weston
Visit www.westonsupply.com for our complete line of products and Use and Care Guides – as well as delicious recipes, tips, and other great information.
Questions Please call us – our friendly associates are ready to help. USA: 1.800.814.4895

Vacuum Sealer Scelleuse sous vide Selladora al Vacío
English 2
Français 18
Español.... 36
IMPORTANT SAFEGUARDS
When using electrical appliances, basic safety precautions should always be followed to reduce the risk of fire, electric shock, and/or injury to persons, including the following:
- Read all instructions.
- This appliance is not intended for use by persons (including children) with reduced physical, sensory, or mental capabilities, or lack of experience and knowledge, unless they are closely supervised and instructed concerning use of the appliance by a person responsible for their safety.
- Close supervision is necessary when any appliance is used by or near children. Children should be supervised to ensure that they do not play with the appliance.
- Never let the vacuum sealer run unattended. Disconnect the vacuum sealer from the power source before leaving the work area.
- To protect against risk of electric shock, do not immerse cord, plug, or vacuum sealer in water or other liquid.
-
Unplug from outlet when not in use and before cleaning.
-
Do not operate any appliance with a damaged supply cord or plug, or after the appliance malfunctions or has been dropped or damaged in any manner. Supply cord replacement and repairs must be conducted by the manufacturer, its service agent, or similarly qualified persons in order to avoid a hazard. Call the provided customer service number for information on examination, repair, or adjustment.
- The use of accessory attachments not recommended by the appliance manufacturer may cause injuries.
- Do not use outdoors.
- Do not let cord hang over edge of table or counter, or touch hot surfaces, including stove.
- Do not disassemble this appliance. Doing so may result in personal injury.
- Do not place on or near a hot gas or electric burner, or in a heated oven.
- Do not use for other than intended purpose.
SAVE THESE INSTRUCTIONS
Other Consumer Safety Information
This appliance is intended for household use only.
⚠ WARNING Electrical Shock Hazard: This appliance is provided with a polarized plug (one wide blade) to reduce the risk of electric shock. The plug fits only one way into a polarized outlet. Do not defeat the safety purpose of the plug by modifying the plug in any way or by using an adapter. If the plug does not fit fully into the outlet, reverse the plug. If it still does not fit, have an electrician replace the outlet.
The length of the cord used on this appliance was selected to reduce the hazards of becoming tangled in or tripping over a longer cord. If a longer cord is necessary, an approved extension cord may be used. The electrical rating of the extension cord must be equal to or greater than the rating of the appliance. Care must be taken to arrange the extension cord so that it will not drape over the countertop or tabletop where it can be pulled on by children or accidentally tripped over.
Parts and Features
To order parts:
US: 1.800.814.4895
www.westonsupply.com
Canada: 1.216.901.6801
NOTE: Not all available parts and accessories are shown here. Please visit our website or call for a complete list.

Control Panel
Power Light: The power light will remain illuminated when the vacuum sealer is plugged into an outlet. Power light is green when unit is ready and red when in operation.
Vac&Seal/Cancel Button: Press this button to start vacuum and seal operation. This button will stop operation at any time. Seal Button: Press this button to start heat-sealing operation. Use to make bags from rolls.
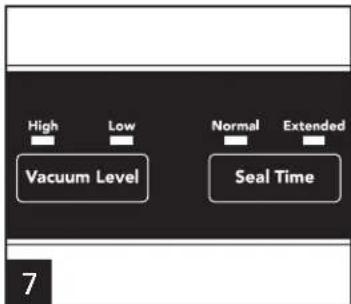
Vacuum Level Button:
- Select High for maximum air removal.
- Select Low for softer/delicate foods.
Seal Time Button:
- Select Normal when vacuum-sealing dry items.
- Select Extended when vacuum-sealing moist items.
Pulse Button: Press, hold, and release this button to control air removal for delicate or crushable items. Press Seal button when proper amount of air is removed.
Accessory Button:
- Press this button to operate accessory port on the side of the appliance.
- Use with vacuum hose, special canisters, and zipper bags (not included).
![graph TD A["Power Light"] --> B["Vac&Seal Cancel"] A --> C["Seal"] A --> D["High"] A --> E["Low"] A --> F["Vacuum Level"] A --> G["Normal"] A --> H["Extended"] A --> I["Seal Time"] A --> J["Pulse"] A --> K["Accessory"]](/content/2026/04/702870/images/4ae8f9592a671ad77273c521765a348192c5fa2bb504982d93d7286096204009.jpg)
Before You Start Vacuum-Sealing
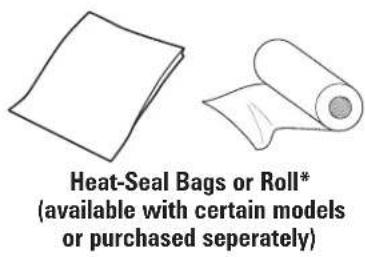
- The vacuum sealer is intended to be used only with heat-seal bags which have at least one side that is textured for air flow. Do not use household plastic bags.
- A vacuum bag is sealed when the two layers of the bag are heated from the heat-seal strip, causing the bag to be permanently sealed.
- Wait at least 20 seconds between operations for heat-seal strip to cool to prevent overheating and premature melting of the bag.
- There are two ways to close the vacuum sealer to start the vacuum or sealing process:
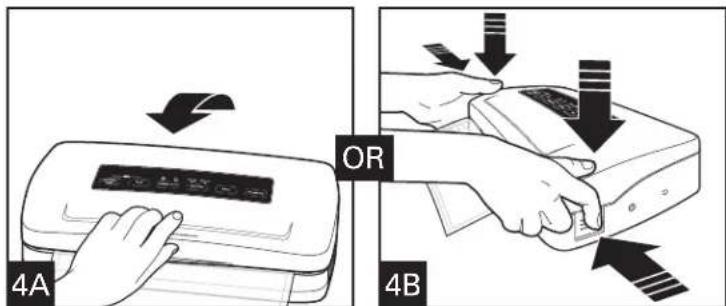
Lower the lid; press and hold the lid down until vacuuming or sealing starts.
Use locks if you do not want to hold the lid down manually. Lower the lid. Press down on both corners and push in locks on both sides to lock lid.
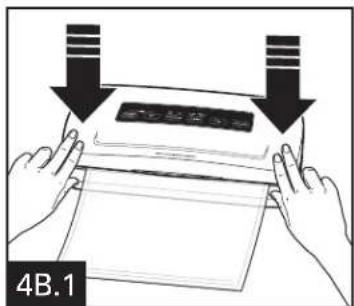
The locks will release automatically after sealing or vacuum-sealing. If the lid remains locked, press down corners to release lid.
Making Bags From Rolls
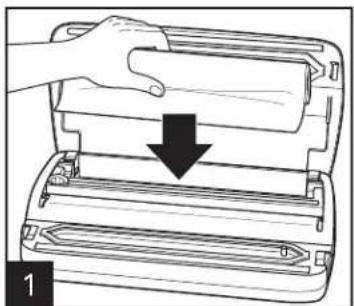
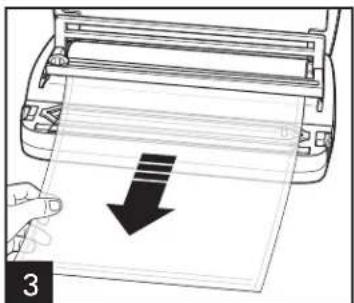
Insert heat-seal roll into roll holder with roll feeding over the top.
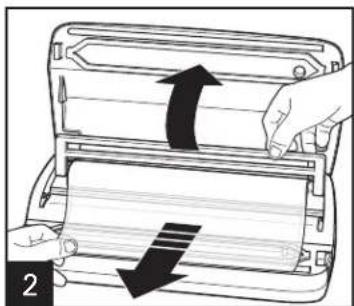
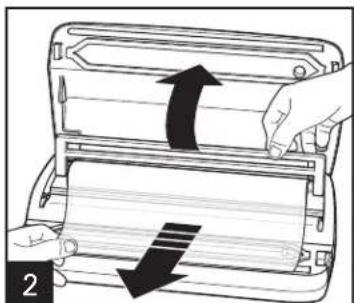
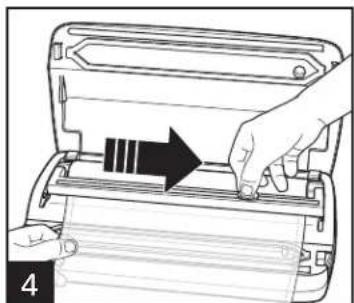
Raise roll cutter bar and pull material under bar; then lower cutter bar.
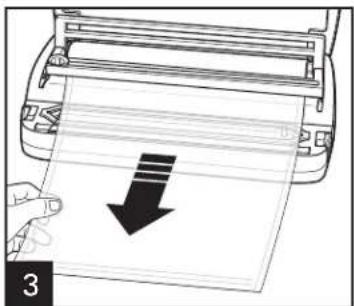
To cut material to form the bag, pull forward enough material for the item to be vacuum-sealed plus another 4 inches (10.2 cm).
CAUTION Burn Hazard. Seal bar is hot. Avoid touching it.
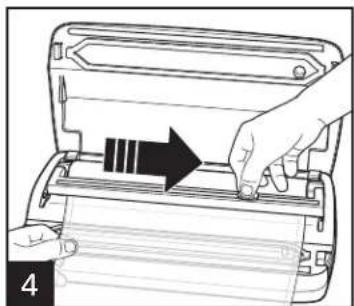
Slide cutter across to cut the bag.
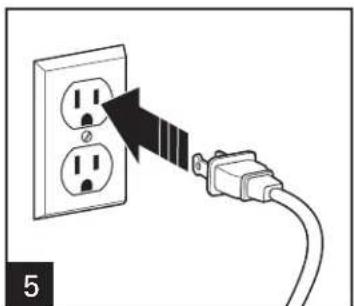
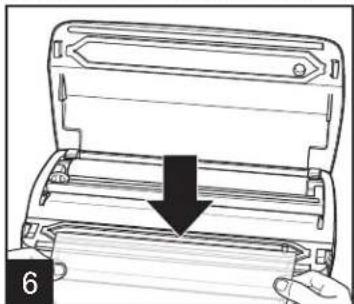
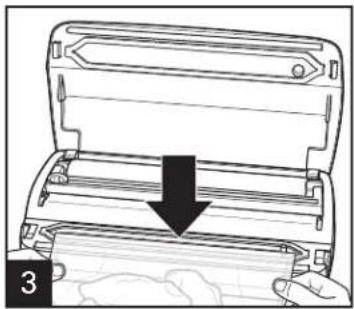
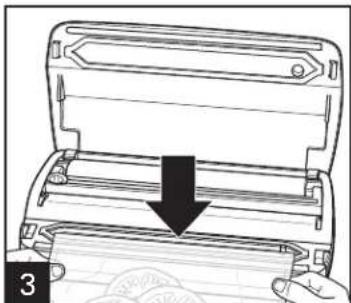
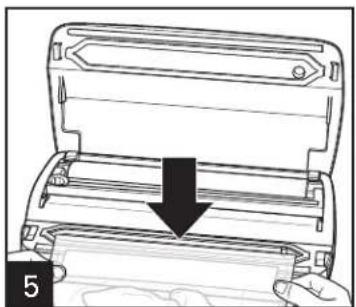
Plug into outlet. Place one open end of bag over heat seal strip and completely within vacuum chamber. For best sealing, place curl side down so end of bag points down into the chamber. Be sure there are no folds or wrinkles.
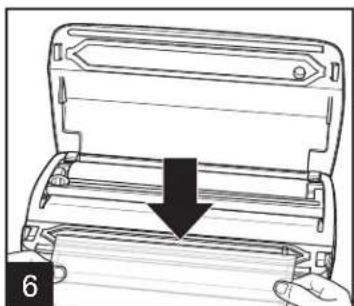
of bag over heat seal strip and For best sealing, place curl side o the chamber. Be sure there are
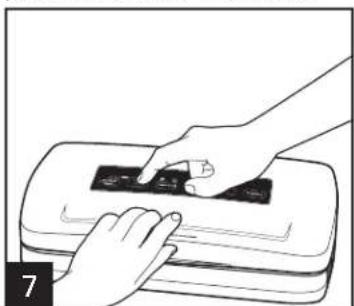
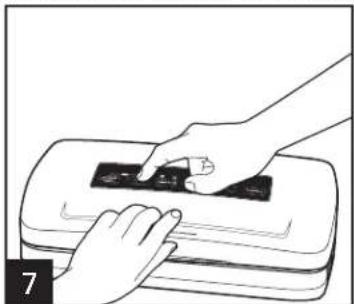
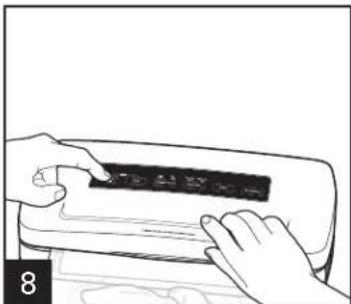
Close the vacuum sealer. Push the Seal button. Press and hold the lid down during sealing or use locks. Red light will illuminate for about 6 seconds indicating the unit is heating the seal. Then, vacuum comes on to allow slight pressure to finish the seal and release the lock.
Making Bags From Rolls (cont.)
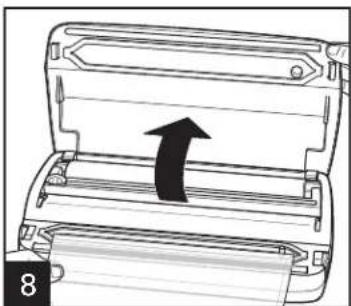
Wait to open the lid until unit beeps and light turns green.
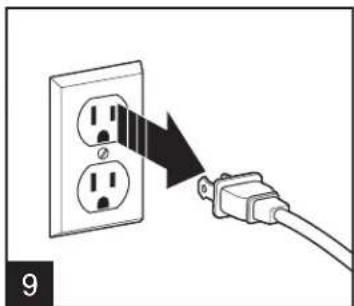
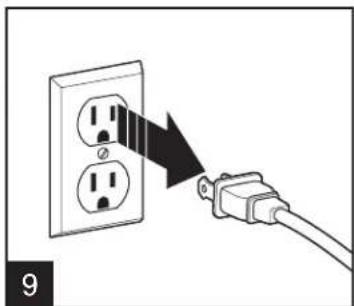
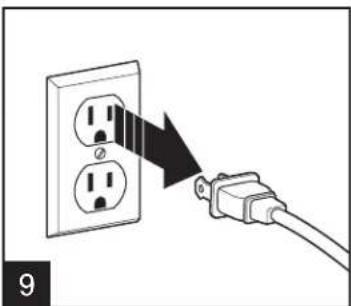
Unplug when finished making bags.
NOTES:
• To prevent overheating, allow 20 seconds between each bag that is sealed.
• To ensure proper seal, keep the lid closed during use.
How to Vacuum-Seal
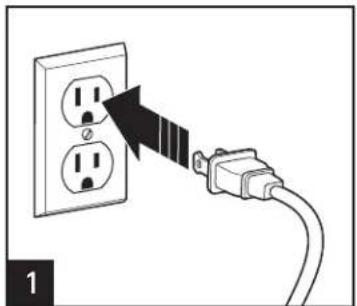
Plug into outlet.

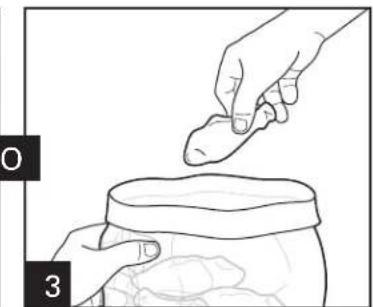
For better sealing, fold over top of bag to keep clean while adding food. Unfold top of bag after filling.
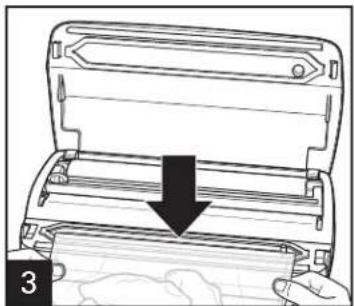
Center the open edge of bag within the vacuum chamber. Ensure entire edge of bag is inside the chamber and bag is flat with no folds or wrinkles.
How to Vacuum-Seal (cont.)
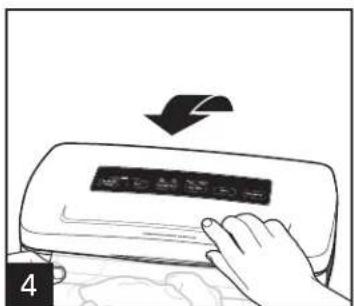
To begin vacuum-seal operation, lower the lid.
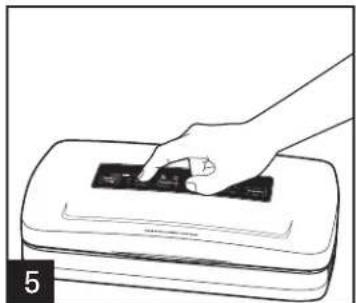
Select Vacuum Level and Seal Time. See page 4 for recommendations.
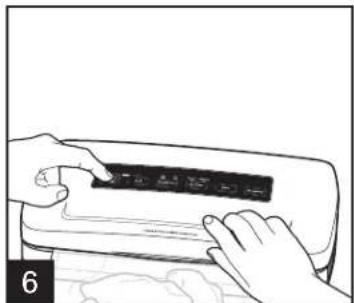
Push the Vac&Seal button. Press down and hold the lid during vacuum-sealing or use locks.
CAUTION Burn Hazard. Seal bar is hot. Avoid touching it.
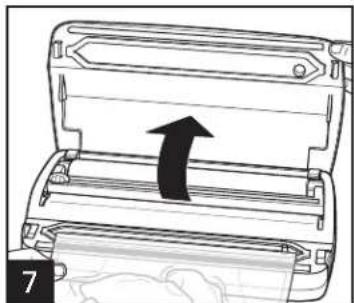
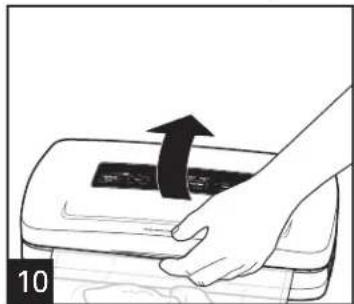
Wait to open the lid until unit beeps and light turns green. Remove the sealed bag.
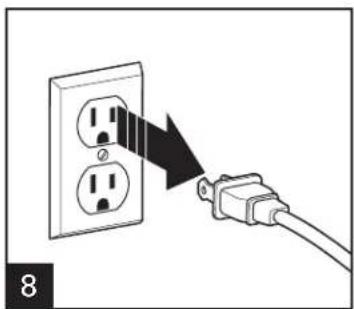
Unplug when finished vacuum-sealing bags.
NOTES:
• To prevent overheating, allow 20 seconds between each bag that is vacuum-sealed.
• To ensure proper seal, keep the lid closed during use.
- Do not let moisture into the vacuum port. This may damage the motor.
How to Vacuum-Seal Fragile Foods or Nonfood Items
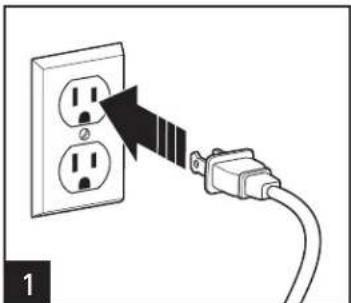
Plug into outlet.
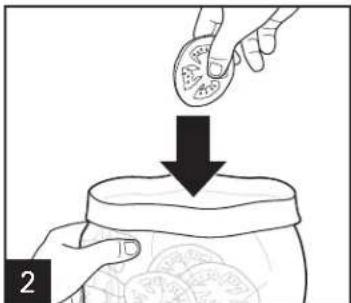
Add fragile food or item to heat-seal bag. Unfold top of bag.
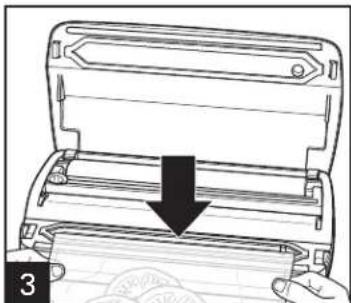
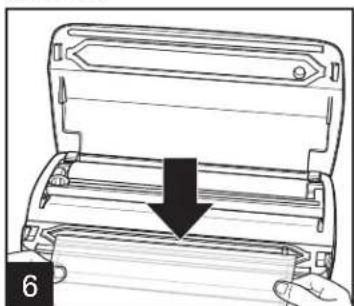
Center open edge of bag within vacuum chamber.
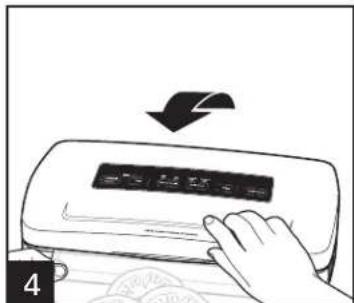
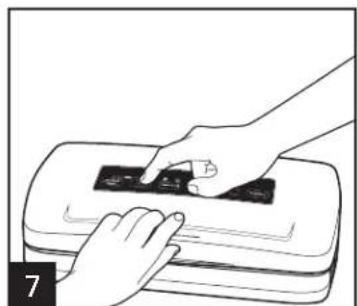
Close the lid and hold down in center or use locks.
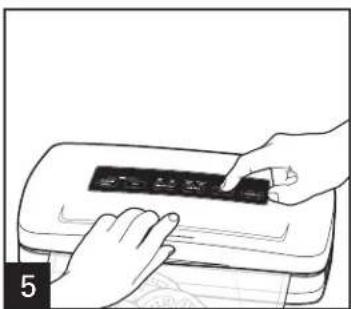
Press and hold Pulse button to vacuum air out of the bag.
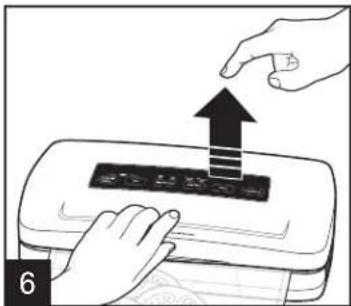
Release Pulse button when desired amount of air is removed.
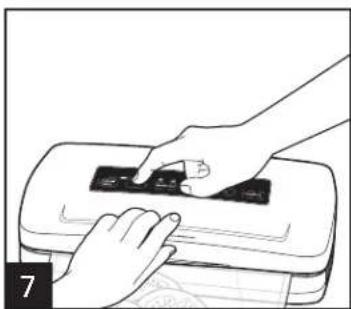
Press Seal button while continuing to hold the lid down. Red light comes on.
How to Vacuum-Seal Fragile Foods or Nonfood Items (cont.)
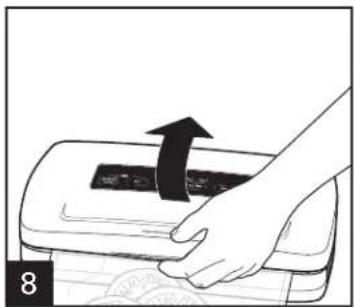
Wait to open the lid until unit beeps and light turns green. Release locks manually by pressing down on corners, if necessary.
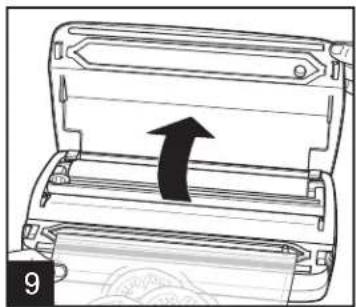
Remove the sealed bag.

Unplug when finished vacuum-sealing bags.
⚠️ CAUTION Burn Hazard. Seal bar is hot. Avoid touching it.
NOTES:
• To prevent overheating, allow 20 seconds between each bag that is vacuum-sealed.
• To ensure proper seal, keep the lid closed during use.
- Do not let moisture into the vacuum port. This may damage the motor.
How to Vacuum-Seal Moist Foods
PREFREEZING: For best results and to prevent accidental entry of fluids into the vacuum sealer, it is best to prefreeze meats, delicate fruits, and baked foods before vacuum-sealing. Prefreeze casseroles, sauces, and soups in plastic containers before vacuum-sealing.
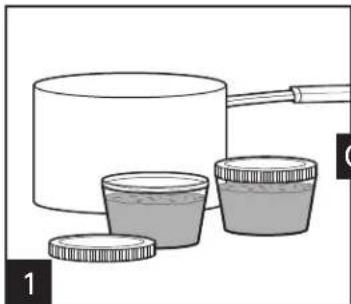
Pour cooled liquids or moist food into freezer-safe containers and freeze.
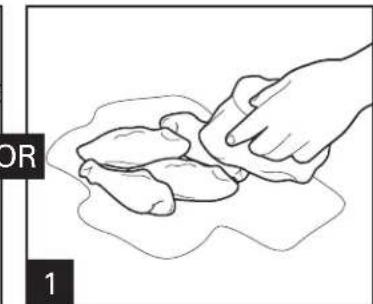
If prefreezing is not practical, dry moist foods with a paper towel before vacuum-sealing.
NOTE: If liquid is drawn into the vacuum port, the unit will no longer work.
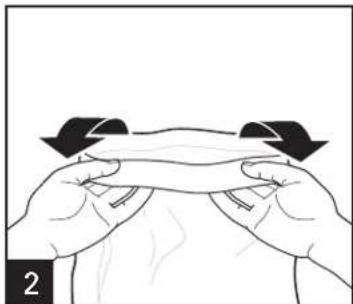
Fold over 1 1/2 inch of the top edge of bag to prevent moisture transfer from food to top surfaces of bag.
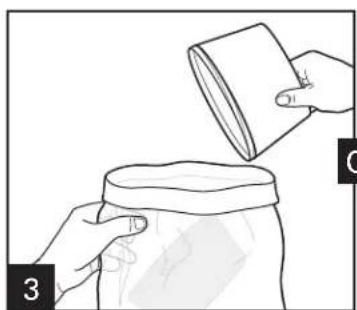
Invert freezer container to remove frozen food. Place frozen food in heat-seal bag. Unfold top of bag.
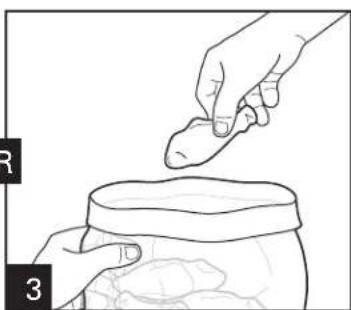
Add food to heat-seal bag. Wipe and dry top 2-inch interior surfaces of the bag with another paper towel. Unfold top of bag after filling. Plug into outlet.
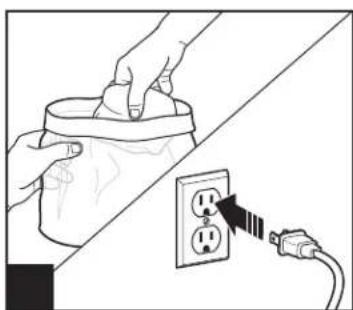
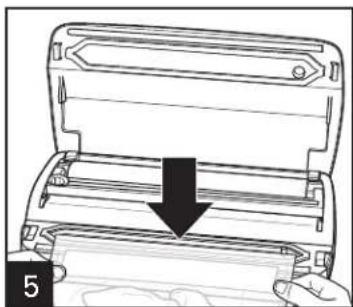
Center open edge within the vacuum chamber. Ensure entire edge of bag is inside the chamber and bag is flat with no folds or wrinkles.
How to Vacuum-Seal Moist Foods (cont.)
⚠️ CAUTION Burn Hazard. Seal bar is hot. Avoid touching it.
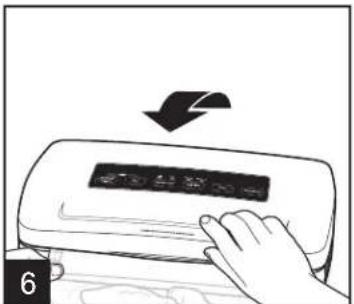
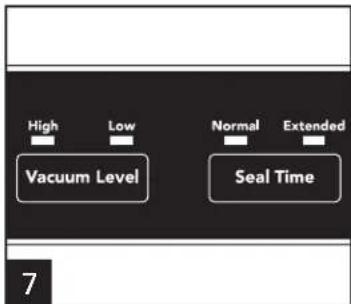
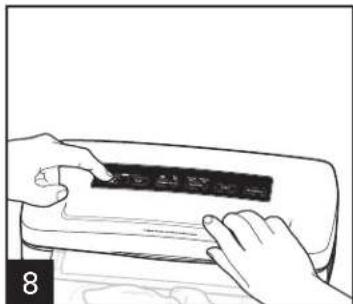
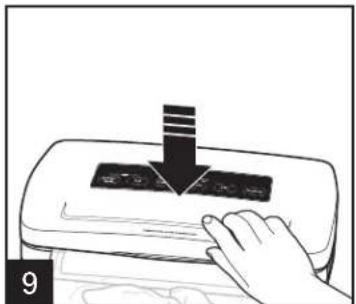
Lower the lid. Press Seal Time button to select Extended Seal Time. This slows and extends the sealing time which is better when sealing moist foods. NOTE: If liquid is drawn into the vacuum port, the unit will no longer work.
Push the Vac&Seal button. Press down and hold the lid during operation or use locks.
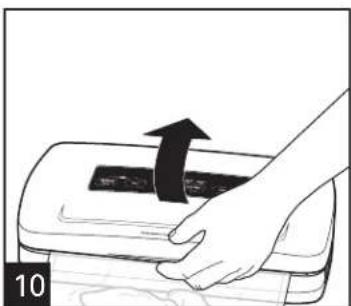
Wait to open the lid until unit beeps and light turns green.
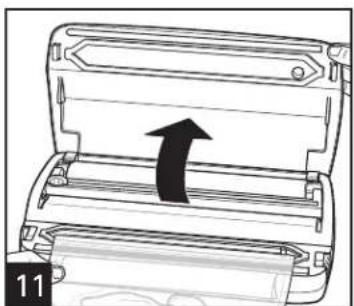
Remove the sealed bag. Unplug when finished vacuum-sealing bags. Store sealed bag in freezer or refrigerator.
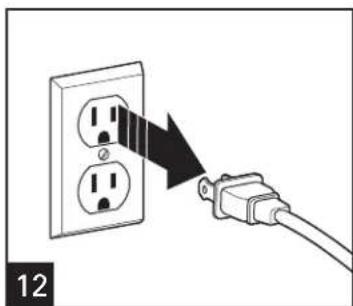
NOTES:
• To prevent overheating, allow 20 seconds between each bag that is vacuum-sealed.
• To ensure proper seal, keep the lid closed during use.
- Do not let moisture into the vacuum port. This may damage the motor.
Care and Cleaning
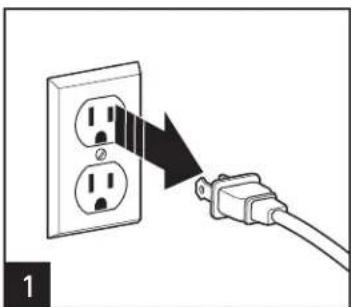
Unplug. Let unit cool completely before cleaning.
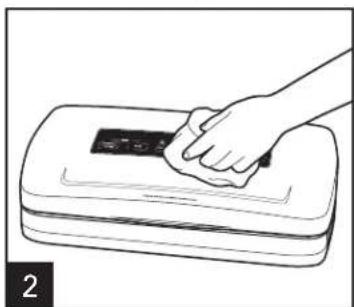
Wipe the outside of the vacuum sealer and vacuum chamber with a damp cloth or paper towel.
WARNING Electrical Shock Hazard:
Before cleaning, assembling, or disassembling the vacuum sealer, make sure the vacuum sealer is unplugged.
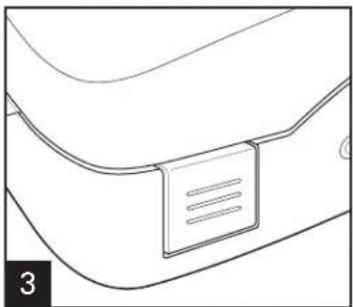
Do not use the locks when
storing. Using the locks for an extended time will damage the vacuum sealer.
Vacuum-Sealing Tips
- Avoid sharp items around heat-seal bags or rolls when vacuum-sealing. Punctured bags will not seal properly.
- Buy foods in bulk and vacuum-seal to save time and money.
- Wash and dry all fruit and vegetables before vacuum-sealing.
- Washed leafy vegetables can be quickly dried with salad spinners.
• To avoid crushing berries when vacuum-sealing, freeze them first. To freeze, wash, dry, and freeze on cookie sheets. Then vacuum-seal frozen berries. - Vegetables such as broccoli, brussels sprouts, carrots, cabbage, cauliflower, green beans, kale, onions, peas, peppers, snap peas, and squash need to be blanched and frozen before vacuum-sealing.
• After defrosting vacuum-sealed meats, poultry, and seafood, cook to a safe internal temperature. - Always cook foods to a safe internal temperature. Foods vacuum-sealed in Weston Bags can be used in sous vide cooking and in water on the stovetop. Contact manufacturer for safety of other bags.
- For food safety information, visit http://www.foodsafety.gov/.
Sous Vide
- Sous vide is a no-fail method of cooking vacuum-sealed food in a precisely temperature-controlled water bath, ensuring that food is evenly cooked throughout and reducing chance of over- or undercooking.
- Use only heat-seal bags made especially for sous vide cooking.
- Follow directions for vacuum-sealing moist foods when preparing meats, fish, and poultry for sous vide. Juices from meat cannot be drawn into the vacuum port or the unit will no longer work.
- Follow recommended sous vide cooking times to ensure optimal results.
Nonfood Tips
- Nonfood items, such as batteries, boating licenses, matches, and passports, can be vacuum-sealed to keep safe when boating, camping, or traveling.
- Keys, utensils, and other sharp or pointed objects can be vacuum-sealed. Make sure to wrap the item in paper towels or some type of cushion before vacuum-sealing.
- For camping, boating, or hiking, be sure to take scissors to open your nonfood items.
Vacuum-Sealing Tips (cont.)
Food Storage Tips
• Always defrost frozen vacuum-sealed foods in the refrigerator.
- Store all vacuum-sealed cooked foods in the refrigerator or freezer.
• Vacuum-sealed bags of coffee beans, crackers, cereal, granola, and nuts can be stored at room temperature.
Troubleshooting
| PROBLEM | PROBABLE CAUSE/SOLUTION |
| My vacuum sealer shut off and won't turn on again. | ·Check power at outlet and then call Customer Service. |
| The sealing bar melts through the bag. | ·Only heat-seal bags should be used. DO NOT USE PLASTIC HOUSEHOLD BAGS with the vacuum sealer.·Bag cut at an angle does not seal. Ensure bag is cut perpendicular to sides.·Unit stored with the lid locked down, gaskets deformed, or overcompressed. Do not store with the lid locked.·Check the condition of the seal bar tape strips. Replace if needed.·Open the lid and allow the sealing bar to cool for 5-10 minutes. Always leave the lid open between bags, and allow at least 20 seconds between cycles. |
| The bag seal pulls apart. | ·The seal of the bag may be incomplete. If the seal has a crease in it, or if a liquid or powder has been trapped between the layers of the bag, the layers may not have been welded together properly. Cut off the seal and wipe the inside of the bag clean. Then, try to vacuum-seal the bag again. |
| The vacuum pump starts, but no air is being removed from the heat-seal bag. | ·Be sure you are either pushing down throughout the vacuum-sealing process or using the locks.·For best results, use Weston heat-seal bags.·Be sure the bag is inserted properly. The open end of the bag should be centered within the vacuum chamber. Be sure the vacuum port is not blocked.·The bag may have a leak. If there is a leak in the bag, air will be pulled into the bag from the outside. Check for tears or punctures. If you are using a bag that was made from a roll of material, double-check that the end of the bag is sealed.·Bag cut at an angle does not seal. Ensure bag is cut perpendicular to sides.·Unit stored with the lid locked down, gaskets deformed, or overcompressed. Do not store with the lid locked. |
| Locks will not engage. | ·Be sure to push down firmly on both corners while attempting to engage latches. |
| Lid will not open. | ·Lid may not have released automatically. Press down on the front lid corners to release locks. |
| No seal was formed. | ·If too many seals were made in rapid succession, the unit may be too hot. Wait 2 minutes and retry. |
| Seal button is pressed but nothing happens. | ·Once Seal button is pressed, the red light comes on indicating that the vacuum sealer is heating to seal the bag. Wait about 6 seconds. The vacuum will come on briefly to finish the seal and release the locks. |
One-Year Limited Weston Warranty
This warranty applies to products purchased and used in the U.S. and Canada. This is the only express warranty for this product and is in lieu of any other any other warranty or condition. This product is warranted to be free from defects in material and workmanship for a period of one (1) year from the date of original purchase. During this period, your exclusive remedy is repair or replacement of this product or any component found to be defective, at our option. If the product or component is no longer available, we will replace with a similar one of equal or greater value.
This warranty does not cover unauthorized repairs or service to products, products sold "as-is" by retailers, glass, filters, wear from normal use, use not in conformity with the printed directions, or damage to the product resulting from accident, alteration, abuse, or misuse. This warranty extends only to the original consumer purchaser or gift recipient and is not transferable. Keep the original sales receipt, as proof of purchase is required to make a warranty claim. This warranty is void if the product is subjected to any voltage and waveform other than as specified on the rating label (e.g., 120V \~ 60 Hz).
We exclude all claims for special, incidental and consequential damages caused by breach of express or implied warranty. All liability is limited to the amount of the purchase price. Every implied warranty, including any statutory warranty or condition of merchantability or fitness for a particular purpose, is disclaimed except to the extent prohibited by law, in which case such warranty or condition is limited to the duration of this written warranty.
This warranty gives you specific legal rights. You may have other legal rights that vary depending on where you live. Some states or provinces do not allow limitations on implied warranties or special, incidental, or consequential damages, so the foregoing limitations may not apply to you. Before returning the product for any repair or service: it must be clean and free from any food particles or other debris; otherwise, we will return it or impose a \$50 cleaning surcharge, at our option.
To make a warranty claim do not return this product to the store: Please go to www.westonsupply.com/; or call 1.800.814.4895 in the U.S. and 001.216.901.6801 outside the U.S., Monday – Friday, 8 am – 5 pm Eastern. You are responsible for all costs associated with shipping us the product freight prepaid. If the product qualifies for a warranty repair or replacement, we will bear the cost of returning it to you. We are not responsible for shipping damage.
For non-warranty work: call 1.800.814.4895 in the U.S. and 1.216.901.6801 outside the U.S., Monday – Friday, 8 am – 5 pm Eastern, to obtain a Return Merchandise Authorization Number (RMA Number). We will refuse all returns without an RMA Number. We charge US\$35/hour for all diagnostic, service, repair and processing work. We will not start any service or repair work without prior authorization. You are responsible for all costs associated with shipping us the product freight prepaid and our returning it to you.
PRÉCAUTIONS IMPORTANTES
Bouton Accessory (Accessoires) :

NOTAS:


- VACUUM SEALER SCELLEUSE SOUS VIDE SELLADORA AL VACÍO
- IMPORTANT SAFEGUARDS
- SAVE THESE INSTRUCTIONS
- OTHER CONSUMER SAFETY INFORMATION
- THIS APPLIANCE IS INTENDED FOR HOUSEHOLD USE ONLY
- PARTS AND FEATURES
- CONTROL PANEL
- VACUUM LEVEL BUTTON
- SEAL TIME BUTTON
- ACCESSORY BUTTON
- BEFORE YOU START VACUUM-SEALING
- MAKING BAGS FROM ROLLS
- MAKING BAGS FROM ROLLS (CONT.)
- NOTES
- HOW TO VACUUM-SEAL
- HOW TO VACUUM-SEAL (CONT.)
- HOW TO VACUUM-SEAL FRAGILE FOODS OR NONFOOD ITEMS
- HOW TO VACUUM-SEAL FRAGILE FOODS OR NONFOOD ITEMS (CONT.)
- HOW TO VACUUM-SEAL MOIST FOODS
- HOW TO VACUUM-SEAL MOIST FOODS (CONT.)
- CARE AND CLEANING
- WARNING ELECTRICAL SHOCK HAZARD
- VACUUM-SEALING TIPS
- SOUS VIDE
- NONFOOD TIPS
- VACUUM-SEALING TIPS (CONT.)
- FOOD STORAGE TIPS
- ONE-YEAR LIMITED WESTON WARRANTY
- PRÉCAUTIONS IMPORTANTES
- BOUTON ACCESSORY (ACCESSOIRES)
- NOTAS
Brand : Weston
Model : 65-3001-W
Category : Vacuum packaging machines