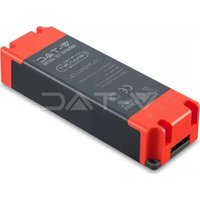
VT-5145 - Smart Home V-TAC - Free user manual and instructions
Find the device manual for free VT-5145 V-TAC in PDF.


| Product Type | Smart Humidity and Temperature Controller |
| Brand | V-TAC |
| Model | VT-5145 |
| Input Voltage | AC 90-250V |
| Maximum Current | 16A |
| Wireless Standard | Wi-Fi 2.4 GHz |
| Housing Material | PC (polycarbonate) |
| Main Functions | Wi-Fi on/off control, compatible with external temperature and humidity sensors (not included), manual and automatic modes, scenes |
| App | V-TAC Smart Home (iOS/Android) |
| Voice Assistant | Amazon Alexa, Google Home |
| Installation Type | Fixed, requires wiring (direct connection to mains) |
| Dimensions (estimated) | Approximately 50 x 50 x 25 mm |
| Weight (estimated) | Approximately 60 g |
| Power Consumption | Less than 1W in standby |
| LED Indicator | Status LED for pairing mode |
| Maintenance and Cleaning | Disconnect before cleaning. Use a soft dry cloth. Do not use abrasive products. |
| Safety | Cut off power before installation. Use a circuit protected by a circuit breaker. |
| Spare Parts | Not provided by the manufacturer. Contact customer service for any repairs. |
| Repairability | Product not repairable by user. Contact a qualified professional. |
| Warranty | 2 years from date of purchase |
| Box Contents | VT-5145 device, user manual |
Frequently Asked Questions - VT-5145 V-TAC
User questions about VT-5145 V-TAC
0 question about this device. Answer the ones you know or ask your own.
Ask a new question about this device
Download the instructions for your Smart Home in PDF format for free! Find your manual VT-5145 - V-TAC and take your electronic device back in hand. On this page are published all the documents necessary for the use of your device. VT-5145 by V-TAC.
USER MANUAL VT-5145 V-TAC
natural_image
Close-up of a black and red electronic device casing with visible branding (no readable text or symbols)

works with the Google Assistant
works with amazon alexa
INTRODUCTION & GARANTIE
2 YEAR WARRANTY*
GOOGLE PLAY
IOS

FAQ
natural_image
Close-up of a red and black electronic component with a blue wire and a blue indicator line, no visible text or symbols.natural_image
Black electrical plug with a terminal connector, shown in a simple line drawing style (no text or symbols)Temperature & Humidity Sensor (Not Included)
natural_image
Coiled black cable with two terminal leads (no text or symbols visible)Temperature Waterproof Probe (Not Included)
Please select a region

Phone number or email address
Password
flowchart
graph TD
    A["Login"] --> B["Register"]
    style A fill:#333,stroke:#000,color:#fff
    style B fill:#fff,stroke:#000,color:#fff

Quick Pairing Mode (Touch)

Power up the model, then press and hold pairing button for 5s until the led indicator blinks twice and on repeatedly.
For LED or humidifier, please repeatedly turn on and off the model for 3 times, the time gap is 2s. The led indicator will blink quickly.

Compatible Pairing Mode(AP)
Next
natural_image
Simple graphic with a black arrow pointing diagonally down-right on a dark blue background (no text or symbols)Image A

Image B
Your content and devices all in one place

natural_image
Abstract geometric shapes including a triangle, circle, and rectangle (no text or symbols)GET STARTED >
b. Choose account
This account will be used to personalize your experience
c. Choose a home
You will be able to control the devices and services in this home.

Create another home
d. Plug in your device
Make sure your device is nearby and connected to power, then try again

Office
1 device

Office Speaker
Pause
b.

Add to Home

Set up device

Add home member

Create speaker group

Create new home
Add services

Music and audio

Videos and photos
Set up new devices or add existing devices and services to your home
New devices

Set up new devices
Google Home, smart displays and devices labelled 'Made for Google' such as C by GE smart bulbs
Works with Google

Have something already set up?
Link your smart home services such as Philips Hue and TP-Link

Account is now Linked
b. ×
Choose device
Log In
Commandes Google:
natural_image
Red and black electronic device casing with visible branding (no readable text or symbols)

works with the Google Assistant
works with amazon alexa
GOOGLE PLAY
IOS

FAQ
natural_image
3D diagram of a red and black electrical component with labeled terminals N and L, showing wiring or connections (no text or symbols beyond labels)natural_image
Black electrical connector with a terminal block and cable (no text or symbols visible)natural_image
Coiled black cable or wire with two terminal connectors (no text or symbols visible)Please select a region

Phone number or email address
Password
flowchart
graph TD
    A["Login"] --> B["Register"]
    style A fill:#333,stroke:#000,color:#fff
    style B fill:#fff,stroke:#000,color:#fff

Quick Pairing Mode (Touch)

Power up the model, then press and hold pairing button for 5s until the led indicator blinks twice and on repeatedly.
For LED or humidifier, please repeatedly turn on and off the model for 3 times, the time gap is 2s. The led indicator will blink quickly.

Compatible Pairing Mode(AP)
Next
natural_image
Simple graphic with a black arrow pointing diagonally down-right on a dark blue background (no text or symbols)Image A
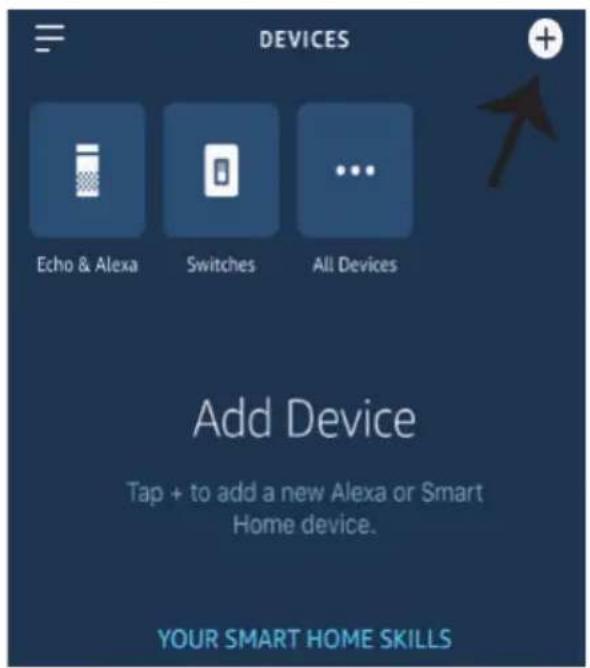
Image B
Your content and devices all in one place

natural_image
Abstract geometric shapes including a triangle, circle, and rectangle (no text or symbols)GET STARTED >
b. Choose account
This account will be used to personalize your experience
c. Choose a home
You will be able to control the devices and services in this home.

Create another home
d. Plug in your device
Make sure your device is nearby and connected to power, then try again

Office
1 device

Office Speaker
Pause
b.

Add to Home

Set up device

Add home member

Create speaker group

Create new home
Add services

Music and audio

Videos and photos
Set up new devices or add existing devices and services to your home
New devices

Set up new devices
Google Home, smart displays and devices labelled 'Made for Google' such as C by GE smart bulbs
Works with Google

Have something already set up?
Link your smart home services such as Philips Hue and TP-Link

Account is now Linked
b. ×
Choose device
Log In
You will be able to control the devices and services in this home.

Smart-Home

Office

Smart Home

Create another home
NEXT >
Master bedroom
1 device
Smart Plug
Off
On

natural_image
Red and black electronic device casing with visible model number VZ-TAC (no text or symbols on body)
works with amazon alexa
works with the Google Assistant
GOOGLE PLAY
IOS
FAQ
natural_image
3D illustration of a red and black electronic component with a blue wire and a light bulb, labeled N and L (no text or symbols on the object itself)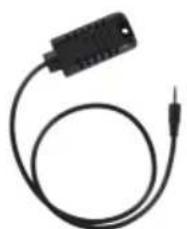
natural_image
Black electrical connector with a terminal pin and cable (no text or symbols visible)Температура и влажност Сензор (не е включен)
natural_image
Coiled black cable with two terminal connectors (no text or symbols visible)Please select a region

Phone number or email address
Password
flowchart
graph TD
    A["Login"] --> B["Register"]
    style A fill:#333,stroke:#fff,color:#fff
    style B fill:#fff,stroke:#000

Quick Pairing Mode (Touch)

Power up the model, then press and hold pairing button for 5s until the led indicator blinks twice and on repeatedly.
For LED or humidifier, please repeatedly turn on and off the model for 3 times, the time gap is 2s. The led indicator will blink quickly.

Compatible Pairing Mode(AP)
Next
natural_image
Blue background with a black arrow pointing diagonally downward to the left (no text or symbols)V-TAC has been successfully linked.
What to do next:
→ Close this window to discover smart-home devices you can control with Alexa.

b) Discover Devices
Smart Home devices must be discovered before they can be used with Alexa.
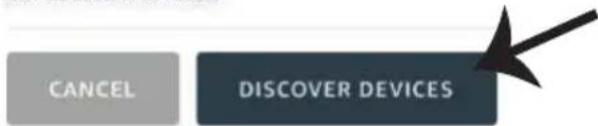
Image A
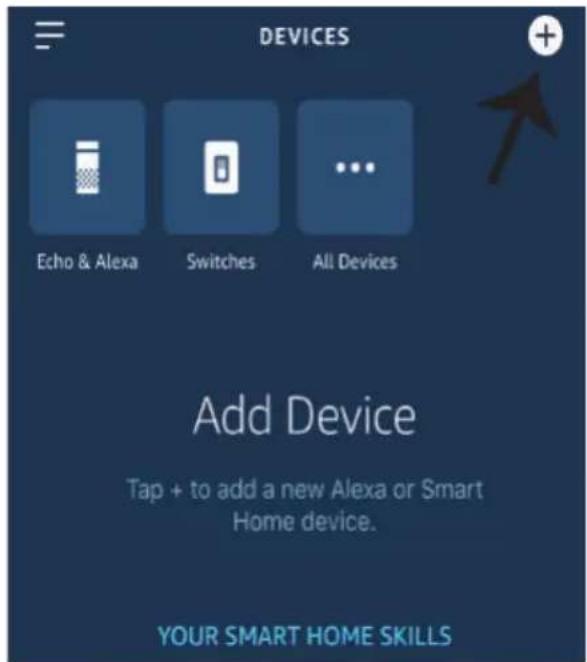
Image B
Your content and devices all in one place

natural_image
Abstract geometric shapes including a triangle, circle, and rectangle (no text or symbols)GET STARTED >
b. Choose account
This account will be used to personalize your experience
c. Choose a home
You will be able to control the devices and services in this home.

Create another home
d. Plug in your device
Make sure your device is nearby and connected to power, then try again

Office
1 device

Office Speaker
Pause
b.

Add to Home

Set up device

Add home member

Create speaker group

Create new home
Add services

Music and audio

Videos and photos
Set up new devices or add existing devices and services to your home
New devices

Set up new devices
Google Home, smart displays and devices labelled 'Made for Google' such as C by GE smart bulbs
Works with Google

Have something already set up?
Link your smart home services such as Philips Hue and TP-Link

Account is now Linked
b. ×
Choose device
You will be able to control the devices and services in this home.

Smart-Home

Office

Smart Home

Create another home
NEXT >
Master bedroom
1 device
Smart Plug
Off
On

natural_image
Red and black electronic device casing with visible branding (no readable text or symbols)

works with the Google Assistant
works with amazon alexa
UVOD I JAMSTVO
2 YEAR WARRANTY*
GOOGLE PLAY
IOS

FAQ
Napomena: U slučaju problema molimo skenirajte FAQ barkod, a ako želite priručnik s uputama na drugom jeziku skenirajte barkod višejezičnog priručnika (Multi-Language Manual).
Ožičenje
natural_image
Red and black electronic component with a light bulb and labeled terminals (N and L), no readable text or symbols beyond labels.natural_image
Black electrical connector with a terminal and cable (no text or symbols visible)Temperatura i vlažnost Senzor (nije uključen)
natural_image
Coiled black cable or wire with two terminal connectors (no text or symbols visible)Temperatura Vodootporna Sonda (nije uključena)
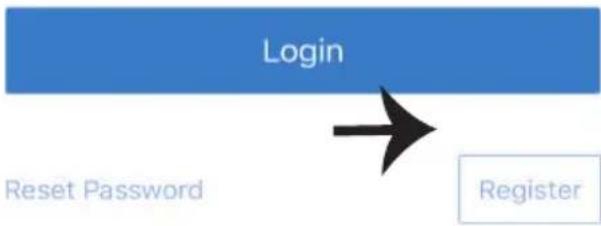
Korak 1: Otvorite aplikaciju V-TAC Smart Home App i registrirajte se. Ako već imate otvoren račun za V-TAC Smart Home, jednostavno se prijavite.
Please select a region

Phone number or email address
Password
flowchart
graph TD
    A["Login"] --> B["Register"]
    style A fill:#333,stroke:#000,color:#fff
    style B fill:#fff,stroke:#000,color:#fff
Korak 3: Provjerite da li je Vaš pametni uređaj napunjen.
1) Pritisnite i zadržite gumb Power na 6 sekundi da biste uključili uređaj u Režim za uparivanje. Kada je režim za uparivanje uključen, LED će početi svjetlucati 3 puta uzastopno.
2) Pritisnite "Dalje" za uparivanje uređaja i aplikacije. (Vidite sliku)
Napomena: Ako imate bilo kakvih problema za vrijeme uparivanja u režimu Brzog uparivanja (Quick Pairing), molimo pokušajte upariti uređaj u režimu Kompatibilnog uparivanja (Compatible Pairing) (Pritisnite na vezu kao što je ukazano na slici).

Quick Pairing Mode (Touch)

Power up the model, then press and hold pairing button for 5s until the led indicator blinks twice and on repeatedly.
For LED or humidifier, please repeatedly turn on and off the model for 3 times, the time gap is 2s. The led indicator will blink quickly.

Compatible Pairing Mode(AP)
Next
Temperature Humidifier, može se koristiti kao normalan Wifi Switch (On / Off) i također može biti spojeni s osjetnicima temperature sonde (nisu uključeni) za otkrivanje temperature i Humidity. Napomena: Vrijednost temperature prikazuje se na APP samo kada Povezani su senzori (nisu uključeni)
Funkcije povezivanja senzora: Kada je uređaj spojen sa senzorom i uparen s APP-om prikazat će vrijednosti temperature i vlažnosti, a može se postaviti na automatski način rada.
Korak 3: Na domaćoj stranici aplikacije Amazon Alexa, pritisnite na ikonu na način prikazan na slici ispod.
natural_image
Simple graphic with a black arrow pointing diagonally down-right on a dark blue background (no text or symbols)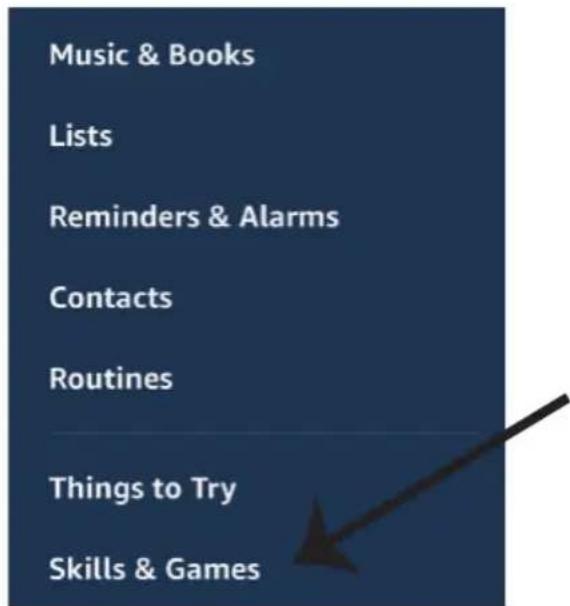
Korak 5: U traci za pretraživanje upišite "VTAC" kao što je prikazano dolje, te kliknite na V-TAC vještinu (vidite sliku).
Korak 7: Unesite vjerodajnice za V-TAC Smart Home, zatim kliknite na Prijavu (Log In). Ako nemate otvoren račun, registrirajte se na "Registracija" (Register).
Korak 6: Kliknite na Prihvati vještinu (Enable Skill) za povezivanje V-TAC Smart Home aplikacije s Amazon Alexa.
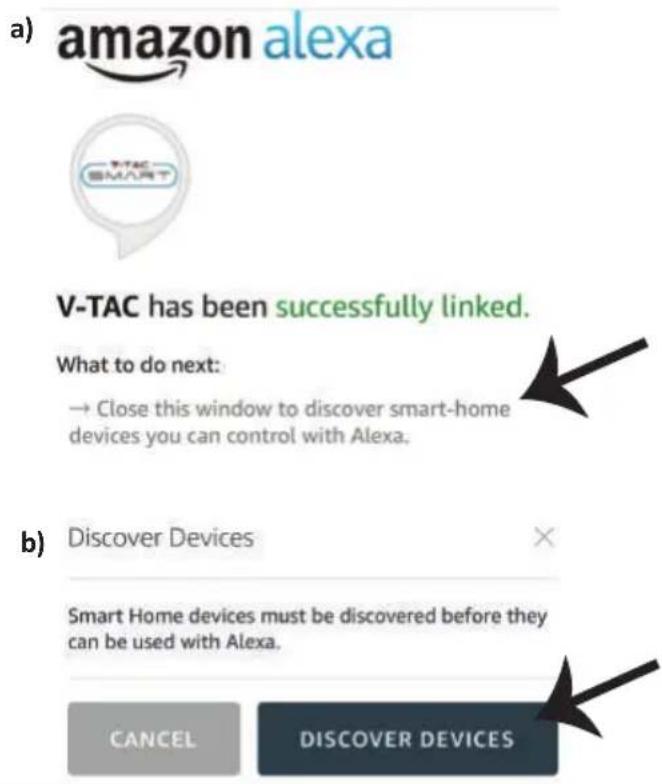
Korak 8: a) Kada ste uspješno povezali V-TAC vještinu, zatvorite prozor te & (b) kliknite na Pronadi uređaj. Provjerite da li je pametni uređaj uparen s V-TAC Smart Home aplikacijom.
Korak 9: Pronađite svoj pametni uređaj na Alexa. Možete reći “Alexa pronadí uređaje” Alexa-ino, uređaju koji imate. (ILI) možete dodati nove uređaje ručno s domaće stranice Amazon Alexa, gdje trebate kliknuti na ikonu (Ref: slika A) & kliknuti na “+” dodaj novi uređaj (Ref: Slika B). Čim pronađete uređaj moći ćete kontrolirati svoj pametni uređaj pomoću Alexa.
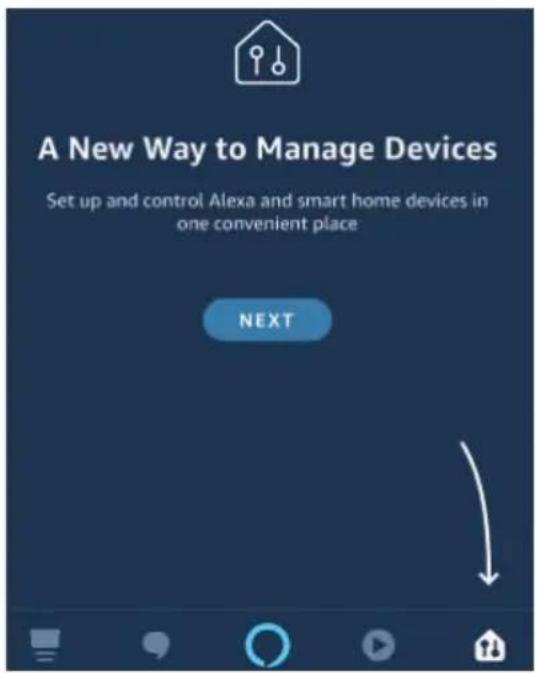
Image A
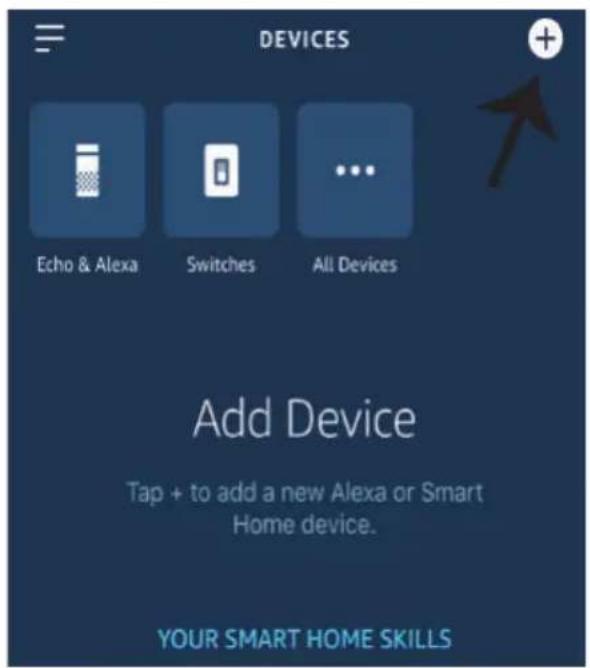
Image B
Your content and devices all in one place

natural_image
Abstract geometric shapes including a triangle, circle, and rectangle (no text or symbols)GET STARTED >
b. Choose account
This account will be used to personalize your experience
c. Choose a home
You will be able to control the devices and services in this home.

Create another home
d. Plug in your device
Make sure your device is nearby and connected to power, then try again

Korak 2: Kada uđete u Googlovu domaću stranicu, kliknite na ikonu Dodaj “+” – za dodavanje novog uređaja i vještine. Zatim pritisnite Postavi uređaj kao što je prikazano na slici ispod.
a.

Play

Broadcast

Add

Settings
Office
1 device

Office Speaker
Pause
b.

Add to Home

Set up device

Add home member

Create speaker group

Create new home
Add services

Music and audio

Videos and photos
Korak 3: Provjerite da li je Smart Device uparen s aplikacijom V-TAC Smart Homeprije nego što napravite korak 3.
Kliknite na strelicu kao što je ukazano na slici ispod.
Set up
Set up new devices or add existing devices and services to your home
New devices

Set up new devices
Google Home, smart displays and devices labelled 'Made for Google' such as C by GE smart bulbs
Works with Google

Have something already set up?
Link your smart home services such as Philips Hue and TP-Link

Korak 5: Prijavite se sa svojim V-TAC Smart Home Login vjerodajnicama da biste povezali Smart Home uređaj.

Korak 4: Upišite "Vtac" u traku za pretraživanje i pritisnite ikonu s padajućeg izbornika VTA Smart opcija. (Vidite sliku ispod).

Vtac


Add new

VTAC Smart

Korak 6:
Account is now Linked
b. ×
Choose device
Log In
You will be able to control the devices and services in this home.

Smart-Home

Office

Smart Home

Create another home
NEXT >
Smart-Home
Add
Settings
Master bedroom
1 device

Smart Plug
Off
On

natural_image
Exterior view of a black and red electronic device casing (no visible text or symbols)

works with the Google Assistant
works with amazon alexa
GOOGLE PLAY
IOS

FAQ
natural_image
Illustration of a red and black electronic device with labeled terminals N and L, showing wiring or connection lines (no readable text or symbols beyond labels)natural_image
Black electrical connector with a terminal and cable (no text or symbols visible)natural_image
Coiled black cable or wire with two terminal connectors (no text or symbols visible)Please select a region

Phone number or email address
Password
flowchart
graph TD
    A["Login"] --> B["Register"]
    style A fill:#333,stroke:#000,color:#fff
    style B fill:#fff,stroke:#000,color:#fff

Quick Pairing Mode (Touch)

Power up the model, then press and hold pairing button for 5s until the led indicator blinks twice and on repeatedly.
For LED or humidifier, please repeatedly turn on and off the model for 3 times, the time gap is 2s. The led indicator will blink quickly.

Compatible Pairing Mode(AP)
Next
natural_image
Simple graphic with a black arrow pointing left and a horizontal line, no text or symbols present.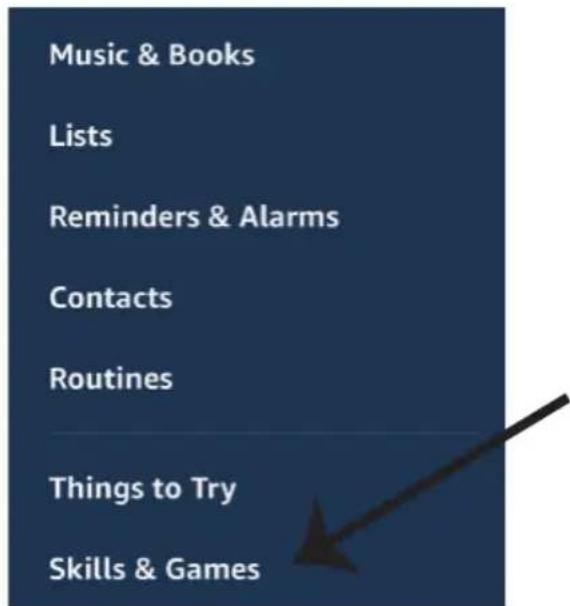
Image A
Your content and devices all in one place

natural_image
Abstract geometric shapes including a square, circle, and triangle (no text or symbols)GET STARTED >
b. Choose account
This account will be used to personalize your experience
c. Choose a home
You will be able to control the devices and services in this home.

Create another home
d. Plug in your device
Make sure your device is nearby and connected to power, then try again

Office
1 device

Office Speaker
Pause
b.

Add to Home

Set up device

Add home member

Create speaker group

Create new home
Add services

Music and audio

Videos and photos
Set up new devices or add existing devices and services to your home
New devices

Set up new devices
Google Home, smart displays and devices labelled 'Made for Google' such as C by GE smart bulbs
Works with Google

Have something already set up?
Link your smart home services such as Philips Hue and TP-Link

Account is now Linked
b. ×
Choose device
You will be able to control the devices and services in this home.

Smart-Home

Office

Smart Home

Create another home
Smart-Home
Add
Settings
Master bedroom
1 device

Smart Plug
Off
On

natural_image
Red and black electronic device casing with visible model number V-TAC (no text or symbols on body)

works with the Google Assistant
works with amazon alexa
BEVEZETÉS ÉS GARANCIA
2 YEAR WARRANTY*
GOOGLE PLAY
IOS

FAQ
natural_image
Red and black electronic device with a blue wire and a light bulb, labeled N and L (no text or symbols on the device body)natural_image
Black electrical connector with a terminal plug, shown in a simple line drawing style (no text or symbols)natural_image
Coiled black cable or wire with two terminal connectors (no text or symbols visible)Please select a region

Phone number or email address
Password
flowchart
graph TD
    A["Login"] --> B["Register"]
    style A fill:#333,stroke:#fff,color:#fff
    style B fill:#fff,stroke:#000
There are no devices paired."Tap the add" device button below to begin pairing devices


Quick Pairing Mode (Touch)

Power up the model, then press and hold pairing button for 5s until the led indicator blinks twice and on repeatedly.
For LED or humidifier, please repeatedly turn on and off the model for 3 times, the time gap is 2s. The led indicator will blink quickly.

Compatible Pairing Mode(AP)
Next
natural_image
Simple graphic with a black arrow pointing diagonally down-right on a dark blue background (no text or symbols)Image A
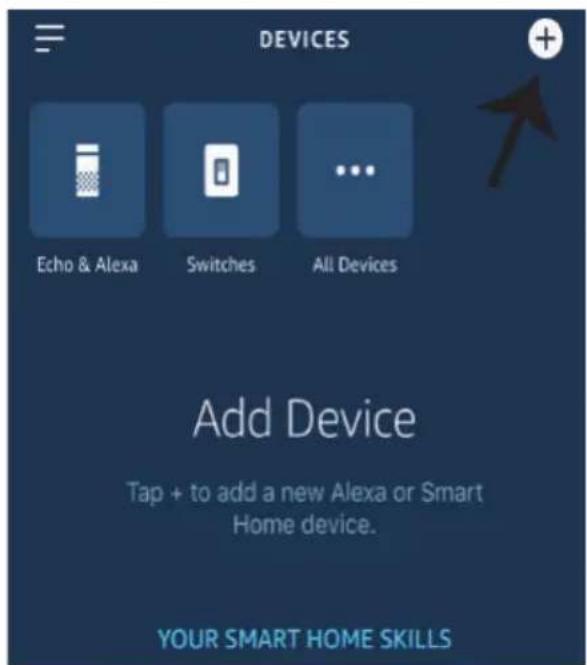
Image B
Your content and devices all in one place

natural_image
Abstract geometric shapes including a triangle, circle, and rectangle (no text or symbols)GET STARTED >
b. Choose account
This account will be used to personalize your experience
c. Choose a home
You will be able to control the devices and services in this home.

Create another home
d. Plug in your device
Make sure your device is nearby and connected to power, then try again

Office
1 device

Office Speaker
Pause
b.

Add to Home

Set up device

Add home member

Create speaker group

Create new home
Add services

Music and audio

Videos and photos
Set up new devices or add existing devices and services to your home
New devices

Set up new devices
Google Home, smart displays and devices labelled 'Made for Google' such as C by GE smart bulbs
Works with Google

Have something already set up?
Link your smart home services such as Philips Hue and TP-Link

Account is now Linked
b. ×
Choose device
You will be able to control the devices and services in this home.

Smart-Home

Office

Smart Home

Create another home
NEXT >
natural_image
Red and black electronic device casing with visible model number 120 (no text or symbols on body)

works with the Google Assistant
works with amazon alexa
GOOGLE PLAY
IOS

FAQ
natural_image
3D illustration of a red and black electronic component with labeled axes (N, L) and a central symbol, no readable text or symbols beyond labels.natural_image
Black cable with a rectangular connector and a terminal pin, no visible text or symbolsnatural_image
Coiled black cable with two terminal connectors (no text or symbols visible)Please select a region

Phone number or email address
Password
flowchart
graph TD
    A["Login"] --> B["Register"]
    style A fill:#0066cc,stroke:#333
    style B fill:#fff,stroke:#333

Quick Pairing Mode (Touch)

Power up the model, then press and hold pairing button for 5s until the led indicator blinks twice and on repeatedly.
For LED or humidifier, please repeatedly turn on and off the model for 3 times, the time gap is 2s. The led indicator will blink quickly.

Compatible Pairing Mode(AP)
Next
natural_image
Simple graphic with a black arrow pointing diagonally down-right on a dark blue background (no text or symbols)Image A
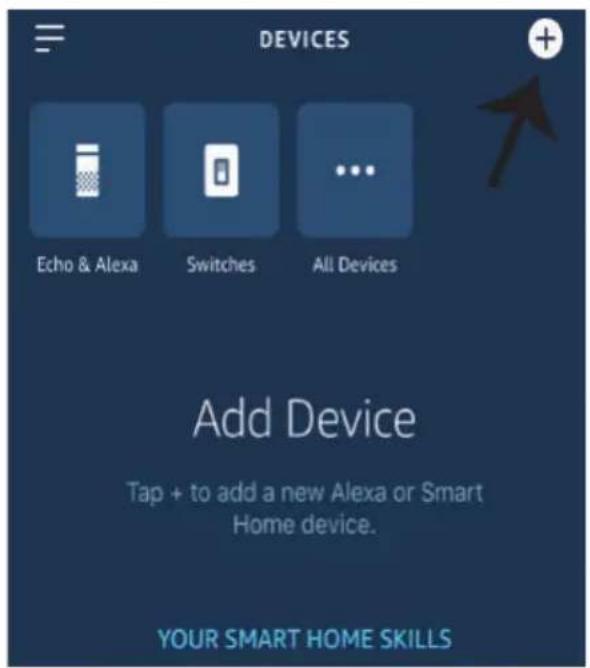
Image B
Your content and devices all in one place

natural_image
Abstract geometric shapes including a triangle, circle, and rectangle (no text or symbols)GET STARTED >
b. Choose account
This account will be used to personalize your experience
c. Choose a home
You will be able to control the devices and services in this home.

Create another home
d. Plug in your device
Make sure your device is nearby and connected to power, then try again

Office
1 device

Office Speaker
Pause
b.

Add to Home

Set up device

Add home member

Create speaker group

Create new home
Add services

Music and audio

Videos and photos
Set up new devices or add existing devices and services to your home
New devices

Set up new devices
Google Home, smart displays and devices labelled 'Made for Google' such as C by GE smart bulbs
Works with Google

Have something already set up?
Link your smart home services such as Philips Hue and TP-Link

Account is now Linked
b. ×
Choose device
Log In
You will be able to control the devices and services in this home.

Smart-Home

Office

Smart Home

Create another home
NEXT >
Master bedroom
1 device
Smart Plug
Off
On

natural_image
Red and black electronic device casing with visible model number 120 and certification marks (no readable text beyond branding)

works with the Google Assistant
works with amazon alexa
INTRODUCERE, GARANTIA
2 YEAR WARRANTY*
GOOGLE PLAY
IOS
FAQ
natural_image
3D illustration of a red and black electronic component with labeled terminals N and L, showing wiring or connection lines (no readable text or symbols beyond labels)natural_image
Black cable with a rectangular connector and a terminal pin, isolated on white background (no text or symbols)natural_image
Coiled black cable with two terminal leads, no text or symbols visiblePlease select a region
Phone number or email address
Password
Login
Reset Password
Register

Quick Pairing Mode (Touch)

Power up the model, then press and hold pairing button for 5s until the led indicator blinks twice and on repeatedly.
For LED or humidifier, please repeatedly turn on and off the model for 3 times, the time gap is 2s. The led indicator will blink quickly.

Compatible Pairing Mode(AP)
Next
natural_image
Simple graphic with a black arrow pointing diagonally down-right on a dark blue background (no text or symbols)Image A
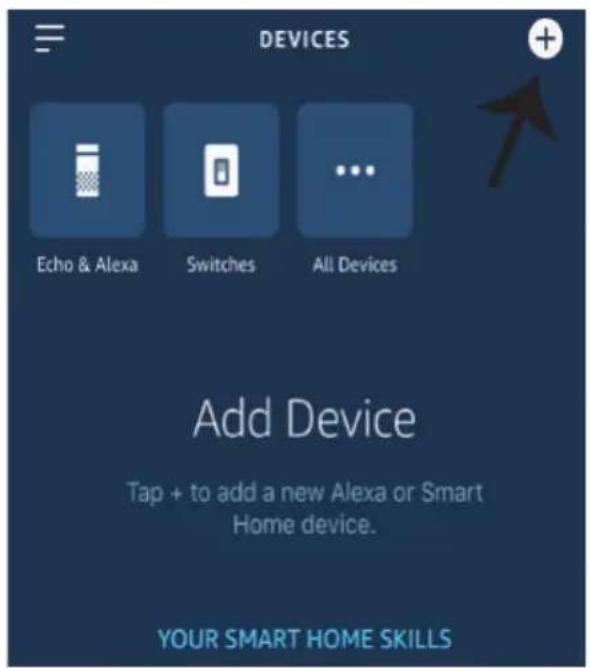
Image B
Your content and devices all in one place

natural_image
Abstract geometric shapes including a triangle, circle, and rectangle (no text or symbols)GET STARTED >
b. Choose account
This account will be used to personalize your experience
c. Choose a home
You will be able to control the devices and services in this home.

Create another home
d. Plug in your device
Make sure your device is nearby and connected to power, then try again

Create speaker group

Create new home
Add services

Music and audio

Videos and photos
Set up new devices or add existing devices and services to your home
New devices

Set up new devices
Google Home, smart displays and devices labelled 'Made for Google' such as C by GE smart bulbs
Works with Google

Have something already set up?
Link your smart home services such as Philips Hue and TP-Link

Account is now Linked
b. ×
Choose device

Log In
Comenzile Google:
natural_image
Red and black electronic device casing with visible model number V-TAC (no text or symbols on body)

works with the Google Assistant
works with amazon alexa
ΕΙΣΑΓΩΓΗ - ΕΓΓΥΗΣΗ
2 YEAR WARRANTY*
GOOGLE PLAY
IOS

FAQ
natural_image
3D illustration of a red and black electronic component with a blue wire and labeled terminals (N, L), no readable text or symbols beyond labels.natural_image
Black cable with a rectangular connector and a terminal pin, no visible text or symbolsnatural_image
Coiled black cable or wire with two terminal connectors (no text or symbols visible)Please select a region

Phone number or email address
Password
flowchart
graph TD
    A["Login"] --> B["Register"]
    style A fill:#333,stroke:#000,color:#fff
    style B fill:#fff,stroke:#000,color:#fff

Quick Pairing Mode (Touch)

Power up the model, then press and hold pairing button for 5s until the led indicator blinks twice and on repeatedly.
For LED or humidifier, please repeatedly turn on and off the model for 3 times, the time gap is 2s. The led indicator will blink quickly.

Compatible Pairing Mode(AP)
Next
natural_image
Simple graphic with a black arrow pointing diagonally down-right on a dark blue background (no text or symbols)Image A
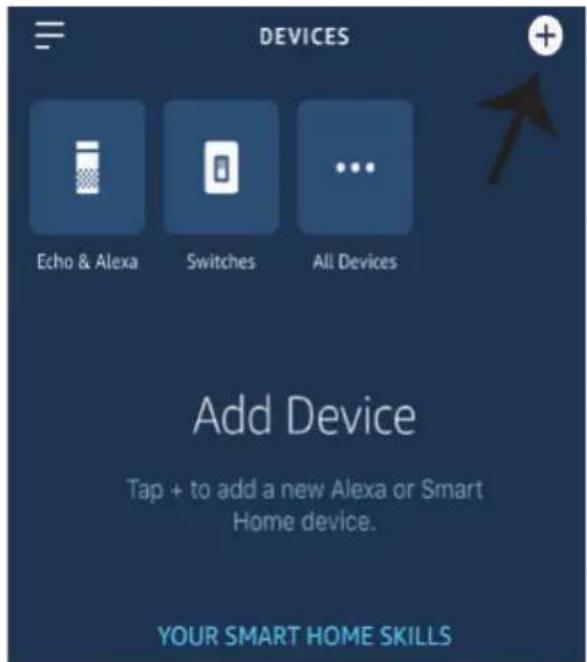
Image B
Your content and devices all in one place

natural_image
Abstract geometric shapes including a triangle, circle, and rectangle (no text or symbols)GET STARTED >
b. Choose account
This account will be used to personalize your experience
c. Choose a home
You will be able to control the devices and services in this home.

Create another home
d. Plug in your device
Make sure your device is nearby and connected to power, then try again

Office
1 device

Office Speaker
Pause
b.

Add to Home

Set up device

Add home member

Create speaker group

Create new home
Add services

Music and audio

Videos and photos
Set up new devices or add existing devices and services to your home
New devices

Set up new devices
Google Home, smart displays and devices labelled 'Made for Google' such as C by GE smart bulbs
Works with Google

Have something already set up?
Link your smart home services such as Philips Hue and TP-Link

Account is now Linked
b. ×
Choose device
NEXT >
Smart Plug
Master bedroom
Google εντολές:
natural_image
Red and black electronic device casing with visible model number V-TAC (no text or symbols on body)

works with the Google Assistant
works with amazon alexa
WSTĘP I GWARANCJA
2 YEAR WARRANTY*
GOOGLE PLAY
IOS

FAQ
natural_image
Red and black electronic component with a blue wire and a blue indicator light, labeled N and L (no text or symbols on the component itself)natural_image
Black electrical connector with a terminal pin, shown in a coiled cable (no text or symbols visible)natural_image
Coiled black cable or wire with two terminal connectors (no text or symbols visible)Please select a region

Phone number or email address
Password
flowchart
graph TD
    A["Login"] --> B["Register"]
    style A fill:#333,stroke:#fff,color:#fff
    style B fill:#fff,stroke:#000

Quick Pairing Mode (Touch)

Power up the model, then press and hold pairing button for 5s until the led indicator blinks twice and on repeatedly.
For LED or humidifier, please repeatedly turn on and off the model for 3 times, the time gap is 2s. The led indicator will blink quickly.

Compatible Pairing Mode(AP)
Next
Sensor Connection Functions: Once your device is connected with the sensor and paired with the APP itwill display temperature and humidity values, and it can be set to Auto mode.Scene Mode: You can use V-TACs Temperature Humidity Scheduler to collect temperature value and set a temperature to turn on/off several types of other switches (such as V-TACs Smart Plug, Smart Power Strip etc) Example: You can set a condition stating when the temperature reaches 24 degrees turn on the smart Plug. Note: The V-TACsTemperature Humidity Scheduler should be in manual mode, not auto mode. When the real-time temperature is across the preset temperature range, it will trigger the condition.
USTAWIENIA ALEXA
natural_image
Simple graphic with a black arrow pointing diagonally down-right on a dark blue background (no text or symbols)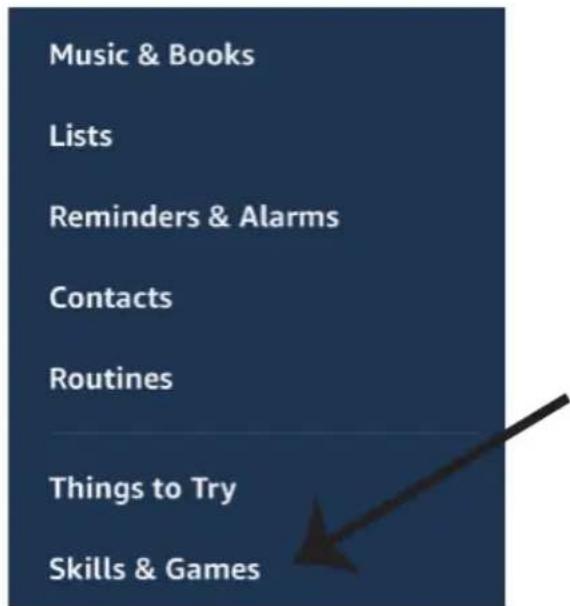
Image A
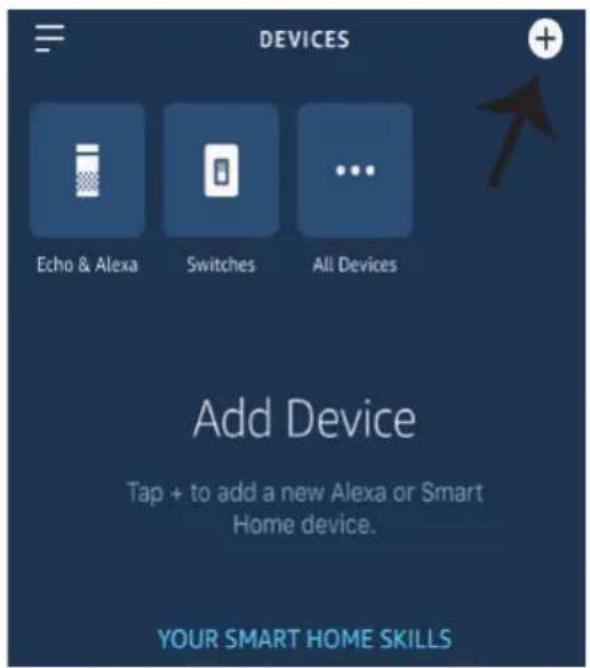
Image B
Your content and devices all in one place

natural_image
Abstract geometric shapes including a triangle, circle, and rectangle (no text or symbols)GET STARTED >
b. Choose account
This account will be used to personalize your experience
c. Choose a home
You will be able to control the devices and services in this home.

Create another home
d. Plug in your device
Make sure your device is nearby and connected to power, then try again

Office
1 device

Office Speaker
Pause
b.

Add to Home

Set up device

Add home member

Create speaker group

Create new home
Add services

Music and audio

Videos and photos
Set up new devices or add existing devices and services to your home
New devices

Set up new devices
Google Home, smart displays and devices labelled 'Made for Google' such as C by GE smart bulbs
Works with Google

Have something already set up?
Link your smart home services such as Philips Hue and TP-Link

Account is now Linked
b. ×
Choose device
You will be able to control the devices and services in this home.

Smart-Home

Office

Smart Home

Create another home
Smart-Home

Add
Settings
Master bedroom
1 device
Smart Plug
Off
On

natural_image
Red and black electronic device casing with visible terminal labels (no readable text or symbols)

works with the Google Assistant
works with amazon alexa
INTRODUCTION & GARANTIE
2 YEAR WARRANTY*
GOOGLE PLAY
IOS

FAQ
natural_image
3D illustration of a red and black electronic device with a light bulb and labeled terminals (N and L), no text or symbols present.natural_image
Black electrical connector with a terminal and cable (no text or symbols visible)Temperature & Humidity Sensor (Not Included)
natural_image
Coiled black cable with two terminal connectors (no text or symbols visible)Temperature Waterproof Probe (Not Included)
Please select a region
Phone number or email address
Password
flowchart
graph TD
    A["Login"] --> B["Register"]
    style A fill:#333,stroke:#000,color:#fff
    style B fill:#fff,stroke:#000,color:#fff

Quick Pairing Mode (Touch)

Power up the model, then press and hold pairing button for 5s until the led indicator blinks twice and on repeatedly.
For LED or humidifier, please repeatedly turn on and off the model for 3 times, the time gap is 2s. The led indicator will blink quickly.

Compatible Pairing Mode(AP)
Next
natural_image
Simple graphic with a black arrow pointing diagonally down-right on a dark blue background (no text or symbols)Image A
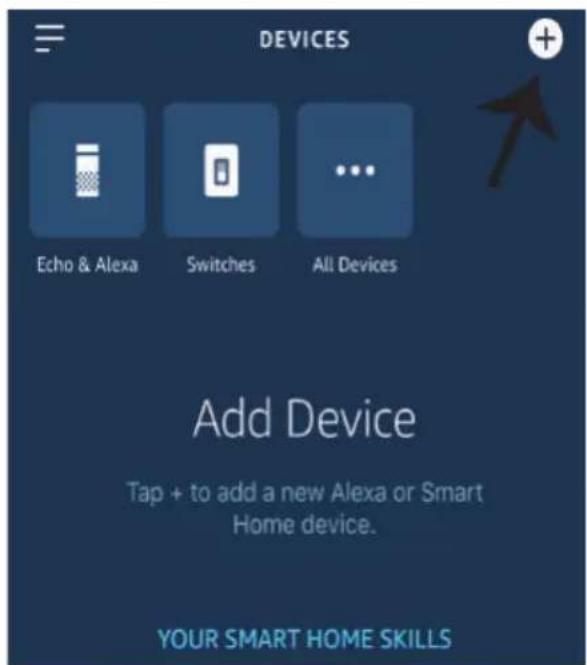
Image B
Your content and devices all in one place

natural_image
Abstract geometric shapes including a triangle, circle, and rectangle (no text or symbols)GET STARTED >
b. Choose account
This account will be used to personalize your experience
c. Choose a home
You will be able to control the devices and services in this home.

Create another home
d. Plug in your device
Make sure your device is nearby and connected to power, then try again

Office
1 device

Office Speaker
Pause
b.

Add to Home

Set up device

Add home member

Create speaker group

Create new home
Add services

Music and audio

Videos and photos
Set up new devices or add existing devices and services to your home
New devices

Set up new devices
Google Home, smart displays and devices labelled 'Made for Google' such as C by GE smart bulbs
Works with Google

Have something already set up?
Link your smart home services such as Philips Hue and TP-Link

Account is now Linked
b. ×
Choose device
Log In
You will be able to control the devices and services in this home.

Smart-Home

Office

Smart Home

Create another home
NEXT >
Master bedroom
1 device
Smart Plug
Off
On

natural_image
Red and black electronic device casing with visible model number 1-04 (no text or symbols on body)

works with the Google Assistant
works with amazon alexa
ÚVOD A ZÁRUKA
2 YEAR WARRANTY*
GOOGLE PLAY
IOS

FAQ
natural_image
Red and black electronic device with a light bulb and wire connection (no visible text or symbols)natural_image
Black electrical connector with a terminal pin and cable (no text or symbols visible)natural_image
Coiled black cable or wire with two terminal connectors (no text or symbols visible)Please select a region

Phone number or email address
Password
flowchart
graph TD
    A["Login"] --> B["Register"]
    style A fill:#333,stroke:#000,color:#fff
    style B fill:#fff,stroke:#000,color:#fff

Quick Pairing Mode (Touch)

Power up the model, then press and hold pairing button for 5s until the led indicator blinks twice and on repeatedly.
For LED or humidifier, please repeatedly turn on and off the model for 3 times, the time gap is 2s. The led indicator will blink quickly.

Compatible Pairing Mode(AP)
Next
natural_image
Simple graphic with a black arrow pointing diagonally down-right on a dark blue background (no text or symbols)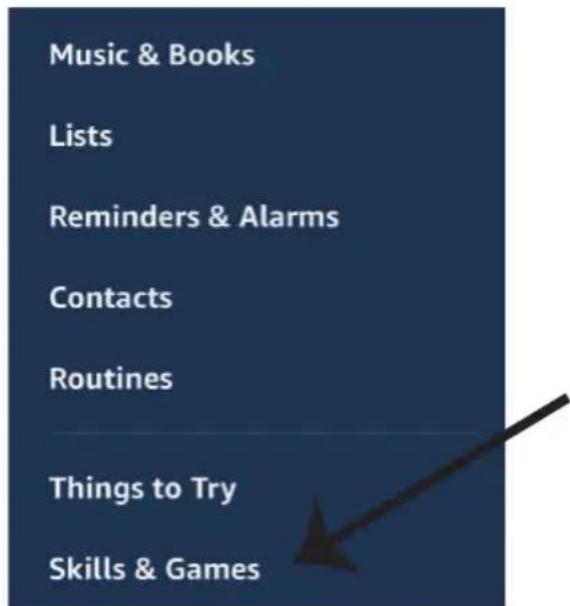
Image A
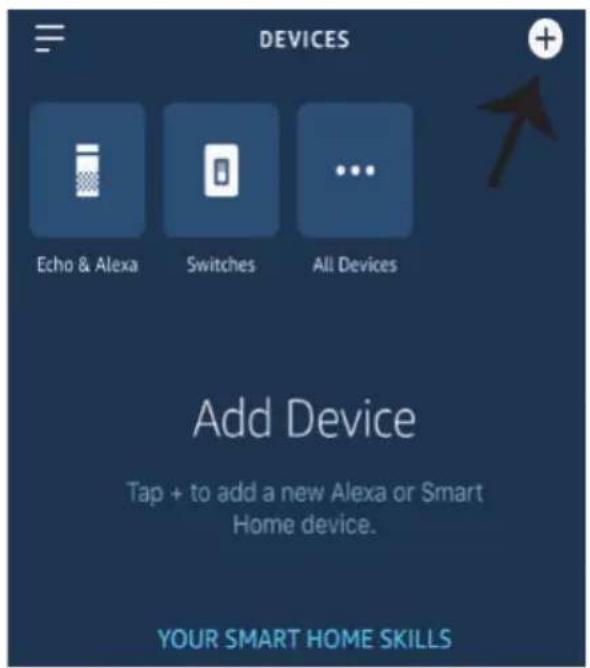
Image B
Your content and devices all in one place

natural_image
Abstract geometric shapes including a triangle, circle, and rectangle (no text or symbols)GET STARTED >
b. Choose account
This account will be used to personalize your experience
c. Choose a home
You will be able to control the devices and services in this home.

Create another home
d. Plug in your device
Make sure your device is nearby and connected to power, then try again

Office
1 device

Office Speaker
Pause
b.

Add to Home

Set up device

Add home member

Create speaker group

Create new home
Add services

Music and audio

Videos and photos
Set up new devices or add existing devices and services to your home
New devices

Set up new devices
Google Home, smart displays and devices labelled 'Made for Google' such as C by GE smart bulbs
Works with Google

Have something already set up?
Link your smart home services such as Philips Hue and TP-Link

Account is now Linked
b. ×
Choose device
You will be able to control the devices and services in this home.

Smart-Home

Office

Smart Home

Create another home
Smart-Home

Add
Settings
Master bedroom
1 device
Smart Plug
Off
On

natural_image
Red and black electronic device casing with visible model number V-TAC (no text or symbols on body)

works with the Google Assistant
works with amazon alexa
INTRODUCTION & WARRANTY
2 YEAR WARRANTY*
Thank you for selecting and buying V-TAC Product. V-TAC will serve you the best. Please read these instructions carefully before starting the installation and keep this manual handy for future reference. If you have any other query, please contact our dealer or local vendor from whom you have purchased the product. They are trained and ready to serve you at the best.
The warranty is valid for 2 years from the date of purchase. The warranty does not apply to damage caused by incorrect installation or abnormal wear and tear. The company gives no warranty against damage to any surface due to incorrect removal and installation of the product.
SPECIFICATIONS
| SKUModel | Nupule Voltage Max Current Wireless Standard Material | ||||
| 8467VT-5145 | AC:90-250V 16A | Wi-Fi 2.4Ghz | PC | ||
INSTALLATION
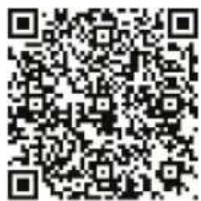
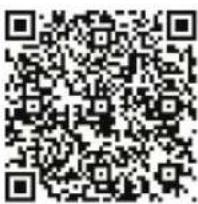
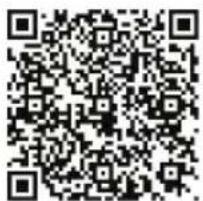
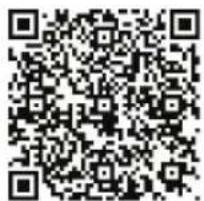
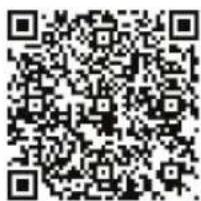
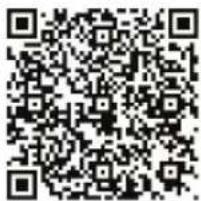
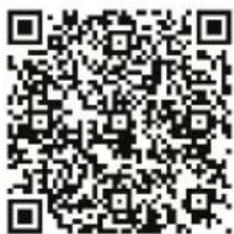
V-TAC SMART HOME APP: Download V-TAC SMART HOME APP by going to APP Store or Google PPlay Store (OR) Download the VTAC SMART HOME APP by scanning the below QR Code

GOOGLE PLAY
IOS

FAQ
Note: For troubleshooting please scan the Barcode of FAQ and to read the instruction manual in a different language please scan the barcode of Multi-Language Manual
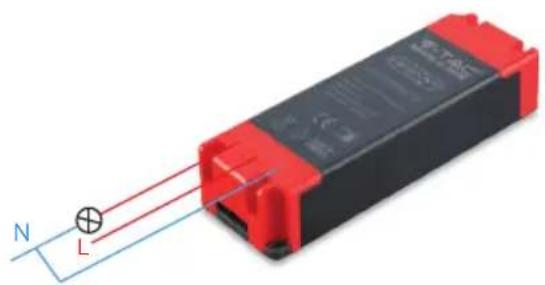
Wiring
1) Cut Off the Power.
2) Connect the wires correctly.
3) Install and power it up.
natural_image
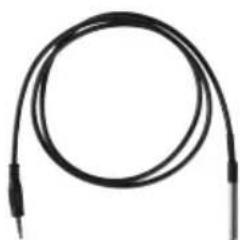
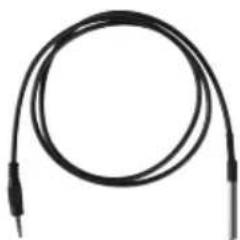
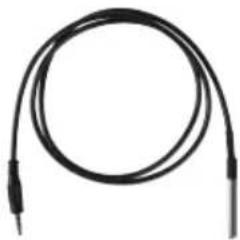
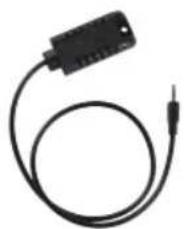
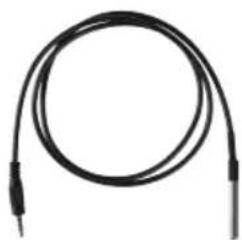
Red and black electronic component with a light bulb and labeled terminals N and L (no text or symbols on the body)Note: The below two items are not included and are compatible with V-TACs Temperature Humidity Scheduler. These can be connected directly with the device.
natural_image
Black electrical connector with a terminal pin, shown in a simple line drawing (no text or symbols)Temperature & Humidity Sensor (Not Included)
natural_image
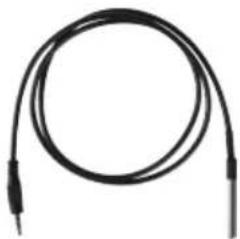
Coiled black cable with two terminal leads (no text or symbols visible)Temperature Waterproof Probe (Not Included)
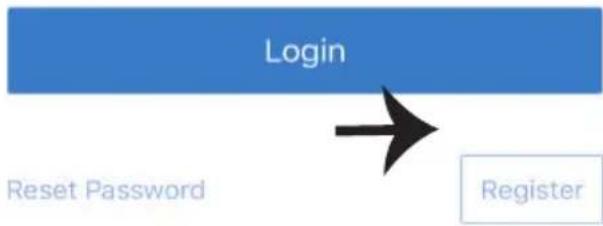
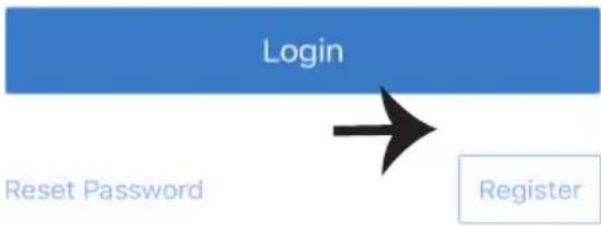
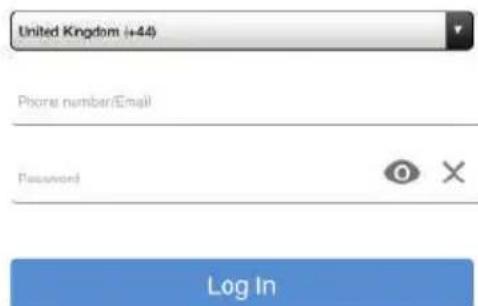
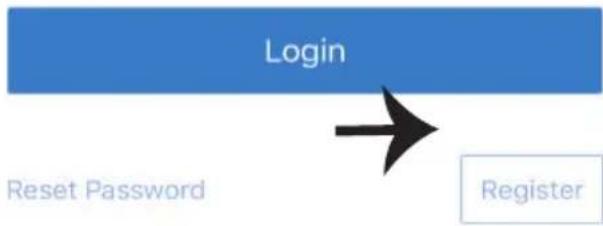
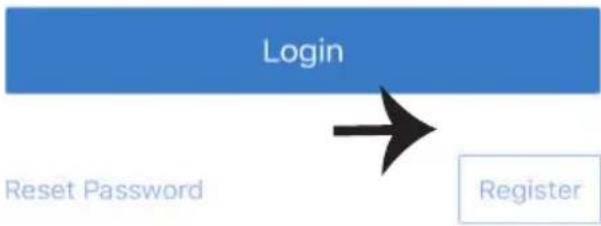
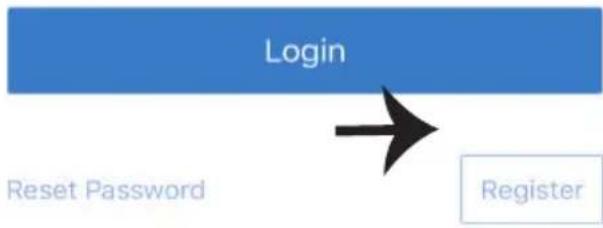
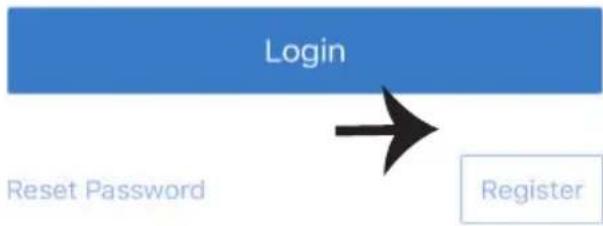
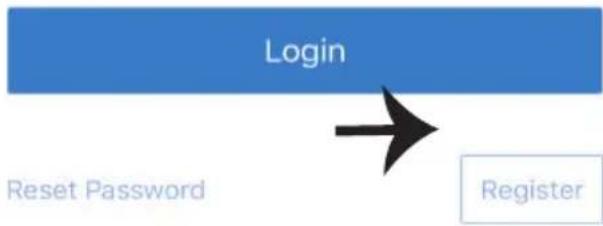
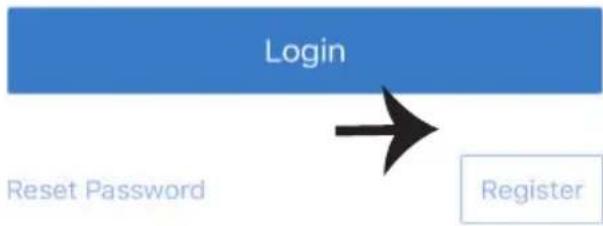
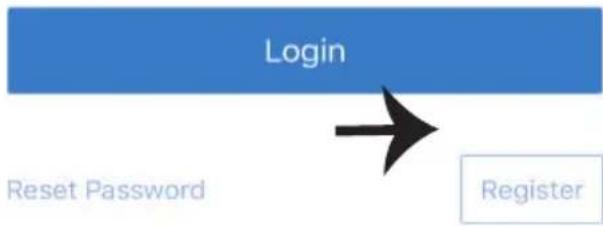
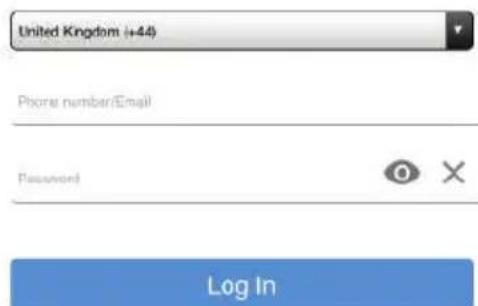
Step1: Open the V-TAC Smart Home App and register. If you already have an existing account with V-TAC Smart Home, please proceed to logging in.

V-TAC smart home
Please select a region

Phone number or email address
Password
Login
Reset Password
Register
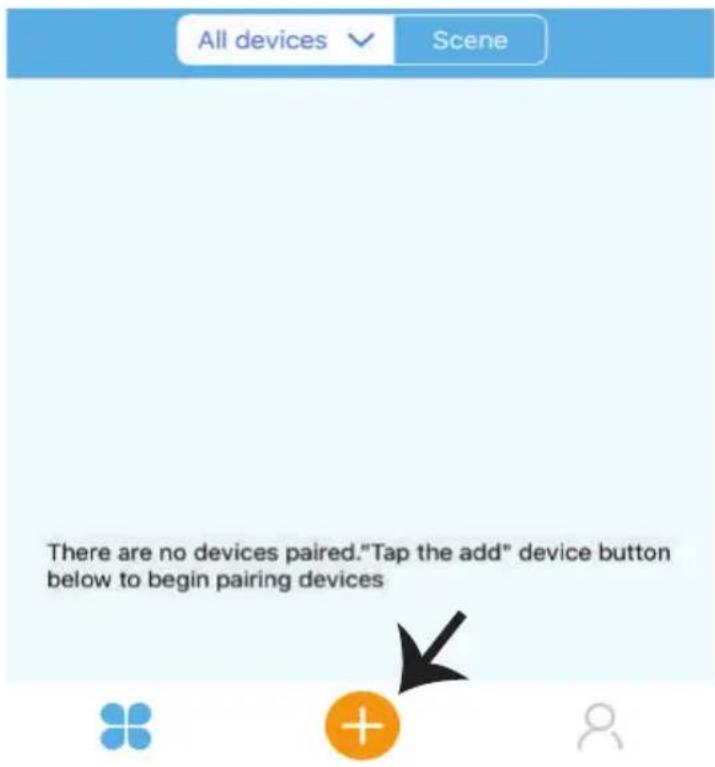
Step2: To Add a New device tap on the "+" sign(as shown)
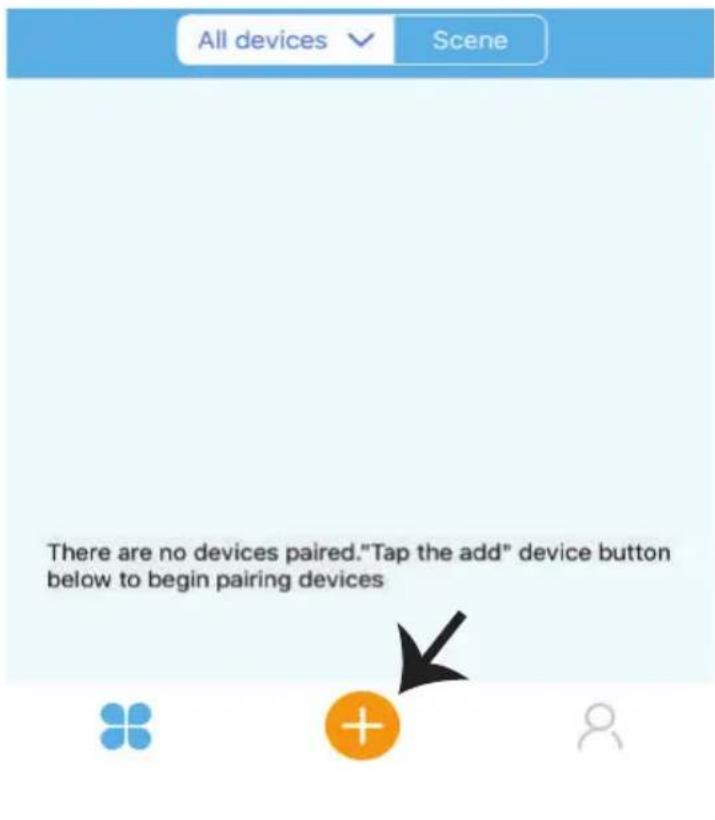
Step3: Make sure your Smart Device is Powered.
1) Tap and Hold on the Power Button for 6 seconds to make the device available in Pairing Mode. Once in pairing mode the LED will start blinking 3 times repeatedly.
2) Tap on Next to start the pairing of device with the app. (Shown in the image)
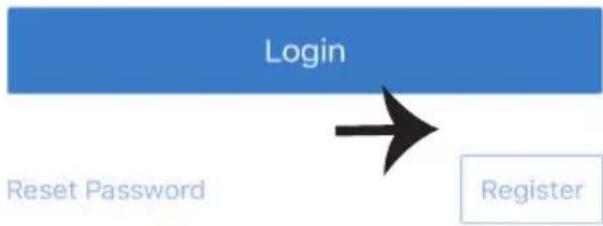
Note: If you are facing any trouble while pairing in Quick Pairing mode please try to pair the device in Compatible Pairing Mode (Click on the link as shown on the image).

Quick Pairing Mode (Touch)

Power up the model, then press and hold pairing button for 5s until the led indicator blinks twice and on repeatedly.
For LED or humidifier, please repeatedly turn on and off the model for 3 times, the time gap is 2s. The led indicator will blink quickly.

Compatible Pairing Mode(AP)
Next
Step4: Select your Wifi Name and enter the password and Tap on Next.
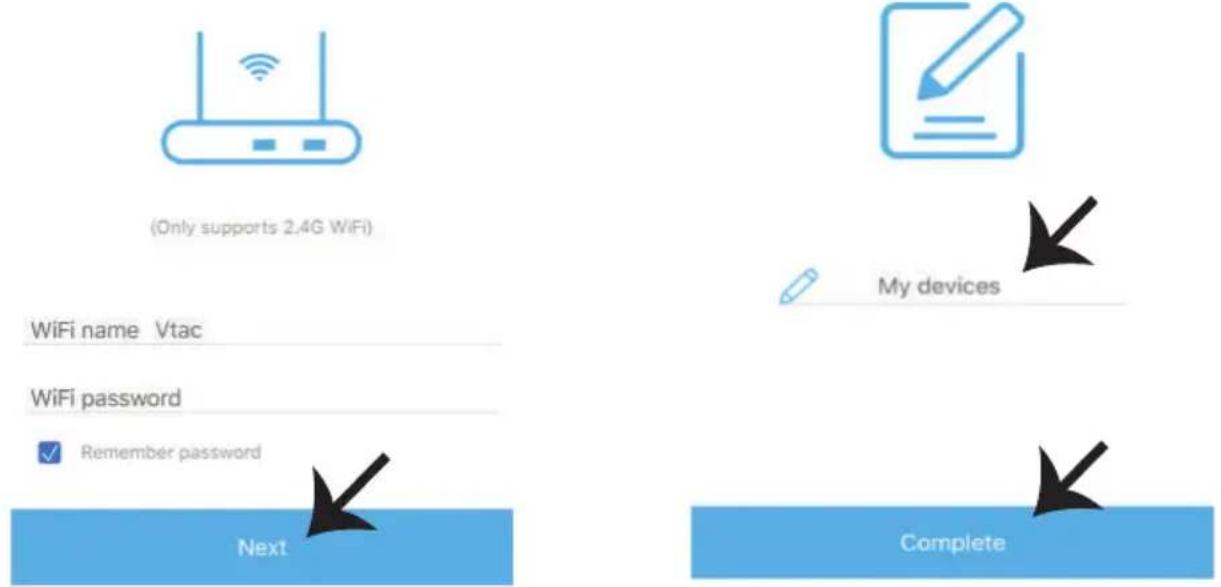
WiFi name Vtac
WiFi password
Remember password
Next
Step5: Give a Name to your Device(Ex: Smart Plug/ smart switch) & Tap on complete.
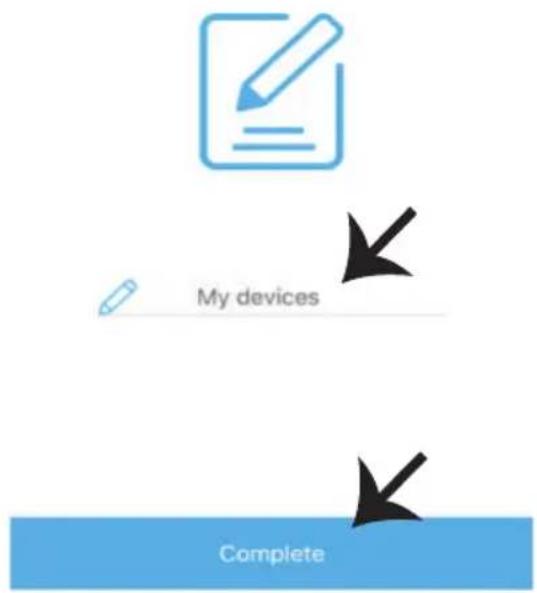
My devices
Complete
Step6: Your Device is now paired and will appear as shown below example image
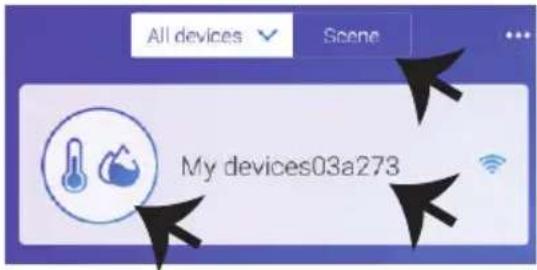
Temperature Humidifier, can be used as a normal Wifi Switch(On/Off) and also can be connected with probe temperature sensors (Not included) to detect the Temperature and Humidity. Note: The Temperature value displays on the APP only when the Sensors(Not included) are connected)
Sensor Connection Functions: Once your device is connected with the sensor and paired with the APP it will display temperature and humidity values, and it can be set to Auto mode. Scene Mode: You can use V-TACs Temperature Humidity Scheduler to collect temperature value and set a temperature to turn on/off several types of other switches (such as V-TACs Smart Plug, Smart Power Strip etc) Example: You can set a condition stating when the temperature reaches 24 degrees turn on the smart Plug. Note: The V-TACs Temperature Humidity Scheduler should be in manual mode, not auto mode. When the real-time temperature is across the preset temperature range, it will trigger the condition.
ALEXA SETTINGS
Step1: Install the Amazon Alexa app via the App Store (iOS) or the Play Store (Android) and register. If you already have an existing account with Amazon Alexa, please proceed to logging in.
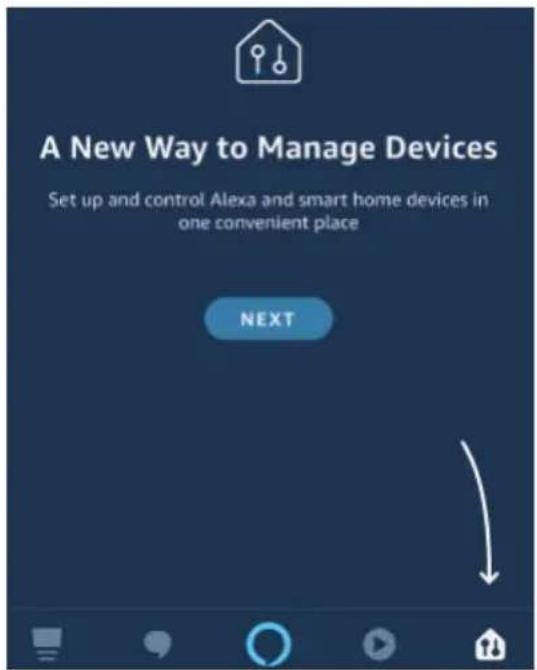
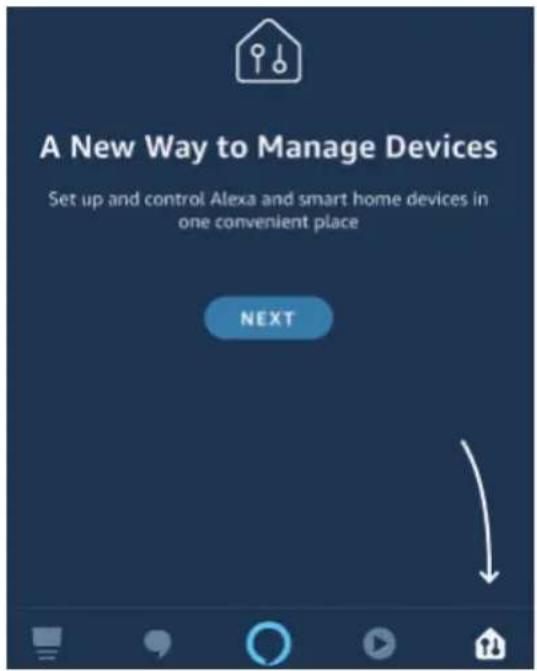
Step3: On the Home page of Amazon Alexa App, Tap on the icon as shown on the image below.
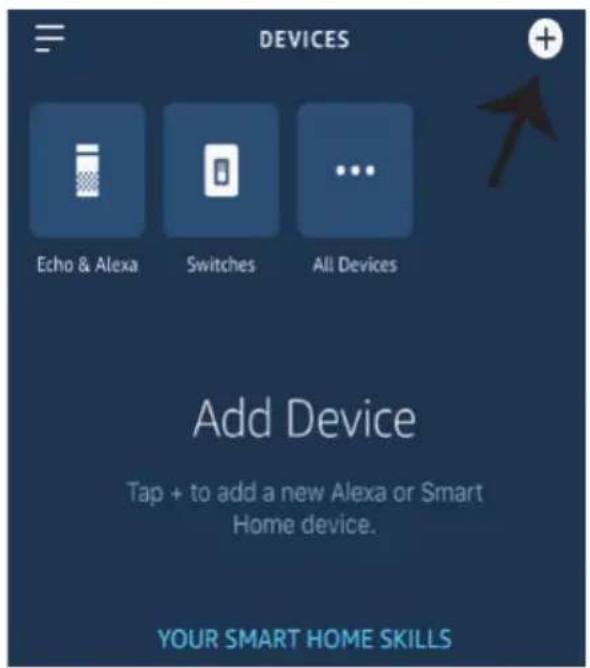
Step2: Once you are on the Amazon Alexa home page, tap on the lower right icon — where the arrow is pointed— to add a new device and Enable Skills.
Step4: Tap on "Skills & Games" as show below

natural_image
Simple graphic with a black arrow pointing diagonally down-right on a dark blue background (no text or symbols)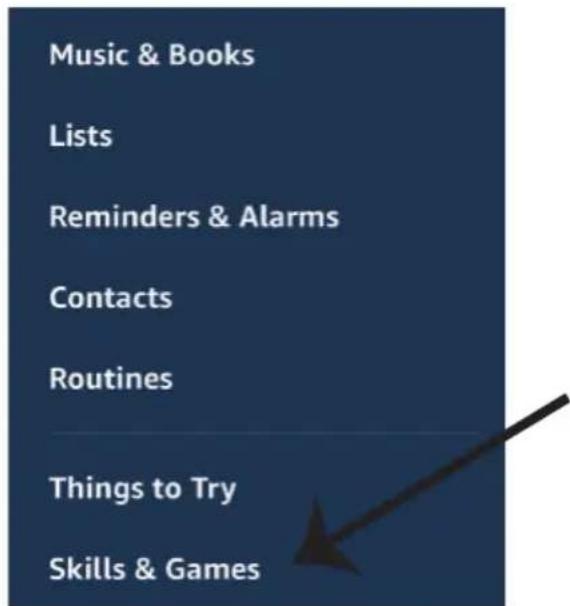
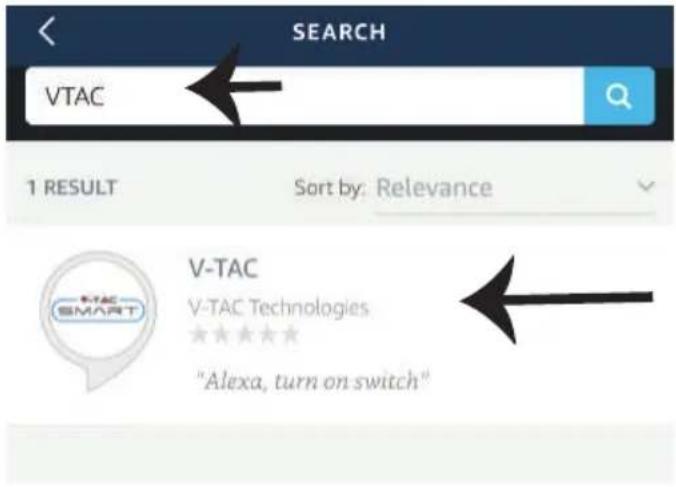
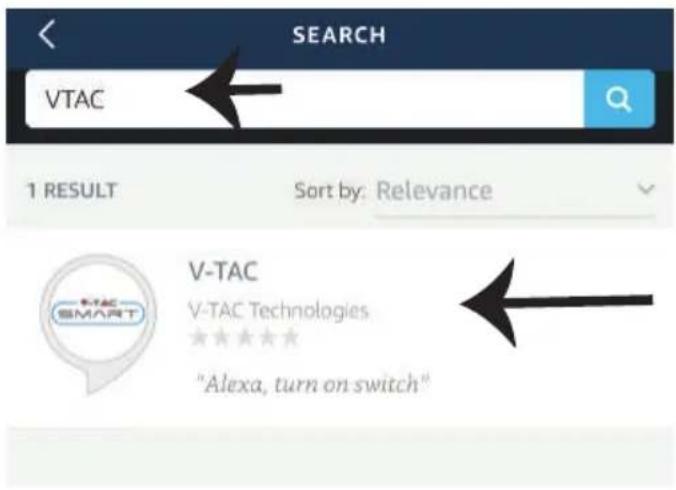
Step5: On the Search bar as shown below type"V-TAC" and tap on the V-TAC skill as shown on the image.
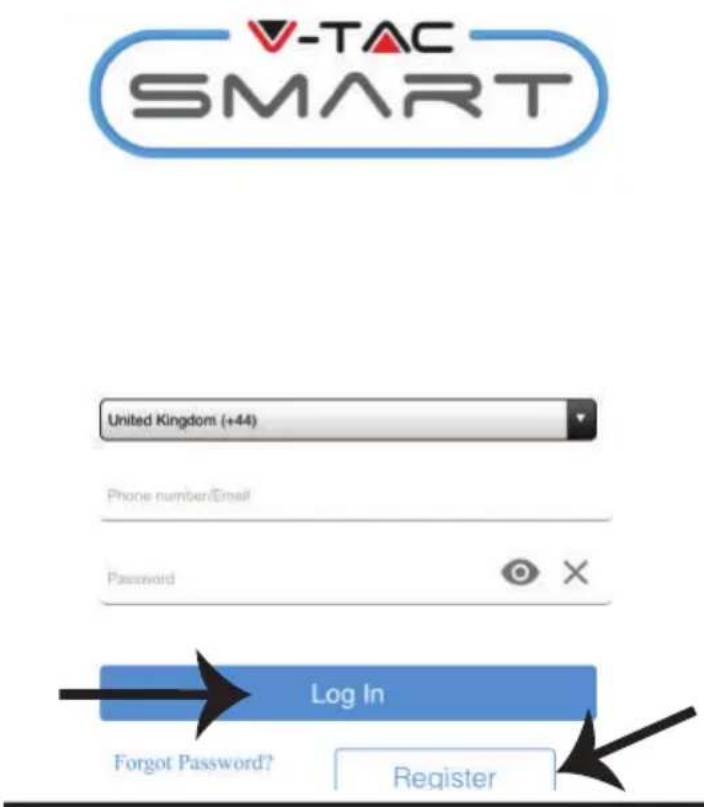
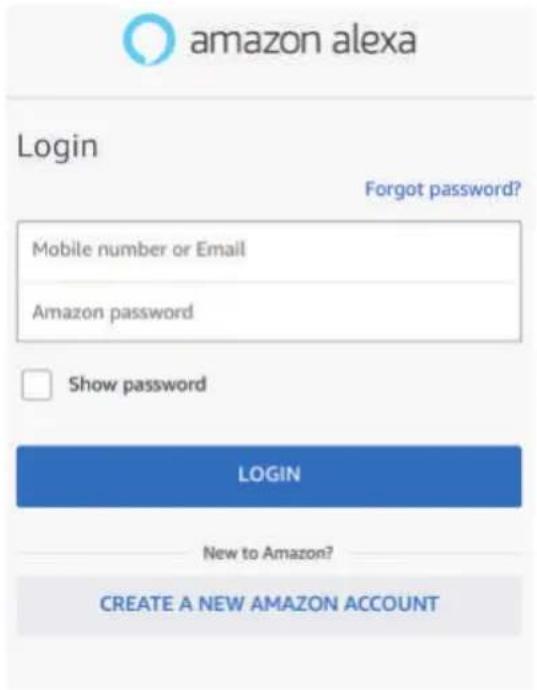
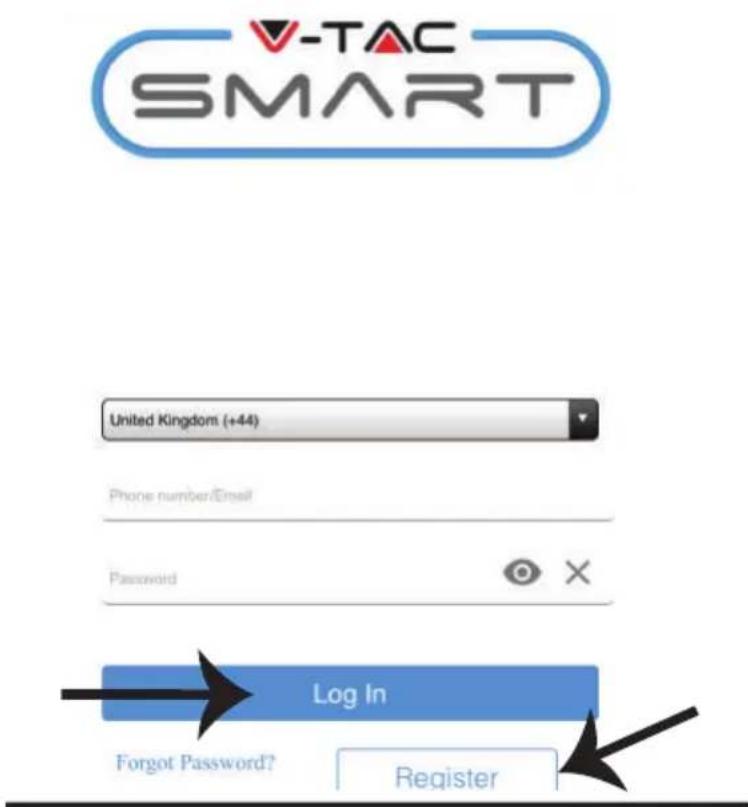
Step7: Enter Login credentials of V-TAC Smart Home and then tap on Log In. If you do not have a existing account please register by tapping on the register.
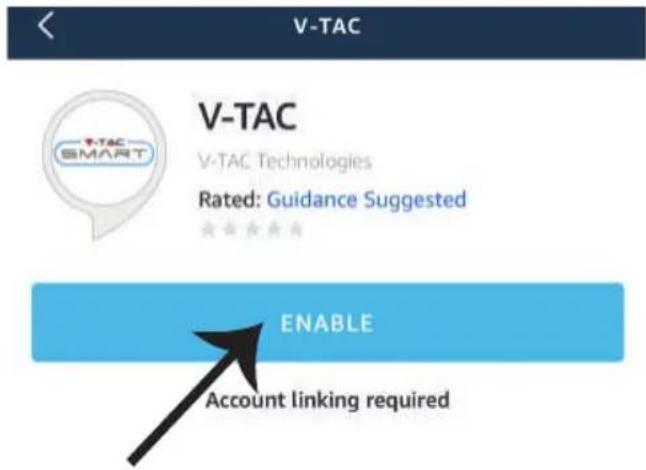
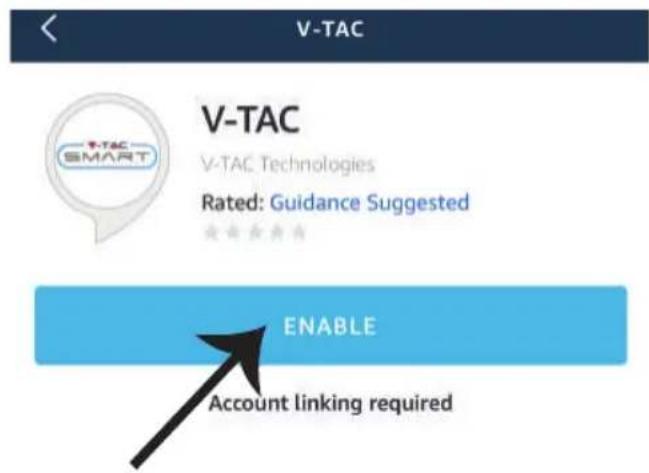
Step6: Tap on Enable Skill to link V-TAC Smart Home app with Amazon Alexa.
Step8: a) Once you have successfully linked V-TAC Skill close the window & (b) tap on Discover device. Make sure Smart device is paired with V-TAC Smart Home app.
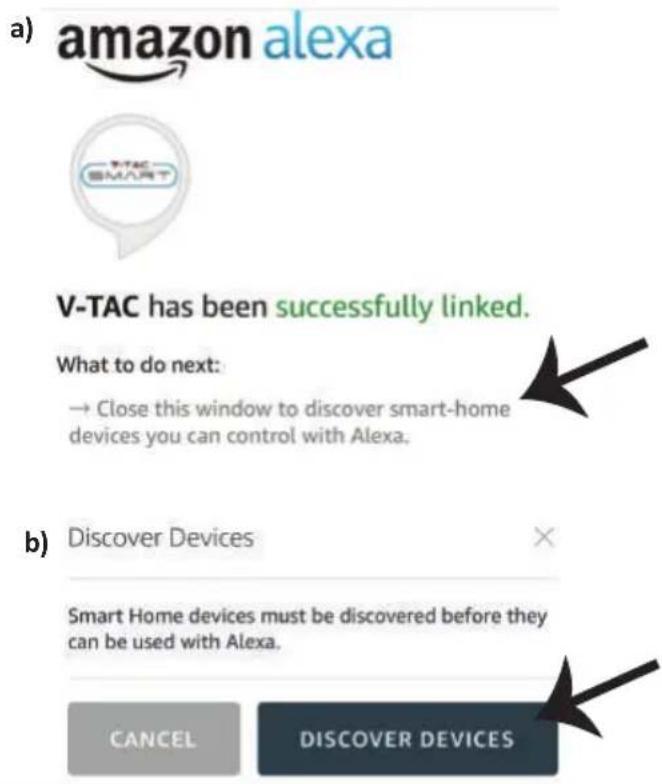
Step8: Discover your smart device on Alexa. You can say "Alexa discover devices" to the Alexa device which you have. (OR) you can add new devices manually by going to the home page of Amazon alexa and tapping on the icon (Ref: image A) & tap on "+" sign to add new device(Ref: Image B). Once the device is discovered you can now control your smart device using Alexa.
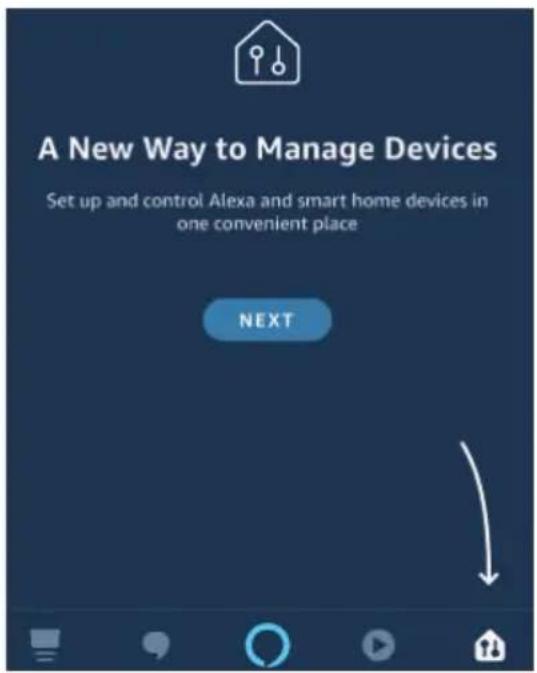
Image A
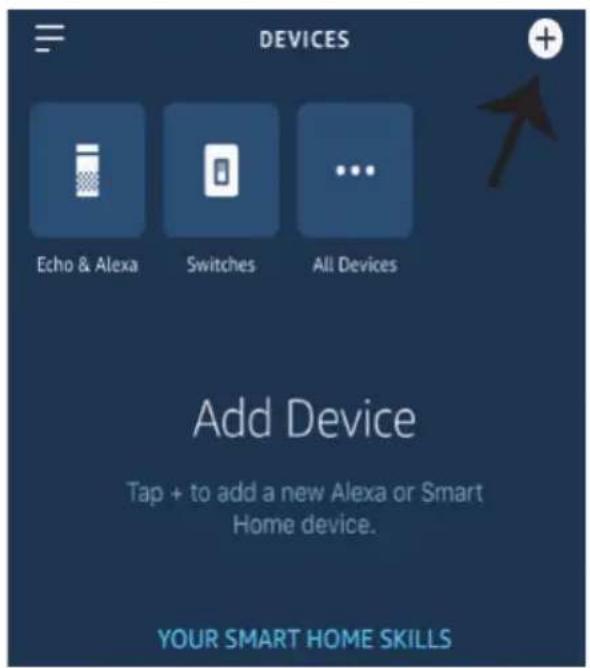
Image B
Note: Discovering the device must be done every time the device's name is changed on the app.
ALEXA Commands
Now, you can control your smart device using voice commands on Alexa. Below is a example commands you can use:
➢! Alexa, turn ON Smart Plug
➢! Alexa, turn OFF Smart Plug
THINGS TO REMEMBER BEFORE STARTING INSTALLATION:
- V-TAC Smart Home App & Amazon Alexa App
- Make sure you have Amazon Alexa Device(including Echo, Echo Tap, or Echo Dot)
- Smart Home Device
- Stable Wifi network
GOOGLE HOME SETTINGS
Step1:
a&b) Install the Google Home app via the App Store (iOS) or the Play Store (Android) and register. If you already have an existing account with Google Home, please proceed to logging in.
c) Create a New Home/Choose from the existing home if any.
d) Power ON the Google Home device and connect it to the App.(Then Proceed to step 2)
a. Welcome home
Your content and devices all in one place

natural_image
Abstract geometric shapes including a triangle, circle, and rectangle (no text or symbols)GET STARTED >
b. Choose account
This account will be used to personalize your experience
c. Choose a home
You will be able to control the devices and services in this home.

Create another home
d. Plug in your device
Make sure your device is nearby and connected to power, then try again

Step2: Once you are on the Google home page, tap on the Add "+" icon—to add a new device and skill. And then tap on Set up device as shown in below image.
a.

Play

Broadcast

Add

Settings
Office
1 device

Office Speaker
Pause
b.

Add to Home

Set up device

Add home member

Create speaker group

Create new home
Add services

Music and audio

Videos and photos
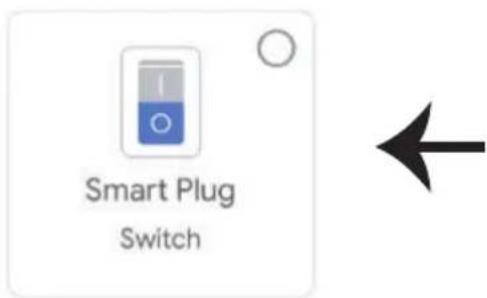
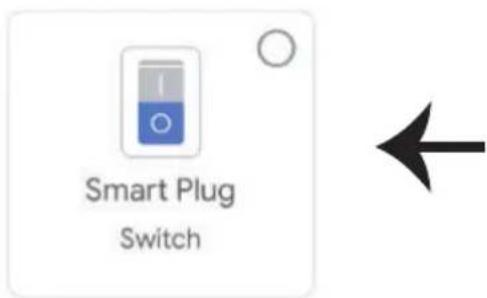
Step3: Make sure the Smart Device is paired with V-TAC Smart Home app before starting step 3. Tap on the arrow section as highlighted in the below image.
Set up
Set up new devices or add existing devices and services to your home
New devices

Set up new devices
Google Home, smart displays and devices labelled 'Made for Google' such as C by GE smart bulbs
Works with Google

Have something already set up?
Link your smart home services such as Philips Hue and TP-Link

Step5: Sign In with your V-TAC Smart Home Login credentials to Link the Smart Home device

Step4: Type "Vtac" on the search bar and tap on the icon from the drop down options of VTAC Smart as shown below.

Vtad


Add new

VTAC Smart

Step6:
a. Account will now be linked, please stay on the page you will be redirected in few seconds to select the device to add to your home.
b. Select the device and tap on Next as show in image(b)
a. Done

assistant.google.com

Account is now Linked
b. ×
Choose device

Step7: Select the Home where you would like to add the Smart Device under. (Or) you can create a New home in order to add the Smart Device to it.
Step8: You have successfully added V-TAC Smart device to your Google home App.
Choose a home
You will be able to control the devices and services in this home.

Smart-Home

Office

Smart Home

Create another home
Smart-Home
Add
Settings
Master bedroom
1 device

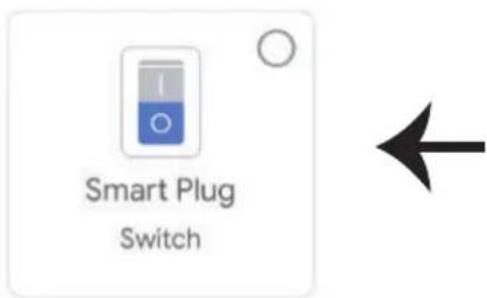
Smart Plug
Off
On

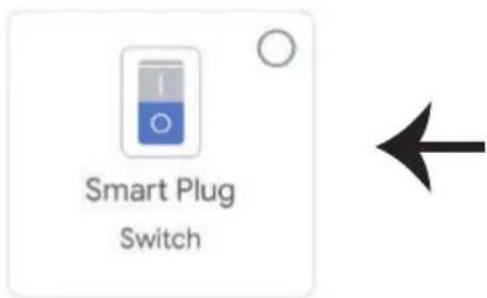
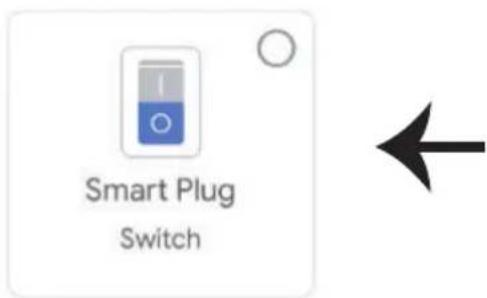
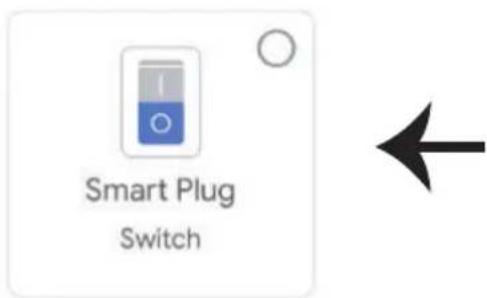
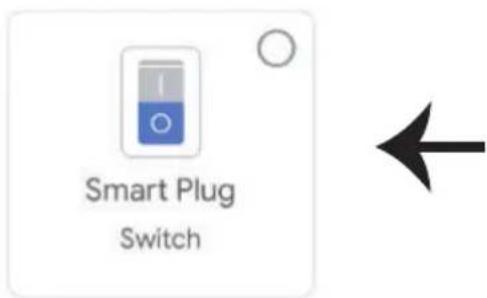
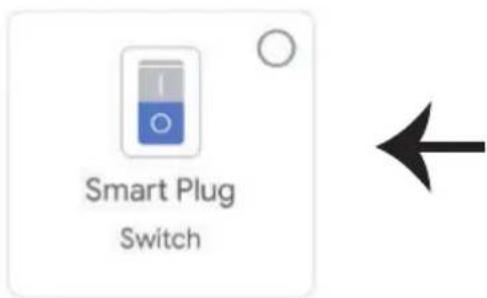
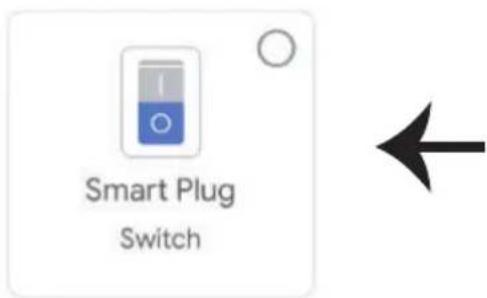
Step9: You can turn the Device On/OFF by taping On/Off options as shown below. (OR) You can tap on the Name(Ex:Smart Plug as shown below) to redirect to new page.
Smart-Home

Add

Settings
Master bedroom


Smart Plug
Off
。
On

Smart Plug
Master bedroom
On
Google Commands:
Now, you can control your smart device using voice commands on Google Home. Below are a few example commands you can use:
➢! OK Google, turn ON Smart Plug
▶! OK Google, turn OFF Smart Plug
THINGS TO REMEMBER BEFORE STARTING INSTALLATION:
- V-TAC Smart Home App & Google Home App
- Make sure you have Google Home Device
- Smart Home Device
- Stable Wifi network
In case of any query/issue with the product please reach out to us at support@vtacexports.com
V-TAC EUROPE LTD, Bulgaria, Plovdiv 4000, bul.L.Karavelow 9B

- INTRODUCTION & GARANTIE
- b. Choose account
- c. Choose a home
- d. Plug in your device
- New devices
- Set up new devices
- Works with Google
- Have something already set up?
- Commandes Google:
- Ožičenje
- Set up
- Korak 6:
- Smart-Home
- Master bedroom
- BEVEZETÉS ÉS GARANCIA
- INTRODUCERE, GARANTIA
- Comenzile Google:
- Google εντολές:
- WSTĘP I GWARANCJA
- USTAWIENIA ALEXA
- SPECIFICATIONS
- INSTALLATION
- Wiring
- ALEXA SETTINGS
- ALEXA Commands
- THINGS TO REMEMBER BEFORE STARTING INSTALLATION:
- GOOGLE HOME SETTINGS
- Step1:
- a. Welcome home
- Step6:
- Choose a home
- Smart Plug
- Google Commands:
Brand : V-TAC
Model : VT-5145
Category : Smart Home