
TPM 124 - Compressor BLAUPUNKT - Free user manual and instructions
Find the device manual for free TPM 124 BLAUPUNKT in PDF.

User questions about TPM 124 BLAUPUNKT
0 question about this device. Answer the ones you know or ask your own.
Ask a new question about this device
Download the instructions for your Compressor in PDF format for free! Find your manual TPM 124 - BLAUPUNKT and take your electronic device back in hand. On this page are published all the documents necessary for the use of your device. TPM 124 by BLAUPUNKT.
USER MANUAL TPM 124 BLAUPUNKT
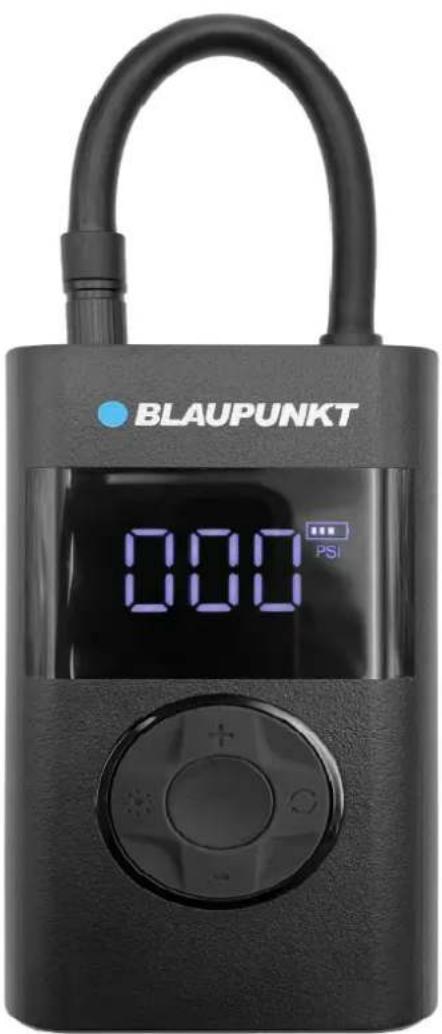
PORTABLE AIR COMPRESSOR TPM 124
Enjoy it.
Zubehör
natural_image
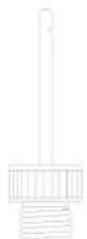
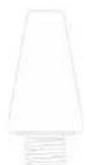
Three technical line drawings of mechanical components, labeled ①, ②, and ③, with no visible text or symbols.natural_image
Line drawing of a USB cable connector with two USB ports (no text or symbols)Sicherheitshinweise
Please read these instructions carefully before using the product and keep it in a safe place. Noise in excess of 75dB is generated when the machine is operating. Please pay attention to the protection. The tube and the device may generate high temperature when the inflator is used for a long time. Please cool it down before use. This product is not a toy. Children are not allowed to use it.
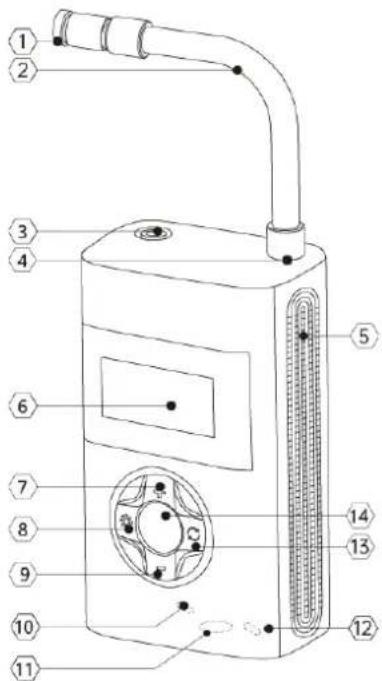
Instruction Parts info:
- American Air Nozzle
- Tube
- Tube storage bin
- Tube Interface
- Heat Emission Holes or
-
LED Display
-
"+"Button
-
Light Button
-
"-"Button
-
USB connector
-
LED Light
-
Charging Input
-
Mode Button
-
Start/stop button
Please note:
The illustrations of the product, accessories, user interface, etc. in the manual are all schematic diagrams for reference only. Due to product update, the actual product and the schematic illustration may be slightly different. Please consult the actual product.
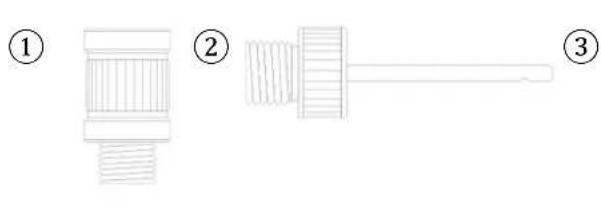
Accessories
Adapter for air nozzle french X1
Air needl X1
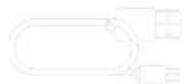
Charging Cord X1
Swim Ring NozzleX1
How to Operate
1- Battery capacity and charge display
The length of the power indicator shows different formats to indicate the remaining power:
- Four bars: 100% battery power, -Three bars: 75% battery power,
- One bar: power < 25%, charging is required
Charging
Please make sure to fully charge the device the first time you use it. Use the charging cable and connect it to the 5V USB charger (not included) to charge the device.
Battery indicator lights up when charging: Battery indicator flashes. Battery charge indicator four bars: fully charged.
Tip:The device cannot be used to inflate while charging
1-Switch On
Switch On
Pull out tube and long press "start-stop button" for three seconds to start the device. In the power-on state, long press the "Start-Stop button" for three seconds then device will automatically shut down. After the tube is pulled out, it can be turned on again by long pressing the "start-stop button".
2-Connecting the nozzle to the tube
American Air Nozzle
Mountain bikes, electric bikes, motorcycles and cars will be equipped with American air nozzles. Inflation:
The American air nozzle can be directly connected to inflate.
Deflate: Use a suitable tool to press the gas needle inside the nozzle to release the gas
French Air Nozzle Adapter
Road bikes and individual mountain bikes will use the "French Air Nozzle Adapter" to inflate: unscrew the screw of French gas nozzle and connect the "French air nozzle adapter" to inflate. After the inflation is completed, turn the screw on the tire nozzle port tight.
Deflation: Unscrew the screw of the French gas nozzle and press the screw to release the gas.
Air needle
When inflating basketball, football and other balls, you need to use an "air needle".
Inflation: Tighten the "air needle" and "American air nozzle" and insert the needle into the air hole to inflate.
Deflate: Insert the "gas needle" directly into the air hole to deflate
3-Detect the tire pressure
When the device switching on, connect the tube to the tire which needs to be inflated, the number displayed on the screen means the current pressure.
5- Check the air pressure of several devices
To ensure safety, please check the inflation pressure of the inflated object by reading the instruction manual before inflating to avoid personal injury caused by over-inflation.
Car Tires
The pressure range of automobile, bicycle and motorcycle tires is marked on the sidewall of the tire. The guiding air pressure of the car's tires is marked near the inner wall of the driver's side door. Please refer to the car manual for more details on the inflation pressure.
Balls
Inflating pressure of football, basketball volleyball and other balls is marked around the air nozzle on the ball
Recommended inflating pressure list
| Device | Product Category | Recommended pressure range |
| Bicycle | Bicycle electric-assisted folding bicycle tire | 45-50psi |
| 12, 14, 16 inch bicycle tire | 30-50psi | |
| 20,22, 24 inch bicycle tire | 40-50psi | |
| 26, 27.5, 29 inch mountain bike tire | 45-65psi | |
| Mi Electric Scooter Tire | 45-50psi | |
| 700C Clincher Bicycle Tire | 100-130psi | |
| 700C Tubular Bicycle Tire | 120-145ps | |
| Motorcycle | Motorcycle or Electronic Motorcycle Tire | 1.8-3.0bar |
| Cars | Car tire | 2.2-2.8bar |
| Balls | Basketball Soccer Ball Volleyball Rugby Ball | 7-9psi8-16psi4-5psi12-14psi |
Note: The recommended pressure range is for reference only. Please refer to the instruction manual of the inflated product
4-Default inflation pressure
Mode Change
Press the "Mode Change" button to navigate through the six types of mode conditions. Before selecting the appropriate air pressure units, a long press selects between "PSI", "BAR" and "KPA
Zero Mode: The preset pressure can be freely set from 3 to 150 psi
Cycling mode: Default 45psi. Adjustable range: 30-65 psi
Motorbike mode: Default 2.4 bar. Adjustable range:1.8\~3.0 bar
Car mode: Default 2.5 bar. Adjustable range: 1.8\~3.5 bar
Balloon mode: Default 8 psi. Adjustable range: 4-16 psi
Default value Adjustment
After Choosing Mode, short press "+" or "-" to adjust preset pressure value. long press "+" or "-" to quickly adjust the pressure value
The flashing number indicates the preset pressure can be adjusted, while the non-flashing number indicates the real-time pressure
LED Light
Press "LED light" button to turn the light on or off. Turning on the light is helpful to connect the nozzle and other operations in a dark environment. long press the "LED light" to trigger the SOS signal.
7-Inflating
How to start inflating
Press power button to start inflating when you choose your default mode. The LED display will show air pressure change simultaneously During inflating, there will be 75-80 dB noise. Please pay attention to protection. Because of temperature rising, please don't touch the tube when it has worked for long time.
How to stop inflating
The air compressor will stop inflating automatically when it reaches to default pressure. Also, you can stop inflating by pressing "Start/stop button" button during the process of inflating.
Special Remind
The pressure exerted on balls, game balls, swimming rings and other products is lower than that of the pump. Therefore, the inflation pressure cannot be automatically stopped by the preset pressure and should be used with caution. Battery and standby mode
At full power, the continuous operating time without charging at 25^ C is about 30 minutes. An increase in pressure load and a lower temperature can lead to a low resistance.
8- Remove the nozzle
The air pipe temperature is relatively high after the air nozzle is unscrewed. Be careful of scalding when removing the air nozzle. There will be slight air leakage during disassembly. Please disassemble quickly to reduce air output.
9- Stop
Plug in the tube and turn it off. When the air compressor is on, press and hold the "start/stop button" to stop it or turn it off automatically without any operation within 3 minutes.
Warning
- This product is not a toy. It is not suitable for use by children. It is recommended for use from the age of 16. During inflation, keep children at a safe distance from the pump.
- The product has a built-in non-removable Lithium battery. It is forbidden to throw the product into the fire or throw it away carelessly. Lithium battery are at risk of fire. spontaneous combustion and explosion due to overheating, impact and water inflow. Please avoid exposure to the sun in the vehicle and other high temperature environments.
- The storage temperature of the product should not be lower than-10Coor higher than 45^ C, too cold or too hot will shorten the product life and damage the built-in battery.
- Idle the product for a long time may damage the battery. It is recommended to charge it at least once every three months.
- The product has a built-in DC motor, which may generate electric sparks during operation. Please do not use it in a flammable or explosive environment.
- Please shut down immediately if abnormal noise or high temperature occurs during working.
- Before setting the inflation pressure value, make sure to select the correct unit of measurement, otherwise it may cause accidents such as a puncture. Common unit conversion: 1bar=14.5psi,1bar=100kpa.
- Do not walk away during inflation and observe the inflation process to prevent the inflation pressure from being too high without setting the preset air pressure.
- Please use it in a dry and clean environment. The intrusion of sand and dust may cause damage to the product. The product is not waterproof, it is forbidden to wash with water.
NOTES:
| Failure | Solution |
| Low-speed Inflating | 1. Ensure the batter capacity is full enough2. Check air leakage in the air tube3. Check whether the inflated devices are leaking air4. Check whether the connecting parts of both ends of the tube are tightened |
| Non-inflating | 1. Check whether the tube is pulled out, you can start inflation only while tube pulled out2. Ensure the battery capacity is full enough3. Check that the current tyre pressure is higher than the default |
| Unable to raise or lower default pressure | Check whether you are in incorrect situation mode, or select zero mode to adjust the inflating pressure in the range of 3-150 psi |
| The pressure is zero during infating | Low-pressure inflatable products such as balloons are not within the measurable range of the air |
| The device automatically shuts down after the air nozzle is screwed on | Long press the Start/stop button to switch on the device again |
| Air leakage | Tighten the nozzle |
| Can not be charged | 1. Check whether the charging cord is well connected2. The battery is in the state of low capacity for a long time, and it needs a period of charging to display the charging statu |
SPECIFICATION:
| Product Definition | Portable Electric Air Inflator |
| Item TPM 124 | |
| Executive standard | |
| Device Dimension | 125x71x46mm |
| Default Press Range | 0.2-10.3bar/3150psi |
| Operating Temperature | Charge 0°C~45C,Descharge-10°C~45°C |
| Storage Temperature | -10°C~45°C |
| Tube Length | The length of tube is 170mm, including the nozzle adapter(wi-thout thread) |
| Nozzle size | American nozzle11X20mmFrench nozzle11X15mm |
| Battery Capacity | 4000mAh(14.8Wh) |
| Operating Noise | 5V2A |
| Input Voltage and Current | Type C |
| Charge Port | <3 hours |
| Charge Time ±2psi |
After-sales service
This device is covered by warranty against manufacturing defects. This does not include mishandling and/or negligence on the part of the end user. In case you require assistance, please contact our after-sales service:
MANUEL DE L'UTILISATEUR DU GONFLEUR ÉLECTRIQUE PORTABLE
Rappel:
natural_image
Pure technical line drawings of mechanical components without any text, numbers, or symbolsAll rights reserved. This material may be reproduced, copied or distributed for personal use only.