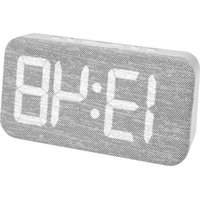
60.2042.02 - Clock TFA - Free user manual and instructions
Find the device manual for free 60.2042.02 TFA in PDF.


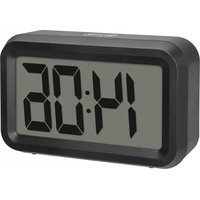
| Product type | Digital alarm clock |
| Brand | TFA |
| Model | 60.2042.02 |
| Power supply | USB-C port (cable included, 5V 300 mA) or 3 AAA 1.5V batteries (not included) |
| Housing dimensions | 160 x 56 x 82 mm |
| Weight | 147 g (device only) |
| Display | LED with 3 brightness levels (HIGH, MIDDLE, LOW) |
| Display functions | Time, date, alarm time; 12/24 h mode |
| Brightness adjustment | Manual via SNOOZE button; automatic with timer (adjustable interval) |
| Alarm | 3 modes: Mon-Fri, Mon-Sat, Mon-Sun; snooze repeat (5-20 min) |
| Alarm stop | Press any button (except SNOOZE); automatic stop after 1 min |
| Visual indicators | Alarm symbol, blinking second dots |
| Maintenance | Soft damp cloth; no solvents; remove batteries if unused for long |
| Electrical safety | Use only in dry indoor environments; do not expose to water; check cable integrity |
| Child safety | Keep out of reach of children (risk of battery ingestion) |
| Batteries | 3 x AAA 1.5V (not included); replace if display becomes dim |
| Repairability | Do not disassemble or repair yourself; contact seller if problem |
| Included accessories | USB-A to USB-C cable (1.5 m); user manual |
| Operating temperature | Not specified; avoid extreme temperatures |
Frequently Asked Questions - 60.2042.02 TFA
User questions about 60.2042.02 TFA
0 question about this device. Answer the ones you know or ask your own.
Ask a new question about this device
Download the instructions for your Clock in PDF format for free! Find your manual 60.2042.02 - TFA and take your electronic device back in hand. On this page are published all the documents necessary for the use of your device. 60.2042.02 by TFA.
USER MANUAL 60.2042.02 TFA
www.11a-dostmann.de/en/service/downloads/instruction-manuals
TFA
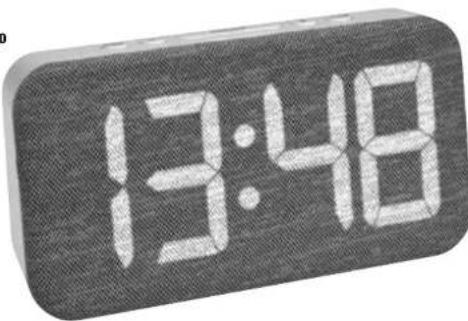
Kat. Nr. 60.2042.02
-2--3-
Fig. 2
Thank you for choosing this product from TFA.
1. Before you use this product
- Please make sure you read the instruction manual carefully.
- Following and respecting the instructions in your manual will prevent damage to your instrument and
loss of your statutory rights arising from defects due to incorrect use.
• We shall not be liable for any damage occurring as a result of non-following of these instructions.
- Please pay particular attention to the safety notices!
- Please keep this instruction manual safe for future reference.
2. Delivery contents
• Digital alarm clock
- USB-cable
• Instruction manual
3. Range of application and all the benefits of your new instrument at a glance
• LED digits in 3 brightness levels
- Dimming function with automatic timer
• Indication of clock or date
• Alarm with snooze function, adjustable snooze interval
• 3 different alarm functions (Mo-Fr, Mo-Sa, Mo-Su)
• Power supply via USB (cable included)
- This product is exclusively intended for the range of application described above. It should only be used as described within these instructions.
- Unauthorised repairs, alterations or changes to the product are prohibited.

Caution! isk of electrocution!
- Connect the device via the USB cable only to a suitable USB power source such as a computer. USB power adapter.
- The device and the USB cable must not come into contact with water or moisture. Suitable for indoor use only.
- Do not use the device if the housing or the USB cable are damaged.
- Operate the device out of reach of persons (including children) who cannot fully appreciate the potential risks of handling electrical equipment.
- Unplug the device if any fault occurs or if the device is not used for a long period of time.
- Route the USB cable lead so that it does not come into contact with sharp-edged or hot objects.

Caution! isk of injury!
- Keep this device and the batteries out of reach of children.
- Small parts can be swallowed by children (under three years old).
-16--17-
Digital alarm clock

- Batteries contain harmful acids and may be hazardous if swallowed. If a battery is swallowed, this can lead to serious internal burns and death within two hours. If you suspect a battery could have been swallowed or otherwise caught in the body, seek medical help immediately.
- Batteries must not be thrown into a fire, short-circulted, taken apart or recharged. Risk of explosion!
- Low batteries should be changed as soon as possible to prevent damage caused by leaking. Never use a combination of old and new batteries together, nor batteries of different types.
- Avoid contact with skin, eyes and mucous membranes when handling leaking batteries In case of contact. Immediately rinse the affected areas with water and consult a doctor.

Important information on product safety!
- Do not expose the device to extreme temperatures, vibrations or shocks.
- Protect it from moisture! Protect the textile display from direct sunlight and soiling.
5. Elements
A: Display (Fig. 1):
A 1: PM (12-hour system) A 2: Alarm symbol
A 3: Time/alarm/date
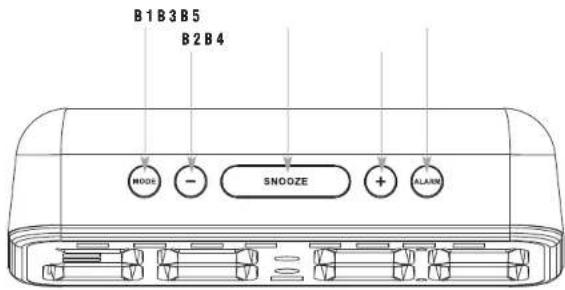
B: Buttons (Fig. 2):
B 1: MODE button B 2: DOWN (-) button
B 3: SNOOZE button B 4: UP (+) button
B 5: ALARM button
C 1: USB-C port C 2: Battery compartment
6. Getting started
- The alarm clock can be operated with 3 x 1,5 V AAA batteries (not included). The batteries maintain the clock operation in the event of blackout or other power failure. In pure battery operation, the display is activated briefly each time a button is pressed. Continuous illumination of the display only works with USB-fains connection.
- Optional: Open the alarm clock's battery compartment. Insert three new AAA 1.5 V batteries, polarity as illustrated. Close the battery compartment.
- For a permanent display light and to save battery life, use the supplied USB cable.
- Connect the device to a suitable USB power source, such as a computer, or use a suitable power adapter (not included).
• A beep tone is heard and 0:00 appears on the display.
7. Settings
- Press and hold the UP or DOWN button in setting mode for fast mode.
- The device will automatically quit the setting mode if no button is pressed for 10 seconds.
7.1 Setting of the time and date
- Press and hold the MODE button in normal mode for three seconds to enter the setting mode.
• The first adjustable value flashes on the display. - Use the UP or DOWN button to make the desired setting, while the value flashes.
-18--19-
GB
Digital alarm clock
GB
-
Confirm with the MODE button and go to the next setting.
• The sequence is shown as follows: -
24/12-hour format (default: 24HR)
- Hour, minutes
– Year, month, day
- Press the MODE button to confirm the setting or wait 10 seconds, the unit will save the setting automatically.
7.2 Alarm settings
- Press the ALARM button in normal mode to enter the alarm mode.
- 6:00 (default) or the last adjusted alarm time appears on the display.
- Press and hold the ALARM button for three seconds to enter the alarm setting mode.
- The first adjustable value flashes on the display.
- Use the UP or DOWN button to make the desired setting, while the value flashes.
- Confirm with the ALARM button and go to the next setting.
• The sequence is shown as follows:
- Hour minutes
– Snooze interval 5 to 20 minutes (default:5)
– Alarm frequency 1-7 (daily), 1-6 (weekdays), 1-5 (Monday to Friday), default setting 1-7
- Confirm the setting with the ALARM button or wait 10 seconds, the device will automatically use the settings you have made so far.
• To activate and deactivate the alarm function press the ALARM button in alarm mode.
• The alarm symbol appears/disappears on the display.
- When the alarm is activated, the alarm starts to ring when the set alarm time is reached.
- Press any button (except SNOOZE) and the alarm will stop.
- If the alarm is not stopped manually, the ascending alarm tone automatically turns off after one minute
and will be reactivated at the same set time in the following day.
• The alarm symbol remains on the display.
- When the alarm rings, press the SNOOZE button and the snooze function is activated.
- Once the snooze function is activated, the alarm symbol will be flashing on the display.
• The alarm will be interrupted for the set time.
8. Display mode
- Each press on the MODE button in normal mode will change the display between: Time, date and automatic dimming function OFF/ON.
- The display automatically switches back to the current time display after 10 seconds.
8.1 Automatic dimming mode
- Select the automatic dimming function OFF/ON by pressing the MODE button.
- By default, the automatic dimming function is disabled (OFF).
- To activate (ON) or deactivate (OFF) the function press the UP or DOWN button.
- If the auto dimming mode is activated (ON), the weak backlight turns on automatically at 6 pm and switches off again at 6 am (default setting).
-20--21-

Digital alarm clock
GB
8.1.1 Setting time interval
- Press and hold the MODE button (display ON) to enter the setting mode for the automatic timer.
- The start time flashes. Press the UP or DOWN button to adjust the hours.
- Confirm the setting with the MODE button and press the UP or DOWN button to set minutes.
- Confirm the setting with the MODE button and set the end time in the same way.
- Confirm the setting with the MODE button.
- If the auto dimming mode is activated (ON), the weak backlight turns on automatically for the set time.
9. Display light
- Press the SNODZE button to adjust the brightness in 3 levels:
HIGH (default)/MIDDLE/LOW. - Attention: Continuous illumination of the display only works with USB-/mains connection.
- Battery operation: Press any button. The backlight turns on for 15 seconds.
10. Dots between the hour and minute indicators
• The two dots flash every second on the display.
- To activate or deactivate the function, press the UP button for 2 seconds in normal mode.
11. Care and maintenance
- Clean the device with a soft damp cloth. Do not use solvents or scouring agents.
- Remove the batteries if the device will not be used for an extended period of time.
- Store the device in a dry place.
11.1 Batlery replacement
- Change the batteries 3 x 1,5 V AAA when the illumination without USB-/mains connection gets weak.
12. Troubleshooting
Problem Solution
No display Operation with USB-/mains connection:
→ Connect the device with the USB cable to a suitable power source
→ Check the connection
Battery operation:
→ Ensure the batteries' polarities are correct
→ Change the batteries
→ Press any button to activate the display briefly
Incorrect indication → Restart the instrument according to the manual
Battery operation:
→ Change the batteries
If your device fails to work despite these measures, please contact the retailer where you purchased the product from for advice.
13. Waste disposal
This product and its packaging have been manufactured using high-grade materials and components which can be recycled and reused. This reduces waste and protects the environment.
-22--23-
Digital alarm clock

Dispose of the packaging in an environmentally friendly manner using the collection systems that have been set up.

Disposal of the electrical device
Remove non-permanently installed batteries and rechargeable batteries from the device and dispose of them separately.
This product is labelled in accordance with the EU Waste Electrical and Electronic Equipment Directive (WEEE).
This product must not be disposed of in ordinary household waste. As a consumer, you are required to take end-of-life devices to a designated collection point for the disposal of electrical and electronic equipment, in order to ensure environmentally-compatible disposal. The return service is free of charge. Observe the current regulations in place!

Disposal of the batteries
Never dispose of empty batteries and rechargeable batteries with ordinary household waste. They contain pollutants which, if improperly disposed of, can harm the environment and human health. As a consumer, you are required by law to take them to your retail store or to an appropriate collection site depending on national or local regulations in order to protect the environment. The return service is free of charge.
The symbols for the contained heavy metals are:
Cd=cadmium, Hg=mercury, Pb=lead.
| Power consumption Power adaptor: DC 5V, 300 mA (not included), cable USB-A - USB-C, 1.5 m (included) Batteries 3 x AAA 1.5 V (not included) |
Dimensions 160 x 56 x 82 mm
Weight 147 g (device only)
TFA Dostmann GmbH & Co.KG, Zum Ottersberg 12, 97877 Wertheim, Germany
No part of this manual may be reproduced without written consent of TFA Dostmann. The technical data are correct at the time of going to print and may change without prior notice. The latest technical data and information about this product can be found in our homepage by simply entering the product number in the search box.
www.tfa-dostmann.de 02/24
-24--25-
Réveil numérique

The operating instructions are enclosed with the device or can be downloaded at www.lfa-doslmann.de/en/service/downloads/instruction-manuals
F Mode d'emploi


- Before you use this product
- Delivery contents
- Range of application and all the benefits of your new instrument at a glance
- Caution! isk of electrocution!
- Caution! isk of injury!
- Digital alarm clock
- Important information on product safety!
- Elements
- Getting started
- Settings
- Setting of the time and date
- GB
- Alarm settings
- Display mode
- Automatic dimming mode
- Setting time interval
- Display light
- Dots between the hour and minute indicators
- Care and maintenance
- Batlery replacement
- Troubleshooting
- Problem Solution
- Waste disposal
- Disposal of the electrical device
- Disposal of the batteries
- Réveil numérique
Brand : TFA
Model : 60.2042.02
Category : Clock