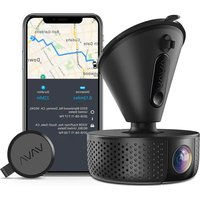
VA-CD001 - Surveillance Camera VAVA - Free user manual and instructions
Find the device manual for free VA-CD001 VAVA in PDF.


User questions about VA-CD001 VAVA
0 question about this device. Answer the ones you know or ask your own.
Ask a new question about this device
Download the instructions for your Surveillance Camera in PDF format for free! Find your manual VA-CD001 - VAVA and take your electronic device back in hand. On this page are published all the documents necessary for the use of your device. VA-CD001 by VAVA.
USER MANUAL VA-CD001 VAVA
E-mail support@vavo.com
Tel: 1-888-436-8469 (Monday-Friday 900 - 17:00 PST)
Address: 46724 Lakeview Blvd, Fremont, CA 94518
EUROPE
support.uk@vavo.com(UK)
www.caiyuan.com/DE
www.f-2019.com/16
(1)
Supporting the following:
E-mail: support@inways.com/JP
Learr more about the EU Declaration of Conformity;
https://www.vsa.com/downloads.VA_DD001.DE.Crch.html


MODE IN CHINA

VAVA DASH CAM
User Guide
CONTENTS
| English | 01/07 |
| Deutsch | 08/14 |
| Français | 15/21 |
| Español | 22/28 |
| Italiano | 29/35 |
| 日本語 | 36/42 |
EN
text_image
Labeled diagram of a hairdryer with numbered parts for identification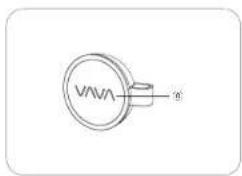
natural_image
Technical line drawing of a circular mechanical component with a labeled end (no text or symbols beyond the label)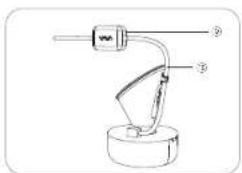
text_image
Diagram of a laboratory apparatus with labeled parts, showing a clamp and tube setup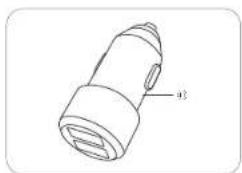
natural_image
Technical line drawing of a mechanical device with labeled part 'a3' (no text or symbols beyond label)Product Diagram
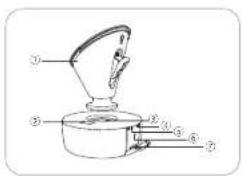
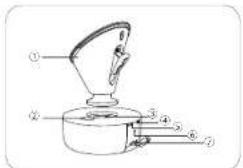
① Cor Mount
(2) Micro USB Port
③ Magnet
④ Power / Working Status LED
⑤ WiFi Status LED
⑤:Reset Button
① Micro SD Cord Slot
⑧ Snapshot Button
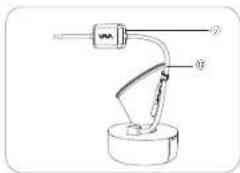
⑩ GPS Module
Micro USB Cable
©VAVA Car Charger
What's In the Box:
1 x VAVA Dash Cam
1 x Car Mount
1x Shapanot Button
1 x VAVA Car Charger
1 x Micro USB Cable with GPS Module
1x Crowder
5 x Cable Clips
1x Button Cell
1x User Guide
1 x Quick Installation Guide
1x Thank You Card
Specifications
| CPU | NT96663 |
| Vision Processor | Sony IMX291, 1/2.8 in |
| Lens | Full 6G + 1 IR Lens |
| Angle | 155° |
| G-Sensor | 3-axis Accelerometer |
| Resolution | 1920*1080/60fps (Default) |
| 1920*1080/30fps | |
| 1280*720/30fps840*480/30fps | |
| Storage | Class 10 Micro SD Cord up to 128GB (max) |
| Wireless Connections | WiFi (between phone and VAVA Dash Cam) |
| 24G (between Snapshot Button and VAVA Dash Cam) | |
| RAM | 2Gb |
| Operating Temperature | -70°C to 50°C |
| -4°F to 122°F | |
| Built-in Battery | 320mAh |
Dash Cam
| LED Indicator | Status |
| Blue LED light slowly blinks | Working |
| Blue LED light on | Stop working / micro SD card storage full |
| Red LED light blinks | Recording an emergency video clip |
| Recording a 15 second video clip after the video recording icon is tapped in the app | |
| Red LED light fast flashes | Micro SD card error |
| Red LED light flashes once | Snapshot photo has been taken |
| White LED light on | Connected to WiFi |
| White LED light off | Not connected to WiFi |
Snapshot Button
1 Dash Cam and Snapshot Button Pairing: Once the dash cam is turned on, press and hold the Snapshot Button for 5 seconds until you hear 4 beep sounds and they are synced. The Snapshot Button enters standby mode once there is no operation in 1 minute. Press again to restart and take a photo.
- Snapshot Button Operations: 1) Press once to take photos; 2) Press and hold for 3 seconds with a beep sound to take videos.
Note:
1 After the dash cam and the Snapshot Button is successfully paired, the Snapshot Button enters standby mode when the dash cam is shut off. When the dash cam is turned on again, press the Snapshot Button to activate the button while taking a snapshot photo, it takes around 3 seconds to resume normal working status.
- Continually pressing the Snapshot Button will drain the button battery. Replace the button cell if you run out of battery.
Emergency Recording Mode
A 20 second video will be captured when the G-Sensor is activated in case of sharp turns or a sudden stop. When the capacity of these videos reaches 30% of the SD card space, the oldest ones will be overwritten by the new ones.
Parking Mode
When your car is not running, i.e. engine being shut down, the dash cam will automatically power off in 10 seconds and enter Parking Mode. When a shock or crash is detected, the G-Sensor will activate the dash cam and start recording a 15 second video. The dash cam will then re-enter the Parking Mode.
VAVA Dash App
Downloading the VAVA Dash App
For Android / iOS phones, search for "VAVA Dash" in the Google Play Store or Apple App Store. Download the app and install it on your phone.
Connecting the VAVA Dash to Your Phone
Connect your Android / iOS smartphone with the VAVA Dash Corn through WiFi: Settings > WLAN > Select "VAVA WiFi" > Enter password > Open the VAVA Dash App Note: The initial WiFi password is 12345678.
Live Preview
Once your phone is connected to the VAVA Dash Cam, open the app to view a real-time video feed and configure the dash cam.
Take Photos and Videos
Press the Snapshot Button or tap the snapshot icon in the app to take a photo. Tap the video recording icon in the app to record a video from 5 seconds before the pressing or tapping to 15 seconds afterwards. The photo and the video clip will be automatically downloaded from the VAVA Dash Com onto the VAVA Dash App.
Media Gallery Management
View, edit, and share captured photos and videos.
Path
Check information regarding driving routes.
Travel Log
Add photos to driving routes and turn it into a Travel Log. Click the share icon to post it on your favorite social networks (Facebook, Twitter, Instagram, etc.)
Installing the VAVA Dash Cam
1 Insert the micro SD card into the micro SD card slot.
2. Stick the car mount onto your car windshield (ideally right in the middle)
3. Fix the VAVA Dash Cam onto the mount via the magnet.
4. Connect the USB cable to the micro USB port of the dash arm. Run the cable along the edge of the windshield, tuck it away in the seams, and extend it all the way to the USB port of the Car Charger. Be sure to keep it away from the airbag area.
5. Insert the Car Charger into your cigarette lighter, connect the Dash Cam to the Car Charger.
6. Start your car to turn on the VAVA Dash Cam. Connect it with your phone (refer to the "VAVA Dash App" section) and open the VAVA Dash App to view a real-time feed.
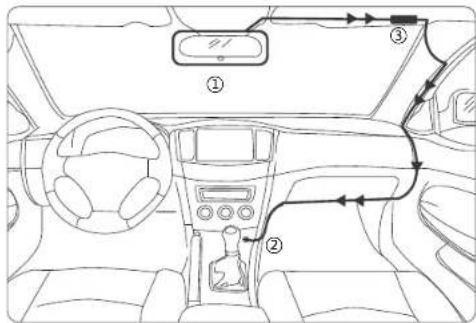
text_image
Diagram of a car interior with numbered components and directional arrows indicating flow or movement.① Ideal Mounting Position ② Car Charger ③ GPS
Note
- The dash com supports up to a class 10 micro SD card up to 128GB. Do not remove or insert the micro SD card when the camera is working.
Suggested micro SD card brands: Samsung, Sandisk, Transcend.
- Stick the Snapshot Button with a 3M adhesive tape on the dashboard or besides the steering wheel. Do not put it on the airbag.
- Stick the GPS module with a 3M adhesive tape on the top left/right corner of windshield.
- Do not use the Car Charger to charge devices with Quick Charge technology.
- Install the car mount on windshields that are titled on an angle between 17° - 58°.
Attention
- Our apps and camera firmware will be updated regularly, you can update the firmware via apps.
Do not use cardboard, paper towel, or napkin to clean the lens.
- Do not attempt to repair, dismente, or modify the dash camera hardware by yourself.
DE
text_image
Labeled diagram of a mechanical device with numbered parts for identification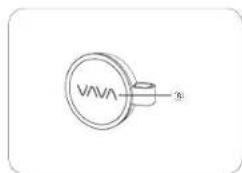
natural_image
Simple line drawing of a circular mechanical component with 'VIVA' and a labeled end (no text or symbols beyond the label)Produktabbildung
① Autohalterung
text_image
Diagram of a laboratory apparatus with labeled parts, including a tube and curved arm, marked with numbers ① and ②.
natural_image
Line drawing of a cylindrical device with a handle and label (no text or symbols present)text_image
Diagram of a car interior with labeled parts and directional arrows indicating flow or movement.text_image
Diagram of a cooking pot with numbered parts labeled ① to ⑦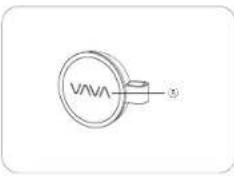
natural_image
Simple line drawing of a circular mechanical component with a base and end cap, no text or symbols present.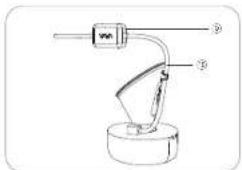
text_image
Diagram of a laboratory apparatus with labeled parts, showing a clamp and rod setup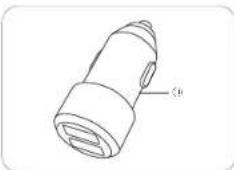
natural_image
Technical line drawing of a cylindrical mechanical component with a labeled section (no text or symbols present)Schéma produit
Application VAVA Dash
text_image
Diagram of a car interior with labeled parts and directional arrows indicating flow or movement.text_image
Labeled diagram of a cooking pot with numbered parts for identification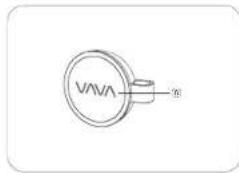
text_image
VAVA ①- Rarado para pojeto M - Participated in at least
text_image
Diagram of a laboratory apparatus with labeled parts ⑨ and ⑫, showing a clamp or probe setup.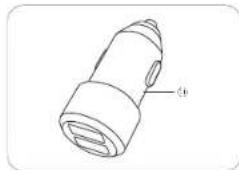
natural_image
Technical line drawing of a mechanical component with no visible text or symbolstext_image
Diagram of a car interior with numbered components and directional arrows indicating flow or movement paths.text_image
Labeled diagram of a cooking pot with numbered parts for identification
text_image
VAVA ⑤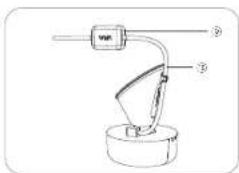
text_image
Diagram of a hairdryer with labeled parts and numbered parts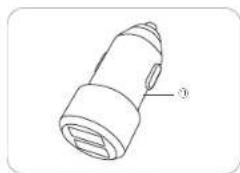
natural_image
Technical line drawing of a cylindrical mechanical component with a labeled part (no text or symbols present)Schema del Prodotto
text_image
Diagram of a car interior with labeled parts and directional arrows indicating flow or movement.text_image
Labeled diagram of a mechanical device with numbered parts for identification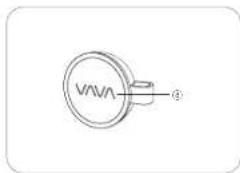
natural_image
Technical line drawing of a circular component with VAVA branding and a pin labeled ④ (no text or symbols beyond branding)製品図
①車両マウント
②マイクロUSBポート
(2) マグレット
④ 電源オン操作中ステータスLED
⑧ WiFi7元一次7LED
(6) 其他
① リモンドホタン
⑦ マイクロSDカードスロット
(3) スナップ写真ポタン
⑧ GPSモジュール
① Micro USB ケーブル
VAVA車載充電器
natural_image
Simple line drawing of a laboratory apparatus with labeled parts (no text or symbols)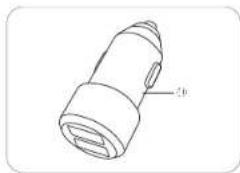
natural_image
Line drawing of a cylindrical device with a labeled part (no text or symbols present)同梱物
text_image
Diagram of a car interior with labeled parts and directional arrows indicating traffic or movement paths.This device complies with Part 15 of the FCC Rules: Operation is subject to the following two conditions:
-
This device may not cause harmful interference and
-
This device must accept any interference that is received, including any interference that may cause undesired operation.
This device is acting as slave and operating in the 2.4 GHz (2412 - 2462 MHz) band.
Ad Hoc function is supported but not able to operate on non-US frequencies.
NOTE: This equipment has been tested and found to comply with the limits for a Class B digital device, pursuant to
part 15 of the FCC Rules. These limits are designed to provide reasonable protection against harmful interference in a residential installation. This equipment generates uses and can radiate radio frequency energy and, if not installed and used in accordance with the instructions, may cause harmful interference to radio communications. However, there is no guarantee that interference will not occur in a particular installation. If this equipment does cause harmful interference to radio or television reception, which can be determined by turning the equipment off and on, the user is encouraged to try to correct the interference by one or more of the following measures:
- Reorient or relocate the receiving antenna.
- Increase the separation between the equipment and receiver.
-Connect the equipment into an outlet on a circuit different from that to which the receiver is connected.
-Consult the dealer or an experienced radio/TV technician for help
Changes or modifications not expressly approved by the party responsible for compliance could void the user's authority to operate the equipment.