302967 - Lighting Aplic - Free user manual and instructions
Find the device manual for free 302967 Aplic in PDF.


| Product type | LED bicycle light set (front and rear lights) |
| Brand | Aplic |
| Model | 302967 |
| Front light power supply | 3 AAA 1.5V batteries (not included) |
| Rear light power supply | 4 AAA 1.5V batteries (not included) |
| Front light weight | Approximately 50 g |
| Rear light weight | Approximately 40 g |
| Bulb type | LED |
| Functions | On/Off and lighting mode change |
| Mounting | Simple, with rubber strap for front light and clamp for rear light |
| Quick release device | Unlock lever on the front light to remove the lamp from the bracket |
| Approval | Complies with road traffic regulations (StVZO) |
| Use | Road traffic |
| Water resistance | Not waterproof; use only in dry conditions |
| Operating temperature | Avoid high temperatures and sudden changes |
| Safety | Do not open, do not short-circuit, do not use accumulators (voltage too low) |
| Maintenance | Check before use, clean with a dry cloth |
| Disposal | Do not dispose of with household waste; comply with WEEE directive |
| Batteries | Remove used batteries and recycle them in accordance with regulations |
| Warranty | Void if repairs are not carried out by the supplier |
| Package contents | LED light set, instruction manual |
Frequently Asked Questions - 302967 Aplic
User questions about 302967 Aplic
0 question about this device. Answer the ones you know or ask your own.
Ask a new question about this device
Download the instructions for your Lighting in PDF format for free! Find your manual 302967 - Aplic and take your electronic device back in hand. On this page are published all the documents necessary for the use of your device. 302967 by Aplic.
USER MANUAL 302967 Aplic
natural_image
Blue abstract logo shape resembling a stylized letter 'Q' or partial circle (no text or symbols)aplic
LED Bike Lights
ENG: Latest information, drivers, user manuals and data sheets can be found at www.ganzeinfach.de in our download area.
natural_image
Diagram of a car air lift with a curved arrow indicating clockwise motion (no text or symbols)4.2 Rücklicht
5. Inbetriebnahme
natural_image
Diagram of a car interior showing airflow direction and structural layers (no text or symbols)natural_image
Simple line drawing of a rectangular object with a curved top and side profile, no text or symbols present.Thank you for having chosen this aplic product and for placing your trust in our company. Please read this manual carefully before installation to ensure your long-term enjoyment of this product. For future reference, please keep this manual. Before using the delivered product, check that it is complete, faultless and undamaged.
1. Scope of delivery
- LED Bike lights
- User manual
2. Technical specifications
| Power supply • 3x AAA | 1,5V batteries (front light)• 4x AAA 1,5V batteries (rear light) |
| Weight | • Approx. 50g (front light)• Approx. 40g (rear light) |
| Features • Easy installation |
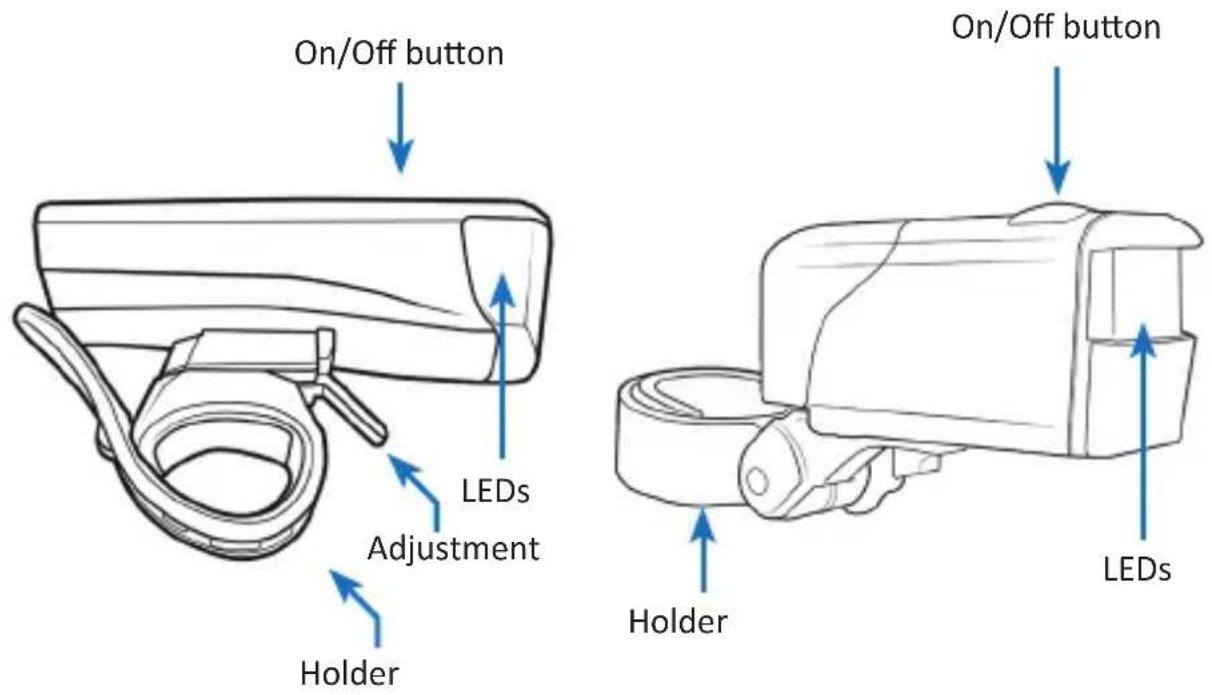
3. Product details
4. Installation
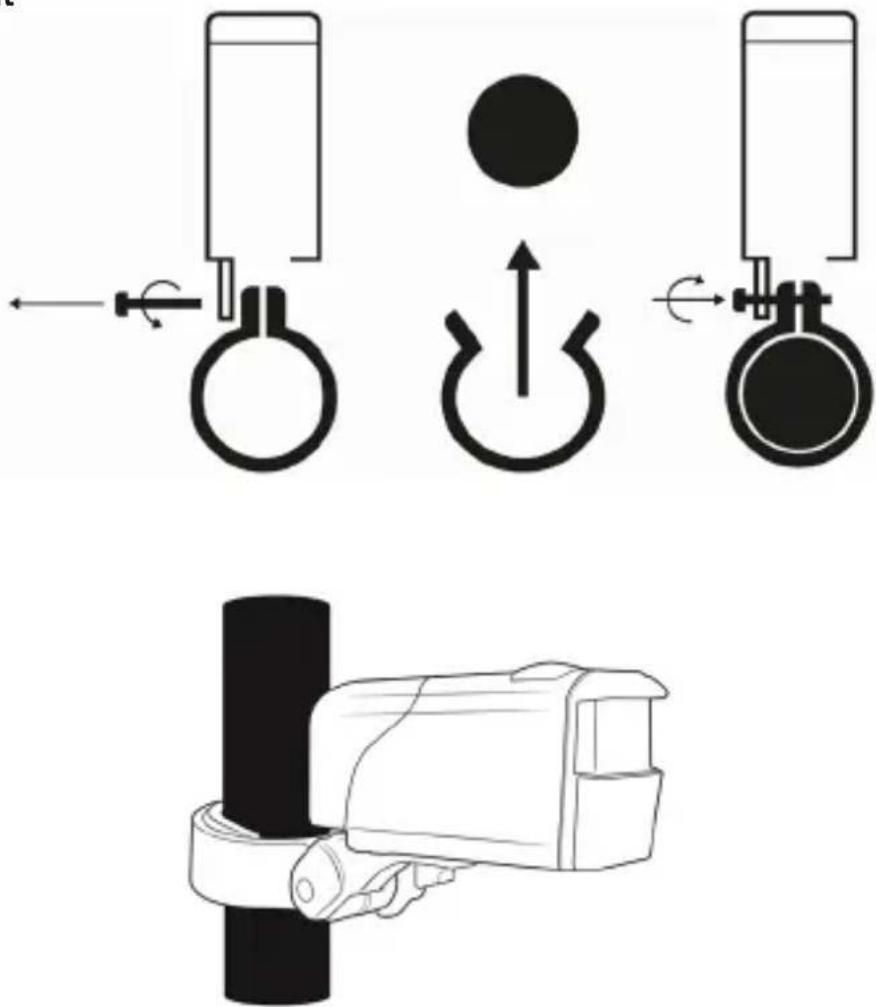
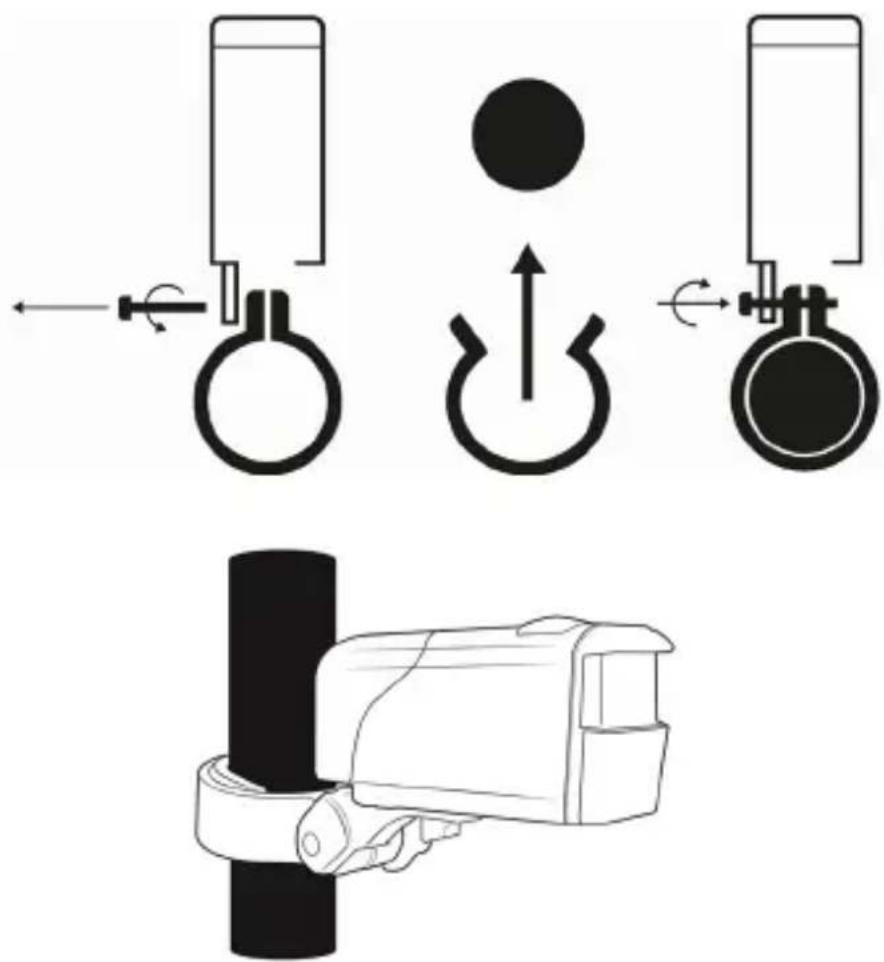
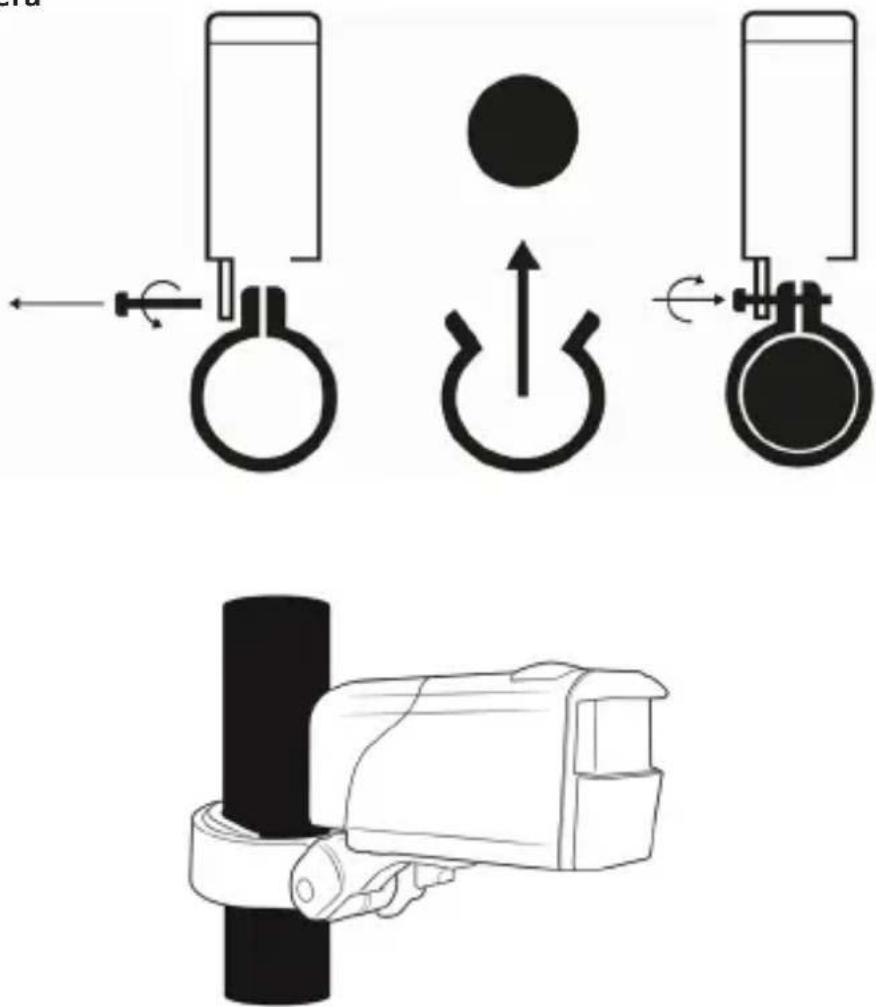
Mount the front light on the handlebars and the rear light at the rear part of the bicycle frame. For mounting on the front light, open the rubber strap and screw it. Place the mounting clamp to the desired position and also to the desired rod and screw it.
4.1 Front light
natural_image
Line drawing of a car air conditioner with a curved handle and arrow indicating clockwise motion (no text or symbols)Now the lights are installed correctly on the handlebars.
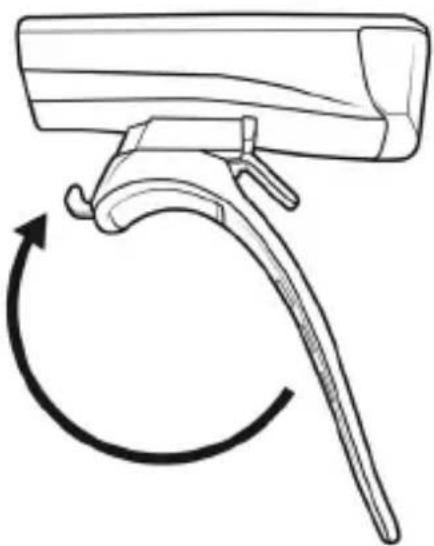
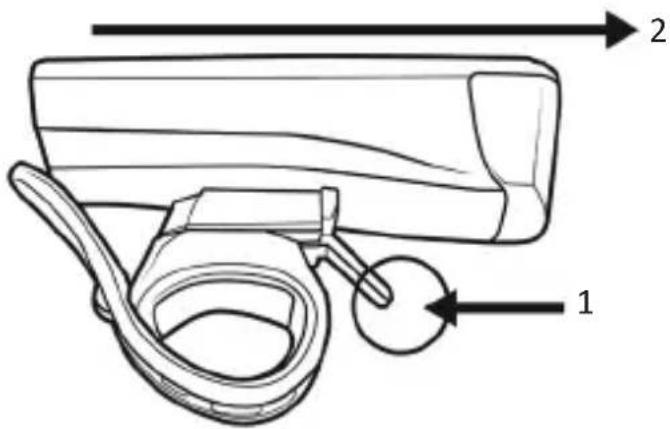
Because of the quick-release lock the front light is very easy to remove and re-install from the holder.
Press the lever (1) down and remove the light (2) as shown in the figure below.
4.2 Rear light
5. Start-up
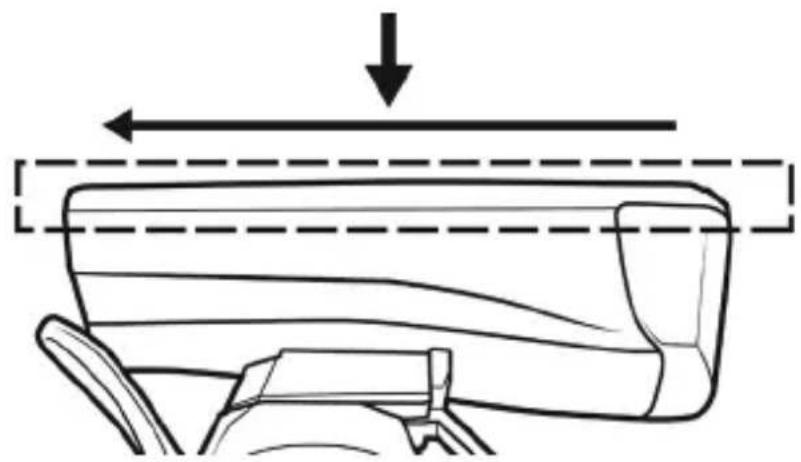
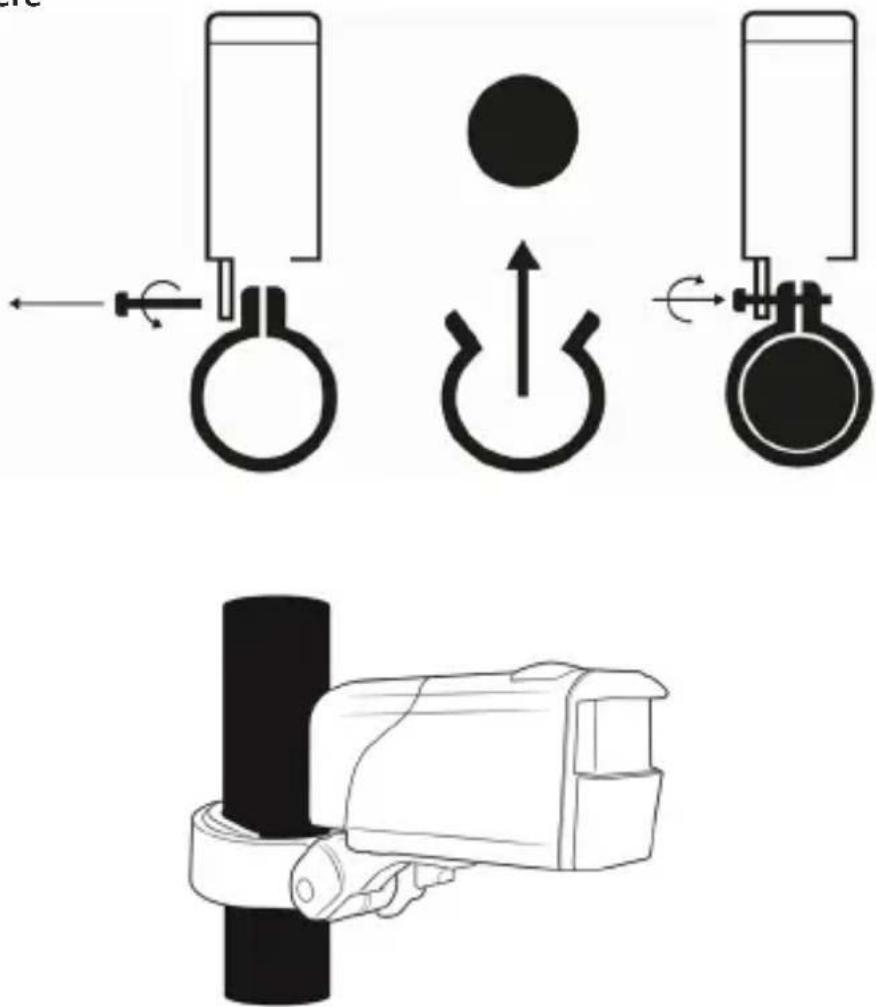
For a quick start-up, you have to insert the batteries. Open the battery compartment of the front light and insert 3x AAA 1.5V batteries. To open the battery compartment, it is necessary to pull the top cover back. Insert the batteries with the correct polarity!
natural_image
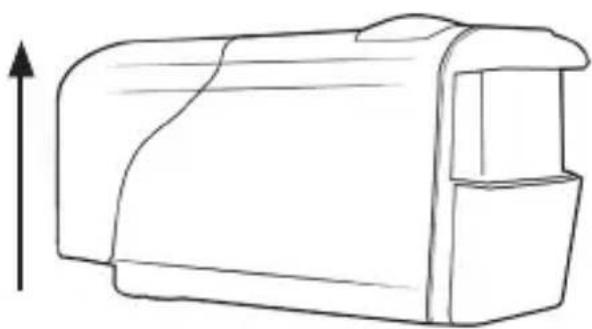
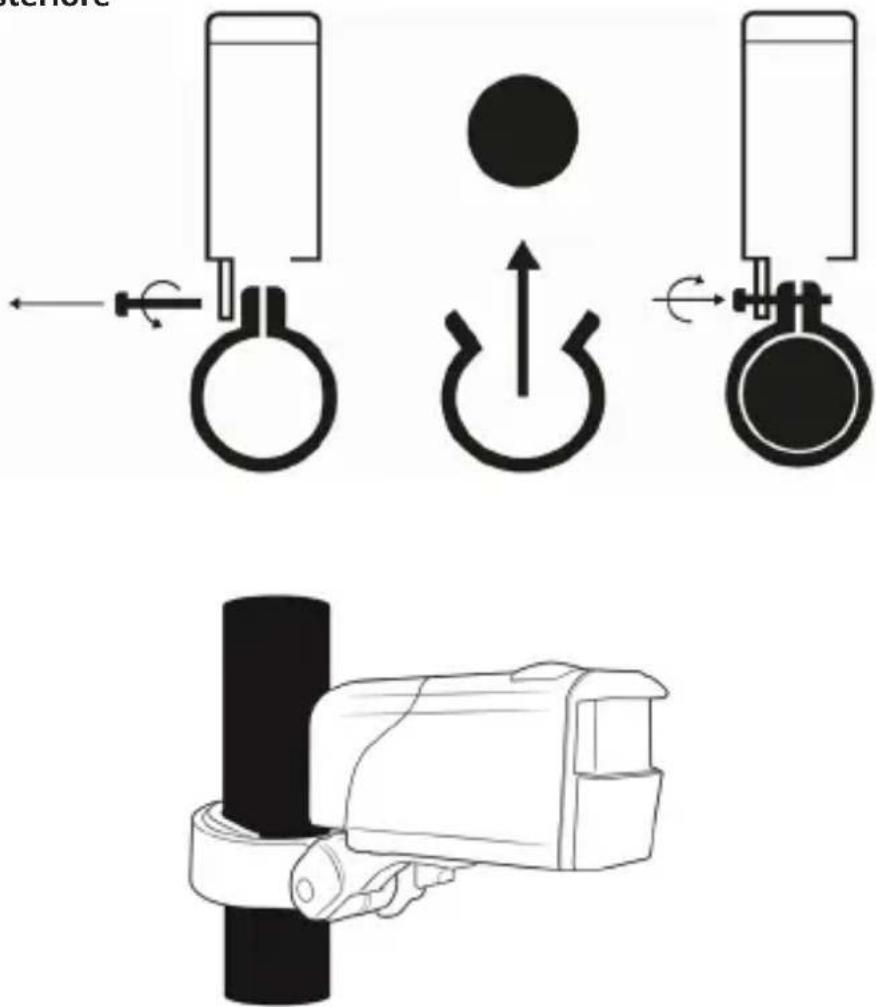
Diagram of a car interior showing airflow direction and horizontal dashed lines (no text or symbols)To install the batteries of the rear light you have to open the battery compartment by removing upwardly the back of the light and inserting 4x AAA 1.5V batteries. Insert the batteries with the correct polarity!
natural_image
Simple line drawing of a cylindrical object with an upward arrow, no text or symbols presentNote: Do not use rechargeable batteries because these batteries only have a voltage of 1.2V. The use of rechargeable batteries can lead to functional or brightness problems.
To turn on the lights or to change the operating modes, you have to press the on or off button in each case.
6. Safety instructions and liability disclaimer
This product has a StVO approval (German road traffic registration ordinance) and is therefore permitted for use in traffic! Never try to open the device to carry out repairs or conversions. Avoid contact with mains voltages. Do not short-circuit the product. The device is not certified for use in the open air; only use it in dry
conditions. Protect it from high humidity, water and snow. Keep it away from high temperatures. Do not subject the device to sudden changes in temperature or heavy vibration as this might damage electronic components. Examine the device for damage before using it. The unit should not be used if it has received an impact or has been damaged in any other way. Please observe national regulations and restrictions. Do not use the device for purposes other than those described in the instructions. This product is not a toy. Keep it out of the reach of children or mentally impaired persons. Any repair or alteration to the device not carried out by the original supplier, will invalidate the warranty or guarantee. The product may only be used by persons who have read and understood these instructions. The device specifications may change without any separate prior notice to this effect.
7. Disposal instructions
Electrical and electronic devices may only be disposed of in accordance with the European WEEE Directive and not with household rubbish. Components must be disposed of or recycled separately as dangerous, toxic elements can inflict sustained damage on the environment if they are disposed of incorrectly. As a consumer, you are bound by the Electrical and Electronic Devices Act (ElektroG) to return electrical and electronic goods free of charge at the end of their useful life to the manufacturer, the place of purchase or to specially set up, public collection points. The details in each case are governed by national law. The symbol on the product, the operating instructions and/or the packaging refers to these regulations. By separating materials in this way, recycling and disposing of old devices, you are making an important contribution towards protecting our environment
8. Instructions on the disposal of batteries
With regard to the sale of batteries or the supply of devices containing batteries, the supplier is obliged to draw the customer's attention to the following: As the end user, the customer has a statutory obligation to return used batteries. He can return old batteries stocked or previously stocked by the supplier in the form of new batteries to the supplier's despatch warehouse (despatch address) free of charge. The symbols shown on the batteries have the following meanings: Pb = battery contains more than 0.004 percent by mass of lead, Cd = battery contains more than 0.002 percent by mass of cadmium, Hg = battery contains more than 0.0005 percent by mass of quicksilver.
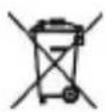
The symbol of the rubbish bin with a cross through it indicates that the battery may not be put in household waste.
WEEE guideline: 2012/19/EU WEEE register number: DE 67896761
WD Plus GmbH, herewith declares that this product 302967/20201009JS001 conforms to the principle requirements and other relevant stipulations. The complete Declaration of Conformity can be obtained from: WD Plus GmbH, Wohlenbergstraße 16, 30179 Hanover
natural_image
Diagram of a car air lift with a curved arrow indicating clockwise motion (no text or symbols)4.2 Feu arrière
5. Mise en service
natural_image
Diagram of a car interior showing airflow direction and structural layers (no text or symbols)natural_image
Simple line drawing of a rectangular object with a curved top and side profile, no text or symbols present.natural_image
Diagram of a car air lift with a curved arrow indicating clockwise motion (no text or symbols)4.2 Luce posteriore
natural_image
Diagram of a car interior showing airflow direction and structural layers (no text or symbols)natural_image
Simple line drawing of a rectangular object with a curved top and side profile, no text or symbols present.natural_image
Diagram of a car air lift with a curved arrow indicating clockwise motion (no text or symbols)4.2 Luz trasera
5. Puesta en marcha
natural_image
Diagram of a car interior showing airflow direction and structural layers (no text or symbols)natural_image
Simple line drawing of a rectangular object with a curved top and side profile, no text or symbols present.
- aplic
- Rücklicht
- Inbetriebnahme
- Scope of delivery
- Technical specifications
- Product details
- Installation
- Front light
- Rear light
- Start-up
- Safety instructions and liability disclaimer
- Disposal instructions
- Instructions on the disposal of batteries
- Feu arrière
- Mise en service
- Luce posteriore
- Luz trasera
- Puesta en marcha
Brand : Aplic
Model : 302967
Category : Lighting