
HOCE7T620DXK - Refrigerator HAIER - Free user manual and instructions
Find the device manual for free HOCE7T620DXK HAIER in PDF.
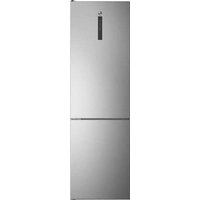


| Brand | Haier |
| Model | HOCE7T620DXK |
| Product type | Refrigerator |
| Defrost technology | Total No Frost (automatic) |
| Control type | Electronic with LED display |
| Refrigerator temperature range | 2 °C to 8 °C (adjustable in 1 °C steps via app) |
| Freezer temperature range | -16 °C to -24 °C (adjustable in 1 °C steps via app) |
| Super Cool function | Yes (automatic temperature 2 °C, max duration 30 h) |
| Super Freeze function | Yes (automatic temperature -24 °C, max duration 50 h) |
| Eco mode | Yes (refrigerator 5 °C, freezer -18 °C) |
| Holiday function | Yes (turns off refrigerator, maintains freezer) |
| Wi-Fi connectivity | Yes (via hOn app) |
| Door reversibility | Yes |
| Power supply | 220-240 V, 50 Hz |
| Wi-Fi radio frequency | 2400-2483.5 MHz, max power 100 mW |
Frequently Asked Questions - HOCE7T620DXK HAIER
User questions about HOCE7T620DXK HAIER
0 question about this device. Answer the ones you know or ask your own.
Ask a new question about this device
Download the instructions for your Refrigerator in PDF format for free! Find your manual HOCE7T620DXK - HAIER and take your electronic device back in hand. On this page are published all the documents necessary for the use of your device. HOCE7T620DXK by HAIER.
USER MANUAL HOCE7T620DXK HAIER
EN....1 BG....11 CS 22 DA 33 DE....43 EL 54 ES....66 FI....75 FR 86 HR....96 HU 106 IT....116 NL 126 NO 136 PL....146 PT....156 RO....166 RU....177 SK 188 SL....198 SR 208 SV 218 UK 228
Summary
PRODUCT DESCRIPTION ...... 2
Space requirements .... 2
USE....3
Use 3
Customized temperature 4
Super Cool function 4
Super Freeze function 5
Eco mode 5
Holiday function 5
Defrosting 5
Demo mode 6
Error Codes 6
WI-FI USE 7
Step 1 7
Step 2 7
Step 3 7
Wi-Fi Use....8
DOOR REVERSIBILITY....9
PRODUCT DESCRIPTION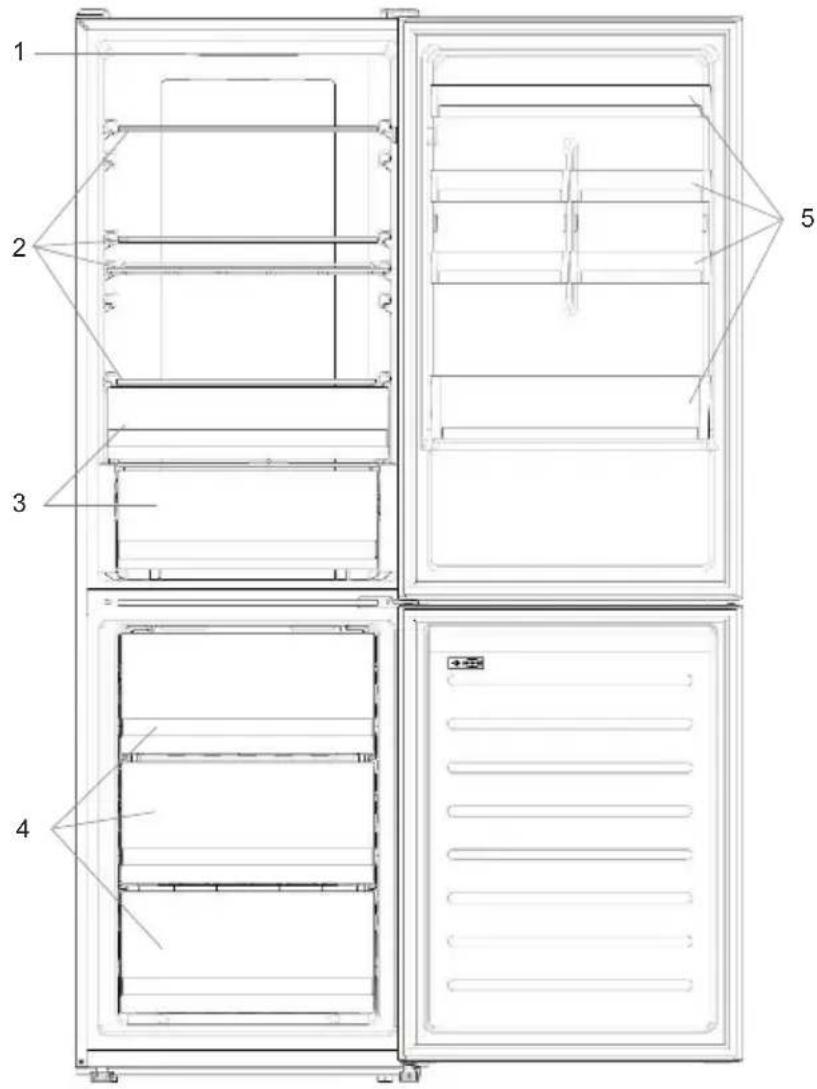
- Control Panel
- Shelves
- Crispers
- Freezer Boxes
- Door rack
* The most energy-saving configuration requires drawers, food box and shelves to be positioned in the product, please refer to the above pictures. ** The pictures above are only for reference. The actual configuration will depend on the physical product or statement by the distributor.
Space requirements
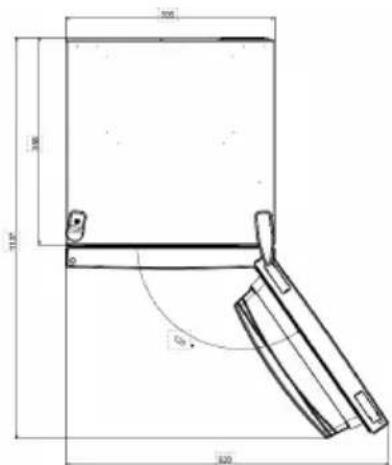
The unit's door must be able to fully open as shown. Spare enough space for convenient opening of the doors and drawers.
Keep a distance of at least 50 mm between the side walls of the product and adjacent parts.
Width: min. 920 mm
Depth: min. 1137 mm
USE
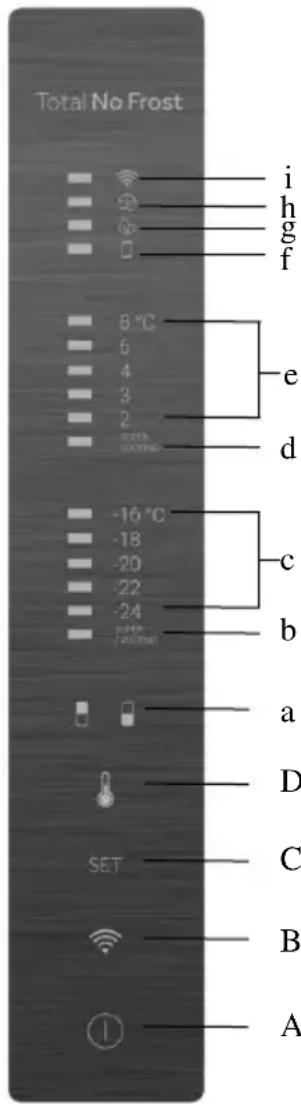
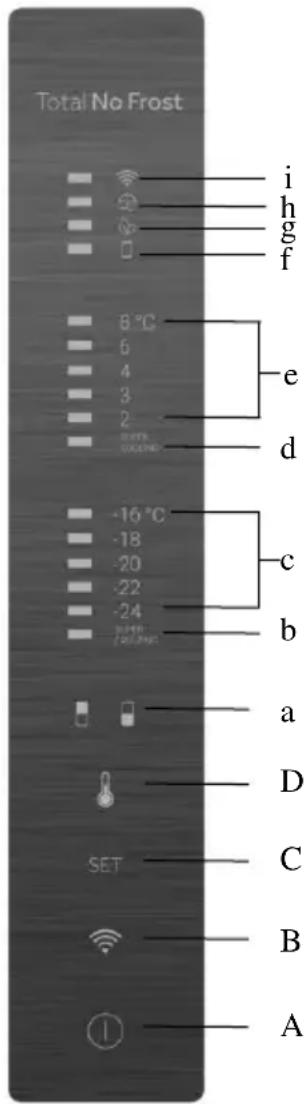
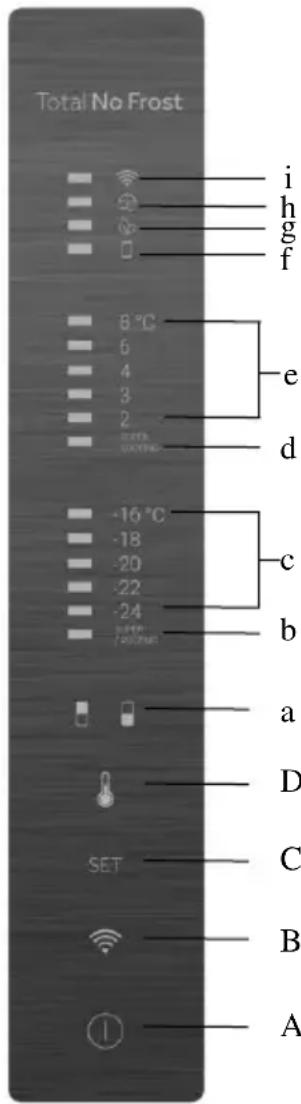
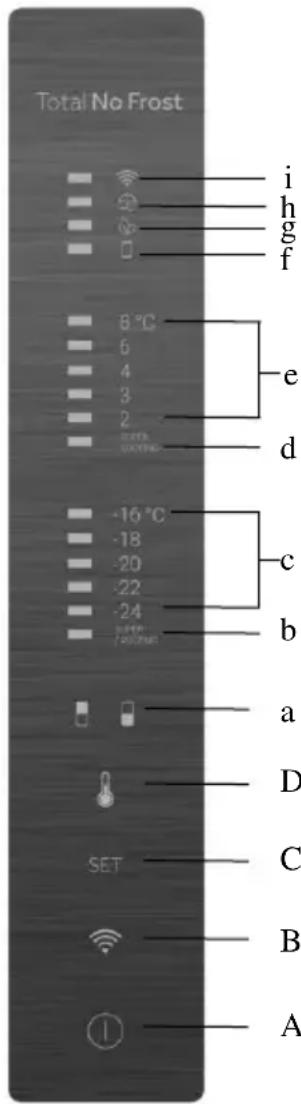
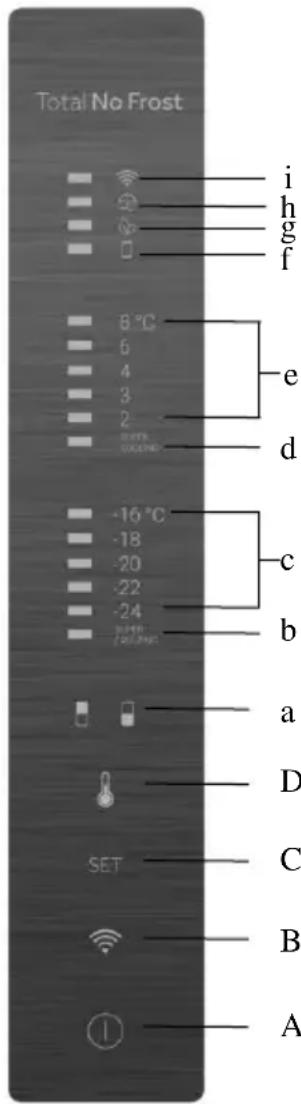
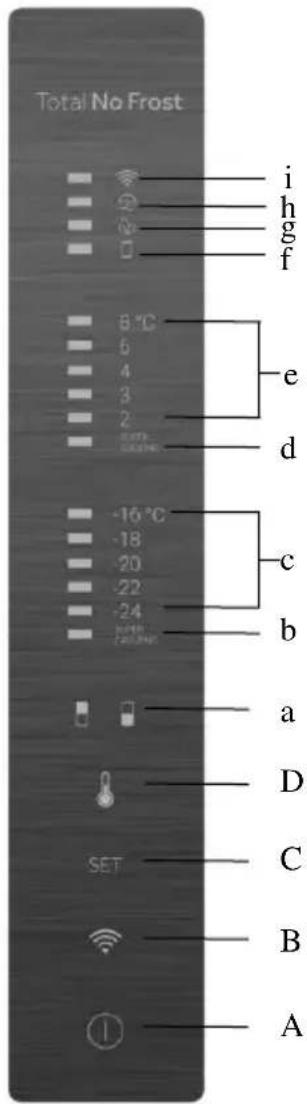
A. ON/OFF key, used to switch on/off the appliance B. Wi-Fi key, used to switch on/off the Wi-Fi C. Mode key, used to select the desired function D. TEMP key, used to select the fridge and freezer temperature
a. Fridge/freezer area icon, shows which compartment of the appliance is selected b. Super Freeze icon, shows if the Super Freeze function is activated c. Freezer temperature levels, show which is the selected temperature in the freezer d. Super Cool icon, shows if the Super Cool function is activated e. Fridge temperature levels, show which is the selected temperature f. Customized temperature icon, shows if the temperature has been selected by app g. Eco mode icon, shows whether the eco mode is activated h. Holiday function icon, shows whether the holiday function is activated i. Wi-Fi icon, shows whether the Wi-Fi is working and the appliance is connected
Use
- Plug in the appliance, it automatically turns on. The temperature will automatically set at 4 °C in the fridge and -18 °C in the freezer.
- To change the temperature, press the TEMP key for 5 seconds, an acoustic signal is made and the icon of the selected compartment (fridge or freezer) as well as all the temperature LEDs of the corresponding compartment turn on for 2s, after 2s the selection of the compartment is confirmed. With the selected compartment icon on, quick press the TEMP key to change the temperature. When the setting increases, the corresponding LED light will turn on. An acoustic signal is made every time the TEMP key is pressed and the temperature is changed, after 5 seconds the selection is confirmed. After 30s without operation the fridge/freezer icon area turns off, while the LEDs of the selected temperatures stay on. When the TEMP key is touched again, the icon of the last selected area (fridge or freezer) turns on. • In case of power loss, the last cooling level set will be restored
- To restore the default setting, long press the Temp key button and click the ON/OFF key button 5 times (in 5 seconds)
- Under normal operating conditions (in spring and autumn), it is recommended to set the temperature at 4 °C. In summer when the ambient temperature is high, it is recommended to set temperature at 6~8 °C, so as to guarantee the fridge and freezer temperatures and reduce the refrigerator continuous running time; and in winter when the ambient temperature is low, it is recommended to set temperature at 3~4 °C to avoid frequent start/stop of the refrigerator.
Customized temperature
From the app it is possible to customize the temperature for both fridge and freezer. The temperature can be set with 1 °C sensitivity. It is possible to select a temperature from 2 °C to 8 °C in the fridge, and from -16 °C to -24 °C in the freezer.
When the temperature is selected by the app, the customized temperature icon turns on, while all the temperature LED lights of the affected compartment are turned off (i.e., if the refrigerator temperature is selected from the app, LEDs from 2 °C to 8 °C are turned off. If the freezer temperature is selected from the app, LEDs from -16 °C to -24 °C are turned off). If only a single area (freezer or fridge) has the customized temperature, the temperature selection of the other area is not changed and the LED light of the selected temperature of that area remains on. An acoustic signal is made every time the temperature is changed.
Super Cool function
It is suggested to switch on the Super Cool function if a large quantity of food should be stored (for example after the purchase). The Super Cool function accelerates the cooling of fresh food and protects the goods already stored from undesirable warming. When the function is activated, the temperature of the fridge is automatically set at 2 °C.
How to use the Super Cool function:
- The function can be activated by long pressing the TEMP key to select the fridge compartment, and then quickly pressing the TEMP key until the Super Cool icon LED is turned on, or it can be turned on from the app. When the function is activated, the Super Cool LED is always ON.
- To exit the Super Cool function, press the TEMP key or turn it off from the app.
- The Super Cool function automatically ends when the function has lasted for more than 30 hours.
- When the Super Cool ends, the icon of the control panel is switched off and the previously set cooling level is restored.
Note: Super Cool and Super Freeze functions cannot be activated simultaneously.
Super Freeze function
The super freezing function accelerates the freezing of fresh food and protects the goods already stored from undesirable warming. If a large amount of food has to be frozen, it is recommended to set the Super Freeze function on 24 hours before the usage. When the function is activated, the temperature is automatically set at -24 °C.
How to use the Super Freeze function:
- The function can be launched by long pressing the TEMP key to select the freezer compartment, and then quickly pressing the TEMP key until the Super Freeze icon LED is turned on, or it can be turned on from the app. When the function is activated, the Super Freeze LED is always ON.
- To exit the Super Freeze function, press the TEMP key or turn it off from the app.
- The Super Freeze function automatically ends when the function has lasted for more than 50 hours.
- When the Super Freeze ends, the icon on the control panel switches off and the previously set freezing level is restored.
Note: The Super Cool and Super Freeze functions cannot be activated simultaneously.
Eco mode
The Eco mode can be activated to optimize the performance of the appliance while ensuring the best food storage. The Eco mode will automatically set the temperature at 5 °C in the fridge and at -18 °C in the freezer.
How to use the Eco mode:
- The function can be activated from the control panel by pressing the “mode” key until the Eco mode icon turns on (an acoustic signal confirms the selection), or by selecting the function from the app. When the function is activated, the Eco mode icon is always ON.
- To exit the Eco mode, turn it off from the app or choose another function from the control panel.
- When the Eco mode ends, the icon on the control panel switches off and the previously set cooling levels are restored.
Holiday function
The Holiday function can be used to reduce the energy consumption of the appliance when it is not used regularly. When the function is on, the LED lights are off (even if the door is open) and the fridge is turned off, whereas the freezer will keep working normally.
How to use the Holiday function:
- The function can be activated from the control panel by pressing the “mode” key until the Holiday icon turns on (an acoustic signal confirms the selection), or by selecting the function from the app. When the function is activated, the Holiday icon is always ON.
- To exit the Holiday function, turn it off from the app or choose another function from the control panel.
- When the Holiday function ends, the icon on the control panel switches off and the previously set cooling levels are restored.
Defrosting
The defrosting of the refrigerator and freezer compartments is done automatically: no manual operation is needed.
Slider
Near the vegetable basket there is a slider that allows you to adjust the humidity inside it: moving it to the right decreases the humidity, moving it to the left increases the humidity.
Demo mode
To enter the demo mode, with the display unlocked, keep pressed the SET key and press the WiFi key 5 times within 5 seconds. To exit the demo mode, perform the same operation or power off the refrigerator.
Error Codes
- Communication error
[-16°C;-18°C;-20°C;-22°C;-24°C] lights in the freezer turn on sequentially, it means there has been a communication error between the main control board and the display board. Please, contact the technical assistance to help solve the problem
- Fan
[-16°C;-20°C;-22°C;-24°C] lights in the freezer flashing simultaneously if the fan is not working properly. Please, contact the technical assistance to help solve the problem
WI-FI USE
Step 1
- Download the hOn app on the stores


Step 2
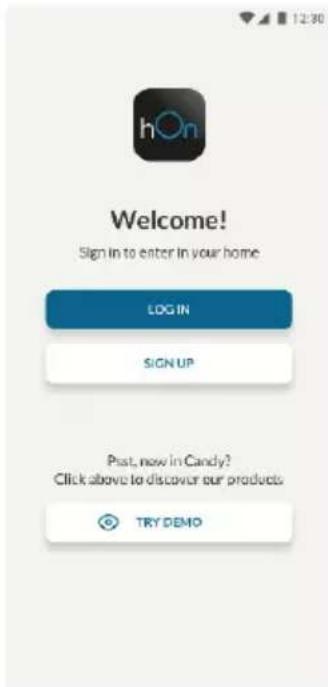
- Create your account on the hOn App or log in if you already have an account
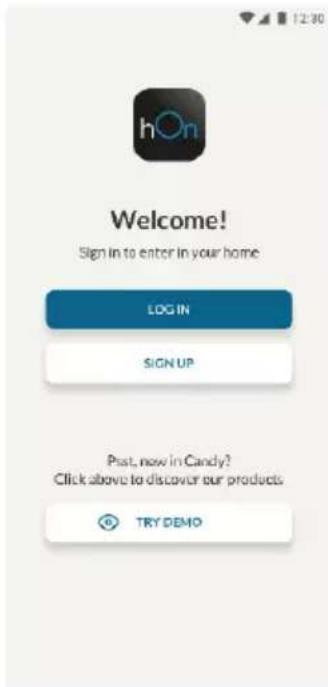
Step 3
- Follow the pairing instructions in the hOn App
Wi-Fi Use
If the Wi-Fi has not been configured yet, when the refrigerator turns on, it will automatically enter configuration mode and remain in this state for 30 minutes. The Wi-Fi icon blinks and product enrollment can begin.
- Follow the in-app instructions to configure the Wi-Fi (see above)
- Once the Wi-Fi is configured and the connection is established, the Wi-Fi icon is on and fixed.
- After 30 minutes without any operation, the Wi-Fi will automatically exit configuration mode.
- If the Wi-Fi has already been configured, it will automatically reconnect according to the configuration information.
To reset the Wi-Fi, press the Wi-Fi key and the SET key for 2 seconds.
To turn off the Wi-Fi, press the Wi-Fi key for 3 seconds.
Radio-module - Technical data
| Frequency rate (OFR) | 2400 MHz-2843.5 MHz |
| Channel frequencies | 2412...2472 MHz(step size 5 MHz) |
| Maximum power(EIRP) | 100 mW |
The radio equipment type complies with Directive 2014/53/EU.
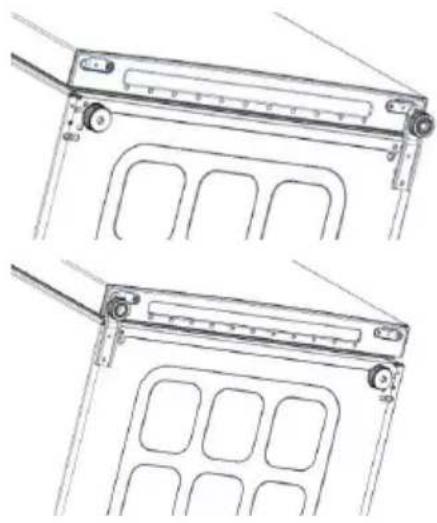
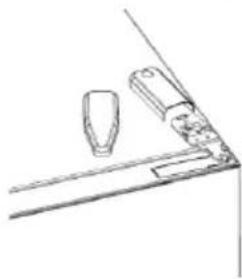
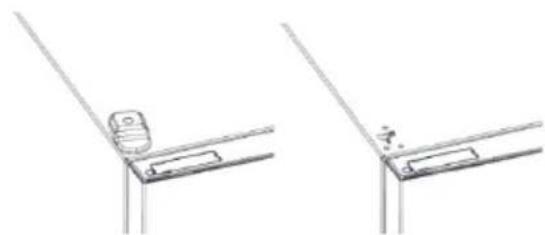
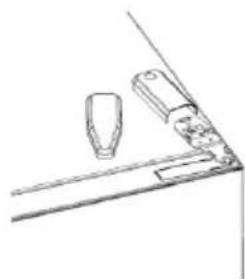
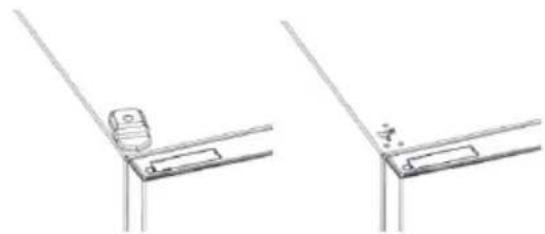
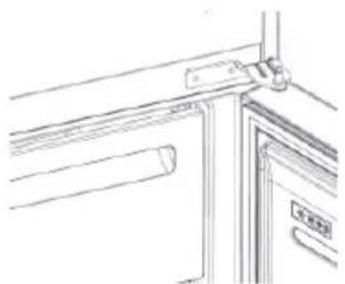
DOOR REVERSIBILITY
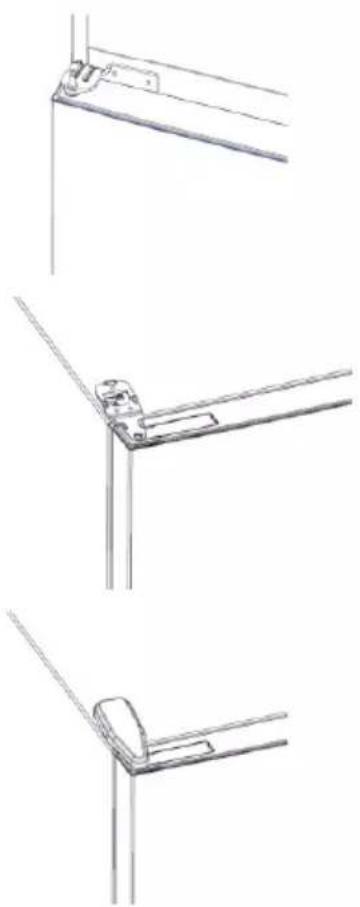
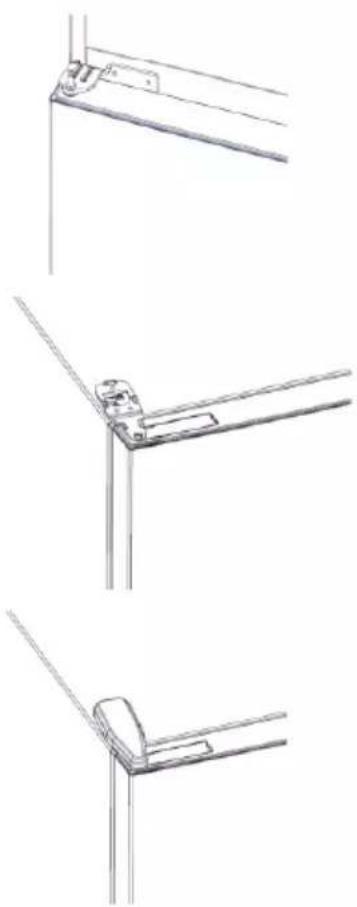
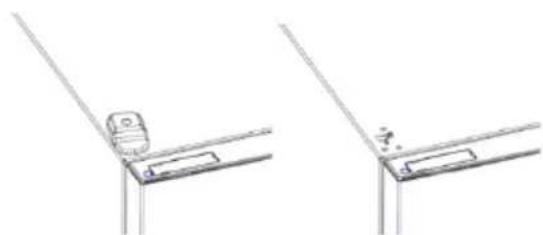
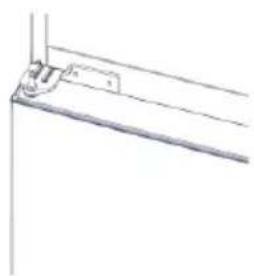
Tools needed: Electric screwdriver
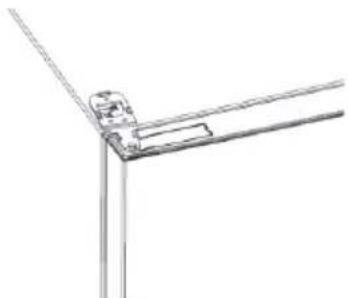
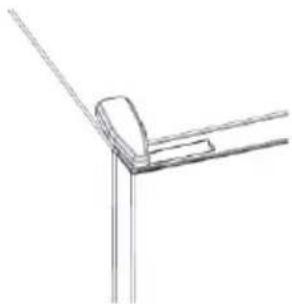
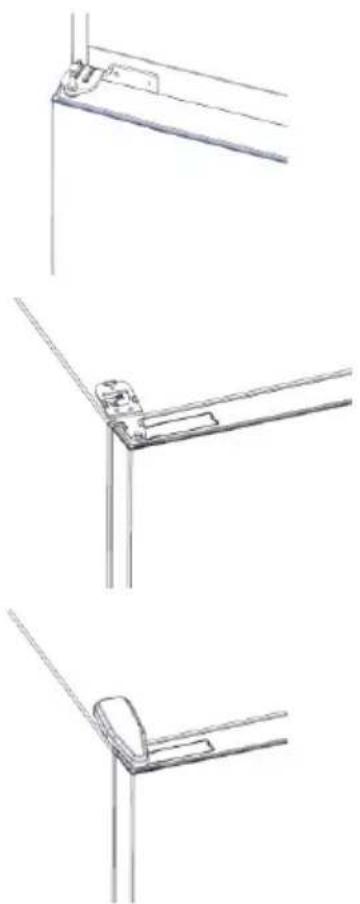
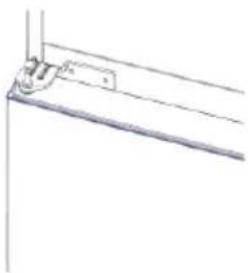
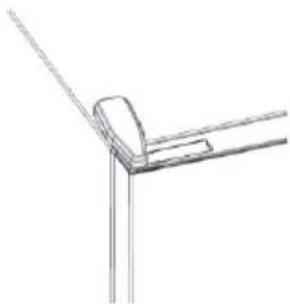
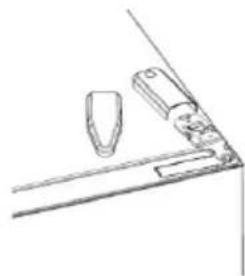
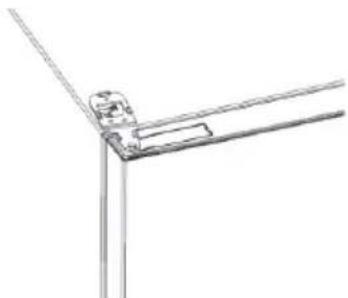
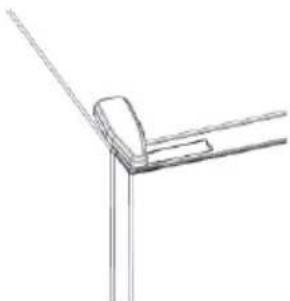
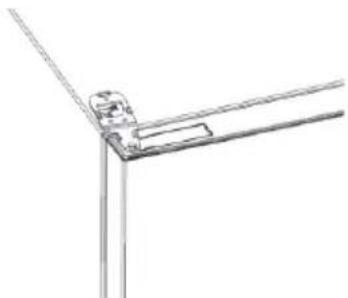
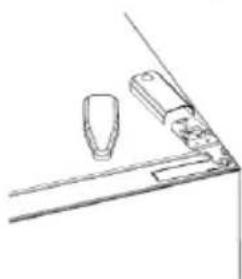
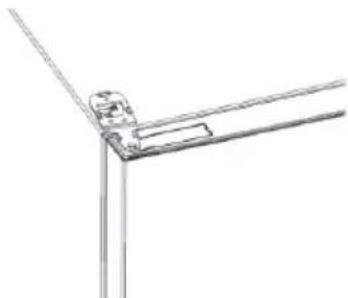
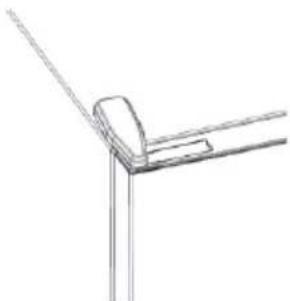
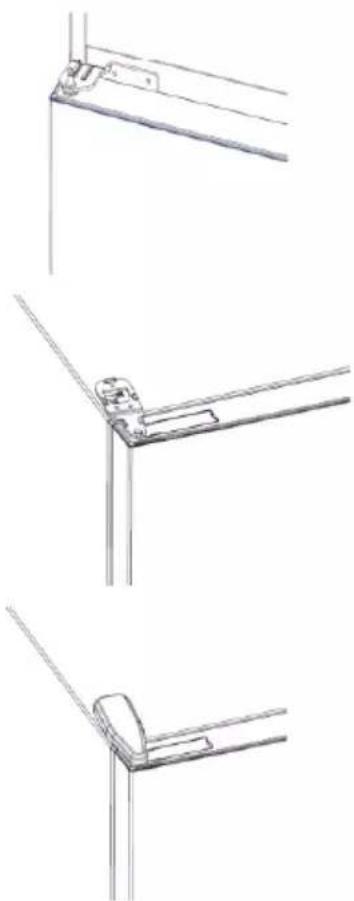
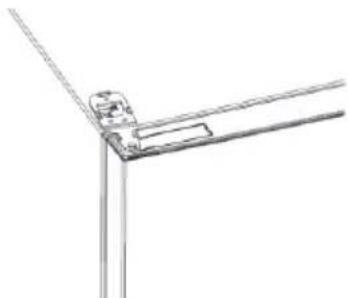
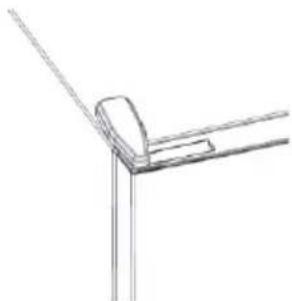
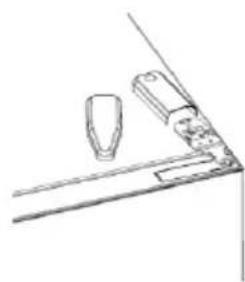
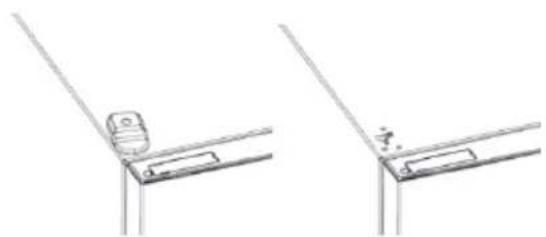
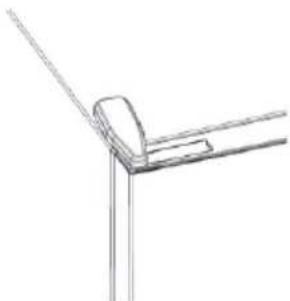
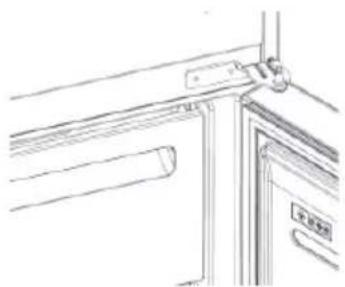
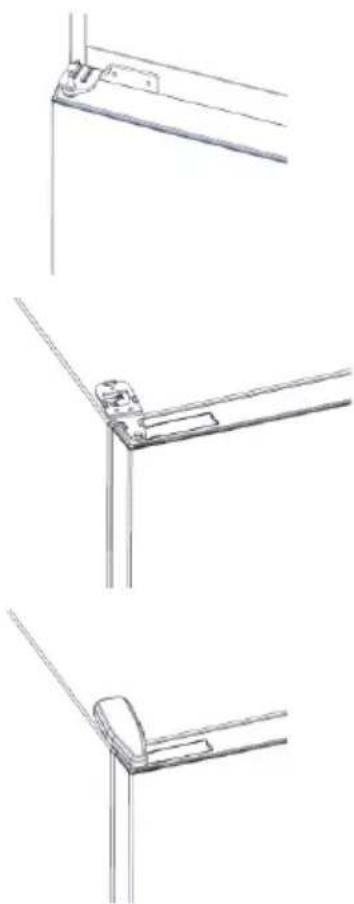
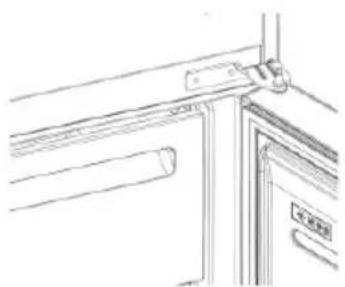
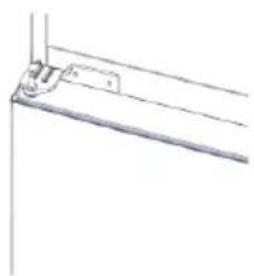
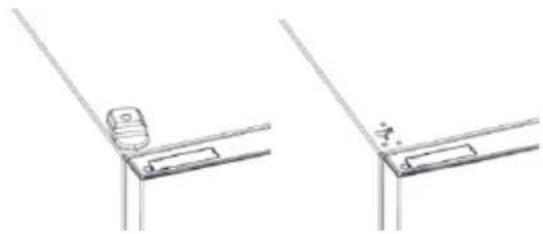
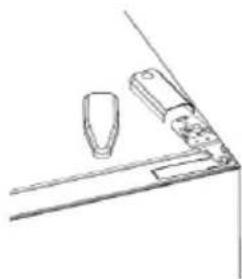
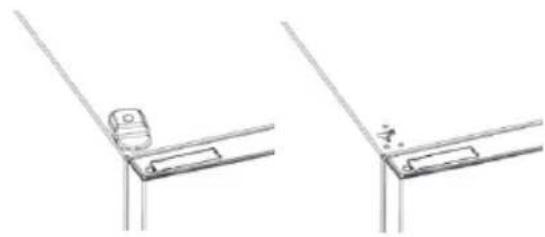
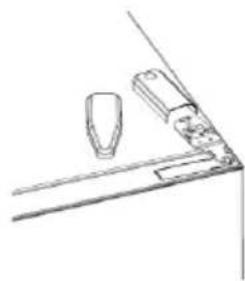
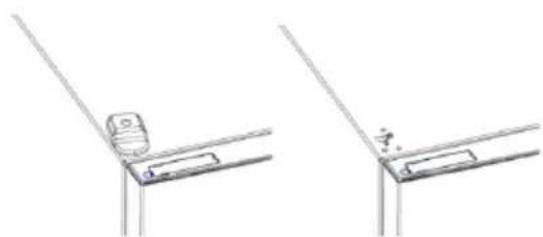
- Remove the top hinge cover
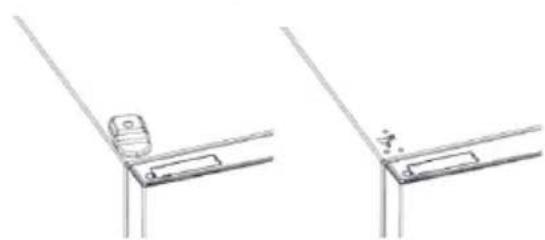
- Unscrew the top hinge
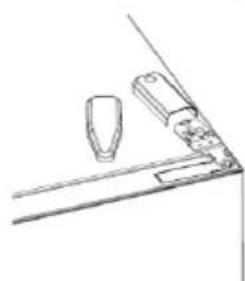
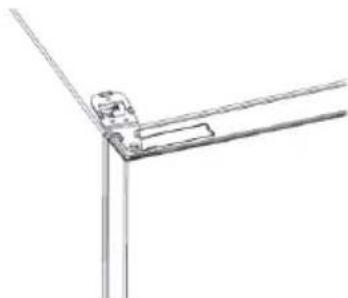
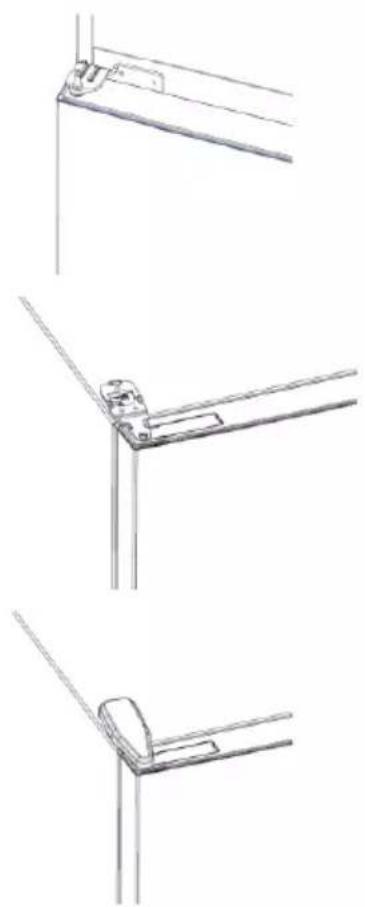
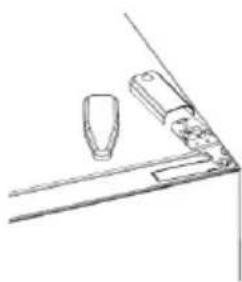
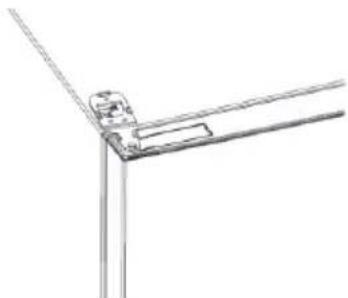
- Remove the top hinge cover (left)
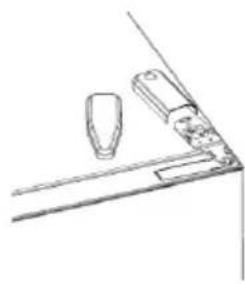
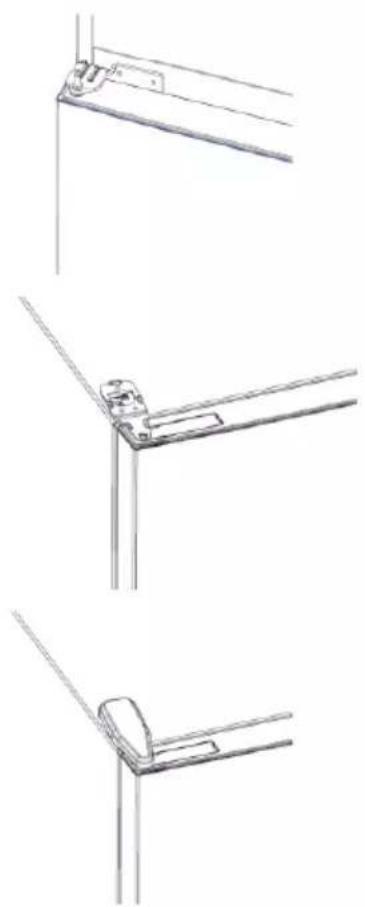
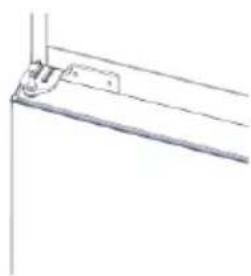
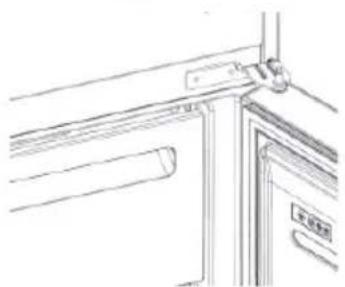
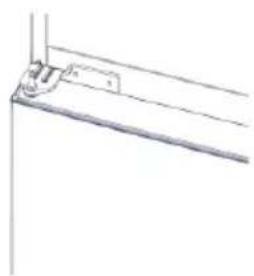
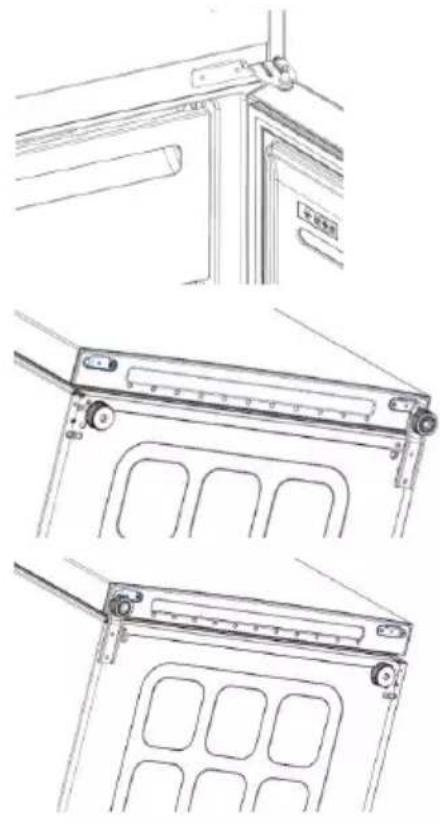
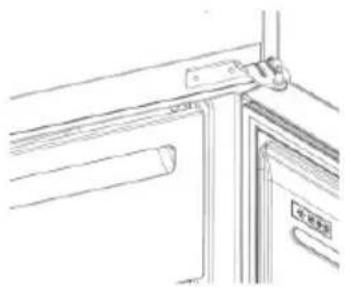
- Remove middle hinge
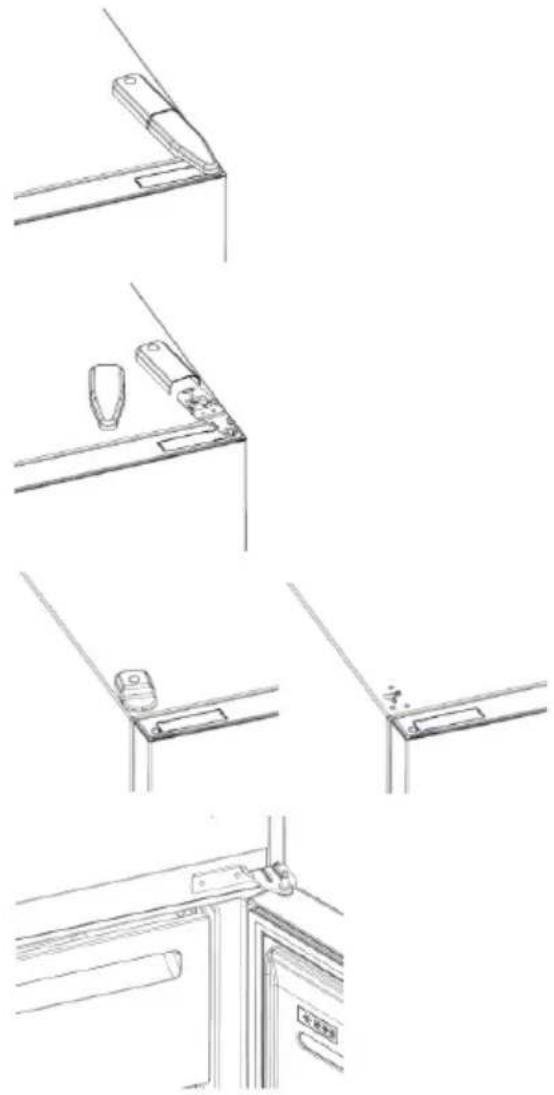
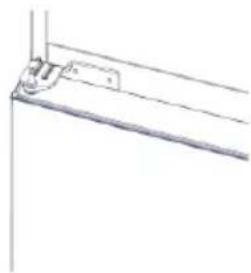
- Remove lower hinge
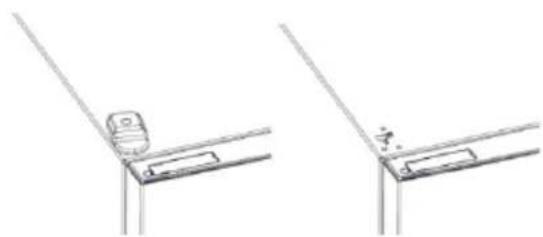
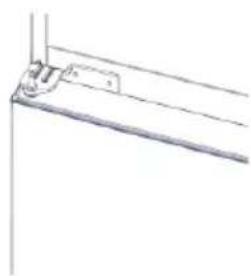
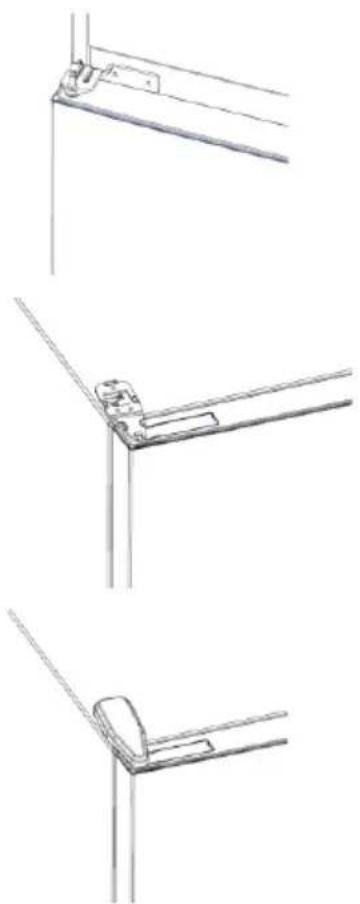
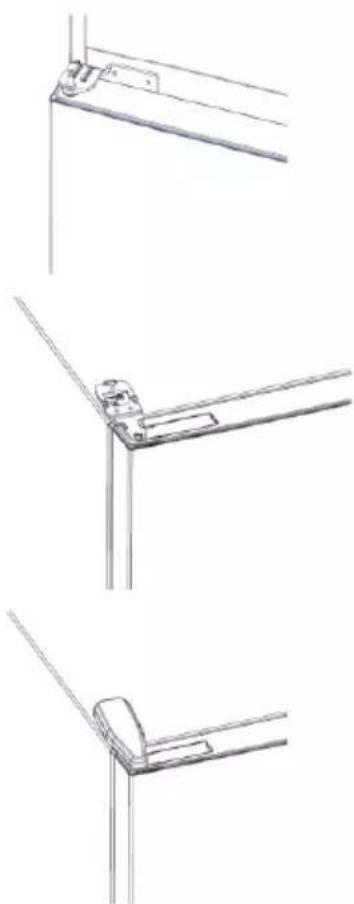
- Mount hinge foot
- Mount middle hinge
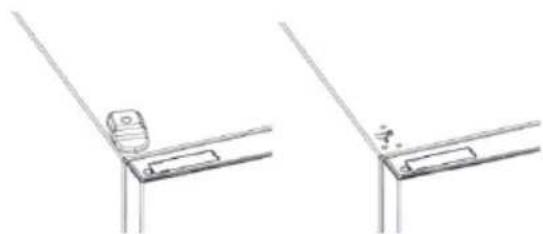
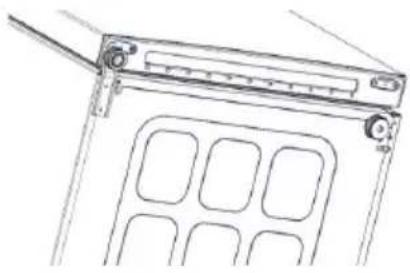
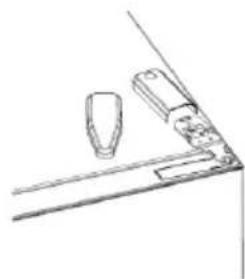
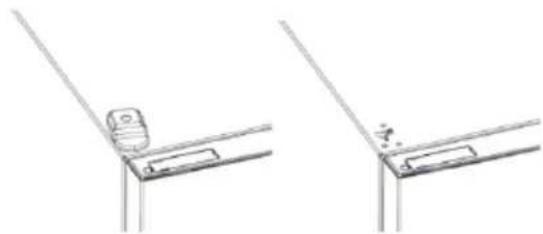
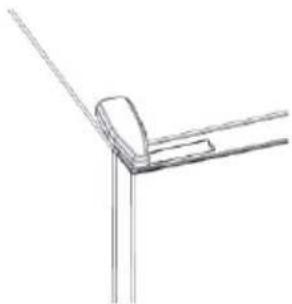
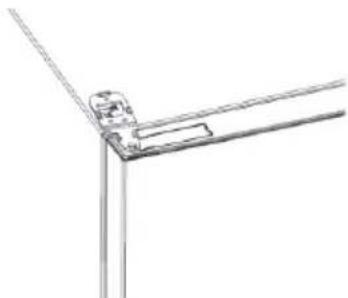
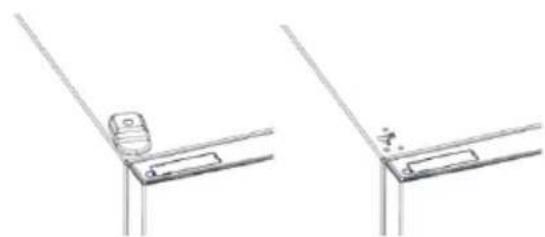
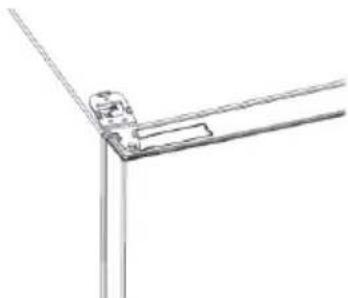
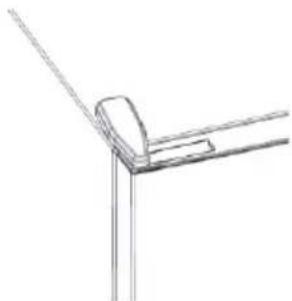
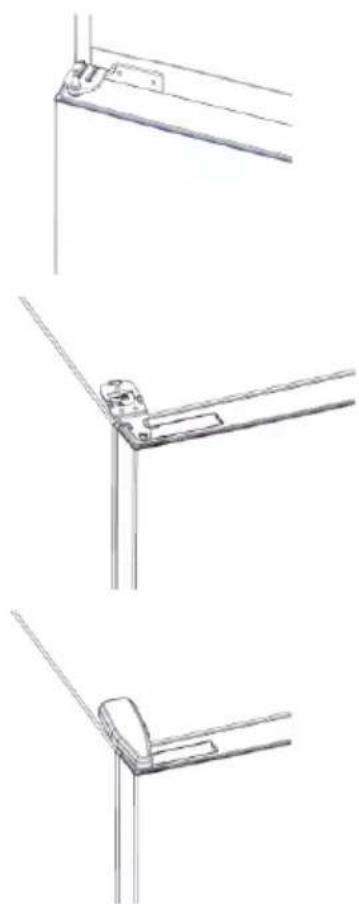
- Mount the upper hinge plate
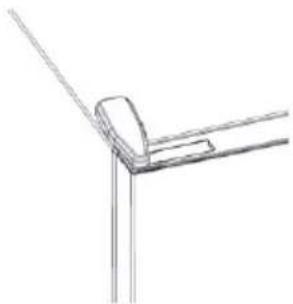
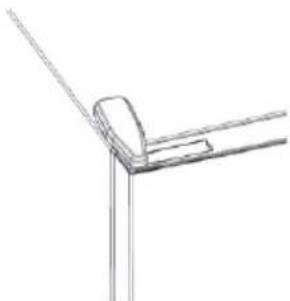
- Mount the upper hinge cover
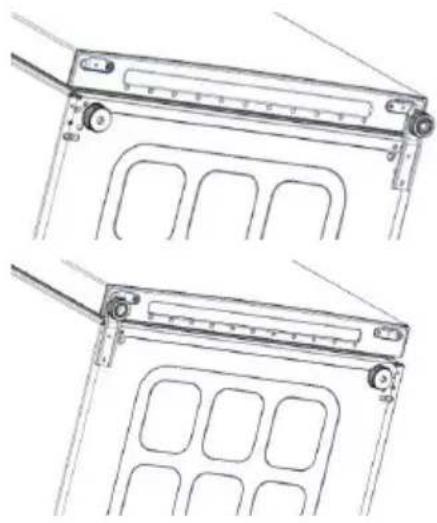
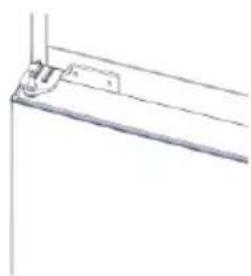
Summary
PRODUCT DESCRIPTION 12
Space requirements 13
USE 14
Use 14
Custom temperature 15

Step 2
Step 3
Summary
PRODUCT DESCRIPTION 23

Step 2
Step 3
Overview
PRODUCT DESCRIPTION....34
Space requirements....34
USE....35
Use....35
Adjusted temperature....36
Super Cool function....36
USE

Step 2
Step 3
Summary
USE

Step 2
Step 3
Summary

Step 2
Step 3
Summary

Step 2
Step 3
Summary
PRODUCT DESCRIPTION....76
Space requirement 77
USE....78
Use....78

Step 2
Step 3

Summary
PRODUCT DESCRIPTION......87
Space required ....87
USE 88
Use....88

Step 2
Step 3
Summary
PRODUCT DESCRIPTION 97
Space requirements ....97
USE....98
Use....98
Adjusted temperature 99
Supercooling function 99
Superfreezing function....99
Eco mode.... 100
USING THE WI-FI NETWORK....102
Step 1 ....102
Step 2 102
Step 3 ....102
Using the Wi-Fi network.... 103
REVERSING THE DOORS....104
PRODUCT DESCRIPTION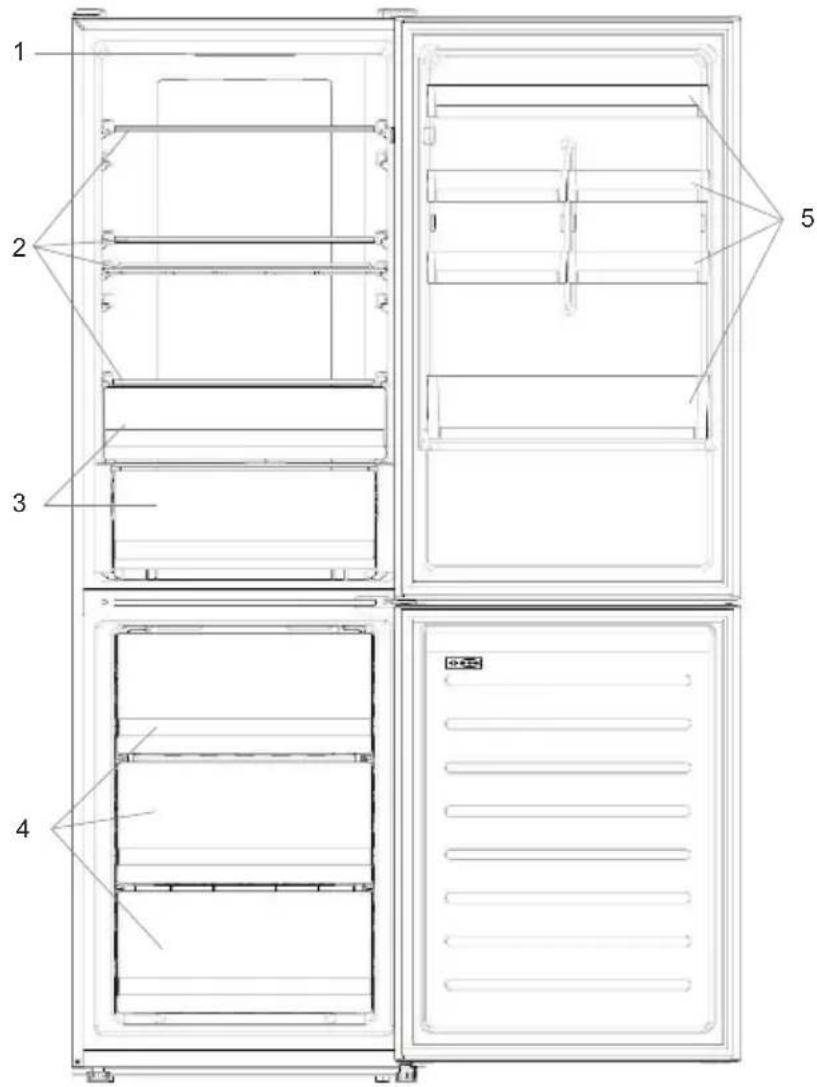
USE
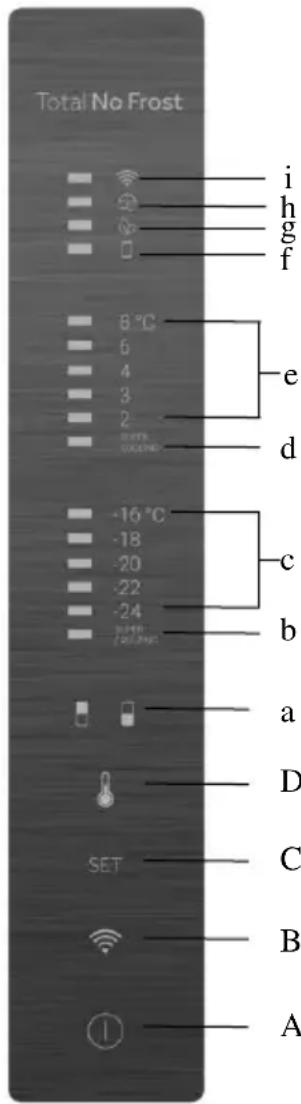
A. ON/OFF button, used to turn the appliance on/off. B. Wi-Fi button, used to turn the Wi-Fi network on/off. C. Mode button, used to select the desired function. D. TEMP button, used to select the temperature of the refrigerator and freezer.
a. The refrigerator/freezer compartment icon shows which section of the appliance is selected. b. The superfreezing icon shows whether the superfreezing function has been activated. c. The freezer temperature levels show which temperature is selected in the freezer. d. The supercooling icon shows whether the supercooling function has been activated. e. The refrigerator temperature levels show which temperature is selected. f. The custom temperature icon shows whether the temperature was selected using the app. g. The Eco mode icon shows whether Eco mode is activated. h. The holiday function icon shows whether the holiday function has been activated. i. The Wi-Fi network icon shows whether the Wi-Fi network is working and whether the device has connected.
Use

Step 2
Step 3
- Follow the pairing instructions in the hOn app
Using the Wi-Fi network
If the Wi-Fi network has not been configured yet when the refrigerator is turned on, it automatically enters configuration mode and remains in this status for 30 minutes. The Wi-Fi icon blinks and product connection can begin.
- Follow the instructions in the app to configure the Wi-Fi network (see above).
- Once the Wi-Fi network is configured and the connection is established, the Wi-Fi icon turns on and remains steadily lit.
- After 30 minutes without any action, the Wi-Fi network automatically exits configuration mode.
- If the Wi-Fi network has already been configured, it automatically reconnects according to the configuration information.
To reset the Wi-Fi network, press the Wi-Fi button and the SET button for two seconds.
To turn off the Wi-Fi network, press the Wi-Fi button for three seconds.
Radio module - Technical data
| Učestalost (OFR) | 2400 MHz-2843.5 MHz |
| Frekvencije kanala | 2412...2472 MHz(veličina koraka 5 MHz) |
| Maksimalna snaga(EIRP) | 100 mW |
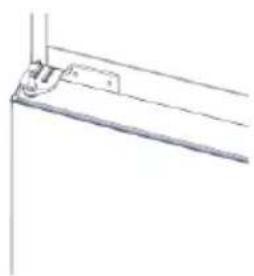
- Remove the lower hinge
- Install the hinge base
- Install the middle hinge
- Install the upper hinge plate
- Place the upper hinge cover

Summary
PRODUCT DESCRIPTION....107
Space requirement....107
USE 108
Use....108
USE

Step 2
Step 3
Index

Phase 2
Phase 3
Summary
PRODUCT DESCRIPTION....127

Step 2
Step 3
Summary
PRODUCT DESCRIPTION....137
Space requirements....137
USE....138
Use....138
Custom temperature....139

Step 2
- Create your account on the hOn app, or log in if you already have an account
Step 3
Summary
PRODUCT DESCRIPTION....147

Step 2
Step 3
Summary

Step 2
Step 3
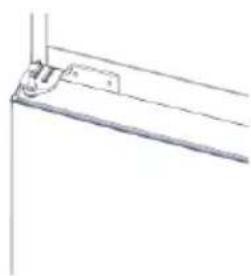
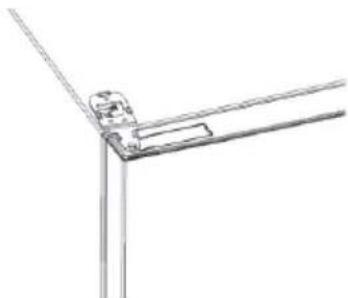
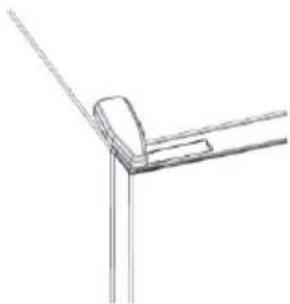
Table of contents
PRODUCT DESCRIPTION....167

Step 2
Step 3
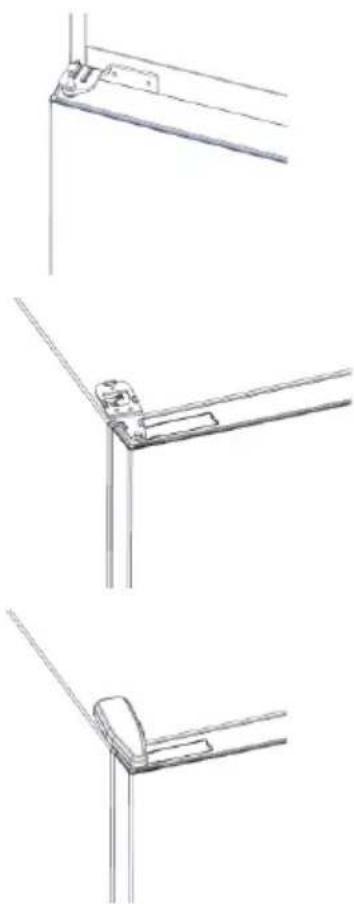
Table of contents
USE

Step 2
Step 3
Summary
PRODUCT DESCRIPTION 189

Step 2
Step 3
- Follow the pairing instructions in the hOn app
Using Wi-Fi
Summary
PRODUCT DESCRIPTION 199
Space requirements....199
USE....200
Use....200
Custom temperature....201
Super Cool function....201
Super Freeze function....202
ECQ mode....202
Holiday function....202
Defrosting....202
Demonstration mode 203
Error codes ....203
USING THE WI-FI NETWORK 204
Step 1 204
Step 2 204
Step 3 204
Using the Wi-Fi network 205
REVERSIBLE DOORS....206
PRODUCT DESCRIPTION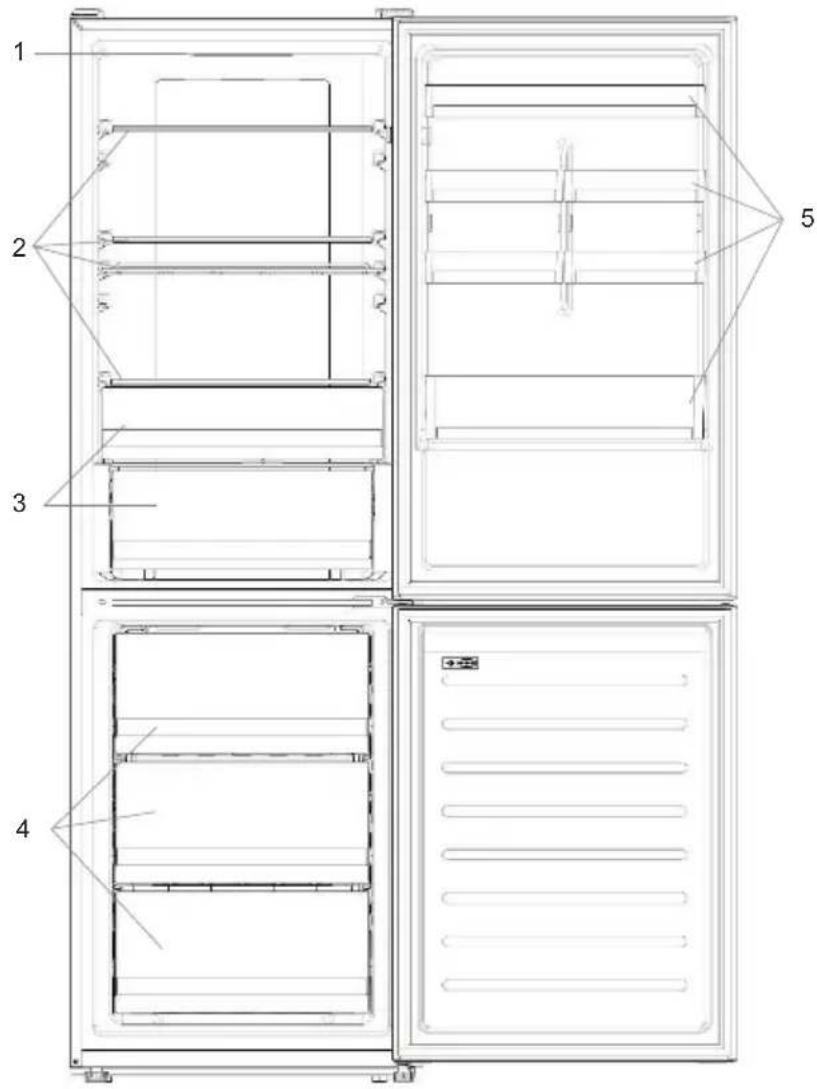
- Control panel
- Shelves
- Vegetable drawer
- Freezer drawers
- Door bin
USING THE WI-FI NETWORK
Step 1

Step 2
Step 3
Summary
PRODUCT DESCRIPTION 209
Space requirements....209
USE 210
Use....210
Adjusted temperature 211
Super Cool function....211
Super Freeze function....212
Eco mode 212
Holiday function 212
Defrosting 212
Demonstration mode....213
Error codes 213
USING THE "WI-FI" NETWORK ......214
Step 1 214
Step 2 214
Step 3 214

Step 2
Step 3
• Follow the pairing instructions in the hOn app
Using the "Wi-Fi" network
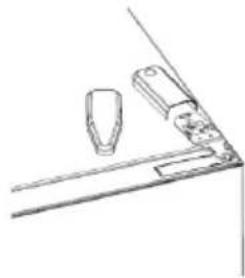
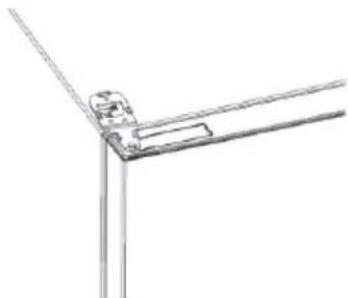
- Remove the middle hinge
- Remove the lower hinge
- Place the hinge foot
- Place the middle hinge
- Place the upper hinge plate
- Place the upper hinge cover
Summary
PRODUCT DESCRIPTION....219
USE

Step 2
Step 3
Summary
DEVICE DESCRIPTION 229

Step 2
Step 3
- SUMMARY
- PRODUCT DESCRIPTION
- USE
- SPACE REQUIREMENTS
- CUSTOMIZED TEMPERATURE
- SUPER COOL FUNCTION
- SUPER FREEZE FUNCTION
- ECO MODE
- HOLIDAY FUNCTION
- DEFROSTING
- SLIDER
- DEMO MODE
- ERROR CODES
- WI-FI USE
- STEP
- DOOR REVERSIBILITY
- OVERVIEW
- USING THE WI-FI NETWORK
- REVERSING THE DOORS
- INDEX
- PHASE
- TABLE OF CONTENTS
- USING WI-FI
- REVERSIBLE DOORS
- USING THE "WI-FI" NETWORK
Brand : HAIER
Model : HOCE7T620DXK
Category : Refrigerator