
PPG 45587 - Salt/pepper mill KALORIK - Free user manual and instructions
Find the device manual for free PPG 45587 KALORIK in PDF.

| Product Type | Automatic rechargeable salt and pepper mill |
| Brand | Kalorik |
| Model | PPG 45587 |
| Body Material | Stainless steel and plastic |
| Spice Container | Transparent, capacity not specified (approx. 50 g) |
| Power | 4 Ni-MH rechargeable batteries 1.2 V (included) + charging base with power adapter |
| Charging Time | 2 to 4 hours |
| Battery Life | 60 to 80 uses per charge |
| Grinding Mechanism | Electric, automatic activation by tilting |
| Grind Adjustment | Dial under the device: turn clockwise for finer, counterclockwise for coarser |
| Charge Indicator | Blue light: solid (base plugged), blinking (charging), off (charged) |
| Dimensions (approx.) | Height: 20 cm, Diameter: 5 cm (per mill) |
| Weight (approx.) | 300 g per mill (with batteries) |
| Maintenance | Clean with a damp cloth; do not immerse |
| Safety | Do not use with wet hands, do not expose to water, do not incinerate batteries |
| Spare Parts | Replacement Ni-MH rechargeable batteries (4 per mill) |
| Warranty | 1 year (United States and Canada) |
| Usage | Household use only |
Frequently Asked Questions - PPG 45587 KALORIK
User questions about PPG 45587 KALORIK
0 question about this device. Answer the ones you know or ask your own.
Ask a new question about this device
Download the instructions for your Salt/pepper mill in PDF format for free! Find your manual PPG 45587 - KALORIK and take your electronic device back in hand. On this page are published all the documents necessary for the use of your device. PPG 45587 by KALORIK.
USER MANUAL PPG 45587 KALORIK
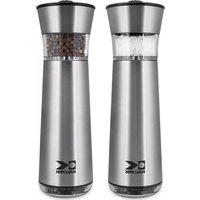
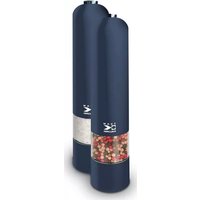
natural_image
Two identical stainless steel coffee maker pens with clear glass and blue buttons, mounted on a black base (no text or symbols visible)EN..... 4
ES......12
FR.....20
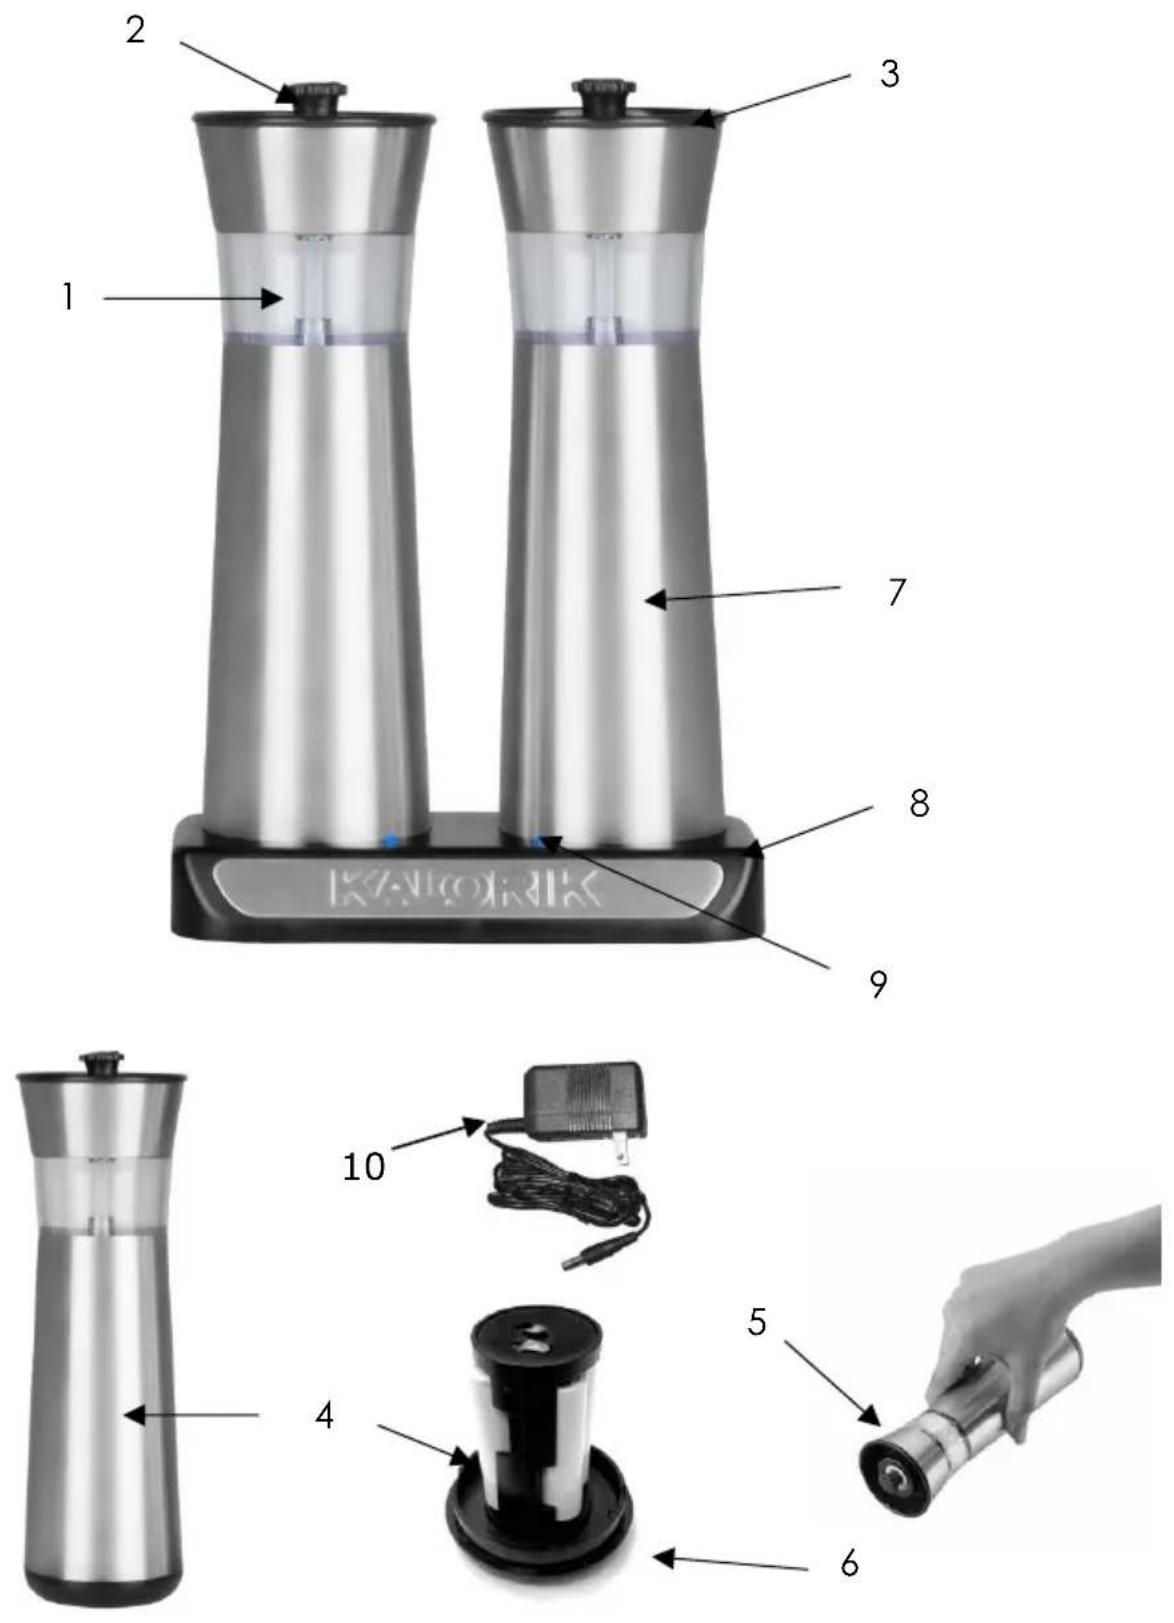
ENGLISH:
- Refill chamber
- Lid / Grinding head
- Opening mechanism for refill chamber
- Battery block
-
Gravity mechanism
-
Base / Cap of the battery compartment
- Housing
- Charging base
- Indicator lights
- Adapter
ESPAÑOL:
Please read these instructions carefully before using the appliance. Important: People (including children) who are not able to use the appliance in a safe way, due to their physical, sensorial or mental capacity or their lack of experience or knowledge, must never use the appliance except if they are supervised by a person responsible for their safety or if they previously received instructions concerning the safe use of the appliance.
Close supervision is necessary to prevent children from using the appliance as a toy.
- Never leave the appliance unsupervised when in use.
- From time to time check the appliance for damages. Never use the appliance if it shows any signs of damage. All repairs should be made by a qualified service, like the after-sales service of the manufacturer or a qualified electrician use to the repair of this type of appliance. Please return the appliance to this service in case of dysfunction.
- Only use the appliance for domestic purposes and in the way indicated in these instructions.
- Use only with charger provided with the appliance. Do not attempt to charge this product with any other charger.
- To protect against electrical shock, do not put the charger base or motor body of this appliance in water or other liquid. Never submerge any other portion of this unit. If any part falls into liquid, remove immediately. Carefully remove, clean and dry unit thoroughly before continuing
- Appliance should be plugged into an electrical outlet away from the sink or hot surfaces.
- Do not use an extension cord. Plug charger base adapter directly into an electrical outlet.
- Do not operate in the presence of explosive and/or flammable fumes.
-
Do not incinerate the mills, even if they are severely damaged. The batteries can explode in a fire.
-
This product contains nickel-metal hydride (NiMH) batteries, which must be recycled and disposed of properly. Do not incinerate or compost batteries as they will explode at high temperatures.
- Before cleaning, always remove the batteries and unplug charger base from outlet
- Do not operate any appliance with a damaged cord or plug, or after the appliance has malfunctioned or has been dropped or damaged in any way or is not operating properly. Contact Kalorik customer service.
- If the batteries leak, remove them, clean the contacts of the appliance and wash your hands.
- If you do not use the appliance for a long time, remove the batteries so that they do not leak.
Important: Do not mix old and new batteries. Do not mix alkaline, standard (zinc-carbon), or rechargeable (Ni-Cd, Ni-MH, etc.) batteries.
SAVE THESE INSTRUCTIONS HOUSEHOLD USE ONLY
PARTS DESCRIPTION
See page 2-3.
BEFORE USE
- Place charging base and all removable parts on a clean flat surface and unpack all pieces.
- Before using the mills for the first time, we suggest wiping the product with a clean, damp cloth to remove any dirt or dust.
- Dry it thoroughly with a soft, absorbent cloth.
- Read all instructions completely for detailed operating procedures.
- Please note, this product comes with batteries ready for use.
To fill with pepper or salt:
- With the pepper mill standing on its base, hold the black plastic rim located around the edges of the grinding head and turn it counterclockwise to uncover the salt/pepper chamber's opening.
- Fill the transparent refill chamber with salt or pepper.
- Close the grinding head by returning it back into its initial position, lock in place by turning the black plastic part counter-clockwise, until the opening is completely closed.
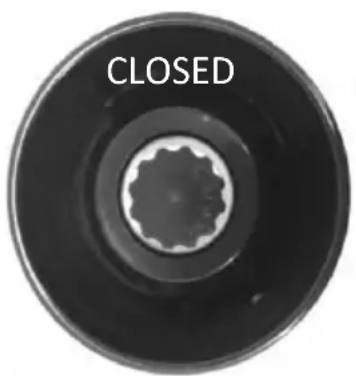
natural_image
Circular object with a central gear-like ring and the word 'CLOSED' above it, no other text or symbols visible.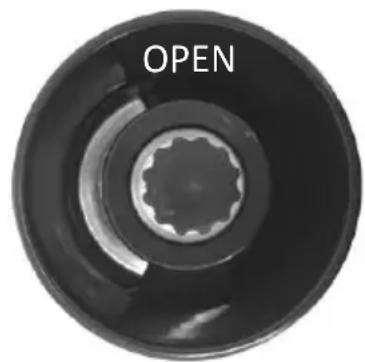
natural_image
Circular mechanical component with a central gear-like ring and 'OPEN' text above it (no other symbols or text)USE
- Connect the other end of power adapter to the charging base by grasping the end of the power adapter and inserting it horizontally into the back opening of the charge base.
- Connect the power adapter plug into an outlet. The blue indicator lights will turn on letting you know the base is properly plugged in and ready for use.
- Hold the mills upright and gently push the grinding mills into the charging base until they lock in place. The grinding containers will fit comfortably with the unit housing.
- The blue indicator lights will start to blink after the mills are inserted to show the mills are currently being charged.
-
Charging the mills will take about 2 to 4 hours. It takes the same amount of time to charge whether charging one or both mills at a time.
-
The mills are fully charged once the blue indicator lights are turned off.
- Each mill gives you around 60-80 uses before having to recharge again. This can be 25 minutes of grind/ continuous use.
- Hold the appliance above the meal to season. There is no button to push, grinding will start automatically when the grinder is placed upside down (gravity-activated and automatic function).
ADJUSTING THE GRIND
- Before seasoning your meals, you can adjust the fineness of the ground salt and pepper by turning the adjustment wheel on the underside of the mill.
- To do so, turn the wheel clockwise for a finer grind and counterclockwise for a coarser grind.
MAINTENANCE
Clean the housing and grinding head with a damp cloth and dry with a paper towel. Do not immerse the mill in liquid or put it in a dishwasher. Do not use with wet hands. Do not use cleaning products or detergents.
Do not wet battery contacts.
BATTERIES
• Each mill runs on 4 x Ni-MH rechargeable batteries.
- Rechargeable batteries are included with your salt and pepper mill set.
- To open the unit and access the battery compartment, turn the mill upside down and turn the plastic cap counterclockwise to unlock it. Once unlocked, simply lift the battery compartment out from the unit.
- When inserting batteries, make sure that the polarity of each battery is respected and matches with the symbol indicated on the battery cradle.
- To close the battery housing, put the battery cradle back into the appliance, and replace the cap turning it clockwise until it gets locked firmly.
Important:
- Do not mix old and new batteries
- Do not mix alkaline, standard (carbon-zinc), or rechargeable (nicad, Ni-MH, etc.) batteries
If your appliance does not work properly, it is probably because the batteries are discharged. In that case, recharge the batteries on the charging base, or replace the batteries with a new set of NiMH rechargeable batteries.
This product includes four Ni-Mh rechargeable and recyclable batteries (1.2V) in each mill. At the end of the batteries' useful life, they should be recycled. These batteries must not be incinerated or composted. See "Protection of the environment". Do not incinerate or compost batteries, as they will explode at high temperatures.
TROUBLESHOOTING
If the mill does not grind, or if no motor noise can be heard, please check that the batteries are installed correctly and are not discharged.
If the mill gets stuck during use (motor produces hum, but internal shaft does not turn and no pepper is ground), gently shake the mill or tap the mill gently on a hard surface, to remove the stuck pepper or salt.
To remove deeply stuck peppercorn, remove the upper lid as if for refilling the mill, turn the coarseness setting to its coarsest, and tap lightly on a hard surface until all the peppercorn is released. Re-adjust coarseness setting to the desired level once done and replace upper lid.
Note: Too fine a grind setting may not enable salt or pepper to be ground. If this is the case, set the grinder to a coarser setting (see above).
In order to preserve our environment and protect human health, electrical and electronic equipment waste should be disposed of in accordance with specific rules with the implication of both suppliers

and users. For this reason, as indicated by the symbol on the rating label or on the packaging, your appliance should not be disposed of as unsorted municipal waste. The user has the right to bring it to a municipal collection point performing waste recovery by means of reuse, recycling or use for other applications in accordance with the directive.
We suggest that you complete and return the enclosed Product Registration Card promptly to facilitate verification of the date of original purchase. However, return of the Product Registration Card is not a condition of these warranties. You can also fill out this warranty card online, at the following address: www.KALORIK.com
This KALORIK product is warranted in the U.S.A. and in Canada for 1 year from the date of purchase against defects in material and workmanship. This warranty is not transferable. Keep the original sales receipt. Proof of purchase is required to obtain warranty performance.
During this period, if the KALORIK product, upon inspection by KALORIK, is proven defective, it will be repaired or replaced, at Kalorik's option, without charge to the customer. If a replacement product is sent, it will carry the remaining warranty of the original product.
This warranty does not apply to any defect arising from a buyer's or user's misuse of the product, negligence, failure to follow KALORIK instructions noted in the user's manual, use on current or voltage other than that stamped on the product, wear and tear, alteration or repair not authorized by KALORIK, or use for commercial purposes. There is no warranty for glass parts, glass containers, filter basket, blades and agitators, and accessories in general. There is also no warranty for parts lost by the user.
ANY WARRANTY OF MERCHANTABILITY OR FITNESS WITH RESPECT TO THIS PRODUCT IS ALSO LIMITED TO THE ONE YEAR LIMITED WARRANTY PERIOD.
Some states do not allow limitation on how long an implied warranty lasts or do not allow the exclusion of incidental or consequential damages, so the above limitations may not apply to you. This warranty gives you specific legal rights, and you may also have other rights which vary from state to state.
If the appliance should become defective within the warranty period and more than 30 days after date of purchase, do not return the appliance to the store: often, our Customer Service Representatives can help solve the problem without having the product serviced. If
servicing is needed, a Representative can confirm whether the product is under warranty and direct you to the nearest service location.
If this is the case, bring the product, or send it, postage prepaid by the user (all Kalorik customers are responsible for the initial shipment back to the warranty center), along with proof of purchase and a return authorization number indicated on the outer package, given by our Customer Service Representatives. Send to the authorized KALORIK Service Center (please visit our website at www.KALORIK.com or call our Customer Service Department for the address of our authorized KALORIK Service Center).
When sending the product, please include a letter explaining the nature of the claimed defect.
If you have additional questions, please call our Customer Service Department (please see below for complete contact information), Monday through Thursday from 9:00am - 5:00pm (EST) and Friday from 9:00am - 4:00pm (EST). Please note hours are subject to change.
If you would like to write, please send your letter to:
KALORIK Customer Service Department
Team International Group of America Inc.
1400 N.W 159th Street, Suite 102
Miami Gardens, FL 33169 USA
Or call:
Toll Free: +1 888-521-TEAM / +1 888-KALORIK
Only letters can be accepted at this address above. Shipments and packages that do not have a return authorization number will be refused.
Team International Group of America Inc.
1400 N.W 159th Street, Suite 102
Miami Gardens, FL 33169 USA
O llame gratuitamente (U.S.A.) al +1 888-521-TEAM / +1 888-KALORIK
Team International Group of America Inc.
1400 N.W 159th Street, Suite 102
Miami Gardens, FL 33169 USA
For questions please contact:
KALORIK Customer Service Department
Team International Group of America Inc.
1400 N.W 159th Street, Suite 102
Miami Gardens, FL 33169 USA
Toll Free: +1 888-521-TEAM / +1 888-KALORIK
www.KALORIK.com

Model PPG 45587
User manual content and recipes courtesy of Team International Group – Do not reproduce without consent of the authors - All rights reserved.
KALORIK®
Since 1930


Brand : KALORIK
Model : PPG 45587
Category : Salt/pepper mill