Compaq 6715s - Laptop HP - Free user manual and instructions
Find the device manual for free Compaq 6715s HP in PDF.

| Product Type | Laptop |
| Brand | HP |
| Model | Compaq 6715s |
| Processor | AMD Turion 64 X2 (depending on configuration) |
| RAM (Random Access Memory) | Up to 2 GB DDR2 |
| Hard drive | Variable capacity (80-160 GB SATA) |
| Screen | 15.4-inch TFT (resolution 1280x800 or 1280x768) |
| Weight | Approximately 2.7 kg |
| Dimensions (W×D×H) | 357 × 264 × 30 mm |
| Power supply | 65 W AC adapter, 6-cell lithium-ion battery |
| Main functions | Office productivity, Internet browsing, multimedia playback |
| Maintenance and cleaning | Clean the screen with a soft, lint-free cloth; avoid liquids |
| Security | Kensington lock, BIOS password, antivirus recommended |
| Spare parts and repairability | Parts available from authorized dealers; RAM and hard drive accessible |
| General information | Original operating system Windows Vista Business or Windows XP |
Frequently Asked Questions - Compaq 6715s HP
User questions about Compaq 6715s HP
0 question about this device. Answer the ones you know or ask your own.
Ask a new question about this device
Download the instructions for your Laptop in PDF format for free! Find your manual Compaq 6715s - HP and take your electronic device back in hand. On this page are published all the documents necessary for the use of your device. Compaq 6715s by HP.
USER MANUAL Compaq 6715s HP
The HP USB Digital Drive ① is a pocket-sized SD (Secure Digital) memory drive for storing and transferring files such as digital pictures, music, video, and data. The Digital Drive can be used with any computer that is running Microsoft Windows XP Home, Windows XP Pro, or Windows 2000.
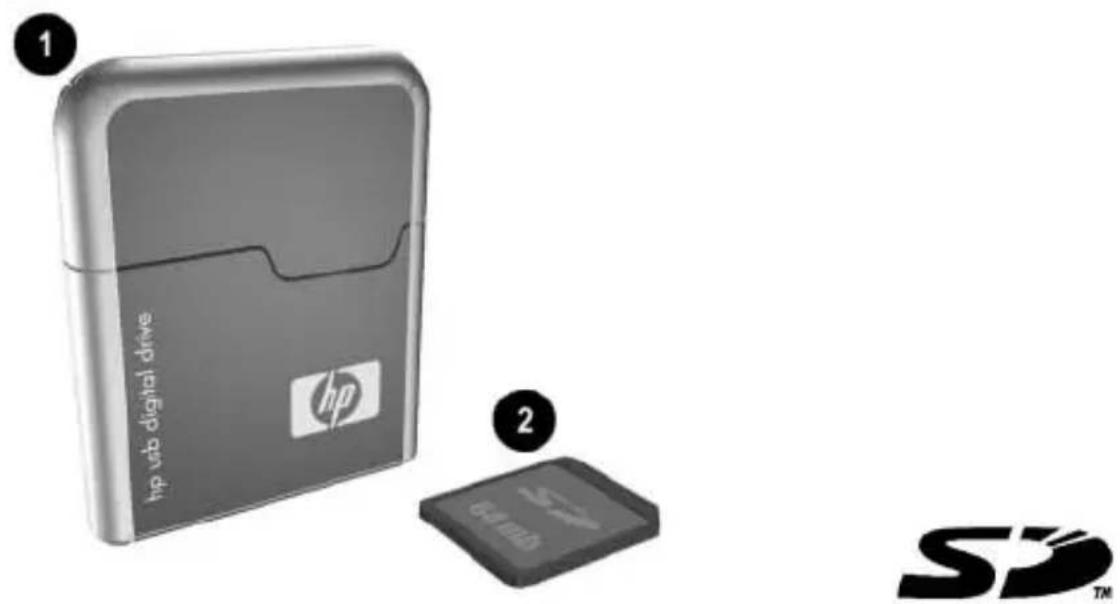
An SD memory card ② may not be included. However, you will need an SD memory card to operate the Digital Drive. You can purchase one (in various storage capacities) from any HP authorized reseller.
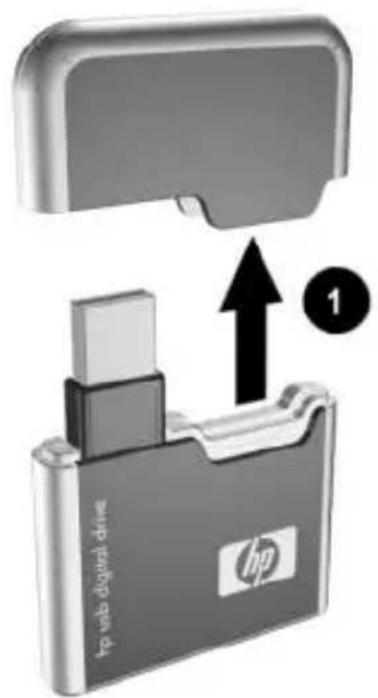
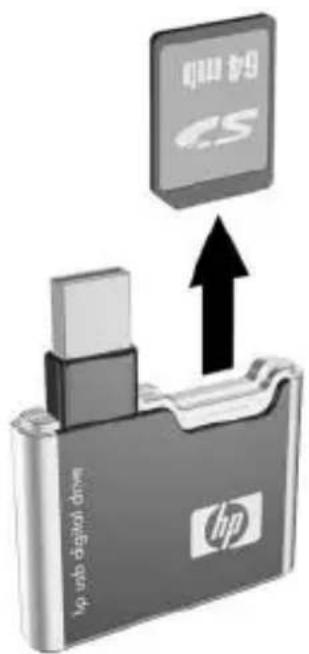
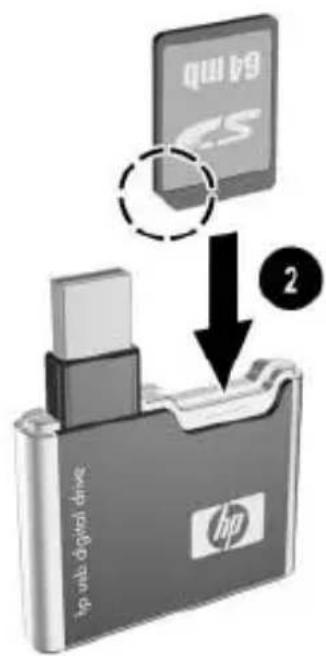
Installing the SD Memory Card
- Remove the cap ① of the Digital Drive.
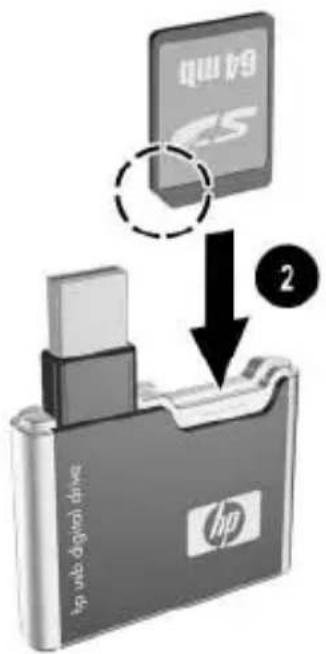
- Insert the SD memory card into the SD slot ② with the notched corner positioned on the lower left as shown. If the SD memory card does not slide in properly, gently pull it out and reinsert it.

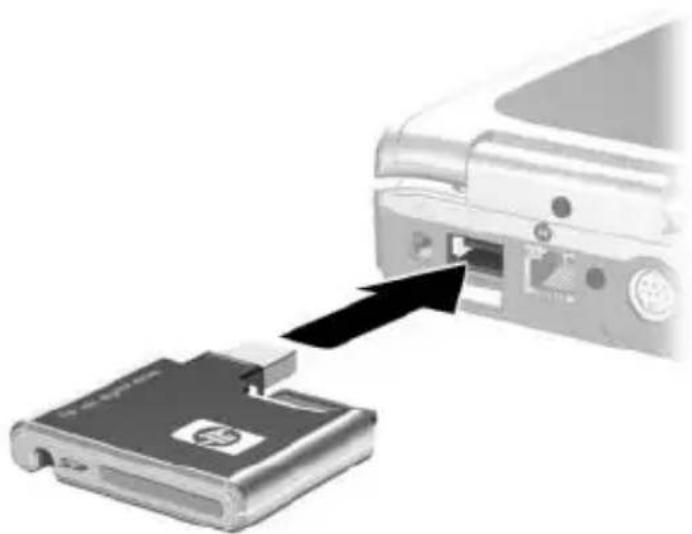
Connecting the Digital Drive to a USB Port
The Digital Drive can be connected to a USB port on any computer either directly (with the USB connector cable in its unextended position) or by extension (with the USB connector cable extended). Refer to the documentation included with your computer for the USB port location.
To connect the Digital Drive to a USB port directly (with the connector cable in the unextended position):
» Insert the USB connector on the Digital Drive into a USB port on your computer.
natural_image
Diagram showing a device with an open port and a separate internal component, no text or symbols present.The status light on the Digital Drive turns on when the connection is successful. If the status light does not turn on, remove the Digital Drive from the USB port, then reinsert the USB connector.
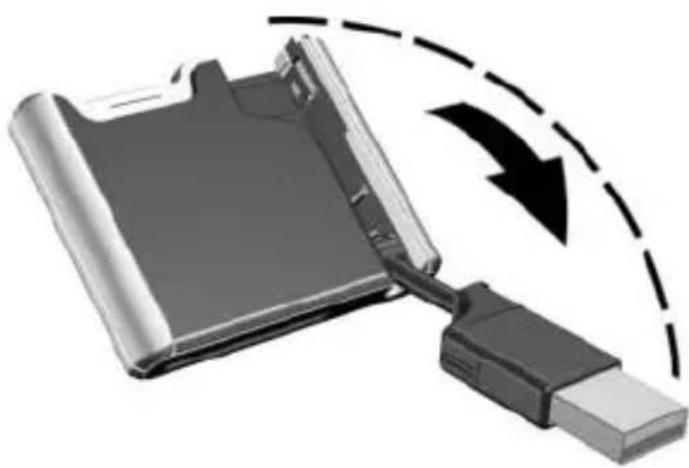
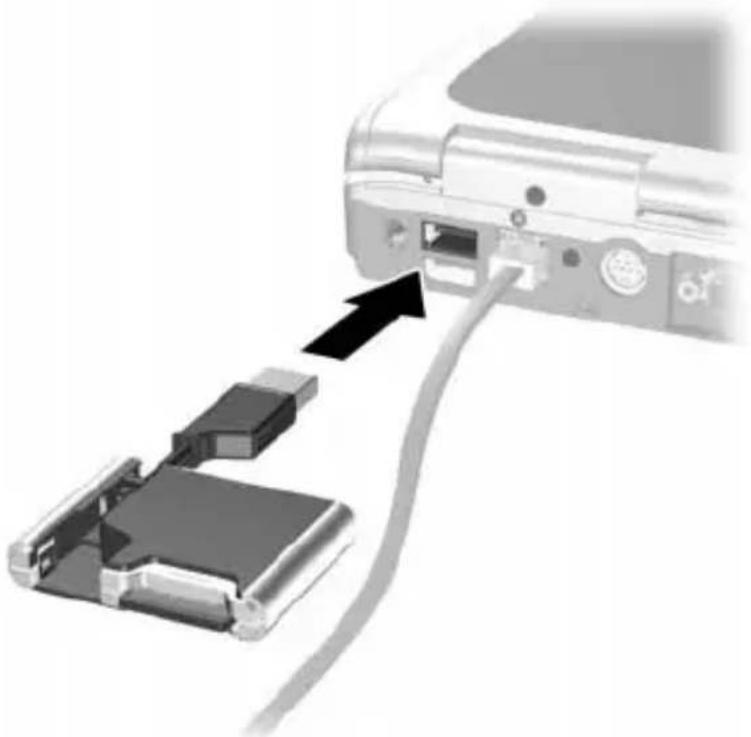
To connect the Digital Drive to a USB port by extension (with the USB cable in its extended position):
- Rotate the USB connector cable out of its track gently until it is fully extended.
natural_image
Illustration of a USB flash drive with an external USB port, showing a black arrow indicating direction (no text or symbols present)- Insert the USB connector on the Digital Drive into a USB port on your computer.
natural_image
Diagram showing a computer interface with an attached cable and a connector, no text or symbols presentThe status light on the Digital Drive turns on when the connection is successful. If the status light does not turn on, remove the Digital Drive from the USB port, then reinsert the USB connector.
Accessing the Digital Drive
You are now ready to use the Digital Drive as a storage device.
» Select the Digital Drive icon in “My Computer” to display the contents of the Digital Drive.
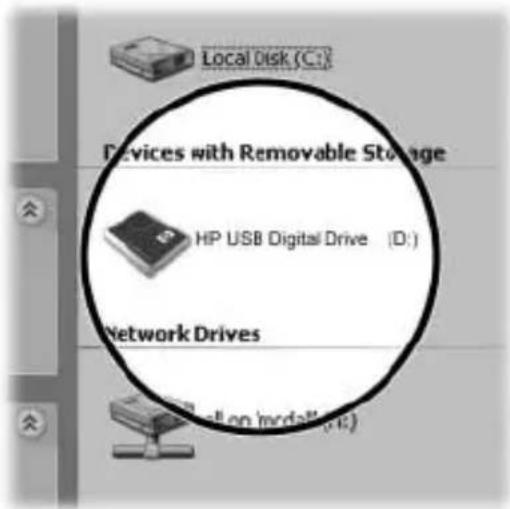

The status light on the Digital Drive flashes when you copy and move files to and from the Digital Drive.
Disconnecting the Digital Drive

Do not attempt to remove the Digital Drive when the status light on the Digital Drive is flashing.
- Select the “Safely Remove Hardware” icon on your taskbar.

A dialog box displays a list of connected devices.
-
Select the Digital Drive and wait until the “Safe to Remove Hardware” message appears on your screen.
-
Gently unplug the Digital Drive from the USB port.

If the USB connector cable is in the extended position, return it on its track for safe storage.
Removing the SD Memory Card

Do not attempt to pull the SD memory card out when the status light on the Digital Drive is flashing.
» After you disconnect the Digital Drive from your computer, gently pull the SD memory card from the Digital Drive.
Accessing Technical Support
Support services are available on the Internet through HP technical support. You can either browse the postings as a guest, or register as a user and submit your own questions. HP responds to questions in a timely manner.
To access HP technical support, visit the HP Web site at http://www.hp.com, and select your country or region.
When you call technical support, have the following items available:
■The HP USB Digital Drive
■Conditions under which the problem occurred
■Error messages that have occurred
■Hardware and software you are using
12 User Guide
natural_image
Diagram showing a device being inserted into a computer interface, with an arrow indicating the process (no text or symbols present)natural_image
Illustration of a device being inserted into a hard drive, showing a USB cable and a black arrow indicating direction (no text or symbols)natural_image
Close-up of a computer interface showing a cable inserted into a device with an arrow pointing to it (no text or symbols visible)
natural_image
Diagram showing a device being inserted into a computer interface, with no visible text or symbols.natural_image
Illustration of a device being inserted into a hard drive, showing a USB cable and a separate drive (no text or symbols present)natural_image
Close-up of a computer interface showing a cable inserted into a device with an arrow pointing to it (no text or symbols visible)
natural_image
Diagram showing a device being inserted into a computer interface, with an arrow indicating the process (no text or symbols present)natural_image
Illustration of a device being inserted into a hard drive, showing a USB cable and a black arrow indicating direction (no text or symbols)natural_image
Diagram showing a computer interface with an attached cable and a connector, no text or symbols present

natural_image
Diagram showing a device being inserted into a folder, with no visible text or symbolsnatural_image
Illustration of a device being inserted into a hard drive, showing a USB cable and a separate drive (no text or symbols)natural_image
Close-up of a computer interface showing a cable inserted into a device with an arrow pointing to it (no text or symbols visible)
natural_image
Diagram showing a device being inserted into a computer interface, with no visible text or symbols.natural_image
Illustration of a device being inserted into a hard drive, showing a USB cable and a separate drive (no text or symbols)natural_image
Close-up of a computer interface showing a cable inserted into a device with an arrow pointing to it (no text or symbols visible)

natural_image
Diagram showing a device with an internal port and a separate physical device (no text or symbols visible)natural_image
Illustration of a USB flash drive with a black arrow indicating data transfer (no text or symbols present)natural_image
Close-up of a computer interface showing cable routing from a port to a device (no text or symbols visible)
User Guide 69
Få teknisk support
natural_image
Diagram showing a device with an open port and a close-up of its internal components (no text or symbols visible)natural_image
Diagram showing a device being inserted into a USB, with a dashed arrow indicating the process (no text or symbols present)natural_image
Diagram showing a computer interface with an attached cable and a connector, no text or symbols present
テクニカル サポート情報
USB 포트에 디지털 드라이브 연결
natural_image
Diagram showing a device with an open port and a close-up of its internal components (no text or symbols visible)natural_image
Illustration of a USB flash drive with a USB cable, showing a black arrow indicating compression or disassembly (no text or symbols present)natural_image
Diagram showing a computer interface with an attached cable and two internal components (no text or symbols visible)
기술 지원 액세스

连接数码驱动器和 USB 端口
natural_image
Diagram showing a device being inserted into a digital camera module, with no visible text or symbols.natural_image
Illustration of a USB flash drive with a USB cable, showing internal components and an arrow indicating data transfer (no text or symbols present)natural_image
Close-up of a computer cable connector with an attached plastic component (no text or symbols visible)
natural_image
Diagram showing a device being inserted into a computer via an external port, with no visible text or symbols.natural_image
Illustration of a USB flash drive with a USB cable, showing internal components and a dashed arrow indicating rotation (no text or symbols)natural_image
Close-up of a computer monitor showing cable and connector (no text or symbols visible)
取得技術支援
© 2003 Hewlett-Packard Development Company, L.P.
Microsoft and Windows are trademarks of Microsoft Corporation in the U.S. and/or other countries. SD Logo is a trademark.
The information contained herein is subject to change without notice. The warranties for HP products and services are set forth in the express warranty statements accompanying such products and services. HP shall not be liable for technical or editorial errors or omissions contained herein.
User Guide
HP USB Digital Drive
First Edition July 2003