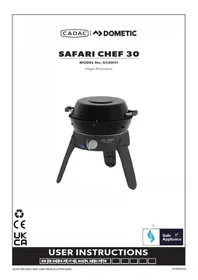
Safari Chef 30 HP - Barbecue CADAC - Free user manual and instructions
Find the device manual for free Safari Chef 30 HP CADAC in PDF.


| Product type | Gas barbecue |
| Brand | CADAC |
| Model | Safari Chef 30 HP |
| Fuel | Threaded gas cartridge 500g or 445g (butane), compliant with EN417 |
| Gross heat output | 1.82 kW |
| Rated consumption | 132 g/h |
| Use | Outdoor only, on a flat and stable surface |
| Included cooking surfaces | Barbecue grate, cooking plate (plancha), pot support |
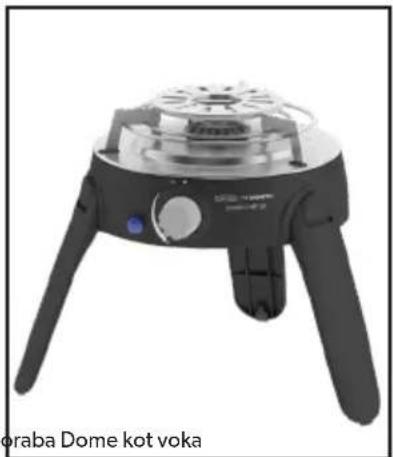
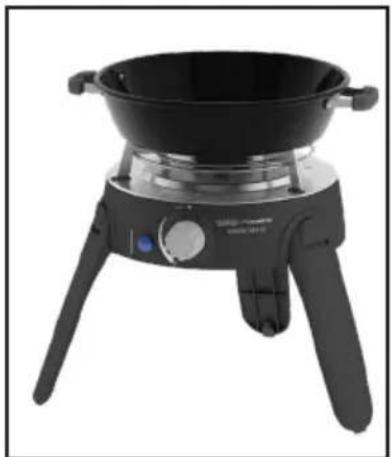
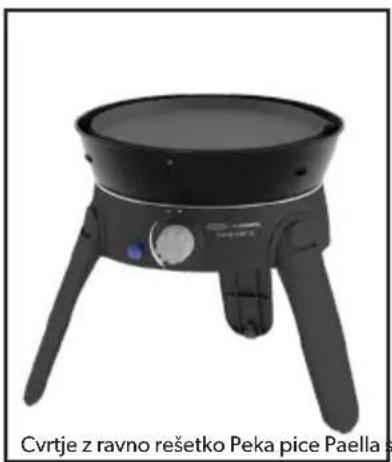
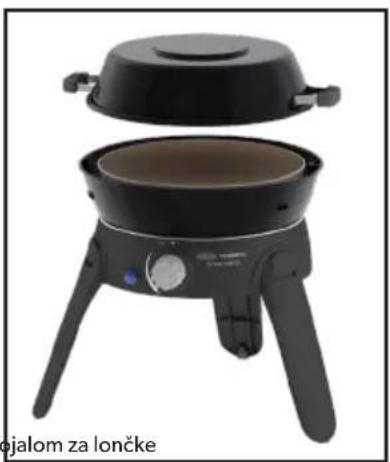
| Cooking options | Grilling, frying, boiling, paella, pizza, coffee (optional accessories) |
| Coating | GreenGrill ceramic non-stick without PFOA |
| Ignition | Integrated piezo |
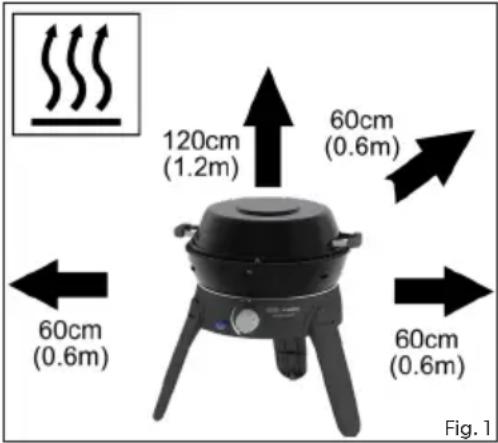
| Safety distances | 1.2 m above, 60 cm behind and on the sides |
| Pot dimensions | Diameter 150 mm to 300 mm |
| Maintenance | Clean with soapy water, do not immerse, use silicone/wood utensils |
| Included accessories | Carry bag, grease collection tray |
| Warranty | 2 years on taps and enamel parts, 1 year on burner |
Frequently Asked Questions - Safari Chef 30 HP CADAC
User questions about Safari Chef 30 HP CADAC
0 question about this device. Answer the ones you know or ask your own.
Ask a new question about this device
Download the instructions for your Barbecue in PDF format for free! Find your manual Safari Chef 30 HP - CADAC and take your electronic device back in hand. On this page are published all the documents necessary for the use of your device. Safari Chef 30 HP by CADAC.
USER MANUAL Safari Chef 30 HP CADAC


Safe Appliance
USER INSTRUCTIONS
EN DE DKES FR IT NL NO PL SESI FITR □□□□□
Explanation of Symbols

Recycling packaging material. Place the packaging material in the appropriate recycling waste bins wherever possible.
1. Safety information
These instructions are for your safety and to help you avoid risk of injury and/or damage. All warranties will become void if you do not follow these instructions.
• This appliance complies with EN521:2019 and SANS 1539:2017.
- Gas appliances require ventilation for efficient performance and to ensure the safety of users and other persons in close proximity, do not use the appliance in an unventilated area. It is intended for outdoor use only.
- Ensure that the appliance is used in a well-ventilated area.
• WARNING: ACCESSIBLE PARTS MAY BE VERY HOT. KEEP YOUNG CHILDREN AWAY.
- Read these instructions carefully before using the appliance.
• FOR OUTDOOR USE ONLY!
Assembly and use
- Do not use the appliance if it has damaged or worn seals.
- Do not use an appliance that is leaking, damaged or which does not operate properly.
- Handle the appliance with care, do not drop it.
• Always operate the appliance on a firm level surface. - Ensure that the assembled product is stable and does not rock.
- This appliance is not suitable for installation or connection to a reticulated gas supply.
- This appliance must be kept away from flammable materials during use. Minimum safe distances are: Above the appliance 120cm. At the rear and sides 60cm. (fig 1)
- When using a pot, the minimum recommended pot size is 150mm and maximum recommended size is 300mm.
- Do not use any cooking surface or pot that is larger than the recommended size. Our cooking surfaces have been specifically designed to allow gas combustion to escape and the closure of this space could affect the performance of this appliance.
- Do not modify this appliance, any modification may be dangerous. Do not use it for anything for which it has not been designed.
- Do not move the appliance during use.
- Never leave the appliance unattended when lit.
- During use, parts of the appliance will become hot (particularly the burner). Avoid touching hot parts with bare hands. The use of gloves is recommended.
- Ensure the pot stand /cooking surfaces are correctly placed when using the appliance.
Gas Container
- The appliance may only be used with a 500g or 445g threaded cartridge (model CA500 or CA445) or the same type of resealable cartridge that meets the EN417 standard.
- IT COULD BE HAZARDOUS TO ATTEMPT TO FIT OTHER TYPES OF GAS CARTRIDGES.
- Ensure that the gas container is fitted or changed in a well-ventilated location, preferably outdoors, away from any sources of ignition such as naked flames, pilots, electric fires and away from other people.
- Keep gas containers away from heat and flame. Do not place on a stove or any other hot surface.
- Refillable containers are to be used only in the upright position so as to ensure proper fuel withdrawal. Failure to adhere to this may cause liquid discharge from the gas container resulting in a dangerous operating conditions.
- Do not try to remove the gas container whilst the appliance is in operation.
- The gas container must be disconnected from the appliance after use or when in storage.
Light back
- In the event of light back (where the flame burns back and ignites inside the burner or venturi housing), immediately turn off the gas supply by closing the appliance valve. After the flame is extinguished, remove the cannister and check the condition of the seal; replace the seal if in doubt. Re-light the appliance.
- Should the flame persistently light back, return the product to your authorized repair agent.
Leaks
- If there is a gas leak on your appliance (smell of gas), immediately turn off the gas supply by turning the control knob clockwise to the "OFF" position and take it into a flame free location where the gas leak may be detected and stopped. If you wish to check for gas leaks on your appliance, do it outside. Do not try to detect gas leaks using a flame; use soapy water.
How to check the appliance is connected to the gas supply in a sound fashion
- It is important that all gas connections have been correctly connected to prevent any gas leaks.
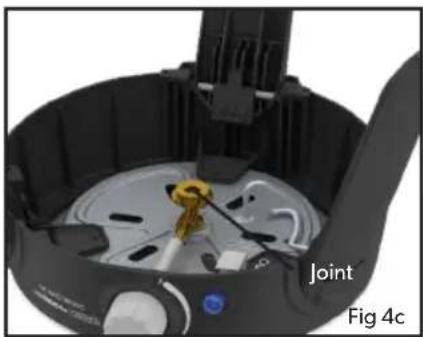
- The correct way is to smear the joint, i.e. where the gas container connects to the appliance, with soapy water. Turn the appliance control knob slightly anti-clockwise to turn the gas on. If bubbles form, then there is a gas leak. Immediately turn the gas off and disconnect the gas supply from the appliance. Check that all the connections are properly fitted. Check that the seal is in place and in good condition before connecting the gas supply. Re-check with soapy water after refitting the gas supply.
- If a gas leak persists, return the product to your local dealer for inspection/repair.
| 6540H1 | ||||
| Country of Use | BE, CH, CY, CZ, ES, FR, GB, GR, IE, IT, LT, LU, LV, PT, SK & SI | PL | BE, CY, DK, EE, FR, FI, HU, IT, LT, NL, NO, SE, SI, SK, RO, HR, TR, BG, IS, LU, MT, & ZA | AT, CH, DE & SK |
| Allowable gasses | Butane | |||
| Gas Pressure | Vapour Pressure | |||
| Jet Number | 0.25 | |||
| Nominal Usage | 132g/hr | |||
| Gross nom. heat input | 1.82kW | |||
| Country Name and Abbreviations | ||||
| AE = United Arab Emirates AL = | Albania AT = Austria BE = Belgium CH = Switzerland | |||
| CZ = Czech Republic DE = Germany DK = Denmark ES = Spain FI = Finland | ||||
| FR = France GB = United Kingdom GR = Greece HR = Croatia IT = Italy | ||||
| JP = Japan KR = Korea NL = Netherlands NO = Norway | PL = Poland | |||
| PT = Portugal | RO = Romania | RU = Russia | RS = Serbia | SI = Slovenia |
| SK = Slovakia | SE = Sweden | TR = Turkey | ZA = South Africa | |
2. Assembling the appliance
- WARNING: The legs are spring loaded. Opening and closing of the legs must be done in a controlled manner to avoid personal injury or damage to your Safari Chef.
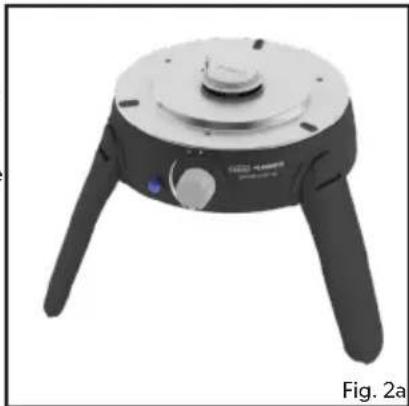
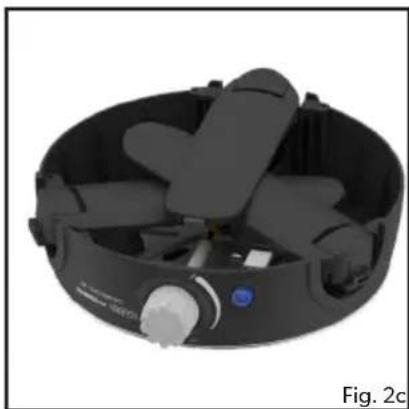
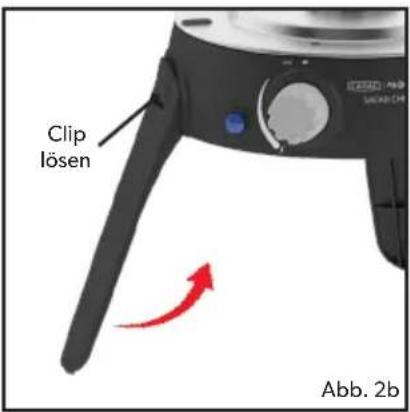
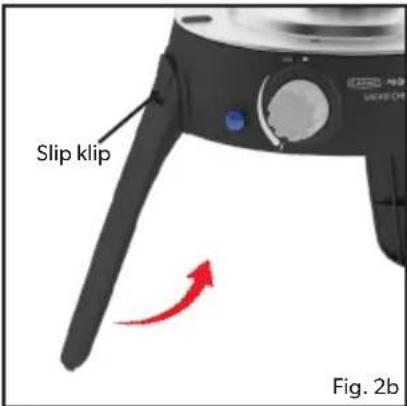
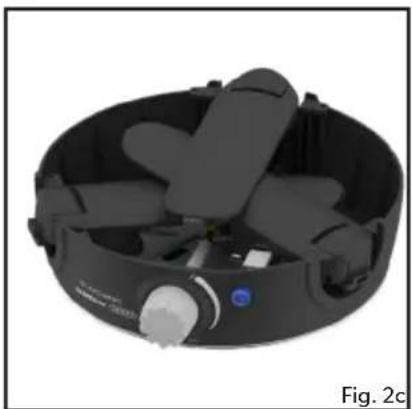
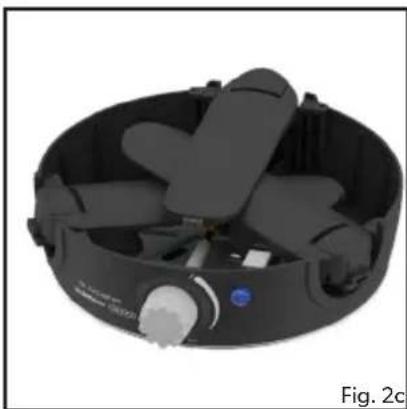
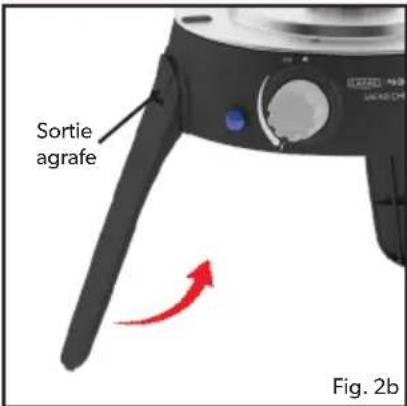
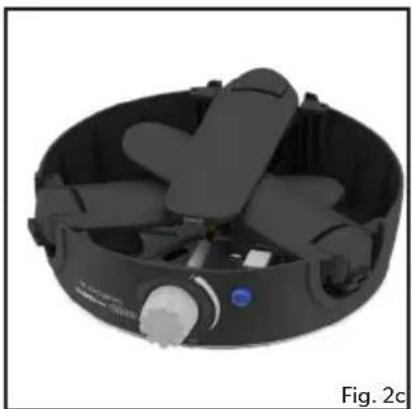
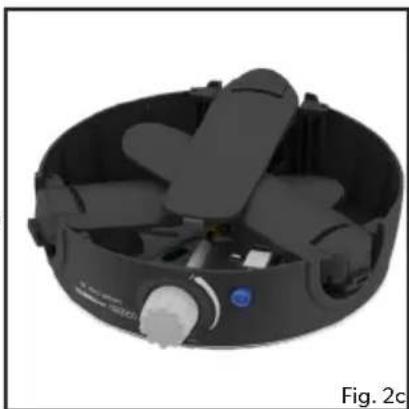
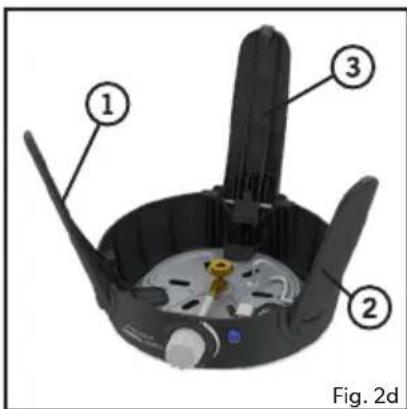
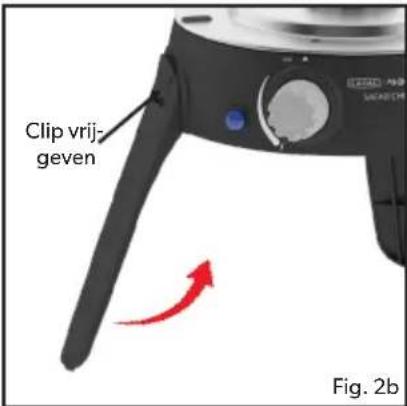
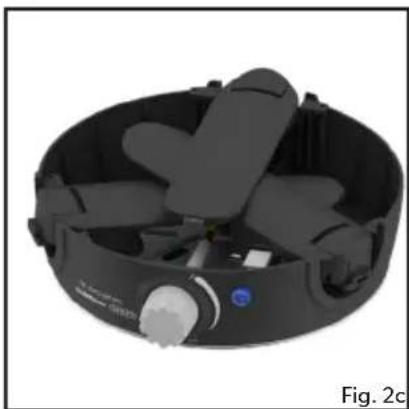
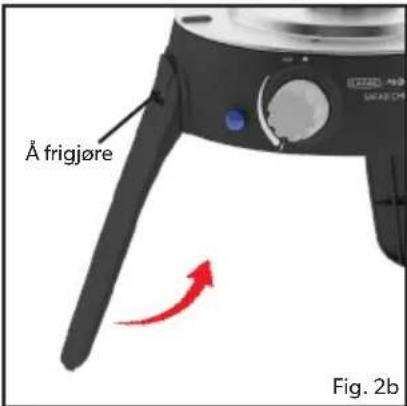
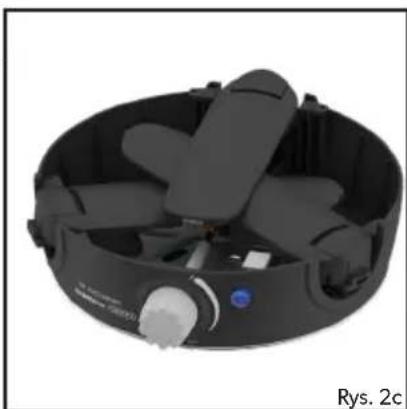
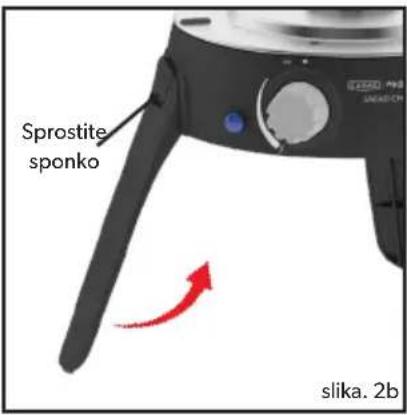
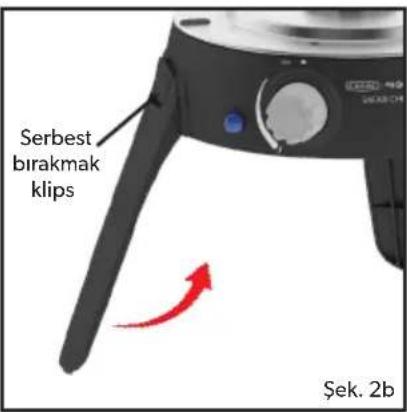
- To open the legs, turn the unit upside-down and hold the legs down while lifting each leg individually (Fig. 2c). You will hear a "click" if the leg(s) has located correctly (Fig. 2a).
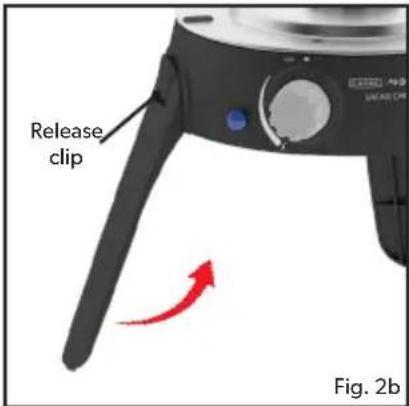
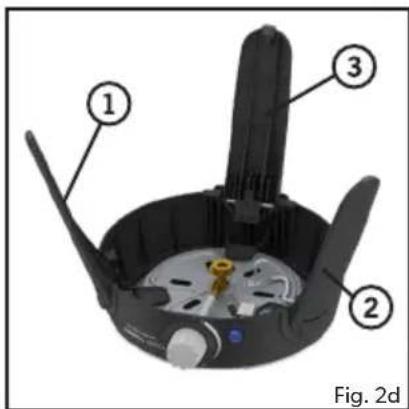
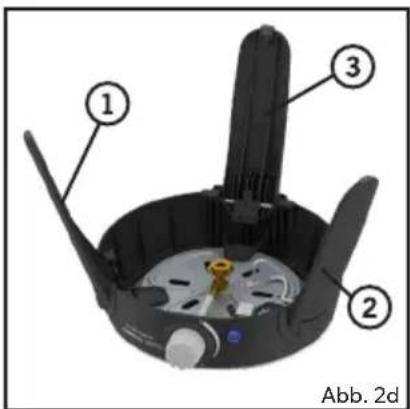
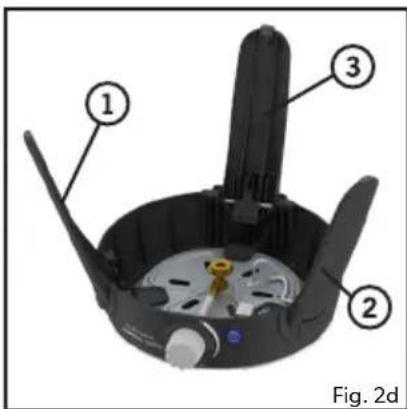
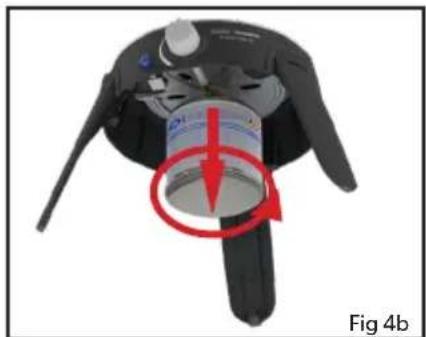
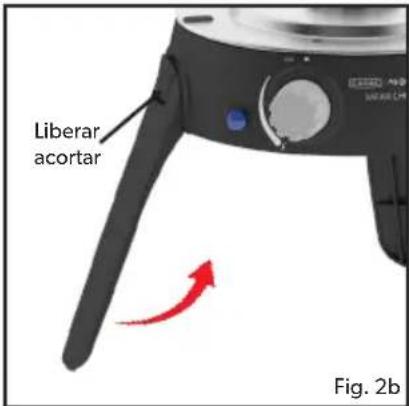
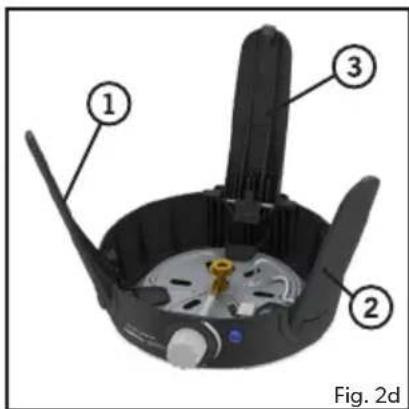
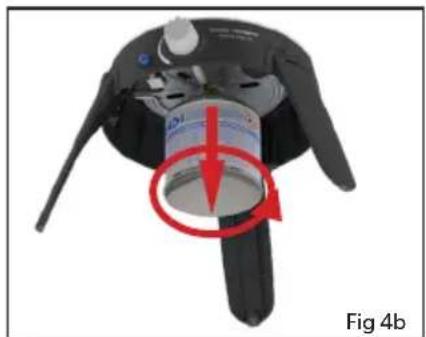
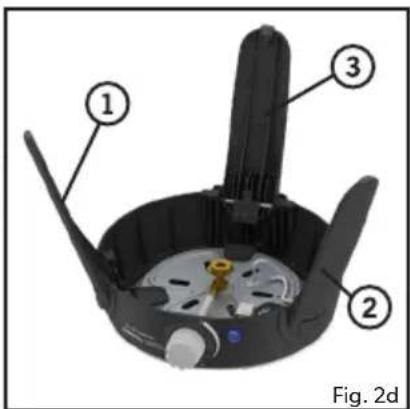
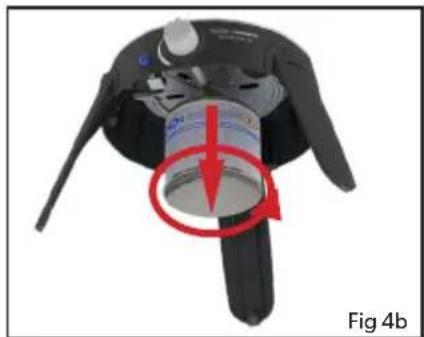
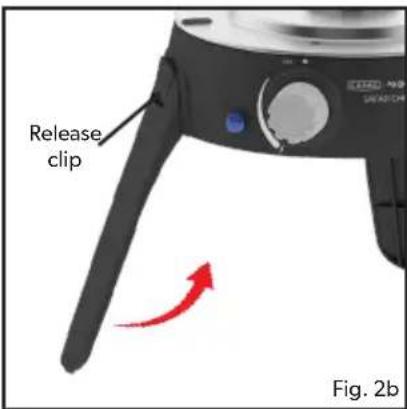
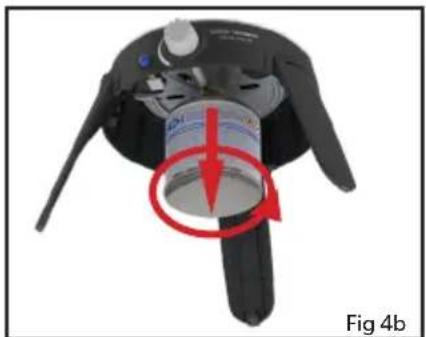
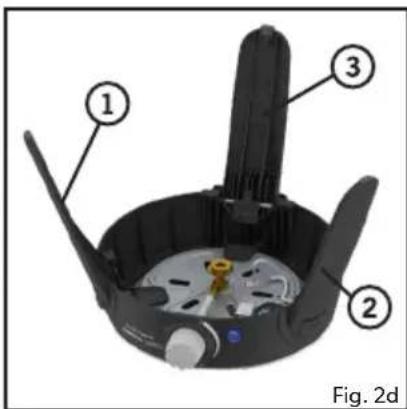
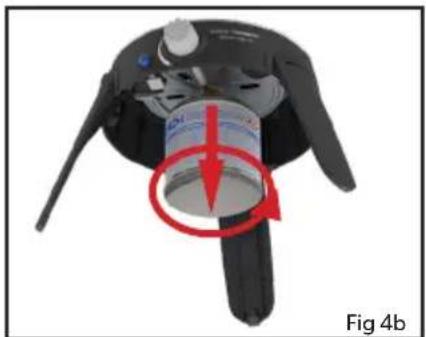
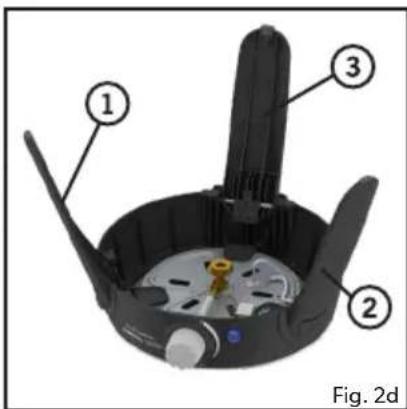
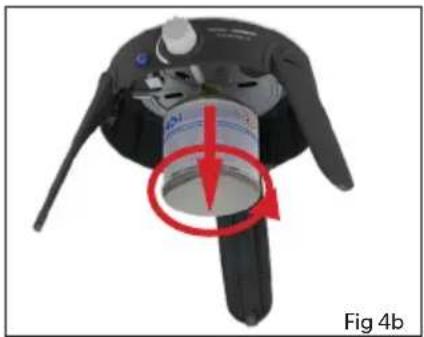
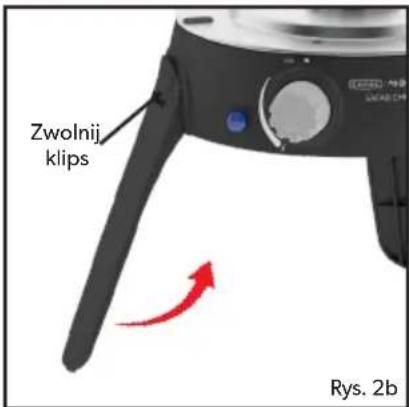
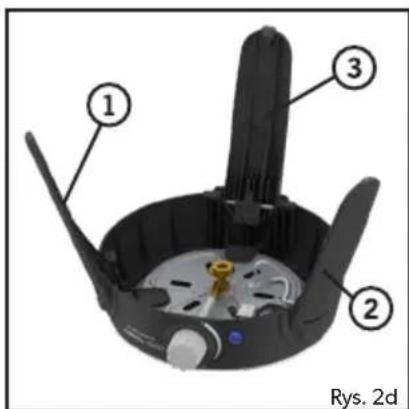
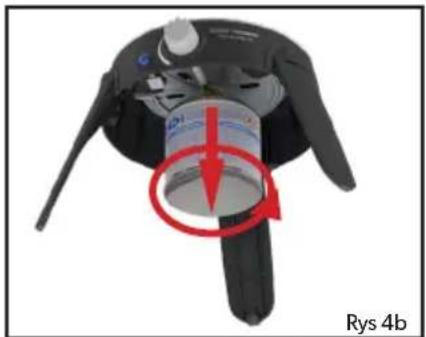
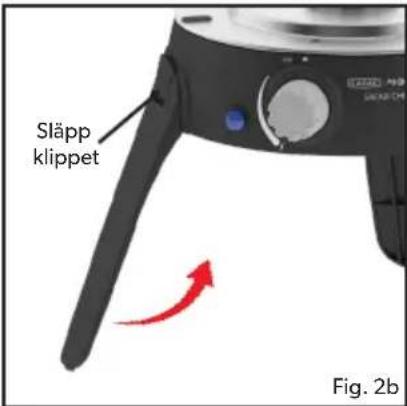
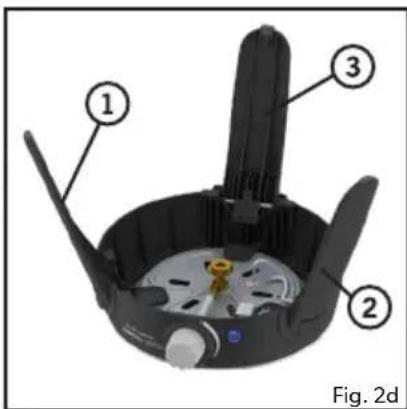
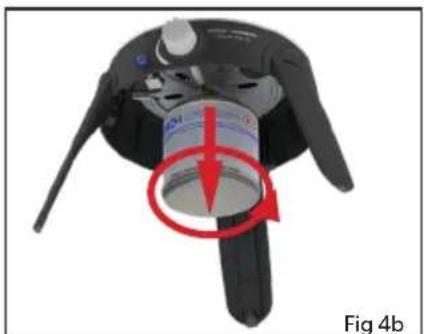
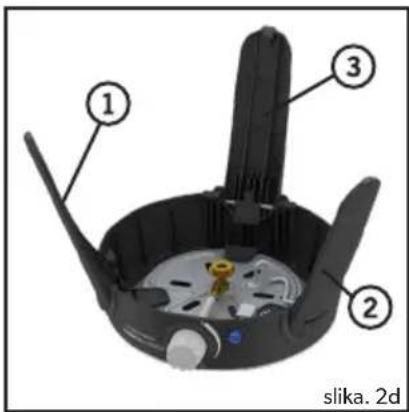
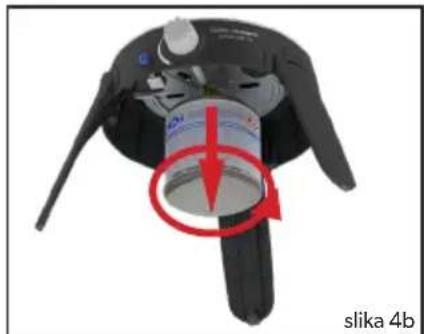
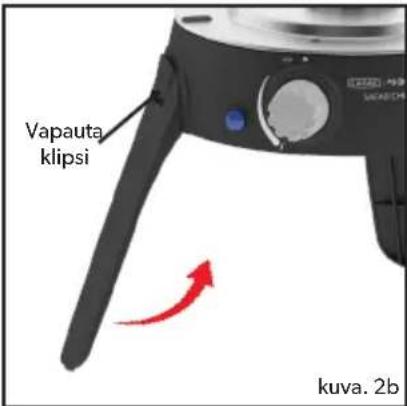
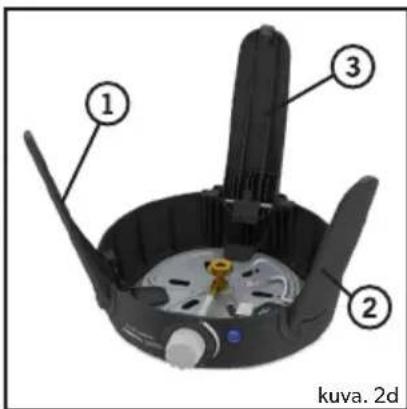
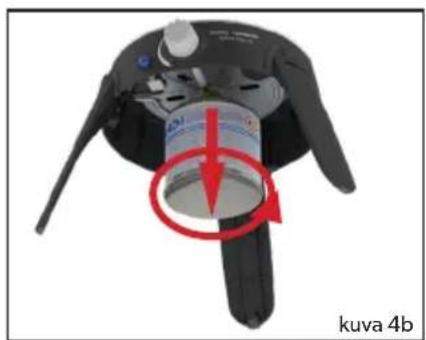
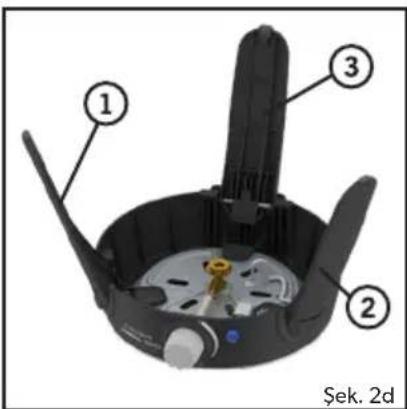
- To fold the legs back, securely hold the leg and push the leg release clip down (Fig. 4b). Then push the legs in-ward to its closed position (Fig. 2c). This needs to be done sequentially to optimize space. First the right front leg (1), then the left front leg (2), and lastly the rear leg (3) (as seen in Fig. 2d).
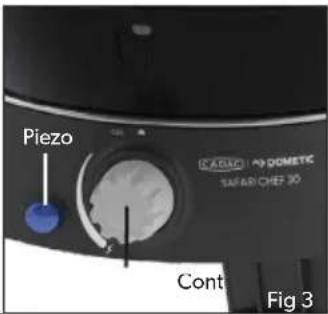
- Before connecting the gas supply, firstly check that the appliance valve is in the off position by turning the control knob fully clockwise (See Fig. 3).
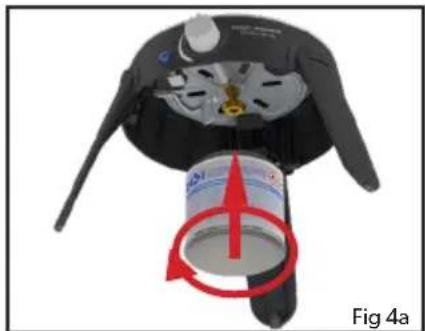
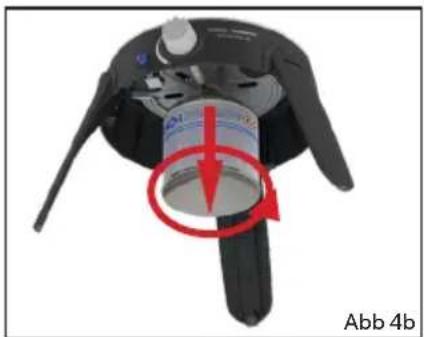
- Making sure that the gas cartridge is kept upright, screw the cartridge into the valve in a clockwise direction until it is fully engaged (Fig. 4a), hand-tighten only. If the cartridge is over-tightened, it may damage the cartridge valve.
3. Connecting the gas supply and operating the appliance
Connecting the gas supply
- Before connecting the appliance to a gas cartridge, ensure that the rubber seals are in position and in good condition.
- Before connecting the gas cartridge to the appliance, check that the appliance control knob is in the "OFF" position.
- Carry out this check each time you fit the appliance to a gas cartridge.
- Blow out any dust from the gas supply opening to prevent possible blockage of the jet.
- Ensure that the gas cartridge is fitted in a well-ventilated location away from any source of ignition, such as naked flames and away from other people.
- Make sure that the gas cartridge is kept upright at all times, connect to the cartridge by screwing on hand tight until fully engaged.
- Ensure that a complete gas seal has been made (check for the smell of gas around the connection joint). Do not check for leaks with a naked flame. Use warm soapy water only, applied to the joints and connections of the appliance. Any leakage will show up as bubbles around the leakage area.
• If you cannot rectify the gas leak do not use the appliance. If you are in doubt, contact your nearest stockist.
Disconnecting and changing the gas supply
• Check that the burner is extinguished before disconnecting the gas cartridge.
- To disconnect the gas cartridge, unscrew the cartridge in a counter clockwise direction from the valve keeping the appliance in vertical position. (See Fig 4b)
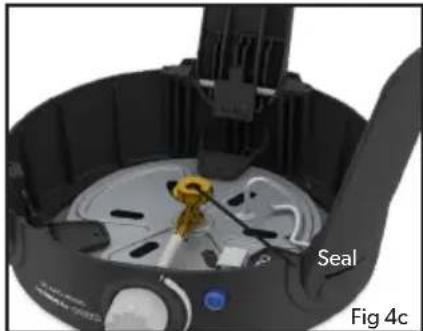
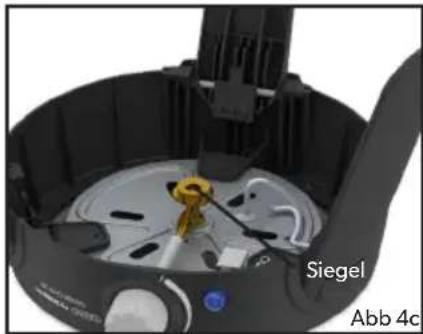
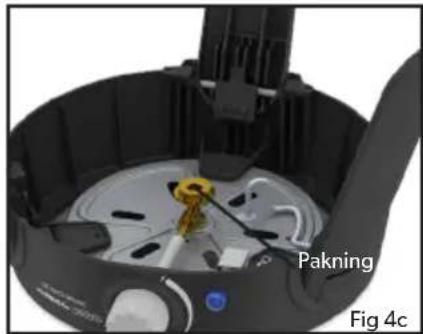
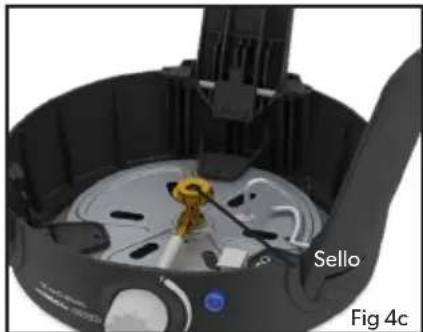
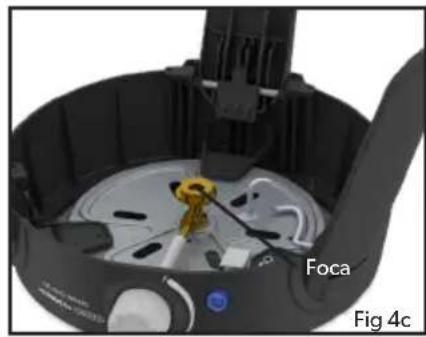
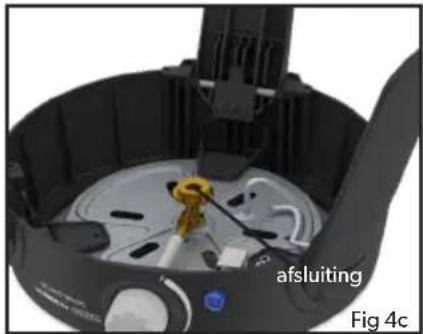
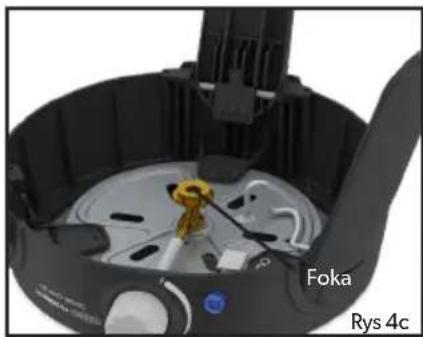
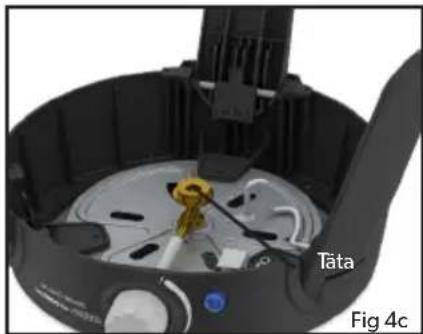
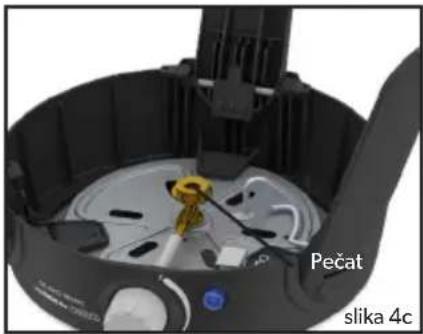
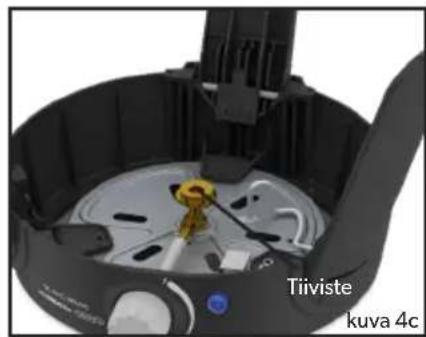
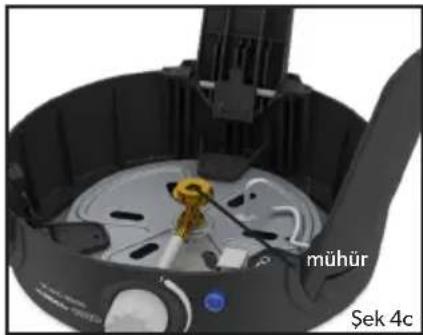
- Check the seal before replacing the gas container (Fig. 4c).

- When operating this appliance, please take care to ensure that all parts are in good working order and that you have checked for any gas leaks before lighting the appliance with every use.
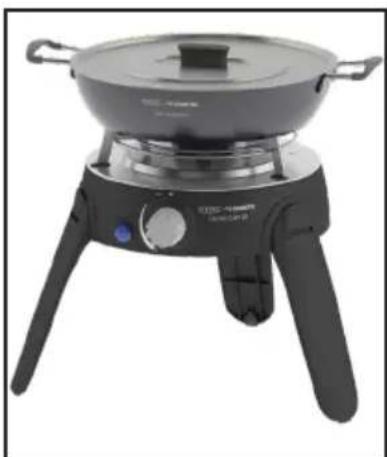
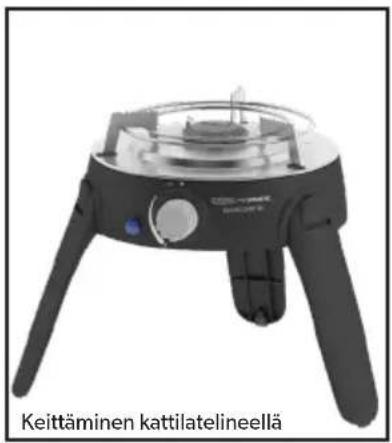
- Cooking surfaces can simply be placed and are ready to use. No assembly required.
- PLEASE NOTE: Please ensure all protective packaging and plastic are removed from the appliance before use.
• The appliance is designed for use with cooking vessels of not less than 150mm in diameter and not greater than 300mm in diameter.
Precautions to observe before lighting.
- Use this appliance only on a firm level surface.
• After prolonged storage, inspect the appliance for any insects and webs, which may affect gas flow.
Lighting the appliance using the piezo
• It is recommended to remove any cooking surfaces when trying to light the appliance. This way it will be easy to see the burner when it is lit.
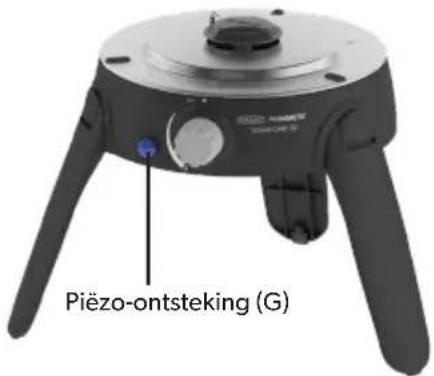
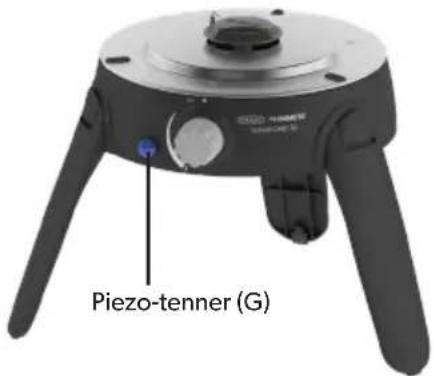
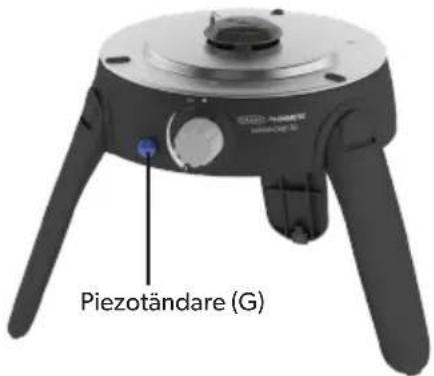
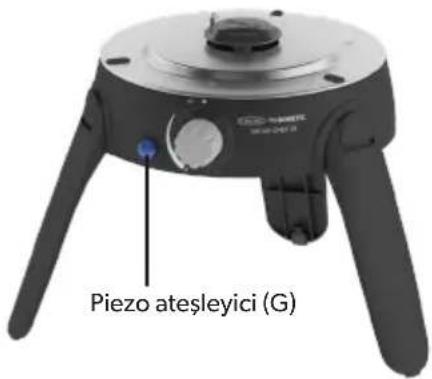
- To light up the appliance using the piezo igniter, push and turn the control knob to its highest setting in an anti-clockwise direction, then press the piezo button to ignite the gas. If the gas does not ignite on the first spark, turn the control knob back to its "OFF" position. Try again, by pushing and turning the control knob anti-clockwise and push the piezo button to ignite the gas. If the gas has not ignited in the first two to three seconds you should close the control valve by turing the control knob back to its "OFF" position.
- Wait approximately thirty seconds to let any accumulated gas within the burner escape. Repeat the above process if necessary until the flame ignites. The flame should normally light up within the first one to two seconds.
Lighting up using a BBQ lighter
- When starting cold, the appliance may be lit from the top prior to fitting the desired cooking surface. When lighting up a hot appliance, it is recommended that this be done by sticking a barbecue lighter through one of the vent holes underneath the burner, until it is in line with the burner (DO NOT place the BBQ lighter through the large hole directly underneath the burner). Ignite the BBQ lighter. Whilst the BBQ lighter is lit, push and turn the control knob anti-clockwise to light the burner.
General
- Once the appliance is lit, the flame intensity may be adjusted by turning the control knob clockwise to decrease the flame and anticlockwise to increase the flame.
- When cooking food with a high fat content, flaring may occur if the selected heat setting is too high. Should this happen, turn the heat down until the flaring ceases.
- Do not move the appliance when in use. It is unsafe practice to move the appliance whilst lit and may cause flaring.
• After use, ensure the control knob on your appliance is in the off position, and that the flame is extinguished before removing the cartridge.
4. Component List
| A B C D E F G H | ||||||||
| 6540H1-10 | * | * | * | * | * | * | * | |
| 6540H1-20 | * | * | * | * | * | * | ||
| 6540H1-21 | * | * | * | * | * | * | ||
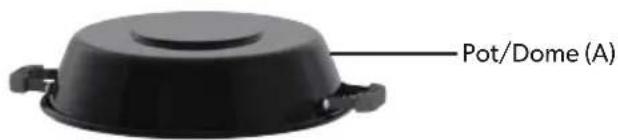
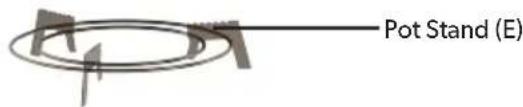
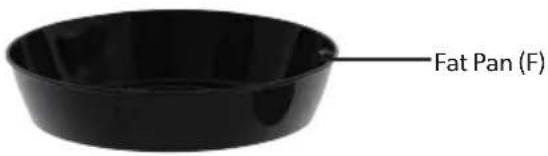
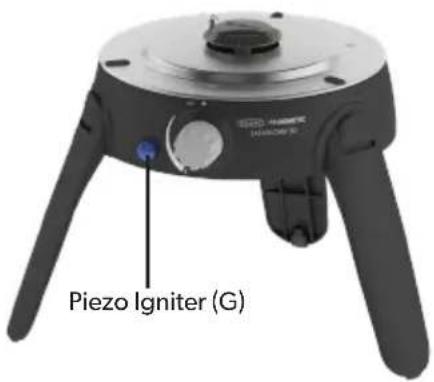
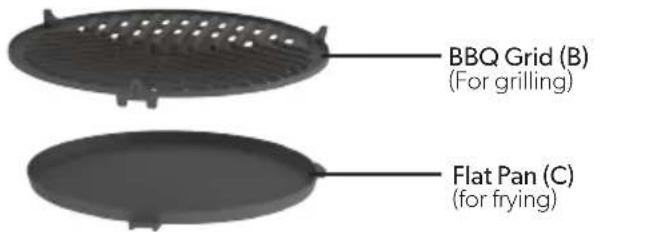

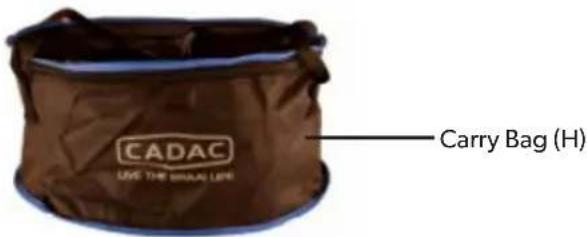
The following are sold separately as optional accessories, and may not be available in all regions. Contact your local supplier for availability (see back page for contact details).
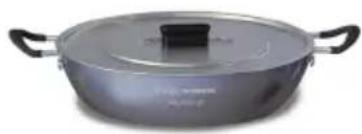
(Paella/Frying)
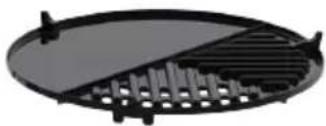
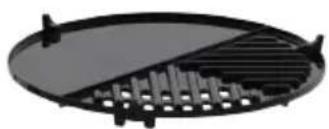
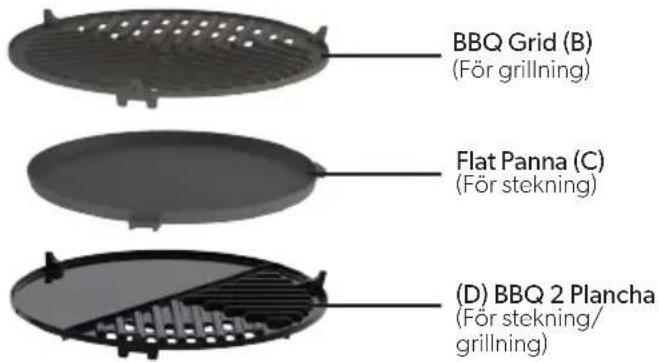
BBQ 2 Plancha 30 (Grilling/Frying)
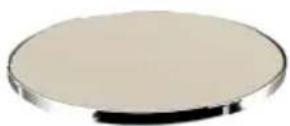
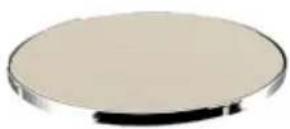
Pizza Stone Pro 30 (Pizza making)
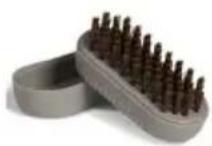
Soft Soak BrushPaella Pan 3

Soft Soak 30 (for easier cleaning)
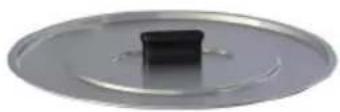
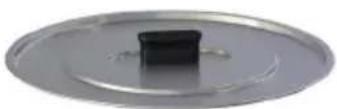
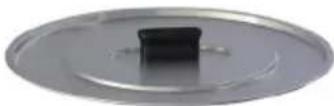
Lid
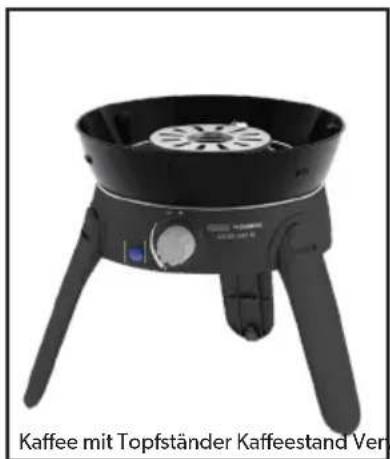
Coffee Pot Stand
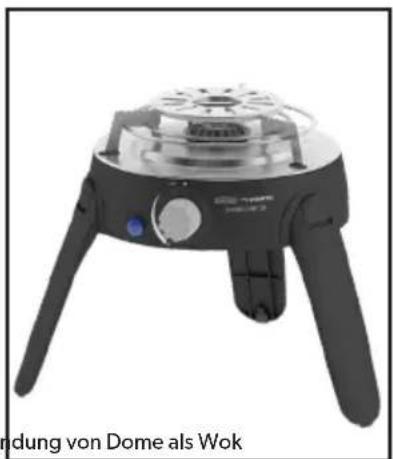
5. GreenGrill Cooking Options
GreenGrill Cooking
Most of the cooking surfaces have our GreenGrill coating. This ceramic coating is completely PFOA-free; it contains no toxic substances, and guarantees healthier cooking!
PREPARATION & USE
- 'Seasoning': before using the cooking surface for the first time, you can season it to give the cooking surface a thin protective layer that prevents food from sticking. It is not required but we do recommend it. It's very easy: lightly rub cooking oil on the surface and then place over medium heat for 2 - 3 minutes. When it cools, wash the cooking surface with soapy water before use and grease it lightly with some oil (cooking oil of your choice, e.g. sunflower oil).
It's ready to go! - Note: GreenGrill coating conducts heat better than products with a regular (PTFE) non-stick coating. We therefore recommend using only 75% of the power of what you are used to.
- Never leave the cooking surface on the heat source without oil. Apply a thin layer of oil with a kitchen paper towel or a brush before placing the cooking surface on the heat source. Make sure you have oiled all parts, so with e.g. a BBQ grid include the raised edges as well.
• We recommend frying in sunflower oil or Rapeseed Oil because of the high burning point. Olive oil can have a relatively low burning point, which can cause the ingredients to stick to the pan or burn. We therefore do not recommend using olive oil.
Tip: bring meat or fish to room temperature before frying. This will prevent sticking to the cooking surface. - Always use silicone and/or wooden utensils so that the GreenGrill coating is not damaged. Never use metal utensils as this can damage the coating.
CLEANING
- Let the cooking surface cool down before cleaning. Extreme temperature changes can cause deformation of the cooking surface.
- The GreenGrill coating is 'Easy Clean'. Warm soapy water with a soft sponge is sufficient for cleaning the cooking surfaces with GreenGrill coating. Avoid scouring pads or steel wool.
- If the cooking surface has food particles remaining from a previous use they can adhere to the coating, which can lead to brown spots. In these places, ingredients can stick to the cooking surface because the coating is no longer reached. Make sure that these spots are properly removed before use.
- For stubborn stains or residues, you can try the 'vinegar method' for the paella pan or chef pan: pour a layer of vinegar into the pan and heat the pan slightly. The vinegar does not have to boil and should certainly not evaporate completely. Pour the vinegar out of the pan, clean the pan with soapy water and the pan is as good as new. Note: heating vinegar can give off an unpleasant smell.
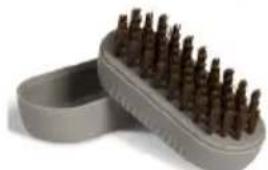
- The CADAC | DOMETIC Soft Soak (sold separately) is the ideal companion product to facilitate overnight soaking. When using the Soft Soak, we recommend placing the cooking surface face down which allows for maximum soaking and also uses less water.
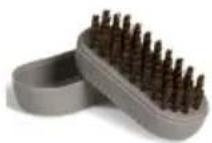
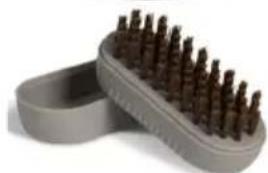
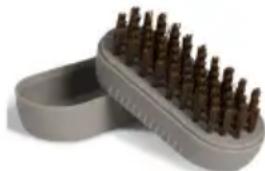
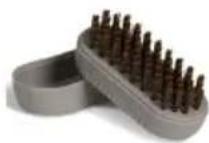
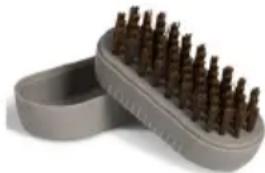
- Any stubborn stains that remain after soaking, can be loosened and brushed away using the CADAC | DOMETIC Soft Soak Brush (sold separately).
• Dry with a soft cloth and you're done!
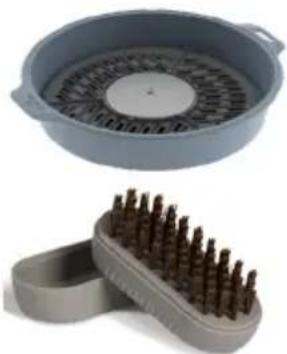
Soft Soak Brush
MAINTENANCE
• We recommend to add a little oil to the cooking surface after cleaning and spread it with kitchen paper
The oil seals the surface from the outside air and moisture. It also ensures that the food does not burn into the surface.
- Place the cooking surface in a plastic bag before you put it into its storage bag so you are ensured the storage bag remains clean and oil free.
- The storage bag prevents damage to the GreenGrill coating and your product.
Cooking Options
• These are the available cooking options.
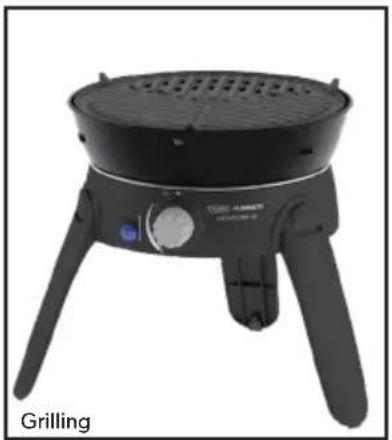
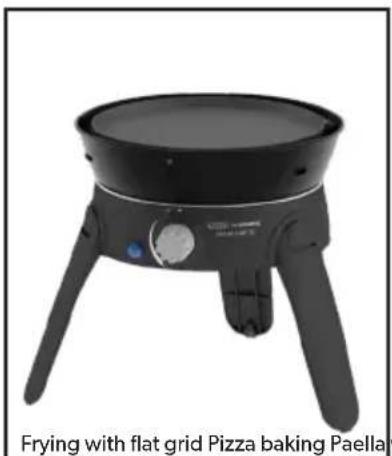
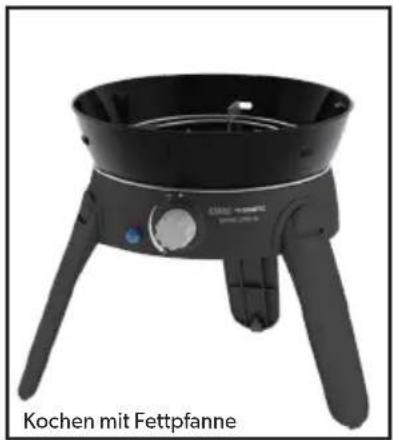
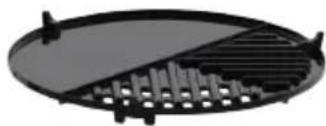
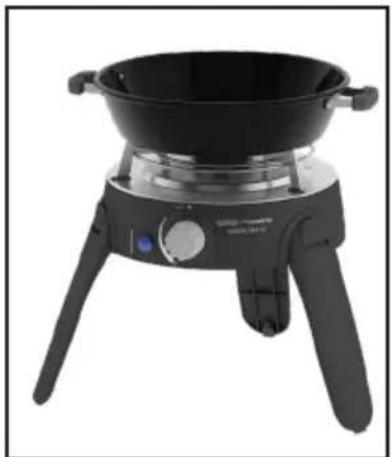
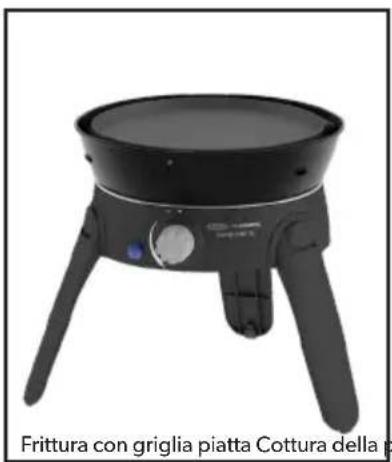
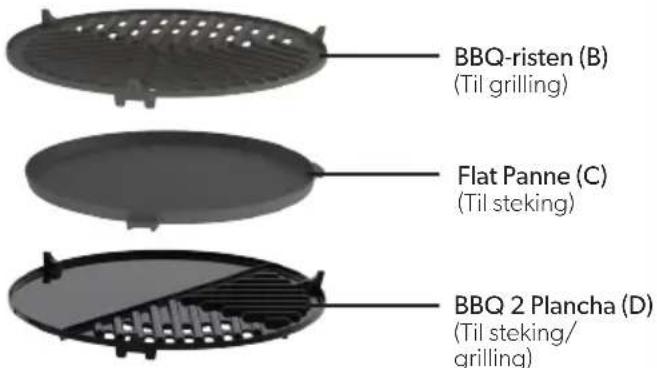
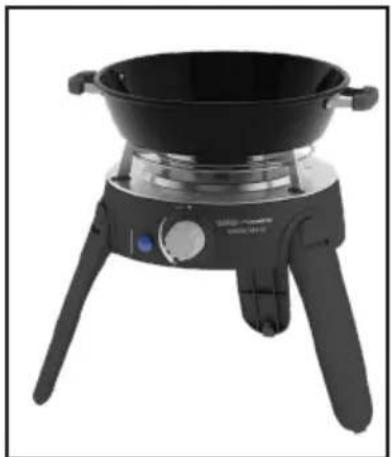
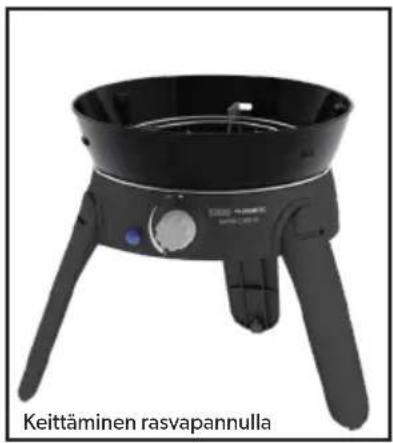
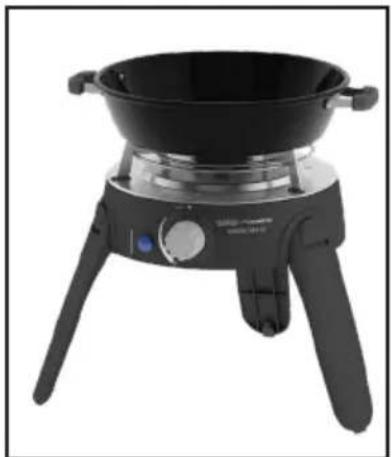
Grilling: This cooking option is ideal for fat-free grilling of chicken, sausages, chops, kebabs, fish or vegetables. For this type of cooking, use the grill plate.
Caution: Please note that when cooking fatty meats some fat will splatter onto the unit which may cause flare-ups. Please use caution when handling such meats. The cooking temperatures are easily adjusted to suit your own requirements by turning the control knob to regulate the degree of heat.
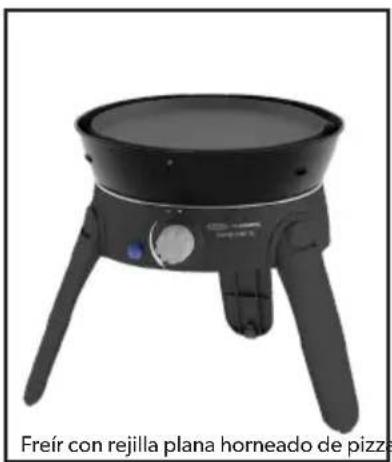
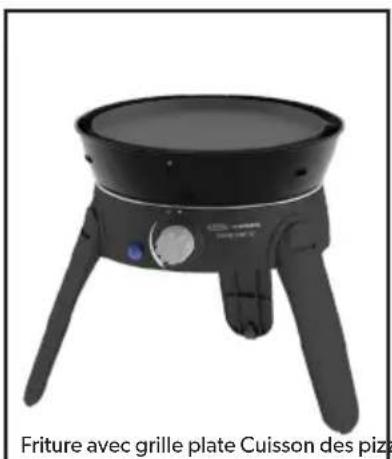
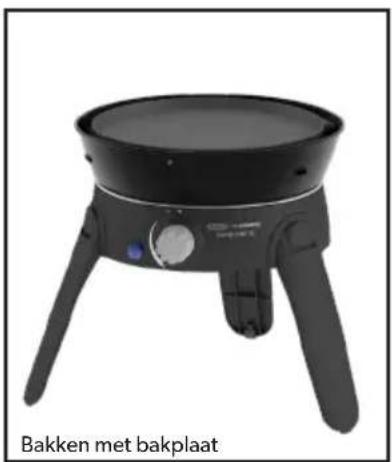
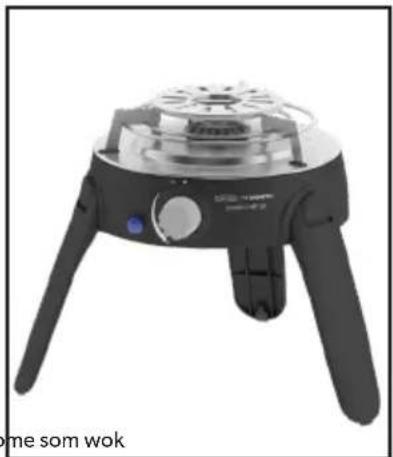
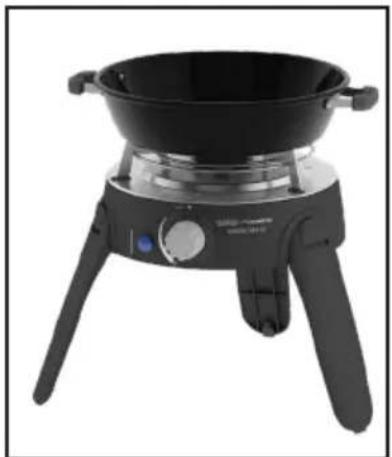
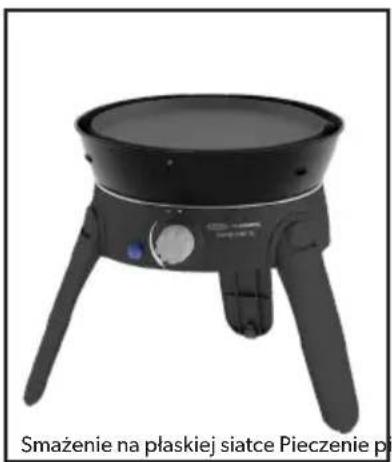
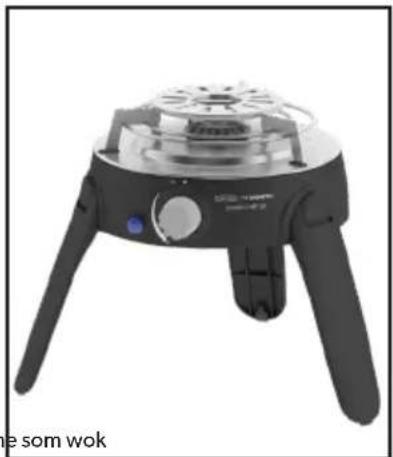
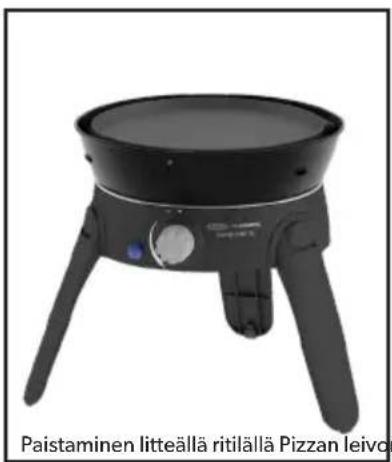
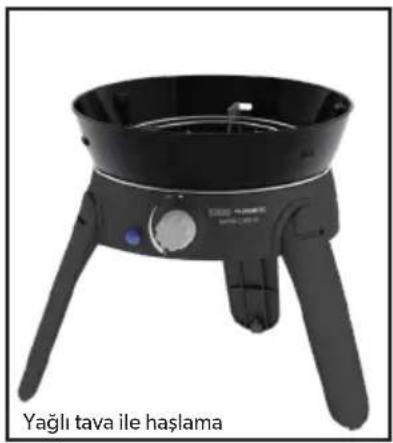
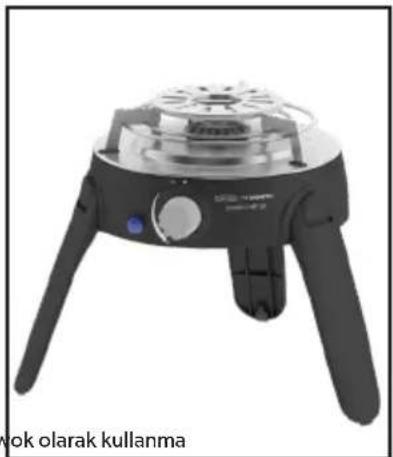
Frying: This option is ideal for stir-fries, fish, breakfast, pancakes, prawns, paella and vegetables. For this type of cooking, use the flat grill. Please note that being a shallow pan, it is not suitable for deep-frying. The easy clean surface encourages the minimum use of fat for healthy cooking.
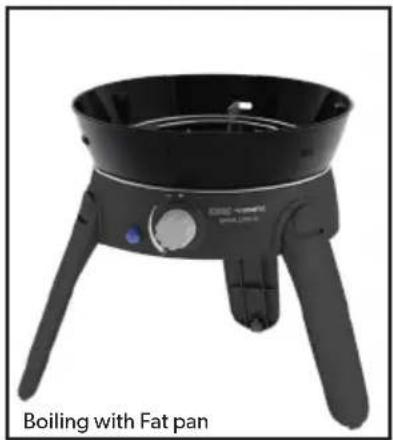
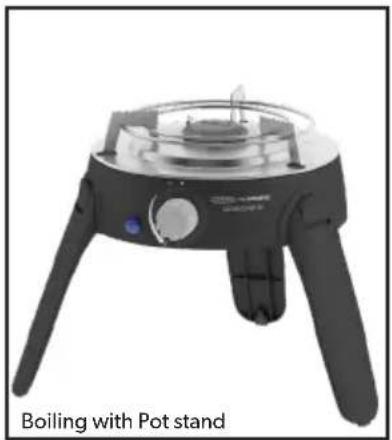
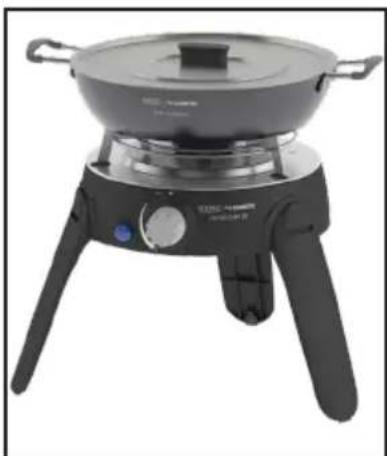
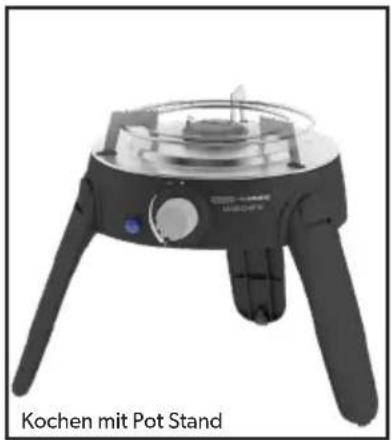
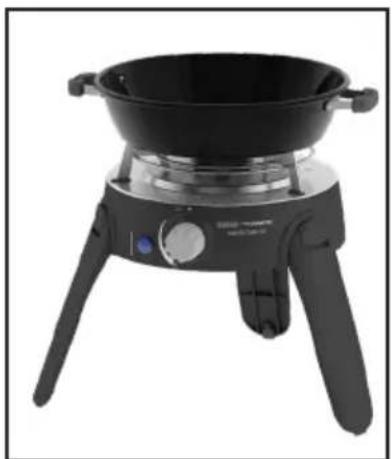
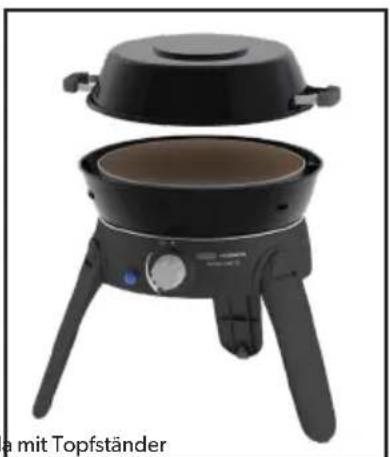
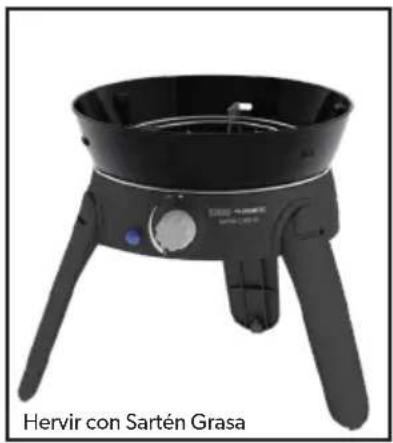
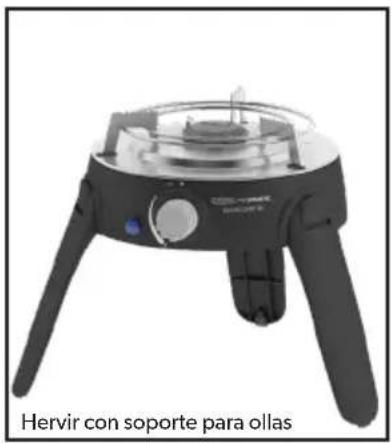
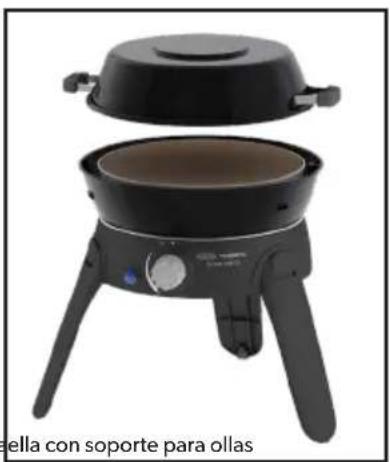
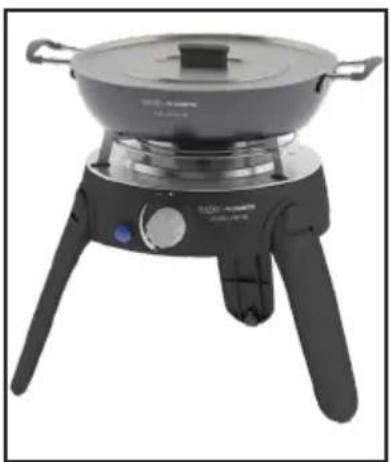
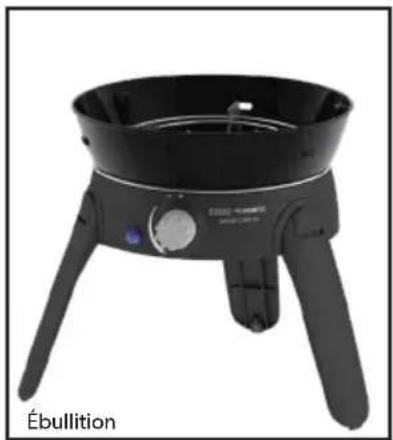
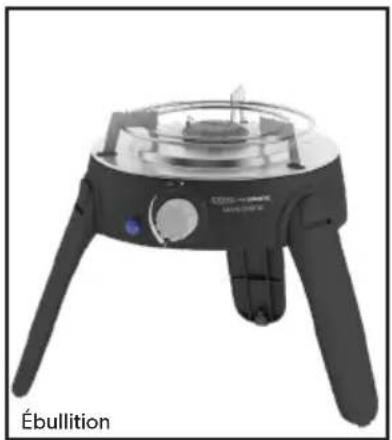
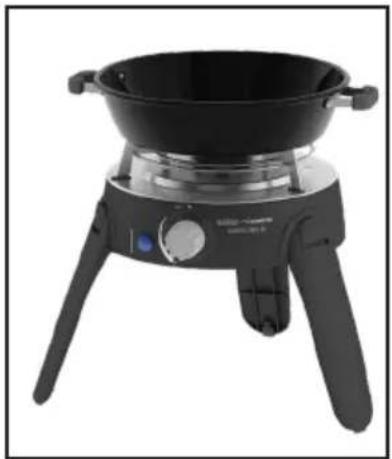
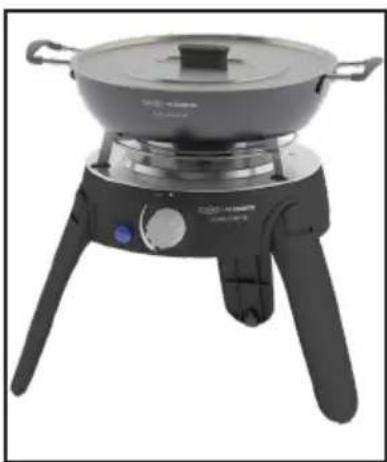
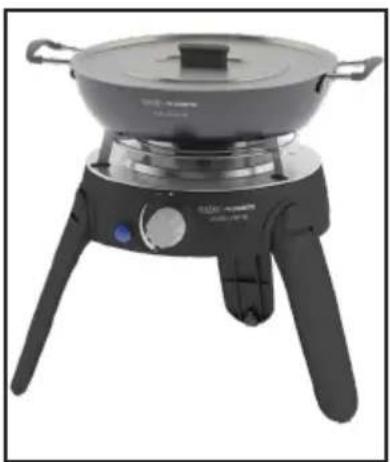
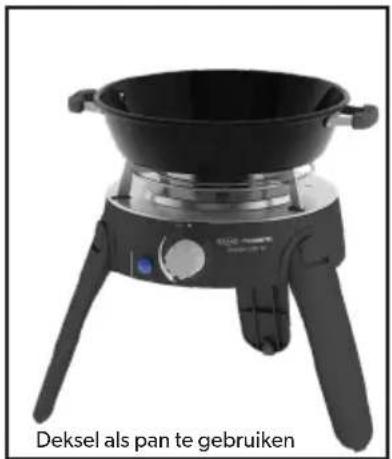
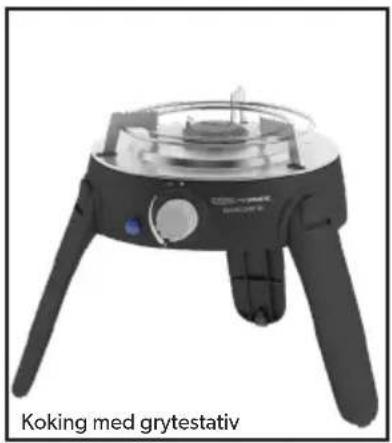
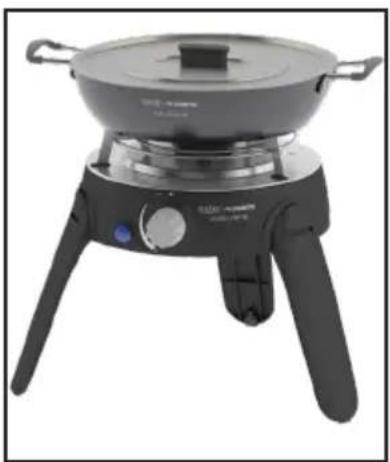
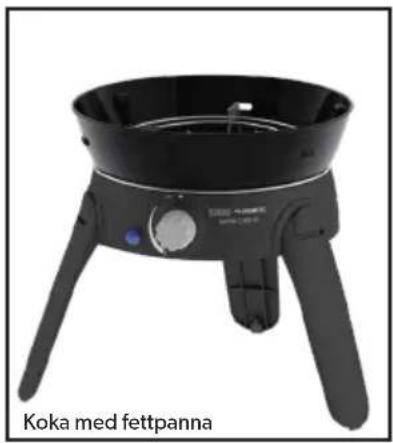
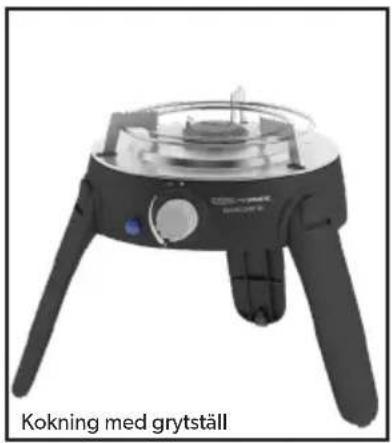
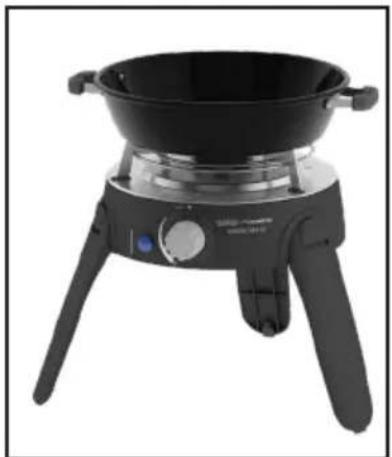
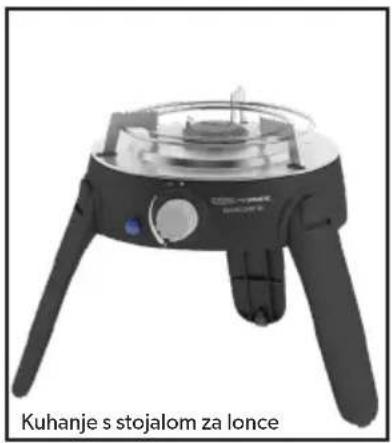
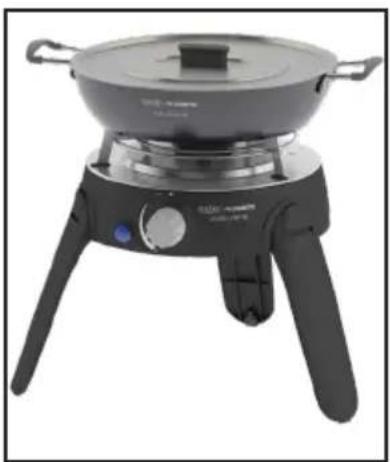
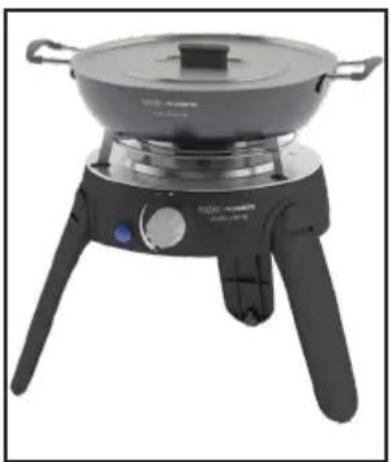
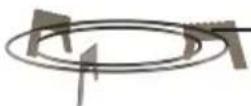
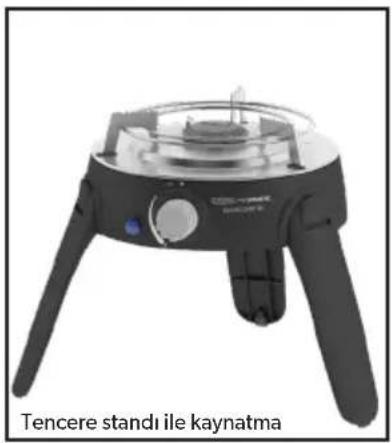
Boiling: For this type of cooking, place the pot stand in its locator grooves ensuring that it is properly seated. Place a suitable pot (not less than 150mm diameter and not more than 300mm diameter). One liter of water will boil in approximately 6 minutes depending on the conditions, size of pot used, etc. Use windshields in case of windy conditions
Note: When using small sized pots do not attempt to use pots with plastic handles as these can get extremely hot.
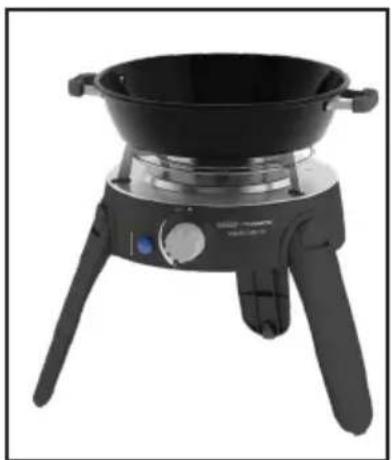
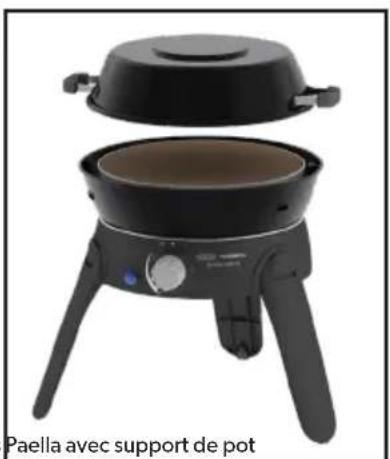
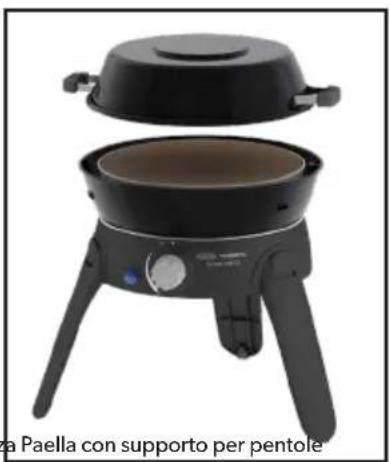
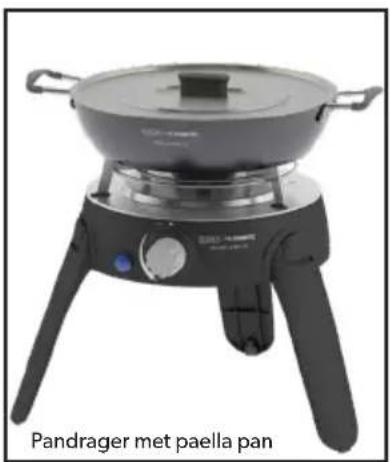
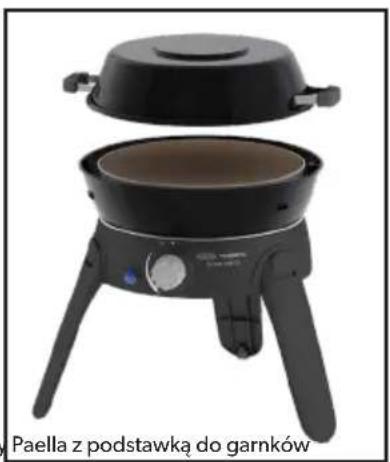
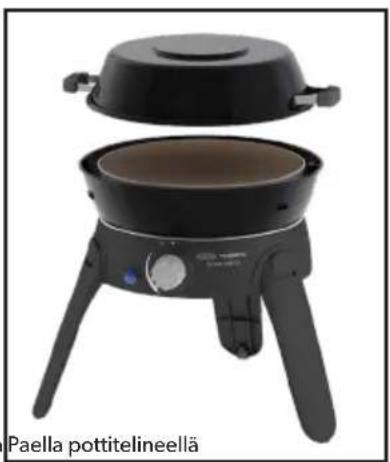
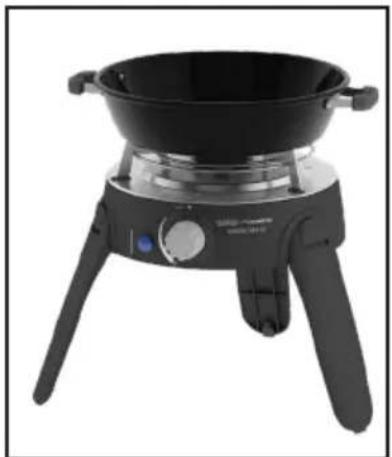
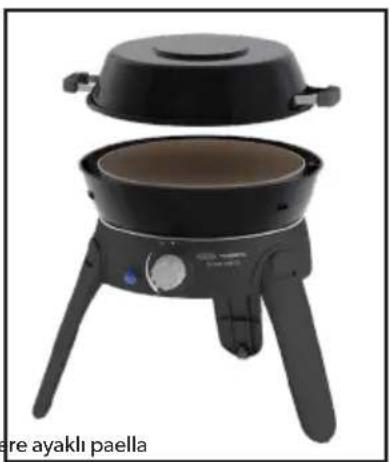
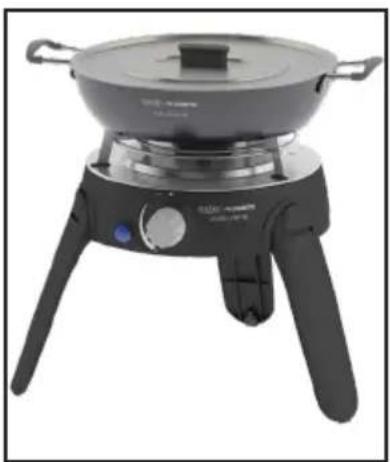
Paella: This cooking option is ideal for preparing paellas, risottos, pasta dishes, traditional breakfasts etc. The Paella Pan is made from a high quality pressed aluminium which allows for excellent heat distribution and retention.
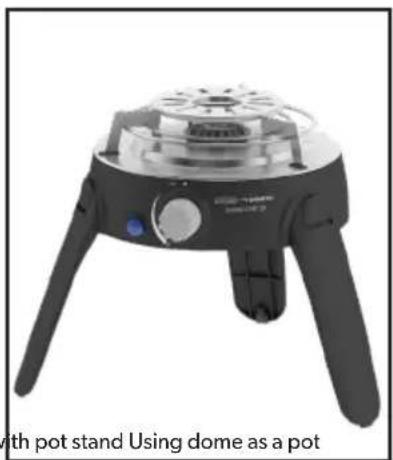
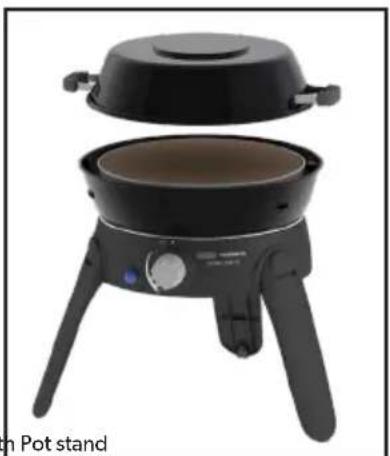
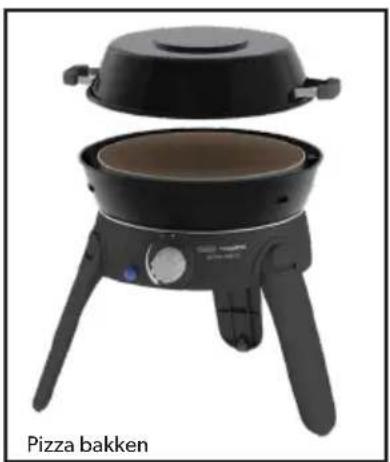
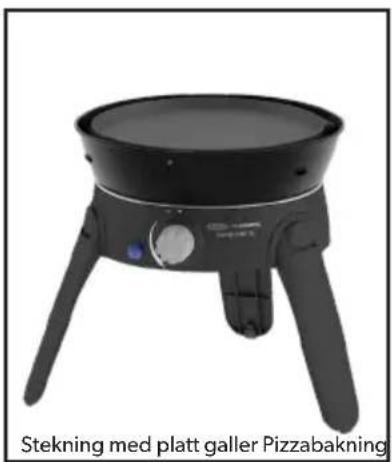
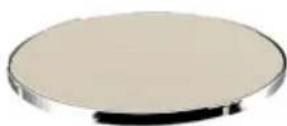
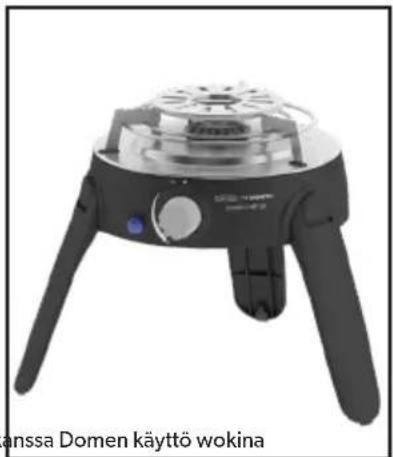
Pizza baking: This cooking option is ideal for preparing pizzas, flat breads etc. The pizza stone is 12mm thick that can withstand temperatures of up to 300°C and includes a pan. The dome needs to be used in order to create the baking effect.
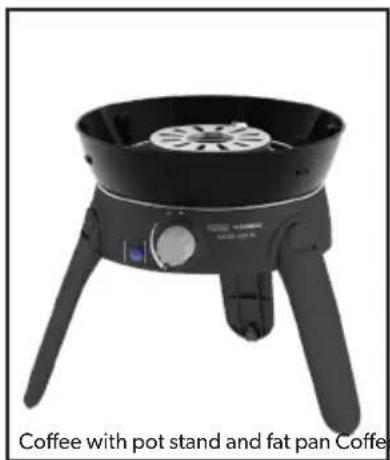
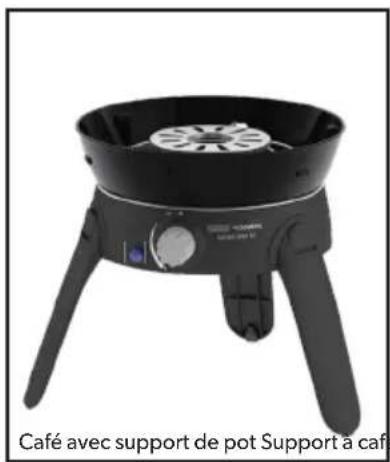
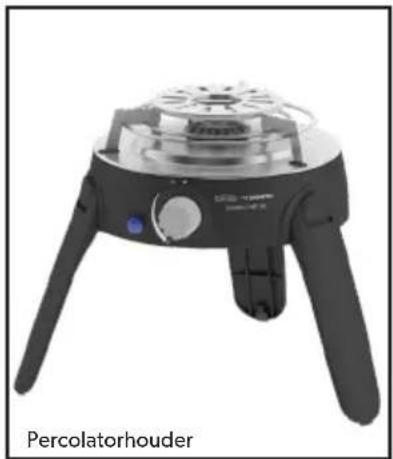
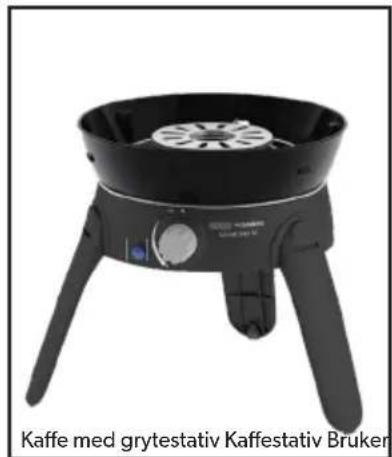
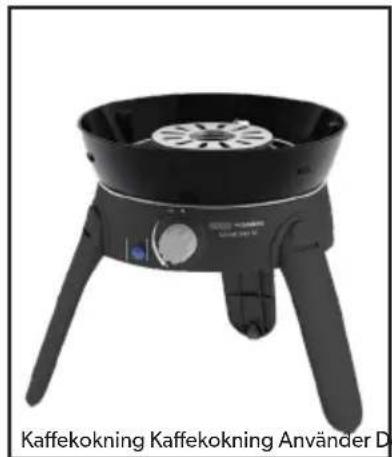
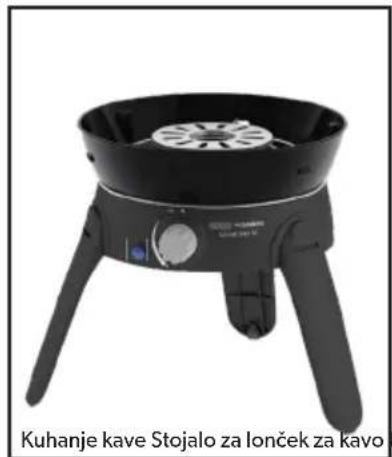
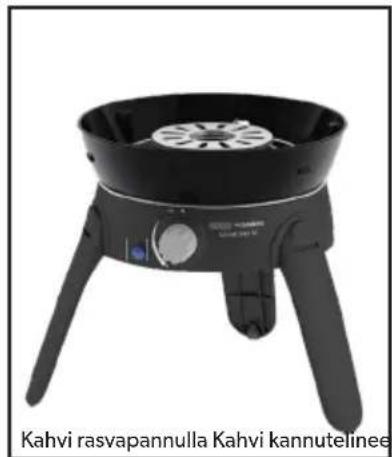
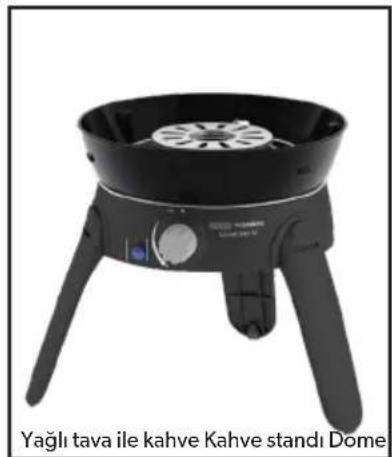
Coffee: The ideal option for brewing a cup of coffee. Anytime, anywhere! Make use of the coffee pot stand for this option.
EN
6. Cleaning
- It is recommended to clean your appliance after every use. This will prolong the life of your appliance.
- Allow the appliance to cool down before you clean it.
- Use a damp cloth wrung out in a solution of soapy water to clean exterior surfaces.
• To clean the stove body, simply wipe with a damp cloth using a little detergent, if necessary.
• DO NOT IMMERSE IN WATER as this will allow water to get into the burner tube causing the appliance to malfunction. - The grill plate is coated with a tough durable ceramic non-stick coating that has been used with great success on some of the best cookware in the world. Never the less, taking care of it can help you to enjoy extra years of healthy, easy, non-stick cooking.
- Whilst the ceramic non-stick coating is very durable, it can easily be damaged by the use of metal cooking utensils. It is therefore recommended that only plastic or wooden utensils be used when cooking.
• Always allow the grill/flat plate to cool before immersing it in water. - Make sure that no water gets onto the burners or pilot/light area. Wipe the appliance completely dry before use.
- Do not use abrasive cleaners as they may damage the surfaces.
- Clean the appliance after each use. After cleaning recondition the cooking surface with a light wipe of oil.
- Do not use any high-pressure steam equipment or a water jet to clean the appliance.
• Note: For stubborn stains, CADAC oven cleaner may be used.
7. Storage
• Always allow the unit to cool down and be cleaned before storing.
- Turn off the gas supply to the appliance, disconnect and remove the gas supply from the appliance.
- Never store an appliance with the gas supply connected, this is an unsafe practice.
- Store the appliance and gas supply in a well-ventilated area away from combustible material. Storage of cylinders should preferably be outdoors and must NOT be in a basement.
8. Maintenance & troubleshooting
Maintenance
- If you clean and maintain your appliance on a regular basis, the life of your appliance will extend and the possibility of problems will decrease.
• We recommend the service of your appliance to be every twelve (12) months by a service agent to ensure continued efficient operation.
• This appliance must only be serviced by an authorized person. - Check your connections regularly for any signs of leaks and every time the gas cylinder is re-filled or fitted to the appliance with every use.
Troubleshooting
In the case of a spattering flame or jet blockage:
- Clean your burner ports in case of an over spill.
• We recommend to clean or replace the jets every six (6) months to ensure continued efficient operation of your appliance.
- Should the appliance operate abnormally after storage and all checks have not isolated the problem, the jet may be blocked. A blocked jet would be indicated by a weaker yellowish flame or no flame at all in extreme cases. Under these circumstances it will be necessary to remove and check and thoroughly clean out any foreign matter which may have gathered in the appliance.
- This may be done by removing the jet using standard tools and blow any dirt from the jet, alternatively, you may purchase new jets from your local store. Do not attempt to clean the jet mechanically.
Replacing a blocked jet
- Your appliance is fitted with a specific size jet to regulate the correct amount of gas.
- Should the hole in the jet become blocked, this may result in a small flame or no flame at all. Do not attempt to clean the jet with a pin or other such device as this may damage the orifice, which could make the appliance unsafe.
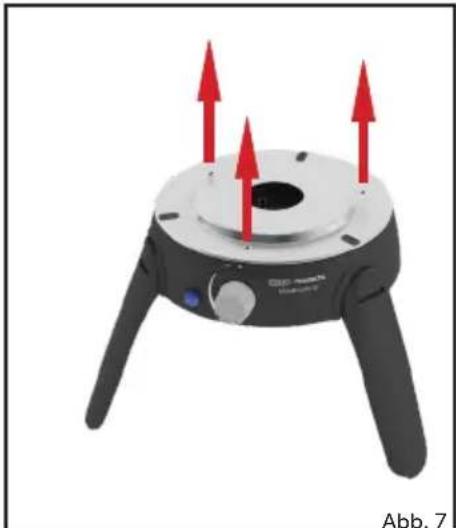
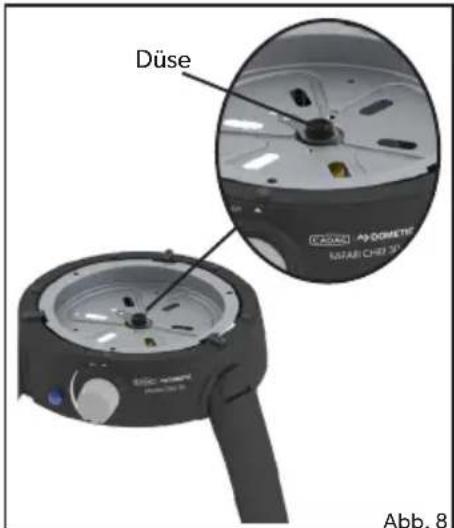
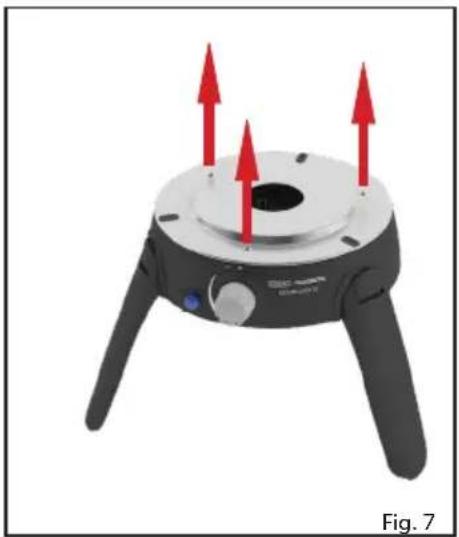
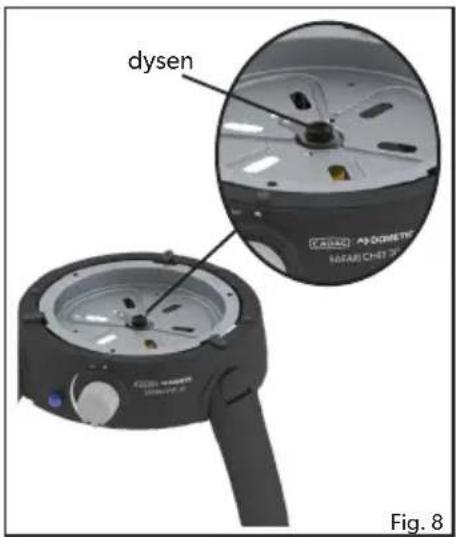
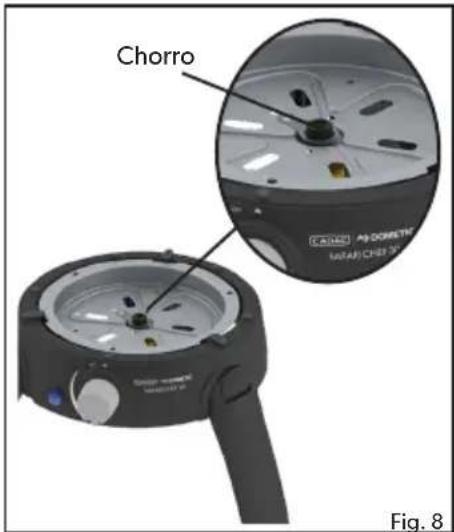
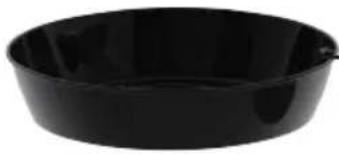
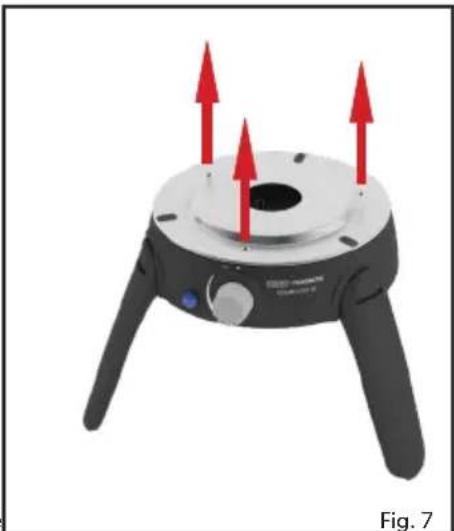
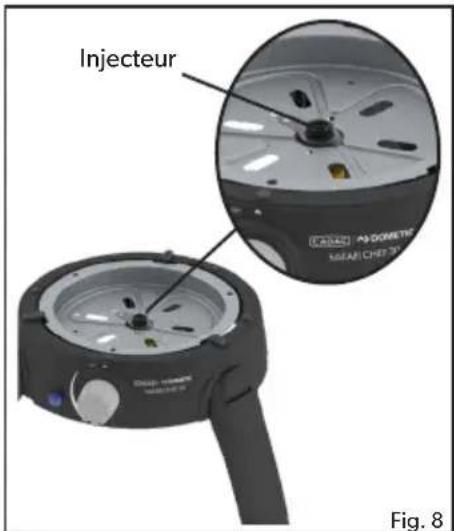
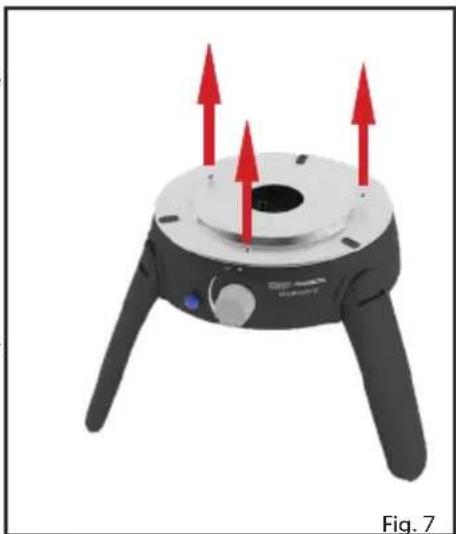
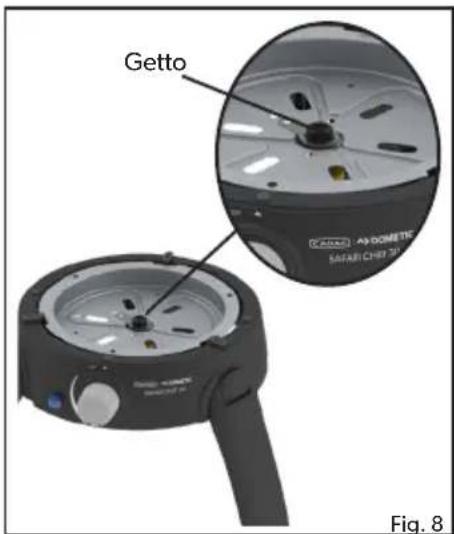
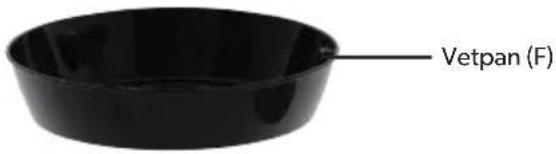
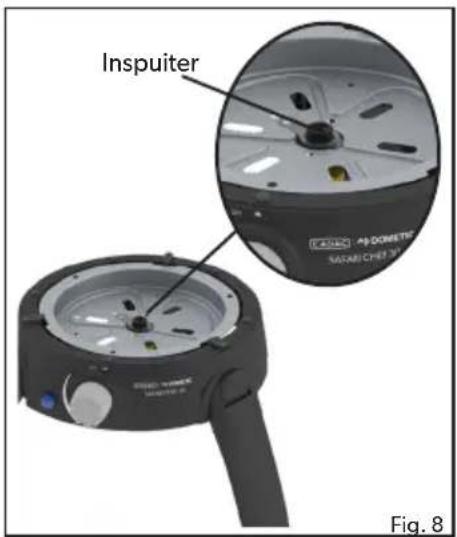
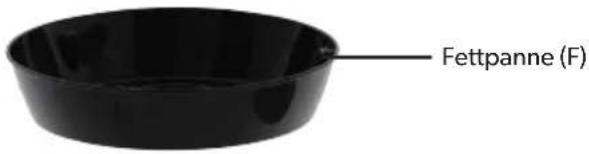
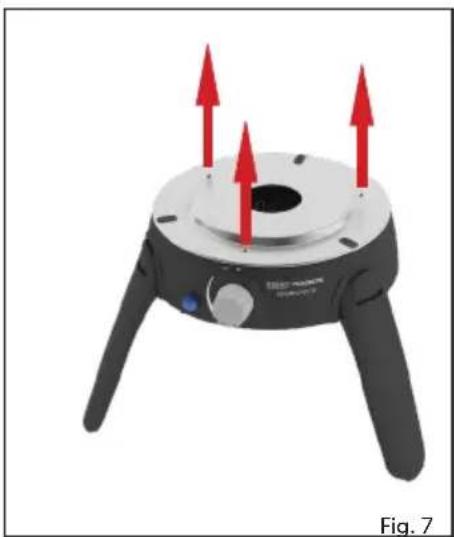
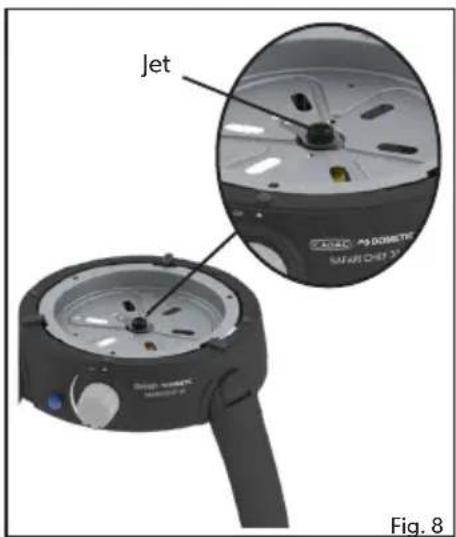
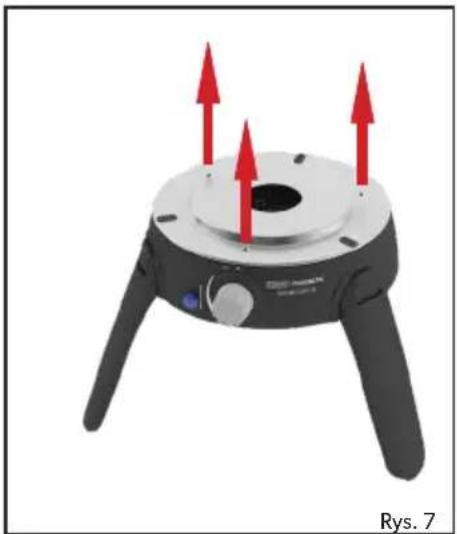
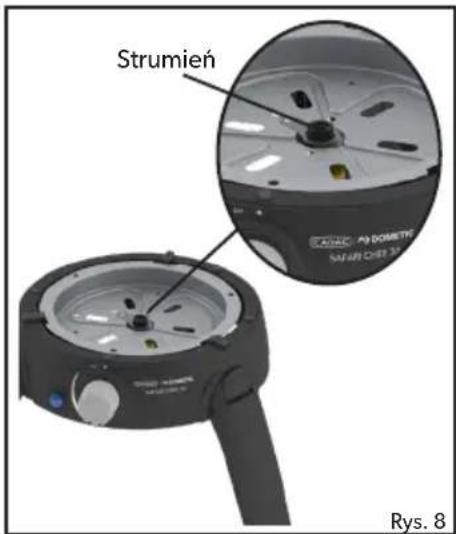
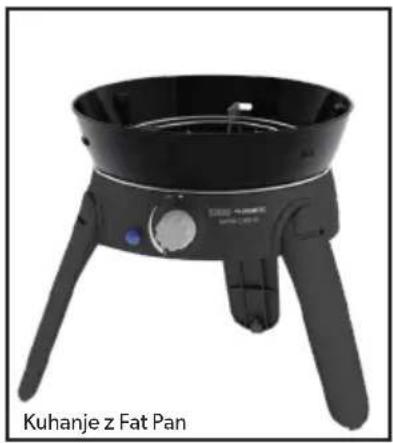
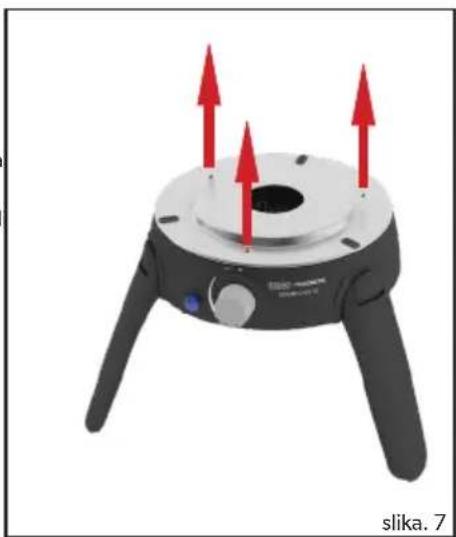
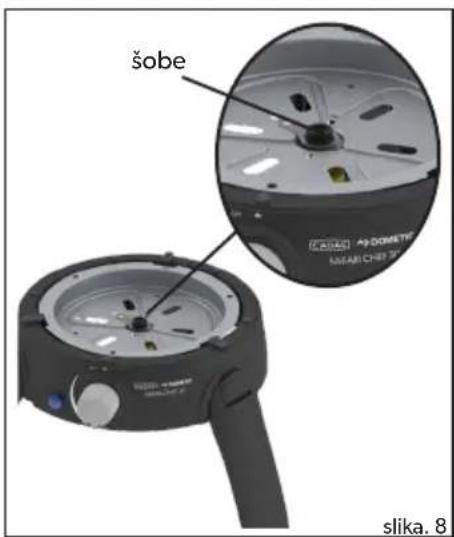
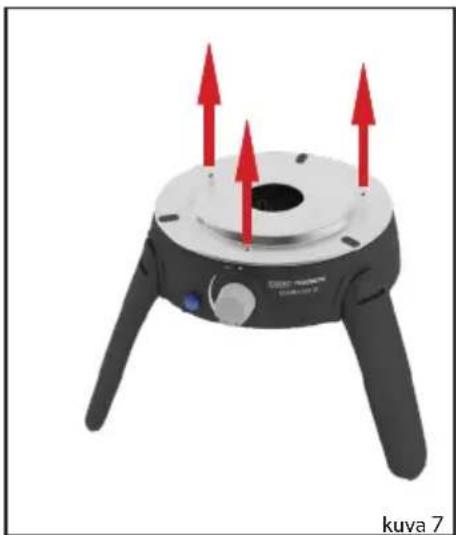
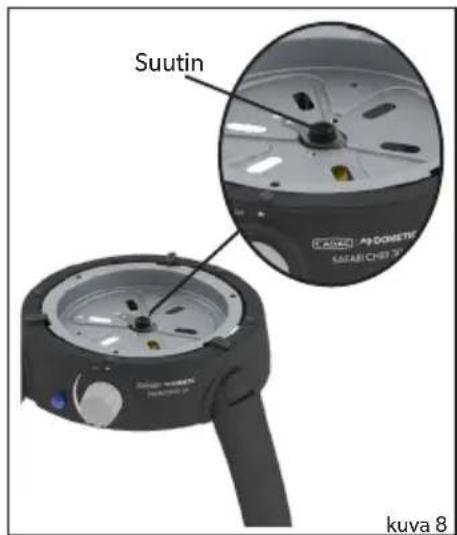
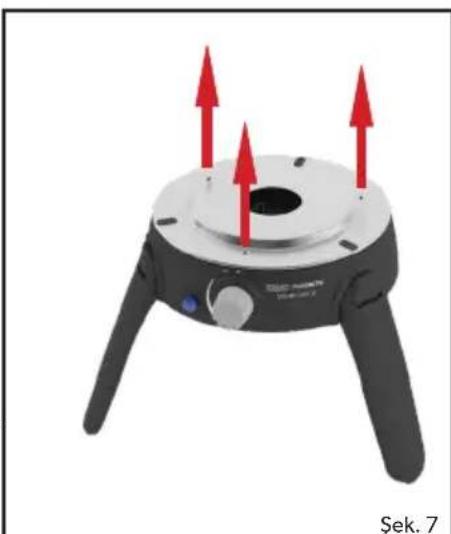
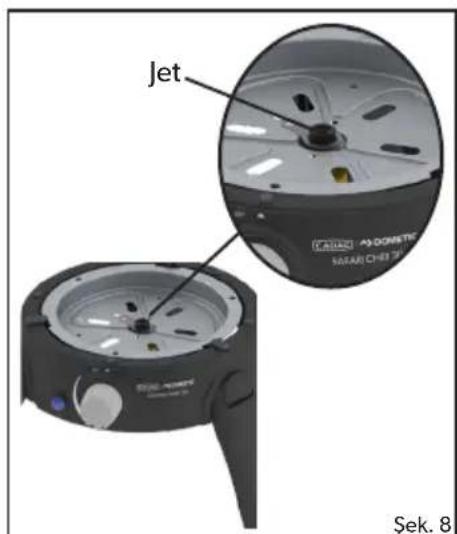
• To replace the jet: Remove the fat pan (Fig. 5). Gently unscrew the burner assembly (Fig. 6). Remove the three screws from the heat shield plate and remove the heat shield (Fig. 7), taking care not to damage the piezo electrode. The jet can now be removed using a suitable spanner (Fig. 8). Do not use pliers on the jet as this may damage the jet, making it unusable or impossible to remove. Screw the new jet into the valve. Do not over-tighten as this may damage the jet.
- Reverse the above procedure to re-assemble the unit.
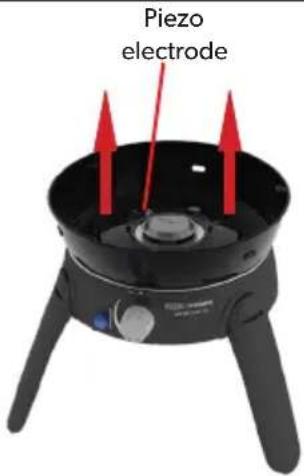
Fig. 5
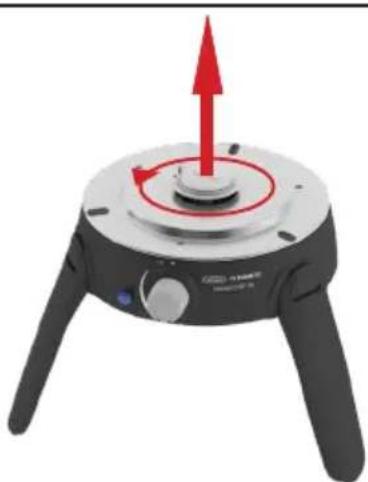
Fig. 6
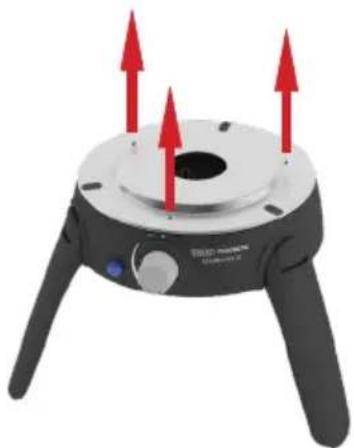
Fig. 7
Jet
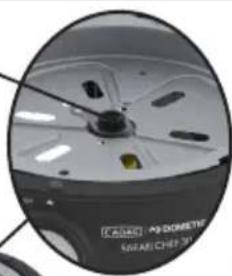
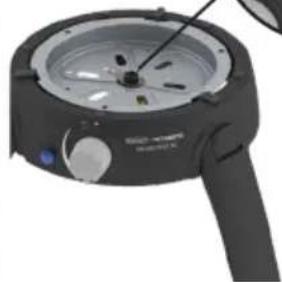
Fig. 8
EN
Packing back into the carry bag
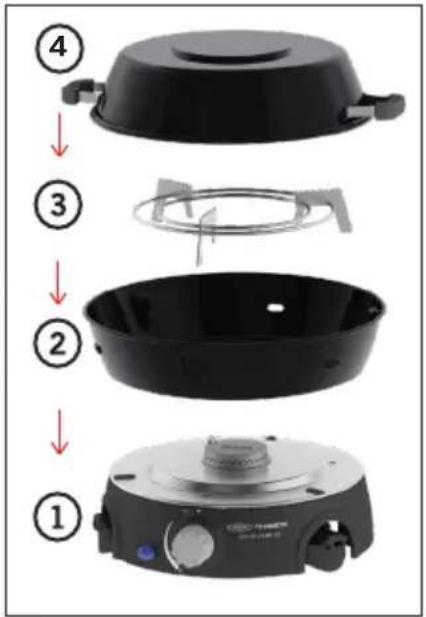
• After use, allow your appliance to cool and fold legs of the base unit back as per instructions described above.
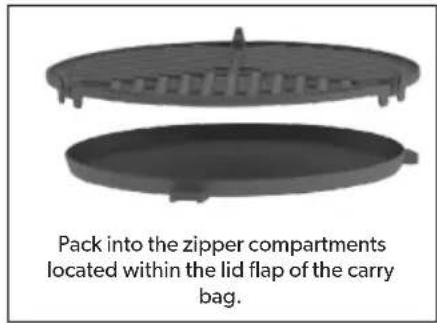
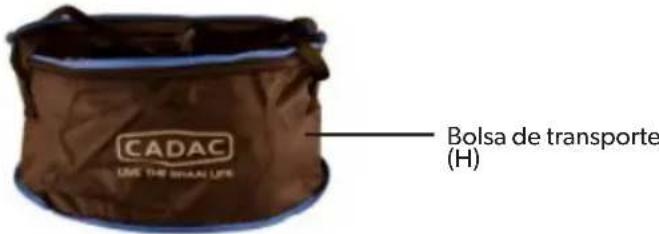
- Starting with the base unit first, pack the appliance into the carry bag following the number order.
- Pack the BBQ Grid and the Flat Grid into the zipper compartments located within the lid flap of the carry bag.
9. Spares and Accessories
• Always use genuine spares as they have been designed to give optimum performance.
Spares
| Item Spares | No. | Item Spares | No. | Item Spares | No. |
 | 6540-SP011 |  | 6540-SP056 |  | Front L & R Leg6540-SP010 |
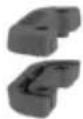 | 6540-SP020 |  | 6540-SP008 | 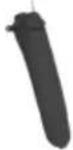 | Back Leg6540-SP009 |
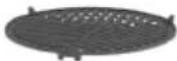 | 6540-SP002 |  | 6540-SP015-V2(Jet 0.25 & valve) | 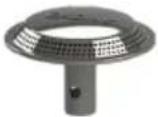 | 66540-SP018-V2 |
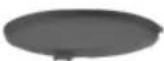 | 6540-SP004 | 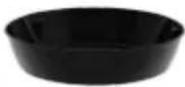 | 6540-SP017 | 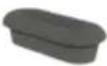 | 6540-SP019 |
| 6540-SP003 | |||||
Accessories
| Item Item No. | Item Item No. Item | Item No. | |||
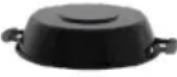 | 6540-300 6540-8 |  |  | ||
 | 6540-100 6540-7 |  |  | ||
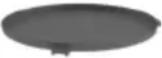 | 6540-200 | 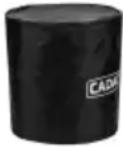 | Cover(300 x 300mm)6540-800 | 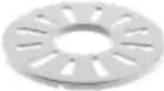 | 203-100 |
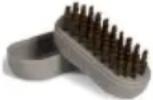 | 98326 | ||||
10. Warranty
CADAC Europe BV hereby warrants to the ORIGINAL PURCHASER of this appliance for 2 years, that it will be free of defects in material and workmanship from the date of purchase as follows:
Valves:
2
Years
Plastic parts: No Warranty
Enamel parts: 2 Years
Burners:
1
Year
The warranty will only apply if the unit is assembled and operated in accordance with the printed instructions.
CADAC Europe BV may require reasonable proof of your date of purchase. THEREFORE, YOU SHOULD RETAIN YOUR SALES SLIP OR INVOICE.
This Limited Warranty shall be limited to the repair or replacement of parts that prove defective under normal use and service and which on examination shall indicate, to CADAC Europe BV's satisfaction, they are defective. Before returning any parts, contact the customer service representative in your region using the contact information provided with your manual. If CADAC Europe BV confirms the defect and approves the claim, CADAC Europe BV will elect to replace such parts without charge. CADAC Europe BV will return parts to the purchaser, freight or postage prepaid.
This Limited Warranty does not cover any failures or operating difficulties due to accident, abuse, misuse, alteration, misapplication, vandalism, improper installation or improper maintenance or service, or failure to perform normal and routine maintenance, including but not limited to damage caused by insects within the burner tubes, as set out in this owner's manual.
Deterioration or damage due to severe weather conditions such as hail, hurricanes, earthquakes or tornadoes, discoloration due to exposure to chemicals either directly or in the atmosphere, is not cover by this Limited Warranty.
There are no other express warrants except as set forth herein and any applicable implied warranties of merchantability and fitness are limited in duration to the period of coverage of this express written Limited Warranty. Some regions do not allow limitation on how long an implied warranty lasts, so this limitation may not apply to you.
CADAC Europe BV is not liable for any special, indirect or consequential damages. Some regions do not allow the exclusion or limitation of incidental or consequential damages, to this limitation or exclusion may not apply to you.
CADAC Europe BV does not authorize any person or company to assume for it any obligation or liability in connection with the sale, installation, use, removal, return, or replacement of its equipment; and no such representations are binding on CADAC Europe BV.
This Warranty applies only to products sold at retail.
To enjoy and ensure longevity of your CADAC Europe BV product, please refer to the cleaning and maintenance section of the user manual.

Soft Soak BrushPaella Pan 3C
BBQ 2 Plancha 30 Pizza Stone Pro 30

Soft Soak 30
Deckel
Kaffeekannenständer
5. GreenGrill-Kochen
GreenGrill-Kochen
Soft Soak Brush
WARTUNG

6. Reinigung
DE
Paella Pan 30 (til Paella/stegning)
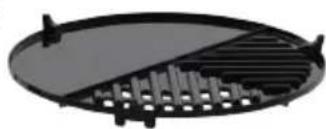
BBQ 2 Plancha 30 (til stegning/grillning)
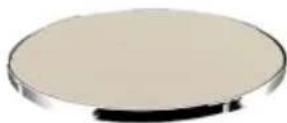
Pizza Stone Pro 30
(til pizzabagning)
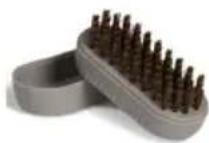
Soft Soak Brush

Soft Soak 30 (for lettere rengøring)
Låg
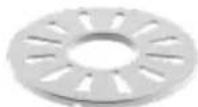
Kaffekandestander
5. GreenGrill Madlavningsmuligheder
GreenGrill Madlavning
Soft Soak Brush
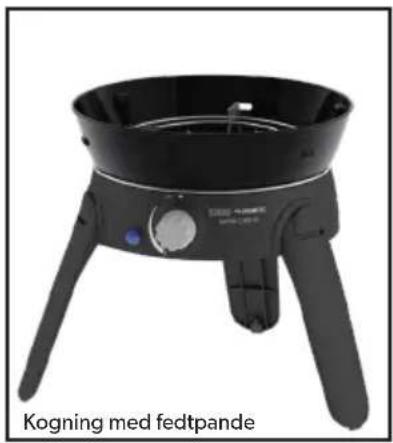
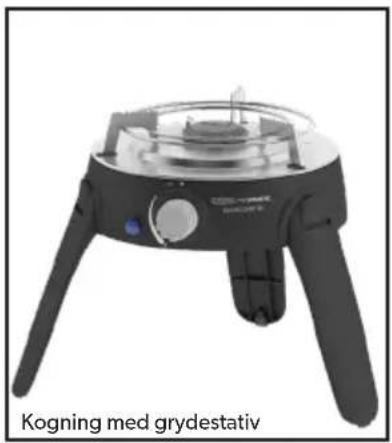

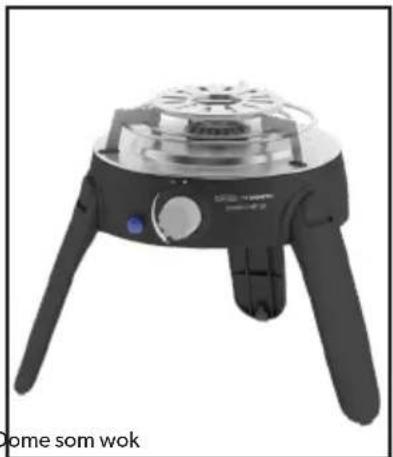
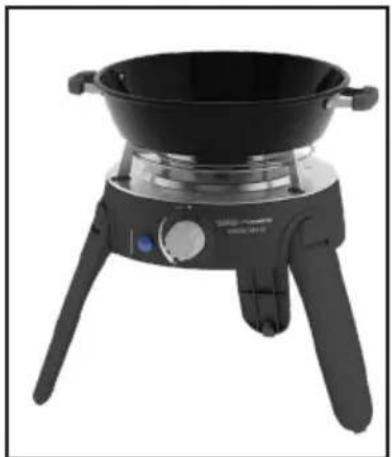
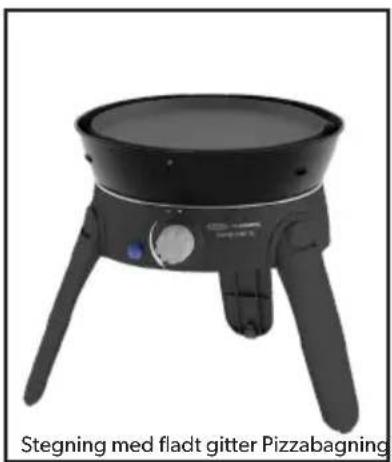
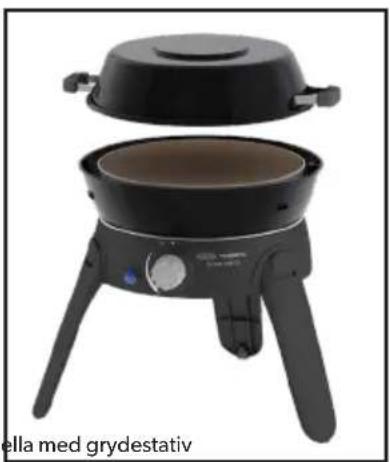
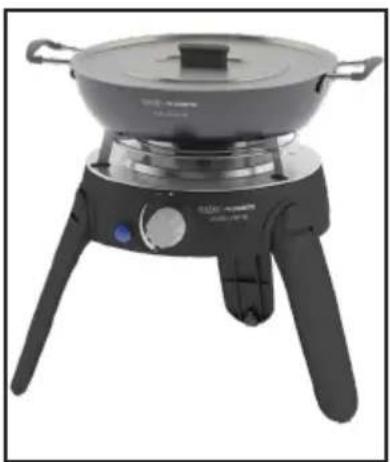
6. Rengøring
DK

Paella Pan 30 (para paella/fritura)
Soft Soak 30 (para facilitar la limpieza)
Tapa
Soft Soak Brush
Opciones de cocción

6. Limpieza

ES
Dôme / Plat (A)
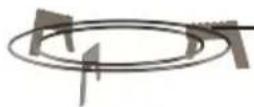
Support de casserole (E)
BBQ 2 Plancha 30 (pour frire/griller)
Soft Soak Brush
ENTRETIEN
6. Nettoyage
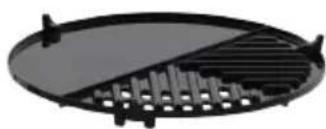
Paella Pan 30 (per la paella/frittura)
Soft Soak Brush
MANUTENZIONE
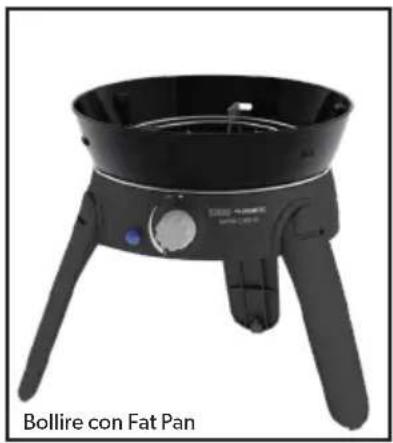
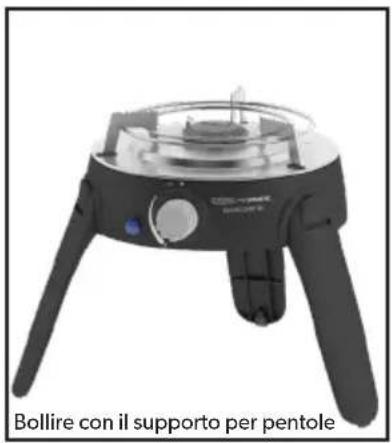
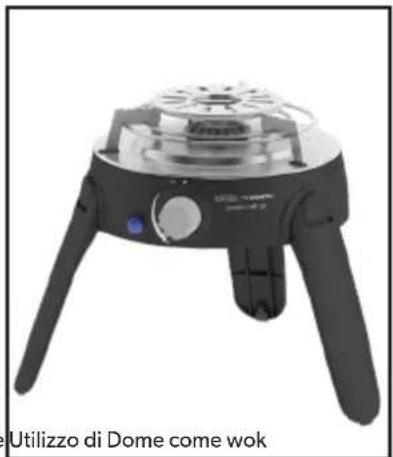
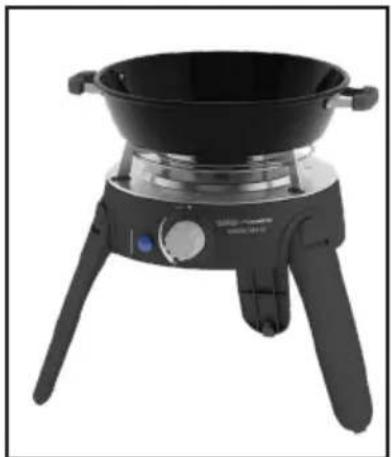
6. Pulizia
IT

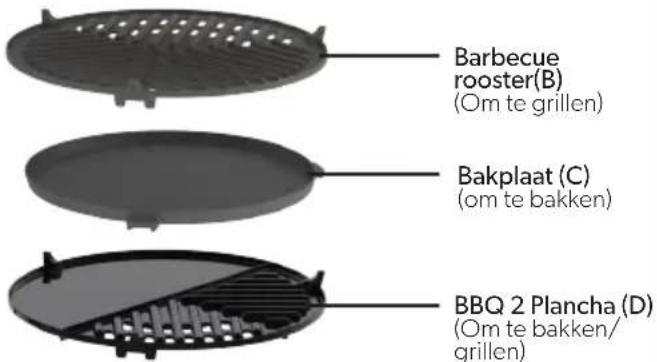

BBQ 2 Plancha 30 (om te frituren/grillen)
Soft Soak Brush
ONDERHOUD
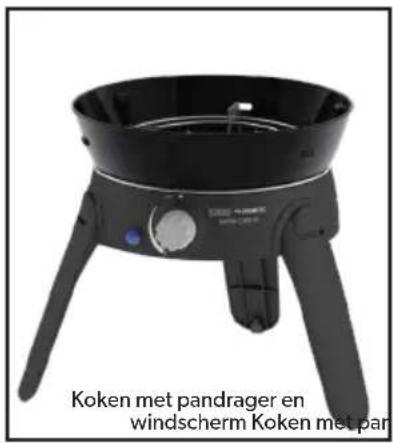
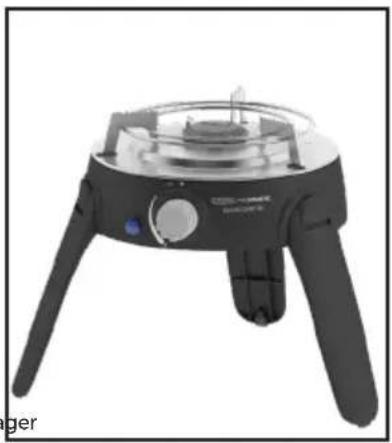
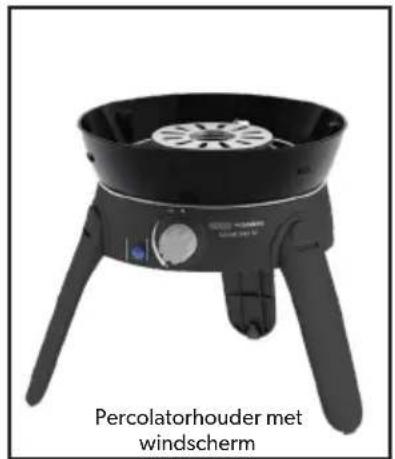
6. Schoonmaken

NL
9. Reserveonderdelen en accessoires


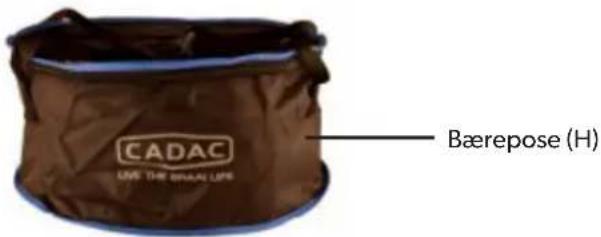
Paella Pan 30 (Til Paella/grilling)
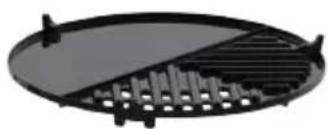
BBQ 2 Plancha (Til steking/grilling)
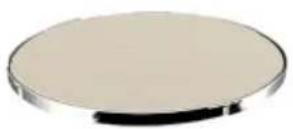
Pizza Stone Pro 30
(For pizzabaking)
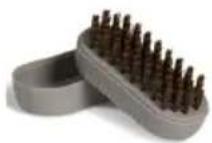
Soft Soak Brush

Soft Soak Brush
VEDLIKEHOLD


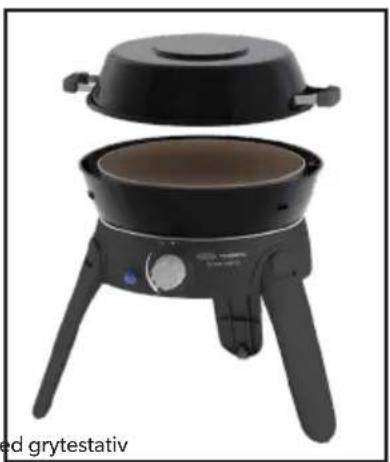

6. Rengjøring
NO
Soft Soak Brush
UNDERHÅLL
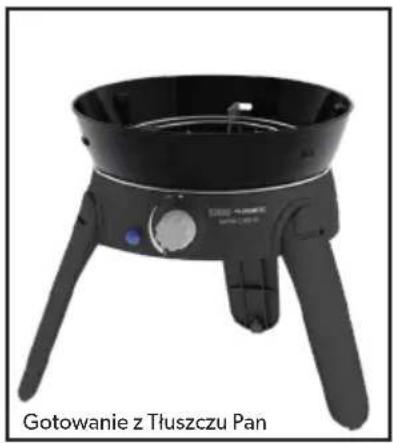
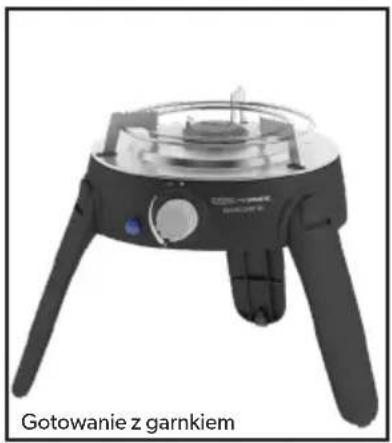
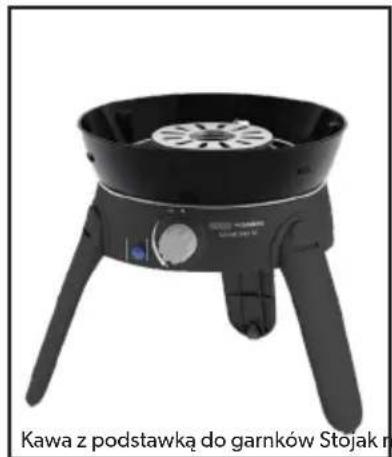
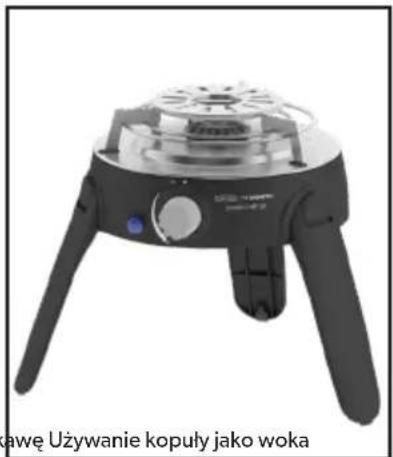
6. Czyszczenie
PL
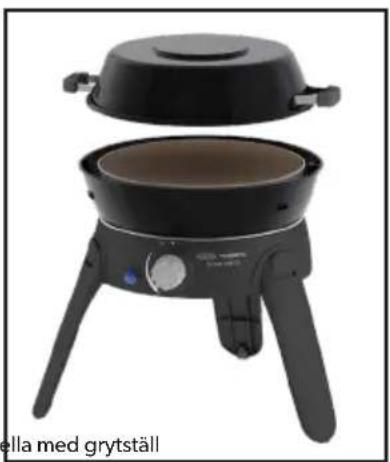
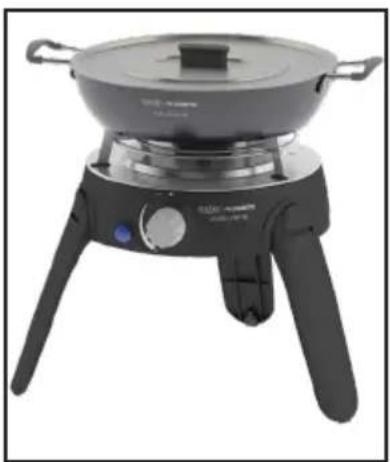
Gryta /Huv (A)
Fettpanne (F)
Soft Soak Brush
UNDERHÅLL
6. Rengöring
Fig. 6

Fig. 7
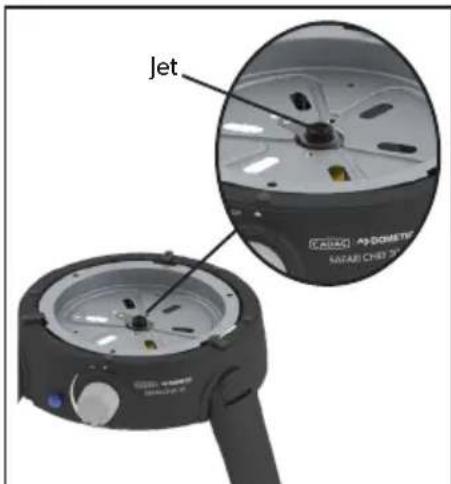
Fig. 8
SE

BBQ 2 Plancha 30 (za cvrtje/žar)
Pizza Stone Pro 30
(za peko pice)
Soft Soak Brush

Soft Soak Brush
Možnosti kuhanja
6. Čiščenje
SI
Pakiranje nazaj v torbo
Paella Pan 30 (paellalle/paistamiseen)
Soft Soak Brush
HUOLTO
6. Puhdista

Pan/Kubbe (A)
Yağ tavası (F)
Soft Soak Brush
BAKIM

6. Temizleme
TR
Front Runner Outfitter RSA
C/o Forssman Close & River Rd,
Barbecue Downs,
Kyalami, Johannesburg
+27114660155
www.frontrunneroutfitters.com/en/za/
CADAC UK
14 Deanfield Court,
Link59 Business Park,
Clitheroe, Lancashire,
BB71QS
United Kingdom.
Tel: +44 (0) 333 2000363
E:mail: info@cadacuk.com
www.cadacinternational.com
CADAC SCANDINAVIA
Millarco International A/S
Rokhøj 26
8520 Lystrup, Denmark
Phone: +45 87 43 42 00
millarco@millarco.dk
www.millarco.com
CADAC Czech Rep.
Riverlea Group (Pty) Ltd
2A Maui Street, Pukete,
Hamilton 3200, New Zealand
Tel: +64 7 847 0204
Email: sales@riverleagroup.co.nz
www.riverleagroup.co.nz
CADAC FINLAND
OY KAMA FRITID AB
Koivuhaantie 2-4 B
01510 VANTAA
00358 20 792 0310
info@kamafritid.fi
CADAC U.A.E.
Supreme Impex General Trading
LLC Office No. 1801-7 Latifa
Tower Sheikh Zayed Road
Dubai, UAE
CADAC POLAND
Kamai
Wola Batorska 461
32-007 Wola Batorska Poland
Tel: +48 12 635 1373
Email: handlowy@kamai.pl
www.kamai.pl
CADAC MONTENEGRO
City kvart Z1L6
81000 Podgorica, Montenegro
Tel 38220671446, 38269020063
E-mail: coca@t-com.me
CADAC IRAN
Robin Bazarganan Carin Co.
Unit D, 6th Floor, Negin Zafar
Building, No.1327,
Shariati Street, Tehran, Iran
Tel: +98 21 276 00 781
Mail: info@cadac.ir
CADAC DENMARK
Camper Fritid
Industrivej 11
6640 Lunderskov, Denmark
Tel.: +45 7558 5255
Email: info@camper.dk
www.camper.dk
CADAC SOUTH EAST EUROPE
Bulevar oslobodjenja 285
Tel: +381 11 339 2700
Email: sinisaj@cadac.rs
www.cadac.rs
CADAC ITALY
Brunner SRL/GMBH
via Buozzi, 8
39100 Bolzano (Italy)
Tel: +39 0471 542900
Email: info@brunner.it
www.brunnerinternational.com
CADAC CHINA
Room 807, Huayue International
Building, No.255 Tiangao Road,
South
Yinzhou business district,
Ningbo, China
Tel:+86 574 87723937
Email: info@cadac.com.cn
CADAC SWEDEN & NORWAY
KAMA FRITID AB
0046 36 353700
info@kamafritid.se



- EXPLANATION OF SYMBOLS
- SAFETY INFORMATION
- ASSEMBLY AND USE
- GAS CONTAINER
- LIGHT BACK
- LEAKS
- HOW TO CHECK THE APPLIANCE IS CONNECTED TO THE GAS SUPPLY IN A SOUND FASHION
- ASSEMBLING THE APPLIANCE
- CONNECTING THE GAS SUPPLY AND OPERATING THE APPLIANCE
- CONNECTING THE GAS SUPPLY
- DISCONNECTING AND CHANGING THE GAS SUPPLY
- PRECAUTIONS TO OBSERVE BEFORE LIGHTING
- LIGHTING THE APPLIANCE USING THE PIEZO
- LIGHTING UP USING A BBQ LIGHTER
- GENERAL
- COMPONENT LIST
- GREENGRILL COOKING OPTIONS
- GREENGRILL COOKING
- PREPARATION & USE
- CLEANING
- MAINTENANCE
- COOKING OPTIONS
- EN
- STORAGE
- MAINTENANCE & TROUBLESHOOTING
- TROUBLESHOOTING
- REPLACING A BLOCKED JET
- PACKING BACK INTO THE CARRY BAG
- SPARES AND ACCESSORIES
- WARRANTY
- GREENGRILL-KOCHEN
- WARTUNG
- REINIGUNG
- DE
- GREENGRILL MADLAVNINGSMULIGHEDER
- GREENGRILL MADLAVNING
- RENGØRING
- DK
- OPCIONES DE COCCIÓN
- LIMPIEZA
- ES
- ENTRETIEN
- NETTOYAGE
- MANUTENZIONE
- PULIZIA
- IT
- ONDERHOUD
- SCHOONMAKEN
- NL
- RESERVEONDERDELEN EN ACCESSOIRES
- VEDLIKEHOLD
- RENGJØRING
- NO
- UNDERHÅLL
- CZYSZCZENIE
- PL
- RENGÖRING
- SE
- MOŽNOSTI KUHANJA
- ČIŠČENJE
- SI
- HUOLTO
- PUHDISTA
- BAKIM
- TEMIZLEME
- TR
- CADAC UK
- CADAC SCANDINAVIA
- CADAC CZECH REP
- CADAC FINLAND
- CADAC U.A.E
- CADAC POLAND
- CADAC MONTENEGRO
- CADAC IRAN
- CADAC DENMARK
- CADAC SOUTH EAST EUROPE
- CADAC ITALY
- CADAC CHINA
- CADAC SWEDEN & NORWAY
Brand : CADAC
Model : Safari Chef 30 HP
Category : Barbecue