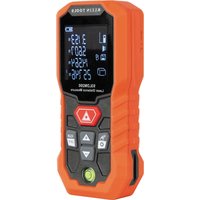
93LDM200 - Rangefinder Klein Tools - Free user manual and instructions
Find the device manual for free 93LDM200 Klein Tools in PDF.


| Product Type | Laser Distance Measurer |
| Brand | Klein Tools |
| Model | 93LDM200 |
| Measuring Range | 51 mm to 61 m (2 in to 200 ft) |
| Accuracy | ±1.6 mm (≤10 m) ; ±3.2 mm (>10 m) |
| Laser Class | 2 (500-550 nm, ≤1 mW) |
| Ingress Protection Rating | IP54 (water and dust resistant) |
| Drop Resistance | 2 m (6.6 ft) |
| Power Supply | Rechargeable lithium-ion battery 5 V DC, 800 mAh |
| Battery Life | More than 5 hours (full battery) |
| Charging | USB-C (USB-A to USB-C cable included) |
| Dimensions (device only) | 117 × 52 × 29 mm (4.61 × 2.05 × 1.14 in) |
| Weight (device only) | 139 g (4.9 oz) |
| Display | LCD screen with multiple icons |
| Memory | 30 stored measurements |
| Measurement Functions | Distance, area, volume, indirect measurements (3 modes), addition/subtraction, continuous measurement |
| Measurement Units | Feet (decimal/fraction), inches (fraction), meters |
| Auto Power Off | Laser after 30 s, device after 3 min |
| Operating Temperature | 0 °C to 40 °C (32 °F to 104 °F) |
| Storage Temperature | -10 °C to 60 °C (14 °F to 140 °F) |
| Maximum Operating Altitude | 2000 m (6562 ft) |
| Built-in Accessories | Spherical bubble level, V-groove for conduits, 1/4-20 tripod mount, 25 mm (1 in) alignment mark |
| Maintenance and Cleaning | Wipe with a clean, dry cloth. Do not use abrasive cleaners. Store in the provided case. |
| Safety | Class 2 laser – do not stare into beam. Do not modify the device. Use in a clean and safe environment. |
| Spare Parts and Repairability | No user-serviceable parts. Do not attempt to repair. Replace if damaged. |
| Certifications | CE, UKCA, ROHS, REACH, DOE/CEC, RNCan, FCC, ICES-003 |
| Warranty | Visit www.kleintools.com/warranty |
Frequently Asked Questions - 93LDM200 Klein Tools
User questions about 93LDM200 Klein Tools
0 question about this device. Answer the ones you know or ask your own.
Ask a new question about this device
Download the instructions for your Rangefinder in PDF format for free! Find your manual 93LDM200 - Klein Tools and take your electronic device back in hand. On this page are published all the documents necessary for the use of your device. 93LDM200 by Klein Tools.
USER MANUAL 93LDM200 Klein Tools
Laser Distance Measure
• MEASURES DISTANCES FROM 2" TO 200' (51 mm TO 61 m)
- AREA
• VOLUME
- INDIRECT MEASUREMENTS

IP54
ESPAÑOL pg. 15
FRANÇAIS p. 29
KLEIN TOOLS®

CE UK CA
GENERAL SPECIFICATIONS
The Klein Tools 93LDM200 is a 200' (60.96 m) Laser Distance Measure featuring area, volume, and indirect measurements.
• Operating Altitude: 6562 ft. (2000 m)
- Charging Temperature: 32°F to 113°F (0°C to 45°C)
- Operating Temperature: 32°F to 104°F (0°C to 40°C)
• Storage Temperature: 14°F to 140°F (-10°C to 60°C)
- Laser: 500-550 nm, ≤1mW, Class 2 Laser Product
- Accuracy: ±0.063" (±1.6 mm) for distances ≤ 32.8' (10m) ±0.125" (±3.2 mm) for distances > 32.8' (10m)
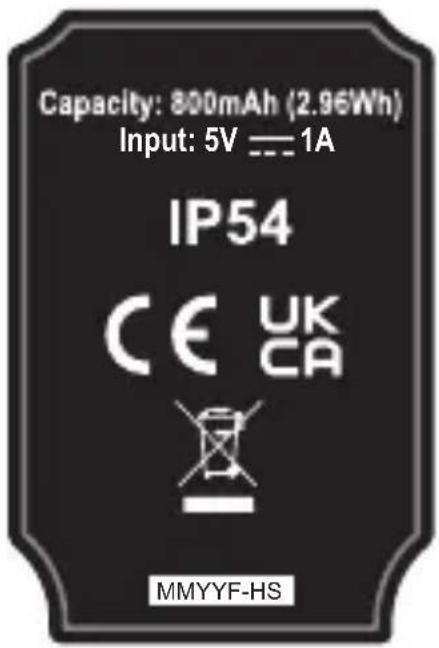
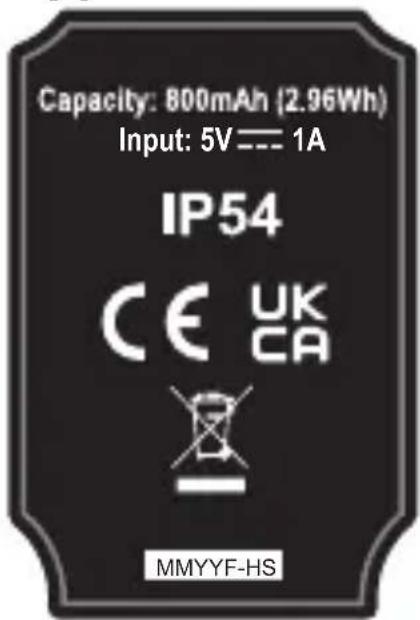
- Battery Type: Internal Li-Ion, 5V DC, 800 mAh (2.96 Wh)
- Battery Life: 5+ Hours (on full charge)
• Auto-Off: Laser: 30 seconds
Device: 3 minutes
• Memory/Storage: 30 stored readings
- Dimensions: Unit only: 4.61" × 2.05" × 1.14" (117 × 52 × 29 mm)
With case: 4.74" × 2.29" × 1.56" (120 × 58 × 40 mm)
• Weight: Unit only: 4.9 oz. (139 g)
With case: 6.03 oz. (171 g)
- Calibration: Calibrated for accuracy at factory
- Ingress Protection: IP54 Dust & Water Resistant
- Drop Protection: 6.6' (2 m)
- Standards/Certifications: CE, UKCA, ROHS, REACH, DOE/CEC, NRCan, EN 60825-1:2014/A11:2021, EN 50689:2021. Complies with: 21 CFR 1040.10 and 1040.11 except for conformance with IEC 60825-1 Ed. 3, as described in Laser Notice No. 56, dated May 8, 2019.
Specifications subject to change.
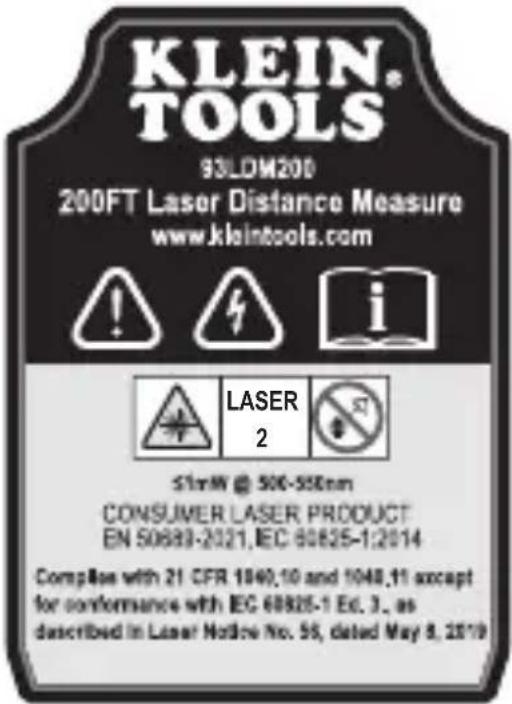
SYMBOLS ON DEVICE
 | Warning or Caution |
 | Warning – Risk of electric shock |
 | Read instructions |
 | Hazardous laser radiation |
| LASER2 | Laser Class 2 |
 | DO NOT stare into beam or view directly with optical instruments |
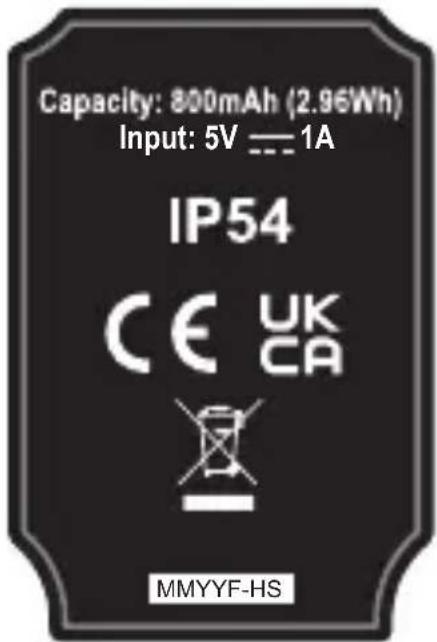
| IP54 | Ingress Protection IP54 Rating – Dust & Water Resistant |
 | WEEE – Electronics disposal |
 | Conformité Européenne: Conforms with European Economic Area directives |
 | UKCA: United Kingdom Conformity Assessment |

WARNINGS
To ensure safe operation and service of the instrument, follow these instructions. Failure to observe these warnings can result in serious personal injury, fire, or electrical shock. Retain these instructions for future reference.

WARNING: LASER RADIATION. DO NOT STARE INTO BEAM. Class 2 Laser.
Labels on unit
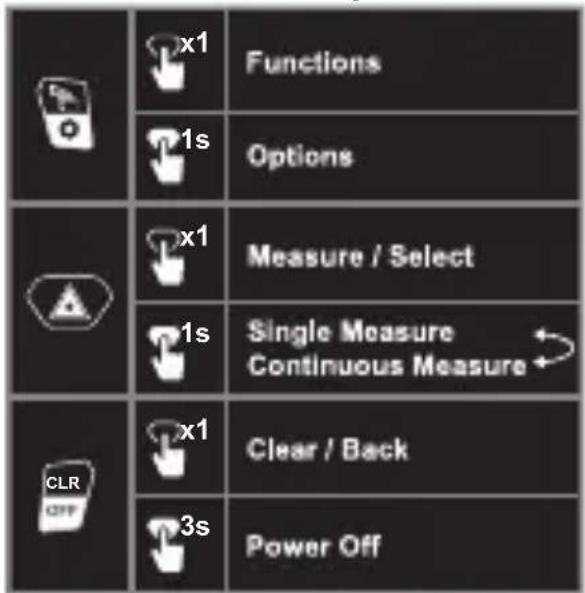
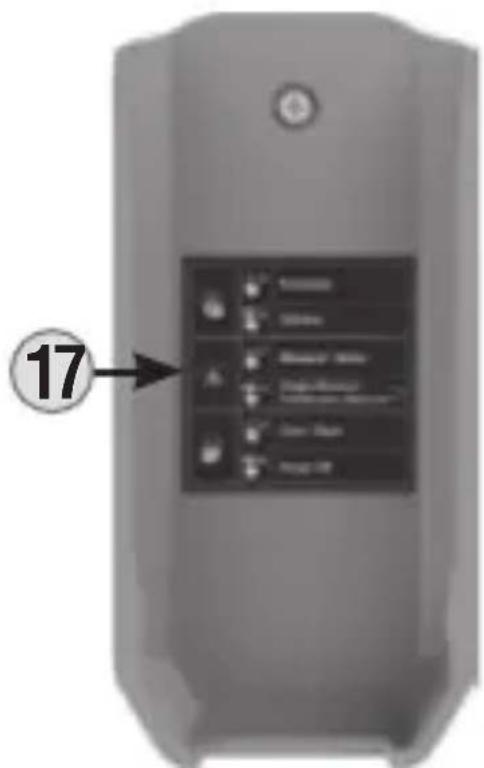
Quick-start label (inside case)

WARNINGS
- Exposing eyes to laser radiation can result in severe and permanent eye injuries. NEVER look directly into the laser beam emitted by this instrument.
- DO NOT use the instrument if it appears to be damaged.
- DO NOT modify the instrument in any way, as to do so could result in emission of hazardous laser radiation than could result in severe eye injuries.
- DO NOT use optical equipment such as lenses, prisms, optical scopes, etc. to transmit, retransmit, or view the laser beam as this could result in severe eye injuries.
- This product should not be used by untrained operators or operators who have not read and fully understood the instructions.
- This product should not be used in any location that could result in somebody looking at or having their eyes inadvertently irradiated by the laser beam as this could result in severe eye injuries.
- The instrument should be powered off following use to minimize the risks of inadvertent exposure to hazardous laser radiation that could result in severe eye injuries.
- DO NOTremove warning labels from this instrument as this could result in serious personal injury and increases the risk of exposure to hazardous laser irradiation.
- The instrument should be securely located in a tidy work environment prior to operation as unexpected drops or movement of the instrument may result in damage to the instrument and increases the risk of inadvertent exposure to laser radiation that could result in severe eye injuries.
- Risk of fire and burns. DO NOT open, crush, heat above specified maximum temperature or incinerate. Prolonged exposure to direct sunlight can result in elevated temperatures.
• DO NOT immerse in water or other liquids. - Properly seal the charging port cover to achieve specified water & foreign object ingress protection. Keep seal free of dirt, oil, sand, or other material that interferes with proper sealing. Failure to do so can result in risk of fire or electric shock.
- DO NOT open the charging port cover if wet or in a wet environment. Thoroughly dry the unit and the seal around water-resistant cover completely before opening water resistant cover.
- DO NOT subject to excessive vibration, impacts, or drops. The housing may not show signs of damage, but internal components may have been compromised. It is advisable to replace the unit if any such severe events occur.
- DO NOT attempt to repair the product or charging cable. There are no user-serviceable parts.
FEATURE DETAILS
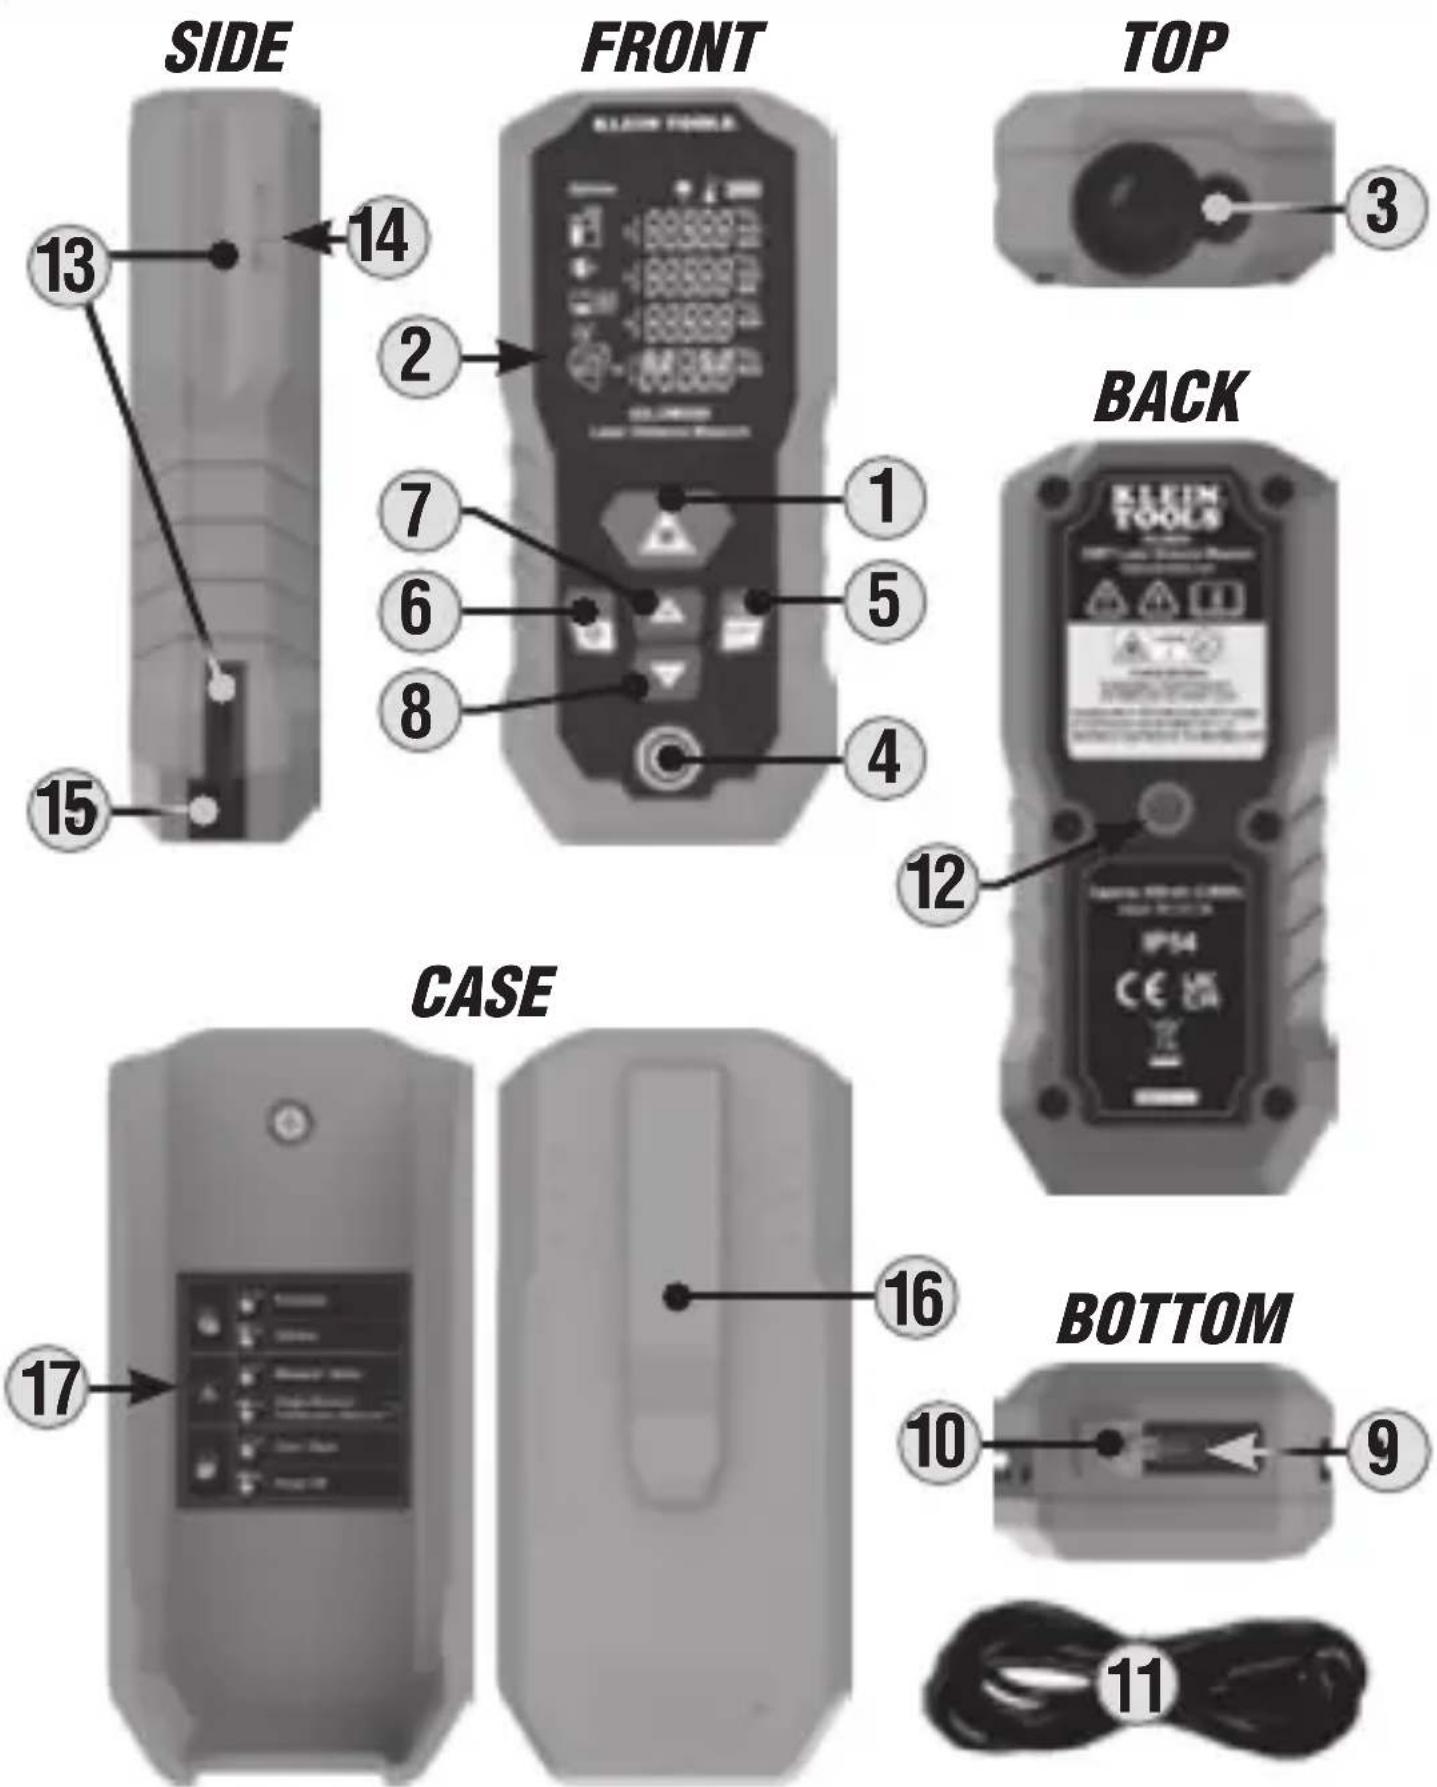
FEATURE DETAILS
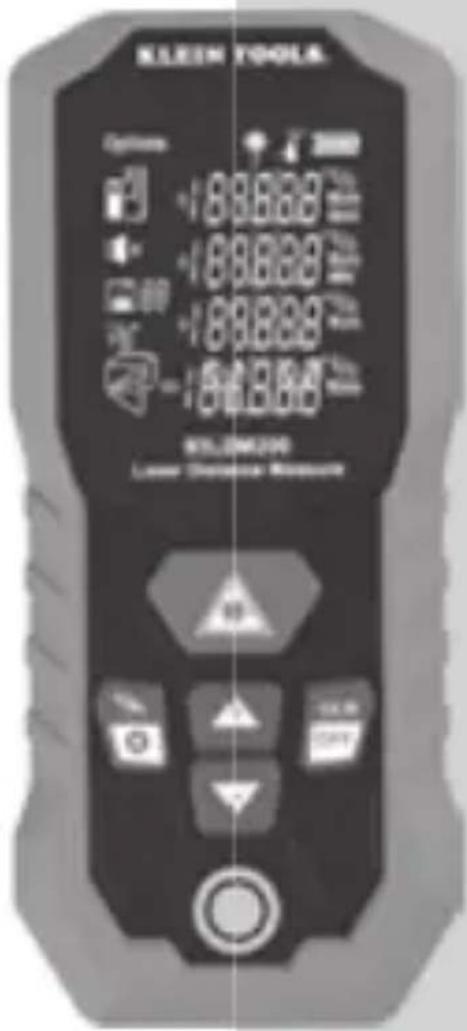
UNIT
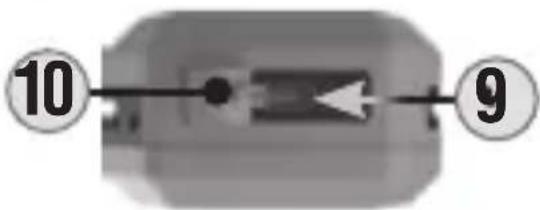
1 Laser / Power ON Button 10 USB Port Cover
2 LCD Screen 11 USB-A to USB-C Charging Cable
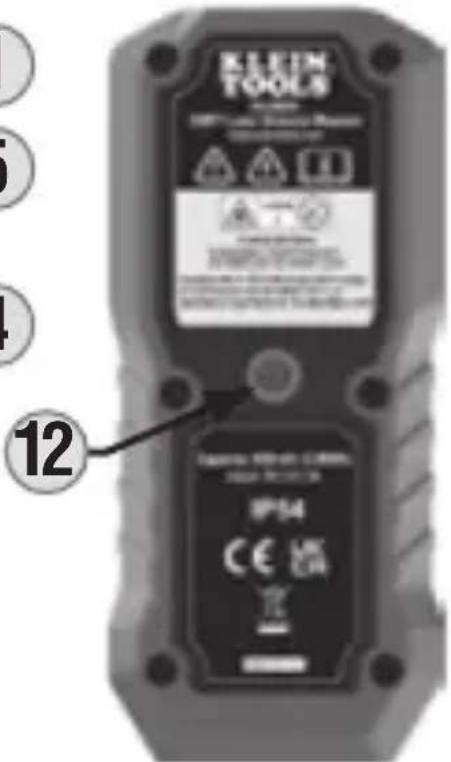
3 Laser Aperture 12 1/4-20 tripod mount
4 Bullseye Bubble Level
5 Clear / Power-OFF Button
6 Functions / Options Button
7 Up/+ Button
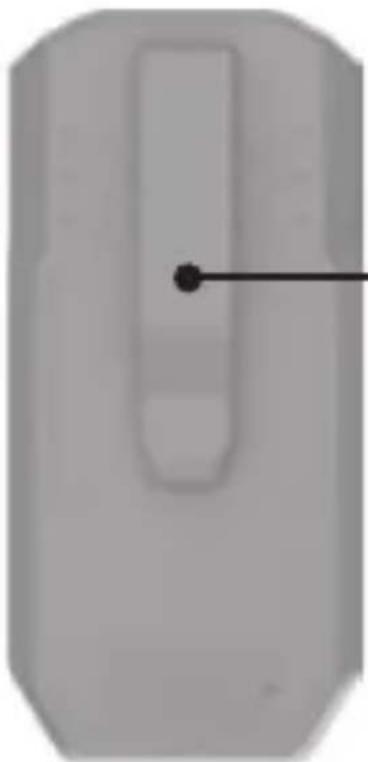
8 Down/- Button 16 Belt Clip
9 USB Charging Port 17 Quick-Reference Label
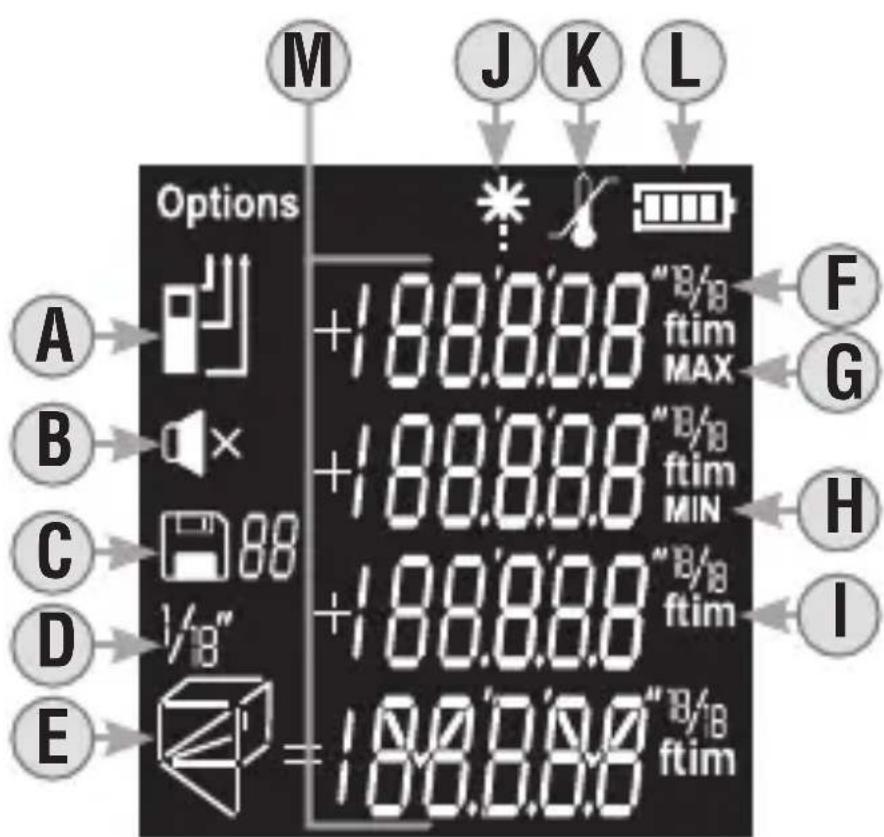
LCD SCREEN
A Reference Point Icon
B Sound On/Off Icon
C Memory Location
D Rounding Value
E Measurement Type
F Fraction (Inches)
G Maximum Value
H Minimum Value
I Unit of Measure
J Laser Active Icon
K High / Low
Temperature
Warning Icon
L Battery Level Indicator
M Measurements / Error Message Text
OPERATING INSTRUCTIONS
CHARGING:
- Connect supplied charging cable's 11 USB-C connection to the USB-C port 9 of the 93LDM200.
- Connect the charging cable's USB-A port to a charging source (5V DC, Min 1.5A, not included).
- The Battery Level Indicator Ⓛ will indicate charging status.
POWER ON UNIT AND LASER: Press the Laser / Power-ON Button 1.
POWER OFF LASER: Press the Clear / Power-OFF Button 5.
POWER OFF UNIT AND LASER: Press and hold the Clear / Power-OFF Button ⑤ for 3 seconds.
AUTO-POWER OFF: The laser will automatically turn off after 30 seconds of inactivity. The unit will automatically power off after 3 minutes of inactivity.
TAKING MEASUREMENTS: Press the Laser / Power-ON Button 1 once to capture a measurement. The laser will turn off. Press the Laser / Power-ON Button 1 again to take another measurement.
SINGLE / CONTINUOUS MEASUREMENTS: To swap between Single Measurement Mode and Continuous-Measurement Mode, press and hold the Laser / Power-ON Button 1. In Continuous-Measurement Mode, the unit will display the minimum, maximum, and current readings, and the laser will blink while on. Press the Laser / Power-ON Button 1 to hold the current measurement on screen. The laser will turn off. Press the Laser / Power-ON Button 1 again to take another measurement.
OPERATING INSTRUCTIONS
OPTIONS
Press and hold the Functions / Options Button 6 for 1 second to enter the Options menu. Press the Up/+ 7 and Down/- 8 Buttons to scroll through the different options. Press the Laser / Power-ON Button 1 to select. Press the Clear/Power-OFF Button 5 to go back:
Reference: Change the reference point to the top surface, tripod mount position, or bottom surface of the unit. NOTE: Remove unit from case for tripod mounting or when referencing from bottom srurface.
Sound: Turn the sound on or off.
Memory: Press the Up/+ 7 and Down/- 8 Buttons to scroll through the last 30 measurements.
Units: Select Feet + Inches (fractional), Feet (decimal), Inches (fractional), or Meters.
Rounding: When Units are set to Feet + Inches, select the fraction to which each measurement will be rounded: 1/16", 1/8", 1/4", or 1/2".
FUNCTIONS: Press the Functions / Options Button ⑥ once to select a function, then press the Up/+ ⑦ and Down/- ⑧ Buttons to scroll through the different functions. Press the Laser / Power-ON Button ① or the Functions / Options Button ⑥ to select. Press the Clear/Power OFF Button ⑤ to go back.
Area (FIG. 1) : Measure the desired length, then the desired width. Perimeter will be displayed on Line 3, Area will be displayed on line 4.
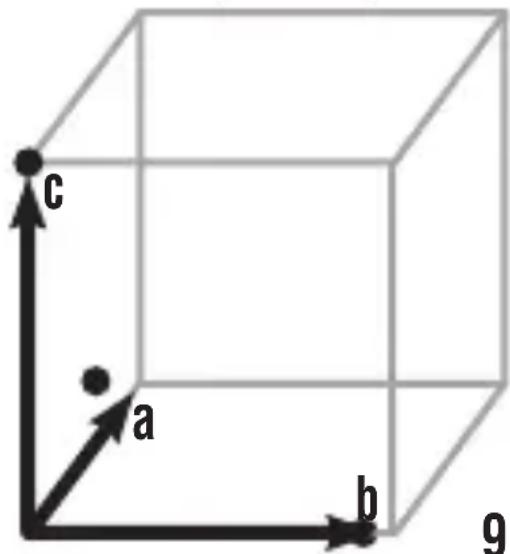
Volume (FIG. 2): Measure the desired length, width, then height.
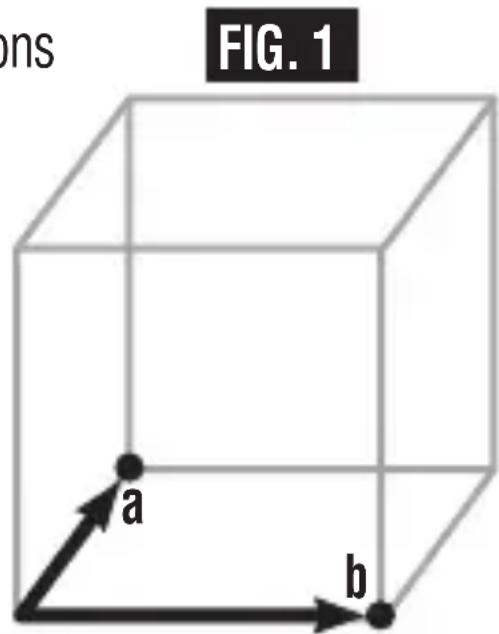
FIG. 2
OPERATING INSTRUCTIONS
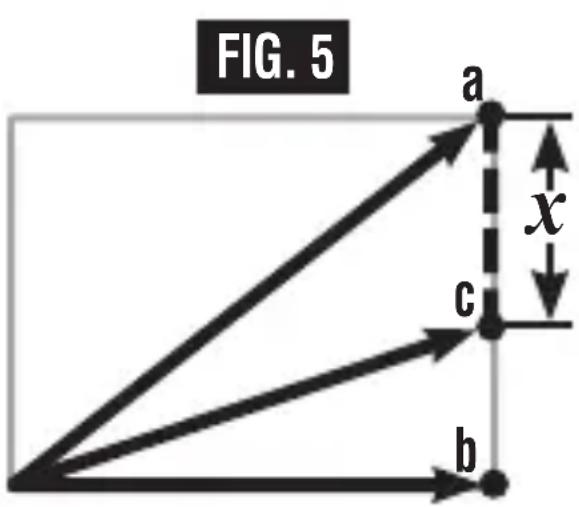
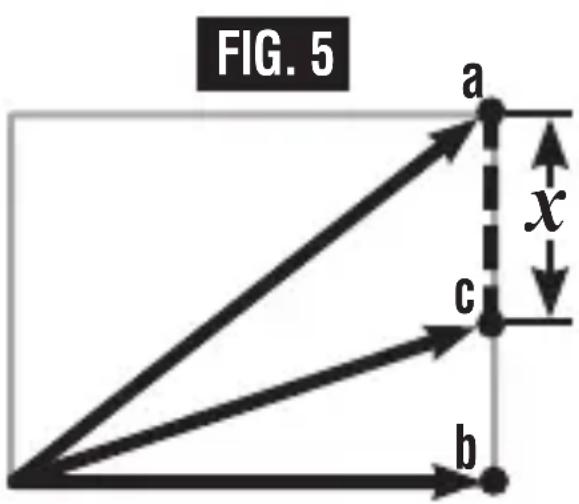
INDIRECT MEASUREMENTS: There are 3 available indirect measurement options. The relative position of the laser line (when aimed perpendicular to the line formed between the two points to be measured) determines which option should be used:
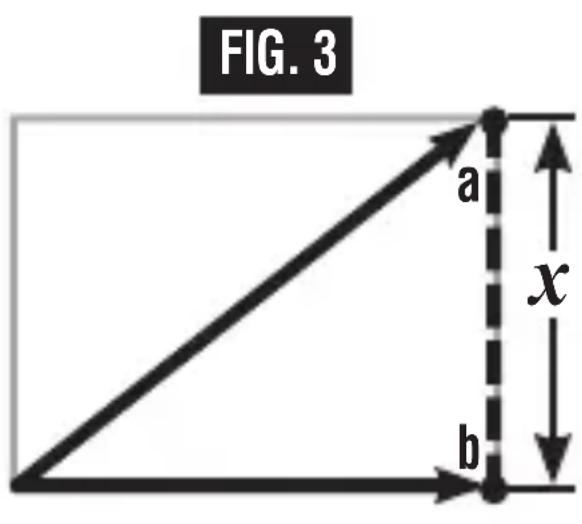
Indirect Method #1 (FIG. 3):
The perpendicular laser line lands on one of the end points of the segment to be measured. Measure to point a, then to the perpendicular point b. The result displayed will be the distance between points a and b.
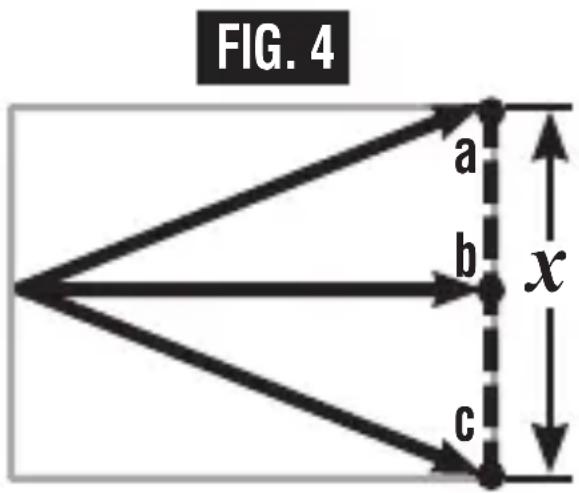
Indirect Method #2 (FIG. 4):
The perpendicular laser line lands between the end points of the segment to be measured. Measure to point a, then to the perpendicular point b, then to point c. The result displayed will be the distance between points a and c.
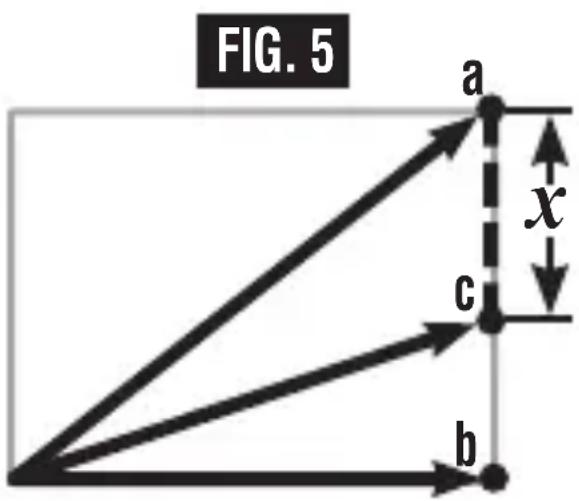
Indirect Method #3 (FIG. 5): The perpendicular laser line lands outside the end points of the segment to be measured. Measure to point a, then to the perpendicular point b, then to point c. The result displayed will be the distance between points a and c.
![graph TD A["Start"] --> B["a"] A --> C["b"] A --> D["c"] B --> E["x"] C --> E D --> E](/content/2026/04/687096/images/71f87bf7aed0f42a5255afb792eab98ce0136f5514583830ba4878985daaa5b3.jpg)
OPERATING INSTRUCTIONS
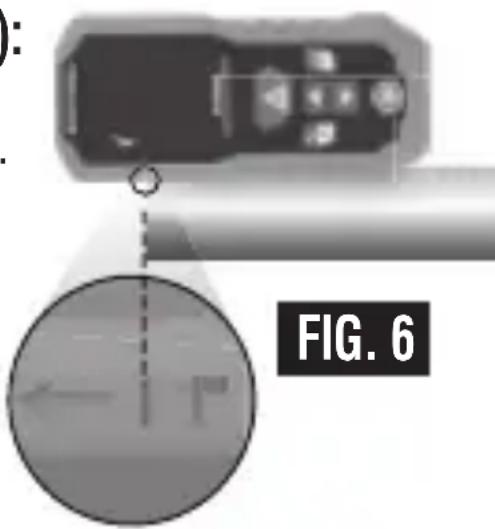
USING THE 1" (25 mm) ALIGNMENT MARK (FIG. 6):
When the Reference Point A is set to the top of the unit, the 1" (25 mm) Alignment Mark 14 can be used. Align the mark 14 with the front face of the surface being measured from and take a measurement. Add 1" (25 mm) to calculate the final measurement.
ADD / SUBTRACT MODE: In this mode you can cumulatively add and/or subtract sequential measurements to calculate a final result.
- From Single Measurement Mode, Press the Up/+ 7 Button or Down/- 8 Button to enter Add / Subtract Mode, and to select the first function (add or subtract) you'd like to perform.
- Press the Laser / Power-ON Button 1 once to capture an initial measurement, which will appear on the top line. This is considered the "current" measurement. The laser will turn off.
- Press the Laser / Power-ON Button 1 to turn the laser back on, then press again to capture a second measurement which will appear on the second line. The laser will turn off. Depending on which function you selected, the unit will add to or subtract from the "current" measurement, displaying the "total" on the third line.
- For cumulative results, press the Laser / Power-ON Button 1 again to turn the laser on, at which point the original "total" will become the "current" measurement and move up to the top line.
Continue this process for as long as you wish to accumulate results.
NOTE: You can switch between the add or subtract functions at any time by pressing the Up/+ ⑦ Button or Down/- ⑧ Button prior to taking a measurement. The previously selected function will be used until it is changed.
To exit Add / Subtract mode, press the Clear/Power-OFF Button 5 twice.
ERROR MESSAGES
LOW BATTERY (CHAR bAAtt)
The battery is too low to operate the unit. Recharge the unit to resume operation.
HIGH TEMPERATURE(Hit) / LOW TEMPERATURE(Lot)
The temperature inside of the unit is too high or too low to safely operate. Use only in temperatures of 14° F to 113° F ( -10° C to 45° C).
LOW SIGNAL (LoSI)
The reflected laser beam signal does not reach the unit. Dark and highly textured surfaces, fog or smoke interference, measuring against fabrics, measuring a surface angled relative to the laser beam, measuring through glass, or a combination of such conditions could diminish the laser reflected signal. Optimum target surfaces will have medium reflectivity, smooth surface texture, and reflect the laser beam directly to the unit.
HIGH SIGNAL (HISI)
The signal exceeds the unit's reception range. This can occur in bright conditions due to additional natural or artificial light sources, as well as laser signal bouncing at maximum power into the detector. Shiny, highly reflective surfaces could also cause this condition. Use caution to avoid eye exposure to strong reflected laser beam.
MEASUREMENT OUT OF RANGE (8or)
Measure distances ranging from 2" to 200' (51 mm to 61 m).
MAINTENANCE
- Regularly inspect ports and charging cable for and debris, dirt, damage, and corrosion.
- DO NOT attempt to repair device or cable; replace as needed.
- To protect the unit when not in use, store the unit inside the provided hard case with the screen facing inward.
CLEANING
Be sure instrument is turned off and disconnected from all power sources. Wipe with a clean, dry lint-free cloth. Do not use abrasive cleaners or solvents.
RECHARGING
Recharge as needed. There are no pre-designated intervals at which to recharge as long as you are using the unit regularly. Avoid discharging completely on a regular basis, as this can impact overall life.
STORAGE
If storing for more than one month, charge completely before storage, and recharge approximately every three months to avoid full discharge. Store in cool temperatures, mild humidity, and away from direct sunlight (See GENERAL SPECIFICATIONS section).
Leaving in a vehicle or other confined spaces in extreme hot temperatures can lead to decrease in service life, overheating, or fire. Extreme cold temperatures below the specified storage range can also harm performance and service life. Keep away from corrosive chemicals and gases.
After taking out of storage, inspect visually to make sure device and all accessories look satisfactory. Allow unit to return to ambient conditions before recharging.
FCC & IC COMPLIANCE
See this product's page at www.kleintools.com for FCC compliance information.
Canada ICES-003 (B) / NMB-003 (B)
WARRANTY
Do not place equipment and its accessories in the trash. Items must be properly disposed of in accordance with local regulations. Please see www.epa.gov/recycle for additional information.
CUSTOMER SERVICE
KLEIN TOOLS, INC.
450 Bond Street Lincolnshire, IL 60069
1-800-553-4676
customerservice@kleintools.com
www.kleintools.com

ADVERTENCIAS
VISTA POSTERIOR
ESTUCHE
16 VISTA INFERIOR

DETALLES DE LAS CARACTERÍSTICAS
UNIDAD
![graph TD A["Start"] --> B["a"] A --> C["b"] A --> D["c"] B --> E["x"] C --> E D --> E](/content/2026/04/687096/images/ead6cf851c97b9684865f59886fa35e852fdb4efc3d1ba9fffcaeb1753e59960.jpg)
KLEIN TOOLS®

CE UK CA
CARACTÉRISTIQUES GÉNÉRALES

AVERTISSEMENTS
INSTRUCTIONS D'UTILISATION
SIGNAL FAIBLE (LoSI)
- LASER DISTANCE MEASURE
- GENERAL SPECIFICATIONS
- SYMBOLS ON DEVICE
- WARNINGS
- FEATURE DETAILS
- UNIT
- LCD SCREEN
- OPERATING INSTRUCTIONS
- CHARGING
- OPTIONS
- INDIRECT METHOD #1 (FIG. 3)
- INDIRECT METHOD #2 (FIG. 4)
- USING THE 1" (25 MM) ALIGNMENT MARK (FIG. 6)
- ERROR MESSAGES
- LOW BATTERY (CHAR BAATT)
- HIGH TEMPERATURE(HIT) / LOW TEMPERATURE(LOT)
- LOW SIGNAL (LOSI)
- HIGH SIGNAL (HISI)
- MEASUREMENT OUT OF RANGE (8OR)
- MAINTENANCE
- CLEANING
- RECHARGING
- STORAGE
- FCC & IC COMPLIANCE
- WARRANTY
- CUSTOMER SERVICE
- ADVERTENCIAS
- DETALLES DE LAS CARACTERÍSTICAS
- UNIDAD
- CARACTÉRISTIQUES GÉNÉRALES
- AVERTISSEMENTS
- INSTRUCTIONS D'UTILISATION
- SIGNAL FAIBLE (LOSI)
Brand : Klein Tools
Model : 93LDM200
Category : Rangefinder