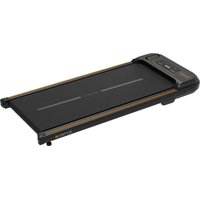
SLFTRD14 - Fitness Equipment SereneLife - Free user manual and instructions
Find the device manual for free SLFTRD14 SereneLife in PDF.


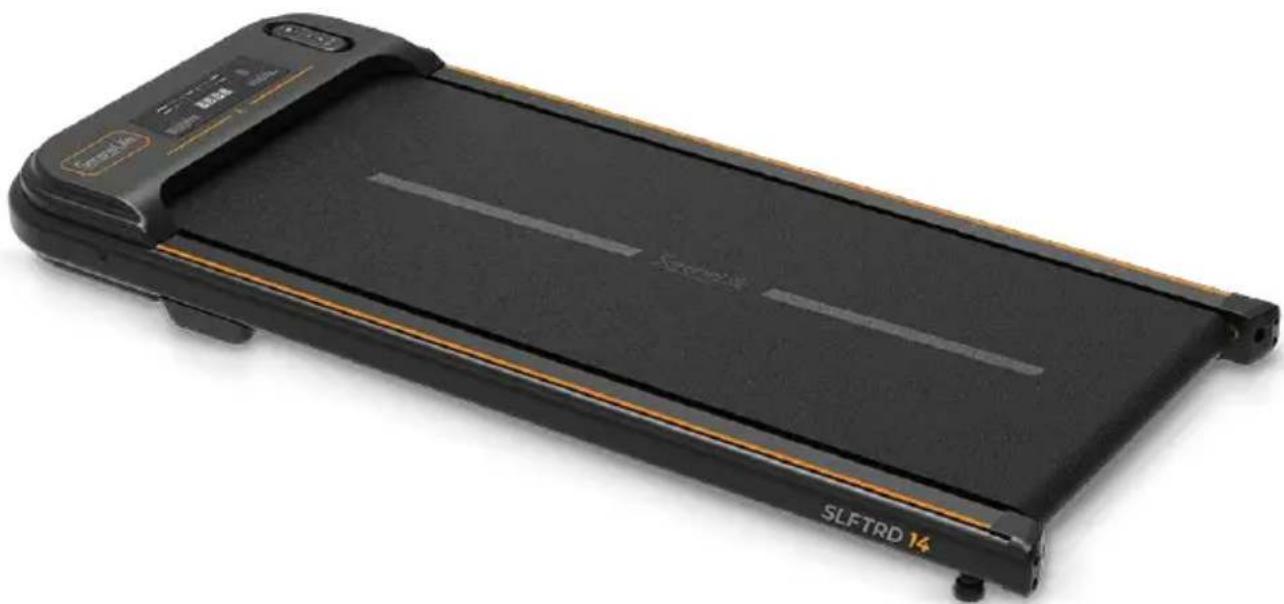
| Product Type | Portable Motorized Walking Treadmill |
| Brand and Model | SereneLife SLFTRD14 |
| Dimensions (L x W x H) | 125 x 54.3 x 11.2 cm (49.21 x 21.37 x 4.41 inches) |
| Running Surface (L x W) | 100 x 42 cm (39.37 x 16.53 inches) |
| Item Weight | 19.7 kg (43.4 lb) |
| Maximum Weight Capacity | 120 kg (265 lb) |
| Power Supply | 100-120 V ~ 60 Hz, US plug |
| Motor Power | 2.5 HP |
| Adjustable Speed Range | 0.6 to 5.0 MPH (1.0 to 8.0 km/h) |
| Adjustable Timer Range | 5 to 99 minutes |
| Display | LED Display: Time, Distance, Speed, Calories |
| Training Programs | 6 preset programs (P01 to P06) |
| Special Features | Remote control included, transport wheels, shock-absorbing design, non-slip belt |
| Safety | Emergency stop device with tether key, immediate stop button |
| Construction Material | Powder-coated steel, ABS |
| Lubrication | Requires periodic lubrication under the walking belt (every 50 hours) |
| Cleaning | Soft cloth and mild detergent; avoid abrasive products and moisture on the screen |
| Storage | Clean, dry indoor environment; unplug after use |
| Assembly | No assembly required |
| Box Contents | Treadmill, power cord, remote control, safety key, manual |
| App Compatibility | Kinomap, FitShow (Android and iOS via Bluetooth) |
Frequently Asked Questions - SLFTRD14 SereneLife
User questions about SLFTRD14 SereneLife
0 question about this device. Answer the ones you know or ask your own.
Ask a new question about this device
Download the instructions for your Fitness Equipment in PDF format for free! Find your manual SLFTRD14 - SereneLife and take your electronic device back in hand. On this page are published all the documents necessary for the use of your device. SLFTRD14 by SereneLife.
USER MANUAL SLFTRD14 SereneLife
SereneLife products are designed to create a more comfortable living space, indoors and out. Our team presents innovative lifestyle solutions throughout the year that promote simplicity and serenity.
We're committed to delivering the most dependable products so you can live a better, more serene life.
CONTENTS
FEATURES AND TECHNICAL SPECS 4
IMPORTANT SAFETY INSTRUCTIONS 5
PARTS LIST 7
LUBRICATION 9
ADJUSTING THE RUNNING BELT 10
CARE, MAINTENANCE & TROUBLESHOOTING GUIDE 10
WARM-UP AND COOL-DOWN ROUTINE 11
APPLICATION SOFTWARE (APP) 14
REGISTER PRODUCT 15
IMPORTANT:
READ ALL INSTRUCTIONS CAREFULLY BEFORE USING THIS PRODUCT. RETAIN THIS OWNER'S MANUAL FOR FUTURE REFERENCE.
The specifications of this product may vary from this photo and are subject to change without prior notice.
California Prop 65 Warning
WARNING:
This product can expose you to chemicals, which is known to the state of California to cause cancer birth defects and other reproductive harm. Do not ingest.
For more info go to: www.P65warnings.ca.gov
Features:
- Offers Both Jogging and Under-desk Walking Functionality
Non-slip, Wear-resistant Running Belt - No-Assembly Required
- Equipped with Transport Wheels for Easy Movement and Storage
- Electric Motorized Plug-in Design
Home Gym Digital Treadmill Design - 4 White Light LED Display Windows Clearly Shows Time, Calories, Steps, Speed and Distance
- Displays Run Time, Distance, Speed, and Calories Burned
Large Multi-layer Tread Belt
Durable, Steady, and Easily Operated - Preset Training Modes for Quick Exercise Sessions
- Adjustable Speed & Timer Settings
- Used for Walking, Jogging, Running Exercise Training
- Perfect for Weight Loss, Cardiovascular Fitness, Endurance & Amp Stamina Building
- Convenient Design to Store the Remote Controller
- Shock Absorption Design effectively reduce joint impact and protect your knees
- Convenient Speed Adjustment via Included Remote Control
What's in the Box:
Unit
Power Cord
Remote Controller
Technical Specs:
- Construction Material: Powder Coated Steel, ABS
- Battery Powered Remote Control: Requires (1) x CR-2032, Included
- Power Cord Length: 6.0^ ft.
Power Supply: 100-120V - Plug Type: US Plug
- Rated Frequency: 60Hz
- Motorized Treadmill Motor Power: 2.5 HP
- Adjustable Speed Range: 0.6 - 5.0 MPH
- Adjustable Timer Range: 5 - 99 Minutes
Weight Capacity: Up to 265+ lbs. - Item Weight: 43.4 lbs.
- Running Belt/Running Surface Size (L x W):
39.37" x 16.53" -inches / 100 x 42 - centimeter
- Product Dimension (L x W x H):
49.01" x 21.37" x 4.41" -inches / 125 x 54.3 x 11.20 - centimeter
IMPORTANT SAFETY INSTRUCTIONS
Basic precautions, including the following important safety instructions, should always be followed when using this treadmill. Read all instructions before using this treadmill.
DANGER: To reduce the risk of electric shock, always unplug the treadmill from the electrical outlet immediately after use and before cleaning, assembling, or servicing the treadmill. Failure to follow these instructions may lead to personal injury and cause damage to the treadmill.
WARNING: To reduce the risk of burns, fire, electric shock, or injury, please read the following:
- Never leave the treadmill unattended while plugged in. Disconnect by turning off the master power switch and unplugging from the wall outlet when not in use or before maintenance.
- Use this appliance only for its intended purpose as described in this manual. Avoid using attachments not recommended by the manufacturer.
- Do not operate if the treadmill has a damaged cord, plug, or is not working properly. Return it to a service center if dropped, damaged, or exposed to water.
- Avoid maintenance or adjustments not described in this manual. Discontinue use and consult an Authorized Service Representative for issues.
- Keep air openings unblocked and free of lint, hair, or obstructions. Do not use outdoors.
- Do not pull the treadmill by its power cord or use the cord as a handle.
- Keep children and pets away during use, and elderly or disabled users should have adult supervision.
- Avoid use where aerosol products are used or oxygen is administered. Operate in dry conditions only.
- The motor cover can become hot; avoid placing the treadmill on flammable surfaces.
- Keep the electrical cord away from heated surfaces.
- Place the treadmill on a solid, level surface with a minimum safety area clearance of two meters. Ensure the area around it remains clear during use.
-
For domestic household use only, with a maximum weight capacity of 265 LBS.
-
Only one person should use the treadmill at a time.
Wear suitable clothing and enclosed athletic footwear.
- Always hold onto the handrails while using the treadmill.
Ensure spring knob and round knob are in place when folding and moving.
- Do not leave children under 12 unsupervised near or on the treadmill.
- To disconnect, turn all controls off and remove the plug from the wall outlet.
- Not intended for use by persons with reduced capabilities unless supervised.
Children should not play on or near the treadmill.
- CAUTION - RISK OF INJURY: Use extreme caution when stepping onto or off a
moving treadmill belt. Read the instruction manual before use.
- Pull out the Safety Tether Key for emergency stop.
- Plug into a grounded 110-120-volt 60Hz outlet.
- Keep hands clear of moving parts. Do not place hands or feet under the treadmill while in use.
- Do not use on a carpet exceeding 1.3cm in height.
- Before use, ensure the belt is aligned and centered on the running deck, with all visible fasteners tightened.
- Cleaning and user maintenance should not be done by unsupervised children.
- If the supply cord is damaged, have it replaced by the manufacturer or qualified personnel.
- Never operate in the folded position. Allow the running belt to stop fully before folding.
- Always face towards the computer console and do not run backward on the running belt.
WARNING: Before beginning any exercise program, consult your physician.
This is especially important for people over 35 or with pre-existing health problems. Read all instructions before using any fitness equipment. Do not operate without properly fitted guards, as moving parts can present a risk of serious injury if exposed.
CAUTION: Read all instructions carefully before operating this product.
Retain this Owner's Manual for future reference.
HARDWARE KIT
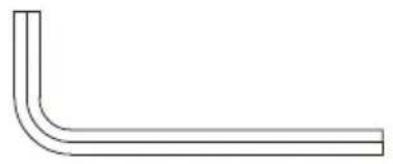
Allen Key
PARTS LIST
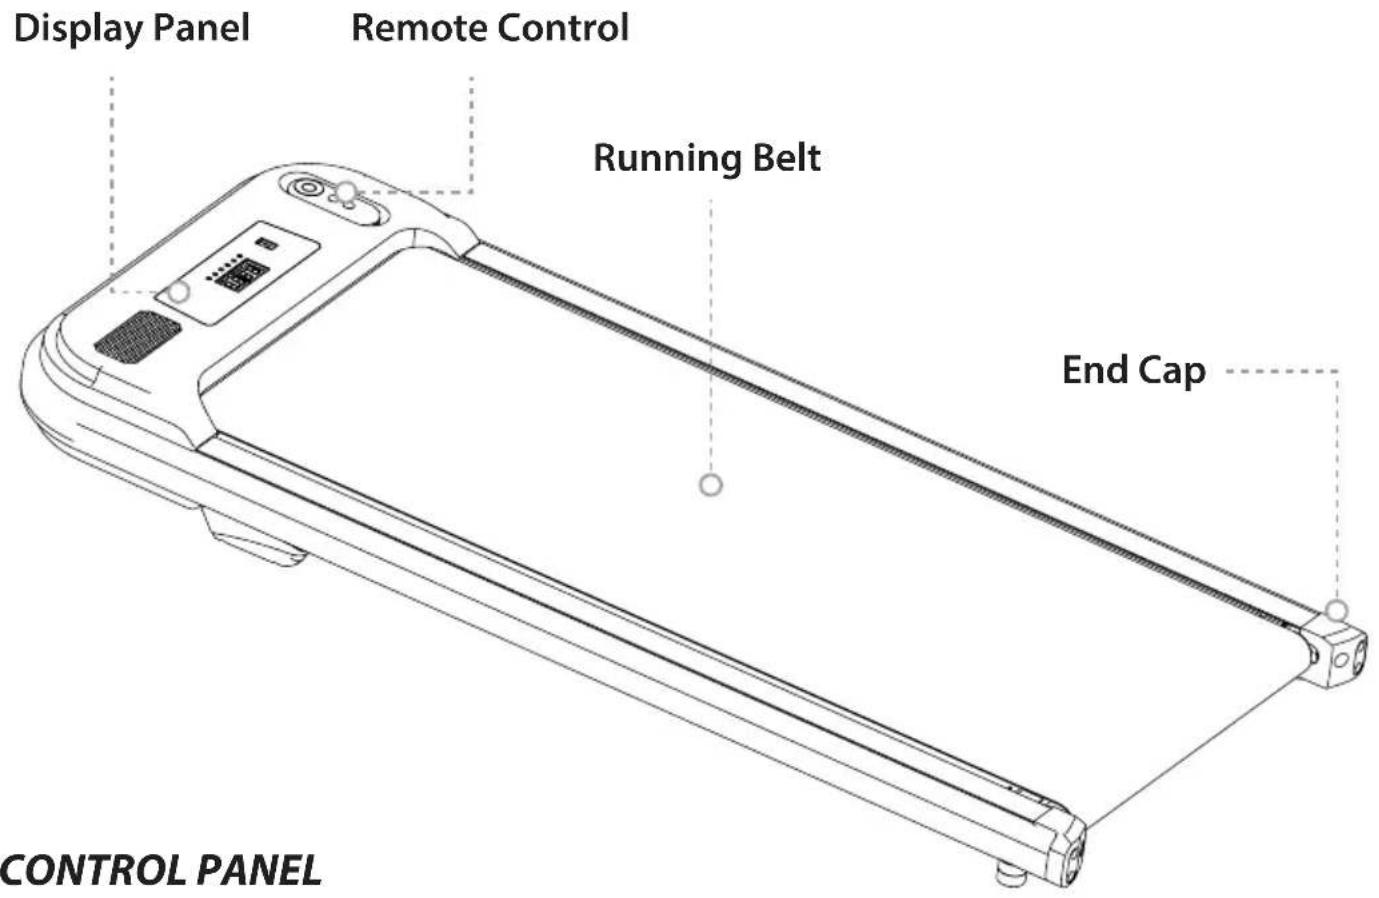
CONTROL PANEL
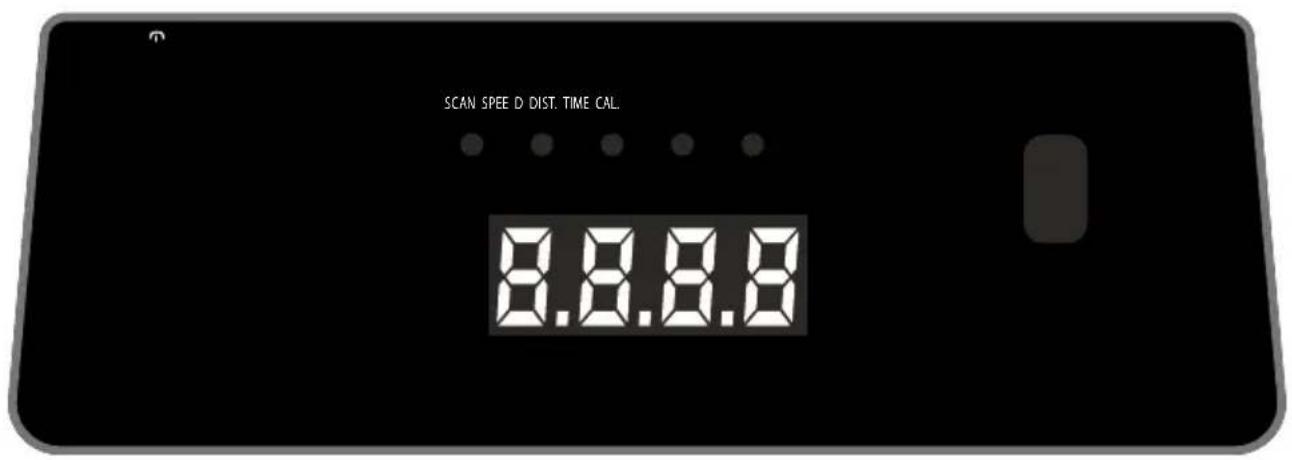
CONTROL PANEL
DISPLAY FUNCTIONS:
TIME: Displays your elapsed workout time in minutes and seconds.
SPEED: Displays the current speed from a minimum of 0.6 MPH to a maximum of 5.0 MPH.
DISTANCE: Displays the cumulative distance traveled during the workout.
CALORIES: Displays the total calories burned during your workout.
FUNCTION BUTTONS:
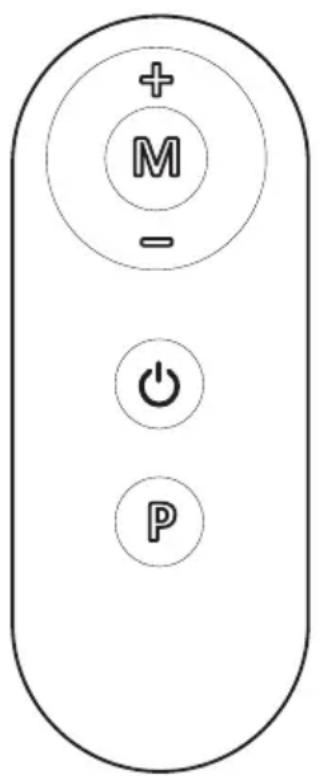

Press the button to start/stop training on different training modes immediately.

Press the button to select the pre-set training program (P01-P06) mode before training.

Press the MODE button to switch between Speed, Time, Distance, and Calorie count.

Press the button to increase the speed.

Press the button to decrease the speed.
| PROGRAM | 1 2 | 3 | 4 | 5 | 6 | 7 | 8 | 9 | 10 | 11 | 12 | 13 | 14 | 15 | 16 | 17 | 18 | 19 | 20 | ||||||||||||||
| P1 | 1.0 | 1.5 | 2.0 | 2.5 | 3.0 | 2 | 5 | 2.0 | 1.5 | 1.0 | 1.5 | 2.0 | 2.5 | 3.0 | 2.5 | 3.0 | 2.5 | 2.0 | 1.5 | 1.0 | 1.5 | 2.0 | 1.5 | ||||||||||
| P2 | 1.5 | 1.5 | 2.0 | 2.0 | 2.5 | 2 | 5 | 3.0 | 3.0 | 4.0 | 4.0 | 3.0 | 3.0 | 2.5 | 2.5 | 2.0 | 2.0 | 1.5 | 1.5 | 2.0 | 2.0 | 1.5 | |||||||||||
| P3 | 1.0 | 1.5 | 2.0 | 1.5 | 2.0 | 2 | 5 | 2.0 | 2.5 | 3.0 | 2.5 | 3.0 | 4.0 | 3.0 | 2.5 | 3.0 | 2.5 | 2.0 | 2.5 | 2.0 | 2.5 | 1.5 | |||||||||||
| P4 | 1.5 | 2.0 | 2.0 | 2.5 | 2.0 | 2 | 5 | 2.5 | 3.0 | 2.5 | 3.0 | 3.0 | 4.0 | 3.0 | 4.0 | 4.0 | 4.0 | 3.0 | 2.5 | 2.0 | 1.5 | 1.0 | |||||||||||
| P5 | 1.5 | 1.5 | 2.0 | 2.5 | 3.0 | 4 | 0 | 4.0 | 3. | 0 | 2.5 | 2.0 | 2.0 | 1.5 | 2 | 0 | 2.5 | 2.5 | 3.0 | 4.0 | 3.0 | 2.5 | 2.0 | ||||||||||
| P6 | 1.0 | 1.5 | 2.0 | 2.0 | 2.0 | 2 | 5 | 3.0 | 4.0 | 4.0 | 4.0 | 3.0 | 2.5 | 2.0 | 1.5 | 1.5 | 1.5 | 2.0 | 2.5 | 2.0 | 1.5 |
LUBRICATION
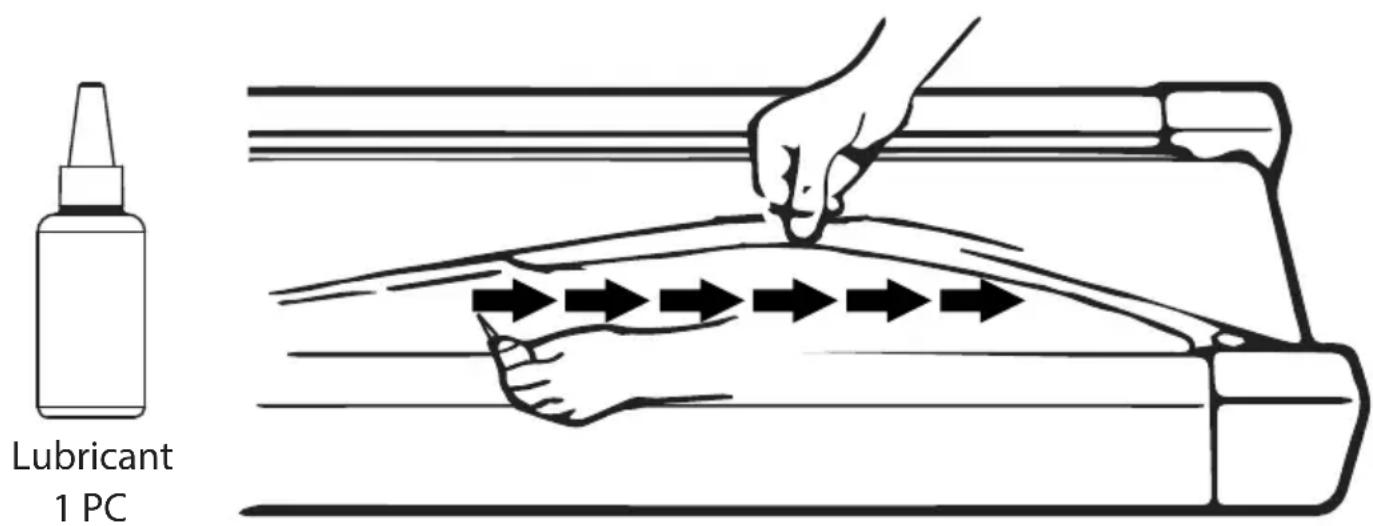
Applying lubricant under the running belt is crucial to ensure superior performance and extend its lifespan. After the first 25 hours of use (or 2-3 months), apply some lubricant, and repeat this process every subsequent 50 hours of use (or 5-8 months).
How to check the running belt for proper lubrication:
- Lift one side of the running belt.
- Feel the top surface of the running deck.
- If the surface is slick to the touch, no further lubrication is required.
- If the surface is dry to the touch, apply some lubricant.
How to apply lubricant:
- Lift one side of the running belt.
- Pour some lubricant under the center of the running belt on the top surface of the running deck.
Run the treadmill at a slow speed for 3 to 5 minutes to evenly distribute the lubricant.
NOTE: DO NOT over-lubricate the running deck. Wipe off any excess lubricant that comes out.
ADJUSTING THE RUNNING BELT
-
The running belt on the Treadmill may shift slightly after continuous use. This is normal for all treadmills.
-
To straighten/adjust the running belt, turn the adjusting bolt on either side of the base (see picture C and D).
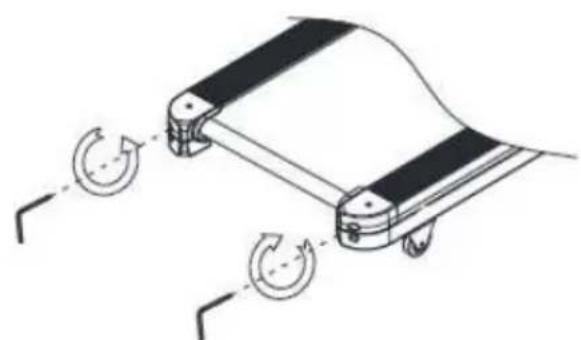
picture C picture D
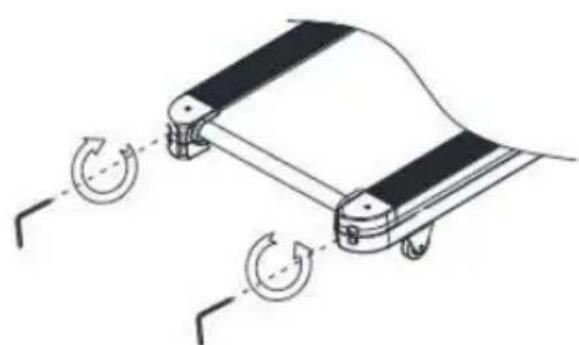
- Do not allow the running belt to catch the sides of the Treadmill, as this may tear the belt.
CARE, MAINTENANCE & TROUBLESHOOTING GUIDE
WARNING: To prevent electrical shock, please turn off and unplug the treadmill before cleaning or performing routine maintenance.
WARNING: Always check the wear and tear components like the spring knob and running belt to prevent injury.
CLEANING
After each exercise, ensure that the unit is wiped down, and any sweat is removed from the unit. The treadmill can be cleaned with a soft cloth and mild detergent. Avoid using abrasives or solvents. Be careful not to get excessive moisture on the display panel, as this might damage the unit and create an electrical hazard. Please keep the treadmill, especially the computer console, out of direct sunlight to prevent damage to the screen.
STORAGE
Store the treadmill in a clean and dry indoor environment. Never leave or use the unit outdoors. Ensure the master power switch is off, and the power cord is unplugged from the wall outlet.
TROUBLESHOOTING GUIDE
| Problem Potential Causes Solution | ||
| Treadmill won't start | 1. Treadmill not plugged in 2. Safety Tether Key is not correctly installed. 3. House Circuit breakers has "stripped" 4. Treadmill circuit breakers has "stripped" | 1. Plug the power cord into the wall outlet 2. Reinstall the Safety Tether Key 3. Reset the circuit breaker, or call an electrician to replace the circuit breaker. 4. Wait 5 minutes and then try to restart the treadmill. |
| Belt slips Belt not tight enough Adjust belt tension | ||
| Belt hesitates when stepped on | 1. Not enough lubrication applied onto the running deck. 2. Belt is too tight | 1. Apply lubricant. 2. Adjust belt tension |
| Belt is not centered | Running belt tension not even across the rear roller | Center the belt |
WARM-UP AND COOL-DOWN ROUTINE
The WARM-UP is a crucial part of any workout. Its purpose is to prepare your body for exercise and minimize injuries. Warm up for two to five minutes before aerobic exercising. Initiate every session with a warm-up to prepare your body for more strenuous exercise by heating up and stretching your muscles, increasing circulation and pulse rate, and delivering more oxygen to your muscles.
COOL DOWN at the end of your workout by repeating these exercises to reduce soreness in tired muscles. The purpose of cooling down is to return the body to its resting state at the end of each exercise session. A proper cool-down gradually lowers your heart rate and allows blood to return to the heart.
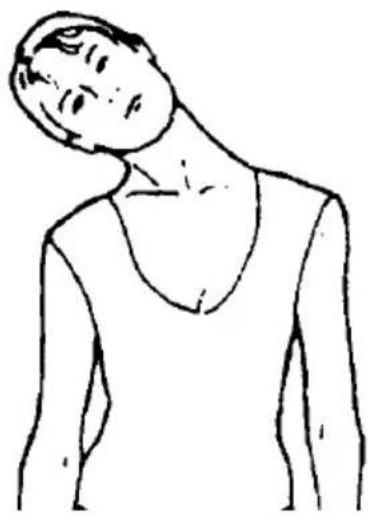
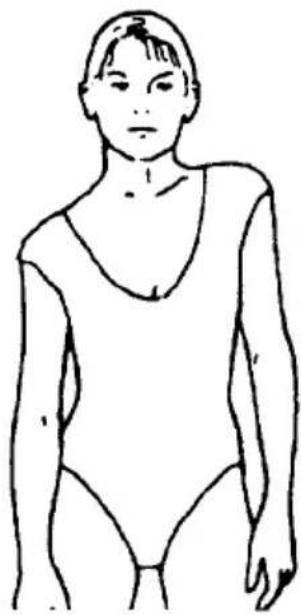
HEAD ROLL
Rotate your head to the right for one count, feeling stretching sensation up the left side of your neck.
Then rotate your head back for one count, stretching your chin to the ceiling and letting your mouth open. Rotate your head to the left for one count, then drop your head to your chest for one count.
SHOULDER LIFTS
Lift your right shoulder toward your ear for one count. Then lift your left shoulder up for one count as you lower your right shoulder.
SIDE STRETCHES
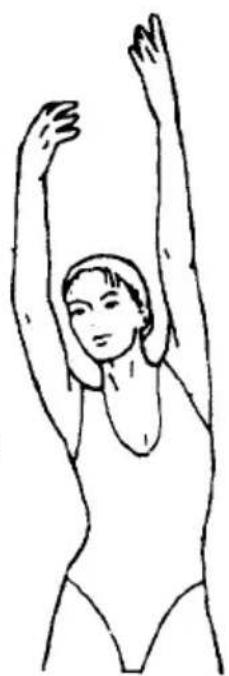
Open your arms to the side and lift them until they are over your head. Reach your right arm as far toward the ceiling as you can for one count. Repeat this action with your left arm.

QUADRICEPS STRETCH
With one hand against a wall for balance, reach behind you and pull your right foot up. Bring your heel as close to your buttocks as possible. Hold for 15 counts and repeat with the left foot.
INNERTHIGHSTRETCH
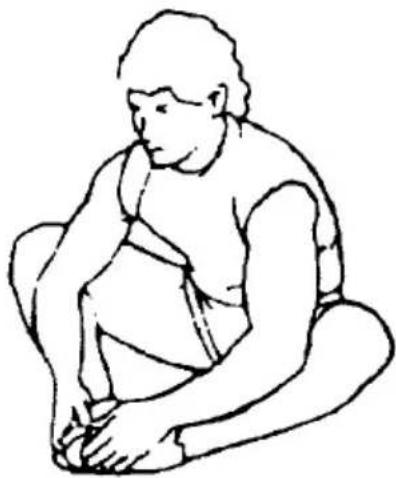
Sit with the soles of your feet together and your knees pointing outward. Pull your feet as close to your groin as possible. Gently push your knees toward the floor. Hold for 15 counts.
TOE TOUCHES
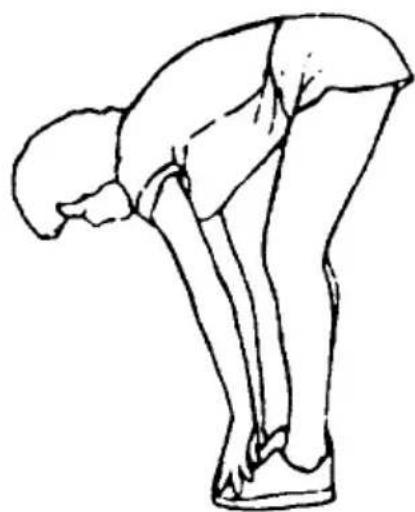
Slowly bend forward from your waist, letting your back and shoulders relax as you stretch toward your toes. Reach as far as you can and hold for 15 counts.
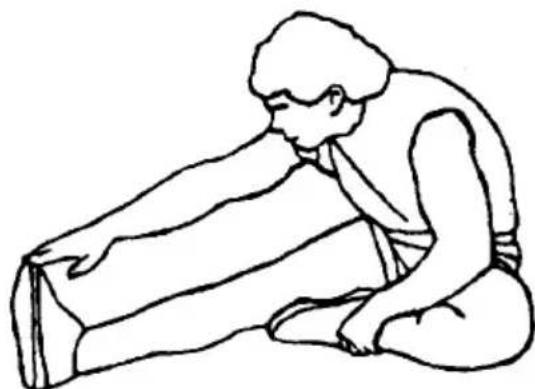
HAMSTRING STRETCHES
Extend your right leg. Rest the sole of your left foot against your right inner thigh. Stretch toward your toe as far as possible. Hold for 15 counts. Relax and then repeat with the left leg.
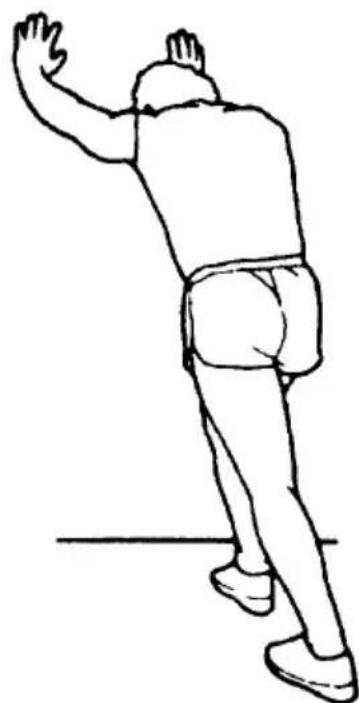
CALF/ACHILLES STRETCH
Lean against a wall with your right leg in front of the left and your arms forward. Keep your left leg straight and the right foot on the floor; then bend the right leg and lean forward by moving your hips toward the wall. Hold, then repeat on the other side for 15 counts.
APPLICATION SOFTWARE (APP)
Check Compatibility: Ensure that your mobile device meets the requirements for the application. The specific requirements for each application can be found in the Google Play Store or App Store.
Bluetooth Activation: Turn on the Bluetooth feature on your mobile device.

Android

Kinomap

iOS

Android

FIT & SHOW

iOS


Note that a complete operation guide for the application is not included in this manual. Instead, refer to the instructions provided within the specific app download store (Google Play Store or App Store).
Understand that the application may be updated periodically, which could result in changes to its operation or design. For the latest information, refer to the instructions within the specific app download store or contact us for assistance.
Register Product
Thank you for choosing SereneLife. By registering your product, you ensure that you receive the full benefits of our exclusive warranty and personalized customer support.
Complete the form to access expert support and to keep your SereneLife purchase in perfect condition.

Serenelifehome.com/ register
SereneLife

SPA
SLFTRD14
LOGICIEL D'APPLICATION (APP)
- CONTENTS
- IMPORTANT:
- California Prop 65 Warning
- WARNING:
- Features:
- What's in the Box:
- Technical Specs:
- IMPORTANT SAFETY INSTRUCTIONS
- WARNING: To reduce the risk of burns, fire, electric shock, or injury, please read the following:
- HARDWARE KIT
- PARTS LIST
- CONTROL PANEL
- DISPLAY FUNCTIONS:
- FUNCTION BUTTONS:
- LUBRICATION
- How to check the running belt for proper lubrication:
- How to apply lubricant:
- ADJUSTING THE RUNNING BELT
- CARE, MAINTENANCE & TROUBLESHOOTING GUIDE
- CLEANING
- STORAGE
- TROUBLESHOOTING GUIDE
- WARM-UP AND COOL-DOWN ROUTINE
- HEAD ROLL
- SHOULDER LIFTS
- SIDE STRETCHES
- QUADRICEPS STRETCH
- INNERTHIGHSTRETCH
- TOE TOUCHES
- HAMSTRING STRETCHES
- CALF/ACHILLES STRETCH
- APPLICATION SOFTWARE (APP)
- Register Product
- SereneLife
- SLFTRD14
- LOGICIEL D'APPLICATION (APP)
Brand : SereneLife
Model : SLFTRD14
Category : Fitness Equipment