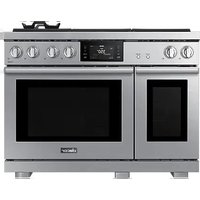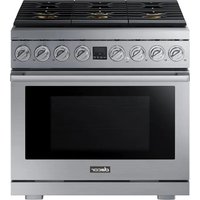
DOP36T86GLS - Cooker Dacor - Free user manual and instructions
Find the device manual for free DOP36T86GLS Dacor in PDF.


User questions about DOP36T86GLS Dacor
0 question about this device. Answer the ones you know or ask your own.
Ask a new question about this device
Download the instructions for your Cooker in PDF format for free! Find your manual DOP36T86GLS - Dacor and take your electronic device back in hand. On this page are published all the documents necessary for the use of your device. DOP36T86GLS by Dacor.
USER MANUAL DOP36T86GLS Dacor
WARNING: If the information in this manual is not followed exactly, a fire or explosion may result causing property damage, personal injury, or death.
- DO NOT store or use gasoline or other flammable vapors and liquids in the vicinity of this or any other appliance.
• WHAT TO DO IF YOU SMELL GAS: - DO NOT try to light any appliance.
- DO NOT touch any electrical switch.
- DO NOT use any phone in your building.
- Immediately call your gas supplier from a neighbor's phone. Follow the gas supplier's instructions.
- If you cannot reach your gas supplier, call the fire department.
- Installation and service must be performed by a qualified installer, service agency, or the gas supplier.
WARNING
Never Operate the Top Surface Cooking Section of this Appliance Unattended.
- Failure to follow this warning statement could result in fire, explosion, or burn hazard that could cause property damage, personal injury, or death.
- If a fire should occur, keep away from the appliance and immediately call your fire department. DO NOT ATTEMPT TO EXTINGUISH AN OIL/GREASEFIR WITH WATER.
ANTI-TIP DEVICE
WARNING
To reduce the risk of tipping the range, the range must be secured by a properly installed Anti-Tip device. AFTER THE RANGE HAS BEEN INSTALLED, CONFIRM THAT THE ANTI-TIP DEVICE HAS BEEN PROPERLY INSTALLED AND VERIFY THAT THE ANTI-TIP DEVICE IS PROPERLY ENGAGED. Refer to the installation manual for instructions.
a) If the anti-tip device is not installed, a child or adult can tip the range and be killed.
b) Verify the anti-tip device has been properly installed and engaged at the right rear (or left rear) of the range bottom.
c) If you move the range and then move it back into place, ensure the anti-tip device is re-engaged at the right or left rear of the range bottom.
d) Do not operate the range without the anti-tip device in place and engaged.
e) Failure to do so can result in death or serious burns to children or adults.

WARNING
Do not step, lean, or sit on the oven door of the range. You can cause the range to tip, resulting in burns or serious injuries.
Confirm that the Anti-Tip device is installed properly. Then, to verify that the Anti-Tip device is engaged, grasp the top rear edge of the range and carefully attempt to tilt it forward. The Anti-Tip device should prevent the range from tilting forward more than a few inches.
If you pull the range out from the wall for any reason, make sure the anti-tip device is properly engaged when you push the range back against the wall. If it is not, there is a risk of the range tipping over and causing injury if you or a child stand, sit or lean on an open door.
Never completely remove the leveling legs. If you remove the leveling legs, the range will not be secured to the anti-tip device properly.
Regulatory Notice
1. FCC Notice

CAUTION
FCC CAUTION: Any changes or modifications not expressly approved by the party responsible for compliance could void the user's authority to operate the equipment.
This device complies with Part 15 of FCC Rules. Operation is Subject to following two conditions:
1) This device may not cause harmful interference, and
2) This device must accept any interference received including interference that cause undesired operation.
For products sold in the US and Canadian markets, only channels 1\~11 are available. You cannot select any other channels.
FCC STATEMENT:
This equipment has been tested and found to comply within the limits for a Class B digital device, pursuant to part 15 of the FCC Rules. These limits are designed to provide reasonable protection against harmful interference in a residential installation.
Regulatory Notice
This equipment generates, uses, and can radiate radio frequency energy and, if not installed and used in accordance with the instructions, may cause harmful interference to radio communications. However, there is no guarantee that interference will not occur in a particular installation. If this equipment does cause harmful interference to radio or television reception, which can be determined by turning the equipment off and on, the user is encouraged to try to correct the interference by one or more of the following measures:
• Reorienting or relocating the receiving antenna
- Increasing the separation between the equipment and receiver
- Connecting the equipment to an outlet that is on a different circuit than the radio or TV
- Consulting the dealer or an experienced radio/TV technician for help.
FCC RADIATION EXPOSURE STATEMENT:
This equipment complies with FCC radiation exposure limits set forth for an uncontrolled environment. This equipment should be installed and operated so there is at least 8 inches (20 cm) between the radiator and your body. This device and its antenna(s) must not be co-located or operated in conjunction with any other antenna or transmitter.
2. IC Notice
The term “IC” before the radio certification number only signifies that Industry Canada technical specifications were met. Operation is subject to the following two conditions: (1) this device may not cause interference, and (2) this device must accept any interference, including interference that may cause undesired operation of the device.
This Class B digital apparatus complies with Canadian ICES-003. For products sold in the US and Canadian markets, only channels 1\~11 are available. You cannot select any other channels.
IC RADIATION EXPOSURE STATEMENT:
This equipment complies with IC RSS-102 radiation exposure limits set forth for an uncontrolled environment. This equipment should be installed and operated so there is at least 8 inches (20 cm) between the radiator and your body. This device and its antenna(s) must not be co-located or operated in conjunction with any other antenna or transmitter.
Key features
Bigger is better
With a capacity of 5.9 cubic feet, this gas oven range offers more space than many other leading brand in the United States and Canadian markets. The enhanced capacity means a better cooking experience.
A cooktop with 6 burners
Power burners provide flexible cooktop heat for a variety of cookware.
Enhanced convenience with easy maintenance
The gas oven range combines all the benefits of 2 separate home appliances - gas range and gas oven - to maximize customer convenience with its careful, stylish design.

To Our Valued Customer:
Congratulations on your purchase of the very latest in Dacor ^® products! Our unique combination of features, style, and performance make us a great addition to your home.
To familiarize yourself with the controls, functions, and full potential of your new Dacor range, read this manual thoroughly, starting with Before you begin.
Dacor appliances are designed and manufactured with quality and price, while working within the framework of our company values. Should you ever have an issue with your range, first consult Troubleshooting, where you will find suggestions and remedies that may pre-empt a service call.
Valuable customer input helps us continually improve our products and services, so feel free to contact our Customer Assurance Team for assistance with all your product support needs.
Dacor Customer Assurance
14425 Clark Avenue
City of Industry, CA 91745
Telephone: 833-35-ELITE (833-353-5483), USA and Canada
Fax: (626) 403-3130
Hours of Operation: Mon - Fri, 5:00 a.m. to 5:00 p.m. Pacific Time
Website: www.dacor.com
Thanks for choosing Decor for your home. We are a company built by families for families, and we are dedicated to serving yours. We are confident that your new Decor range will deliver top-level performance and enjoyment for decades to come.
Sincerely,
The Dacon Customer Assurance Team
ContentsContents
Important safety information 7
Symbols used in this manual 7
California Proposition 65 Warning 7
Commonwealth of Massachusetts 7
General safety 7
Fire safety 8
Gas safety 9
Electrical and grounding safety 9
Installation safety 10
Location safety 10
Cooktop safety 11
Oven safety 13
Self-cleaning oven safety 13
Overview 14
Layout 14
What's included 14
Control panels and displays 15
Before you start 16
Display mode 16
Clock 17
Kitchen timer 17
Oven vent/Cooling vent 18
Gas range 18
Cookware 19
Wok ring 19
Gas burners 20
Ignition 20
Gas oven 21
Cooking modes 22
Racks 24
Recipe guide 26
Special features 27
Other features 28
Self-cleaning 30
Using Sabbath feature 31
Using the IQ control feature 33
Using the hood control feature 35
Settings 36
Maintenance 38
Surface burners 38
Cleaning 40
Gliding rack 40
Ladder racks 41
Door 42
Oven door: remove and re-install 43
Replacing the oven lights 44
Troubleshooting 44
Troubleshooting 44
Information codes 48
Warranty 49
Appendix 50
Important safety information
READ ALL INSTRUCTIONS BEFORE USING THIS APPLIANCE
- All electrical and gas equipment with moving parts can be dangerous. Please read the important safety information for this appliance in this manual. The instructions must be followed to minimize the risk of injury, death, or property damage.
• Save this manual. Please Do Not Discard.
Symbols used in this manual

WARNING
Hazards or unsafe practices that may result in severe personal injury or death.

CAUTION
Hazards or unsafe practices that may result in minor personal injury or property damage.

NOTE
Useful tips and instructions.
These warning icons and symbols are here to prevent injury to you and others. Please follow them explicitly. After reading this section, keep it in a safe place for future reference.
California Proposition 65 Warning

WARNING
Cancer and Reproductive Harm - www.P65Warnings.ca.gov
Commonwealth of Massachusetts
- This product must be installed by a licensed plumber or gas fitter qualified or licensed by the State of Massachusetts. When using ball-type gas shut-off valves, you must use the T-handle type. Multiple flexible gas lines must not be connected in series.
General safety

WARNING
To reduce the risk of fire, electric shock, personal injuries, and/or death, observe the following precautions.
natural_image
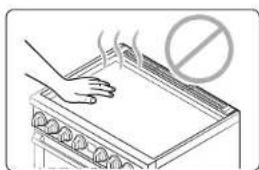
Illustration of a hand using a tool to clean food on an electric stove (no text or symbols)- Do not touch any part of the range, including but not limited to, oven burners, surface burners, interior surfaces, and exterior surfaces except the knobs and handle during or immediately after cooking.
- Know the location of the gas shut-off valve and how to shut it off.
• Make sure the anti-tip device is properly installed on the range. See the installation instructions for more information.
- Do not let children near the range. Do not let children go into the range or onto the range. Do not let children play with the range or any part(s) of the range. Do not leave children unattended in an area where the range is in use.
- Remove all packaging materials from the range before operating to prevent ignition of these materials. Keep all packaging materials out of children's reach. Properly dispose the packaging materials after the range is unpacked.
- Do not store any object of interest to children on the cooktop or backguard of the range. Children climbing on the range to reach items could be killed or seriously injured.
Important safety information
- Do not operate the range if the range or any part of the range is damaged, malfunctioning, or missing parts.
- Do not use the range as a space heater. Use the range for cooking only.
- Do not use oven cleaners or oven liners in or around any part of the oven.
- Use only dry pot holders. Pot holders with moisture in them can release steam and cause burns if they come in contact with hot surfaces. Keep pot holders away from open flames when lifting cookware. Never use a towel or bulky cloth in place of a pot holder.
- Do not use the range to heat unopened food containers.
- Do not strike the oven glass.
- When disposing of the range, cut off the power cord and remove the door to prevent children and animals from getting trapped.
• Unplug or disconnect power before servicing. - Make sure all meat and poultry is cooked thoroughly. Meat should always be cooked to an internal temperature of 160 °F (71 °C). Poultry should always be cooked to an internal temperature of 180 °F (82 °C).
- Teach children not to touch or play with the controls or any part of the range.
- Do not lean on the range. You may accidentally turn a control knob and ignite a burner or the oven.
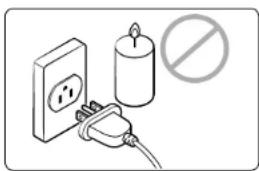
- Do not stand on top of the appliance or place objects (such as laundry, an oven cover, lighted candles, lighted cigarettes, dishes, chemicals, metal objects, etc.) on the appliance.
Items, such as a cloth, may get caught in the door. - This may result in electric shock, fire, problems with the product, or injury.
Fire safety
WARNING
To reduce the risk of fire, electric shock, personal injuries, and/or death, observe the following precautions.
natural_image
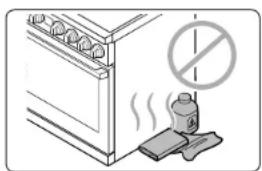
Illustration of a kitchen appliance with a bottle and a stopper emitting steam (no text or symbols)- Do not store, place, or use flammable or combustible materials such as charcoal, paper, plastic, pot holders, linens, curtains, gasoline or other flammable vapors or liquids near or inside the range.
- Do not wear loose fitting or hanging garments while using the range.
• To avoid grease buildup, regularly clean the vents.
- Do not let pot holders or other flammable materials touch a heating element. Do not use a towel or other bulky cloths in place of a pot holder.
- Do not use water on a grease fire. To put out a grease fire, turn off the heat source and smother the fire with a tight-fitting lid or use a multipurpose dry chemical or foam-type fire extinguisher.
- If a grease fire should occur in the oven, turn off the oven by turning both the mode and temperature selector knobs to the OFF position.
- Keep the oven door closed until the fire goes out.
- If necessary, use a multipurpose dry chemical or foam-type fire extinguisher.
- Do not heat unopened food containers. The buildup of pressure may cause the container to burst and result in injury.
- Do not put any combustible material or items near the range.
Gas safety

WARNING
To reduce the risk of fire, electric shock, personal injuries, and/or death, observe the following precautions.
If you smell gas
natural_image
Illustration of a wall-mounted electrical socket connected to a lit candle and a plug, with no visible text or symbols.- Close the valve and do not use the range.
- Do not light a match, candle, or cigarette.
- Do not turn on any gas or electric appliances.
-
Do not touch any electrical switches or plug a power cord into an outlet.
-
Do not use any phone in your building.
- Evacuate the room, building, or area of all occupants.
- Immediately call your gas supplier from a neighbor's phone. Follow the gas supplier's instructions.
- If you cannot reach your gas supplier, call the fire department.
Checking for gas leaks
- Leak testing of the appliance must be conducted according to the manufacturer's instructions. Do not use a flame to check for gas leaks. Use a brush to spread a soapy water mixture around the area you are checking. If there is a gas leak, you will see small bubbles in the soapy water mixture at the leak point.
Electrical and grounding safety

WARNING
To reduce the risk of fire, electric shock, personal injuries, and/or death, observe the following precautions.
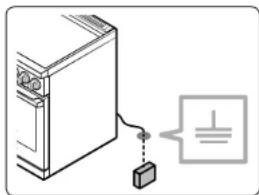
natural_image
Simple line drawing of a server unit connected to a small electronic component (no text or symbols)- Plug into a grounded 3-prong outlet.
- Do not remove the ground prong.
- Do not use an adapter or an extension cord.
- Do not use a damaged power plug, power cord, or loose power outlet.
-
Do not modify the power plug, power cord, or power outlet in any way.
-
Do not put a fuse in a neutral or ground circuit.
- Use a dedicated 120-volt, 60-Hz, 10-amp, AC, fused electrical circuit for this range. A time-delay fuse or circuit breaker is recommended. Do not plug more than one appliance into this circuit.
- Do not connect the ground wire to plastic plumbing lines, gas lines, or hot water pipes.
- This range must be Earth grounded. In the event of a malfunction or breakdown, grounding will reduce the risk of electrical shock by providing a path for the electric current. This range is equipped with a cord having a grounding plug. The plug must be firmly plugged into an outlet that is properly installed and grounded in accordance with the local codes and ordinances. If you are unsure whether your electrical outlet is properly grounded, have it checked by a licensed electrician.
- The range is supplied with a 3-pronged grounded plug. This cord must be plugged into a mating, grounded 3-prong outlet that meets all local codes and ordinances. If codes permit the use of a separate ground wire, we recommend that a qualified electrician determine the proper path for this ground wire.
Important safety information
- Electrical service to the range must conform to local codes. Barring local codes, it should meet the latest ANSI/NFPA No. 70 - Latest Revision (for the U.S.) or the Canadian Electrical Code CSA C22.1 - Latest Revisions.
- It is the personal responsibility of the range owner to provide the correct electrical service for this range.
Installation safety

WARNING
To reduce the risk of fire, electric shock, personal injuries, and/or death, observe the following precautions.

natural_image
Illustration of a notebook, pen, and prohibition symbol (no text or symbols present)- Have your range installed and properly grounded by a qualified installer, in accordance with the installation instructions. Any adjustment and service should be performed only by qualified gas range installers or service technicians.
- Do not attempt to service, modify, or replace your range or any part of your range unless it is specifically recommended in this manual. All other service should be referred to a qualified technician.
• Always use new flexible connectors when installing a gas appliance. Do not use old flexible connectors.
• Make sure the anti-tip device is properly installed on the range. See the installation instructions for more information
• Due to the size and weight of the range, have two or more people move the range. - Remove all tape and packaging materials.
-
Remove all accessories from the cooktop, oven, and/or lower drawer. Grates are heavy. Use caution when handling them.
• Make sure no parts came loose during shipping. Do not install in an area exposed to dripping water or outside weather conditions. -
Make sure your range is correctly installed and adjusted by a qualified service technician or installer for the type of gas (natural or LP) you will use. For your range to utilize LP gas, the installer must replace the 5 surface burner orifices and 2 oven orifices with the provided LP orifice set, and reverse the GPR adapter. These adjustments must be made by a qualified service technician in accordance with the manufacturer's instructions and all codes and requirements of the authority having jurisdiction. The qualified agency performing this work assumes the gas conversion responsibility.
- Installation of this range must conform with local codes or, in the absence of local codes, with the National Fuel Gas Code, ANSI Z223.1/NFPA.54, latest edition. In Canada, installation must conform with the current Natural Gas Installation Code, CAN/CGA B149.1, or the current Propane Installation Code, CAN/CGA B149.2, and with local codes where applicable. This range has been design-certified by ETL according to ANSI Z21.1, latest edition, and Canadian Gas Association according to CAN/CGA-1.1, latest edition.
Location safety

WARNING
To reduce the risk of fire, electric shock, personal injuries, and/or death, observe the following precautions.
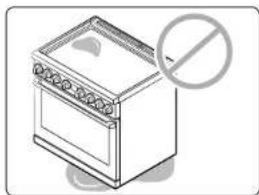
natural_image
Illustration of a kitchen stove with a prohibition symbol (no text or labels)• This range is for indoor, household use only.
Do not install the range in areas exposed to the weather and/or water.
- Do not install the range in a place which is exposed to a strong draft.
- Select a level, well-constructed floor that can support the range's weight. Synthetic flooring, such as linoleum, must withstand 180 °F (82 °C) temperatures without shrinking, warping, or discoloring. Do not install the range directly over interior kitchen carpeting unless a sheet of ¼ inch plywood or a similar insulator is placed between the range and carpeting. Select a location where a grounded, 3-prong outlet is easily accessible.
- If the range is located near a window, do not hang long curtains or paper blinds on that window.
- Do not block or cover the vents (air openings) located at the rear of the range and at the top and bottom of the door. The vents allow for air circulation that is necessary for the range to operate properly with correct combustion. Blocking or covering the vents may cause incorrect combustion which could result in gas leaks and fire.
• Make sure the wall coverings around the range can withstand heat up to 200 °F (93 °C) generated by the range. - Cabinet storage above the surface of the range should be avoided. If cabinet storage above the range is necessary: allow a minimum clearance of 40 inches (102 cm) between the cooking surface and the bottom of the cabinet or install a range hood that projects horizontally a minimum of 5 inches (12.7 cm) beyond the bottom of the cabinets.
- Locate the range out of kitchen traffic paths and drafty locations to prevent poor air circulation.
- If the range is located near a window, NEVER hang long curtains or paper blinds on that window. They could blow over the surface burners and ignite, causing a fire hazard.
Cooktop safety

WARNING
To reduce the risk of fire, electric shock, personal injuries, and/or death, observe the following precautions.
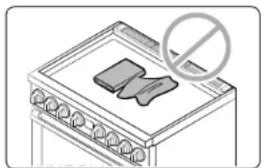
natural_image
Illustration of a kitchen oven with a prohibition symbol (no text or labels)• Make sure all burners are off when you are not using them.
- Do not use aluminium foil to line the grates or any part of the cooktop.
- Do not leave burners unattended on medium or high heat settings.
• Before igniting the burners make sure all burner caps are properly in place and all burners are level.
- Always use the Lite position when igniting the burners and make sure the burners have ignited. If ignition fails, turn the knob to OFF and wait until the gas has dissipated.
- When you set a burner to simmer, do not turn the knob quickly. Make sure the flame stays on.
• Do not place any objects other than cookware on the cooktop.
• This cooktop is designed for use with a wok or wok ring attachment. - To flame food, you must have a ventilation hood. When you flame food, the hood must be on.
- Before removing or changing cookware, turn off the burners.
- Remove food and cookware immediately after cooking.
- Before removing any parts of the burner for cleaning, make sure the range is off and completely cool.
• After cleaning the burner spreader, make sure it is completely dry before reassembling. - Make sure the spark mark on the dual burner spreader is placed beside the electrode when it is assembled.
• To avoid carbon monoxide poisoning, do not pour water into the cooktop well while cleaning.
Important safety information
- Select cookware that is designed for top-range cooking. Use cookware that is large enough to cover the burner grates. Adjust the burner flames so that the flames do not extend beyond the bottom of the cookware.
- To avoid cookware discoloration, deformity, and/or carbon monoxide poisoning, do not use cookware that is substantially larger than the grate.
• Make sure cookware handles are turned to the side or rear of the cooktop, but not over other surface burners. - Stand away from the range while frying.
- Always heat frying oils slowly, and watch as they heat. If you are frying foods at high heat, carefully watch during the cooking process. If a combination of fats or oils is to be used during frying, mix them together before heating.
- Use a deep fryer thermometer whenever possible. This prevents overheating the fryer beyond the smoking point.
- Use a minimum amount of oil when shallow pan-frying or deep-frying. Avoid cooking unthawed food or food with excessive amounts of ice.
- Before moving cookware full of fats or oils, make sure it has completely cooled.
- To prevent delayed eruptive boiling, always allow heated liquids to stand at least 20 seconds after you have turned off the burner so that the temperature in the liquid can stabilize. In the event of scalding, follow these first aid instructions:
a. Immerse the scalded area in cool or lukewarm water for at least 10 minutes.
b. Do not apply any creams, oils, or lotions.
c. Cover with a clean, dry cloth.
natural_image
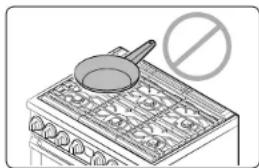
Illustration of a frying pan on an induction cooktop with a prohibition symbol (no text or labels)- Place pots in the center of the grate. Do not place a pot larger than 9" in diameter on the left rear burner. If you place an oversized pot in the wrong position, it might disrupt necessary air circulation and make the flame on the burner sputter and burn inefficiently.
- To warm liquids such as sauces, stir them while warming.
- Do not wear loose or hanging garments when using the range. They could ignite and burn you if they touch a surface burner.
- Do not leave plastic items on top of the range. Hot air from the vents on top of the range can melt the plastic and may cause pressure build-up in closed plastic containers. The melted plastic may clog the vents at the rear of the range. Clogged vents may cause incorrect combustion which could result in gas leaks and fire. And you may get severe burns if you touch the surfaces near the vent while the oven is operating.
- Do not place portable appliances, or any other object other than cookware on the cooktop. Damage or fire could occur if the cooktop is hot.
- Always make sure foods being fried are thawed and dried. Moisture of any kind can cause hot fat to bubble up and over the sides of the pan.
• Always make sure the controls are OFF and the grates are cool before you remove them to prevent any possibility of burning.
• Do not put any combustible material or items around the range.
Take care that your hands do not touch the burners when they are on. Turn off the burners when you change a pan or pot.
Oven safety

WARNING
To reduce the risk of fire, electric shock, personal injuries, and/or death, observe the following precautions.
natural_image
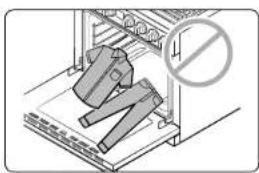
Illustration of a mechanical device with a prohibition symbol overlay (no text or symbols on the diagram itself)- Do not use the oven for non-cooking purposes such as drying clothes or storage. Use the oven for cooking only.
- Make sure the inner portion of the split oven-rack is in the proper position within the outer rack.
- Make sure the oven racks are placed on the same level on each side.
- Do not damage, move, or clean the door gasket.
- Do not spray water on the oven glass while the oven is on or just after you have turned it off.
- Do not use aluminium foil or foil liners anywhere in the oven. Do not use aluminium foil or like material to cover any holes or passages in the oven bottom or to cover an oven rack.
- Stand away from the oven when opening the oven door.
- Keep the oven free from grease buildup.
- When repositioning the oven racks, make sure the oven is completely cool.
- Only use cookware that is recommended for use in gas ovens.
- To avoid damaging the burner control knobs, always bake and/or broil with the oven door closed.
- Do not broil meat too close to the burner flame(or heater). Trim excess fat from meat before cooking.
- when using cooking or roasting bags in the oven, follow the manufacturer's directions.
- Do not touch any surfaces of the range during oven cooking.
Self-cleaning oven safety

WARNING
To reduce the risk of fire, electric shock, personal injuries, and/or death, observe the following precautions.

natural_image
Illustration of a hand opening a kitchen oven with steam rising from the side (no text or symbols)- The self-cleaning feature operates the oven at temperatures high enough to burn away food soils in the oven. The range is extremely hot during a self-cleaning cycle. Do not touch any surfaces of the range during a self-cleaning cycle.
-
Keep children away from the oven during a self-cleaning cycle.
-
Before starting a self-cleaning cycle, remove all racks, cookware, and utensils from the oven. Only porcelain-coated oven racks may be left in the oven.
- Before starting a self-cleaning cycle, wipe grease and food soils from the oven.
- When opening the door after a self-cleaning cycle, stand away from the oven.
- If the self cleaning cycle malfunctions, turn off the oven, disconnect the power supply, and contact a qualified service technician.
Overview
Layout
text_image
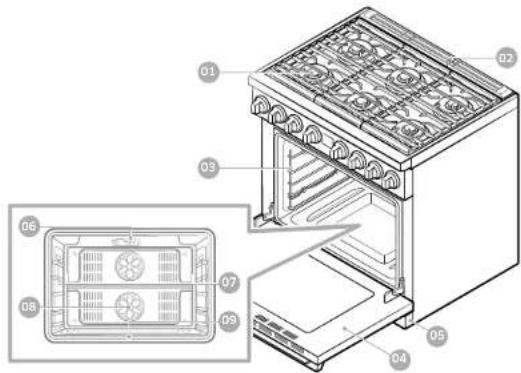
Technical diagram of an oven with numbered components and a close-up view of the internal structure.01 Surface burners
02 Oven vent cover
03 Ladder racks
04 Removable oven door
05 Kick panel 06 Broil oven burner
07 * Oven lights (2 locations)
08 Convection fan 09 Bake oven burner
What's included
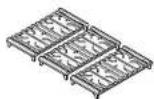
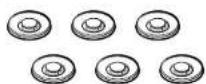
* Surface burner grates (3) Burner heads (6) and Burner caps(6)
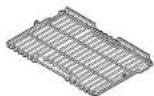
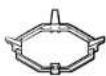
* Flat rack (1) * Wok ring (1)
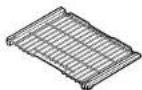
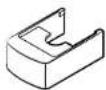
* Gliding rack (2) ^ Front leg covers (2)

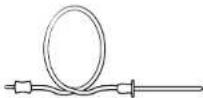
* Anti tip bracket (1) * Temperature probe (1)
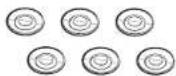

Brass burner caps (6) Convection filter (2)

If you need an accessory marked with a *, you can buy it from the Dacor Contact Center (833-35-ELITE (833-353-5483)).
14 English
Control panels and displays
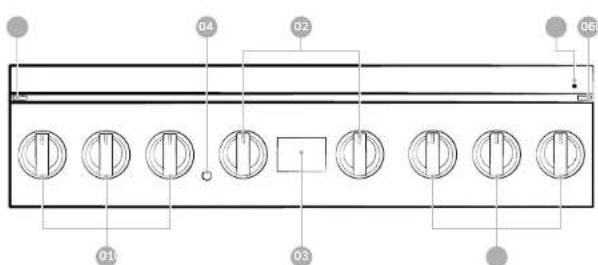
text_image
01 02 03 04 0601 Surface burner knobs (6 pcs)
02 Oven burner knobs (mode, temperature) (2 pcs)
03 Oven control panel
04 Oven light button
05 iQ Control LED
06 iQ Control button (beneath bullnose)
07 LED Ambient Lighting button (beneath bullnose)
Oven control panel
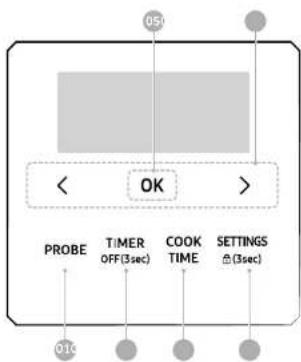
flowchart
graph TD
    A["05t"] --> B["<"]
    B --> C["OK"]
    C --> D[">"]
    D --> E["PROBE"]
    D --> F["TIMER OFF(3sec)"]
    D --> G["COOK TIME"]
    D --> H["SETTINGS △(3sec)"]
    E --> I["010"]
01 Probe: Activate the temperature probe mode.
02 Timer: Activate or deactivate the timer.
03 Cook Time: Set the cooking time.
04 Settings: Display the user options available.
05 OK: Start a function or set the time.
06 <,>: Select a function or set time.
Before you startOverview
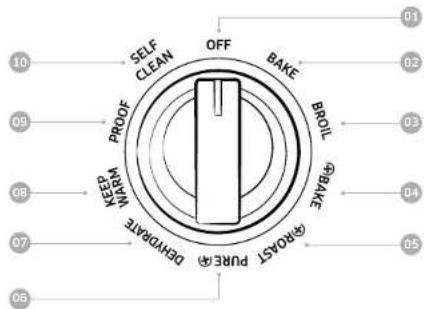
Mode selector knob
text_image
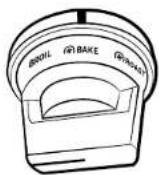
SELF CLEAN PROOF KEEP MARM DEHIDATE PAPRANT PURE PABE BROIL BAKE OFF 10 09 08 07 06 05 04 03 02 01The Modes are printed on the knob itself. To select a mode, turn the knob so that the mode you want is aligned with the line on the knob frame.
01 OFF: Cancel the current operation.
02 Bake. Bake food evenly using the oven burner.
03 Broil: Broil food using the upper oven burner.
04 Convection Bake: Activates convection baking for large amounts of food on multiple racks.
05 Convection Roast: Activates convection roasting for large cuts of meat.
06 Pure Convection ☑ Activates pure convection baking for an even distribution of heat and faster cooking time.
07 Dehydrate: Activates the Dehydrate function.
08 Keep Warm: Keep cooked food warm at a lower temperature of 175 °F (80 °C).
09 Proof: Activates the proof function.
10 Self Clean: Burn off food residues at very high temperatures.
Important: To set the oven temperature in most modes, you must turn the separate temperature selector knob to the temperature you want.
NOTE
The temperature selector knob turns freely. It is not necessary to push the knob in to turn it.
16 English
Before you start
You should know about the following features and components before you use your range for the first time.
Display mode
Sleep
After 2 minutes of inactivity (or 1 minute when the oven is in standby mode), the control panel enters Sleep mode. In Sleep mode, the control panel stays inactive until it is reactivated by the user.
Wake-Up
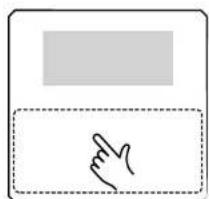
text_image
Icon showing a pointing hand inside a dashed rectangular box, with a gray rectangle above it.• To activate the control panel, touch the lower area of the screen to wake it up. User preferences are available in this mode including the timer and/or Child Lock.
Clock
It is important to set the clock correctly to ensure automatic features work properly. This product supports two time formats: 12-hour and 24-hour.
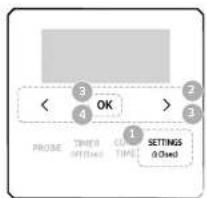
To set the clock time
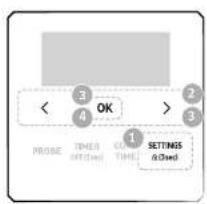
text_image
< .3 OK > 2 4 3 1 SETTINGS PRASE TIMES COST TIME &Used- Press the Settings button.
- Press <, > to select Set Time.
- Tap OK. Press <, > to set the current time and tap OK. Display the AM/PM option, and then choose by pressing <, >.
- Tap OK to confirm the settings.
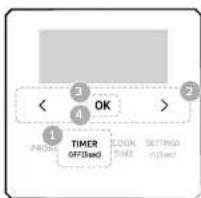
To change the time format
text_image
< 3 OK > 2 PROSE TIMER COST SETTINGS OFF/Used TIME Closed- Press the Settings button.
- Press <, > to select Time Format.
- Tap OK and then press <, > to select 24 hr / 12 hr format.
- Tap OK.
Kitchen timer
The kitchen timer gives you an extra timer you can use to time cooking tasks such as boiling eggs.
It does not, however, start or stop any cooking operation. You can set the timer from 1 minute to 9 hours and 59 minutes.
flowchart
graph TD
    A["Start"] --> B{OK}
    B -->|Yes| C["Return"]
    B -->|No| D["End"]
- Press the Timer button.
- Press <, > to set the timer.
- When done, tap OK. To cancel the Timer settings, press the Timer button again for 3 seconds.
- When the set time elapses, the oven beeps and displays the "Time is up" message. Tap the OK button to delete the message.

NOTE
You can set/change the clock or the kitchen timer before you start a cooking mode or while most cooking modes are operating. However, you cannot set or change the time if a time based function is operating (Time Bake, for example) or the Sabbath option is enabled.
Before you start
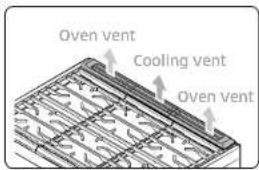
Oven vent/Cooling vent
text_image
Oven vent Cooling vent Oven ventBoth the oven vent and the cooling vent are located at the back of the oven range. Proper air circulation prevents combustion problems and ensures good performance.
- Do not block the vent or its
surroundings with objects. - Use caution when placing items near the vent. Hot steam can cause them to overheat or melt.
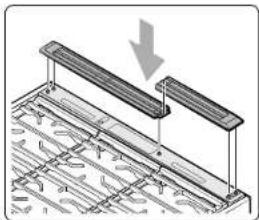
- Make sure that the oven vent coversits securely on the cooktop. You can verify that the oven vent cover is in the correct position by confirming that the tabs on the bottom side of the oven vent cover fit into the corresponding slots on the cooktop.
natural_image
Technical diagram of a structural assembly with two parallel plates and a downward arrow indicating force or direction (no text or symbols)Gas range
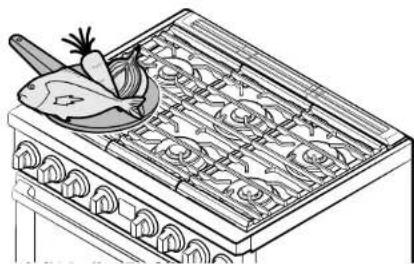
Step 1 Put all ingredients into a cooking container (pan, pot, etc.).

Step 2 Place the container on a surface burner.
natural_image
Line drawing of a kitchen stove with a plate, carrot, and dish (no text or symbols)Step 3 Ignite the surface burner.
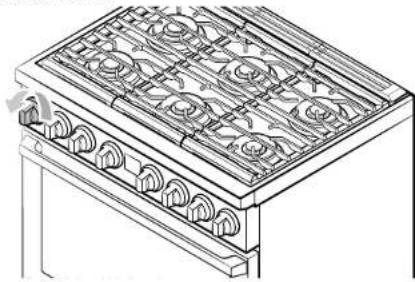
natural_image
Line drawing of a multi-tiered kitchen appliance with heat sinks and fan-shaped ventilation grilles (no text or symbols)Cookware
Requirements
- Flat bottom and straight sides
- Tight fitting lid
- Well-balanced with the handle weighing less than the main portion of the pot or pan.
Material characteristics
- Aluminum: An excellent heat conductor. Some types of food may cause the aluminum to darken. However, anodized aluminum cookware resists staining and pitting.
- Copper: An excellent heat conductor but discolors easily.
- Stainless steel: A slow heat conductor with uneven cooking performance but is durable, easy to clean, and resists staining.
- Cast-Iron: A poor conductor but retains heat very well.
- Enamelware: Heating characteristics depend on the base material.
- Glass: A slow heat conductor. Use only glass cookware that is specified for range top cooking or oven use.
Wok ring
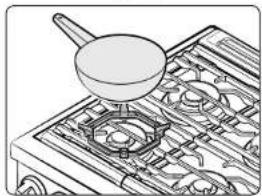
Woks are often used for stir frying, pan frying, deep frying, and poaching. The provided Wok ring supports 12" to 14" woks.
natural_image
Illustration of a cooking pan on a stove burner (no text or symbols)- Turn off all burners, and wait until the grates completely cool down.
- Place the Wok ring on either side grate.
- Put a wok on the Wok ring. Make sure the wok settles securely on the wok ring.
- Turn on the burner, and adjust the flame level as appropriate.
text_image
Technical diagram showing a hand using a tool to press or install a component, with a circular symbol labeled '×411' and '×47'CAUTION
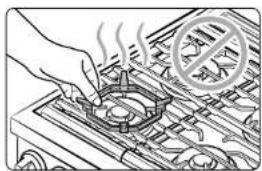
- Do not remove the Wok ring until the cooktop grates, surfaces, and Wok ring completely cool down.
- When using the cooktop or oven, the Wok ring on the cooktop may become very hot. Use oven gloves when placing or removing the Wok ring.
- Do not use cookware with a flat bottom or with a diameter less than the wok ring diameter. The cookware may tip over.
- Do not use an oversized wok. The burner flames may spread out, causing damage nearby.
- Use only the supplied Wok ring. This cooktop is not compatible with other manufacturers' wok rings or Wok rings.
- This cooktop is not designed to flame food.
Gas range
Gas burners
text_image
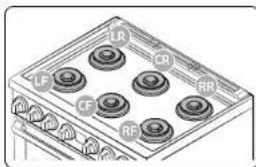
LF CF RF CR RREach burner has a corresponding knob that enables you to set the flame level from LO to HI. In addition, each burner has a Lite setting. Turning a knob to Lite ignifies the corresponding burner. The burner indicators are located above the corresponding knob and show which burner the knob controls. Each burner is designed for specific cooking purposes.
| Position Purpose Food type Characteristics | |||
| Right Front (RF)22,000 BTU | Power heating/Low simmering | Boiling food.tomato sauce | Maximum output |
| Right Rear (RR)16,000 BTU | Quick heating/Low simmering | General/Chocolate,casseroles, sauces | Delicate food thatrequires low heatfor a long time |
| Center Front (CF)16,000 BTU | Quick heating General | General-purpose cooking | |
| Center Rear (CR)16,000 BTU | Quick heating General | General-purpose cooking | |
| Left Front (LF)22,000 BTU | Power heating/Low simmering | Boiling food.tomato sauce | Maximum output |
| Left Rear (LR)16,000 BTU | Quick heating/Low simmering | General/Chocolate,casseroles, sauces | Delicate food thatrequires low heatfor a long time |
Ignition
text_image
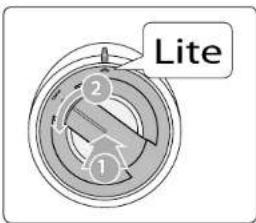
Lite ① ②Make sure all surface burners are properly installed.
- Push in and turn the control knob to the Lite position. You will hear a "clicking" sound indicating the electronic ignition system is working properly.
- After the surface burner lights, turn the control knob to shift it out of the Lite position and turn off the electronic ignition system.
- Turn the control knob to adjust the flame level.
Manual ignition
You can ignite the burner manually in case of a power failure. Use caution when doing this.
- Hold a long gas grill lighter to the surface burner you want to light.
- Push in and turn the control knob for that burner to the Lite position. Turn on the grill lighter to ignite the burner.
- After the burner is lit, turn the control knob to adjust the flame level.
Flame level
The flames on the burners should always stay under the cookware, and should not extend beyond the cookware bottom at any time.

WARNING
• Flames larger than the cookware bottom may result in a fire or physical injury.
- When you set a burner to simmer, do not turn the burner knob quickly. Watch the flame to make sure it stays on.
• After turning on a surface burner, check to make sure that the burner has ignited. Adjust the level of the flame by turning the burner knob.
- Always turn off the surface burner controls before removing cookware. All surface burner controls should be turned OFF when you are not cooking.
• Always turn the burners off before you go to sleep or go out.
- If you smell gas, turn off the gas to the range and call a qualified service technician. NEVER use an open flame to locate a leak.
Gas oven
Step 1 Put all ingredients in a heat-safe container.
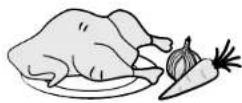
Step 2 Select a cooking mode and temperature, and then start preheating.
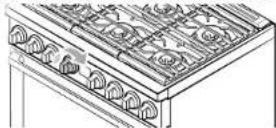
Step 3 Place the container on a rack.
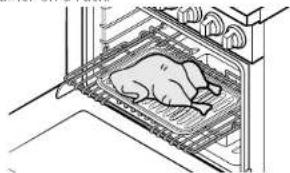
natural_image
Line drawing of a chicken inside an oven with cooling fans (no text or symbols)Step 4 Close the door and start cooking.
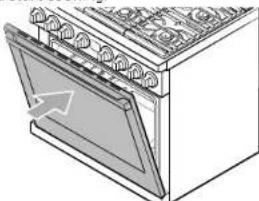
natural_image
Line drawing of a kitchen oven with a door and top panel (no text or symbols)Gas oven
Cooking modes
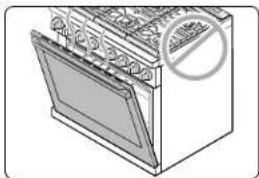
natural_image
Line drawing of a kitchen oven with a door and fan (no text or symbols)- Make sure to close the door before you start cooking.
- If you leave the door open for 30 seconds while the oven is in the convection baking/roasting, baking, or broiling modes, the oven burner shuts off. To restart the burner, close the door.
Limitations
| Feature Temperature or Time Range | |
| Bake LO - 550 °F (285 °C) | |
| Broil LO - MED - HI | |
| Convection Bake | LO - 550 °F (285 °C) |
| Convection Roast | LO - 550 °F (285 °C) |
| Pure Convection | LO - 550 °F (285 °C) |
| Dehydrate 150 °F (65 °C) | |
| Keep Warm 175 °F (80 °C), 3 hours | |
| Proof 95 °F (35 °C) | |
| Self Clean 2-5 hours | |
Baking
Bake is used to cook cakes, cookies, and casseroles. Always preheat the oven first. Baking temperatures and times will vary depending on the ingredients and the size and shape of the baking pan used. Dark or nonstick coatings may cook faster with more browning.
How to set the oven for baking
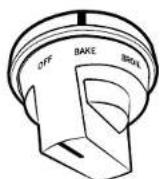
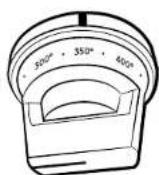
- Rotate the mode selector knob from OFF to the Bake position, and then turn the temperature selector knob from OFF to set the baking temperature. You can set the temperature from LO to 550°F (285°C).
- Let the oven preheat. The temperature display will start to change once the oven temperature reaches 150°F.
- When preheating is complete, place the food on the desired rack. Close the oven door.
- When baking is complete, turn both knobs to the OFF position.
NOTE
- Place food in the oven after preheating if the recipe calls for it.
- Preheating is very important for good results when baking cakes, cookies, pastry, and breads. After the oven has reached the desired temperature, the oven will beep 3 times.
- If you are using an oven thermometer in the oven cavity, the temperature registered by the thermometer may differ from the actual set oven temperature.
22 English
Convection cooking
The convection fan at the back of the gas oven circulates hot air evenly throughout the oven cavity so that food is evenly cooked and browned in less time than with regular heat.
| Convection baking | · Ideal for foods being cooked using multiple racks.· Good for large quantities of food.· Provides the best performance for cookies, biscuits, brownies, cupcakes, cream puffs, sweet rolls, angel food cake, and bread.· Cookies bake best when cooked on flat cookie sheets.· When convection baking using a single rack, place the rack in rack position 3.· When convection baking on two racks, place the racks in positions 2 and 4 for cake and cookies.· When convection baking on three racks, place the racks in positions 1, 3 and 5 for cookies. For the best results, we recommend you use commercial half-sheets or a 16" cookie sheet.· The oven automatically adjusts the temperature for convection baking. |
| Convection roasting | · Good for larger, tender cuts of meat, uncovered.· For best performance, place a broiler pan and grid under the meat or poultry. The pan catches grease spills and the grid prevents grease spatters.· Heated air circulates over, under, and around the food. Meat and poultry are browned on all sides as if they were cooked on a rotisserie. |
| Pure convection | Pure convection uses powerful dual fans to circulate the oven's heat for an even distribution of the heat and faster cooking timeIdeal for foods being cooked using single rack.Provides the best performance for cookies, biscuits, cupcakes, etc.When Pure convection baking using a single rack, place the rack in rack position 3.When Pure convection baking using multiple racks, place the racks in rack positions 2 and 4. |
Gas oven
How to set the oven for convection cooking
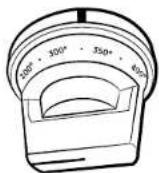
- Rotate the mode selector knob from OFF to Convection Bake, Convection Roast, or Pure Convection and then turn the temperature selector knob from OFF to set the temperature. You can set the temperature from LO to 550 °F (285 °C).
- Let the oven preheat. The temperature display will start to change once the oven temperature reaches 150°F.
- When preheating is complete, place the food on the desired rack. Close the oven door.
- When cooking is complete, turn both knobs to the OFF position.

NOTE
- The convection oven fan shuts off when the oven door is opened.
- Do not leave the door open for long periods of time while using convection cooking or you may shorten the life of the convection heating element.
- When you have finished cooking, the cooling fan will continue to run until the oven has cooled down.
- For performance reasons, the convection fan may turn on or off during baking.
- If you are using an oven thermometer in the oven cavity, the temperature registered by the thermometer may differ from the actual set oven temperature.
- The oven can hold a full-sized commercial baking sheet (18" x 26"). When using commercial size baking utensils, use only one.
Racks
Position
The gas oven range comes with 3 oven racks and 2 ladder racks (one on each side). The ladder racks serve as rack guides and support the oven racks in 5 different oven rack positions. Each rack guide has a stop that prevents you from accidentally pulling an oven rack out completely.
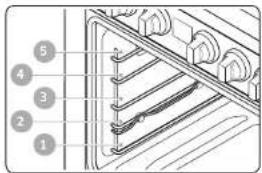
text_image
1 2 3 4 5| Rack Position | Food type |
| 5 Hamburgers, Steak, Toasts | |
| 4 Fish, Chicken pieces, Steak | |
| 3 Cakes, Muffins, Brownies, Cookies, Pound cake | |
| 2 Angel food cake, pies, Most roasts, Fresh pizza | |
| 1 Turkey, Large roast | |

CAUTION
- Do not cover an oven rack with aluminum foil. This will disturb the heat circulation, resulting in poor baking.
- Do not place aluminum foil on the oven bottom. The aluminum can melt and damage the oven.
- Arrange the oven racks only when the oven is cool.
- When placing an oven rack in the topmost rack position (position 5) on the ladder racks, make sure the oven rack is situated stably on the embossed stop.
24 English
Multi-rack Baking
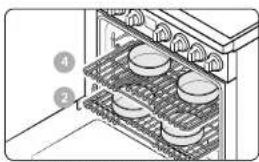
natural_image
Diagram of an oven with numbered compartments (no text or symbols)Cakes pans position
- When baking cakes on two racks, place the racks in positions 2 and 4 for the best performance.
- When baking cookies on two racks, place the oven racks in positions 2 and 4.
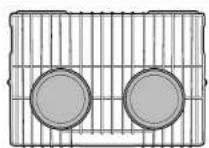
- For 4 baking pans on two racks: Place two pans in the rear of the upper rack and the other two in the front of the lower rack.
- When baking multiple items on one rack, maintain a 1" to 1.5" (2.5 cm to 3.8 cm) space between items.
- When using the gliding rack, place it below the flat rack.
- When baking multiple items on one rack, maintain a 1" to 1.5" (2.5 cm to 3.8 cm) space between items.
- When using the gliding rack, place it below the flat rack.
Baking Items Rack Position
Cakes and Cookies 2 and 4
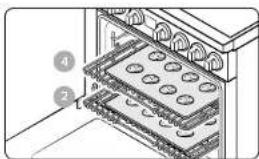
text_image
Technical diagram showing a rack with labeled components, including numbered parts 1 and 4.Cookie sheets position
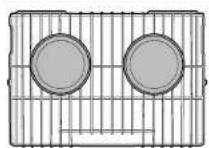
Rack 4 Rack 2
Inserting and removing an oven rack
To insert an oven rack
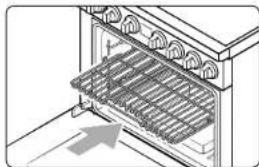
natural_image
Illustration of an oven with a rack inside, showing internal components and a directional arrow (no text or symbols)To remove an oven rack
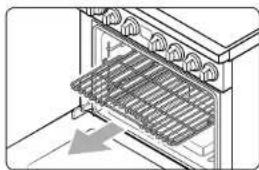
natural_image
Illustration of an oven with a rack and ventilation grilles (no text or symbols)- Place the rear end of the rack on a rack guide.
-
Slide the rack into the rack guide while holding the front end of the rack.
-
Pull out the rack until it stops.
- Pull up the front end of the rack and remove it from the rack guide.
Gas oven
Broiling
Broiling uses the oven broil burner at the top of the oven to cook and brown food. Meat or fish must be put on a broiling grid in a broiling pan. Preheating for 5 minutes before broiling is recommended.
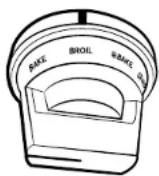
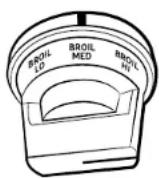
- Put food on a broiling grid in a broiling pan.
- Rotate the mode selector knob from OFF to the Broil position, and then turn the temperature selector knob from OFF to HI, MED, or LO to set the broiling temperature.
- Let the oven pre-heat for 5 minutes, and then place the pan with the food on the desired rack. Close the oven door.
- When one side of the food is browned, turn it over and start cooking the other side.
- When broiling on both sides is complete, turn both knobs to the OFF position.

NOTE
- Use the Broil LO for poultry or thick cuts of meat to prevent overbroiling.
- Use caution when you open the oven door to turn over the food. The air escaping from the oven will be very hot.
- This oven is designed for closed door broiling. While broiling, keep the door closed. Only open the door to put food in, turn food over, or take food out.
Recipe guide
Broiling guide
NOTE
• This is for reference only.
• Preheating for 5 minutes before broiling is recommended.
- The size, weight, thickness, starting temperature, and your doneness preference will affect broiling times.
• This guide is based on meat at refrigerator temperature.
- If you cover meat with aluminum foil and you let it stand covered for 10 minutes after cooking is complete, the internal temperature increases by 5 - 10^ degrees.
| Food Doneness Size | Thickness (inch) | Broil | Rack Position | Cooking Time (min.) | |||
| 1st 2nd | |||||||
| Hamburgers | Medium 9 | pattles 1 H | 5 | 5:00-5:30 | 4:00-4:30 | ||
| Beef steak | Rare 1 lb. | 1 Hi 5 | 4:00-5:00 | 3:00-4:00 | |||
| Medium 1 | lb. 1 Hi 5 | 5:00-7:00 | 4:00-6:00 | ||||
| Well done 1 | lb. 1 Med | 4 | 7:00-9:00 | 5:00-7:00 | |||
| Pork steak | Well done | 1-2 pcs 1⁄2-1 | Lo | 4 | 12:00-13:00 | 12:00-14:00 | |
| Chicken pieces | Well done | 1.5 lbs. | 1⁄2-1 | Lo | 4 | 9:00-10:00 | 8:00-10:00 |
| Well done | 3 lbs. | 1⁄2-1 | Lo | 3 | 19:00-21:00 | 11:00-13:00 | |
| Chicken breasts | Well done | 3-5 pcs 1⁄2-1 | Med | 4 | 8:00-10:00 | 8:00-10:00 | |
| Salmon steaks | Well done | 3-5 pcs 1⁄2-1 | Med | 4 | 5:00-7:00 | 5:00-7:00 | |
| Fish fillets | Well done | 3-5 pcs | 1⁄4-1⁄2 | Med | 4 | 5:00-7:00 | 3:00-5:00 |
| Cold fillets | Well done | 3-5 pcs | 1 | Med | 4 | 6:00-8:00 | 5:00-7:00 |

CAUTION
Make sure to close the door after turning over the food.
26 English
Special features
Dehydrate
Dehydrate dries food or removes moisture from food via heat circulation. After drying the food, keep it in a cool and dry place. For fruit, adding lemon (or pineapple) juice or sprinkling sugar on the fruit helps the fruit retain sweetness.
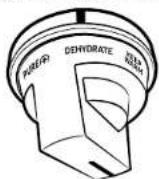
- Place the container with the food on a rack, and then close the door.
- Set the temperature selector knob to the OFF position.
- Turn the mode selector knob from OFF to the Dehydrate position.
- The oven heats up to 150 °F (65 °C).

NOTE
You can cancel Dehydrate at any time by setting the mode selector knob to the OFF position.
Proof
Proof mode provides an optimal temperature for the bread proofing process, and therefore does not require a temperature adjustment. For the best results, always start the Proof option with a cool oven.
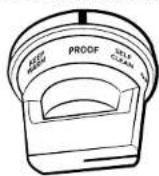
- Place the container with the dough on a rack, and then close the door.
- Set the temperature selector knob to the OFF position.
- Turn the mode selector knob from OFF to the Proof position.
- The oven heats up to 95°F.

NOTE
You can cancel Proof at any time by setting the mode selector knob to the OFF position.
CAUTION
- Do not use Proof when the oven temperature is above 95 °F. If the temperature is above 95 °F, Proof will not function. Instead, a warning beep will sound 3 times and "The oven is too hot for proofing" message appears on the display. Wait until the oven cools down.
- Do not use Proof for warming food. The proofing temperature is not hot enough to keep food warm.
- Place the dough in a heat-safe container on rack position 2 or 3 and cover it with a cloth or with plastic wrap. The plastic wrap may need to be anchored underneath the container so that the oven does not blow it off the dough.
- To avoid lowering the temperature and extending proofing time, do not open the oven door.
Gas oven
Keep Warm
Keeps cooked food warm at a low temperature up to 3 hours.
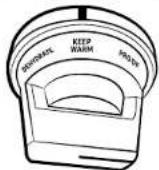
- Place the container with the food on a rack, and then close the door.
- Set the temperature selector knob to the OFF position.
- Turn the mode selector knob from OFF to the Keep Warm position.
- The oven heats up to 175 °F (80 °C).

NOTE
You can cancel Keep Warm at any time by setting the mode selector knob to the OFF position.
Other features
Temperature probe
The temperature probe lets you cook roasts and poultry to the exact internal temperature you want, taking the guess work out of determining whether a piece of meat is done or not.
You can use the temperature probe with the oven set to Bake, Convection Bake, Pure Convection For Convection Roast. When you use the temperature probe, the internal temperature is shown on the display when it reaches 100 °F.
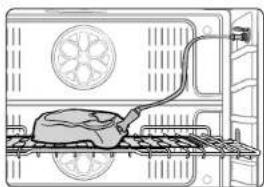
natural_image
Line drawing of a kitchen appliance with a kettle and stove (no text or symbols)-
Push the temperature probe into the meat so that the tip of the probe reaches the center of the meat.
-
When you insert the temperature probe, make sure it does not contact bone, fat, or gristle.
- For bone-in meats, insert the probe into the center of the lowest and thickest portion of the piece.
- For whole poultry (turkey, large chickens, etc.), insert the probe into the thickest part of the inner thigh, parallel to the leg.
- If you activate Keep Warm after cooking is complete using the temperature probe, the meat's internal temperature will exceed your initial settings.
- If you remove the temperature probe while cooking is in process, the oven shuts off in 60 seconds.
- The temperature probe may not function properly if inserted into frozen food. (The temperature probe icon will not appear.)
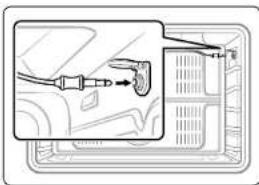
natural_image
Diagram showing a car interior with connected cables and a plug, no text or symbols present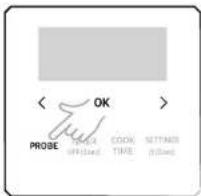
text_image
< OK > PROBE TIME OFF ON OFF COOK TIME NETTAKES OFF ON OFF ON OFF COOK TIME NETTAKES OFF ON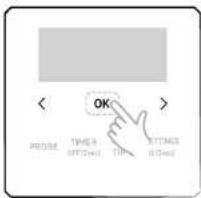
text_image
< OK > PROISE TIMER OFF=0.01 TIME KITCHES 0.01=0.0-
Insert the temperature probe plug into the socket on the right side wall of the oven.
-
Turn the mode selector knob from OFF to Bake, Pure Convection ④, Convection Bake or ⑤ Convection Roast. Rotate the temperature selector knob from the OFF position to set the temperature. You can set the oven to any temperature from LO to 550 °F.
-
Press the Probe button, and then tap the Probe button, to set the internal temperature between 100 °F to 200 °F by pressing <, >, and tap OK.
-
Tap the OK button. When the food reaches the set internal temperature, the oven automatically shuts off, and then beeps.
Temperature table
| Type of food Internal temperature (°F) | |
| Beef/Lamb | Rare 140-150 |
| Medium 160-170 | |
| Well done 175-185 | |
| Pork 175-185 | |
| Poultry 185-195 | |
CAUTION
- To protect the temperature probe, be careful not to insert the probe so that it comes out of the meat. Make sure that the probe is inserted around the center of the meat.
- Do not store the probe in the oven.
- Do not leave the probe inside the oven during the Self-Cleaning or Broiling cycle. This will cause permanent damage to the probe.
- To avoid damage to the probe, defrost food in advance.
- Do not use tongs when inserting or removing the probe. Tongs can damage the probe.
- Use the temperature probe only for the applicable cooking operations.
NOTE
If you have covered meat with aluminum foil and leave it for 10 minutes after cooking is complete, the internal temperature increases by 5-10 °F degrees.

NOTE
The Temperature probe operation will shut off automatically when the temperature reaches the temperature you set.
Gas oven
Self-cleaning
This self-cleaning oven uses high temperatures (well above cooking temperatures) to burn off leftover grease and residue completely or to reduce them to a finely powdered ash that you can wipe away with a damp cloth.
CAUTION
- Do not leave small children unattended near the gas oven during the self-cleaning cycle. The outside surfaces of the gas oven can get extremely hot.
- Some birds are extremely sensitive to fumes from a self-cleaning gas oven. Relocate birds to a well-ventilated room away from the gas oven.
- Do not line the oven, oven racks, or oven bottom with aluminum foil. Doing so will result in poor heat distribution, produce poor baking results, and cause permanent damage to the oven interior. The aluminum foil will melt onto and adhere to the interior oven surfaces.
- Do not force the oven door open during the self-cleaning cycle. This will damage the automatic door-locking system. The door automatically locks when the self-cleaning cycle is started and stays locked until the cycle is completed or cancelled and the oven temperature is below 400 °F.
- Use caution when opening the oven door after the self-cleaning cycle. The gas oven will still be VERY HOT and hot air and steam might escape when the door is open.
- Wipe off any excess spillage before using the self-cleaning operation.
- Do not use oven cleaners. Commercial oven cleaners or oven liners should NEVER be used in or around any part of the oven. Residue from oven cleaners will damage the inside of the oven during a self-cleaning operation.
- Both knobs must be in the OFF position initially before you set the mode selector knob to the Clean position.
To perform the self-cleaning cycle
Make sure the door lock is released. Remove all racks (Flat rack, Gliding rack, Ladder rack) from the oven cavity.
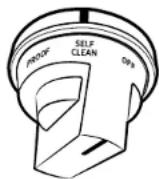
Mode Selector Knob
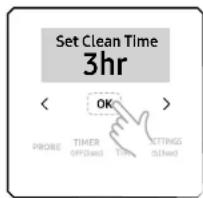
text_image
Set Clean Time 3hr < OK > PROBE TIMER OP(Used) TIME SETTINGS (SUsed)Set Clean Time
- Make sure the oven door is unlocked and closed completely.
- Turn the mode and temperature selector knobs to the OFF position. Then, turn the mode selector knob from OFF to the Self Clean position.
- Set the self cleaning time. 3hr is the default. Press <, > to select another time set. Press OK to start Self Cleaning.
- The oven door is locked and the oven begins to heat up. When the cycle is complete, an alert beep sounds. The door will remain locked until the oven temperature falls below 400 °F (205 °C).
- When the Self-Cleaning cycle is complete, turn the mode selector knob to the OFF position.
CAUTION
Do not use the surface burners while the gas oven is performing a self-cleaning cycle. If you attempt to start a self-cleaning cycle while using the surface burners, a message appears warning you to turn off the surface burners. If you attempt to use the surface burners during a self-cleaning cycle, a message appears warning you to turn off the burners. Also, the temperature knob light blinks orange for 10 seconds. If you do not turn off the burners within 10 seconds, the self-cleaning cycle is cancelled.
30 English
To cancel the self-cleaning cycle
You may find it necessary to stop or interrupt a self-cleaning cycle due to smoke in the oven. To turn off the self-cleaning cycle, turn both the mode and temperature selector knobs to the OFF position. The cycle turns off, but the door remains locked until the oven temperature falls below 400 °F (205 °C).
After self-cleaning
- The door stays locked until the internal oven temperature falls below 400 °F.
- When the oven has cooled down, wipe the oven surfaces with a cloth to remove ash residue.
- Stubborn stains can be removed using a steel-wool pad. Lime deposits can be removed using a vinegar-soaking cloth.
- If you are not satisfied with the cleaning results, repeat the self-cleaning cycle.
- The oven will not let you repeat a self cleaning cycle immediately. You must wait 2 hours before running self-cleaning again.
CAUTION
Do not attempt to open the oven door immediately after the self-cleaning cycle is complete. The oven is still very hot when the door unlocks. Escaping hot air and/or steam could burn you.
Using Sabbath feature

(For use on the Jewish Sabbath and Holidays)
Use this option only for baking on the Jewish Sabbath and Holidays. For more information, visit the website at http://www.star-k.org
With the Sabbath feature
- The oven temperature can be set higher or lower after you have set this option.
- The display doesn't change and no beep sounds when you change the temperature.
- Once the oven is properly set for baking with the Sabbath option active, the oven will remain on continuously until the Sabbath feature is cancelled. This will override the factory preset 12 hour energy saving feature.
- If the oven light is needed during the Sabbath, press Oven light before activating the Sabbath feature. Once the oven light is turned on and the Sabbath option is active, the oven light will remain on until the Sabbath option is turned off.
- If you want the oven light off, be sure to turn it off before activating the Sabbath feature.
- Do not use the surface cooktop when the Sabbath option is on.
Gas oven
How to set the Sabbath feature
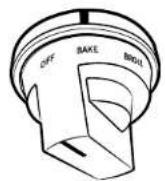
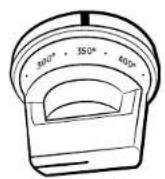
- Turn the mode selector knob from OFF to Bake.
- Rotate the temperature selector knob from the OFF position to set the temperature. You can set the oven to any temperature from LO to 550 °F.
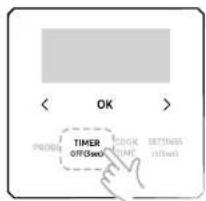
text_image
< OK > PROB OFF/Sec TIMER OFF/Sec Clock TIME SETTINGS n/Sec- Press the Timer and Oven light button simultaneously for 3 seconds to display "OK". Once "OK" appears, the oven control no longer beeps or displays any further changes.
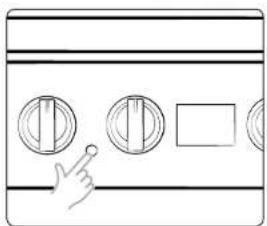
natural_image
Simple line drawing of a door with three circular buttons and a square, no text or symbols present32 English

NOTE
- You can change the oven temperature once baking starts, but the display will not change or beep. After changing the temperature, it takes 15 seconds before the oven recognizes the change.
- You can turn off the oven at any time by turning the mode and temperature selector knobs to the OFF position. However, this doesn't deactivate the Sabbath option.
• To deactivate the Sabbath option, press and hold "OK" for 3 seconds. - You can set the cooking time before activating the Sabbath option.
- After a power failure, the oven will not resume operation automatically. "OK" will appear in the control panel, but the oven will not go back on. Food can be safely removed from the oven, but you should not turn off the Sabbath option and turn the oven back on until after the Sabbath/Holidays.
- After the Sabbath observance, turn off the Sabbath option by pressing and holding "OK" for at least 3 seconds.

CAUTION
- Do not attempt to activate any other functions except for Bake when the Sabbath option is on. Only the temperature selector knob will function properly.
- Do not open the oven door or change the oven temperature for about 30 minutes after you have started the Sabbath option. Let the oven reach the set temperature. The oven fan operates only when the oven temperature increases.
Using the iQ control feature
Your range has a built-in Wi-Fi module that you can use to sync the range with the SmartThings app. Using the SmartThings app, you can:
- Monitor the operational status of your range or the notifications from your range, and then change options or settings if necessary. Functions that can be operated from the SmartThings app may not work smoothly if communication conditions are poor or the product is installed in a place with a weak Wi-Fi signal.
How to connect the range
Before you can use the remote features of your Dacor oven or range, you must pair it to the SmartThings app.
- Download and open the SmartThings app on your smart device.
- Follow the app's on-screen instructions.
- Press the iQ Control button for 3 seconds to connect your range.
- Once the process is complete, the oven displays "Connection Complete". The range is connected successfully.
- If the oven displays "Can't Connect Try Again", follow the instruction in the app to reconnect.
Gas oven

NOTE
The iQ Control button is beneath the bullnose.
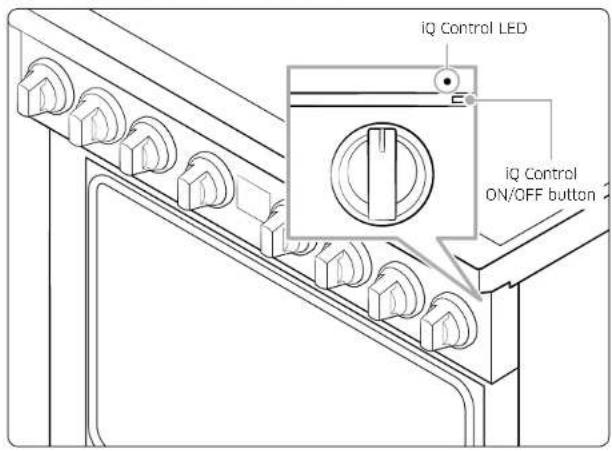
text_image
iQ Control LED iQ Control ON/OFF buttonTo monitor the range remotely
- Make sure the oven is displaying "iQ Control On". If the oven is not displaying "iQ Control On", press the iQ Control button. The range can now be monitored remotely with a connected remote device.
- Select the range icon on the SmartThings app to open the range monitor app.
iQ control on/off
If you set the IQ Control to Off, mobile devices cannot connect to the range. To turn IQ Control on, follow these steps:
- Press the iQ Control button.

NOTE
• The range continues operating even if the Wi-Fi connection is lost.
- The SmartThings Application will not work properly if the Wi-Fi Connection is unstable.
• See the SmartThings app manual for detailed information.
- For further instructions, refer to the SmartThings app web manual at www.Dacor.com
Using the hood control feature

NOTE
This product features a Bluetooth device that you can use to connect the range to Dacor hood control models. Through the Bluetooth connection, you can use the hood control function on the SmartThings app. For the matching hood control-enabled range and hoods, refer to the below table.
To connect to a hood control model and a hood:
- Download and run the SmartThings app on your smartphone. Then, complete the iQ Control procedure to connect to the range. See page 33.
- Follow the hood control model's Bluetooth instructions and activate the Bluetooth connection.
- Press the Bluetooth icon ✕ on the hood's control panel. The Bluetooth icon LED blinks.
text_image
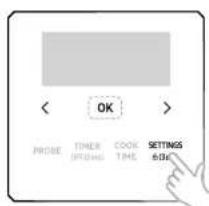
OK PROBE TIMER COOK SETTINGS OFFICE TIME BOX- Press the Settings button on the range display screen. Press <, > to select Hood Connection. Tap OK to connect to the hood.
- When Bluetooth pairing is finished, the Bluetooth icon LED stops blinking and glows steadily. Press the Settings button to exit.
- Follow the instructions in the user manual of the hood control model and the App guide to use the hood control.
Bluetooth on/off
- Press the Bluetooth icon ✝ on the hood's control panel.
NOTE
- The Bluetooth icon LED on the hood is on when Bluetooth is enabled. The Bluetooth icon LED on the hood is off when Bluetooth is not enabled.
- If the iQ Control connection is not successful, you cannot use the SmartThings app to monitor and control the hood.
- Without a iQ Control connection to the range, you can use a Bluetooth connection to pair the range with the hood and sync them. To do this, follow the Bluetooth connection steps on page 35.
- Bluetooth will not work properly if the Bluetooth connection is unstable.
• See the SmartThings app manual for detailed information.
Gas oven
Settings
This function lets you control various electronic control options. These options include Temp. Adjust, Temp. Unit, Screen Timeout, Wi-Fi On/Off, Sound On/Off, 12hr Energy Saving, Demo Mode, and Child Lock. The option menu is only available when the oven is not being used (not cooking).
Temp. Adjust
The temperature in the oven has been calibrated at the factory. When first using the oven, be sure to follow recipe times and temperatures. If you think the oven is too hot or too cool, you can correct the temperature in the oven. Before correcting, test a recipe by using a temperature setting that is higher or lower than the recommended temperature. The baking results should help you to decide how much of an adjustment is needed. The oven temperature can be adjusted +35 °F (+19 °C).
How to correct the oven temperature
- Press the Settings button.
- Press <, > to select Temp. Adjust.
- Tap OK and then press, <, > to select the adjustment you want to make.
- Tap OK
NOTE
This adjustment will not affect the broiling or the self-cleaning temperatures. The adjustment will be retained in memory after a power failure.
Temp. Unit (Fahrenheit or Celsius temperature selection)
You can program the oven control to display the temperature in Fahrenheit or Celsius. The oven has been preset at the factory to display in Fahrenheit. How to change the display from Fahrenheit to Celsius or Celsius to Fahrenheit
-
Press the Settings button.
-
Press <, > to select Temp. Unit
- Tap OK and then press, <, > to select the temperature unit.
- Tap OK.
Screen Timeout
You can adjust the screen timeout.
- Press the Settings button.
- Press <, > to select Screen Timeout.
- Tap OK and then press, <, > to change time. (Default is 20 min.)
- Tap OK
Wi-Fi On/Off
You can turn the oven's Wi-Fi connection On or Off.
How to turn the Wi-Fi On or Off
- Press the Settings button.
- Press <, > to select Wi-Fi.
- Tap OK and then press, <, > to select On or Off
- Tap OK.
NOTE
When you turn the oven's Wi-Fi connection off, you can not use Easy Setup.
Sound
Using Sound setting, you can set the oven controls to operate silently.
How to set the sound
- Press the Settings button.
- Press <, > to select Sound.
- Tap OK and then press, <, > to select Sound On / Alerts Only On / Sound Off.
- Tap OK.
12hr Energy Saving
If you accidentally leave the oven on, this feature will automatically turn off the oven after 12 hours during baking functions or after 3 hours during a broil function.
How to turn the 12 hours energy saving feature On or Off
- Press the Settings button.
- Press <, > to select 12hr Energy Saving
- Tap OK and then press, <, > to select On or Off.
- Tap OK.
Demo Mode
This option is for use by retail establishments for display purposes only. (When Demo Mode is on, the heating elements are disabled and do not operate.)
How to enable or disable demo mode
- Press the Settings button.
- Press <, > to select Demo Mode.
- Tap OK and then press, <, > to select On or Off.
- Tap OK.
Child Lock
Child Lock lets you lock the buttons on the touch pad so they cannot be activated accidentally. Child Lock also locks the oven door so it cannot be opened. You can only activate Child Lock when the oven is in standby mode.
How to activate Child Lock
-
Cancel or turn off all other functions.
-
Touch Settings for 3 seconds.
The oven will display "Child Lock On" and the lock icon along with the current time.

- Child Lock is available only when the oven temperature is under 400 °F.
- All other functions must be cancelled before you activate Child Lock.
How to unlock the controls
Touch Settings for 3 seconds.
"Child Lock On" and the lock icon will disappear from the display.

It may take up to 10 seconds for the door to unlock.
MaintenanceMaintenance
Surface burners
Burner controls
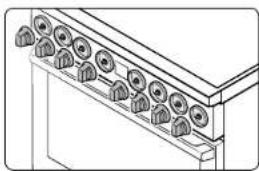
Make sure all surface burner knobs are in the OFF position.
natural_image
Technical line drawing of a mechanical assembly with multiple circular components (no text or symbols)- Pull the knobs off the control valve stems as shown.
- Clean the knobs in warm, soapy water. Then, rinse and dry them thoroughly.
- Clean the stainless steel surfaces using stainless steel cleaner.
- Push the knobs back onto the control valve stems.

CAUTION
• Do not clean the control knobs in a dishwasher.
- Do not spray cleansers directly onto the control panel. Moisture entering the electric circuits may cause electric shock or product damage.
Cooktop surface
The porcelain-enameled cooktop surface needs to be kept clean. We recommend that you remove food spills immediately after they take place.
natural_image
Diagram of a mechanical component with grid-like structure and circular holes, no visible text or symbols- Turn off all surface burners.
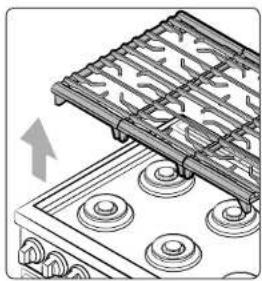
- Wait until all burner grates cool down, and then remove them.
- Clean the cooktop surface using a soft cloth. If food spills run into the gaps around a burner component, remove the burner cap and head, and then wipe up the spills.
- When cleaning is finished, reinsert the burner components, and then put the burner grates back into position.

CAUTION
- Do not use a steel-wool pad or abrasive cleaner, which can scratch or damage the enamel surface.
- Do not remove the cooktop surface for cleaning. The gas lines leading to the burner manifolds can be damaged, resulting in a fire or system failure.
- Do not pour water into the cooktop well while cleaning the cooktop. The water could leak down into the range gas and electrical systems creating a risk of electrical shock or high levels of Carbon Monoxide, due to corrosion of the gas valves or ports.
- Keep oven vent ducts unobstructed. Clean vents frequently to avoid grease buildup
38 English
Burner grates and components
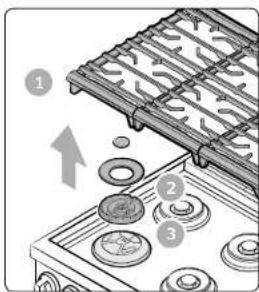
Turn off all surface burners and make sure they have all cooled down.
text_image
Diagram showing a tray with coins and an arrow indicating direction, labeled with numbers 1, 2, and 3.- Remove the burner grates.
- Remove the burner caps from the burner heads.
- Remove the burner heads from the valve manifolds to reveal the starter electrodes.
- Clean all removable grates and burner components in warm, soapy water. Do not use steel wool pads or abrasive cleaners.
- Rinse and dry grates and burner components thoroughly.
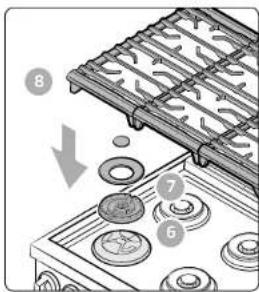
text_image
Diagram showing a mechanical device with numbered components and an arrow indicating direction, likely illustrating a process or assembly.- Return the burner heads to their positions on top of the manifold valves. Make sure a starter electrode is inserted through the hole in each burner head.
- Return the burner caps to their positions on top of burner heads. To ensure proper and safe operation, make sure the burner caps lie flat on top of the burner heads.
- Reinstall the burner gates in their respective positions.
- Turn on each burner and check if it operates properly. After verifying that a burner operates normally, turn it off.

CAUTION
- The starter electrodes are not removable. Do not attempt to remove them by force.
- Make sure all burner components (heads and caps) are reinstalled properly. When installed properly, they are stable and rest flat.
- To avoid chipping, do not bang grates and caps against each other or hard surfaces such as cast iron cookware.
- The burner spreader can be blocked by food or dust. Clean the spreader if it appears blocked. If you clean the spreader with water, assemble it only after it is completely dry. If the spreader is wet, it might prevent the burners from igniting.
Maintenance
Cleaning
Stainless steel surface
- Remove any spills, spots, and grease stains using a soft, wet cloth.
- Apply an approved stainless steel cleanser to a cloth or paper towel.
- Clean one small area at a time, rubbing with the grain of the stainless steel if applicable.
- When done, dry the surface using a soft, dry cloth.
- Repeat steps 2 through 4 as many times as necessary.

CAUTION
- Do not use a steel-wool pad or abrasive cleanser on stainless steel surfaces. It will scratch the surface.
- Do not spray any type of cleanser into the manifold holes. The ignition system is located in those holes and must be kept free of moisture.
Racks
To keep the racks clean, remove them from the cavity, and soak them in lukewarm soapy water. Then, scour impurities off of the racks using a plastic scouring pad. If the racks do not slide in and out smoothly after you have cleaned them, rub the side rail guides with wax paper or a cloth containing a few drops of cooking oil. This will help the racks glide more easily on their tracks.
Gliding rack
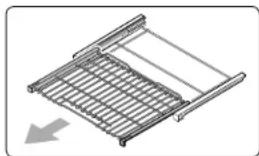
natural_image
Isometric view of a metal rack structure with a gray arrow indicating direction (no text or symbols)- Remove the gliding rack from the oven.
- Fully extend the gliding rack on a table. It is a good idea to put newspaper beneath the rack for later cleanup.
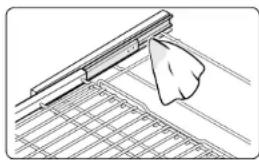
natural_image
Diagram of a hand pressing down on a metal grid structure (no text or symbols)- If the sliding tracks are contaminated, remove impurities using a paper towel. If the gliding rack has been sticking, apply graphite lubricant according to the instructions below.
To apply the graphite lubricant
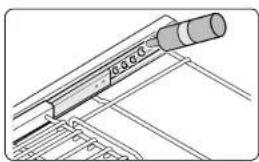
natural_image
Technical line drawing of a mechanical assembly with no visible text or symbols- Shake the graphite lubricant before opening it.
- Apply 4 drops of lubricant to the inner side of the left sliding track and 4 drops to the outer side of the left sliding track.
- Repeat Step 2 above on the right sliding track.
- Extend and collapse the gliding rack several times to distribute the lubricant.
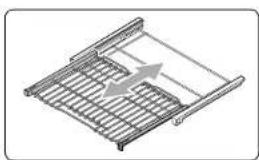
natural_image
Diagram of a metal rack with a directional arrow indicating movement or force (no text or symbols)
NOTE
- Do not use a dishwasher to clean the racks.
- If a rack does not slide in and out smoothly, apply a few drops of cooking oil to the oven rack guides.
- If a rack becomes too difficult to slide in or out, lubricate the rack.
• To purchase the graphite lubricant, contact us at 833-35-ELITE (833-353-5483).

CAUTION
- Do not leave racks in the oven during the self-cleaning cycle. The extreme heat generated in this cycle can permanently peel off the racks' coating and make it difficult to remove the racks.
- Do not spray cooking oil or lubricant directly onto the gliding rack.
Ladder racks
Ladder Racks can be removed for manual cleaning or to prevent discoloration during a Self-Cleaning cycle.
Removing the Ladder racks
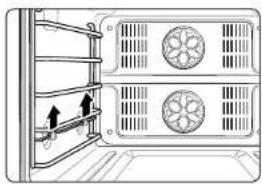
natural_image
Diagram of a double-chamber electric oven with ventilation grilles and fan slots (no text or symbols)- Grasp the Position 2 rack guide, and then lift the Ladder Rack straight up. This frees the Ladder Rack from its two supports on the oven wall.
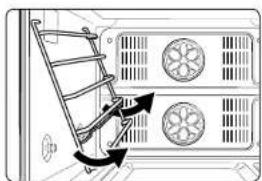
natural_image
Diagram showing a ladder leaning against a wall-mounted fan or vent, with arrows indicating direction of movement (no text or symbols present)- Rotate the Ladder Rack by approximately 45°.
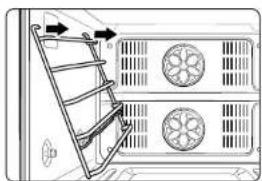
natural_image
Diagram of a refrigerator with a ladder and fan layout, showing directional arrows (no text or symbols)- Pull the Rack away from the oven wall to remove it from the two support holes in the wall of the oven.
- Repeat this procedure with the Ladder Rack on the opposite wall.
Maintenance
Replacing the Ladder racks

natural_image
Diagram of a refrigerator interior with doors and wheels, no text or symbols present- Put the top of the Ladder Rack back into the two support holes in the oven wall.
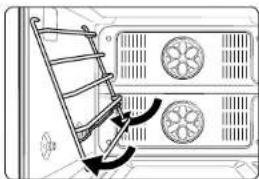
natural_image
Diagram of a ladder leaning against a double vented fan (no text or symbols)- Rotate the Ladder Rack towards the oven wall.
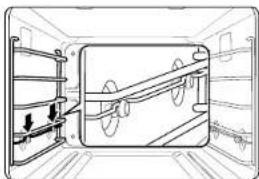
natural_image
Technical line drawing of a mechanical assembly with no visible text or symbols- Pull up on the Position 2 rack guide, and then press the Rack into the two supports on the oven wall.
- Repeat this procedure with the Ladder Rack on the opposite wall.
Door
Do not remove the inner gasket of the oven door for cleaning.
Inner side
- Inner surface: Clean the inner side of the door manually using a soapy plastic scouring pad, and then wipe with a dry cloth. Take care not to get the gasket wet or allow moisture into the door.
• Inner glass: The inner glass is cleaned automatically during the self-cleaning cycle.
Outer side
- Outer surface: Follow the cleaning instructions for a stainless steel surface in the previous section.
- Outer glass: Clean the outer glass using a glass cleanser or soapy water. Rinse and dry thoroughly. Take care not to get the gasket wet or allow moisture into the door.
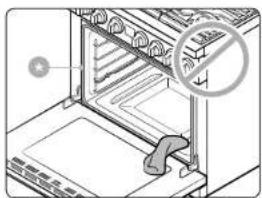
natural_image
Diagram of an oven with a hand operating the door, showing no text or symbols on the main structure.CAUTION
Do not let moisture to enter the door or contact the door gasket (). Moisture may reduce the gasket's performance.
Oven door: remove and re-install
Oven door
natural_image
Technical line drawing of a rack-mounted device with mounting holes and a close-up inset showing internal components (no text or symbols)- Turn off the oven and let cool.
- Fully open the oven door.
- Pull the hinge locks away from the oven body and down toward the door frame into the unlocked position.
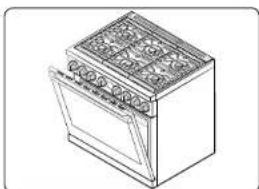
natural_image
Line drawing of an open oven with a gridded top panel (no text or symbols)- Close the door to 5 degrees from vertical. This is the removal position.
- While holding both sides of the oven door tightly, lift it up and out until the hinge arms come clear of the slots at the bottom of the oven door.
- Place the door in a safe location.

WARNING
- The door is very heavy. Be careful when removing and lifting the door. Do not lift the door by the handle.
- Take care when moving the oven door. Improper handling could result in physical injury.
- To prevent electric shock, make sure the oven is turned off before removing the oven door.
To reinstall the door
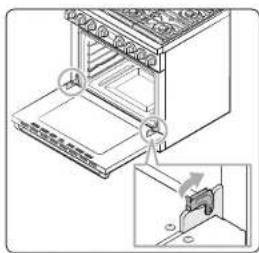
natural_image
Technical line drawing of a kitchen appliance with a close-up inset showing a component detail (no text or symbols)- Firmly grasp both sides of the door at the top.
- With the door set at the same angle as the removal position (about 5 degrees from vertical), slide the hinge arms into the hinge slots at the bottom of the door.
- Open the door fully. If you cannot open the door fully, the hinge arms are not set properly in the hinge slots.
- Lock the hinge arms by pushing them up against the front frame of the oven.
- Close the door, and make sure it opens and closes normally.
Mainbeeshroeting
Replacing the oven lights
Oven lights (2 Locations)
There are 2 oven lights, one on each side oven wall. To replace a light, follow these steps:
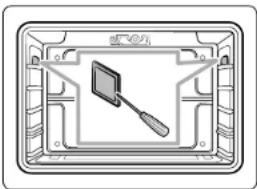
natural_image
Diagram of a device inside a rectangular frame with a central screen and handle (no text or symbols)- Hold the lower end of the side oven light cover with one hand, and then use a flat-sharp tool such as a table knife to remove the cover as shown.
- Replace the side oven light.
- Reinsert the light cover.

CAUTION
To prevent electric shock, make sure the gas oven is power off and cool before replacing the oven light.

NOTE
- The oven lights do not operate during a self-cleaning cycle.
- Remove the racks if they prevent you from accessing an oven light.
Troubleshooting
Troubleshooting
If you run into unexpected trouble, look first for a solution in the tables below. If you're still having trouble after trying the suggested solution, call 833-35-ELITE (833-353-5483).
Gas safety
| Problem Possible cause Solution | ||
| You smell gas. | The surface burner knob is not in the OFF position and the burner is not lit. | Turn the burner knob to OFF. |
| There is a gas leak. | Clear the room, building, or area of all occupants. Immediately call your gas supplier from a neighbor's phone. Do not call from your phone. It is electrical and could cause a spark that could ignite the gas. Follow the gas supplier's instructions. If you cannot reach your gas supplier, call the fire department. | |
Surface burner
| Problem Possible cause Solution | ||
| All burners do not light. | The power cord is not plugged into the electrical outlet. | Make sure the electrical plug is plugged into a live, properly grounded outlet. |
| A fuse in your home may be blown or the circuit breaker may have tripped. | Replace the fuse or reset the circuit breaker. | |
| The gas supply is not properly connected or turned on. | See the installation instructions that came with your range. | |
| Surface burners do not light. | The control knob is not set properly. | Push in the control knob and turn it to the Lite position. |
| The burner caps are not in place.The burner base is misaligned. | Clean the electrodes.Put the burner cap on the burner head.Align the burner base. | |
| Surface burner clicks during operation. | The control knob has been left in the Lite position. | After the burner lights, turn the control knob to a desired setting.If the burner still clicks, contact a service technician. |
| The burners do not burn evenly. | Surface burner components and caps are not assembled correctly and level. | See page 39. |
| Surface burners are dirty. | Clean surface burner components. (See page 39.) | |
| Very large or yellow surface burner flames. | Wrong orifice is assembled. | Check the burner orifice size and contact your installer if you have the wrong orifice (LP gas instead of natural gas or natural gas instead of LP gas). |
| Surface burners light but oven burners do not light. | The Gas Pressure Regulator shut off switch is in the OFF position. | Call a qualified service technician. |
Oven
| Problem Possible cause Solution | ||
| The oven control beeps and the oven control display shows an information code. | There may be an issue with your oven. See the Information codes chart on page 48. | Rotate both the mode and temperature selector knobs to the OFF position and restart the oven. If the problem persists, disconnect all power to the range for at least 30 seconds and then reconnect the power. If this does not solve the problem, call for service. |
| Very large or yellow oven burner flames. | The oven burner air adjustment shutters need to be adjusted. | Call for a qualified service technician. |
| The gas supply is not properly connected or turned on. | See the Installation instructions that came with your range. | |
| Wrong orifice is assembled. | Check the burner orifice size and contact your installer if you have the wrong orifice (LP gas instead of natural gas or natural gas instead of LP gas). | |
| Oven temperature is too hot or cold. | The oven temperature needs to be adjusted and recalibrated. | See page 36. |
| Oven light (lamp) will not turn on. | Loose or burned-out bulb. | See page 44. |
| The switch button operating the oven light needs to be replaced. | Call for a qualified service technician. | |
Troubleshooting
| Problem Possible cause Solution | ||
| Oven smokes excessively during broiling. | Meat or food not properly prepared before broiling. | Cut away excess fat and/or fatty edges that may curl. |
| Improperly positioned top oven rack. | See the Broiling guide on page 26. | |
| Greasy buildup on oven surfaces. | Regular cleaning is necessary when broiling frequently. See page 30. | |
| Oven will not self-clean. | The oven is too hot. | A warning beep sounds 3 times, and "The oven is too hot for self cleaning." message appears on the display. Let the oven cool down, and then reset the controls. The self-clean cycle will not lock the oven door if the oven temperature is too hot. The door must lock before the self-clean cycle can start. After you have run a self-cleaning cycle, the oven will not let you run another self-cleaning cycle for two hours. |
| The self-cleaning oven controls are not properly set. | Reset the self-cleaning oven controls. (See page 30.) | |
| The door is open. | An alert beep sounds, and the "Please close the door," message appears on the display. Make sure that the door is closed. | |
| Crackling or popping sound. | This is normal. | This is the sound of the metal heating and cooling during any cooking or cleaning function. |
| Problem Possible cause Solution | ||
| Excessive smoking during a self-cleaning cycle. | This is the first time the oven has been cleaned. | This is normal. The oven will always smoke more the first time it is cleaned.Wipe up all excessive soiling before starting the self cleaning cycle.If smoke persists, rotate both the mode and temperature selector knobs to the OFF position. Open the windows to clear the smoke from the room. After the oven has cooled and unlocked, wipe up excessive soil and reset the oven for self-cleaning. |
| Oven door will not open after a self-cleaning cycle. | This is normal. | The oven door will stay locked until the oven temperature drops below 400 °F. |
| Oven not clean after a self-cleaning cycle. | A fine dust or ash is normal. | This can be wiped clean with a damp cloth. Set the self cleaning cycle for a longer cleaning time. The cycle was not long enough to burn off the dirt buildup. Extremely dirty ovens require hand-cleaning of excessive spillovers and food buildup before you start a self-cleaning cycle. Multiple self-cleaning cycles may be necessary to completely clean the oven. |
| Steam or smoke coming from under the control panel. | This is normal. | The oven vent is located there. More steam is visible when using the convection functions or when baking or roasting multiple items at the same time. |
| Burning or oily odor coming from the vent. | This is normal for a new oven and will disappear within 1/2 hour of the first Bake cycle. | To speed the process, set a self-cleaning cycle for 3 hours. (See page 30.) |
| Strong odor. This is temporary. | The insulation around the inside of the oven emits an odor the first few times the oven is used. | |
| Oven racks are difficult to slide. | - | Apply a small amount of vegetable oil to a paper towel and wipe edges of the oven racks with the paper towel. Racks become dull and hard to slide if they are left in the oven during a self-clean cycle. |
| Fan noise. This is normal. | The convection fan runs until the function is over or the door is opened. | |
| Convection fan is not working. | - | The fan starts automatically when the oven reaches the preheat temperature. |
Others
| Problem Possible cause Solution | ||
| The product is not level. | The appliance has been installed improperly.The leveling log(s) is (are) damaged or uneven. | Make sure the floor is level, strong, and stable. If the floor sags or slopes, contact a carpenter.Check and level the range. (See the Installation instructions.) |
| The kitchen cabinets are not properly aligned and make the range appear to be not level. | Ensure that cabinets are square and provide sufficient room for installation. | |
| Food does not bake or roast properly in the oven. | Wrong cooking mode is selected. | See page 22. |
| The oven racks have not been positioned properly for the food being cooked. | See page 24. | |
| The cookware has not been positioned correctly on the rack. | See page 25. | |
| Oven thermostat needs adjustment. | See page 36. | |
| There is a aluminum foil on racks and/or oven bottom. | Remove the foil. | |
| Food does not broil properly in the oven. | Oven controls not set properly. | See page 26. |
| Oven door was not closed during broiling. | See page 22. | |
| The rack has not been properly positioned. | See broiling guide on page 26. | |
Troubleshooting
Information codes
OVEN
| Displayed Code | Possible cause Solution | |
| C-d0 | This code occurs if the control key is short for 1 minute. | Clean the buttons and make sure there is no water on/around them. Turn off the oven and try again. If the problem continues, contact a local Dacor service center. |
| C-d1 | This code occurs if the door lock is mispositioned. | Turn both the mode and temperature selector knobs to OFF, and then restart the oven. If the problem persists, disconnect all power to the oven for at least 30 seconds and then reconnect the power. If this does not solve the problem, call for service. |
| C-F0 | This code occurs if communication between the Main and Sub PBA is interrupted. | |
| C-F2 | This code occurs if communication between the Main and Touch is interrupted. | |
| C-20 | The oven sensor is open when the oven is operating. | |
| The oven sensor is short when the oven is operating. | ||
| C-21 | This code occurs if the internal temperature rises abnormally high. | Call for service. |
| Displayed Code | Possible cause Solution | |
| C-22 | The Sub PCB sensor is open when the oven is operating. | Turn both the mode and temperature selector knobs to OFF, and then restart the oven. If the problem persists, disconnect all power to the oven for at least 30 seconds and then reconnect the power. If this does not solve the problem, call for service. |
| The Sub PCB sensor is short when the oven is operating. | ||
| C-23 | The temp probe sensor is short when the oven is operating. | |
| C-30 | The PCB sensor is open when the oven is operating. | |
| The PCB sensor is short when the oven is operating. | ||
| C-31 | This code occurs if the PCB temperature rises abnormally high. | Call for service |
| C-A2 | The cooling motor is operating abnormally. | |
| C-24 Oven | vent blocked | 1. To reset error, disconnect power or press 'Off' key after opening the oven door at least 60sec.2. Check whether any oven vent or air passage is blocked by aluminum foil or other material.3. Remove aluminum foil or other material from any blocked oven vent or air passage. |
48 English
Warranty
PLEASE DO NOT DISCARD.
What Is Covered
CERTIFICATE OF WARRANTIES: DACOR RANGES
WITHIN THE FIFTY STATES OF THE U.S.A., THE DISTRICT OF COLUMBIA, AND CANADA:
FULL TWO-YEAR WARRANTY
The warranty applies only to the Dacor appliance sold to the first use purchaser, starting from the date of original retail purchase or closing date for new construction, whichever period is longer. Warranty is valid on products purchased brand new from a Dacor Authorized Dealer, or other seller authorized by Dacor. If your Dacor product fails to function within one year of the original date of purchase, due to a defect in material or workmanship, Dacor will remedy it without charge to you.
All cosmetic damage (such as scratches on stainless steel, paint/porcelain blemishes, etc.) to the product or included accessories must be reported to Dacor within 60 days of the original purchase date to qualify for warranty coverage. Consumable parts such as filters and light bulbs are not covered and are the responsibility of the purchaser.
LIMITATIONS OF COVERAGE
Service will be provided by a Dacor designated service company during regular business hours. Please note service providers are independent entities and are not agents of Dacor.
Dealer display and model home display products with a production date greater than 5 years, products sold "As Is," and products installed for non-residential use, which include but are not limited to religious organizations, fire stations, bed & breakfast, and spas carry a one year parts warranty only. All delivery, installation, labor costs, and other service fees are the responsibility of the purchaser. Warranty will be null and void on product that has altered, defaced, or missing serial numbers and tags.
The owner must provide proof of purchase or closing statement for new construction upon request. All Dacor products must be accessible for service. Warranty is null and void if non-ETL or non-CUL approved product is transported from the U.S.A.
OUTSIDE THE FIFTY STATES OF THE U.S.A., THE DISTRICT OF COLUMBIA AND CANADA:
LIMITED TWO-YEAR WARRANTY
If your Dacor product malfunctions within one year of the original purchase date, due to material or manufacturing defect, Dacor will furnish a new part, FOB factory to replace the defective part.
All delivery, installation, labor costs, and other service fees shall be paid by the purchaser.
What Is Not Covered
- Slight color variations may be noticed because of differences in painted parts, kitchen lighting, product placement and other factors; this warranty does not apply to color variation.
- Service calls to educate the customer on proper use and care of the product.
- Service fees for travel to islands and remote areas, which include but are not limited to, ferries, toll roads or other travel expenses.
- Consequential or incidental damage, including but not limited to food or medicine loss, time away from work or restaurant meals.
- Failure of the product when used for commercial, business, rental or any application other than for residential consumer use.
- Failure of the product caused by improper product installation.
- Replacement of house fuses, fuse boxes or resetting of circuit breakers.
- Damage to the product caused by accident, fire, flood, power interruption, power surges or other acts of God.
- Liability or responsibility for damage to surrounding property including cabinetry, floors, ceilings and other structures or objects around the product.
- Breakage, discoloration, or damage to glass, metal surfaces, plastic components, trim, paint or other cosmetic finish caused by improper usage, care, abuse or neglect.
Already Appendix
Out of Warranty
Should you experience a service issue beyond the standard warranty period, please contact us. Dacor reviews each issue and customer concern to provide the best possible solution based on the circumstances.
THE REMEDIES PROVIDED IN THE ABOVE EXPRESS WARRANTIES ARE THE SOLE AND EXCLUSIVE REMEDIES. THEREFORE, NO OTHER EXPRESS WARRANTIES ARE MADE, AND OUTSIDE THE FIFTY STATES OF THE UNITED STATES, THE DISTRICT OF COLUMBIA AND CANADA, ALL IMPLIED WARRANTIES, INCLUDING BUT NOT LIMITED TO, ANY IMPLIED WARRANTY OF MERCHANTABILITY OR FITNESS FOR A PARTICULAR USE OR PURPOSE, ARE LIMITED IN DURATION TO ONE YEAR FROM THE DATE OF ORIGINAL PURCHASE. IN NO EVENT SHALL DACOR BE LIABLE FOR INCIDENTAL EXPENSE OR CONSEQUENTIAL DAMAGES. IN THE EVENT DACOR PREVAILS IN ANY LAWSUIT, DACOR SHALL BE ENTITLED TO REIMBURSEMENT OF ALL COSTS AND EXPENSES, INCLUDING ATTORNEY'S FEES, FROM THE DACOR CUSTOMER. NO WARRANTIES, EXPRESS OR IMPLIED, ARE MADE TO ANY BUYER FOR RESALE.
Some states do not allow limitations on how long an implied warranty lasts, or do not allow the exclusion or limitation of inconsequential damages, therefore the above limitations or exclusions may not apply to you. This warranty gives you specific legal rights, and you may also have other rights that vary from state to state.
Open Source Announcement
The software included in this product contains open source software. You may obtain the complete corresponding source code for a period of three years after the last shipment of this product by contacting our support team via http://opensource.samsung.com (Please use the "Inquiry" menu.)
It is also possible to obtain the complete corresponding source code in a physical medium such as a CD ROM; a minimal charge will be required.
The following URL http://opensource.samsung.com/opensource/SMART_AT_051/ seq/0 leads to the open source license information as related to this product. This offer is valid to anyone in receipt of this information.

text_image
QR code image containing encoded data, no visible human-readable text50 English
Memo
Memo
Memo
Memo

Dear Valued Customer,
Thank you for purchasing Dacor. We hope our products empower your passion for cooking!
Inside this box is a set of brass burner caps. These caps are meant to provide an elegant look to your new Dacor product. These caps may be used for cooking, but please know beforehand that they will discolor when used. This is a natural reaction of brass when it comes in contact with the gas flame. We have also included a set of black porcelain burner caps with this product in case you are concerned about the discoloration. Discoloration of burner caps is not covered under our warranty, but new burner caps may be ordered from us if necessary.
We truly hope you enjoy many years of great cooking with your Dacor. If we can be of service, please contact our team at 833-35-ELITE (833-353-5483).
Sincerel.
The Dacor Customer Assurance Team
dacor.
Please visit www.Dacor.com to activate your warranty online.
WARRANTY INFORMATION

IMPORTANT:
Your warranty will not begin until you activate it online or return this form to Decor. If you have purchased more than one Decor product, please return all forms in one envelope, or activate the warranty for each product online.
Please rest assured that under no conditions will Decor sell your name or any of the information on this form for mailing rest purposes. We are very grateful that you have chosen Dacor products for your home and we do not consider the sale of such information to be a proper way of expressing our gratitude!
Owner's Name:
Last Please Type or Type/First Middle
Street
City State:
Zip:
Purchase Date: Email:
Telephone:
Dealer:
City: State:
Zip:
Your willingness to take a few seconds to fill in the section below will be sincerely appreciated. Thank you.
- How were you first exposed to Dacor products? (Please check one only.)
A. TV. Cooking Show
B. Magazine
□ C. Appliance Dealer Showroom
D. Kitchen Dealer Showroom
E. Home Show
□ F Builder
G. Architect/Designer
□ H. Another Dacer Owner
□ 1. Model Home
□ 」 Other
- Where did you buy your Dacor appliances?
A. Appliance Dealer
□ G. Kitchen Dealer
□ C. Builder Supplier
D. Builder
□ C. Other
(二) 2017年
- For what purpose was the product purchased?
□ A. Replacement
B. Part of a Remodel
□ C New Home
D. Other
- What is your household income?
□ A. Under \$75,008
B \75.000 - \100.000
C. \100,000 - \150,000
D. \150,000 - \200,000
□ E. \200,000 - \250,000
F. Over \$250,000
- What are the brands of appliances that you have in your kitchen?
A. Cooklop C. Dishwasher
B. Oven
D. Refrigerator
姓名:____
- Would you buy or recommend another Dacor product?
□ Yes
Comments:
□ No
Place Serial Number Label Here
Thank you very much for your assistance. The information you have provided will be extremely valuable in helping us plan for the future and giving you the support you deserve.
Website: www.Dacor.com
Phone: 833 35 ELITE (833 353 5483)



DACOR
ATTN: WARRANTY PROCESSING DEPT
PO BOX 90070
CITY OF INDUSTRY, CA 91715-9907
-
-
-
-
-
-
-
-
-
-
-
-
-
-
-
-
-
-
-
-
-
-
-
-
-
-
-
-
-
-
-
-
-
-
-
-
-
-
-
-
-
-
-
-
-
-
-
-
-
-
-
-
-
-
-
-
-
-
-
-
-
-
-
-
-
-
-
-
-
-
-
-
-
-
-
-
-
-
-
-
-
-
-
-
-
-
-
-
-
-
-
-
-
-
-
-
-
- 99.
-
-
-
-
-
-
-
-
-
-
-
-
-
-
-
-
-
-
-
-
-
-
-
-
-
-
-
-
-
-
-
-
-
-
-
-
-
-
-
-
-
-
-
-
-
-
-
-
-
-
-
-
-
-
-
-
-
-
-
-
-
-
-
-
-
-
-
-
-
-
-
-
-
-
-
-
-
-
-
-
-
-
-
-
-
-
-
-
-
-
-
-
-
-
-
-

DG68 01105D 00
dacor.
Dacor • 14425 Clark Avenue, City of Industry, CA 91745
• Phone: 833-35-ELITE (833-353-5483) • Fax (626) 403-3130 • www.dacor.com
dacor
Manual del usuario
Estufa Gas Pro
DOP36P86GL*
City of Industry, CA 91745
The Dacor Customer Assurance Team
Contenido Contenido
natural_image
Illustration of a hand using a tool to clean or store food on an electric stove (no text or symbols)natural_image
Illustration of a kitchen appliance with a smokestack and a prohibition sign (no text or symbols on the main image)natural_image
Simple line drawing of an electrical outlet, a lit candle, and a plug with a prohibition symbol (no text or labels)natural_image
Simple line drawing of a server unit connected to a battery (no text or symbols)natural_image
Illustration of a notebook, pen, and prohibition symbol (no text or symbols present)natural_image
Illustration of a kitchen oven with a prohibition symbol (no text or labels)natural_image
Illustration of a kitchen oven with a prohibition symbol (no text or labels)natural_image
Illustration of a frying pan on a stove with a prohibition symbol (no text or labels)natural_image
Illustration of a mechanical device with a prohibition symbol overlay (no text or symbols on the device itself)natural_image
Illustration of a hand opening a large oven with steam rising from the side (no text or symbols)text_image
Technical diagram of an oven with numbered components and internal layout viewnatural_image
Simple line drawing of a hand cursor pointing at a button, enclosed in a dashed border (no text or symbols)natural_image
Technical diagram of a structural frame with two horizontal bars and a downward arrow indicating compression or force (no text or symbols)Estufa de gas
natural_image
Line drawing of a kitchen stove with a plate, carrot, and decorative items (no text or symbols)natural_image
Line drawing of a kitchen appliance with multiple fans and a handle (no text or symbols)Utensilios de cocina
Requisitos
natural_image
Line drawing of a cooking pan on a stove burner (no text or symbols)text_image
Technical diagram showing a hand operating a heating element with a circular symbol labeled '×411' and '×417'PRECAUCIÓN
text_image
LR CR RF RF CF LFnatural_image
Line drawing of a chicken inside an oven (no text or symbols)natural_image
Line drawing of a vintage kitchen oven with a door and top panel (no text or symbols)Español 21
Horno de gas
Modos de cocción
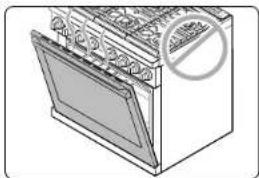
natural_image
Line drawing of an open oven with a door and fan, showing no text or symbolsnatural_image
Diagram of an oven with numbered compartments (no text or symbols)text_image
Technical diagram of an oven with labeled components and numbered partsnatural_image
Simple wireframe diagram of a two-circle fan or vent with a handle, no text or symbols present.Parrilla 4 Parrilla 2
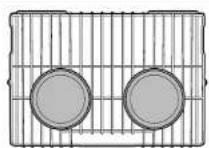
natural_image
Illustration of an oven with a rack inside, showing internal structure and a directional arrow (no text or symbols)natural_image
Diagram of an oven with a rack and ventilation grilles, showing a gray arrow pointing to the outlet (no text or symbols present)natural_image
Line drawing of a kitchen appliance with a kettle and fan (no text or symbols)natural_image
Diagram showing a car interior with connected cables and a plug, no text or symbols presenttext_image
< OK > PROBE TIME OFF/State COOK TIME SETTAKE SIZEtext_image
Set Clean Time 3hr < OK > PROBE TIMER OFF(Used) TIME SETTINGS (Used)natural_image
Simple line drawing of a door with three circular buttons and a square, no text or symbols present32 Español

NOTA
natural_image
Technical line drawing of a mechanical assembly with multiple cylindrical components (no text or symbols)natural_image
Diagram of a mechanical component with grid-like structure and circular holes, no visible text or symbolstext_image
Diagram showing a tray with coins and a net, labeled with numbers 1, 2, and 3, indicating a process or inventory step.text_image
Diagram showing a mechanical device with numbered components and an arrow indicating direction, likely illustrating a process or assembly.natural_image
Isometric view of a metal rack structure with a gray arrow indicating direction (no text or symbols)natural_image
Diagram of a hand pressing down on a grid-patterned surface (no text or symbols)natural_image
Technical line drawing of a mechanical assembly with no visible text or symbolsnatural_image
Isometric view of a metal rack with a gray arrow indicating direction (no text or symbols)
NOTA
natural_image
Diagram of a server rack with ventilation grilles and fan slots (no text or symbols)natural_image
Diagram showing a ladder leaning against a panel with fan-like patterns, no text or symbols present- Gire la rejilla escalonada aproximadamente 45°,
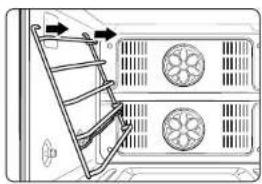
natural_image
Diagram of a refrigerator with a ladder and fan-shaped ventilation grille (no text or symbols)natural_image
Diagram of a refrigerator interior showing door, wheels, and a cabinet (no text or symbols)natural_image
Diagram of a ladder leaning against a double door with two fans, showing airflow direction (no text or symbols)natural_image
Technical line drawing of a mechanical assembly with no visible text or symbolsnatural_image
Diagram of an oven with a hand operating the door, showing no text or symbols on the main structure.PRECAUCIÓN
natural_image
Technical line drawing of a kitchen appliance with a close-up inset showing internal components (no text or symbols)natural_image
Line drawing of an open oven with a gridded top panel (no text or symbols)natural_image
Technical line drawing of a kitchen appliance with a close-up inset showing a component detail (no text or symbols)natural_image
Diagram of a device interior with a central screen and surrounding compartments (no text or symbols)text_image
QR code image containing encoded data, no visible human-readable text50 Español
Notas
Notas
Notas
Notas

Estimado cliente:
The Dacor Customer Assurance Team

C. \100,000 - \150,000
D. \150,000 - \200,000
□ = \200,000 - \250,000
□ F. Más de \$250,000
ATTN: WARRANTY PROCESSING DEPT
PO BOX 90070
CITY OF INDUSTRY, CA 91715-9907
-
-
-
-
-
-
-
-
-
-
-
-
-
-
-
-
-
-
-
-
-
-
-
-
-
-
-
-
-
-
-
-
-
-
-
-
-
-
-
-
-
-
-
-
-
-
-
-
-
-
-
-
-
-
-
-
-
-
-
-
-
-
-
-
-
-
-
-
-
-
-
-
-
-
-
-
-
-
-
-
-
-
-
-
-
-
-
-
-
-
-
-
-
-
-
-
-
- 99.
-
-
-
-
-
-
-
-
-
-
-
-
-
-
-
-
-
-
-
-
-
-
-
-
-
-
-
-
-
-
-
-
-
-
-
-
-
-
-
-
-
-
-
-
-
-
-
-
-
-
-
-
-
-
-
-
-
-
-
-
-
-
-
-
-
-
-
-
-
-
-
-
-
-
-
-
-
-
-
-
-
-
-
-
-
-
-
-
-
-
-
-
-
-
-
-

DG68 01105D 00
dacor.
Dacor • 14425 Clark Avenue, City of Industry, CA 91745
• Teléfono: 833-35-ELITE (833-353-5483) • Fax (626) 403-3130 • www.dacor.com
dacor
Service client Dacor
14425 Clark Avenue
City of Industry, CA 91/45
The Dacor Customer Assurance Team
natural_image
Illustration of a hand pressing down on a stove with a prohibition symbol (no text or labels)natural_image
Illustration of a kitchen appliance with a stop sign and a bottle, no text or symbols presentnatural_image
Simple line drawing of an electrical outlet, a lit candle, and a plug with a prohibition symbol (no text or labels)natural_image
Simple line drawing of a server unit connected to a battery (no text or symbols)natural_image
Illustration of a notebook, a pen, and a prohibition symbol (no text or symbols present)natural_image
Illustration of a kitchen oven with a prohibition symbol (no text or labels)natural_image
Illustration of a kitchen oven with a prohibition symbol (no text or labels)natural_image
Illustration of a frying pan on a stove with a prohibition symbol (no text or labels)natural_image
Illustration of a mechanical device with a prohibition symbol overlay (no text or symbols on the device itself)natural_image
Illustration of a hand opening a large oven with steam rising from the side (no text or symbols)text_image
Technical diagram of an oven with numbered components and internal layout viewtext_image
Simple diagram with a hand cursor icon inside a rectangular box, no text or symbols present.text_image
< 3 OK > 2 3 1 SETTINGS CLOSE TIMER COPY TIME closednatural_image
Technical diagram of a structural support frame with diagonal bracing and a downward arrow indicating compression (no text or symbols)Cuisinière à gaz
natural_image
Line drawing of a kitchen stove with a plate, carrot, and decorative items (no text or symbols)natural_image
Line drawing of a multi-tiered kitchen appliance with fan-shaped ventilation grilles (no text or symbols)Récipients
Exigences
natural_image
Line drawing of a cooking pan on a stove burner (no text or symbols)text_image
Technical diagram showing a hand using a tool to press or install a component, with a circular symbol labeled '×411' and '×47'ATTENTION
text_image
LR CR RF RF CF LFnatural_image
Line drawing of a chicken inside an oven (no text or symbols)natural_image
Line drawing of a vintage kitchen oven with a door and top panel (no text or symbols)Four à gaz
Modes de cuisson
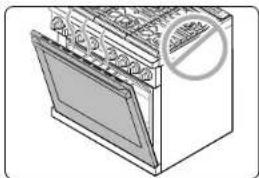
natural_image
Line drawing of an open oven with a door and fan, showing the exterior panel and lid (no text or symbols)natural_image
Diagram of an oven with numbered compartments (no text or symbols)text_image
Technical diagram showing a rack-mounted appliance with labeled parts 1 and 4, likely for assembly or storage instructions.natural_image
Line drawing of an oven with a rack inside, showing internal structure and a directional arrow (no text or symbols)natural_image
Line drawing of an oven with a rack and ventilation grilles (no text or symbols)Convection Bake (Cuisson par convection), Pure Convection (Convection standard)
natural_image
Diagram of a kitchen appliance with a kettle and fan, showing internal components (no text or labels)natural_image
Diagram showing a car interior with connected cables and a plug, no text or symbols presenttext_image
Set Clean Time 3hr < OK > PROBE TIMER OFF(Used) TIME SETTINGS S(Used)natural_image
Simple line drawing of a door with three circular buttons and a square, no text or symbols present32 Français

REMARQUE
natural_image
Technical line drawing of a mechanical assembly with multiple circular components (no text or symbols)natural_image
Diagram of a mechanical component with grid-like structure and circular features, no visible text or symbolstext_image
Diagram showing a tray with coins and an upward arrow, labeled with numbers 1, 2, and 3.text_image
Diagram showing a mechanical device with numbered components and an arrow indicating direction, likely illustrating a process or assembly.natural_image
Isometric view of a metal rack structure with a gray arrow indicating direction (no text or symbols)natural_image
Diagram of a hand pressing down on a grid-patterned surface (no text or symbols)natural_image
Technical line drawing of a mechanical assembly with no visible text or symbolsnatural_image
Isometric view of a metal rack with a directional arrow indicating rotation (no text or symbols)
REMARQUE
natural_image
Diagram of a server rack with ventilation grilles and fan slots (no text or symbols)natural_image
Diagram showing a ladder leaning against a panel with fan-like patterns, no text or symbols presentnatural_image
Diagram of a refrigerator with a ladder and fan-shaped ventilation grille (no text or symbols)natural_image
Diagram of a refrigerator interior showing door, wheels, and a cabinet (no text or symbols)natural_image
Diagram of a ladder leaning against a double door with two fans, showing airflow direction (no text or symbols)natural_image
Technical line drawing of a mechanical assembly with no visible text or symbolsnatural_image
Diagram of an oven with a hand operating the door, showing no text or symbols on the main structure.ATTENTION
natural_image
Technical line drawing of a mounted electrical cabinet with a close-up inset showing internal components (no text or symbols)natural_image
Line drawing of an open oven with a grid-patterned lid (no text or symbols)natural_image
Technical line drawing of a kitchen appliance with a close-up inset showing a component detail (no text or symbols)natural_image
Diagram of a device inside a rectangular frame with a central screen and handle (no text or symbols)text_image
QR code image containing encoded data, no visible human-readable text50 Français
Notes
Notes
Notes
Notes

Cher client estimé,
The Dacor Customer Assurance Team

ATTN: WARRANTY PROCESSING DEPT
PO BOX 90070
CITY OF INDUSTRY, CA 91715-9907
-
-
-
-
-
-
-
-
-
-
-
-
-
-
-
-
-
-
-
-
-
-
-
-
-
-
-
-
-
-
-
-
-
-
-
-
-
-
-
-
-
-
-
-
-
-
-
-
-
-
-
-
-
-
-
-
-
-
-
-
-
-
-
-
-
-
-
-
-
-
-
-
-
-
-
-
-
-
-
-
-
-
-
-
-
-
-
-
-
-
-
-
-
-
-
-
-
- 99.
-
-
-
-
-
-
-
-
-
-
-
-
-
-
-
-
-
-
-
-
-
-
-
-
-
-
-
-
-
-
-
-
-
-
-
-
-
-
-
-
-
-
-
-
-
-
-
-
-
-
-
-
-
-
-
-
-
-
-
-
-
-
-
-
-
-
-
-
-
-
-
-
-
-
-
-
-
-
-
-
-
-
-
-
-
-
-
-
-
-
-
-
-
-
-
-

DG68 01105D 00
dacor.
Dacor • 14425 Clark Avenue, City of Industry, CA 91745
• Telephone : 833-35-ELITE (833-353-5483) • Télécopie : (626) 403-3130 • www.dacor.com